Baker
-
Posts
4,295 -
Joined
-
Last visited
Content Type
Profiles
Forums
Gallery
Events
Everything posted by Baker
-
Welcome to MSW Patrick
-

Roter Löwe 1597 by Ondras71
Baker replied to Ondras71's topic in - Build logs for subjects built 1501 - 1750
Very neatly made Ondras. For you and everyone that follows also a happy 2019 -
HMS ROYAL KATHERINE 1664 by Doris - 1/55 - CARD
Baker replied to DORIS's topic in - Build logs for subjects built 1501 - 1750
I once had a Nissan Bleubird, with some "extra options" on it. Has brought me everywhere without problems for 14 years long. Happy new year to you and everyone here.- 1,035 replies
-
- 6
-

-
- royal katherine
- ship of the line
- (and 1 more)
-
Nice work. And the gratings are indeed a very good idea.
-
Nice work Katsumoto, I'm glad that my idea helped you with your build
- 236 replies
-
- 2
-
-
- artesania latina
- kitbashing
- (and 2 more)
-
You can use the individual tracks as spare tracks. These were often attached to the front or the side. These served also as extra armor. If you want to do this. let me know. Then I post some pictures. Sorry you had some problems with the teeth on your sprockets
-
Vasa deck shift
Baker replied to BLACK VIKING's topic in Building, Framing, Planking and plating a ships hull and deck
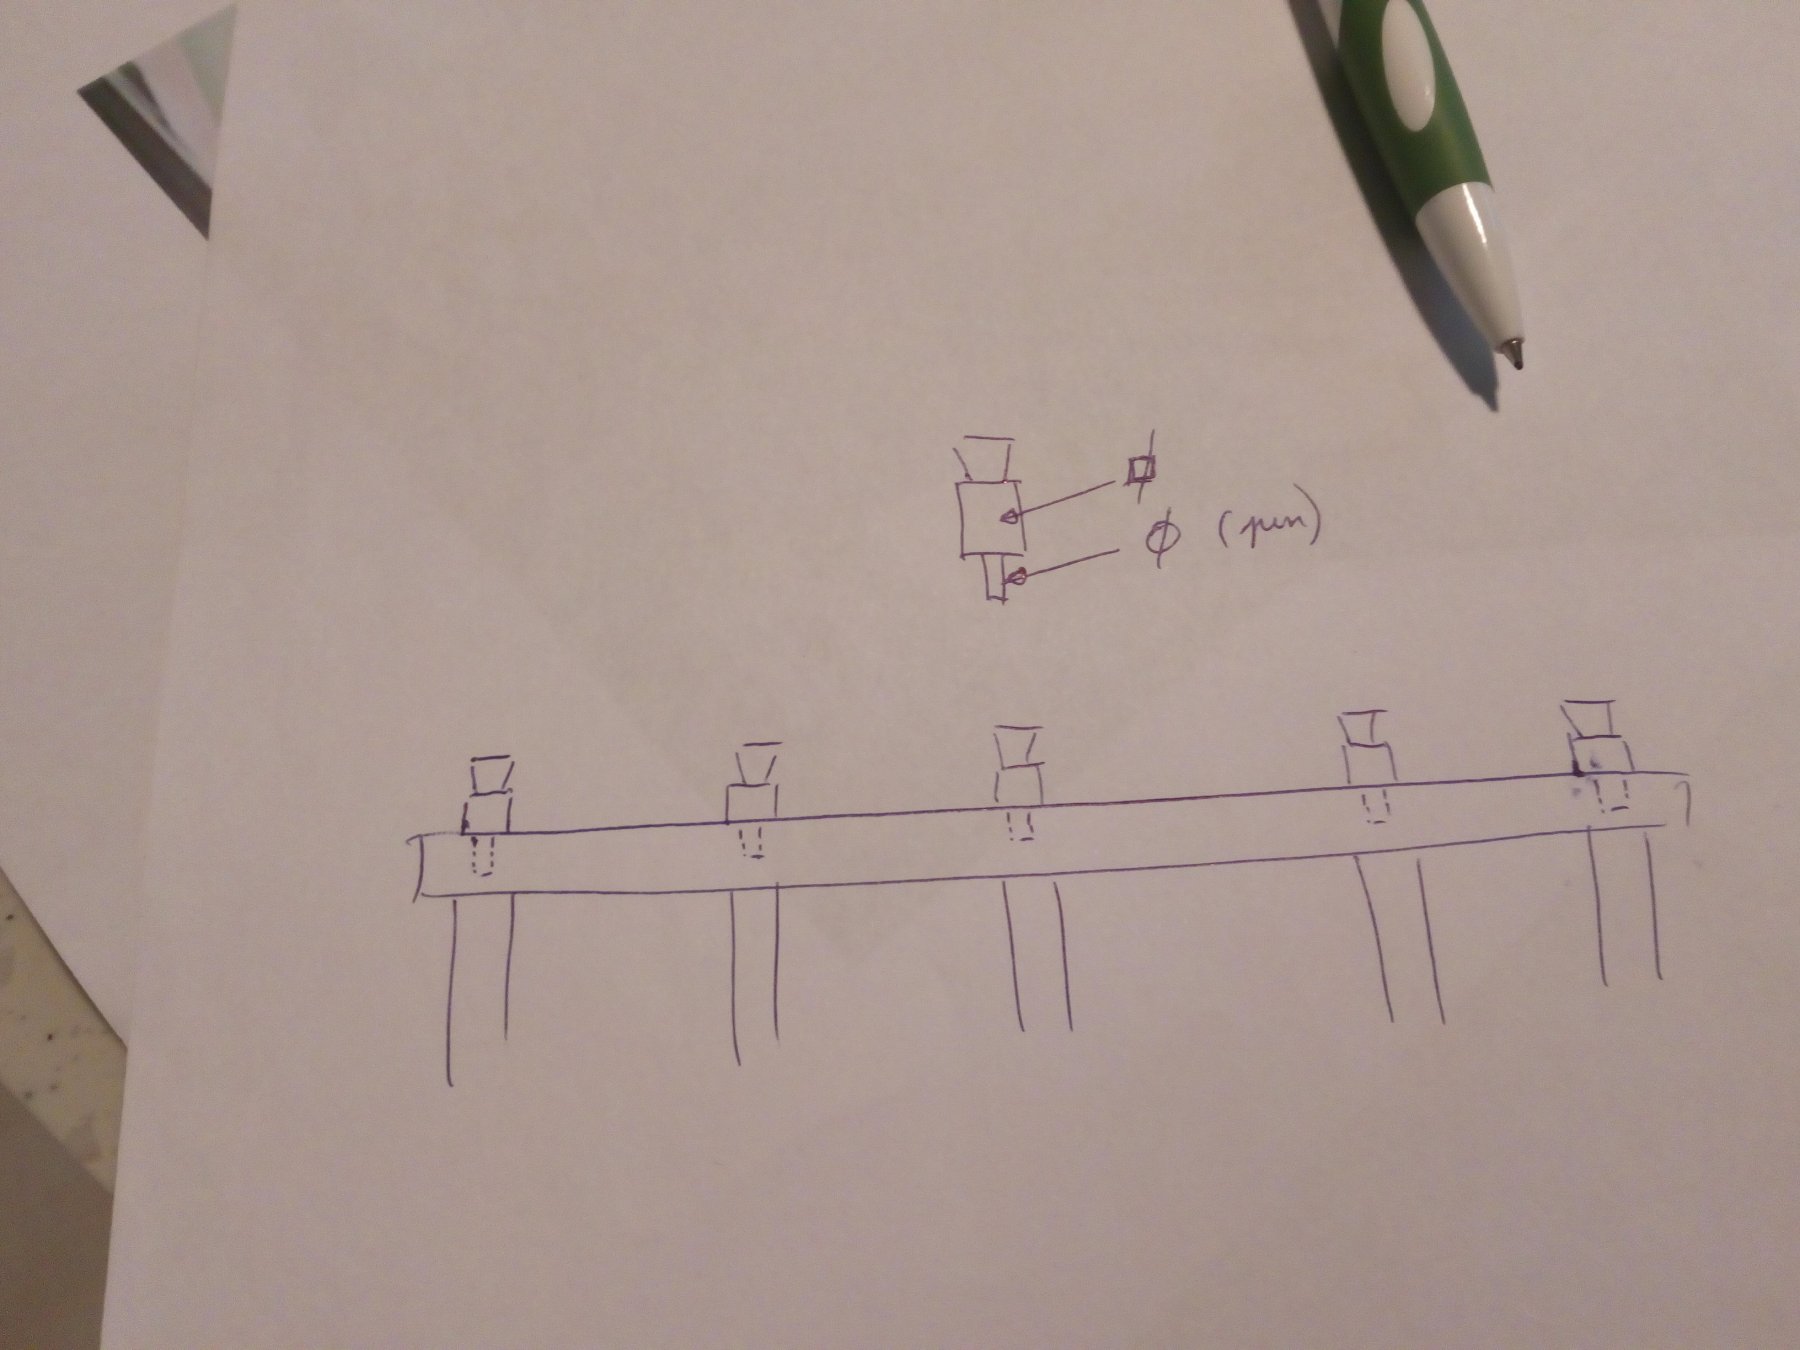
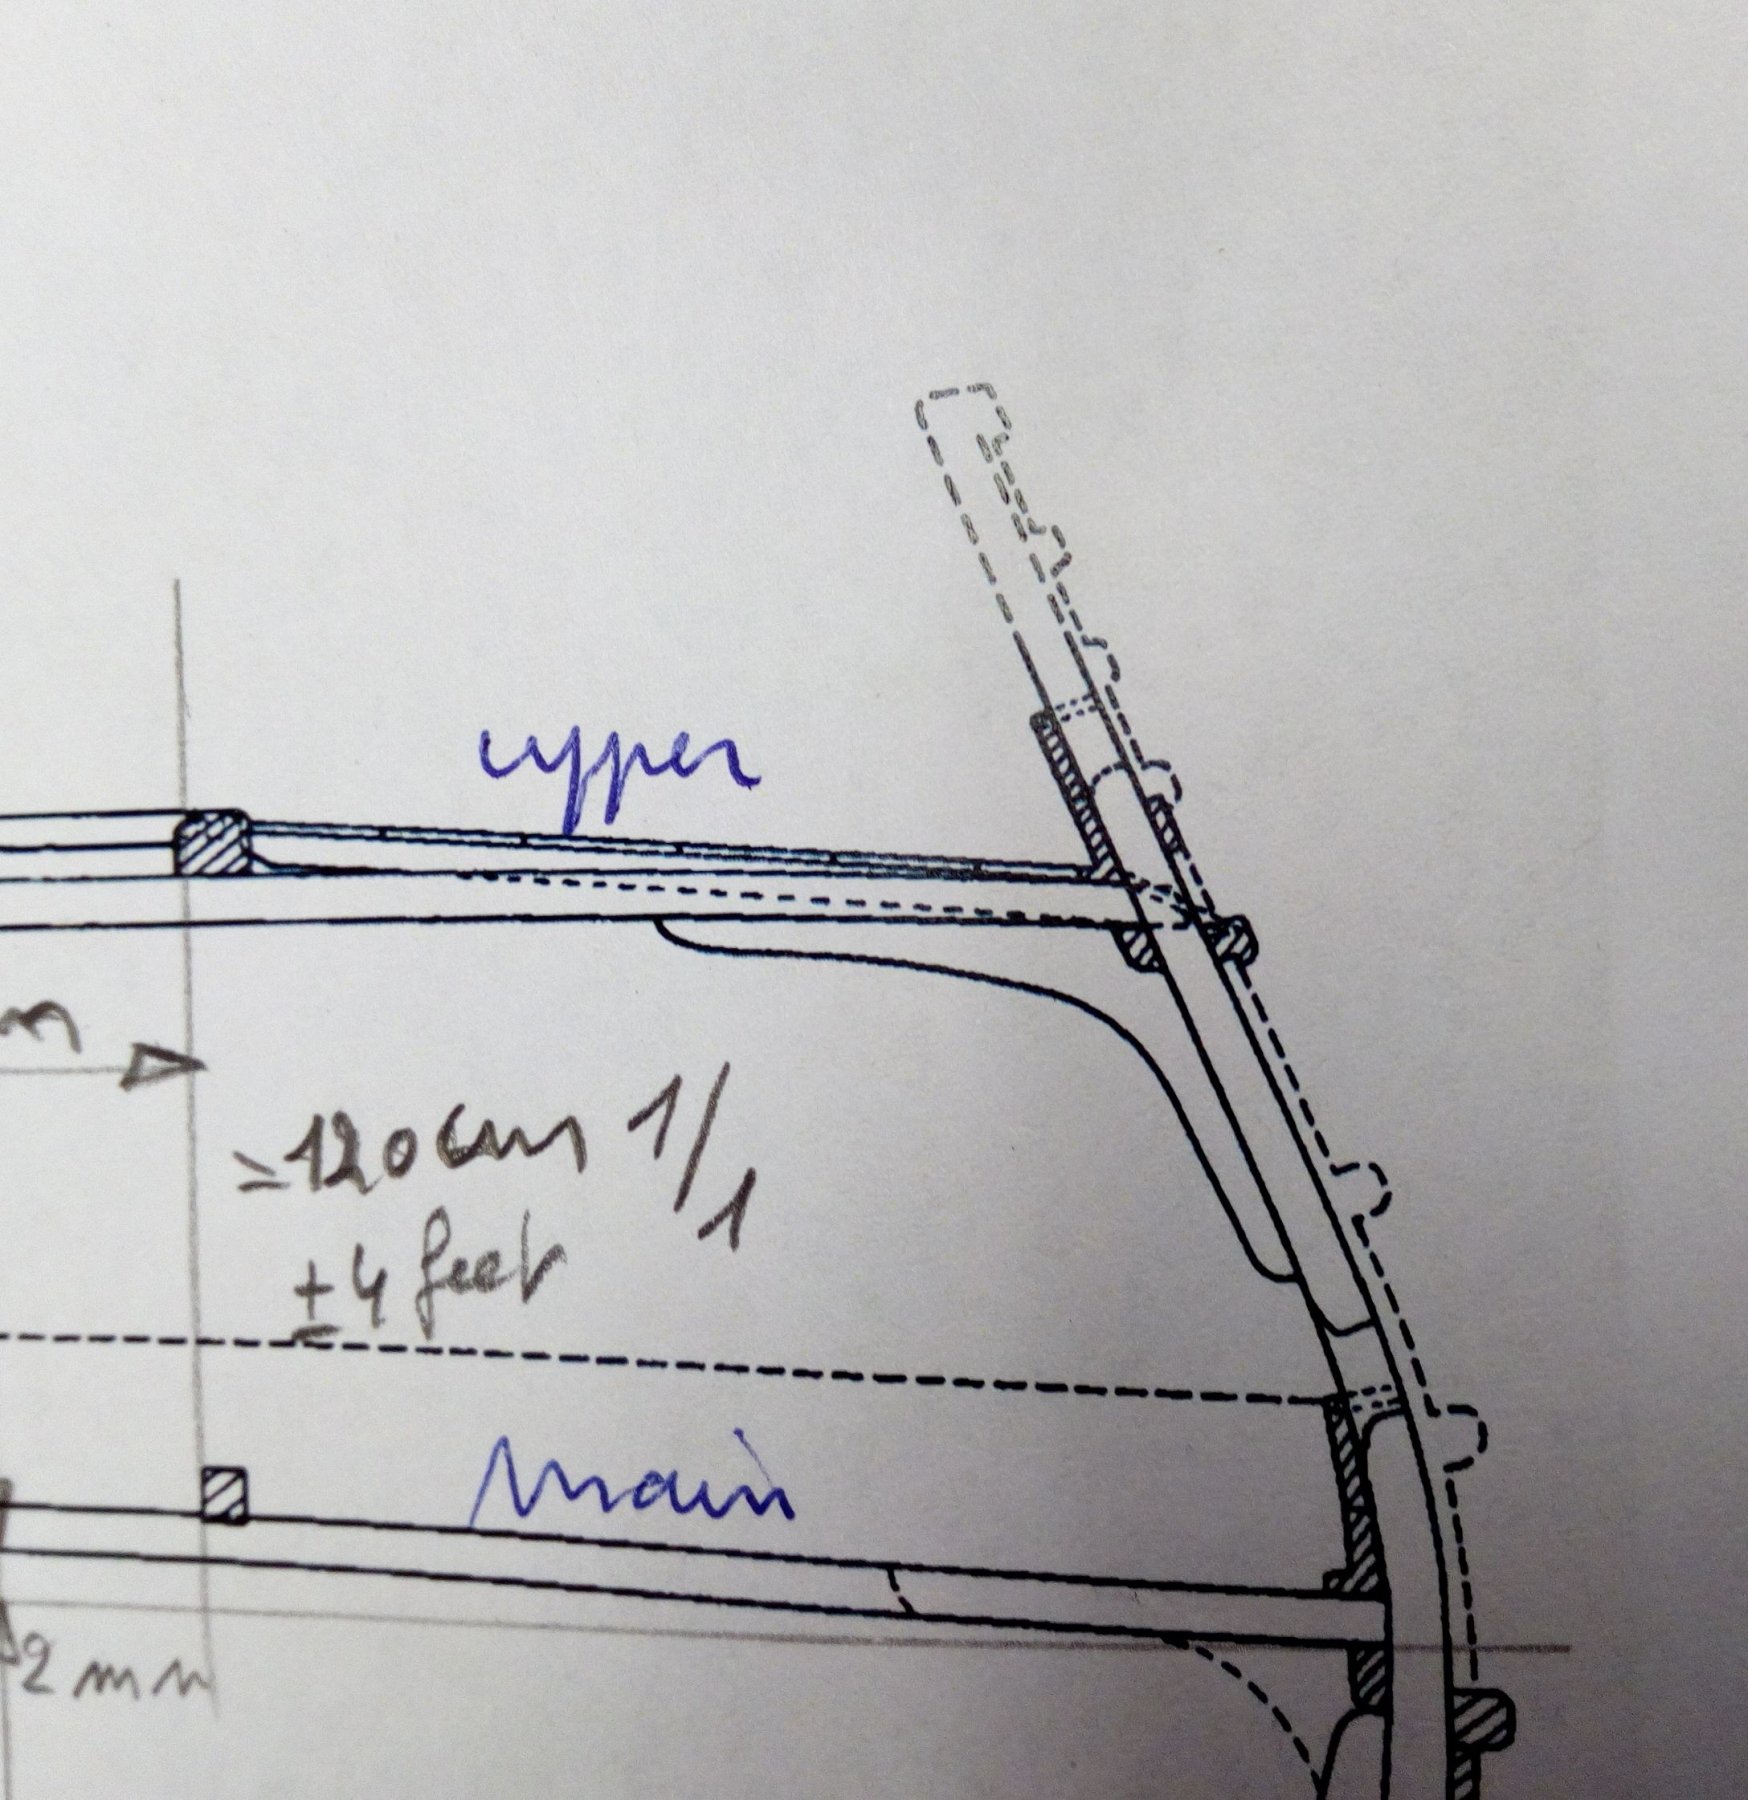
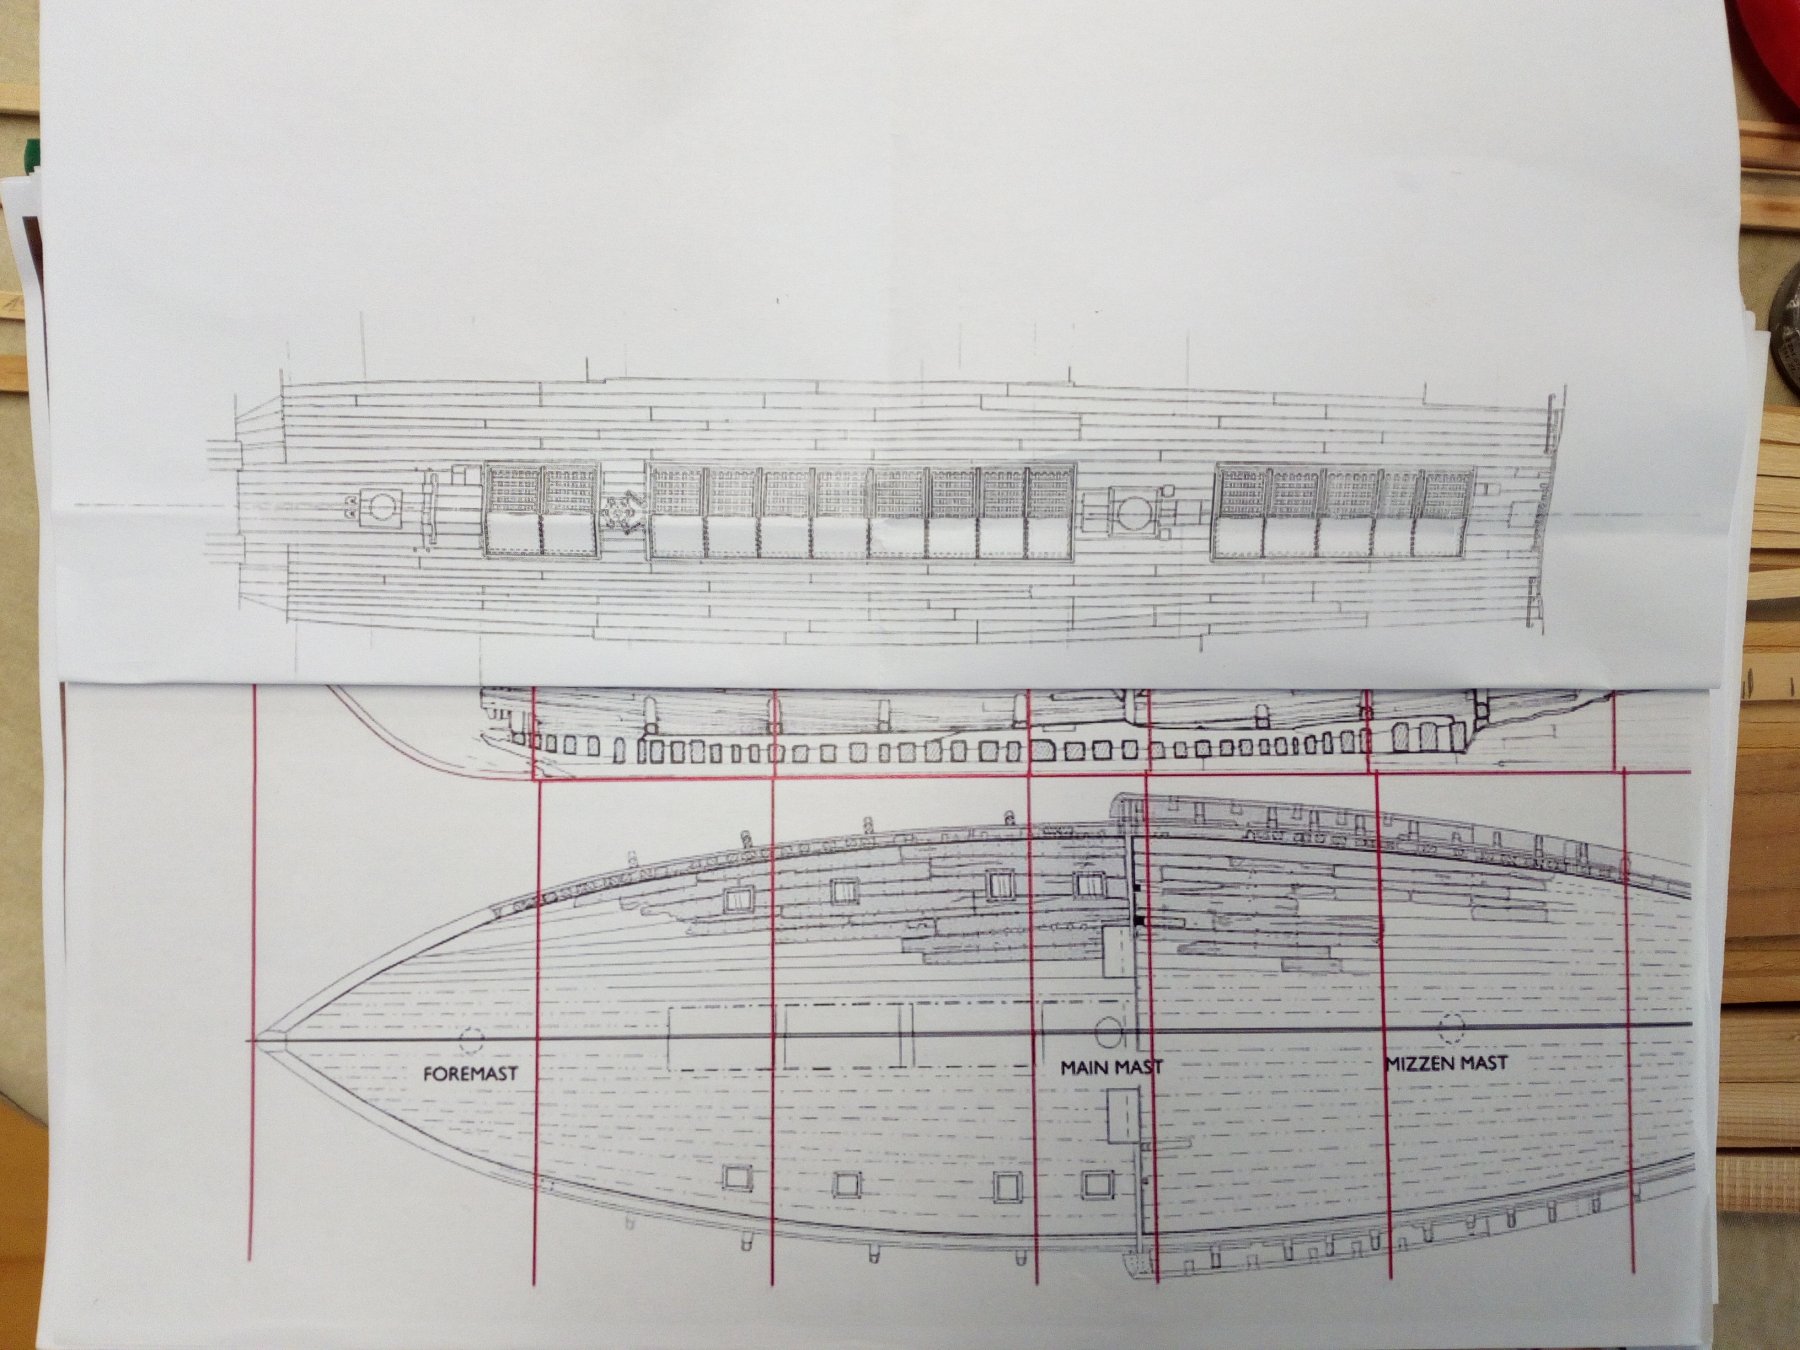
Indeed Your Vasa drawing (above) and the Mary Rose deck (below)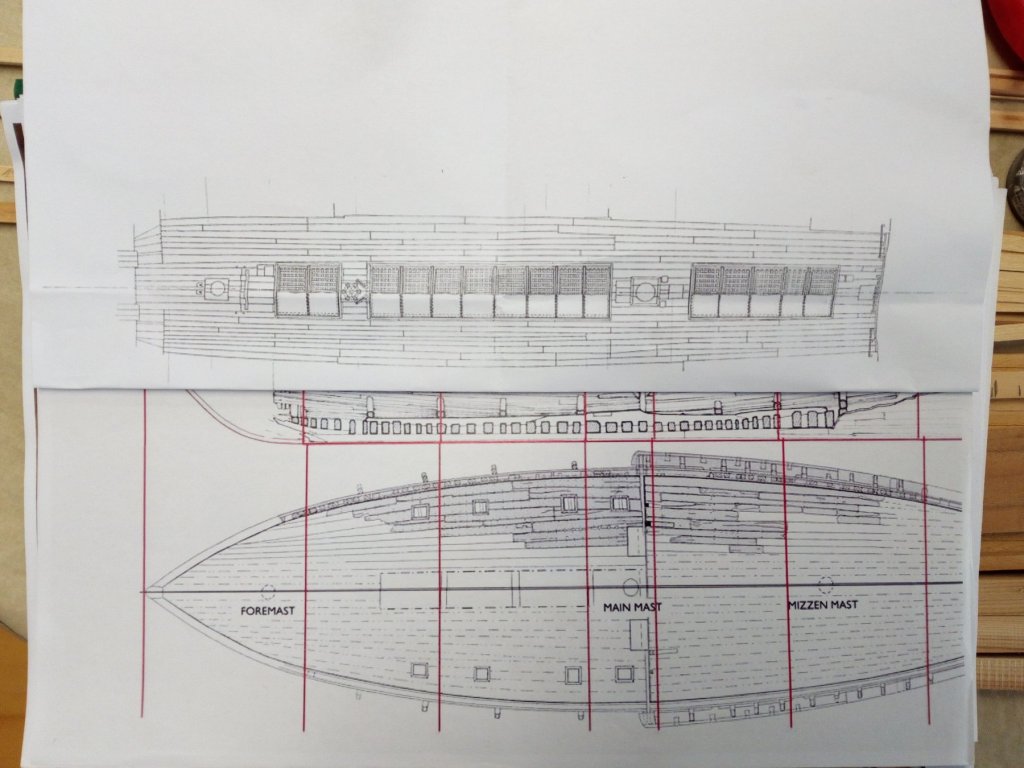
-
Thank you Lawrence and Carl. In the meantime, I found a solution to make the drains for the deck. One has been done as a test. Source San Juan Whale ship.

- 756 replies
-
- 11
-
-
- galleon
- golden hind
- (and 2 more)
-
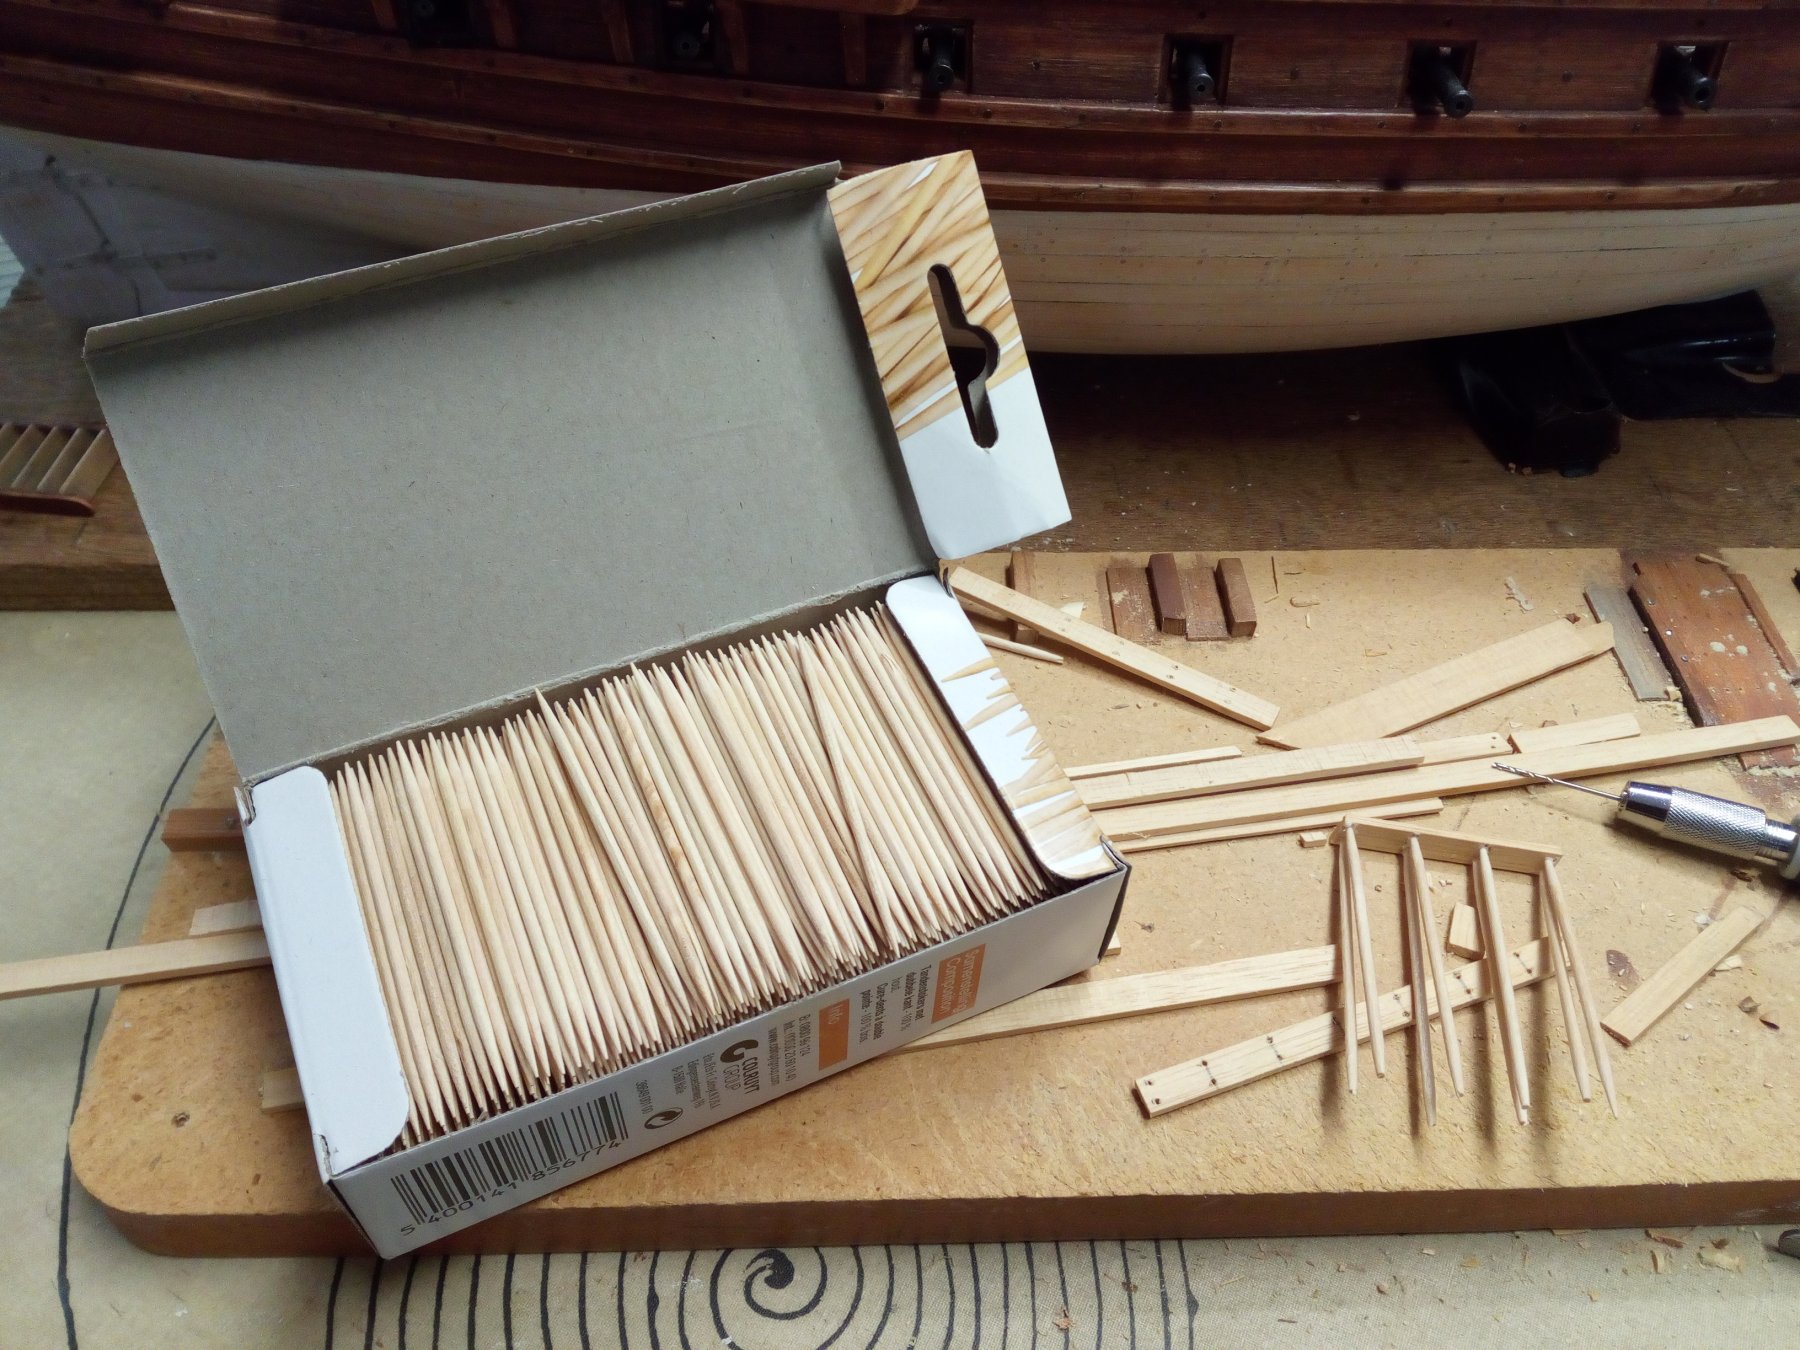
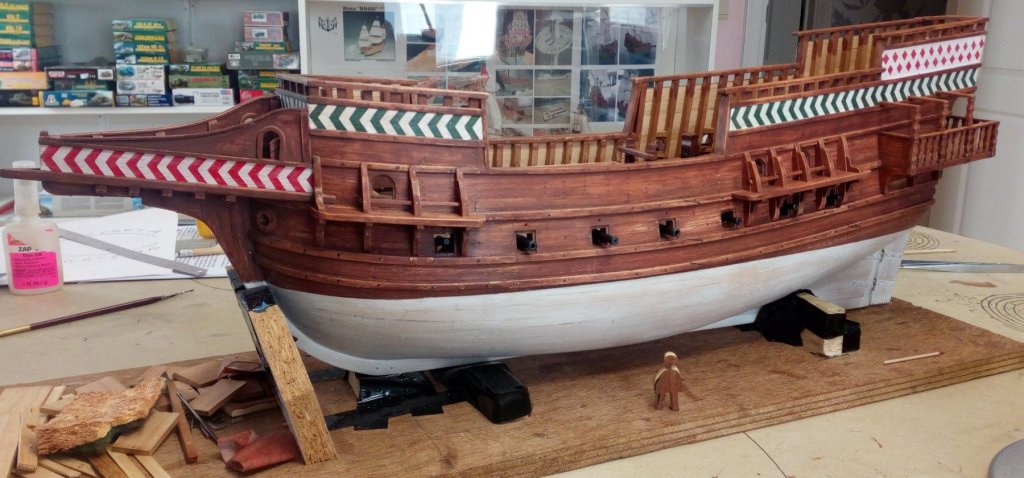
Thank you G.L. There will certainly be enough toothpicks left for the holidays. Steve, Thanks for the comment I certainly will not make a puzzle of it like the examples shown. The Golden Hind was probably not a real warship, but an armed merchantman. Specially built or rebuilt for this trip. Nobody knows that. Of course there will have been nicely planked decks then, and others will have been "less nicely". With the intention of my saying, no rules. I want to say : Nicely planked or with all possible leftovers planked. No one can say what is right or wrong for this period. All evidence is indeed at the bottom of the sea. As you can see, I keep the planking as neat as possible. Interesting topic

- 756 replies
-
- 9
-
-

-
- galleon
- golden hind
- (and 2 more)
-
HMS ROYAL KATHERINE 1664 by Doris - 1/55 - CARD
Baker replied to DORIS's topic in - Build logs for subjects built 1501 - 1750
great work Doris You are not only handy with card and other materials, but also with electricity. happy holidays from Belgium- 1,035 replies
-
- 6
-
-
- royal katherine
- ship of the line
- (and 1 more)
-
Nice model
-
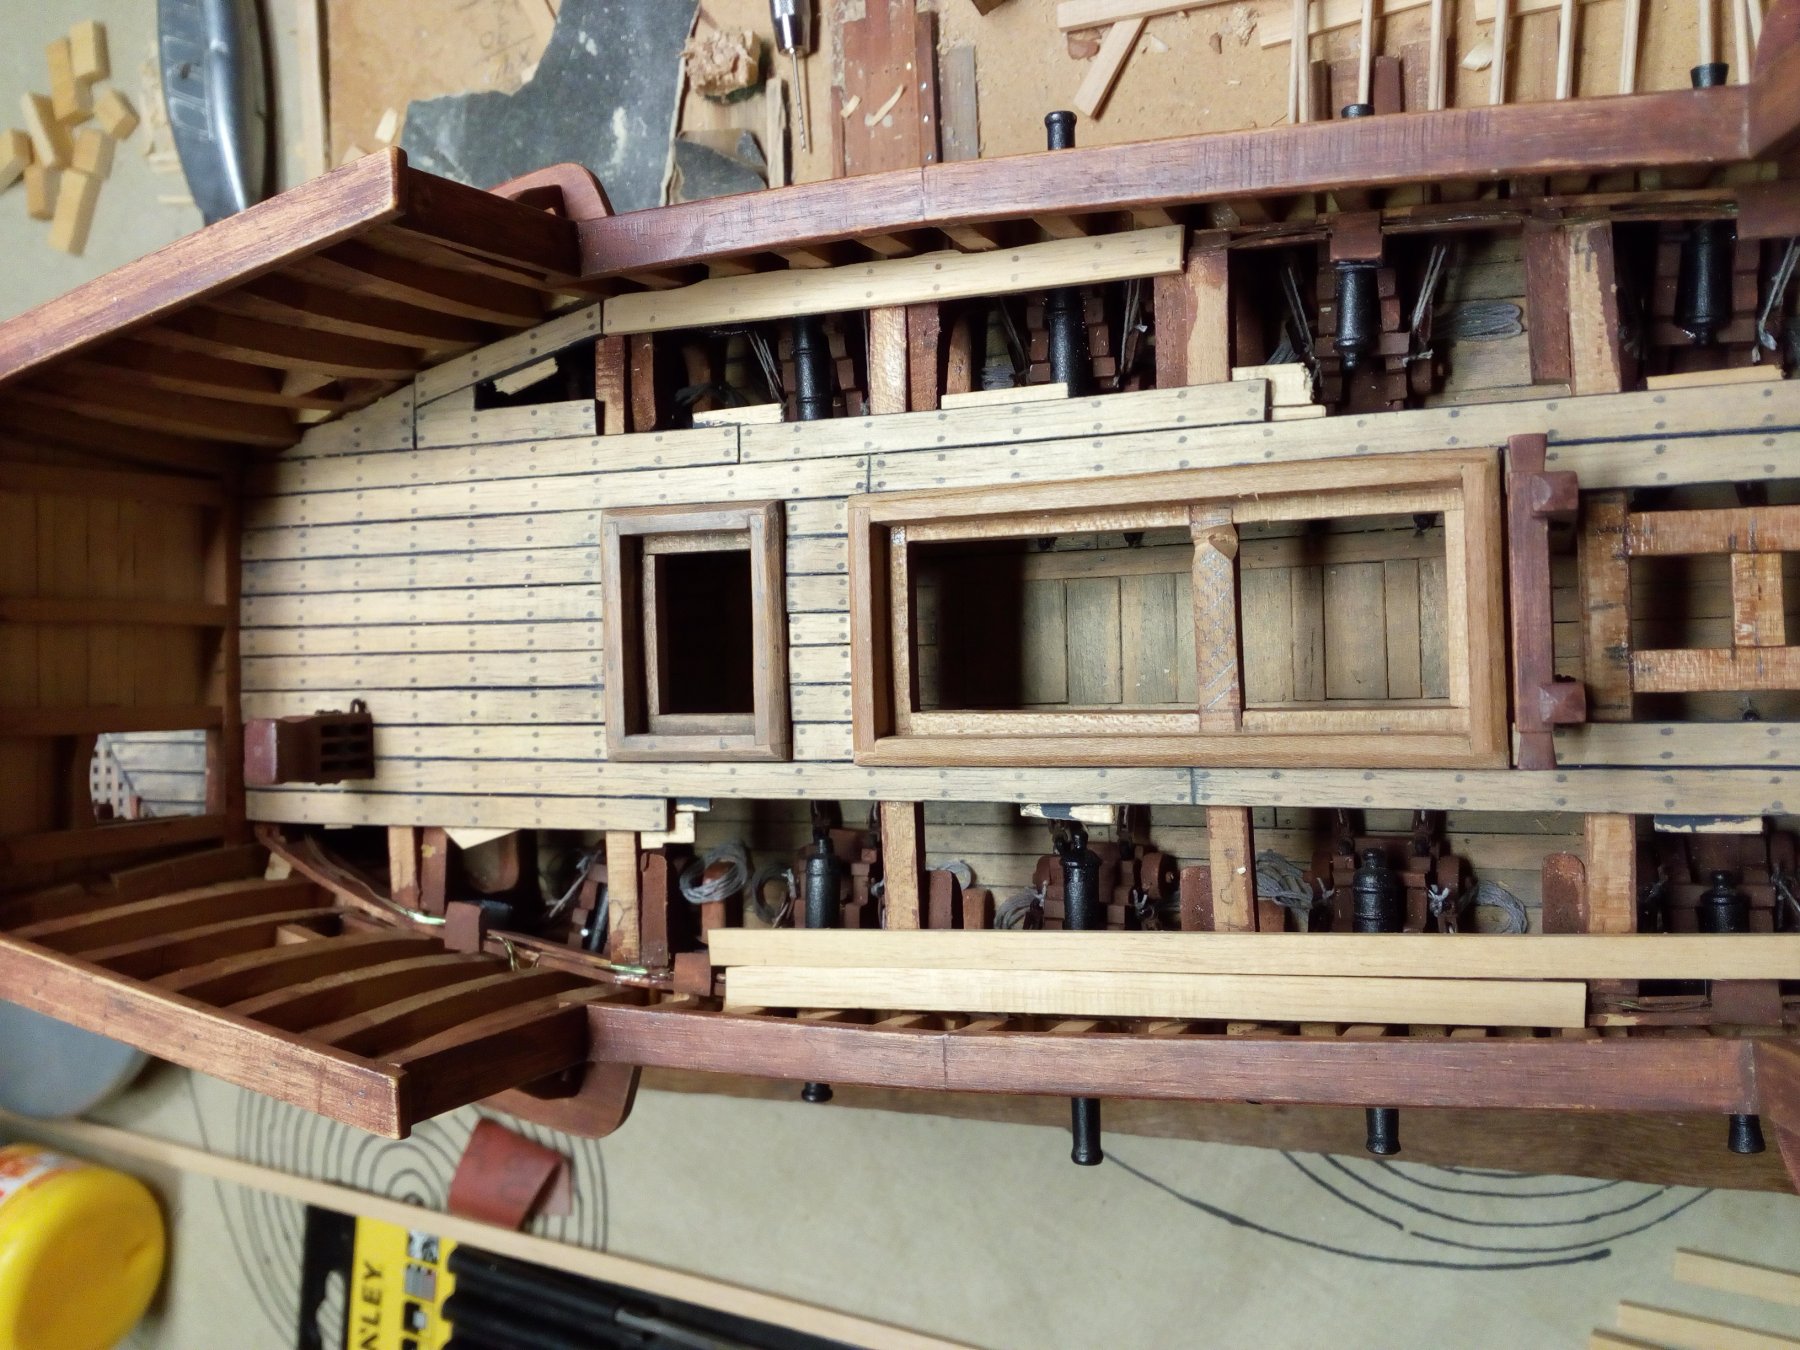
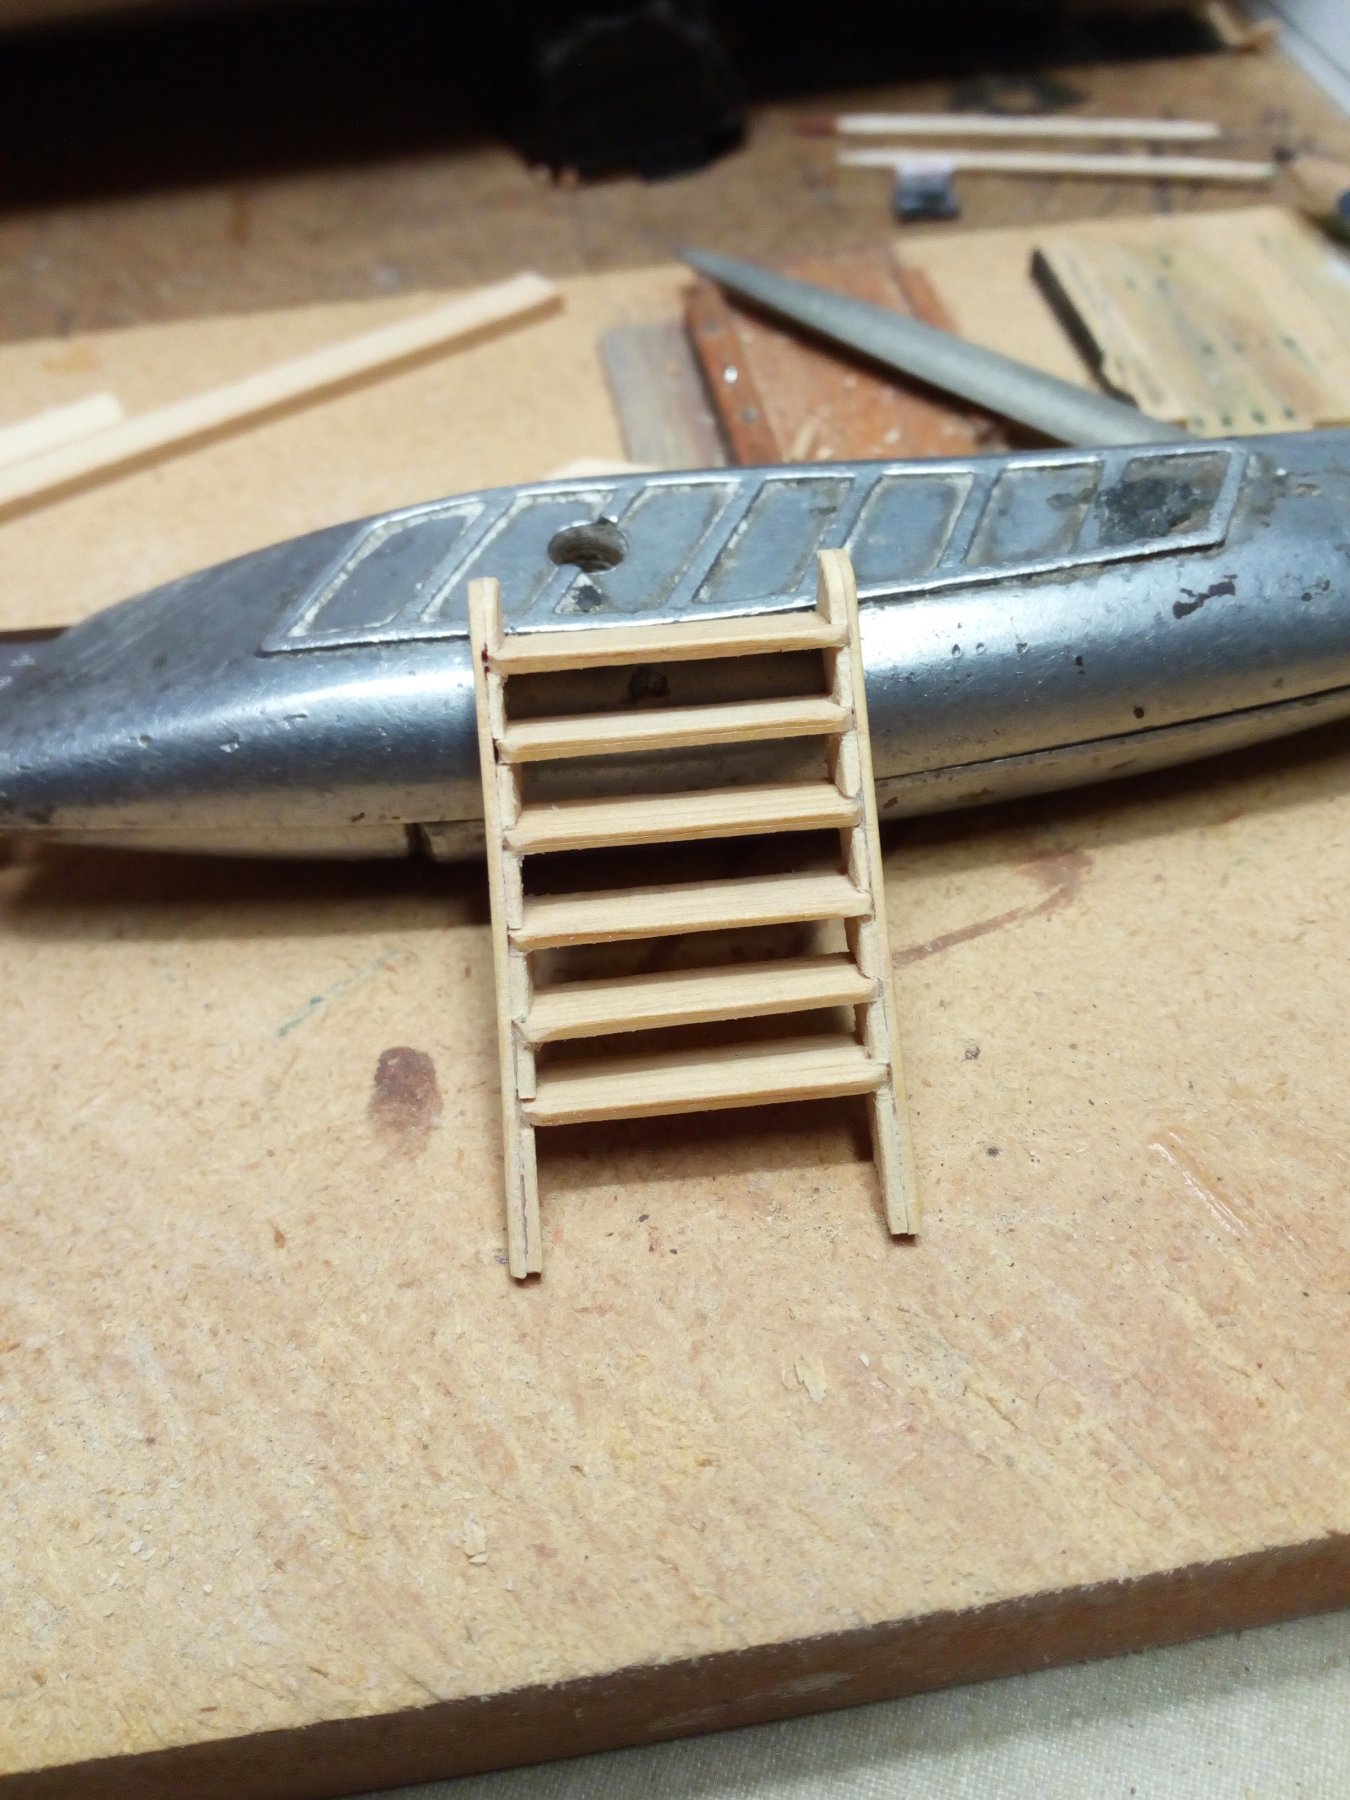
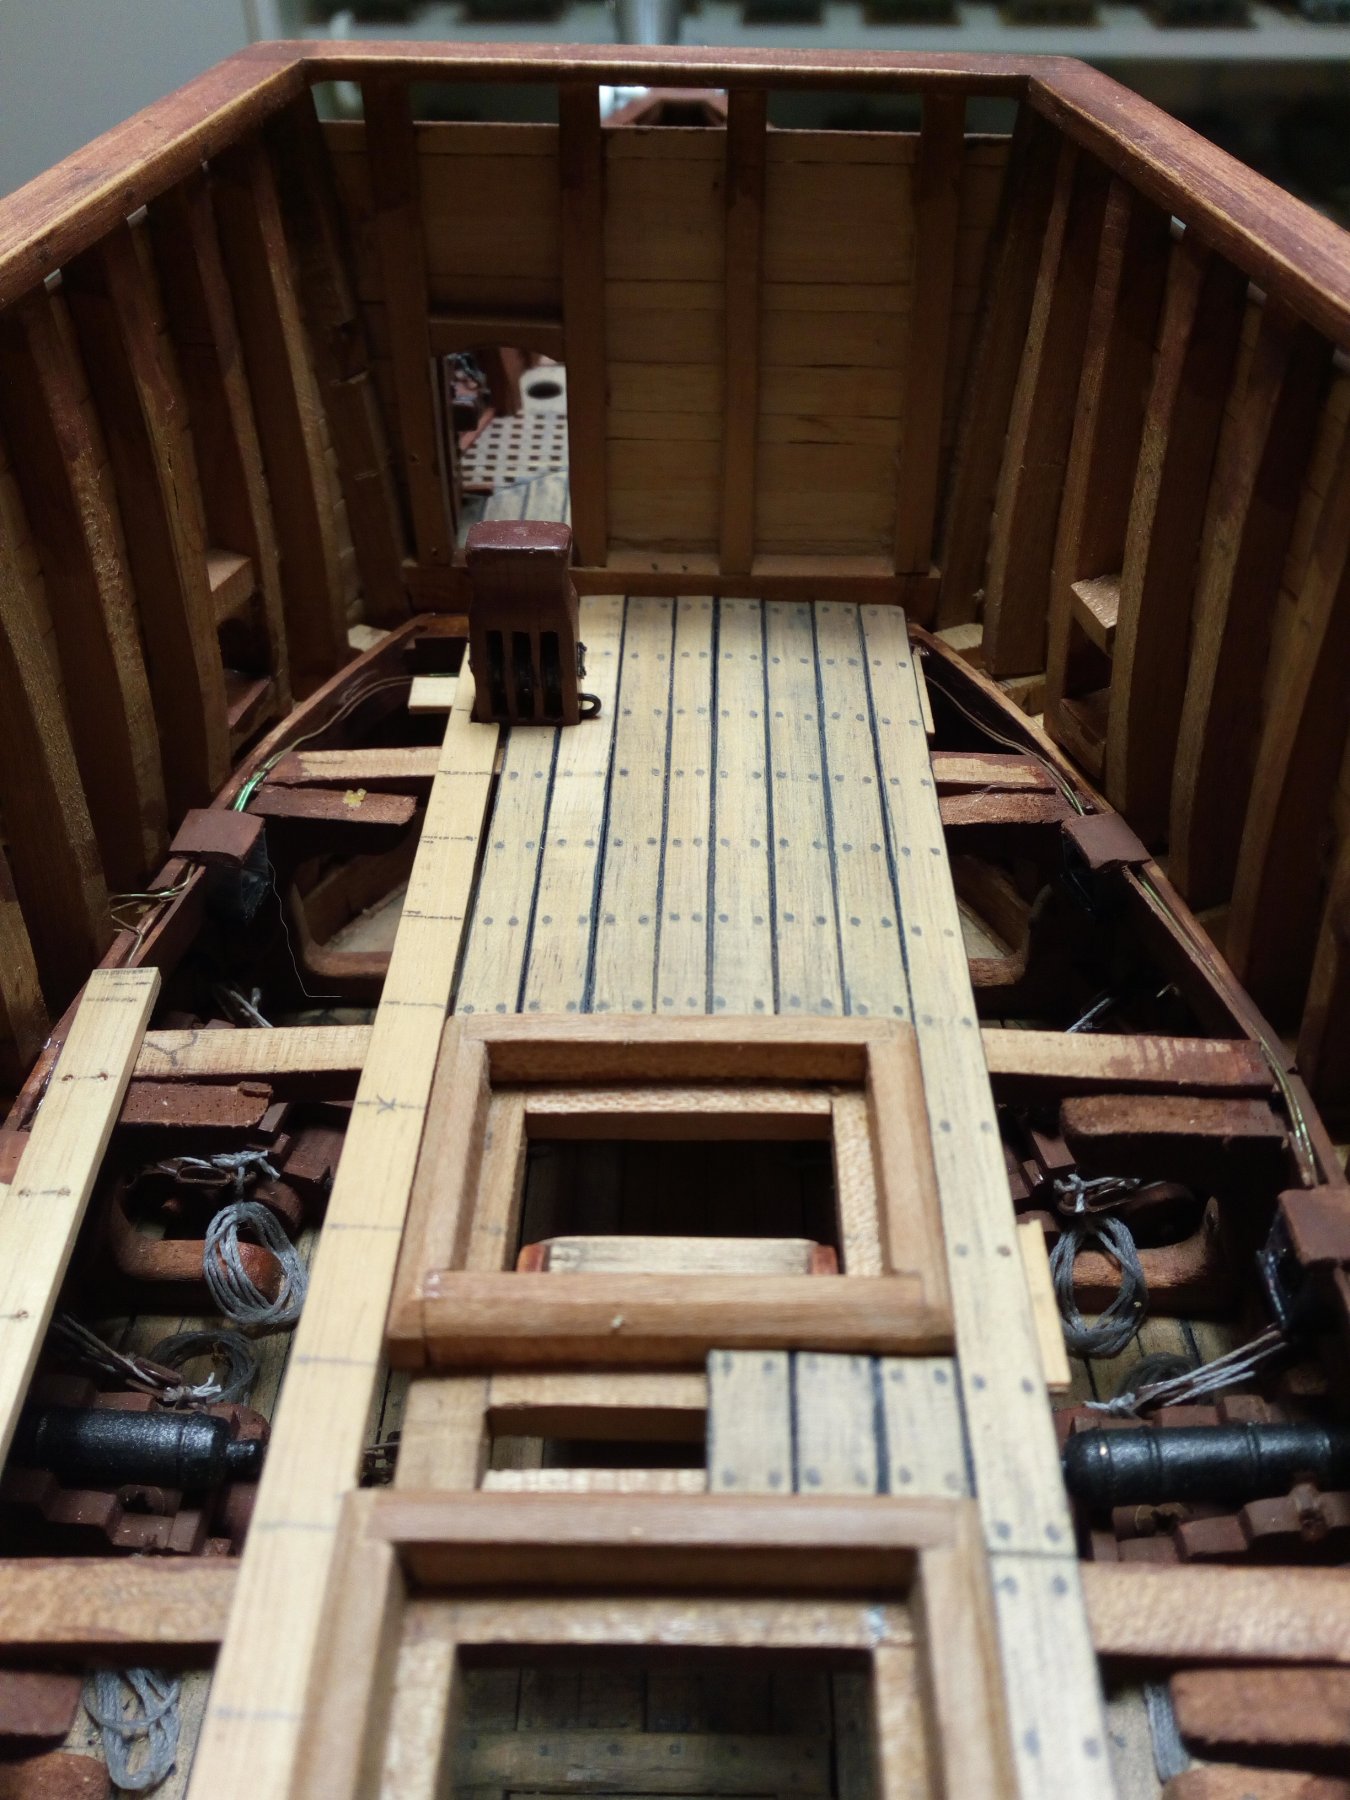
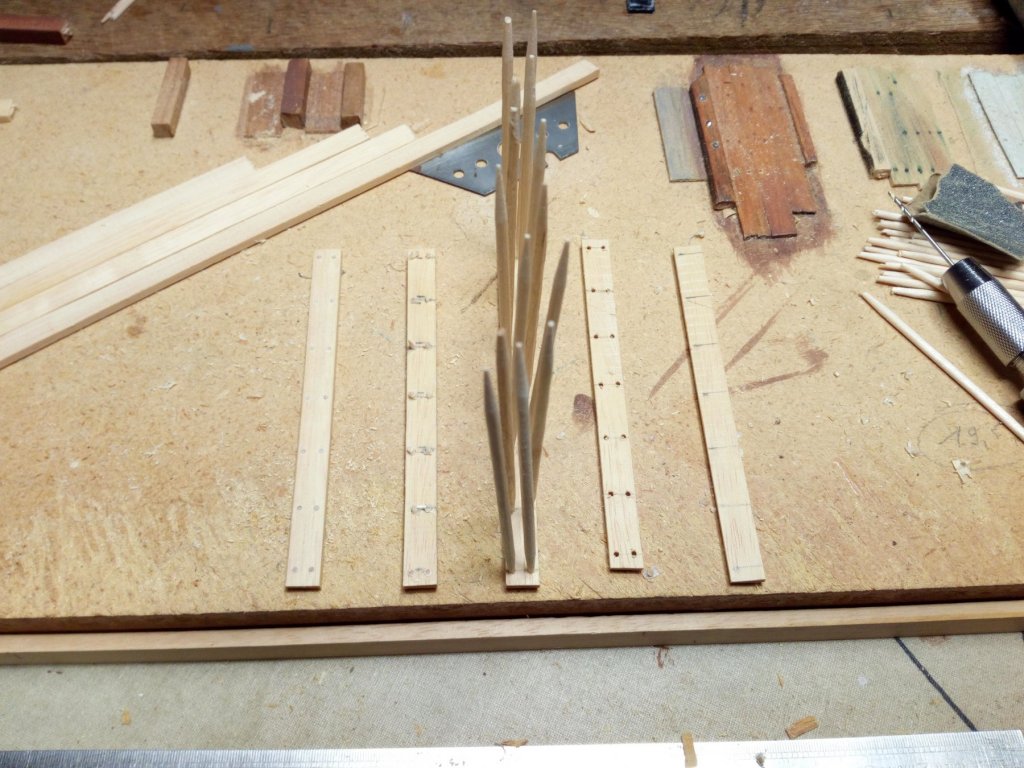
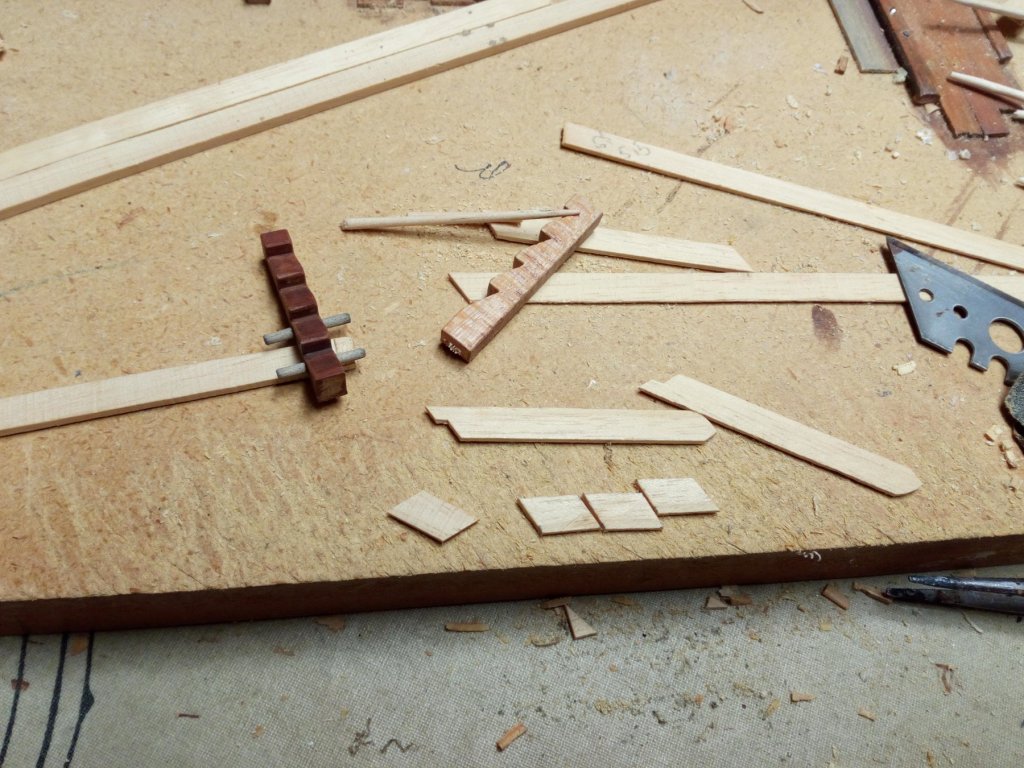
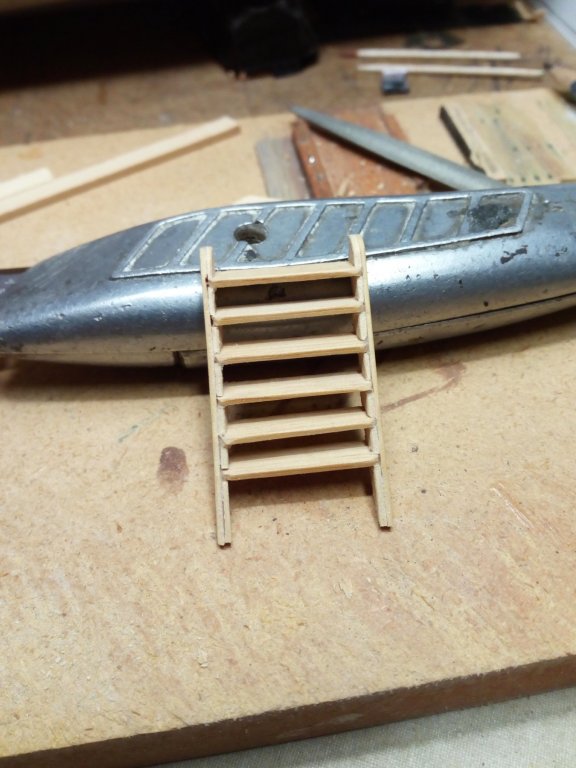
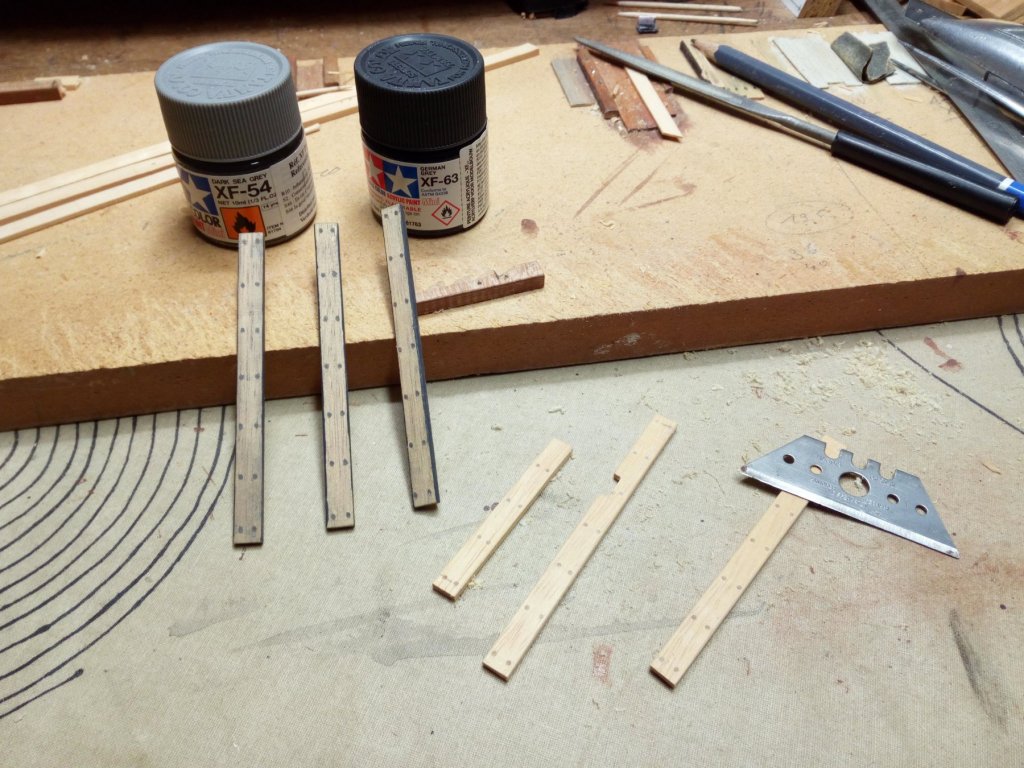
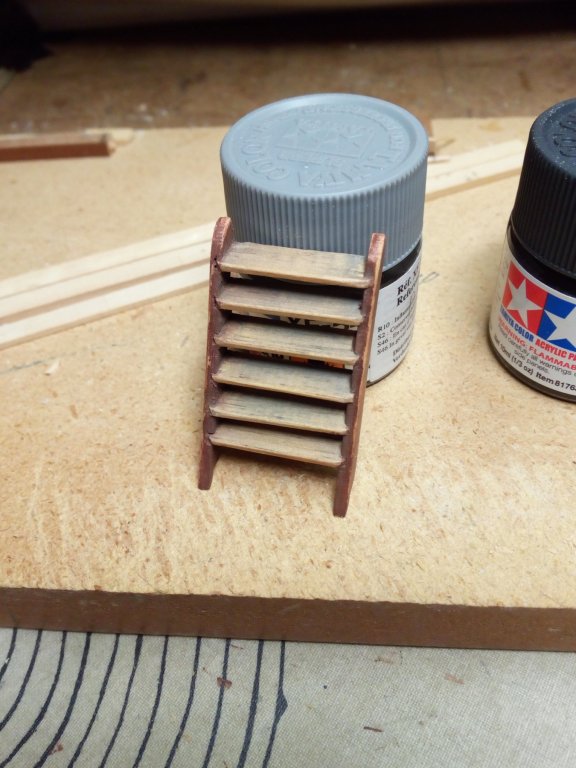
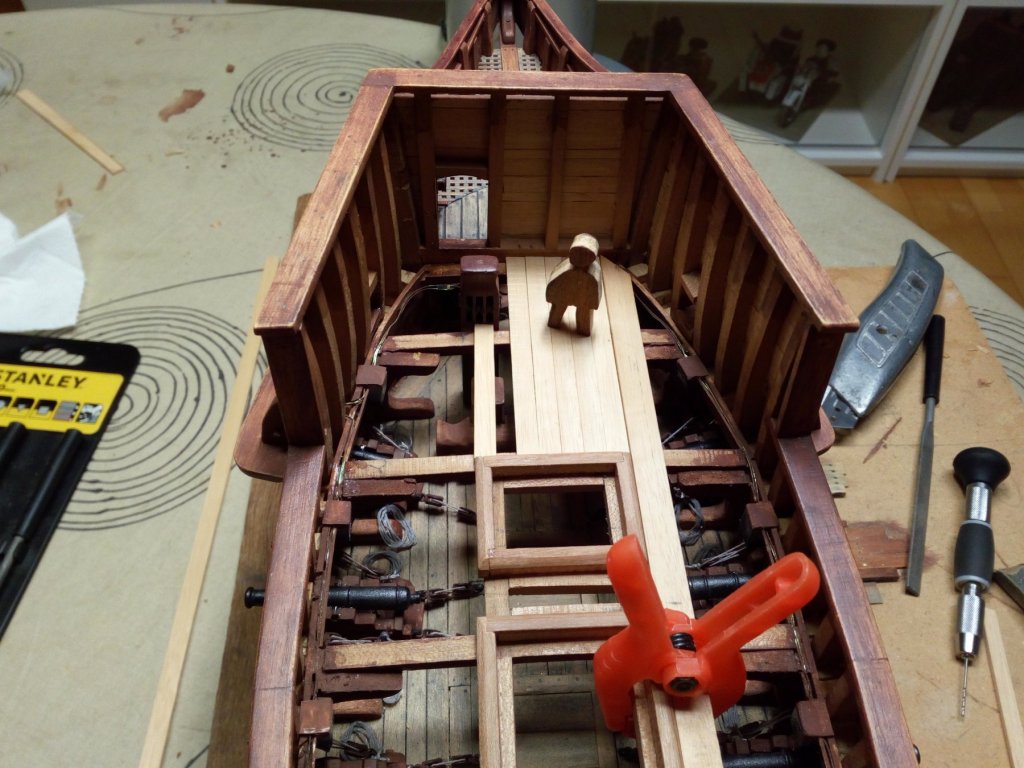
Hello, Started with planking of the deck General rules in 16th century deck planking : there are no rules, use all your wooden planks that you have left ... and is the deck waterproof, then it is good. some examples I also made a ladder. This will be glued on the model when the anchor cable is in place. The original planks were probaly nailed and the head of the nail was caulced. Planks are provided with treenails ( the caulcing) in advance and have already been colored once before glueing on to the model. Work in progress The third box of toothpicks.... Thanks for following and merry christmas


- 756 replies
-
- 11
-
-
- galleon
- golden hind
- (and 2 more)
-
Well done. Much extra work, but the model looks much better now.
- 236 replies
-
- 2
-
-
- artesania latina
- kitbashing
- (and 2 more)
-
Vasa deck shift
Baker replied to BLACK VIKING's topic in Building, Framing, Planking and plating a ships hull and deck
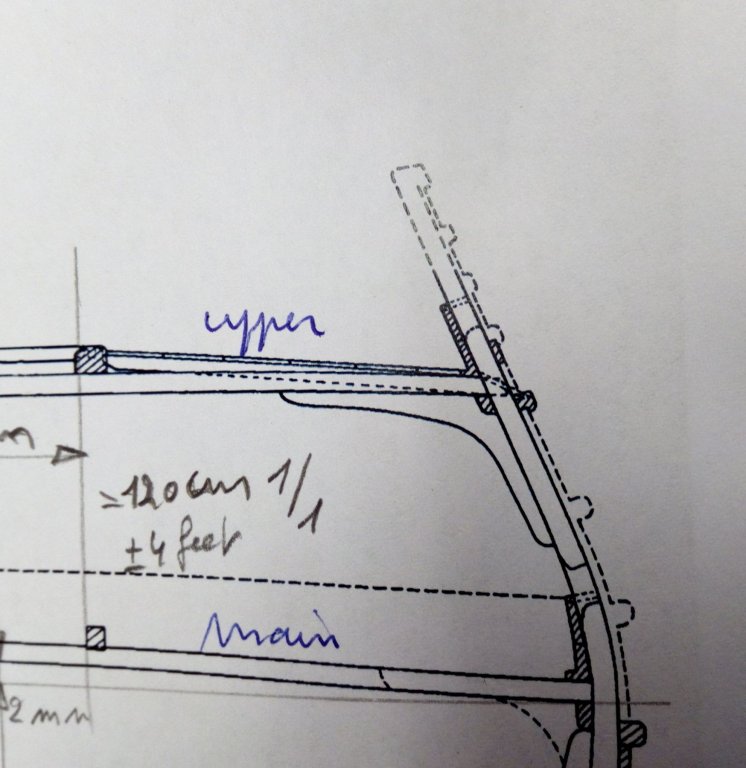
oops. I planned to do something like this pattern with the deck of my Golden Hind. Thanks for the sketch, very interesting -
Welcome to MSW and greeting from Belgium.
-
Good luck with your Victory kit
-
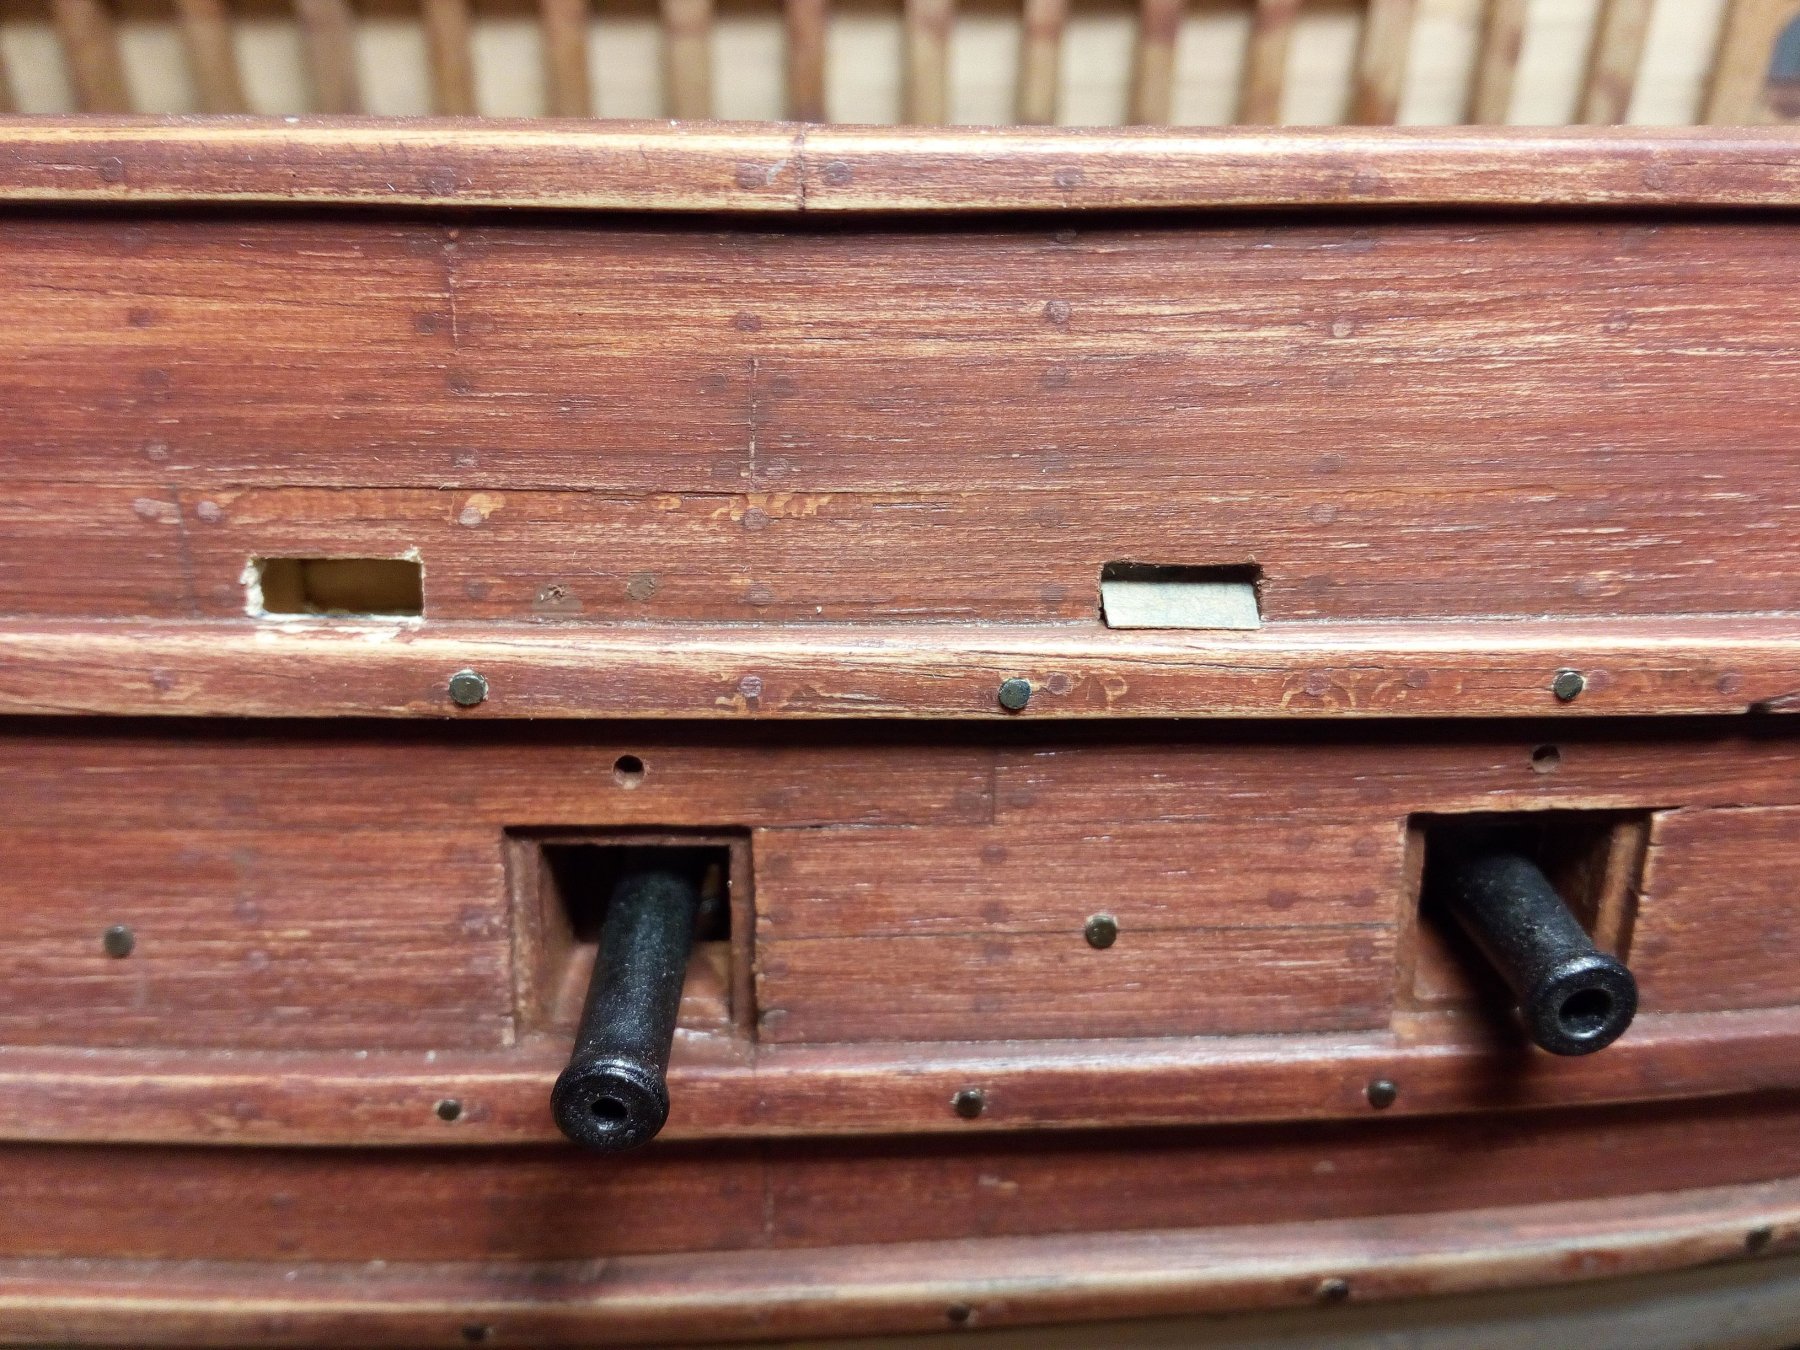
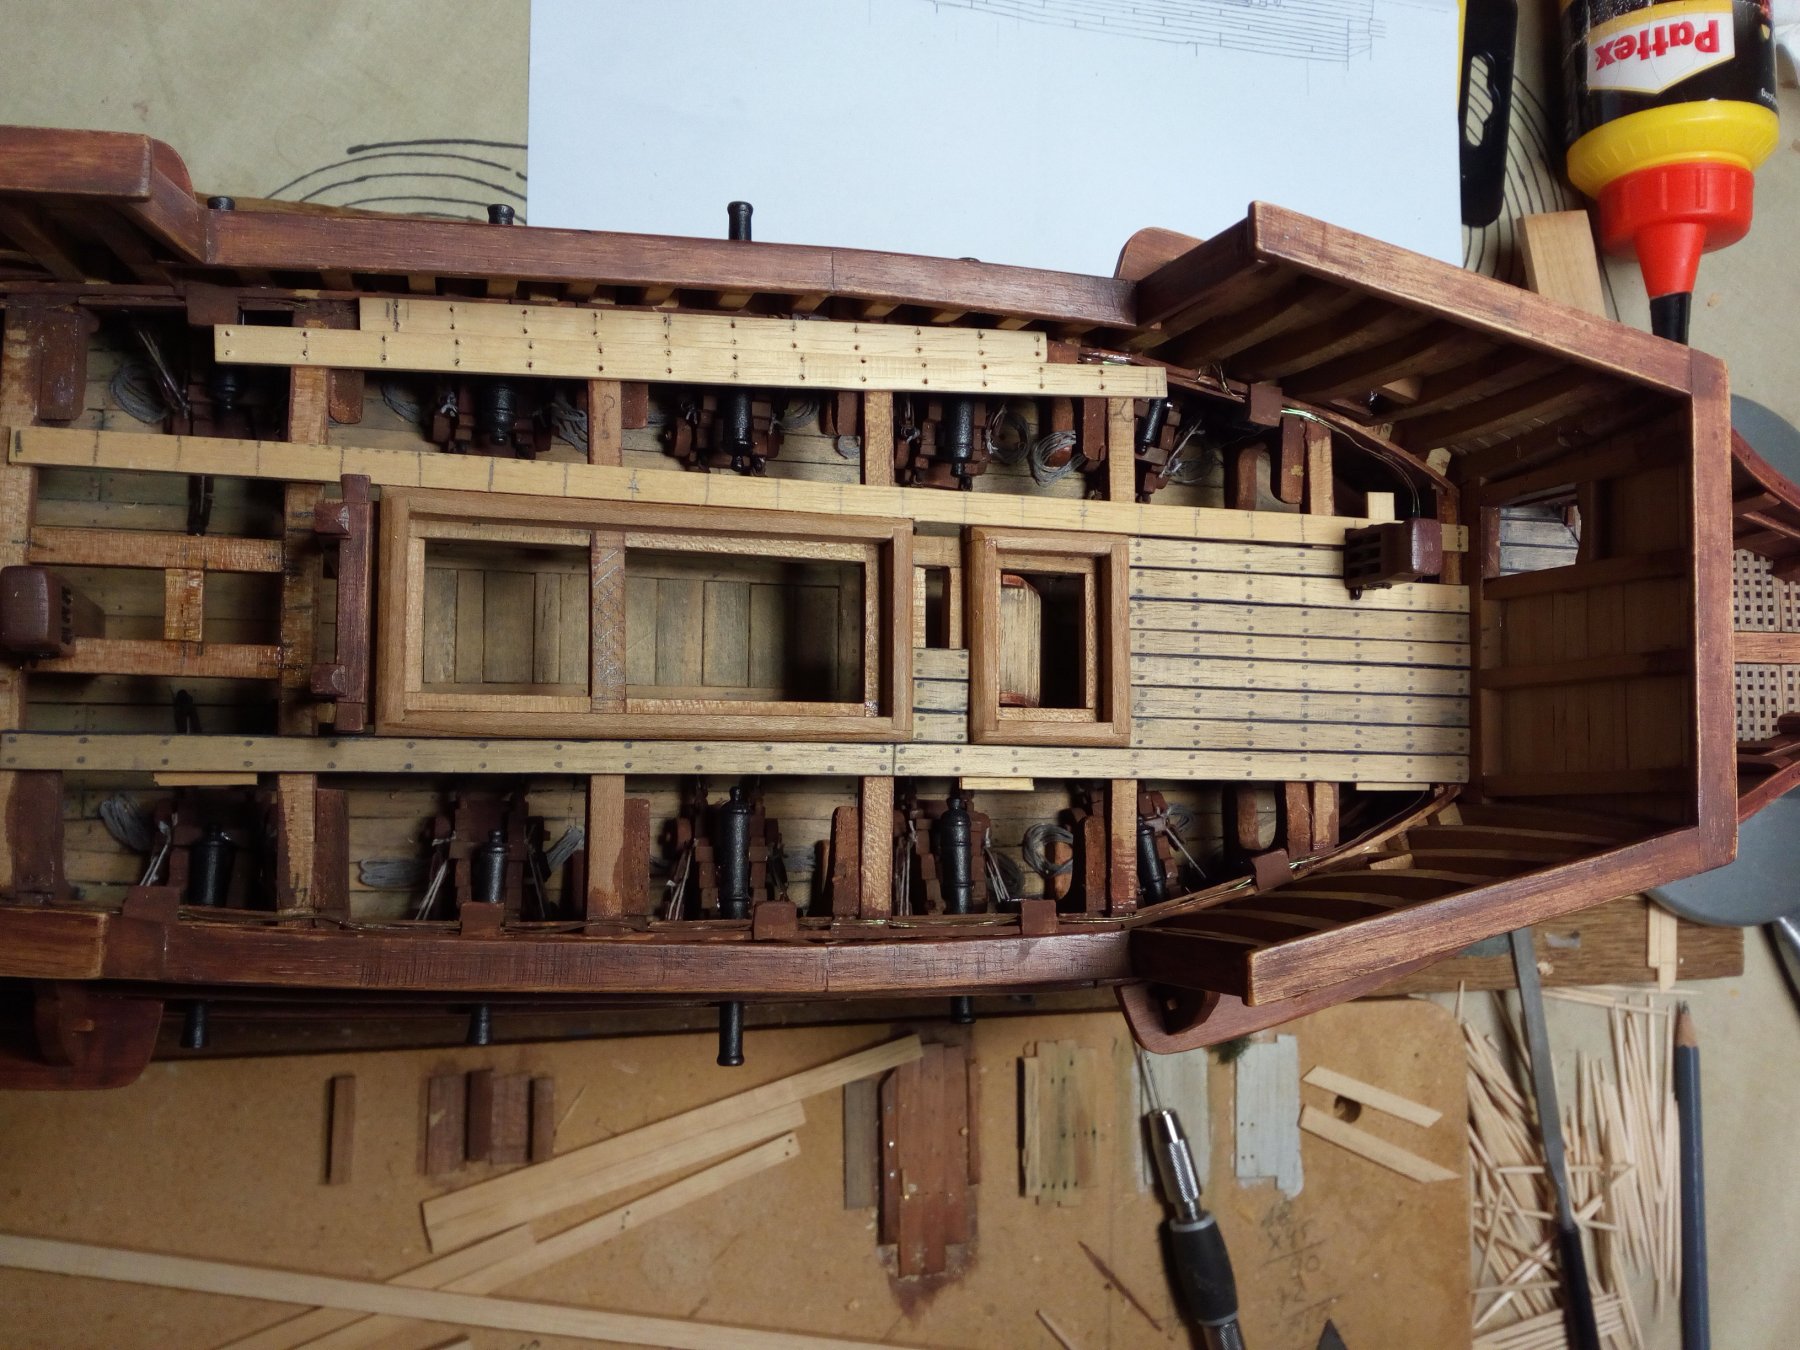
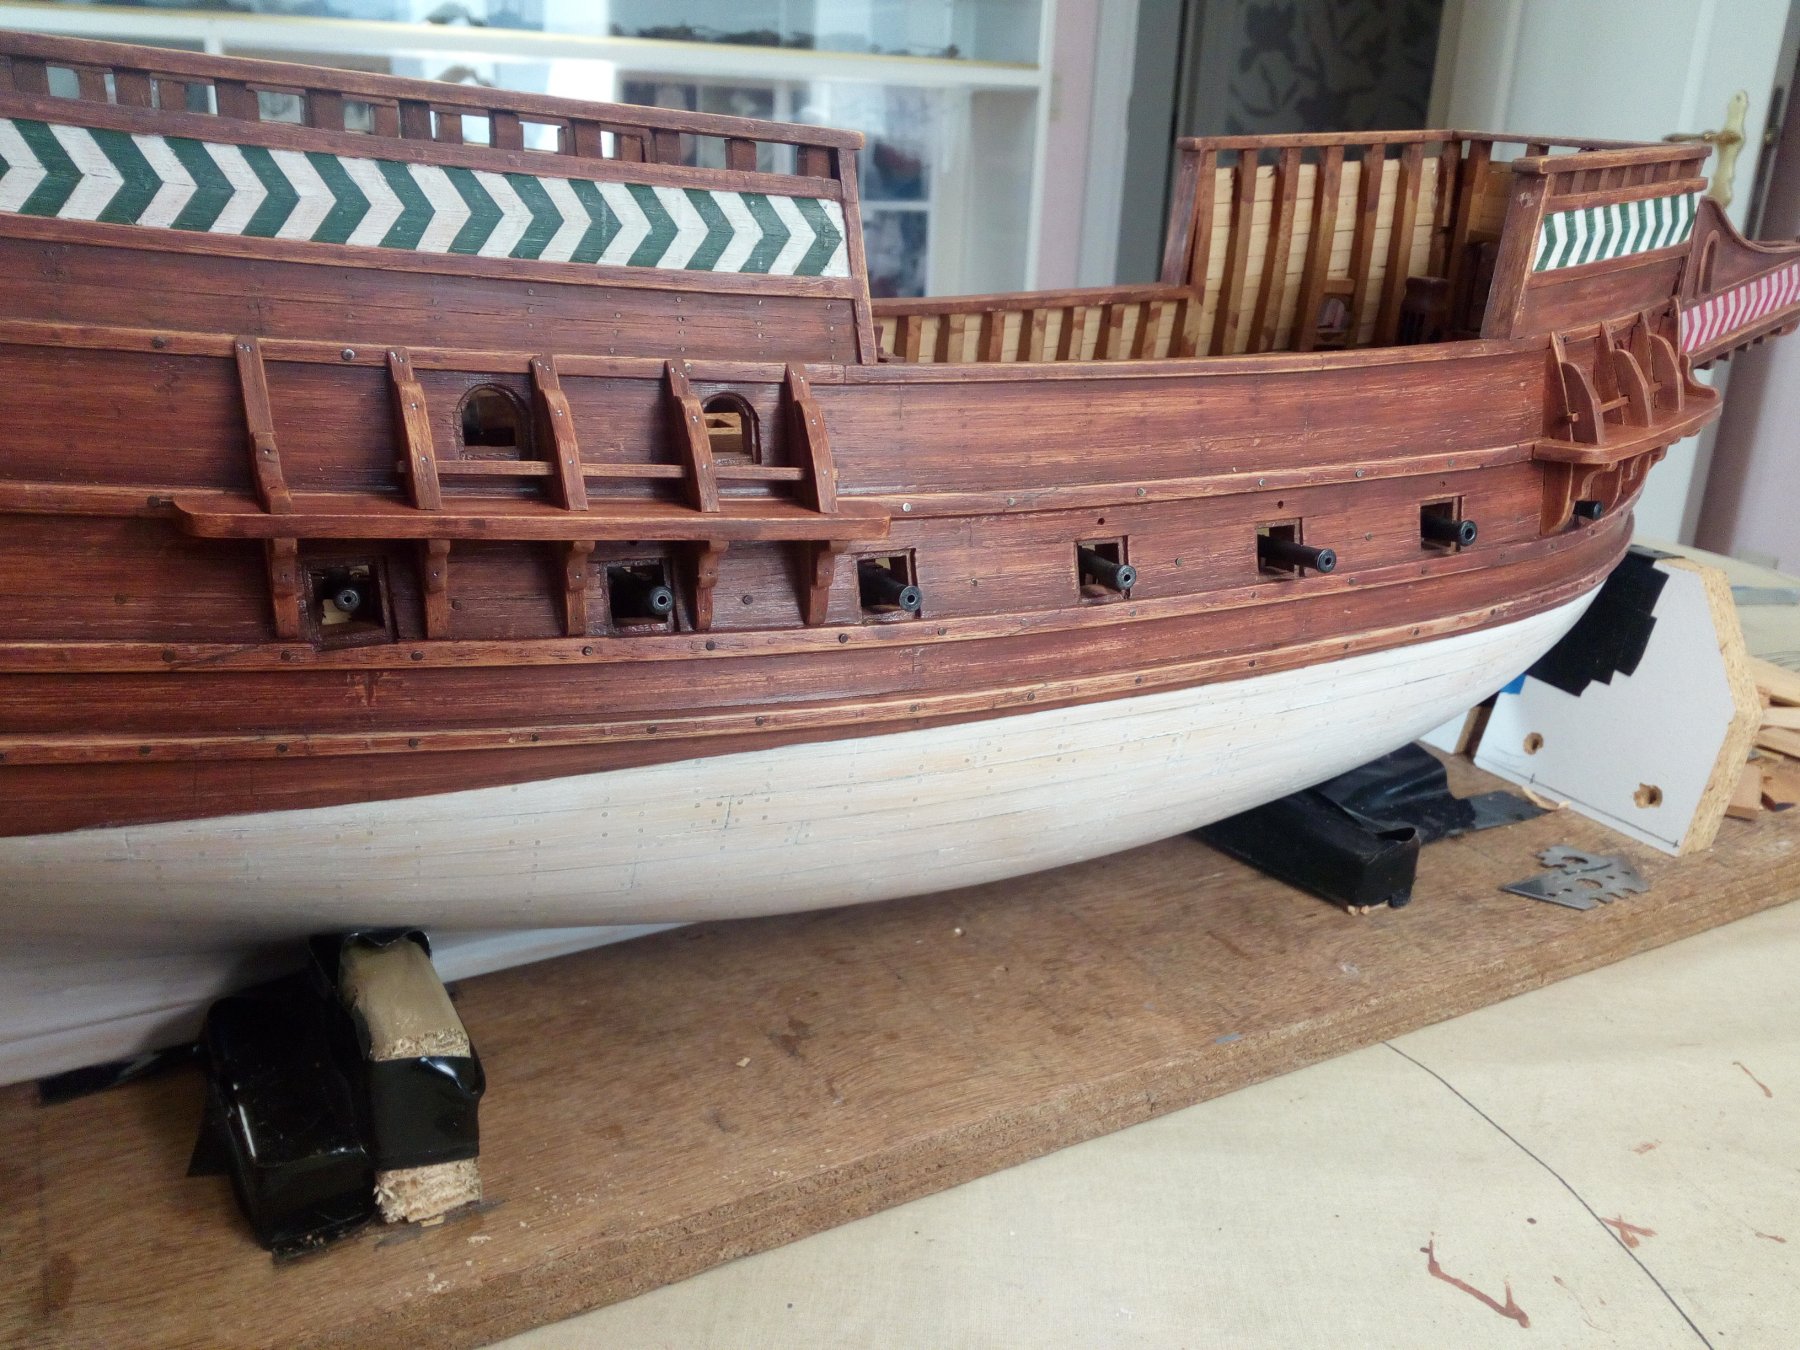
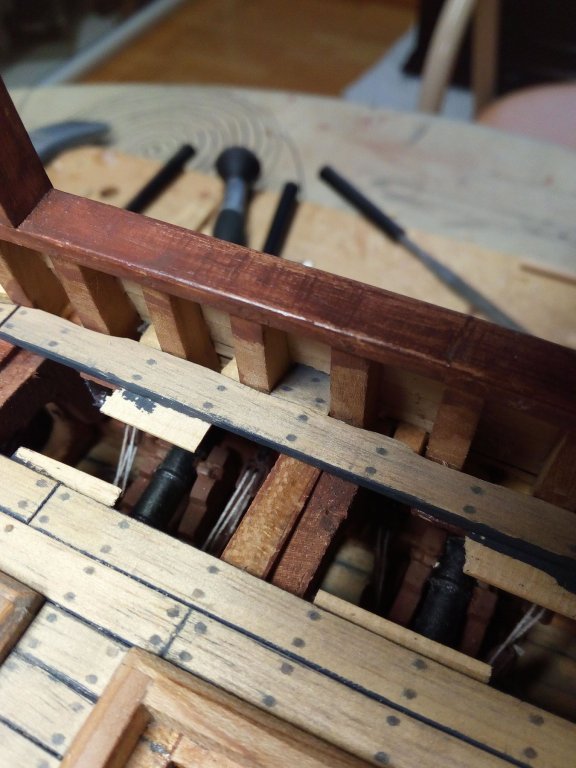
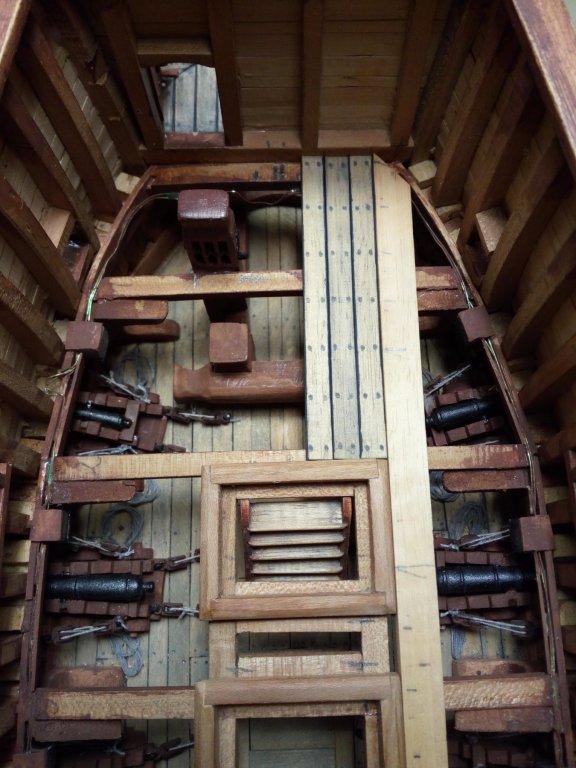
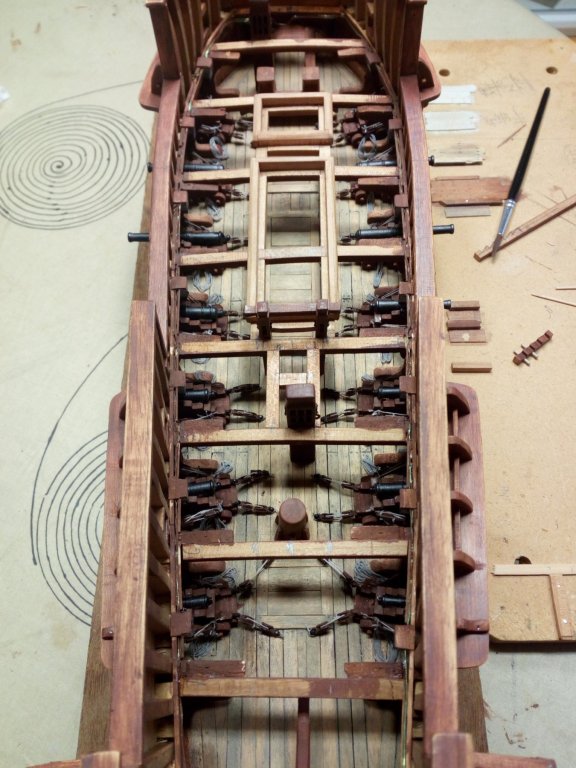
Thank you GL Installing the cannon barrels. As already explained. Various sizes and callibers. The barrles are glued on the carriages with ca glue. Holes have been drilled above the ports. Next step, deck planking (nothing glued yet). Thanks for following and likes

- 756 replies
-
- 16
-
-
- galleon
- golden hind
- (and 2 more)
-