HOLIDAY DONATION DRIVE - SUPPORT MSW - DO YOUR PART TO KEEP THIS GREAT FORUM GOING! (Only 24 donations so far out of 49,000 members - C'mon guys!)
×


FriedClams
-
Posts
1,368 -
Joined
-
Last visited
Content Type
Profiles
Forums
Gallery
Events
Everything posted by FriedClams
-
 Nice update Keith - that mast is looking amazing. Your careful meticulous work is really shining through and everything is just spot on. The preventer chain turned out great - sweet little detail. Gary
 -
Beautiful job FF - congratulations on its completion. Wonderful details on this model! Gary
-
Congratulations Dan on a fine model. Beautiful work on the color rendering - I particularly like the underside oil washing. Very nice. Gary
-
Good to see you picking these two models back up Egilman and you've made some nice progress as well. I really like the way the instrument columns turned out - very nice indeed! Looking forward to more updates. Gary
-
Just read your log from the beginning Chris and please count all posts as "liked". This is another great card kit and as noted by others, the graphic printing on the model is quite extraordinary and so convincing. But it still takes a talented modeler to execute and bring the model to life as you are doing here (and as you did in your previous build.) Very nice work! Gary
-
Good to see an update on this project Michael. Wonderful detail and superb machine work. Gary
-
Amazing sub-miniature detail - rifles in 1:160. Your log is a pleasure to follow and to learn from. Gary
-
Sweet work Dan! I'm looking forward to seeing the final glamor shots. Gary
-
Great progress Brian and I particularly like the stack(s) construction. Nice organizers as well. Gary
-
Excellent model Grant and congratulations on its completion. Such careful and exacting execution - very nice work indeed. Gary.
-
Nice update Keith. I couldn’t help but notice that every yard is level and perfectly inline with the others from every camera angle. I'm sure that took some time and fiddling to get right. Very nice. Gary
-
Thank you all very much for your kind words and generous appraisal of the diorama. It means a lot coming from such a talented group of modelers. This dio has been great fun due in large part because of you folks here at MSW and I thank you for that and for allowing me to share it with you. I look forward to catching up on all your projects. Gary
- 189 replies
-
- 17
-

-

-
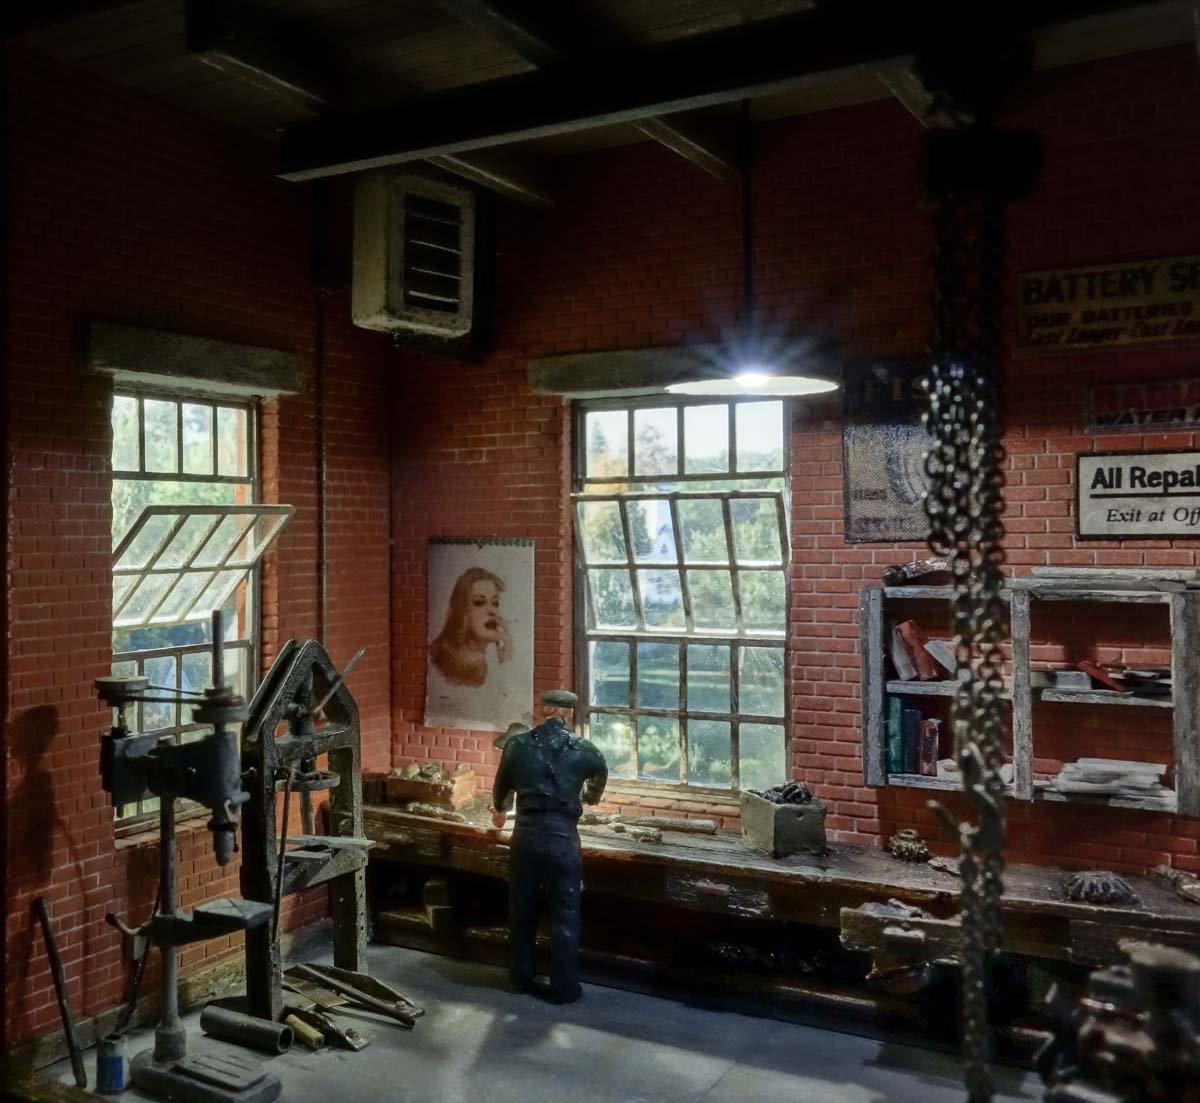
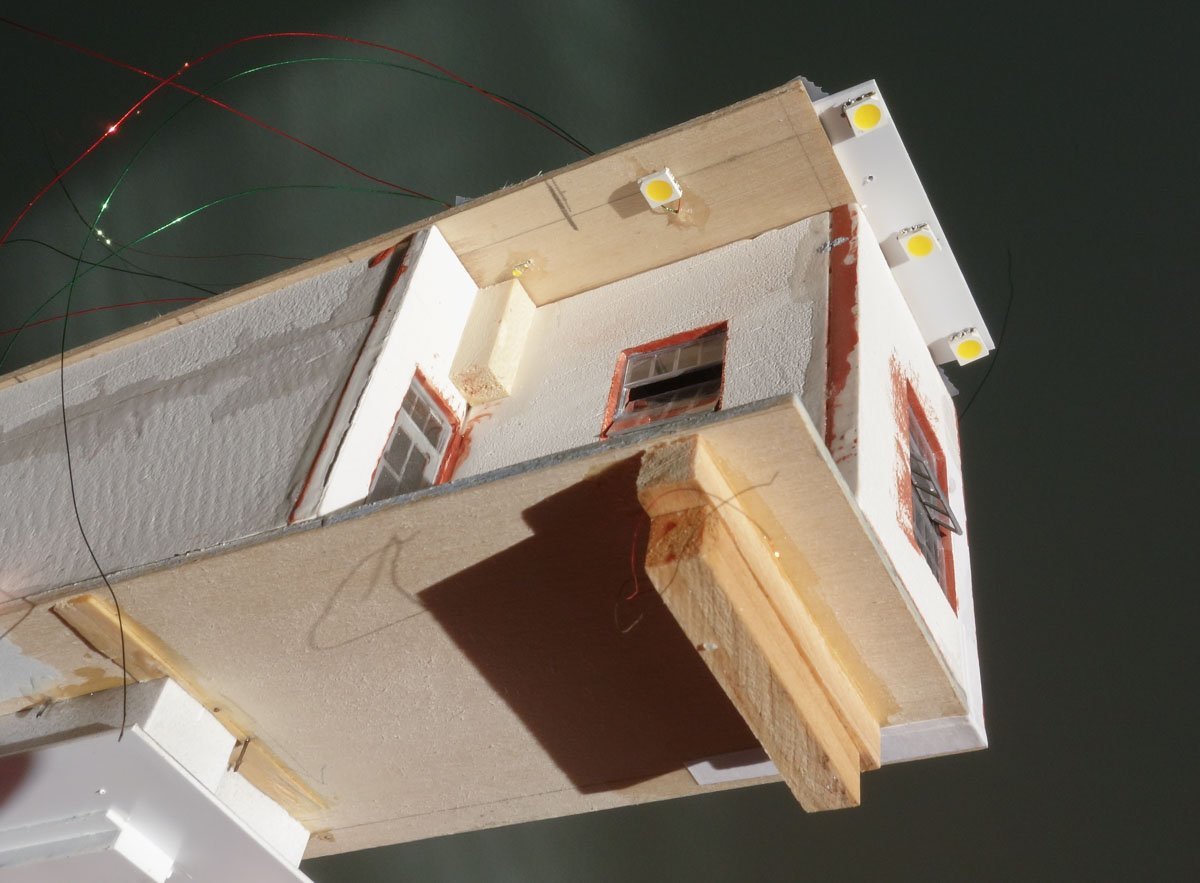
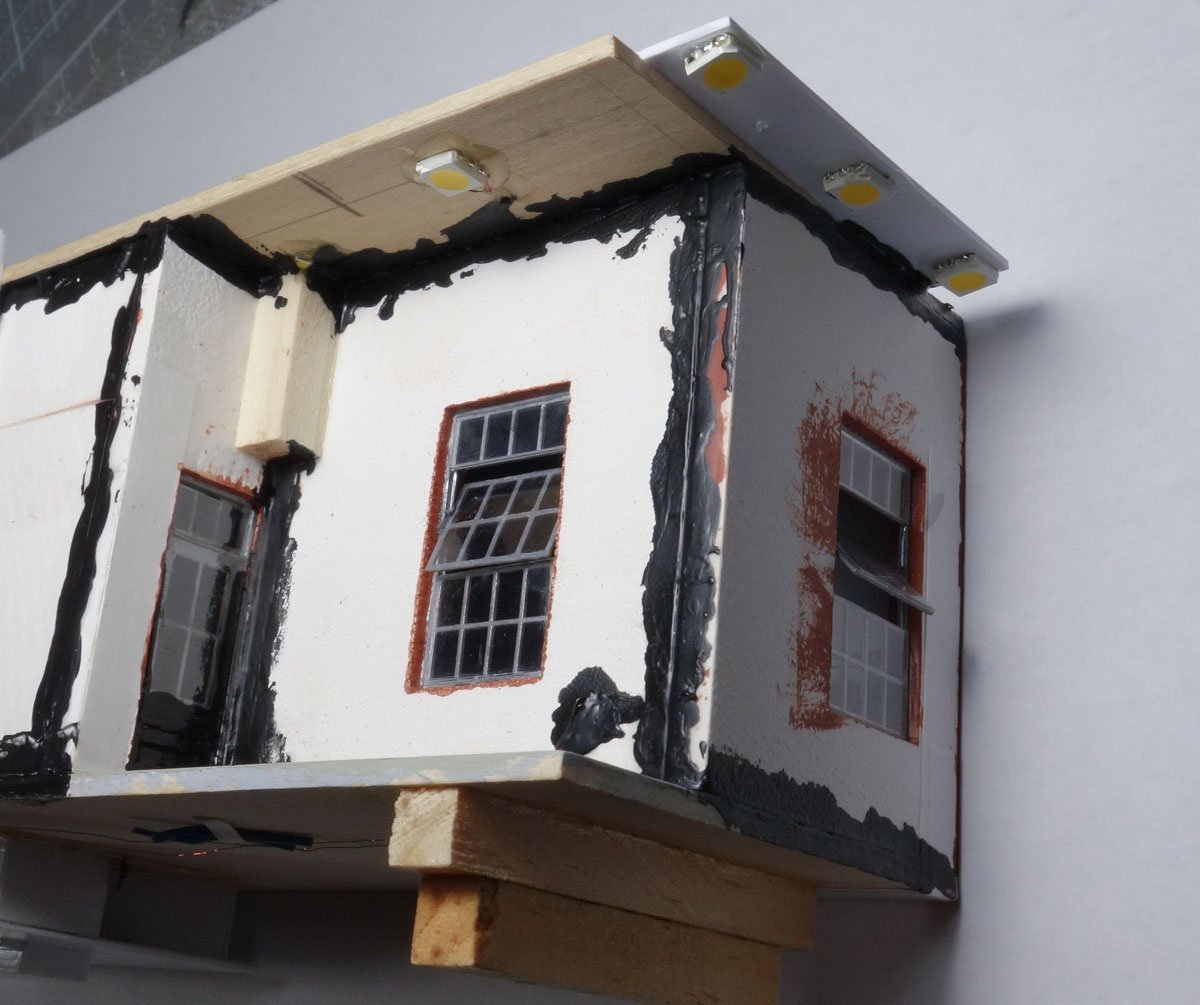
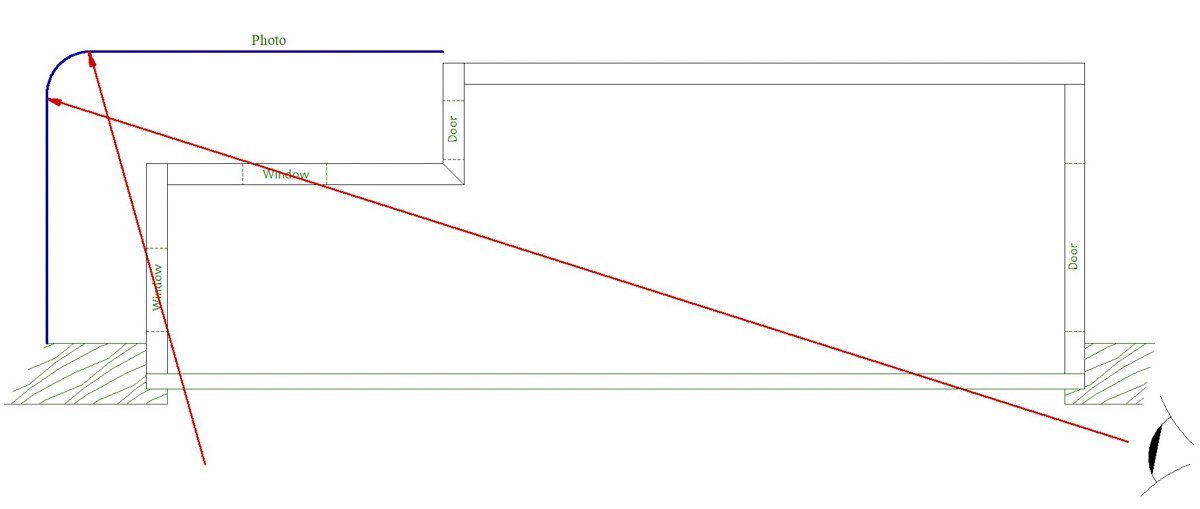
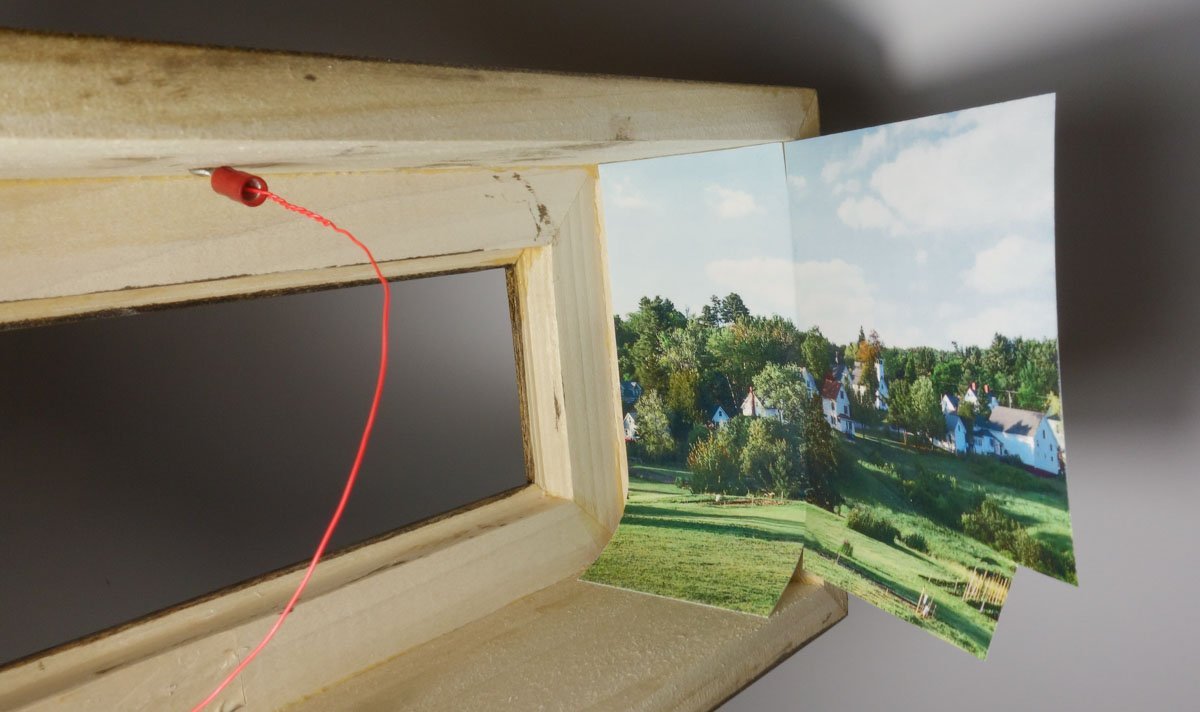
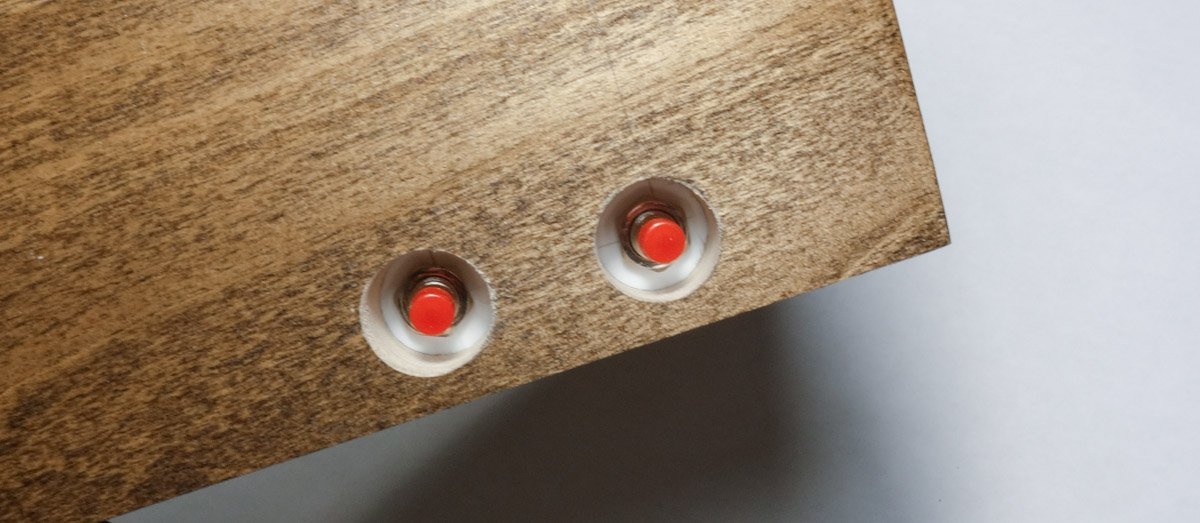
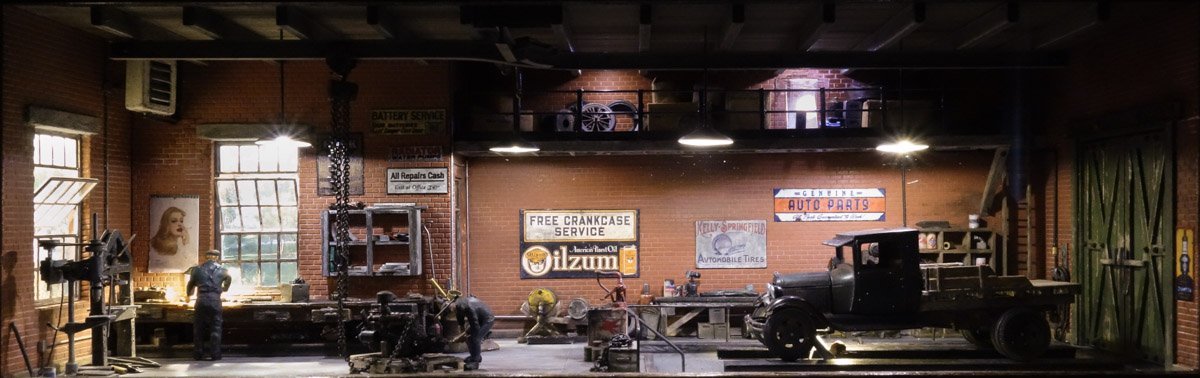
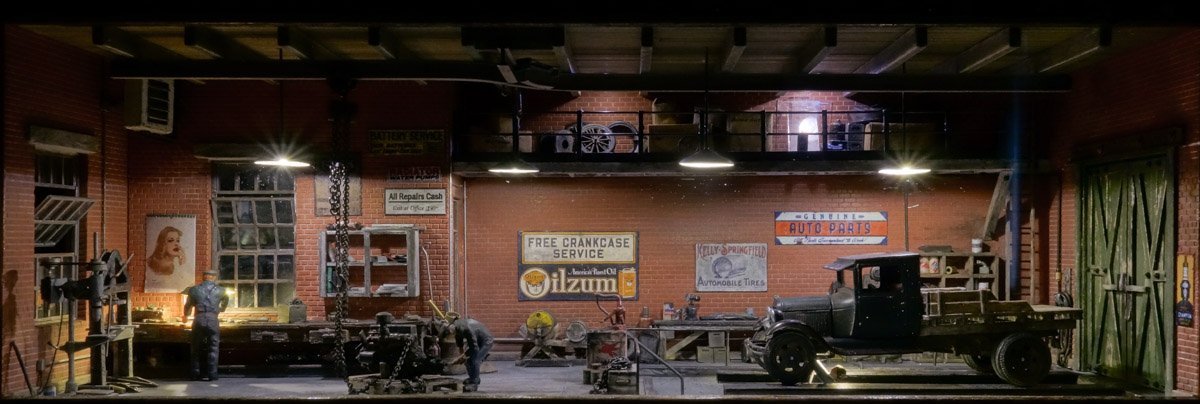
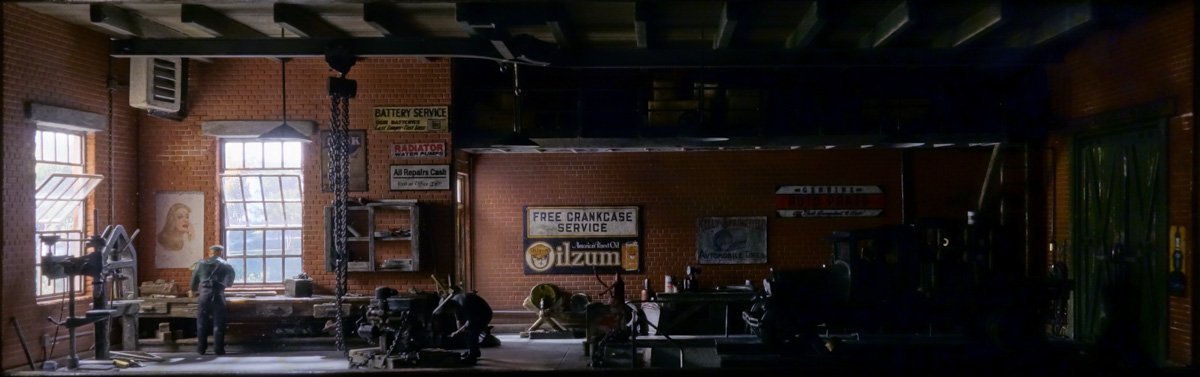
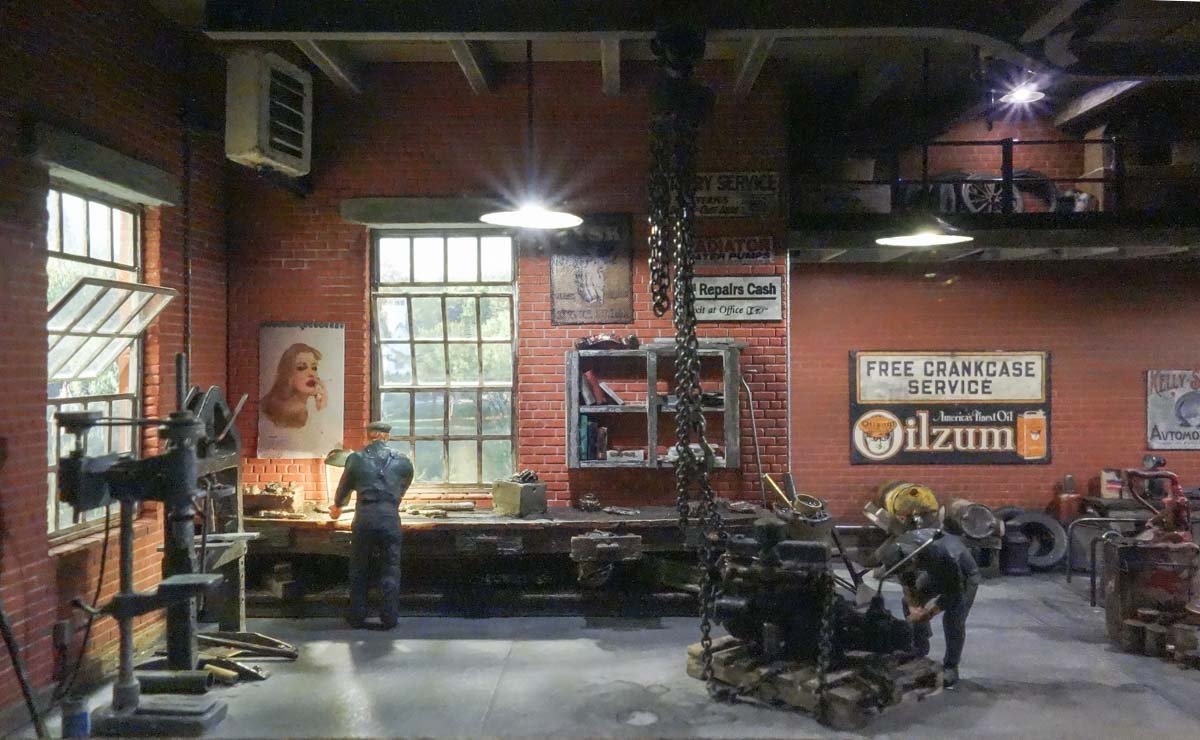
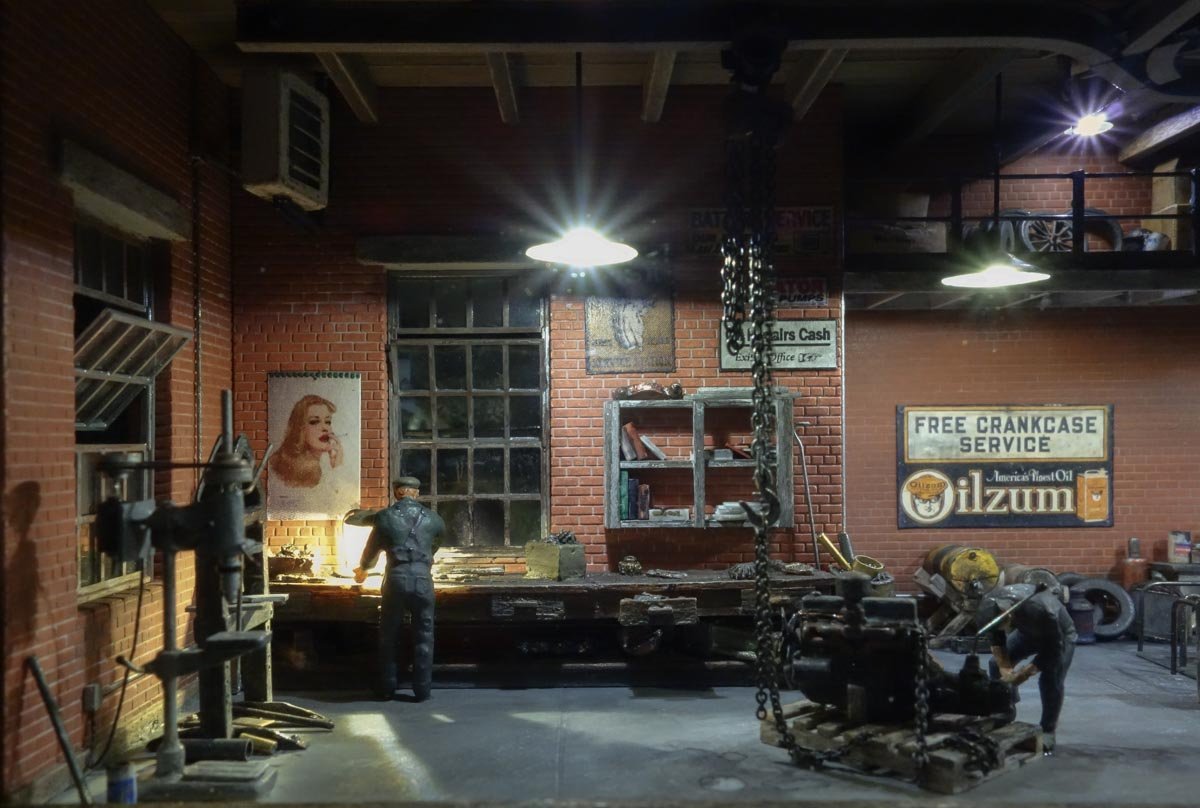
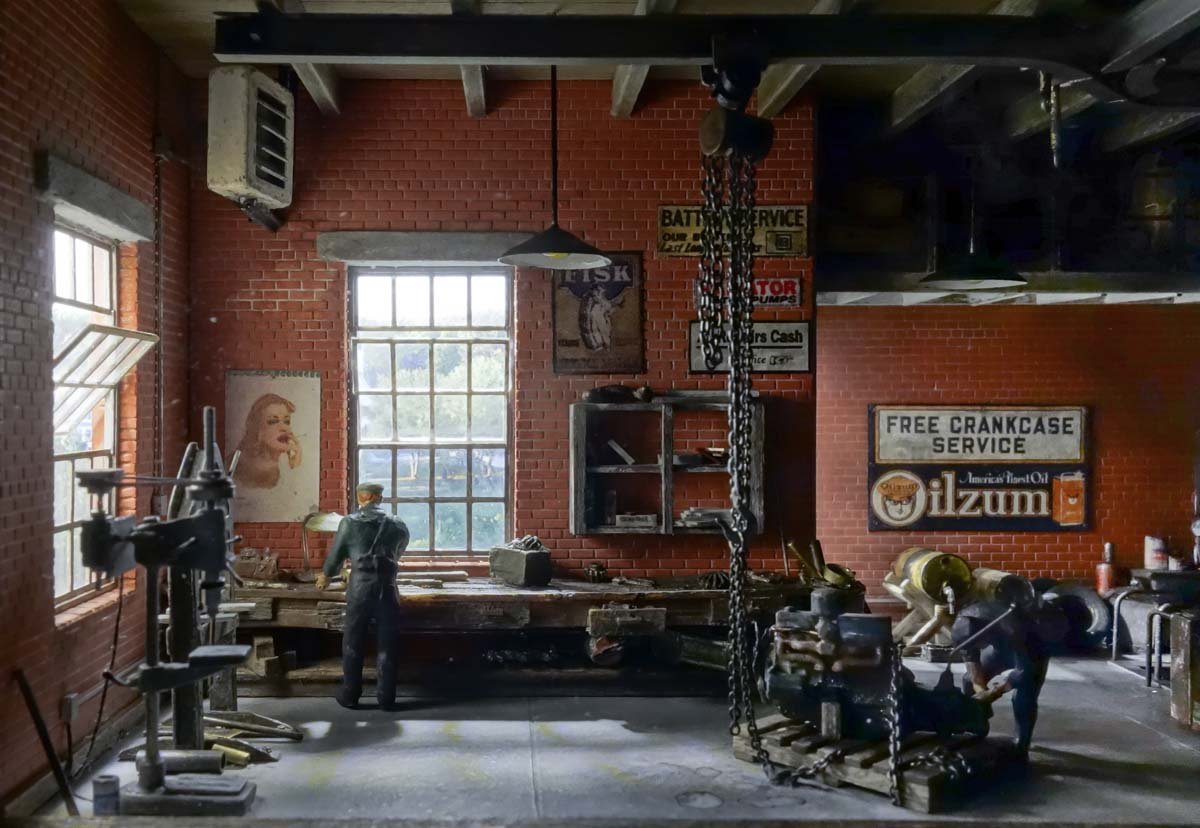
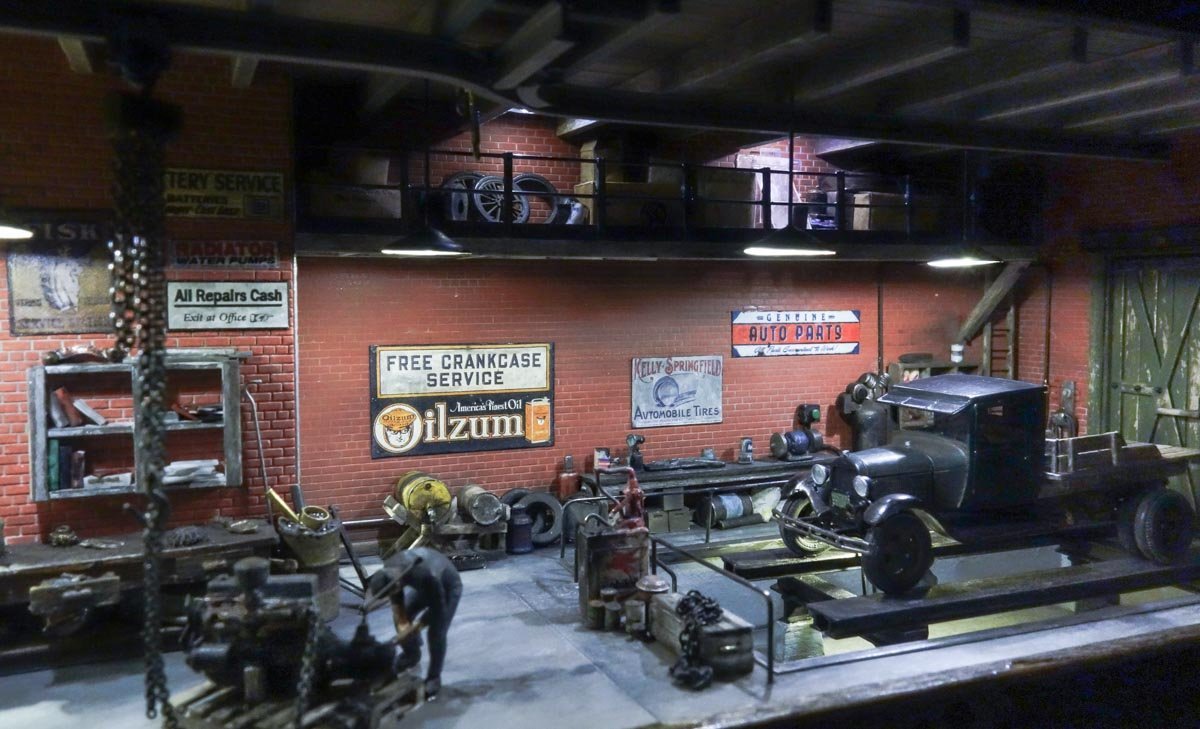
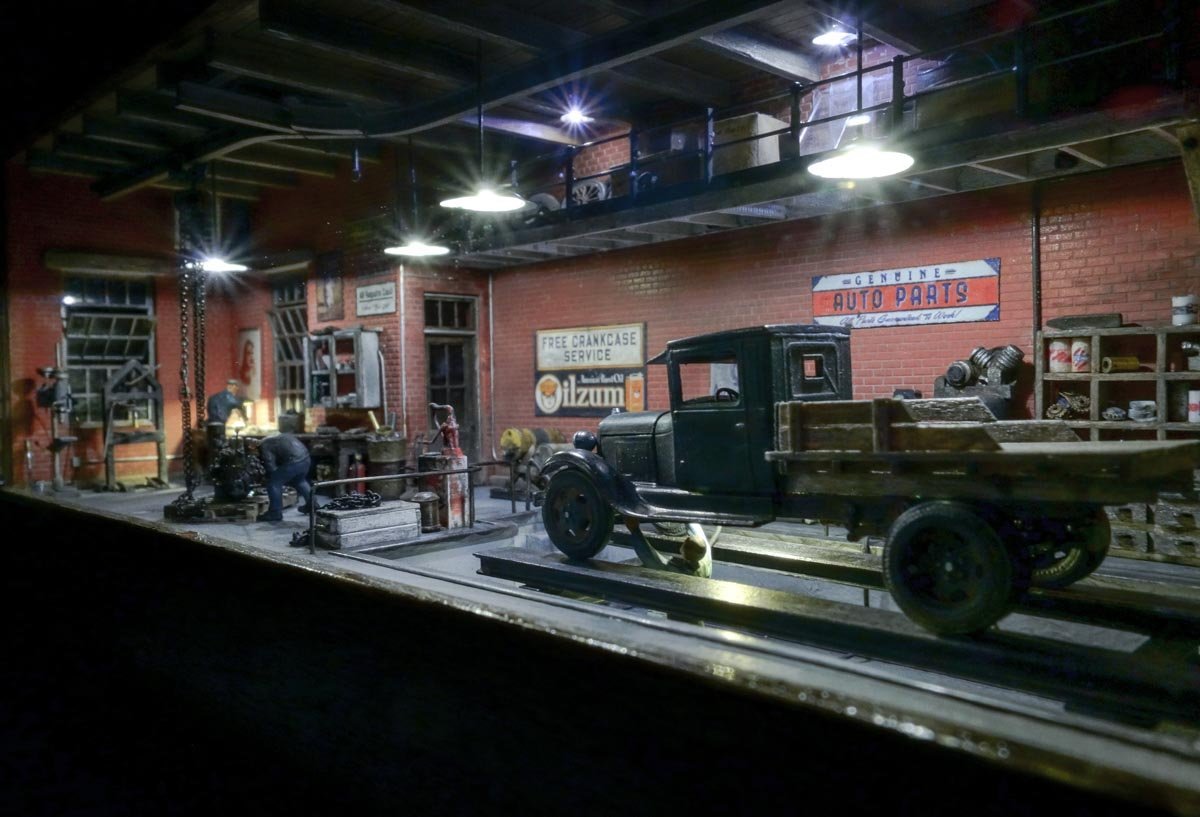
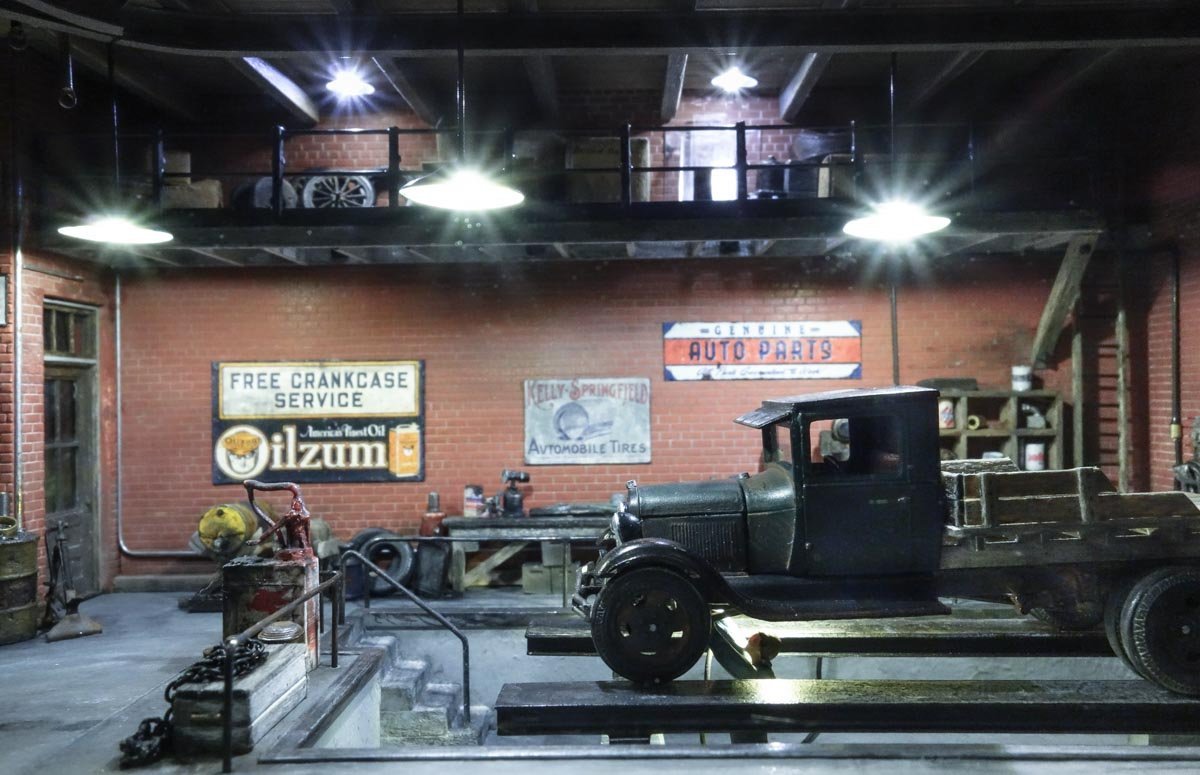
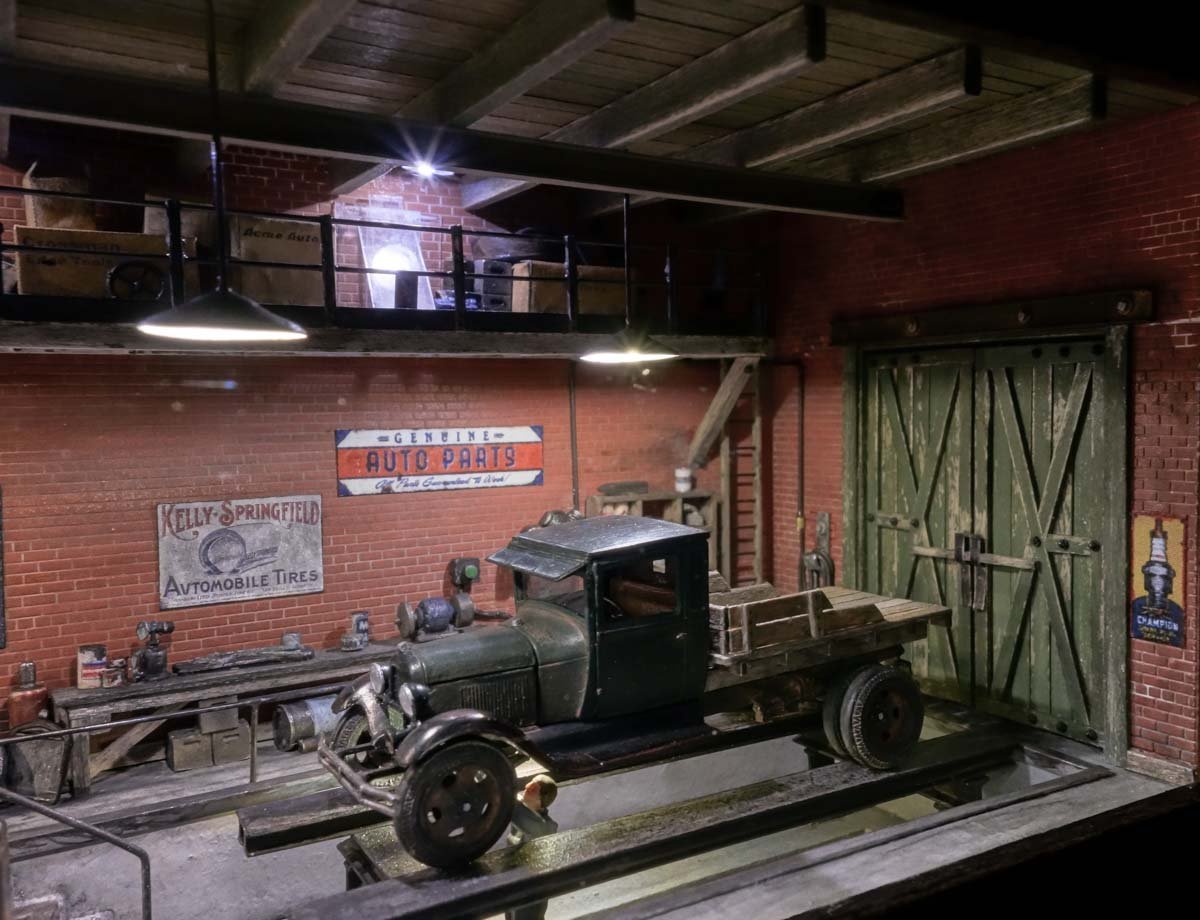
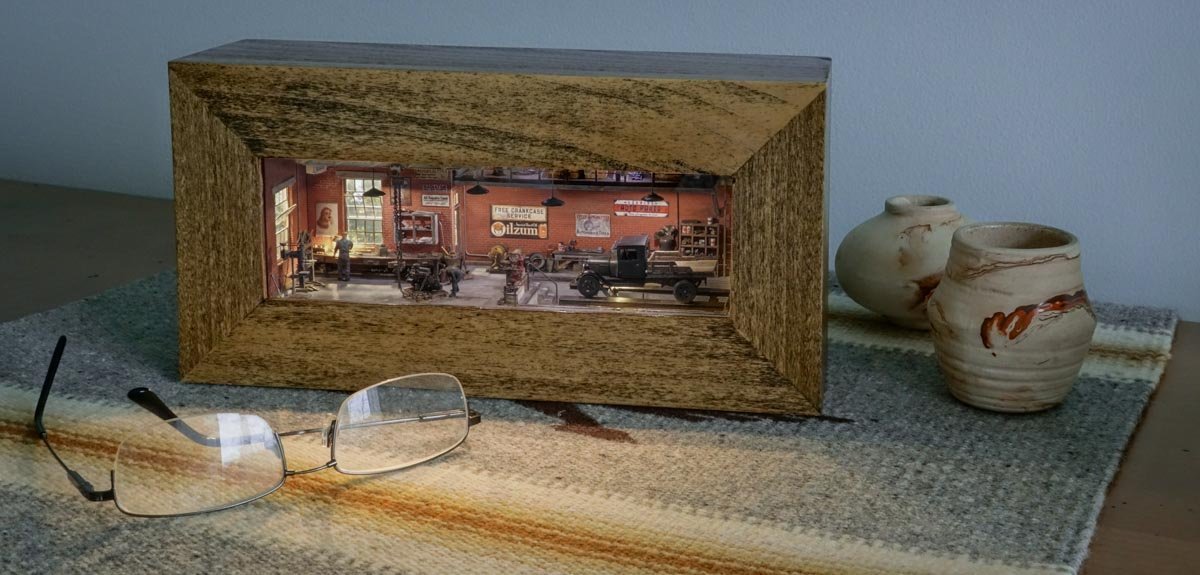
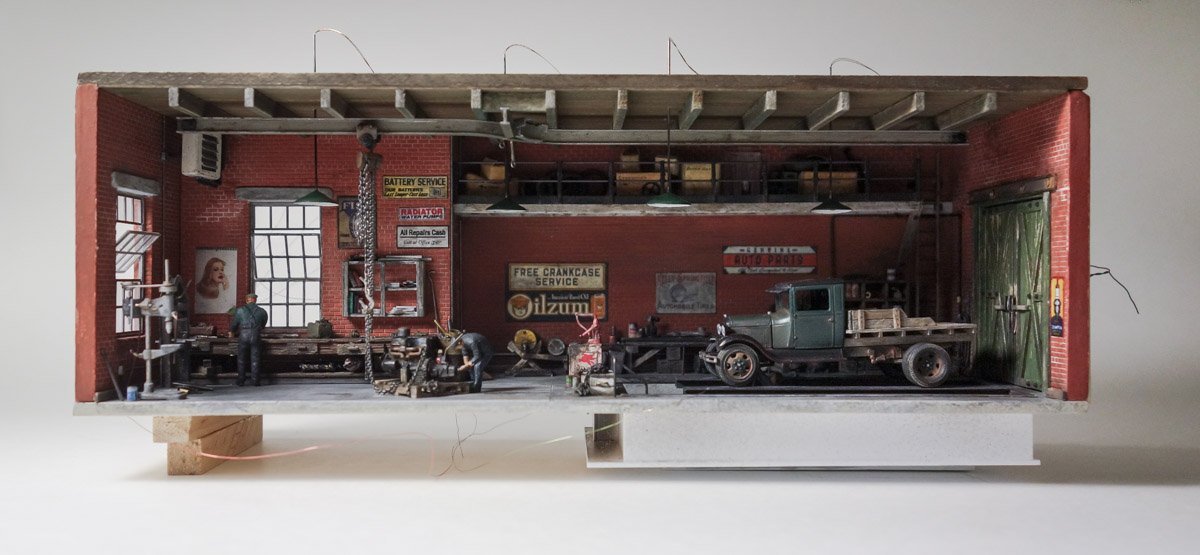
Greetings fellow modelers. The last item to finish on this diorama is the exterior (through the windows) lighting and the wiring. A styrene bracket overhangs the end of the building and LEDs are glued to the underside. There are four warm white 5050 diodes and a single 0805. The 0805 fills in the area above the door. This model is a lot like real estate – it looks OK until you walk around back. The black smeared all over the seams is a PVA and acrylic paint mixture and keeps the light from shining through the cracks. In fact, I've painted the back side of the thin plastic door with the goo to prevent it from glowing as the bright light makes it almost translucent. Originally I had intended on using an industrial/commercial scene, but decided instead on an image with colors that would feel more like a sunny day and contrast with the drab interior. The scene also needed to be a subject that could be wrapped 90 degrees through the corner which would be difficult to do with close up buildings. The line-of-sight created by the window positioning necessitates this continuous scene because it allows for viewing positions where the side wall and the back wall can be seen at the same time through a single window. So two separate scenes (one out the rear window and one out the side) can't be used. The trimmed-to-fit image is attached to the side wall and the back gets folded in after the dio module is inserted. The flare of the lower portion of the photo keeps the viewer from seeing the inside bottom of the shadowbox. The red wire along with an identical one on the bottom holds the dio in place up tight within the face frame inset. Two latching push buttons are recessed into the bottom - one for the interior and one for the exterior. This recess gives me the option to set the shadowbox down on a horizontal surface if I chose not to wall hang it. The lighting is controlled in 3 main groups with each group having its own PWM (Pulse Width Modulator), so I can adjust their light levels up or down if need be. The groups are the 5 exterior lights, four pendant lights and two mezzanine lights. The bench light and pit light are separate with a fixed output. Here is the final result. None of the images are focus stacked and the star-like rays coming from the lights are due to the use of a wide angle lens, a very small aperture and long exposure times in attempt to gain the greatest depth of field. Also, they are not HDR composites although I did open up the shadows in software on some of the images which gives them an HDRish look. All lights on. Interior lights only. Exterior only. All Interior only. Exterior only. Thanks to all for stopping to take a look and for the likes. And I especially want to thank everyone who left comments. Your encouragement, suggestions and input made this a better model than it otherwise would have been – and much more enjoyable as well. Thank you so much. Be safe and stay well. Gary


- 189 replies
-
- 45
-
-
-

-
Nice progress Dan. Did you put the flats on the tires or did it come molded like that? Either way, it's a nice detail and will give the model visual weight. I've seen guys do something similar to truck tires - soften them with heat and squashing them them down to produce a little side bulge. Gary
-
Nice work Keith! As others have already stated, a very helpful tutorial and an excellent result. That goes in my notes folder. So, how many more do you have to go - 435 ? Gary
-
Fabulous work Valeriy! I know I've said this before, but your work is so precise, clean and meticulous. I also know that it takes dedicated hard work to achieve such a result. I've been looking at your brass and wood capped railing and it appears flawless. Bravo! Gary
-
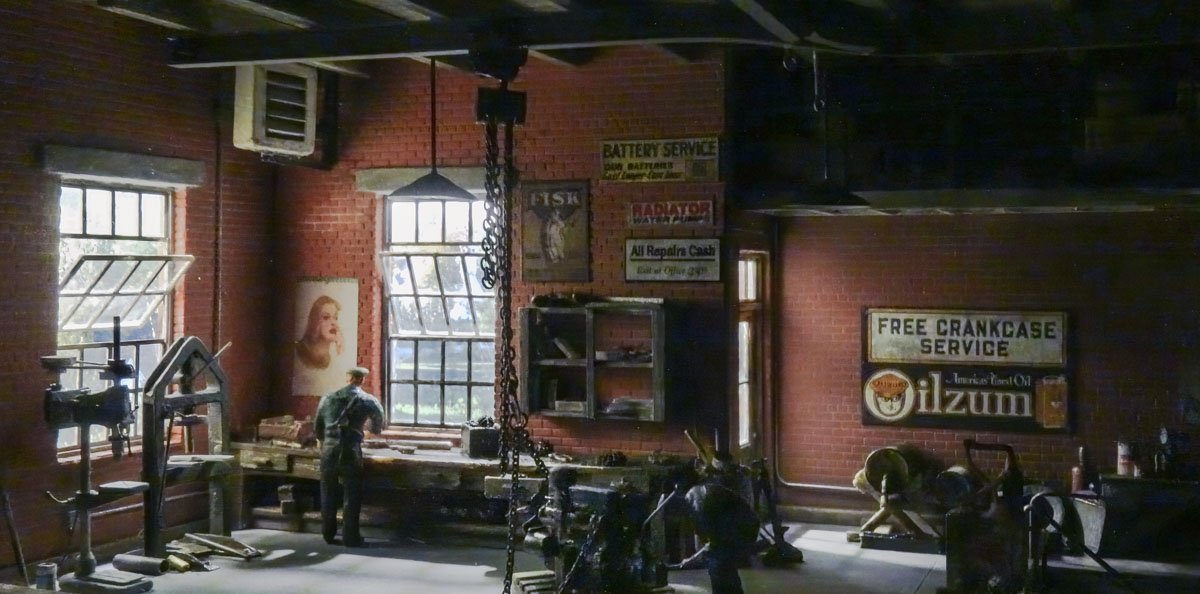
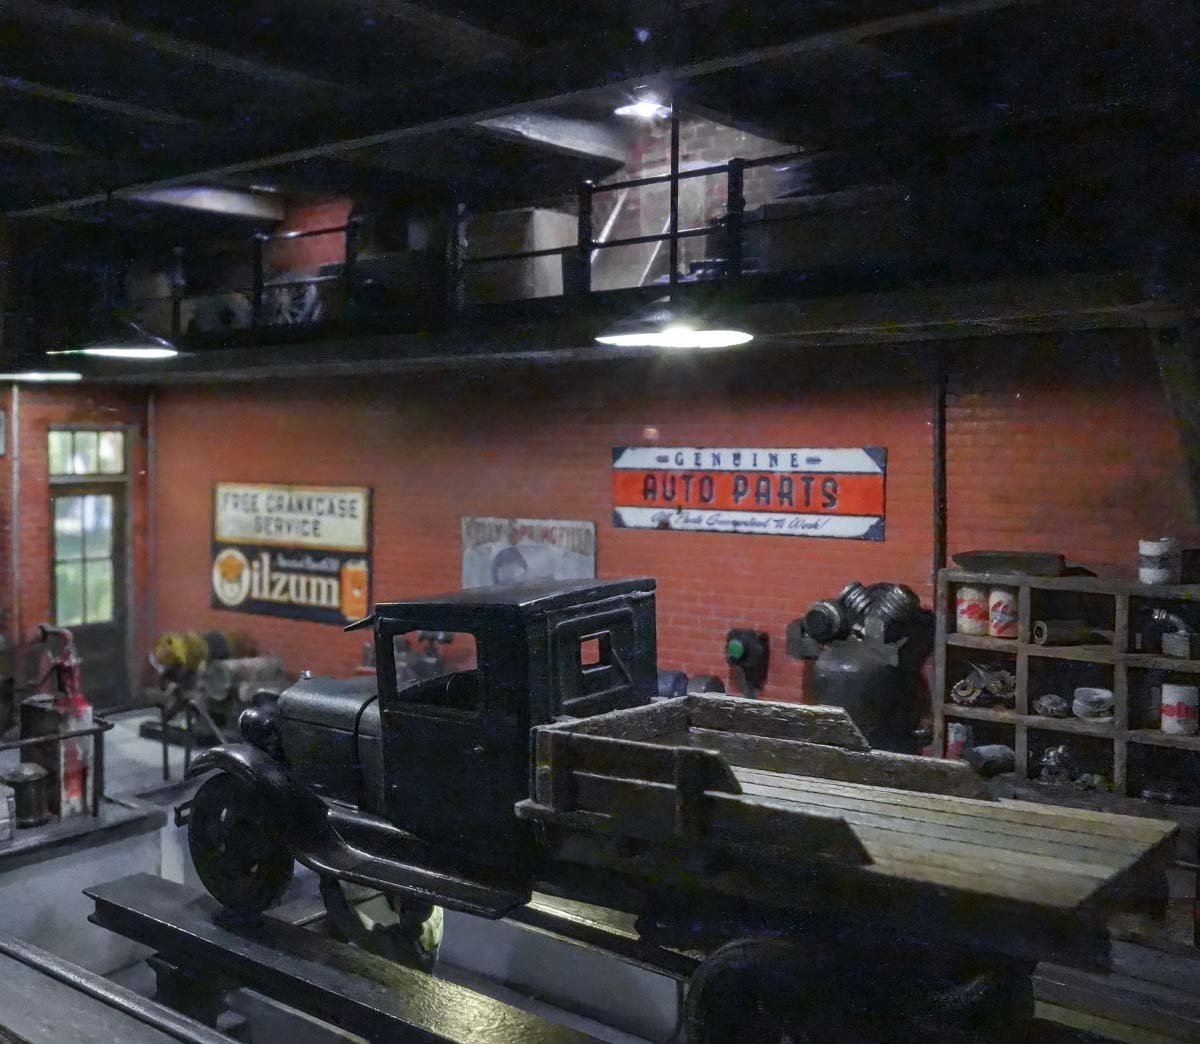
Greetings fellow modelers and thanks so much for the wonderful and generous comments - I do appreciate it. Thanks Eric and I'm glad you found my small build. I'm pleased it has given you some ideas for future projects. Hello Druxey. Yes, the walls do look a bit too clean now and I might darken them around the bench especially. But first I want to get the interior lights going and see it as a completed whole before deciding what, if any more dirtying needs to be done. Thanks for stopping by. Hi Mark. As Egilman has stated, 1:87 is what model railroaders call HO scale and is the most popular scale for that hobby. Although I'm not a railroad modeler, I do model in HO often to take advantage of the detail items that are available in this scale. The brick wall blanks, the figures, injection molded window frames and the 29 Ford kit are the items that made the diorama easier to build and more pleasurable. All these items could of course be scratched, but I wouldn't enjoy the process and if I were intent on scratching everything, I would choose a larger scale - like 1:48 or 1:35. So 1:87 is a good scale to scratch what is interesting or unavailable and buy detail parts for items that are tedious or that someone else has already done better. Hope that answers your question. So, I'm waiting for a couple of latching push button switches to be delivered to complete the diorama. I hope to show you the final result soon. Thanks for looking. Gary
- 189 replies
-
- 13
-
-
Excellent work FF - looks absolutely real! Thanks for tip on the fly tying clips. I want a handful of those. Gary
-
Wonderful exacting work Brian, as I always know it will be. The boats came out great and the canvas is very believable. Your modeling is always very complete and you never skip over the small details - like pipe hangers, or elbows on your steam piping - excellent, I love the surprise of the unexpected. Nice grey base color too. There’s just something about raw umber that adds a deep, complex look of age. Gary
-
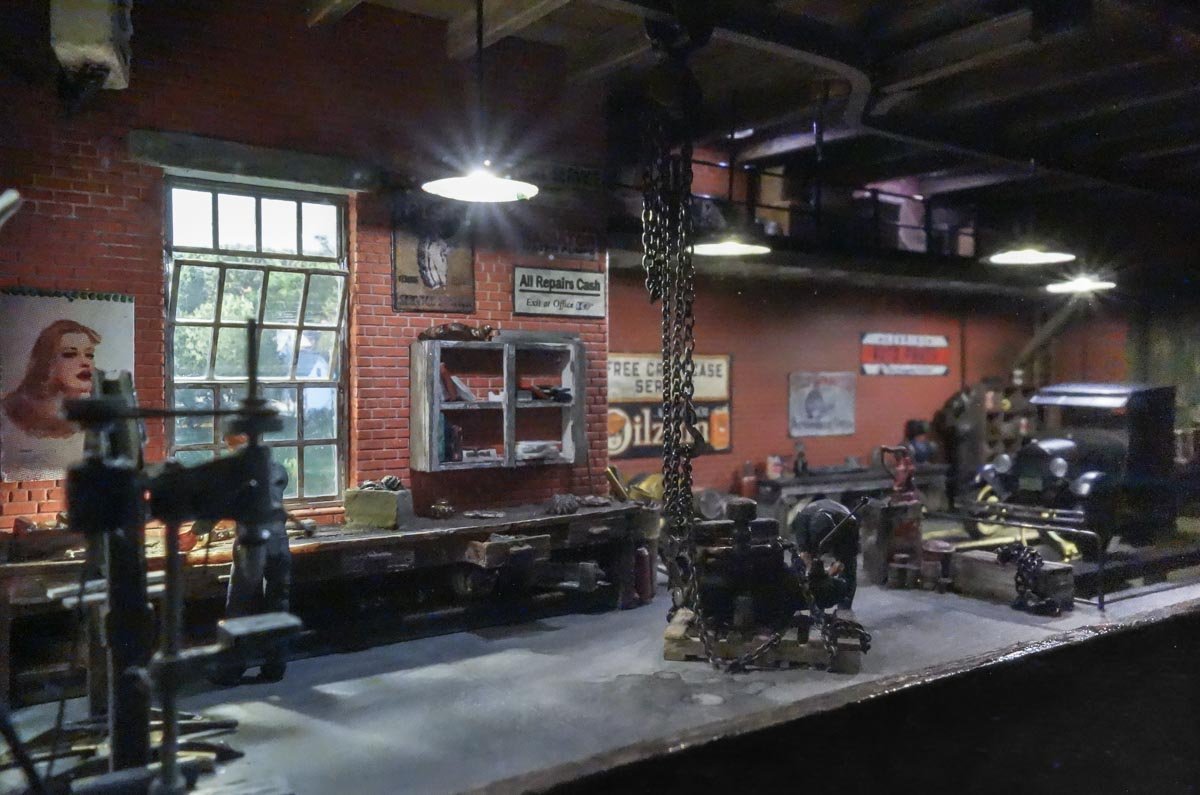
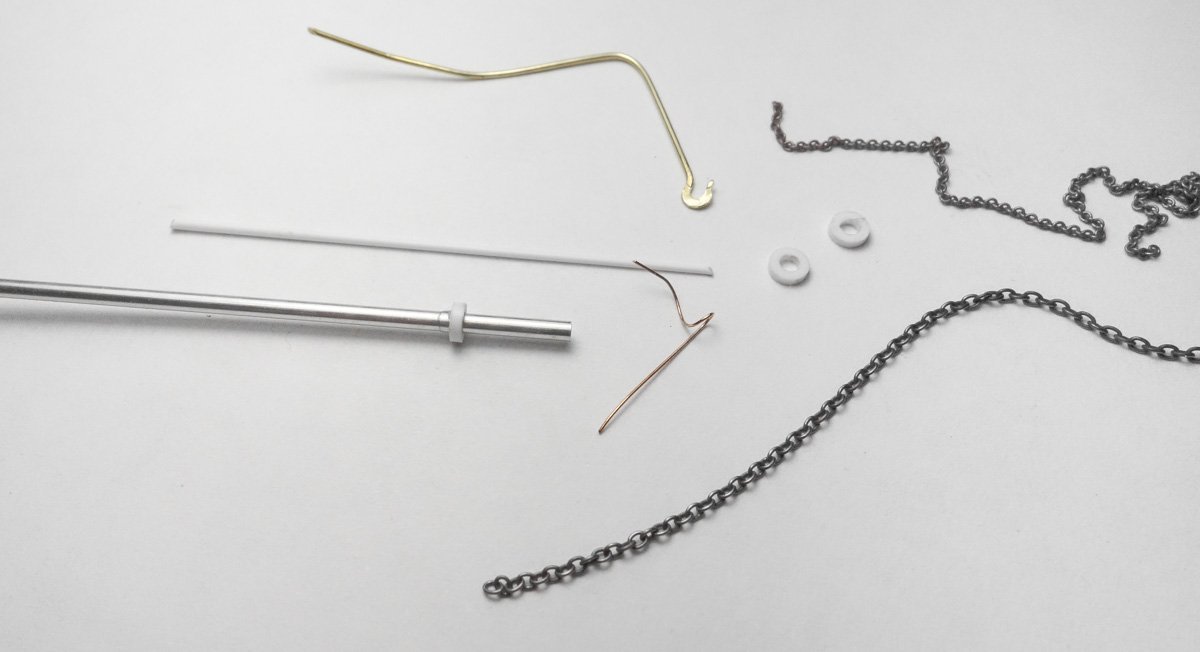
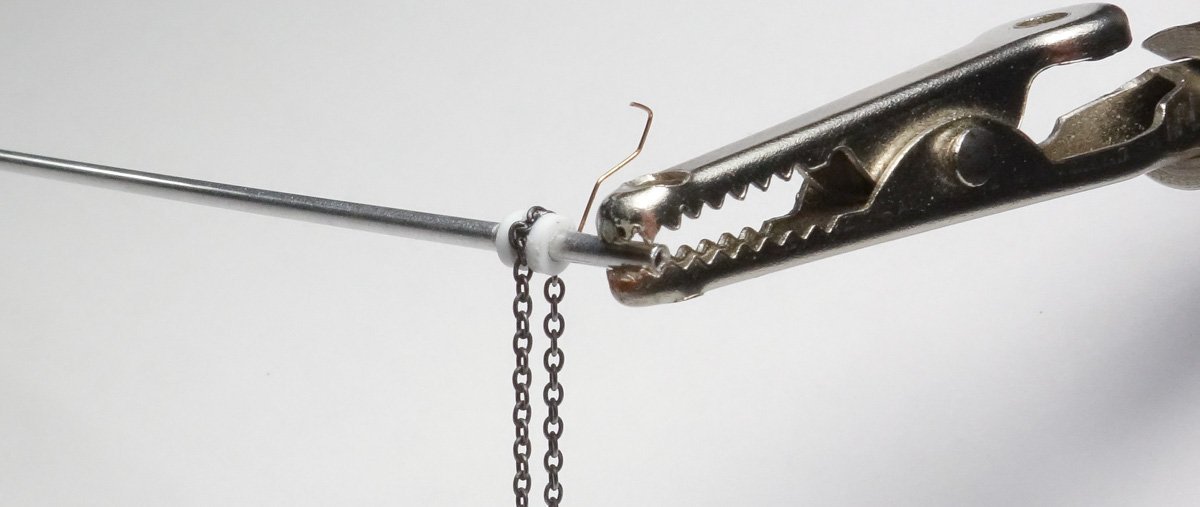
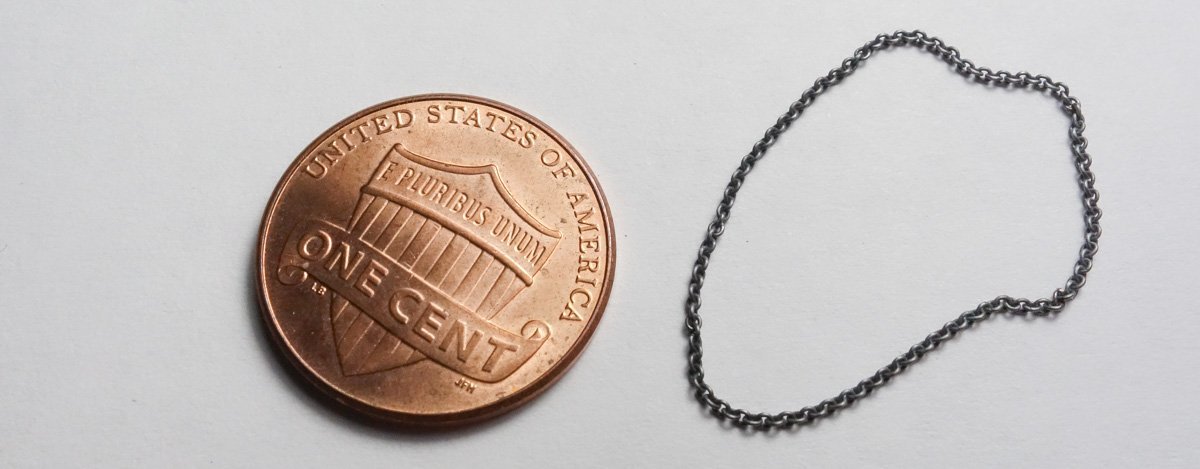
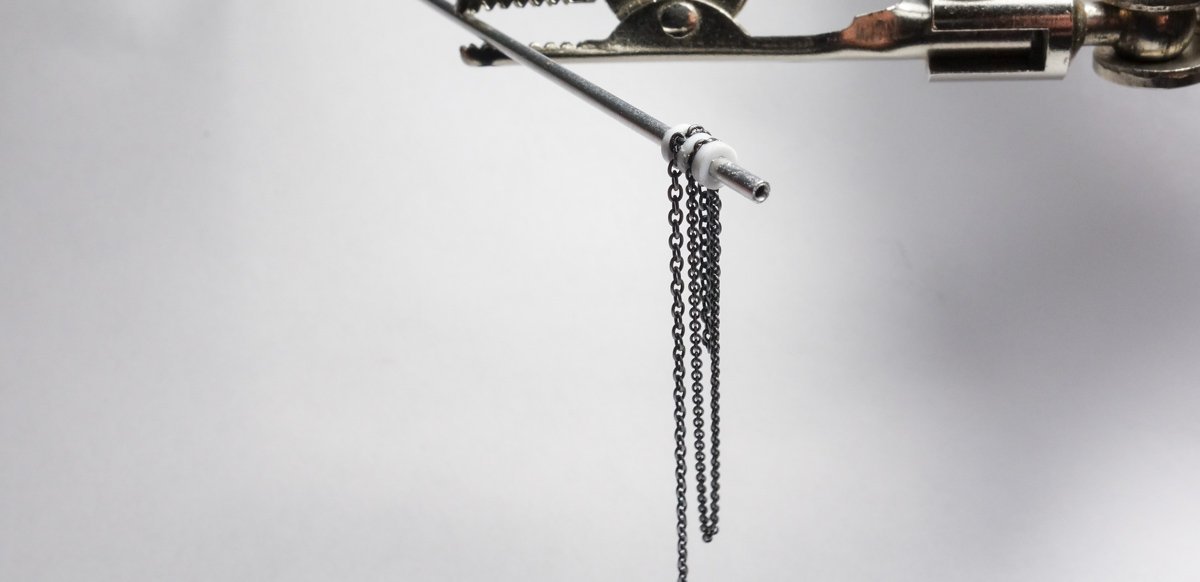
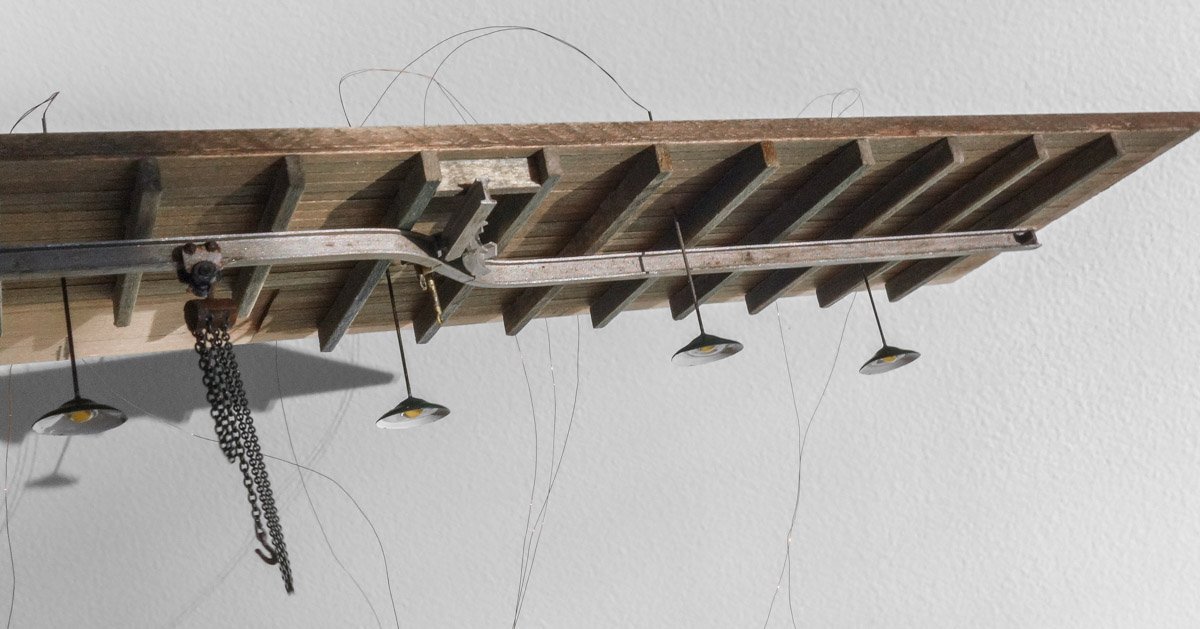
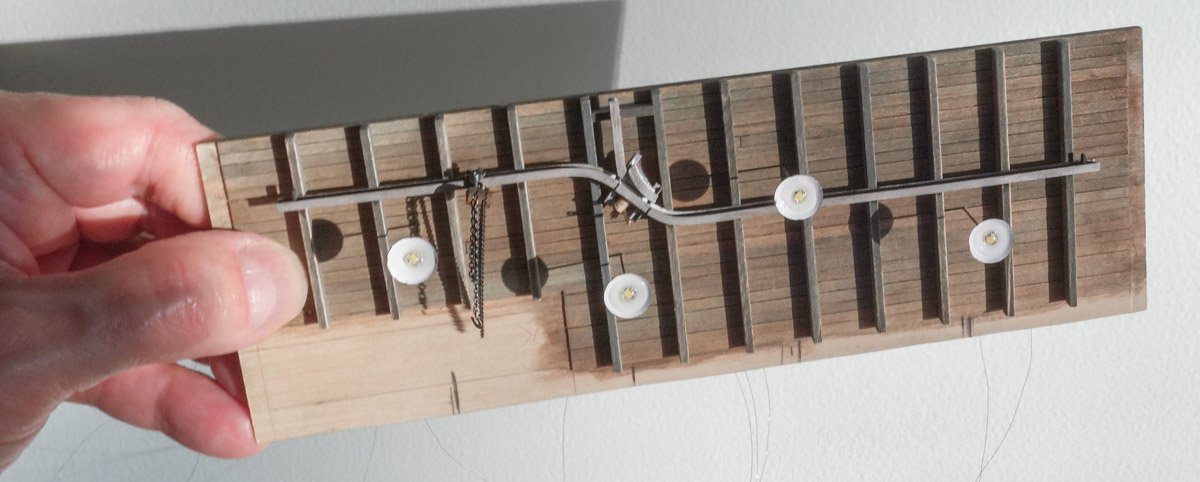
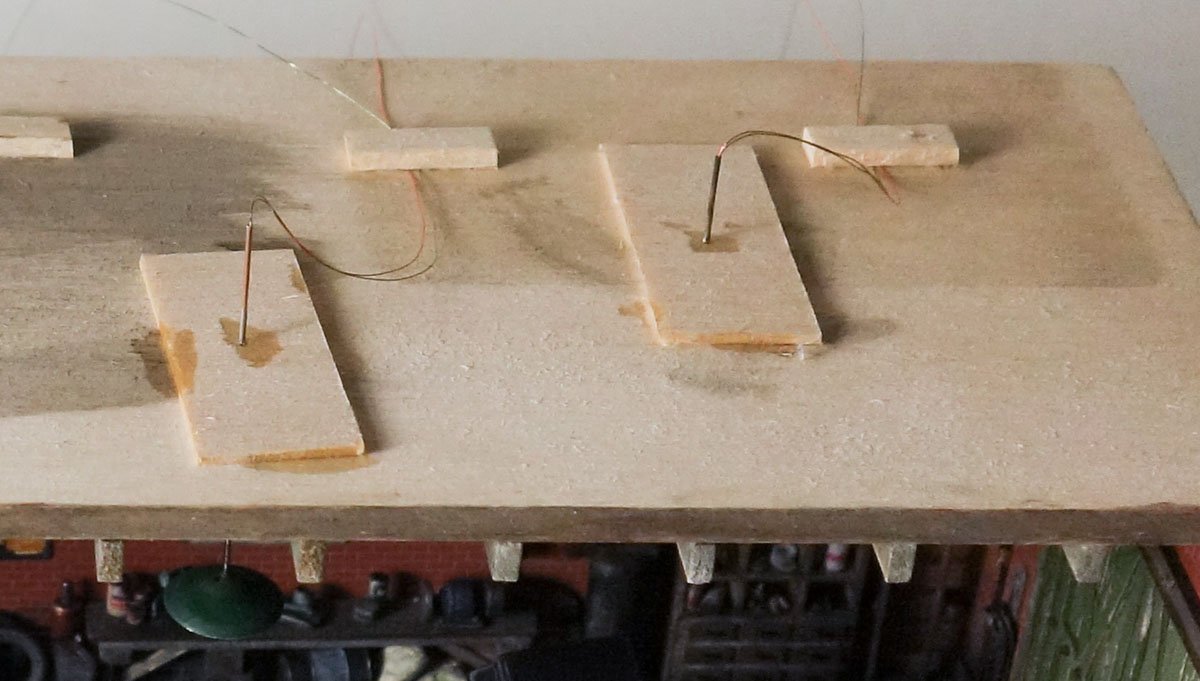
Gentleman, thank you one and all. A short update. The last item to make for the diorama is the chain hoist. The process starts with gathering up the materials. The small chain is 40 links per inch and the larger is 27 lpi. Slices of styrene tube are slid over 1/16” aluminum. The load chain (27 lpi) is draped over the tubing and glued so it doesn't slip off. The wire will be used as a hook to hold the end of the slack load chain. The hand chain is a continuous loop. It is draped over the tube. The excess tubing is trimmed from both ends, a hook is secured to the tubing and paper is then draped over the top to represent a cover. The lifting hook will be added later once the chain length is determined. The trolley is made entirely of styrene and extras are made to replace the ones that will jump from my tweezers and never be seen again. Enamel paint and pigments. The trolley sides are glued to the beam. The connecting shaft that the hoist hangs off is inserted between the two sides and the hoist is hung. The pendant lights that were made previously are located and pushed up through drilled holes in the ceiling. The holes drilled into the ceiling for the pendant lights are snug, but not tight. Additional wood plates placed on top of the ceiling were used to set the plumb of the fixtures by adjusting the shear between the ceiling and plate. Once plumb was established, the plates were glued to the ceiling and thin CA was applied around the pendant tubes. The glide switch has two rods with eyes attached to a rocker that changes the switch direction instead of the ropes as shown in a previous post. It's a seesaw sort of mechanism that is operated by pulling down on the upper eye with a hooked rod. This is often preferable to the dangling ropes which can become entangled with passing trolleys. Also visible (barely) in this photo is an improved mezzanine railing that now has brass rails instead of styrene. I broke (totally destroyed) the original one while fitting the ceiling. The engine is glued down and the mechanic is already wrenching on it. The three figures used on this diorama are from Preiser - set #1010249. That's it for the interior unless I forgot something. The exterior lighting is next. Thanks for stopping by. Gary


- 189 replies
-
- 23
-
-