


aliluke
-
Posts
1,359 -
Joined
-
Last visited
Content Type
Profiles
Forums
Gallery
Events
Everything posted by aliluke
-
 I look forward to your updates Ron. We all go through the lulls and being asked "why?" is never a very useful question...
 -
Yes Frank, that is the one. Pretty sure it is for a completely different ship than the Krick model. Sorry - but still a good book to own. I can only guess that Dirk might confirm this. His Krick Alert log should be good enough to get you somewhere near his skills! Given yours that isn't a big stretch. I still could be wrong about this!!
-
Hi Frank If it is the right book for the Krick Alert I'll be wrong. Please let me know if I am when you get it as I'd be tempted to get both, $60 is a bargain as this AOTS is rare . On my old computer someone sent me a PDF of it but the computer died and it went into the ether.
-
Hey Jesse You are doing some great work here. Pete Jaquith is back. His Newsboy, that I referred you to, has a post. I think it is in General Nautical Discussions. His work is well worth looking at.
- 607 replies
-
- 1
-

-
- scottish maid
- artesania latina
- (and 1 more)
-
Hi Frank Keen to see this unfold. Seriously on my list and I like the idea of the large scale. I think you might be mistaken about the Goodwin book though. That is for an English cutter - like Sherbourne etc and Krick's Alert is an American revenue cutter - a completely different thing. I could be wrong!! I'm quite keen to get Goodwin's AOTS where did you find it?
-
Hi Bob I'm slightly nervous about you going down my route. Would hate it to turn into another coppering nightmare for you. It certainly has it is oddities. Some parts of the plates just will not age at all in spite of being treated exactly the same as those along side them. The starboard side of my rudder remains stubbornly bright. Definitely an uneven finish but I guess that gives it the right look. I should be finished it tomorrow morning and will post profiles when it is done.
-
Just caught up with your log Eamonn. Links are a wonderful thing. Great work on your build and Nigel is steering you very well. I will be a watcher from now on and if I can advise I will. A fine ship it is that you are making.
- 1,039 replies
-
- 2
-
-
- ballahoo
- caldercraft
- (and 2 more)
-
Bob I agree with Arthur. The running end is taken under the coil and then appears to the outside of the coil. That is why it has a left and right hand set. My method still stands but there are many that you can try. I concede that I've only done this for 8 cannons and many are much more experienced than I. Your Vanguard is a beauty btw.
-
Hi Bob I think your coil is too tight. You need to think about how much rope would actually be needed = very little and you should make the middle of the coil more open. I use double-sided tape. Stick it down to a flat surface e.g scrap plywood. Start the coil with an instrument that gives you the right internal diameter for the coil - a piece of dowel or a round ended tool and wrap the rope round that while keeping it stuck down to the tape. I think four or five turns are more than enough. When finished paint with diluted PVA or even CA glue. When dry gently scrape it off the tape, flip it over and the coil is done. My AVS log shows a result that I like. I used CA glue. The coil once it is flipped over doesn't show any glue at all. The coils will have a left or right hand set. You can make many at random and work out the set later. With CA glue each coil takes a matter of minutes to make. Hope that helps.
-
A great subject this model -really unique.Are those angled planks at the bow how it was done? Intrigued and keen to keep up with your model!!
-
Hi Ollie Looking good. I reckon you are a customer for zu Mondfeld's "Historic Ship Models". It is the bible which will answer so many of your questions. The eyebolts look great but, in my opinion, both your eyebolts and ringbolts need to be smaller. I gave up trying to make my own at the tiny scale needed and just bought them from Model Expo. As far as I can tell they make the tiniest eyebolts that you can buy. Caldercraft do a similar size but they are photo etched so lack the roundedness. I bought several hundred eyebolts from ME. Have a look at my cannon in my Fly log - the eyebolts and ringbolts are very, very small. Still trying to figure out what ship/boat is in the background. Got me stumped!
- 803 replies
-
- 3
-
-
- colonial cutter
- modellers shipyard
- (and 1 more)
-
I agree with Eamonn and John except my references suggest that only the very largest cannons had a single/double block rig. Smaller cannons would have single/single rigs. In that rig the rope is seized to the single block at the bulwark taken through the sheave of the block at the carriage and then taken through the sheave of the block at the bulwark and the running end is then frapped to the line or coiled at the deck (Blue Ensign's log of Pegasus shows a frapped rig). That said the double/single block rig will look the part too and is what I did on my AVS in the absence of my latest references.
- 803 replies
-
- 3
-
-
- colonial cutter
- modellers shipyard
- (and 1 more)
-
Hi Mike Hold back that hammer! You have stuffed up the first planking - apologies for saying so - but it doesn't matter at all. Fill out the planking as best you can and then fill it to buggery to get a smooth hull. I think leaving off the planking at the bow - which your instructions must suggest - is a mistake. Taking the planks through to the stem, as hard as it is, tells you how they should run. I don't calculate planking at all. No maths, no science (one day I'll do better than this...). The simple mantra when you get to the second layer is "It must flow upwards". As soon as the planks run horizontal or turn down you are in trouble. So for the second layer taper the planks for the stem and stern from way back on the hull until they flow upwards. Do this straight away, that is, only one - the first plank - isn't tapered. Every single plank after that is. As long as the planks follow this flow - upwards - you can put aside the maths. That said, Bounty is a tough hull with such a bluff bow and you'll probably need some joggle planks at the stem and stealers at the stern to keep that upward flow. Also don't feel you have to run the planks the full length of the hull. Split them up so that you manage them. Put away the hammer! Make it flow upwards every time and you'll be all right.
-
Your cannon rig is looking good Ollie. The tackles are especially sharp. Good stuff.
- 803 replies
-
- 2
-
-
- colonial cutter
- modellers shipyard
- (and 1 more)
-
Hi Ollie A bit hard to understand your question...The breaching ropes (recoil ropes) go through an eye and a ringbolt on the side of the cannon and then are seized to the same - eye and ringbolt - on the bulwarks. Depending on the navy and era, the breachng rope can be wrapped around or spliced about the cascabel, wrapped as you show, or passed through the gun carriage or passed through an eye above the cascabel. I'd go with the rig you have - a simple wrap around the cascabel as in your picture of the lower cannon (the upper cannon rig does not have any historical correctness - it is wrong), then through the ringbolts on the side of the carriage and then seized or tied to ringbolts on eyebolts on the bulwarks.If the cannon is "run out" in your composition make sure the breaching rope has some length - a light drape - to reflect the slack needed for the recoil. Cannons are fun!
- 803 replies
-
- 4
-
-
- colonial cutter
- modellers shipyard
- (and 1 more)
-
Superb outcome and great technique Bob. I will try it.
-
Congratulations Frank. That is a very fine rendition and the addition of crew and sails works perfectly with your aging. More a diorama than just a simple model. Stunning stuff.
- 389 replies
-
- 1
-
-
- supply
- caldercraft
- (and 1 more)
-
Your planking work looks great Tim. I might just have to suck up the shipping costs and get this kit. I love its lines.
-
I'm with Keith That looks really sleek and you could almost read the below waterline area as copper. The contrast shows her lines beautifully. Go for it as is, is what I'd say!
- 607 replies
-
- 1
-
-
- scottish maid
- artesania latina
- (and 1 more)
-
Fabulous work Timmo - did I say definitive in a previous post? Well that is what it is. It is strange how we get into parts of this hobby and then can't wait for them to end - "I'll be glad when this lot is finished". A bit like climbing hills (which I did in the weekend - the Tongariro Crossing). Can't wait to get over the tedium of one part of the climb but when you do, the view is so good you want to climb higher. Keep it up, I like the views from your peaks.
- 366 replies
-
- 2
-
-
- granado
- caldercraft
- (and 1 more)
-
Looking good to me Ollie in all regards. Are those bands paper or copper? If the former they sure look like iron work to me and that is all that matters. Nice stuff on the anchor rig there too - a lesson learned for me about that rig for future reference. Cheers Alistair
- 803 replies
-
- 2
-
-
- colonial cutter
- modellers shipyard
- (and 1 more)
-
Hi Jesse You are probably tiring of this discussion...Given how good the planking on your hull is, perhaps paint the upper works to a masked waterline and have a look at a natural hull below. If it doesn't feel right you can paint or copper below the line. If you copper I can recommend Amati plates which you can get from Cornwall Models (amongst other sources). Many here say these are the most accurate plates. If you paint, may be head to a dark red/brown colour to pick up on your research and provide a contrast. I definitely wouldn't do copper paint over such a large surface - it is really only manageable for small pieces IMHO. I'll leave my thoughts there and look forward to seeing your progress. (Also I hope your current health episode cools down soon).
- 607 replies
-
- 1
-
-
- scottish maid
- artesania latina
- (and 1 more)
-
Hi Rod Wow! That is one seriously cool thing and beautifully made. Congratulations! Cheers Alistair
-
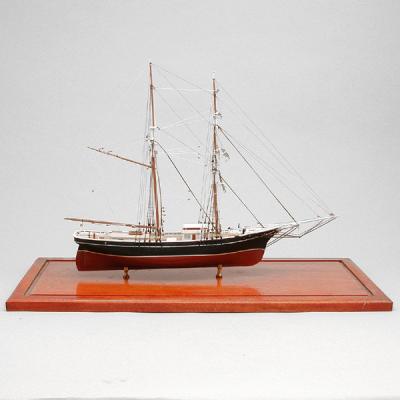
Hi Jesse I remember a build by Pete Jaquith? of Newsboy. It strikes me as being very similar to Scottish Maid but was a little later - 1854 by my quick web search - Goggle "Newsboy ship". It was also built in the USA not Scotland but did serve in the North Atlantic. I can't quite remember Pete's colour scheme but seem to recall a pale blue or white on the inner bulwarks and cap rails and a deep blue or black on the outer works but with a contrasting below waterline finish. My quick web search showed many versions coppered and this one (attached) with red lower works. If you look at my Fly log you can see the subtle difference between the deep blue on the counter and the jet black - Polly Scale Engine Black - on the wales. I still reckon you should go for more contrast than that and since no one seems to know for sure you can't be accused of historical inaccuracy whatever you do! Cheers Alistair
- 607 replies
-
- 1
-
-
- scottish maid
- artesania latina
- (and 1 more)
-
Thanks Jay Harold's little touch with water is intriguing. Whenever I look at the plans of Fly - or other ships for that matter - I realise how much of the hull was below water and how sleek they would look above water. The Swan sloops didn't have much freeboard and when you add in the mast height they, like Pelican, must have been very elegant on the sea. Hahn's attempt to capture that is clever but a bit awkward too. I wonder aside from a diorama and a waterline model how it can be done? Maybe a simple sheet of glass or Perspex at the waterline through the whole area of a display case? You are too kind with your praise - your Constitution and all your tips are a master class! And now you build from scratch. I like your ideas for presentation. It is good to think beyond a frozen thing and something in realistic activity. I'm not quite up for that yet. Best Alistair
