HOLIDAY DONATION DRIVE - SUPPORT MSW - DO YOUR PART TO KEEP THIS GREAT FORUM GOING! (Only 20 donations so far - C'mon guys!)
×


Timothy Wood
-
Posts
571 -
Joined
-
Last visited
Content Type
Profiles
Forums
Gallery
Events
Everything posted by Timothy Wood
-
 Beautiful workmanship, I look forward to seeing more of this build! Tim
 -
I like the work, very clean and ship shape. I look forward to following your work! I have also started this kit but have put it aside to work on the a PT Boat kit from BlueJacket Ship Crafters. You may give me the inspiration to work on two kits at the same time. Regards, Tim
-
Hello Downeaster, Welcome back, glad to see that log again! I spent four years stationed at NAS Brunswick, transfered back to Norfolk in 1987. Looking forward to hearing your answer to Ben. Regards, Tim
-
Welcome aboard! It looks like you are off to a great start, keep the updates and photos coming! Tim
-
Robert, Very, very nice work! I really look forward to seeing more of your posts. Regards, Tim
-
Personally, I work with dowel or a piece of square stock and work it down with a miniature plane. I don't believe there is an advantage in either case, both are very easy to do. Just remember to take very small amounts of wood off with the plane, it takes time but it's the best way to procede. It's also important that your plane is razor sharp and adjusted properly before you attempt to taper your mast. Do sample cuts on a "Test" dowel or or square stock before you tackel the real thing. Always take your time and remove small amounts of wood and check the diameter often. Tim
-
David, Very nice work, I'll be following your build. Tim
-
I personally like to use Elmer's Carpenter's Wood Filler, it's great because it dries fast and sands very well. It's good to use if you plan to paint the hull because its faster and much easier than mixing sawdust with white glue. I purchase it at Lowe's or Home Depot. I'm currently using it on the hull of the BlueJacket Elco PT Boat I'm building. Tim
-
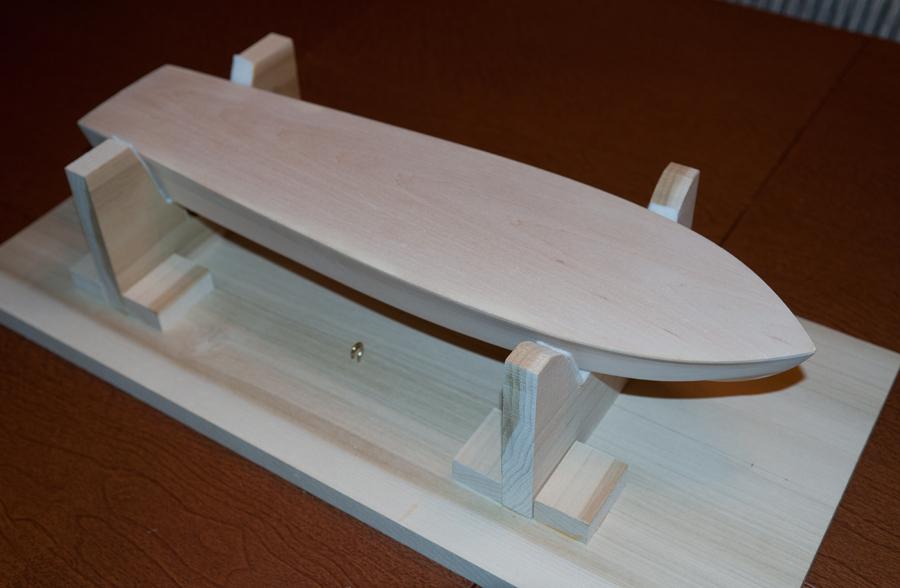
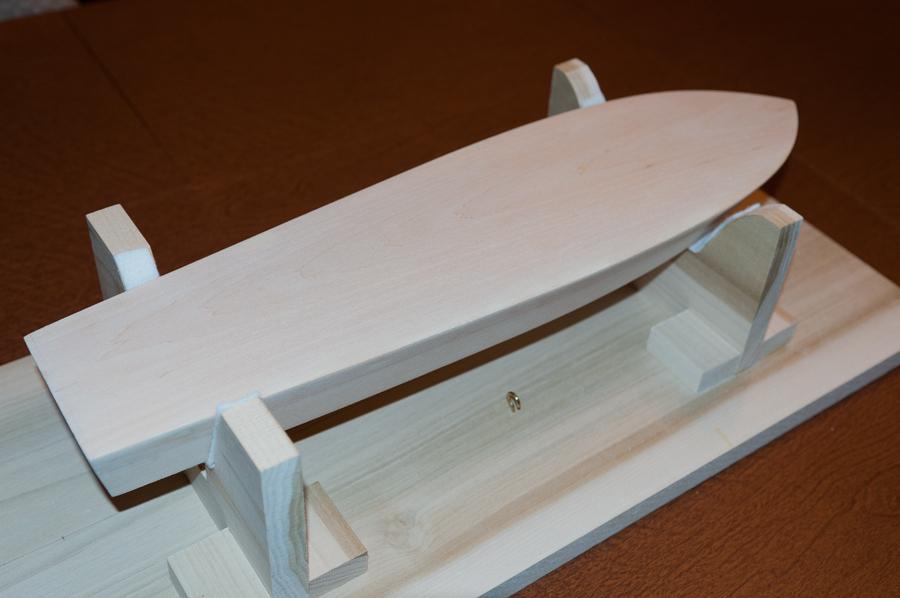
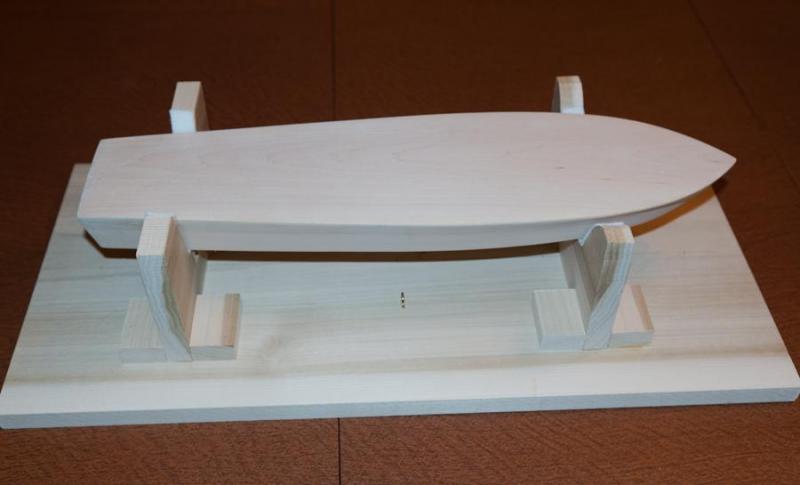
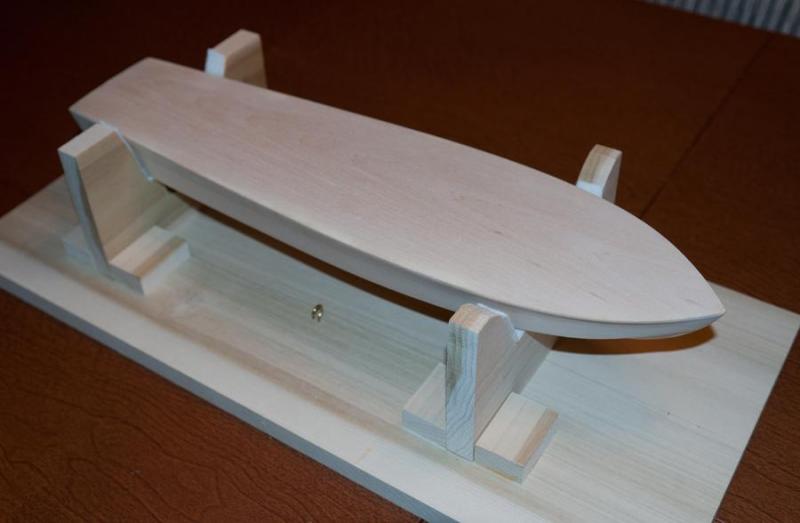
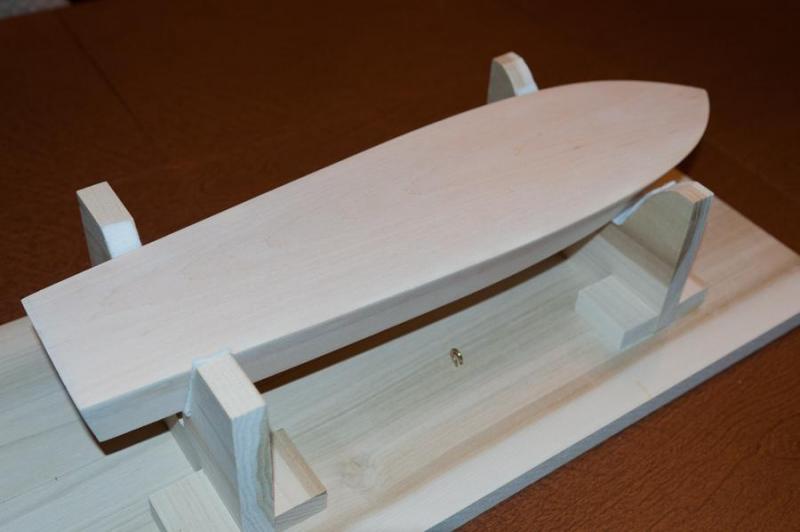
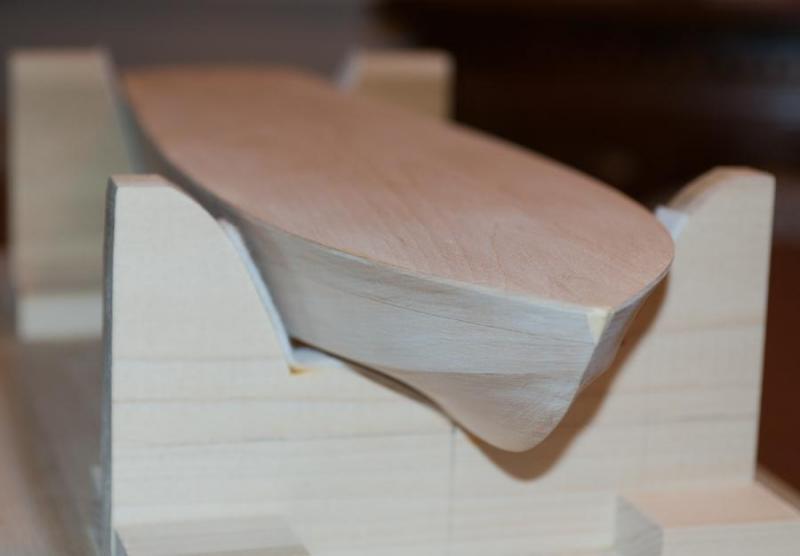
Greetings, I'm not quit as far along as I would have wished, but any progress is better than nothing in my book. I have finished shaping the hull and have most of the heavy sanding complete, I'm sure there will be some minor touchup in a couple areas around the bow. The next step will be to add the deck guard, sheer clamp and chine guards. After those are attached I'll drill the three rudder holes and mark the strut slots and install the shaft boss's to the hull. Photos of the shaped and sanded hull. Tim
-
Enamle vs Acrylic
Timothy Wood replied to Timothy Wood's topic in Painting, finishing and weathering products and techniques
Ok, you guys have me leaning in the direction of Acrylic paint. Now my next question is, should I use a sanding sealer on the wood before I add the primer coat? :mellow: Tim -
John and Jerry, Thank you! The chest cold is getting better! I should feel like a new person by the weekend. I'm not soure about the weight of the wood, it's laminsted, the wood is so clear and clean it's hard to see the glue joints. I really don't believe there will be any chance of checking. (BlueJacket has done an excelent job with this kit). Tim
-
Greetings PT Boat fans, At this point I had hoped to have the Deck Edge Guard and the Chine Guard attached, but I managed to come down with a chest cold and it's prevented me from making any real progress on the kit. For some strange reason VICKS VaporRub and Sawdust are not compatible! I hope to have a new post up by the end of the weekend. Tim
-
Greetings, I'm currently building BlueJackets 80' ELCO PT Boat and I'm getting close to the point where I'll have to decide how to paint the hull. I was wonderng if anyone had strong feelings for Model Master Enamle over Acrylic or vice versa. I ordered the standard gray paint kit rather than the Pacific Green, I assumed I would get Acrylic paint, instead they provided Enamle. :mellow: Thank, Tim
-
Alfons, This is my first BlueJacket kit. At this early point Im highly impressed with their quality and workmanship. The Basswood hull is flawless and extremely easy to work with. I took a look at your build and I must say you are doing a wonderful job. I'll be following your build with great interest also. Tim
-
Your right, "moving along like a "Heard of Turtles".... Im looking forward to it looking a little more like a PT Boat but that takes time! And Joe, I guarantee it won't be PT 109... Tim
-
Elia, What great lines on that schooner, it's fantastic! getting somewhat tired of always seeing Bluenose and Bluenose II. I'm delighted someone is building a Knockabout Schooner. I'll be eagerly following your progress. Tim
-
Hi md1499cs, Beautiful job, I look forward to following your build and seeing the finished kit! Tim
-
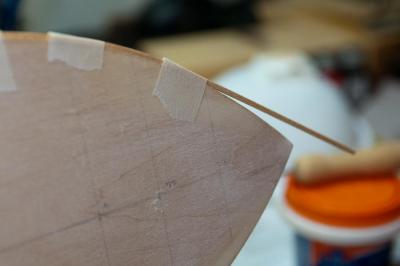
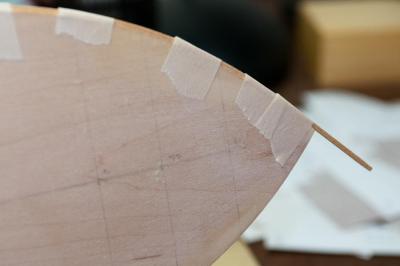
My next step is to soak the 1/16 x 1/16" Deck Edge Gards is water until they are pliable enough to work with, this only takes a short while because of their small size. I then taped them around the deck edge and let them dry completely.

-
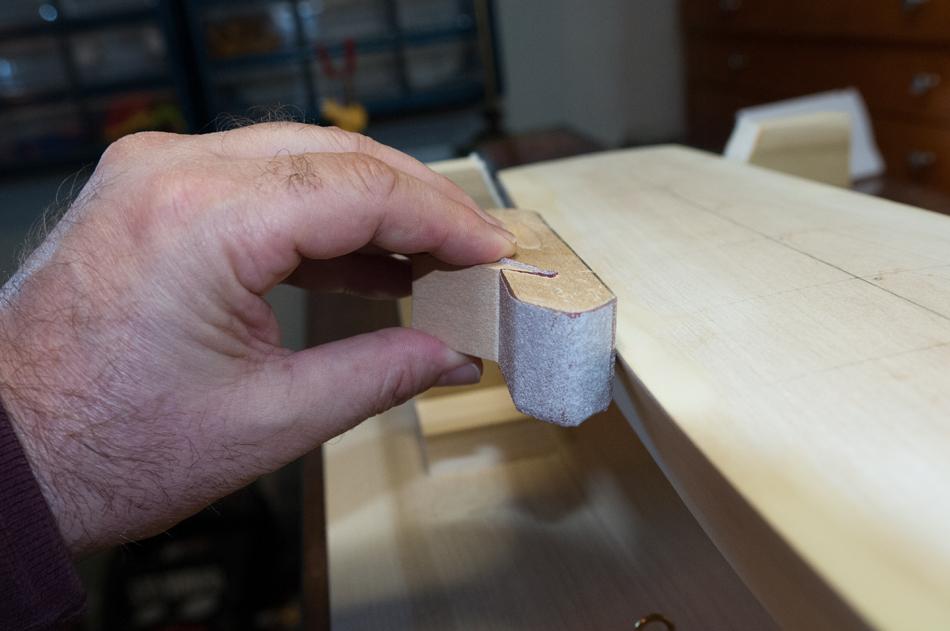
Once the hull is moth and to proper shape the next step is adding the Deck Edge Guards. Using a sanding block and 150 or finer grit sandpaper I'll sand flat a 1/16" wide strip along both sides of the deck-to-side junction from the bow to stern.

-
Harvy, Thanks for the encouragement and don't hesitate to put your two cents in any time you feel. Tim
-
Hello Remco, Ryland Craze recommended your build log to me, he said I would enjoy it, boy was that an understatement! Let me say your work is FANTASTIC and I look forward to following your build. You are truly an inspiration to a mere kit builder as myself. Tim
-
Beautiful workmanship Christian! I'll defiantly be watching your build log. Tim
-
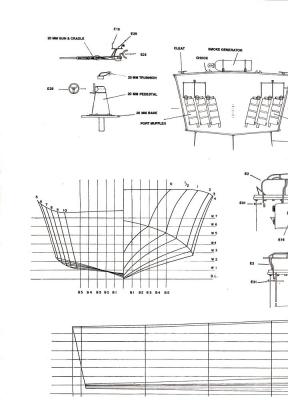
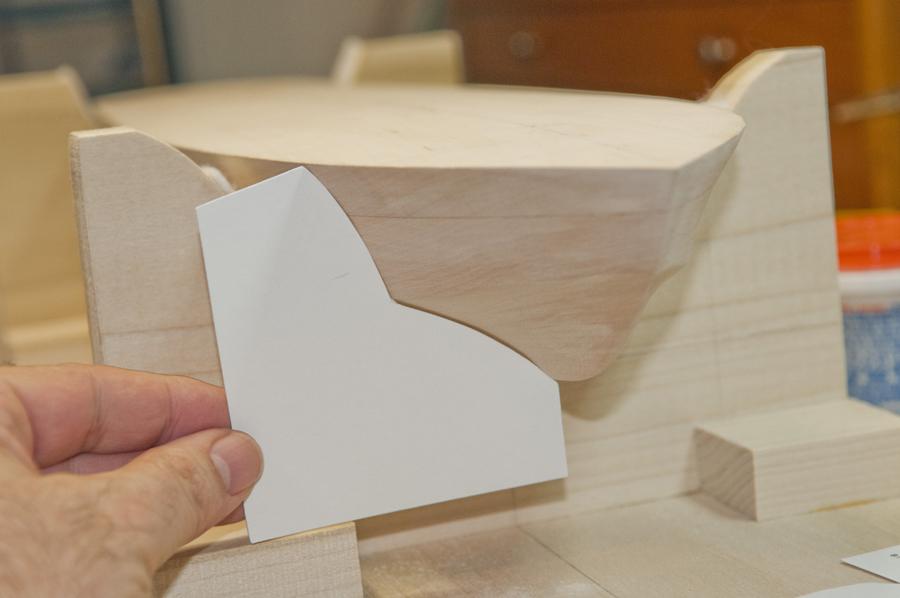
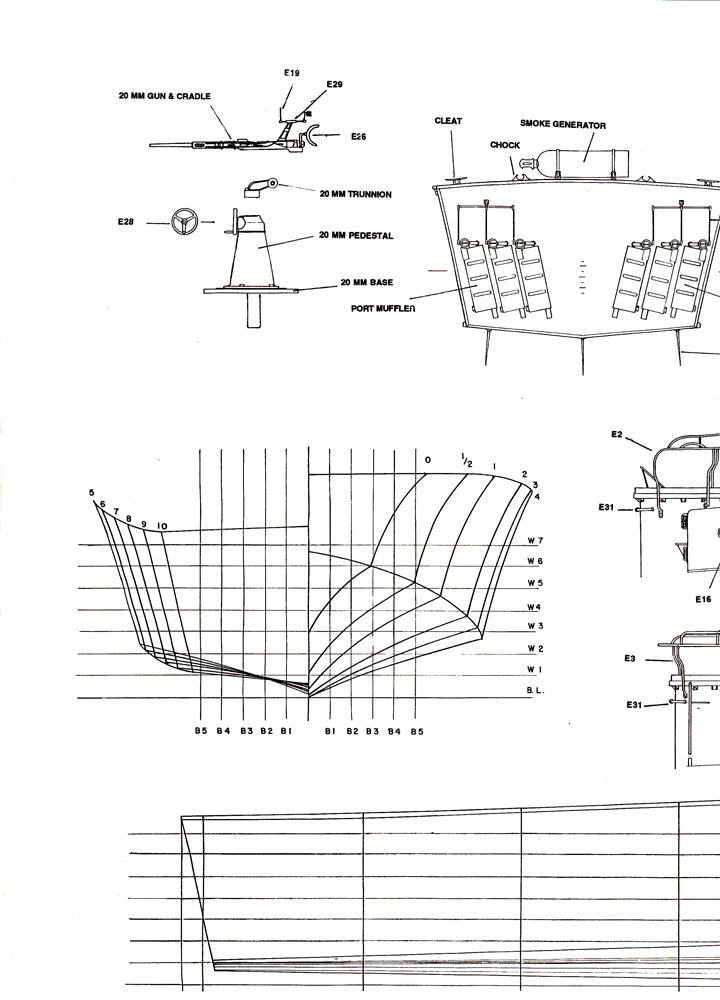
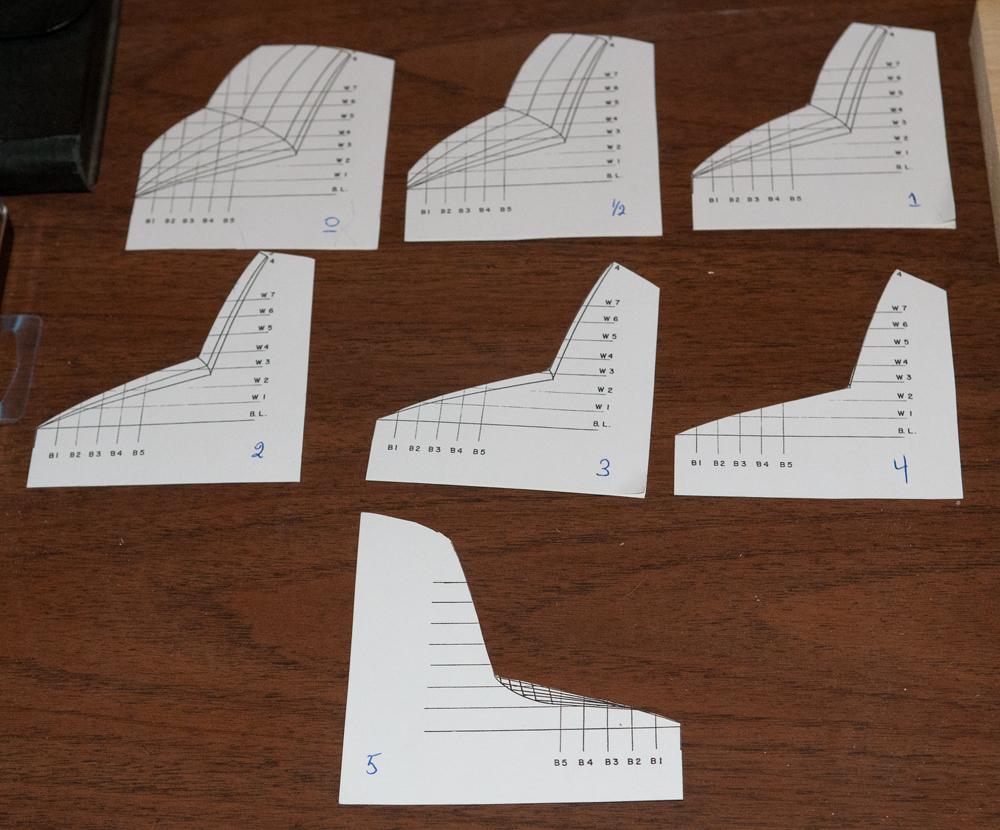
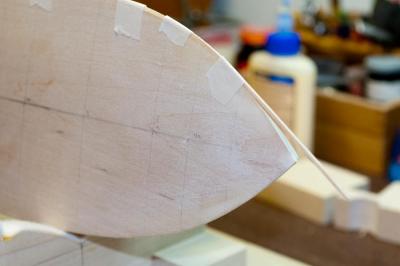
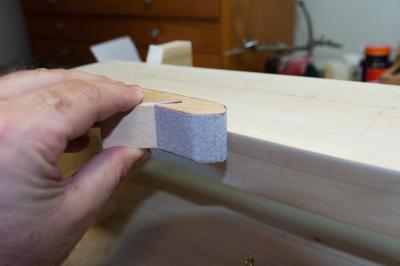
Greetings, My first step was to remove the extra wood, at point on the bow where the wood blank attached to the equipment used by BlueJacket Ship Crafters. This was completed with the use of various small chisels’, files and sanding sticks. My next step was to transfer the hull lines from the plans to the deck of the actual hull. By marking these points I would be able to use the templates I made from the plans, these were copied and mounted on card stock with spray adhesive to make them rigid enough to work with on a continuing basis. Regards, Tim