HOLIDAY DONATION DRIVE - SUPPORT MSW - DO YOUR PART TO KEEP THIS GREAT FORUM GOING! (Only 13 donations so far - C'mon guys!)
×

tlevine
-
Posts
2,032 -
Joined
-
Last visited
Content Type
Profiles
Forums
Gallery
Events
Everything posted by tlevine
-
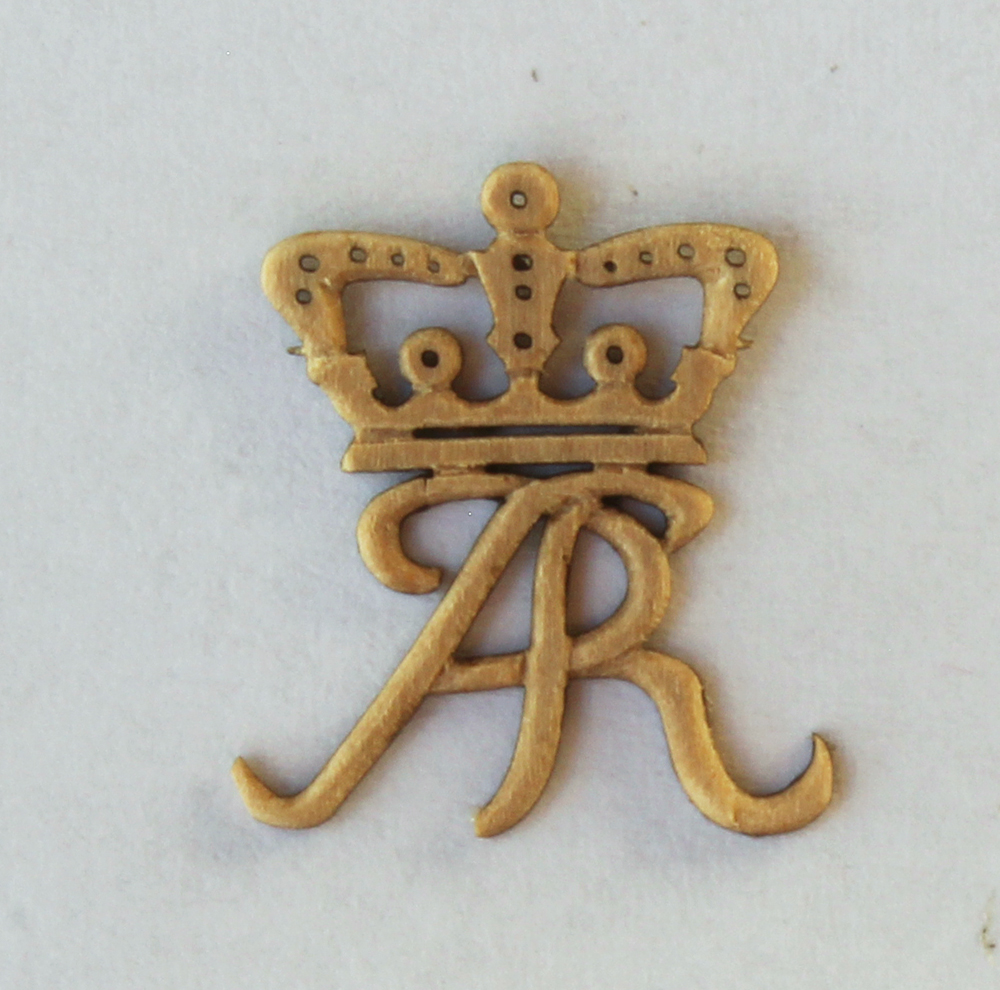
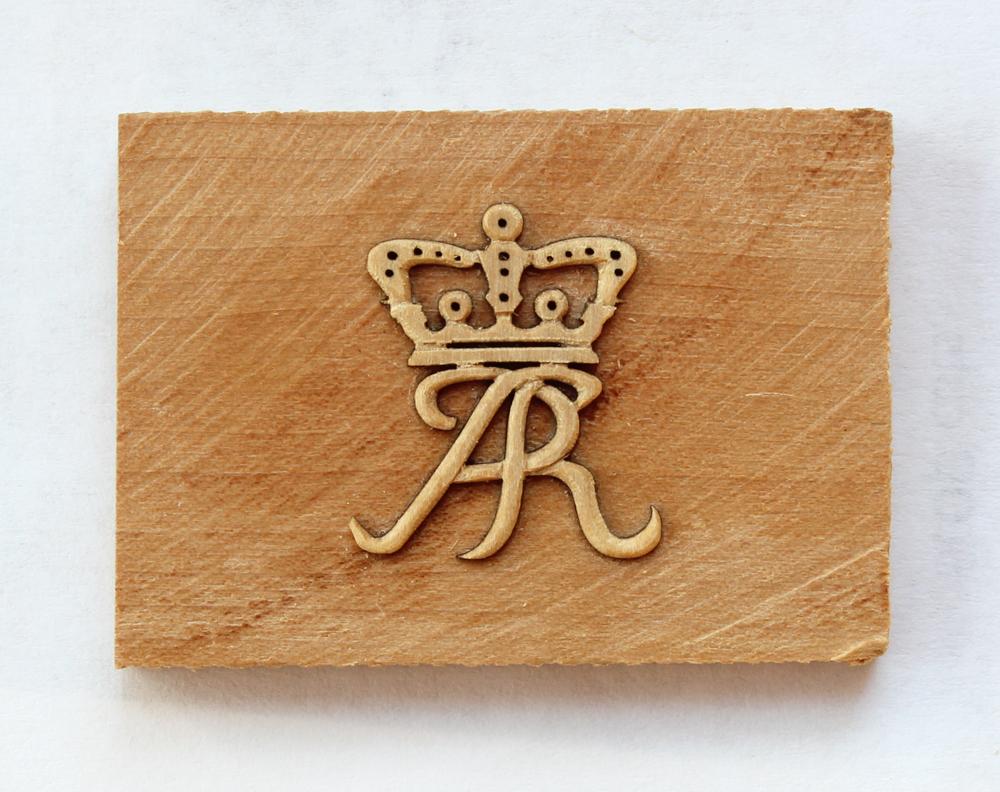
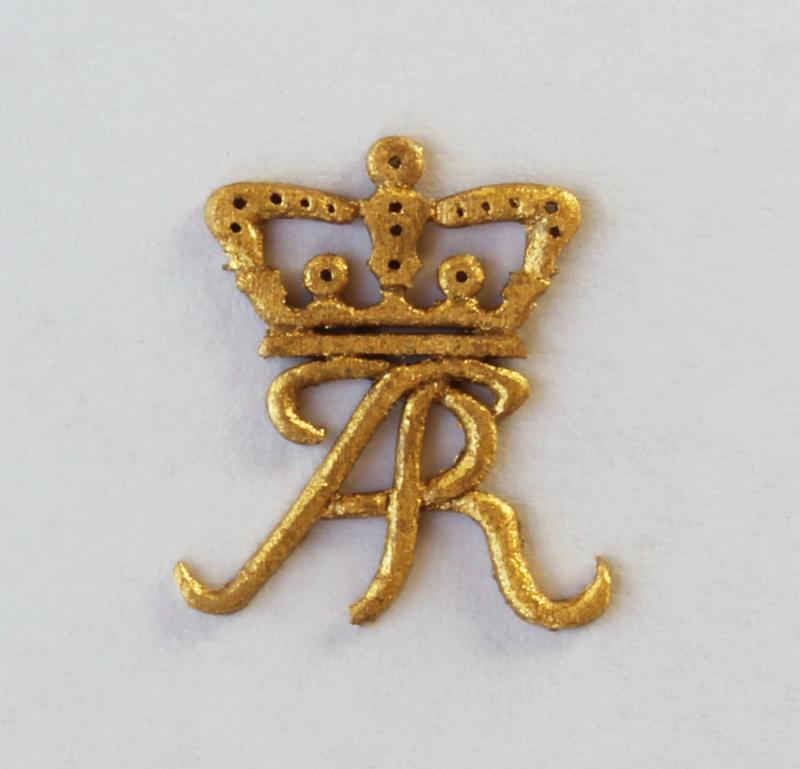
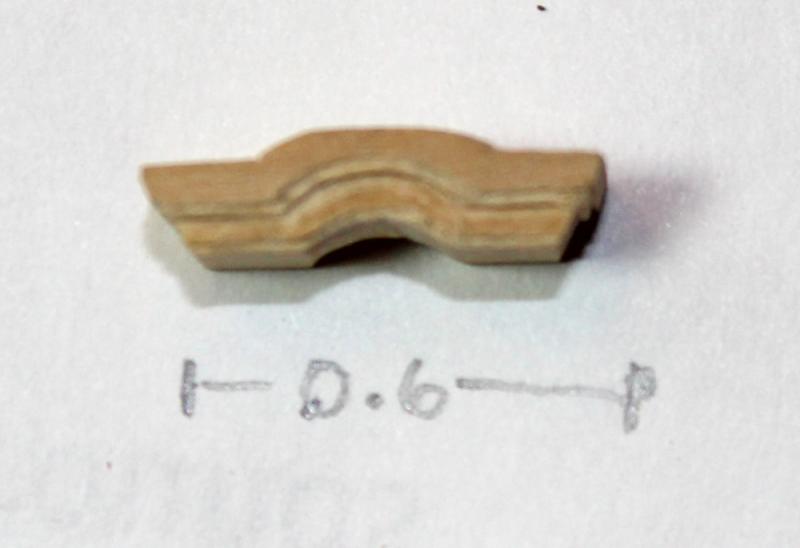
 I cleaned up the carving with some 400 grit wet-dry sandpaper and removed the carving from the blank by soaking in isopropanol for an hour. As you can see, I lost the tip of the bottom of the "R". Next, I gold leafed it and applied a satin sealer. I'll try the other carving in a few weeks.
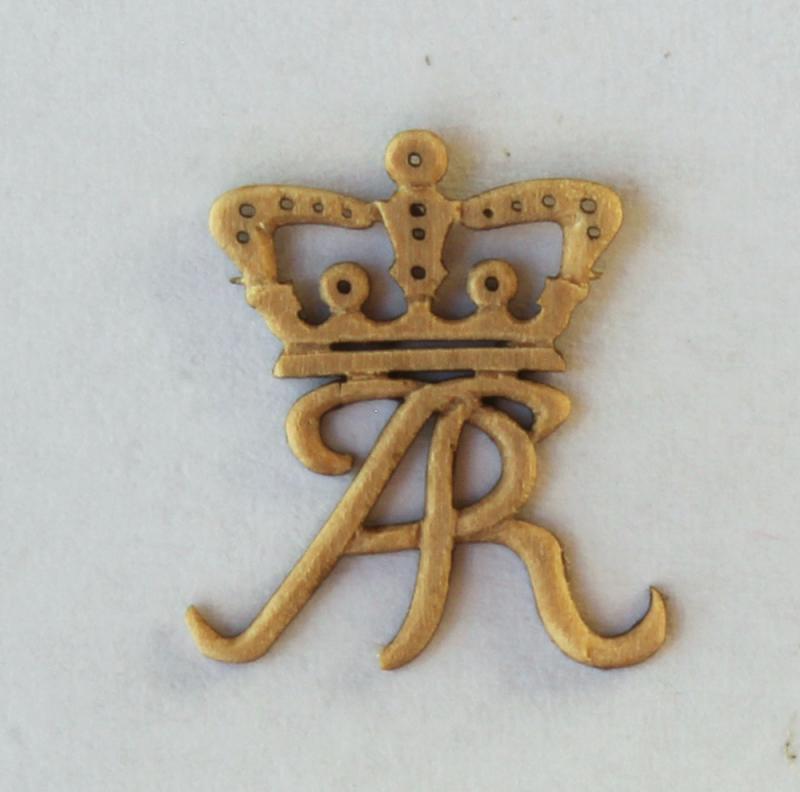
- 9 replies
-
- 12
-

-
Chuck, I have not removed a gall bladder since 1982! Talk to me about tonsils or sinuses... Once I burnish it (hopefully Thursday) I'll give it a good soak. I don't anticipate any problems.
-
Jack, the carving looks great. I just added my cipher, so you guys no longer have to feel alone.
-
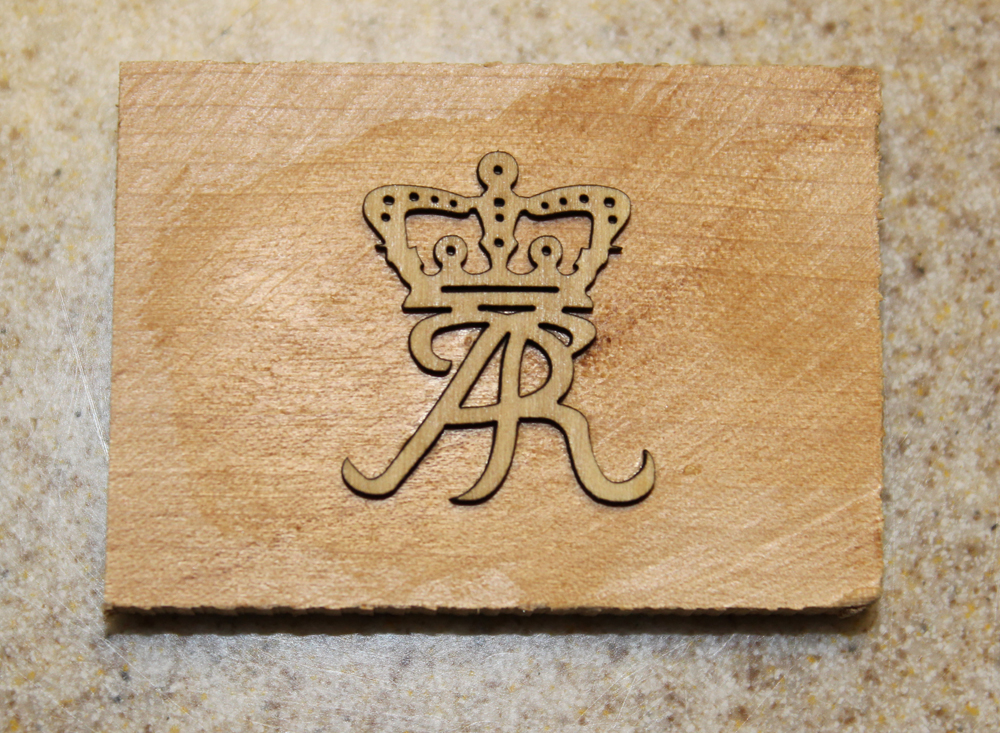
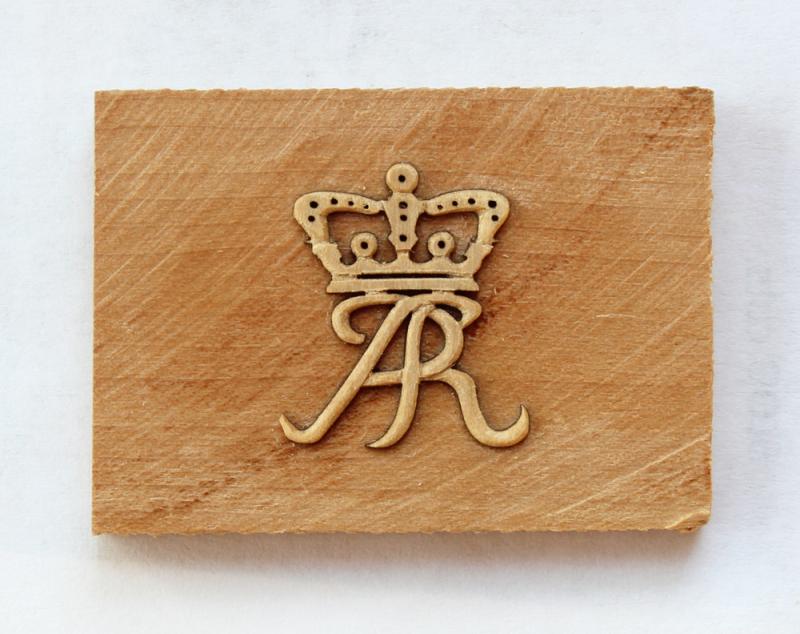
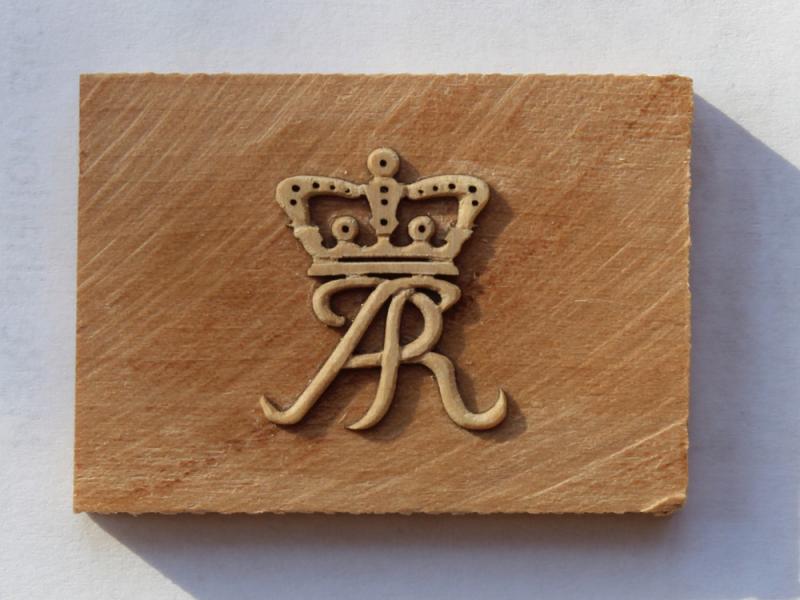
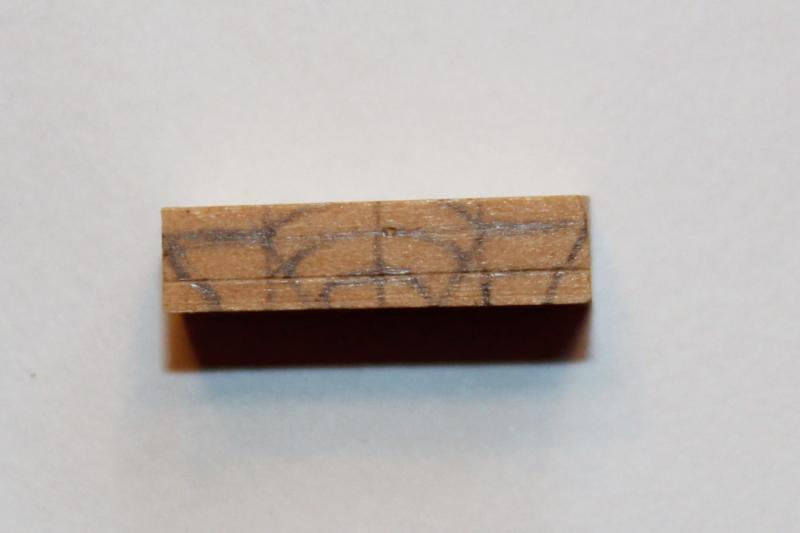
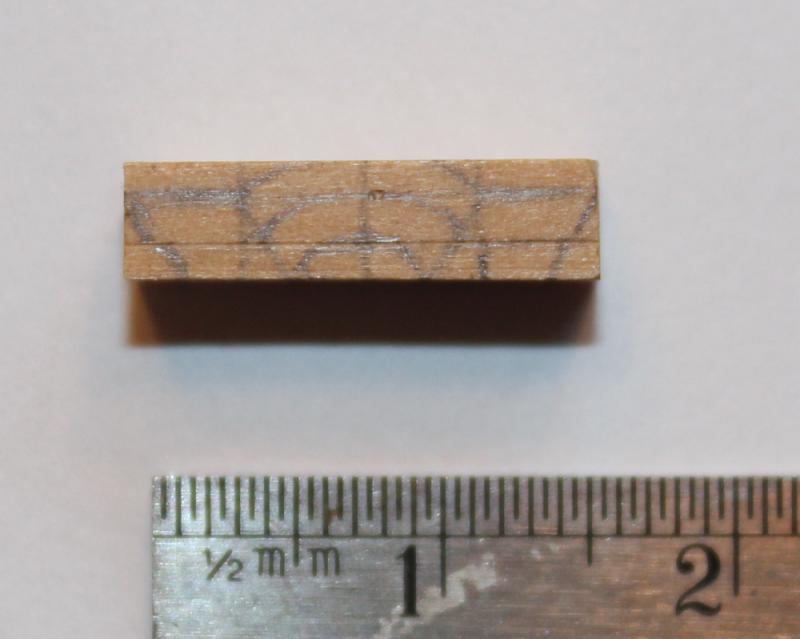
As I have never done any carving, I have decided to join this Group. I am using a combination of a #11 scalpel blade and a 1.5 mm micro-chisel. My first step was to glue the blank onto a piece of scrap wood with yellow Elmer's. I clamped it in place for an hour before getting to work and then scraped off most of the laser char. As recommemded, my first task was to make the stop cuts. The key here is to only take off a tiny piece until one is happy with the effect. In addition to the red lines shown in Chuck's sketch, I added stop cuts on various spots of the crown, looking at what Chuck did for guidance. Finally, I have started to smooth down the corners. The last picture was taken to better illustrate the depth of the cuts. Next, I will make up some 400 grit sanding sticks to improve the surface finish.

- 9 replies
-
- 22
-
-
HMS Naiad 1797 by albert - FINISHED - 1/48
tlevine replied to albert's topic in - Build logs for subjects built 1751 - 1800
Beautiful work! -
Mr. bigcreekdad everyone does stuff that they are unhappy with. It is part of the learning process, whether it is your first or 91st model. The key is to learn and enjoy the ride. You are lucky that it is easy at this point to rectify the problem by sanding and applying a new veneer of planking. Consider making a template of the deck and assemble the planks off the model. That way you can take a straight edge and align the treenails properly. Or leave them off completely because of the scale you are working in.
-
What is your preferred work height?
tlevine replied to Nirvana's topic in Modeling tools and Workshop Equipment
You are right Bob, surgeons typically work at elbow height. But the reason for this is because the sterile field extends only between the surgeon's waist and shoulders. For certain operations, hand, ear and tonsil surgery for example, we usually are seated, with the patient still at relative elbow height for the same reason. It has nothing to do with ergonomics. -
What scale are you building in? At 1:48 you would have holes approximately the size of a number 76 drill bit. If your scale is any smaller, you are best off either eliminating the pegs/trunnels/whatever-you-want-to-call-them or just make a shallow impression with a thin sewing needle and fill the impression with putty of the same color or slightly darker if that is the look you are trying to achieve.
-
Applying the finish made a big difference in their appearance. I wouldn't touch a thing. But if you want to fuss over your next set, I would suggest very narrow sanding sticks (320 or 400 grit) to use while they are still mounted on the backing board or a flexifile after they have been freed.
-
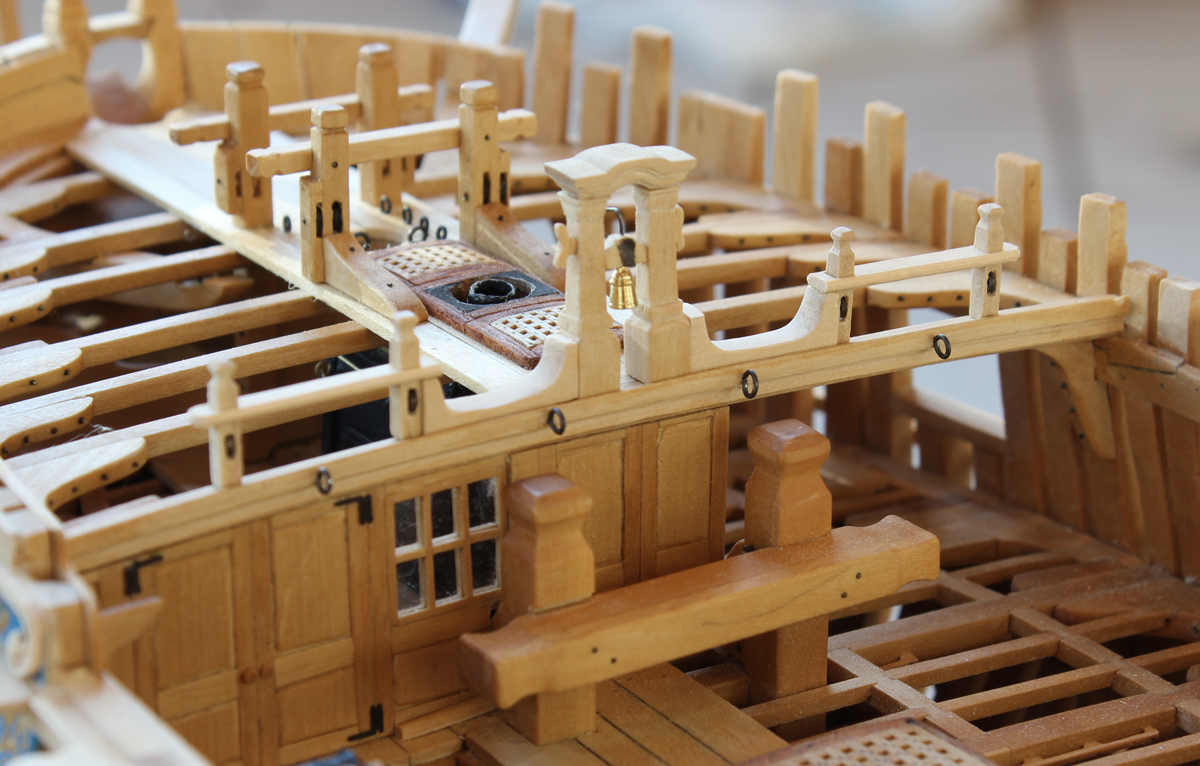
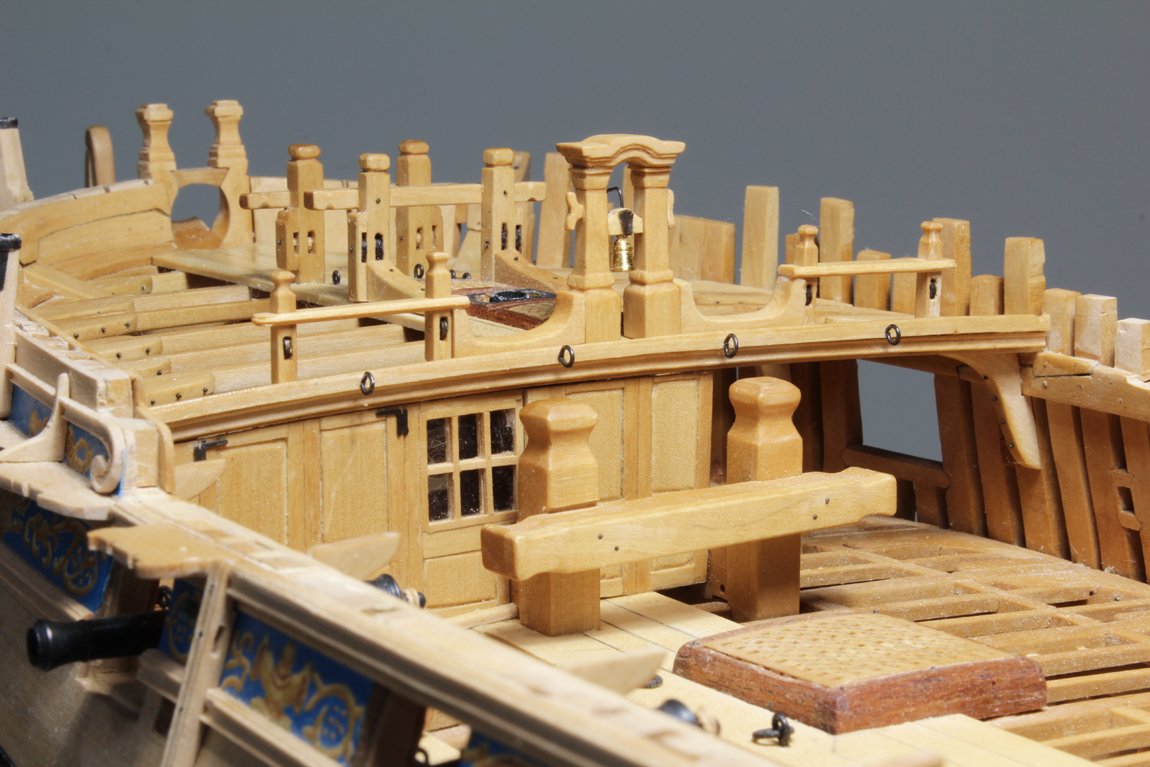
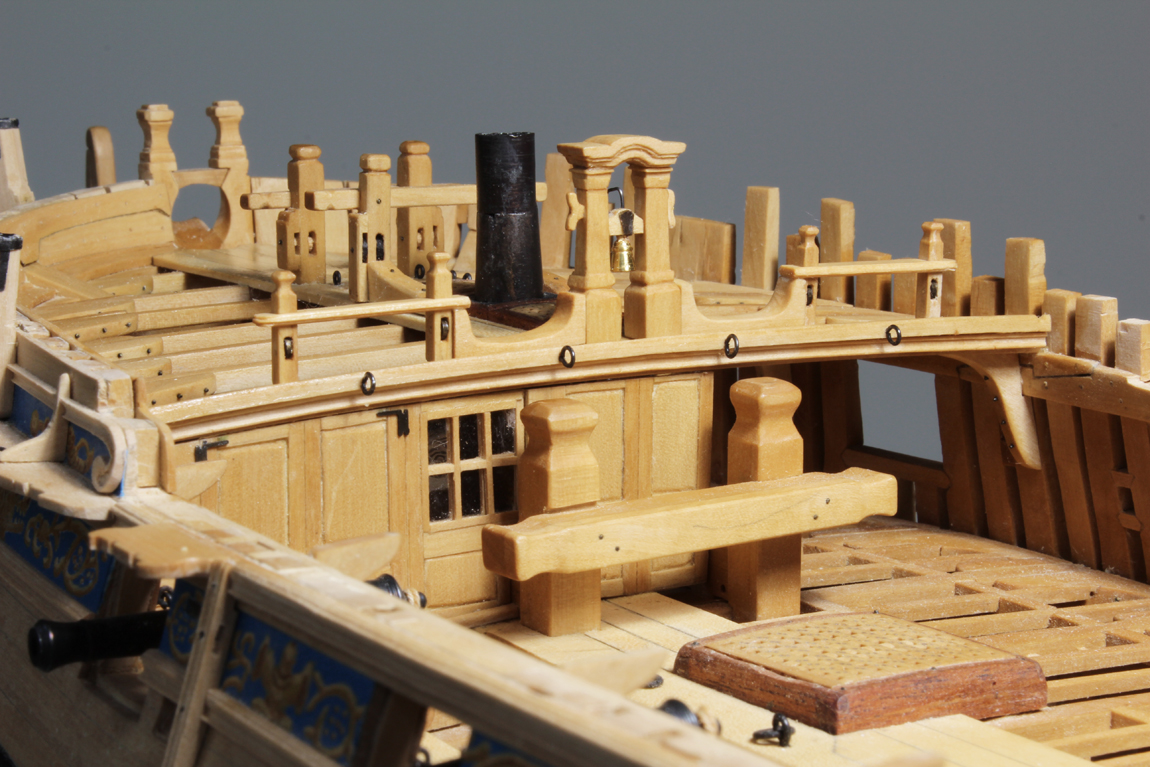
Thank you everyone for the nice comments and thanks for the likes. Now it is on to the quarter deck framing.
-
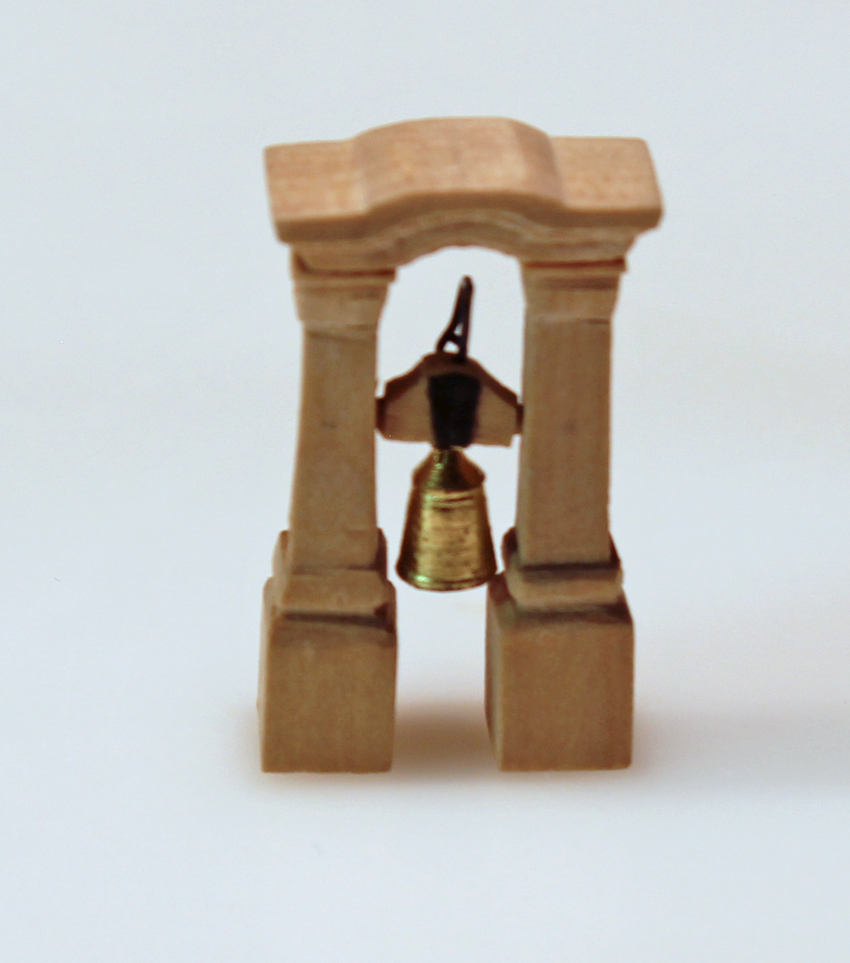
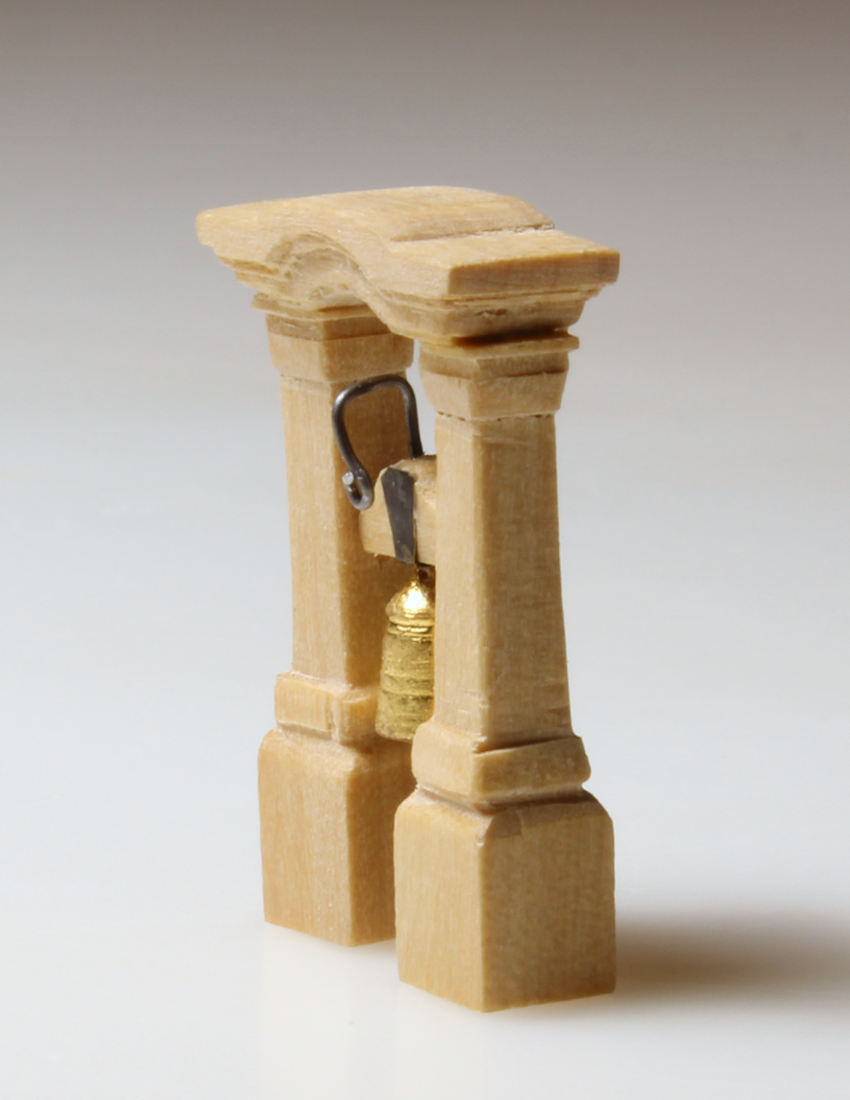
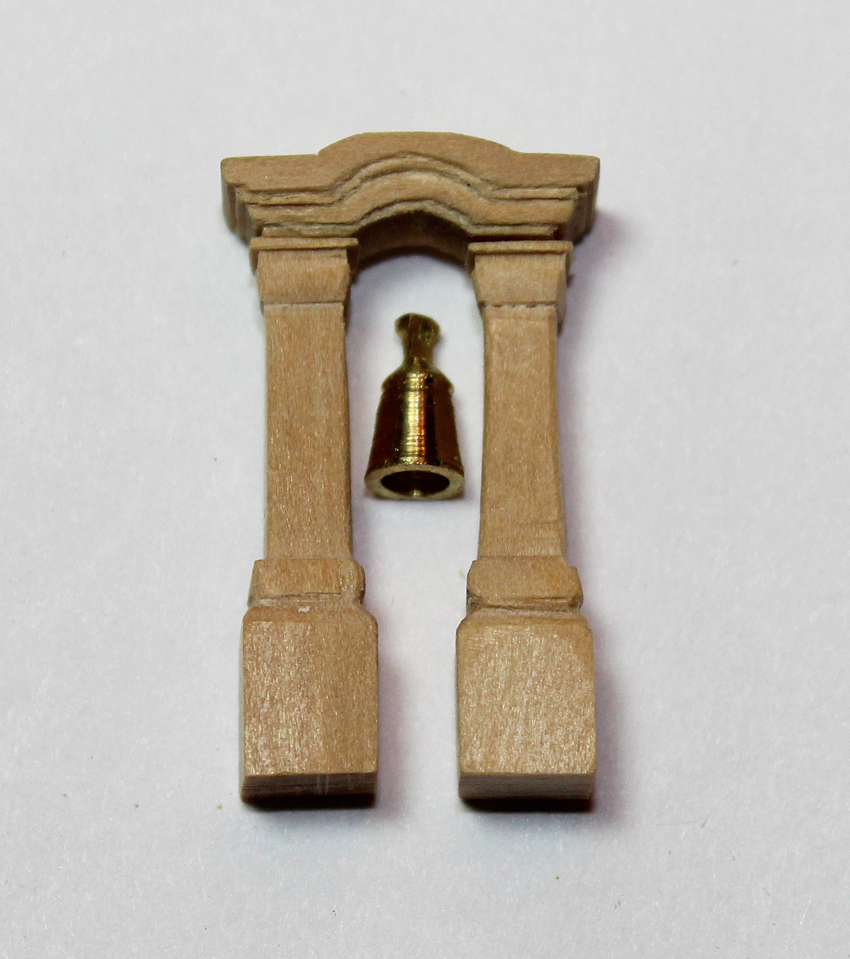
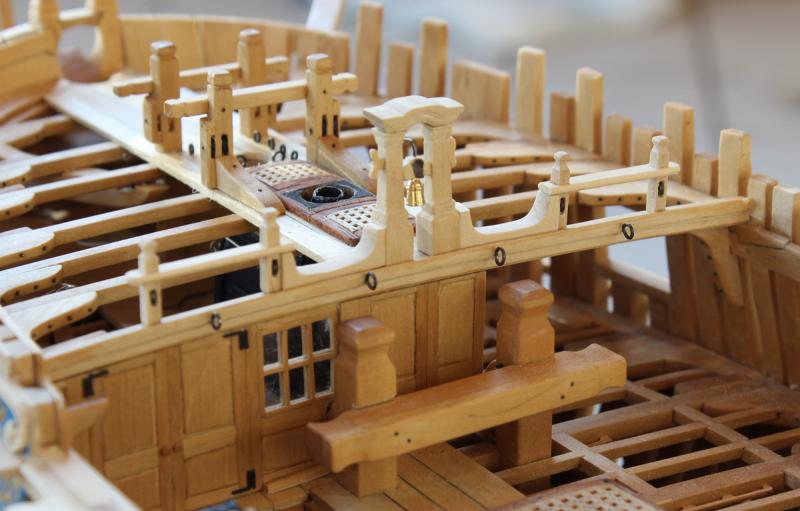
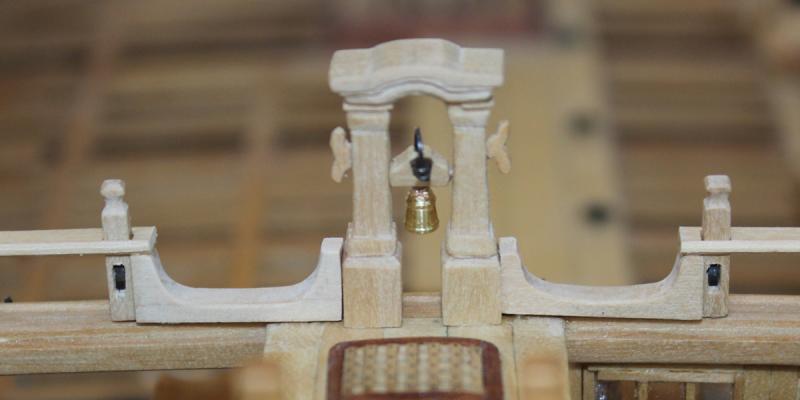
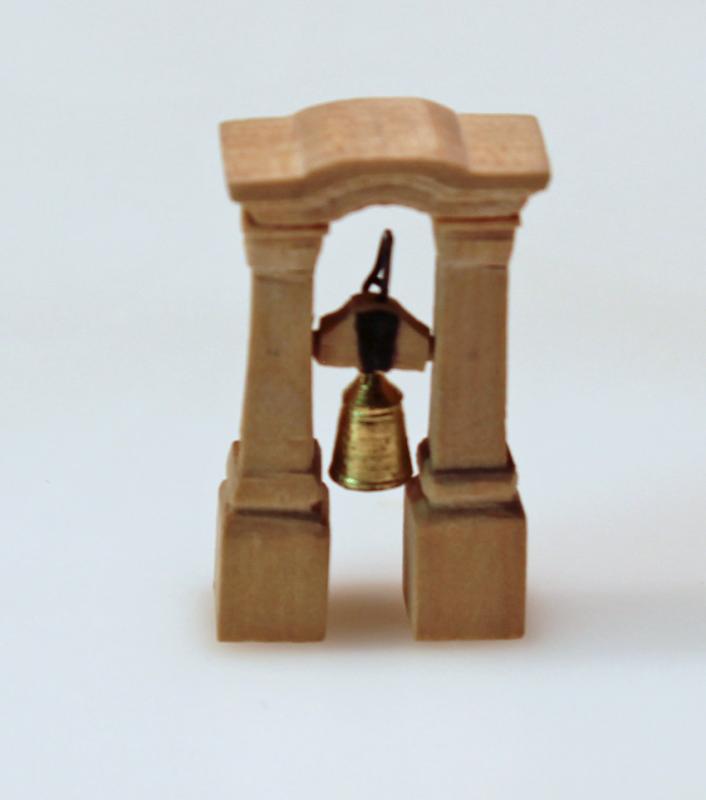
I have made a new bell and am much happier with it. It is in better proportion and I was able to get a smoother finish as well. Like the first one it is gold leafed. The first three pictures show the assembly before a finish was applied. The last two show things after a coat of Watco's.
-
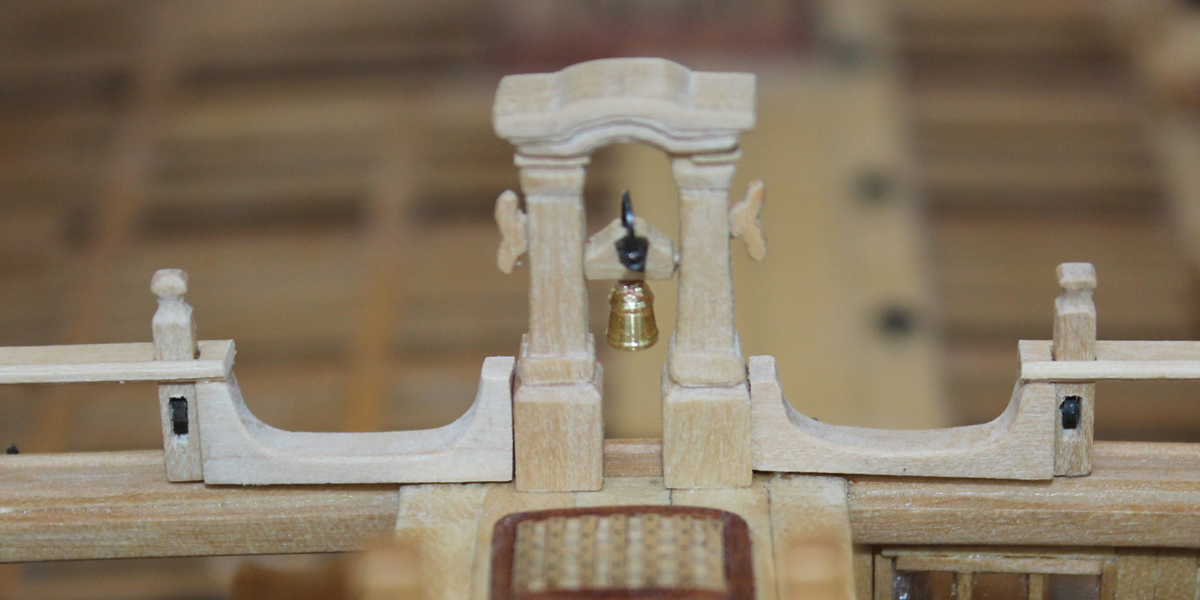
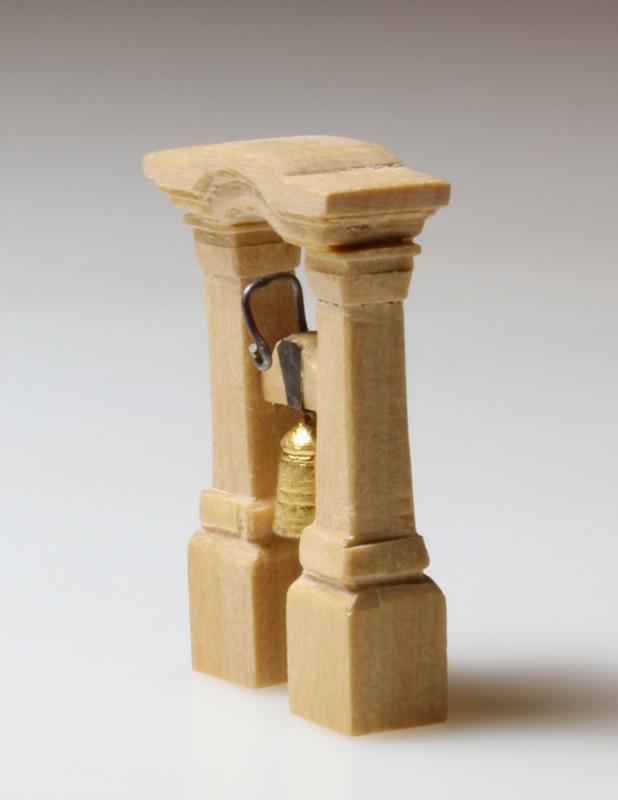
Magnified photos are our best friends and worst enemies. It looked good until I saw the pictures. Oh well, that was the easiest part of the belfry to make. Thank you for pointing it out to me. Take two will be much better!
-
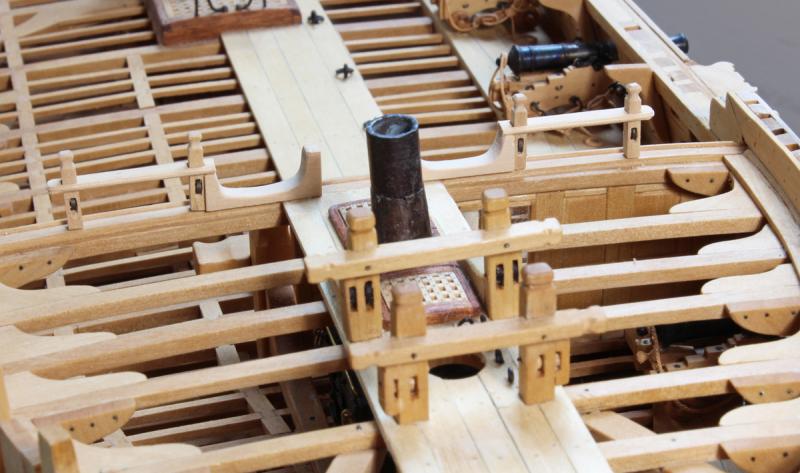
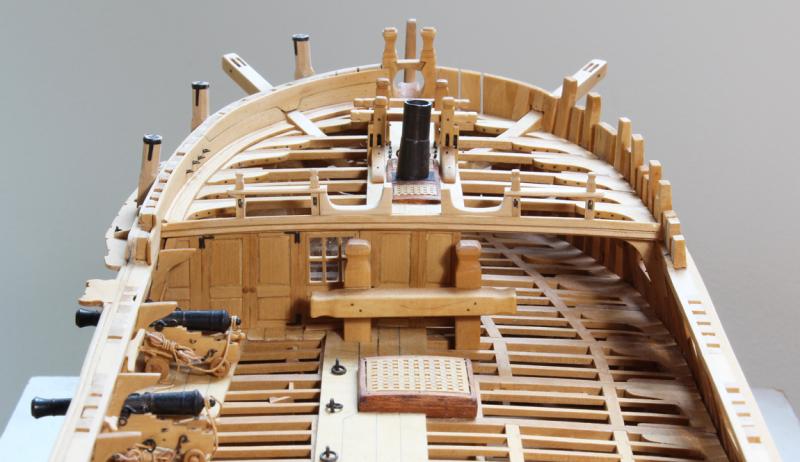
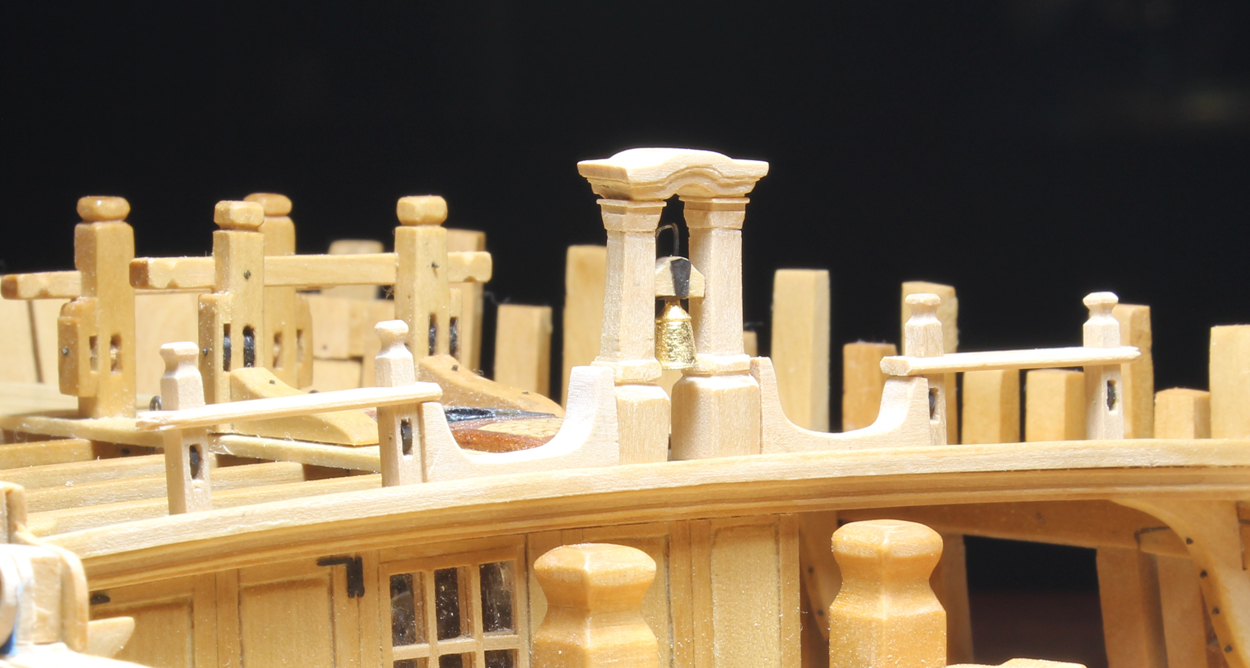
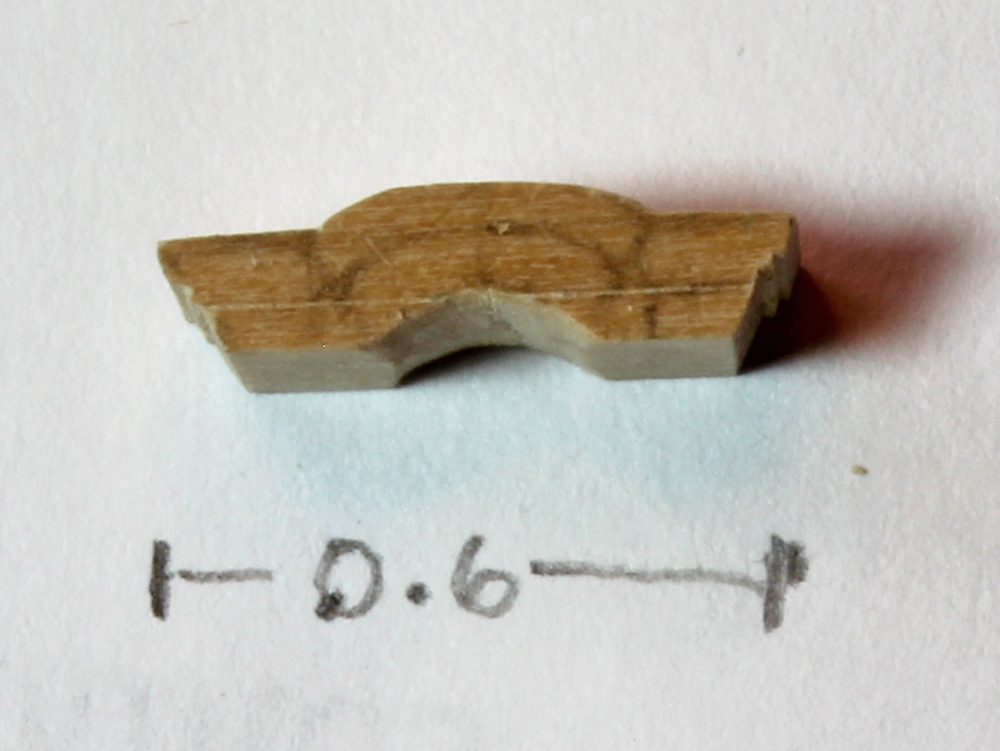
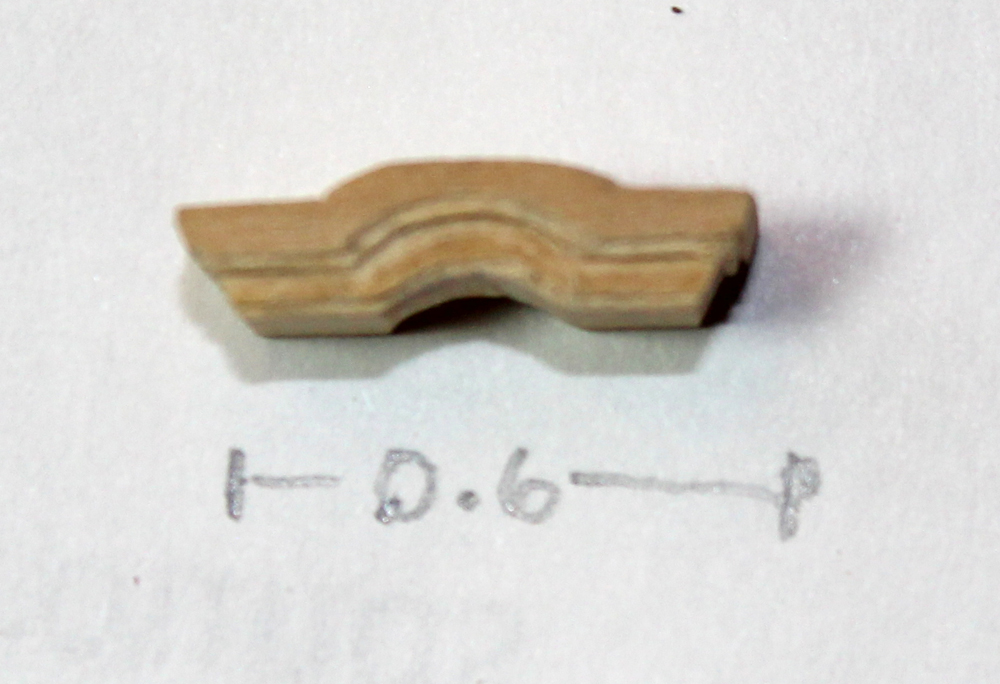
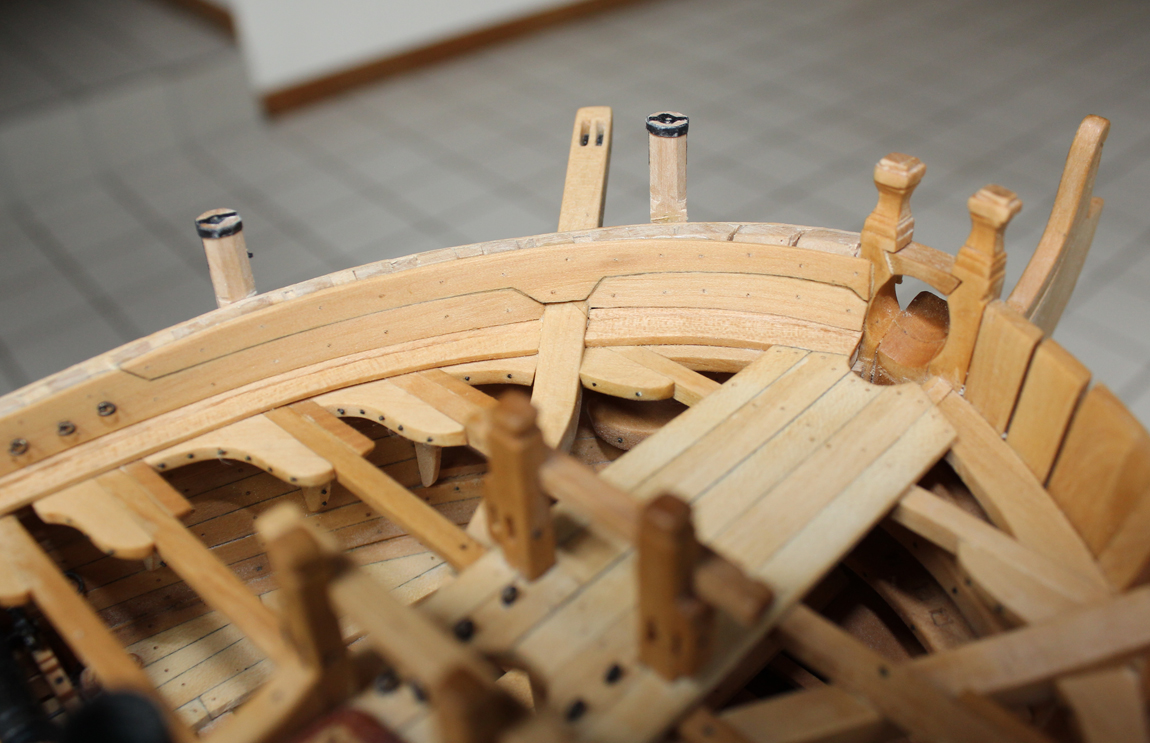
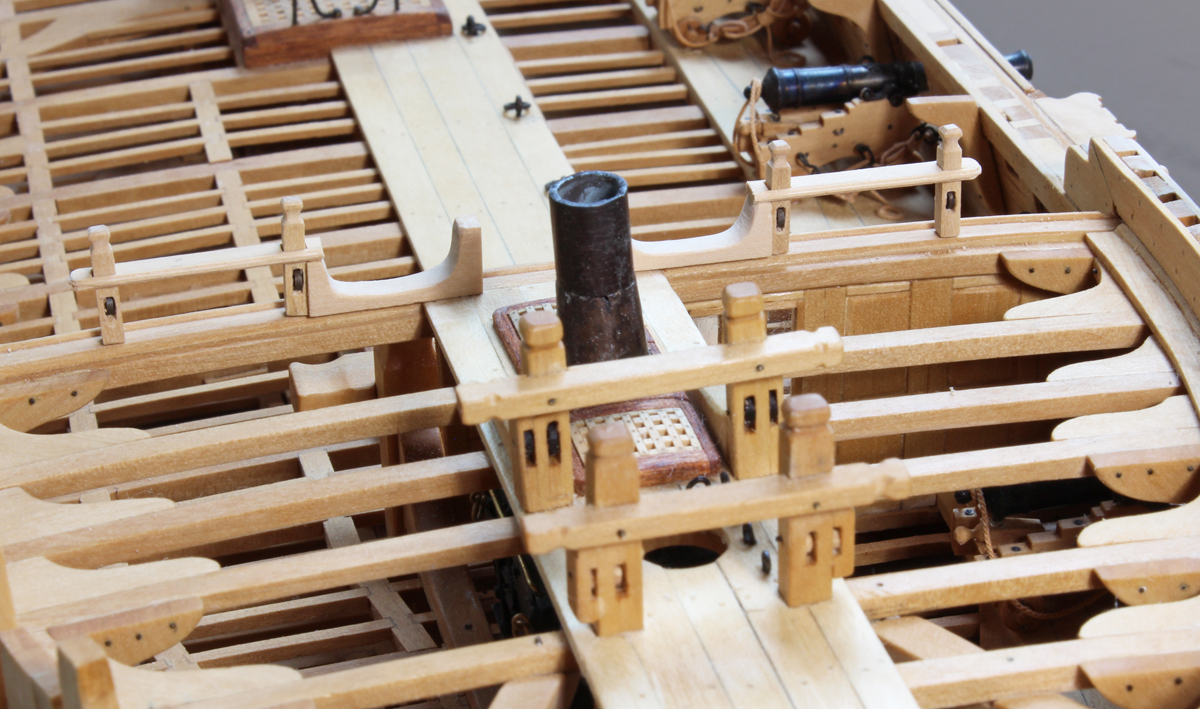
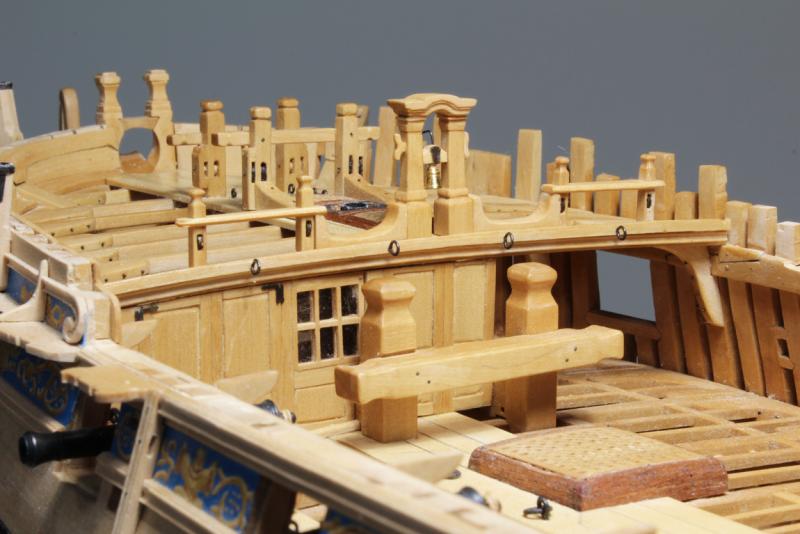
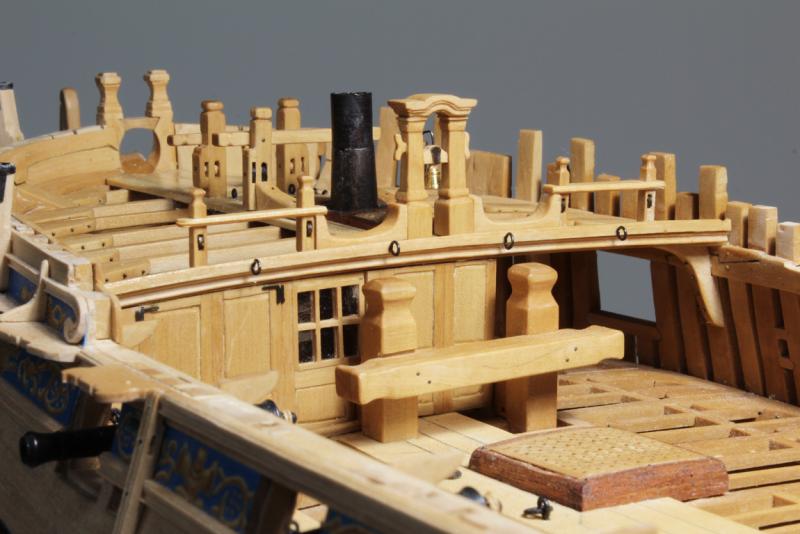
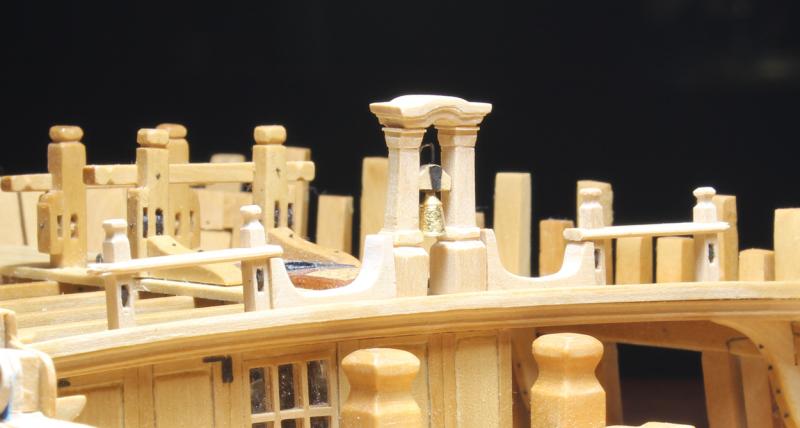
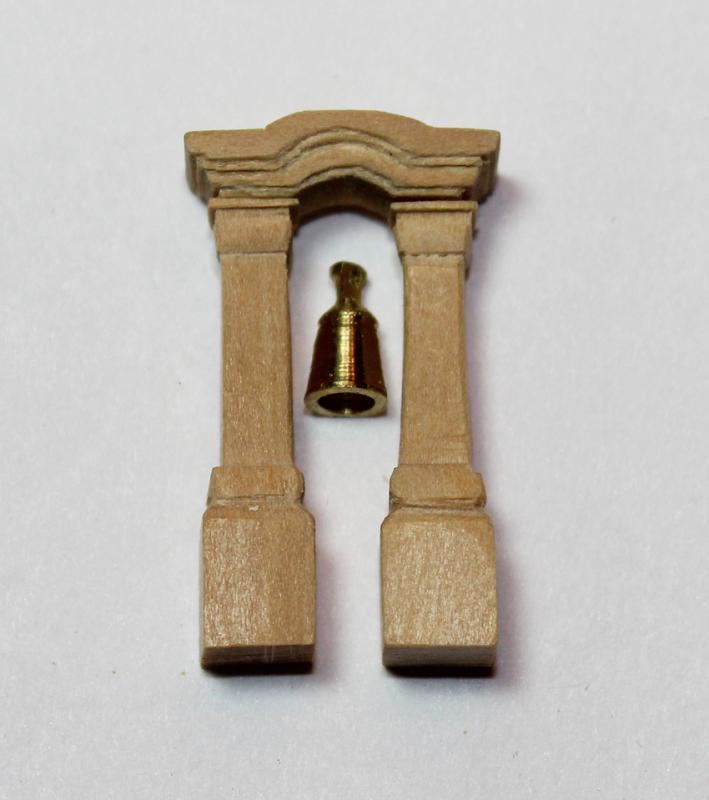
I finally have found a little time to work on Atalanta. For those of you who attended the Swan-Class Panel Discussion, you might remember we reinforced the need to follow the plan for the ship you are building and not blindly follow the book. This is a good case in point. The book shows a drawing for a typical belfry whose overall height is 36', width from the exterior of thestanchions 24" and width of the canopy 31.5". On Atalanta's plan the dimensions are overal height 48", width from the exterior of the stanchionrs 19.5" and extrapolated canopy width of 29". I measured the distance from the lateral edge of the forcastle rail to the bulwark and this only measures 30", the same as the width of a typical interior door. If I had ignored the plan I would have ended up with a distance of only 27" between the rail and the bulwark, too narrow a distance for two men to pass simultaneously. The canopy was made first. I traced the outline on a piece of castello, including the steps for the moldings. The exterior was rough finished top and bottom. Using an 11 blade, I incised the edge for the first molded edge and used a micro-chisel to cut to that line. I did the same thing for the remaining molded edges. On Atalanta the stanchionss are not tapered. The various depths were cut using the Preac. A blind hole was made internally to accept the tenon of the headstock. I drilled a hole into the headstock to accept the bell. A 28 gauge wire formed thecrank. The cleats have not been installed yet. The bell was turned from brass rod on the lathe and drilled out. No, there is not a clapper but the headstock does rotate. As this will be the only bright metal on the ship, it has been gold leafed. The pictures show the forecastle rail and belfry temporarily positioned. I need to level the headstock and mate the surfaces between the rail and the stanchions.


-
I bought one of these magic tools many years ago. It actually is useful for a down-n-dirty first planking with a soft wood such as basswood. But if you are careful with the tool and make many small impressions rather than a few large ones the outside of the plank should be reasonably smooth.
-
Power Tools for a Fully Framed Build
tlevine replied to ChrisLBren's topic in Modeling tools and Workshop Equipment
When I bought my regular chisels I went to the woodworking sites and looked for their recommendations. Lie-Nielsen, Two Cherries and Stanley Sweetheart were names that came up a lot. I then went to Amazon, looked for the best prices and ended up with a combination of Two Cherries and Stanley chisels. I am very pleased with them but keep in mind that quality chisels are not inexpensive. They will, however, last a lifetime if well maintained. -
Power Tools for a Fully Framed Build
tlevine replied to ChrisLBren's topic in Modeling tools and Workshop Equipment
Chris, I agree with you. A good set of chisels and a sharpening system is much more useful. Don't forget the micro-chisels as well unless you plan on making your own. The best sharpening system is the Veritas (http://www.leevalley.com/US/wood/page.aspx?p=51868&cat=1,43072,43078,51868). Good chisels are expensive but worth their price. -
Power Tools for a Fully Framed Build
tlevine replied to ChrisLBren's topic in Modeling tools and Workshop Equipment
As a mill neophyte I will tell you my approach to purchasing a mill and its accessories. First, I held off buying one as long as I could. As already mentioned, both the mill and its accessories are expensive. I finally broke down when it was time to make the capstan for Atalanta. I knew there was no way I could accurately do it any other way. I felt Sherline was the only way to go after reading all of the comments and having previous experience with their lathe. Next, I decided what my "must have right now" accessories were. Everyone has different needs and there is no point in purchasing items that will gather dust. As I learn more and expand my skills I will assuredly buy more accessories. My list is as follows: sensitive drill (turns the mill into a dead accurate, pin-vise equipped drill press) mill vise rotary table tilt table assorted mills and collets to accept them 4-jaw self-centering chuck I hope this is of some help. -
It was great to meet you. Good luck with your model. Don't forget to start a build log.
-
Beautiful model. I am drawn to the extra stanchion in the midline. I presume this is to support the belfry since it is offset from the other two?
-
Interesting Products
tlevine replied to KeithAug's topic in Metal Work, Soldering and Metal Fittings
Those connectors look very interesting. I found the following link for those of us in the US. http://store.spruebrothers.com/category_s/2053.htm -
Thank you gentlemen. Next up is the belfry. I have turned the bell on the lathe and will work on the belfry after the Conference.
-
Transform a brass chain into iron chain
tlevine replied to MESSIS's topic in Metal Work, Soldering and Metal Fittings
You first must remove any finish from the brass chain. Solvents like acetone or acids might work. Since I prefer to stay away from chemicals when possible, I flame brass on the stove before attempting to blacken it. Just be careful not to melt it! -
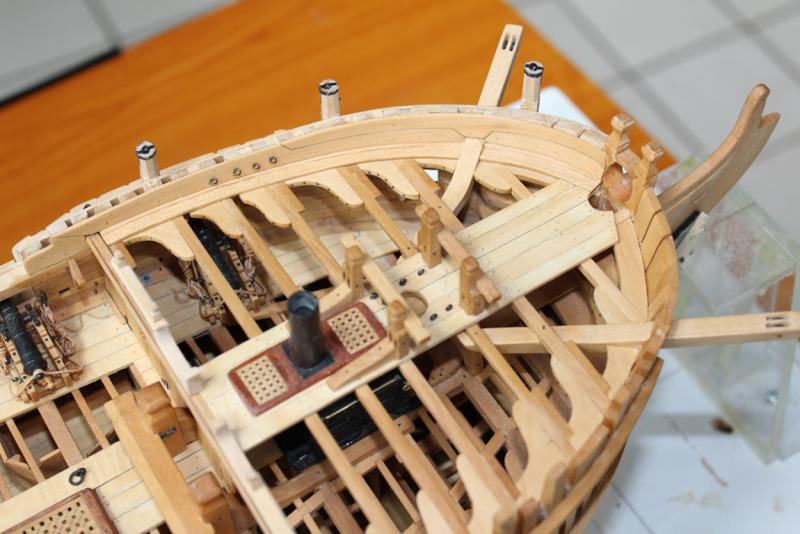
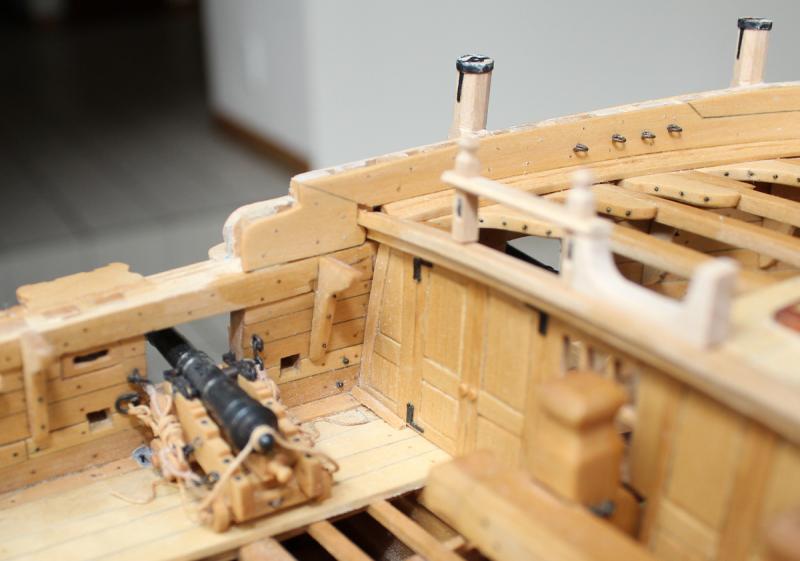
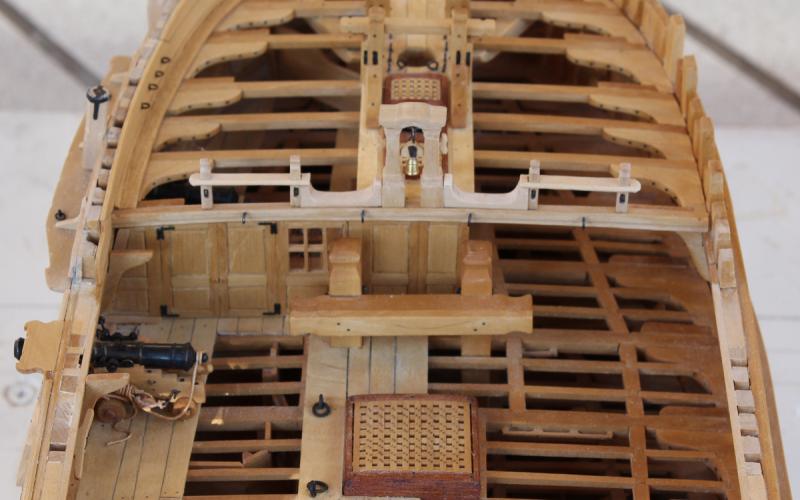
The forecastle bulwark planking was a fun exercise in joinery. The upper plank drops down to the cathead. There is a "lip" at the fore end of the upper plank, locking the lower plank in place. They are treenailed with #76 sized bamboo (second smallest hole on a Byrnes drawplate). Eyebolts are located in the bulwark aft of the foremast. There are four eyebolts on either side of the foremast. The forecastle rail is comprised of two set of pillars with a rail, attached to a spar rack. The rail has a pattern on its edge. On the long sides this was done with a scraper. On the short straight and curved sides this was formed with files. There is a sheave in each of the pillars. The belfry will be made next but this will have to wait until after the Conference. Hope so see a lot of you there.