HOLIDAY DONATION DRIVE - SUPPORT MSW - DO YOUR PART TO KEEP THIS GREAT FORUM GOING! (Only 13 donations so far - C'mon guys!)
×

tlevine
-
Posts
2,032 -
Joined
-
Last visited
Content Type
Profiles
Forums
Gallery
Events
Everything posted by tlevine
-
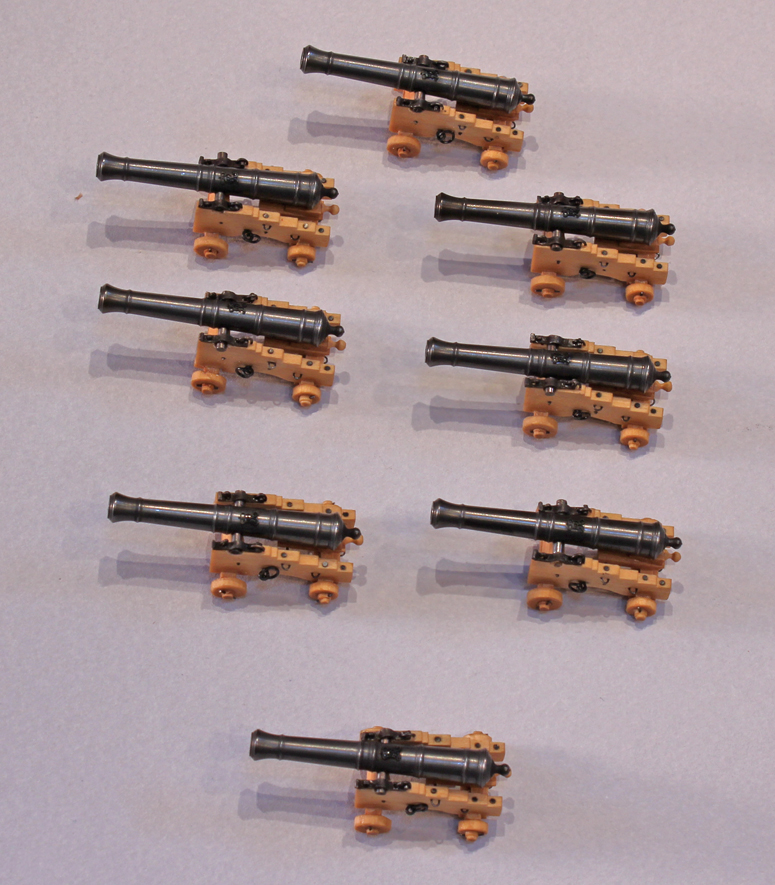
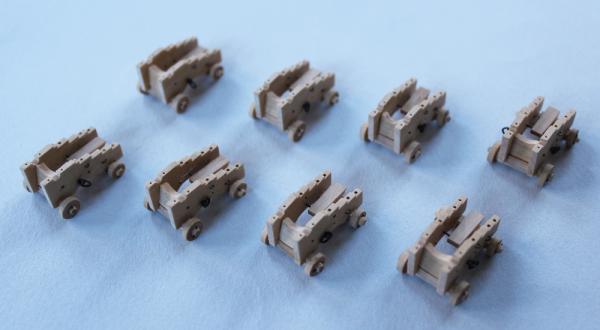
 Sharp eyes, Elijah. Thank you Johann. I was able to finish up one of the cannon today. Only seven more to go!
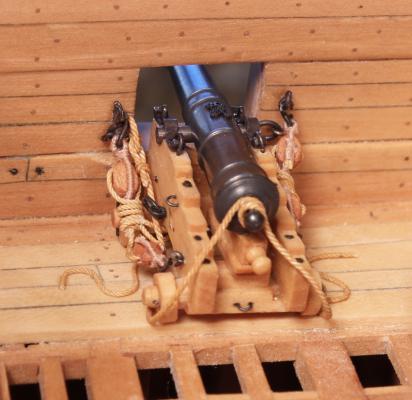
-
Thanks for your concern, Druxey. There is enough length on the tackle to hook both ends without it looking taut. The hooks are possibly a little too long.
-
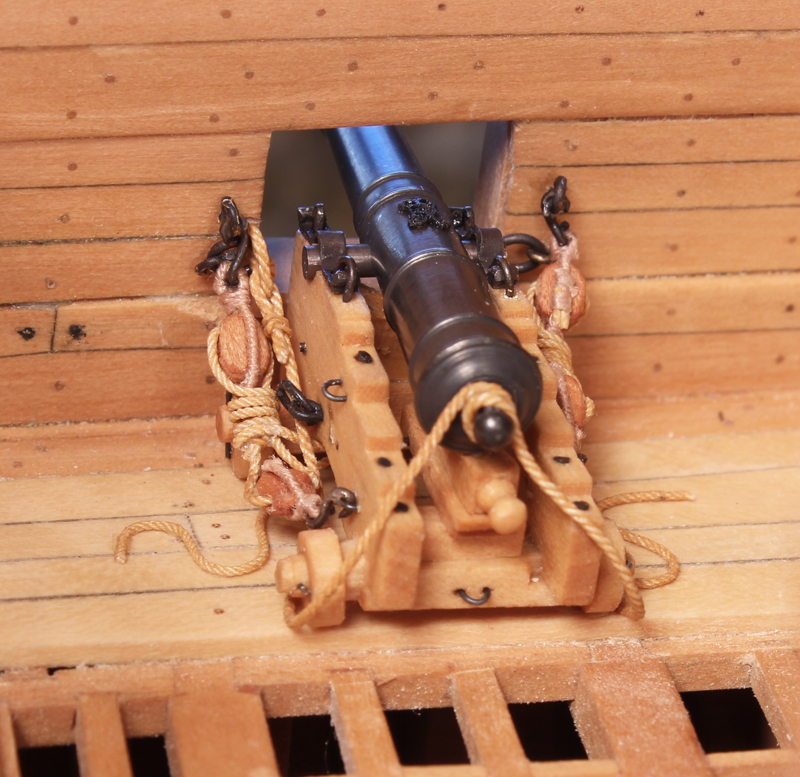
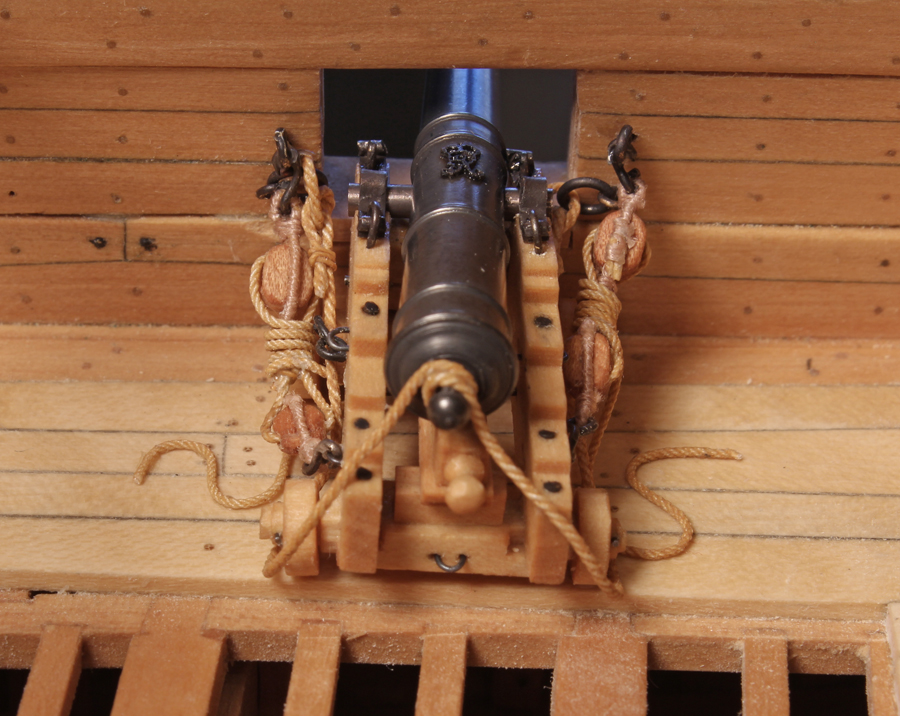
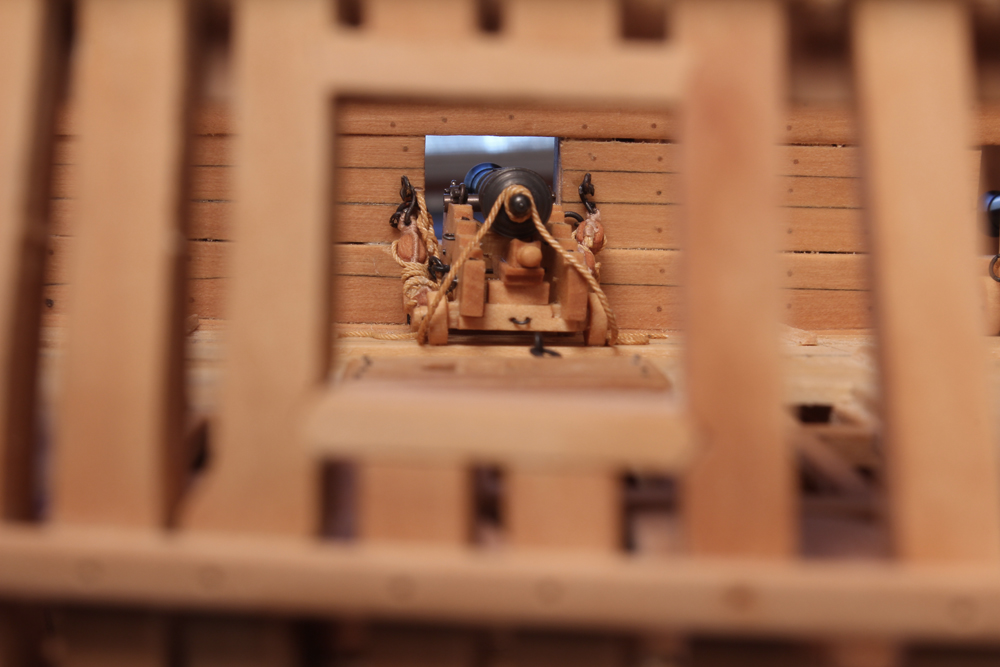
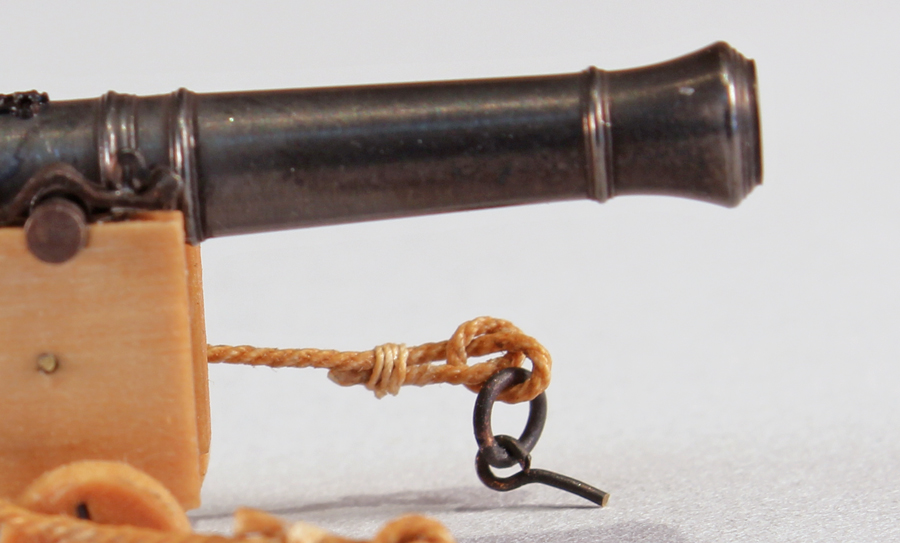
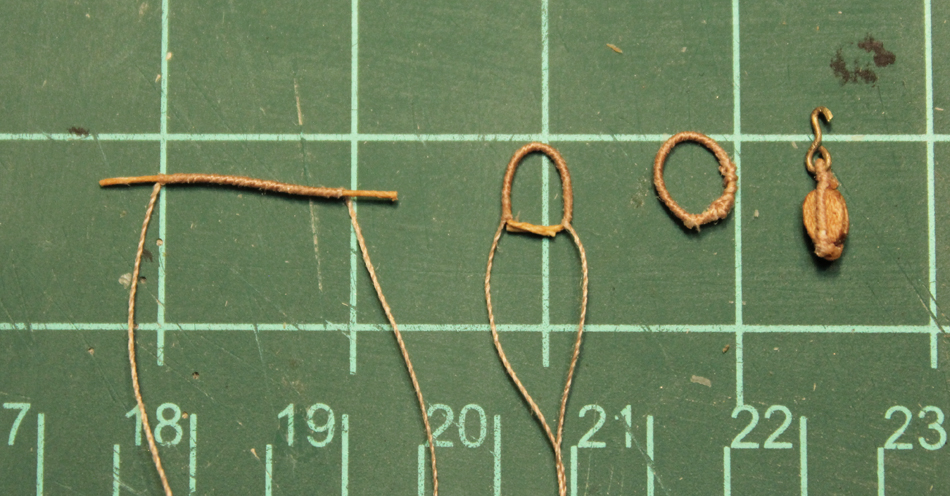
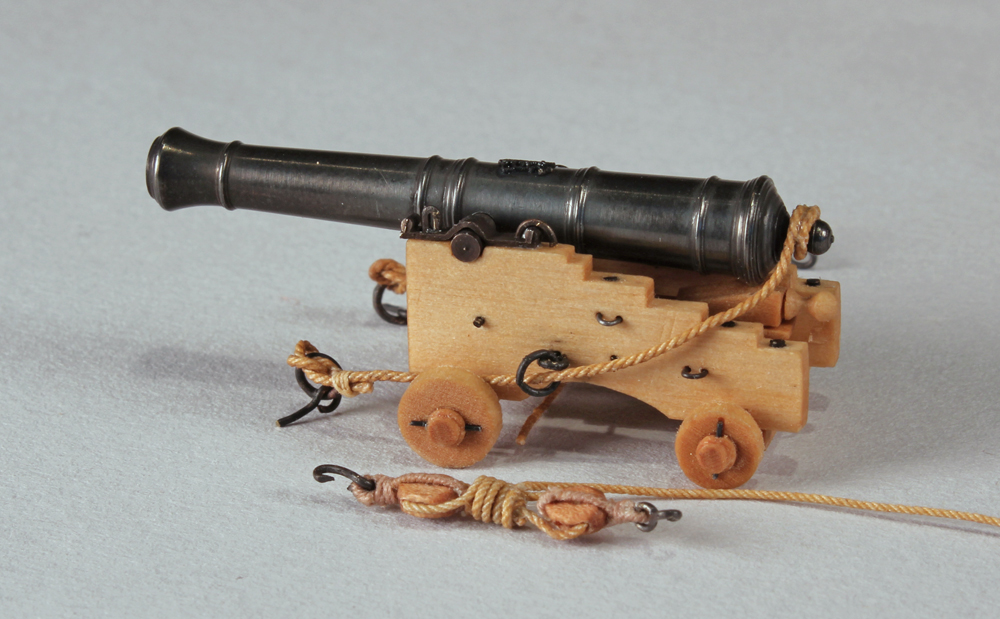
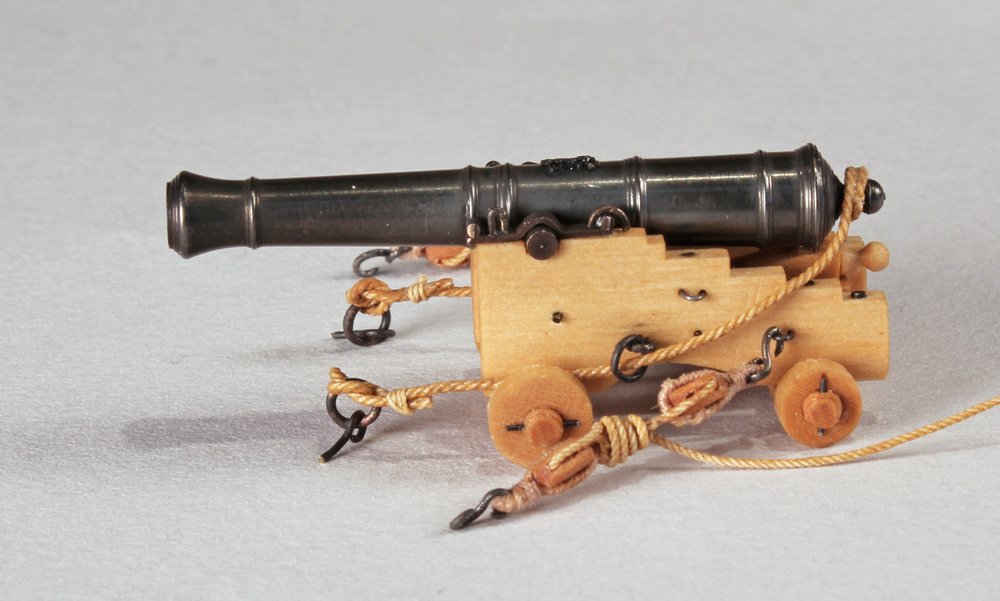
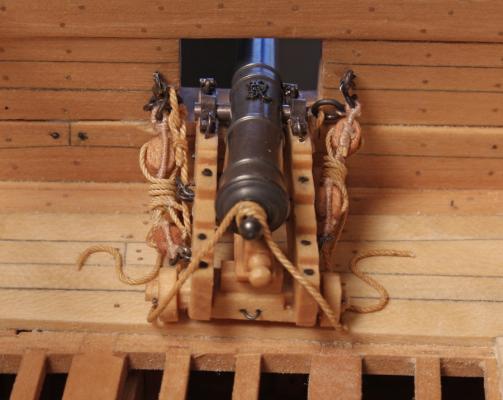
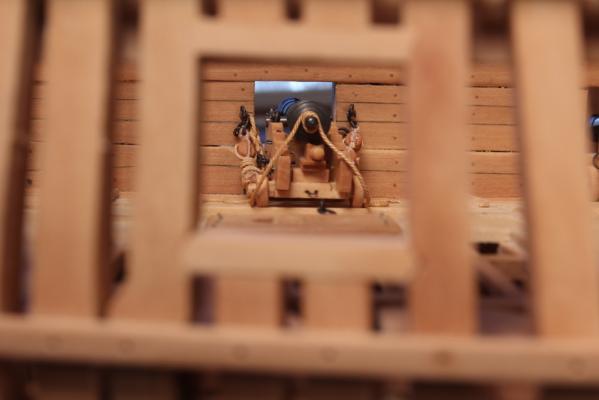
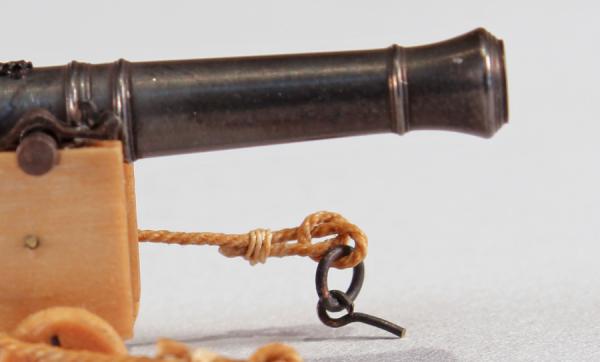
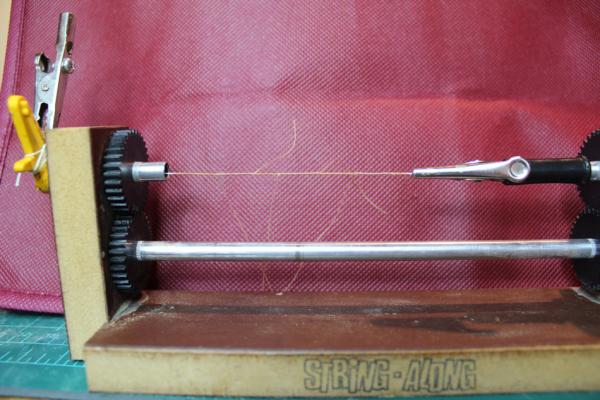
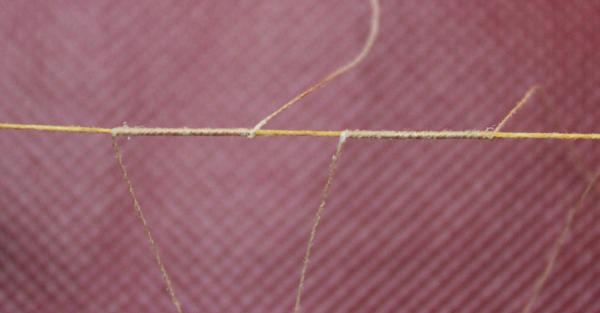
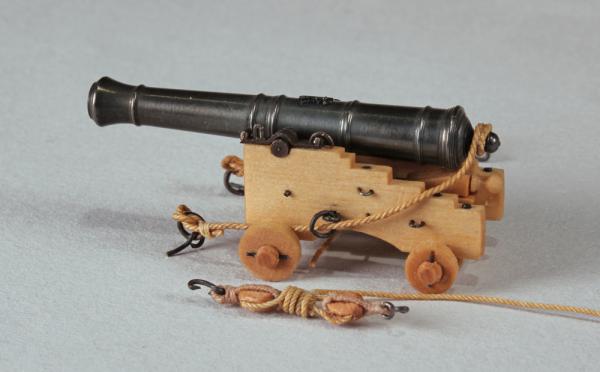
Thank you Druxey, Mark and David. The gun rigging is next. I chose to show only the breeching and the gun tackles. With the open deck, the train tackle just did not look right. The first step was to make the correct rope. The breeching is 4" in circumference and the tackle line is 1.5" In TFFM, the tackle is shown as a left hand laid line. So I made a bunch of it using three strands of 100 weight crochet thread. Something did not seem right so looked in all my sources and they all stated right hand laid (or stated that all rope was right hand laid unless stated otherwise). There are not exactly a lot of 18th century ships still afloat so I decided to use the Victory as my model. Her cannon are rigged with right-hand laid tackles and left hand breeching. So I remade all the tackle rope...correctly this time. The breeching is made with three strands of 50 weight thread. Did I mention that the ropewalk handle broke off in my hand in the middle of all this? I like to secure knots with Titebond. In order to do that I use a water based stain by Minwax, Woodsheen, in manor oak. The blocks are made by laminating the pieces together and then carving in notch for the strop. One block has a strop with one loop and the other has two loops. The strop is served with some ancient thread I found in my sewing machine. The pictures show the sequence of "splicing" and serving the strop. I tried but was unable to actually splice the rope this size. First, the line was served, leaving extra unserved material on either end. The two ends were mated and glued together. When dry, they were thinned down to decrease the bulk and stiffness. The rest of the strop was served by hand. Finally it was given to the block. Not perfect, but it was the best I could do. The ring bolts for the breeching and tackle were temporarily attached to the hull. On Victory, the breeching is secured to the bolt with a loose knot which looks like a pretzel. It is then secured to itself. I duplicated that here. The second picture gives a good view of the knot. There is a hook on each of the tackle blocks. The ring is at a 90o angle to the hook. The tackle is frapped. I wondered how neat and tight this frapping would be in reality. Back to the Victory pictures. They are relatively neat but not very tight, so that is how I depicted them. I have not decided what to do with the end.


-
It might just be the camera angle but the second strake looks like it is side bent severely. Like I suggested, make up a template for the third run of planking and make sure your materials will bend as required. And, yes, you should make them symmetric because it will end up being more work for you down the line. The best tutorial for this build is Bob Filipowski's. I call it a tutorial because it is much more than simply a build log. If you follow his instructions you cannot go wrong.
- 64 replies
-
- 4
-

-
- 18th century longboat
- model shipways
- (and 1 more)
-
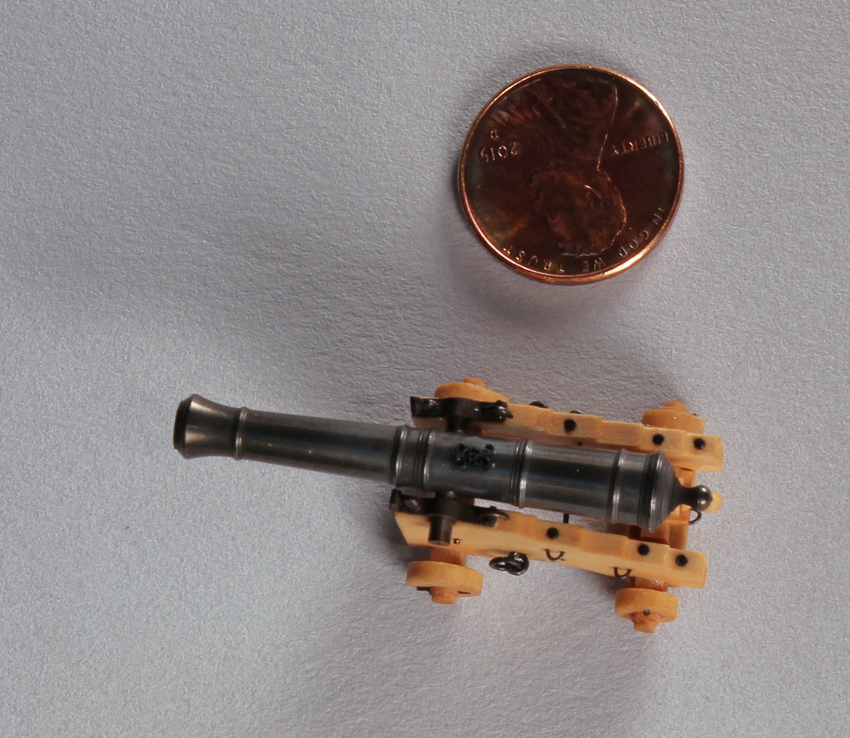
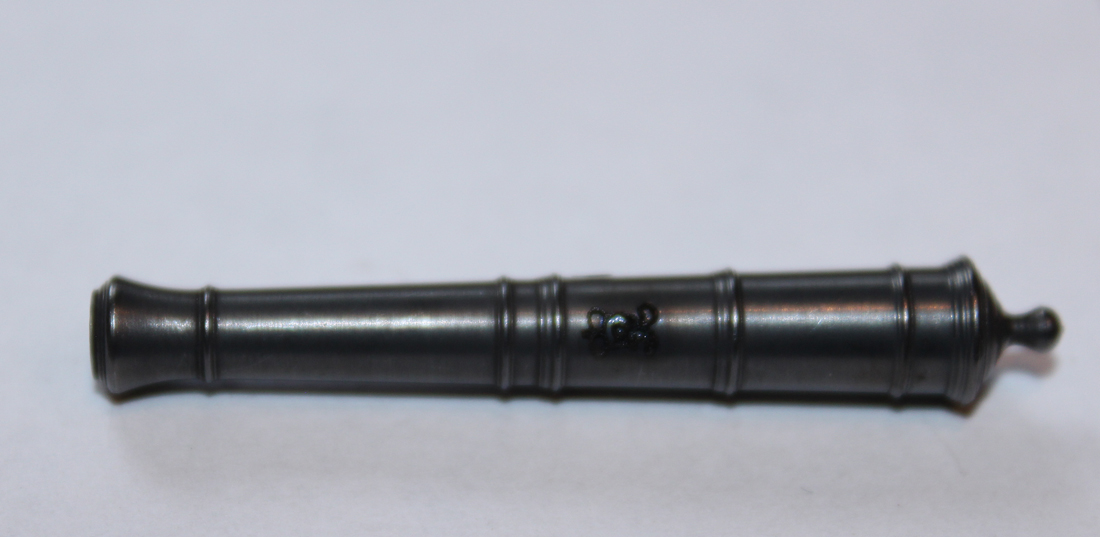
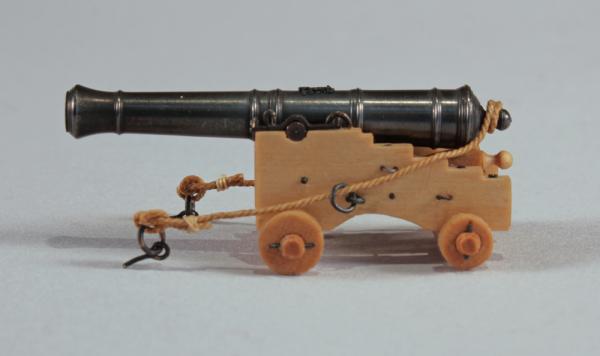
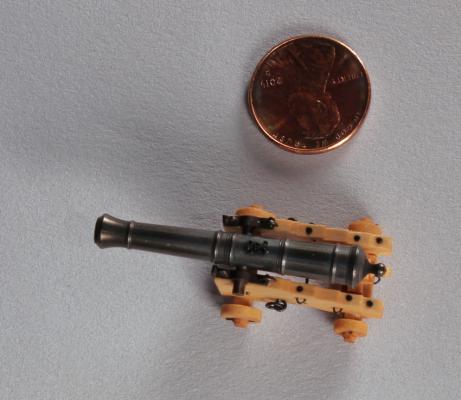
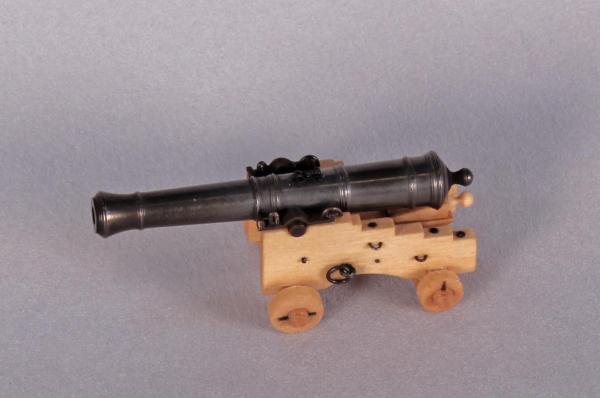
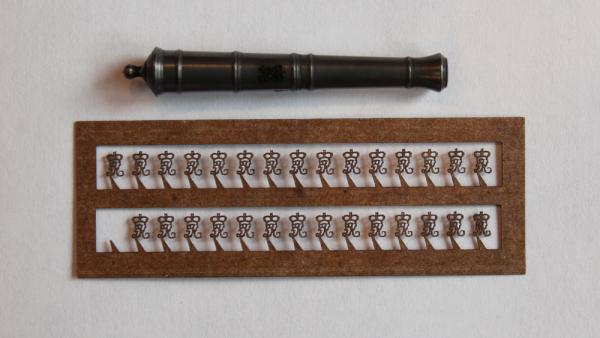
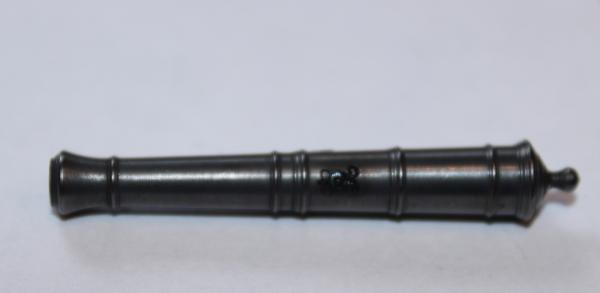
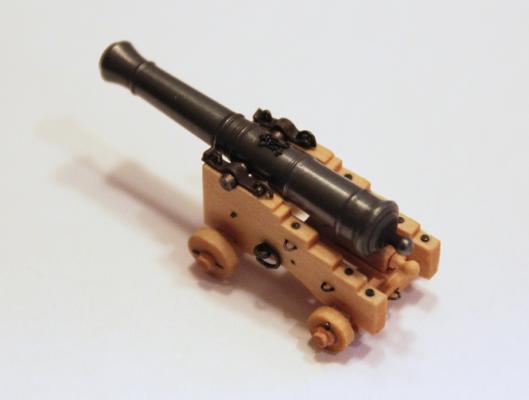
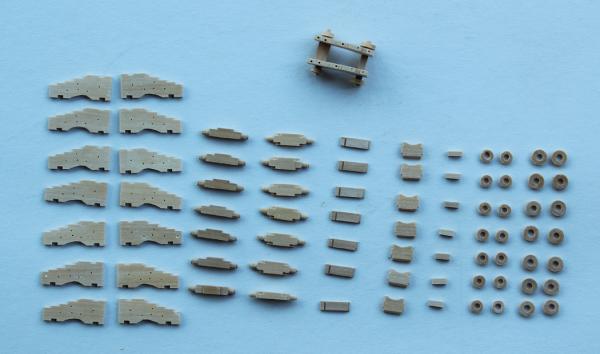
The cannon were addressed next. My original intention was to cast my own cannon. But after looking at the dimensions of the cannon available through Syren, I decided to cheat and use his instead. Maybe someday... I also purchased Chuck's monograms to apply to the cannon barrels. I bored the barrels to the correct diameter and then blackened them in Birchwood Casey. Specifically, they were cleaned in isopropanol and blackened for approximately thirty seconds. They were then rinsed in water and wiped dry. The process was repeated five times. Finally, they were rubbed down with a paper towel. The monogram was applied with CA; Titebond did not hold. The monogram was "painted" with archival marker. Now it is time to mount the cannon barrel.


-
Thanks to everyone for their kind comments and thanks for the likes. Chuck, repetition like this is the reason I hate rigging. Remco, considering your avatar, that is a true compliment. I brought my first completed carriage with cannon to my local club meeting last Saturday so Kurt is referring to the pictures which will follow.
-
Please take a look at your garboard strake. It should extend further forward. Look at the run of the second plank. Because the garboard plank is too short, the second plank had to curve excessively to meet it. Make a template to see what the third row plank would have to look like. The amount of edge bending required would be impossible. And each subsequent row would be worse. This a problem a lot of the builders of this kit have had with the result that they ended up starting over. I would suggest looking at some of the finished builds to see how far forward they extended the garboard.
- 64 replies
-
- 4
-
-
- 18th century longboat
- model shipways
- (and 1 more)
-
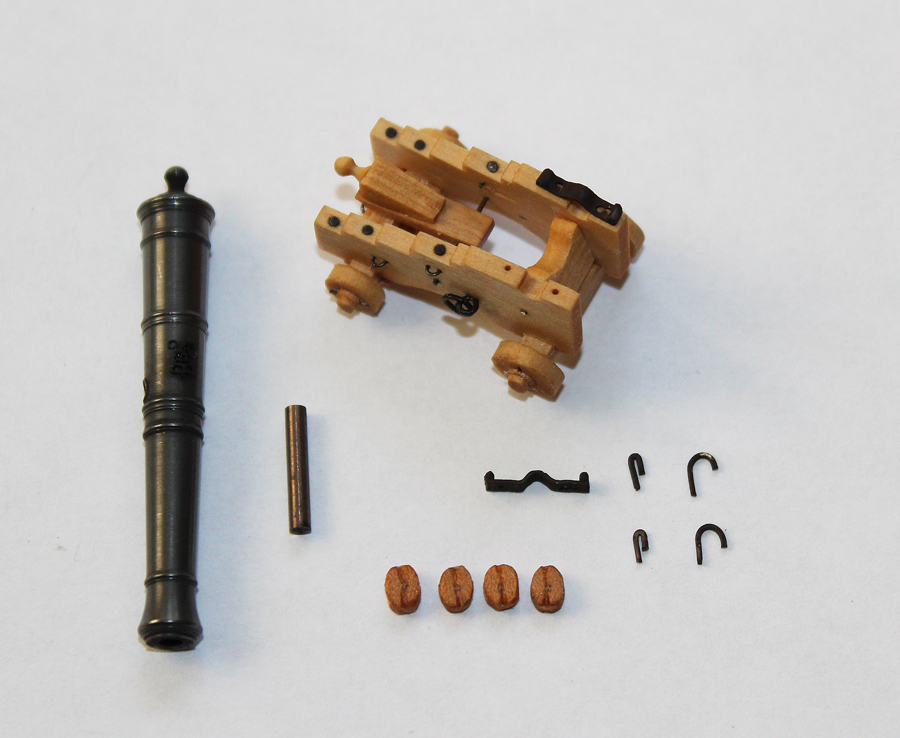
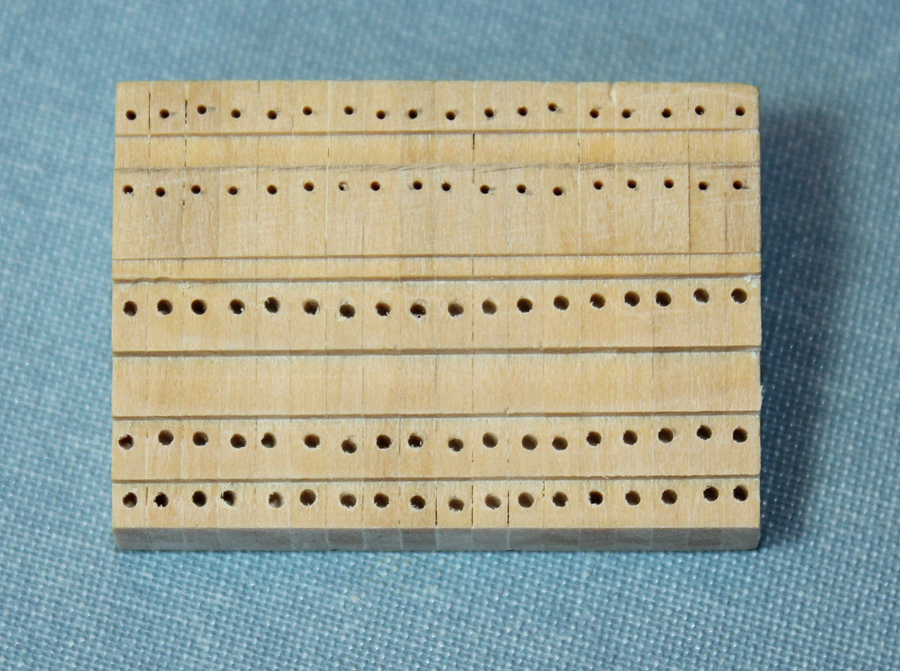
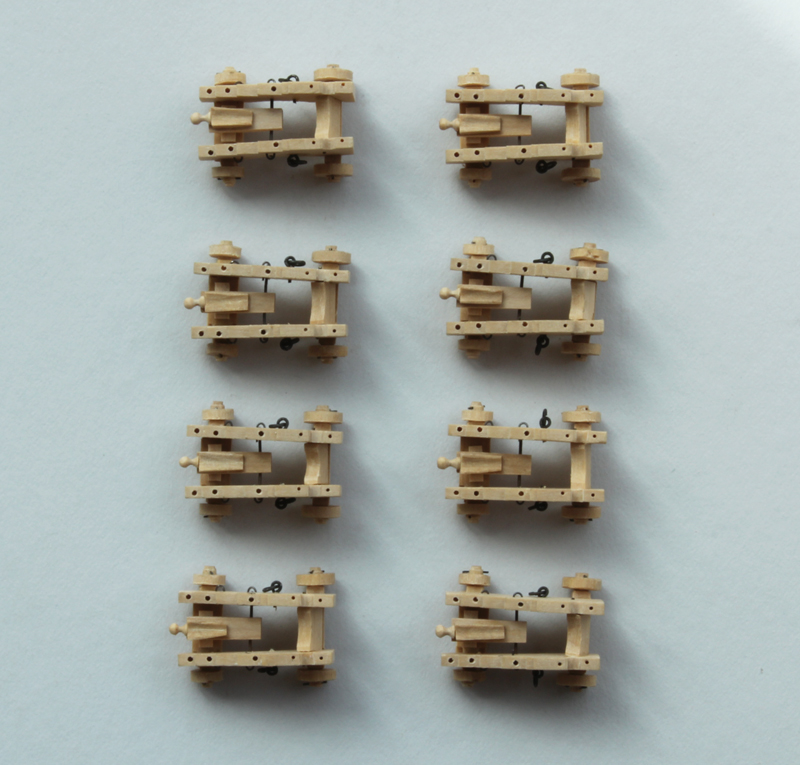
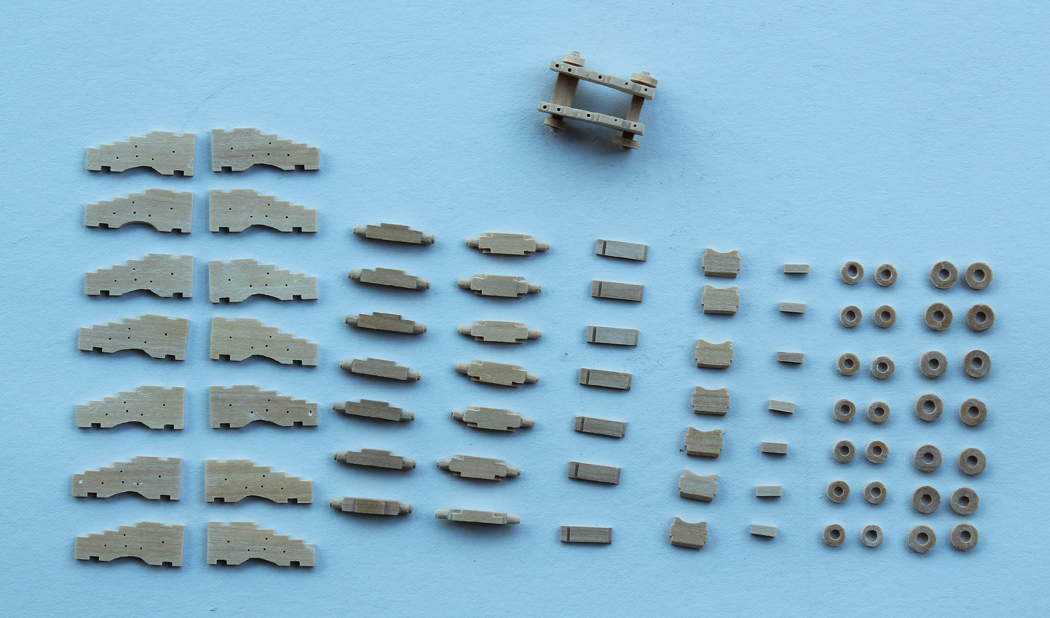
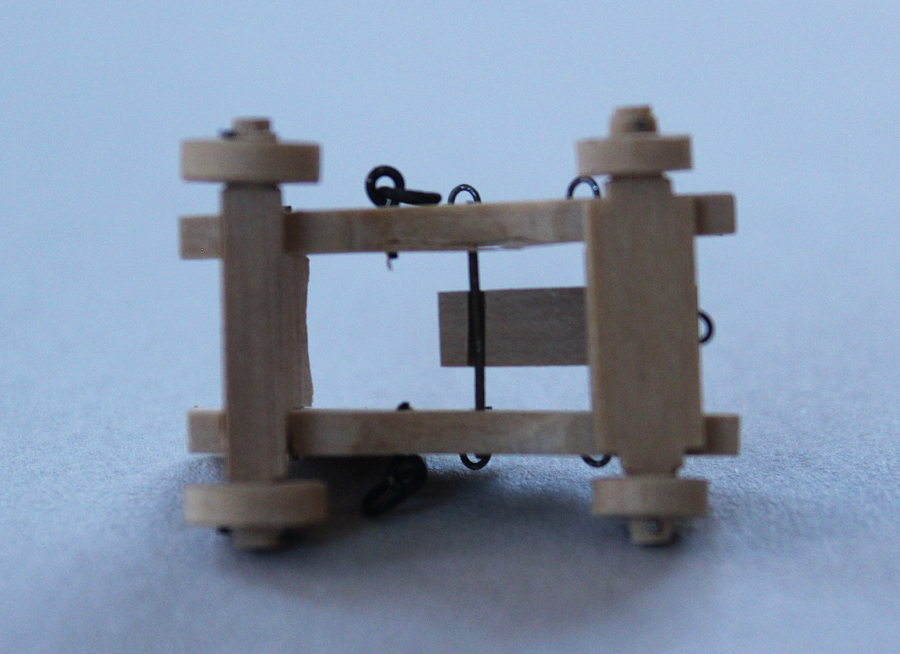
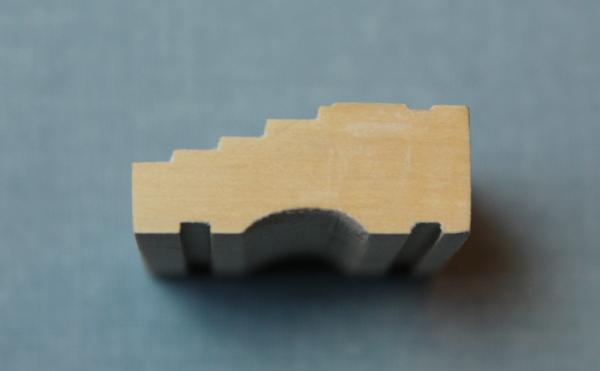
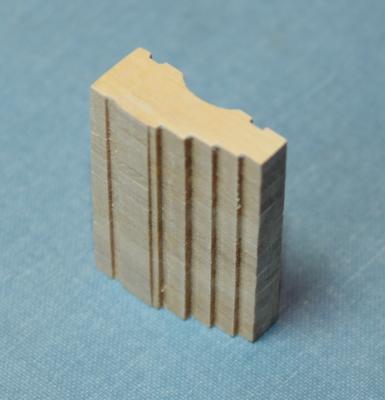
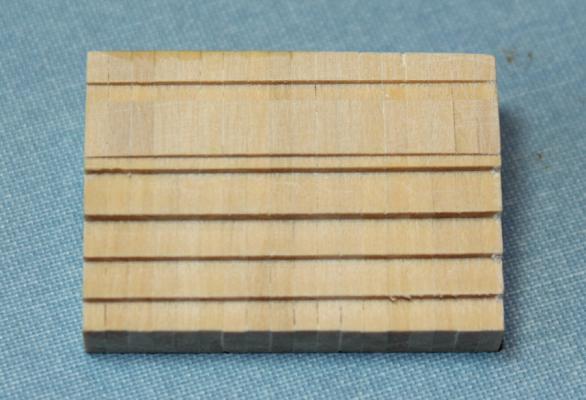
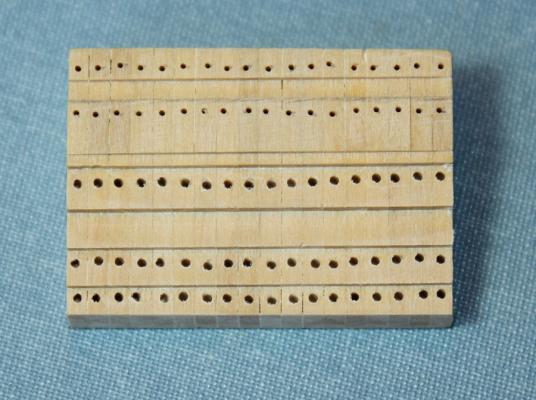
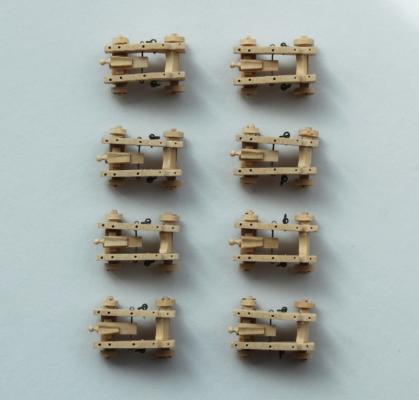
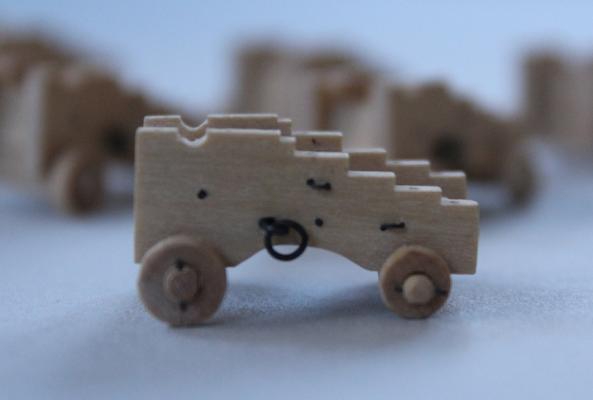
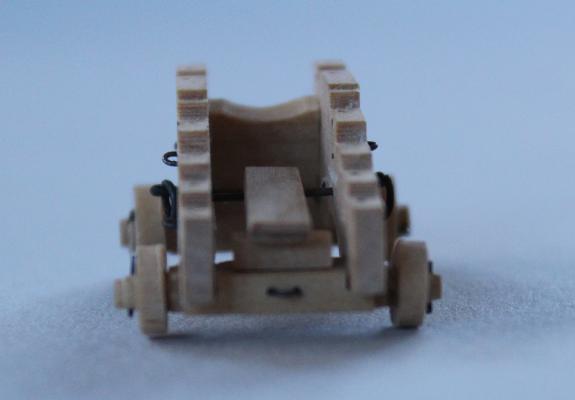
I am stunned to realize that I have not posted on this build log for almost two months! Well, work and life just have a tendency to get in the way. I have started working on the armament. There are sixteen cannon on Atalanta. I will be showing the eight on the port side. This project has taken three times as long as I had anticipated and is not over yet. The first step is making the carriage side. I laminated strips of costello the correct thickness together. The various steps were milled into the laminated blank. The curved under-carriage was roughly milled and the filed smooth. The pictures show the blank from different angles. Holes for the various bolt were drilled while the blank was still intact for stability. The remaining parts of the carriage (axles, wheels, bed) were made. There was nothing complicated about any of these parts. The front and rear wheels are different diameters. These were turned down on a lathe and then cut off with a razor saw to prevent chipping. I made a very simple jig to facilitate assembly. On the left side one can see the two size holes for the wheels. The center hole for the axle was drill by inserting the wheel into the jig. This helped prevent splitting. The next pictures show various views of the partially completed carriages, including various rings, the bed bolt and the wheel pins. Finally the quoin and the rest of the bolts were added. The quoins were hand carved.


-
I used this series of articles to build my Victory. They are very well done but there are some errors. I double-checked everything with other sources, such as Longridge. There is also a compilation of the articles entitled "How to Build a Masterpiece in 1:96 Scale." The content is identical although the photos are of slightly better quality.
-
Danny, the build is beautiful and the cutaways are a great touch, especially the chains in the log pumps. Did you have an extra set of the photoetch for the chains and sprockets?
-
Nice work on those counter timbers. And after all that work, almost none of it will show!
- 968 replies
-
- 3
-
-
- hahn
- oliver cromwell
- (and 1 more)
-
Dave, where's your build log? Beautiful model.
-
OK, Bob, you are now on record saying no more bashing. Beautiful work.
- 277 replies
-
- 2
-
-
- model shipways
- 18th century longboat
- (and 1 more)
-
Love the cutaway view. When you look at the pictures it is difficult to realize just how small a structure the well really is.
-
HMS Naiad 1797 by albert - FINISHED - 1/48
tlevine replied to albert's topic in - Build logs for subjects built 1751 - 1800
Beautiful work, Albert. Those mortises are incredible. -
Thank you Richard and Druxey. And thank you all for the likes. To add insult to injury yesterday, when the temp rose to a balmy -2F, the city's largest water main broke so there was no water for several hours and we are still under boil orders.
-
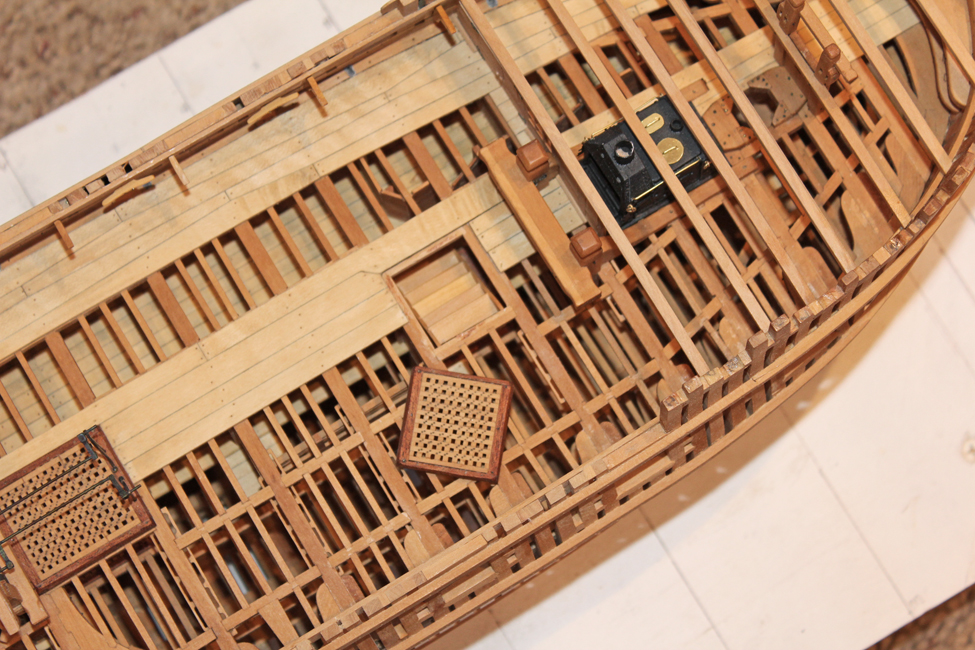
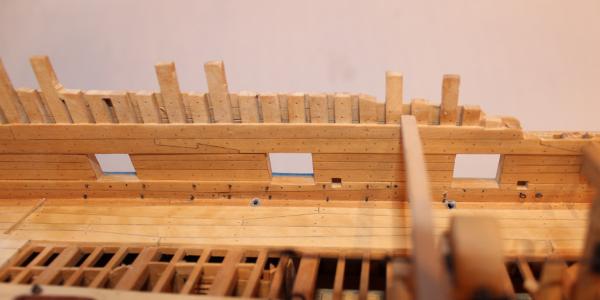
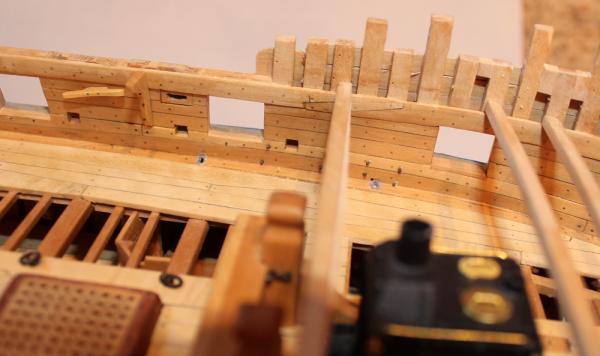
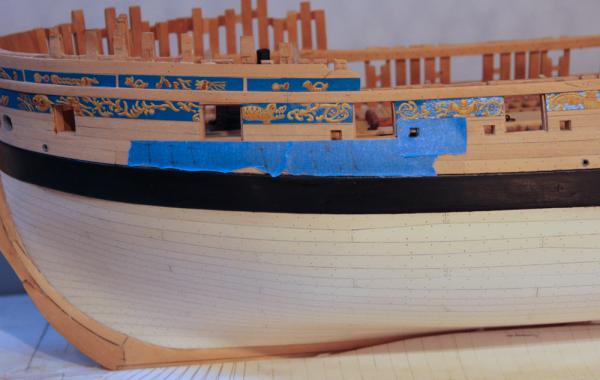
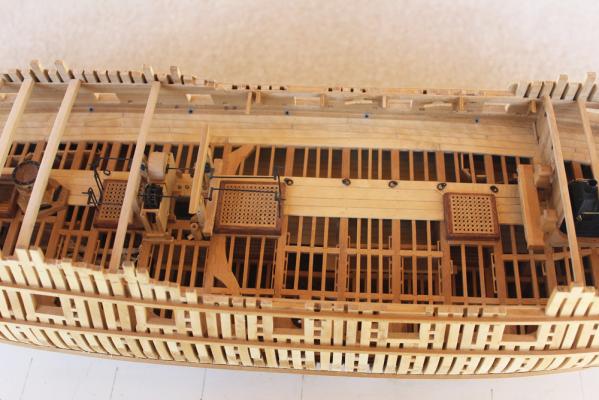
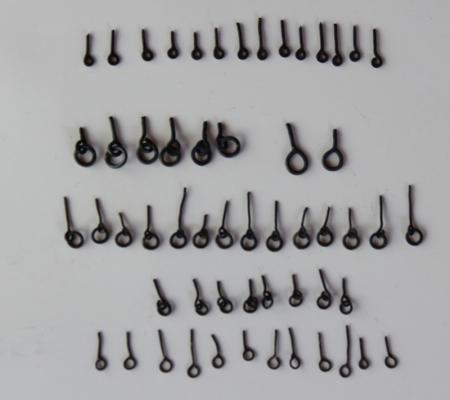
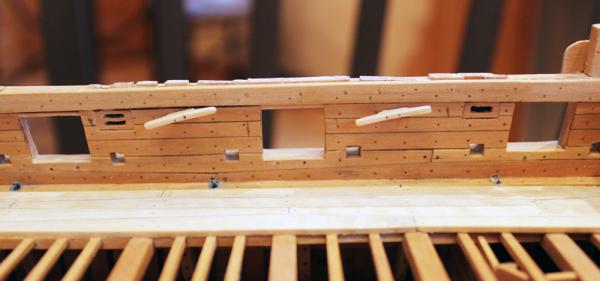
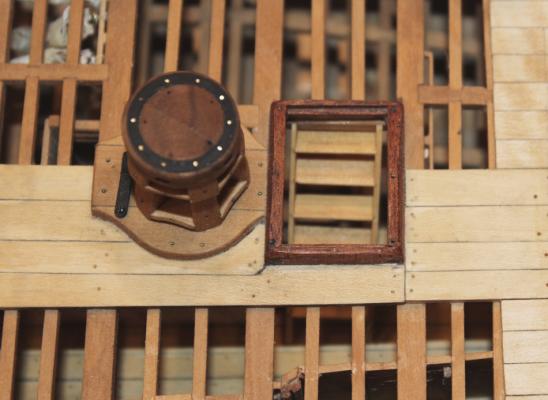
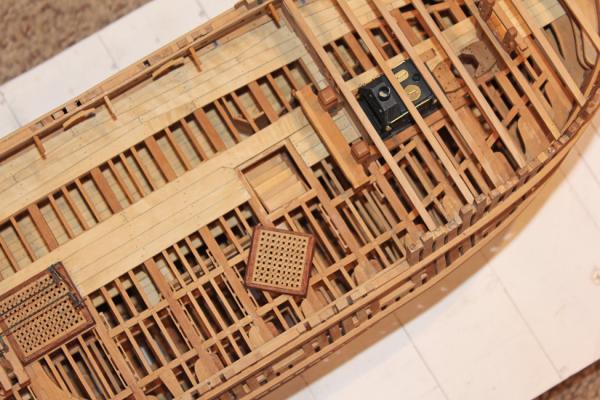
Although it may not look like much, most of the free time this weekend was spent making and installing ringbolts and eyebolts. All the iron work was made with 20, 22 or 24 gauge brass wire. The eyebolts and most of the ringbolts are silver soldered closed. I ran out of propane and it was just too cold (-4F) to want to run out to the hardware store. There are five stopper bolts. These run through the binding strake just lateral to the fore hatch. The top tackle eyebolt is located in the binding strake at the level of the aft end of the after hatch. The gun tackle ringbolts are used to haul the guns inboard and are also located in the binding strake. The stopper bolts serve double duty in this regard. There are four eyebolts in the main mast partners. Finally, there are three ringbolts in the bulwark at the level of the main mast. The breeching ringbolts and port tackle eyebolts will be installed when the guns are rigged. While there is still access to the inner bulwark I installed the simulated chain and preventer bolts. These bolts secure the preventer plates to the hull. First, stub masts were inserted and a string was used to determine the angle of the stays as they intersect the hull. I marked this on masking tape. The locations were then marked internally and installed using 1.5" bolts.
-
Echo by Maury S - FINISHED - Cross-Section
tlevine replied to Maury S's topic in - Build logs for subjects built 1751 - 1800
She looks wonderful, Maury. So what is the next project? -
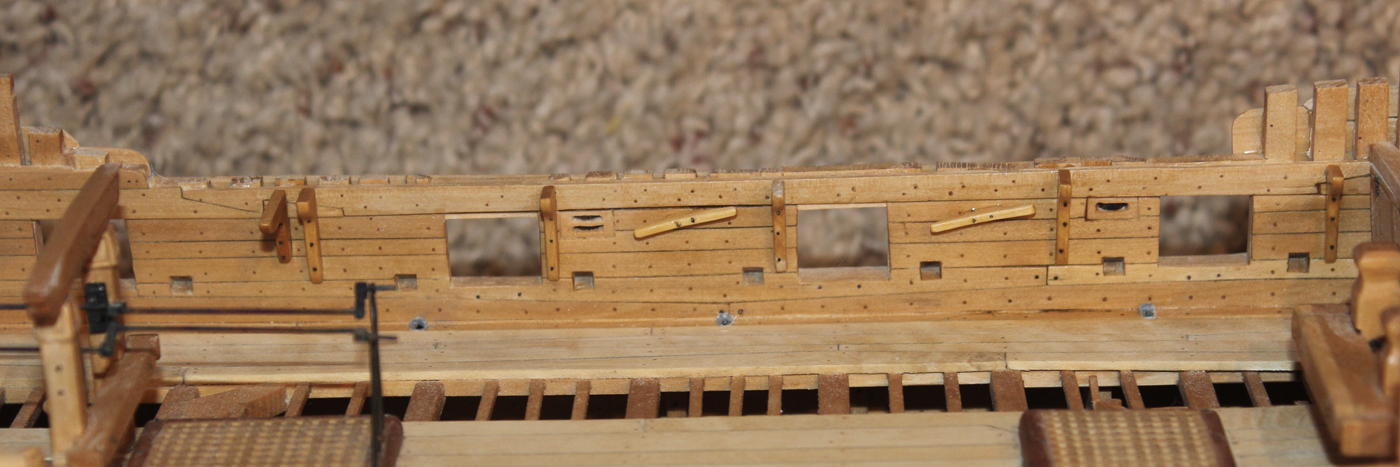
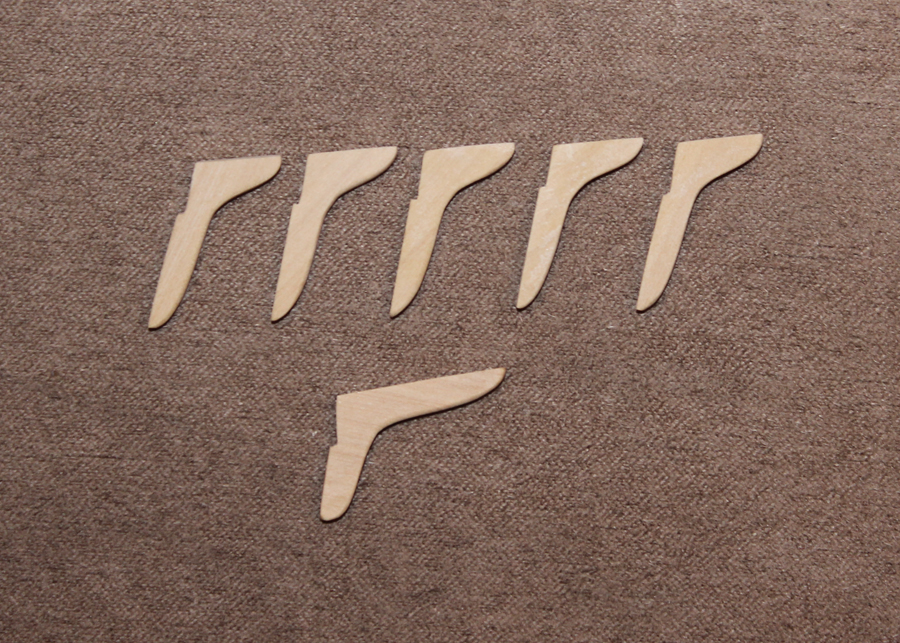
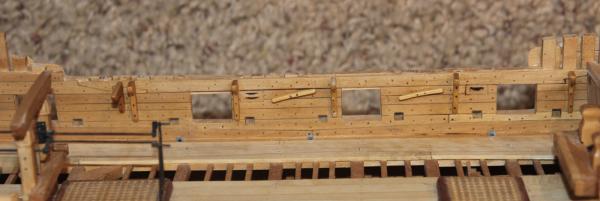
Martin, if you ever saw my feeble attempt at carving you would understand completely. There are two ladders between the upper and lower decks. The fore ladder is located under the fore hatch and the aft is uncovered because it is protected by the quarter deck. In order to install the fore ladder, I had to pry off the fore hatch. The ladders are simple structures. The key is NOT to do what I did and reverse the direction of the treads. With the hatch replaced, it is almost impossible to see the ladder. There are two range cleats in the upper deck bulwarks for the fore braces and the main course tacks. These are fastened through the side of the ship by two bolts. I considered doing this except the bolts would have gone through the frieze. The knees to the gangboards are also installed into the upper deck bulwarks. The aft knee is for the fixed gangway and the five fore knees are for the gangboards. The aft knee has an athwartship arm of 2'9" and the other knees have an athwartship arm of 1'5".
-
Your work is the epitome of perfection. No one would know those bolts are 1/4" too large unless you told them. But of course you will always know. As I am less of a perfectionist than you, I would leave it since overall the construction is very sharp and use that time to move forward rather than look backward. My TFFM is full of sticky-notes for "the next one".
- 1,214 replies
-
- 8
-
-
- sloop
- kingfisher
- (and 1 more)
-
There is also the option of running a humidifier in your workspace to maintain a relative humidity of 30-35%. Doing this in the winter and running a dehumidifier (aka A/C) in the summer made a big difference for me.
- 968 replies
-
- 5
-
-
- hahn
- oliver cromwell
- (and 1 more)
-
Your work is too fantastic to simply give it a "Like".
- 1,214 replies
-
- 4
-
-
- sloop
- kingfisher
- (and 1 more)
-
Thank you, everyone for the likes. Well, Druxey, I gather those central panes are typically darkened? How dark would you recommend? I was afraid that you were going to tell me the acanthus leaves were carved. At least that is a smaller project than some of the other carving which will be required.