


Hubac's Historian
-
Posts
2,950 -
Joined
-
Last visited
Content Type
Profiles
Forums
Gallery
Events
Posts posted by Hubac's Historian
-
-
I went with black because my grating is black and I am mostly trying to minimize inconsistencies between what is and what should be.
- Ferrus Manus, Ian_Grant and Bill97
-
 2
2
-
 1
1
-
I will definitely take a look at Alan Armitage, John. Thank you for the compliment and the reference.
- FriedClams and mtaylor
-
2
-
Thanks Ian! Just call me Ol’ HMS Indefatigable when it comes to searching for SR arcana 😀
-
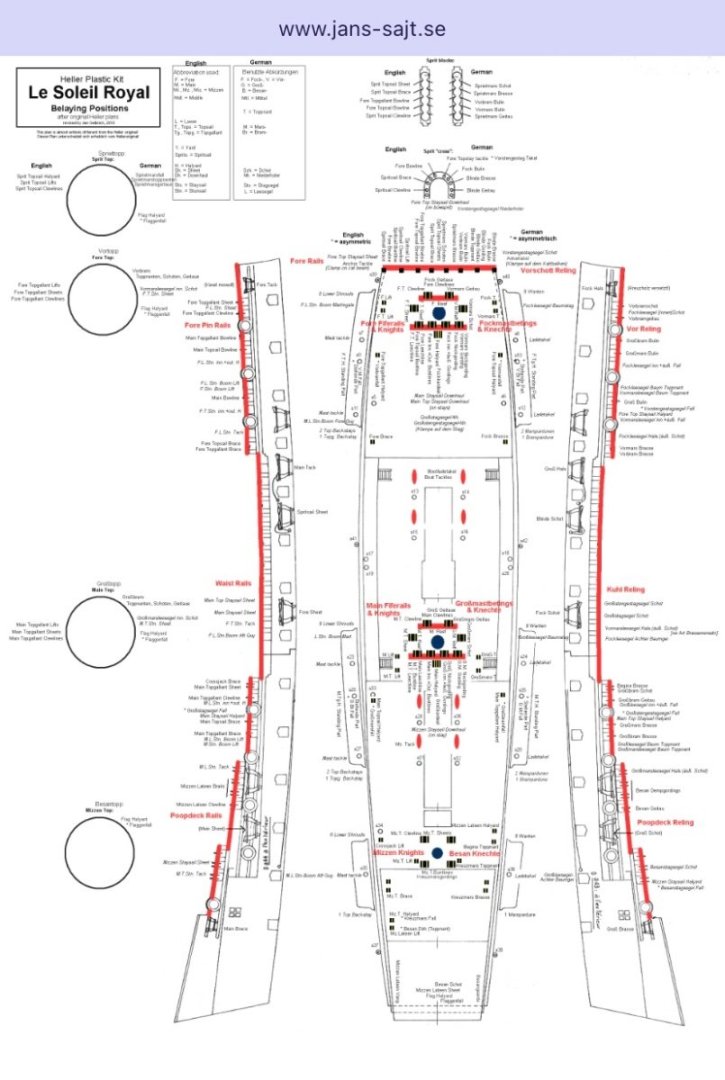
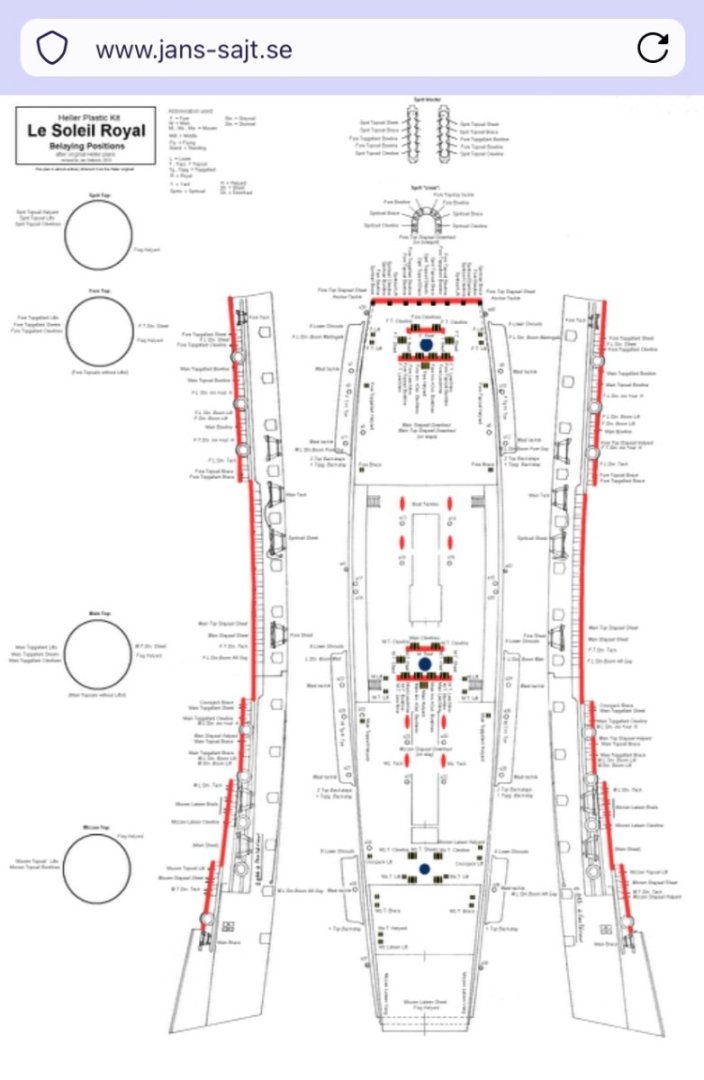
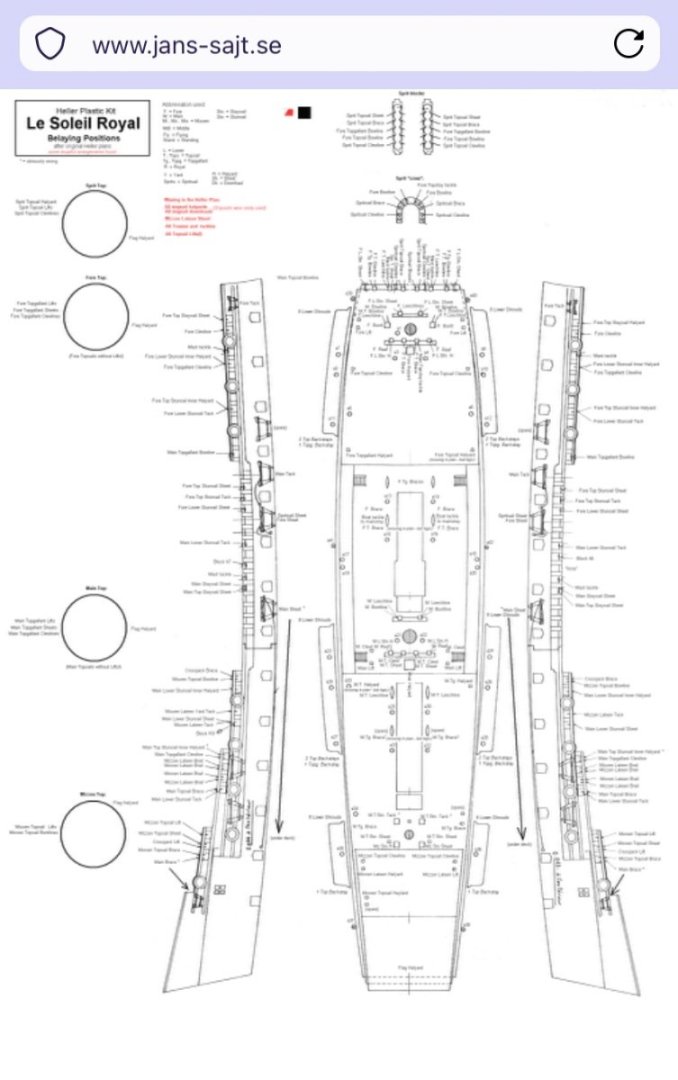
By the way, I’m no expert - especially when it comes to rigging. I haven’t really sorted through all of this yet, but I found an alternative belay plan somewhere on the net by a German builder. I took a few screen shots for future reference:
-
Henry has been a pretty clear voice to me on the practicalities of rigging and his arguments make sense to me. I’ve made my forecastle deck, but I haven’t pierced it for anything yet. When I do, I will follow Henry’s advice, here.
-
Ferrus and Bill - thank you both very much. Your compliments are truly appreciated.
I appreciate also, Bill, that this build has given you inspiration to try various things, and the results are coming to fruition on your beautiful model.
What you see, here, is mostly a patient layering of detail. My hope with this project is to demonstrate that even complicated looking things are achievable with little prior experience, if you break things down into manageable chunks and take your time.
It is exciting to me to see so many people take this kit to places it hasn’t been before. Some day, some one will decide to take a stab at Le Royal Louis of 1668, with this kit, and that will be a fascinating journey to follow along on.
I understand why historians aren’t in love with the idea of these sorts of projects, but as long as we are honest about what they are and what they aren’t, I don’t see the harm in it; they are merely an artistic expression of what might have been.
-
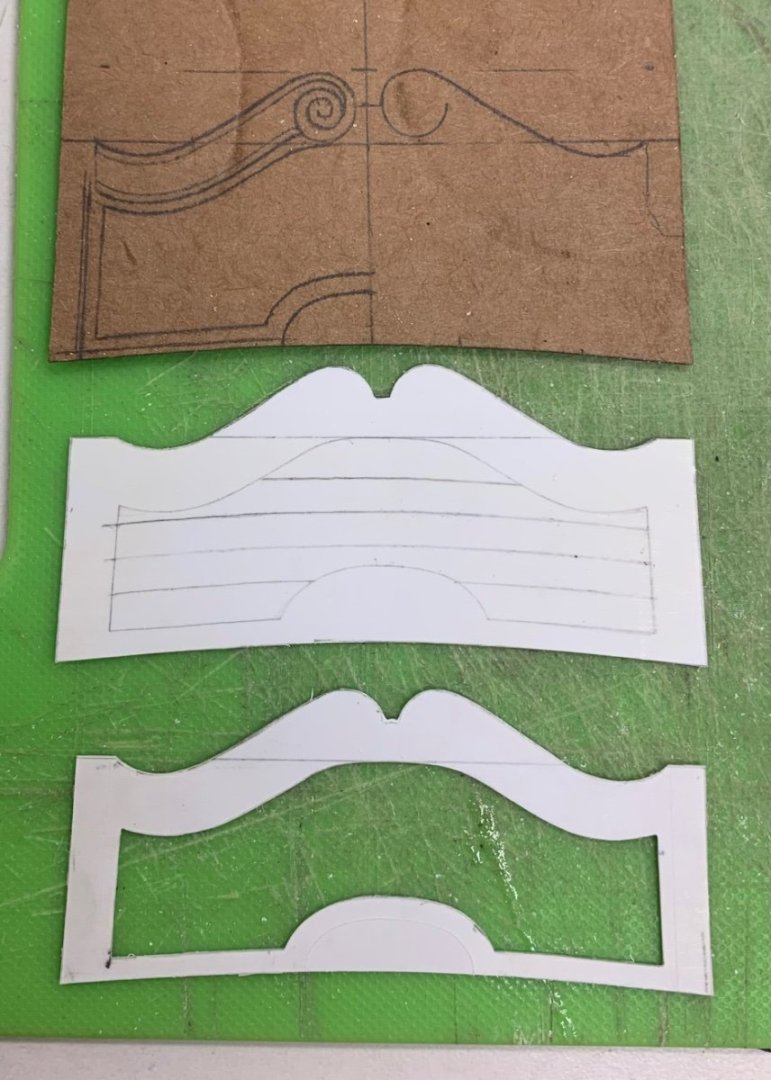
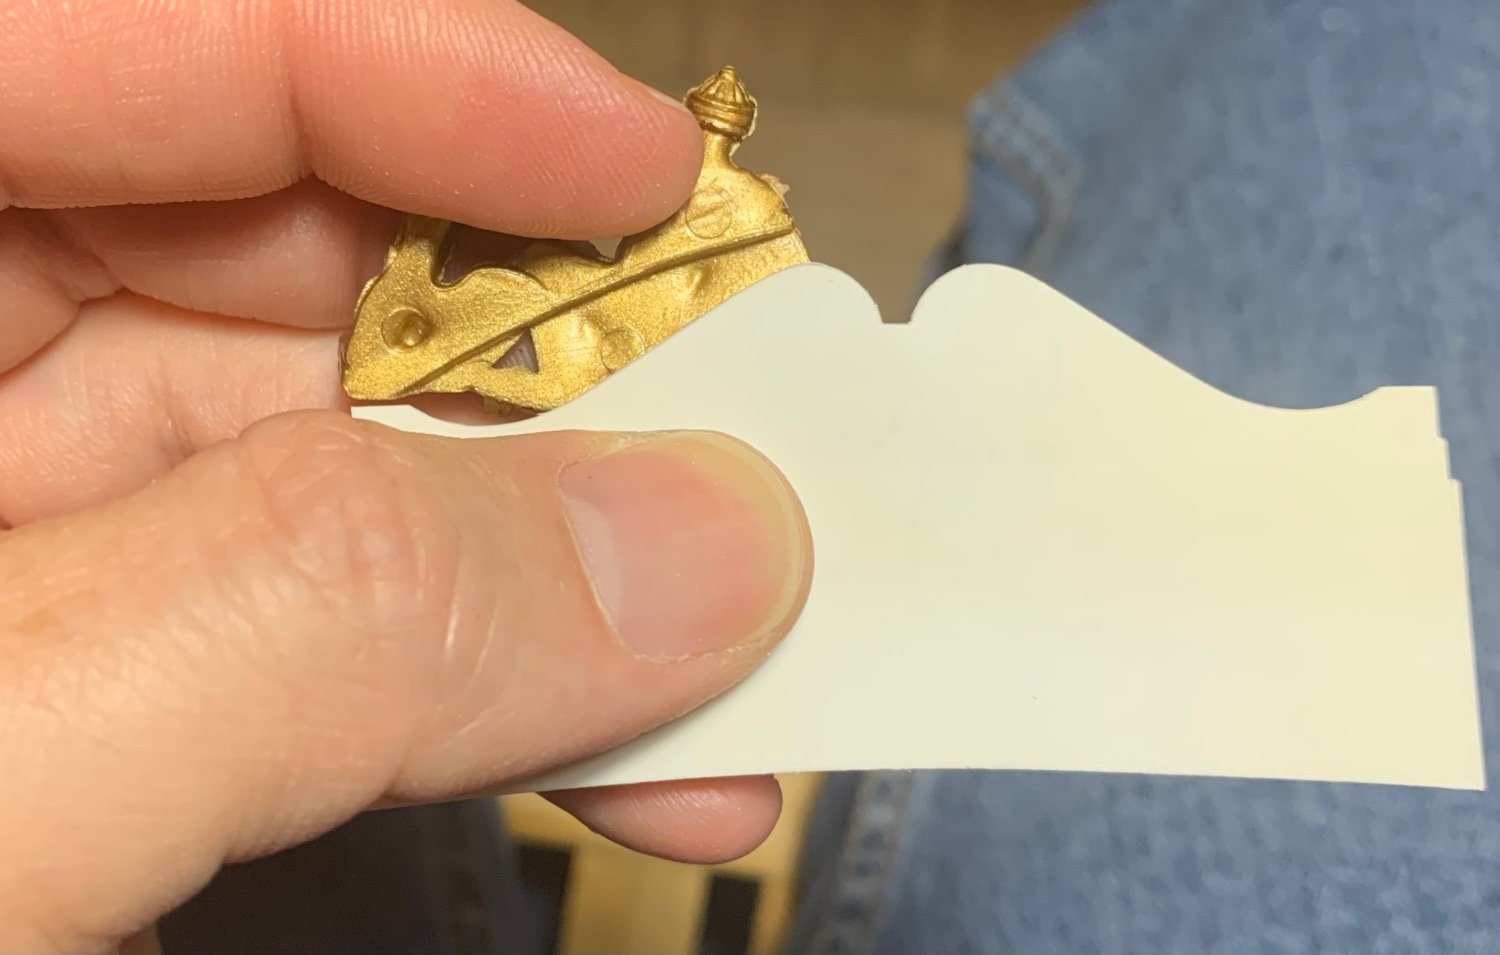
This has been a satisfying week spent detailing the tafferal plate. First task was to complete the architectural moulding and to shape the top mouldings and scrolls:
I have taken a somewhat different tack with my adaptation than what Tanneron/Heller show. I have decided to run this large architectural moulding all the way out to the ship sides. The reason for this is that I chose to use the between window pilasters to bracket the outermost windows on all three levels. These window pilasters are notably more narrow than the long rectangular panels on the outside edges of the tafferal plate, so this architectural moulding caps the lower window pilasters and provides a visual transition to what is happening above. The rectangular panels need to be wider in order to accommodate the long bellflower ornaments.
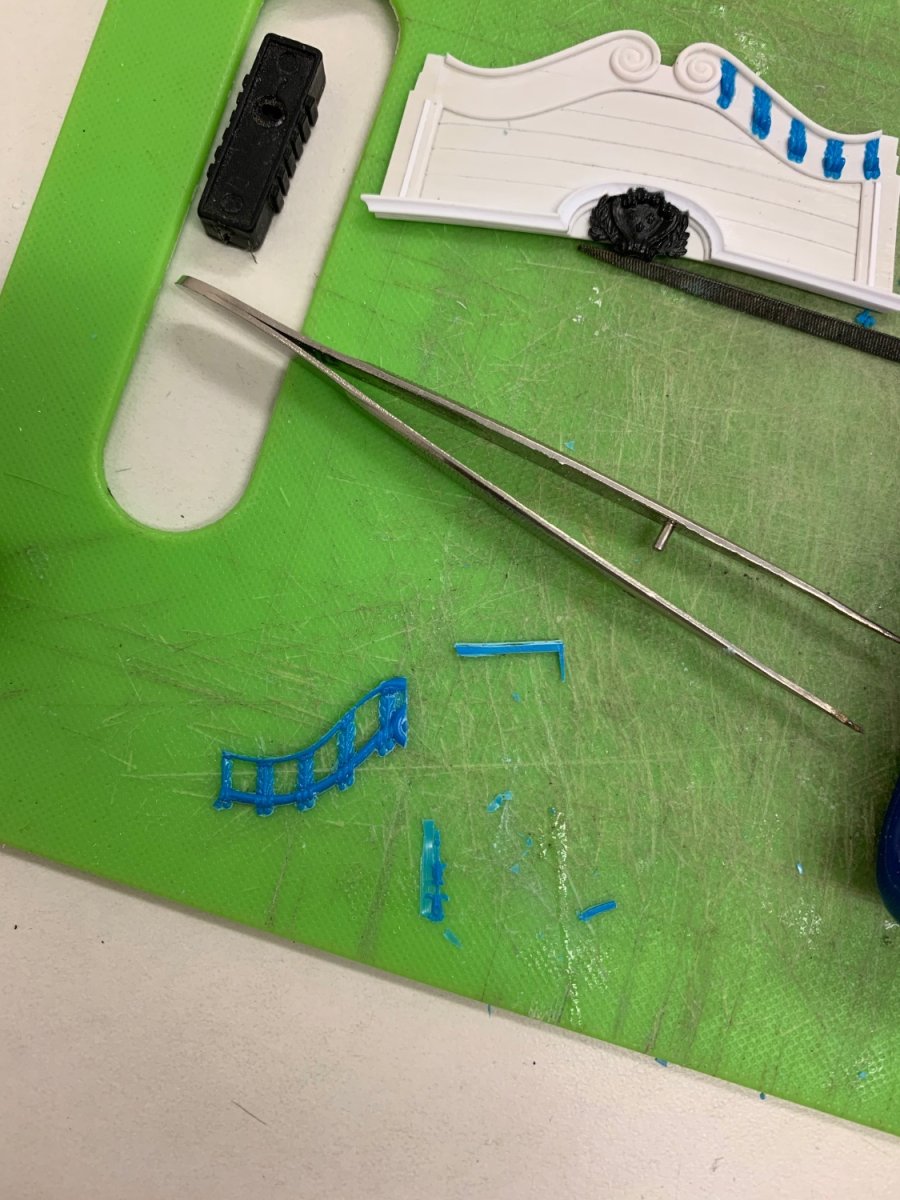
The next step was to skeletonize the extra stock stern plates I have for these decorative elements that would otherwise be extremely difficult to carve or sculpt from scratch, in this scale:
I use the Dremel grinding disc to excise the relevant sections and then sanding drums to waste away material from the backside. Once I can begin to see light through the plastic, I manually sand the parts with finger pressure against a coarse sanding stick. I frequently check to see that the light is coming through evenly as a gauge of how evenly I’m removing the ground material. It doesn’t take long before the desired elements only need the very tip of a sharp EXACTO to separate them from the ground.
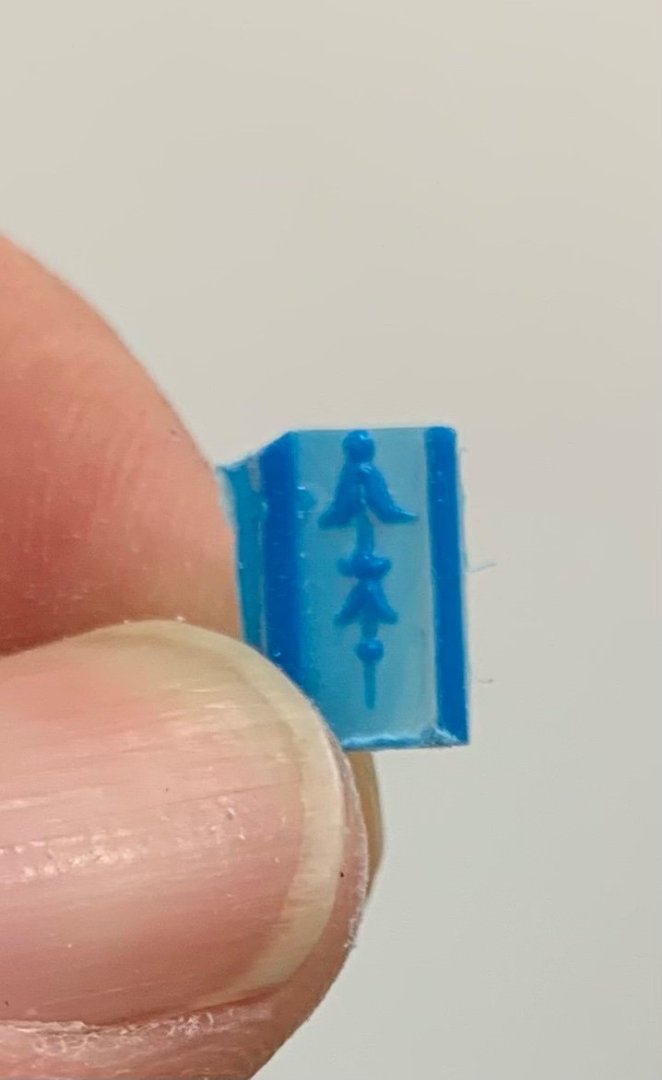
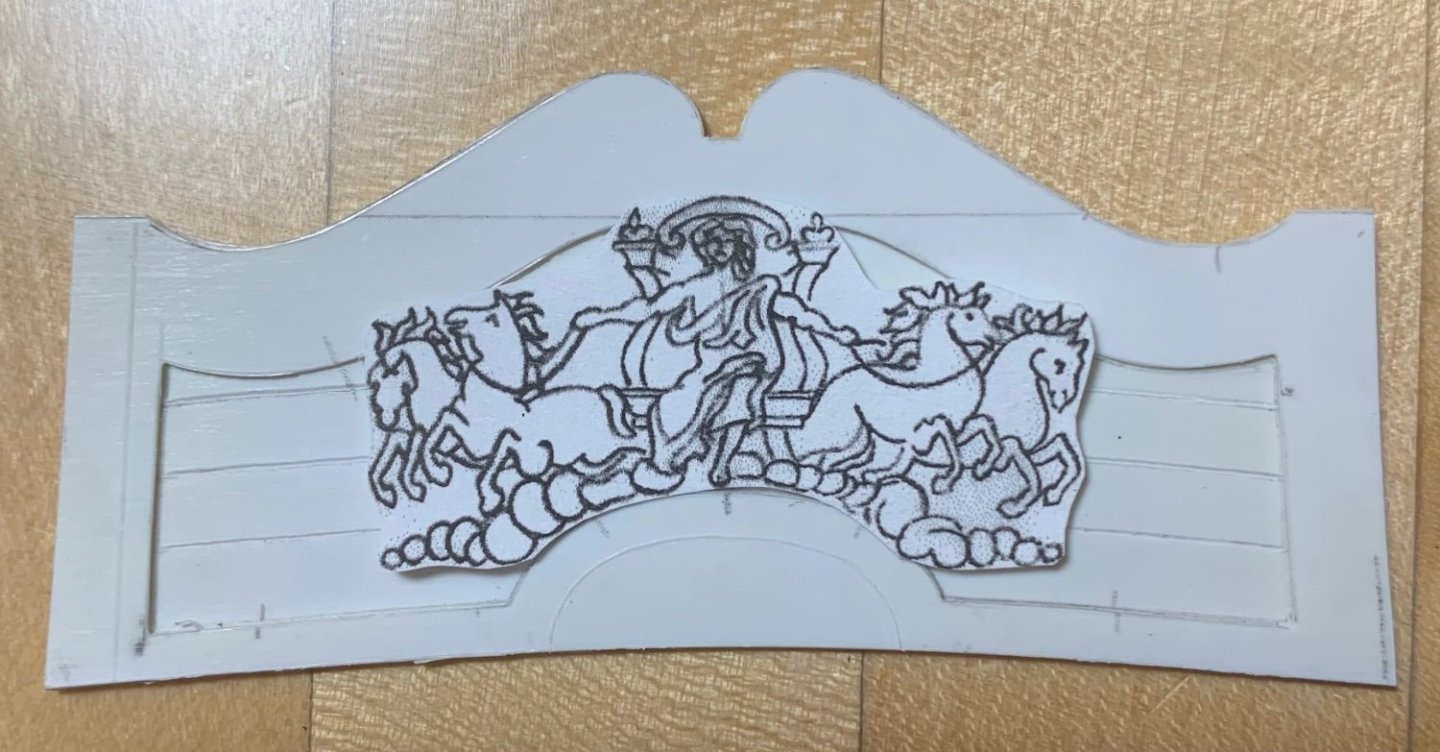
I was able to extract the Zodiac symbols in this same manner:

But, the shortened height of these recessed panels is such that they no longer will fit in those spaces:
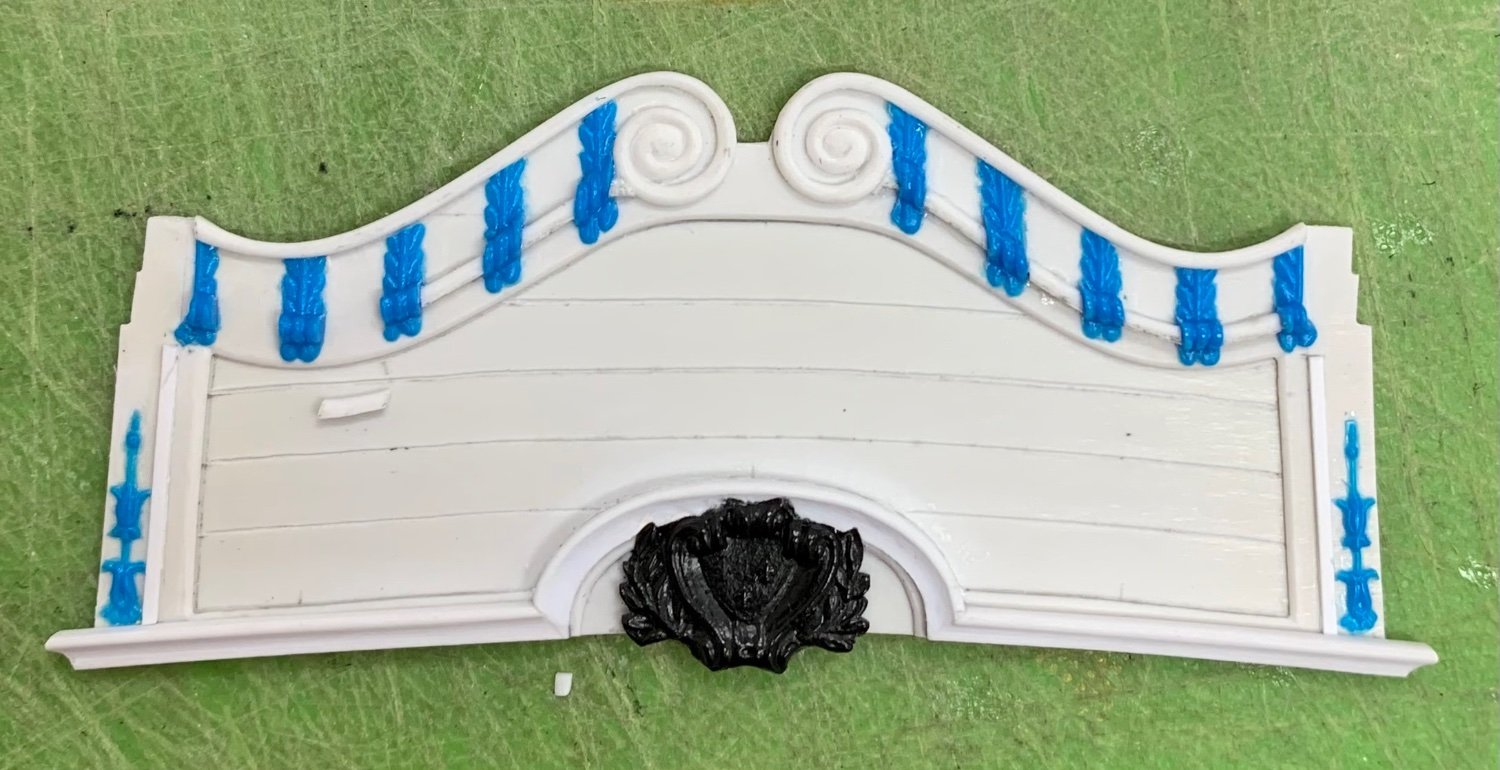
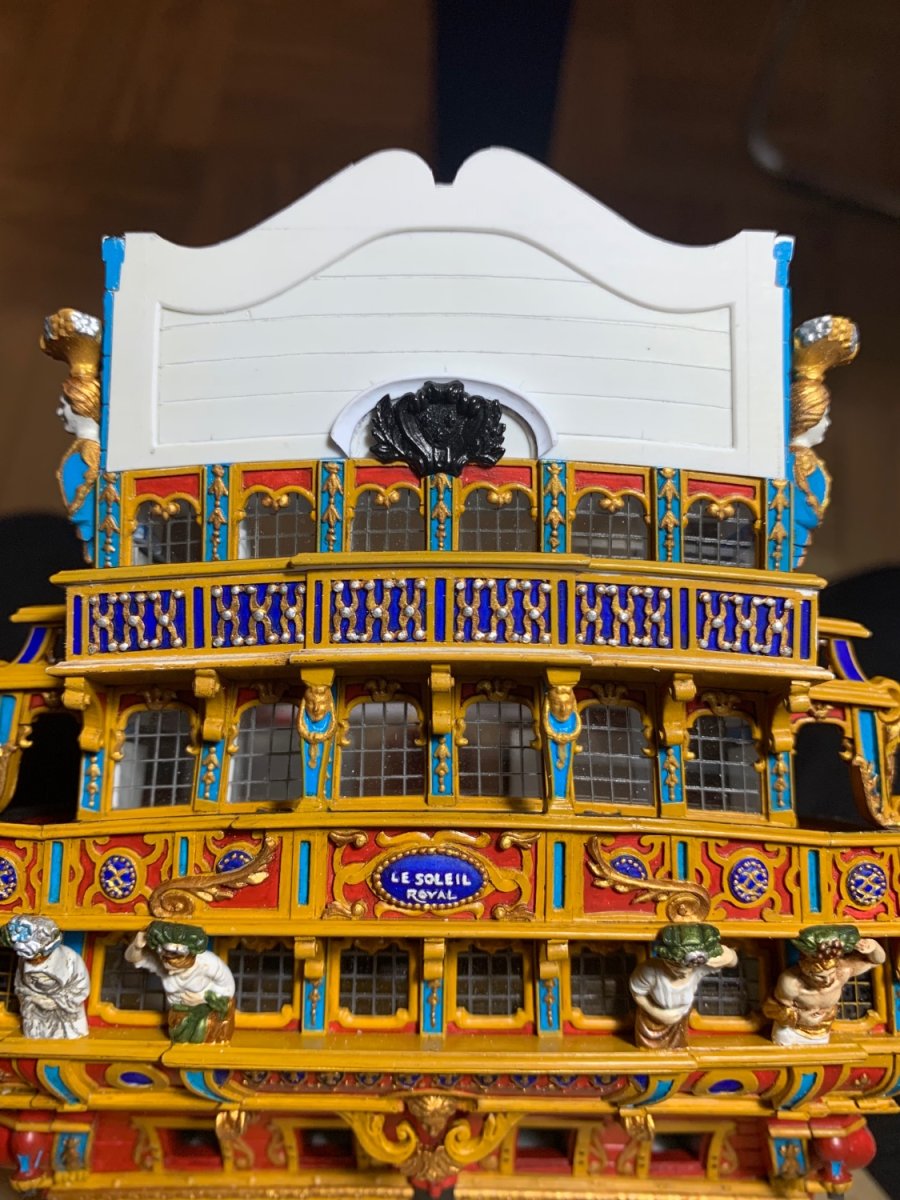
That’s okay - I will simply paint them-in with a very fine brush a little later in the process. Above, you get a clear sense of how dramatically I’ve reduced the height of the backboard and the shape of the cornice.
The lower cornice moulding had to be pieced-in segment by segment. I think the result is good:

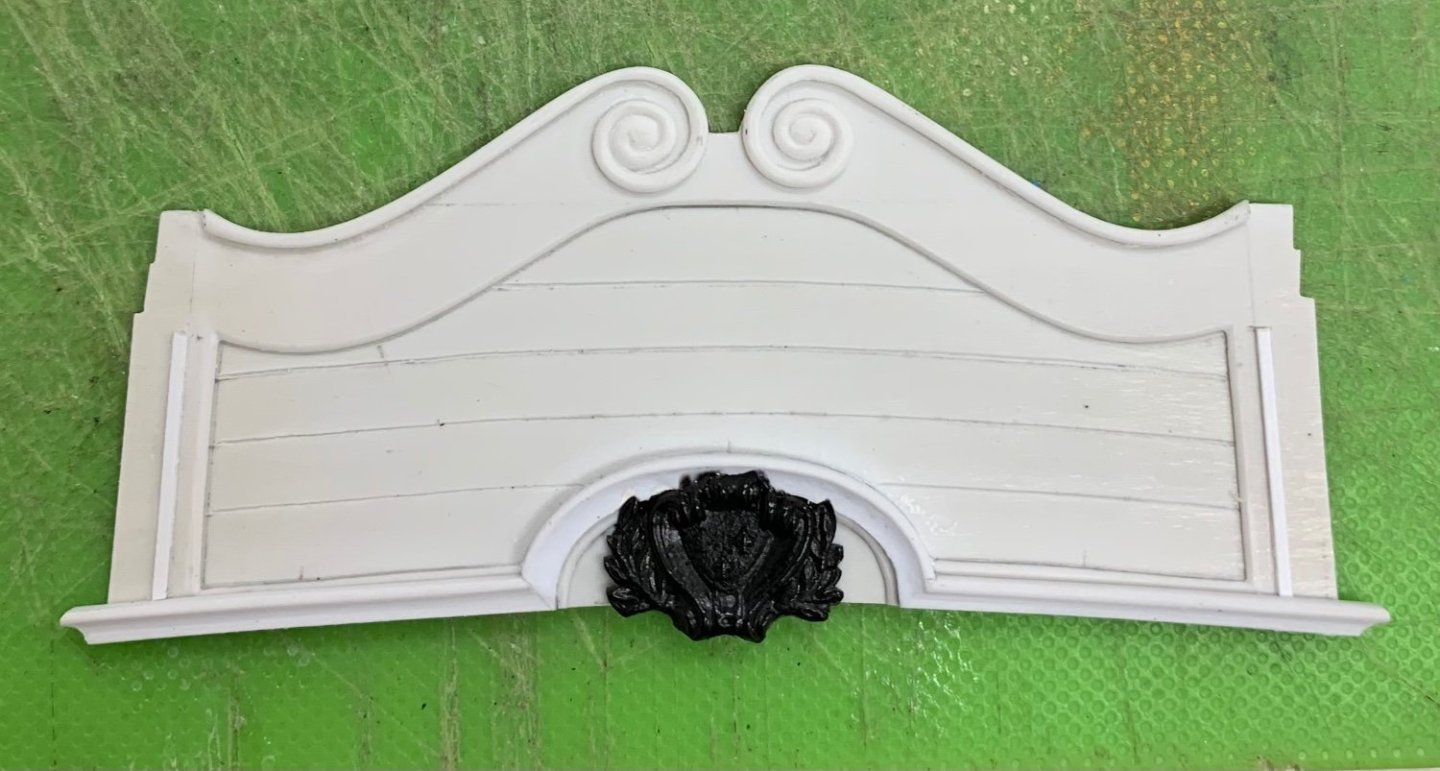
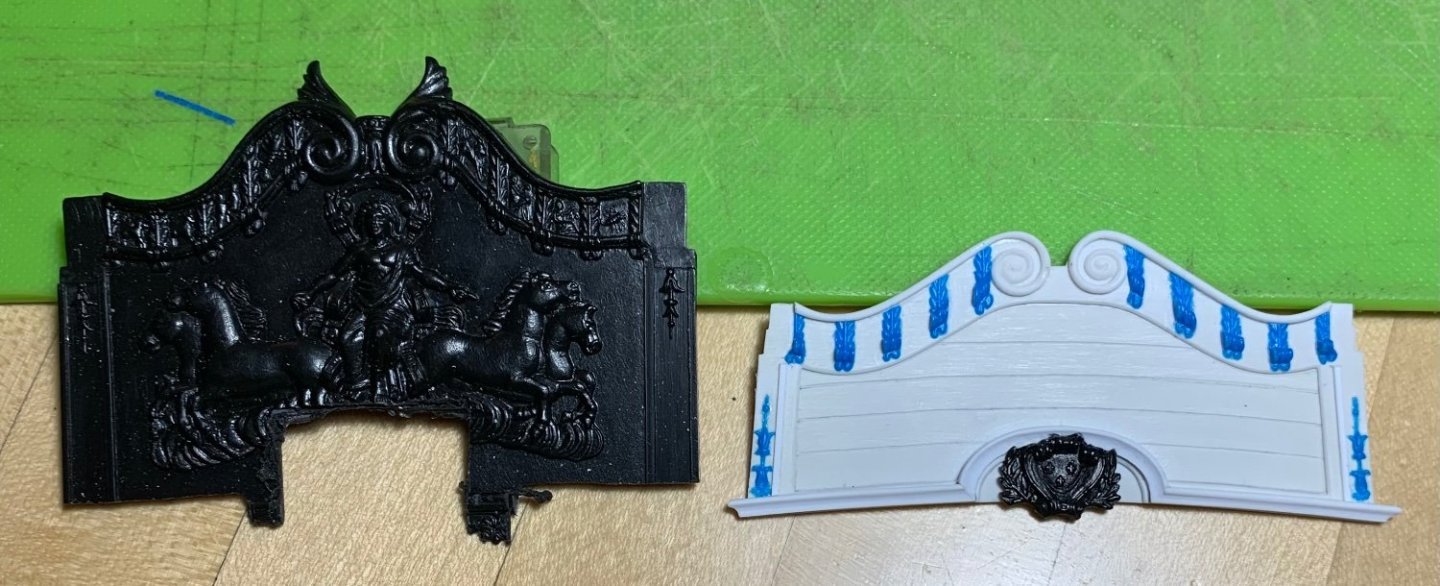
The national coat of arms is still not perfectly centered, but I am happy enough with it’s placement. To this point, here’s how the plate looks on the model:
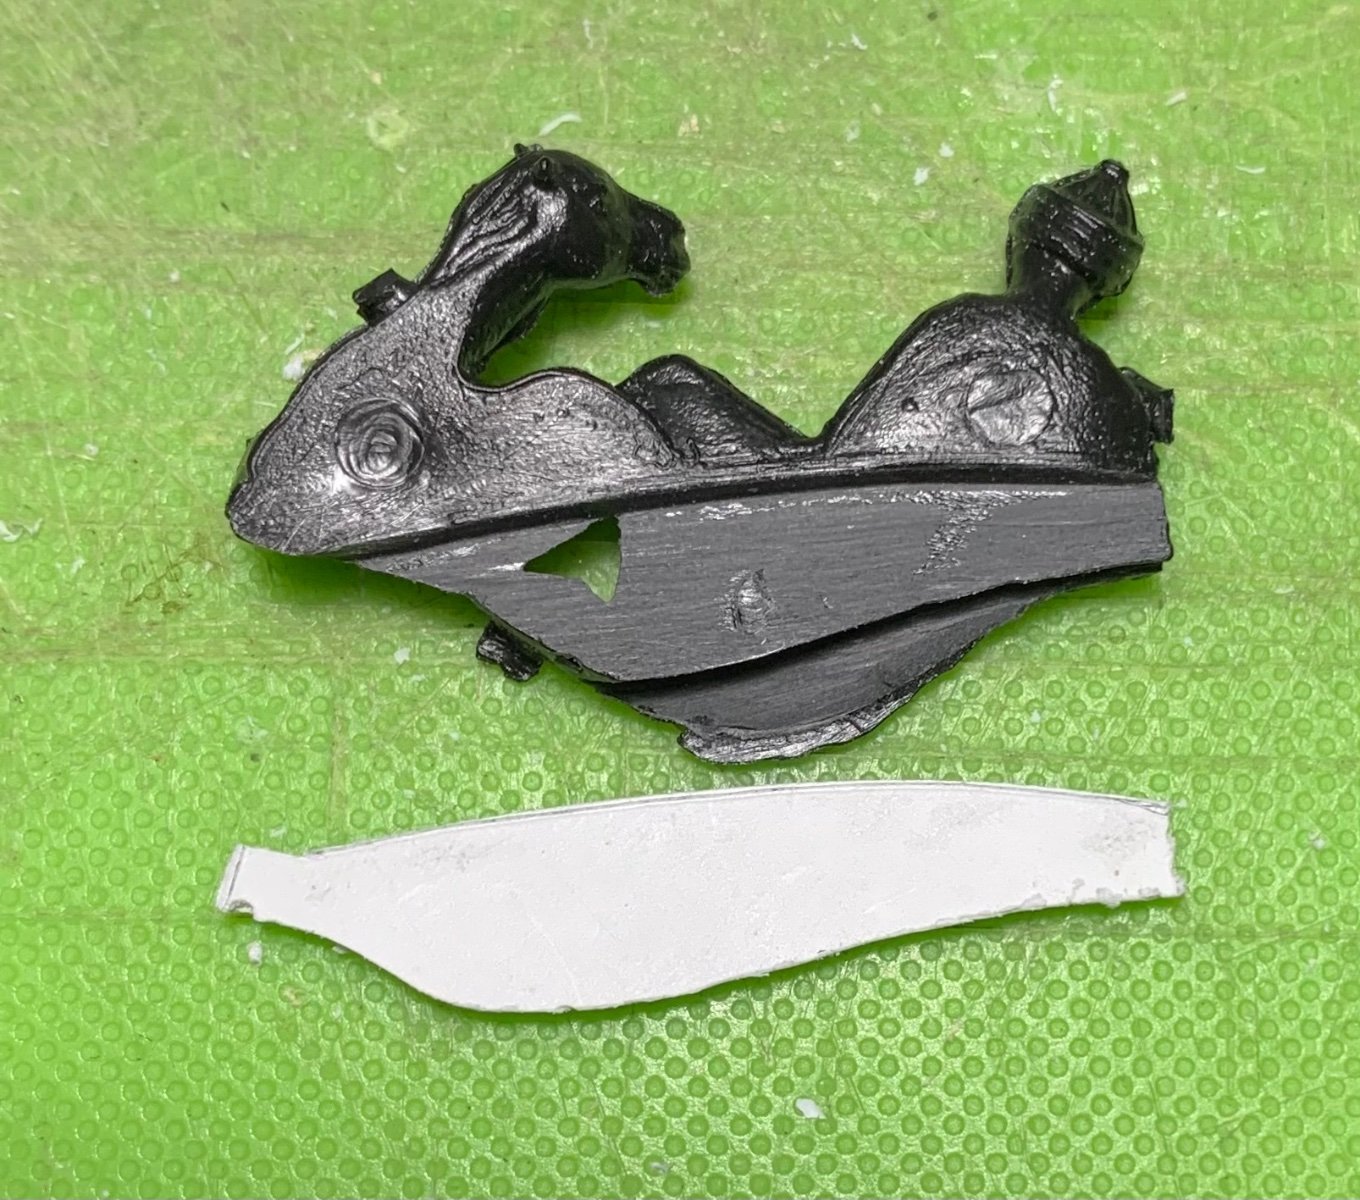
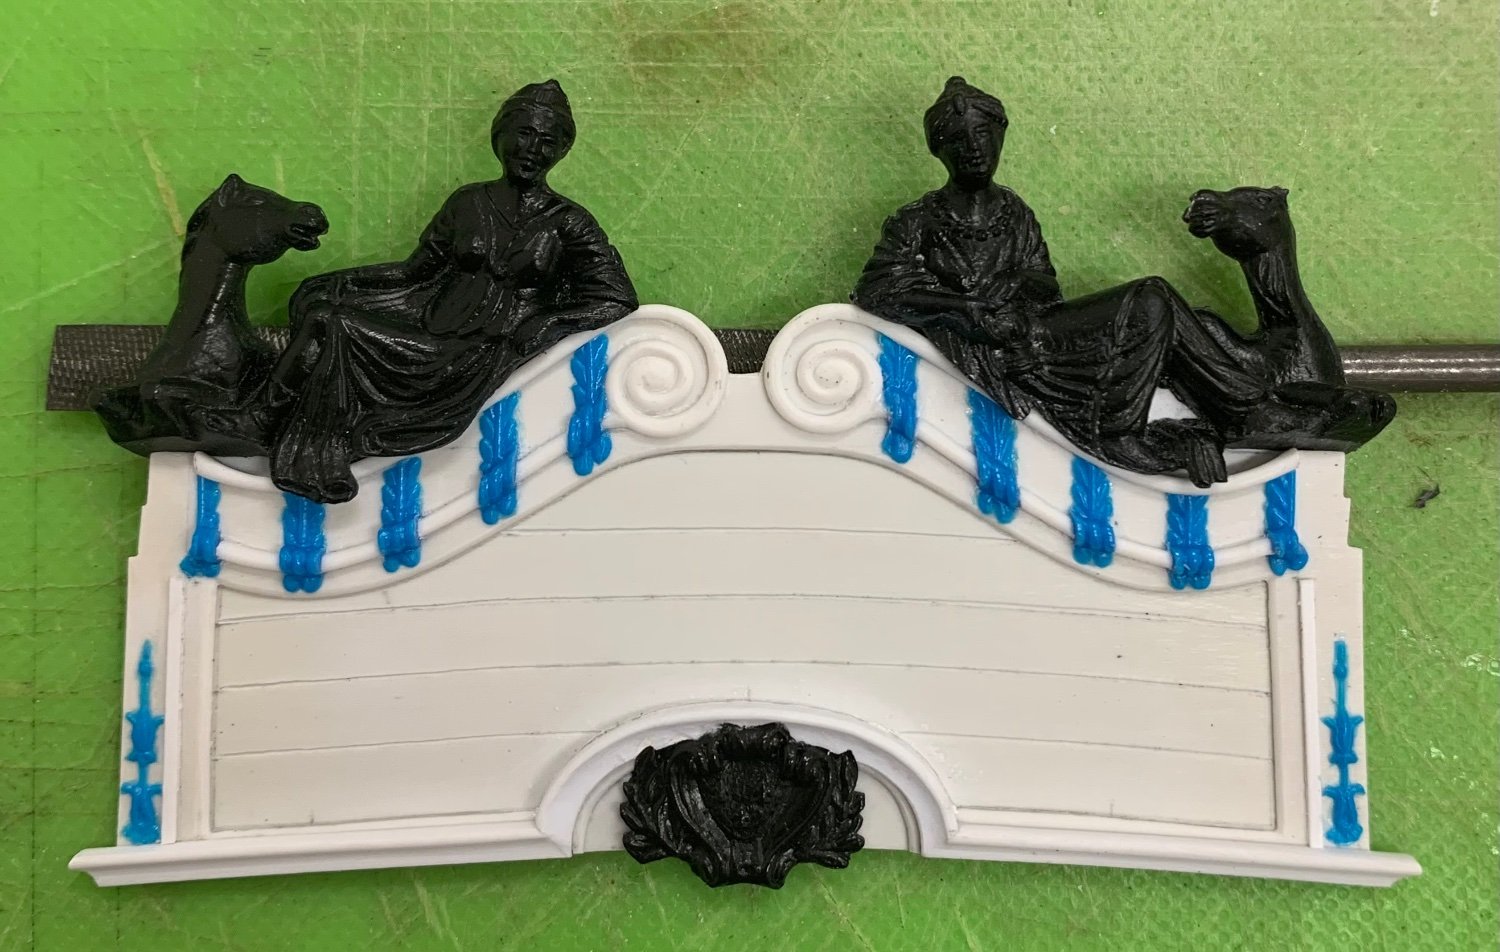
Next, was the challenge of adapting the figures of Europe and Asia. I first had to re-shape the backing to sit snugly on top of the new cornice profile:
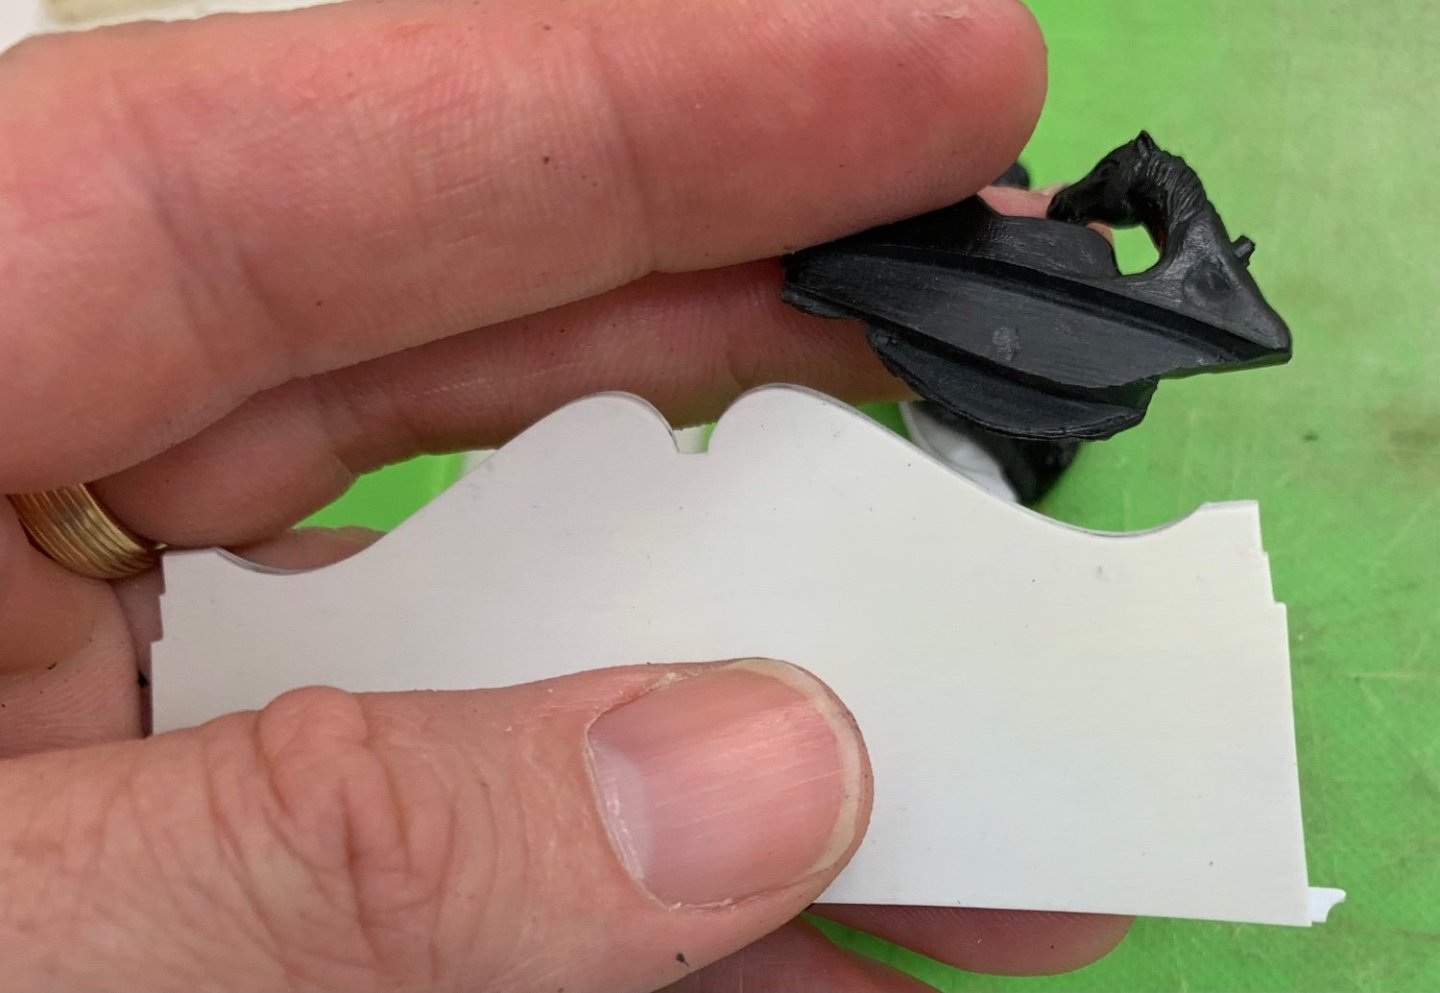
The tricky bit is the bevel that must be incised along this mating surface so that it matches the return bevel of the cornice top. Hopefully, this picture will make what I am trying to say clear:
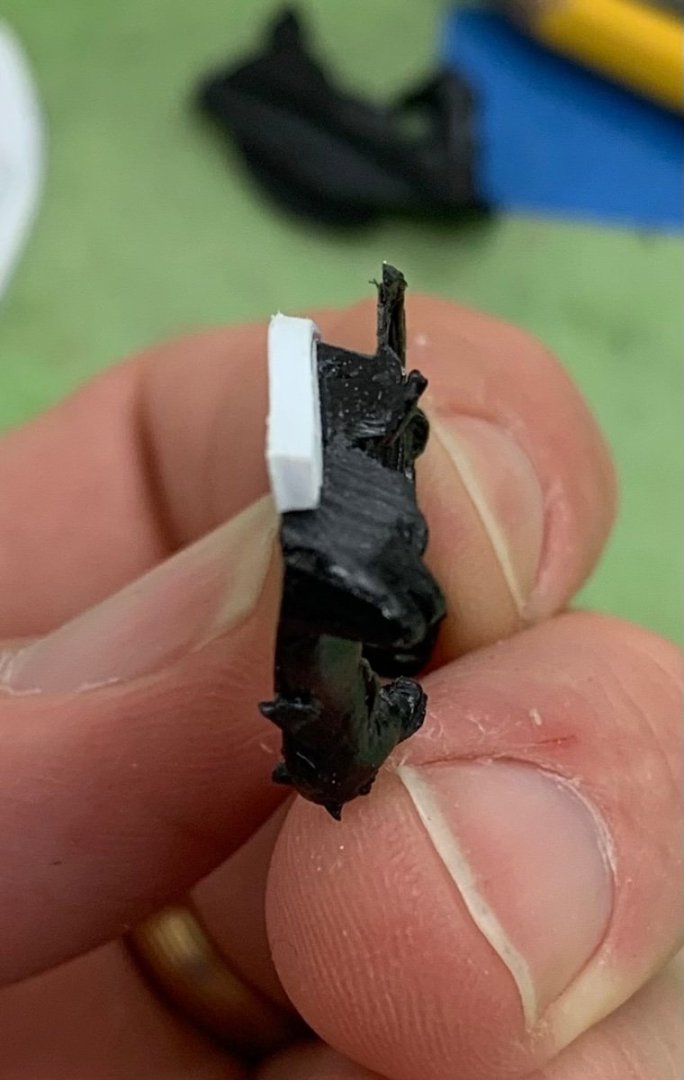
Next, I had to in-fill the back of these figures where the stock kit would have an interior planking plate above the poop royal deck. Out of the box, this plate really serves as the glue surface for these figures.

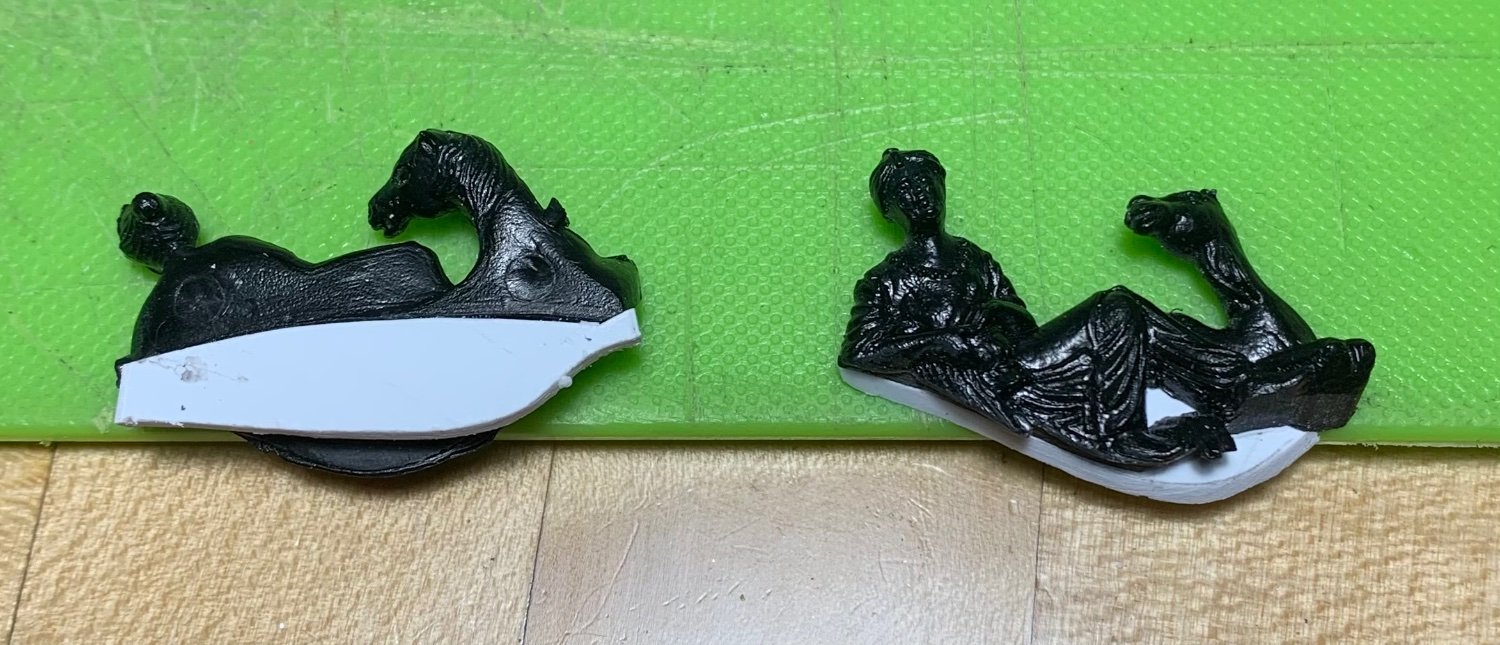
On my version, I want the reverse curves of the cornice moulding to be visible, inboard, so my figures will glue directly to the cornice cap rail. Here, Asia has been faired and filed smooth:

As I was going through all of this I began to be concerned that the apparent height of the figures was no longer in-scale with my shortened back board. However, I began to feel better about this after trimming back the lower swag of the figures’ robes, so that the cornice moulding would be visible. Here is trimmed Asia to compare against un-trimmed Europe:
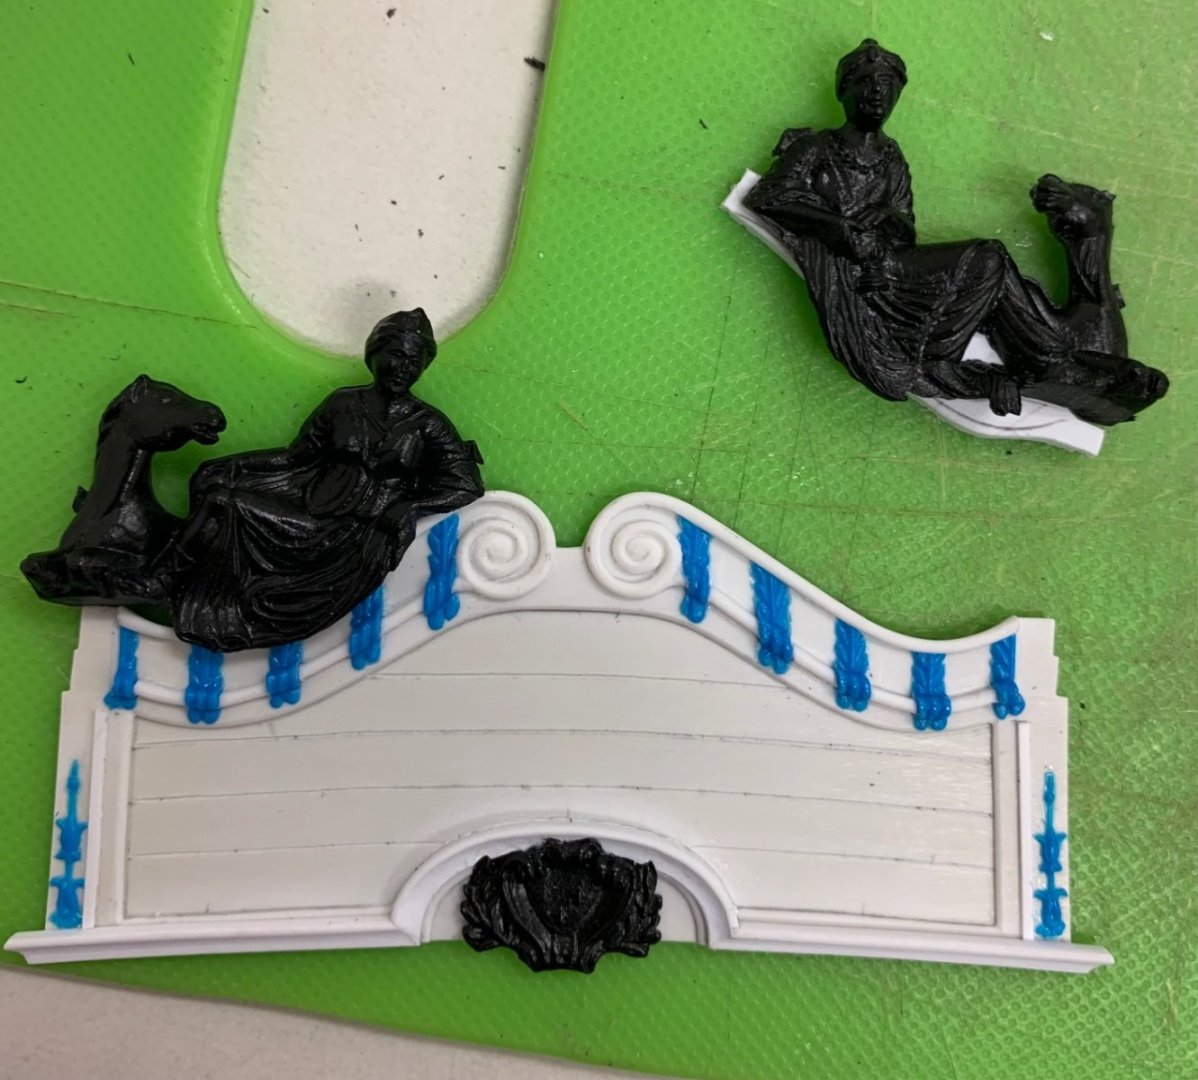
And, after trimming and final fitting both:

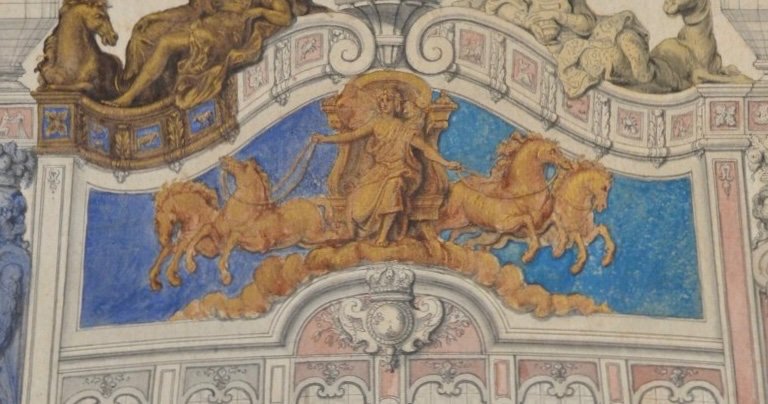
Berain’s drawing does show a little swag dipping below the upper cornice moulding, and I think this is a reasonable facsimile.
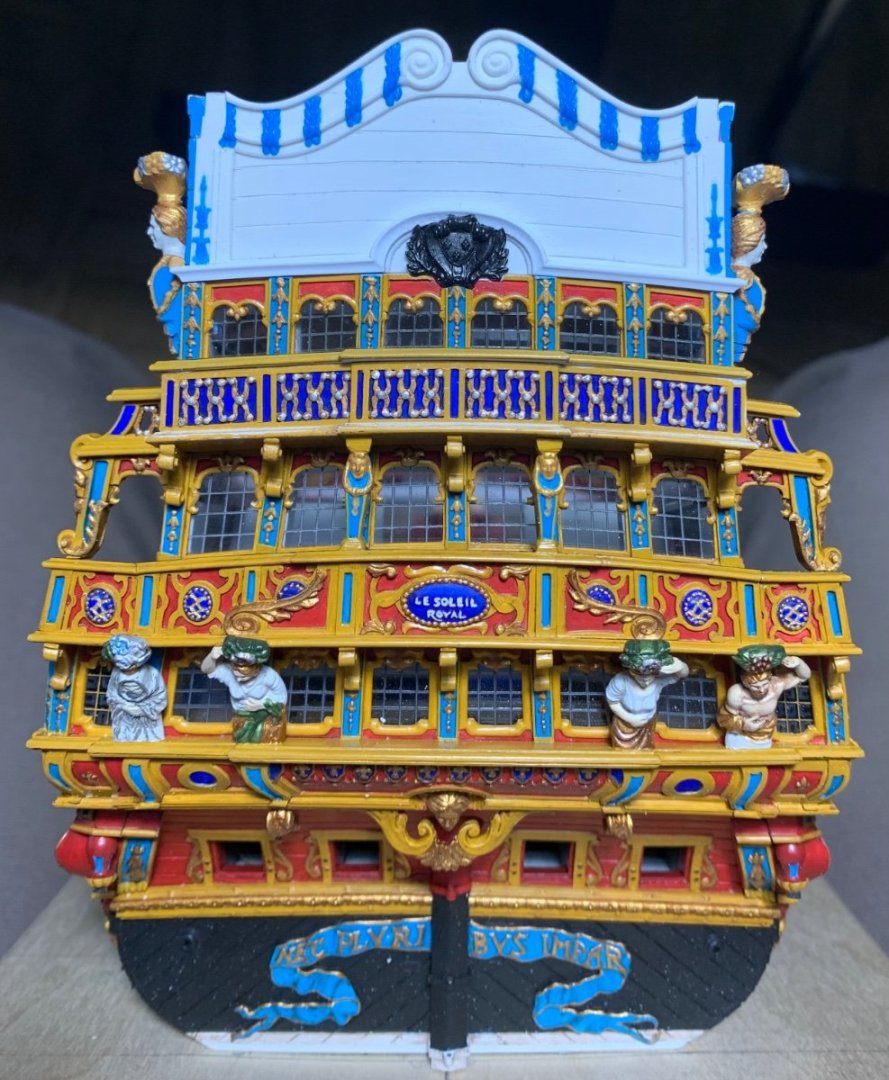
On the model:
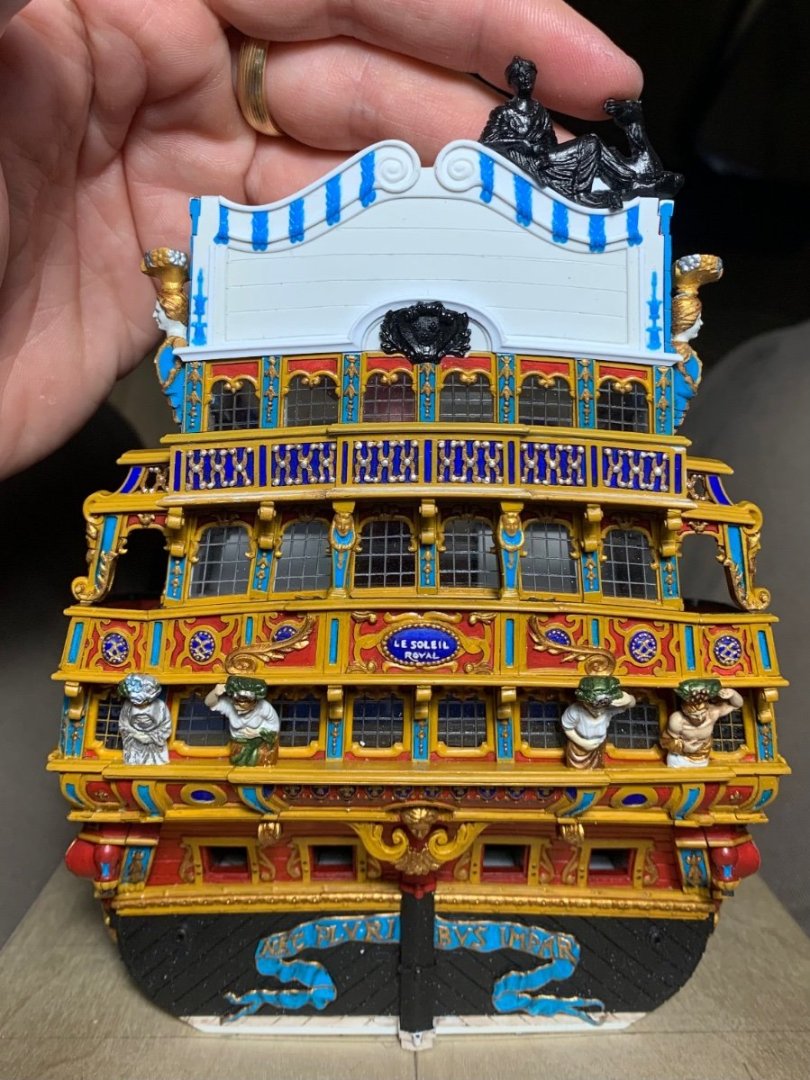
I may yet decapitate and then re-capitate the horse and camel heads in an effort to shorten their necks a little bit. I have some time to decide on that.
In the meantime, I can modify the big carving drawing a bit, so that I can begin making that. I can also begin painting the backboard. which is obviously much easier to do off the model - particularly those Zodiac symbols.
Thank you all for your interest, your comments and for checking-in. Enjoy the holiday weekend!
-
I also agree with what Ian is saying, here. The plastic in this kit is “chewy” for lack of a better descriptor, and difficult to cut into cleanly.
-
I would leave well enough alone, Bill. The additional windows give the stern view the extra visual “ballast” it needs, IMO.
-
Ferrus, you truly have an awesome name, there. I can’t help but think of Black Sabbath’s Iron Man.
All the gilt work looks tremendous, Bill!
- Ian_Grant and Ferrus Manus
-
1
-
1
-
With those really fine bits, you really need a rotary tool, like the Dremel micro, on the lowest speed setting. With a pin vise your hand pressure and movement is too variable and you will break them sooner than later.
-
[The following is in response to an observation by John Ott, on the other forum. John pointed out that my problem with centering the French coat of arms has more to do with the fact that the leaves are asymmetrical from the port side to starboard. This was a key insight for me, and one that I hadn’t picked up on.]
_____
You are right on-time with that observation, John! Nice to see you here, BTW.
Last night, I was measuring once again, and the center pilaster is only a 1/64” to port, which is visually insignificant, so your observation is right-on. I will do as you suggest, and pare down the laurel leaves on the port side.
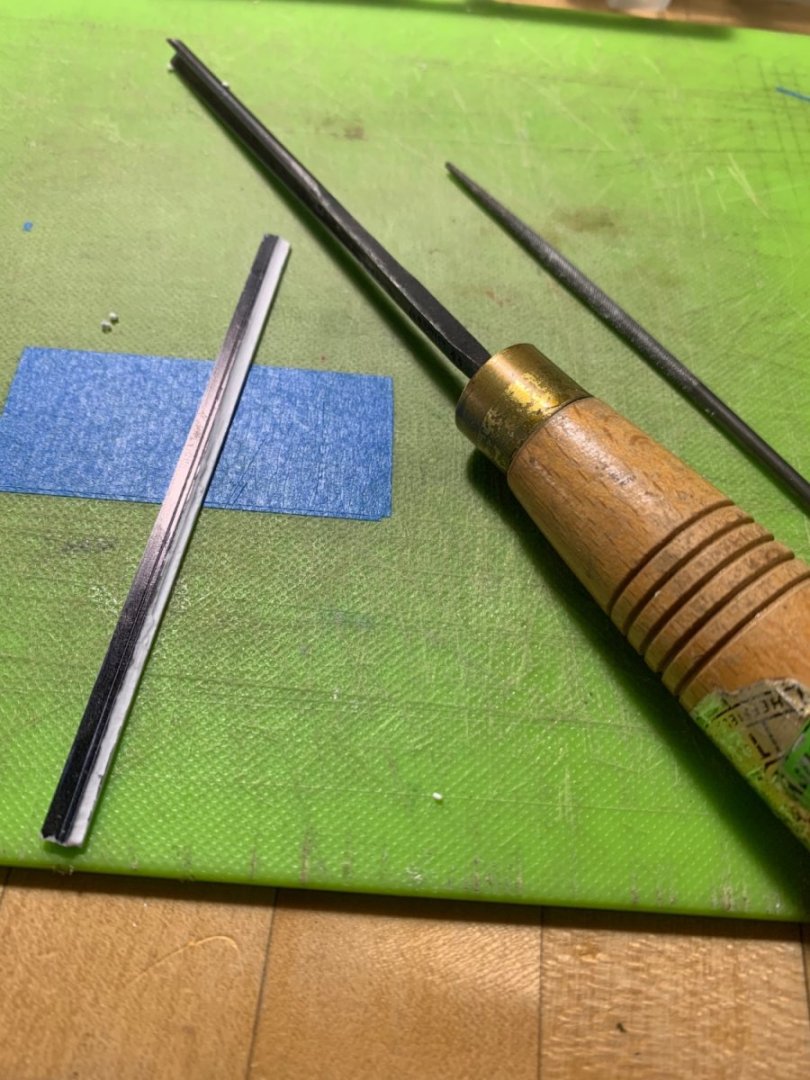
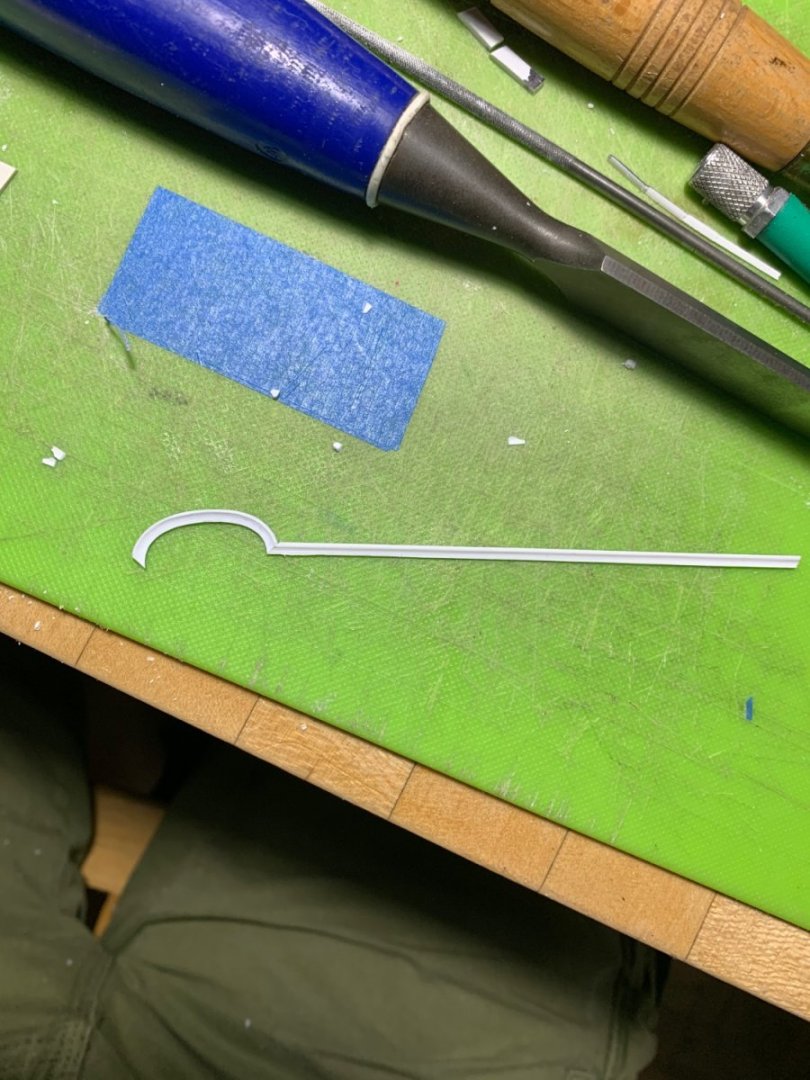
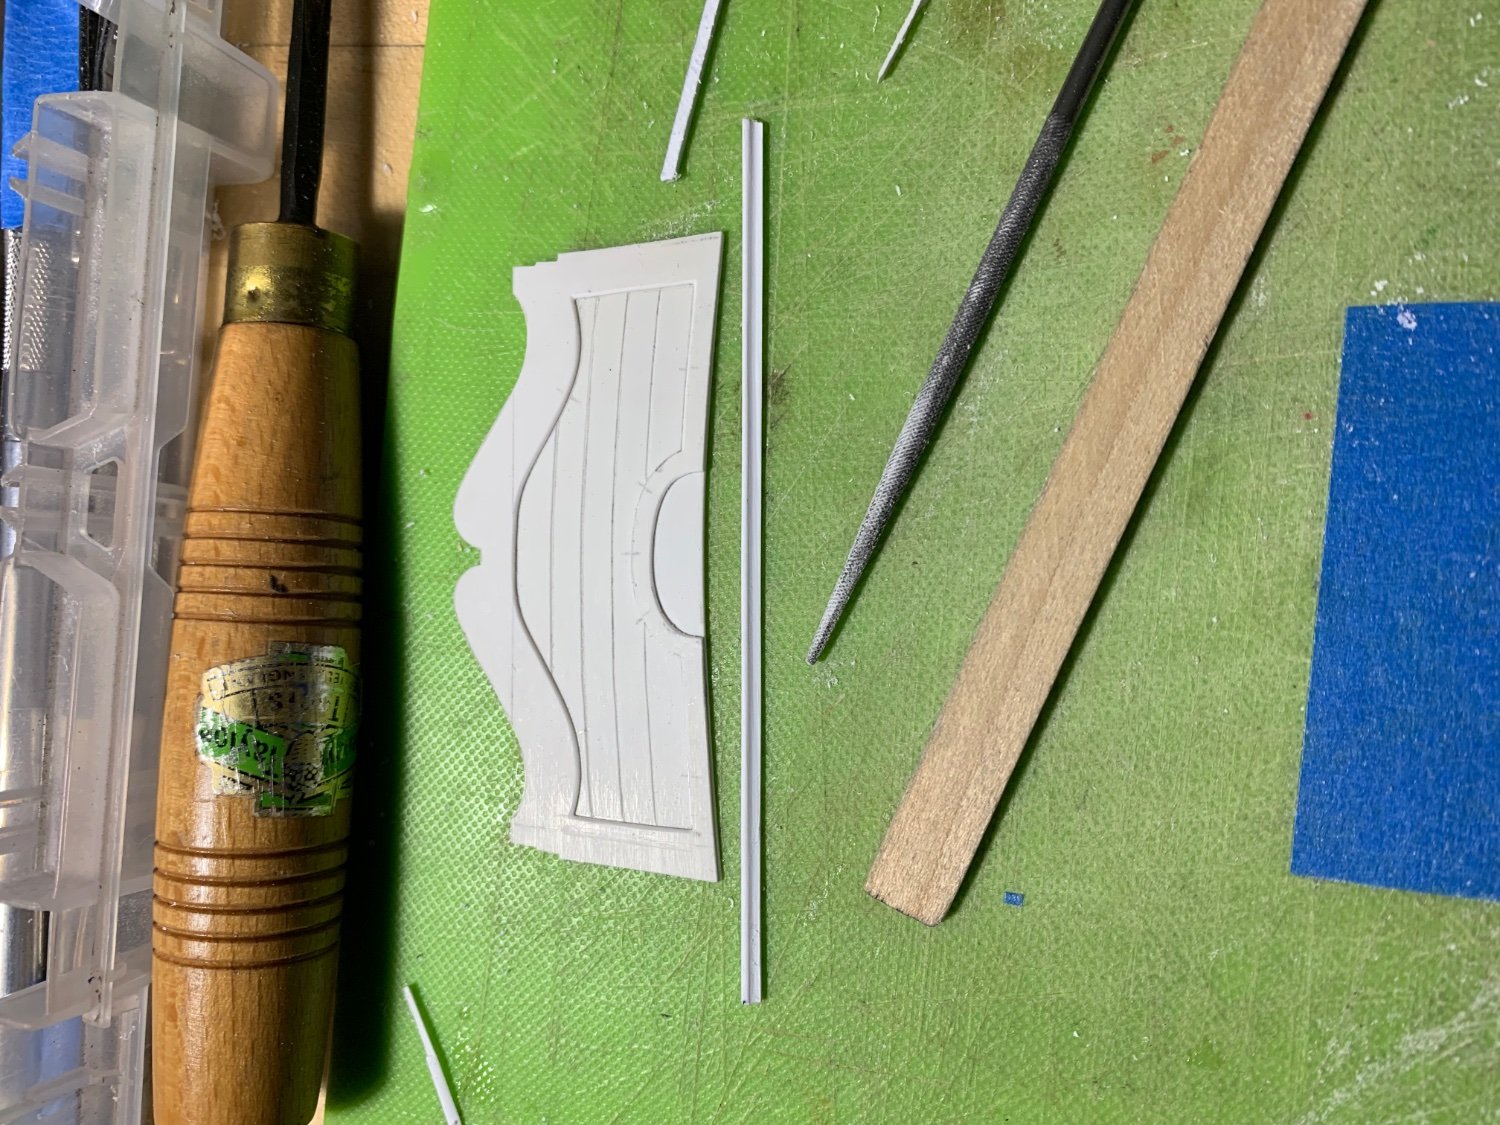
I’ve been making the moulding that defines the lower boundary of the big carving. On Berain’s drawing the shadows indicate an architectural moulding of some significant weight:

I experimented with making a coved profile scraper from a hacksaw blade, however, the arched center section of the moulding would be difficult to scrape if the scraper tracked along both outside edges of the moulding stock; there’d be a lot of chatter in the profile. Instead, I tried to make a scraper that would only track along the bottom edge of the moulding, cutting the low shoulder and coved profile only. This wasn’t working well, either, on my straight stock.
I decided the best course was to carve the moulding by hand with a gouge:
I first blacked the main face and small shoulder side with a Sharpie. I then scribed two razor reference lines, so that I’d know what the boundaries of the coved profile should be.
I started with the straight stock:

After carving the cove, I used a round file to smooth out any irregularities in the surface. Lastly, I used a sanding stick to round over the top profile.
Feeling confident now, I applied the same procedure to the coved section of moulding:
I cut a test miter just to see how the two profiles mated. It’ll require a little finessing of the profiles, at the final fitting, but this is not a big deal.
I spent a little time this morning perfecting the fit of the tafferal plate. This enabled me to position the arched moulding which, as it turns out, had to shift a solid 1/32” to port so that it centered perfectly over the 3rd and 5th pilaster. This helped my coat of arms situation a little bit:
Now, with John’s insight in-mind, I can file down the port side a little bit and then add a little material to the starboard leaves. These adjustments should bring me pretty darn near to center. Once that is corrected, I can inlet the coat of arms into the arched moulding.
Thank you, John Ott! -
This is a truly extraordinary and beautiful execution of this model, Daniel. A real sense of the maker in the work. Congratulations!
- mtaylor, Forlani daniel and druxey
-
3
-
After what has been a very busy time with many competing interests, I’ve been trying to restore some momentum for the project.
I’ve been working steadily, albeit at a snail’s pace, on the bow and stern. This pile of crooked pick-up sticks will eventually become my cambered head grating:
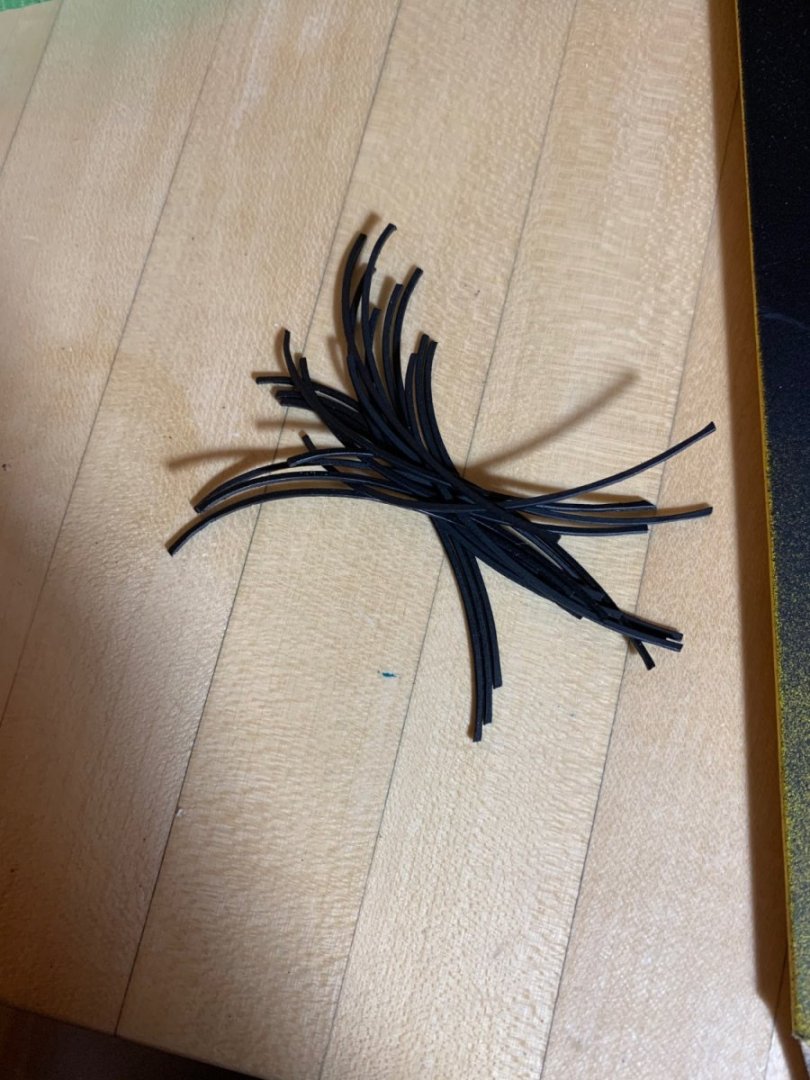
Each slat section is hand-fit and placed by eye. It will not be possible to neatly align these next three tiers of fore and aft slats with the splayed set immediately aft. This is an imperfect compromise that I can live with. In the end, after the grating surface has been sanded smooth and re-painted flat black, these small discrepancies will hardly matter. It looks like it is going to work out just fine:
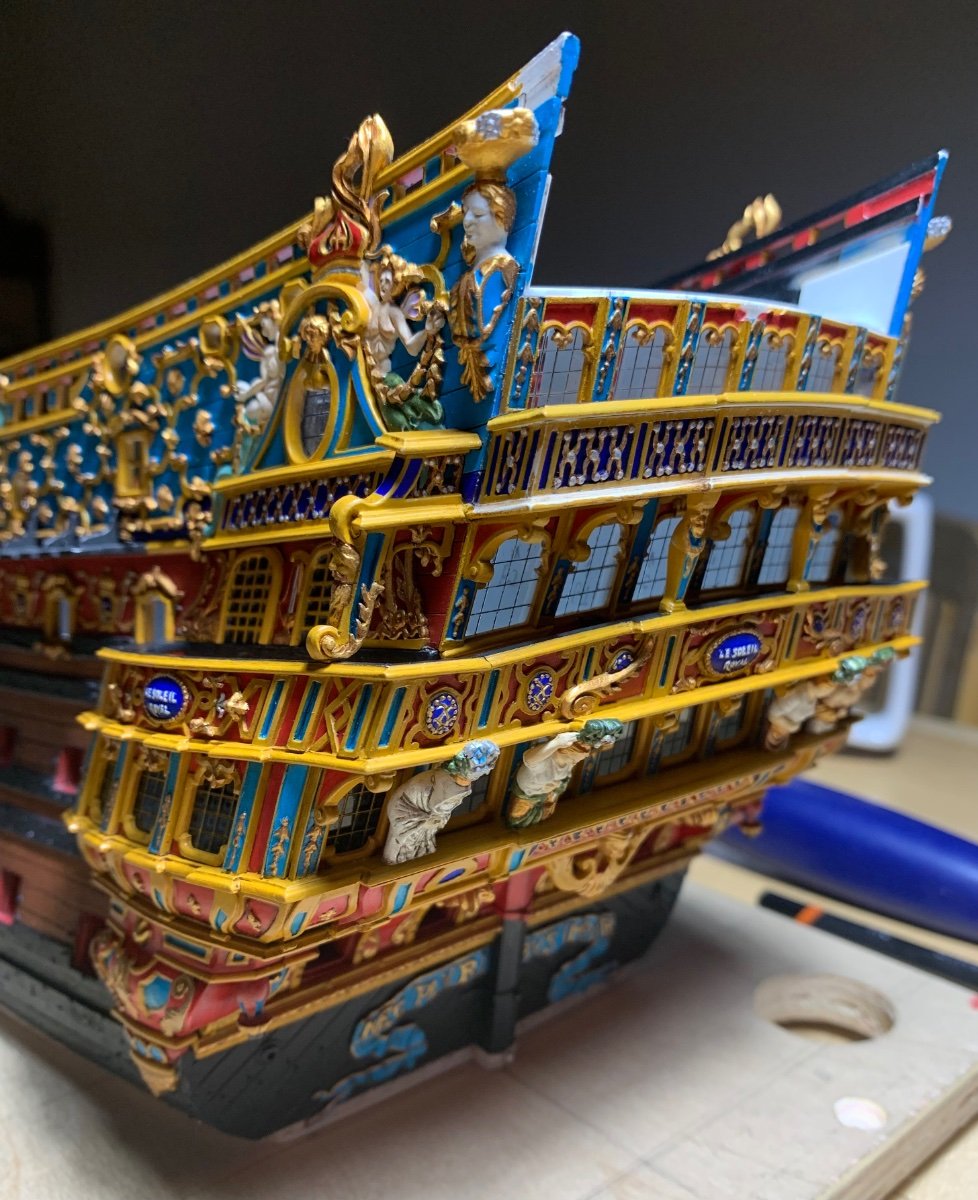
There’s a significant amount of paint re-touching that has to happen - which I have not been in the mood for - but the upper balcony rail is in-place now; again, imperfect in multiple ways, but I am happy with it:

When I really have the focus and determination to, I will re-visit the paint.
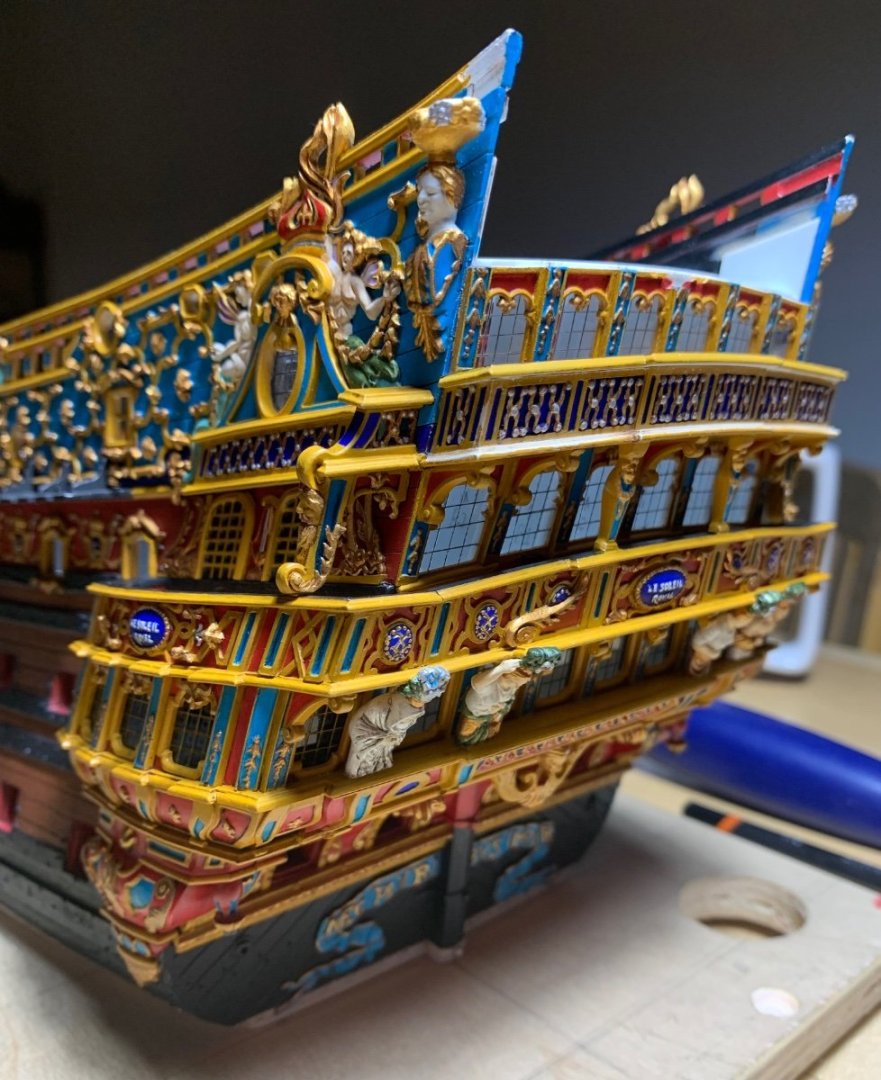
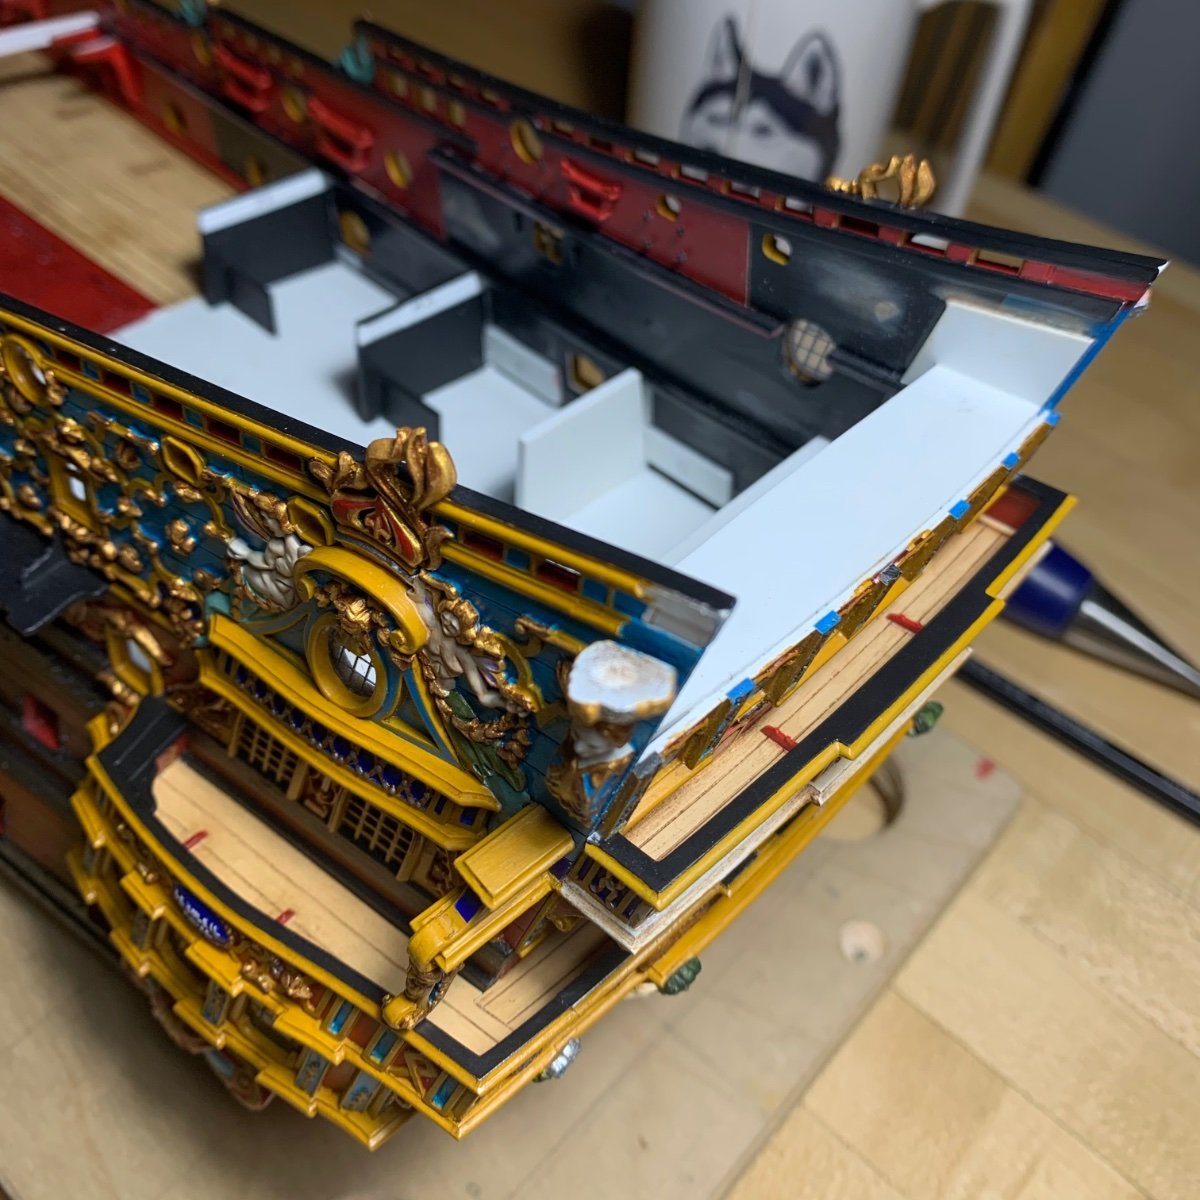
What has excited me, lately, is that I have finally reached the stage that the entire ornamental program has been inching towards for years - the coronation of the stern!
These past couple of days, I’ve been making up and fitting the two primary layers that make up the tafferal:
It will take a combination of subtraction and addition, but I am feeling pretty confident that the stock sculptures for Europe and Asia can be re-worked to fit my new cornice shape:

Unlike the stock kit, which has an interior backing plate that extends above the reverse-cyma curves of the tafferal, I will make it so that the tafferal shape is continuous to the poop deck.
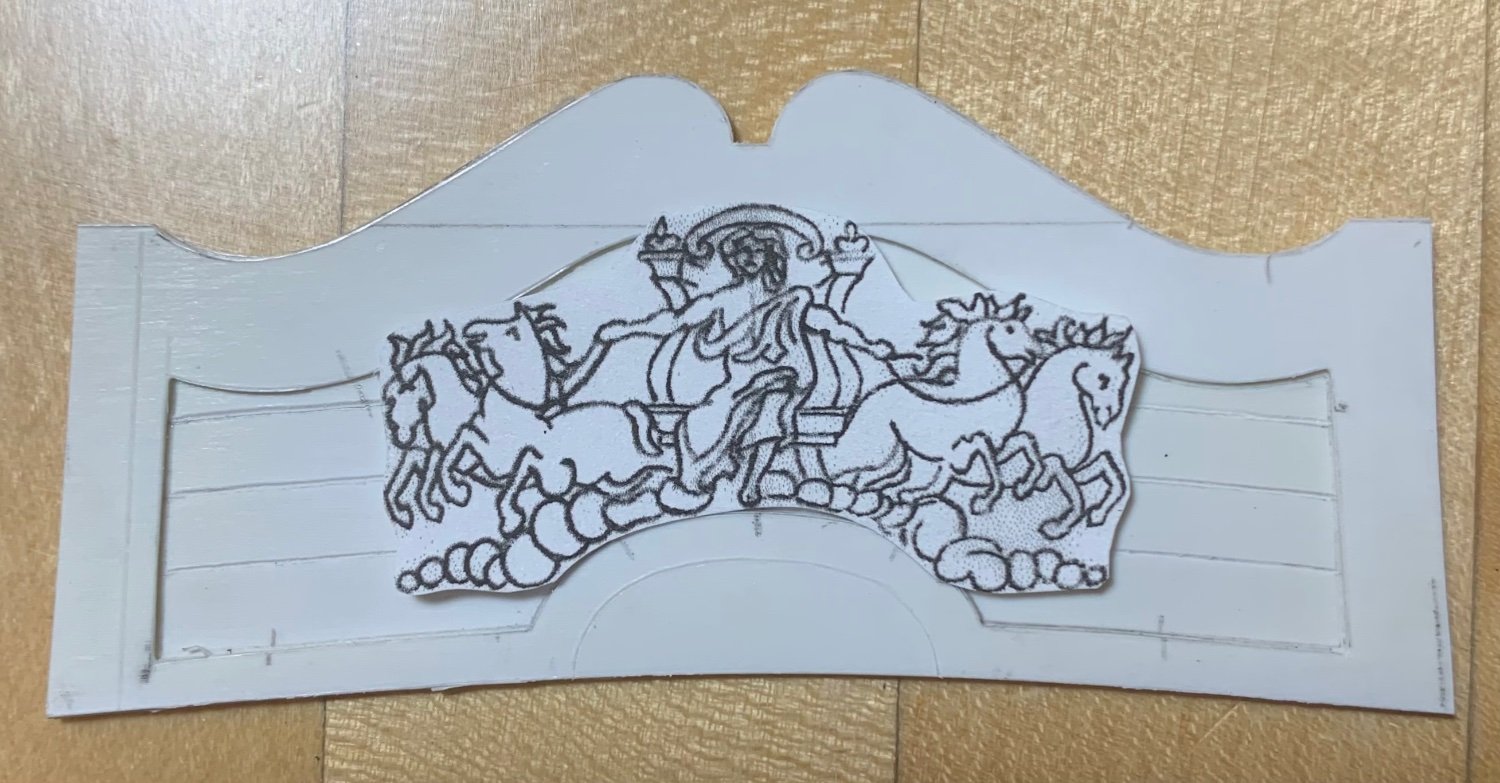
I took some care to scribe-in plank lines for the tafferal backing boards:
I am happy that I increased the camber of the middle and upper window tiers because it lends an appropriate sense of lift for the big carving. The extremities of the clouds will be slightly modified so that they sit lower against the frame.
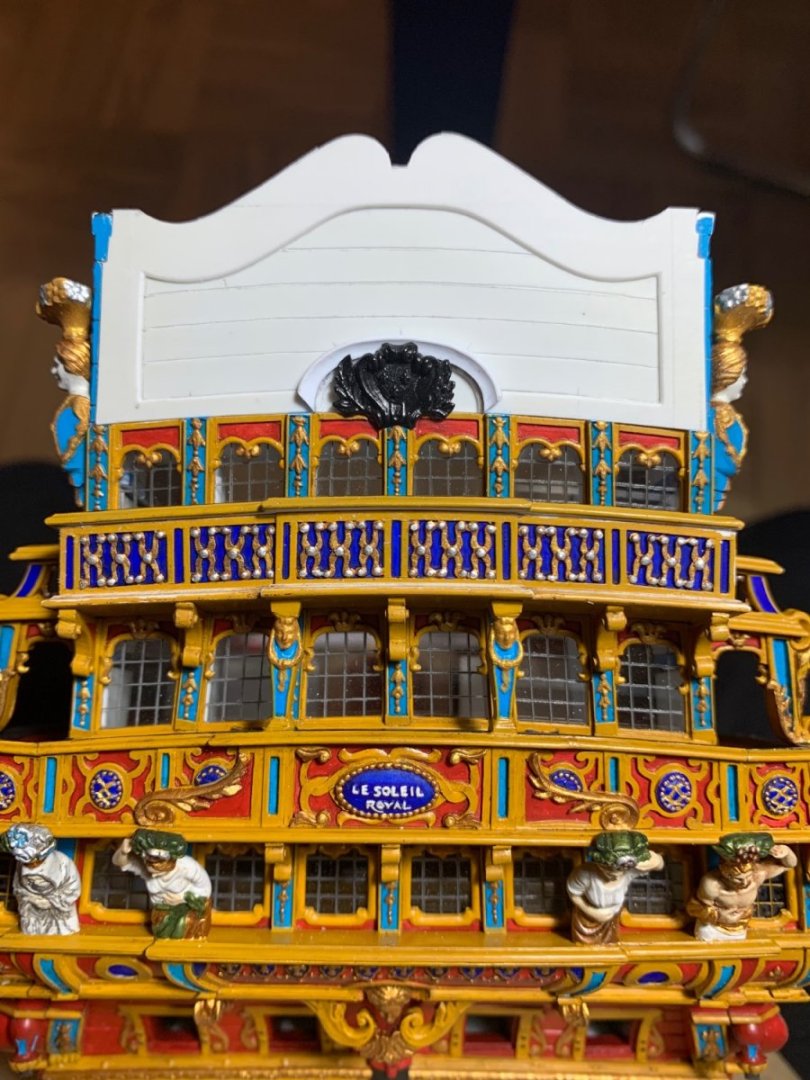
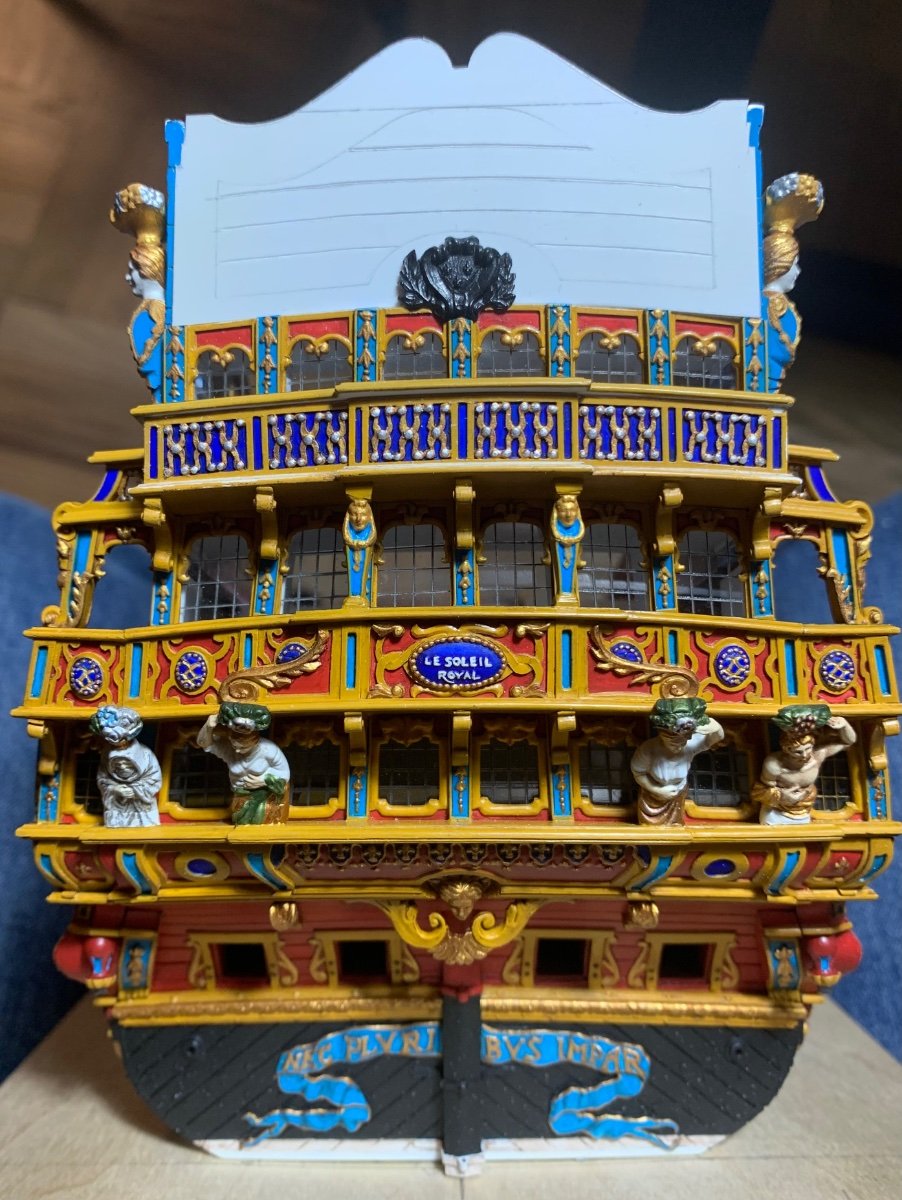
The national coat of arms now fits within the dome:

While these arms are centered on the central window pilaster, they won’t be perfectly centered within that dome shape. I checked the dimensions of the tafferal framing, and that dome shape is perfectly centered. This discrepancy has likely to do with cumulative error stemming from some aspect of the layout for my lowest or maybe the middle window tier.
At this stage, there’s no fixing it, and like all of these discrepancies they will kind of fade to the peripheries of consciousness when the completed stern is considered in its entirety. For the most part, the important details look more right than they do wrong. Most especially, I think I have nailed the correct shape for the big carving panel and the shape of the cornice:
There is very much work and layering of detail to come, but I am pleased with where it is all going.
Thank you all for your interest!
-
-
Although not technically correct, I plan to display my port lids fully up and against the hull: not correct because the geometry of the lid lanyards would not allow for the lids to be raised this high.
My rationale is that I spent a lot of time on those lid ornaments, and I want them to be visible. They are, after all, complimentary to the frieze.
I will have two glue points: at the hinge barrel and where the outside face of the lid meets the edge of a wale. Because these parts are vulnerable and probe to breaking off, I won’t bother installing them until the end of the build.
-
You know, you might be right about that Baker. It’s a long time since I built my first one out of the box, and for this version, I had to make a bunch if them from scratch so that they’d fit my new balconies, which are more shallow than stock.
In any case, it is easy to just check the corbels to the underside of the balconies to see what the fit looks like.
-
-
It looks as though there are some mis-print issues with those instructions, Bill. Yes, you have two different sizes of balcony corbels. The shorter ones are for the upper stern balcony. The longer ones are for the middle stern balcony. Actual part #63 is shown as part # 156, in the instructions, but they are one and the same.
I like the fleurs you sourced for the gun port lids!
-
-
-
-
This is spectacularly clean work, Matthias. I really like your breastrail upgrades.
-
Truly, Matiz - every bit of this is beyond the beyonds!
- mtaylor and Keith Black
-
2


Roter Löwe 1597 by Ondras71
in - Build logs for subjects built 1501 - 1750
Posted
Absolutely superb result, Ondras, and an honor well deserved - CONGRATULATIONS!