


Hubac's Historian
-
Posts
3,220 -
Joined
-
Last visited
Content Type
Profiles
Forums
Gallery
Events
Posts posted by Hubac's Historian
-
-
-
As always, B.E., a very impressive build!
- hollowneck, Blue Ensign and mtaylor
-
 2
2
-
 1
1
-
Many congratulations, Bill, on completing this magnificent model. I have always thought this model looks best on its waterline, and the diorama you have created shows her to best advantage.
I look forward to watching your Endeavor take shape!
-
Trust me - justice is being served, here. Great modifications!
- Ian_Grant and Malcolm Brown
-
2
-
This remains one of my favorite models, Siggi. The paint work is beautiful, but aged to perfection so that it is not perfectly pristine. The woodwork is beautifully executed and always in-scale, and the symmetry from port to starboard is beyond reproach. I also like that this tine period for English warships is the beginning of the end for elegantly rising sheer-lines; in the following decades everything becomes significantly flatter.
- Siggi52, davec, Keith Black and 3 others
-
6
-
On 2/23/2024 at 6:07 PM, Ian_Grant said:
I'm sure it was always her dream to see this ship, Malcolm. HaHa. Welcome to MSW; I am your newest follower.
Seeing the photo with the foremast head in place reminds me to recommend:
By all means glue the mast heads on, but leave off the cleats on the side faces on fore and main (for the jeer block lashings) and any rigging blocks for now. Reason being is that it is far easier to loop (the served) shroud pairs around a suitably sized drill or dowel for seizing then slip them over the masthead and down, rather than trying to seize each in turn around the masthead. Once the shrouds are in place the mast cap and topmast (and the jeer block cleats) can be added.
Ian, your insights into this kit are just incredible. It would never have occurred to me to think this far ahead.
-
Great video, Bill. I never realized there was fore and aft duct work to help ventilate the hold.
-
Hi Malcolm! I love your Victory. I’ll enjoy watching you bring her to completion.
-
-
Hi Mark - it is great to see you working again!
About a decade ago, I had a pretty vexing bout of sciatica. My deteriorating hip and the resulting over-compensations are what were driving it, but I found quite a lot of relief through specific yoga stretches that helped open my lower back. Also, a lot of hamstring stretching. After the hip replacement, the sciatica went away, but I still do the stretching routine every day.
I wish you relief, as I remember how debilitating that particular problem can be.
-
For carving the split-tail tritons out of wood, my inclination would be to carve from the thighs, on up, first, while leaving the twisted lower legs oversized and for last. Before carving them, I’d make a backing piece that the carving fits into, and temporarily fix it in-place with a glue that could be dissolved in alcohol later. This support block should have a long enough handle, or extension, so that it can be clamped in a vice for working the fine details.
You have done really beautiful work! I’m enjoying the build very much.
-
Thanks for the reference, Eric! This is all shaping up very nicely.
- Bill Morrison and EricWiberg
-
2
-
Eric, can you please remind me where you purchased these rivets from? They look like the ideal fastener for my chain preventer plate links.
- Bill Morrison and Ian_Grant
-
2
-
Ian, we are here for that when you do start your SR. You know you want to 🙃
-
-
You are very right about that Bill. It is a task that I know how to go about with some efficiency and guaranteed clean results, and that is comforting. ‘Especially so because I have spent quite a lot of the past five months in a state of observation and contemplation over how, exactly, to tackle the more difficult and unfamiliar aspects of the build.
Apart from the deadeye strops, I really wasn’t happy with any of my other link-making for the chains. Finally, I remembered that Andre Kudin has produced an extremely detailed YouTube log that accompanies his MSW build of Le Fleuron. Granted, he is working in 1:48, and with a substantially heavier gauge of wire, but his chains have no kinks or tell-tale deficiencies of technique, so I searched through his videos to see exactly what he does.
I’ll do a more detailed post on this later, but Andre has absorbed the lessons of the great contemporary Russian masters, and he has quite a lot of original ingenuity that he demonstrates so clearly in his videos. Suffice it to say, for now, that Andre gave me confidence to pick up with that project again and know that I can achieve similarly excellent results. His videos really are superb and you can turn-on English captions to understand what he’s saying and appreciate his humor.
Although I wish I were more active with the actual building of the model, I console myself with the understanding that this mental incubation period is useful and necessary to become a better modeler that isn’t intimidated by metal work or rigging.
We all get where we’re going eventually.
- Jeff T, mtaylor, EricWiberg and 3 others
-
6
-
Gary, congratulations on finding a home filled with eager and inquisitive eyes for the Underwood. Work of your standard and attention to detail is precisely the sort that might inspire someone to give the hobby a try.
I love the elegant lines of these workman boats that you build. The Pelican is shaping up beautifully.
- AJohnson, Retired guy, Keith Black and 5 others
-
7
-
1
-
Truly lovely Eberhard, a thing come to life. This is exquisite work in such a small scale!
- FriedClams, Keith Black, druxey and 2 others
-
5
-
Well, Micheal D. (72Nova) did an excellent job of setting his full-hull SR into a seaway. He showed me a few pictures, at one point, and as I recall, the case base was made deeper to accept the depth of the hull below the waterline. I can’t remember what his approach was to making the water, but it really looked great.
-
I thought it might interest you to take a look at the brilliant Andre Kudin’s video series for his Fleuron, 1729. In this installment he is making the lid lanyard grommets. His process for doing this on a wooden model isn’t as important as what the finished grommet looks like. Granted, there is a good 50+ years between Fleuron and SR, but there is some insight to be gleaned.
You can turn on English subtitles in his videos to understand what he is saying. Andre is an extremely resourceful modeler, and his Fleuron is a true gem of the craft:
- Archi, Bill Morrison and EricWiberg
-
3
-
Skids look awesome, Eric! That’s a whole lotta’ drilling, but it will be worth the effort in the end.
- Bill Morrison and EricWiberg
-
2
-
Boudriot and Lemineur are the period authorities on the matter, so I would trust that they have read the fine print on these small details.
- EricWiberg and Bill Morrison
-
2
-
Hi Eric,
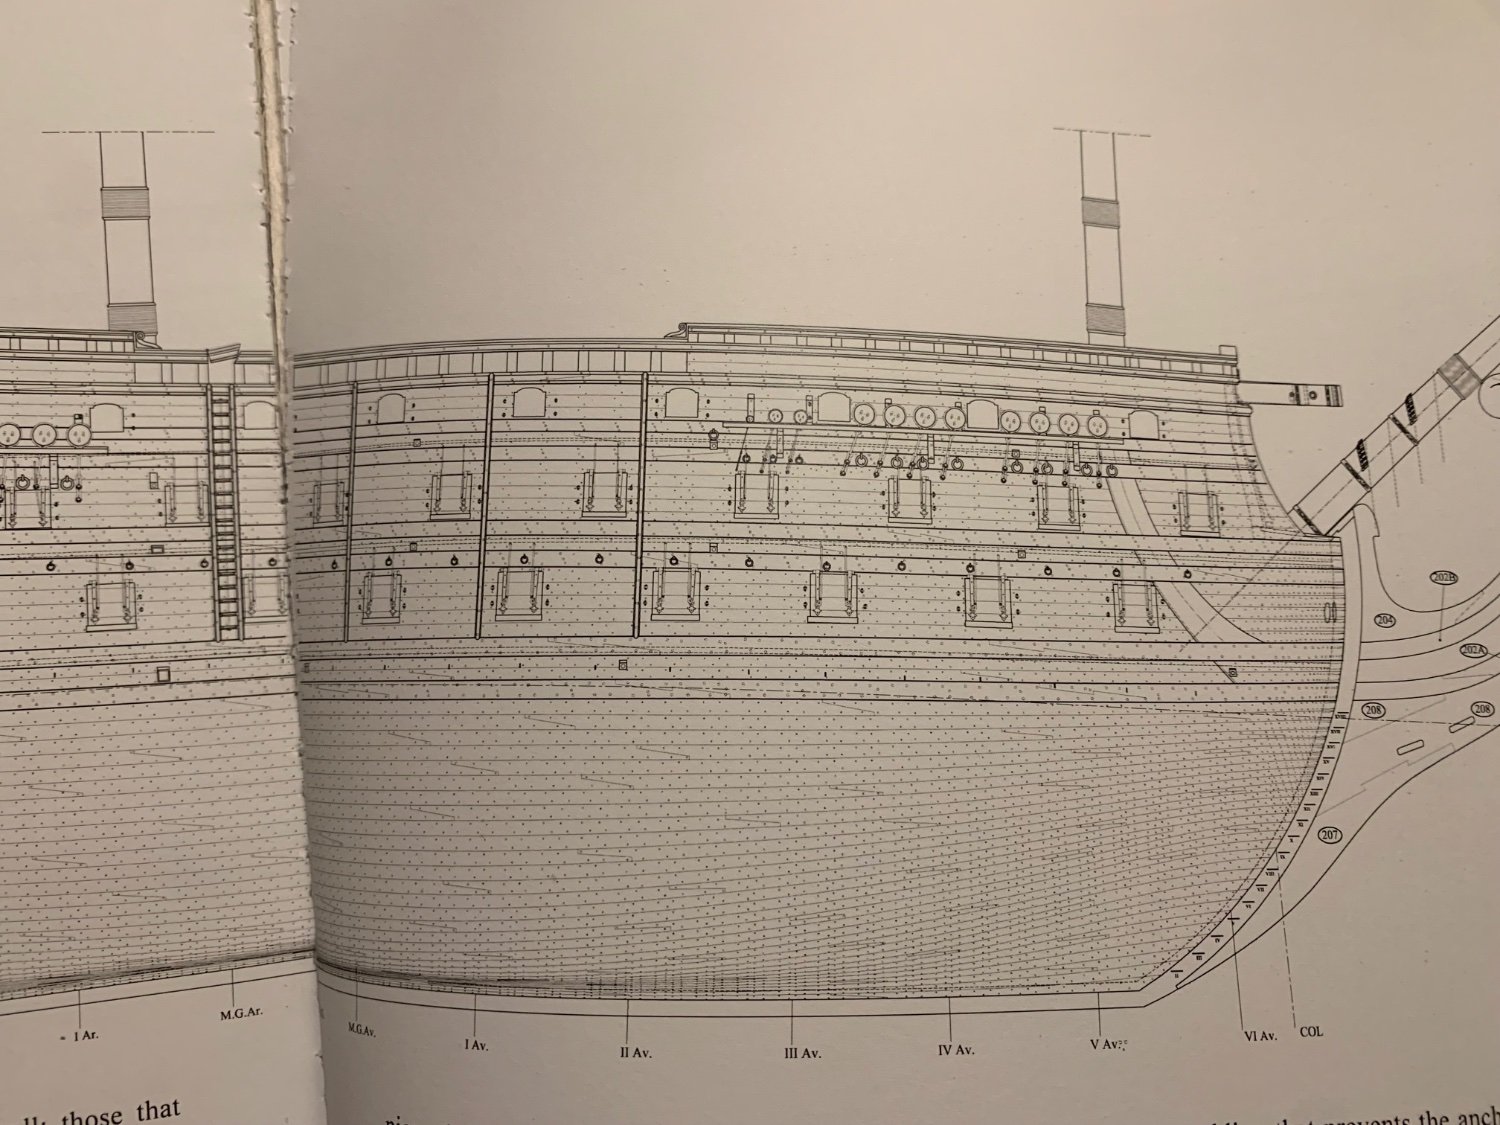
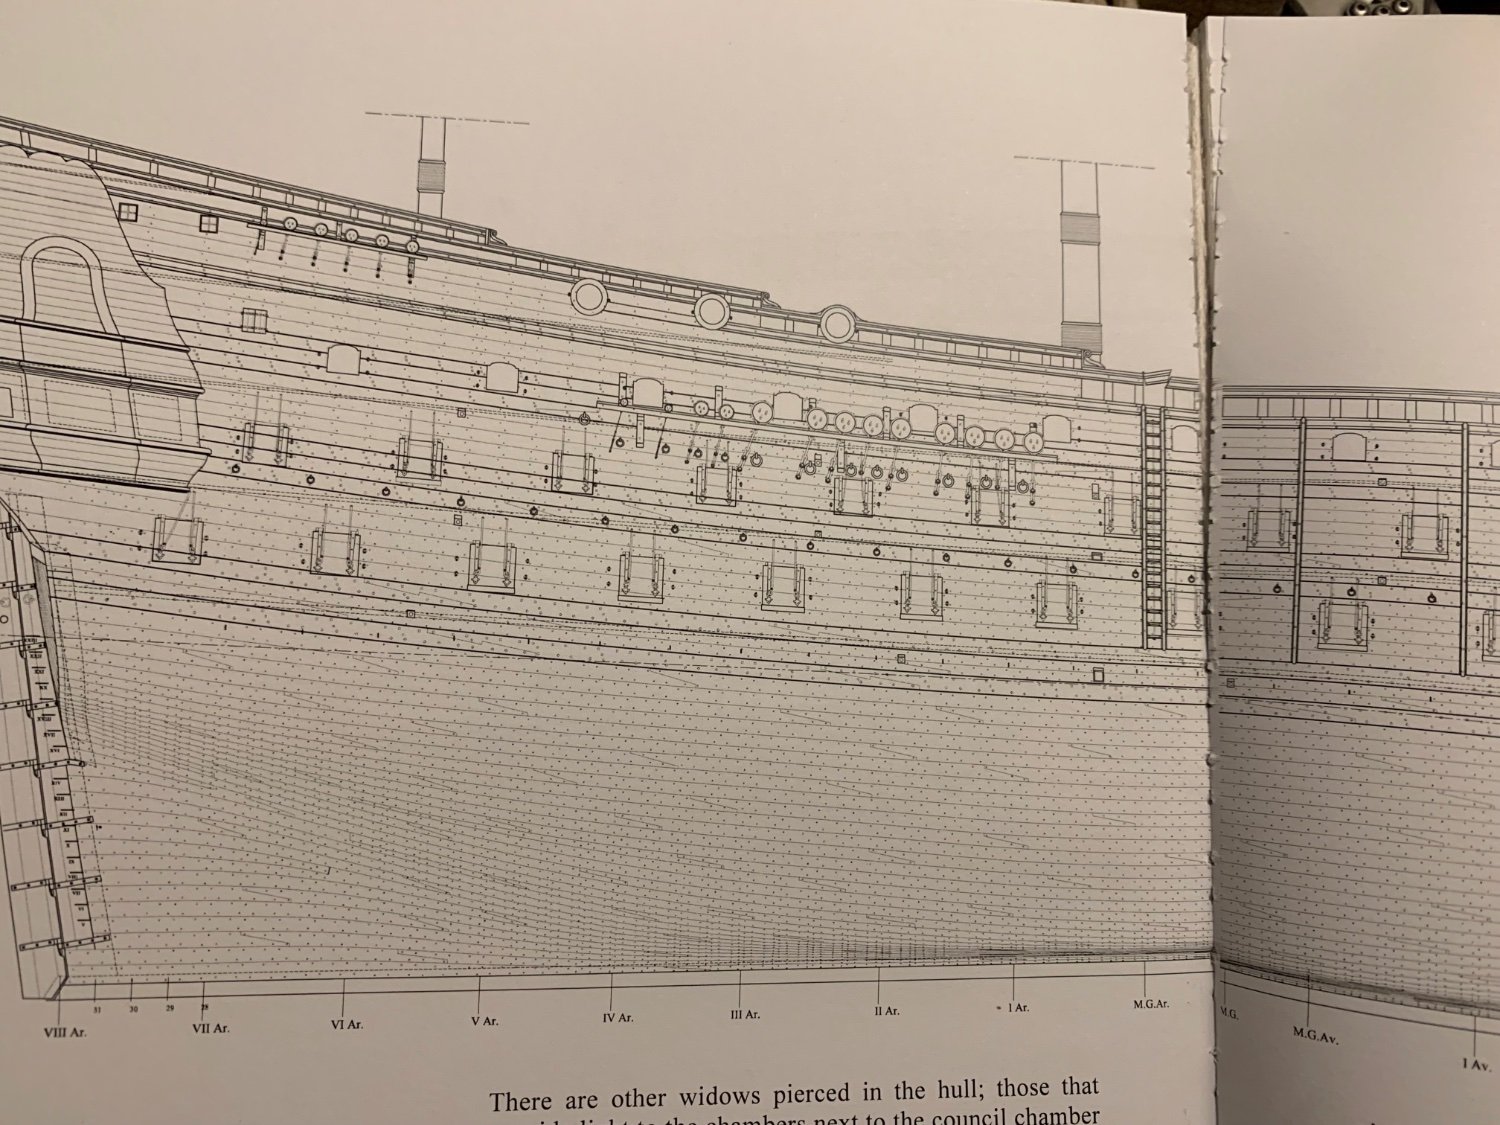
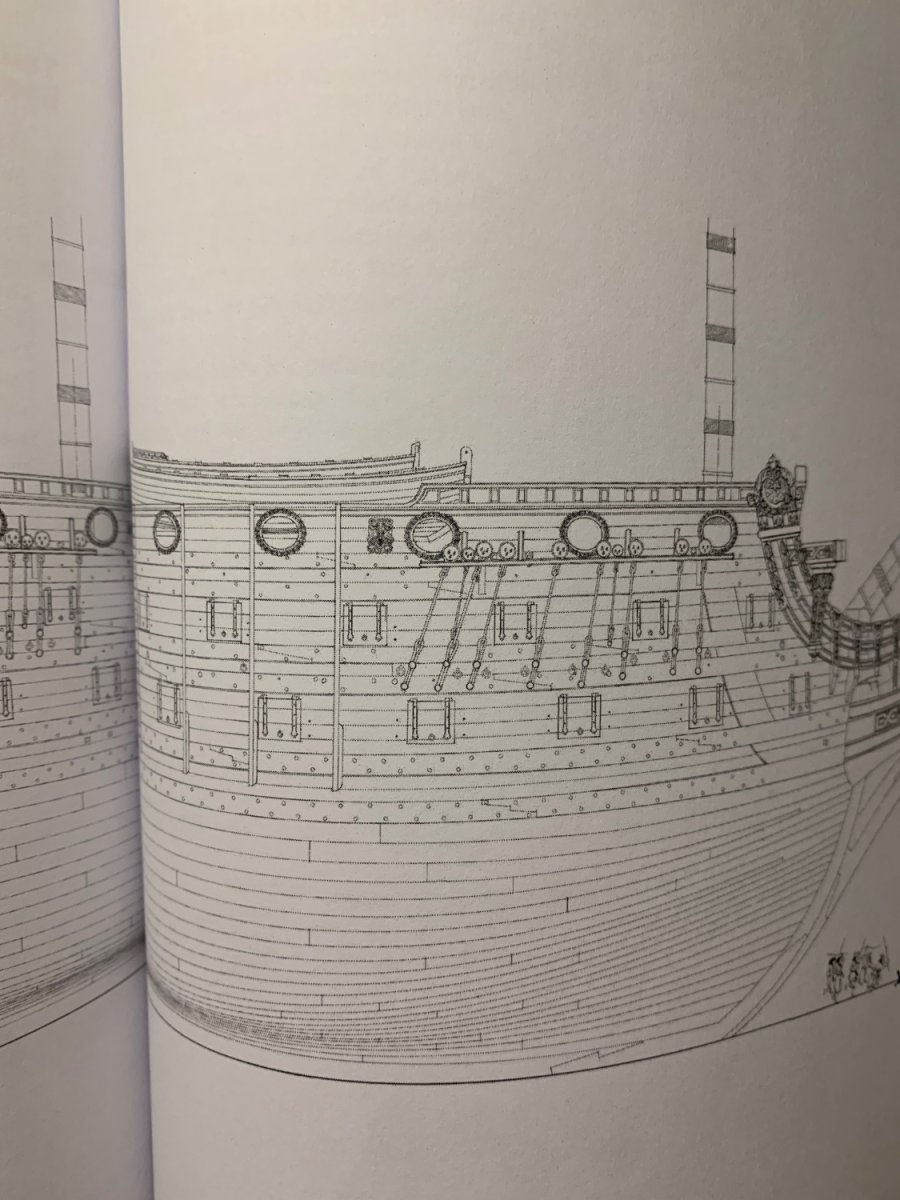
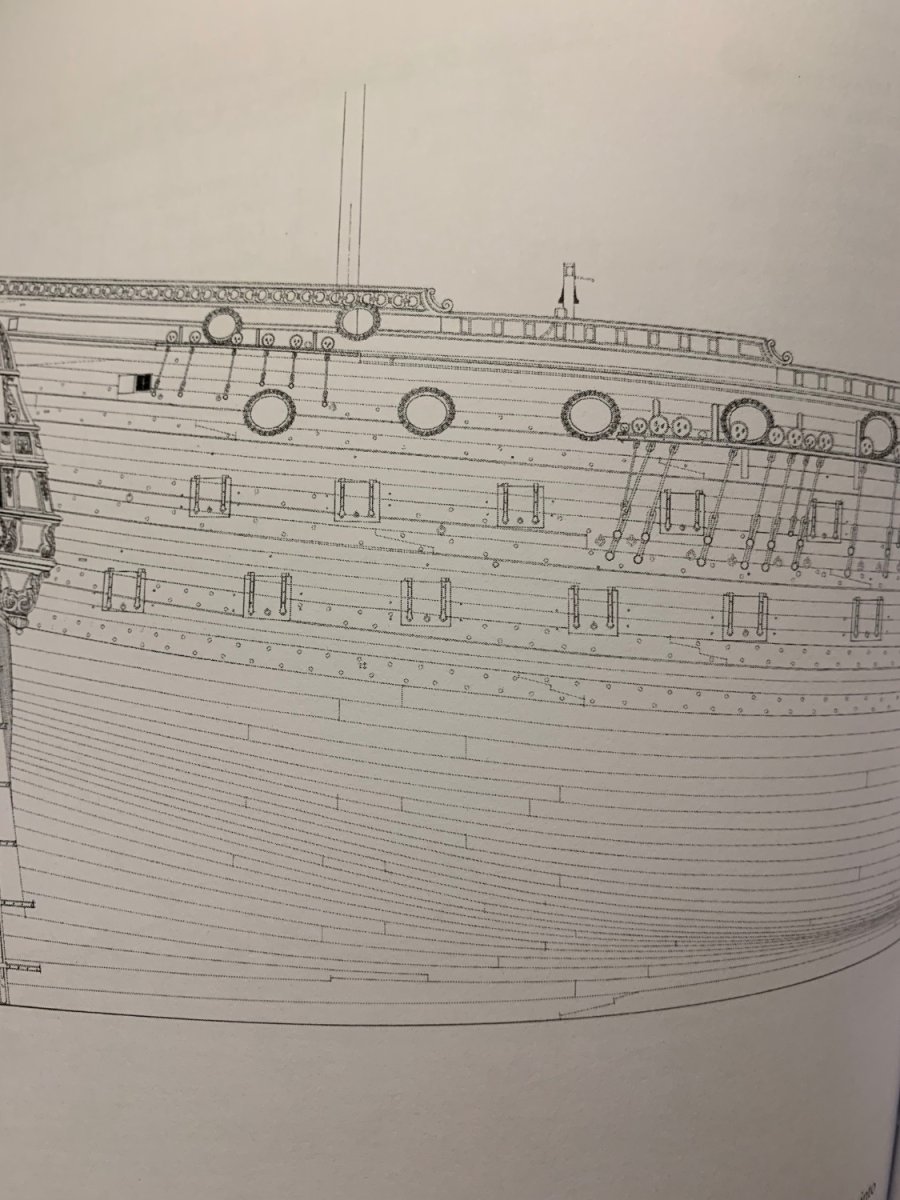
The St. Philippe monograph shows an equidistant transition that crosses the wale and pierces it around mid-ships:

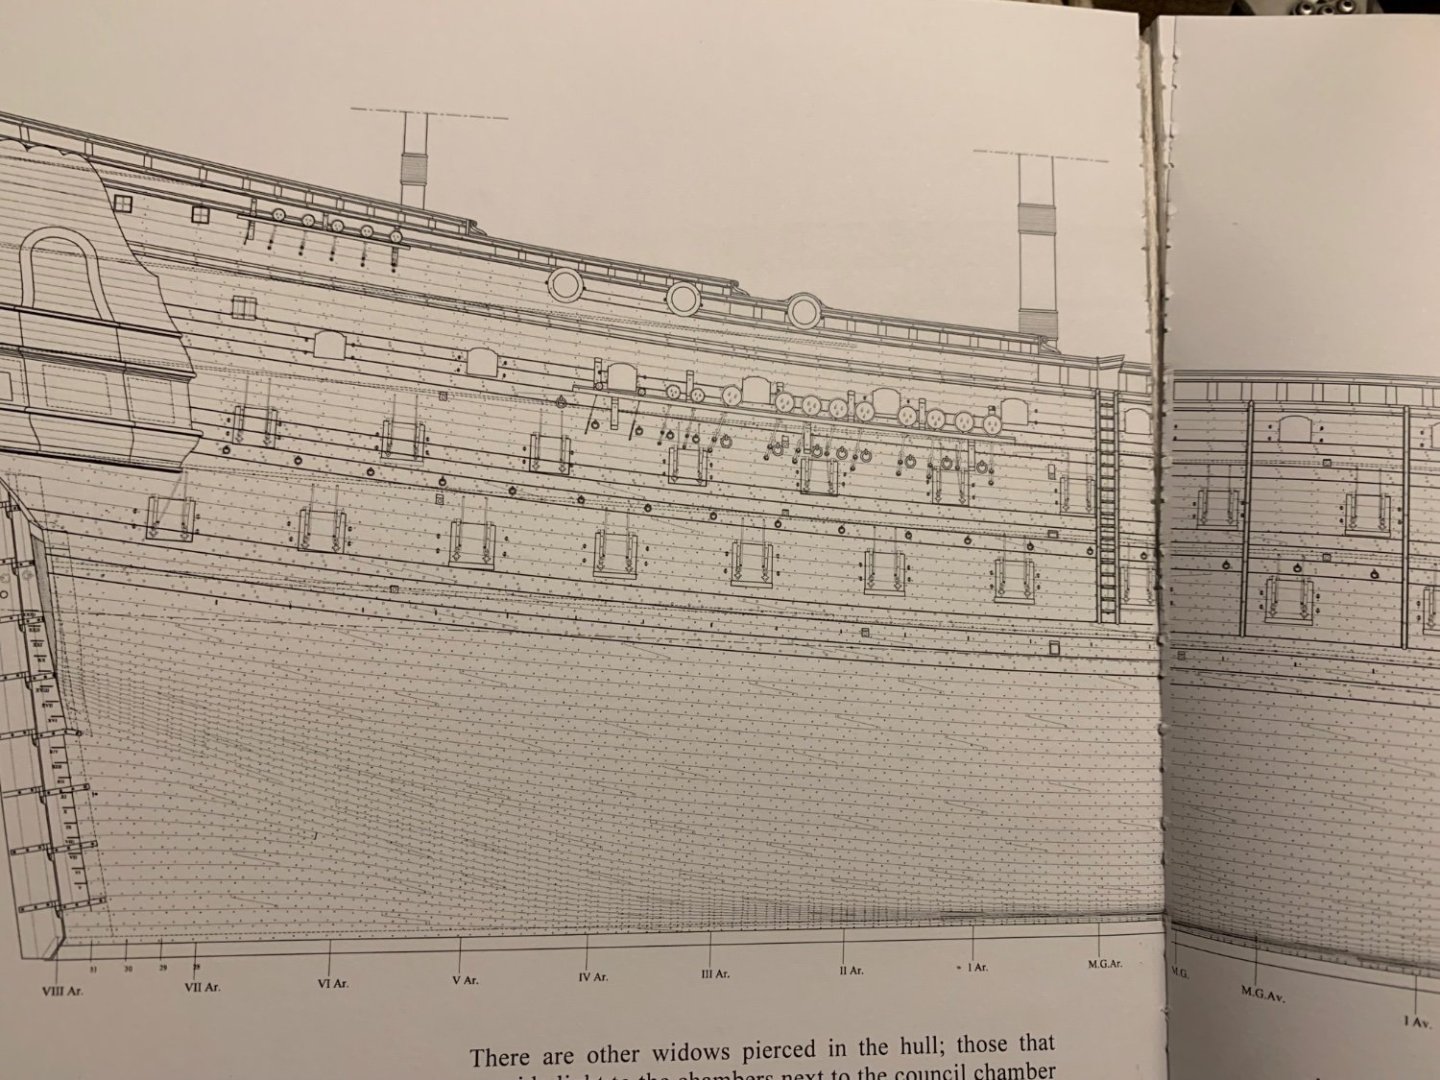
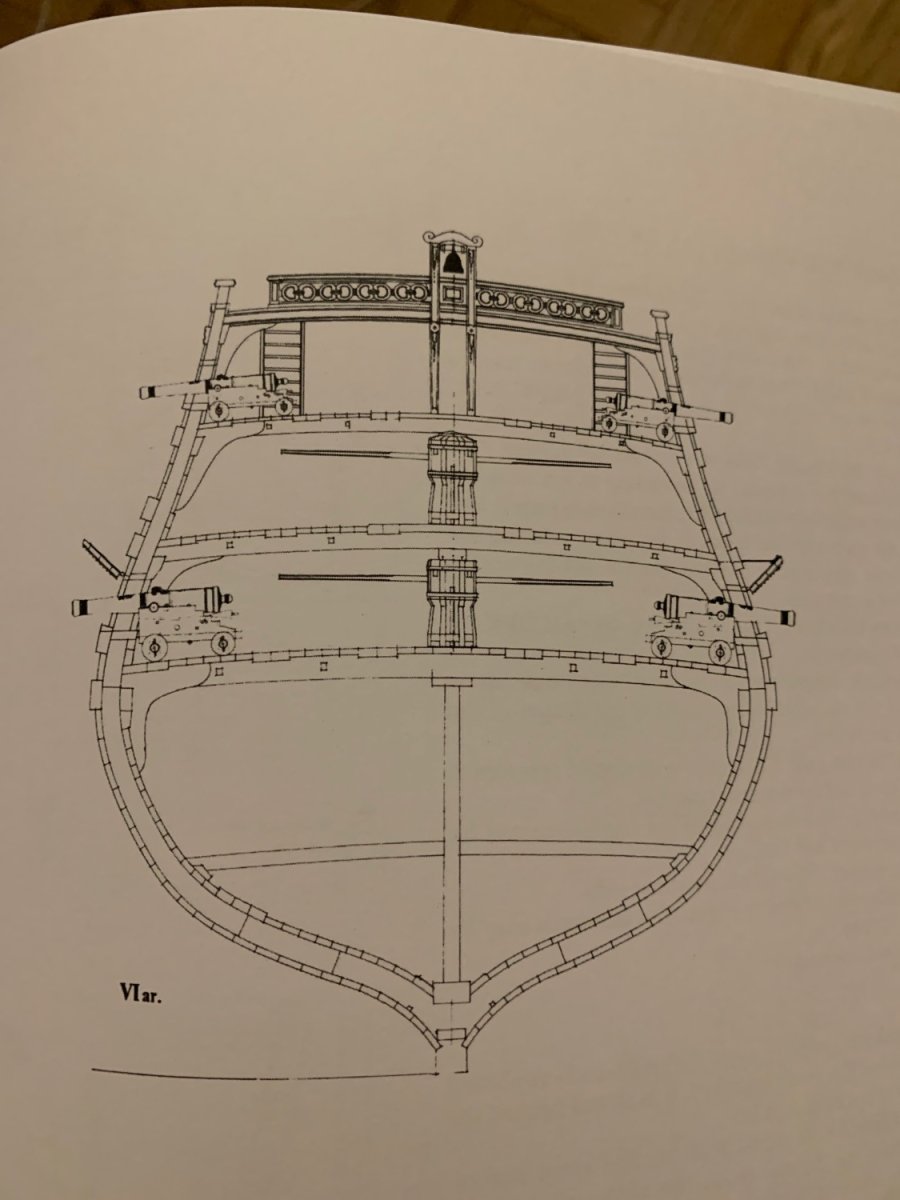
The L’Ambiteaux monograph essentially shows the same thing. A cross-section, where the lanyard passes through the wale:

In the broadside, the lanyards themselves are omitted, but the holes are present:
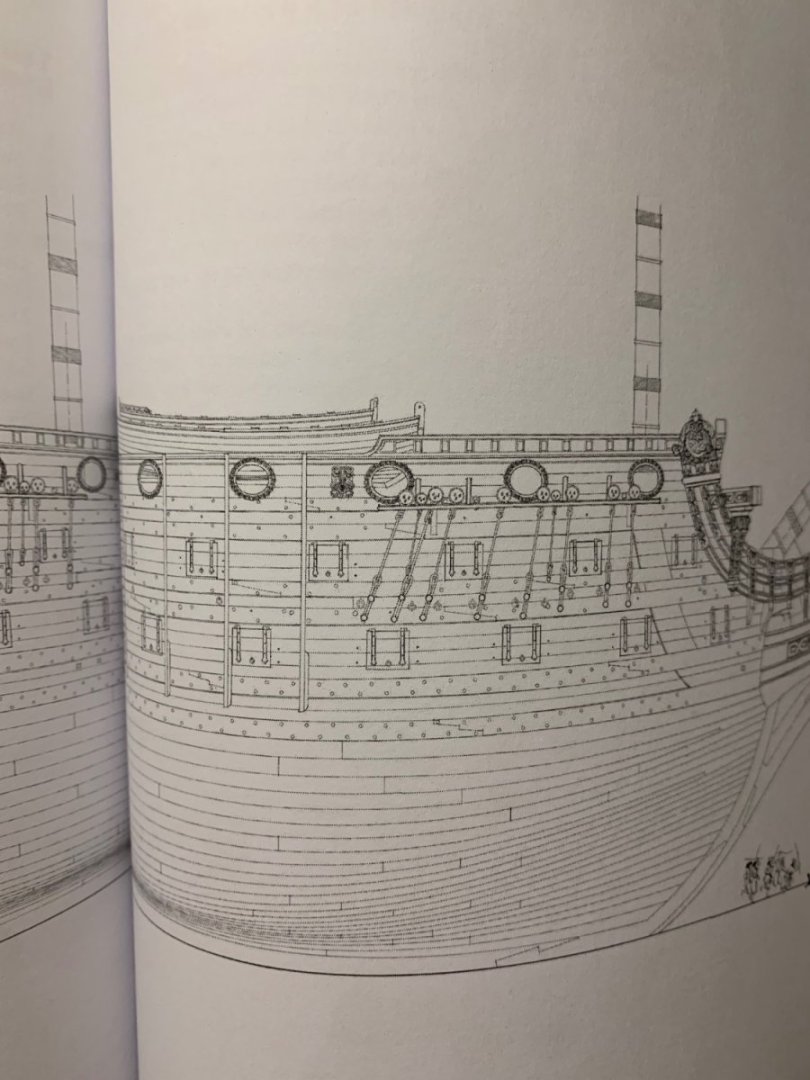
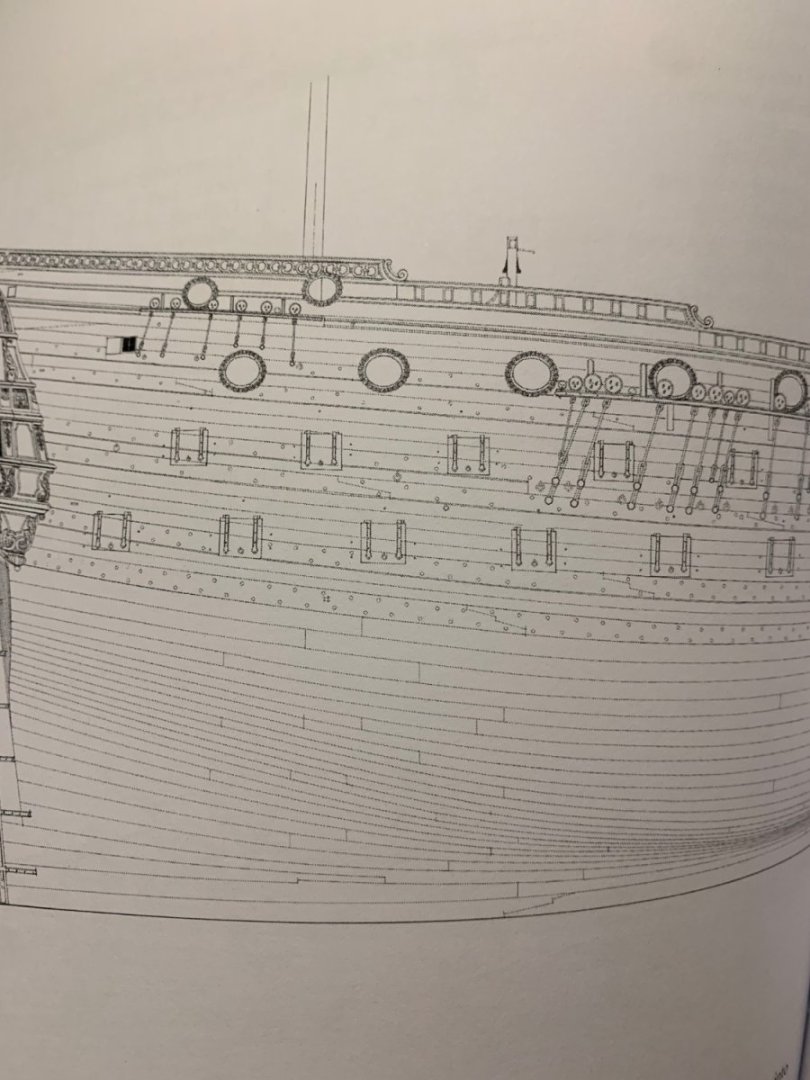
Sorry for the poor photo quality.
- Archi and Bill Morrison
-
2
-
Again, a big improvement in scale, Eric. I’ll get back to you a little later this evening on the lanyard holes.
- Bill Morrison and EricWiberg
-
2
Sovereign of the Seas by 72Nova - Airfix - PLASTIC
in - Kit build logs for subjects built from 1501 - 1750
Posted
I hadn’t realized how far behind I’d fallen on your build, Michael. She truly is the “Golden Devil,” now! Really beautiful paint work and filling-in of the missing ornamentals.