


flying_dutchman2
-
Posts
1,735 -
Joined
-
Last visited
Content Type
Profiles
Forums
Gallery
Events
Posts posted by flying_dutchman2
-
-
For the Dutch readers.
I was reading the travel magazine from the national geographic the other day and there was a small blurp about the city of Blokzijl in Overijssel. The picture shows a ship called a 'Punter'. That would be an interesting build especially as this type of boat is from around the 17th century.
'Jan', maybe you know more about it.
Marcus
-
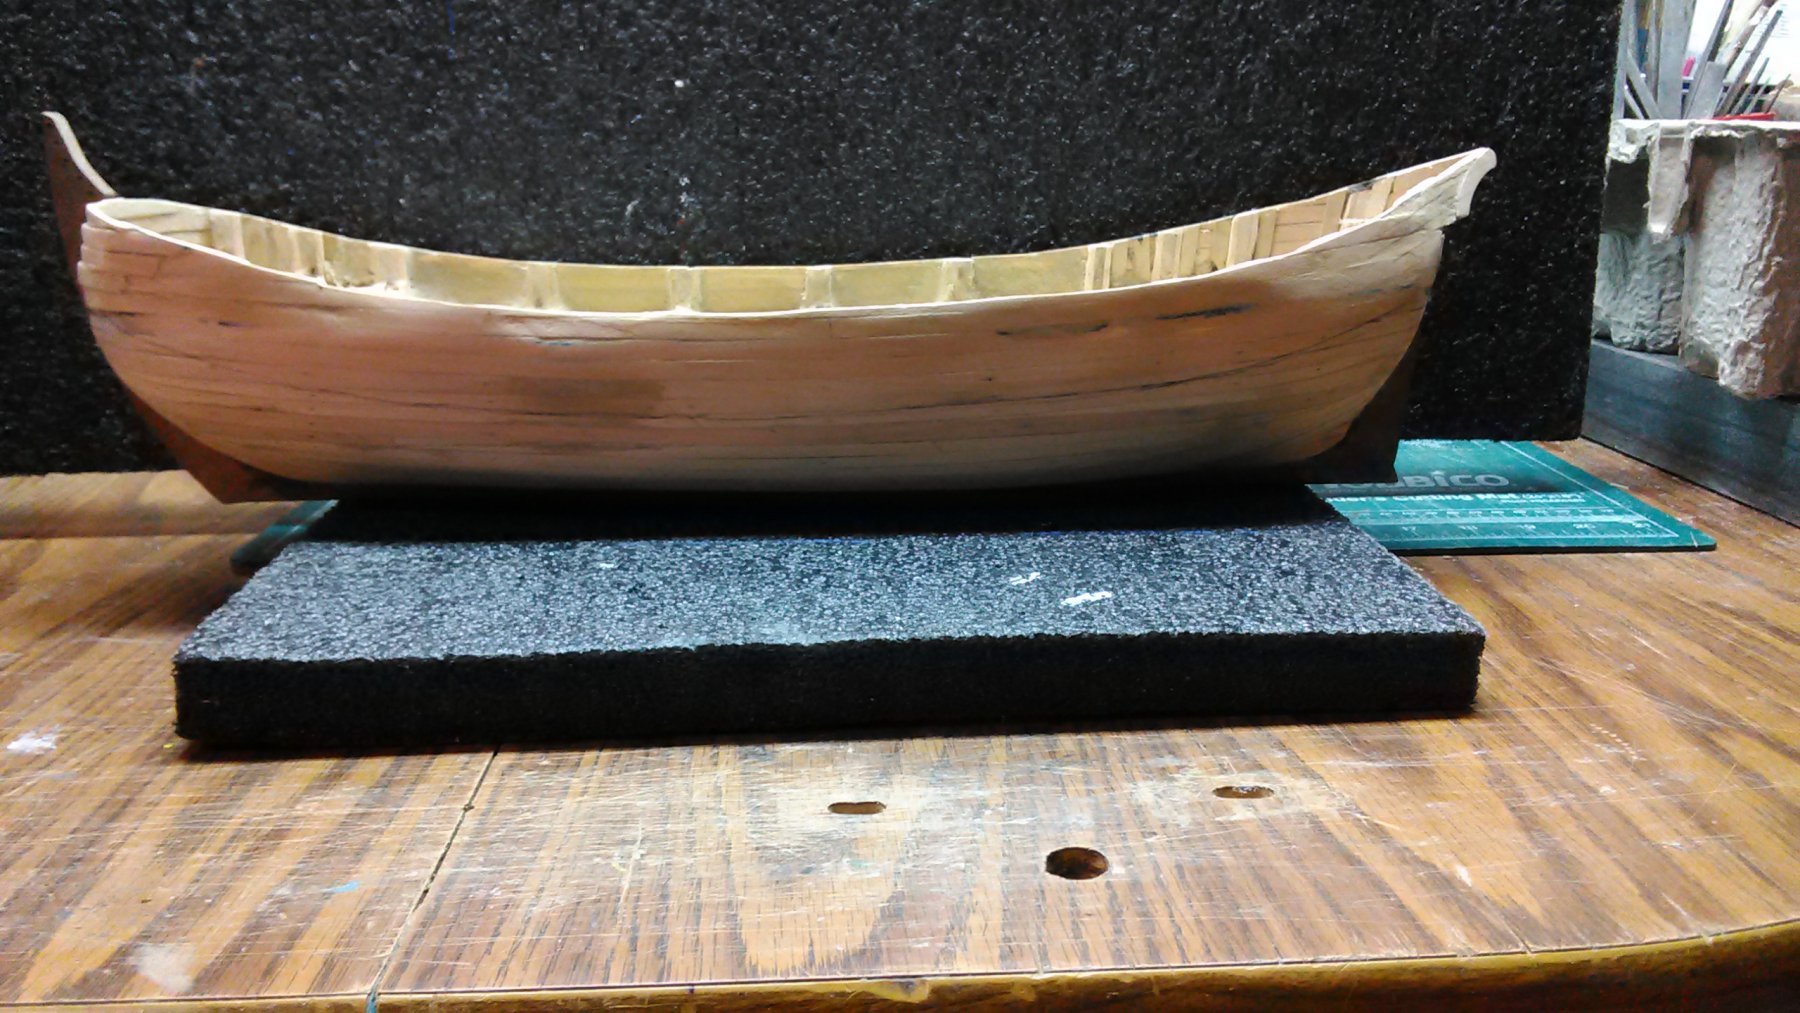
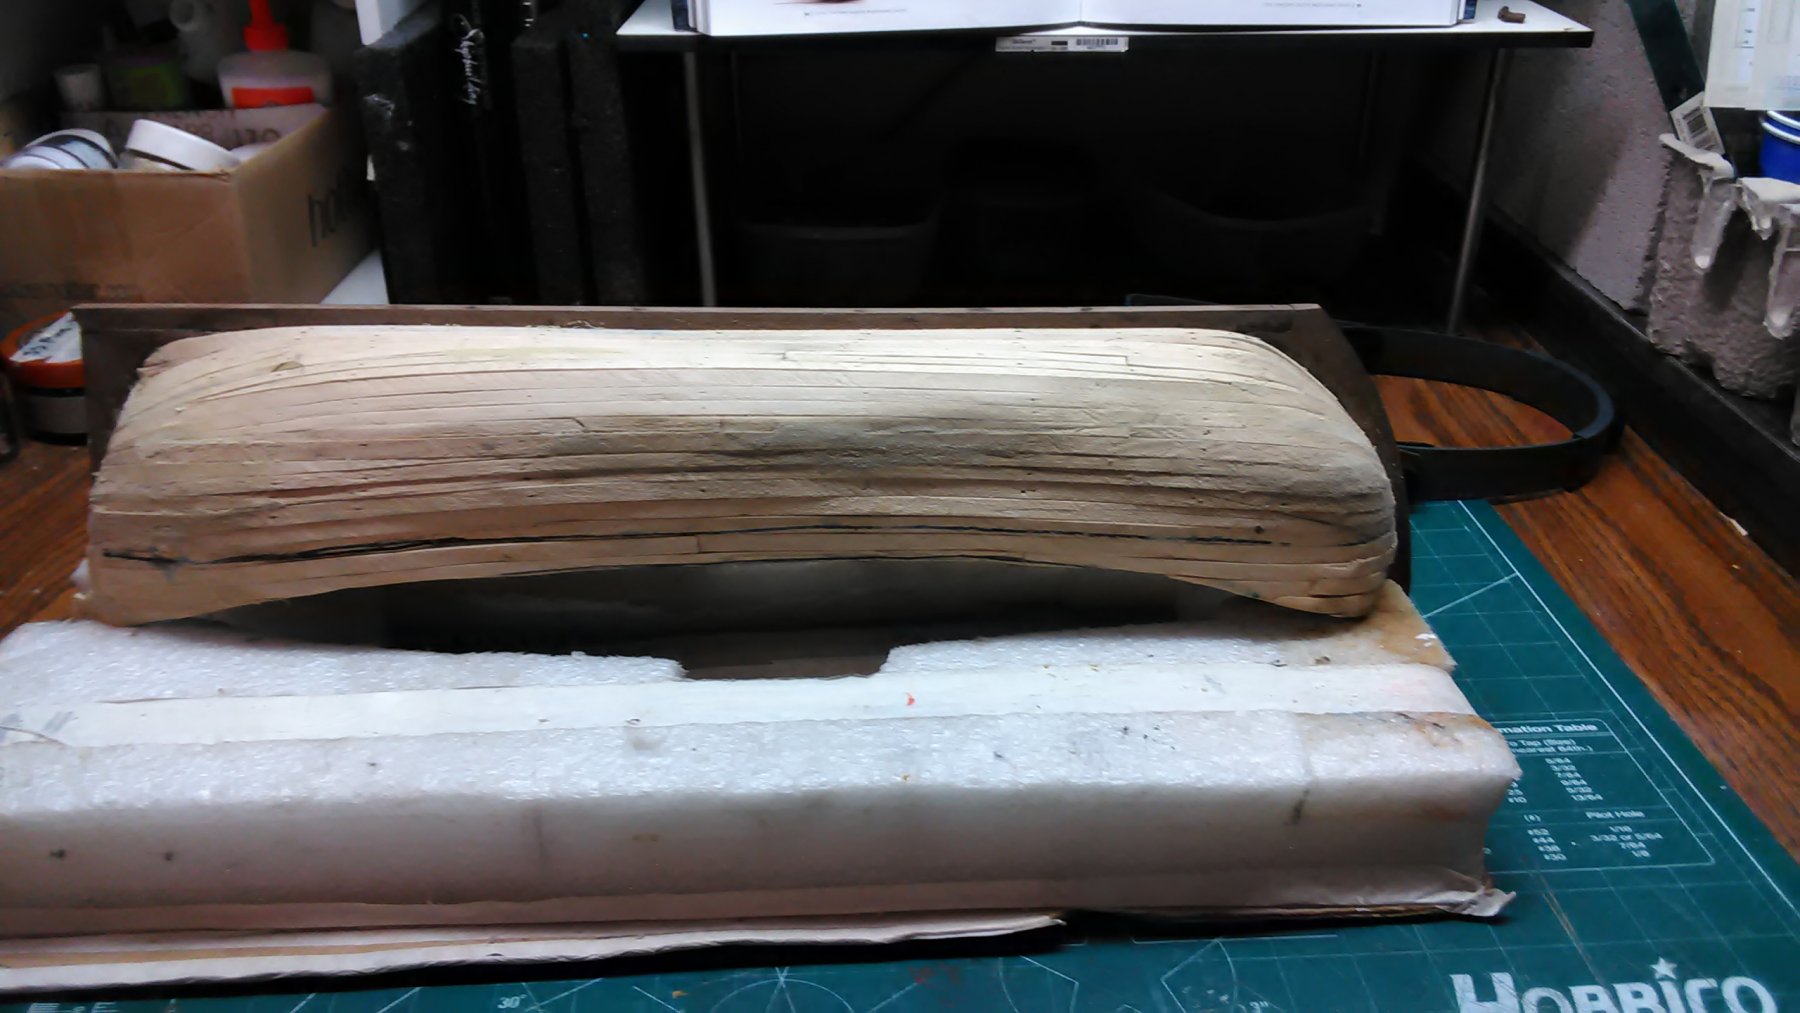
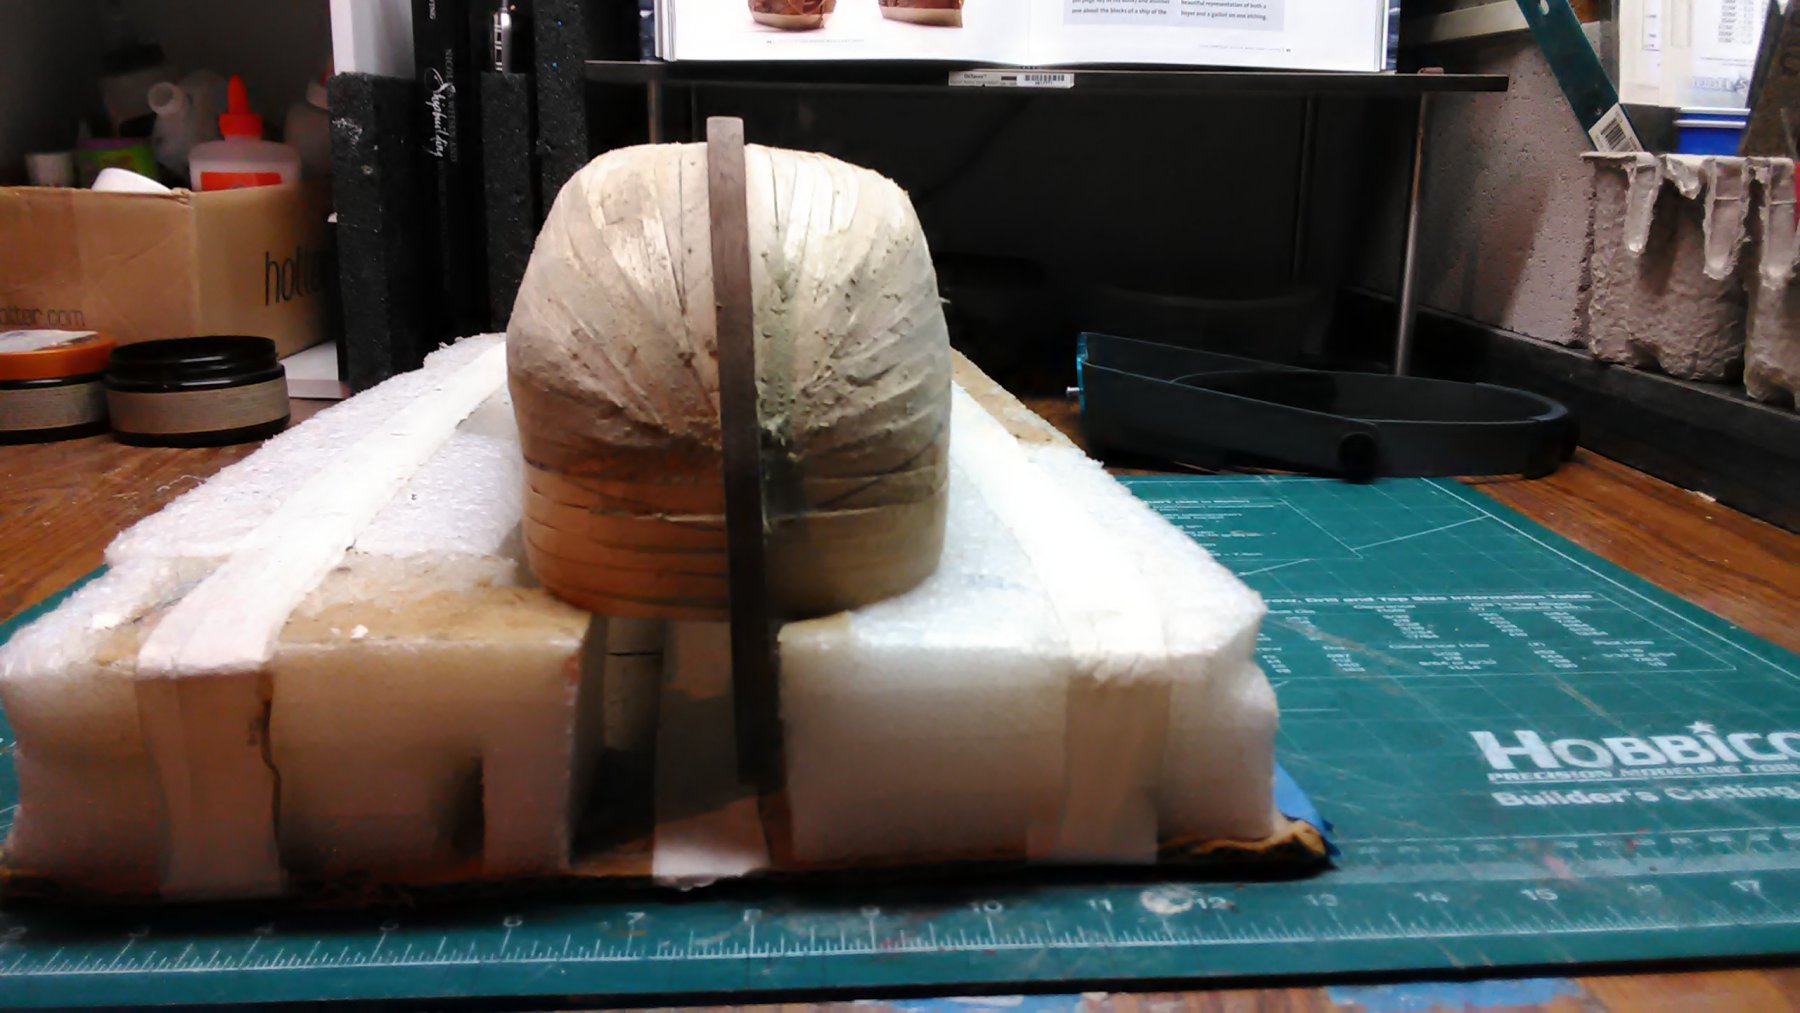
Completely sanded the hull and it is nice and smooth. Also hollowed out the hull a bit more so the deck fits better.
Second planking will be cherry and the wales laminated walnut. I have a source that can supply me with as much cherry as I want and it is free. The planks are 36" x 6" x 1/8" and 1/16". What I like about cherry is that over time it will turn darker. Sort of imitation oak.
I have cut planks at 0.5mm and 1mm thick. Both types will be soaked in water and both will be dry fitted with clamps on the hull. I want to see which one fits and looks better. Because the model is large I think I can use the 1mm planks and that will not look clunky.
Marcus


-
-
My wife is at the conferences and this am I scooped out the resort. We are staying at the Kalahari resort in Wisconsin. Lots of stuff to do and lots of little kids to watch out for. There is a small pool for 21 and older. It is way too busy every where. I am not good with crowds.
I set up shop outside close to our room and have been sanding the Boyer for the last 3 hours. It is coming along nicely. The best of all, and what cog said I don't have to clean up the dust
Marcus
-
# Jan.
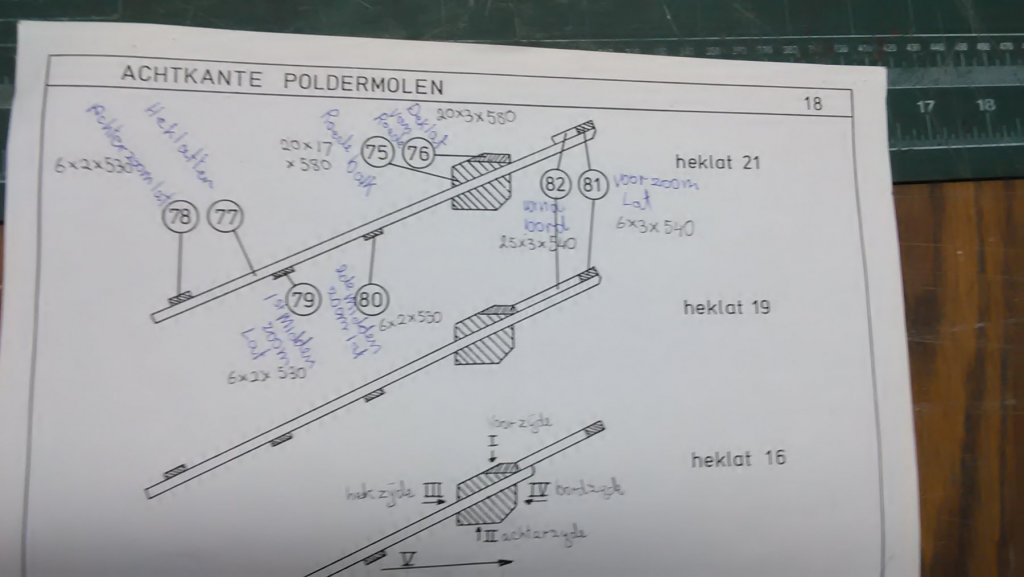
All the vanes have the same template.
The instructions describe how the real vanes are made but that would be too difficult to create. So he describes an easier method that can be created for the model.
In a real mill, the roedes are to be drilled out and the slats (heklatten) are fitted into the holes.
In the instructions there are 2 inside roedes and 2 outside roedes 1 & 3 and 2 & 4. Also, many terms with descriptions.
Marcus
-
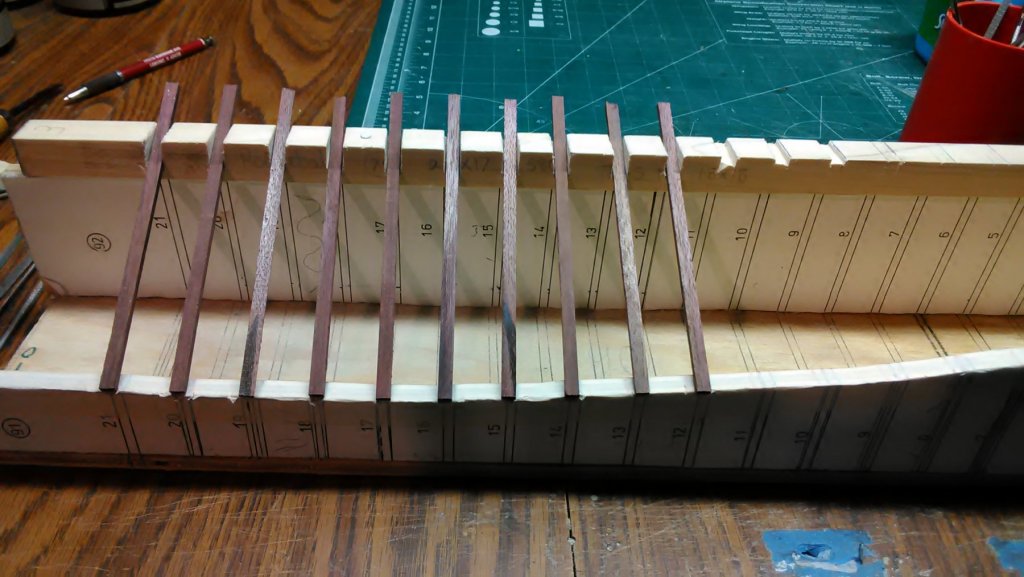
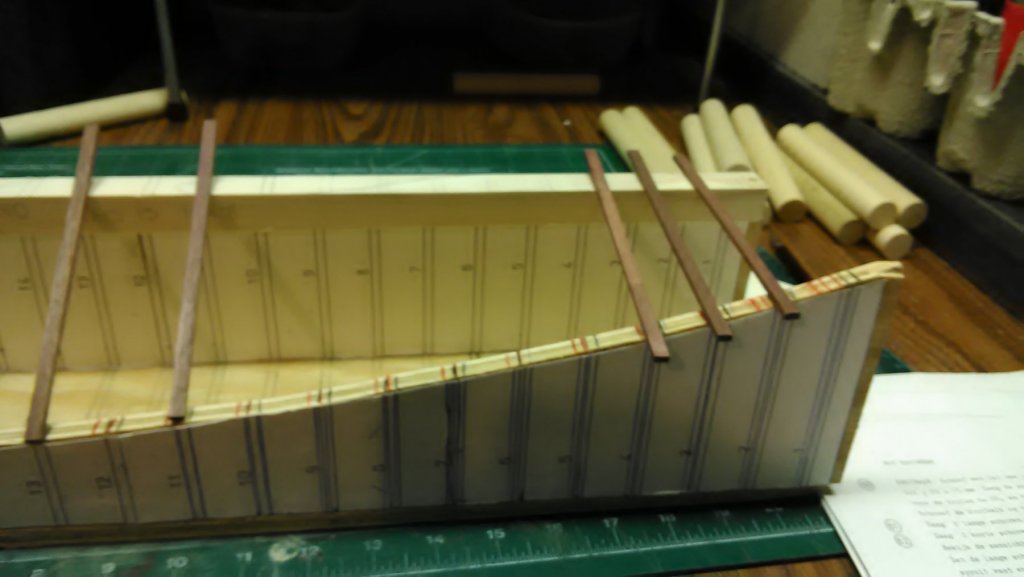
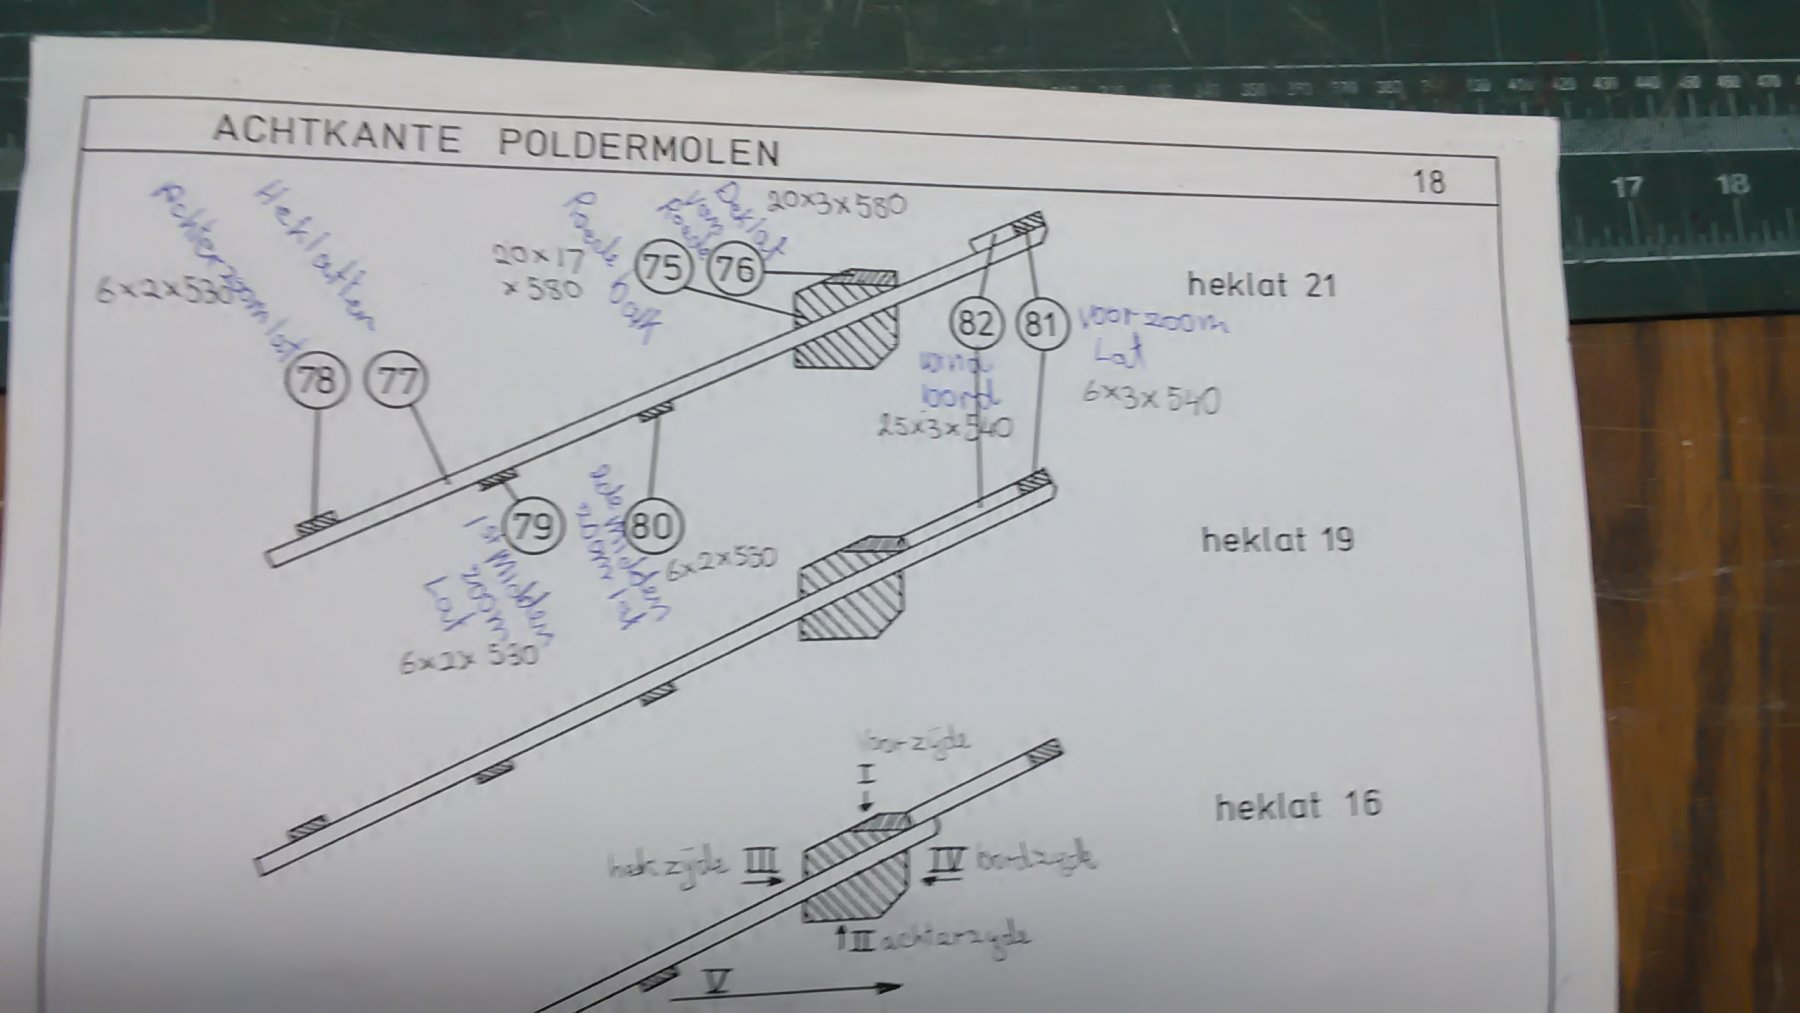
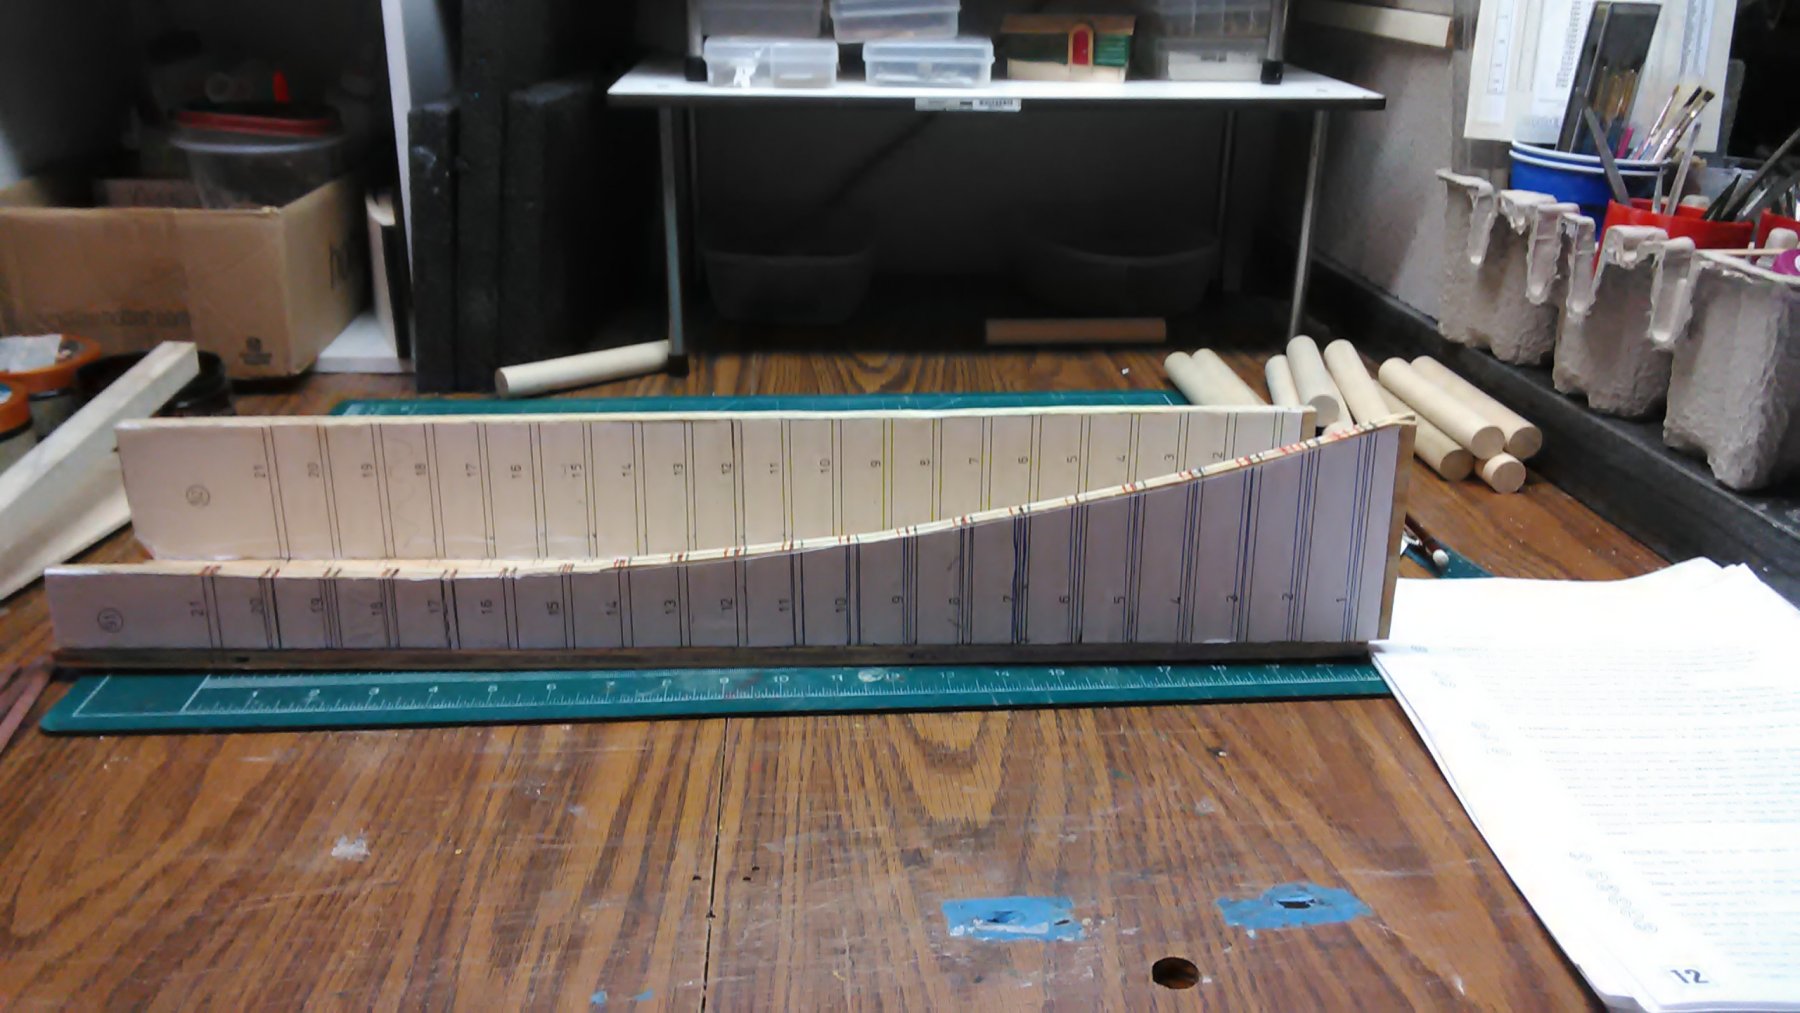
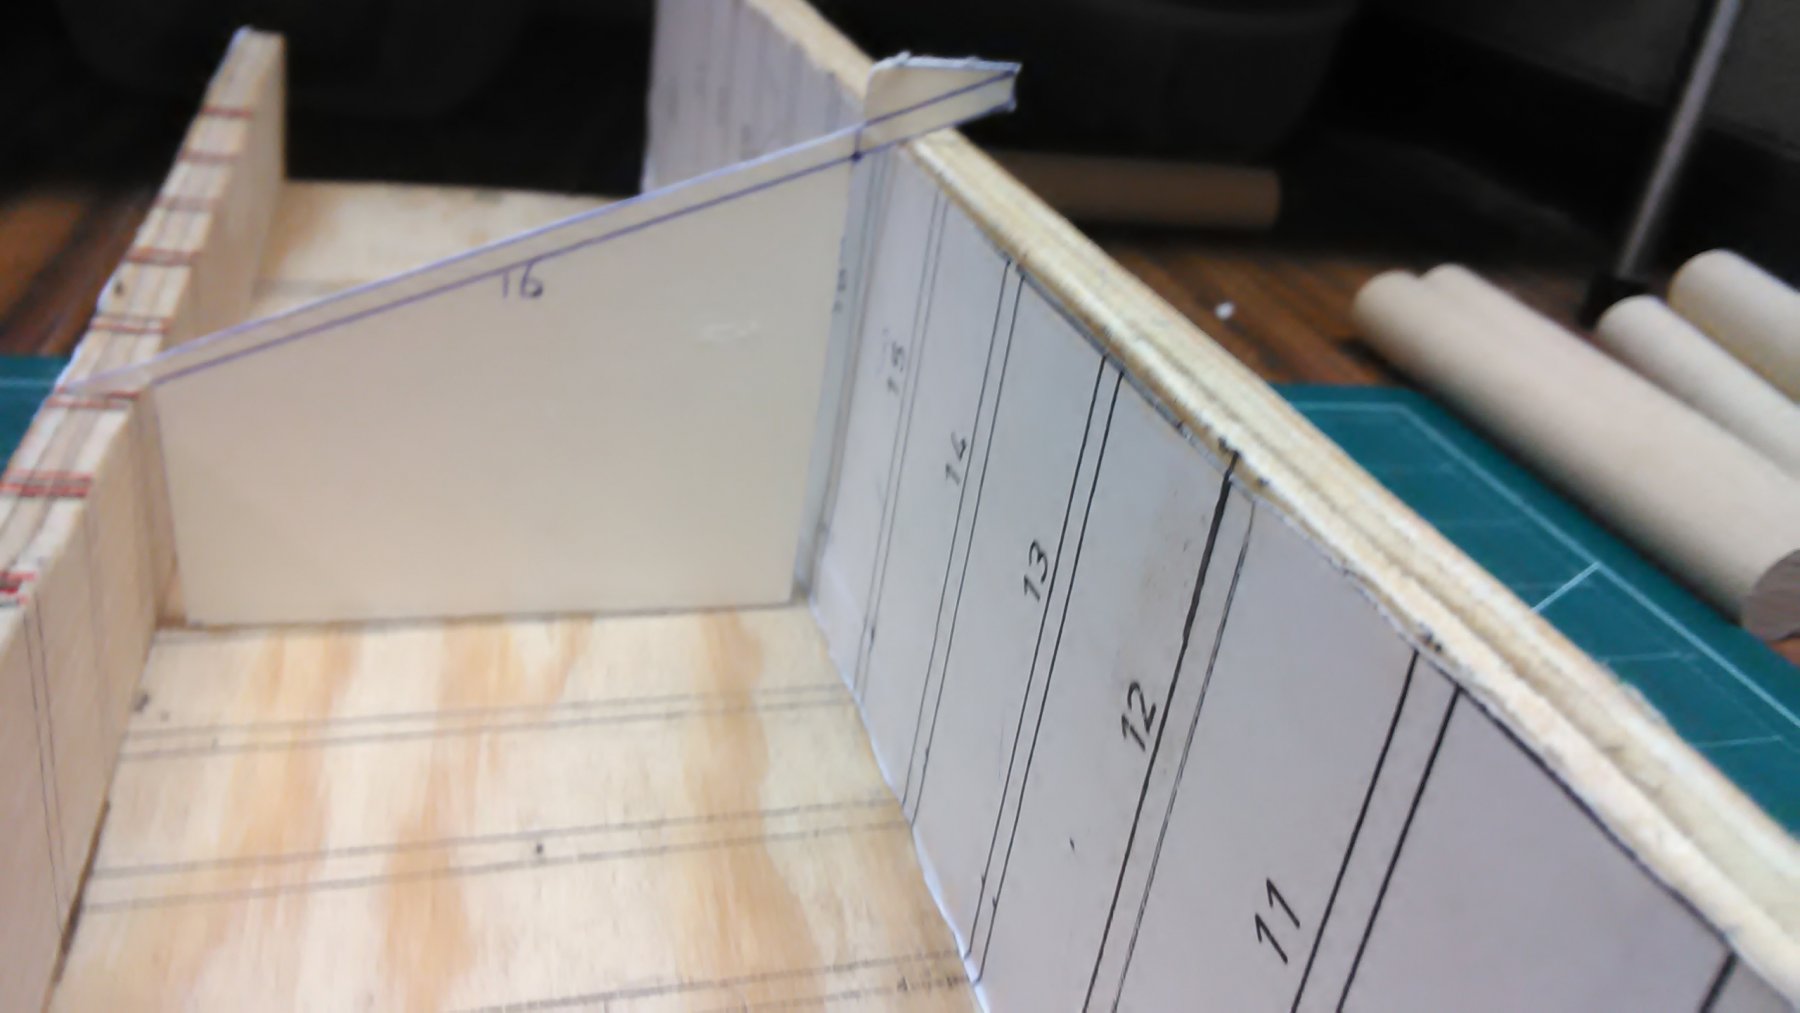
I started working on the fitting of the horizontal slats.
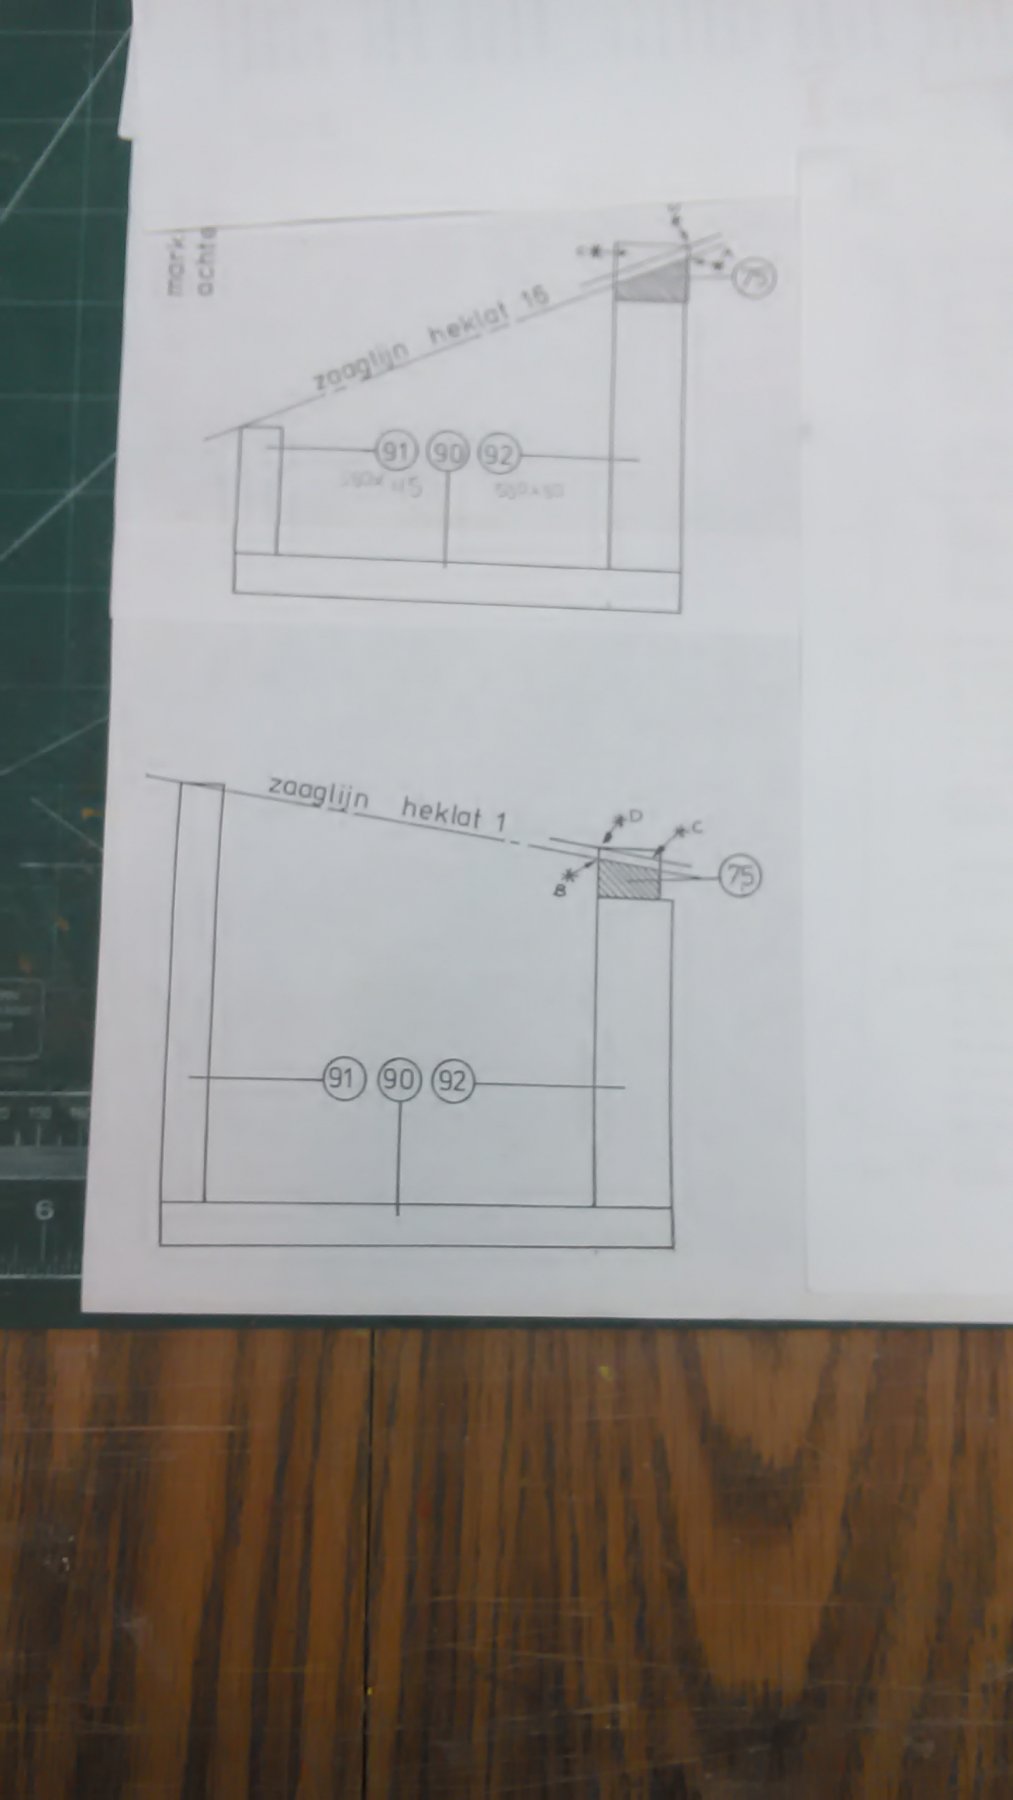
First I angle the saw so it rests on both vertical pieces of the template. I saw at an angle and guess when I have gone deep enough on both sides.
The plan shows how much angle needs to be cut and how to install all the pieces.
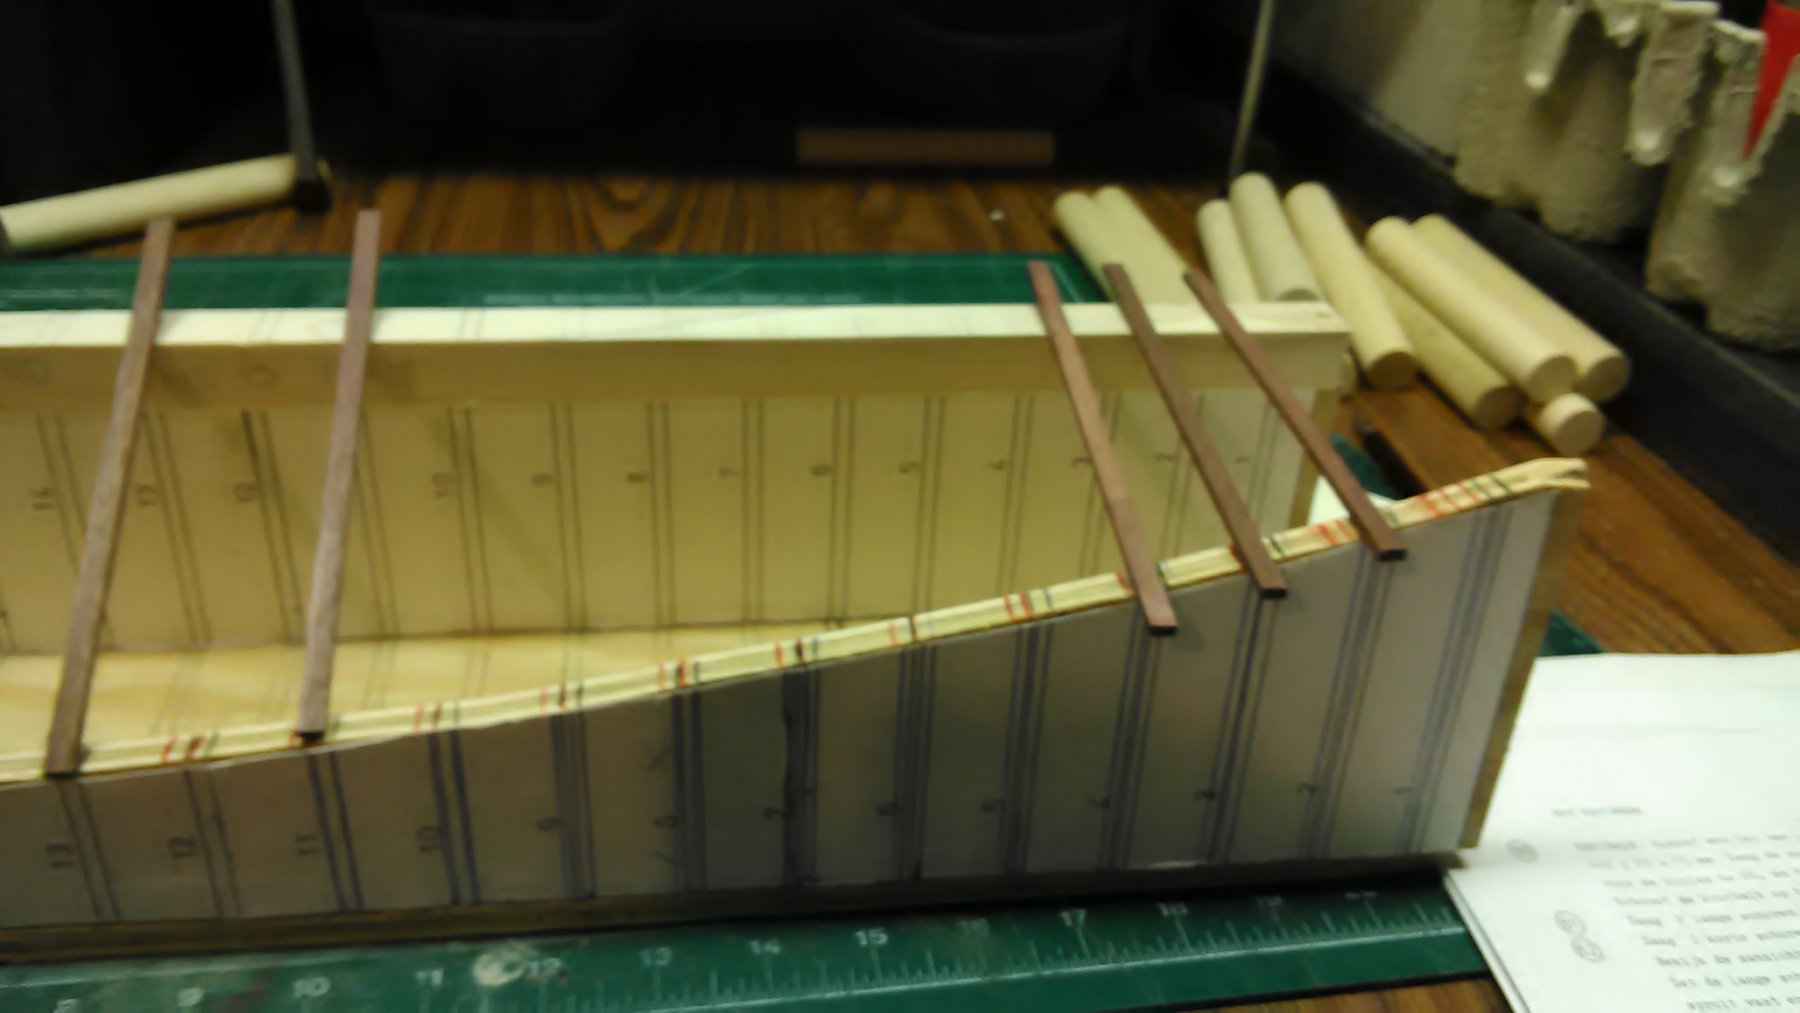
With rifler files I remove the piece of wood where the slat will rest.

The slat is fitted to see if the angle is correct.
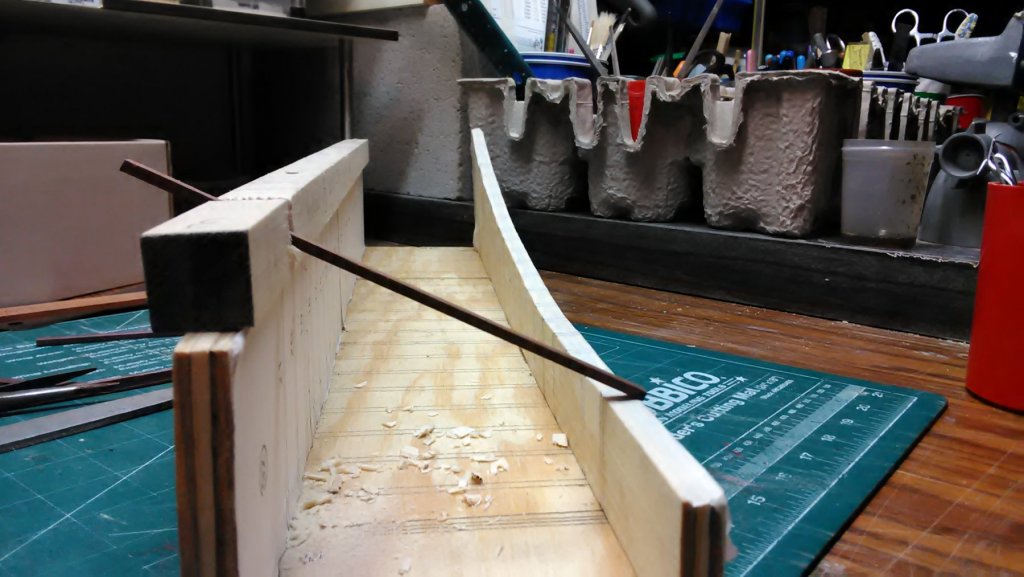
Once it is correct, the empty space will be filled with wood filler so the roede is even on all sides and once dry, a slat will be glued on top of the roede to hold it all together.
This process of installing the horizontal slats will be done 21 times at different angles. Times that by 4 vanes which equals 84. Long process but in the end it should look pretty good
Marcus
- Canute, cog, thibaultron and 4 others
-
 7
7
-
-
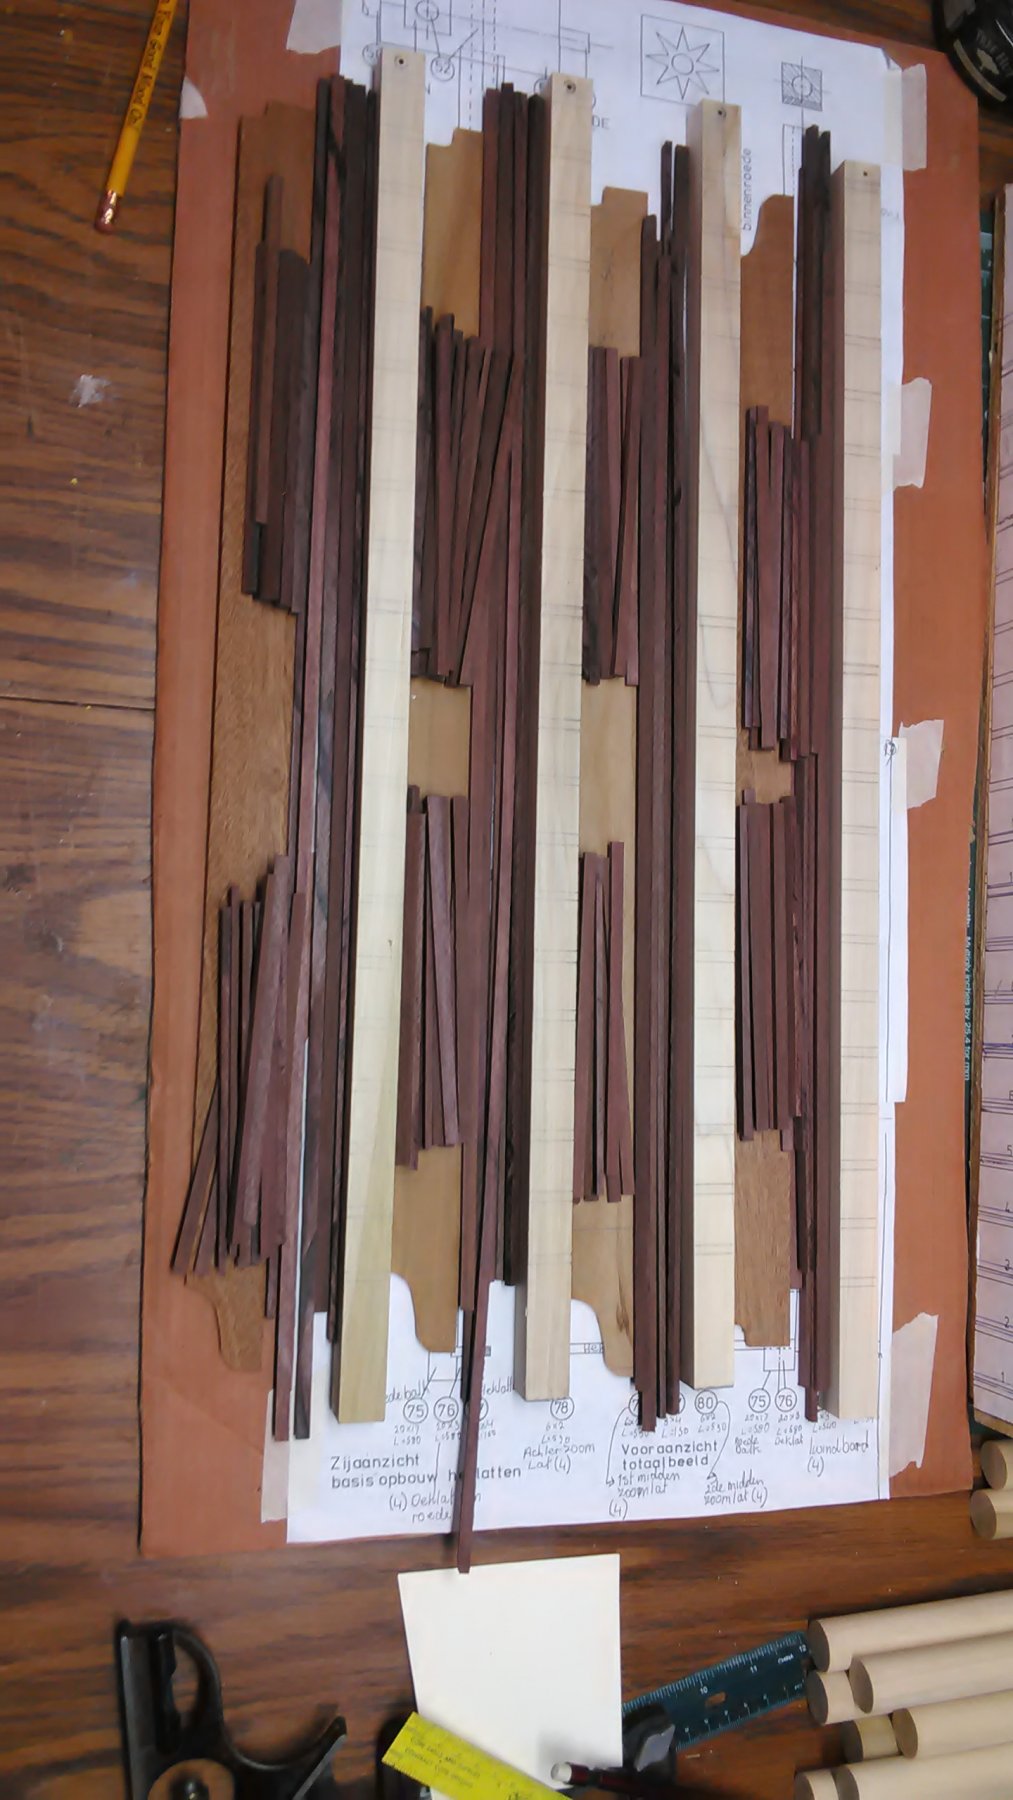
Worked on preparation of getting all the pieces together that make the vanes. The hardwood stock was 9mm by 2mm which I cut to 5mm by 2mm (the table saw comes in very handy) . The plans call for different widths but I kept it all the same. 1mm here and there isn't going to matter and while laying it all out on the plans it doesn't look clunky or too wide.
Cut a little less than 13 meters (39 feet) of wood.
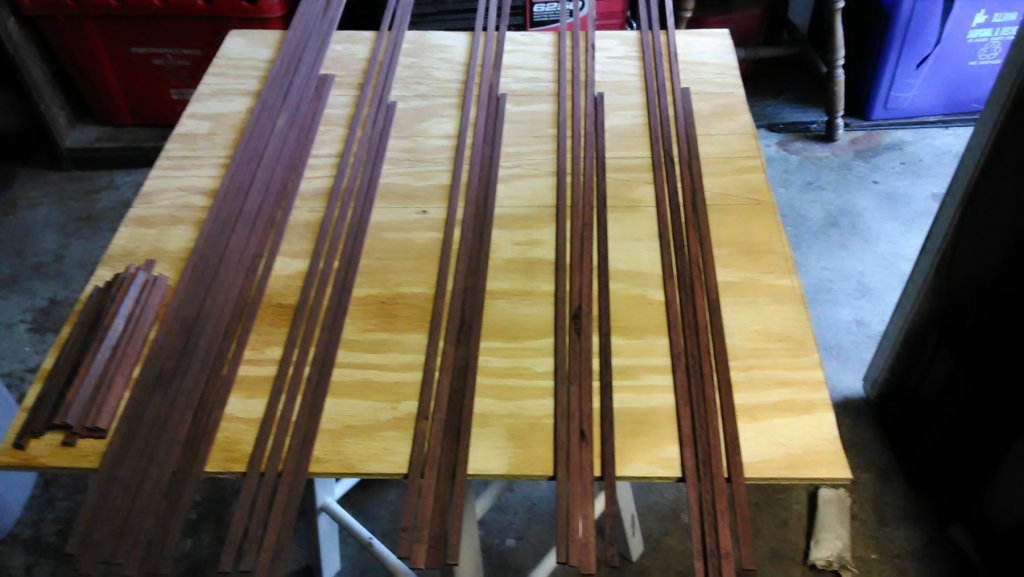

The following have some Dutch words which I have no translation or it sounds rather weird.
After reading the instructions over and over, I figured out how the vanes are put together. (either my Dutch is not what it used to be or the instructions are not very good).
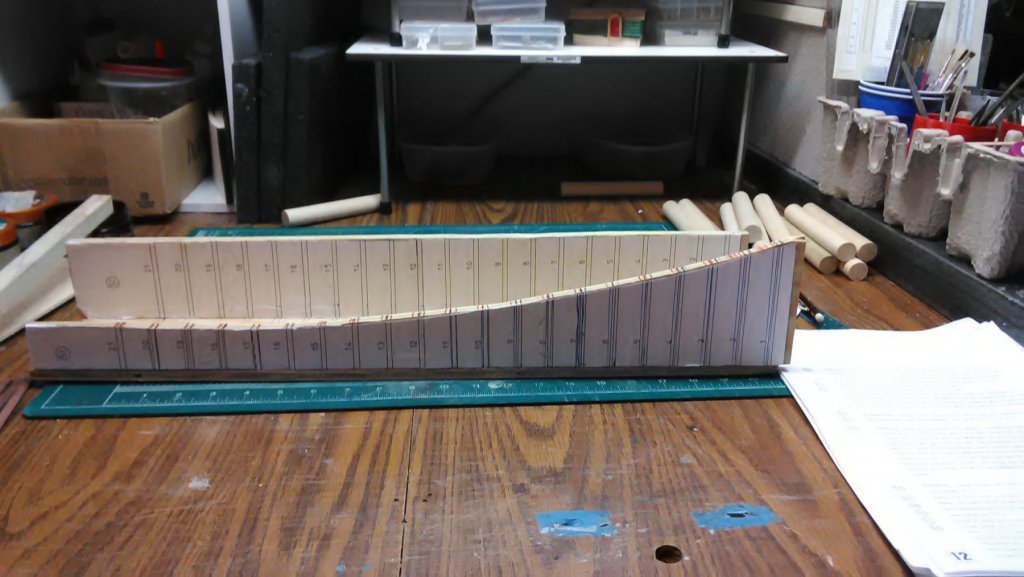
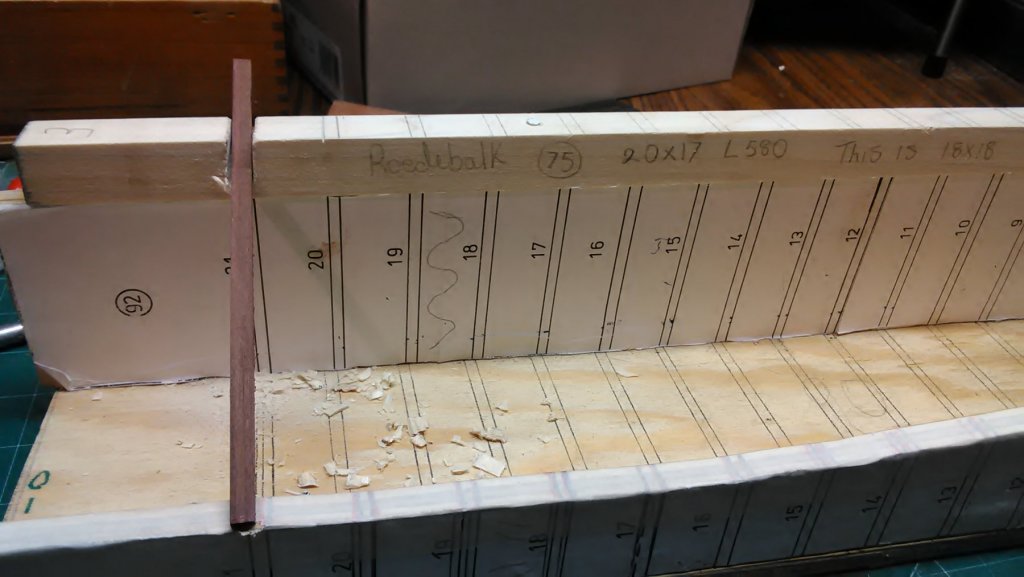
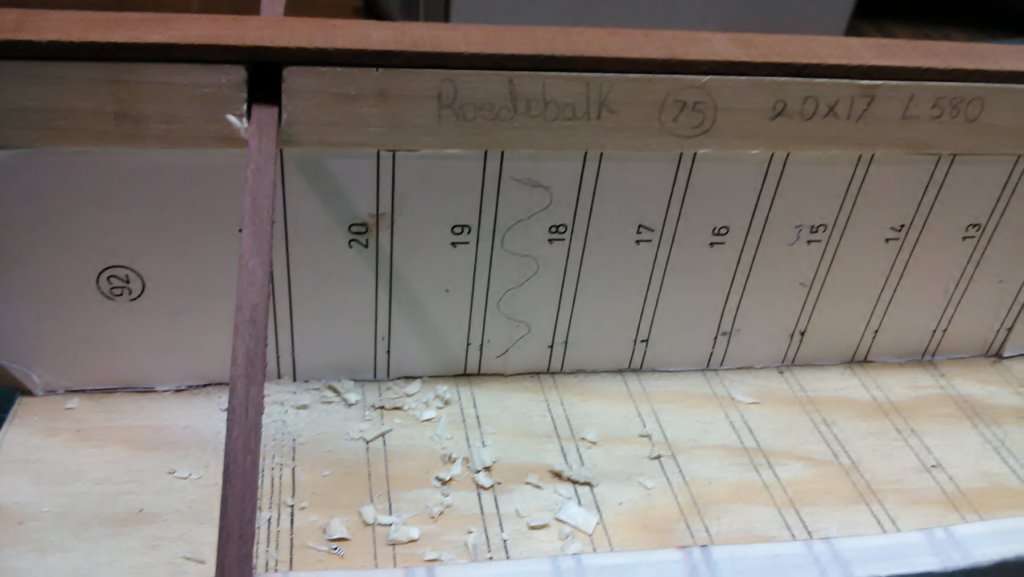
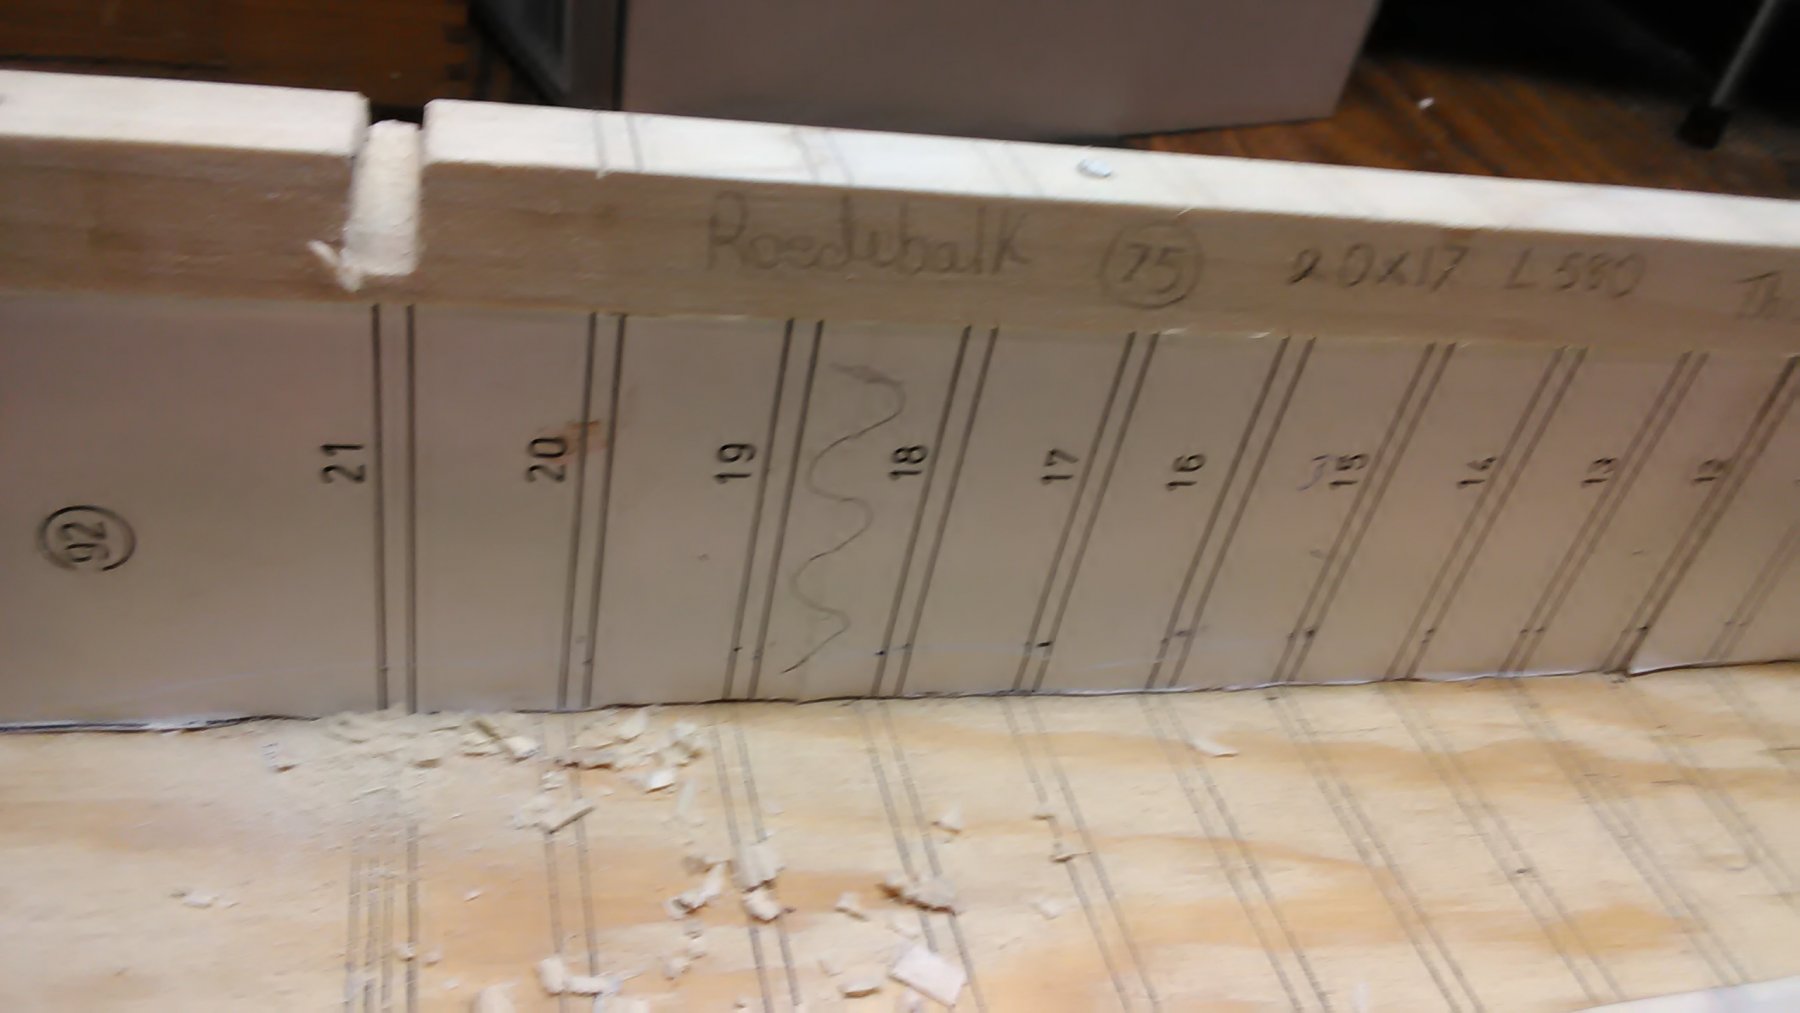
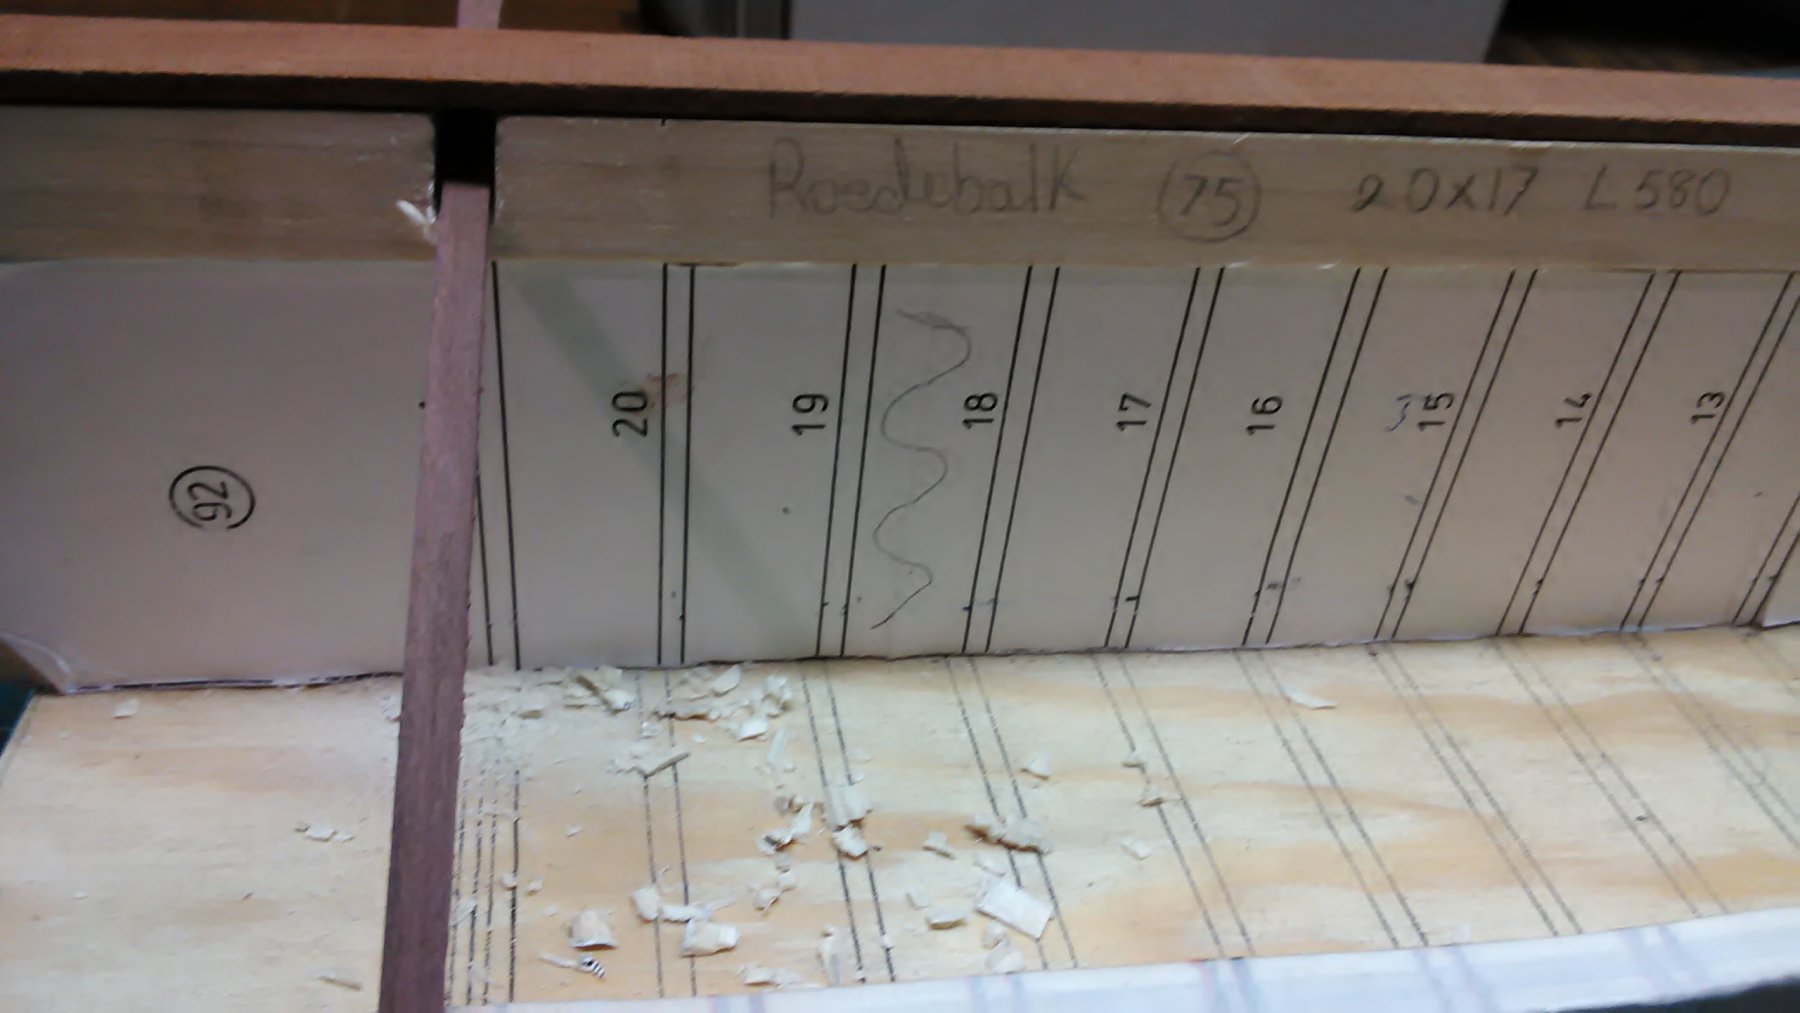
After the template (pieces #90, 91 & 92) are put together, one has to nail de roedebalk (Rod bar) on top of piece #92 of the template. (I made a hole for a screw).
Than you lay the heklatten (no English), which are the horizontal pieces, on the roede and follow the angle of the curve on piece #91 of the template.
Every heklat has a slightly different angle, so to lay it flat on the roede on needs to cut the area out, so it lays flat on the roede and downwards.
The example shows it better. I made a piece from cardboard

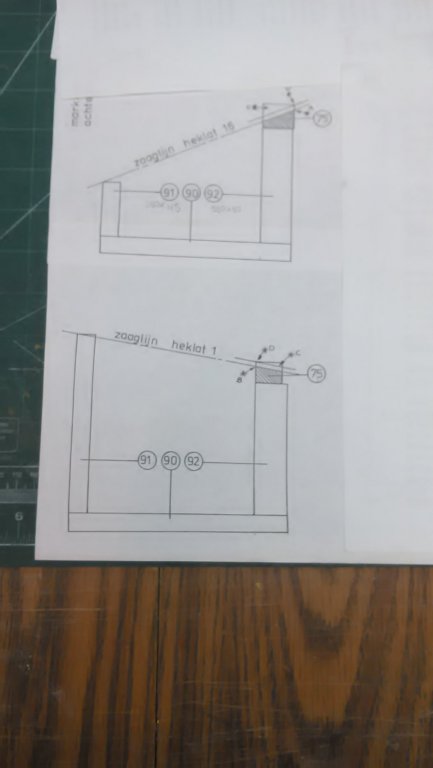
I hope this makes a bit of sense, if not you will understand it better when I take pictures doing the actual cutting
Marcus
- thibaultron, cog, popeye the sailor and 3 others
-
6
-
-
Been sanding the 1st layer of planking, slowly. Should be all done next week as I will have lots of time.
My wife has a (Epic, which is a medical software) conference up in Wisconsin next week and I am tagging along. We will be staying in a resort, so besides swimming and taking advantage of the free stuff I will sanding the Boyer.
Marcus
- Landlubber Mike, mtaylor, Piet and 1 other
-
4
-
2 hours ago, cog said:
Can't say she isn't waterproof on top ...
We will find out when she is outside. With the second layer and some touch up on the sides it may withstand a torrential down poor.
Marcus
-
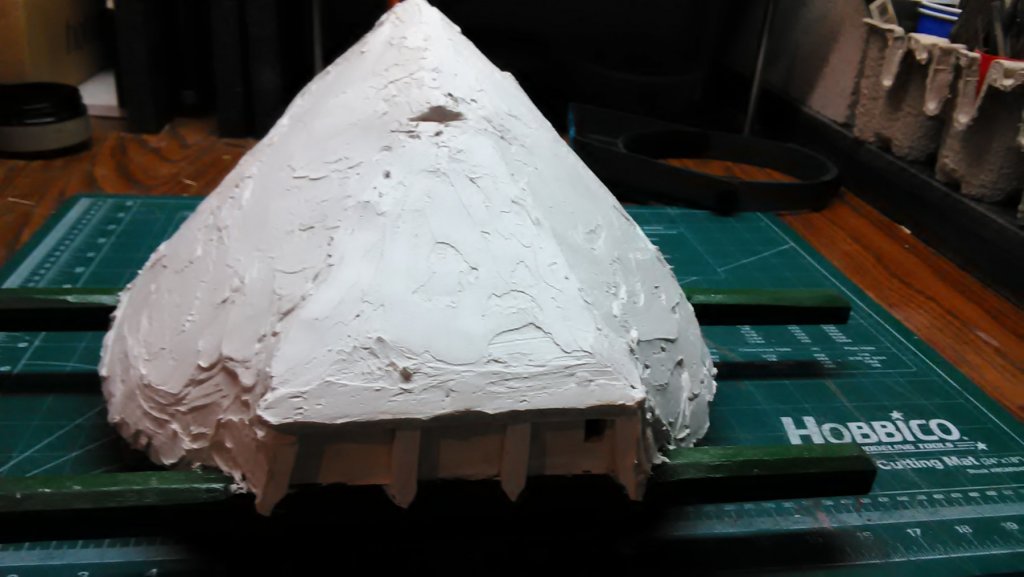
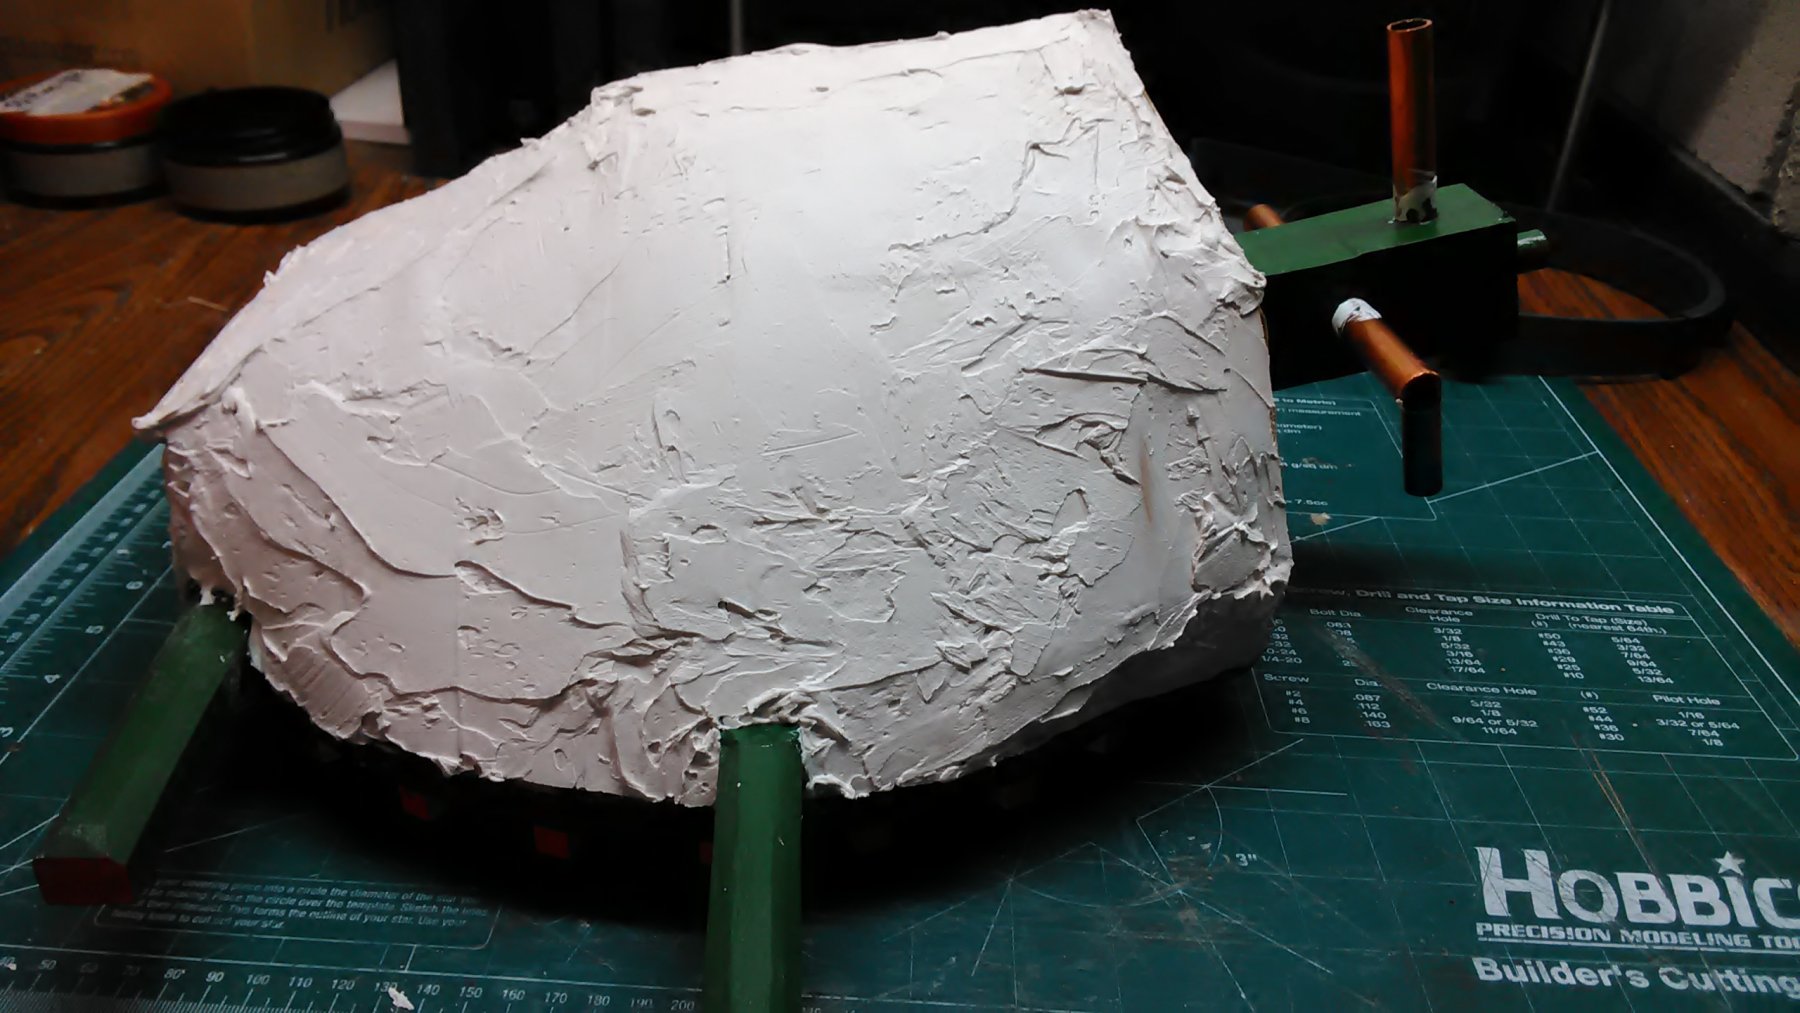
Added about 2-3mm layer of tile glue on the cap. Once dry, add a 1-2mm second layer on top of that and use the same coarse brush I used for the mill wall, to brush imitation thatch.
Marcus

- thibaultron, cog, popeye the sailor and 3 others
-
6
-
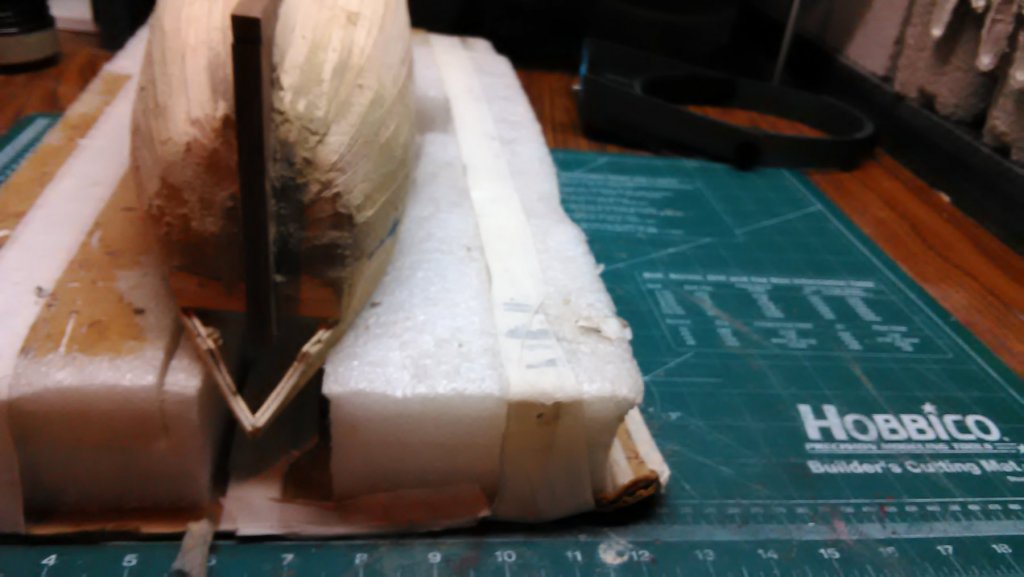
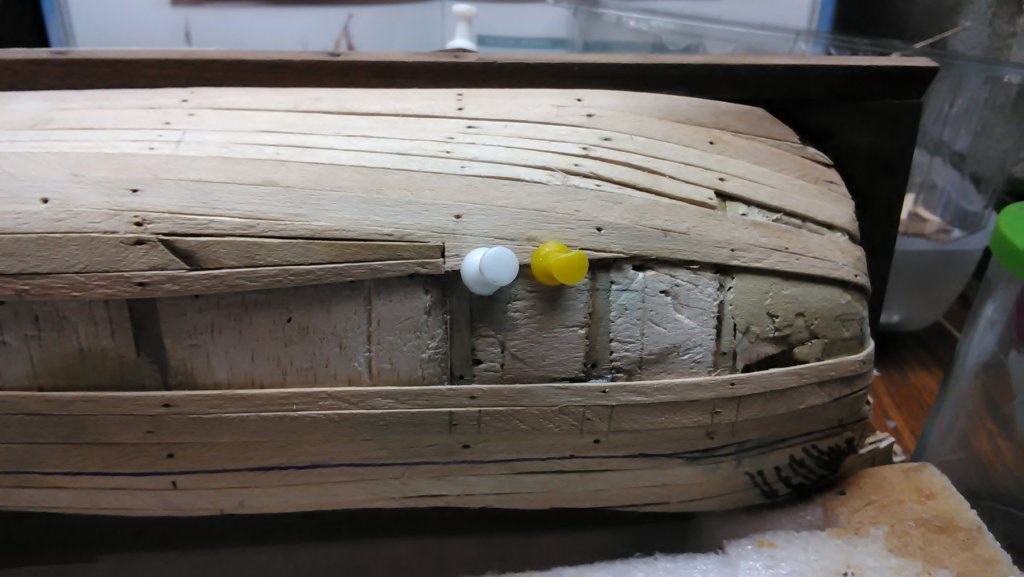
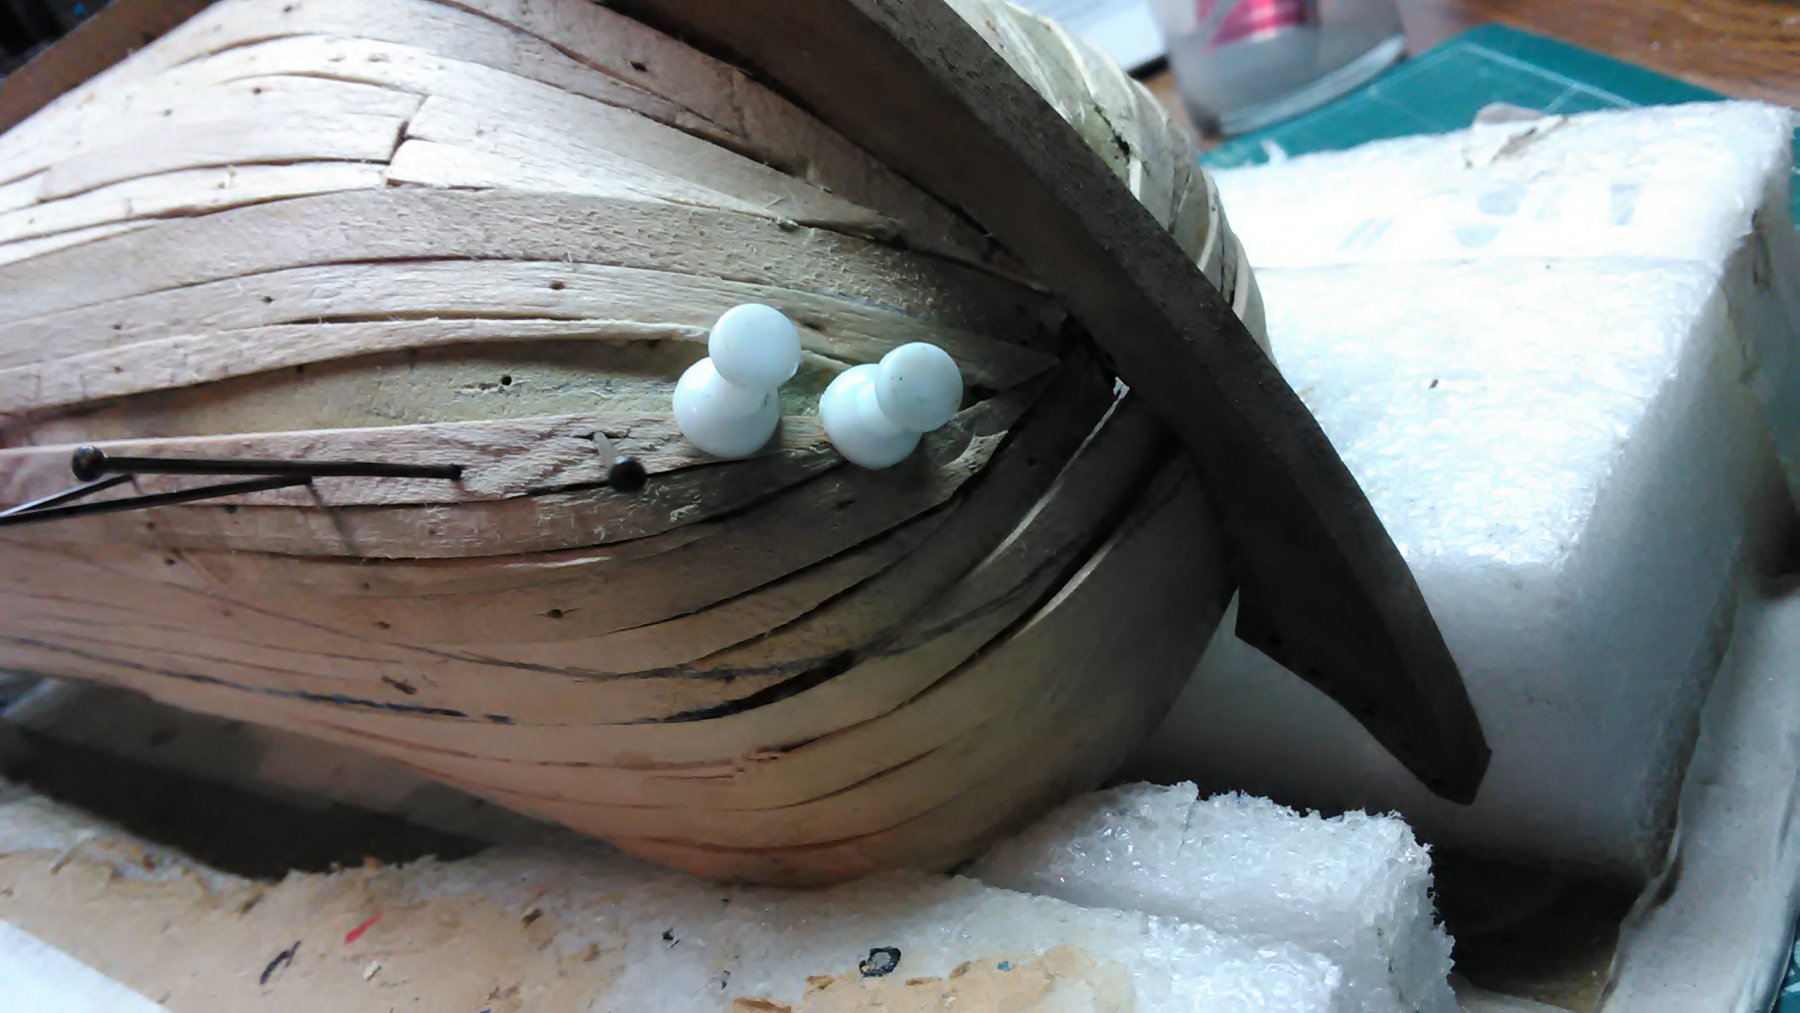
1st layer planking is completed. I have already added some wood filler here and there.
Once dry give it a complete sanding and continue to add wood filler if needed. After that start with the lower wale and going up to the raling and then down to the keel.
The wales are going to be difficult as they need to be curved in 2 directions.
The Utrecht had a similar curvature but with the Boyer it is more extreme.
Re-did the wale template as the first time my curve was off and most importantly my Boyer is 21mm longer than the plan. I goofed at the bow. It is longer. Not that it will matter much. I will adjust accordingly.

Marcus


- GrantGoodale, Omega1234, cog and 4 others
-
7
-
Closed the cap with oak veneer. Repainted some of the surfaces. Once dry I will add a layer of tile glue and apply it the same way as the fake thatch
Marcus
- Canute, thibaultron, Elijah and 3 others
-
6
-
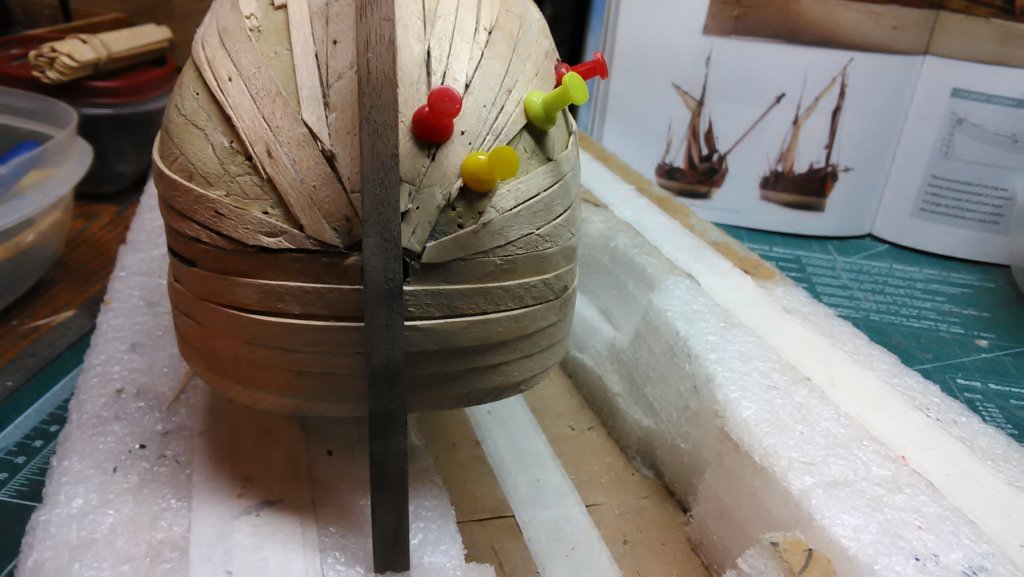
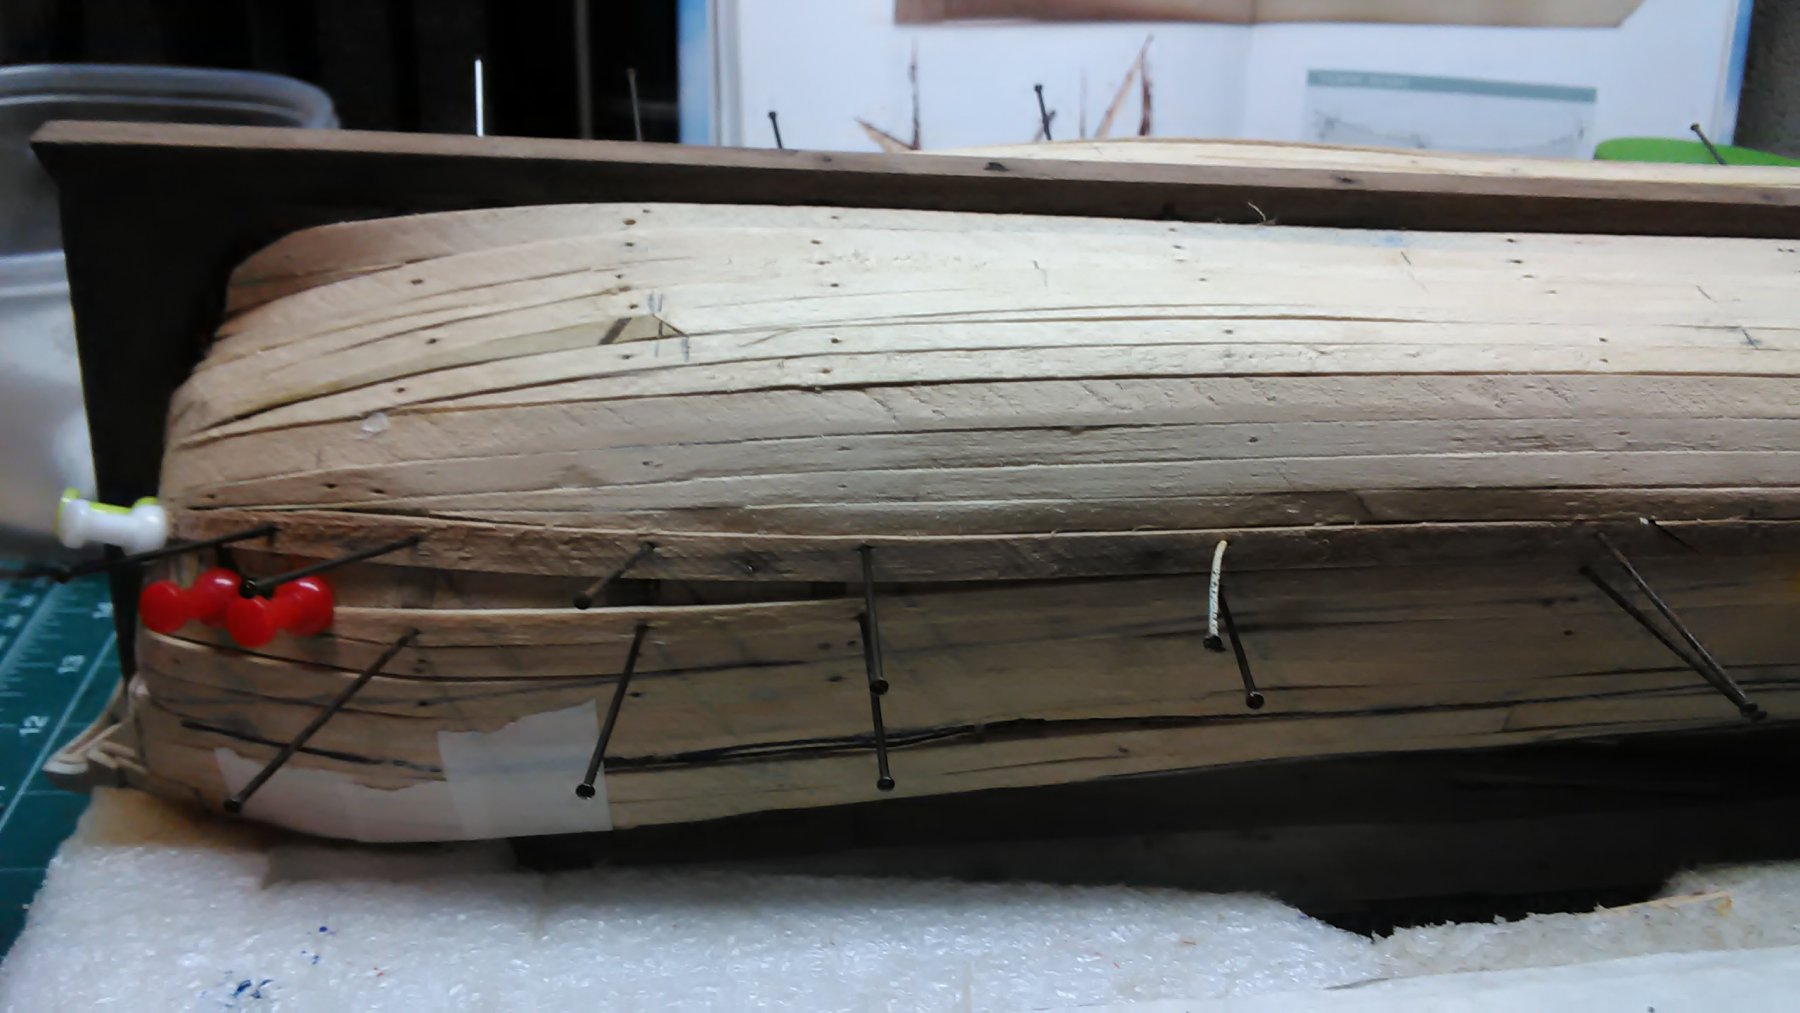
Planking 17th century Dutch ships is an exercise on its own. Dutch ships were planked completely different compared to English, French, Spanish ships, etc. The form of the hull was different so the planking was different (typical Dutch).
The book from Rob Napier, Reconditioning an 18th century ship model Valkenisse, retourschip of 1717 and the Utrecht by Hoving plans have detailed drawings how it was planked. I practiced with the 1st layer and I am going to try to plank the 2nd layer like the Valkenisse. I planked the Utrecht somewhat like it. I will master this after a couple of ships.
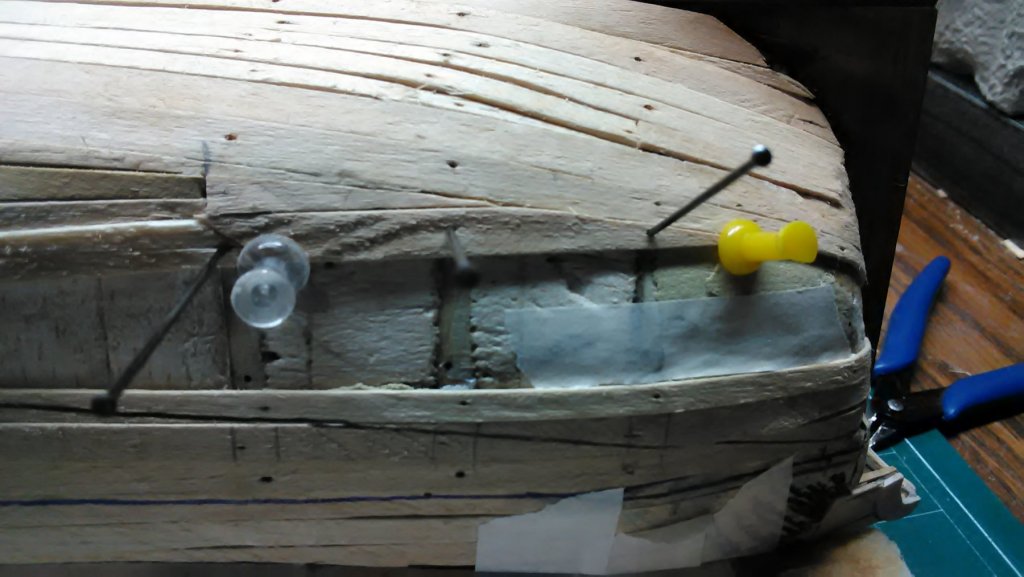
I am getting to the end of the 1st layer and there is a lot of measuring and fitting. I am also very generous with steelers.
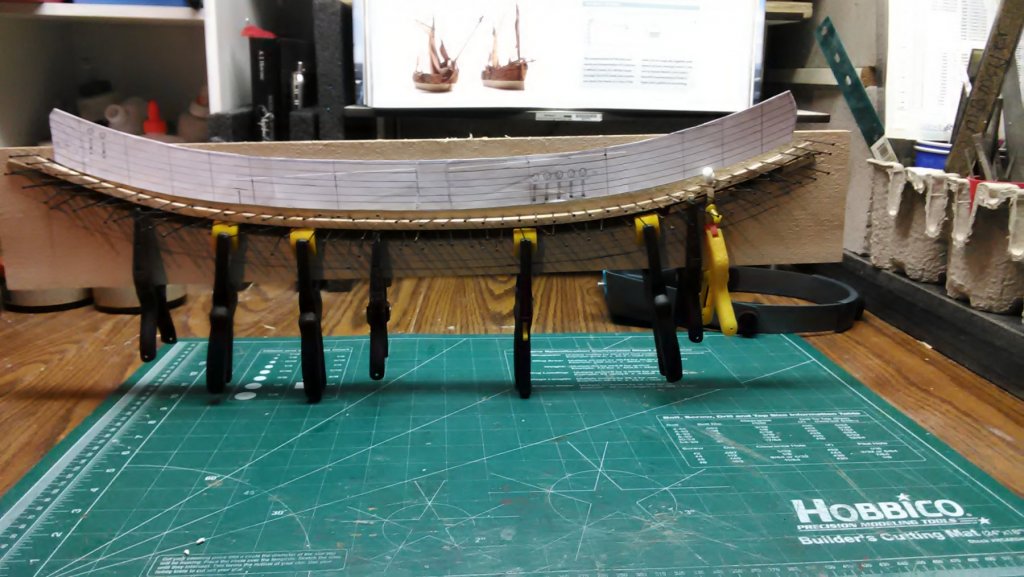
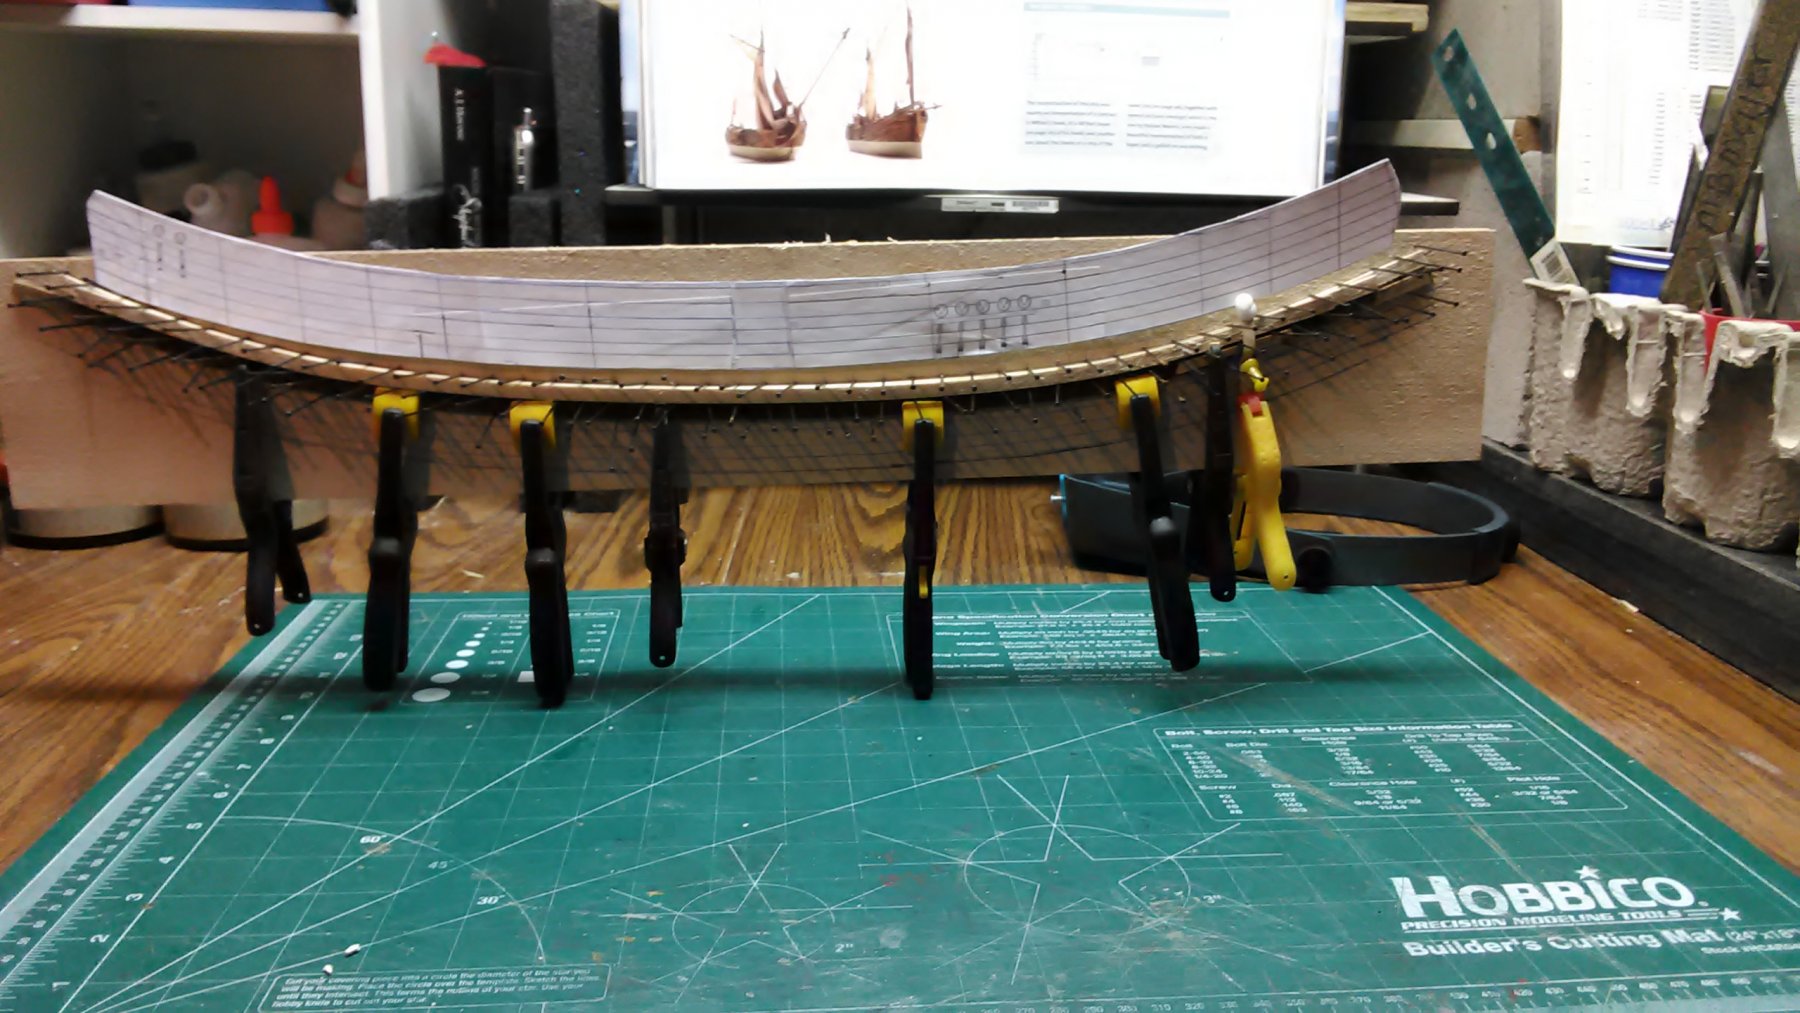
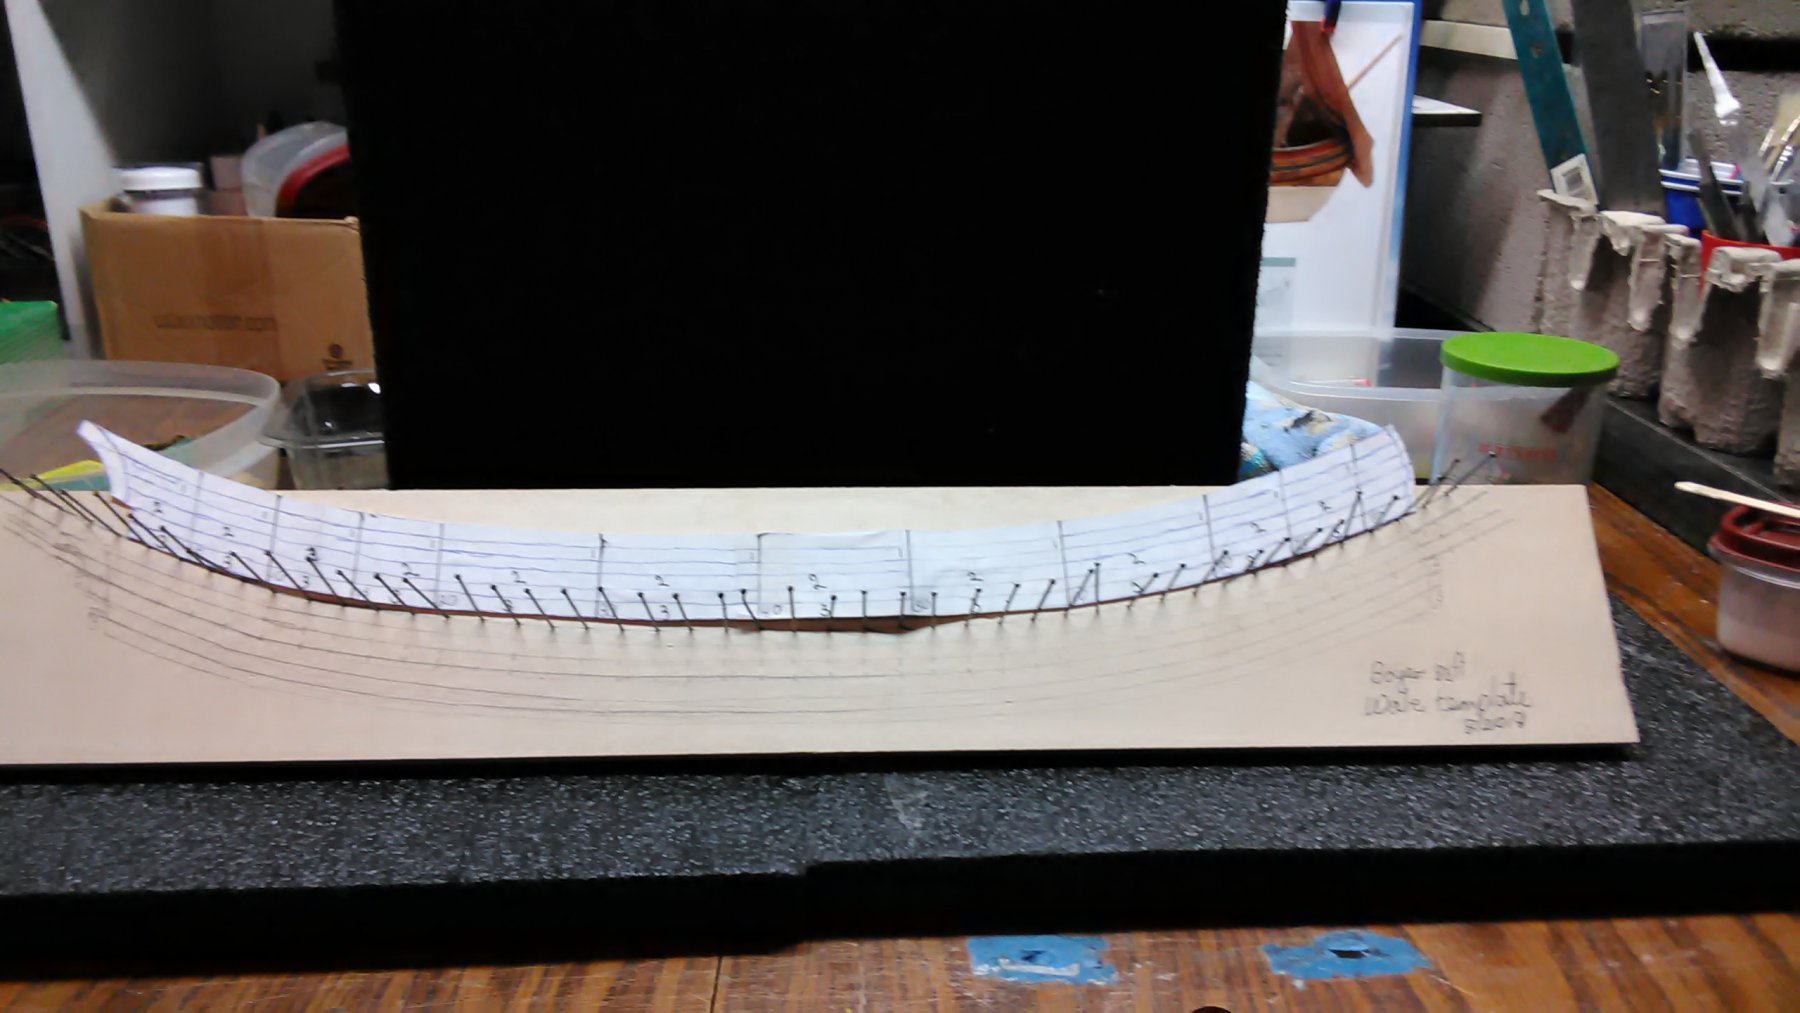
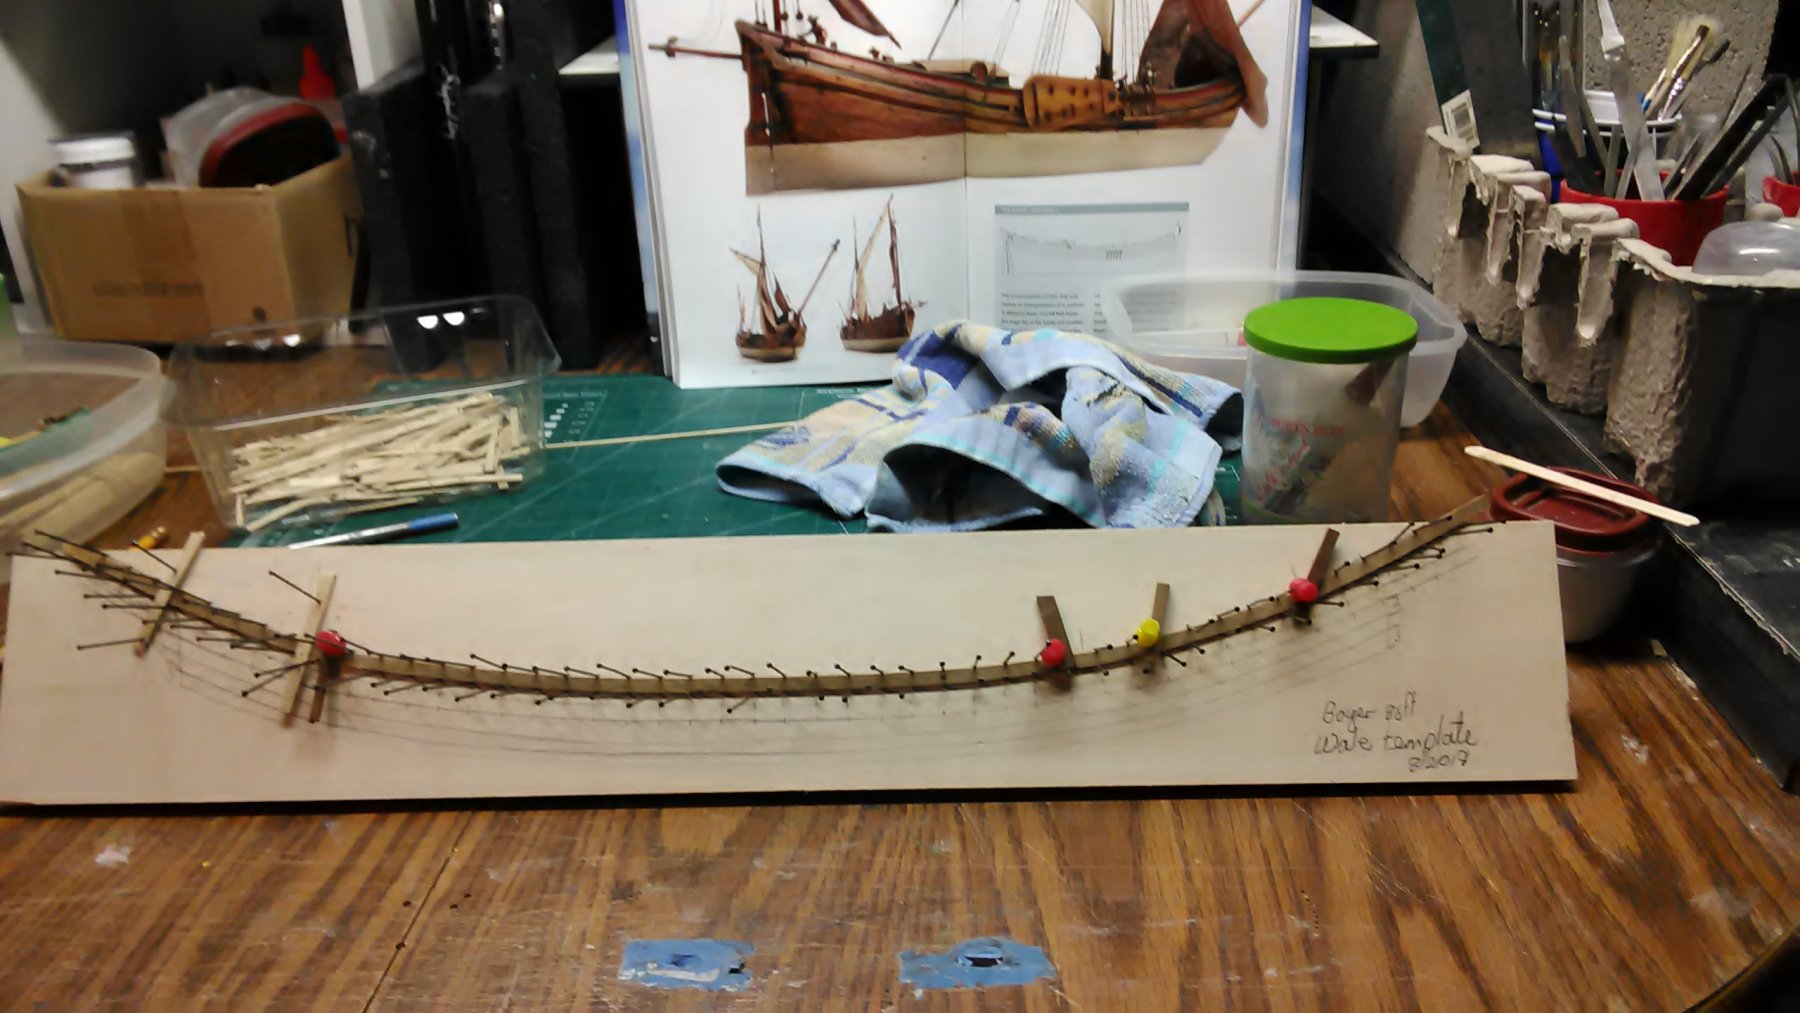
Furthermore, made a template by drawing the outline of the the Wales on a piece of basswood. Inserted pins every 1/2" following one side of the curve. Took a thoroughly soaked piece of walnut and laid it against the pins. While pushing the wood upwards against the pins nailed the lower line of pins every 1/2" as well and slowly formed a curve. The pieces across the plank are to keep the plank flat on the basswood. The wales will be laminated.
Marcus


- kees de mol, Ondras71, cog and 2 others
-
5
-
-
-
-
#Kees, thank you for the wonderful compliment and all the likes from everybody else.
There is always a way of creating/building something. If I stuck with being 'conventional', I would be missing out. As long as the boat I am building looks like what I initially planned to built, it does not matter how I got there.
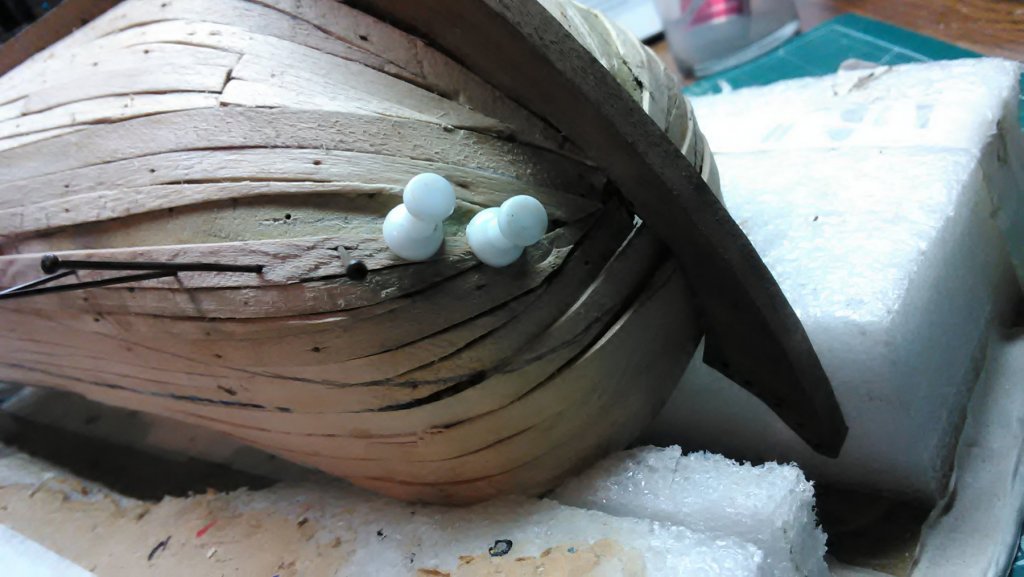
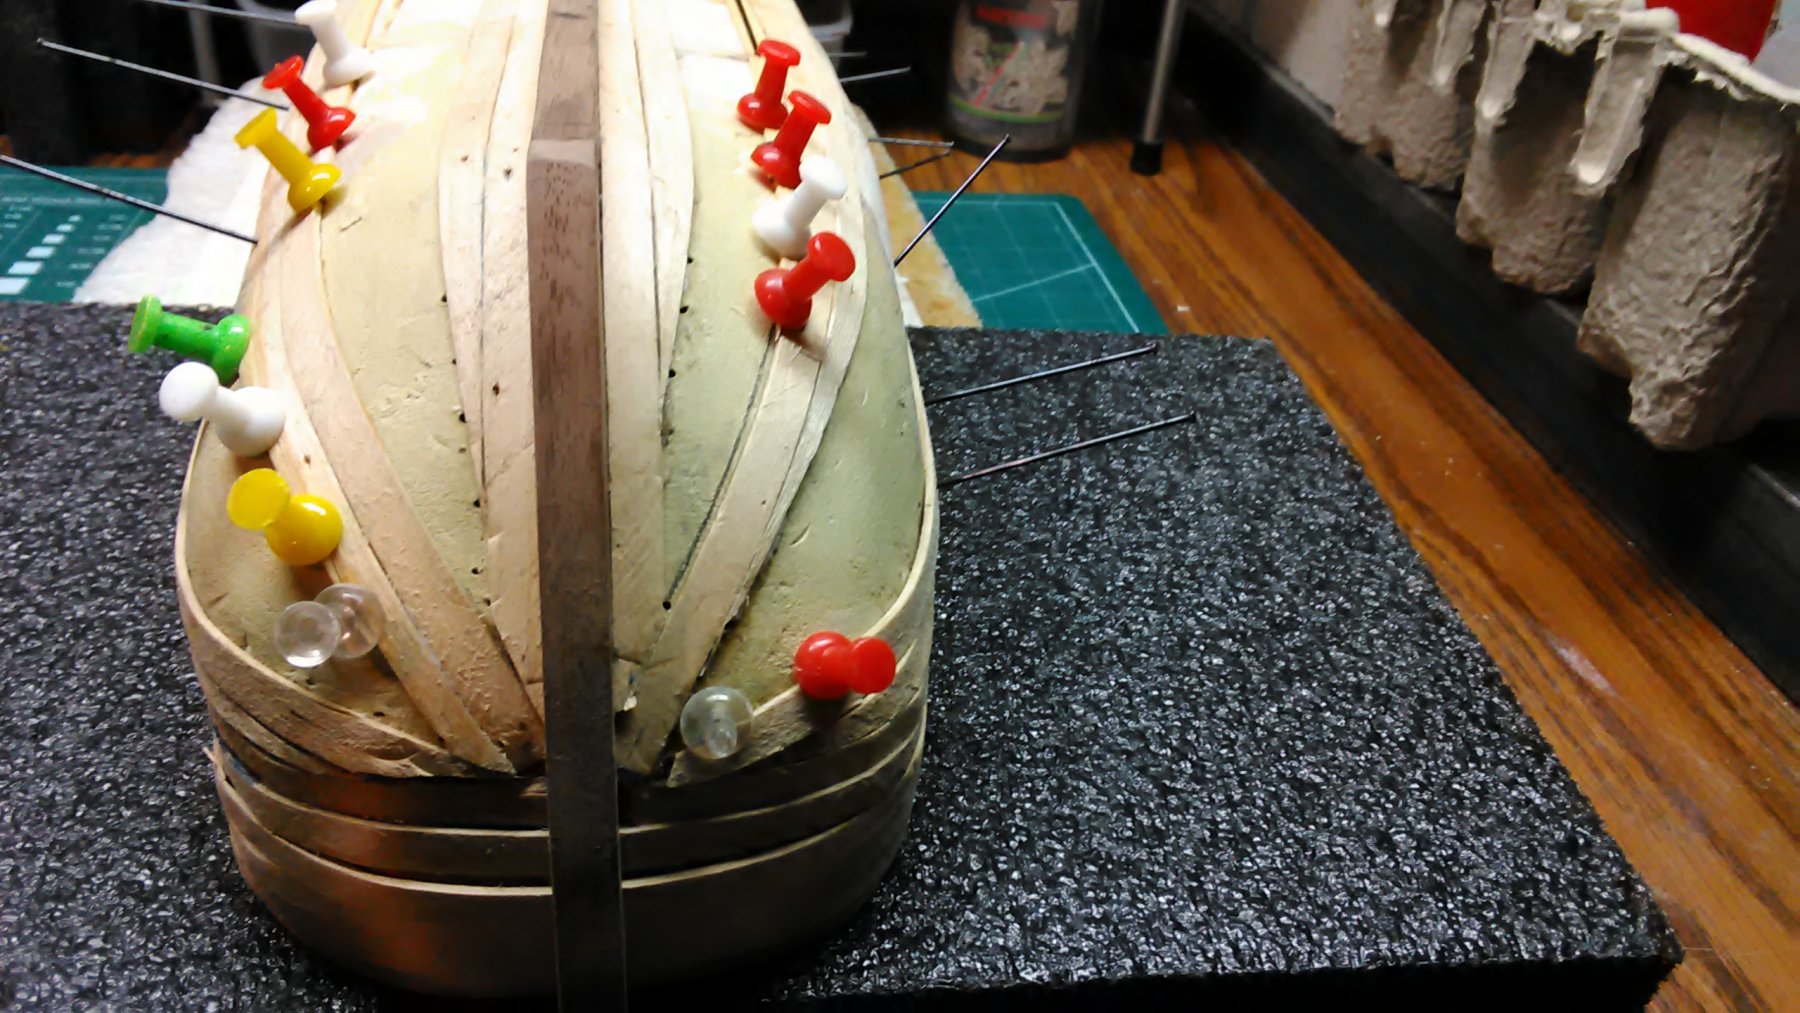
Been doing lots of 1st layer planking. Both the bow and stern are a challenge.
With the Boyer, the 2nd layer has to be curved to follow the contour of the deck. The top of the railing is also very curved. Start from the top going down to the lowest wale.
After that I plan to plank straight towards the keel without using a lot of little pieces of planks.
Marcus


- Omega1234, John Allen, mtaylor and 3 others
-
6
-
#Jan. The English book has the same plans as the merchant book, but they are printed on the pages of the book, so I think too small if you want to build a model of it.
#LandlubberMike. Agreed with a 'change of the English ships'.
The English wrote everything down and so there are more plans of them. The Dutch did not. The senior shipwright taught the junior shipwright and so on. Very little was written down. So the Boyer I am building is an interpretation from contracts, paintings and etchings. No actual plans.
Marcus
-
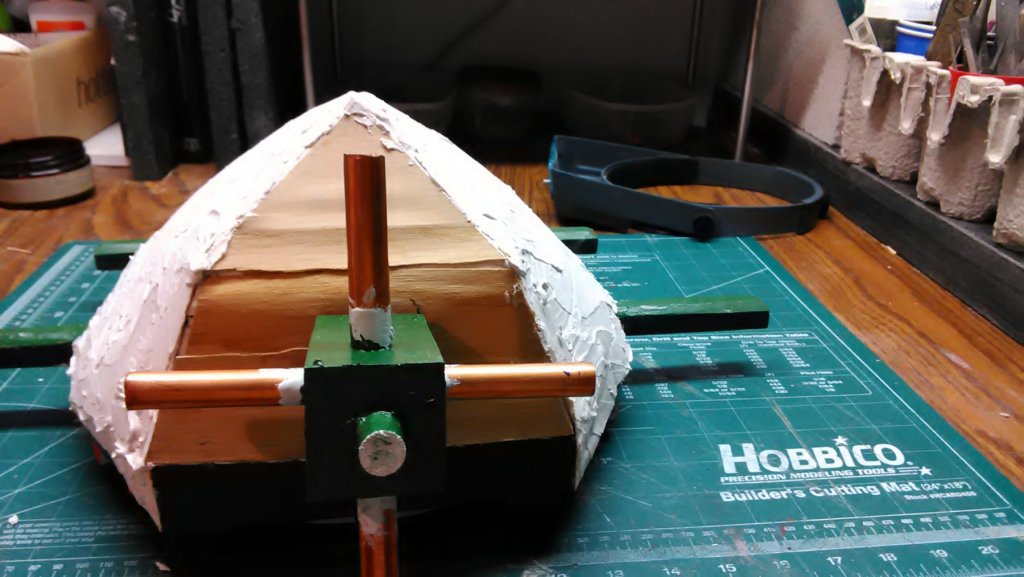
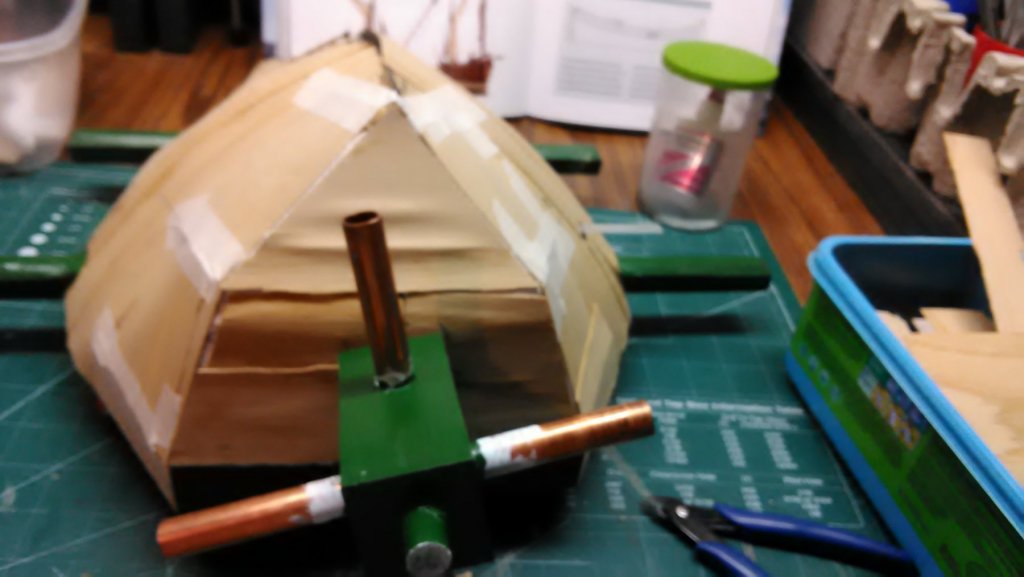
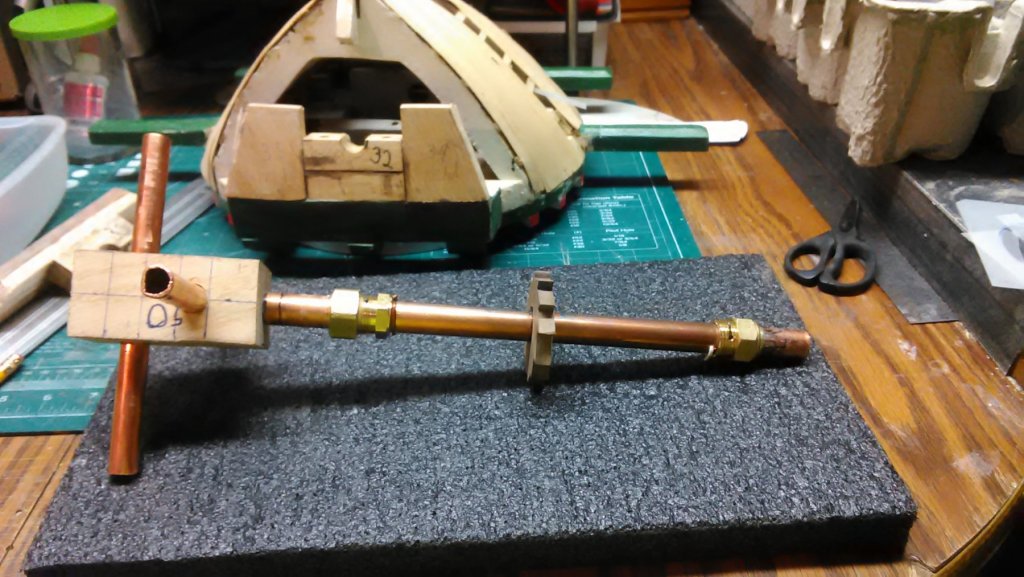
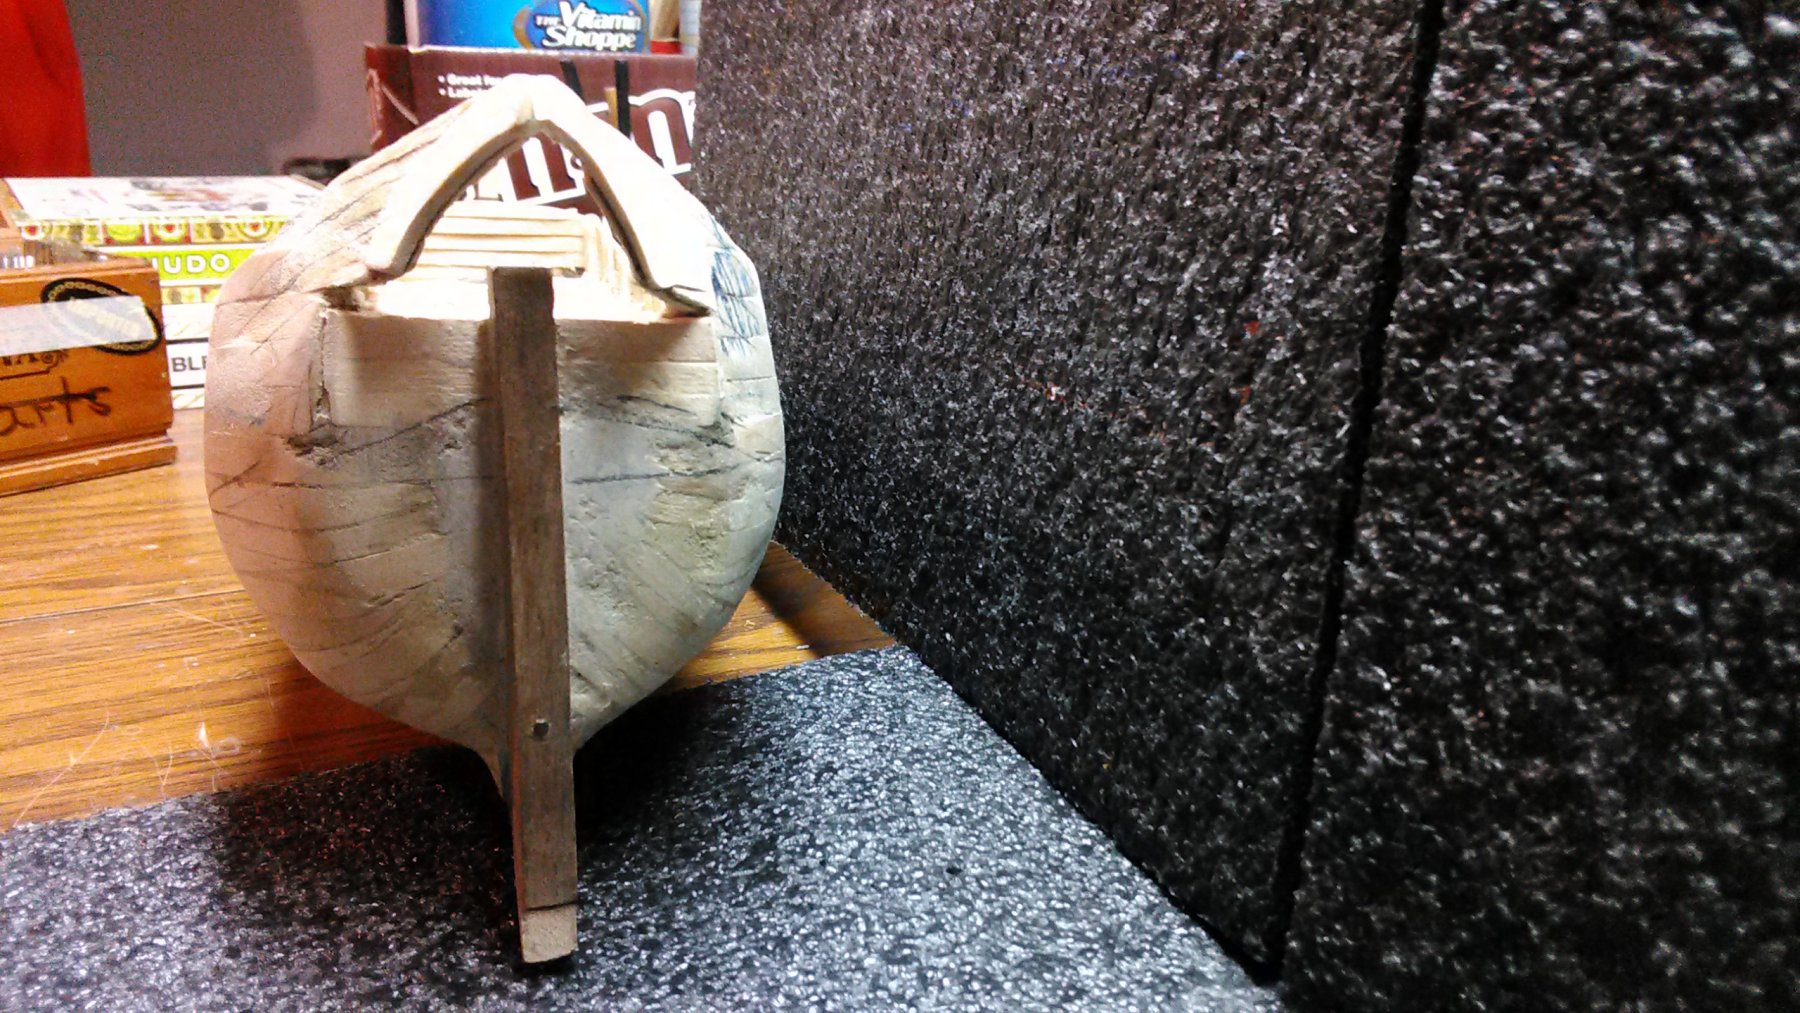
Finished all the drilling of the holes and fitted then in the axle head. Looks good. Instead of being 90 degrees on all four of the vane tubes it is 91 degrees and 89 degrees. Per instructions this can be adjusted by shaving some wood off at the lower ends.
I squared it over and over again, still not exactly. I guess the best thing to do is to use a newly purchased drill press and then get it exact. I am assuming all drill presses have some play after much usr. Oh well.
Marcus
- cog, gjdale, thibaultron and 4 others
-
7
-
2 hours ago, Landlubber Mike said:
Sorry forgot to ask a question - is the Witsens book a good one? It’s a bit pricey, just wondering whether you think it’s worth it for people that have the Seawatch book?
The book from Witsen is excellent. For a guy like me who builds pretty much only Dutch ships, this book is an education for me. Chapter 2 is the biggest and the most detailed. It describes how to build a Pinas in 122 steps. It is highly technical, very detailed in each piece that is part of the ship. The line drawings, and there are many of them, show how it was done. Other chapters discuss what the inventory is for each man on the ship for one year. Contracts for building a ship. Chapter 1 explains how Hoving wrote the book, what is different, etc.
Took Hoving 14 years to translate from 17th century Dutch to present day dutch (800+ pages). 200+ pages are relevant to ship building and that is what this book is about. Took him another 3 years to translate from Dutch to English and 3 to build the Pinas following Witsen's instruments.
I agree, it is pricy, but personally, worth it. I did get it through Amazon. I plan to build the Pinas. So with this book and the plans from the merchant book I am all set.
Plan to build all the merchant ships. First the 1:48 scale and then the1:96 scale which I want to do in 1:48 scale. Just don't know what to do with them once they are all finished. Maybe build a diorama with all of them in it and then beg a naval museum to take it from me.
W. F. zu pferde is a beautiful ship.
Marcus
-
All your detailed work is just beautiful. You are a great artist. WOW.
Marcus
- EJ_L, aviaamator, BETAQDAVE and 1 other
-
4
-
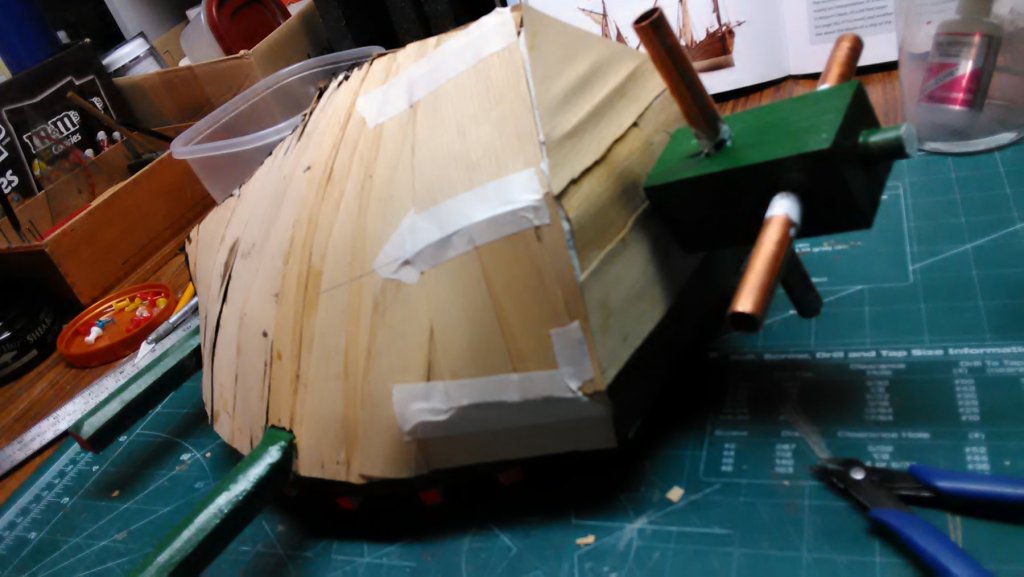
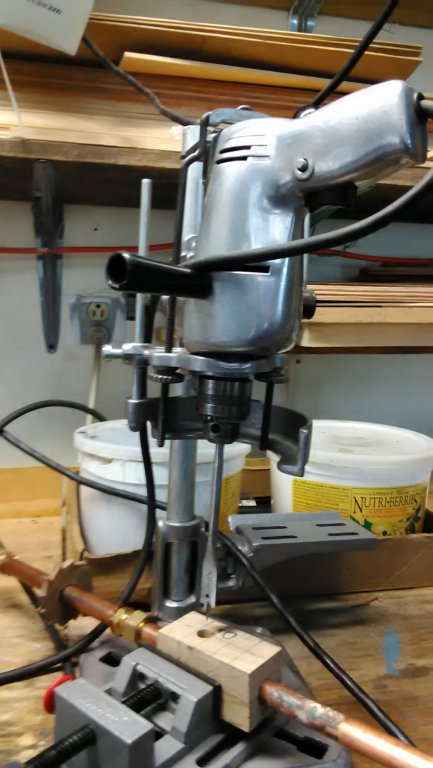
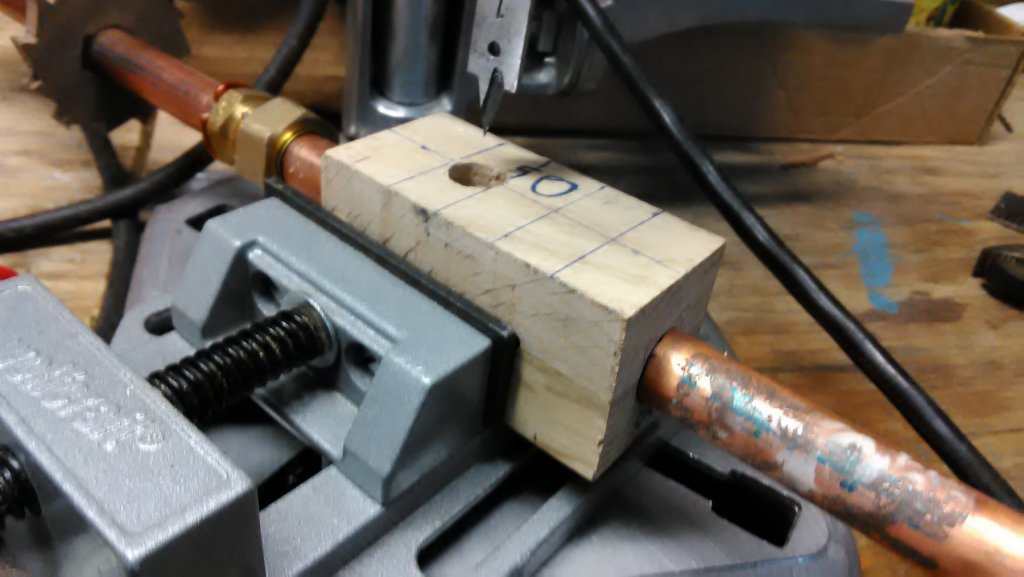
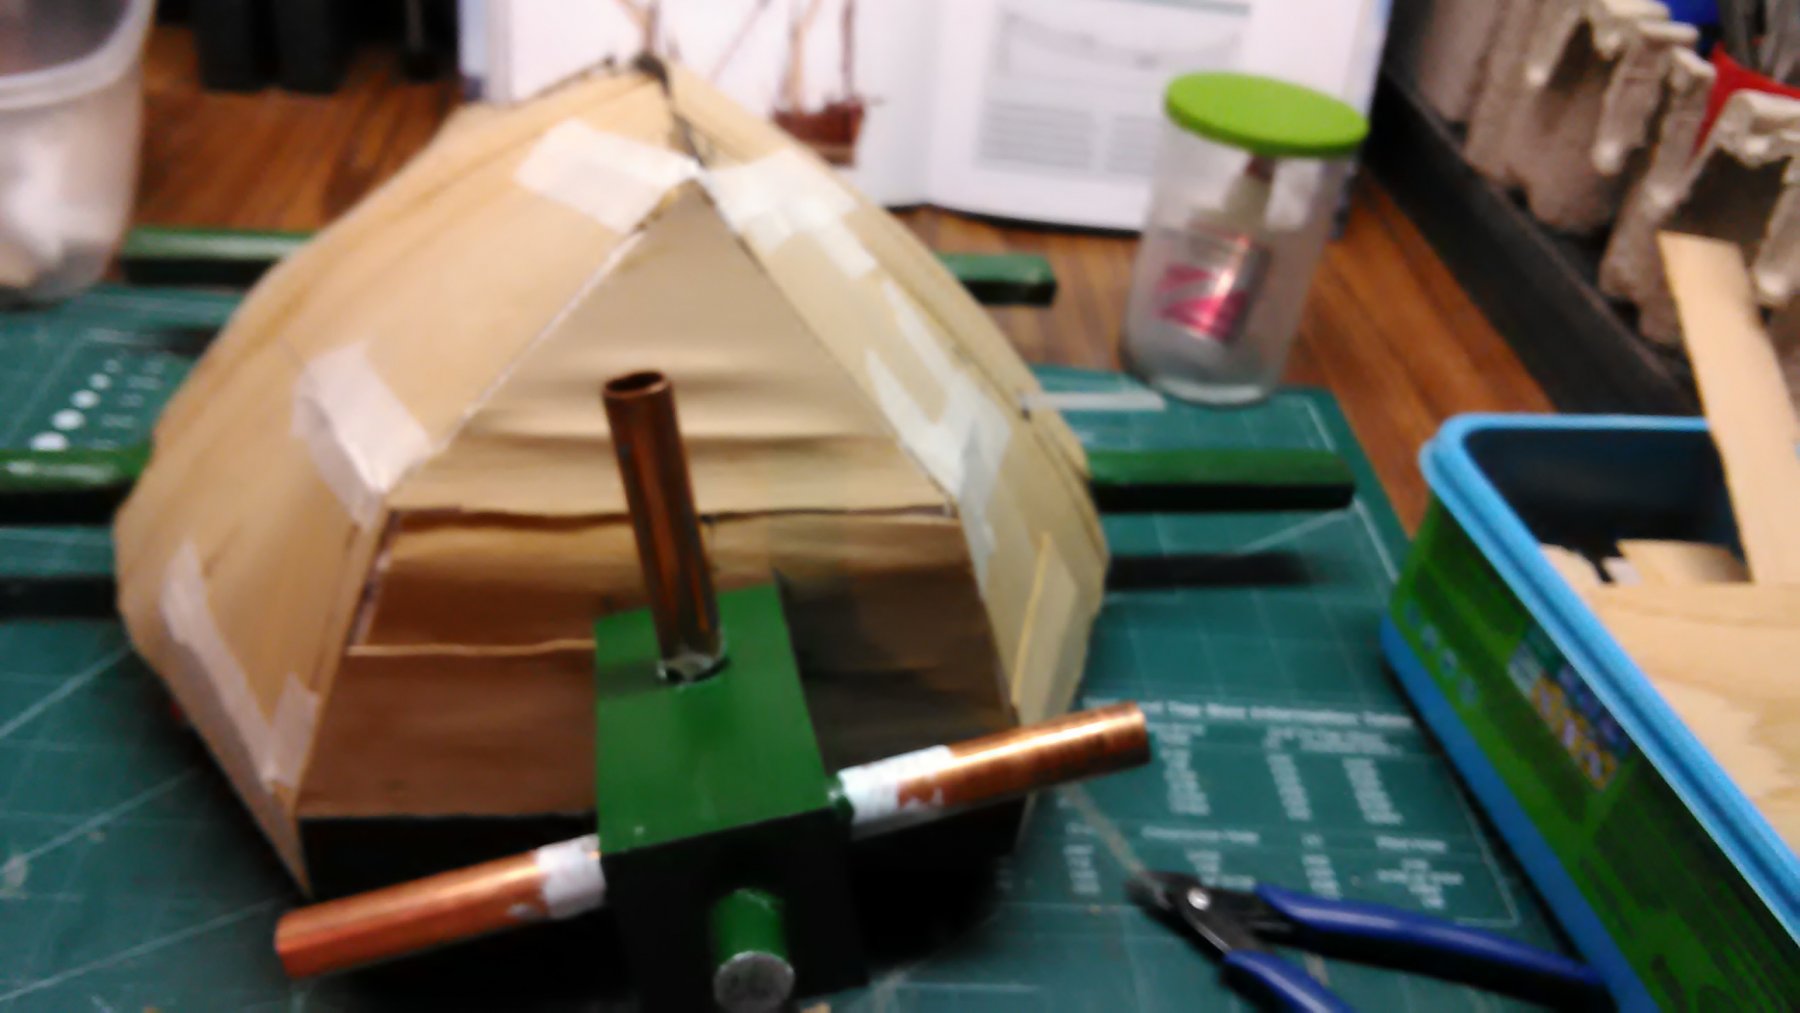
Couldn't resist, drilled the 5/8" axle hole in the block and starting with the first of the 1/2" hole for the vanes.
Marcus
- thibaultron, Jack12477, Canute and 2 others
-
5


Eight Sided Drainage Mill by flying_dutchman2 - FINISHED - scale 1:15 - Achtkante Poldermolen
in Non-ship/categorised builds
Posted
Still working on the angles of the heklatten which go into the roedes. This is a slow process, so no pictures.
Marcus