


Timmo
-
Posts
609 -
Joined
-
Last visited
Content Type
Profiles
Forums
Gallery
Events
Posts posted by Timmo
-
-
-
It's been some time since the last post but with other large projects like the dinghy finished here's an update.
After the frames sitting around for about a year as I dithered over how to fit internal components that were a long way down the track it was a case of just doing something rather than overthinking the project and suffering decision paralysis.
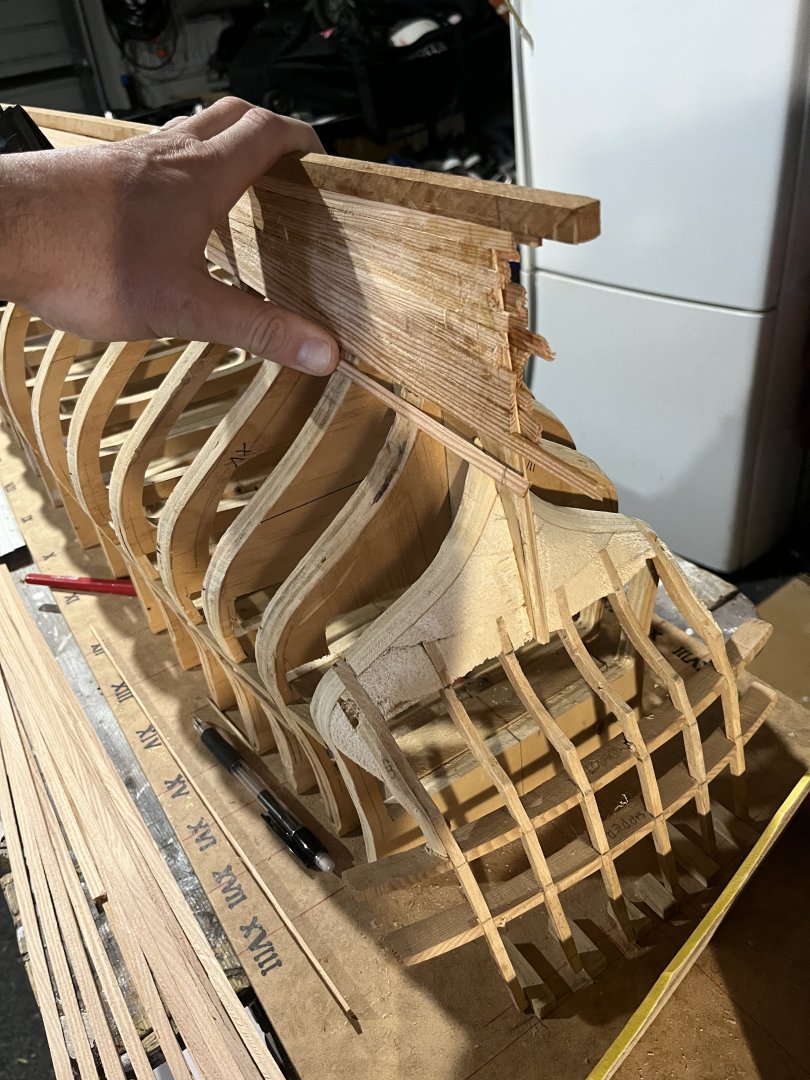
So, the frames were cut and assembled with the keel on the building jig.
Below is a test fit before glue with the frame interiors still solid. These were hollowed out before assembly.

The stern gallery frame has been assembled. This involved a lot of thought and trial and error due to the vagaries of transferring a 2D plan into a three dimensional shape. I worked on the theory that as long as I had fixed and known points at the taffrail (The building board base) and accurate gallery window voids (created with temporary spacer blocks) the rest should follow.

Fairing of the hull framing followed, with some blocks at bow and stern the help with the plank fit.

After adding upper and lower gunport sills planking is now underway. I'll double plank the hull to give a solid base for the more tidy second planking.
I'm using Douglas Fir left over from the mast build on my sailing dinghy and will use matai for the visible portions of the second planking to take advantage of the nice honey tone and hardness. The bottom will likely be coppered anyway.
I'll add a layer of wales as I get closer to them and the upper bulwarks will likely had a 1.5mm ply first layer rather than planking, allowing gunports to be cut and lined easily.

The lines are starting to appear.
- Ian_Grant, JerryTodd, GrandpaPhil and 1 other
-
 4
4
-
Just found this build Dusan. Stunning work and very inspirational. Well done and thanks for sharing.
- westwood and FrankWouts
-
2
-
-
Thanks so much for this thread @thibaultron . It's hugely helpful in understanding the process invovled. I've had printed guns done for a previous project and have been weighing up whether to commission another job for my current project or invest in a printer for this and future use. Lots of food for thought here.
- thibaultron and allanyed
-
1
-
 1
1
-
-
Great work BE.
I've drifted away from ship modelling for a bit so missed most of this build an am having a great time catching up. Fine work indeed on a fine kit. You've nailed the aesthetic of the period. I'm seriously considering a Vanguard kit now as scratch building's so time consuming.
- Blue Ensign, Ronald-V, mtaylor and 1 other
-
4
-
I'm really coveting your vessel here Jason. It's everything I wanted to try with an Artois-class before being distracted by my 1/36 Enterprise (which has been but back on the stocks with some frame shaping done, although nothing worth posting).
Our puppy chewed the corner of my Anatomy of the Ship Diana book on a low shelf the other day and briefly reminded me of what could one day still be. I suspect I'll end up just watching your superior build!
- Beef Wellington and JesseLee
-
2
-
Nice work Jason. I'll be looking to appropriate that volute solut-ion (geddit?) for future work.
The colour tones are looking great on the hull too.
-
9 hours ago, HardeeHarHar said:
Hey Wayne,
Thanks for the reply and the kind words on my build log. As you are aware, I have unashamedly adopted several of your approaches in my ongoing Granado build. While I cannot replicate them with as much skill as you possess, your ideas have been able to help make a difference in the quality of my efforts in a good way. Now having looked back at the way you have displayed the mortars, I think this might be the way I proceed as well. It seems to convey some action is happening with the 2nd mortar being put into commission....right? I also can't say this enough: your display is awesome.
Thanks mate, much appreciated.
There's very few untried ideas out there, just ones that are refined by further use after being taken from others. I got most of these ideas off the fine builds on this site so it's nice to hear they are again helping others here. Keep up the good work.
Also, if you dangle a mortar canopy as I did, you might want to put a weight of some sort on the underside to put a realistic strain on the hoist cables. I used some lead foil folded over a couple of times as it could be kept out of sight.
- Kingspoke and HardeeHarHar
-
1
-
1
-
-
On 8/26/2022 at 1:38 AM, HardeeHarHar said:
Hey Wayne,
Hope all is well with you. While I am working on installing the cannons with all their gun tackle I thought I would take the opportunity to ask a quick question on the Granado that has been bugging me for about a year now: Where did you squirrel away the canopies to the mortars. Did you just suspend the one (which looks so nice!), and the other 3 went back into the box? It appears to me that there is little to no room for stowing them in any fashion that wouldn't look haphazard, and I don't think it would look much better having all 4 suspended. I will look at Joe's and some of the other build logs to see how they worked this out, but I thought I would see if I could get your line of thinking on this...
Best regards,
Brian
Hi Brian,
Sorry about the delay in response. I've had the ship building on low-rotate for a while and don't get back here too often. I do intend to return to future builds though and love still looking at the fine work on this site.
In answer to your questions- I think I still have the canopies in a box somewhere. I harboured visions of using them along with a jolly boat and other miscellaneous bits incorporated into the display like the dropped anchor but never quite got there. I just wanted to show a mortar 'run out' and another more tidily stowed. Asthetics over realism there.
Also I just glued them onto the deck. Thanks for the kind words about the compsition on the display there. I'd bought the plans from NMM and then couldn't justify the expense of framing so came up with incorporating a colour scan of it into the ship modelling.
-
I don't understand the shipping restrictions at present. I recently got a parcel from Hungary in about a week via UPS. I tracked the flights out of curiosity and there seemed to be plenty.
-
That is really quite something Reg. Such nice work
-
Lovely clean decks there Reg. Nice work.
-
Hi Reg,
Any change in the shipping situation? Keen to see more of your fine work and I’m also at a loose end and considering starting a Winnie.
-
Reg, Have you tried NZ post Youshop?
You get USPS or whoever to ship to the NZ Post depot inthe US, Oregon I think, and they onsend it from there. It caters for all the people like us at the quiet end of the earth that some people won't ship to or those who only do domestic.
I've used it before with goods from companies in the States that use one of those mad US Postal service calculators that makes the shipping 10x the cost of the item. It's worked well without much cost.
However, the item probably needs to be commercially packaged/ labelled. as I suspect it relies on scanning tech. I tried it once for a friend in the states sending me some scale rope in an envelope with a handwritten address and coding for the depot and it disappeared.
-
That’s great work and a string of very educational posts Jason. Glad to see her back underway.
The spreadsheet idea seems so obvious and is something I’ll store away for future.
Coincidentally I’ve been fitting decking to a 1:1 scale sailing dinghy and spent a day working out tapers and spacing for a measly five planks.- Beef Wellington and JesseLee
-
2
-
Good work Reg. That's a busy looking gundeck of very tidy weapons.
-
-
-
10 hours ago, HardeeHarHar said:
Timmo, your handiwork is amazing. I also noticed that you had a beautiful schnauzer pup in one of your pics. Always glad to see a happy fuzzy face.....we have two schnauzer first mates, and they do love boats!
Ours seem to be fairly salty seadogs. Here's one in the canoe.


-
It's been a while but Enterprise sits with her masts finished but stored and her framing and building stocks safely hidden away.
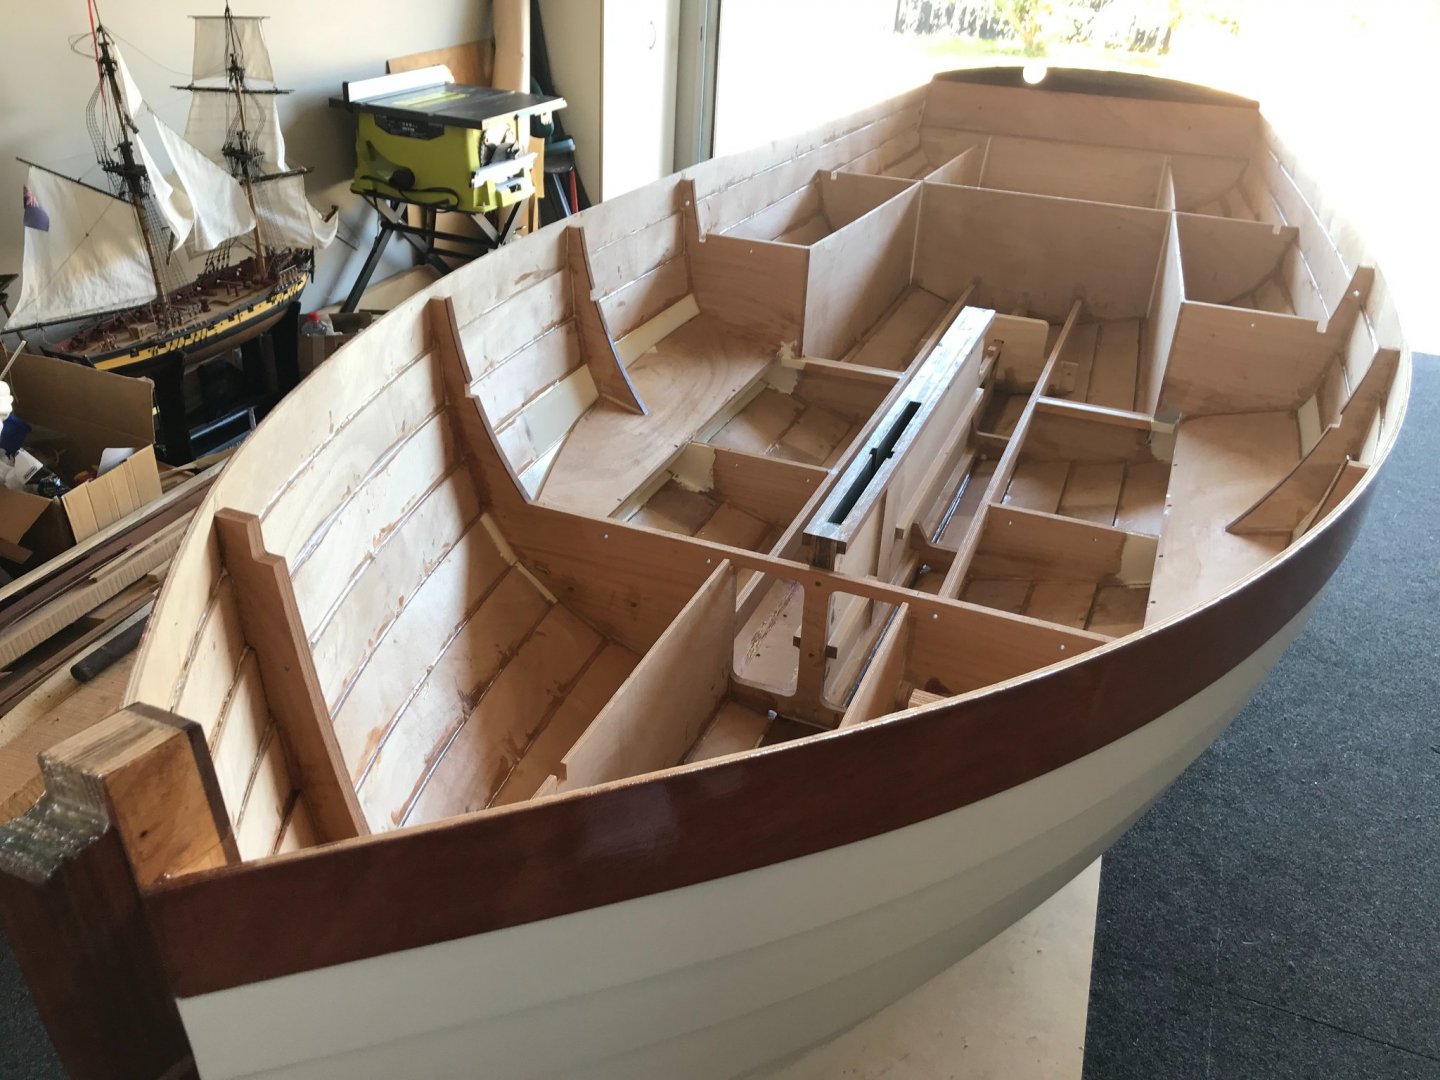
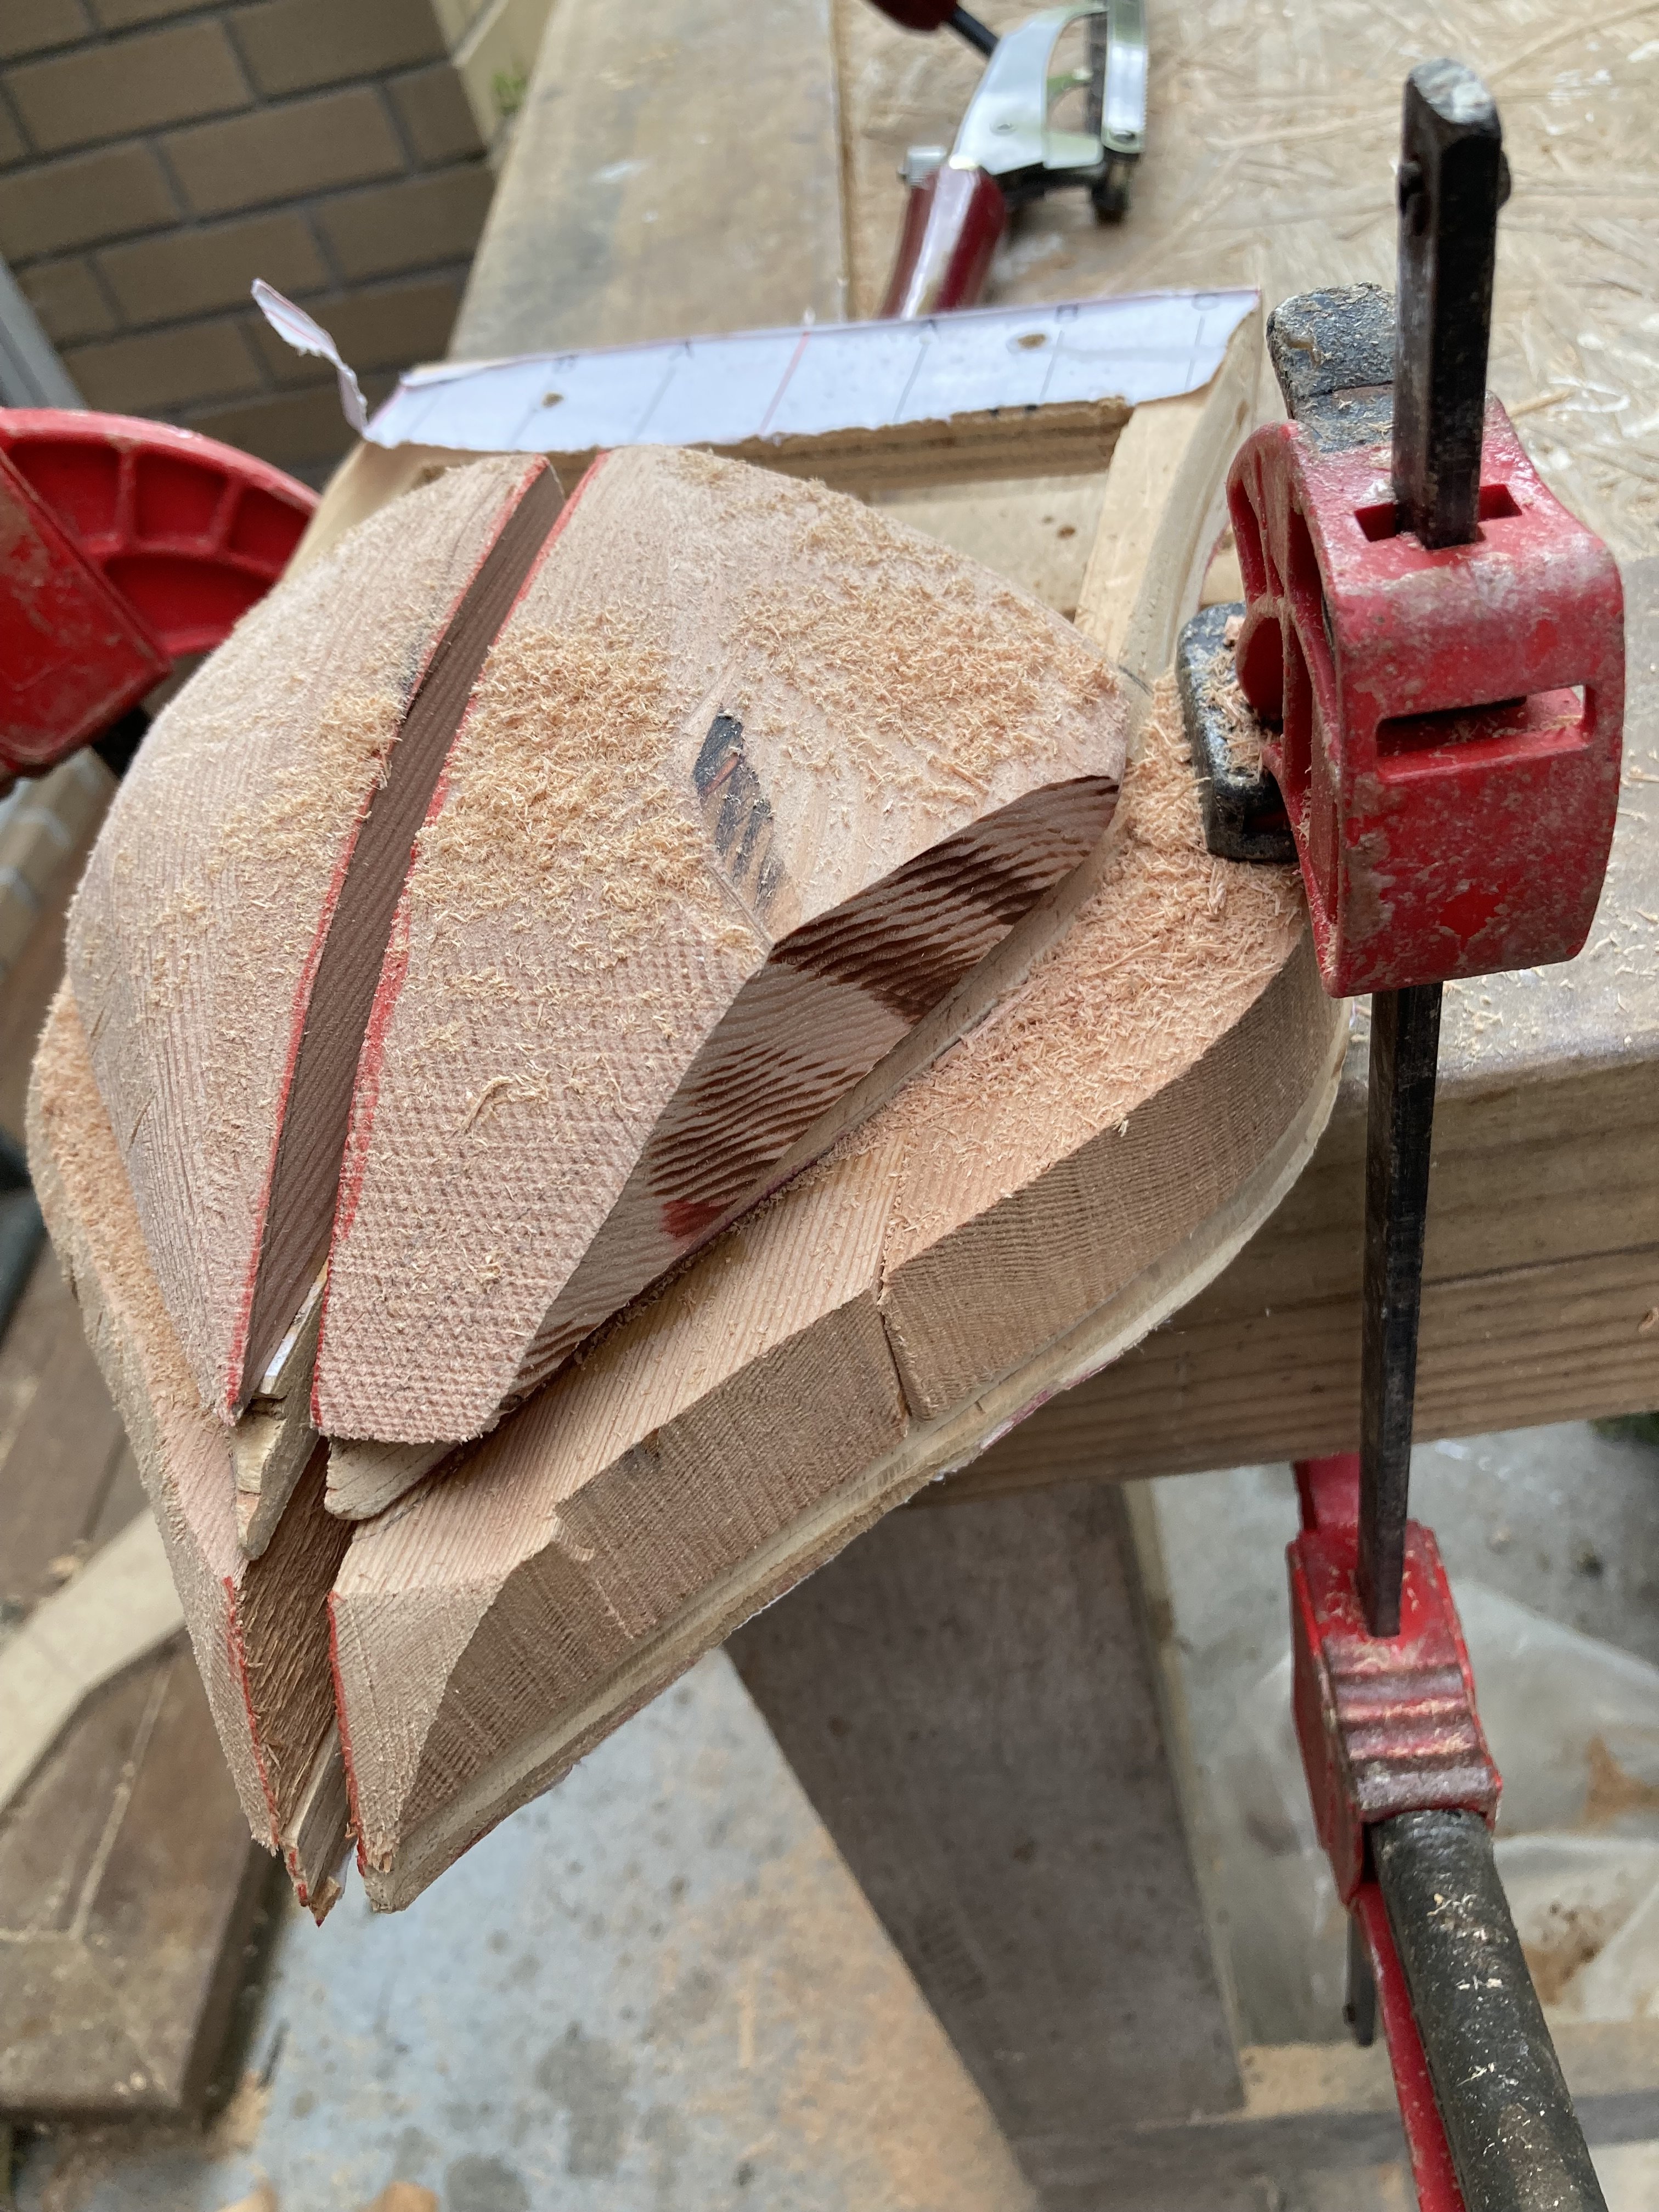
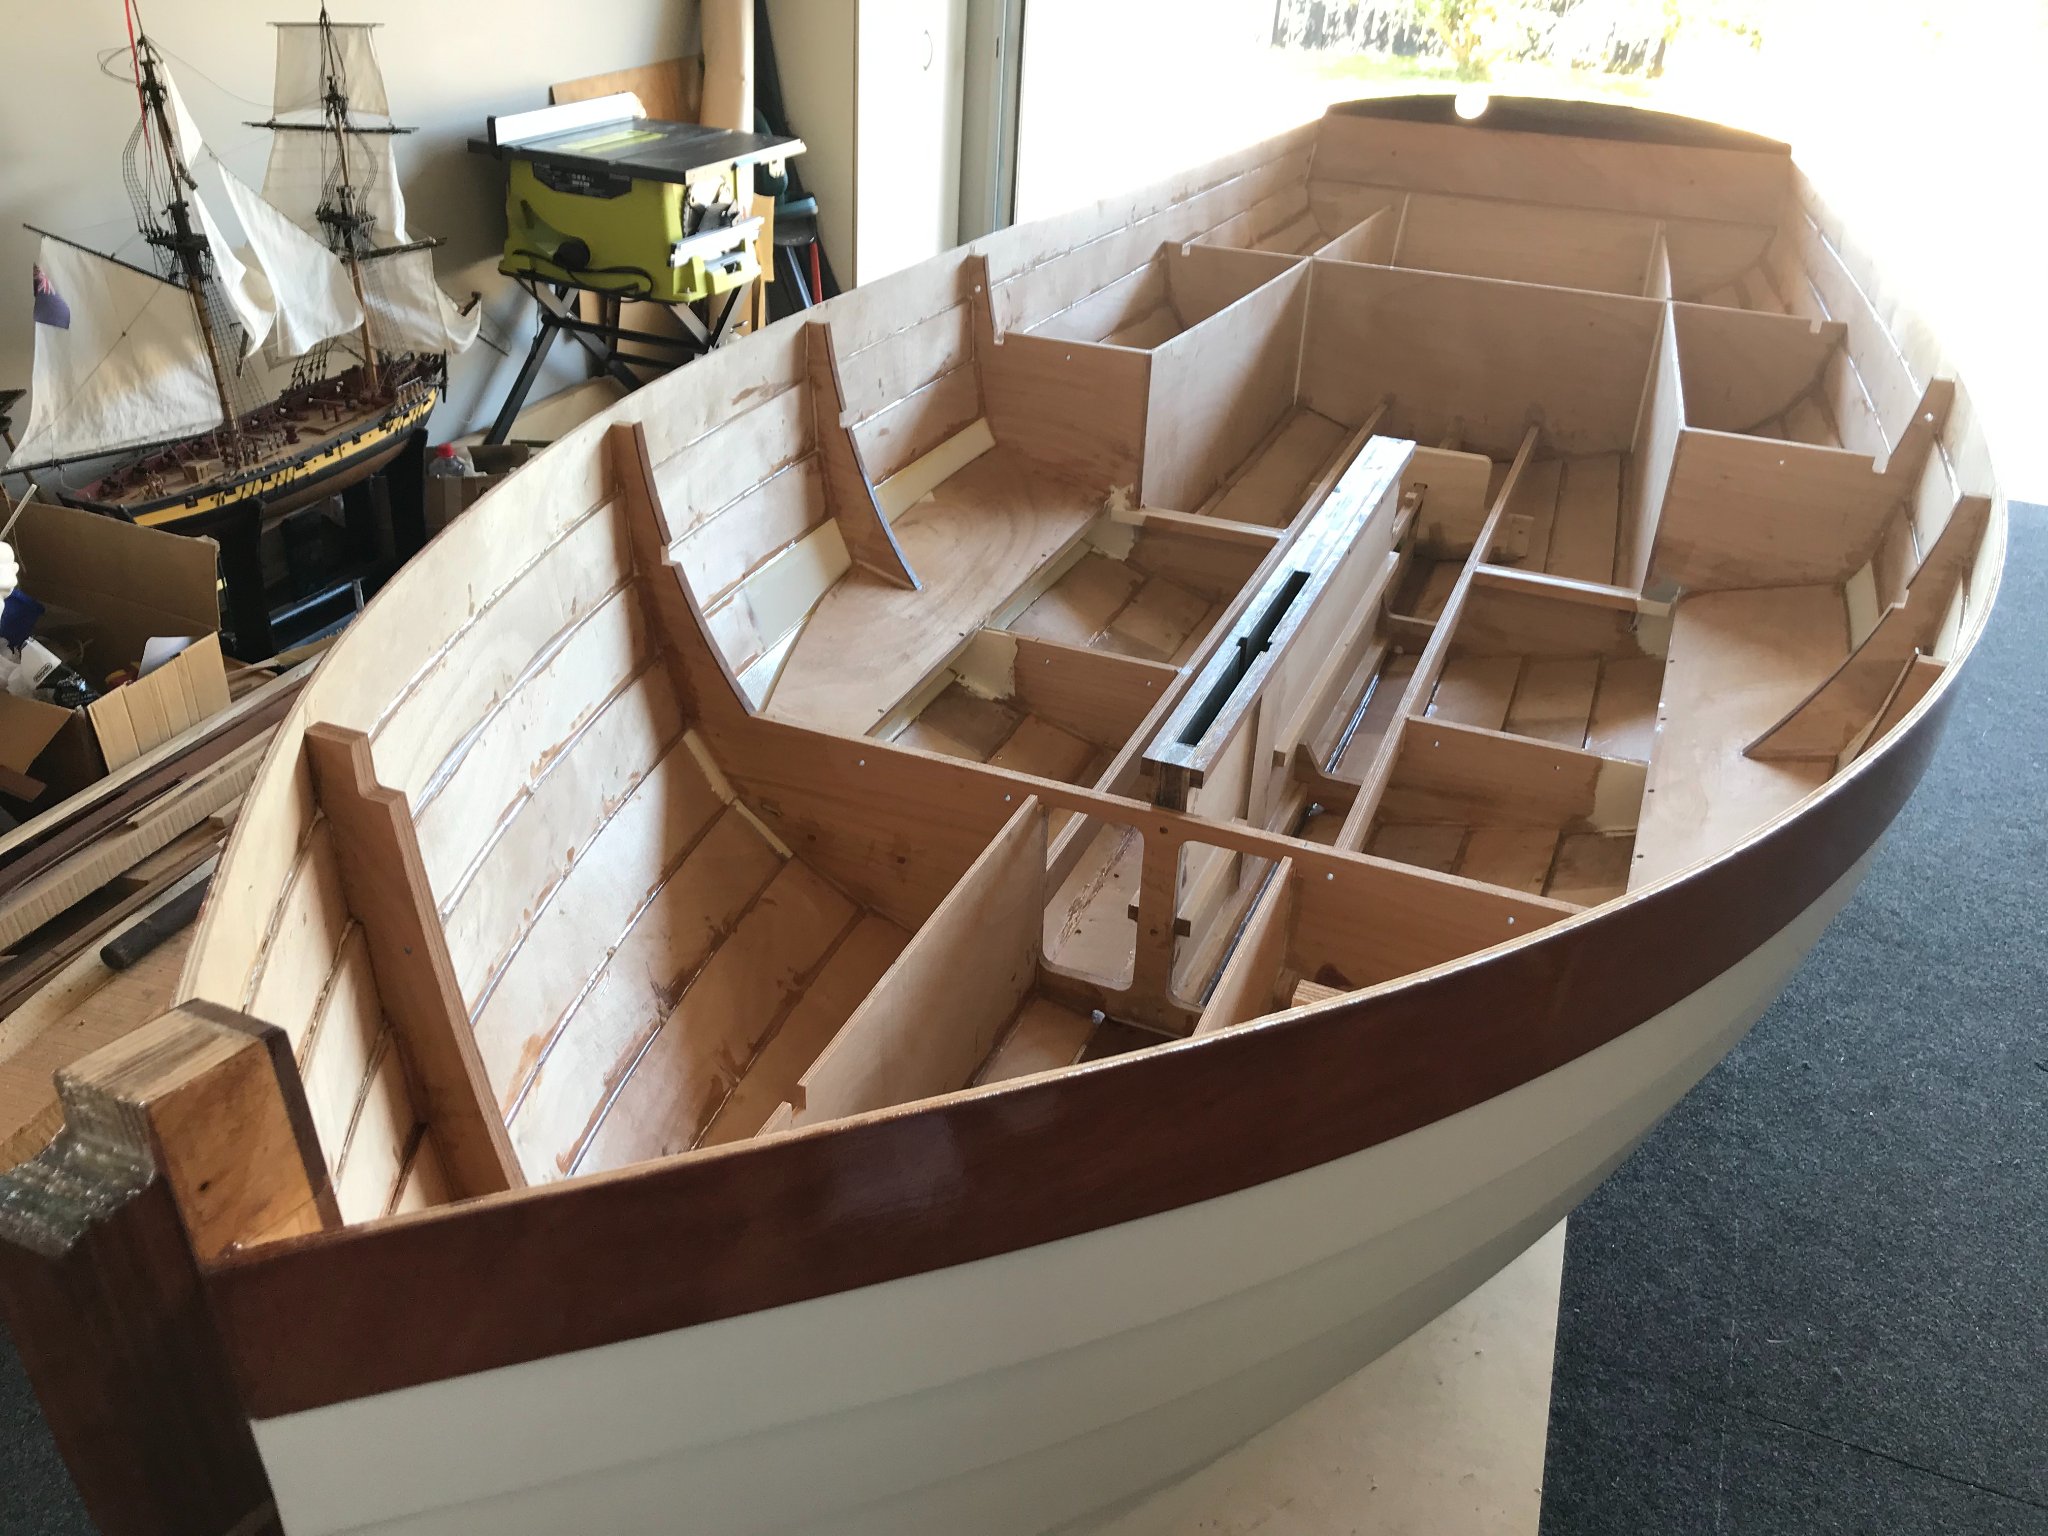
Here's the reason... my new boat is taking shape- a 14ft ilur class sailing dinghy.
Hoping to have her launched around the end of the year and then back to the Enterprise next year at some stage once I need something to build again. Also, after spending all the family treasure and garage space on this one I'll need to reduce scale of size and money again.

-


HMS Harpy 1796 by Blue Ensign – FINISHED - Vanguard Models - 1:64 scale
in - Kit build logs for subjects built from 1751 - 1800
Posted
I'm extremely late to the party BE but have enjoyed cathcing up on your fine build. Harpy looks great. What a superb line of kits Chris has now and you more than do them justice.