

Timmo
-
Posts
609 -
Joined
-
Last visited
Content Type
Profiles
Forums
Gallery
Events
Posts posted by Timmo
-
-
You're right about the lack of specifics of individual ships Joe.
I would have liked to model Pelorus as she did a lot of charting work on the NZ coast late in her career but I couldn't have been confident of details. After1810 higher bulwarks, built up head rails and more metalwork in the rigging seem to become more common. You see this in the war of 1812 vessels but these individuals have more of a record given the notable single ship actions.
I went with an early vessel like Harrier (1804) as it doesn't feel wrong using the 1797 Cruizer plans in Petrejus which have the very simple lines without raised anything.
Plus I liked the name and her role in the 1806 Java campaign where she got a mention in the Gazette for an action alongside a frigate where she raked a Dutch frigate and chased down some merchant vessels.
It will likely be no fore and aft platforms on Harrier as I didn't want to complicate things with a lack of access to the rudder and headsail fairleads given she's a working RC model. Now the rudder is largely sorted and I'm not far off servo installation I think they could be added later if I want. We'll see.
I'm at the stage where I can do without The Petrejus book for a while so if you want to borrow it let me know and I can put it in the post. It's better to have the detail early in the build. Flick me a PM if you are interested.
Wayne
-
We are all our own harshest critics Mike. You have a superb build there.
We all benefit from a fresh set of eyes to see what we can't. It's the old saying 'can't see the wood for the trees'.
I hope to tackle fully framed one day as you have been confident and skilled enough to do.
Keep it up.
- Canute, Captain Poison, Mike Y and 2 others
-
 5
5
-
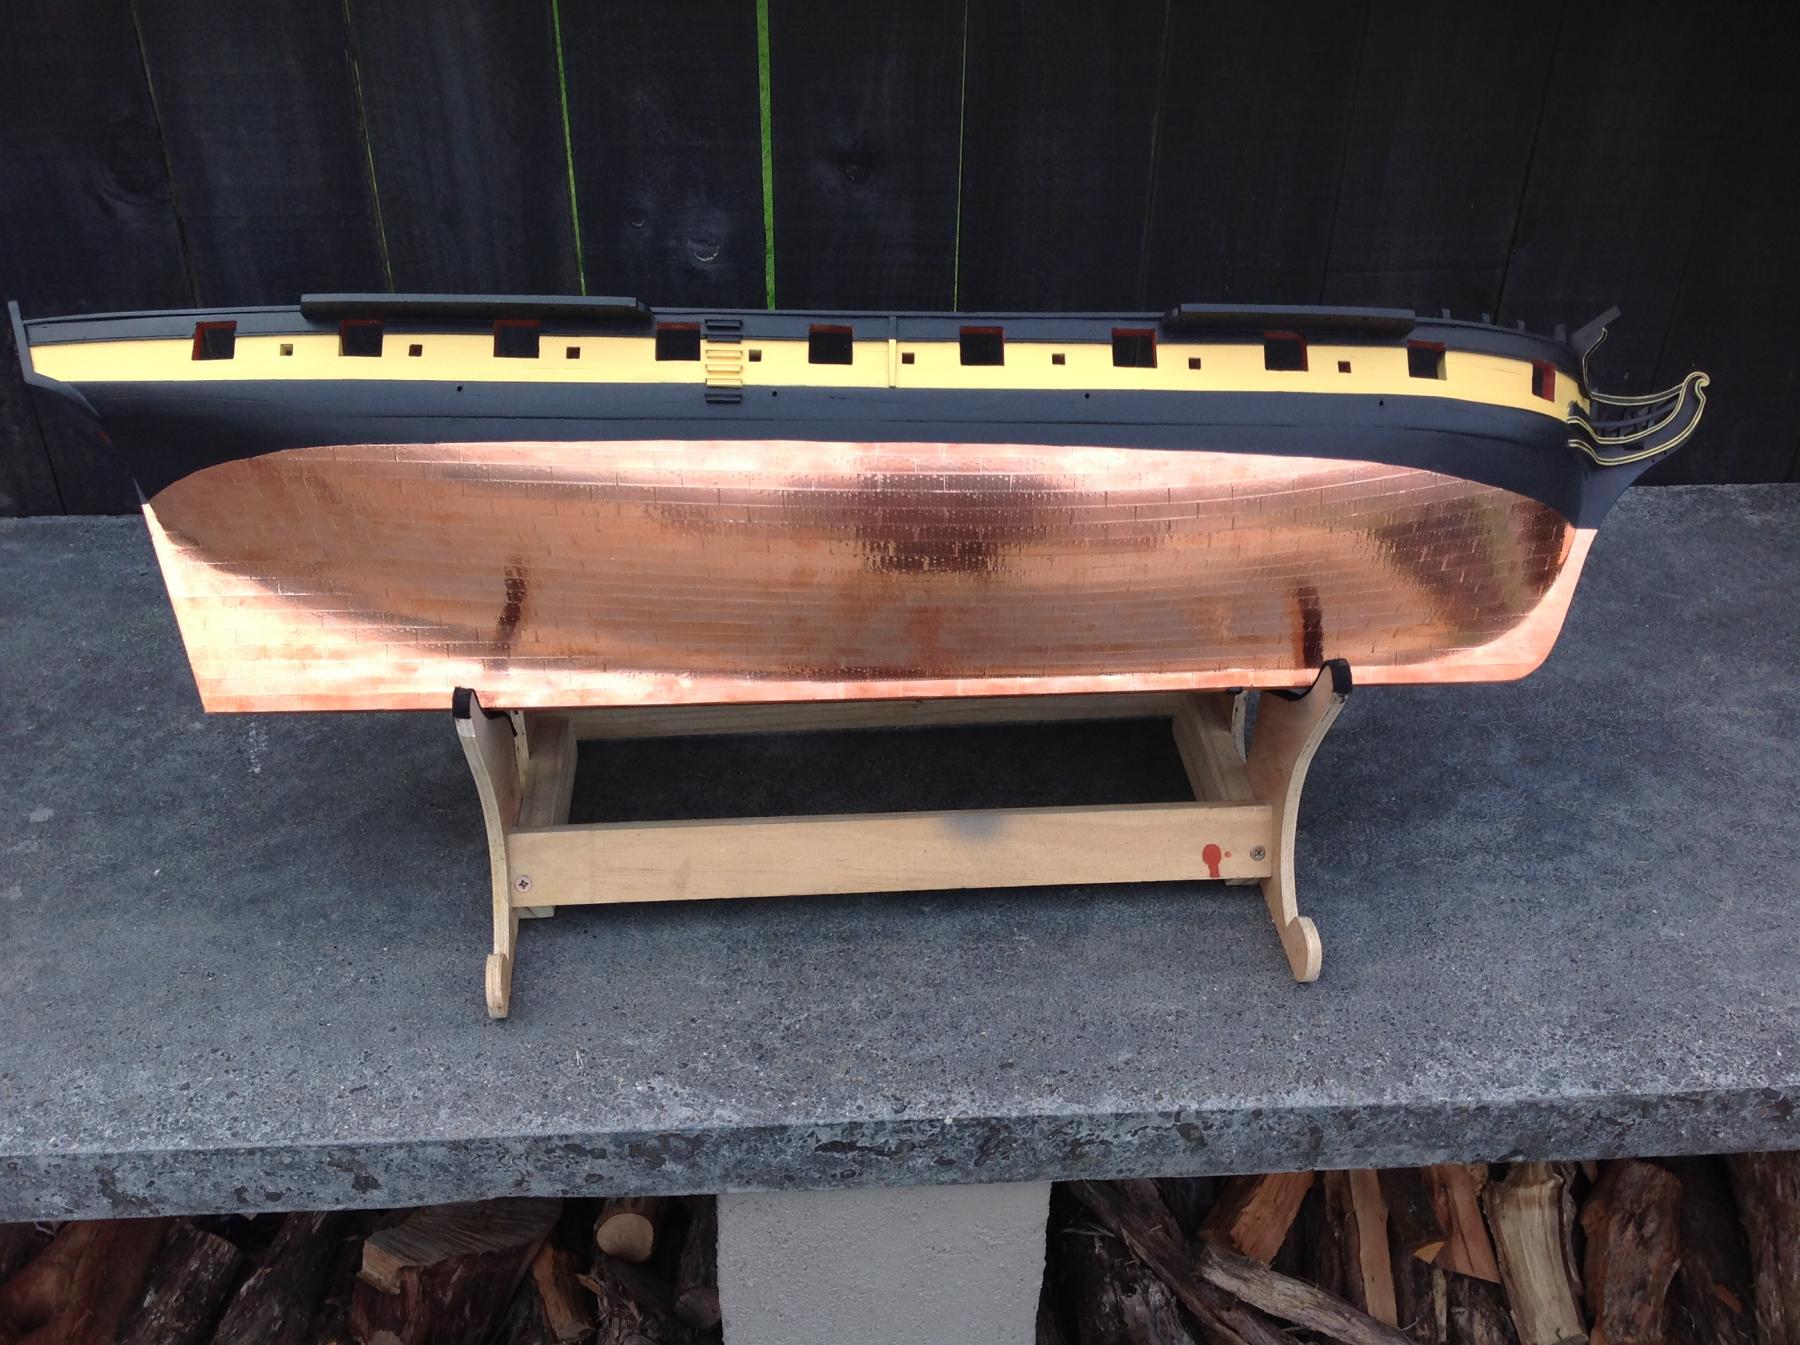
Just had a look back at old pics and it's nice to see the copper is mellowing nicely one month in. I'll post a pic in daylight in near future.
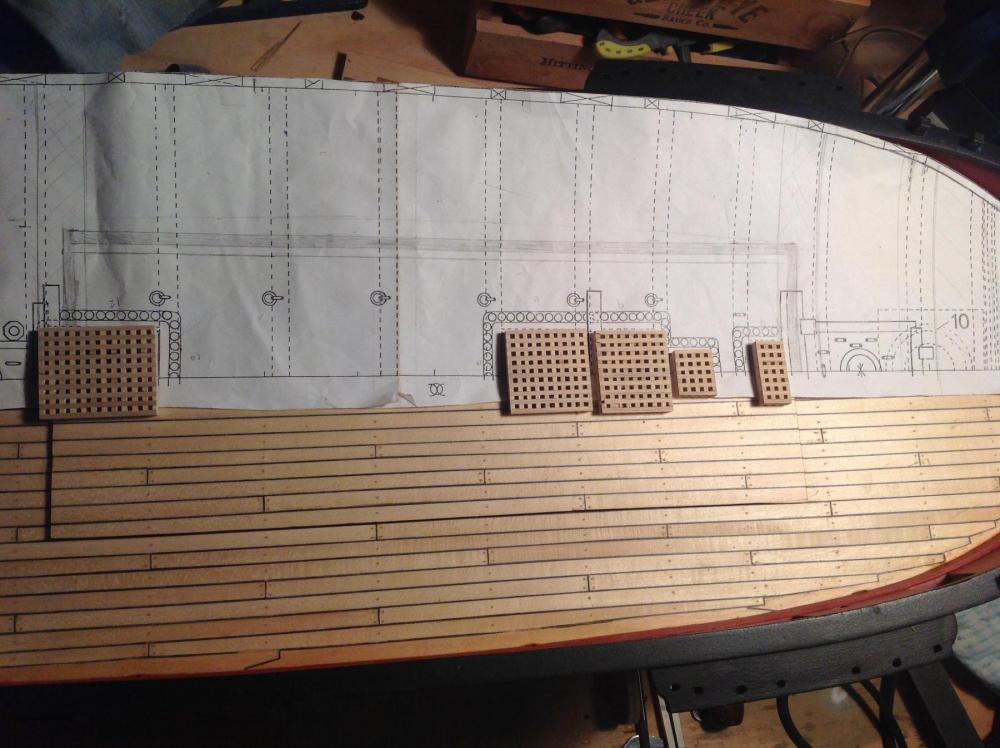
In the meantime work on the deck furniture continues.
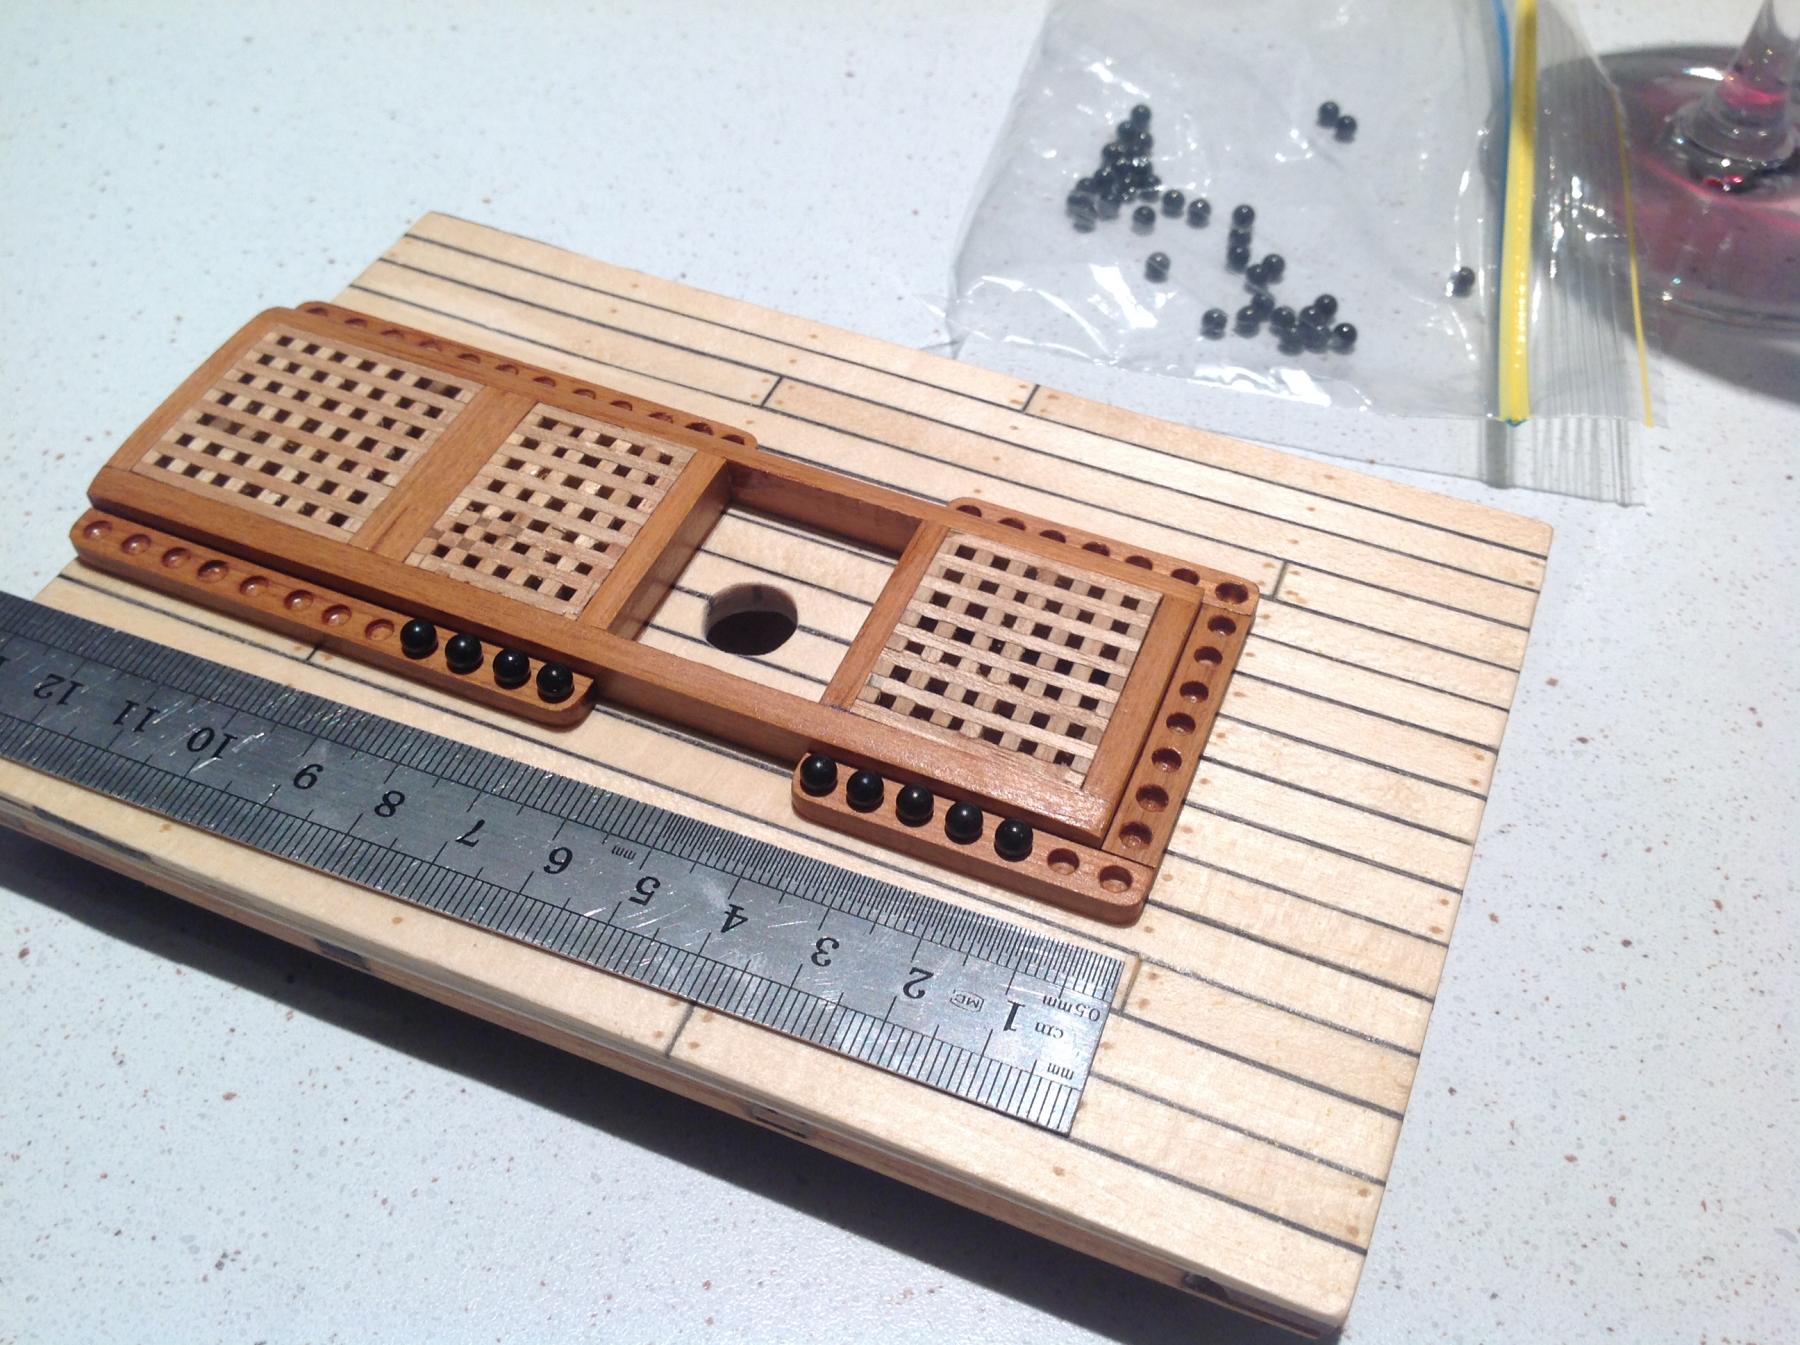
The gratings have all had coamings added. These are just the sort of thing I could cut and have installed, a side at a time, in a spare half hour before going to work each morning. That seems to be my main building time now with the odd bits in the weekend aimed at prepping to line up a series of these bite-sized chunks that could be knocked each morning before heading off to the salt mines.
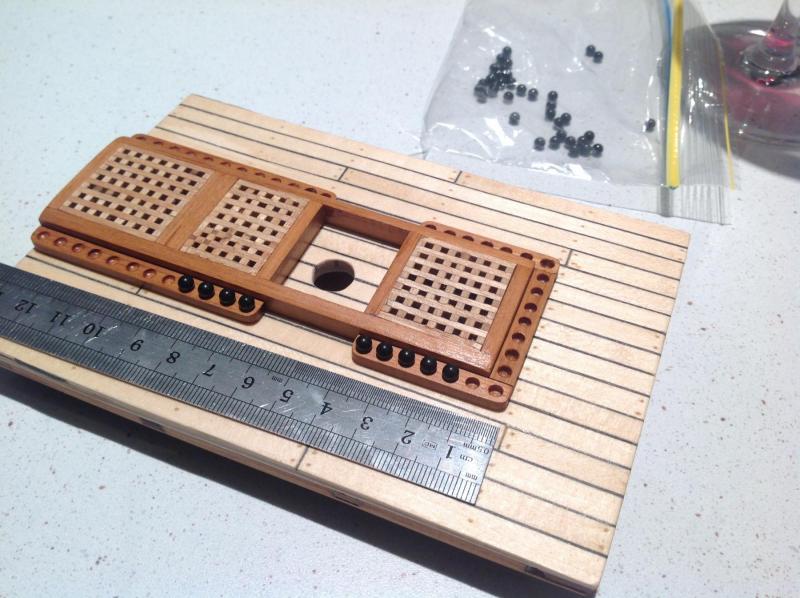
The shot garlands have been added on this grating section for the rear access hatch and there's plenty more to come. I'll have to get more 4mm caldercraft shot (32lb carronade rounds) as I've woefully underestimated how many I need. It'll be somewhere around 120 in the garlands.
For the garlands a basic measurement was taken from a sample made by eye to look right. Pilot holes were drilled with a pinvice using a 1.5mm bit and a 3mm bit in the dremel drill press used to finish. Some are a bit off but most are ok so it's not noticeable. I'll get a proper drill press one day.
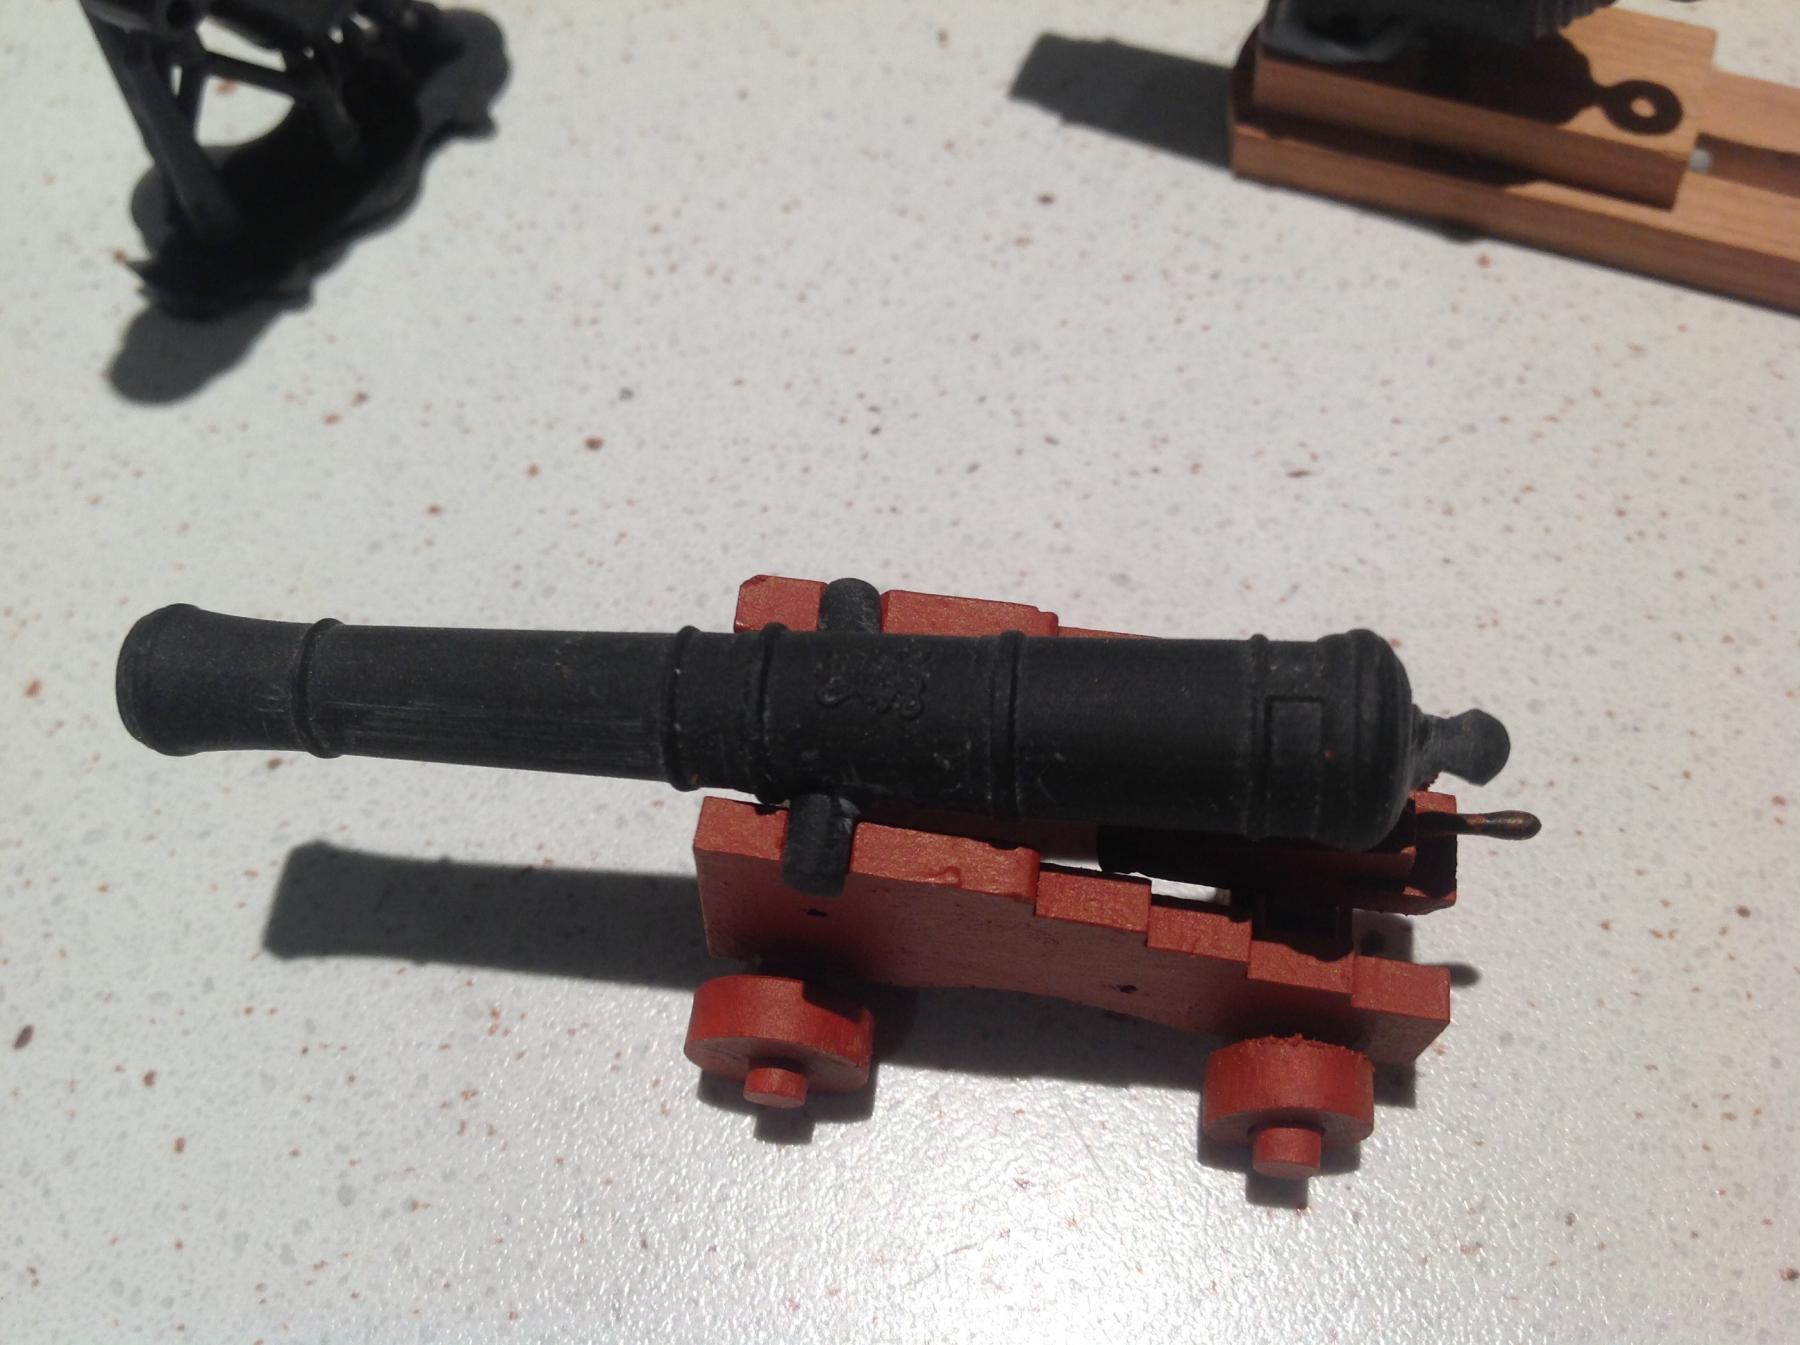
Here's why we need shot - his majesty's armoury has provided guns.
Rather fellow modeller Tim Bowman and his expertise on CAD software has. Tim is building a 1/24 scale Cruizer from a SC&H kit but has redesigned practically every part and had it 3D printed. Check out his highly impressive build here http://www.rcgroups.com/forums/showthread.php?t=1716548.
Have a look if you want to see what the future of the hobby holds.
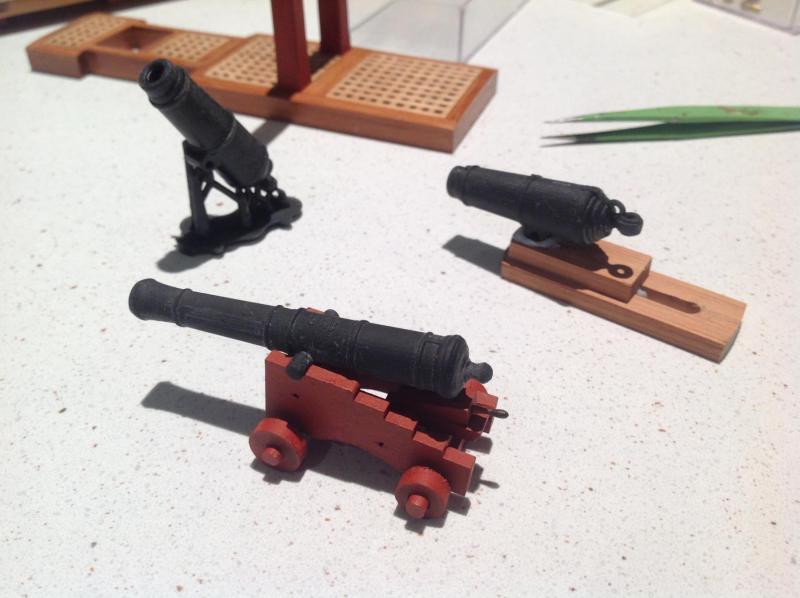
Tim was kind enough to rescale his 6lber long guns and 32lber carronades. A carronade on the printing sprue is pictured in the background. It's a result that would have taken me weeks to do by turning a master and casting in resin. I love working in wood and will never give it away but I hope to develop some rudimentary CAD skills to print some of the finer mechanically oriented or repetitive parts of future builds.
The long guns even have crests on them that should pop out after painting and weathering. The carriages were home made on the table saw using the anatomy of the ship Diana as a guide scaled down from 18lb carriages. The carronade is shown mounted with Royal Navy issue Blutak (not) on a sample slide knocked up to check the fit. They will have brass elevation screws from the hardware store and assorted block and tackle and ironwork rigged eventually.

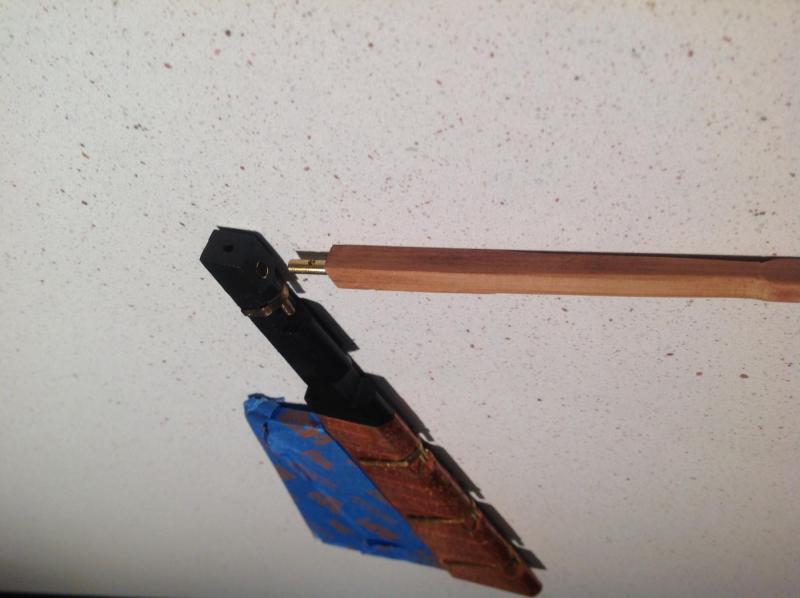
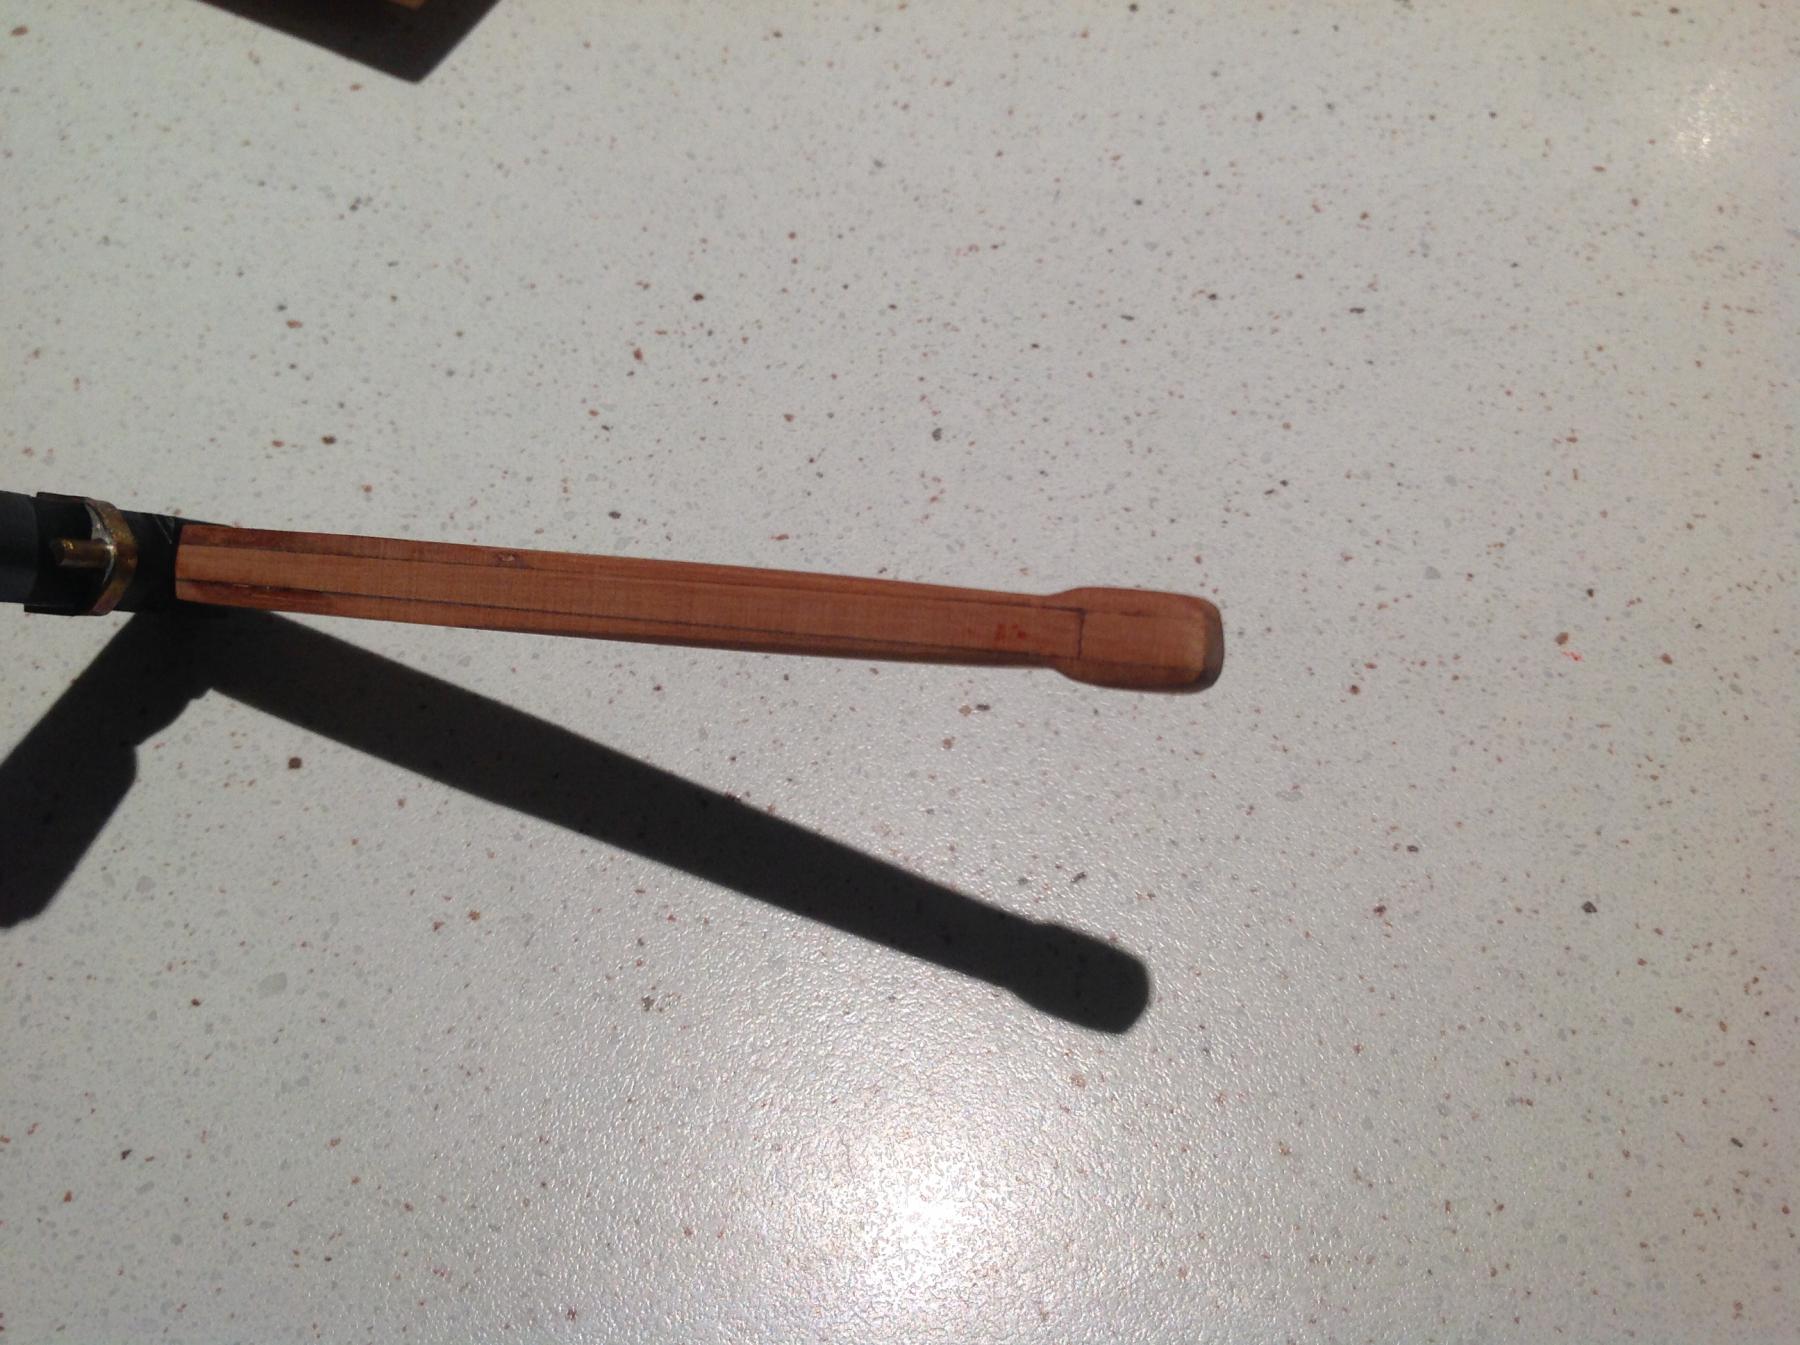
The rudder has been prepped for mounting. Bolt Holes have been drilled in gudgeons and pintles ready for blackening and a tiller made.
This is mounted in a brass sleeve through the rudder head to prevent wear. The tiller is made of a piece of timber with a slot cut in it and brass rod epoxied in and the slot timbered over and sanded to shape. The seams are on the bottom so they won't be seen.
A hole drilled vertically through the rudder head into the tiller's brass rod allows a secure fixing with a pin made from an old railing stanchion. It's very strong and should stand up to the lateral pull of the tiller cable. The blue you see is the clear acrylic rudder extension covered in tape to prevent damage. It should be invisible in the water.

Next up it's the capstan and also the main entry hatch housing on the grating section pictured above and a chimney for the ship's stove. Those later two will be removeable and cover the nut and threaded rod poking up through the hull to secure the ballast keel.
- GuntherMT, Barbossa, aviaamator and 12 others
-
15
-
-
Superb work Liberto. That's a masterclass in scratch building. The simplicity of the longship leaves nowhere to hide mistakes and you have made none that I can see. Very impressive.
I'd be struggling to make even your tools like that brilliant shield making jig.
- FriedClams and mtaylor
-
2
-
Welcome to the Cruizer class Joe.
They sure are endearing vessels and given the start you've made I'll be expecting you to overtake me yet again with another fine result and I'm looking forward to it.
Good move on replacing the long guns with carronades. It would be nice if Caldercraft gave the option of switching armament.
Have you got a copy of Petrejus' 'The Brig Irene'? It's well worth it's there are plans of the Grasshopper as Irene and also the original Cruizer, which is what I'm going off, with some minor alterations on deck furniture.
Wayne
-
-
-
-
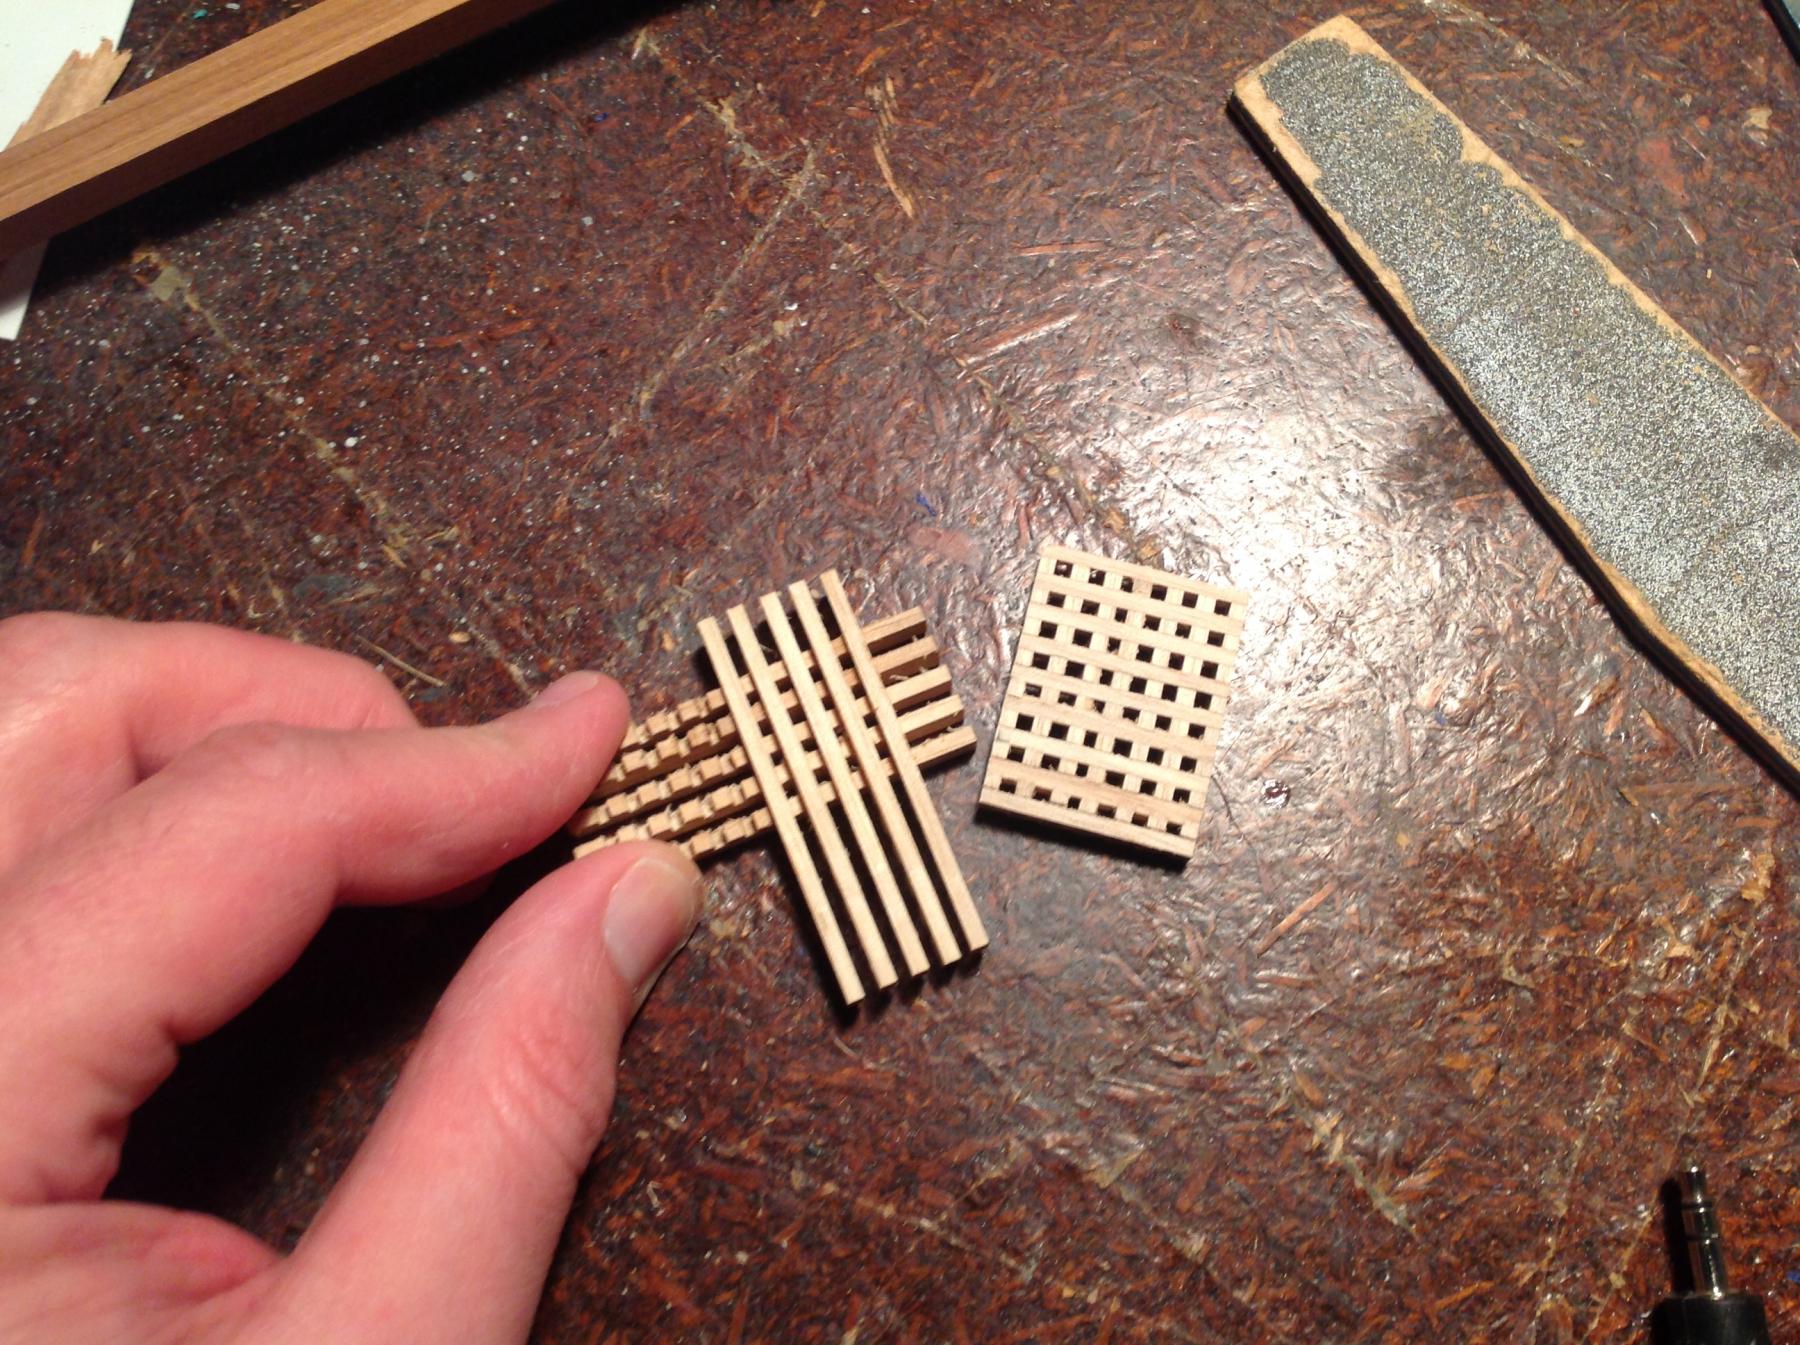
The gratings are nearly all cut. These were made with a light timber of unknown type. It might be beech. I'm after a contrast with the surrounding coaming as these will be among the only natural timber finishes aside from the mast and deck.
A billet about 5-6mm thick was cut on the bandsaw and slots cut with the table saw using the micrometer. The slots were 2mm wide and the Byrnes saw is amazingly accurate.
The individual battens were then sliced off and the gratings assembled with a vice pushing them all together title and diluted white glue securing them.
The excess was sanded flush for vice looking gratings.
A test grating with matai timber
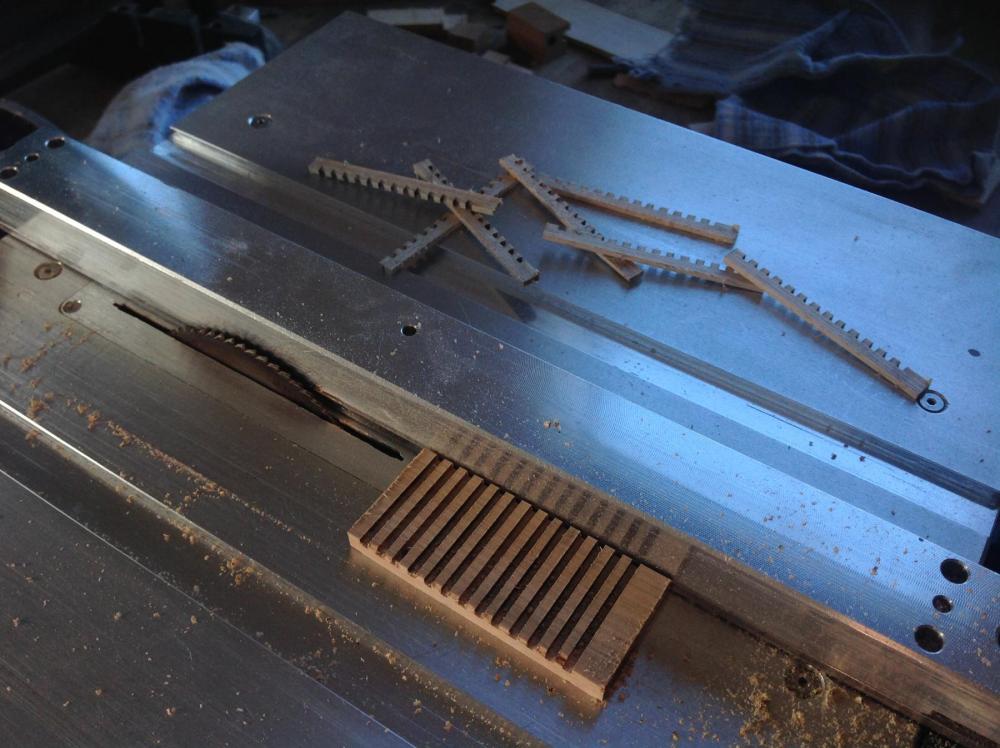
A final version under construction.

Finished gratings. One has lost some sections but these are easily replaced with cubes from leftovers.
-
-
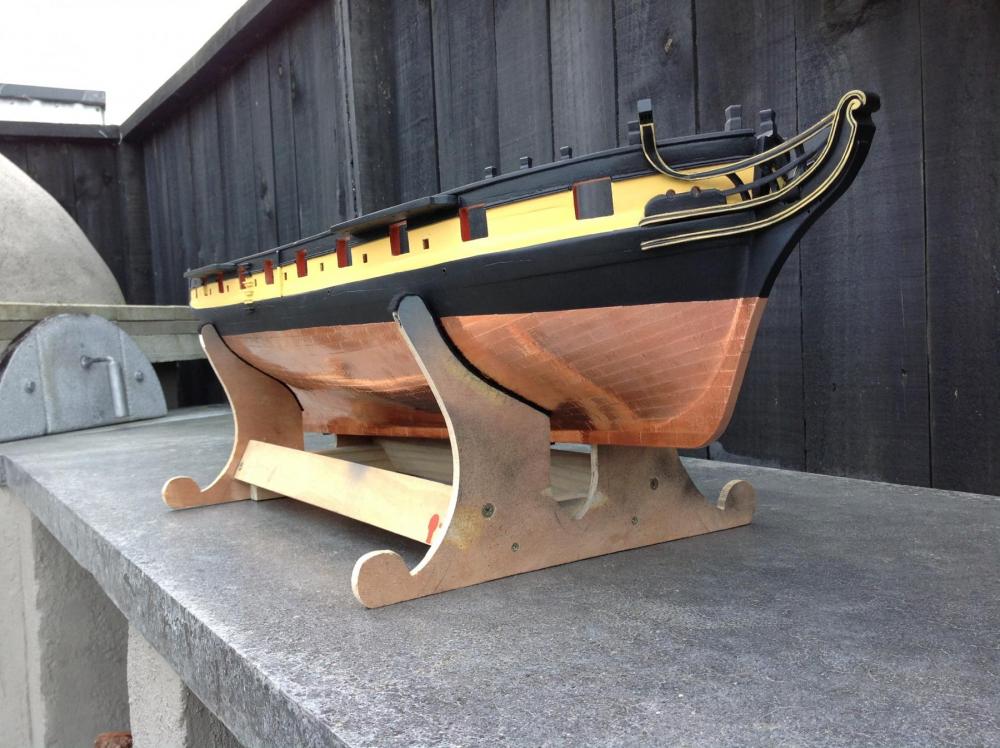
Jib boom, gammoning cleats and martingale completed today. Pics to follow.
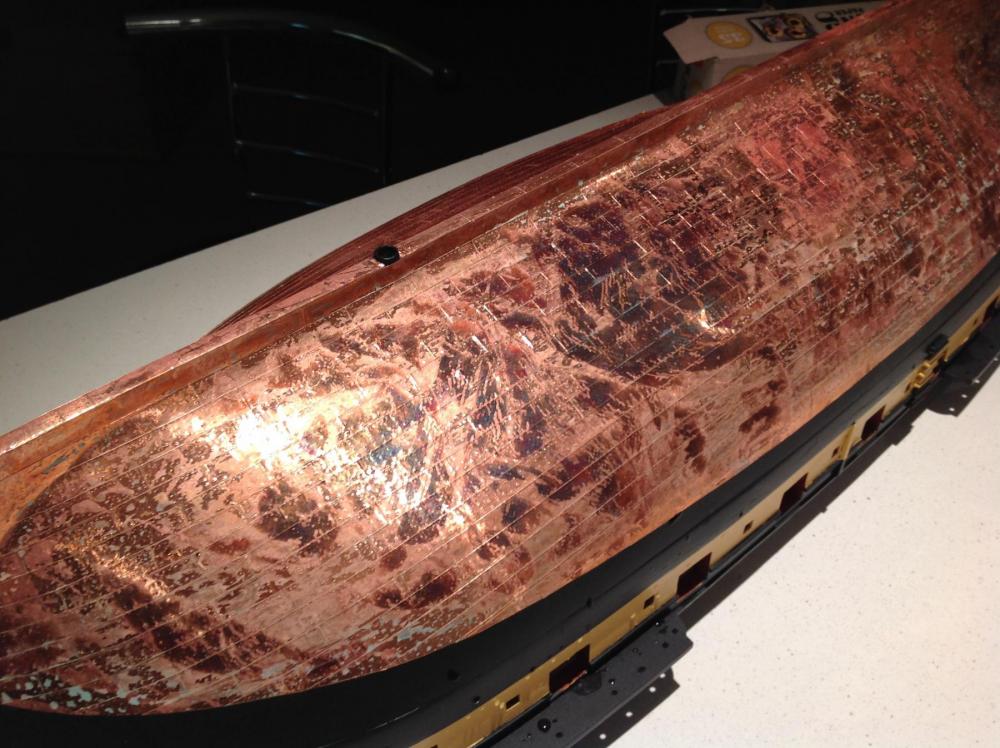
I'm quite liking the copper now. It's dulled off nicely and has a fairly random gentle tarnish to it that's looking quite nice. I expect it will develop more as time goes on and it's nice to have a living element to the ship that will change.
I'm thinking I'll apply a bit of very gentle weathering to the rest of the paintwork to get away from the freshly painted vessel look.
Jerry, I've got to round up some more ballast yet but I'd love to have her in the water and doing something by the end of the year. It'll be a mate's swimming pool first.
-
Ever had a one of those moments where you think - before embarking on a major step in a project - this is the moment that I wish I could go back to if it all goes wrong?
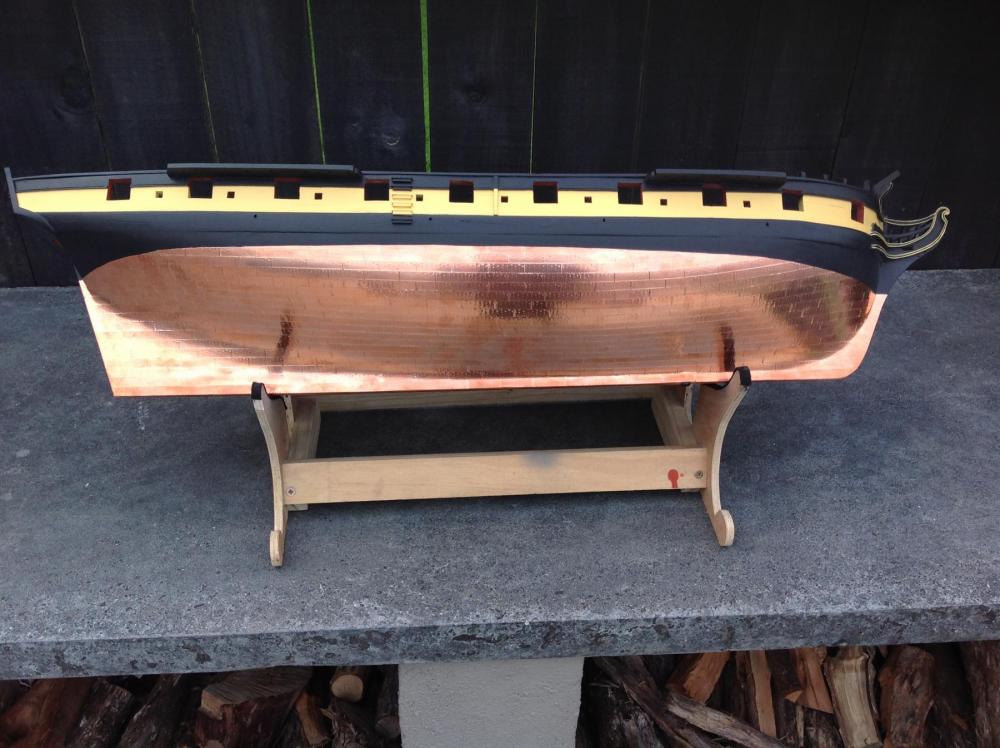
A shade of that today with getting an aged finish on the copper plating.
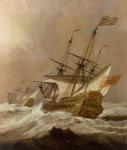
Here's what I was after:

The test plates on the left were done yesterday with a tarnishing solution found in Aliluke's fine Fly build log. The curious can look it up. I'll say no more.
The result is a little lighter in the pic than in reality but is just what I was after with a dulled copper finish and slight hint of verdigris in the plate lines and nail holes.
When applying to the hull it beaded in droplets as per the test piece but little tarnishing occurred. In order to get a consistent spread I overlaid with some paper towels soaked in the solution to create an even contact with the hull.
The opposite happened.
Cue tiger stripes..
This was from the wrinkles in the covering.
Vinegar and salt with some steel wool took it back to almost original.

The steel wool leaves the plates looking a little lightly scratched and beaten rather than the pristine article they once were. Some corners have also pulled up a little.
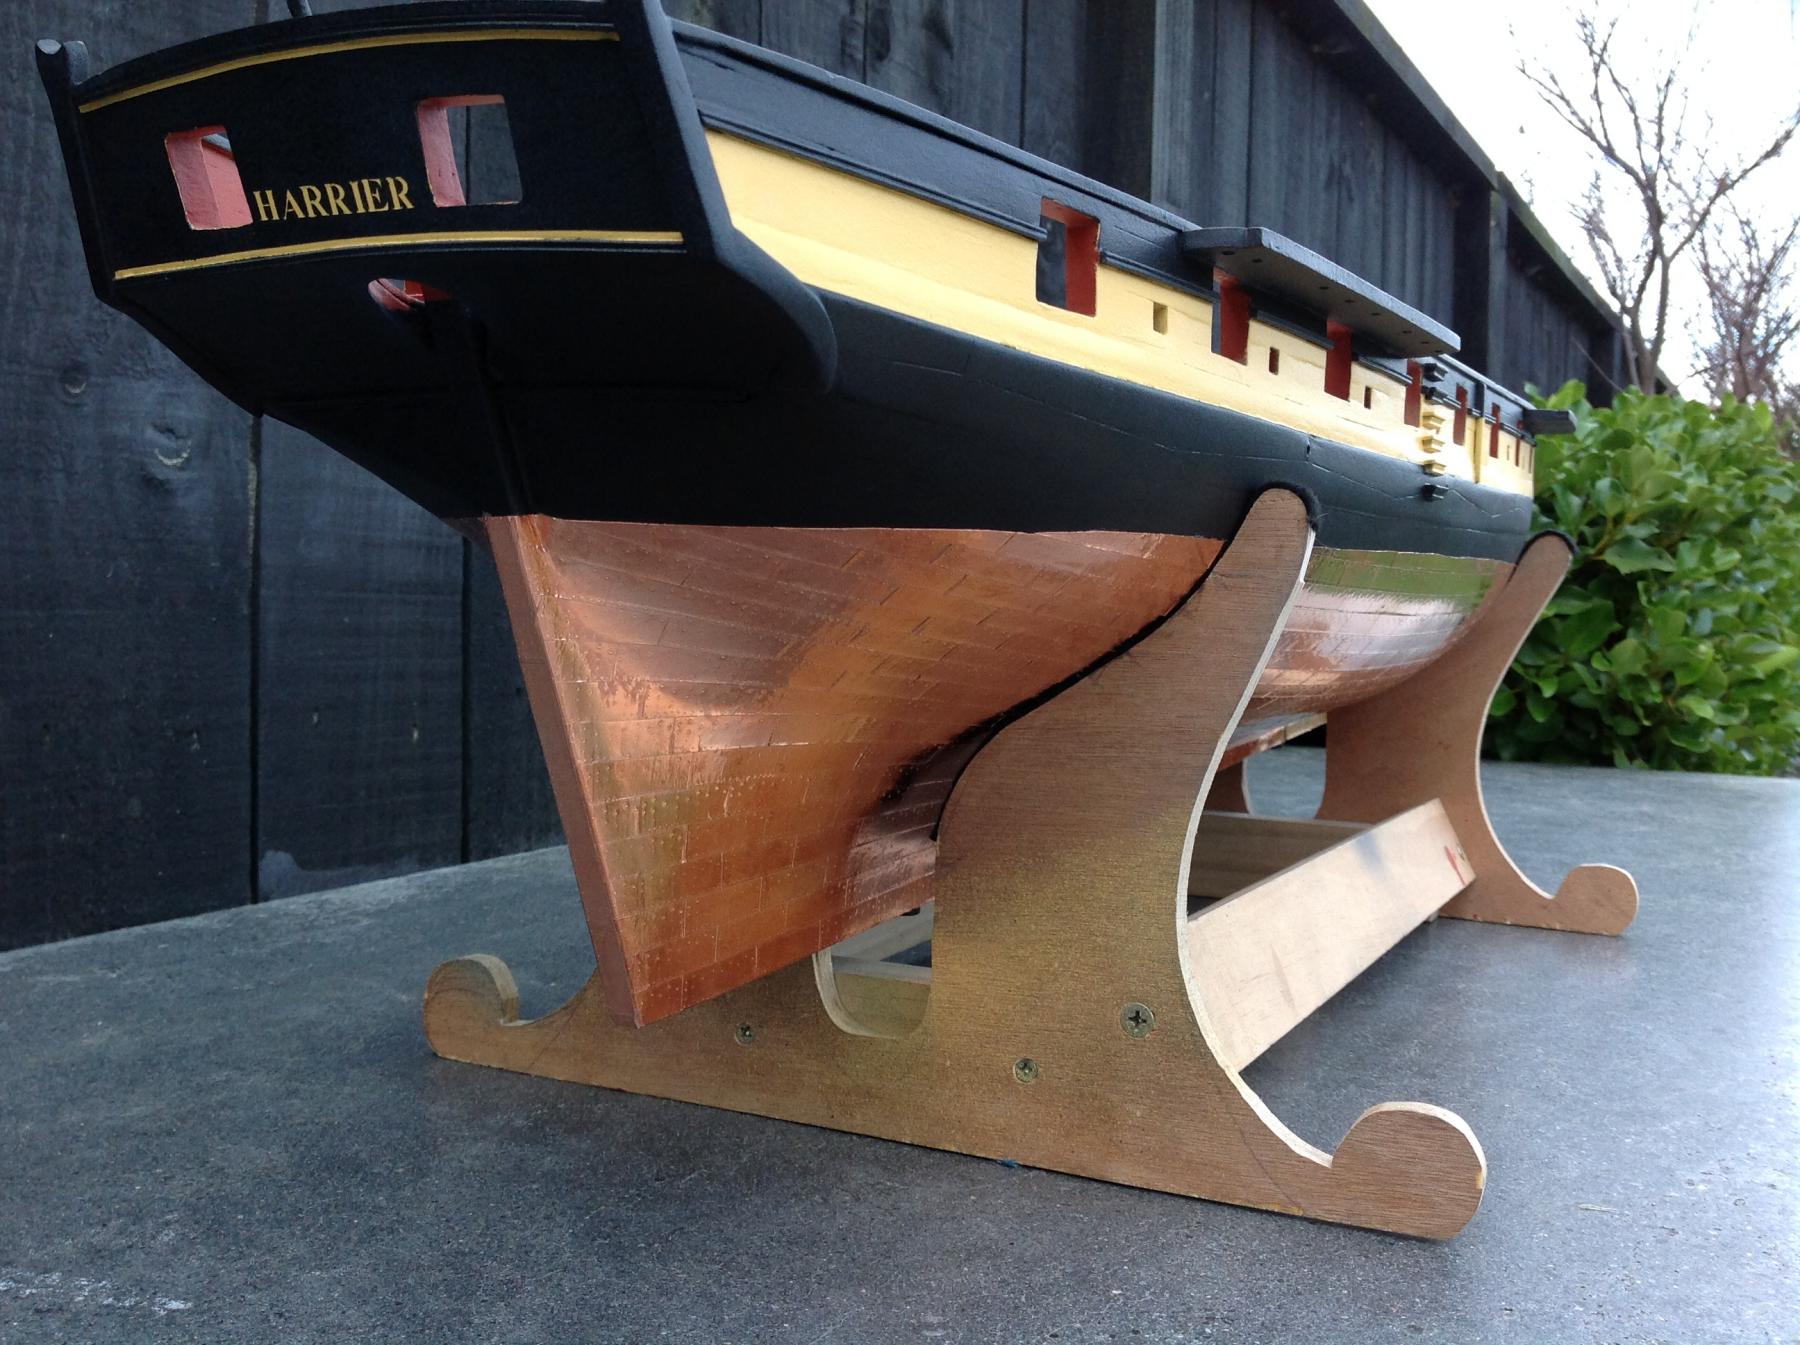
But it's better than a total loss and it looks like Harrier has been a long time between refits in the East Indies.
Lesson learned. I'll leave the copper from here to naturally dull. You could see it already starting with the difference between the first laid rows and the last so it should have plenty of time given I'm likely many months off sailing at this rate. If it didn't work I was considering stripping it off and starting again but glad not to have to do that. If it was a display model in smaller scale I might have.
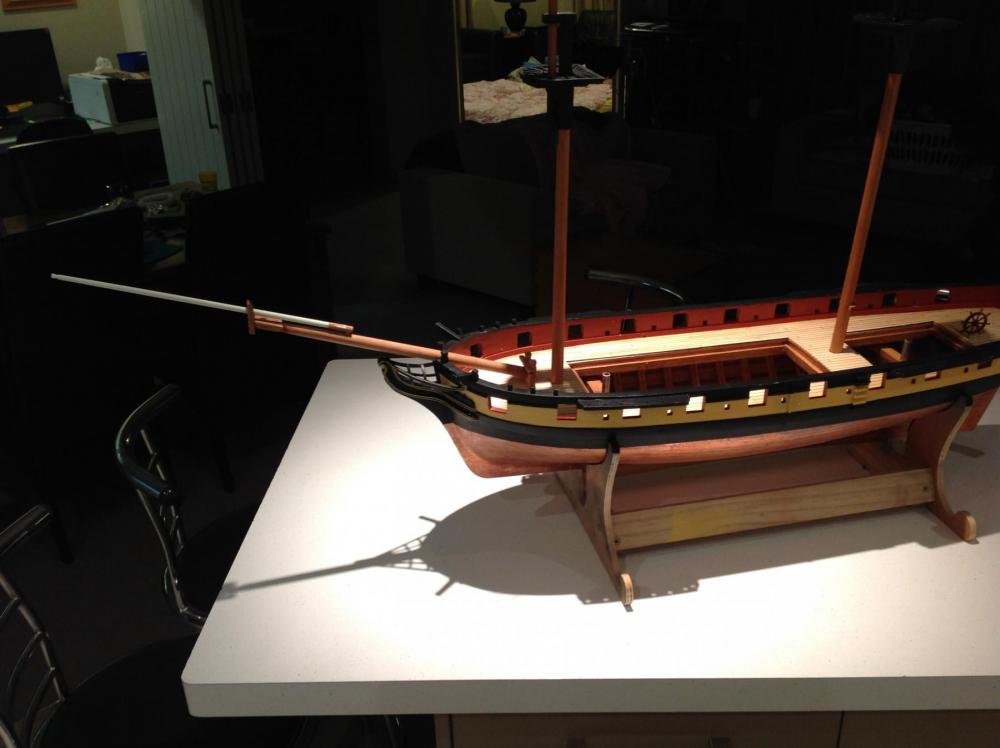
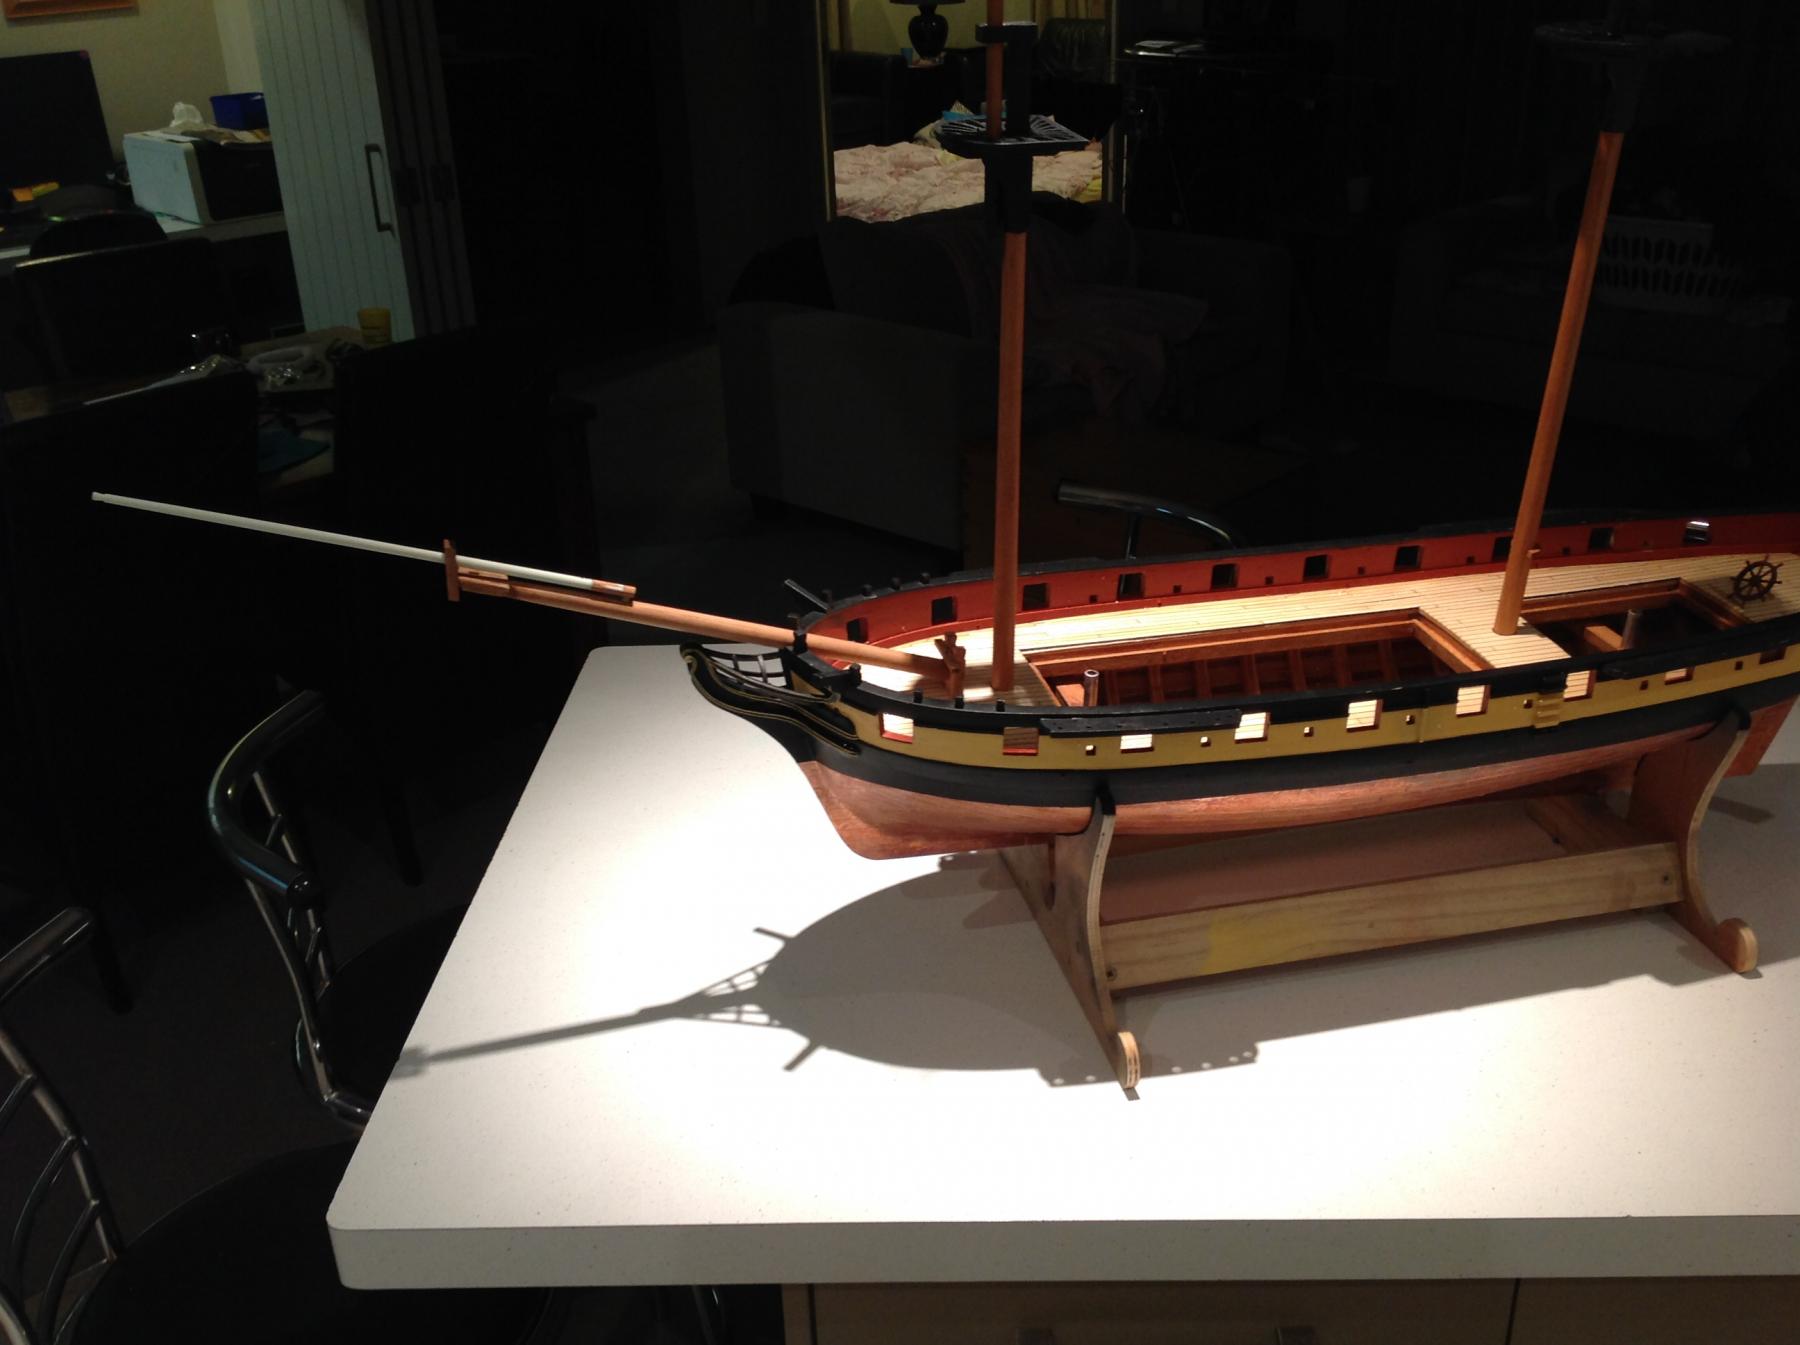
On a brighter note the jib boom has been made from fibreglass rod with a timber base for octagonal section. That gives an idea of the overall length of the Harrier. This is the last major piece of the masts/ sprit assembly.
-
-
Nice Jason. I can see why you didn't have your SNake close to hand for a pic.
Looks like an interesting spot.
My summer holiday haunt is where Cook and Banks tried to observe the transit of Mercury on their first voyage. I bore the kids to tears talking about it and pointing out where they would have anchored and filled the ship's casks.
-
-
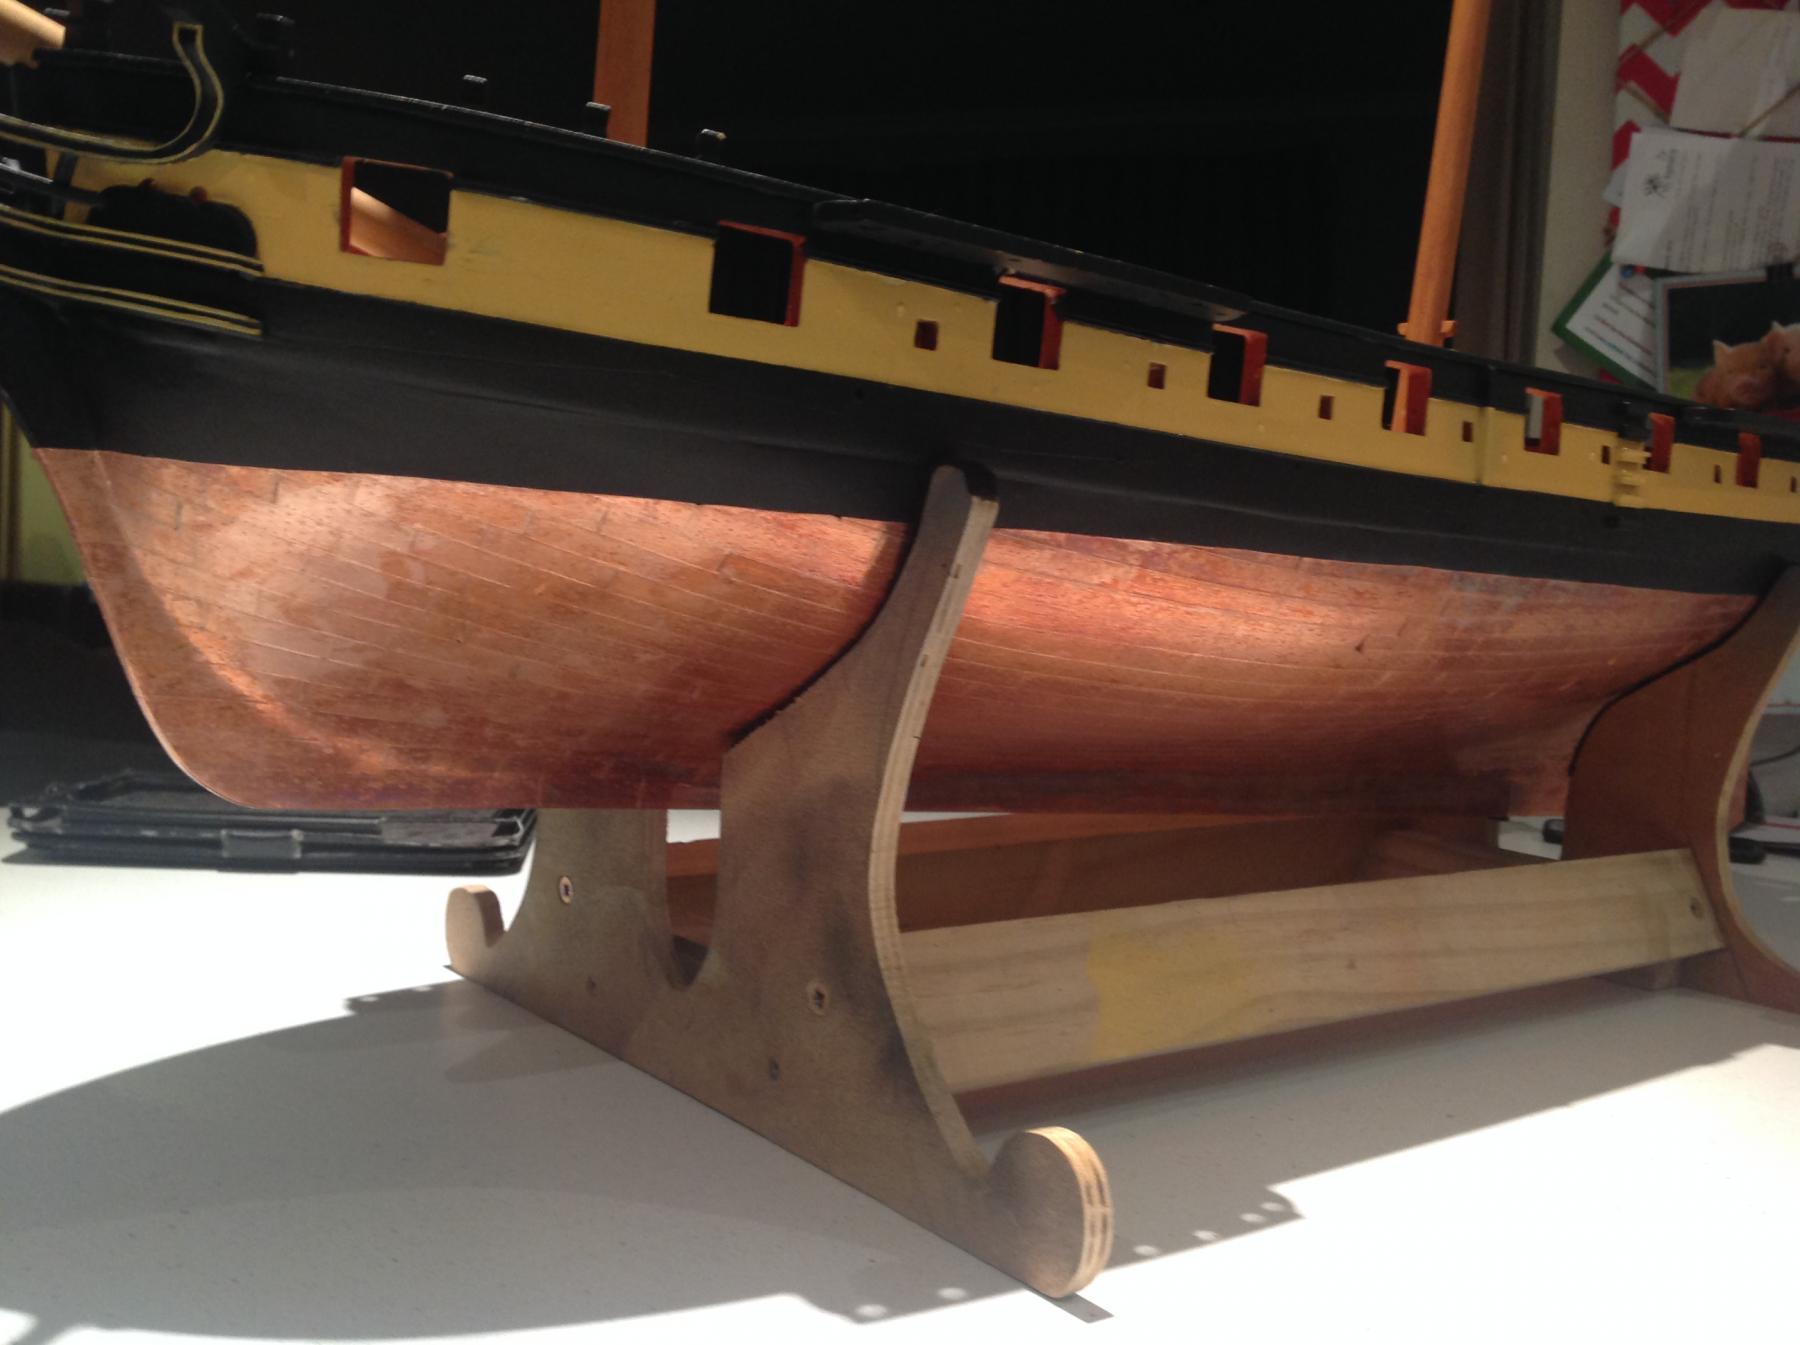
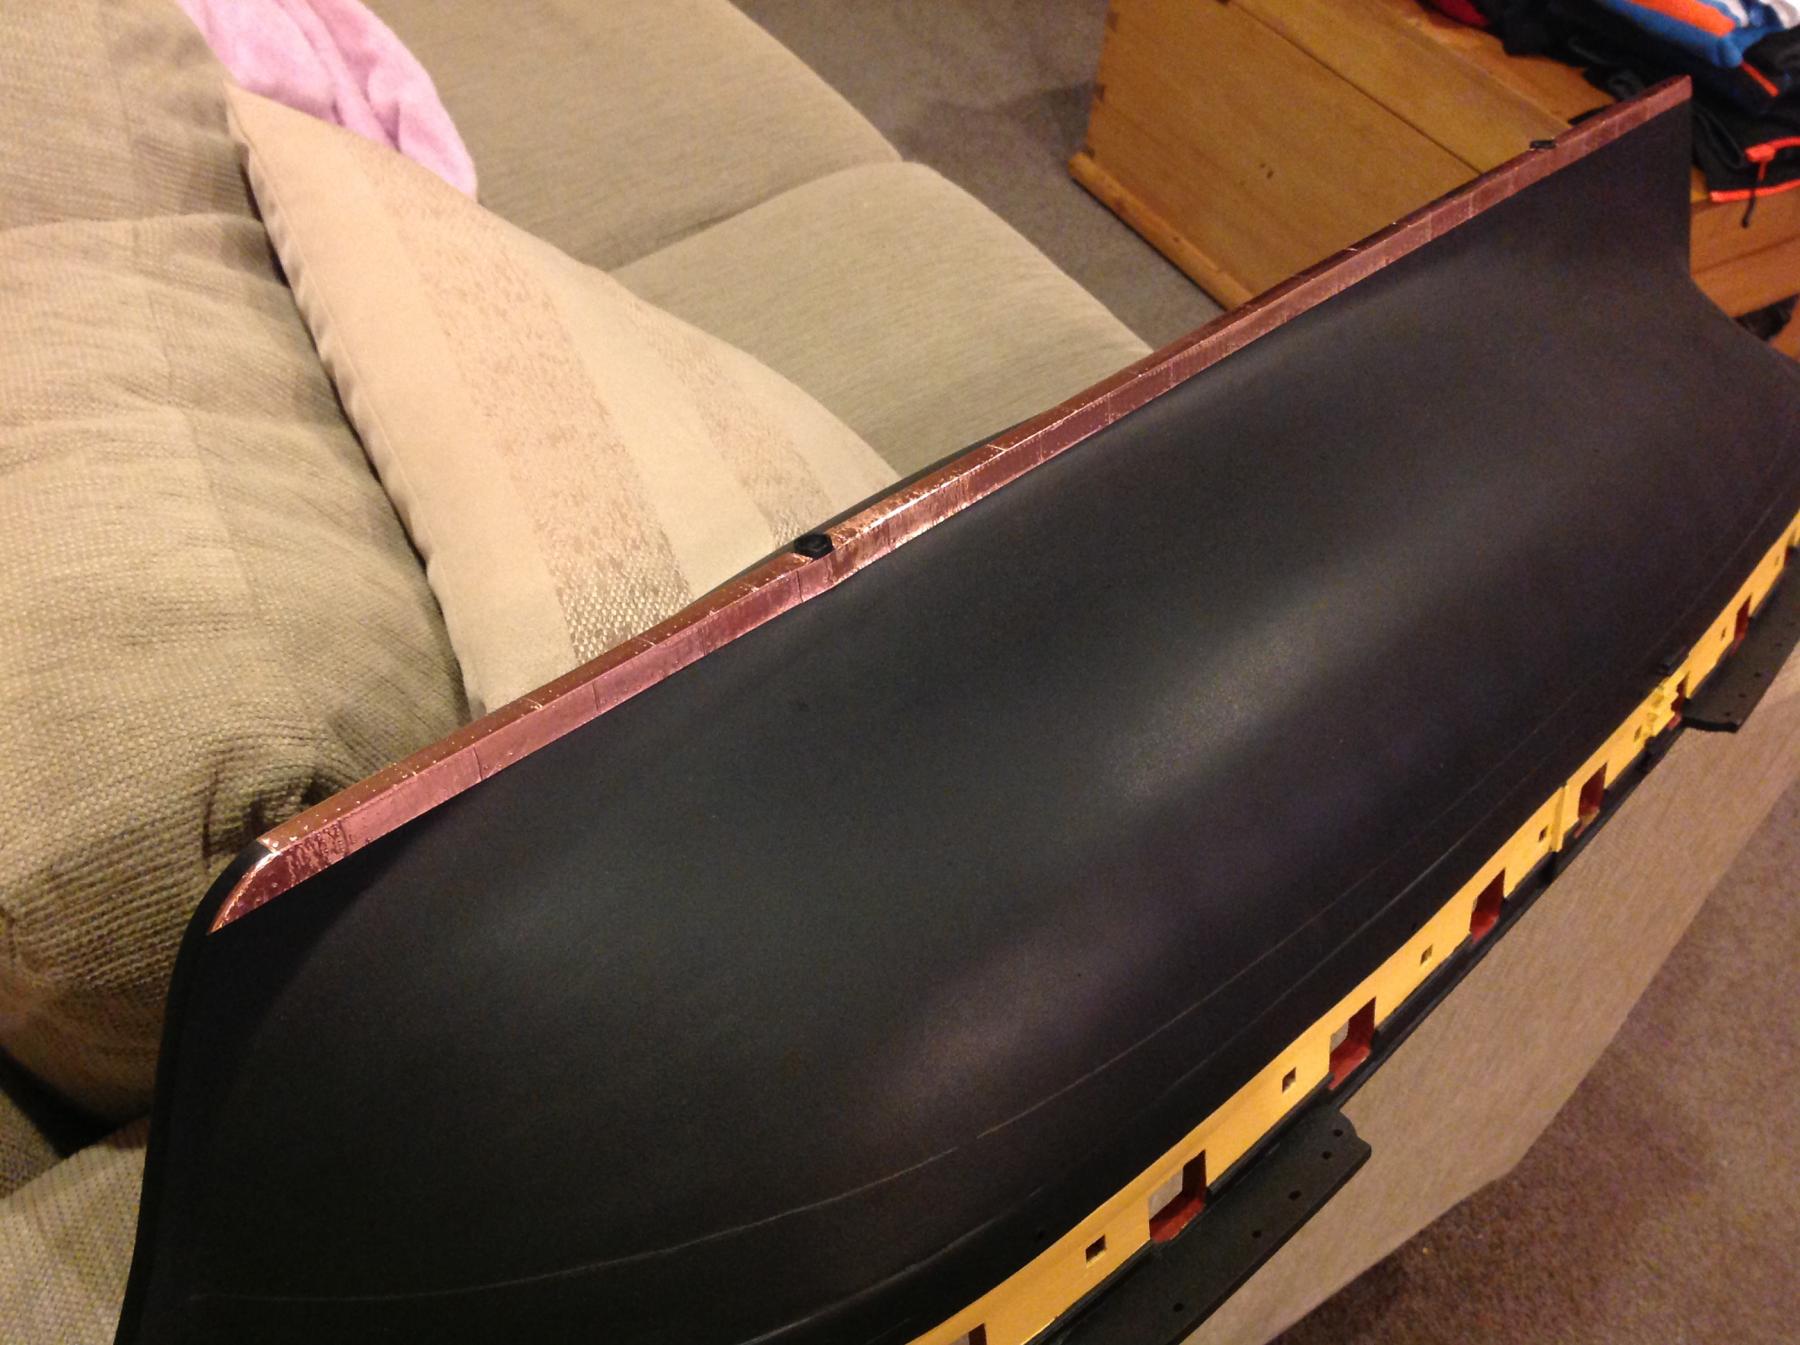
The coppering is finished. I'll likely age it with some sort of patina, as per the other fine builds on this site, then a protective clear coat.

-
Nice start Clare. I've always been intrigued by cardboard kits and wondered how it all works.
I've got the plans for an Enterprize class frigate like Mercury from Shipyard that I've scaled up to 1/64 with a view to one day building in timber.... One day.
In the meantime I'll watch your build.
-
Thanks Dirk.
In the meantime I'd had a re-read of your coppering section and followed your lead.
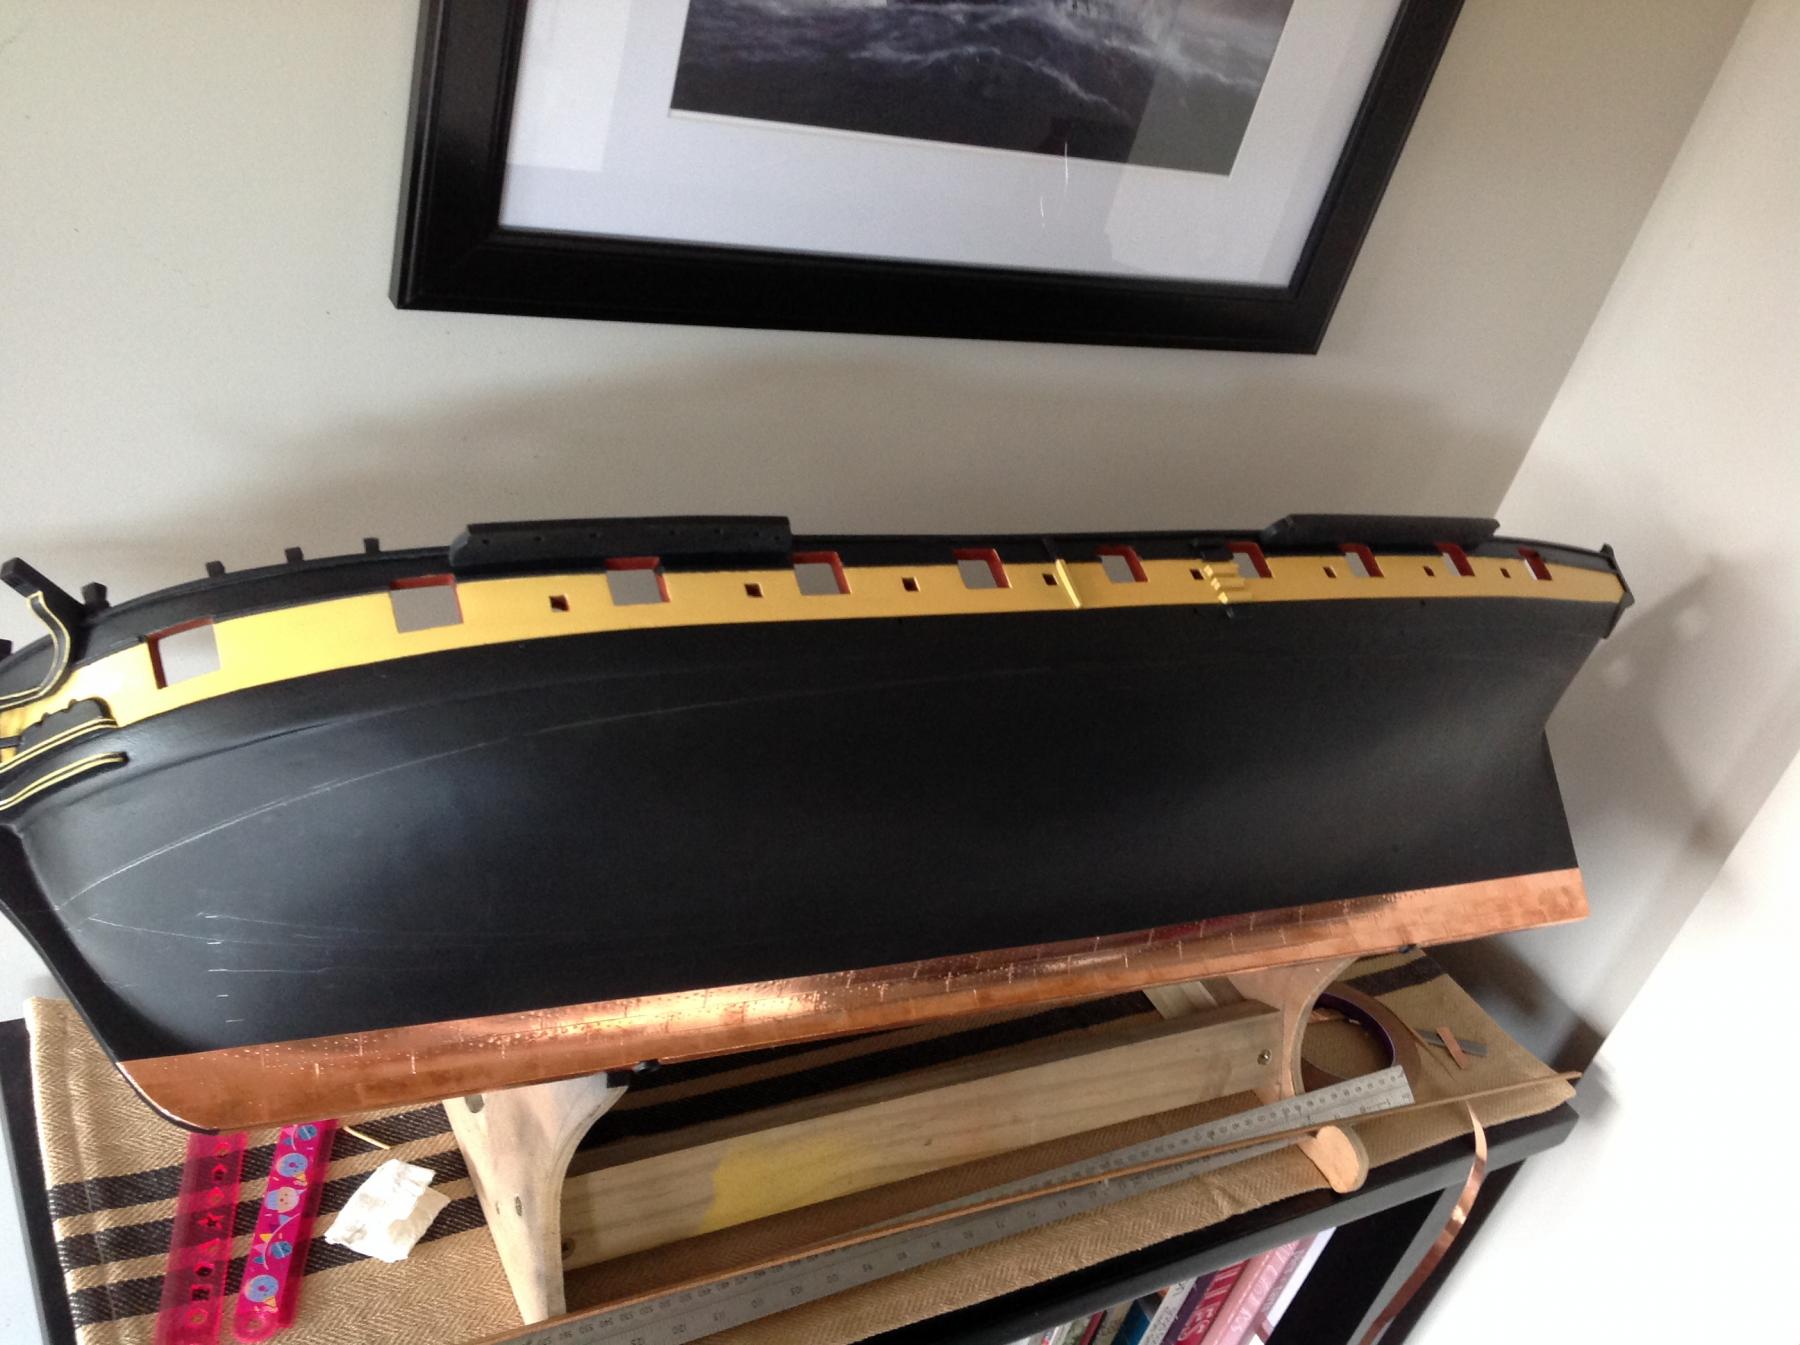
The rows from harrier follow each other from the keel up. It means more individual placement at the bow but it's no drama.
I had done a few rows with spilling but it didn't look right so was removed.
-
A question on coppering for those with more knowledge than me-
The first three rows are on following the line of the keel.
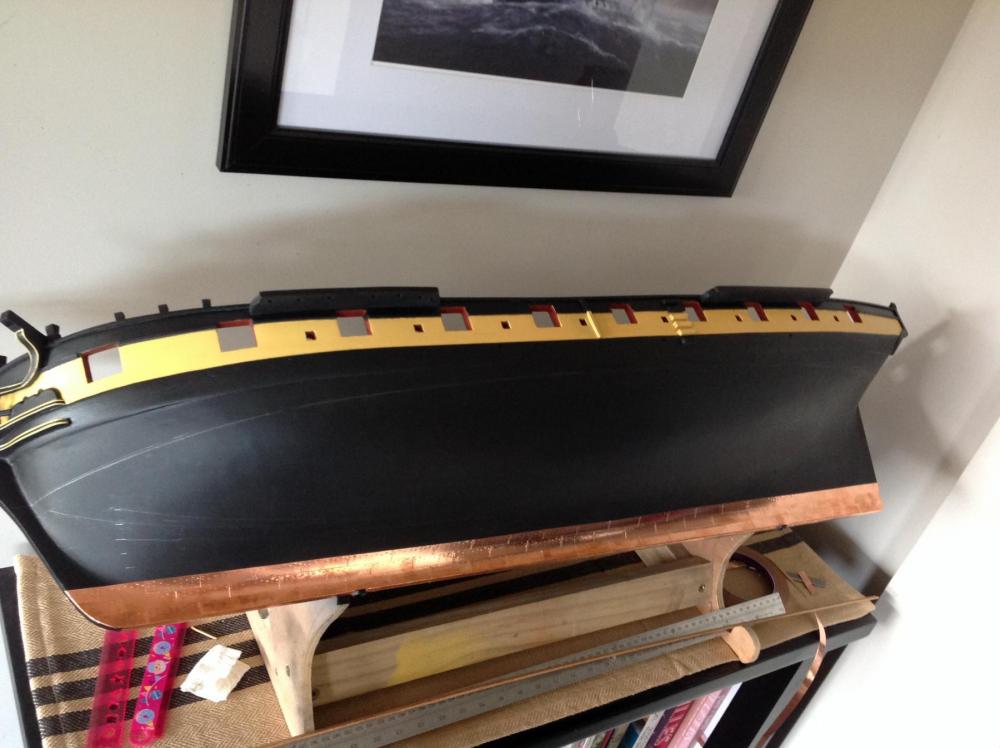
I can see the tape already fighting this line in an effort to maintain its natural line and it's only going to to become more pronounced. The options are to continue following the line and do short lengths of tape to allow for lateral adjustment. Note the cruiser's stern is quite a bit deeper below the waterline than the bow so more plates in a vertical stack on one end than the other.
Or...
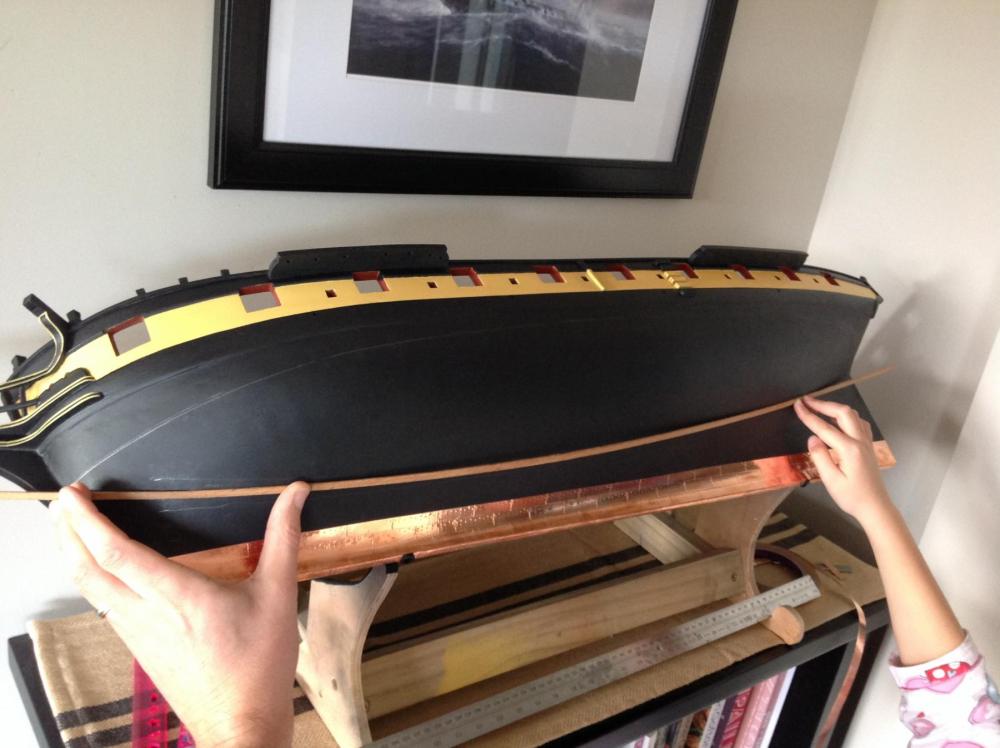
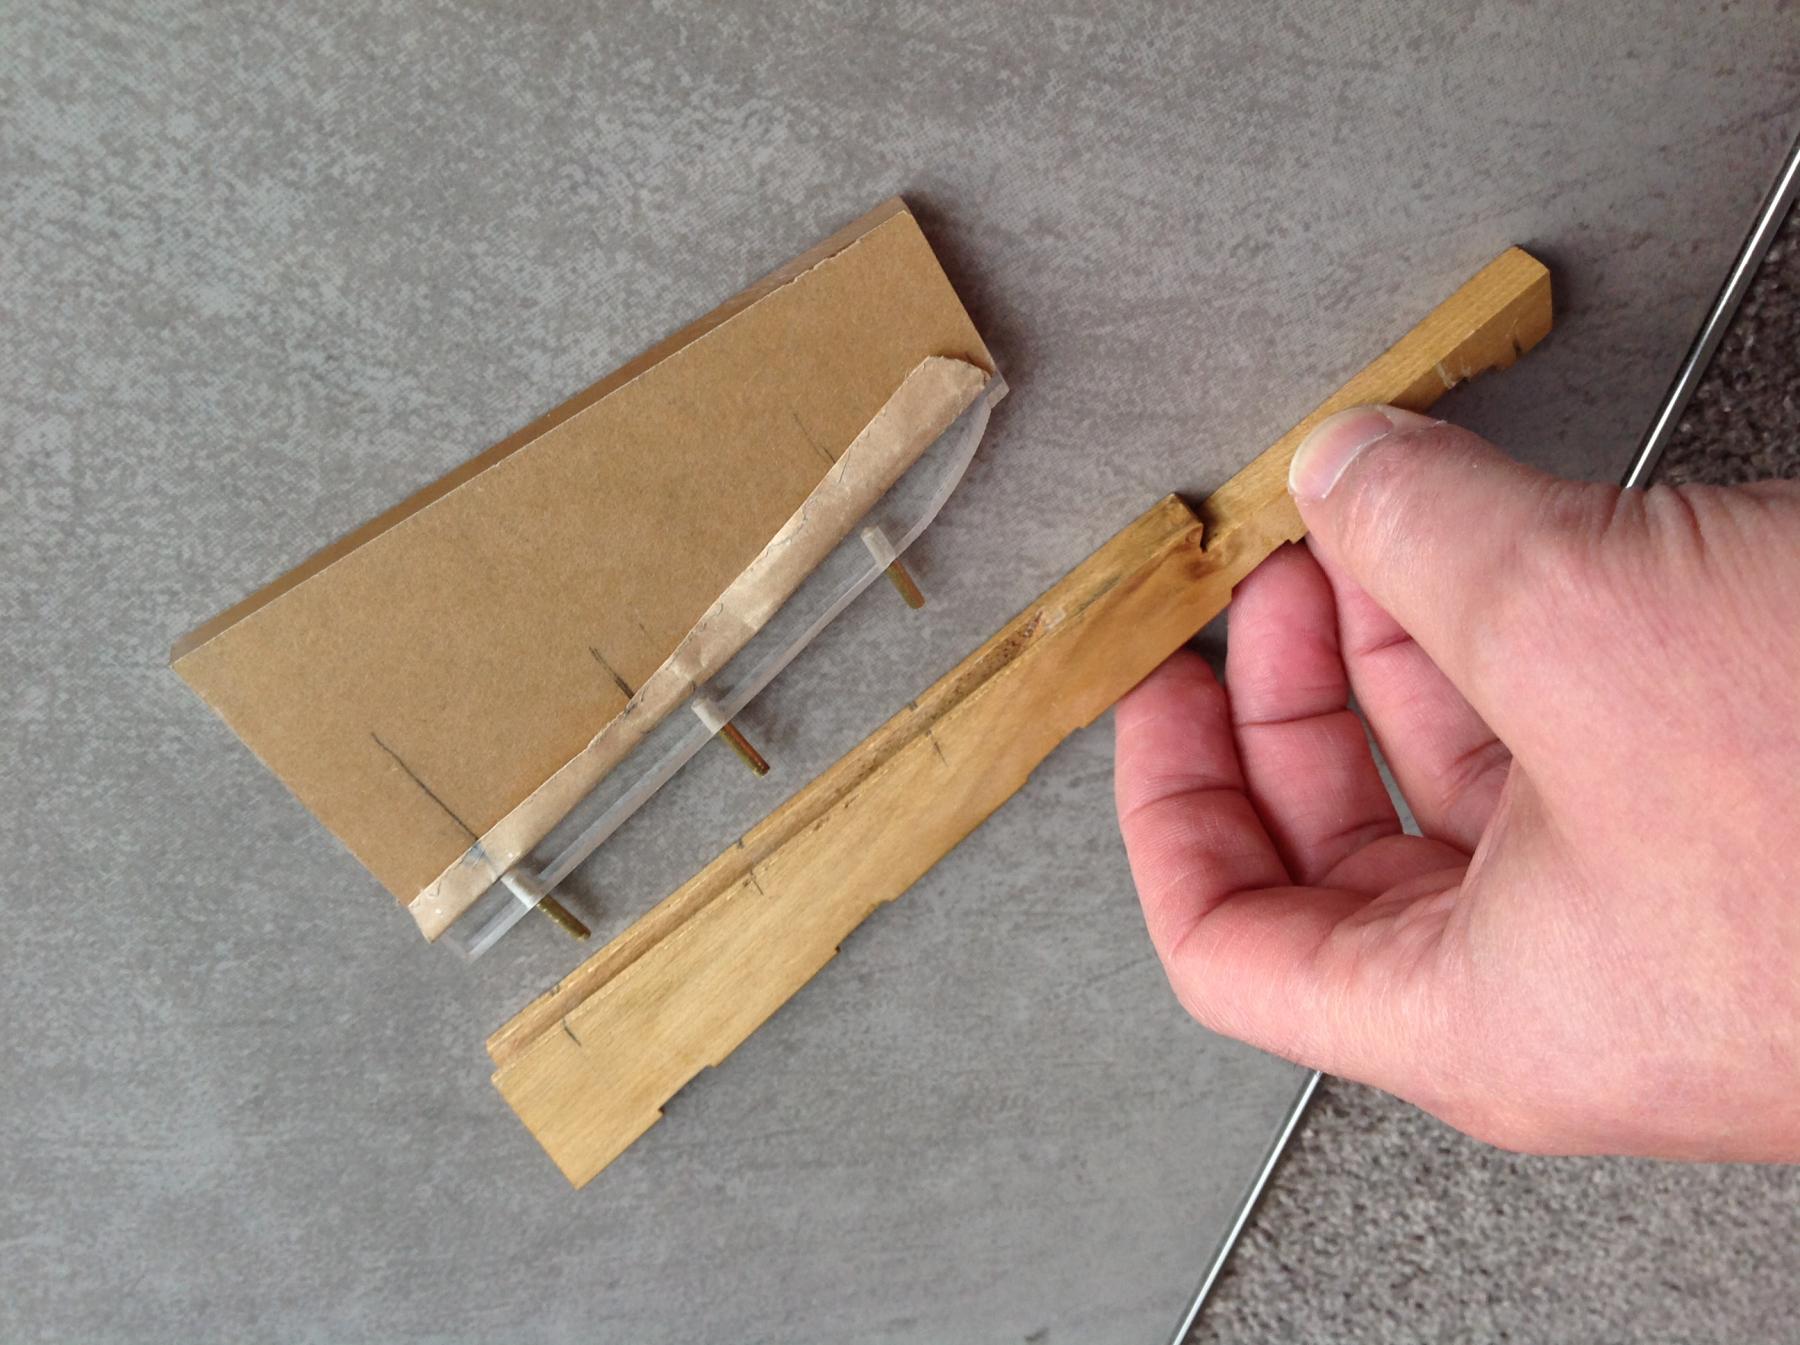
Add a gore line as per pic above demonstrated with a plank in order to allow the copper to maintain the natural run of a plank line. This will enable tape to be all applied in largely single strips and less fighting against it. But it will also mean a bit more noticeable spilling of copper plates at bow and stern I want to avoid the appearance of stark belts heading off at different angles and get something that looks natural like this...
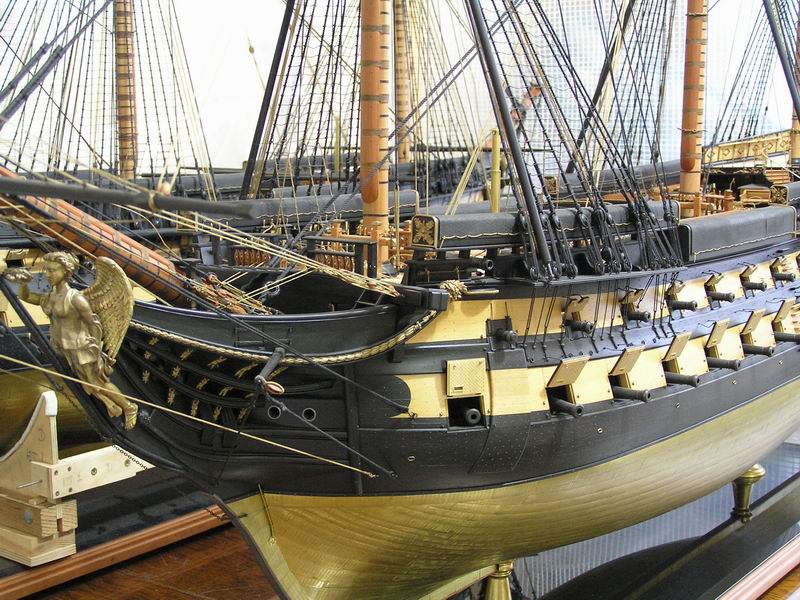
(The work of one of those Russian or Ukrainian masters).
Advice welcome.
-
That is one of the finest models I've seen in a long while Dan.
Lovely composition of the hull elements with the framing, planking and coppering. It would be easy for this to look like a novelty cut away but you've made it look like a class act.
Top work from keel to mast cap!
- RichardG, Mirabell61, mtaylor and 1 other
-
4
-
-
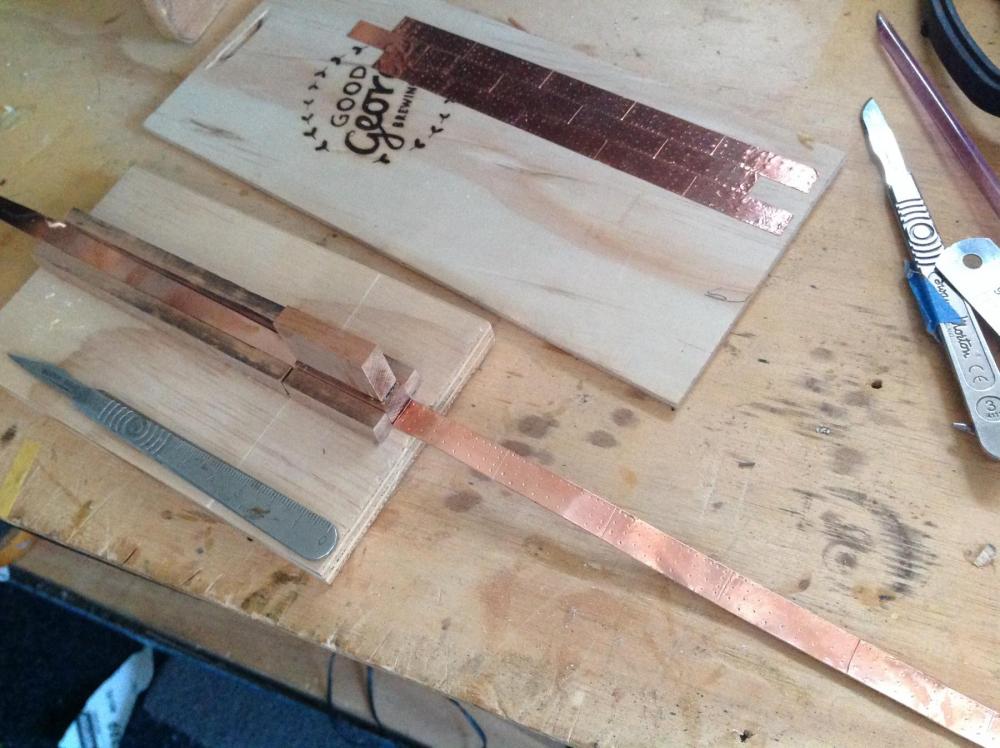
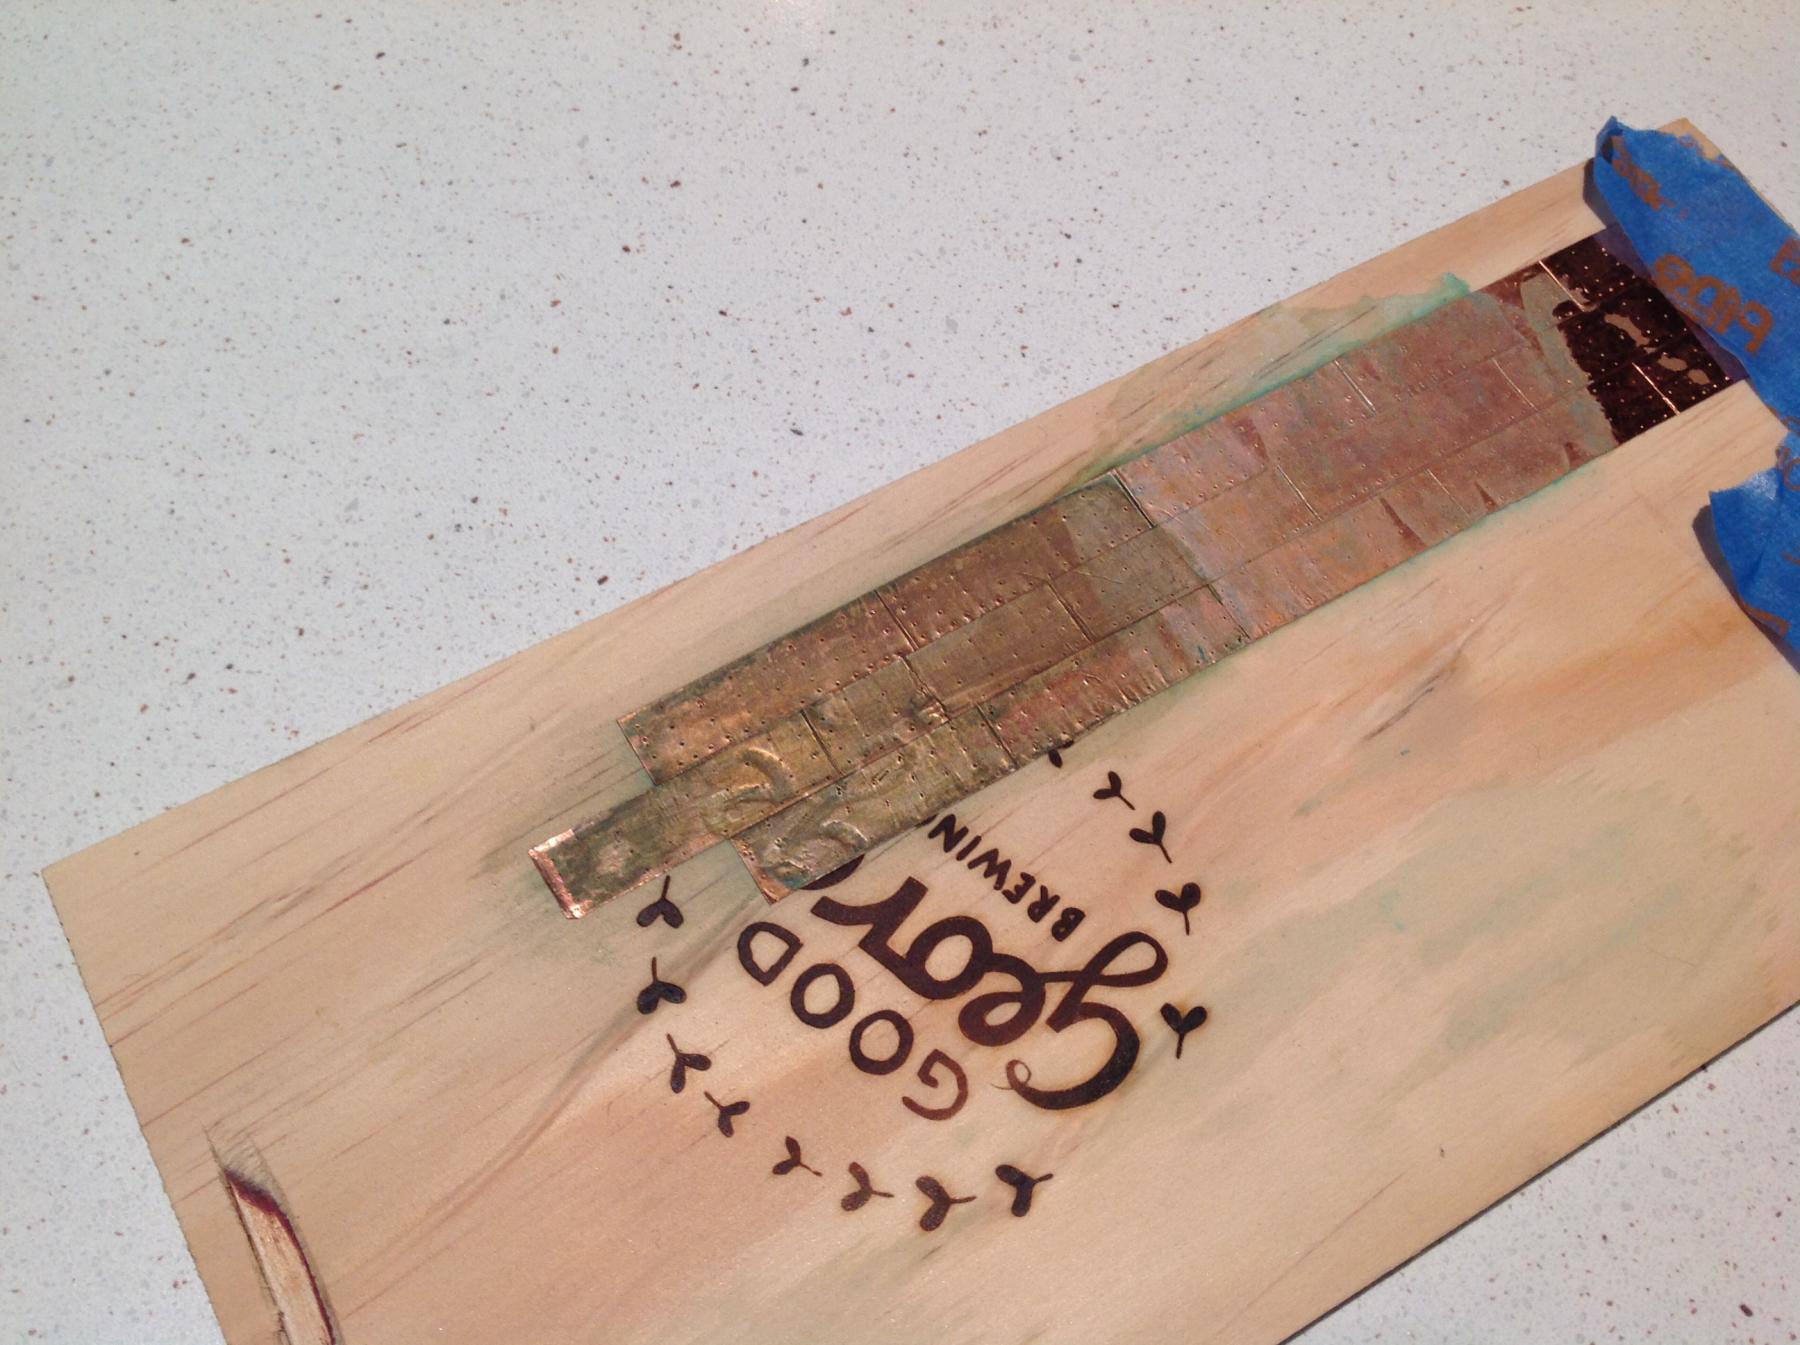
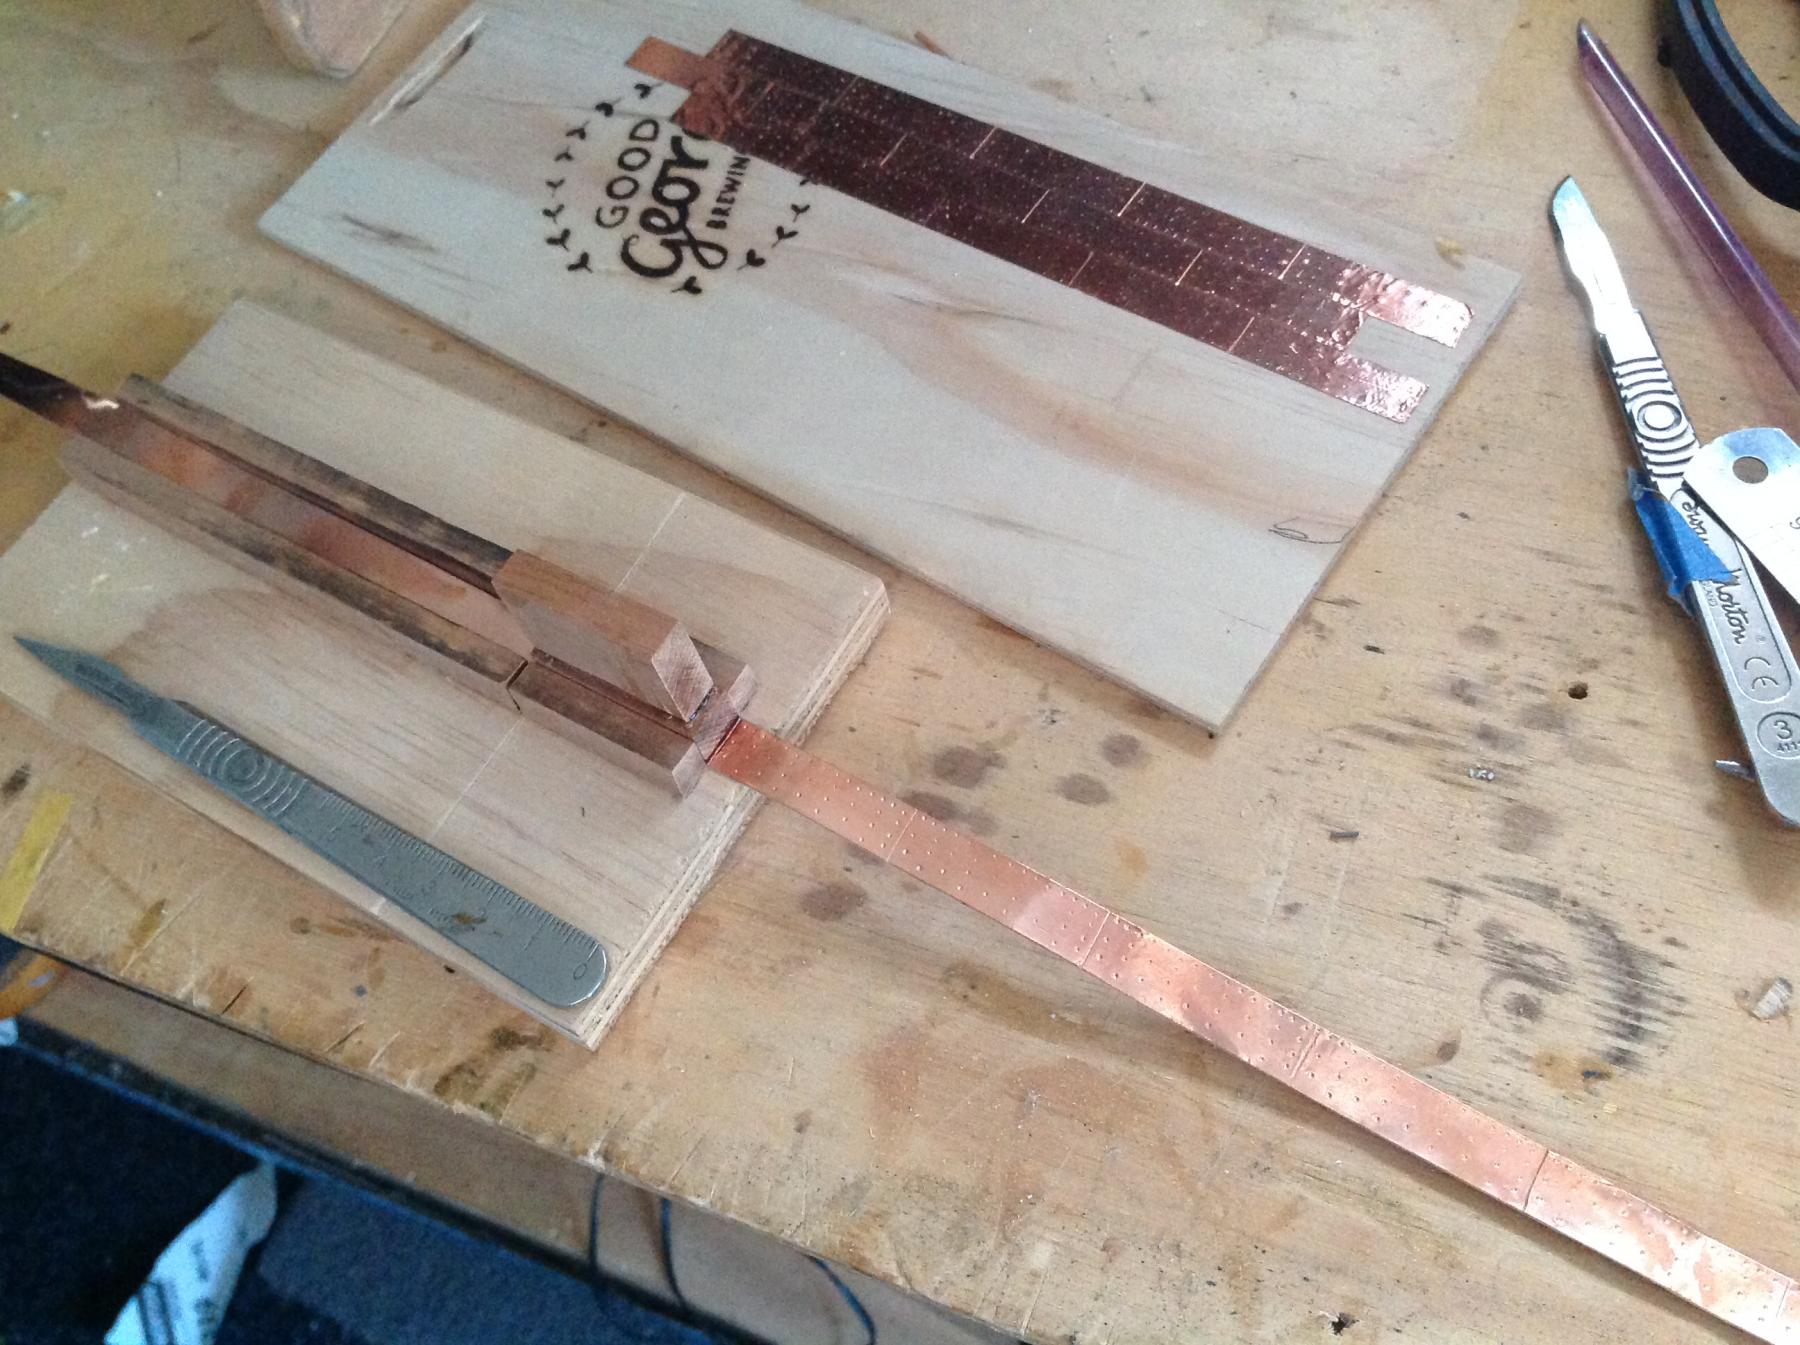
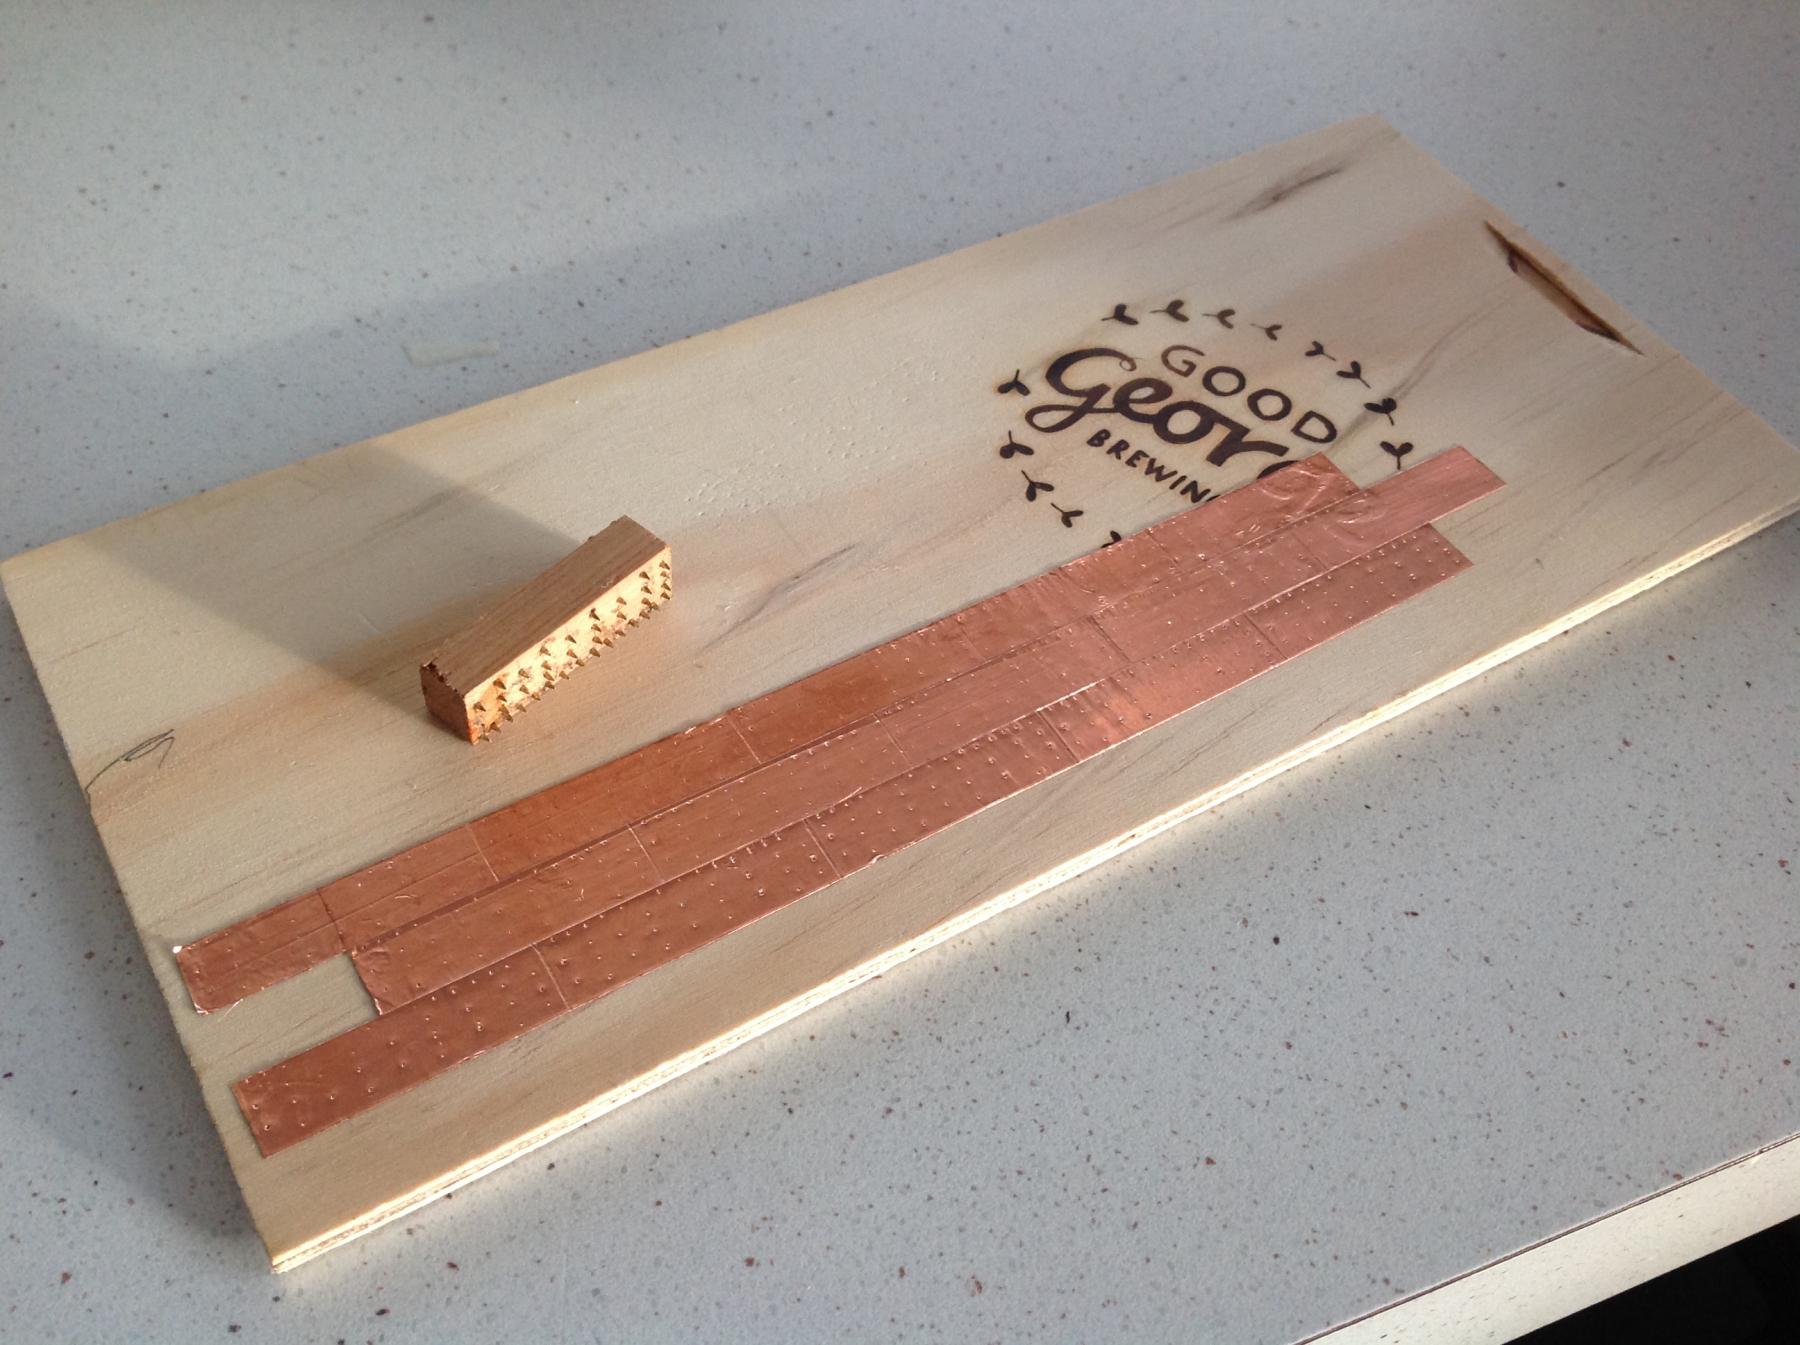
Mass production of copper plates begins with a stamping and scoring jig made from offcuts. Line the end of the plate up with the end of the rails, stamp it and then score through the slot with the back of a blade.
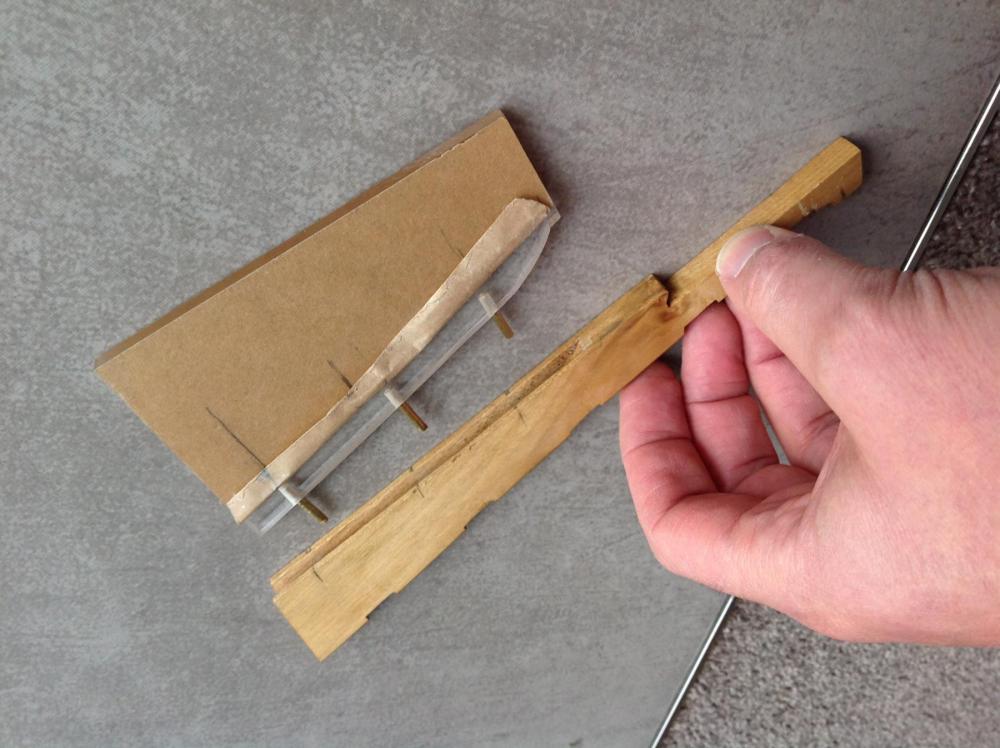
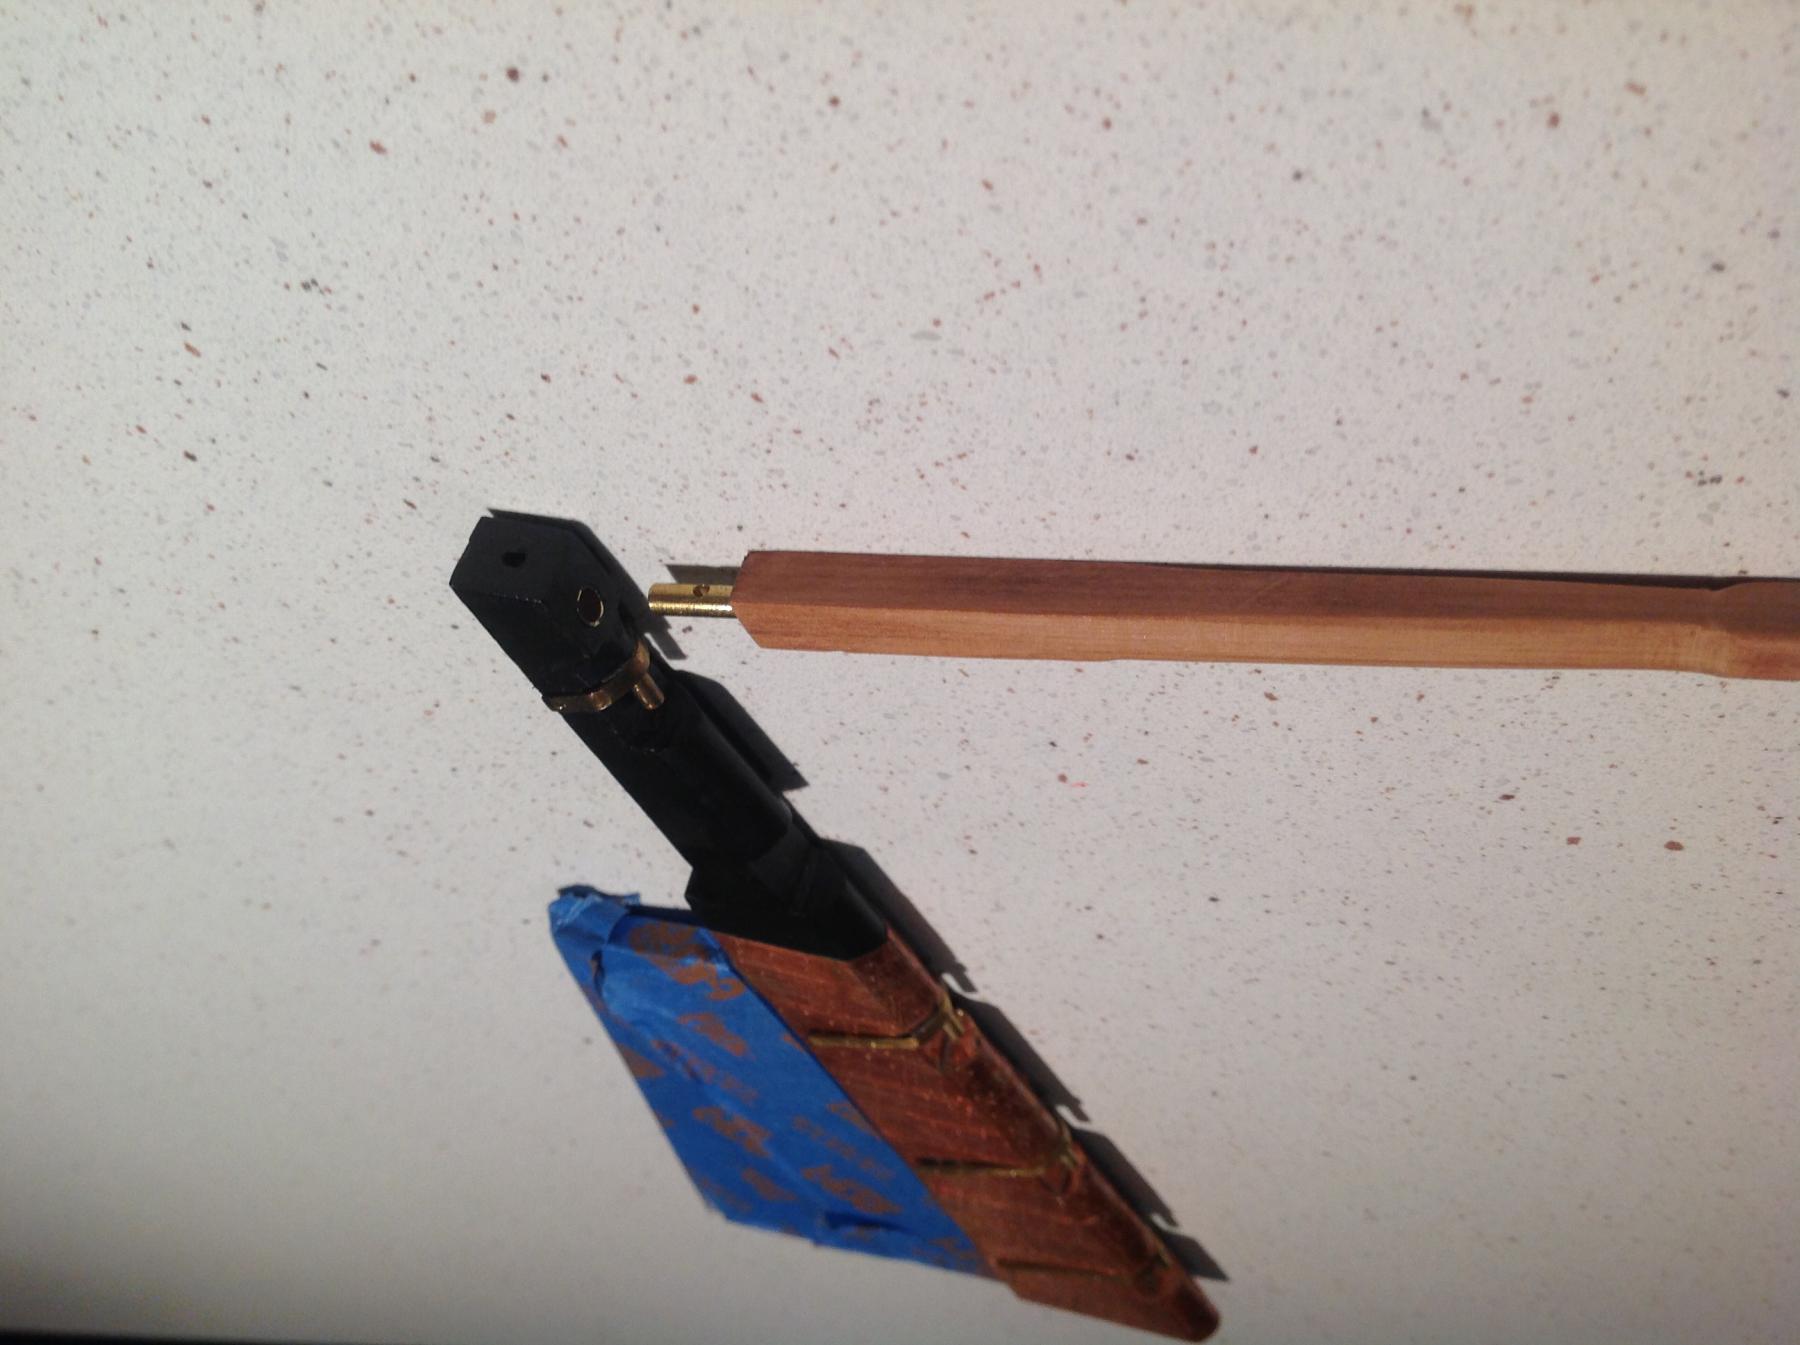
Another small task was making a rudder extension. This is acrylic sheet that came free as an offcut from a local supplier. It will be epoxied into a slot cut into the rudder one that is painted and coppered.
Brass rods have been added for strength but will be hidden inside the slot. The extension should be all but invisible once in the water and also not too noticeable when the Harrier is out of the water.
I know this because this is the second extension I've made. I took the protective cover off the first to see what it looked like and now can't find it because it's all but invisible.
-
Thanks Jerry, your instructions were very helpful around coppering.
I'm keen on copper over paint to get a nice aged patina and this project is a bit of a test of materials and technique so given its still way cheaper than a kit another $40 for the real thing looks like small beer.
Did you use any CA glue or anything else to stick it down or just rely on the adhesive backing and if so how has it lasted? I've tried a test run as below and the adhesive bond feels very solid considering the tape is very thin. I'd like to just do this and maybe a dash of CA here and there but worst case scenario is applying a thin coat of resin to it after the patina is how I want it. I'd rather avoid the resin though.
Anyway, as per the inventive Jerry Todd and a few other builders like Fam http://modelshipworld.com/index.php/topic/8675-brick-de-24-by-fam-scale-148-1809-pob/page-7, a stamp was made from timber with holes drilled for the small brass pins that come with ship kits. The plate size 1:1 is about 13-14inch x 4 ft. The vertical plate join is scribed onto the copper tape with the back of a blade. A small overlap on the horizontal edges was tried on the uppermost join but not on the bottom. It's so imperceptible I don't think I'll bother with overlap as I'm going for the 3ft rule - if it looks ok from that distance it's worked.
The tape is Masterfoil plus copper tape from venture tapes. It's aimed at the stained glass industry and is 3/8inch or 9.53mm wide.


WASHINGTON GALLEY by yamsterman - 1/48 scale - POF
in - Build logs for subjects built 1751 - 1800
Posted
Hugely impressive build you've got going there Mike. Plenty for all to learn from.
I'm looking forward to more.