Captain Slog
-
Posts
904 -
Joined
Content Type
Profiles
Forums
Gallery
Events
Everything posted by Captain Slog
-
 Hi Mike, Your pumps look fantastic. I am currently working on my pumps also and the kit supplied ones are very basic, clunky and look pretty poor really. I was just going to do them as supplied anyway so as to finish the rear deck but seeing yours may make me rethink this. Thanks a bunch Joking of course Cheers Slog
 -
Hi Keith, I am probably not the best person to give advice on second planking as I hated it and it took me at least 9 months to complete as I would do a bit and then put it aside in disgust then do another little bit etc. Anyway for what its worth here’s my thoughts. Firstly on the plans find the side elevation with the wale position on it. I am sure the plans and instructions say to start from here. Accurately measure the height at many points along the top of the wale and transfer it to your hull. Once you have a series of marks I suggest using a full length strip for the 1st plank at least so you get a nice smooth flow along the top wale line. Then plank up and down from there. If 1st plank is accurately placed when you come to do the wales the first wale plank sits perfectly on top of this one. I prefer using whole lengths for the rest of planking as I found long lengths bend laterally more easily. Short lengths become very stiff side ways and hard (for me at least) to get smooth flows. Although I tried both in different areas. A 100mm plank length is a shade under 21 feet which would be an acceptable length I believe. Cheers Slog oops forgot about shift pattern. I started with good intentions but ended up placing them to fit. If I used a full length I didn't bother marking pretend butt joins and when I used short lengths I just made sure none of the joins were next to each other. To be honest I don't really noticed the hull plank pattern on mine. Sorry not a very good answer I am afraid.
-
Hi Mick, Looking good. The chains on the rudder is to prevent losing the rudder should it inadvertently become detached (unshipped) from the keel. According to the AOTS the chains should be attached to the rudder a bit higher than you have them, probably closer tot he step where your rudder changes colour from white to bare wood. Cheers Slog
-
Progressing nicely Wayne. That's a nice touch covering the ply edges and grooving them. Cheers Slog
-
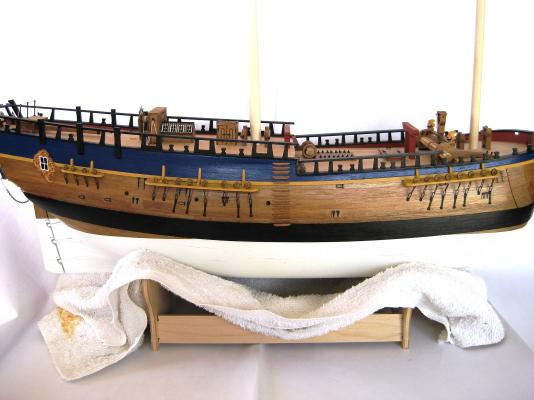
No worries Jeff. Thanks ZyXuz, I am happy how they turned out. They could be a bit darker maybe, but don’t want to do anymore on them in case I mess them up so happy as they are. HI Keith, thanks for the kind words. The Caldercraft Endeavour builds a nice model straight from the box. As far as I can remember I don’t think I have done much different than what is in the plans or provided in the kit either. A couple of small embellishments or replacements but that’s about it. It’s unfortunate about the MSW 1.0 crash as my log originally started from opening the box to the point this log continues from. I also had a hard drive failure and only have some photos from the finish of second planking to current. I was fortunate in the early days of my build that there several Caldercraft Endeavours running at the same time which were further on than me that I could learn from but they seem to have died out in MSW 2.0. I highly recommend you start a log now, I would guess most people, including me find all stages of builds interesting. I will be following your build when you are ready to post and just holler with any questions and I will help where I can. Today was spent blackening about 150 of the supplied copper eyelets and fitting all the eyelets on the rear deck and channels. Not much to show photo wise with that. Probably do the pumps tomorrow and that should be the last of the rear deck fittings, oh and the iron horse. Cheers Slog
-
Hi Mick, You are certainly moving along at a fair lick. That new links/chains you have look very nice and doing a great job on them. My finger tips were numb after squeezing the links round the deadeyes . The 'business end' of your ship is looking great, probably one of my favourite areas on a sail ship I think. Cheers Slog
-
Hi Jeff, Magazine is looking sweet. Is there a lot of 'furniture', fixtures and fittings on the decks? these are thetype of things I like doing most on a build. cheers Slog
-
Hi Jeff, I highly recommend giving it a try. Way back in the beginning of my build until recently I was resistant to try it as read lots of posts in MSW 1.0 where it seemed to be a very hit or miss affair getting even coverage or a nice colour, or it flaked off etc. Some of the processes described seemed to much bother as well with scrub the brass with this and rinse with that and then soak in something else and repeat etc; then someone on MSW 2.0 (I apologise for not giving credit as I can’t remember) posted this link, http://www.modelboatyard.com/blackening.html to an article on blackening. Seemed much simpler and gave it go and it works…for me any way. I don’t clean my brass work in anything prior, although most of it would have seen the hot end of the torch so I guess contaminates are burned off. A quick soak of 10 or more minutes in the acid followed by a rinse in water and then a couple of minutes in the blackening solution followed by a rinse in water again and a buff. I haven’t noticed any difference in 100% neat solution or 50/50 water solution or any difference between 2 and 4 minutes but it would pay to experiment. I think the Blackening was $20 bucks and I got the hydrochloric acid from Bunnings which was $8 or $9 bucks. They had a couple of different brands and volumes. Cheers Slog
-
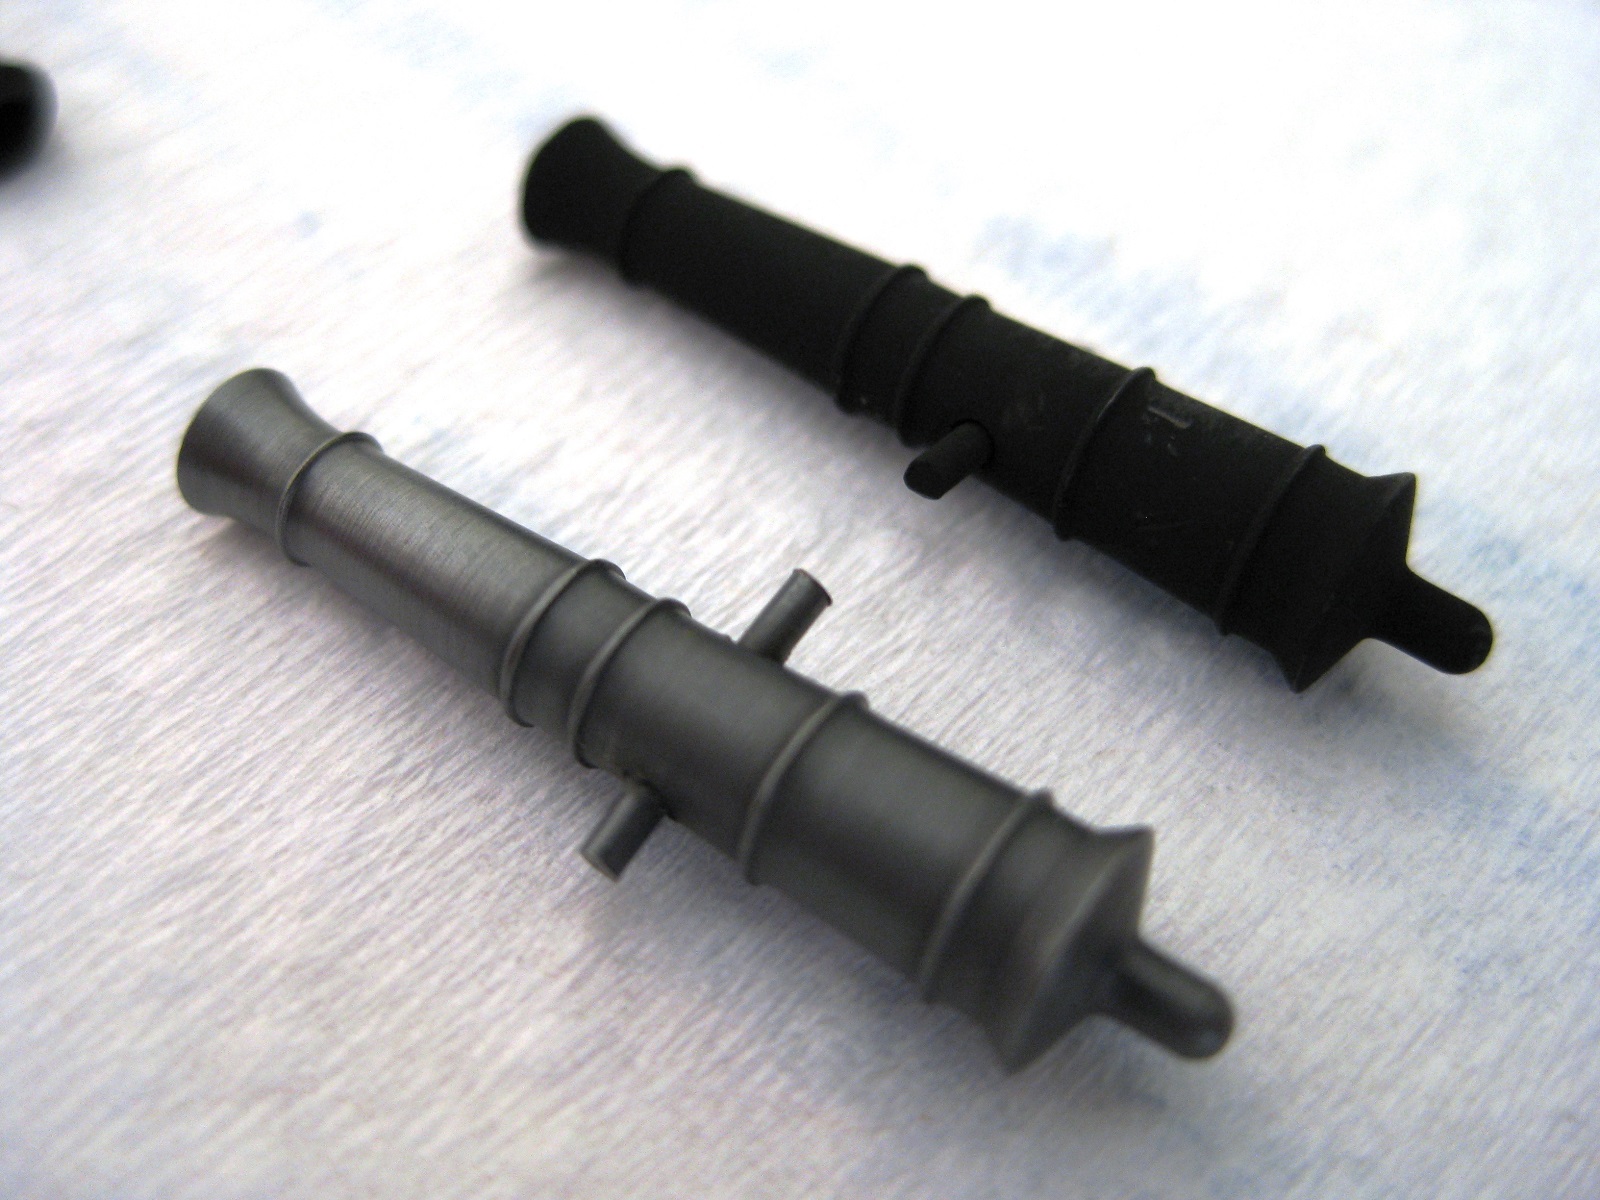
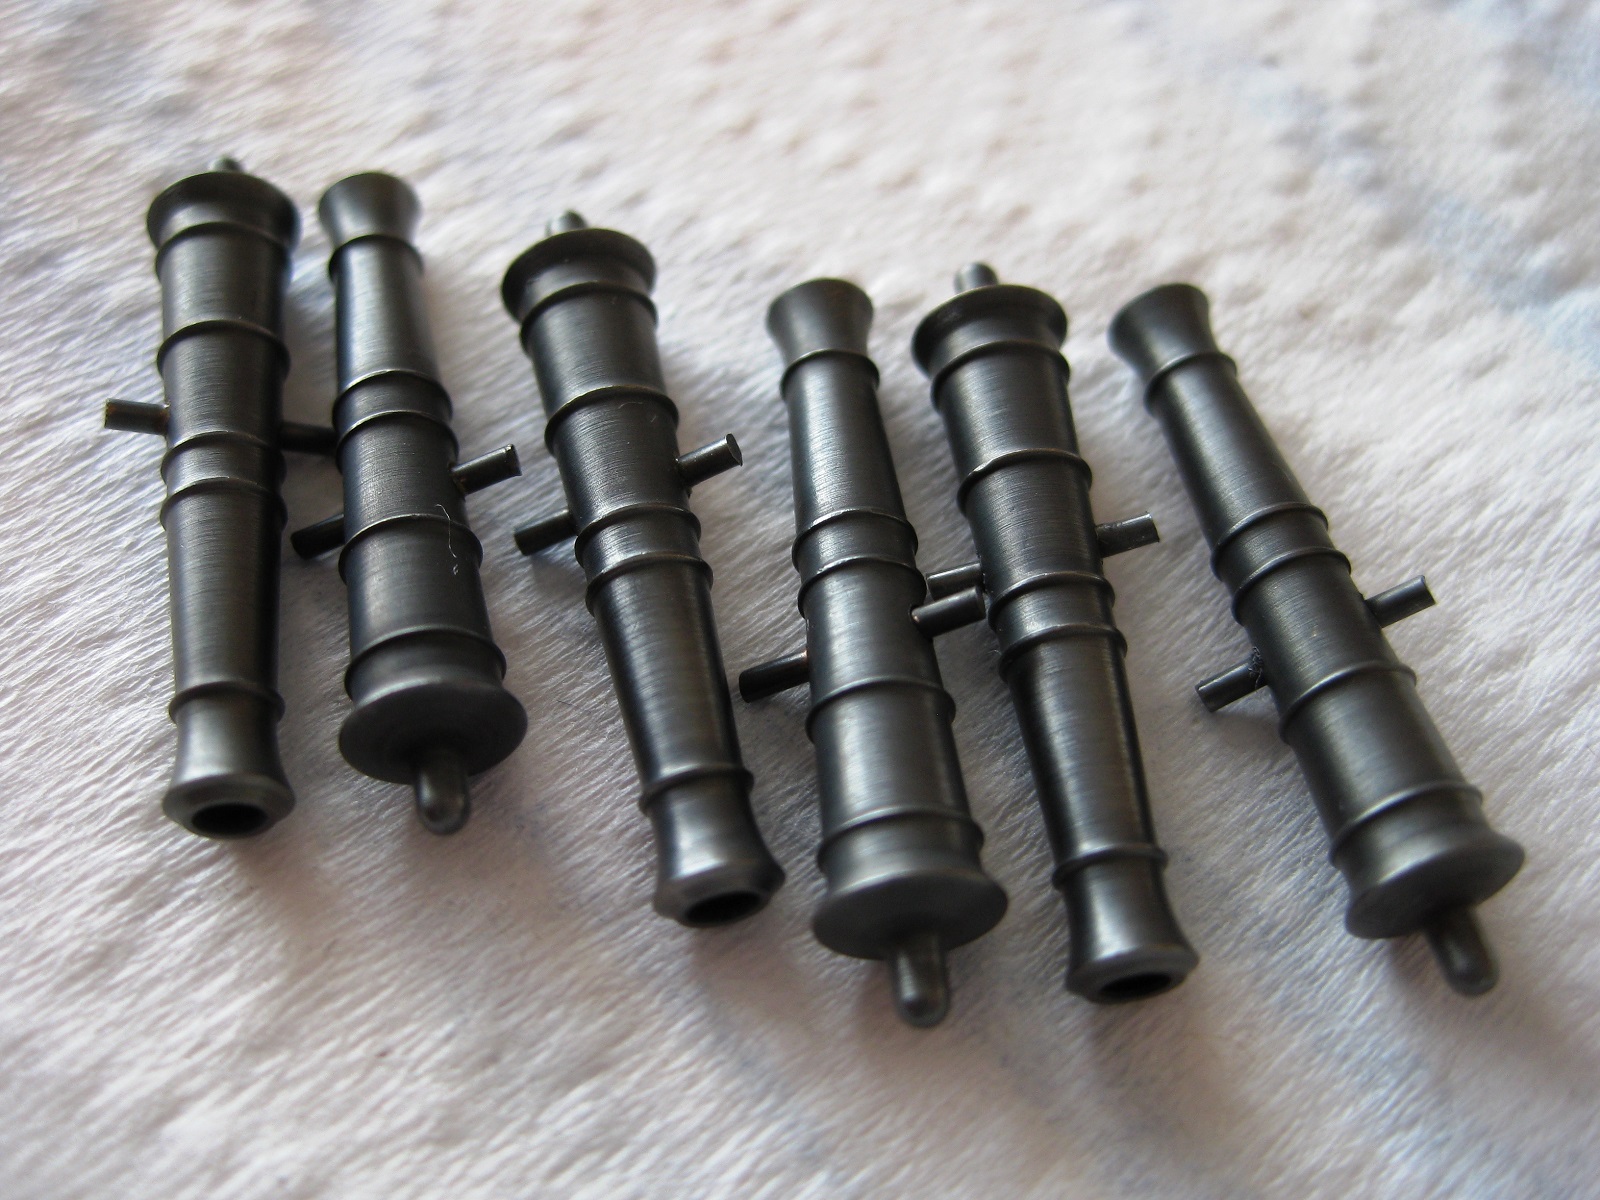
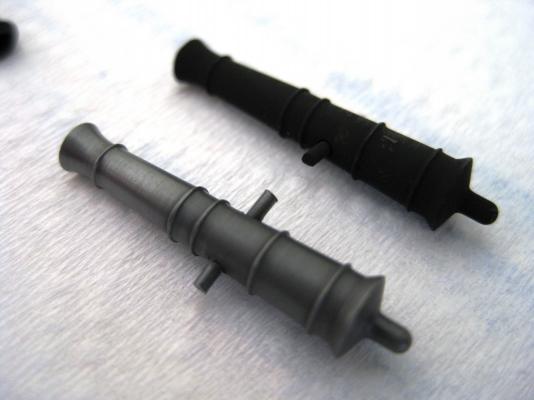
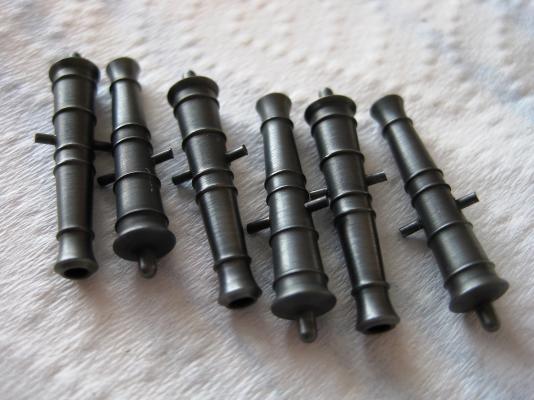
Hi Mick, thanks for the kind words but don’t be hard on yourself. I also look at the work of others then look at mine and feel the same way. As long as you are enjoying yourself then its all good. Hi Greg I wasn’t going to rig the booms, as far as I can tell there is no rigging on them in the stored position but probably wrong on this. The AOTS does show little wooden cleats (nailed?) on to them. I only remembered about them after finishing the varnish so choose to leave them off. The booms can be removed and refitted at the end if necessary. I am spending my time doing all the little bits and pieces I can as putting off doing the masting. I don’t really have the space at the moment working off the end of the kitchen table and have to tidy up and pack away after each build session. Thanks Jeff, had a look at your latest build and looking good, certainly different from the other section builds, I don’t think I have came across a bow section before. I have today, the weekend and the Monday off so hopefully will be able to tinker away a bit. I thought I would do some more work on the cannons and thought I would try blackening the barrels since I seem to have found a process that has worked for me so far. Did the usual 10mm soak in the acid and after rinsing again 2 minutes in the blackening solution. The photo below shows 2 barrels, one how it looks after chemical blackening and after buffing with a soft cloth. Quite pleased with the result as it almost shows how a blackened barrel and a painted barrel would look like as I was previously going to paint them. Happy I didn’t. The 4 pounders waiting for their carriages. Cheers Slog
-
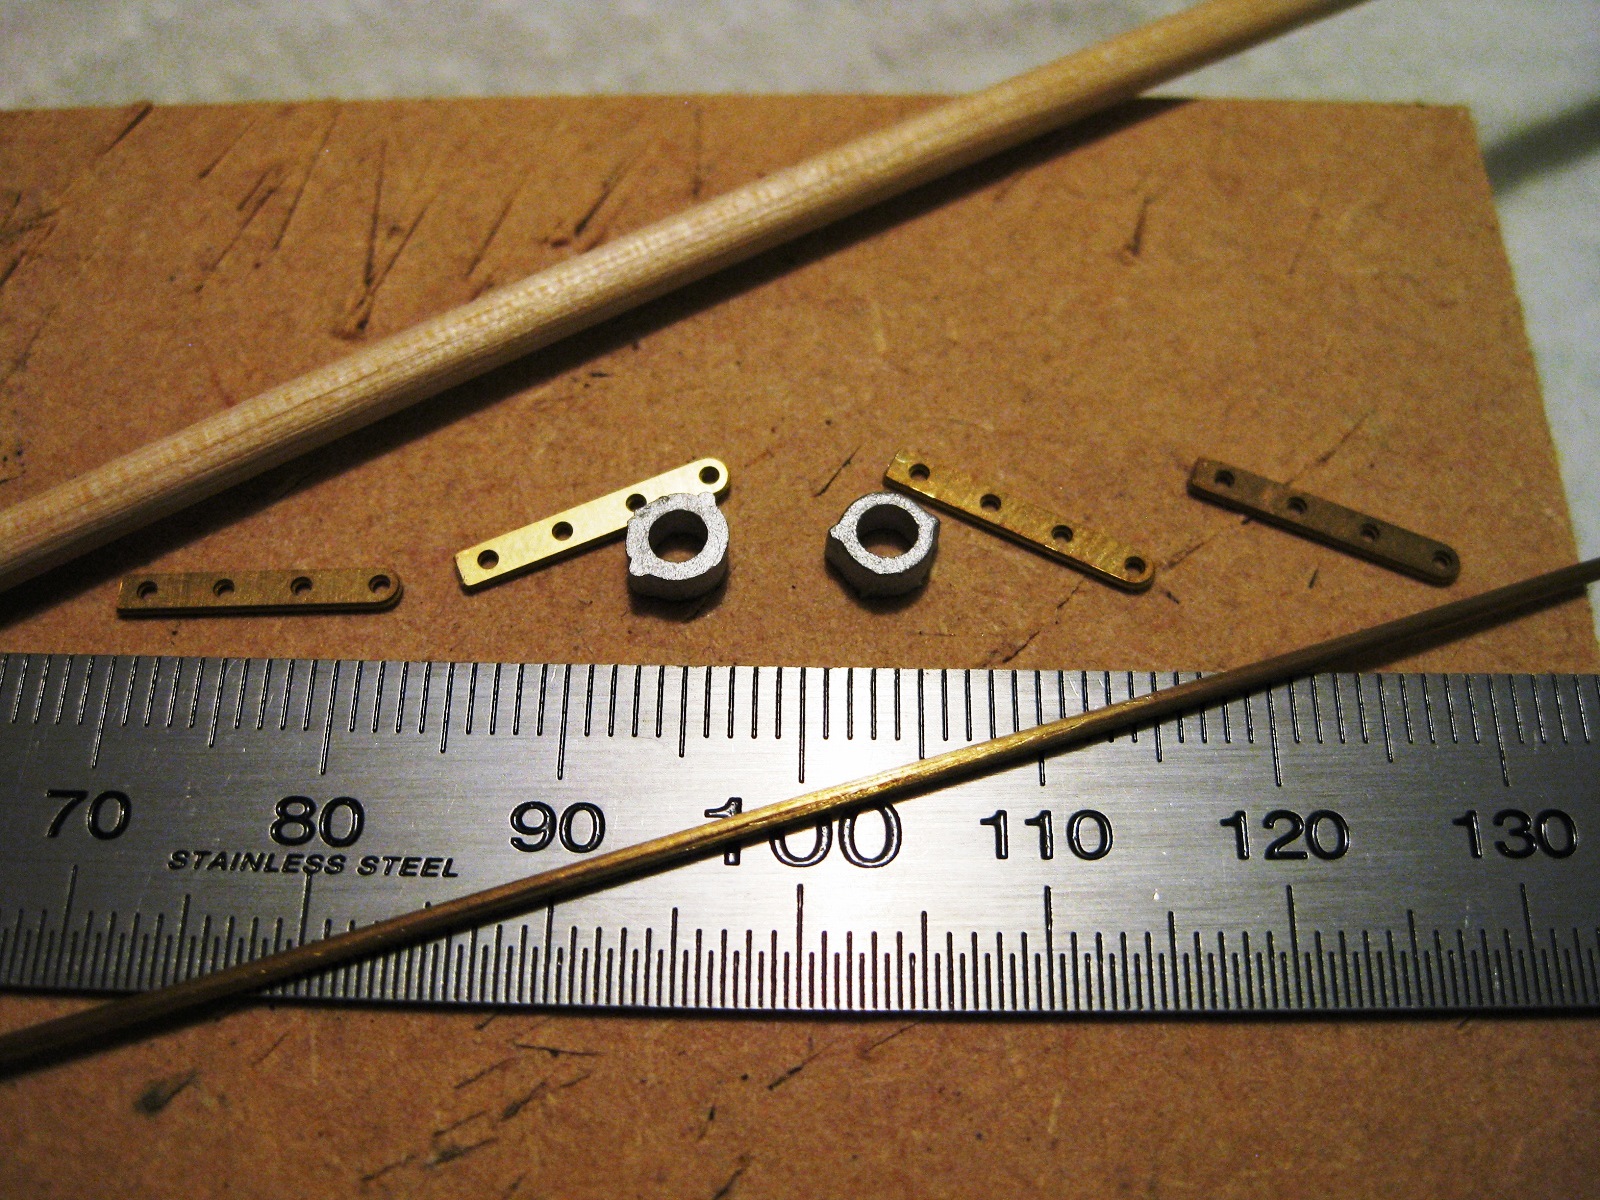
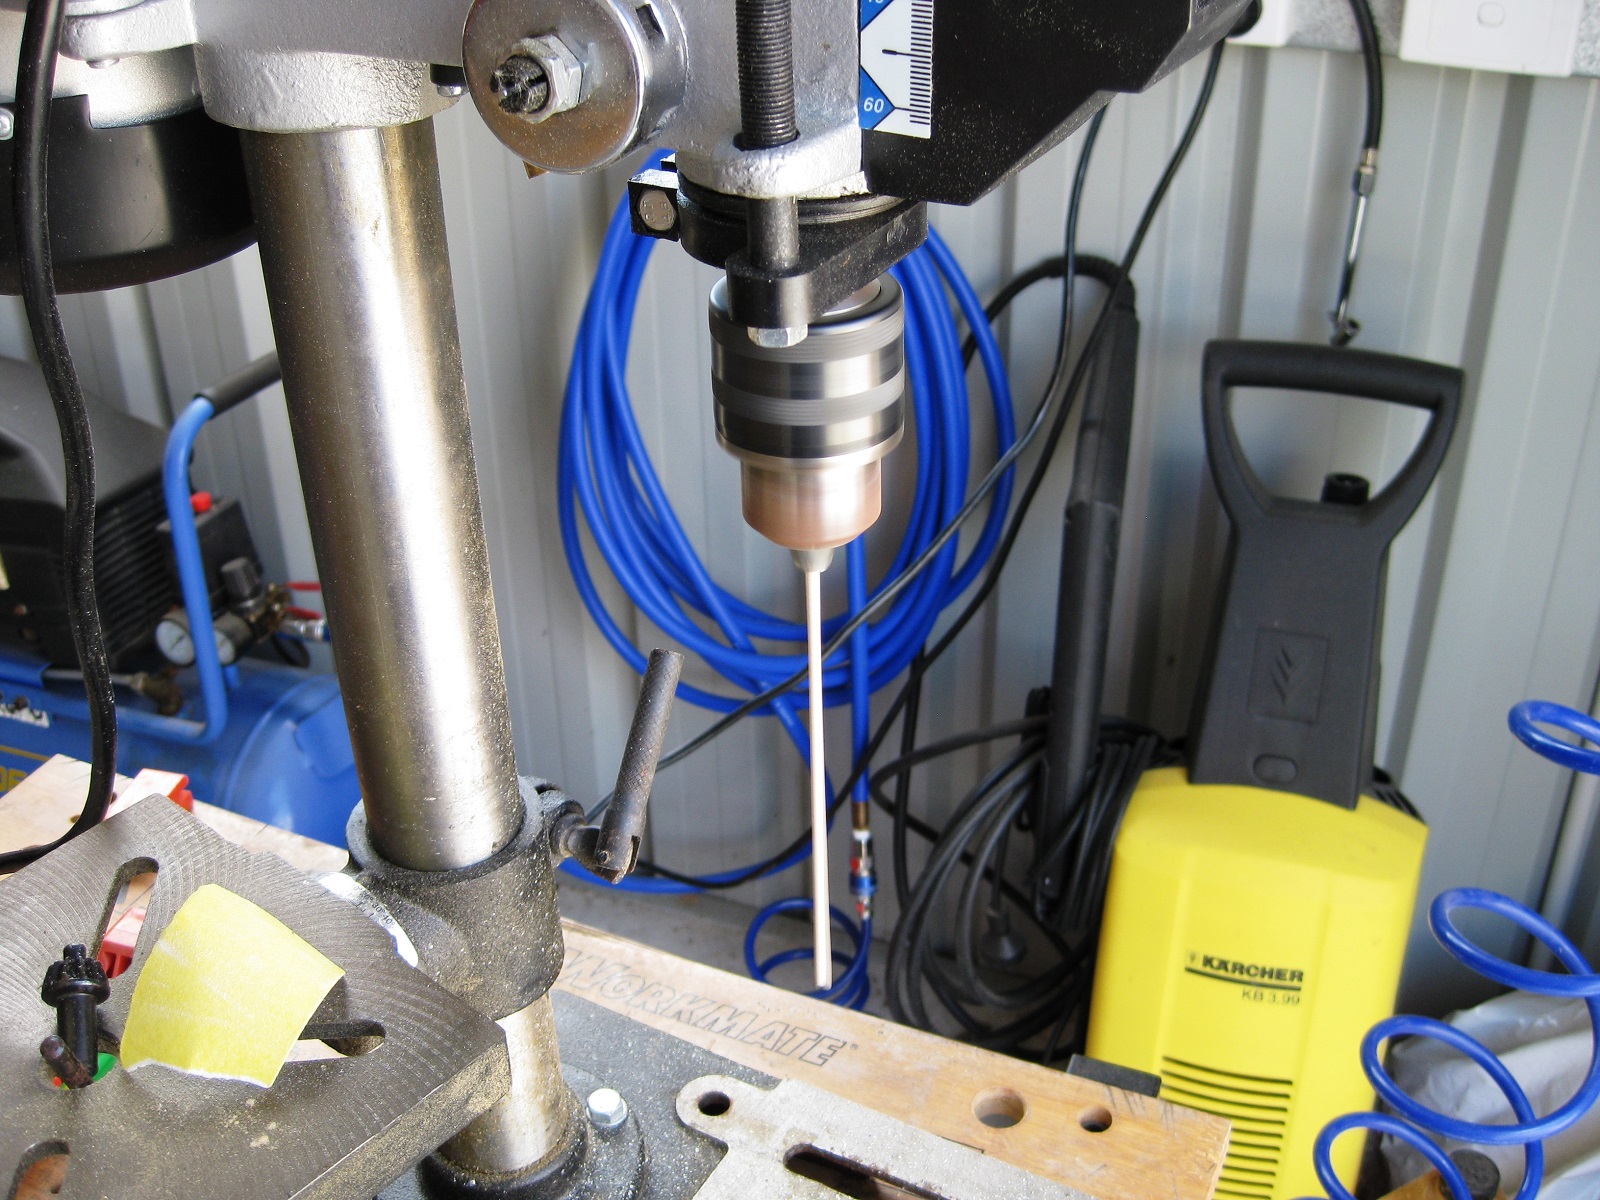
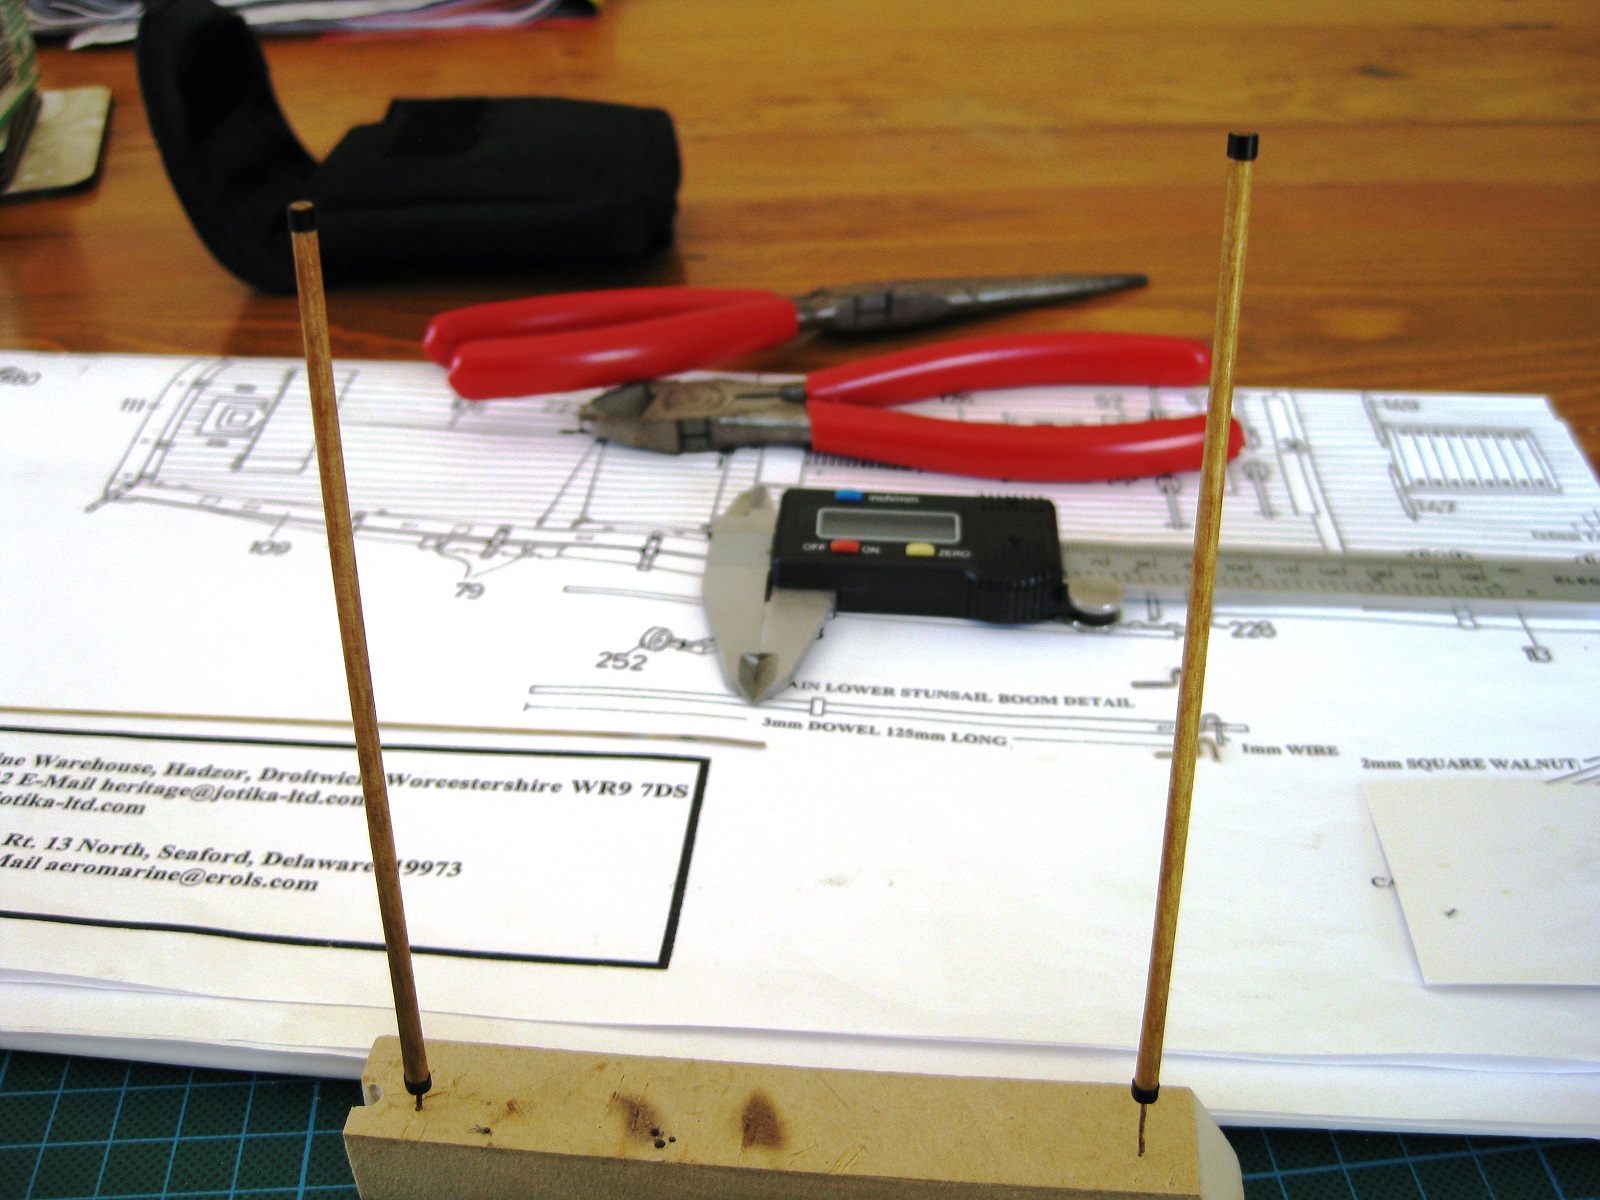
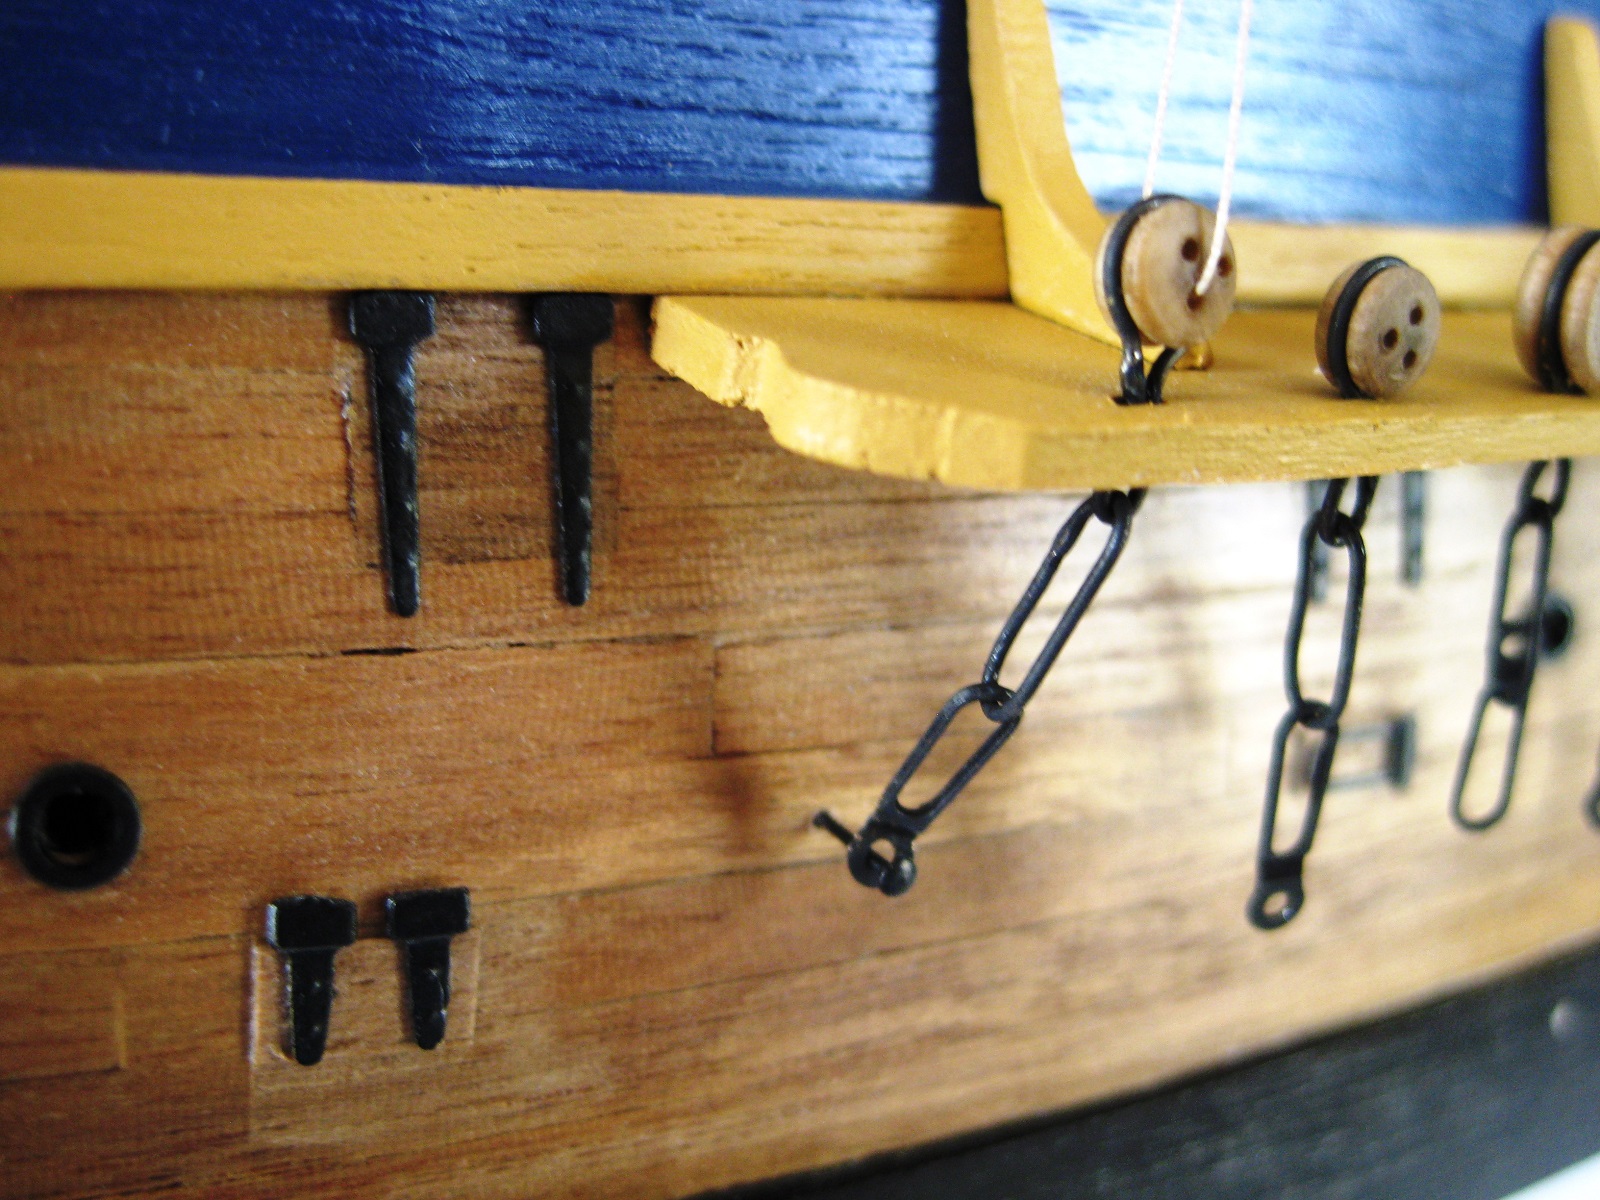
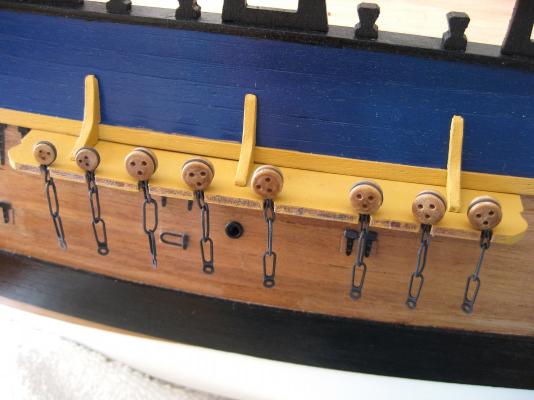
Hi guys, Only made a small bit of progress lately what with long hours at work, jobs for the Admiral, the release of GTA V and the BF4 beta and a dozen more things vying for my time I managed to secure the rest of the chains and did the Lower Main Studding Sail Boom. Okay all the chains are finally secured to the hull on both sides. I mentioned previously of an issue which would raise its ugly head. Not all the chains terminate in a preventer link so attached them as per the plans. On the main channel, 3rd link in, there is a preventer link left off as the chain link is fixed above a hatch. Well as can be seen despite not having a preventer link it joins the hull below the hatch essentially making the hatch useless. As far as I am aware I did place the hatches as per the plan measurements so something is off, me, the plans or both. Oh well another lesson learned. Not to bothered as it gets lost in the general busyness of the area. Here are the components for making the lower main studding sail boom. 3mm dowel cut to 125mm, 4 photo etch brackets, cast white metal hoop brackets (which I replaced) and 1mm brass rod for the hinges. I ended up using 0.8mm instead. For the booms the plans say to cut the 3mm dowel to 125mm and the plans show an obvious taper to them, which I reckoned to be 2mm at the end. I cut them over length and stuck them into the drill press and whilst running at the fastest speed used some 240 paper to sand them down to a taper. Once done they were cut to the final length. There was quite a discussion on the cast metal hoop brackets the kit supplies on Kenr’s Endeavour log in MSW 1.0 with the agreement that in real life the booms wouldn’t be able to be released from the hoops. The solution was to cut the cast hoop in half and pin it to the channel so the boom could sit in it. I thought this was an opportunity to do some more silver soldering so cut strips of brass sheet the width of the bracket and bent round the boom and trimmed. The new brass hoops were then silver solder to the bracket. The AOTS shows that both ends of the boom have metal banding round them so simulated this with the supplied black cartridge paper using PVA applied to the paper strips with a paint brush. The 0.8mm wire was bent to the shape on the plans and a hole drilled into the end of the boom. I tried yet another stain and this time it is Cabots Maple satin Stain/Varnish which is getting closer to what I am after colour wise. The iron (brass)work was treated to 10 minutes in hydrochloric acid, then rinsed with water followed by 2 minutes in Birchwood Casey Brass Black bought from the local gun shop then rinsed again followed by a gentle rubbing with a soft cloth. The finished lower main studding sail boom. I can lift the boom off but will at a later stage lash it down to the hoop bracket for permanent fixing. Cheers Slog


-
Hi Mike, Looking good. Got to ask though, you have the companion way down on the mid deck where the ships boats would go. All references, kits, replica's etc I have seen has it up on the rear deck beside the capstan? Lantern is a nice touch! Cheers Slog
-
Hi Greg, your rigging looks great as well as the jeer blocks, look real and business like. I like that area of rigging at the mast top where all the shrouds and stays come together. Cheers Slog
-
Hi Mike, Your longboat turned out really nice. I also like your companion hatch. I thought about doing redoing my one similar to what you have done but stuck with the kit supplied one as will never finish if i keep going back over previous stuff. Fantastic stuff. Cheers Slog
-
Hi Edward, I think you should contact Jotika as Steve says as they have included the wrong cannon in your kit. I just measured mine and they are a total of 26mm long and the cascabel is little pointy stubs not the big round ones as per your photo. (check out the photo of the cannon in my log to see the difference. The carriage bodies are approximately 17mm long but they come from a sheet of ply containing many parts so they should be alright assuming they supplied the correct sheet. Cheers Slog
-
Hi Edward, Looking forward to following your build. Cheers Slog
-
Hi Mick, progressing well. As Alistair says, paper/card is the way to go. I used paper for my cannonade posts. Caldercraft supply a sheet of black cartridge paper with there kit but like you I wanted to use brass so bought some brass sheets to make all these things out of and guess what ended up using the black paper where ever I could! Cheers Slog
-
Hi Alistair, thanks for dropping by. I checked out Chucks carriages and cannon and although they look fantastic the smallest he has are 6 pounders compared to the Endeavour peashooter 4 pounders. I did measure the cannon supplied and they are about 3-4mm shorter than Chucks. My worry is they will be to big to fit under the roughtree rails. I think I will perserver with the supplied ones first and see how they turn out. Hopefully once cleaned up and painted they should pass muster, if not can always try Chucks ones. HI Ross, exciting times receiving a new model. Hope you start a build log. Although I lost all my progress photos from box opening to second layer planking just ask and will help where I can. Looking forward to seeing it. Thanks Mick, I think a fairly local hobby shop sells 0.3mm piano wire which I check out and there is a jewelry supply store close to work which I will try also. Sam, thanks for the kind words, yup this is my 1st wood ship build. Did the usual plastic planes and tanks as a kid but straight out the box and painted with whatever was at hand LOL I know what you mean about build logs, there is so much nice work out there not forgetting the hints and tips gleaned from them I feel guilty about not posting on them more. Hi Pierre, you do yourself an injustice, the photos you posted of your build look fantastic and certainly not slap dash! Cheers Slog
-
Hi Mick, You are progressing well. Your 'white stuff' looks nice and straight. I do believe various bits of running rigging were tied off on the samson posts (think the correct term is timberheads?) but can't be sure as still far off from that point. I have been at my build for over 3 years on and off so don't worry about progress. I to enjoy doing deck furniture which has influenced my next potential build. Cheers Slog
-
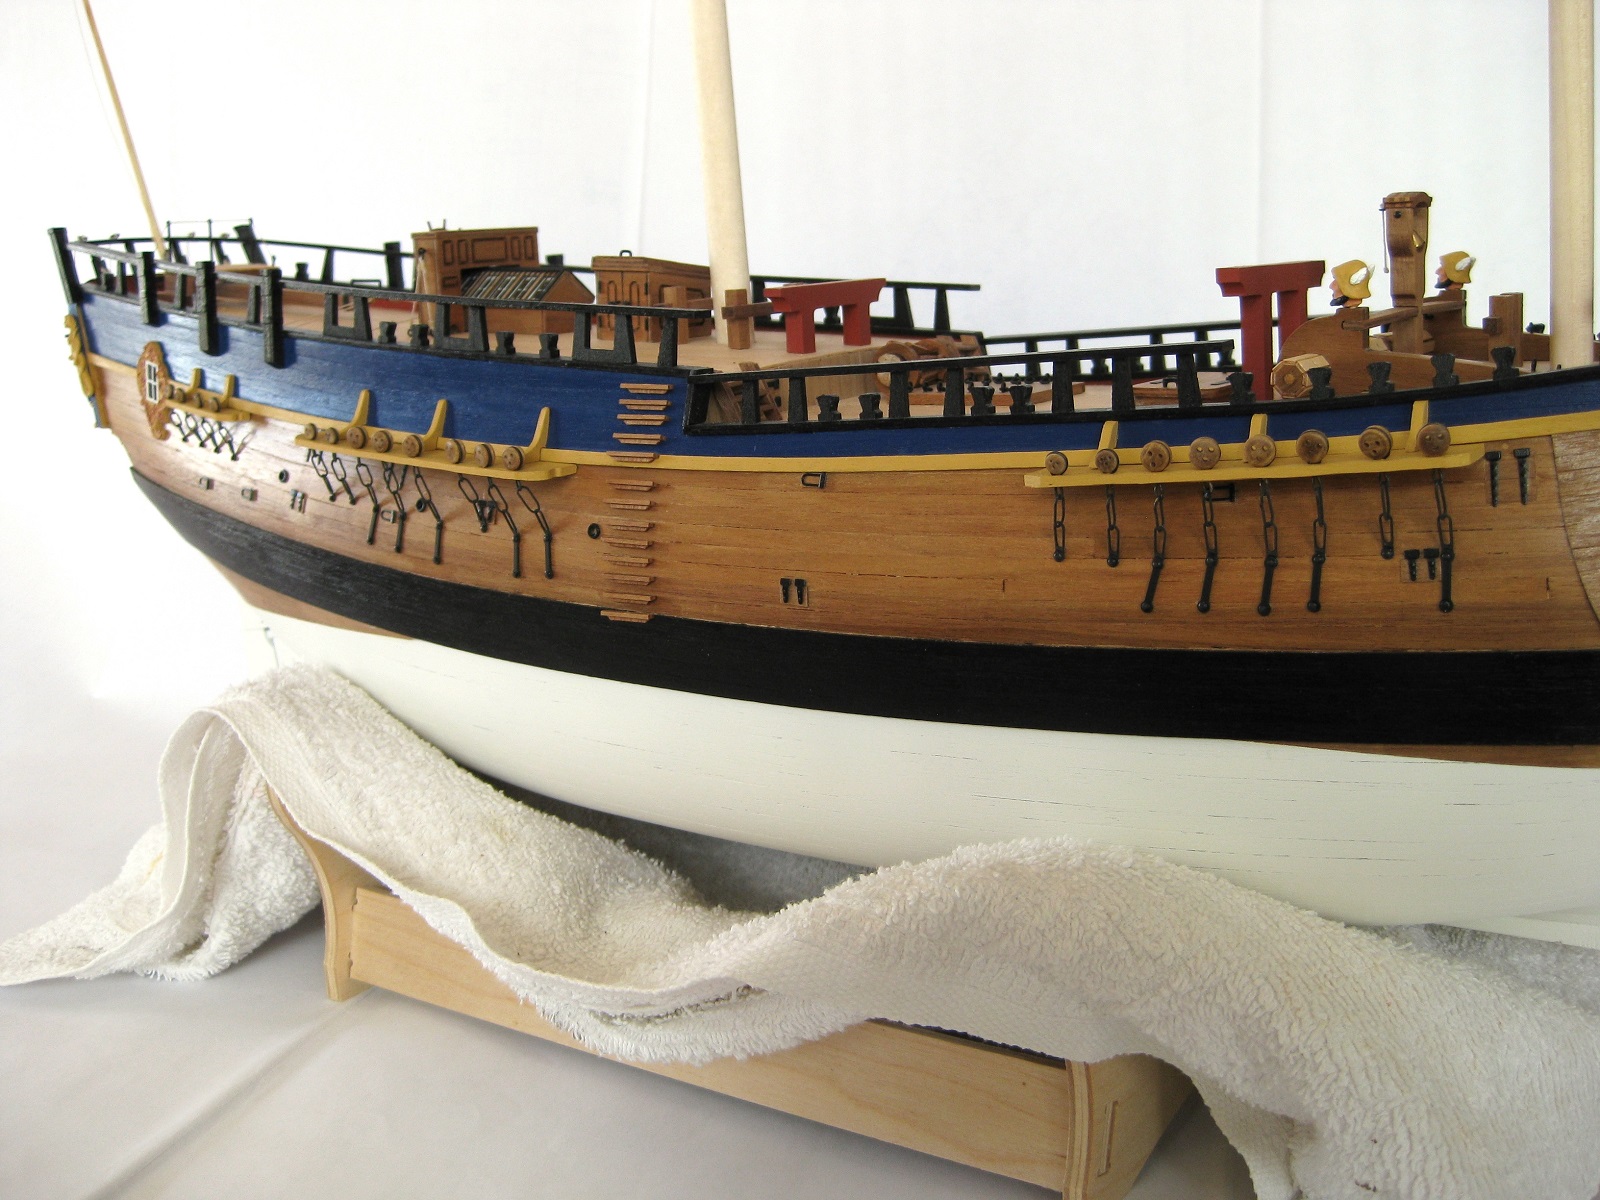
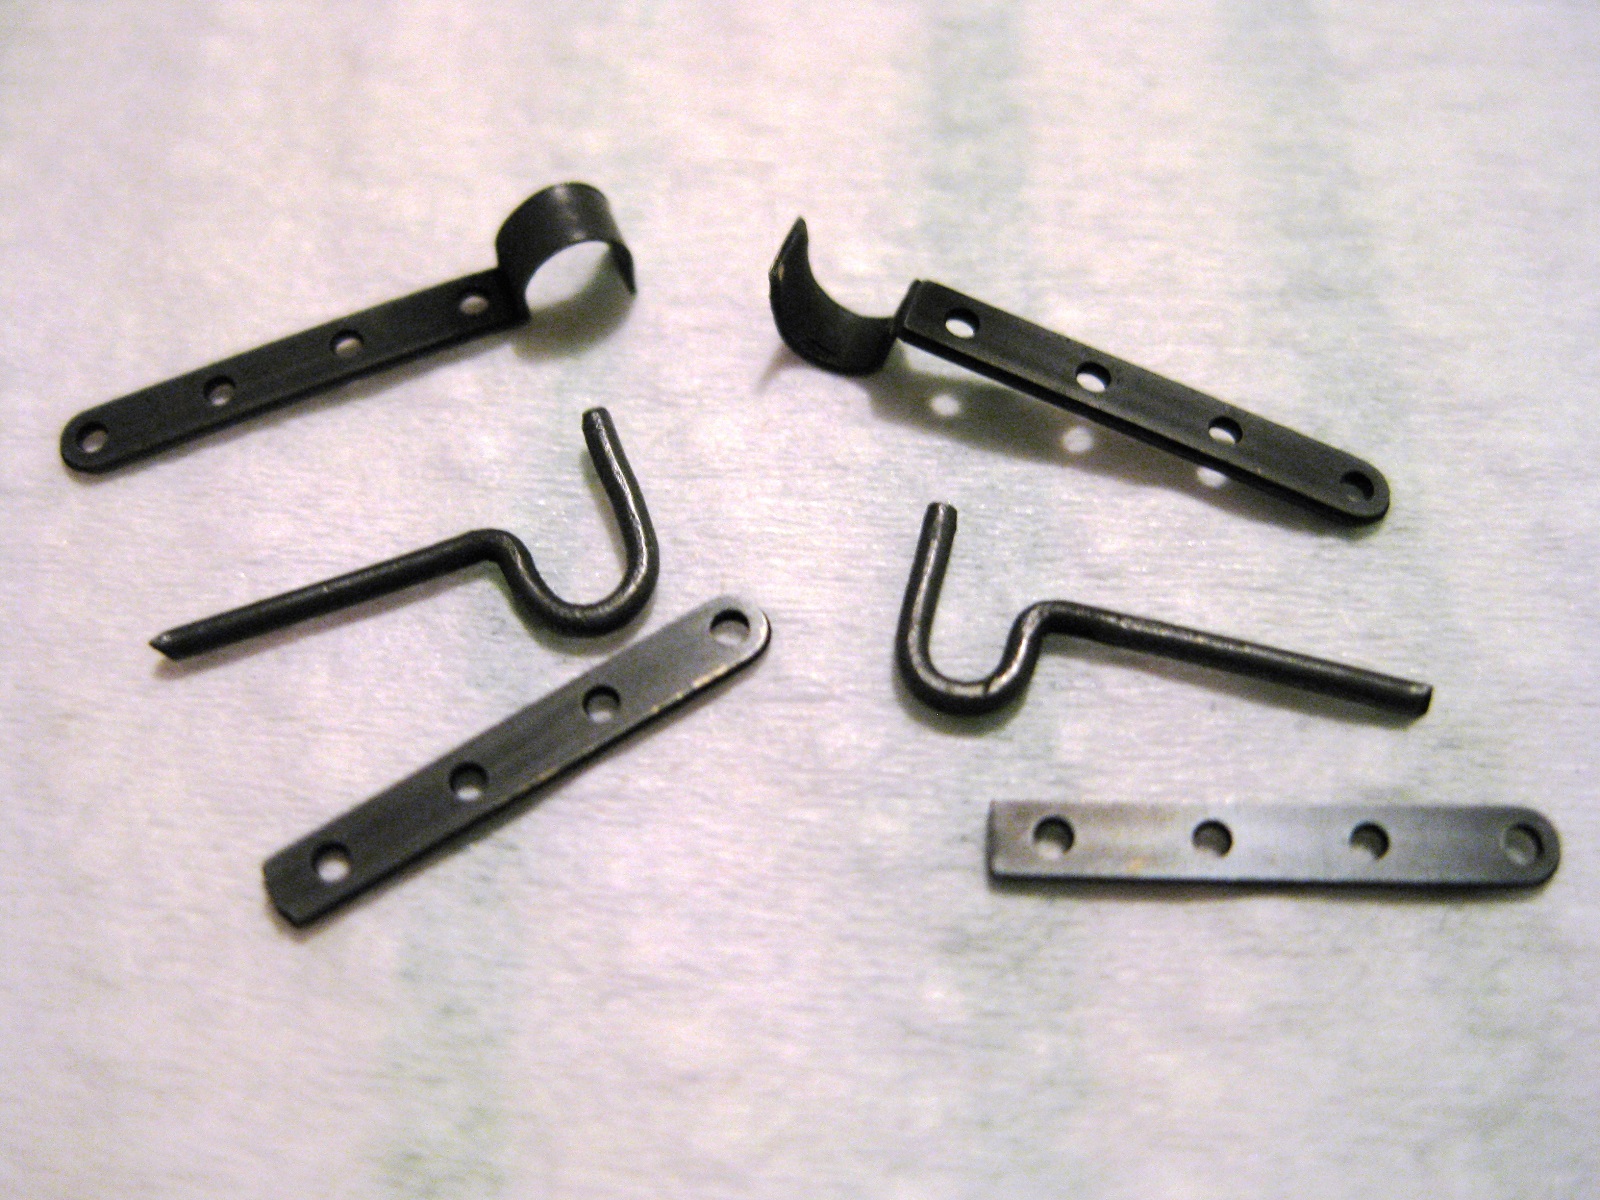
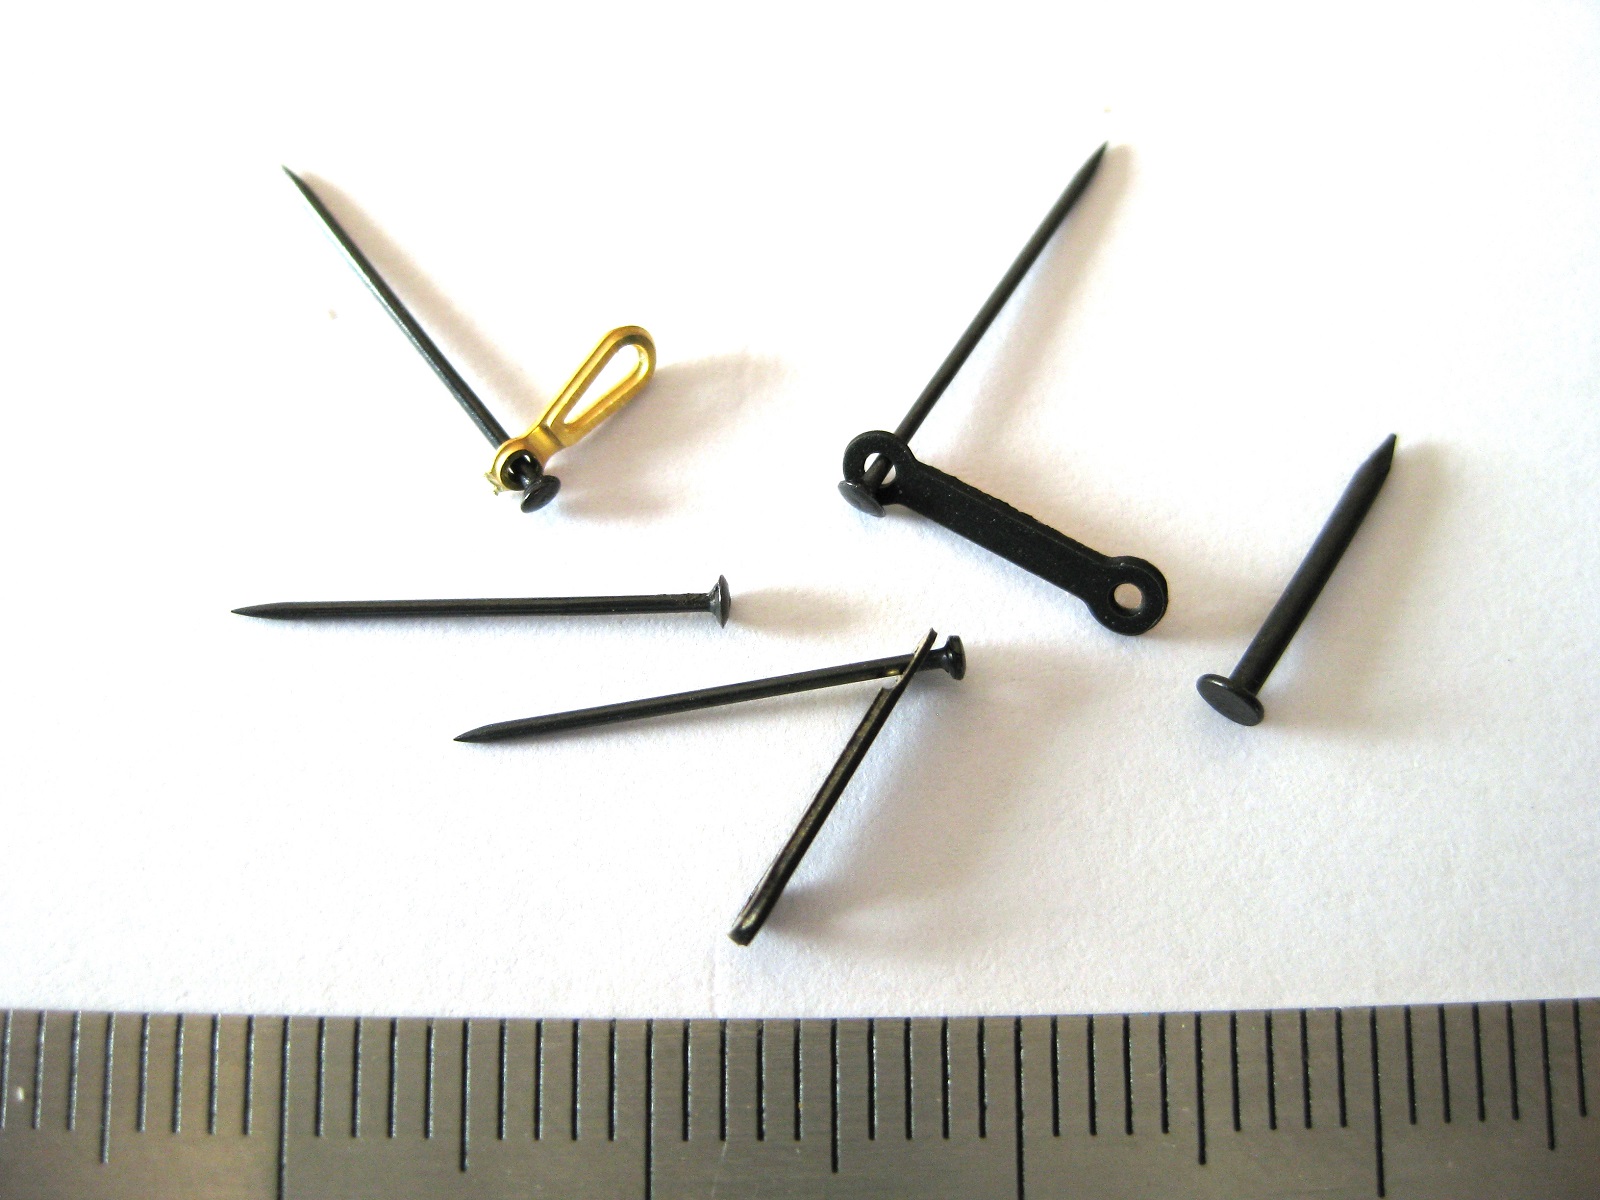
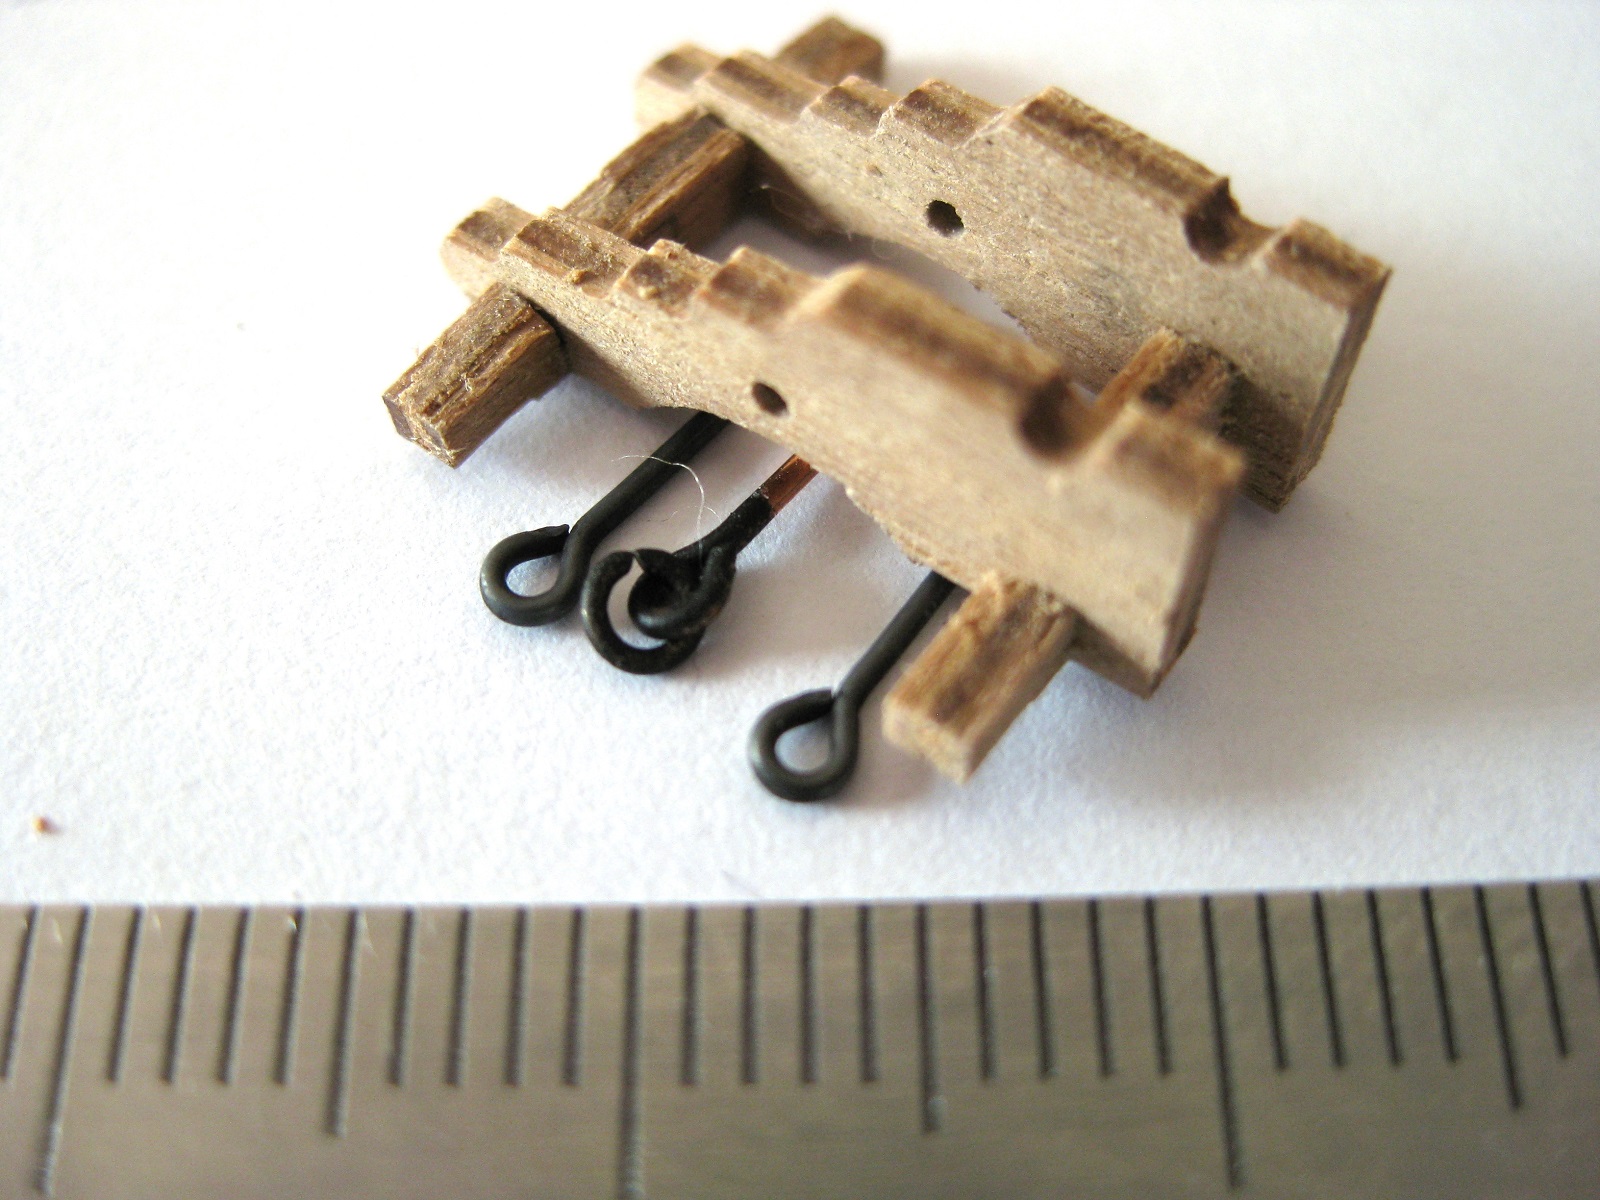
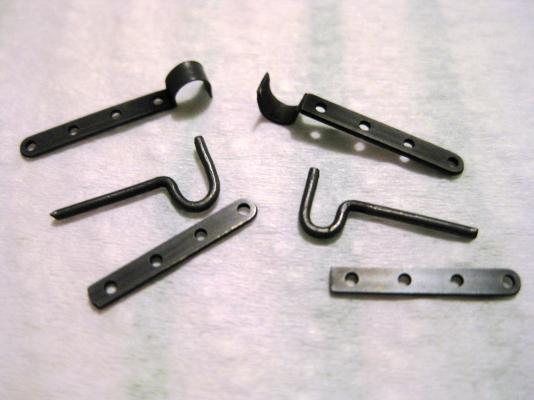
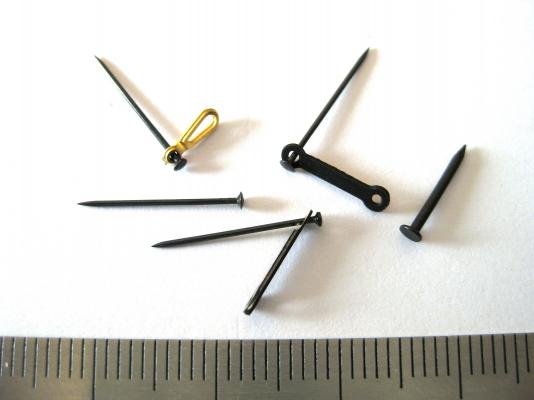
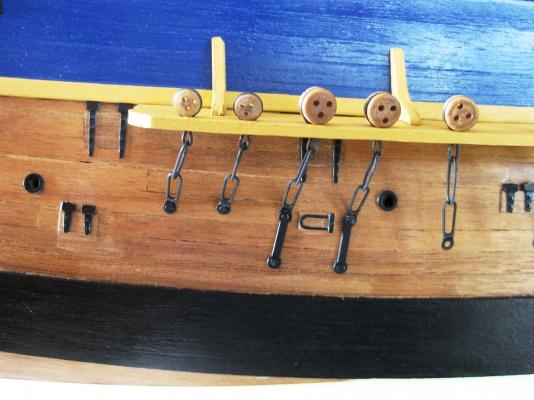
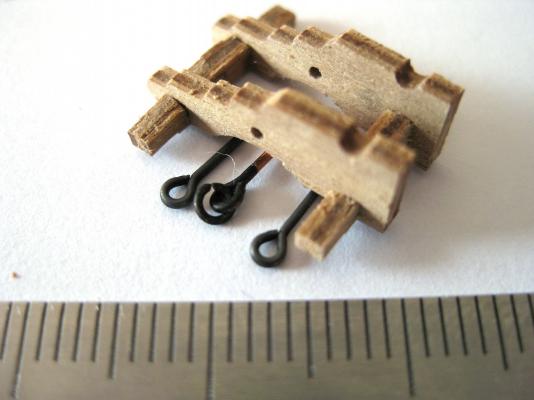
Hi guys, Thanks for the nice comments, they are much appreciated. In my household no one understands, takes an interest or appreciates the effort, blood, sweet and tears that we go through in building these models so comments like the above are very encouraging. Mick, I guess with these kinds of kits we are always at the mercy of what the manufacturer supply us with. I weigh up using and doing what and how the kit says and what others on here have done or embellishing kit parts based on others and the AOTS. Example being Steve (shipaholic) has put in the correct bend to his bowsprit but I think that is beyond me and will just do it straight like the plans say. At the end of the day we do this for pleasure and as long as we learn and try to improve for the next model its all good. I sometimes wish I could start this one over again as my ‘foundation’ (hull) isn’t the best and causing/will cause problems and compromises down the track. Example being a clash between chain links and airing port placement as discovered earlier today. LOL Not much progress done today as time isn’t permitting. I started securing the chain links and preventers to the hull just to show how I am doing it. These are going to take a while and will try and do a couple at a time as time allows. I previously bought some railway track pins to use as ‘bolts’ earlier in the build and the smaller thinner ones fit nicely into the holes in the preventer strap. Not sure if you can see from the photo but I tried to show a preventer strap side on to show how there is a recess (rebate?) on one end. This fits over the top of a similar recess on the chain link to form a halving type of joint. This is a nice touch by Caldercraft as it is exactly how the AOTS shows. I just need to remember to ensure I fitted the chain links the right way round in the channels to ensure the 2 halves fit together. Here is how I attached them to the hull. Firstly strung a length of thread through the middle hole in the deadeye and pulled it up to the correct (hopefully) height on the dowel placed in the mast hole. As you can see the deadeye pulled up off the channel but this is okay as it gets pulled back down. Secondly I bent the bottom of the link with the recess/hole at an angle where it fits against the hull then using a needle in the pin vise, I placed it in the hole and pulled the deadeye back down and once happy the angle was correct, following the thread, pushed the needle into the hull to mark the pin location. Using a drill and the pin vice made the hole for the pin. I pushed the pin into the assembly and then pressed fully home into the hull hopefully putting the final correct bend on o the bottom preventer. To glue I pulled the pin back out a bit and using CA glue applied with a needle coated the pin shaft, the back edge of the preventer link where it touches the hull before pushing the pin fully home again. The following photos just show progress to date. The long preventer links on the larger deadeyes were done similarly but when I pushed the unglued assembly home I then angled the preventer link to the correct position to drill the bottom hole. To glue I pulled both pins out slightly and applied CA glue again with the needle to surfaces that touch each other or the hull and then pushed both pins fully home again. I had planned on fully rigging the cannon but as the smallest rings I have are the copper supplied ones (chemically blacked) there is no way these will all fit on the tiny carriage. As mentioned by Steve on his log I might try seeing how small I can make my own but at the moment haven’t got any wire smaller than 0.5mm which looking at the photo below looks as thick as an arm! Cheers Slog


-
Hi Ron, Looking good. Looks like you are on the home ward stretch now. Cheers Slog
- 240 replies
-
- 1
-

-
- supply
- caldercraft
- (and 1 more)
-
Hi Steve, Your rigged cannon look incredible. I have my carriages together (they are 17mm long) but can't see how I could possibly have room to fit the rings and eye bolts on to them like yours though. cheers Slog
-
Wow, your painting skills are superb. Between your stern and the earlier panels you are quite the artist. Cheers Slog
-
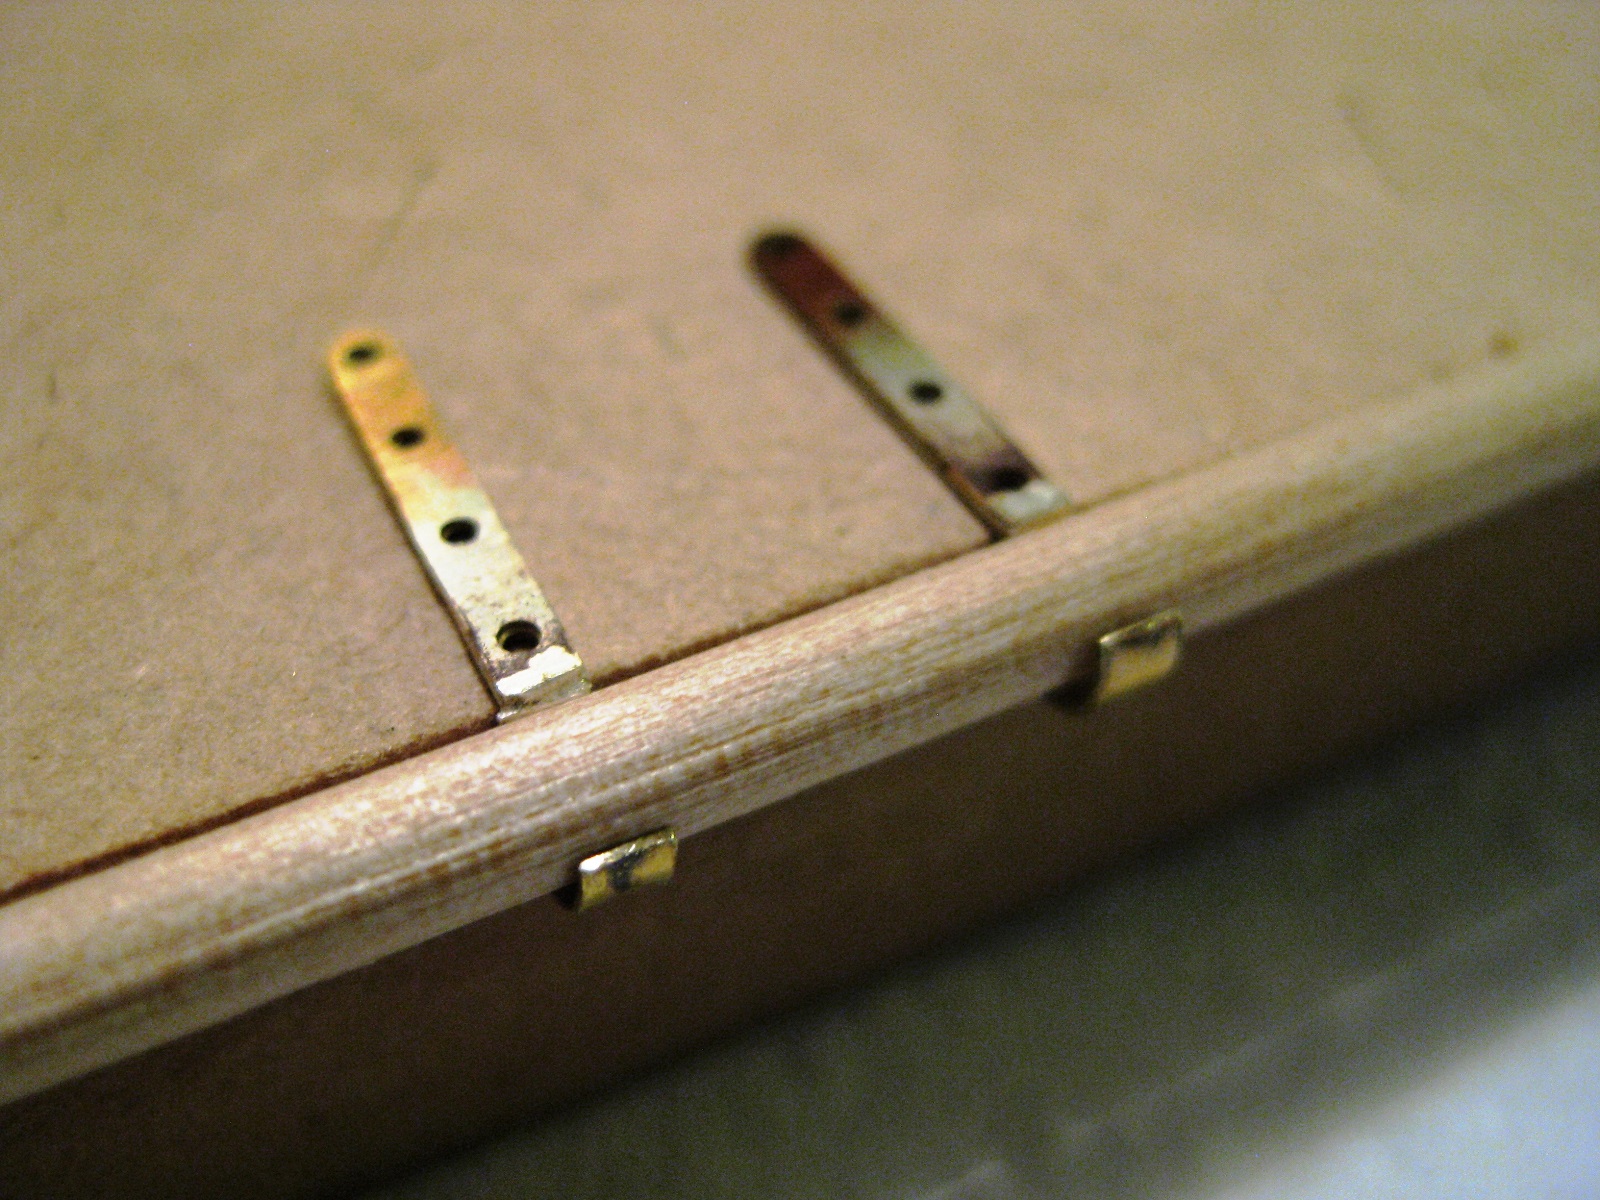
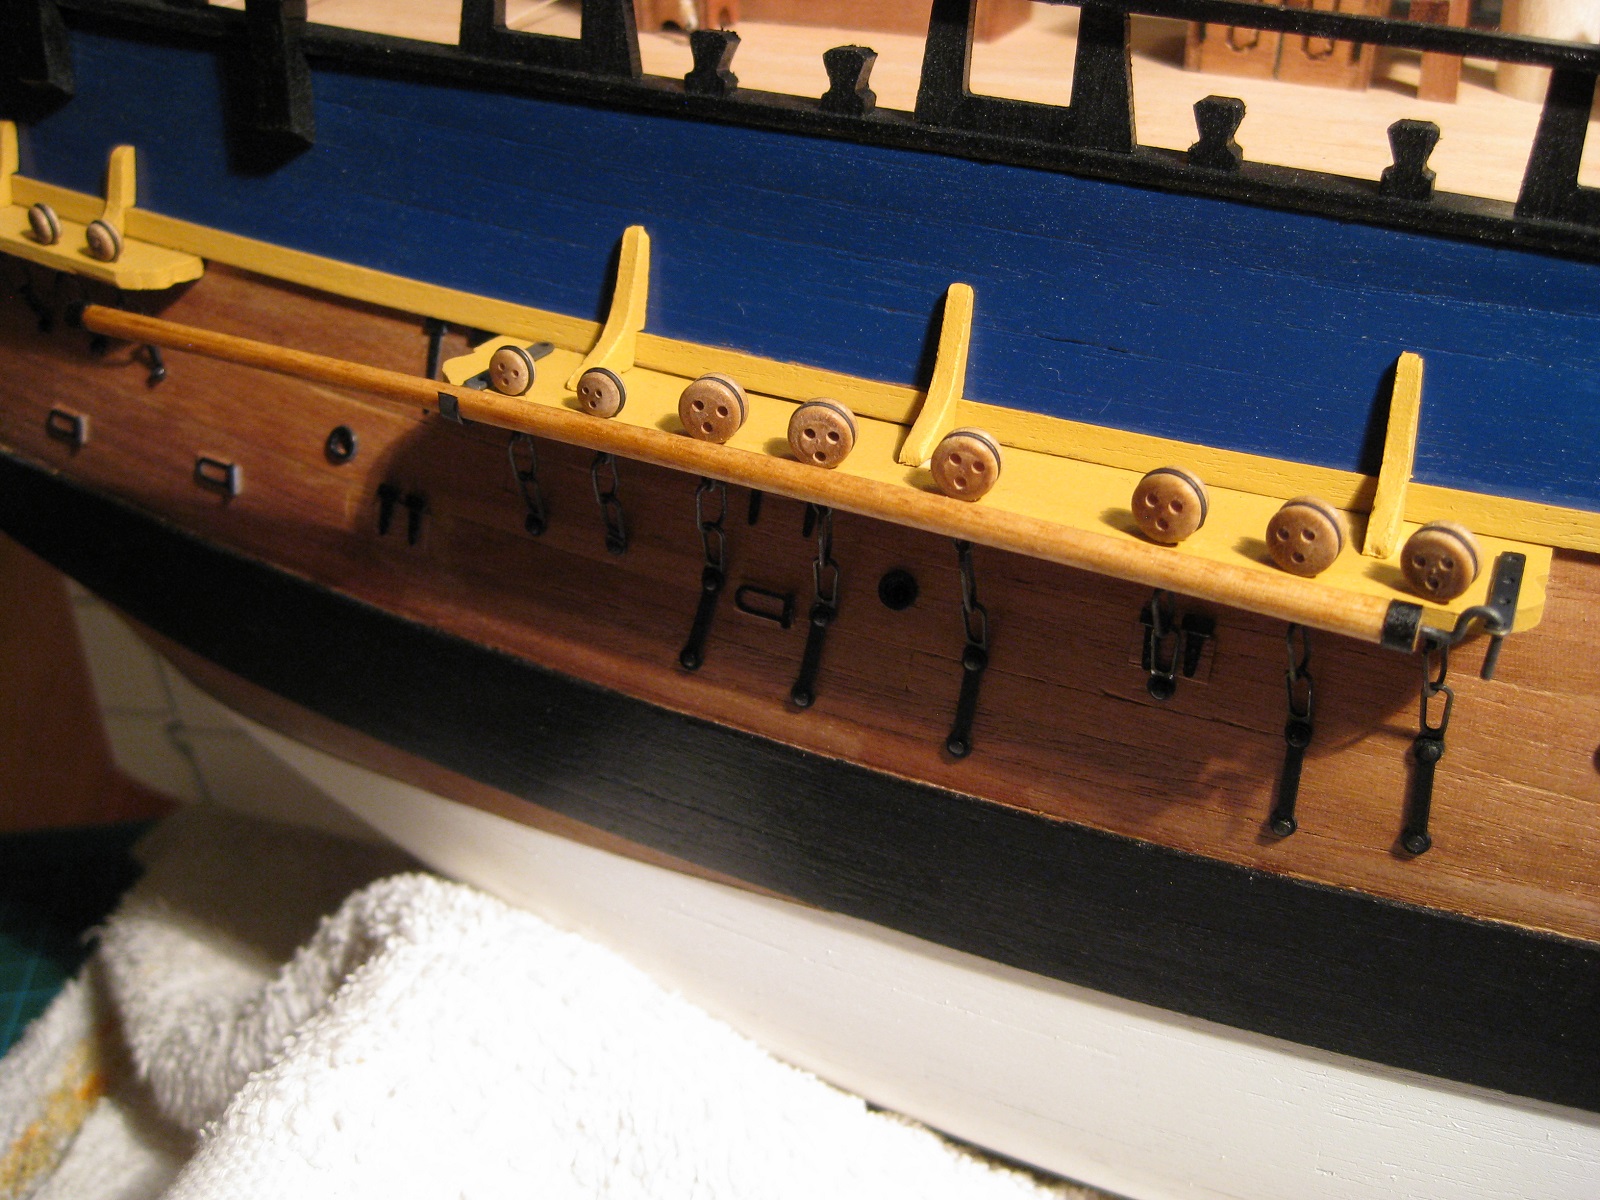
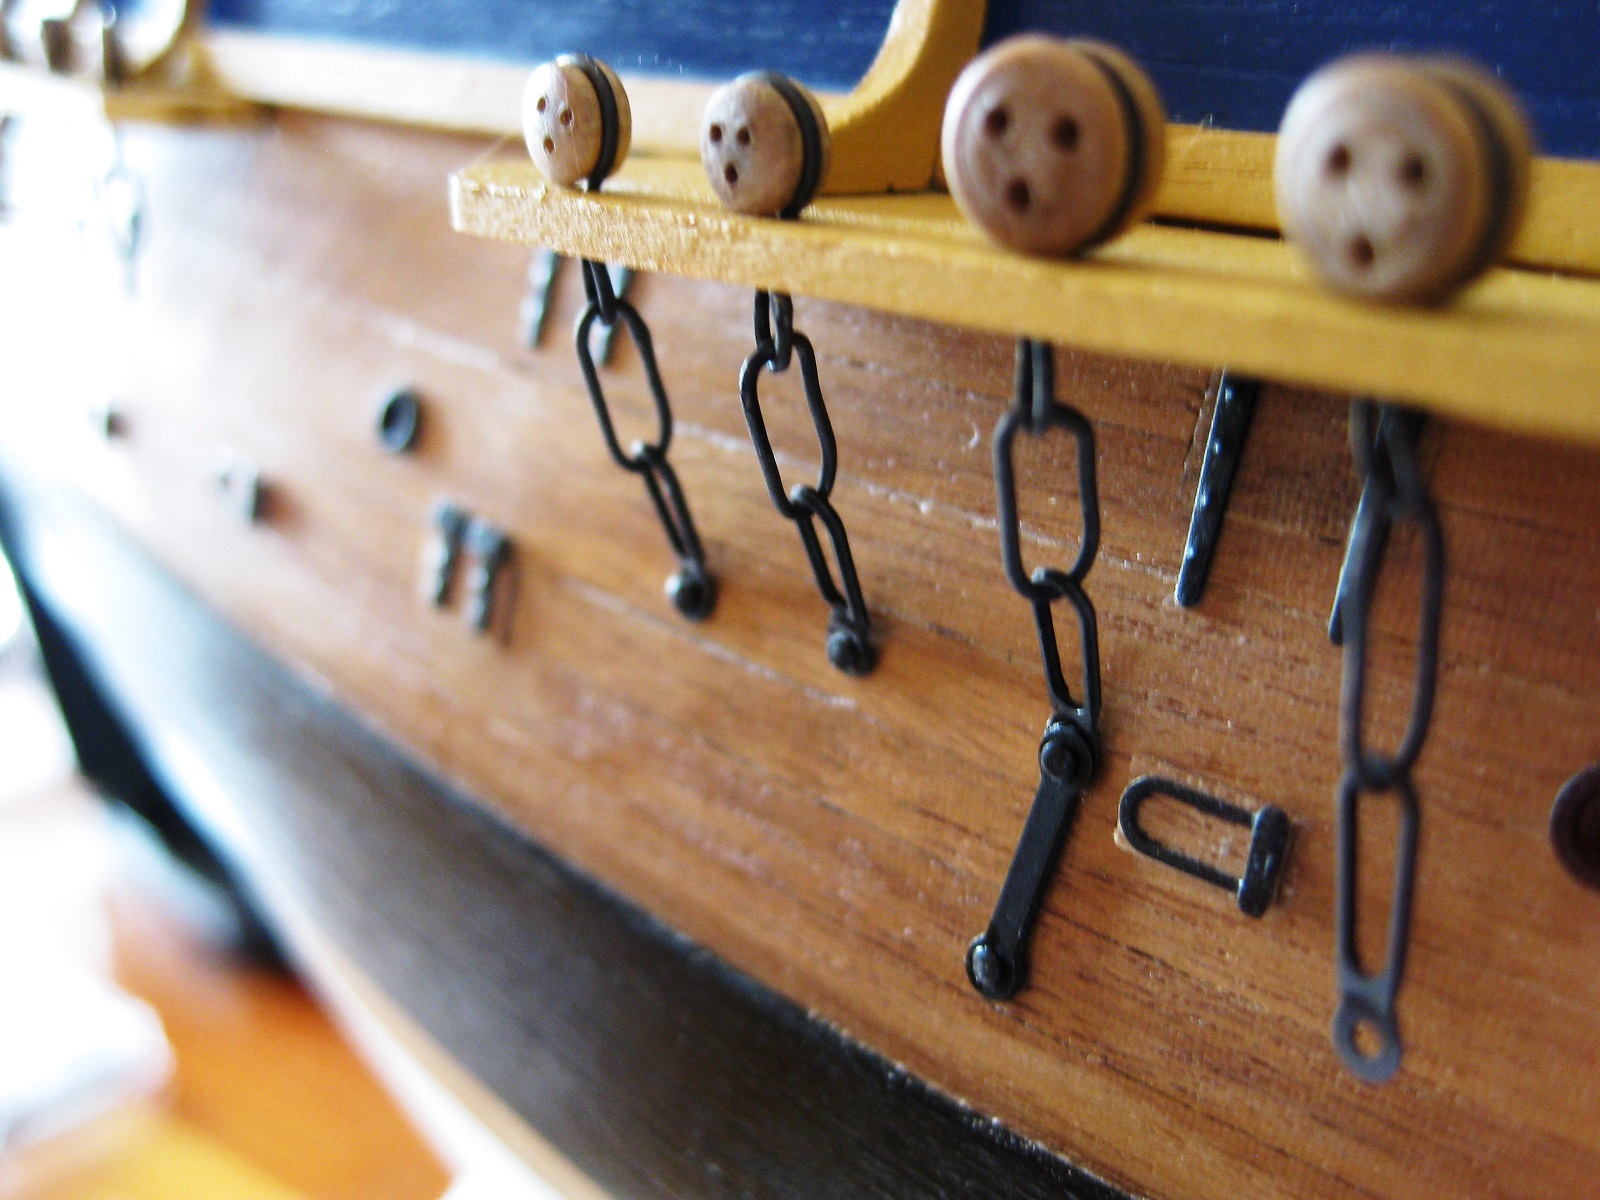
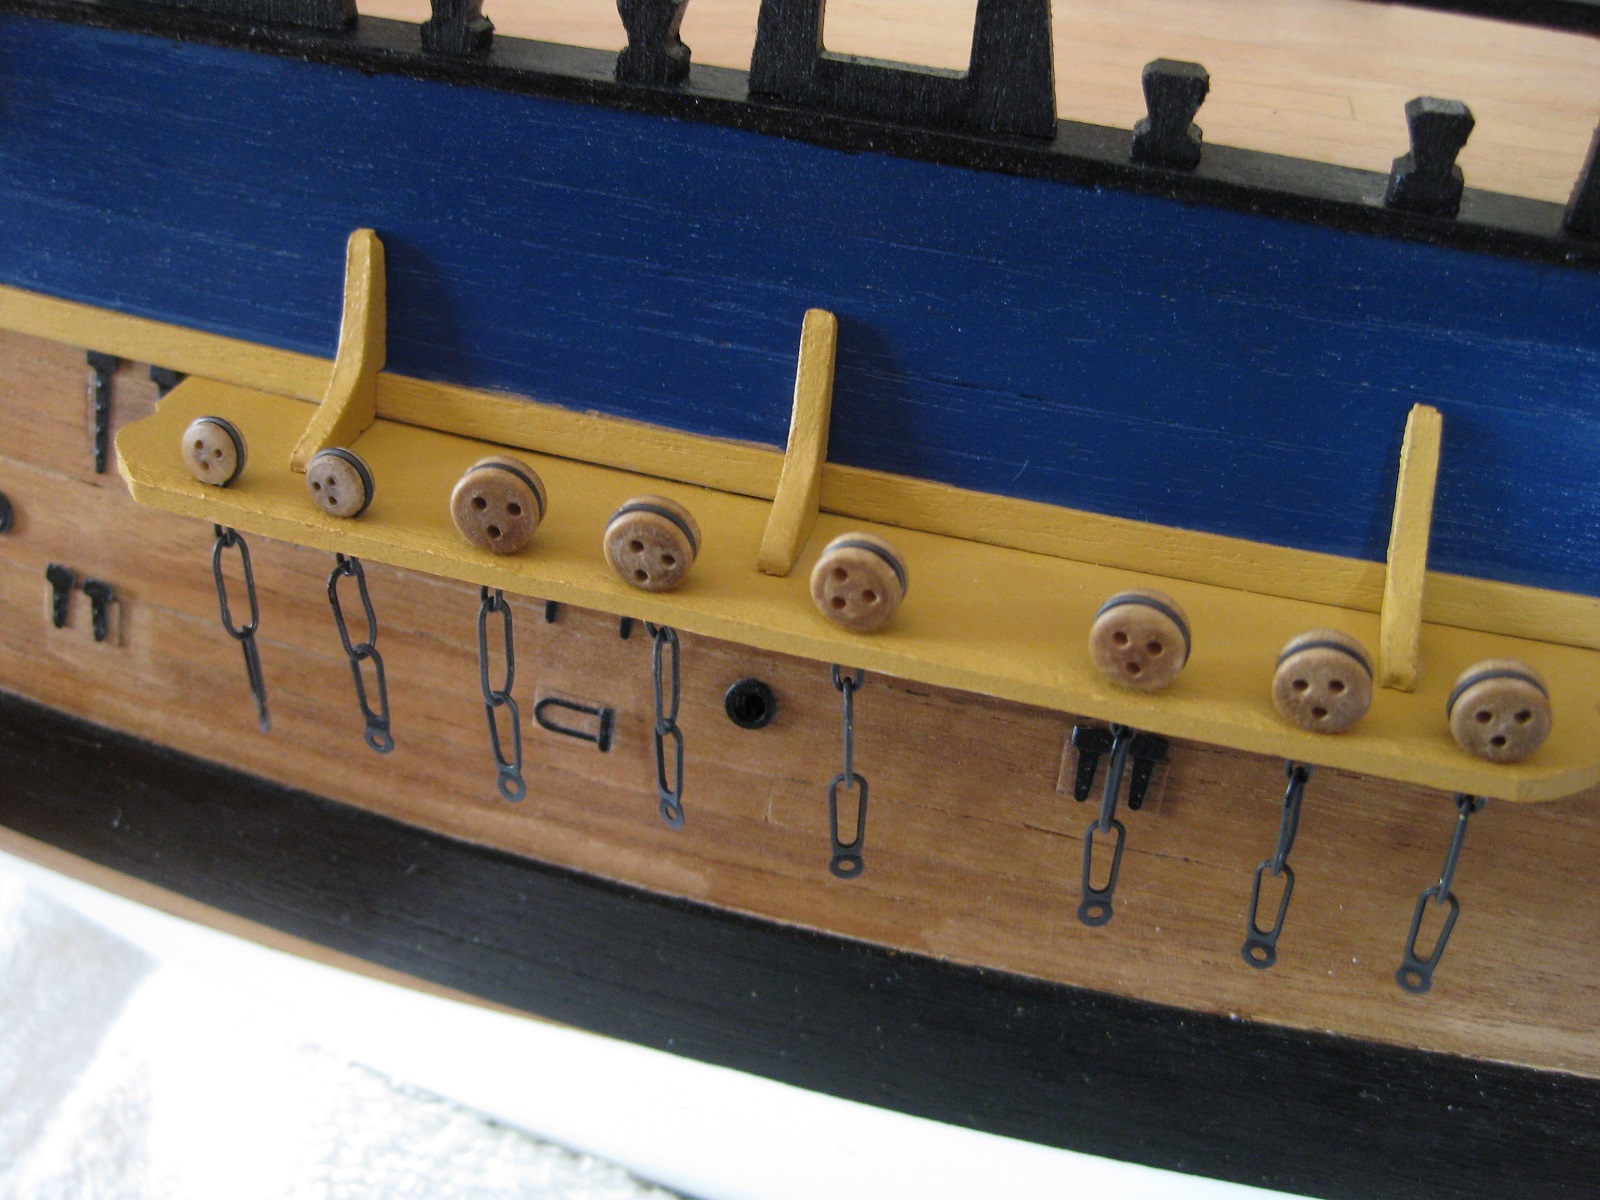
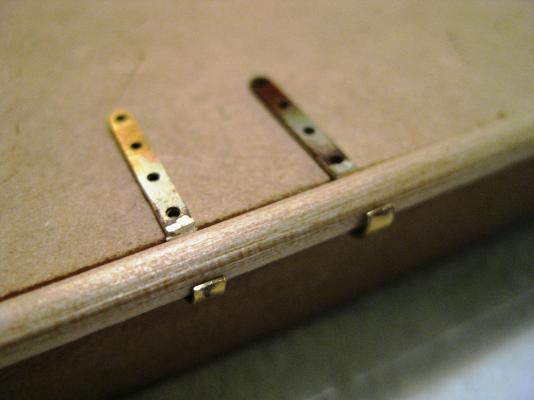
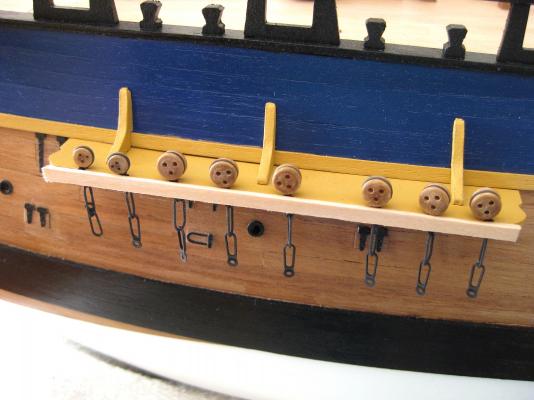
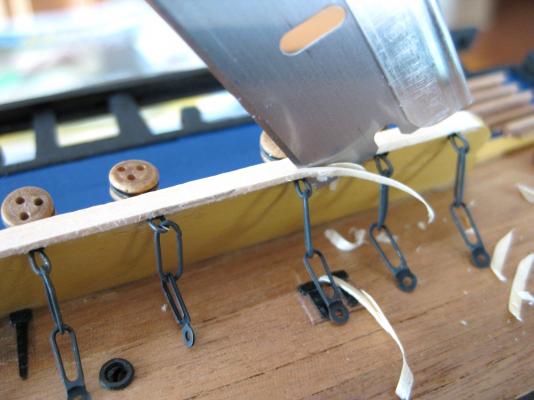
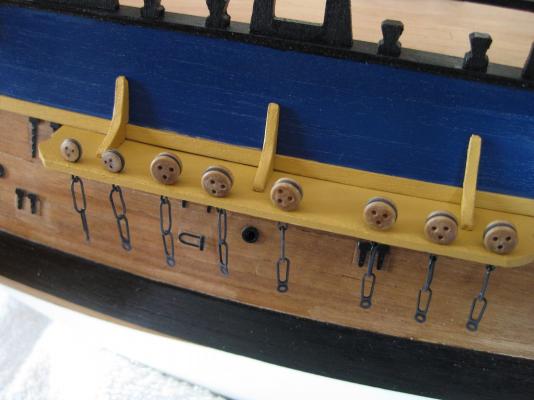
Hi, Mick, the chains and plates supplied by Caldercraft are good in that they match the same style as described in the AOTS book as well as the Endeavour replica. The ones I made were to replace the supplied ones but still match the style of the originals. Not sure how the OcCre ones look like but perhaps as Alistair says might be easier to buy suitable ones. Okay a bit of progress on the channels and deadeye chains. The instructions/plans say to glue a strip of 1.5mm square walnut stock on the edge of the channels. A couple of problems with this in that the plywood channels are actually 2mm thick?! Also the supplied 1.5mm walnut strip stock is pretty poor being splintery as well as…well not very square. Its more diamond shaped and pretty rough. So did it slightly different if not a bit longer to do. To hold the deadeyes in place in the channel notches I dabbed a tiny amount of CA glue, using a needle, on to the strop and placed them in the notches. I only used enough glue to hold them in place temporarily until the channel edge strip is in place trapping the strop in the channel. Once completed a small tweek broke the glue bound and left the deadeyes free with in the notch as planned. Instead of using the 1.5mm stock as instructed I decided to use some 1.5mm x 5mm lime planking left over from the first layer of hull planking for a number of reasons. Firstly it is much more flexible being able to bend more easily against the edge of the channel and much more easily to work with. I ripped the 5mm width down to 2.5mm so that the edges were proud slightly of the channel as well accommodating the slight bow of the main and fore channels. Once the channel edge strips were glued on using CA glue I used a single edge razor blade to pare the strip edges down flush with the channel surfaces. Because the deadeyes are free floating in the notches I could lift them up to clear the blade. Edge strips in place, parred down and painted to match the channels. Again I could lift the deadeyes up to paint the topside and pull the chains up to paint the undersides. Next step now is to place a dowel in the mast holes and run some thread (to simulate the shrouds) from the height of the mast tops down past the deadeyes to get the correct angle of the chain and preventer links before fixing to the hull with nails. With the deadeyes being free I can pull them down on to the channels before securing with nails through the preventer links so that the deadeyes won’t pull up when the lanyards and shrouds put tension on them. Well that’s the plan. Cheers Slog
-
Looking very good Steve. I like the heavy rigging on and around the bowsprit. Cheers Slog