Captain Slog
-
Posts
904 -
Joined
Content Type
Profiles
Forums
Gallery
Events
Everything posted by Captain Slog
-
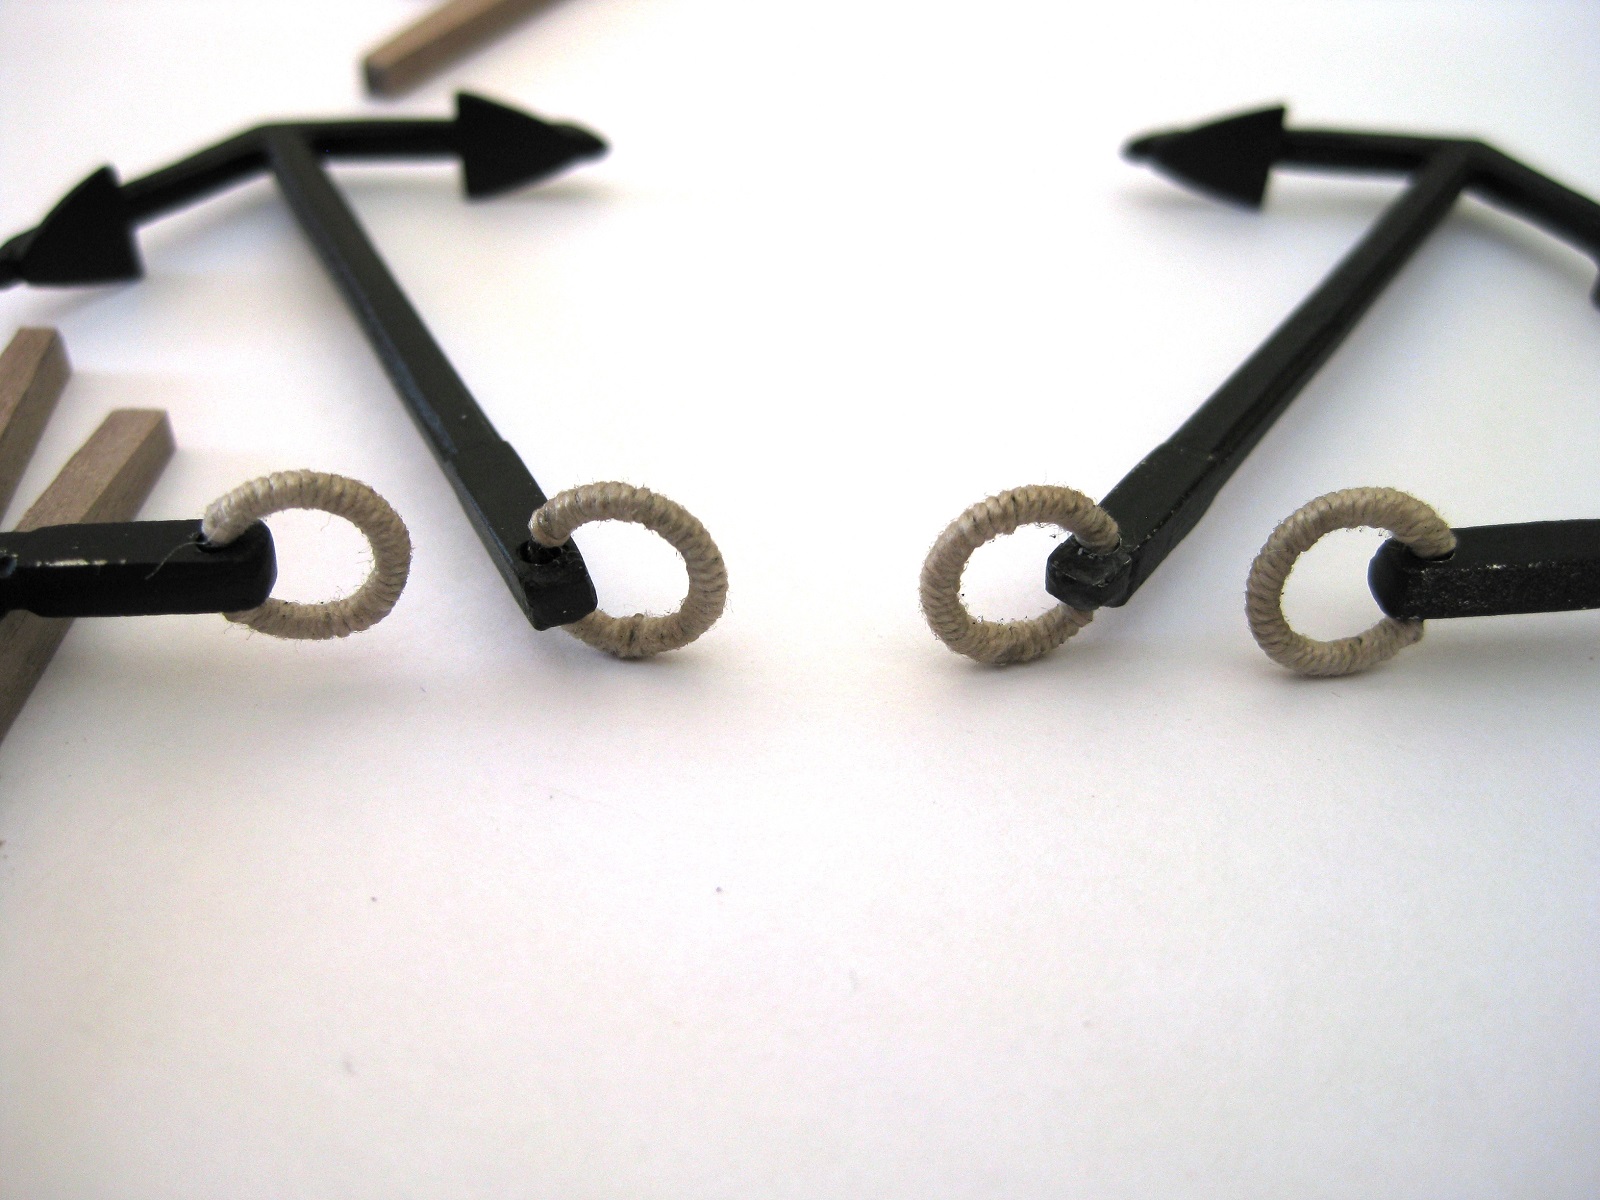
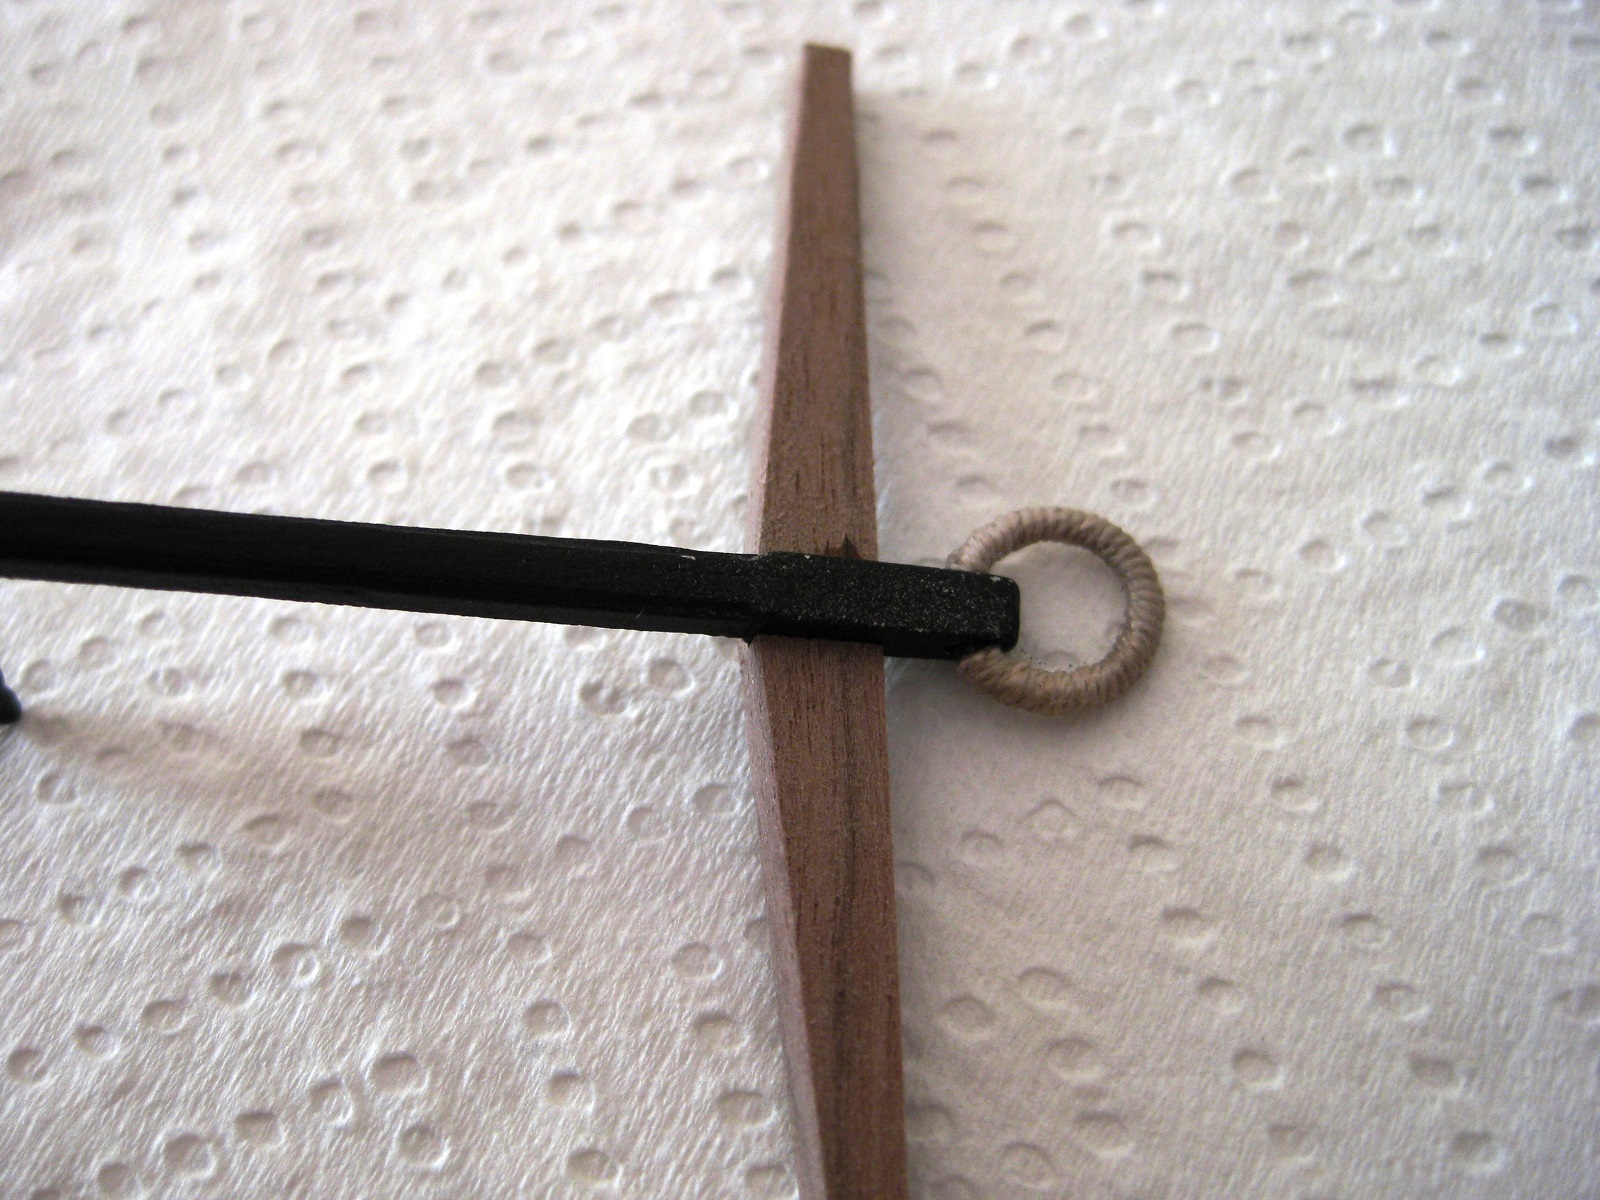
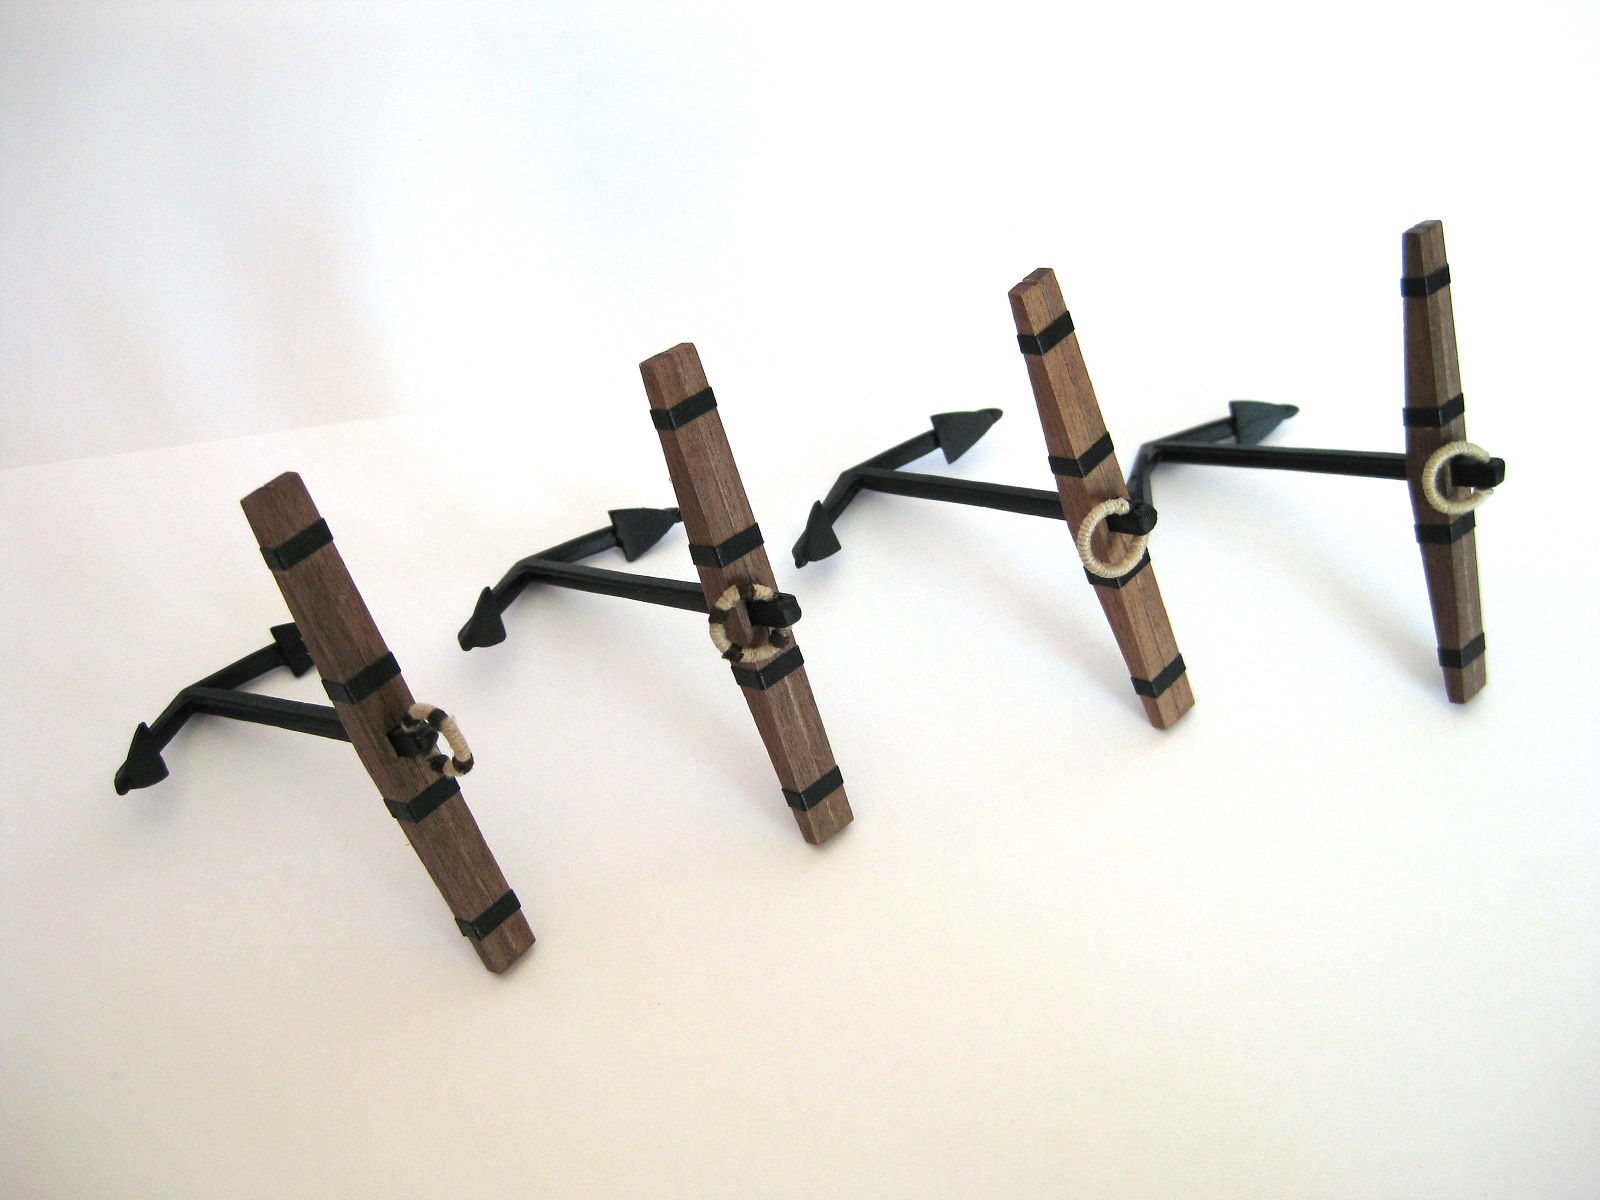
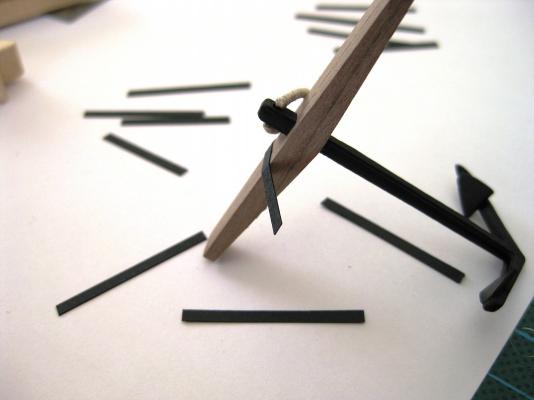
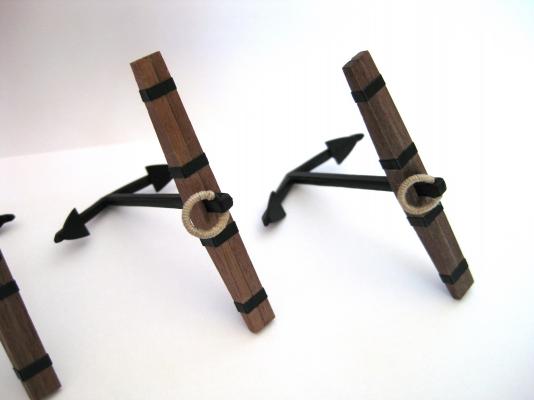
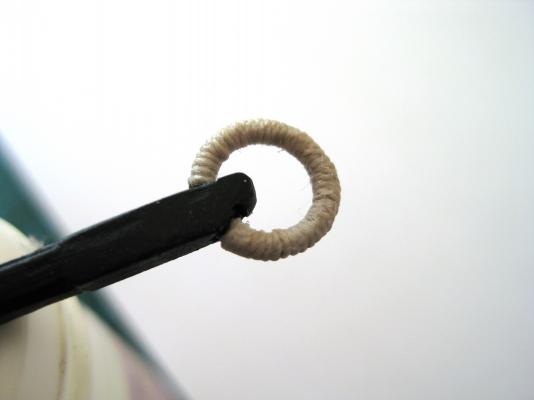
 Hi guys, Well finished my anchors today. Still a bit unhappy with the puddening though. I cut off the puddening and the additional whipping from the last post and started again. I feel got these done a bit better than before and to be honest I think these are as good as I am gonna get them. I tried to do the whipping again and after doing 2 anchors (8 whips) I gave up on them. To be honest the time spent on them for mediocre at best isn’t worth it as I can’t get them looking acceptable so only did 2 and left off the other 2. I used CA glue to start and finish the puddening and then when finished waved the rings over a cigarette lighter to remove the fuzz. It also darkened the thread a little which is fine. To attach the stock halves I applied CA glue to recess on one half and positioned it on the anchor shaft. Then using PVA coated the other half and clamped together The plans say to replicate the iron banding with the black cartridge paper cut to 2mm wide strips. I used PVA applied with a brush to the paper and pressed into position and continued my way round the stocks. The plans don’t mention any dimensions so after a look at the plans and the AOTS I settled on 5mm in from the ends and 5mm out from the anchor shaft. All finished, as can be seen there are 2 with whipping and 2 without. I will get over it. The stocks and ‘bands’ were given a couple of coats of wipe on poly (applied by brush) and then went over the shafts touching in any scrapes and scratches with metal black paint. Cheers Slog

-
Hi Mark/John, I have most of his build photos, but no words. I wasn't sure of posting bits and pieces of them for John since they are Dragons etc. Let me know if I can be of assistance. Cheers Slog
- 2,250 replies
-
- 1
-

-
- model shipways
- Charles W Morgan
- (and 1 more)
-
Hi Kevin, enjoying following this build and the extra bits and pieces you are doing. I assume there are photo etch hand rails/holds that circle the funnel at different levels? If so when you get to them please describe the process as can't imagine how to do a strip of wire with tiny little pegs sticking out. Cheers Slog
-
Hi John, Its a pity it is too big as it looks really well executed. I have kind of been doing this build in my head in preparation for eventually obtaining it trying to work out any problems. My solution for you would be to buy the required section sizes out of Evergreen styrene strip. It will be painted 'yellow' any way and the styrene will be dimensionally consistent. Surely cheaper and easier to obtain than Jeff's beautiful wood, unless of course you are leaving it natural. Anyway I think I will use styrene when dealing with small square strips. Cheers Slog
- 2,250 replies
-
- 1
-
-
- model shipways
- Charles W Morgan
- (and 1 more)
-
Hi John, I forgot about the Tryworks, not sure if you are aware but there is an article in the download section about building this 'brick' by 'brick' http://modelshipworldforum.com/resources/furniture/Tryworks_Building_Guide.pdf I followed Dragon65's (who did the article and I think he was a moderator but I don't think I have seen him on MSW2.0) build in MSW and it was very impressive. I downloaded all the photos of his build. For some strange reason I really want to build the workbench/chicken coop but don't know why Cheers Slog
- 2,250 replies
-
- 1
-
-
- model shipways
- Charles W Morgan
- (and 1 more)
-
Hi John, Its because of all the deck furniture, fixtures and fittings on the CWM that this is likely to be my next build Anyway been following your progress and you did a great job on the hurricane shelters etc and looking forward to more. Cheers Slog
- 2,250 replies
-
- 1
-
-
- model shipways
- Charles W Morgan
- (and 1 more)
-
Hi Ron, Welcome to the Endeavour club. I look forward to following your build. Based on your work on the Supply this should turn out very nice indeed. Cheers Slog
-
Hi Mick, Congratulations on finishing your guitar. I hope it sounds as good as it looks. Very nice. Cheers Slog
-
Hi Greg/Steve, I found another photo of the replica which although of the main mast shows the ratlines parallel with the waterline. I agree with Steve and will do my ratlines when I eventually get to them level with the waterline. Cheers Slog
-
Hi Mick, Your finger board inlays look incredible! Did it come like that pre-done or did you need to route them in yourself? Cheers Slog
-
Hi Greg, That is an interesting question that has me thinking when I checked my plans. I read recently in one of the other threads that the ratlines (of ships in general) should be parallel to the waterline and didn't think anything of it but now you mention being parallel to the decks. I had a look in the AOTS and could only find one drawing which is to small to be definitive as it shows the whole ship on one page so still none the wiser. I did have a look at my Caldercraft plans and even more confused; The Mizzan and Main mast ratlines do appear to follow the slope of the rear deck i.e. sloping down from back to front...except as the ratlines climb up towards the tops they appear to level out?!?!??! More confusion for the Fore mast as the ratlines appear to slope from front to back but again about 1/3rd of the way up they level out and even start to reverse the direction of the slope.?!?!?! This goes against following either the waterline or deck level since the fore deck is level with the waterline. I don't think the Caldercraft plan for your question is particularly helpful. It would appear that Caldercraft initially start the ratlines parallel with the fore and quarter deck gunwales and then got bored drawing all the lines and started making stuff up. Getting back to your question I don't think the slope of the mast comes into it. The ratlines are either parallel to the water line or parallel with the deck (or gunwale as endeavours gunwale climbs higher than the deck further back it goes. Sorry can't really add much more and now have a dilemma when I get to that satge. Cheers Slog
-
The front and back shots really show the sails to great effect. Ron, if your Endeavour turns out anything like the Supply it will be a fantastic example. Cheers Slog
- 240 replies
-
- 1
-
-
- supply
- caldercraft
- (and 1 more)
-
Hi Rob, I followed your build and downloaded all your photos from MSW 1.0 as this is one of 2 builds I really want to do. I always thought of your build as the Agamemnon equivalent of Gil's Victory. Beautiful Ship although some more photos of close ups and details would be appreciated. Cheers Slog
-
Hi Jeff, I agree with the others. Would be a shame not to go the extra yard with making the ports yourself to compliment your excellent planking. Cheers Slog
-
Congratulations Ron, you've built a ship to be proud of. Cheers Slog
- 240 replies
-
- 1
-
-
- supply
- caldercraft
- (and 1 more)
-
Hi Greg, More excellent rigging work. I like the framed drawing showing all the studding sails. Cheers Slog
-
Hi Adrieke, your steering house looks very sharp! Cheers Slog
-
Hi Bob, your deck looks incredible! Cheers Slog
-
Hi Jeff, Your second planking layer is definitely showing the effort you are putting into it. Looks very clean and tight. I hated doing second planking with a passion What is the dimensions of the planking strip? Cheers Slog
-
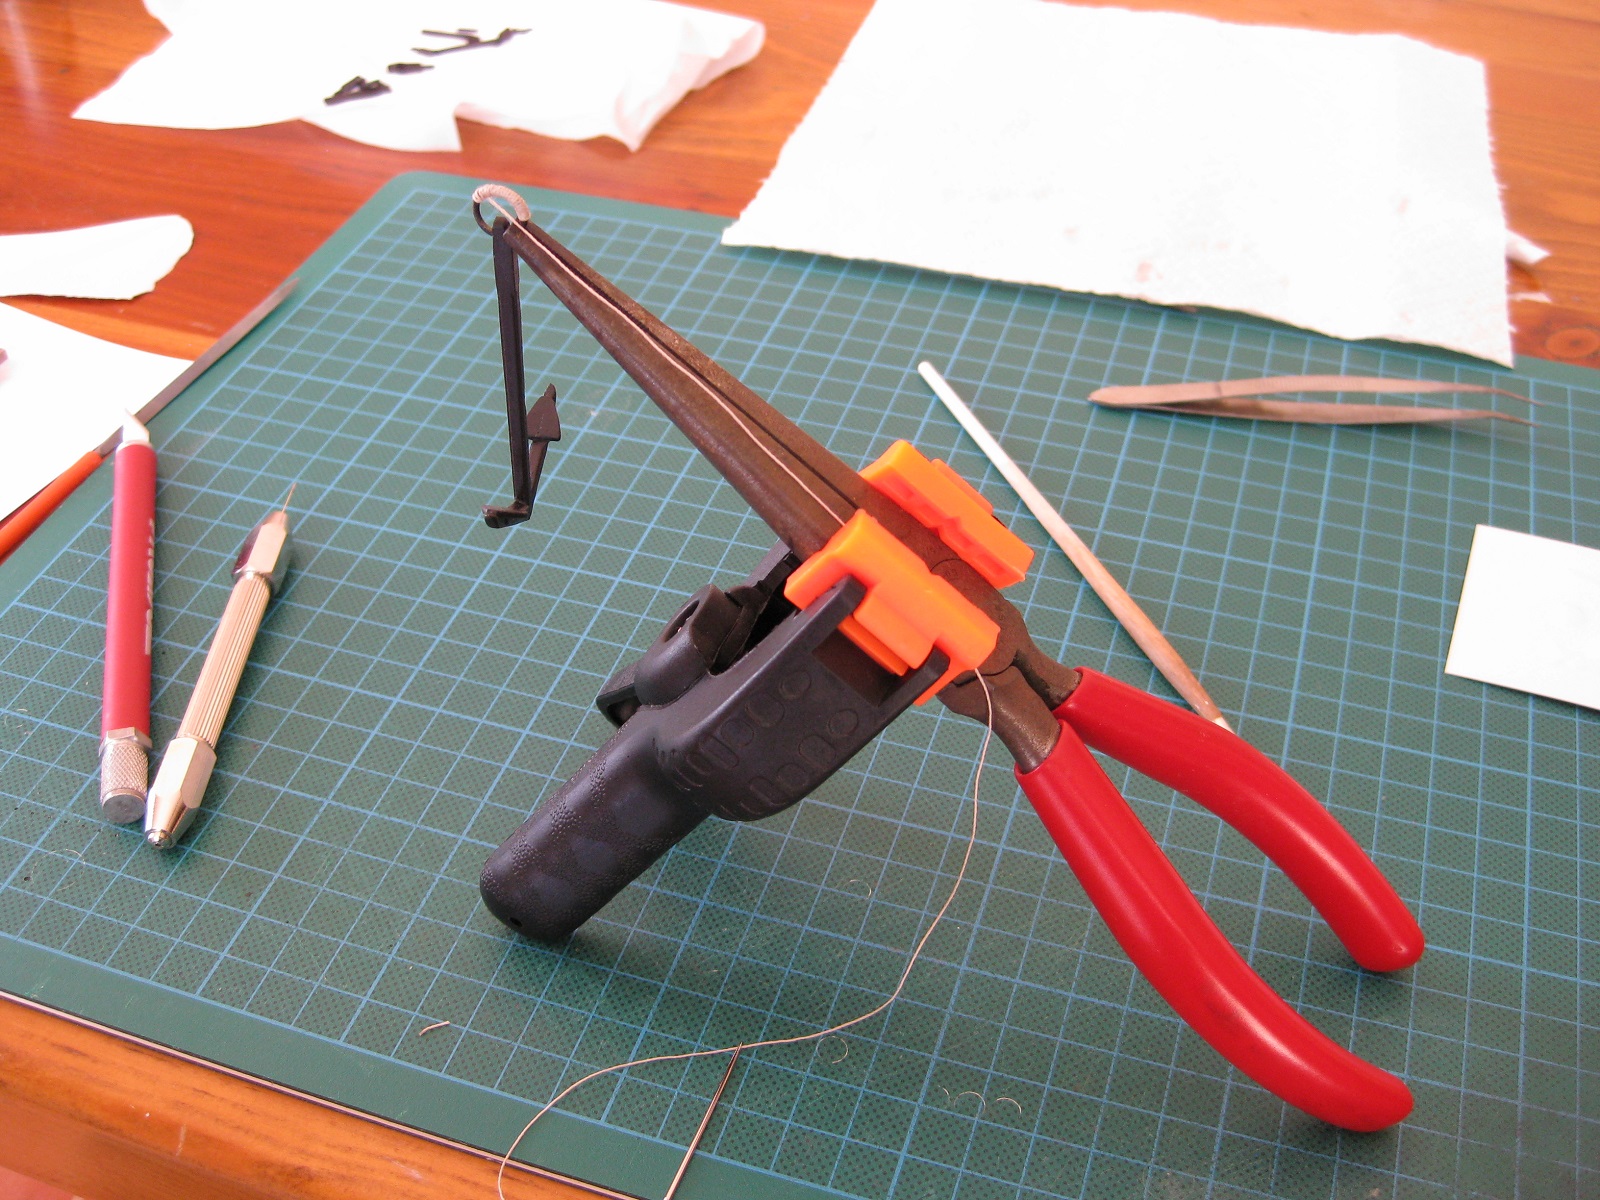
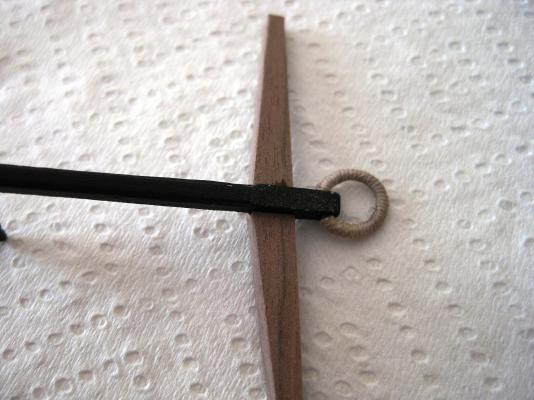
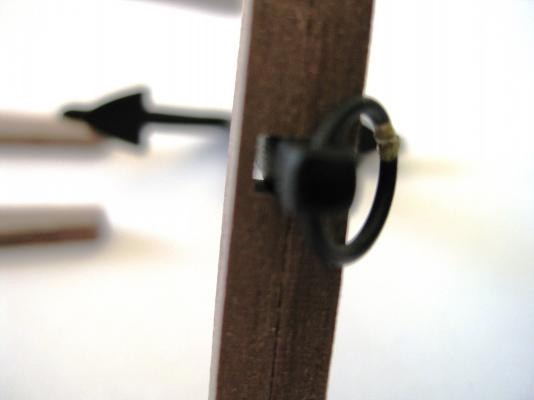
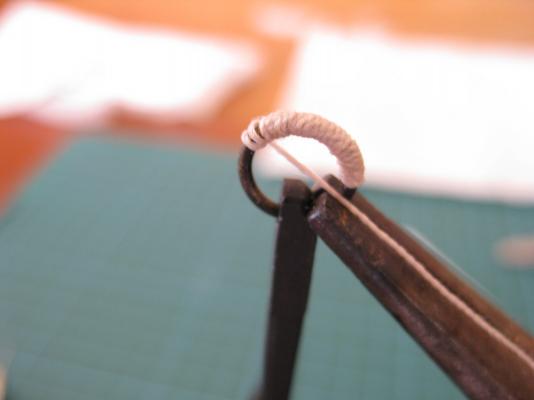
Hi Jeff,I have a 30w soldering iron and some electrical solder so will try that the next time I have any soldering close to possible melting material! The anchor ring isn’t under any stress so CA will do. Thanks for the comment Mick Hi Sam, I might try solid brass rod and take slices off the end as needed. I was also wondering about trying Evergreen or equivalent styrene sheet to cut the sheaves from as would definitely be quicker and easier to cut and trim. A quick paint, as obviously can’t blacken them and they are done. For all you can see of sheave once its in place I think it may be a viable alternative. I may try that also. Hi Wayne, I have also drilled and cut grooves to simulate sheaves and have been happy with the result up to now, but because the davit had an open end sheave I had to fill the gap somehow. When I get to the masts and yards which I believe are dotted throughout with various sheaves I might try some other techniques and materials to see what works. A bit more progress with the anchors. I previously mentioned that the grooves in the anchor stocks were to deep so here is a dark and blurry photo to show the gap with the two halves together. To overcome this I glued in some 1mm walnut strip in to each groove in the stock, which then made the gap to small. It was a case of filing the grooves back in with a miniature file until the anchor shank sat deeper in the stocks. I was going to leave a gap between the stocks and bend the ends together like a real anchor but wasn’t happy with the way they looked so took some artistic licence and continue to file the grooves until the stock halves fitted together the full length. Next up was to do the puddening on the anchor rings. I used my pliers and a clamp as a kind of helping hand. With the puddening I found a thread on MSW which mentioned that 0.25mm thread would be suitable so that’s what I used. I have no idea how to start and end the puddening. I tried a dab of CA glue to fix the end to the ring then wound my way round. Once I got to the end I used CA again to fix it but not happy with this method. I also tried various media as I worked round the ring to hold the thread in place. Initially I tried using watered down PVA but this appeared to bulk up the thread. I also tried using Caldercraft Flat matt varnish which worked very well as dries invisible so used that. I would wind along a bit and then varnish then continue. Again I don’t know a way to secure the ends. I used brown Guttermann cotton thread to do the extra bits round the puddening (don’t know the term for this) but yet again don’t know how to start or finish. As can be seen in the finished photo the puddening itself isn’t bad and settled into a rhythm to do this BUT the start and finishing is terrible and lets it down. Also not happy with extra brown bits as my spacing went awry as well as being clumsily executed. I will cut the whole lot off and try again. If anyone has a method for starting and finishing the puddening I would like to hear from you. Cheers Slog


-
Ah, that makes sense, thanks. Cheers Slog
- 2,250 replies
-
- 2
-
-
- model shipways
- Charles W Morgan
- (and 1 more)
-
It would have overcome an issue I had on my current build and probably will fill the hull on my next. But would use cheap pine as it is a lot cheaper than balsa, locally for me anyway. Cheers Slog
-
The ships bell could do with a bit of a polish! Does anyone know what that "gun port hatch" is on the belfry below the bell? Cheers Slog
- 2,250 replies
-
- 1
-
-
- model shipways
- Charles W Morgan
- (and 1 more)
-
Excellent idea John, thanks If PVC is good enough to transport water through my house for decades, its good enough for a model IMHO. Cheers Slog
-
Hi Jeff, What a difference with the sides on and the gun ports cut out, real nice! Cheers Slog