Captain Slog
-
Posts
904 -
Joined
Content Type
Profiles
Forums
Gallery
Events
Everything posted by Captain Slog
-

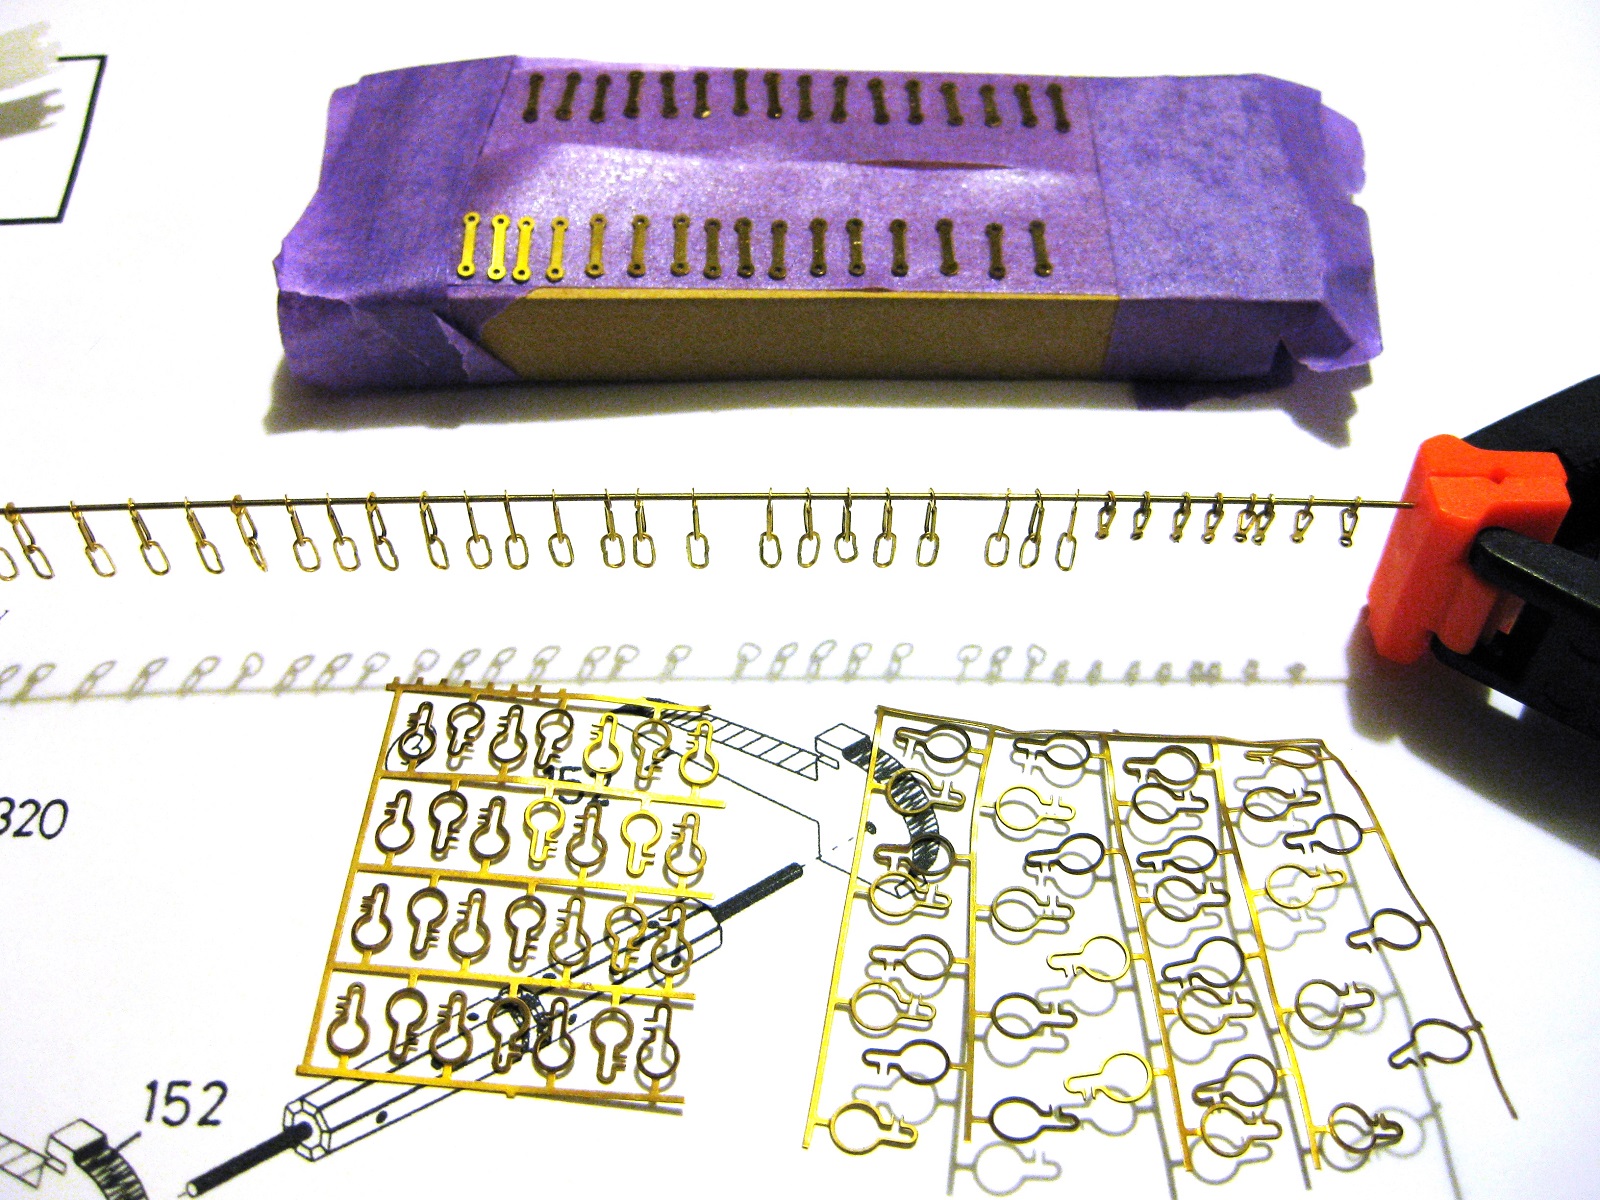
Intro to Card Models Part VIII: Building V108 - Miscellaneous Bits
Captain Slog replied to ccoyle's topic in Card and Paper Models
Great work Chris, I am really enjoying following this log. Cheers Slog -
Hi Rowand, Looking good. I wish I took more care like you in masking my hull, would have saved so much time and effort fixing and cleaning up over spray! Cheers Slog
-
Hi Max, I recently bought a Iwata HP-C Plus from these guys http://www.airbrushmegastore.com/. They are Australian but I believe they ship world wide and seem to cater well for spare parts. I don't know where you are located but a google search of Iwata Airbrush brought up lots of hits (I was trying to find an official dealer in the UK for you). Maybe find a local (ish) one to you and phone them up. You may find that the parts are interchangable anyway. Sorry can't be of more help. Cheers Slog
-
Thanks for the quick reply Steve. There is a gun shop about 15 mins away from me so will check them out next weekend. I noticed you mentioned using the blackening after the brass is attached to the blocks. Does the solution change the blocks in anyway, like maybe the colour or the surface etc. Cheers Slog
-
Hi Jeff, You are off to a great start. I believe all Caldercraft sheet wood is CNC cut so get very accurate shaped pieces with no laser burn to sand off. I also found the photo etch and supplied fittings to be very nice although there strip wood is average at best (for my kit anyway). Although I have read plenty of other Caldercraft builds complaining about the strip wood also, one as far back as Decoymans seven year itch build of the Agamemnon so can't be a recent issue. Will interesting to see what you make of your supplied wood. Cheers Slog
-
Hi Timmo, Your windlass and belfry look really smart. My Caldercraft Endeavour was also supplied with a white metal bell so I sourced a replacement brass one from Modelers shipyard but your painted bell looks sweet. Cheers Slog
-
Hi Steve, your build is very inspirational. I just asked Greg what he uses for blackening his brass work. Do you mind telling me what you use also. I had a half hearted attempt at finding Aussie available stuff but the hit or miss results described throughout the site made me decide on painting but getting fed up with retouching the scratching as you mentioned. Cheers Slog
-
Hi Greg, looking really nice. Do you mind telling me what you use to blacken your brass and copper. I have thought about it in the past but its seems Aussies are limited in the products available and from reading lots of other posts about blackening it can be rather hit hit or miss, so I just paint my parts but need to keep touching them up as the paint gets scratched and chipped with handling. Cheers Slog
-
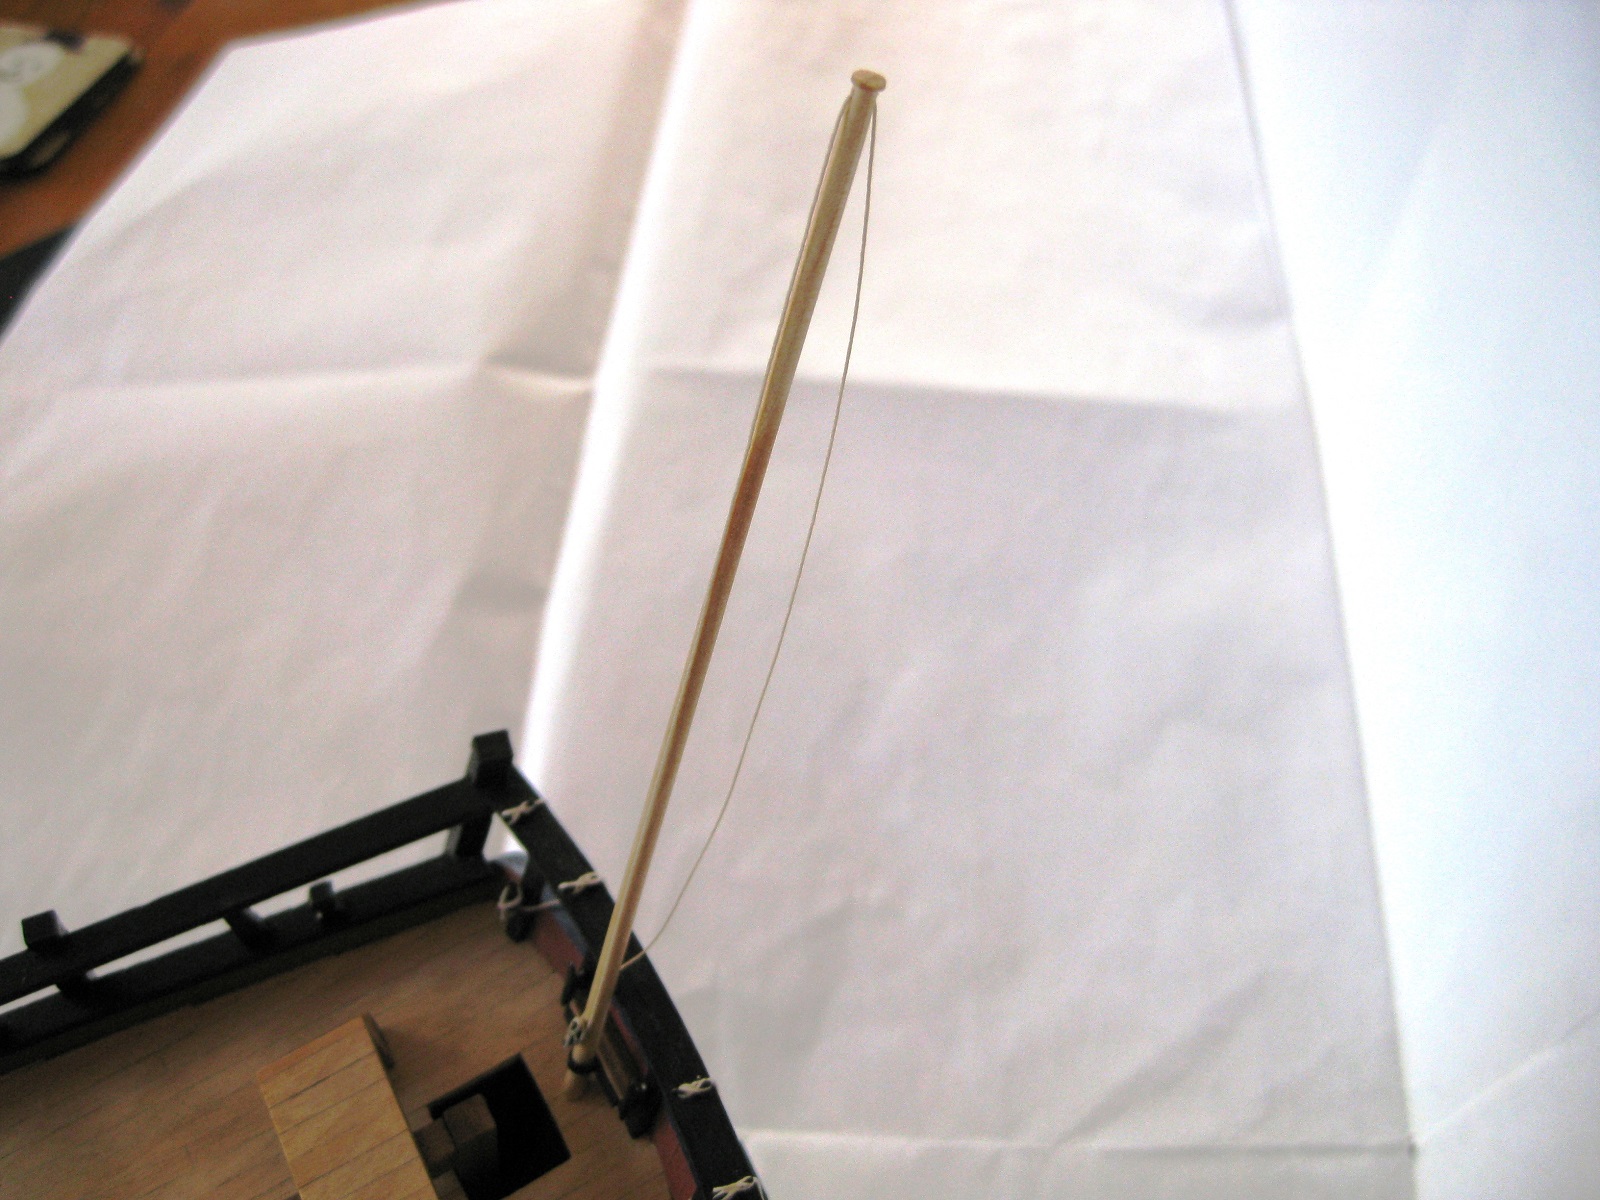
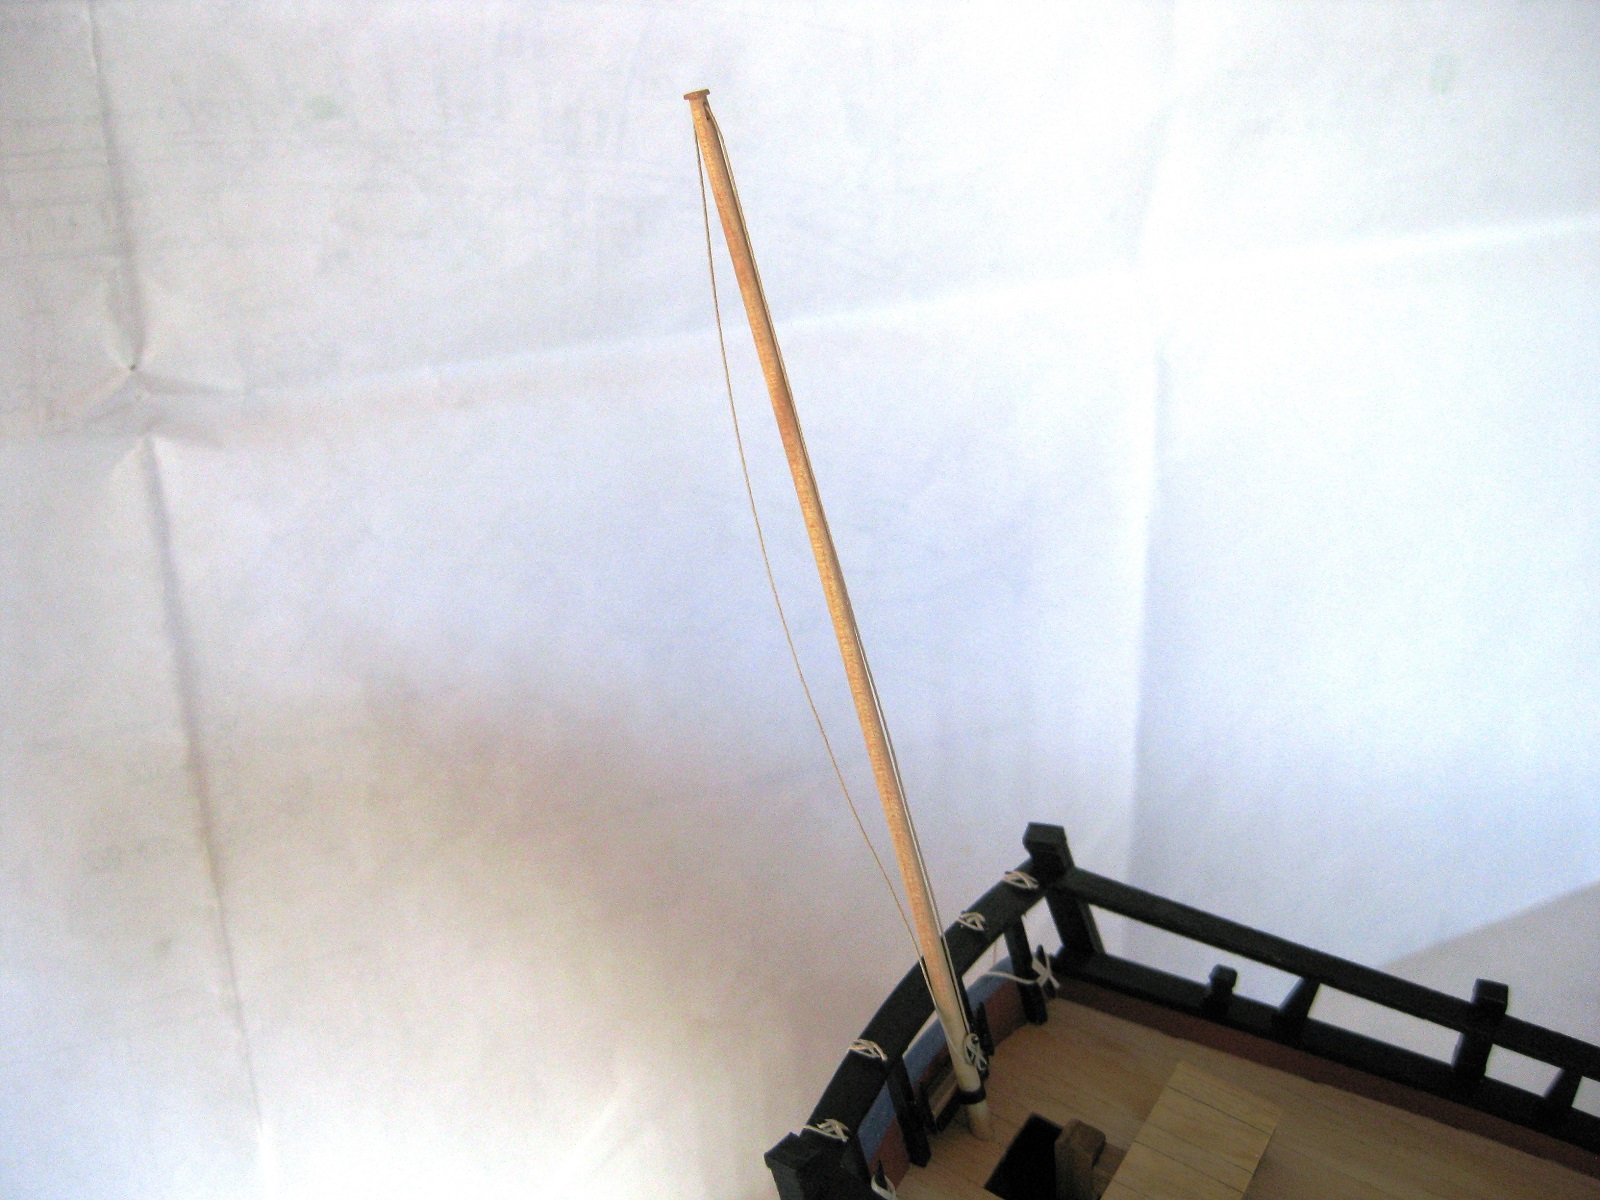
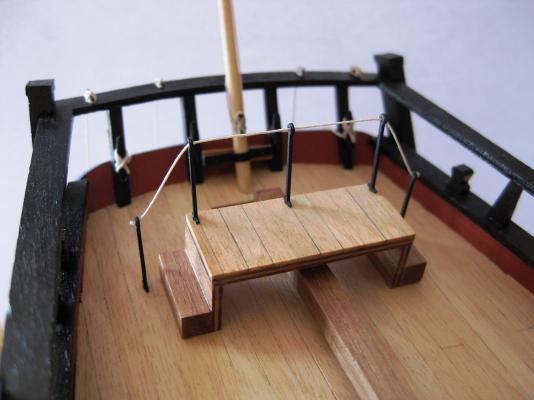
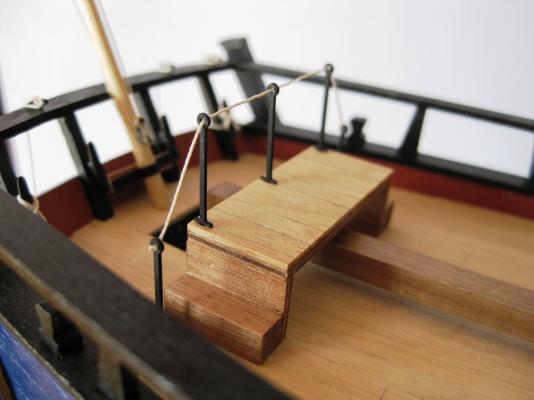
Hi guys, Greg, no its fixed. I never thought about making it detachable . My new plan is to start at the stern and work my way forward completing all the bits I have jumped back and forth from until its time to do the masting and rigging so hopefully won’t be in the way to much. I doubt I will try doing the ensign as from what I can gather from the rest of the site getting material to look realistic at this scale is probably out of my league. Jeff thanks for the comments. Will need to catch up on your Pickle build. Your Norfolk turned out fantastic so looking forward to your Pickle. Thanks Ferit your comments are appreciated. Hi Mick, glad to see you reworked your hull, shouldn’t have any problems now. The Caldercraft kit doesn’t come with sails. Reading through the site for a few years now the general consensus is that trying to get scale sails to look right is incredibly difficult so probably far beyond my skill level. I may try attempting furled sails but like you I am a bit hazy on the subject. Since this is my 1st build I haven’t done masting and rigging before so should be interesting. The masts etc should be okay but I think the rigging is going to drive me nuts based on the little I have been doing with the thread so far. This whole build consists of lessons learned and after each bit of work I have mental notes on how to do better for the next build. Last bit of progress for this week. Attaching the hand rail stanchions and hand rope. Nothing much to describe really except the picture shows better my misaligned ensign staff support better. If it gets damaged I will redo it again but for now just going to live with it. Another lesson learned for next time! Cheers Slog
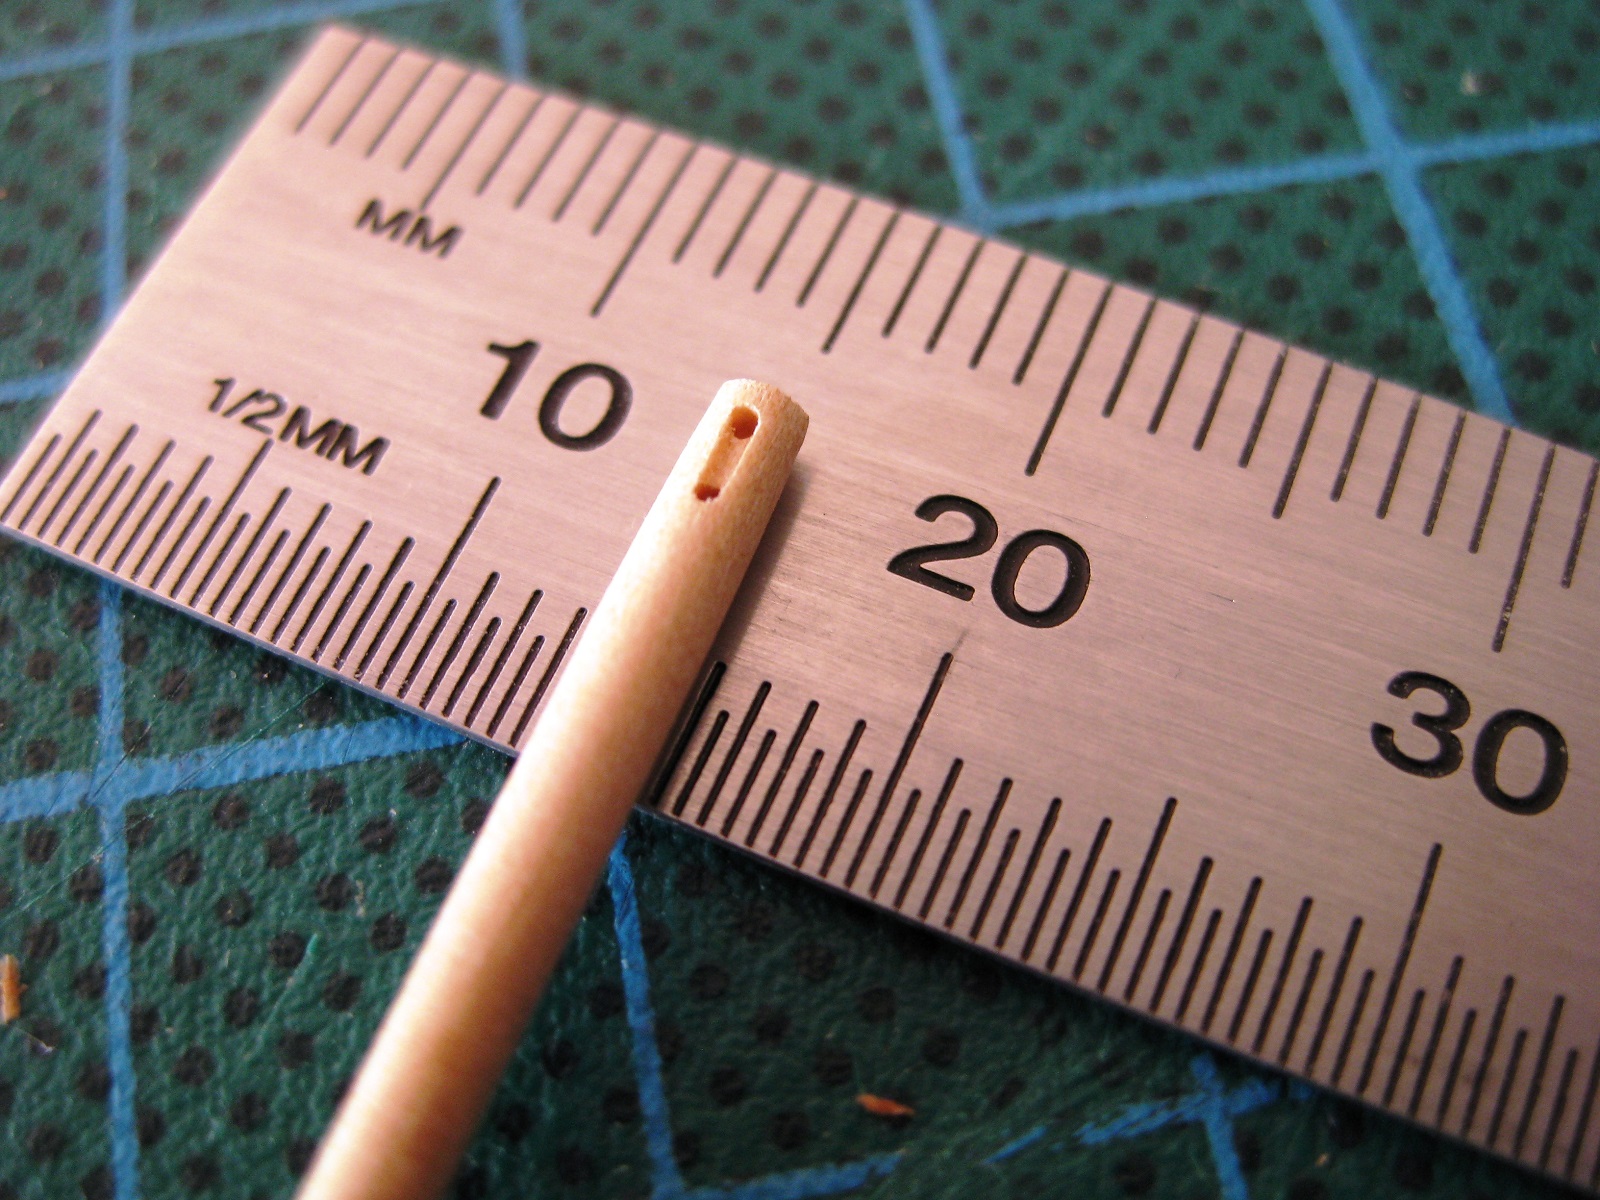
-
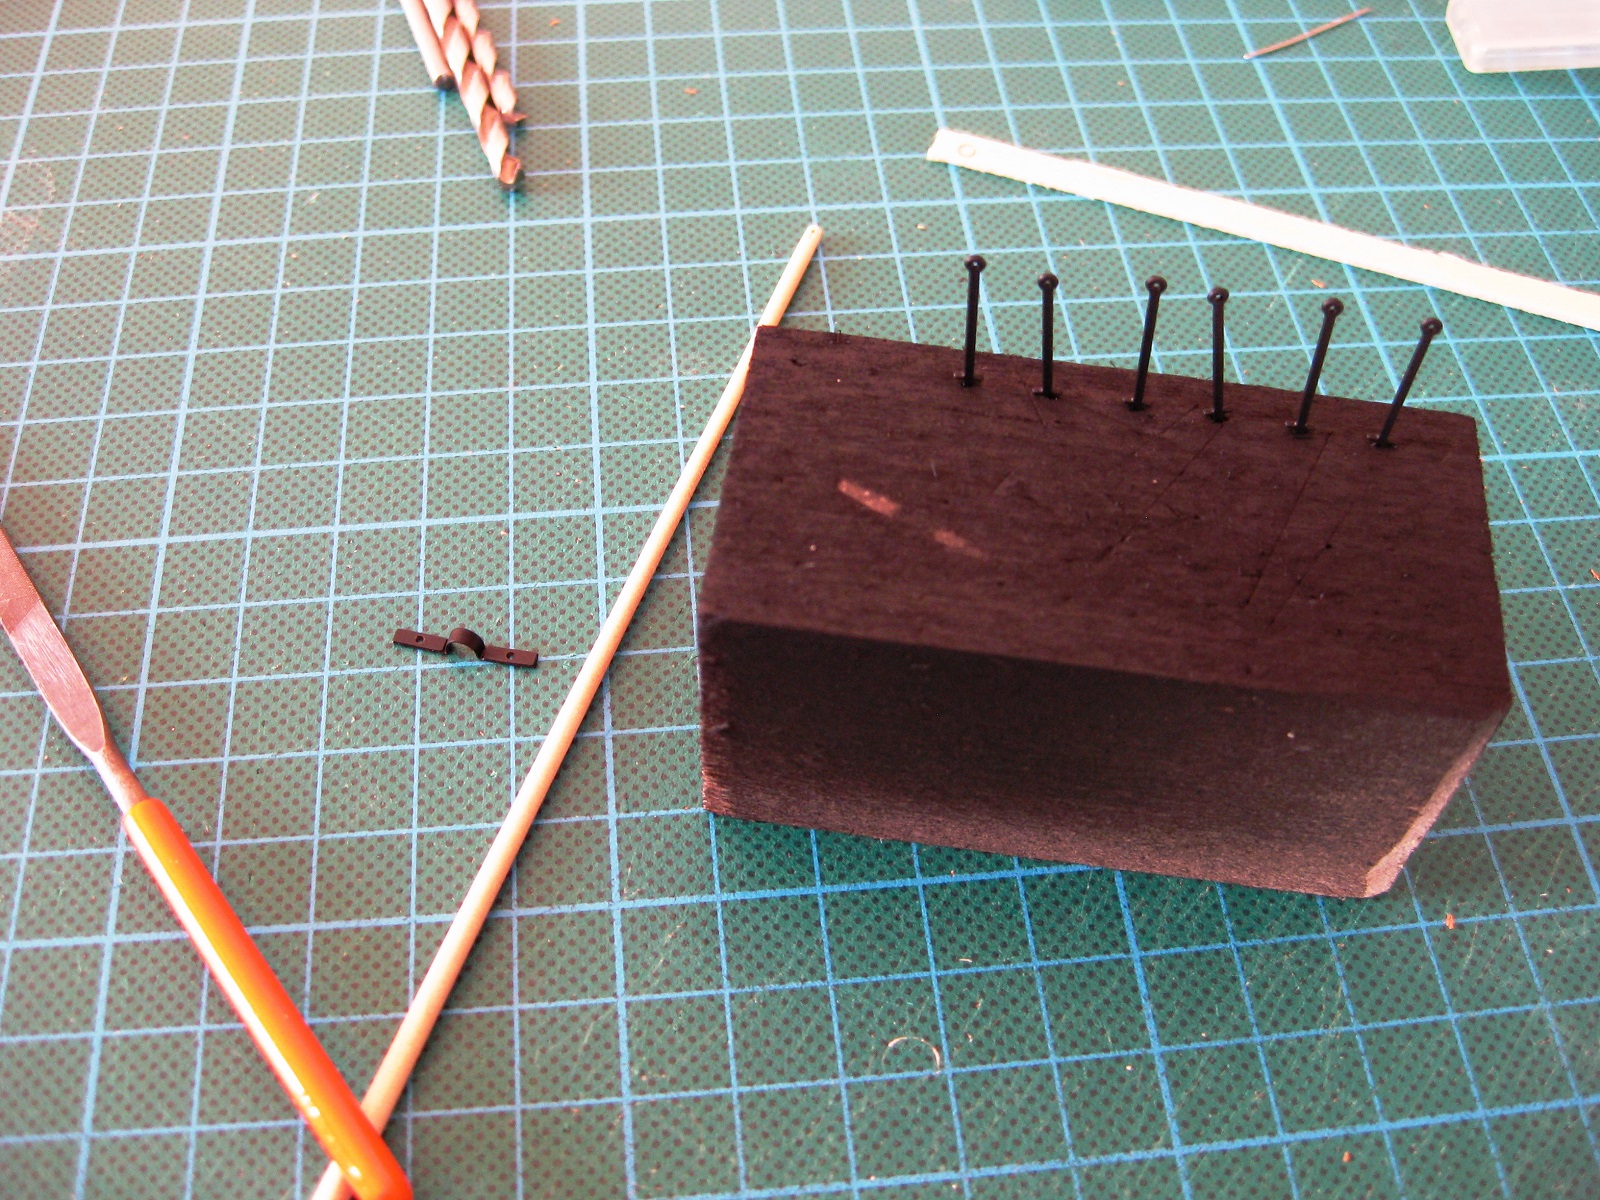
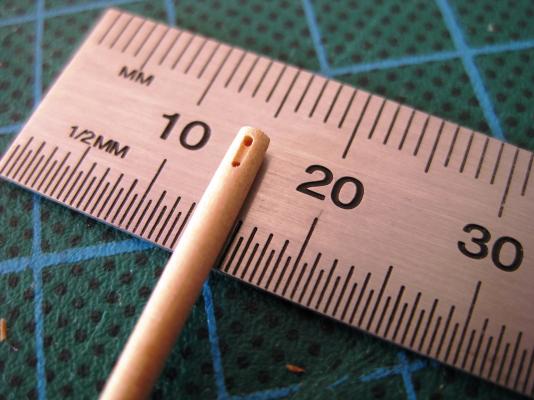
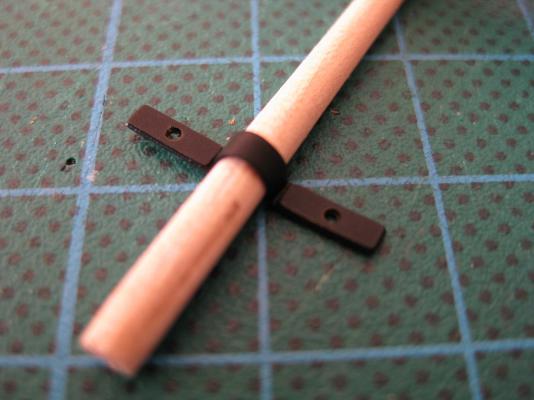
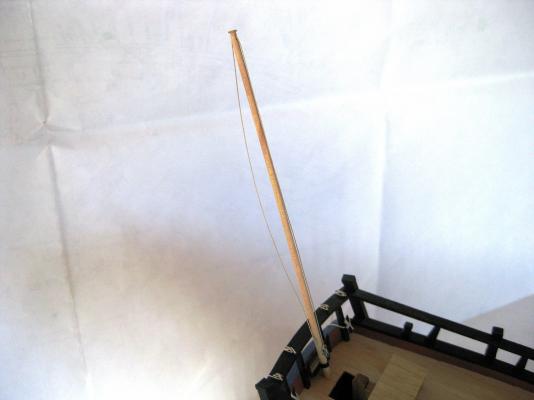
Hi, Thanks for the comments. Will probably get a bag of 2mm and 3mm blocks from Chuck in the near future and see if I can scam a Alexey serving machine for the upcoming father’s day LOL. Been a bit slow on the build lately but did the Ensign staff (mast?). The plans say to use a 140mm length of 3mm dowel, a 2mm walnut ply mast support, a truck (top of the mast) and a photo etch bracket. I didn’t bother looking for the truck on the supplied sheets as it would be walnut and to dark. Photo shows the staff and the bracket bent to shape and sprayed black along with the raised platform handrail stanchions which I will tackle next. A look at the AOTS shows the mast with a sheave near the top for the ensign lanyard and a cleat to tie it off on. To make the holes to simulate a sheave I wrapped some Tamiya tape round the top of the staff so I could mark a centre line and where to drill. I thought the tape would also prevent the hole splintering on the backside when the drill broke through. I used a 0.3mm drill held in a pin vise which I then placed in the chuck of my bench mounted drill press. Once the holes were bored I removed the tape and then placed the mast in the drill press and whilst spinning used sand paper to get a taper to the staff. Once I was happy with the taper I used the point of a No11 blade to join the two holes and pick out the waste to give the fake sheave some depth. The painted bracket was also bent to shape. A couple of issues, I used satin polywipe but the grain of the dowel is not uniform and appears blotchy where the varnish has been absorbed in some areas more than others. I noticed this when staining the dowels used for the capstan and the steering wheel as the staining was quite blotchy on these also. I think I will have issues when doing the larger section masts trying to get the finish uniform. Other issue was the 2mm thick support block wasn’t thick enough for the mast to clear the roughtree rail (taffrail?) so doubled up the thickness of this to get past the rail. The support block was also glued misaligned as I was working over the rear of the stern looking almost upside down. By the time I noticed the CA glue was well and truly set and after trying to prise the support off gave up as didn’t want to damage the stern, oh well. I used 0.1 mm thread and did my usual of treating with 50/50 pva glue and water and leaving to dry under tension. After feeding the thread through the hole and bending down I used a paint brush with water to resoften the pva coated thread so it closed tighter to the front hole. It would have been easier to pull the thread down tight over the front and back of the staff but I wanted to try and leave some slack at the back like it was just loose and hanging there. Not sure if the effect works or not. I really need to try and source some small cleats as I tried making another one from bent wire but can’t seem to get the shape correct. Will do the platform hand rail and maybe the binnacle tie downs over the rest of the weekend. Cheers Slog

-
"You're gonna need a bigger boat" Nice looking forward to following this build Cheers Slog
-
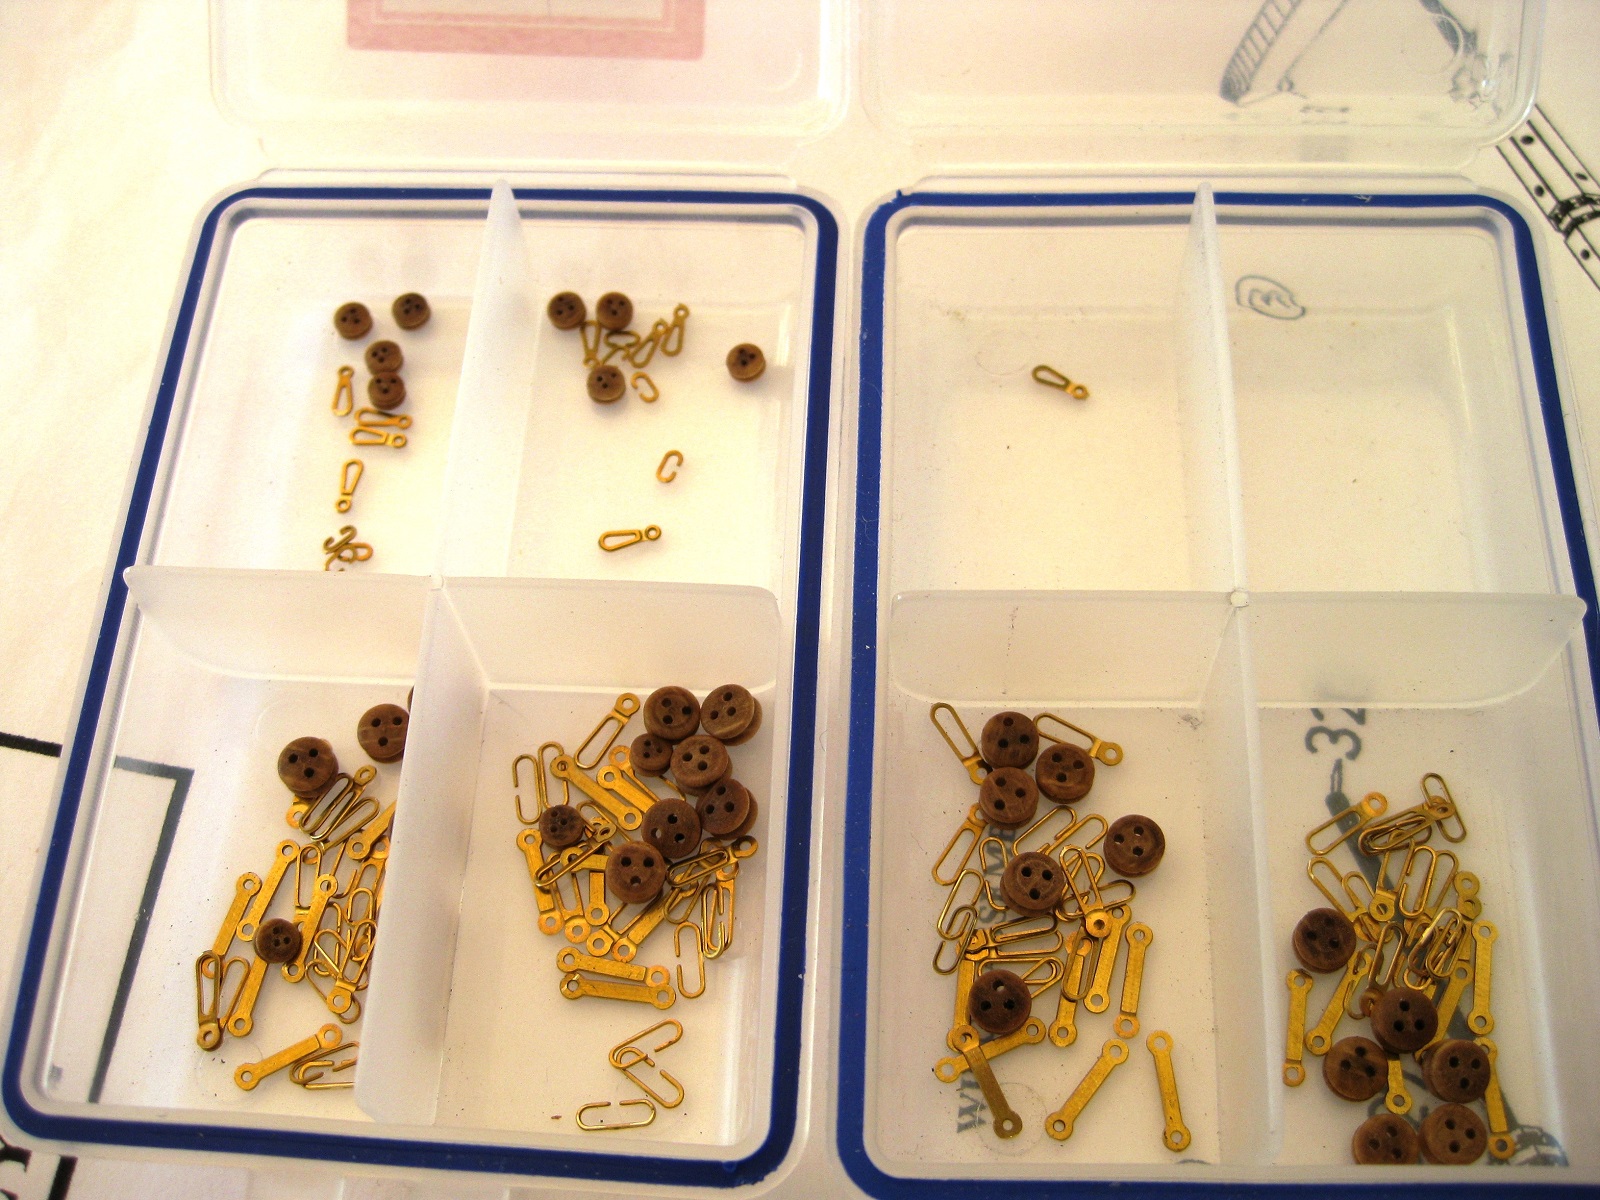
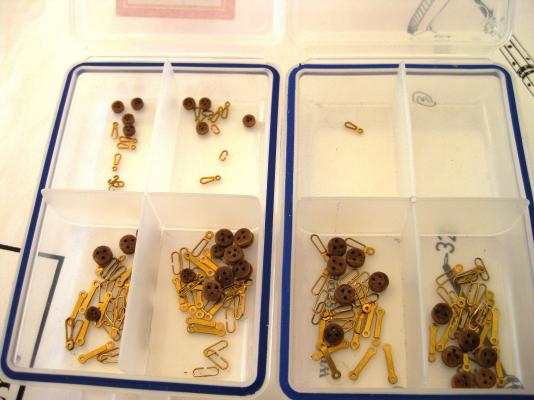
Hi Greg, I had a thought about replacing all the blocks with Chucks fantastic blocks but despite being reasonably priced they would have worked out around a ¼ of the price of the kit. I will order some of the 2mm blocks for doing the cannons and to cover any that I am short from the kit since I redid another 4 for the deck and a couple exploded under pressure from the tweezers. LOL Okay, I redid the 4 deck blocks so the hole orientation was correct and also tweeked one of the tiller handle blocks as it twisted the line. The eyebolts on the deck were also replaced as they were either a bit off or didn’t let the block hook move freely. I couldn’t work out either from the plans or from the AOTS how the tiller blocks were attached so made up a ring from 0.5mm brass and placed it in a hole already there in the photo etch tiller handle and hooked the blocks in to this. To help thread the rope through the block holes I touched the end with CA glue to stiffen it up then it was a case of threading the rope through the holes with tweezers. To tie off the end of the rope I made a false splice and a touch of CA glue to secure it and then trimmed off the tail with a razor blade. Cheers Slog
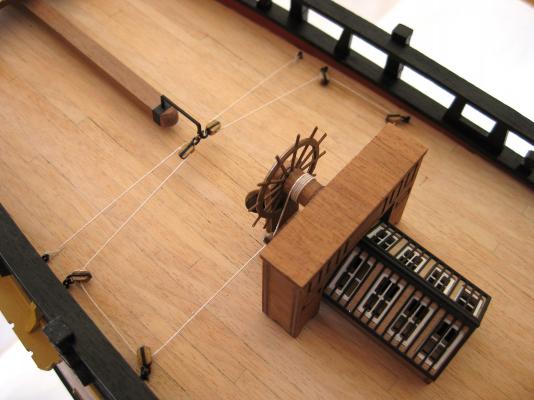
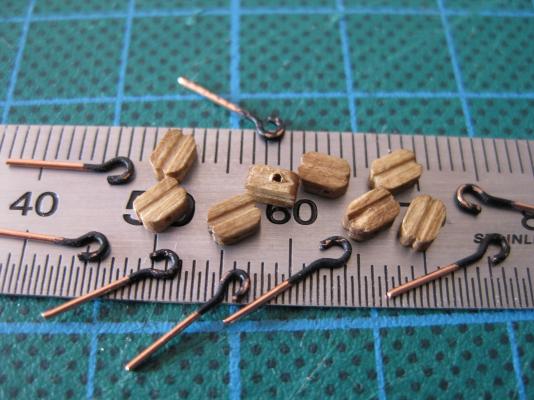
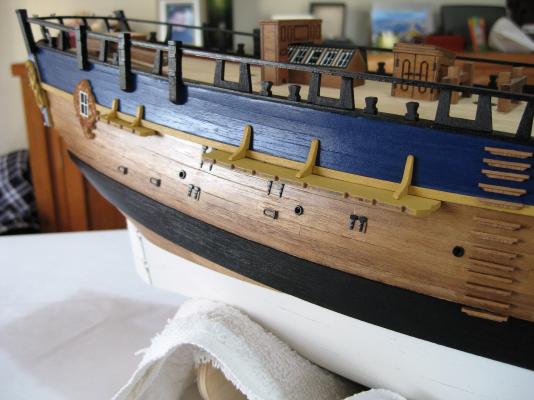
-
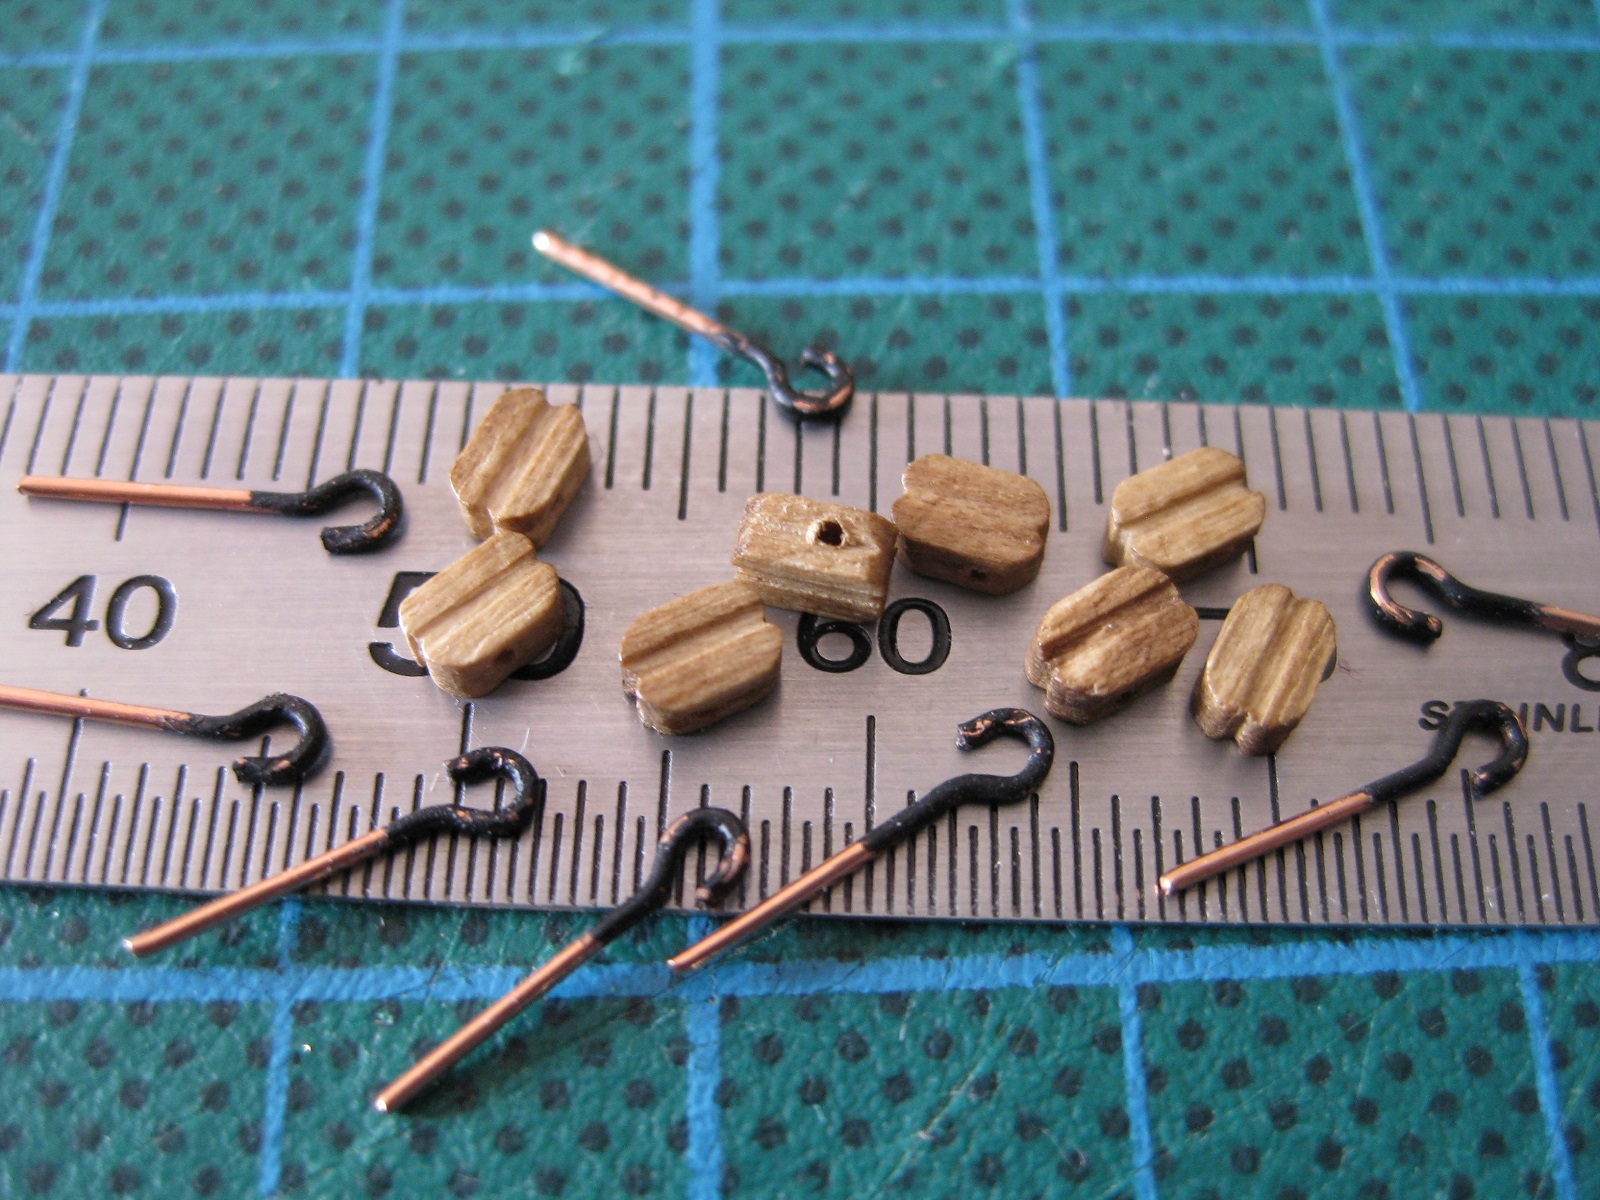
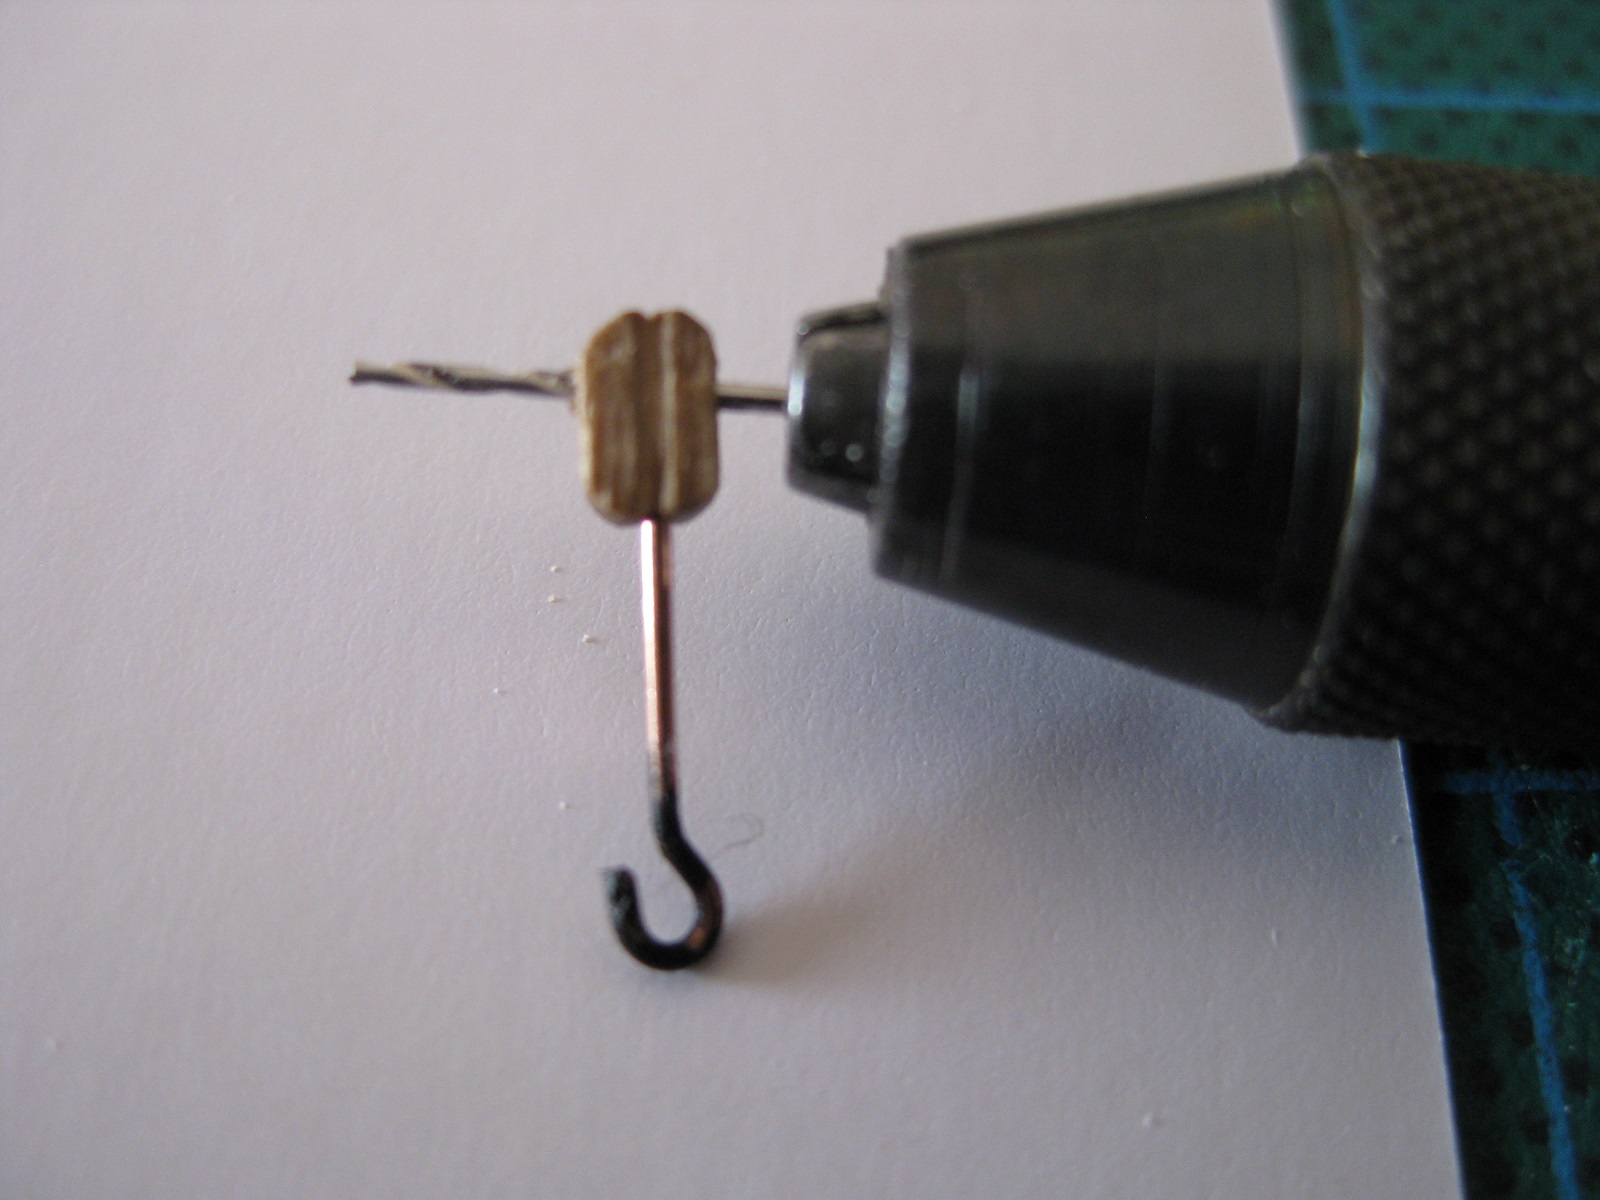
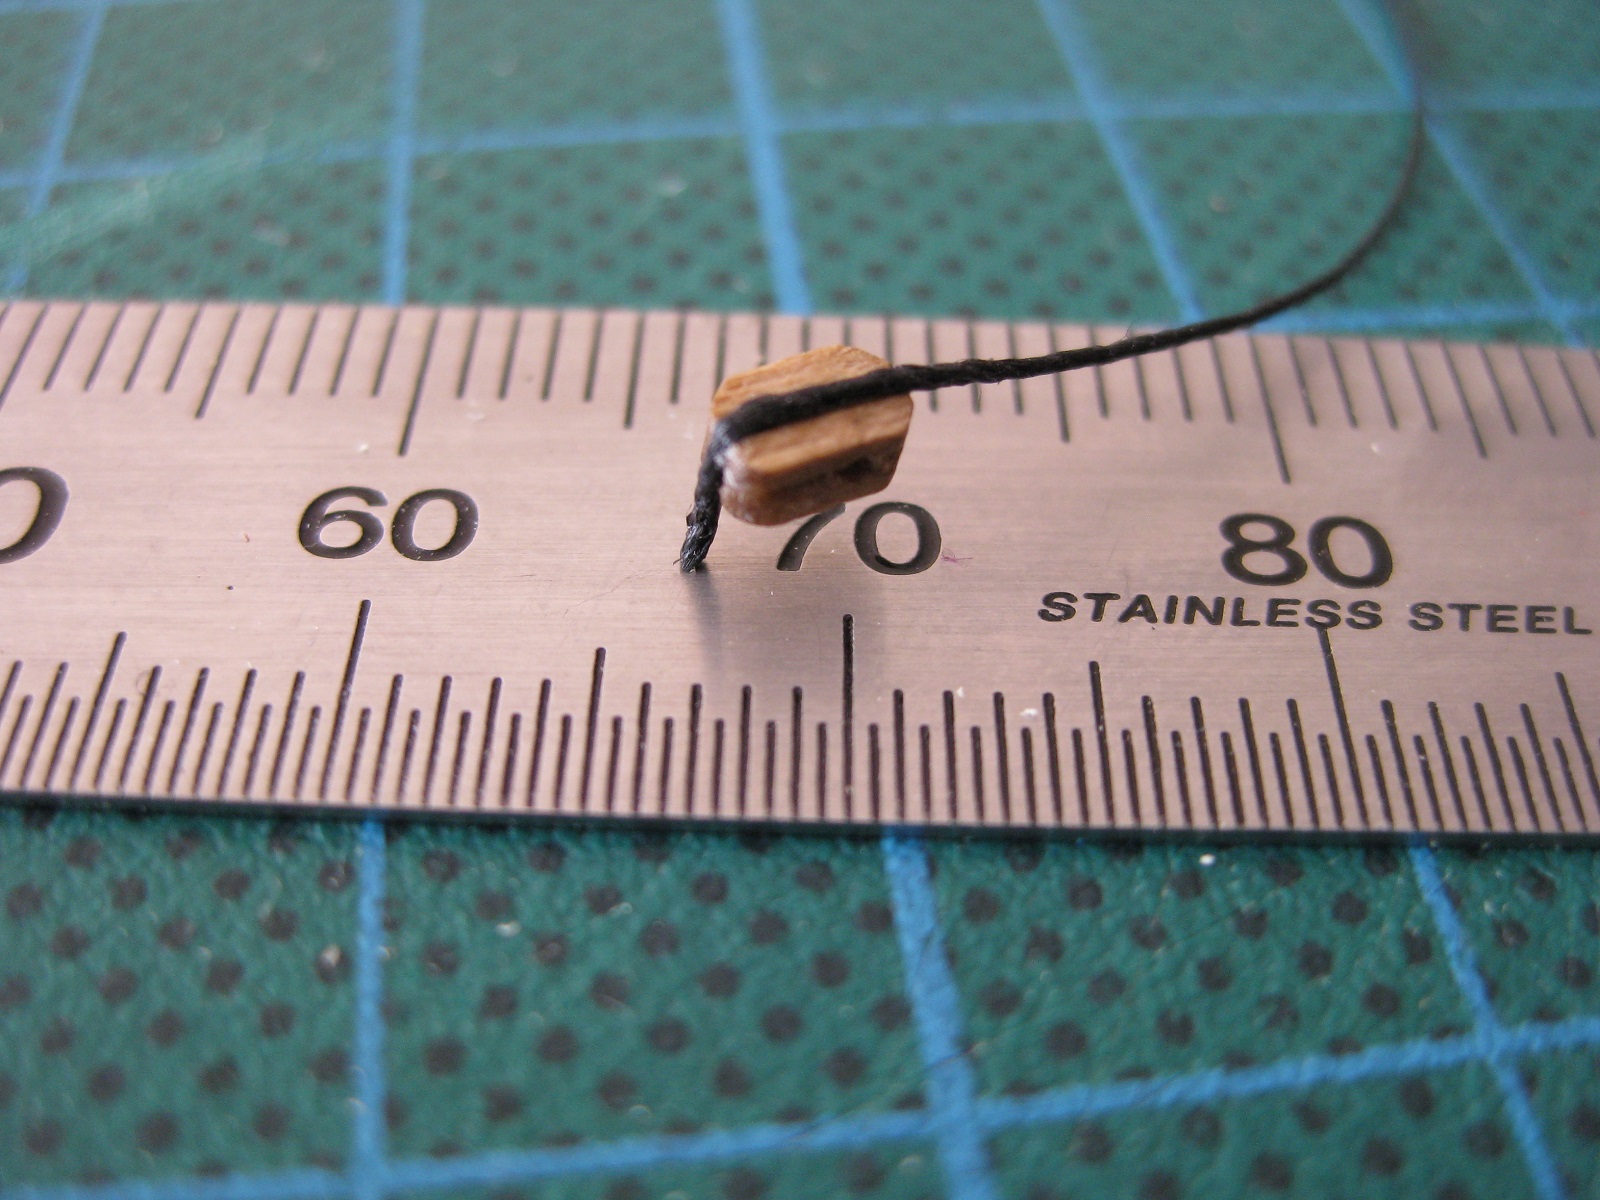
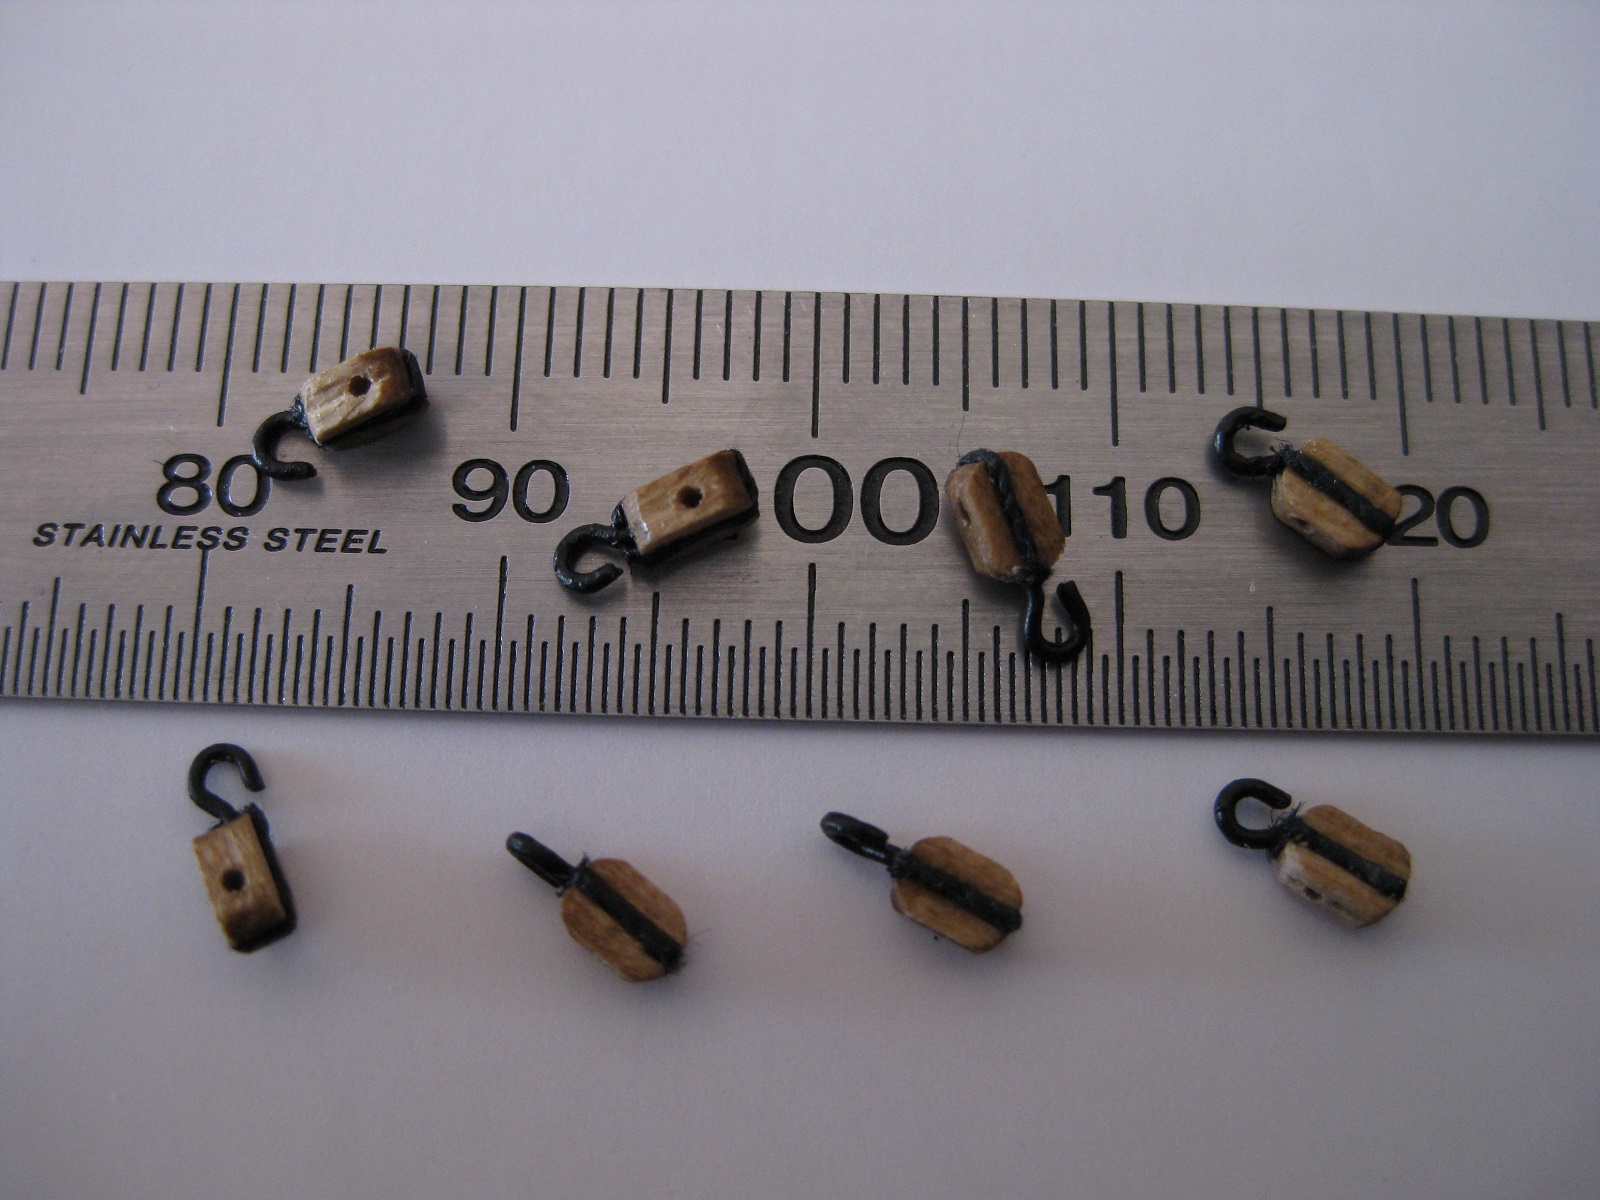
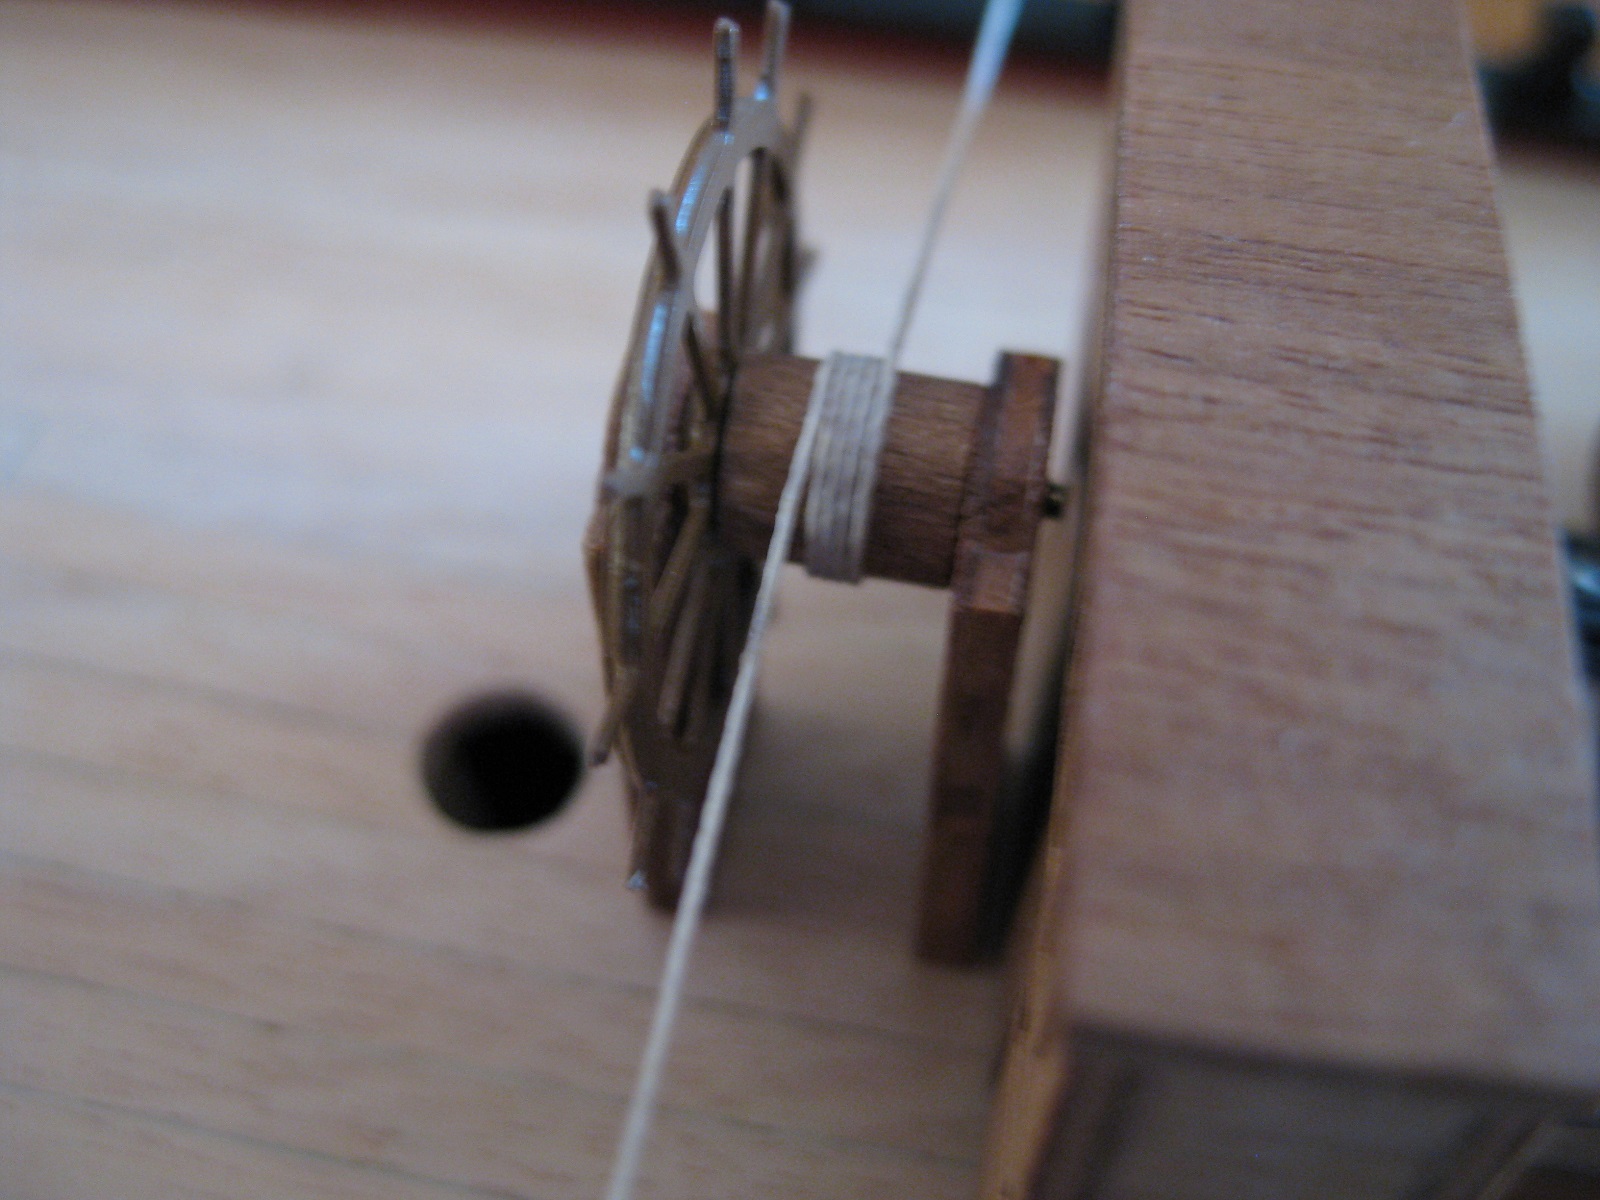
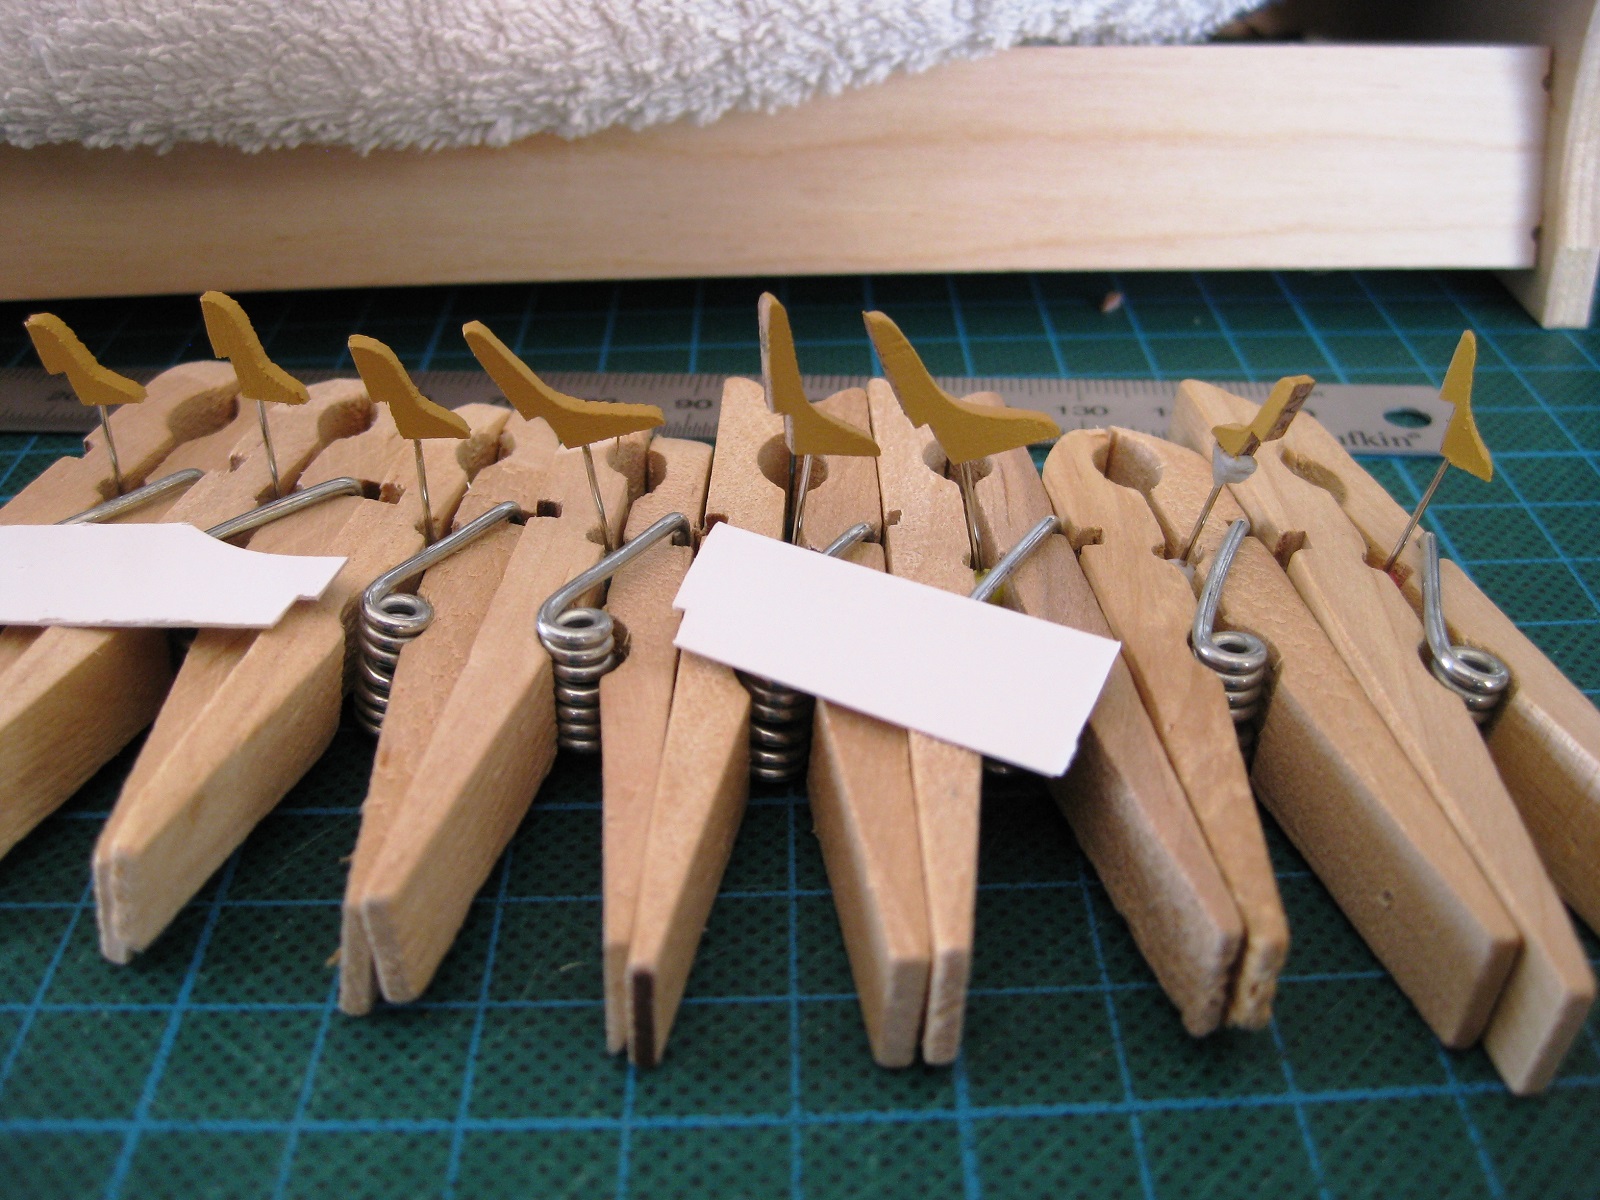
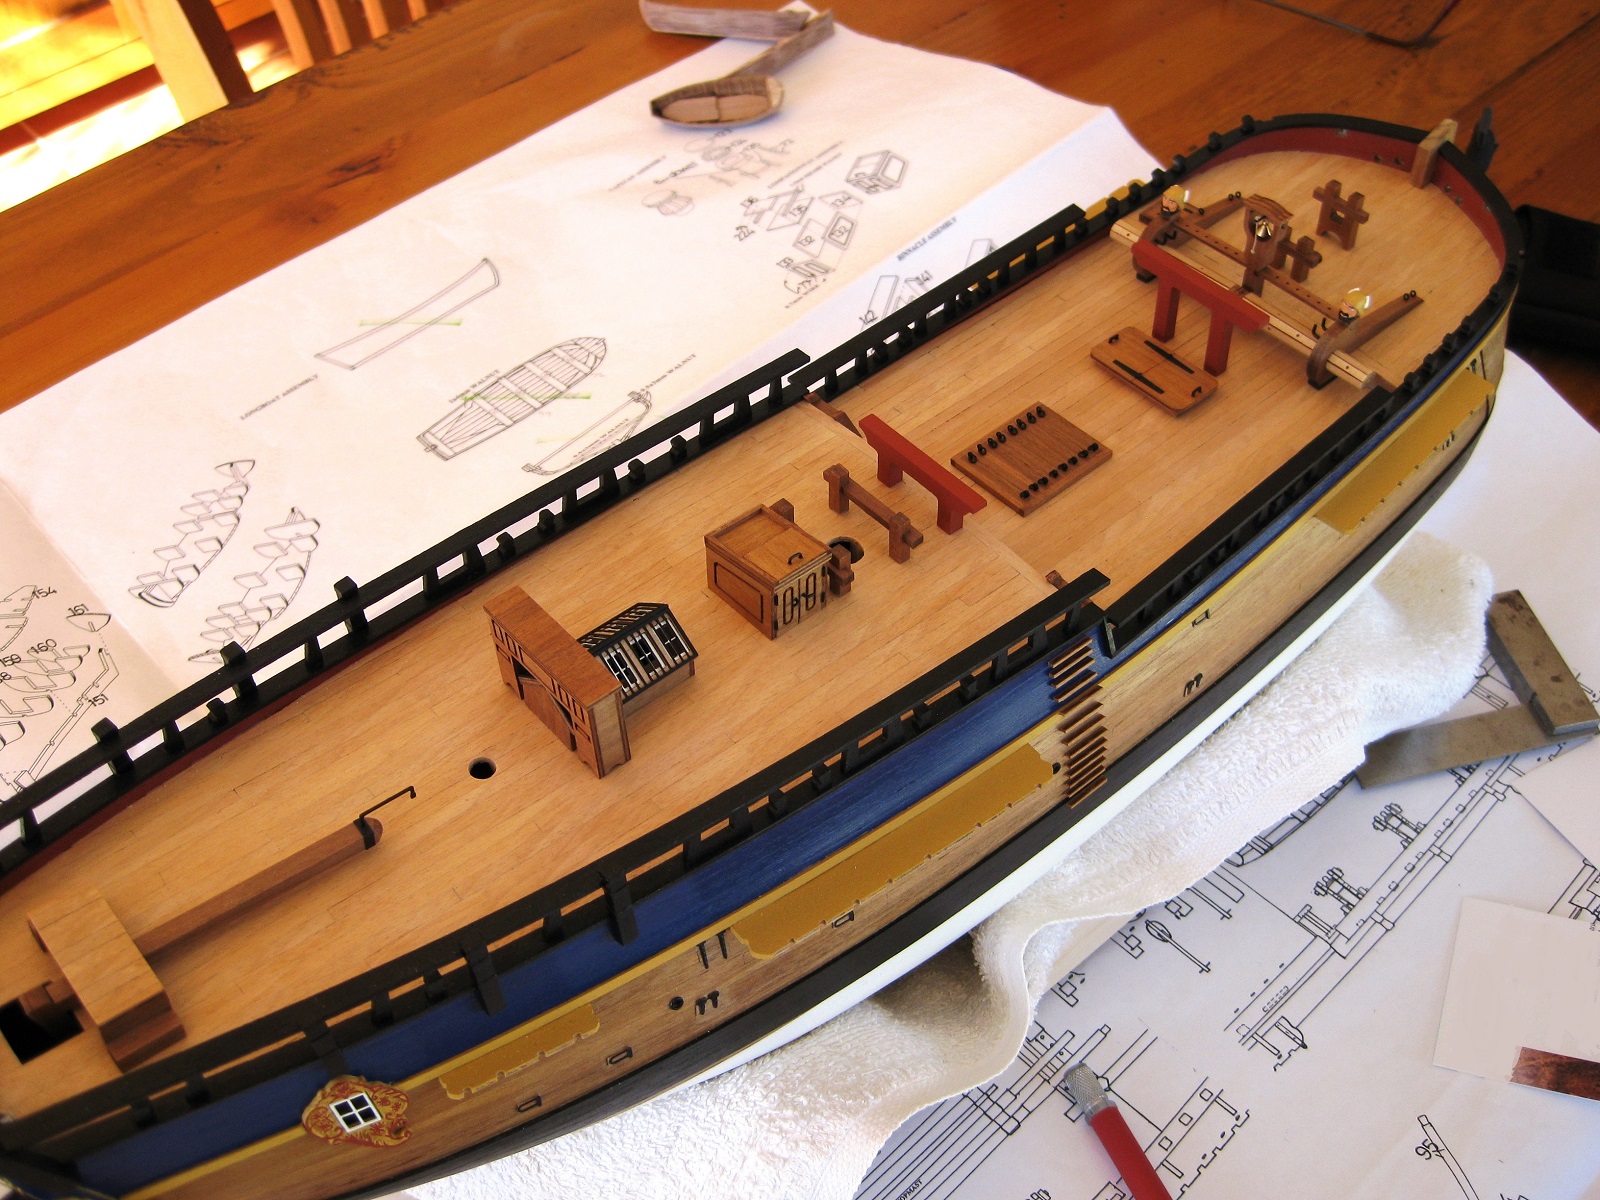
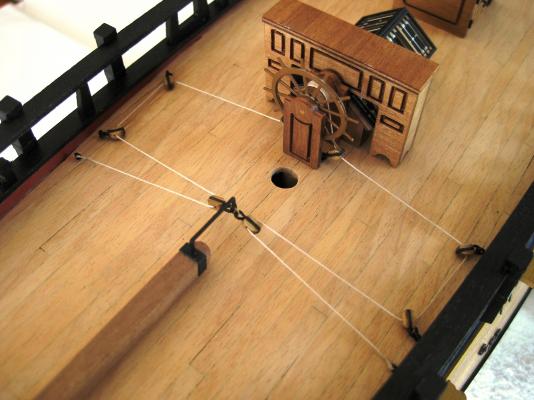
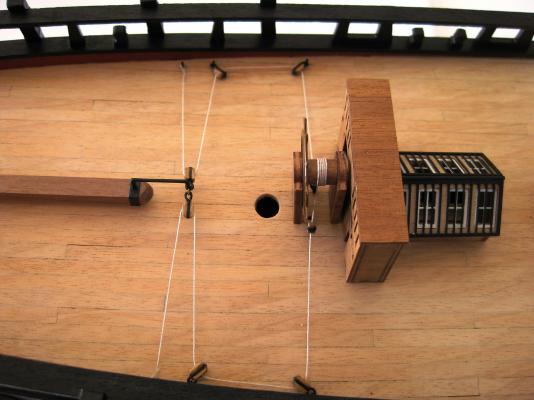
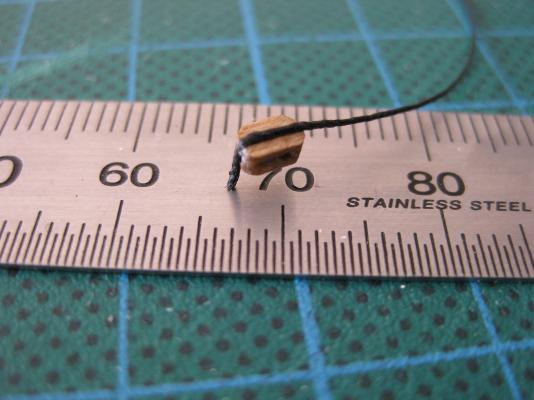
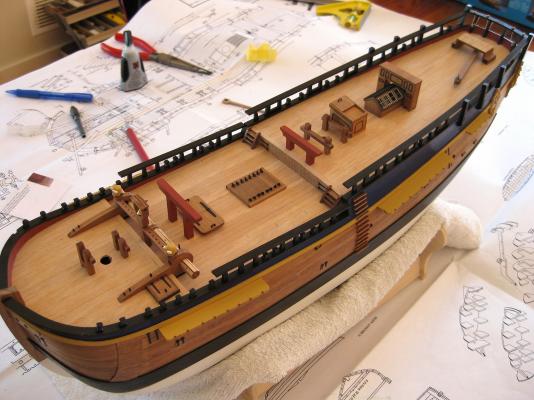
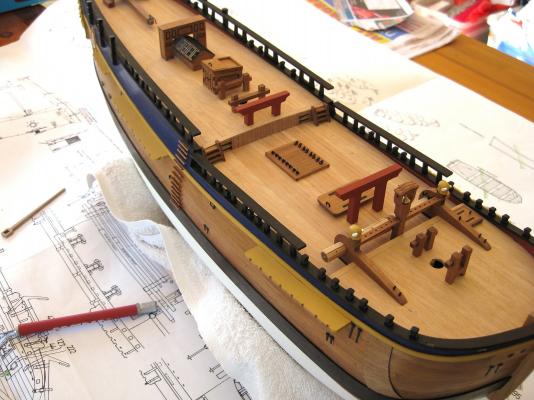
Hi Guys, Thanks for the nice words and encouragement. Mick the Caldercraft instructions or plans (can’t remember which) actually say the correct colour for the anti-fouling is brown but their prototype on their web site and the box picture show white. In this case I went with the Captains prerogative as I think the white looks good especially with the other colours. I have only seen one Endeavour with the brown hull (Lilees) which looks good also. I agree about coppering, I hope to do a ship with a coppered hull at some stage. Continuing on for the tiller steering gear. Anyone familiar with the Endeavour knows that the steering rope runs from the steering wheel assembly across the deck through blocks to the tiller handle. The plans say to use 3mm blocks (smallest they supply) and 0.25mm beige thread. The blocks aren’t too bad for kit supplied ones so used them straight with no further work. Other than the plans there is no description and I couldn't tell how the blocks are secured to the deck eye bolts. They appeared to be tied down with rope. There is no way I could do that so needed some other idea. I had a look at the AOTS and the blocks have iron straps round them with hooks on the end so that would be the easiest way to do them. I tried bending my own hooks from 0.5mm brass rod and although they looked good I couldn’t get them smaller than the supplied copper eye bolts so just used them with the eyes pulled open. I drilled a hole in the end of the block to accept the tail of the hook. I stuck a bit through the sheave hole so I could trim the tail to length. To simulate the strap I used 0.5mm black thread glued round the block with CA glue. It was a bit fiddly and after trying a few different methods got a system going. Once the thread was glued all the way round I used the drill again to drill through the thread into the previously drilled hole and glued the hook in with CA glue. The finished blocks look a bit rough with the macro but at normal viewing don’t look too bad. Just a note about orientation of the sheave hole in the blocks. I only noticed whilst looking at the photos to write this I have 6 of the 8 blocks wrong. I know that the rope runs through the block depending on what side it is pulling against and for some reason I worked out that the 6 deck blocks should run through the hole furthest from the hook and the 2 tiller blocks should be closest to the hook.(2 hooks on the right of the picture) In actual fact all the holes should be closest to the hook for correct operation. Only the 2 blocks set aside for the tiller are correct. I thought I was being smart and making sure the orientation was right and messed up . I will redo the 4 deck blocks so the hole is the right way round but will leave the 2 at the steering wheel assembly as they are because I already fixed them in place and are too hard to get to now. I cut and sanded the steering wheel assembly supports so the assembly sits vertical on the sloping deck. I cut a 500mm length of the 0.25 rigging thread and brushed on a 50/50 mix of PVA and water and wiped off the excess and then suspended a clamp on the end to pull it straight. When it was dry I wrapped it round the barrel of the steering wheel assembly. The plans show it wrapped around the full length of the barrel but the AOTS specifically says it is wrapped 5 times so I did that. I then used a needle to coat the unseen underside with CA glue to hold the wrapped thread in place against each other. I then glued the assembly to the deck with CA glue and hung the excess threads over the side with clothes pegs so I could fit the blocks to the deck. Hopefully tomorrow I will get time to redo the 4 blocks and finish the steering set up. Cheers Slog


-
Hi Steve, Thanks for that, will check out the local spotlight next time I am passing. I PM'd Alexey for a price on his serving machine but was undecided but your examples are impessive and swaying me towards getting one in the near future. Cheers Slog
-
Nice! that last photo looks awesome. Did you serve your lines with kit supplied thread or use something else. I have been wondering what to use for serving. Cheers Slog
-
Hi Bankie, Your deck came out well. I am sure your planking will be fine. Check out the planking tutorial pdf in the article downloads in this site. Took me a few reads to get my head round it. Planking was my least favourite part of the build though. Cheers Slog
-
Hi Mick, Great (and fast) progress, looking forward to more. Cheers Slog
-
Incredible work Grant. I have 3 ships boats I could send you to complete for me Cheers Slog
-
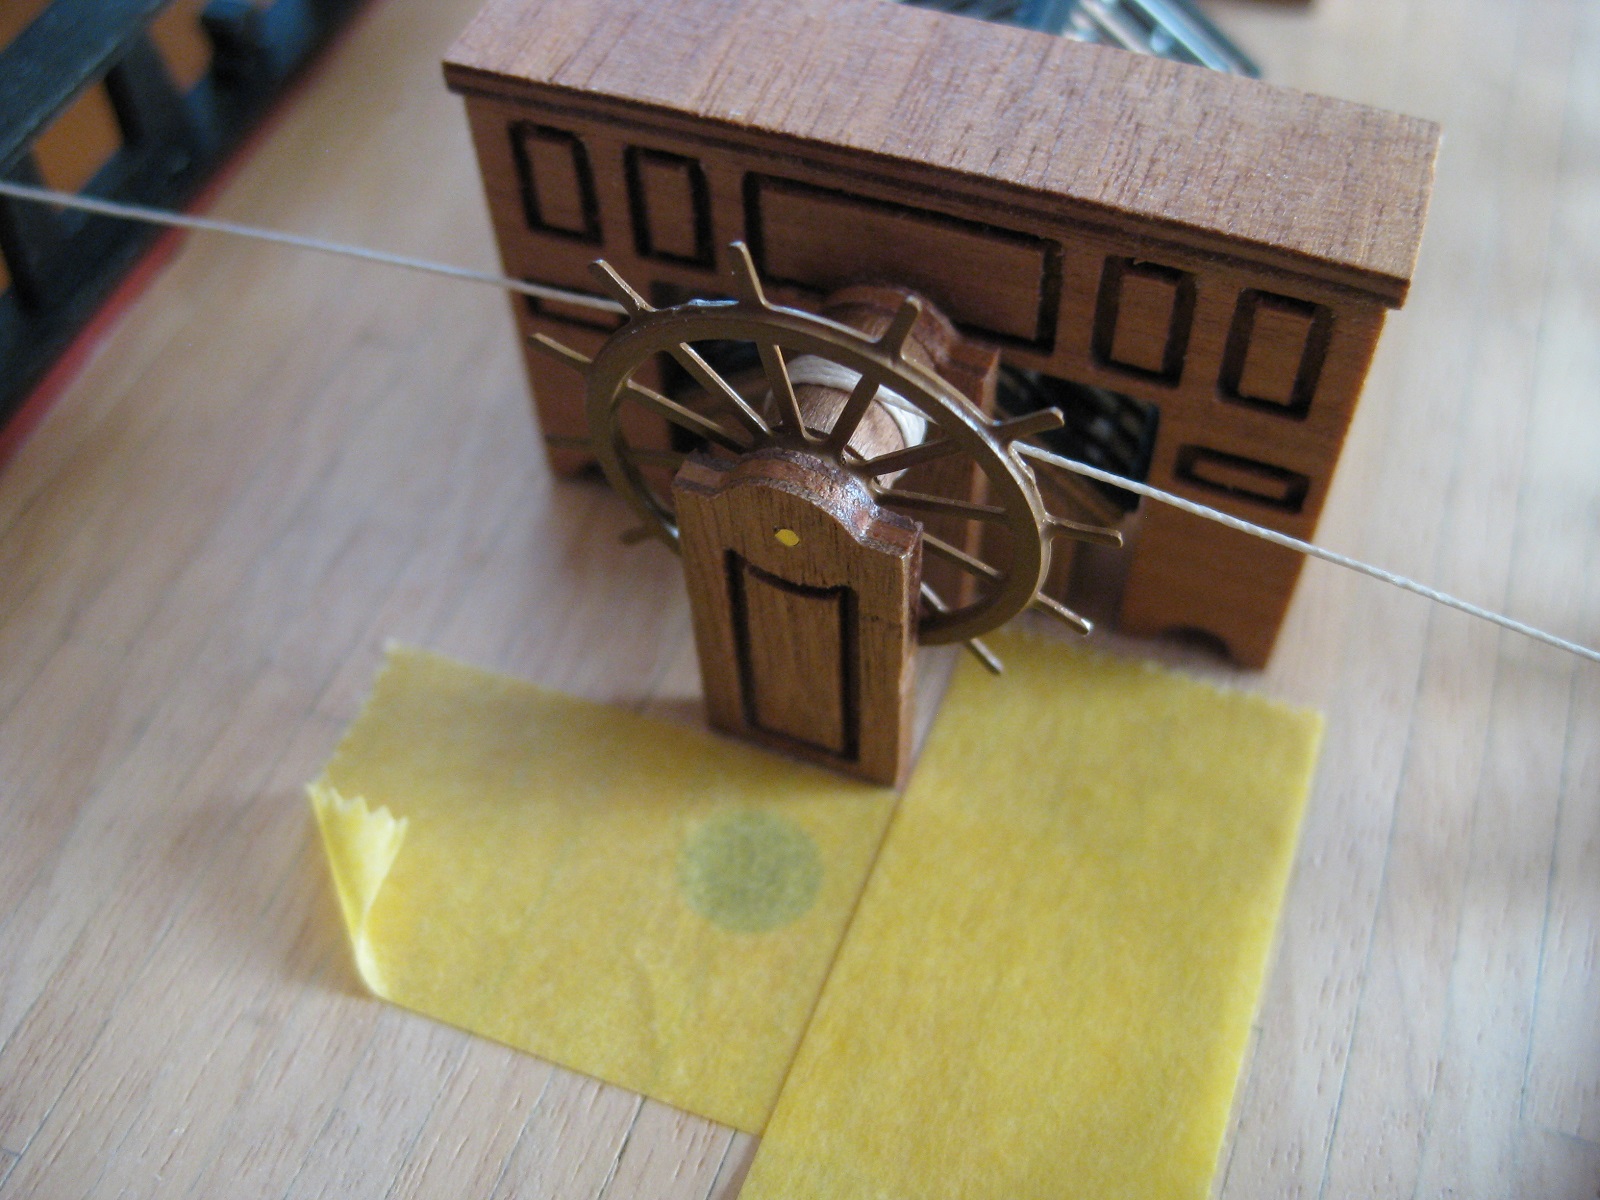
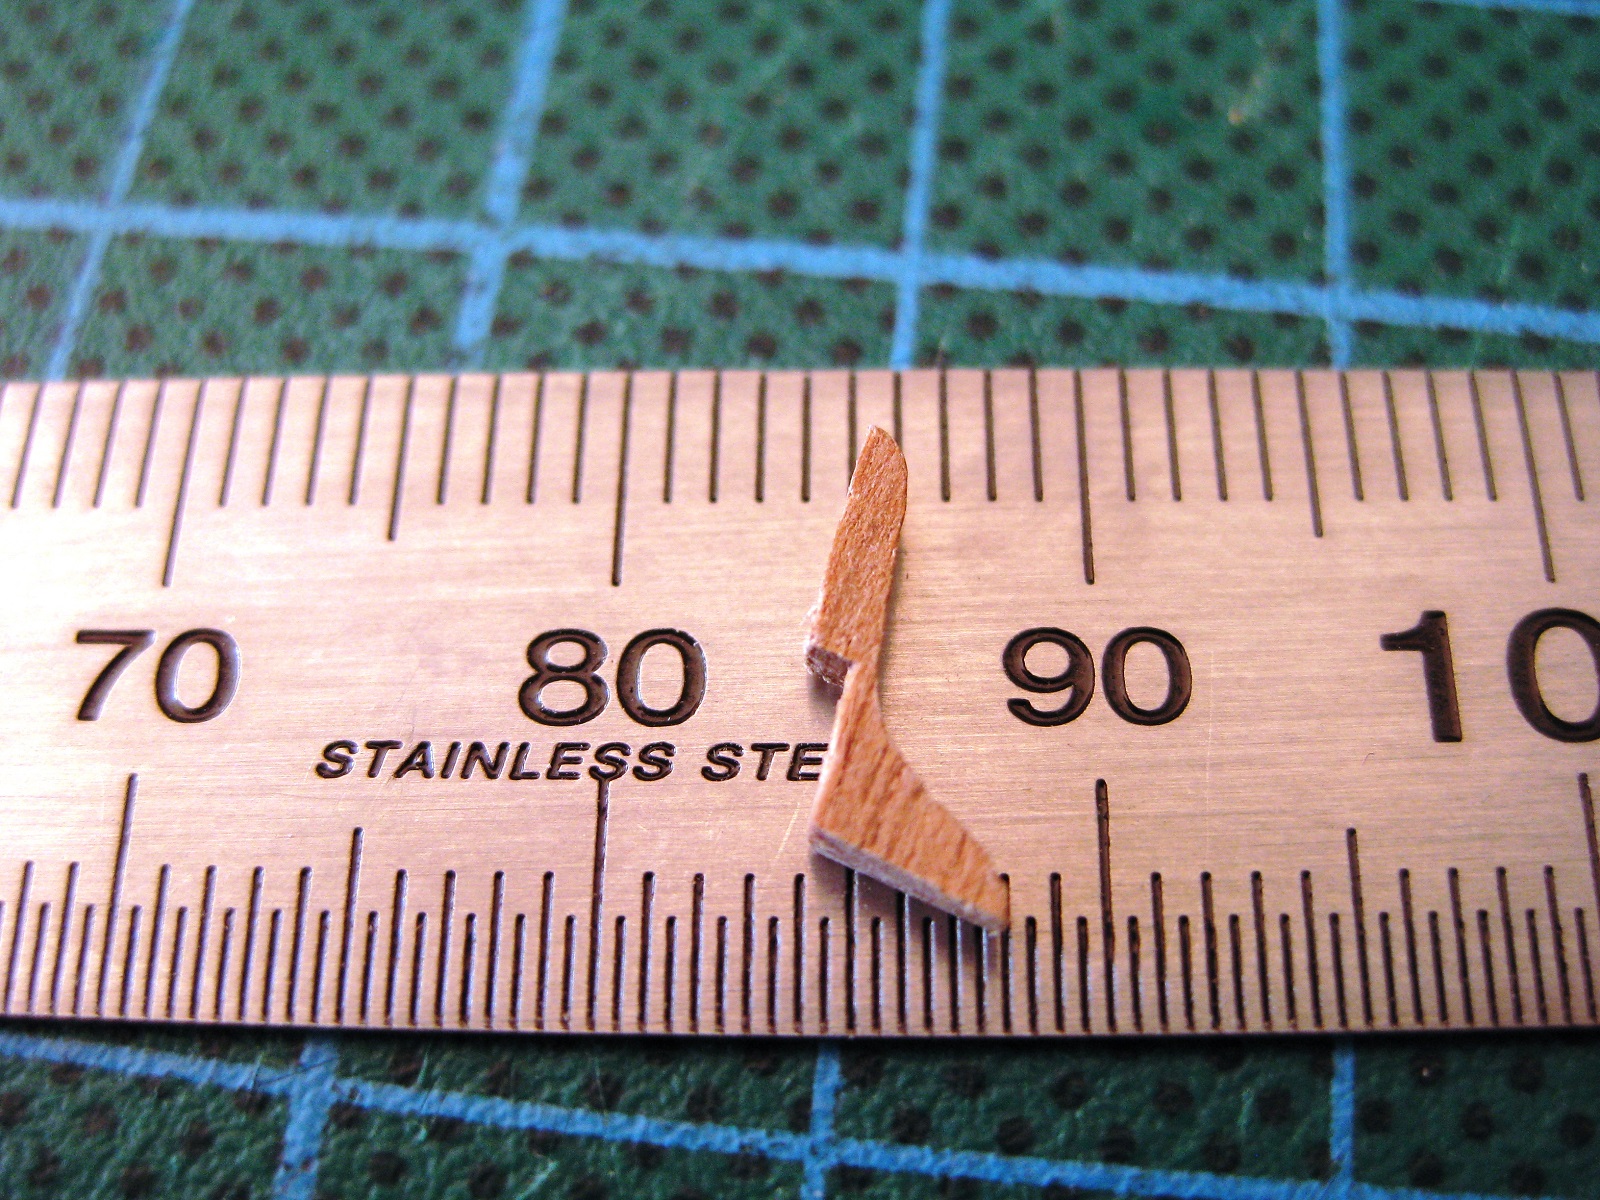
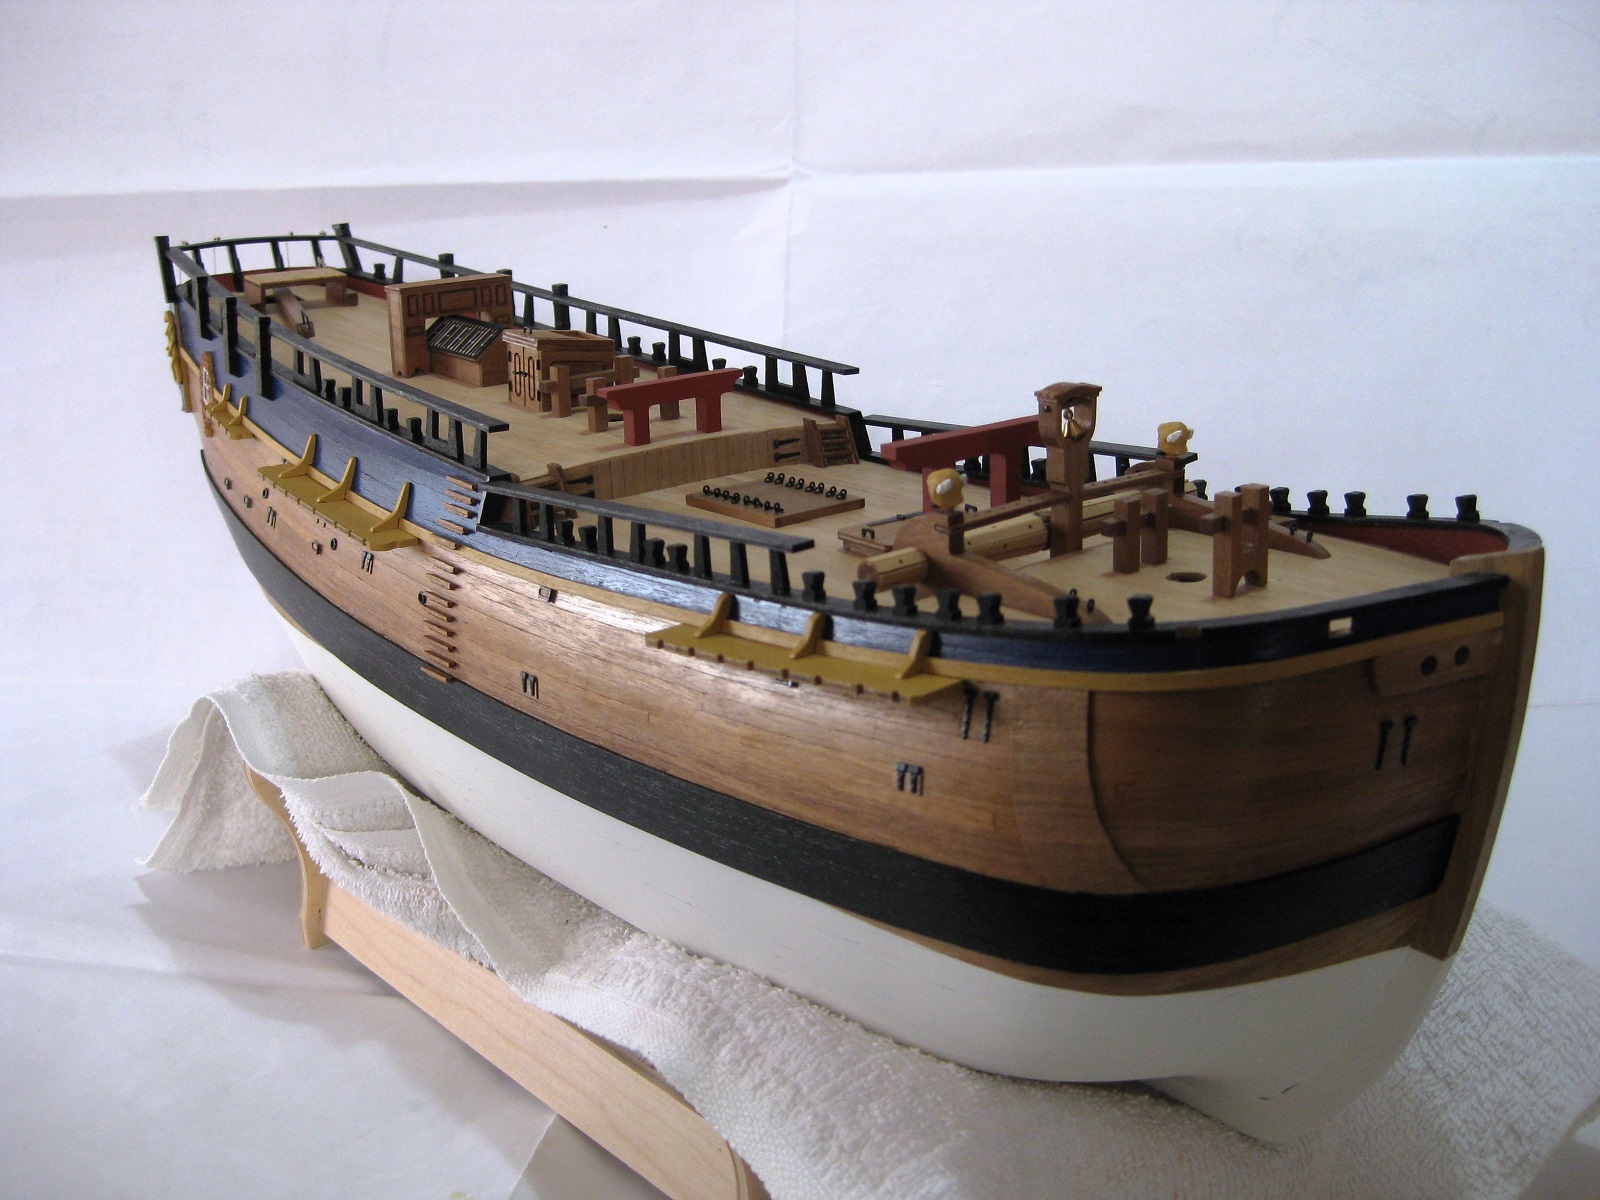
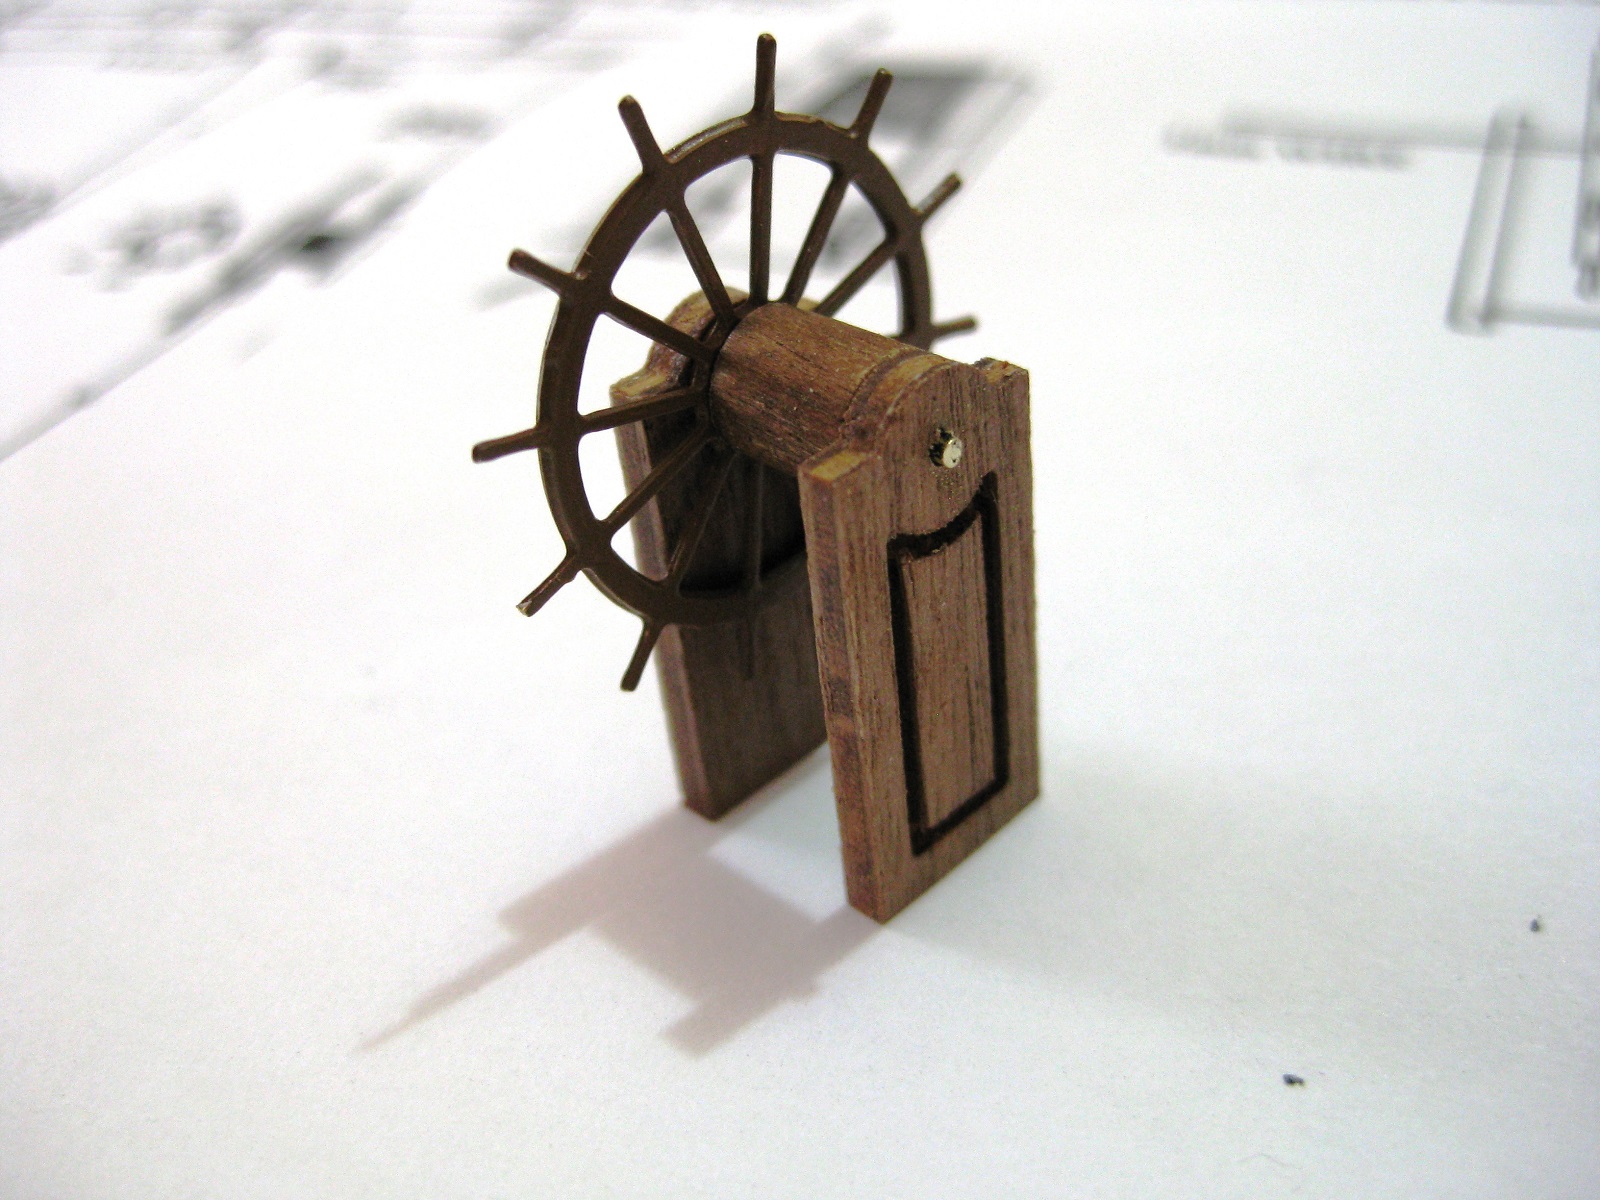
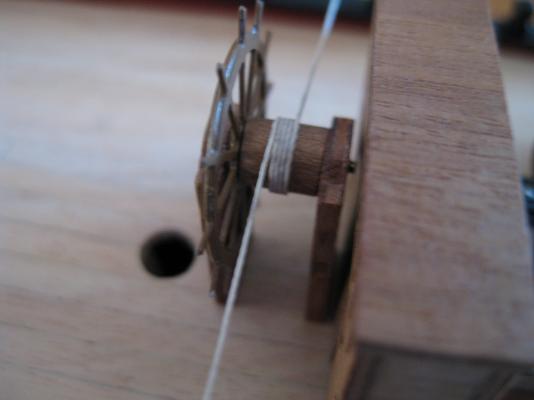
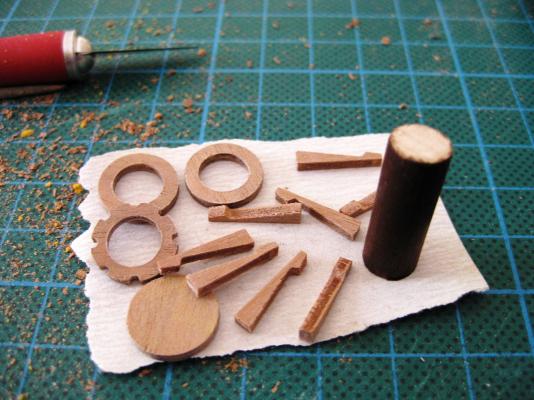
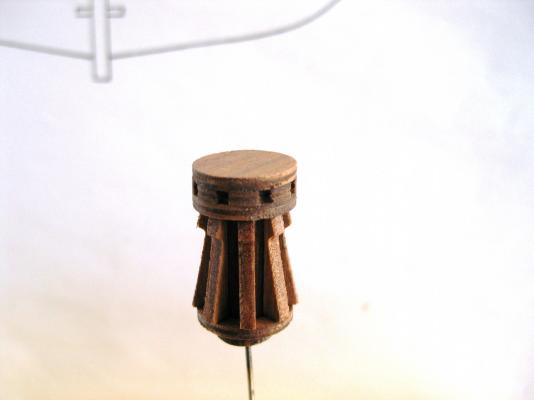
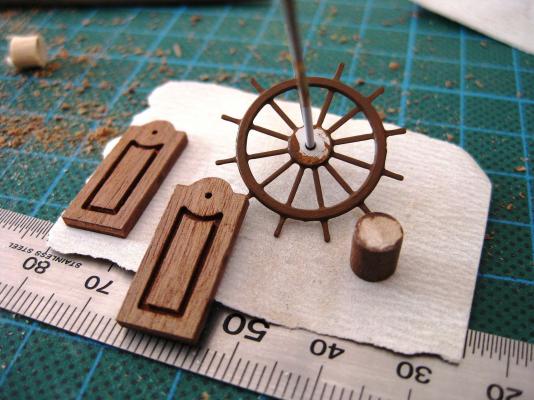
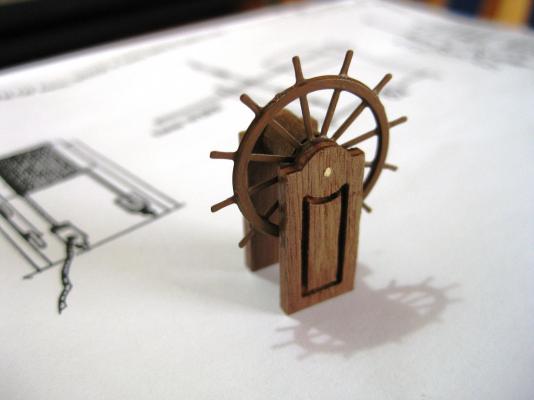
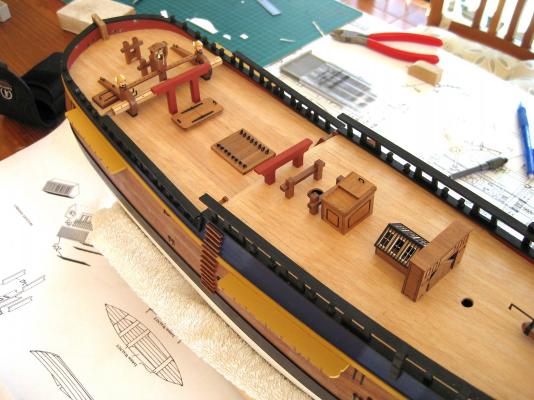
Hi All, A small amount of progress. As mentioned in my last post I decided to work on the channel supports which I didn't enjoy as found the little bits of walnut ply fiddley to cut around the shear strake. The channels, depending on their position also slope up or down and to get the supports to sit vertical a bevel had to be sanded on the bottom of each one. Initially I tried marking and cutting the support directly against the hull but couldn't get satisfactory results. The picture below shows how small the mizzen mast channel supports are and at one stage I only had approximately 0.5mm thickness left and it still wasn't fitted. I tried to make a notch in the shear strake so the support could still further back without removing more material off the already thin section. This didn't work either as I couldn't safely make the notches without fear of damaging the blue paintwork above so I needed to come up with another idea. I ended up filling in the notch in the shear strake and repainting and made another support using the originals as a template. I then glued some 0.5mm strip stock to the back edge of the mizzen mast channel supports to give them more depth for notching. I also used some business cards as templates to get the fit against the hull as this was easier to use then trying up the actual support each time. The shape of the template was then transferred to the piece once I was happy with the card fit. The supports were painted prior to fitting and then after marking thier position on the channels with Tamiya tape were glued on using CA. Next up was the capstan. After cutting out the parts from the walnut ply sheet and tidying up, I needed to make the barrel. This is made from 8mm dowel which I stained using the Admiralty Paints walnut stain. As the deck where the capstan sits slopes down from the stern to the mid deck I also measured and sanded the bottom on an angle so once placed on the deck the capstan sits vertically. I used PVA to assemble and then gave it a couple of coats of satin wipe-on poly The ships wheel followed. I cut out, cleaned up and varnished the 2 supports before fitting together. The ships wheel is a photo etch part which I sprayed with Skull white and then painted with Admiralty Paints brown paint. The barrel is from 6mm dowel, 6mm long which again I stained with walnut. It is all joined together with a piece of 1mm brass rod. I CA glued all the parts together but still need to sand the support bases so again it sits vertical to the sloping deck. Cheers Slog


-
Intro to Card Models Part VI: Building V108 - The Superstructure
Captain Slog replied to ccoyle's topic in Card and Paper Models
Hi Chris, Great series you are providing. The only problem is, it makes me want to get back to my Bismarck when I am on a role with my Endeavour. I voted to go the whole hog Cheers Slog -
Hi Adrieke, I found the Admiralty Red Ochre to be a lot darker and muted than expected but its grown on me now, but definitely a lot darker than the replica which you are replicating with your build. I also found the yellow ochre to be quite mustardy but again its grown on me LOL. Cheers Slog
-
Hi Bankie, You're off to a good start. Your deck looks very nice. Looking forward to seeing more. Cheers Slog
-
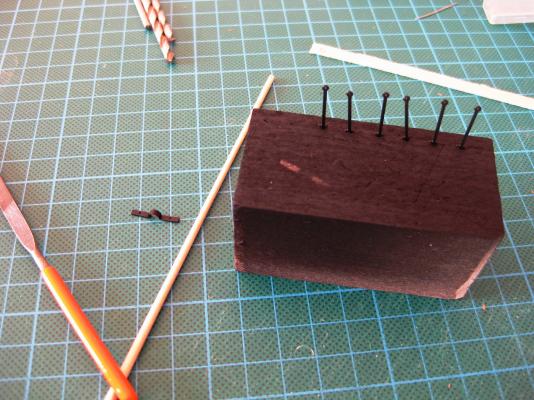
Hi Guys, Thanks for all the comments. Not much to report. Fixed the bitts and gallows in place. After determining their location from the plans I used short lengths of Tamiya tape to mark the positions on the deck. The bottom of each post was drilled and a length of 1mm brass rod glued in place. A corresponding hole was marked and drilled in to the deck and the rod and bottom of the post given a dab of CA glue and pushed into place. Next up is to finish the channels once and for all. From the plans I collected all the parts from the PE sheet needed for each channel and stored them in small containers until I could work on them. After fitting and gluing the chains together I got everything ready for spraying with Chaos Black. The chains were threaded on to a length of brass rod and the chain plates stuck down on to decorators tape, sticky side up. I have also started to fit the channel supports, which are 2mm walnut ply but found this tedious and so progress has been slow. Hopefully I will have made some progress on these to show next time. Cheers Slog


-
Hi David, Looking forward to following your build. Nice one winning the longboat. Cheers Slog
-
Hi Navyyeoman, I am no expert in coppering a hull as I have never done it before but the way I would calculate the area and therefore the number of plates needed would be to simplify the measurements. Firstly I would measure the overall length of the hull to be coppered (including the rudder) and then measure from the top of the coppering to the bottom of the keel to get the area of a simple rectangle then multiply this by 2 to get total area. Once I worked that out I would add 10% to foul ups and wastage then divide this by the area of a single plate to get the total number of plates needed. Don't know if this helps but that's how I would do it. Cheers Slog