Keith Black
-
Posts
6,742 -
Joined
-
Last visited
Content Type
Profiles
Forums
Gallery
Events
Everything posted by Keith Black
-
 Grant, you'll undoubtedly hit it out of the ballpark.
 -
Congratulations, Glen. She looks right smart and right at home, perfect.
- 194 replies
-
- 2
-

-

-
- Bottle
- Treasure Fleet
- (and 3 more)
-
Grant, I don't know if you're familiar with Gary's work but he provides tons of helpful hints for building dioramas.
-
Simon, I think it's something far less sinister, Ebooks. As Ebooks gain in popularity most branch libraries are eliminating the number of printed books and leaving printed materials to be housed by the main libraries.
-
Jerry, welcome to MSW. Glad to have you aboard.
-
I love the BBC show Escape to the Country, what part did she settle into, Keith? The mast work is beautiful.
-
See page 7 of the below link and note the binnacle on the left was used by the British Royal Navy in 1839. The base was 18 inches square and 24 inches high. http://www.balogh.com/binnacleflyerad.pdf
-
I couldn't find a email addy for Dr Mathew Betts but here is his twitter account if any of you tweet. Ask him! https://twitter.com/HMSTerror_model?ref_src=twsrc^tfw|twcamp^embeddedtimeline|twterm^screen-name%3AHMSTerror_model|twcon^s1_c14
-
I'm confused as to the direction you're headed and the reasoning behind it, Keith? Or am I missing something?
-
A binnacle is merely the housing for the compass. They wanted to get away from the cabinet type housing because of the deviations caused by the nails that held the cabinets together. One would think that a date for when the first column type binnacle was developed would be readily available but Mr Google is playing hide and seek with it.
-
Simon, you can order a set of Thermopylae plans (they're 1:124 scale) from Cornwall Model Boats. https://www.cornwallmodelboats.co.uk/cgi-bin/sh000001.pl?WD=thermopylae&PN=Thermopylae-Construction-Plans-Set-961.html#SID=136
-
I've pulled up a chair, Simon and like the cats I'll be following you along on your journey.
-
Make it a black and tan for me, laddie. I'll be along shortly as I've got to pack away this wee bit of knittin'.
-
I want to step in here and defend knitters as I don't think there's anything "easy" about knitting. For one, there's hundreds of different types of knitting needles (of course my wife requires at least one if not two of each) two, there are at least a hundred different types of knitting stitches, and three, there's all the different types of yarns and their respective weights that go hand and hand with those hundreds of different needles. The real kicker is being able to visualize making a three dimensional object out of a single strand of yarn from one of the countless patterns that if placed end to end would stretch from here to the moon.
- 165 replies
-
- 12
-

-
-

-
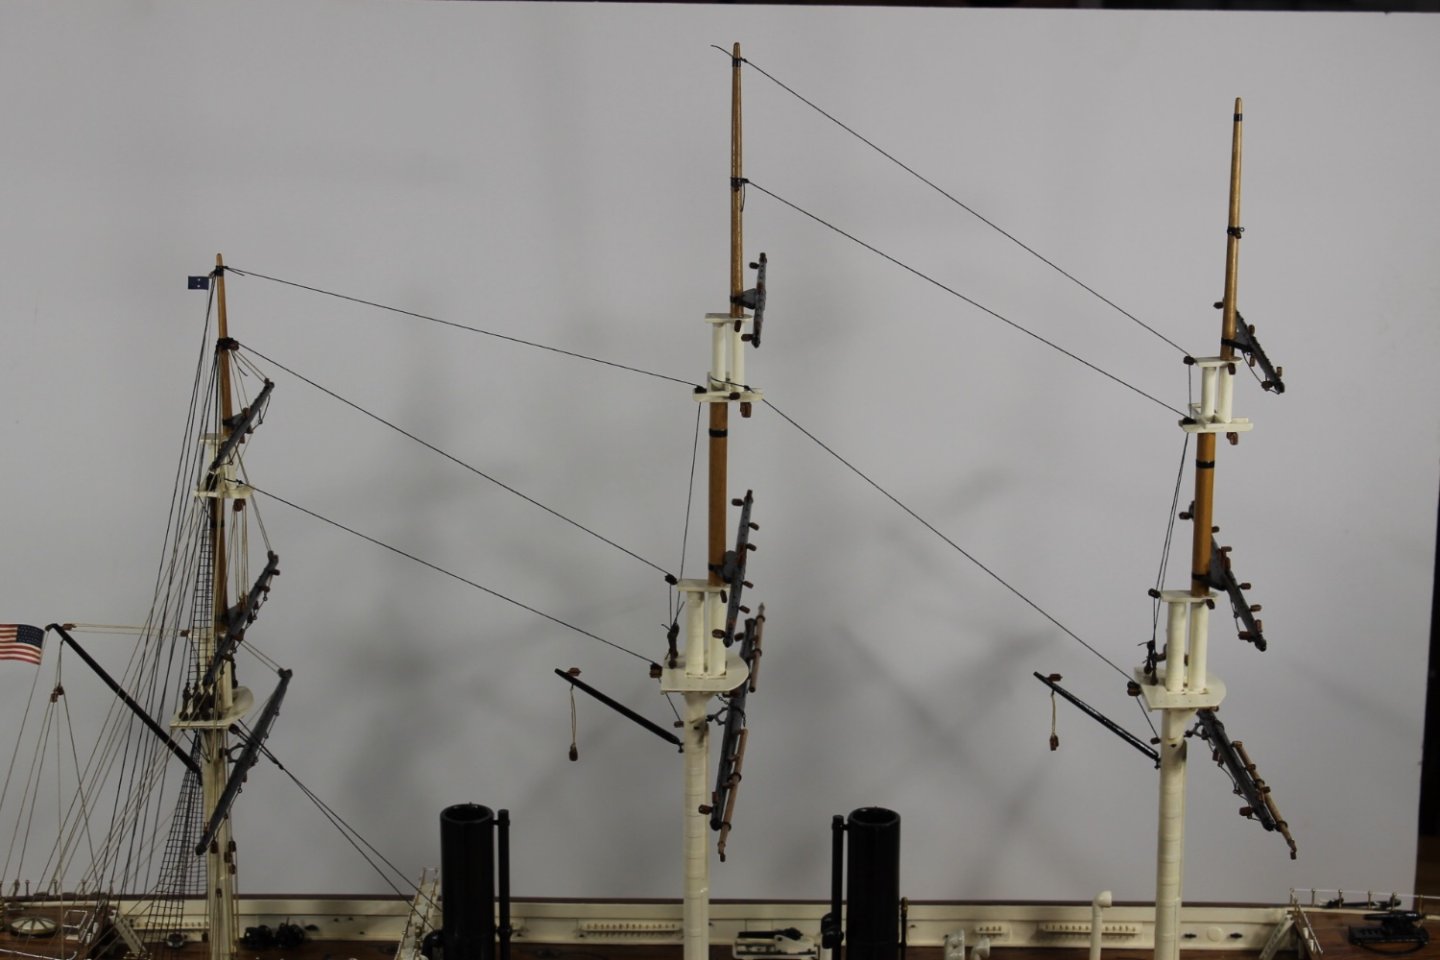
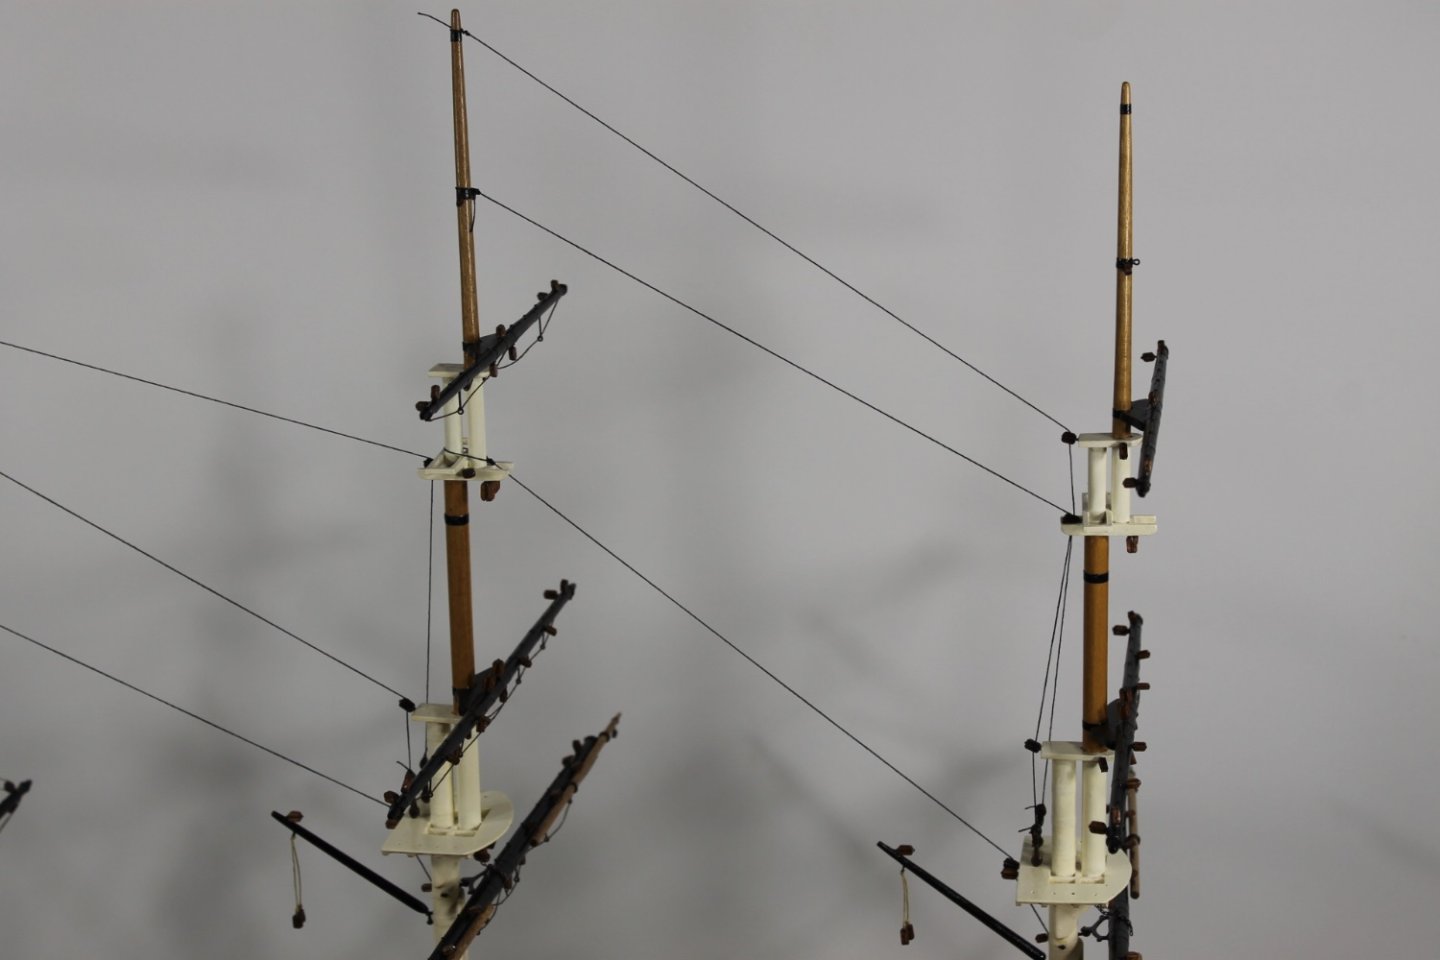
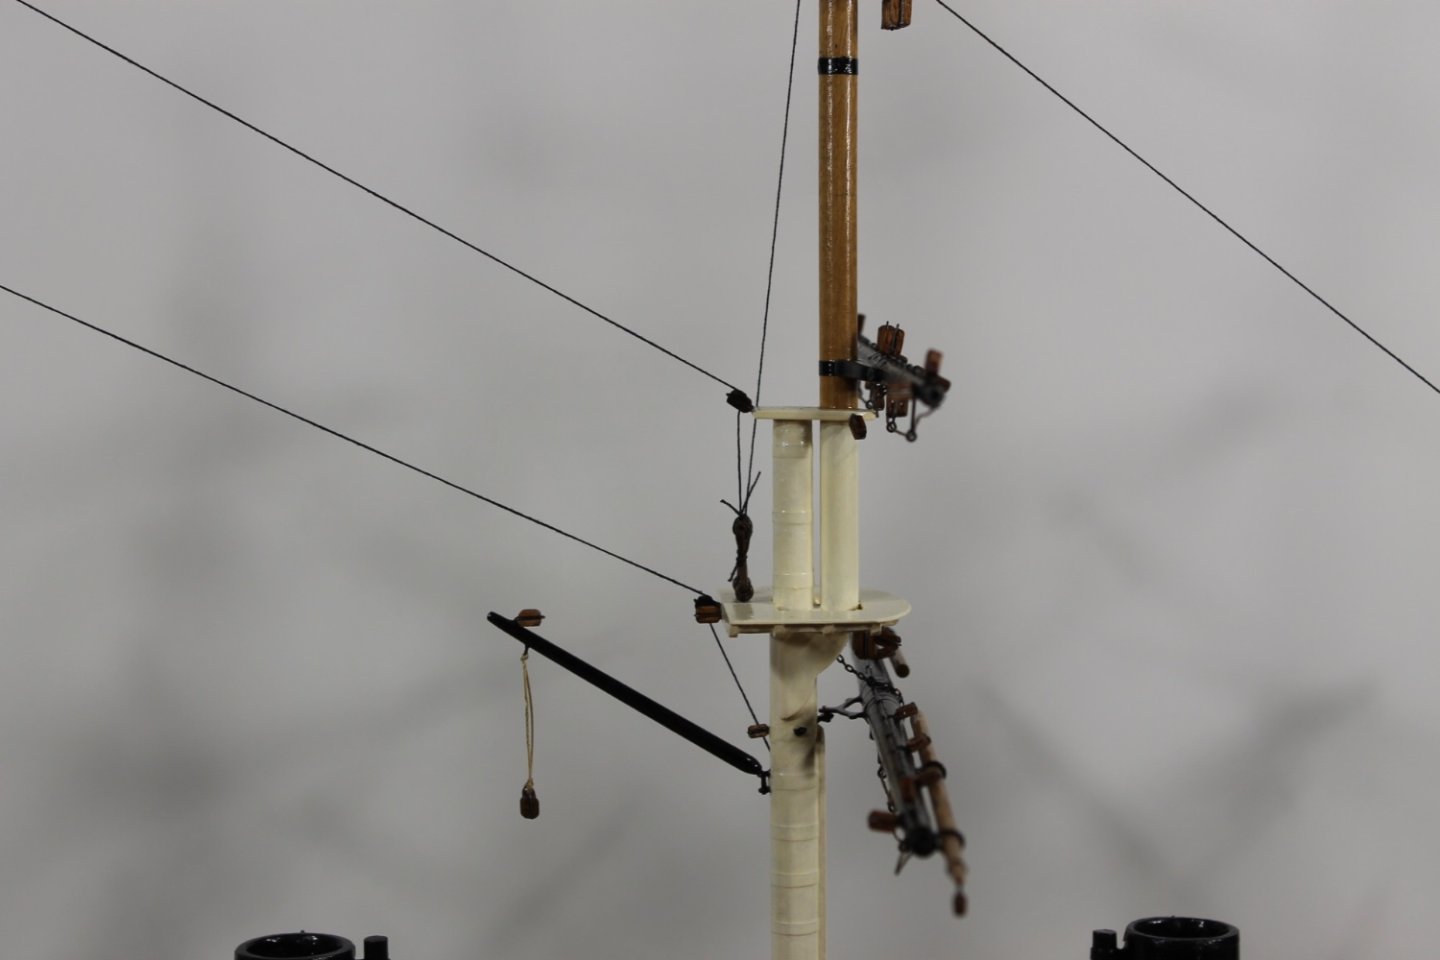
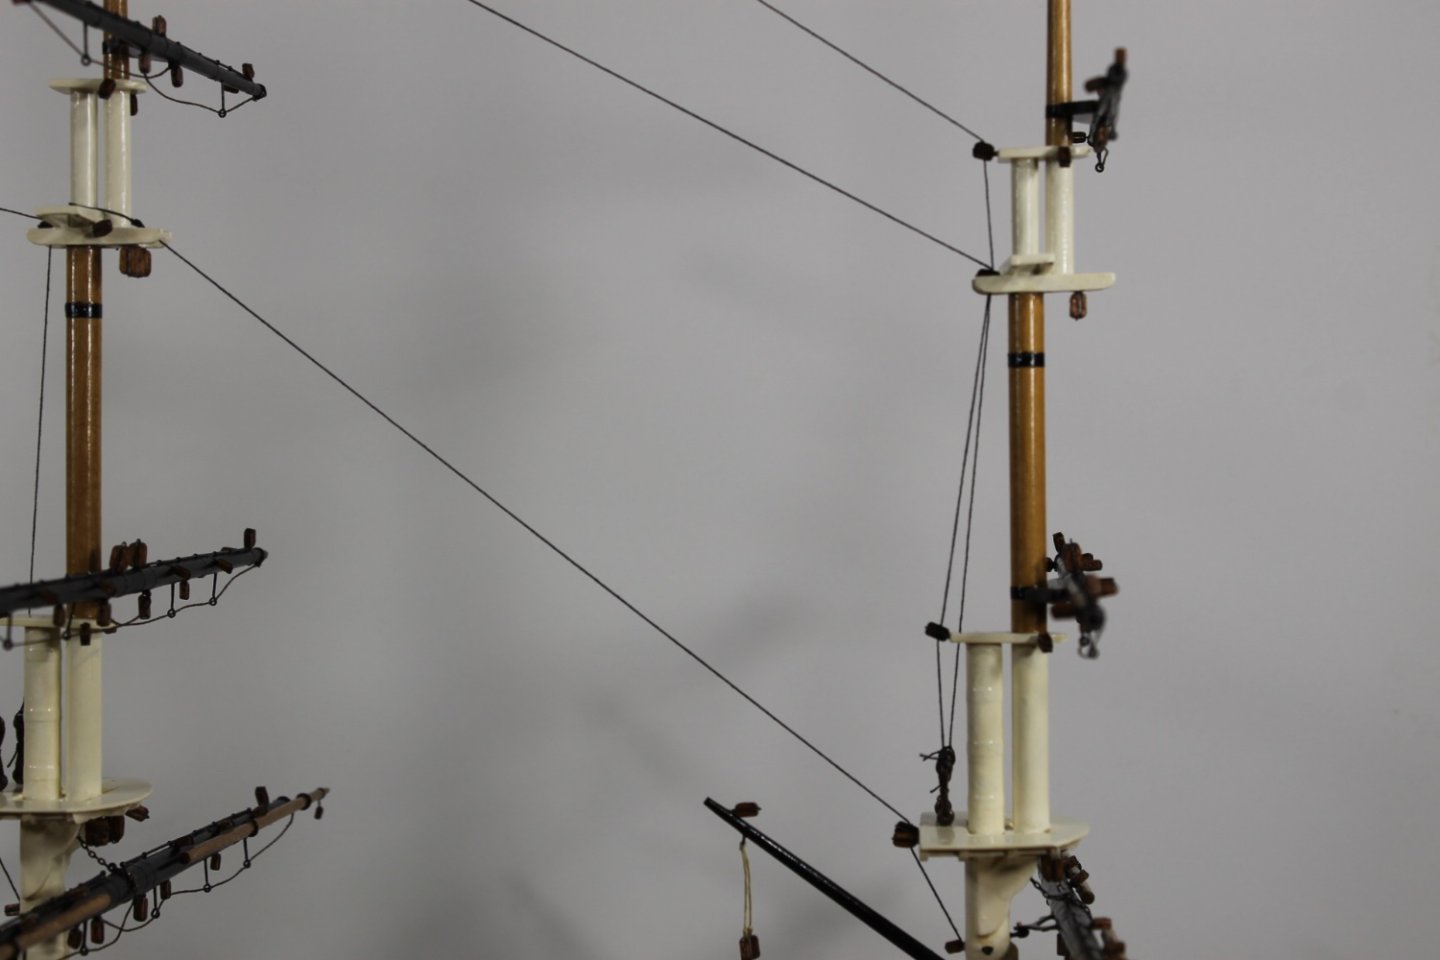
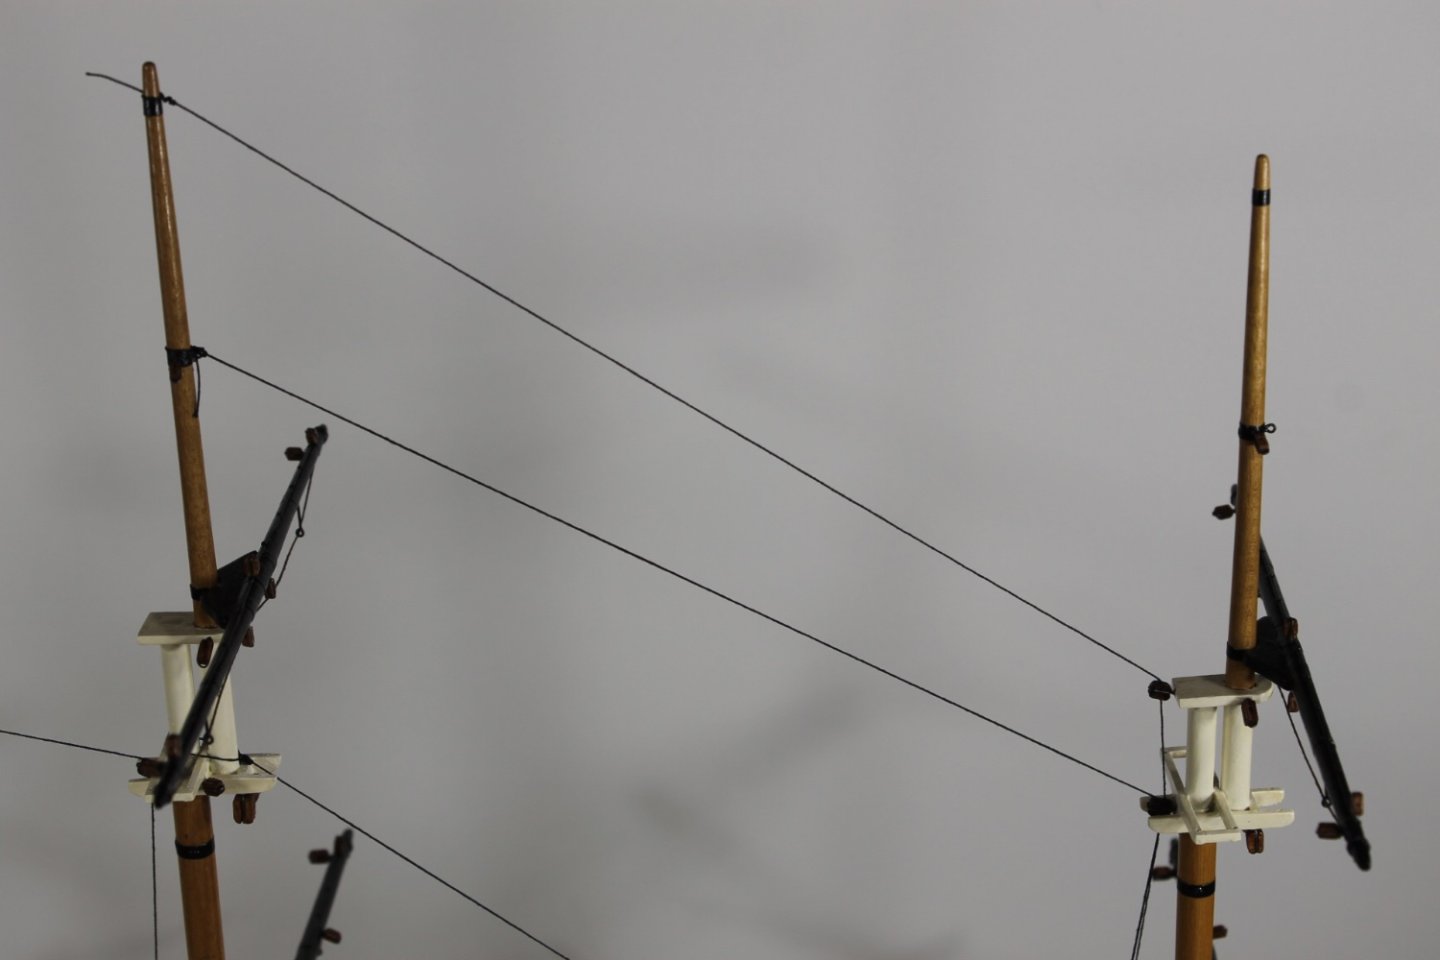
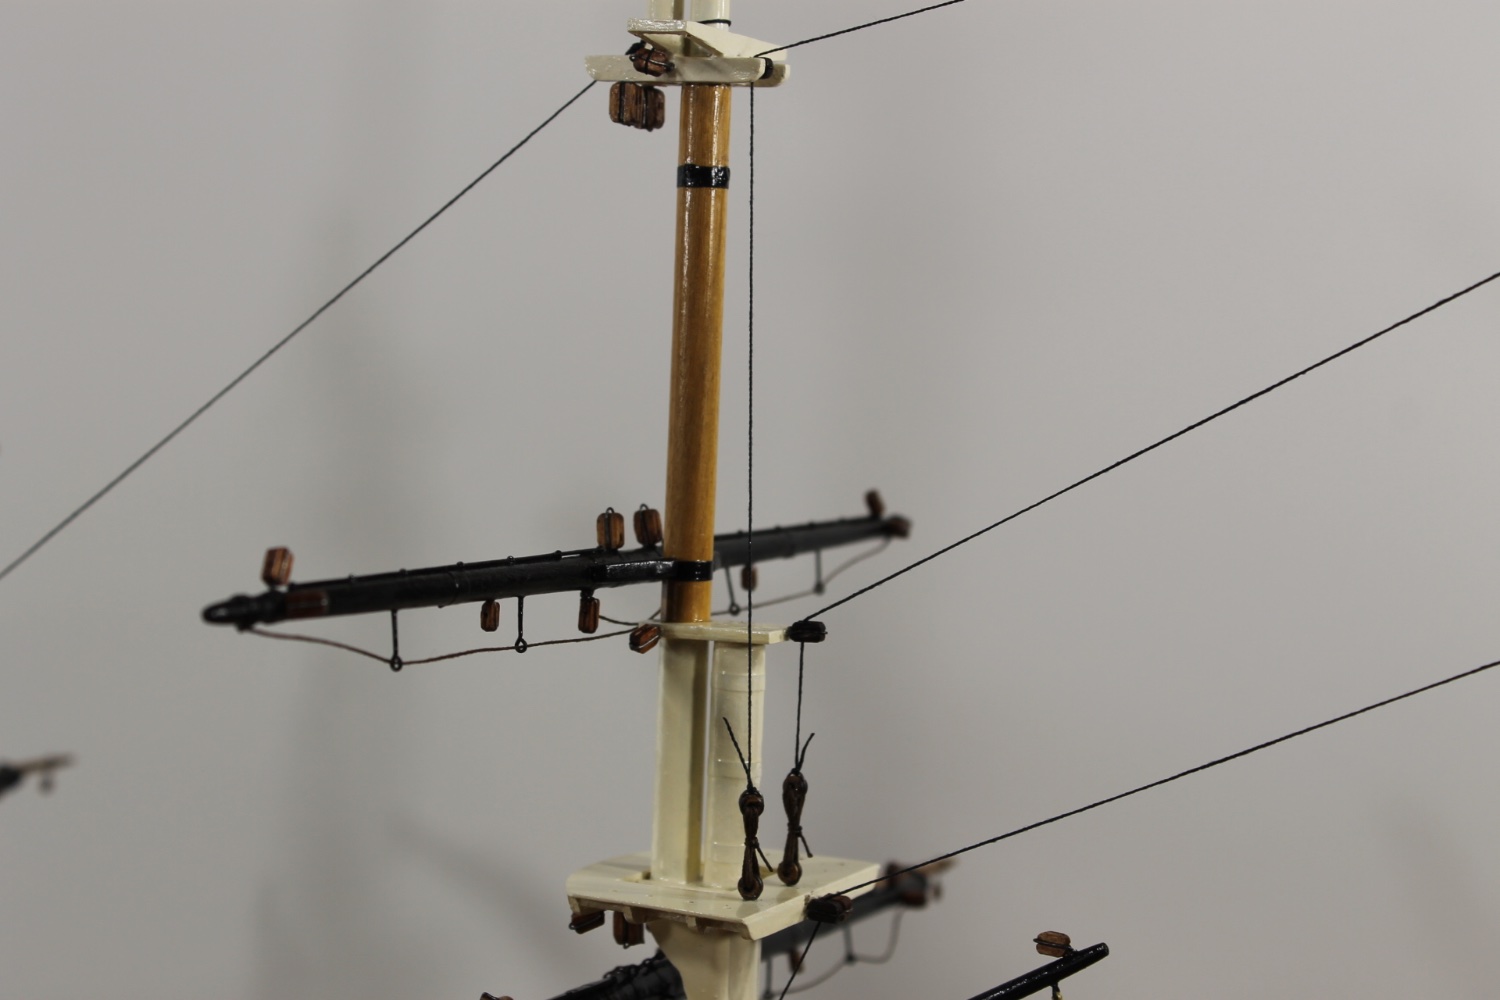
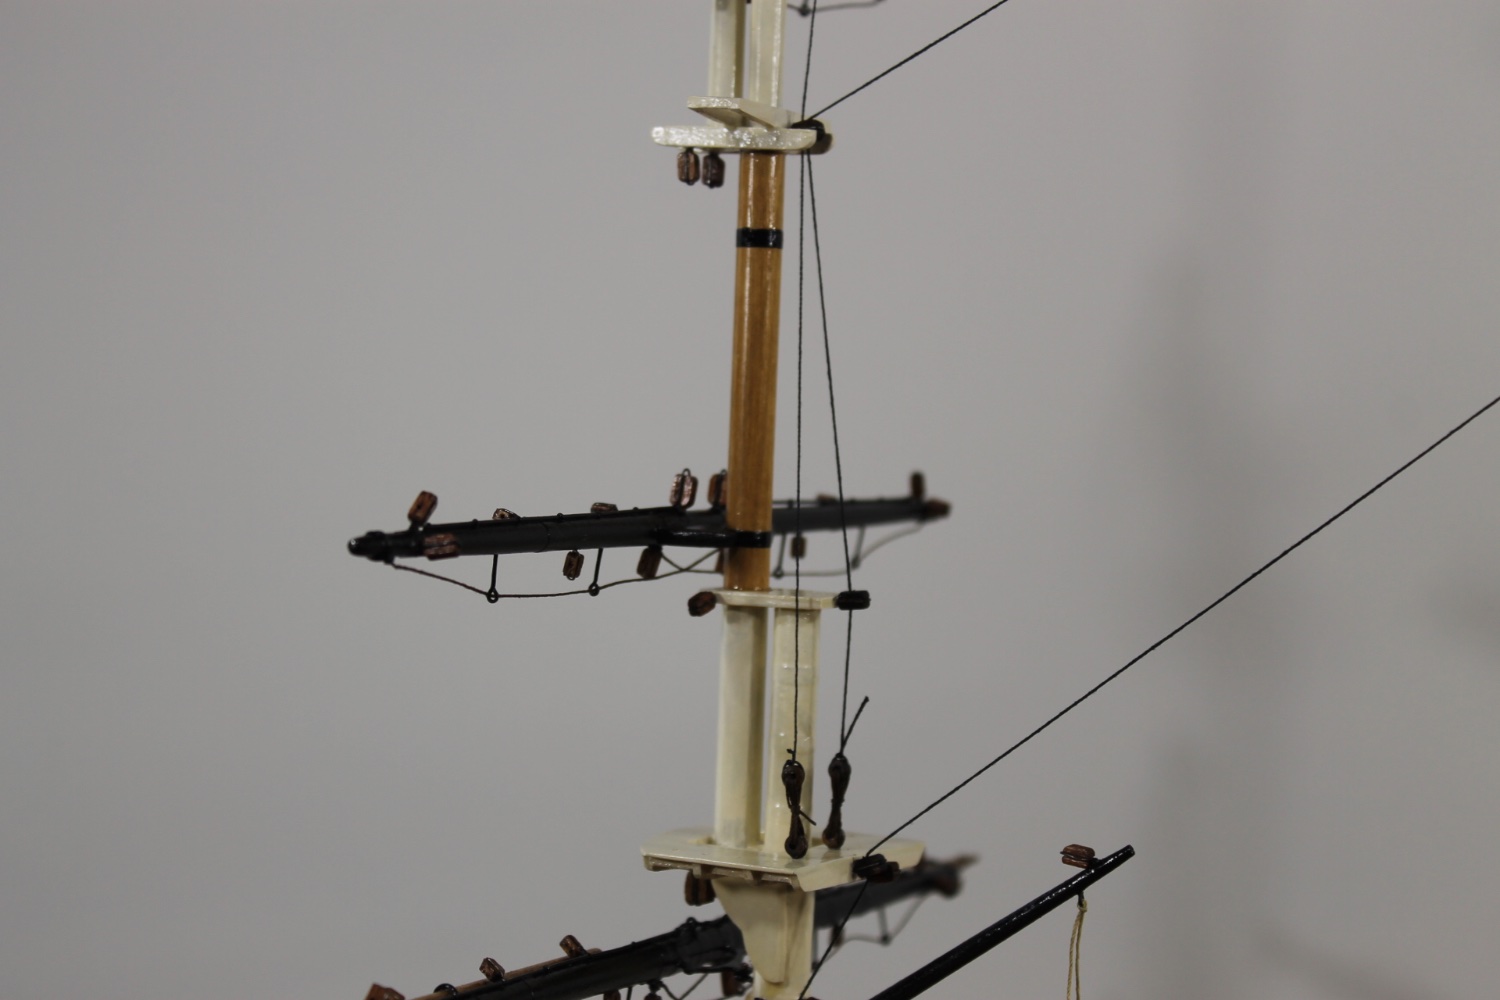
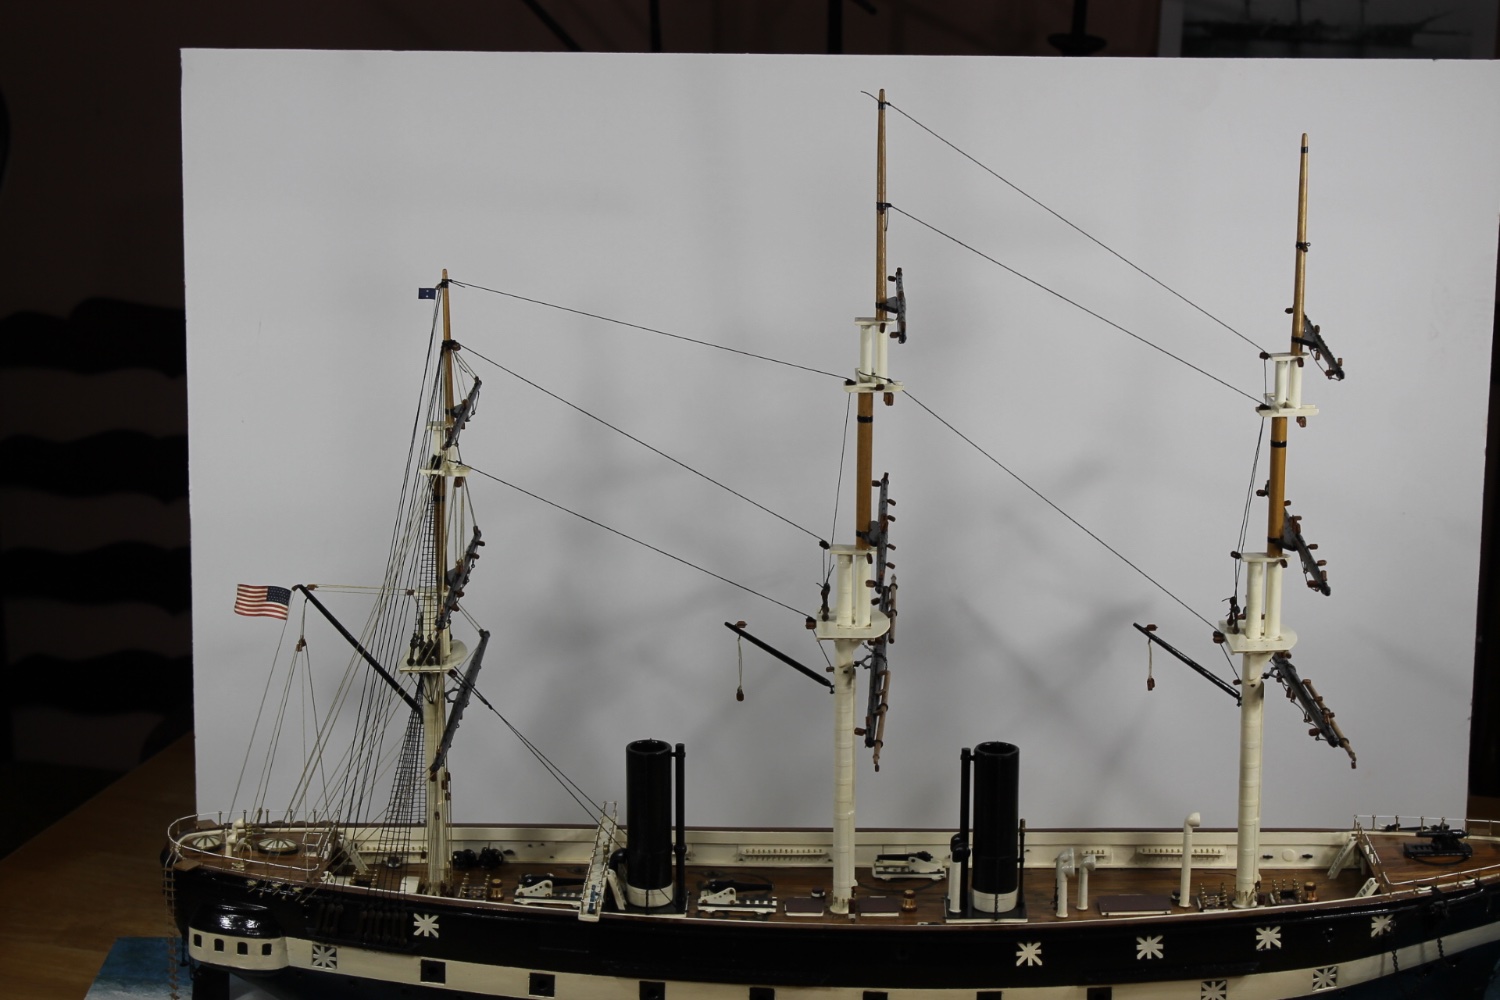
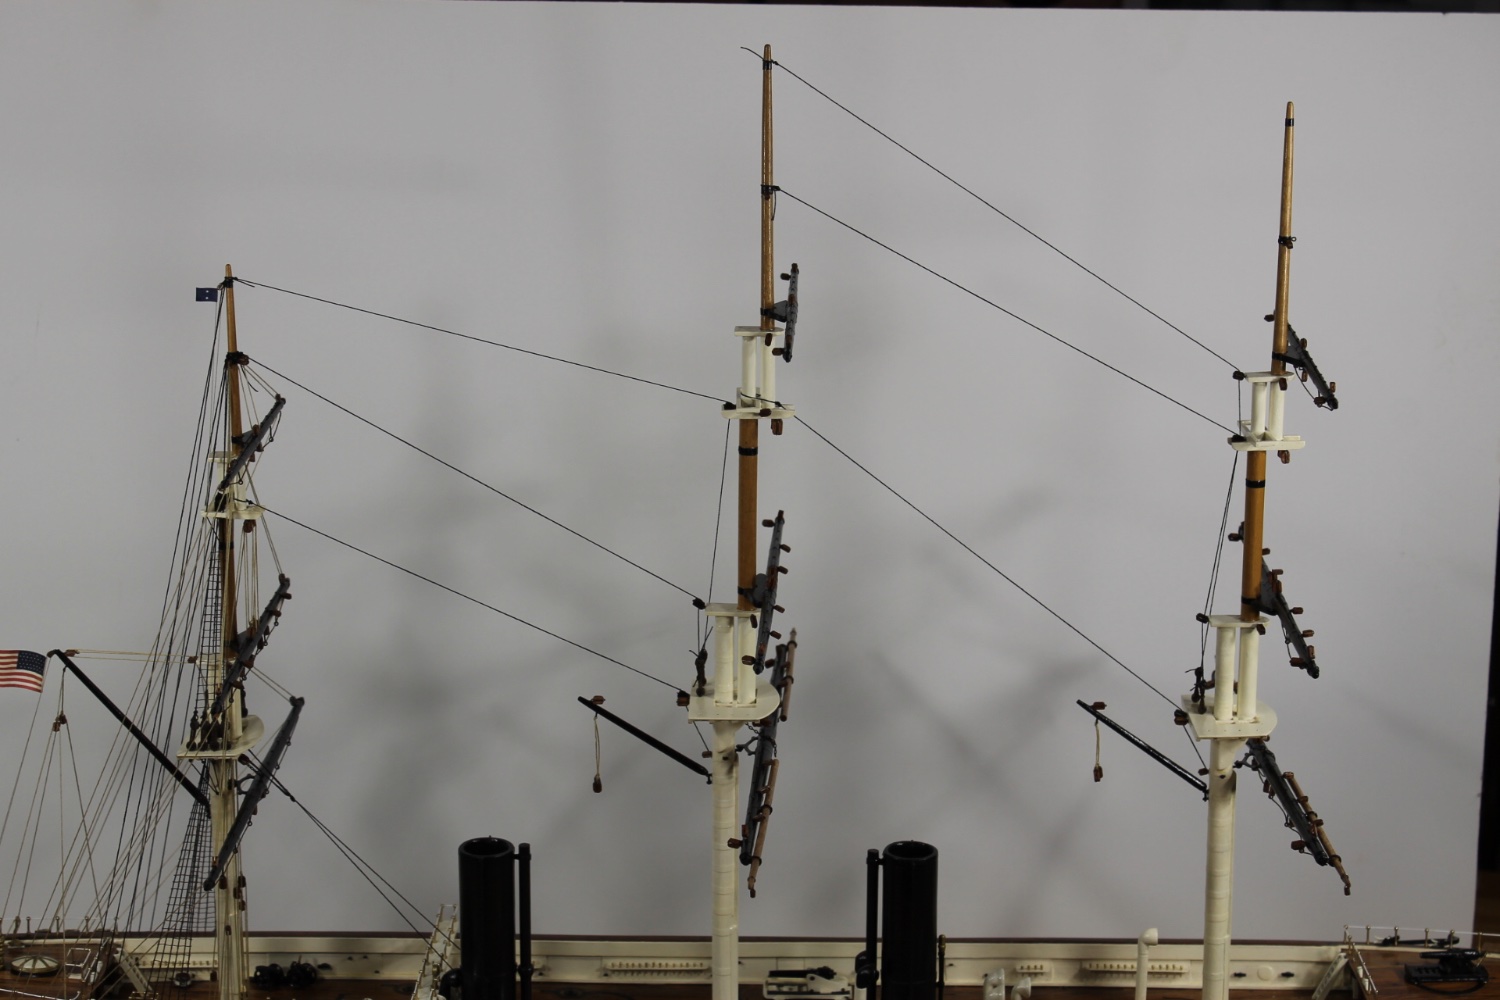
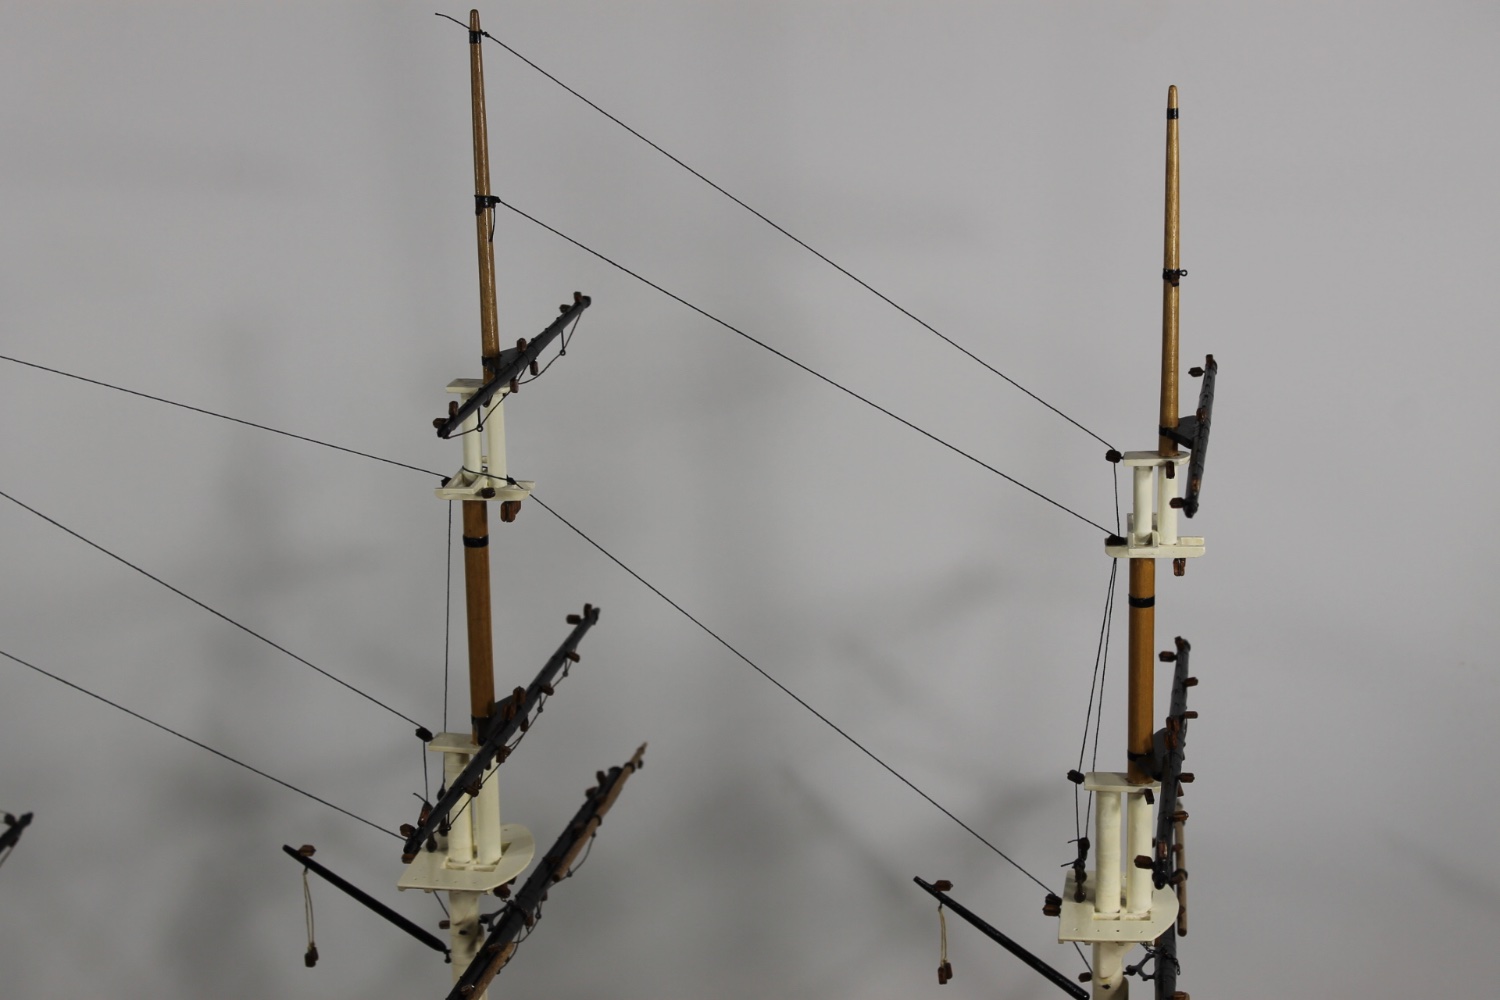
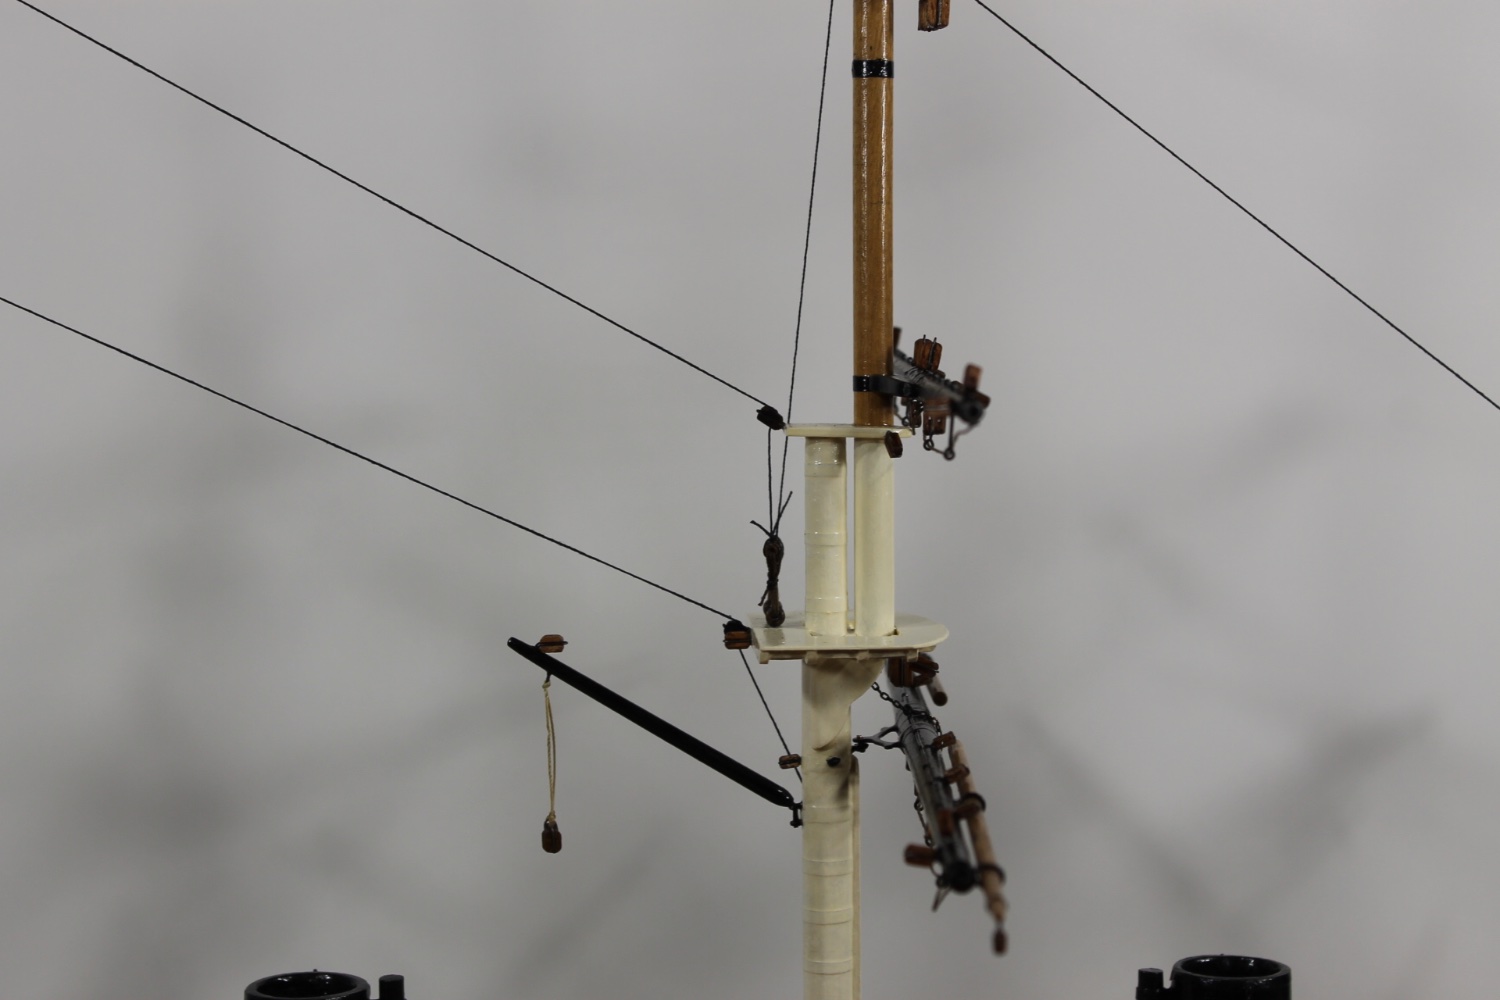
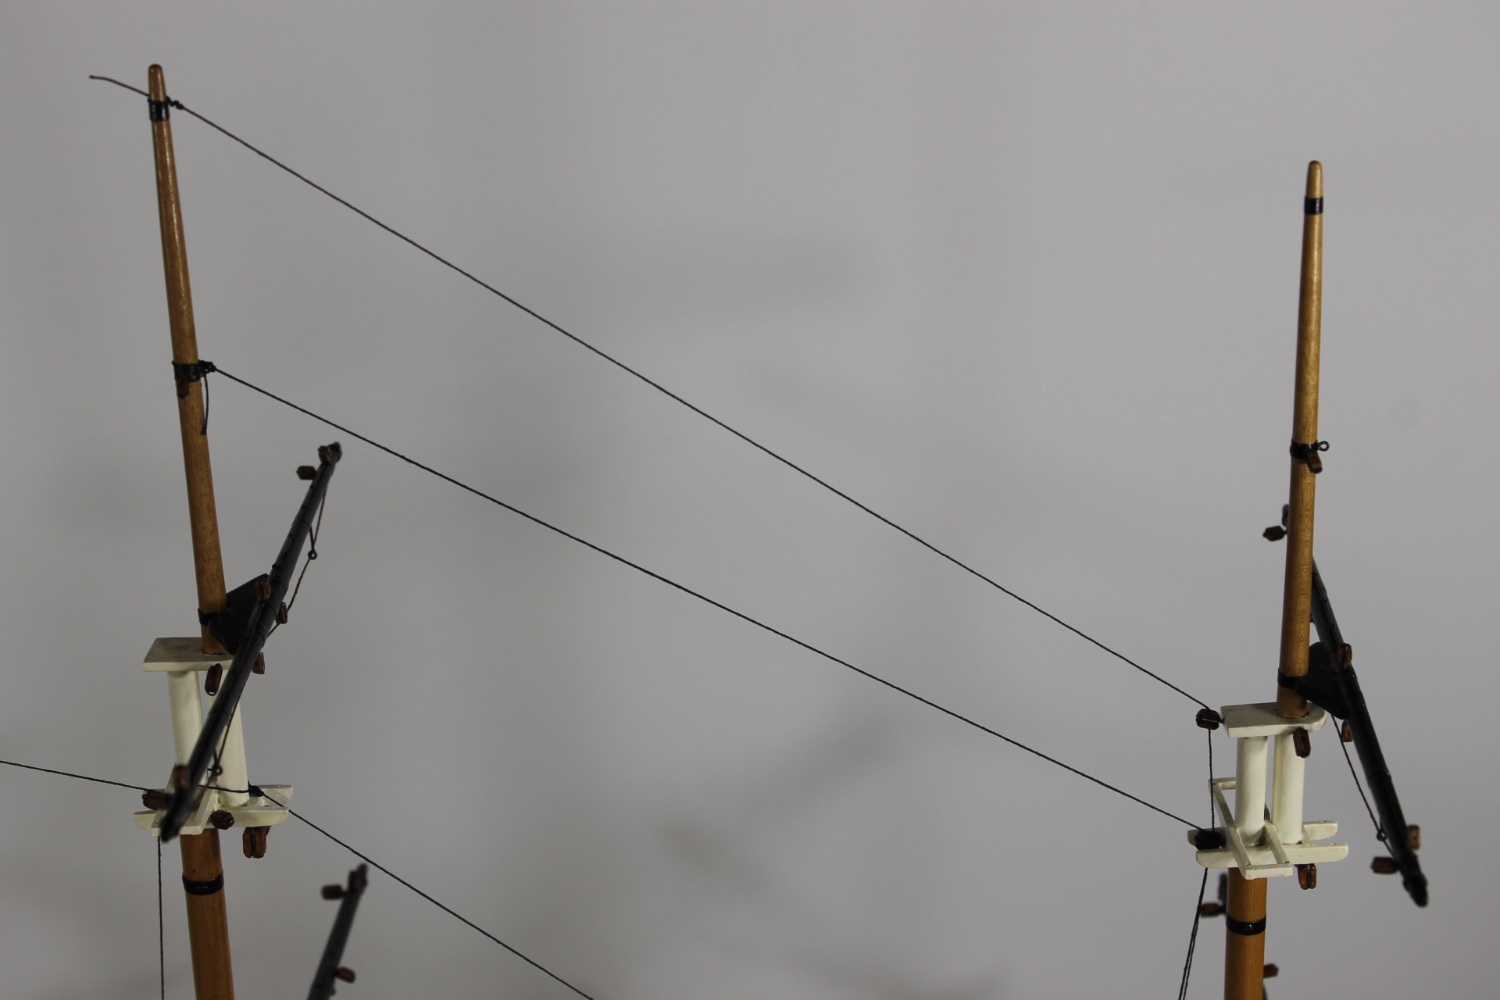
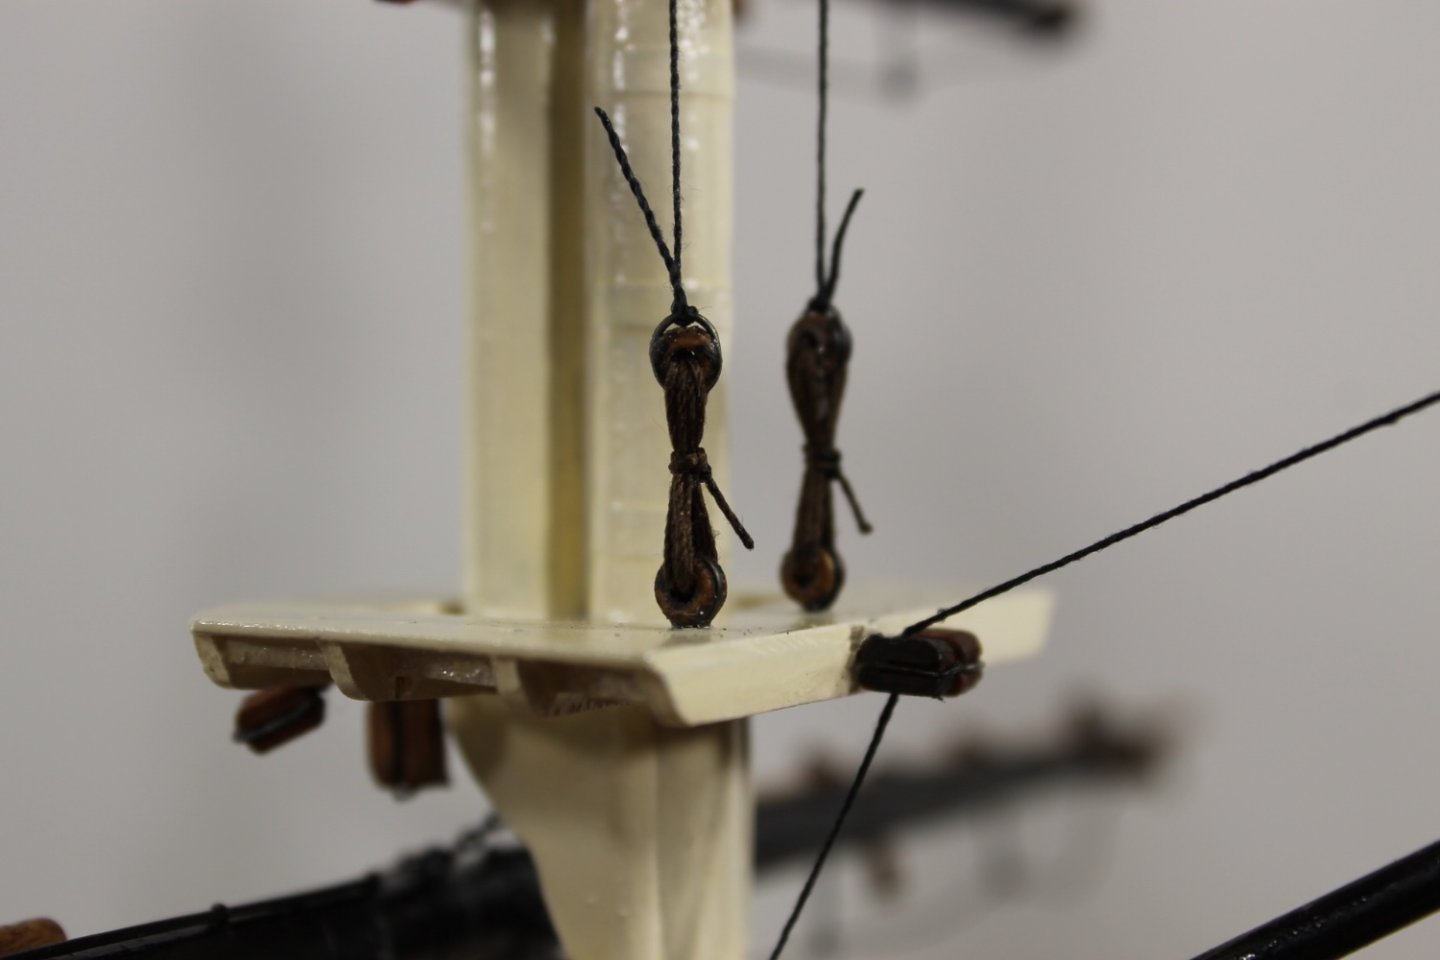
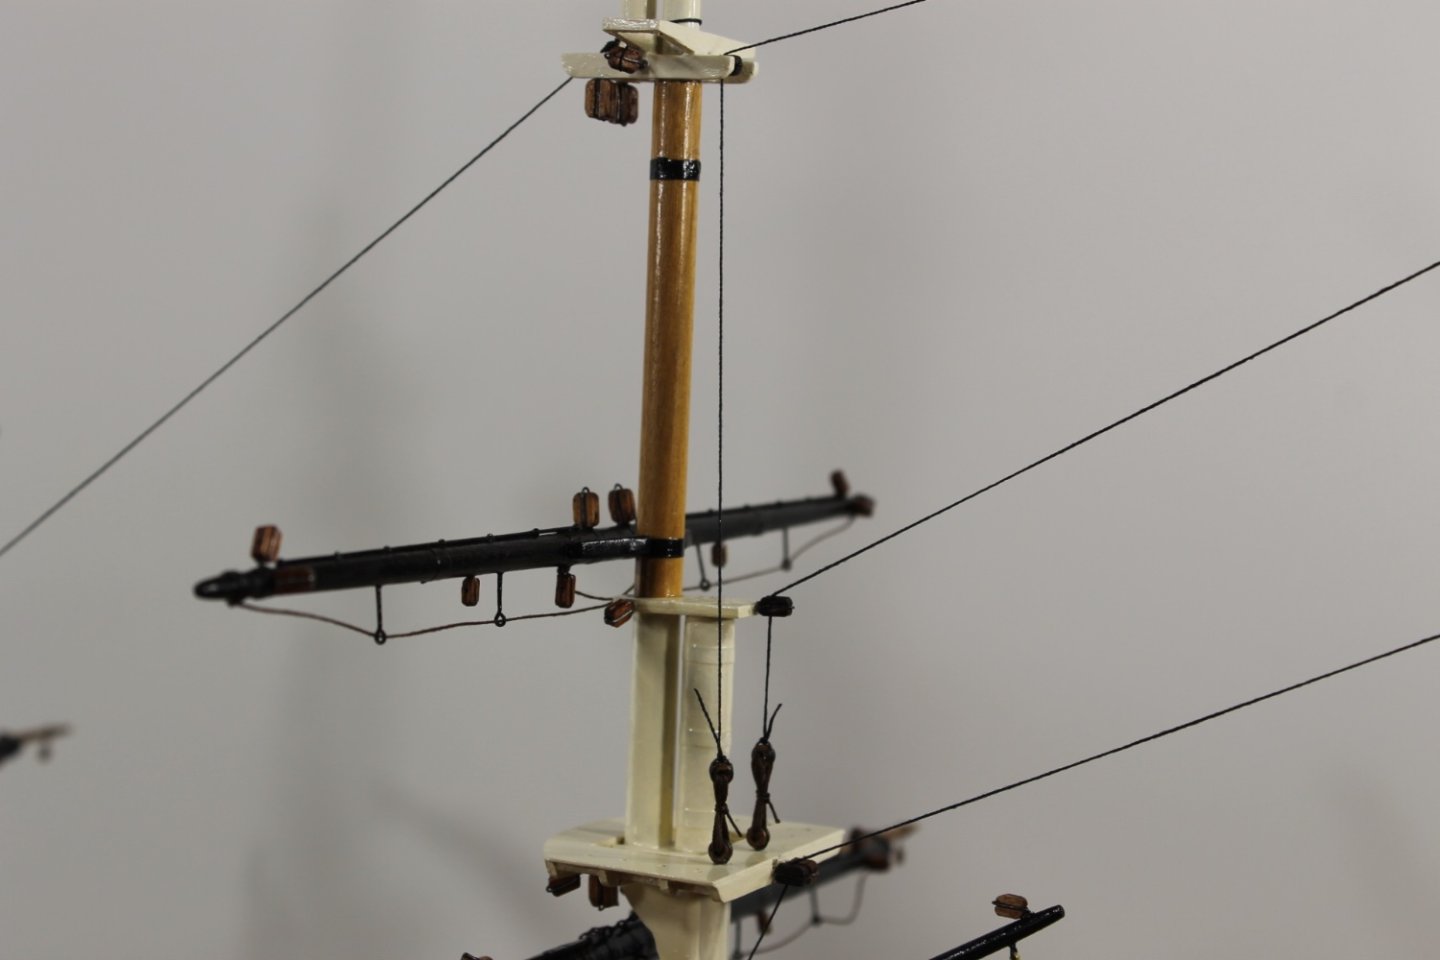
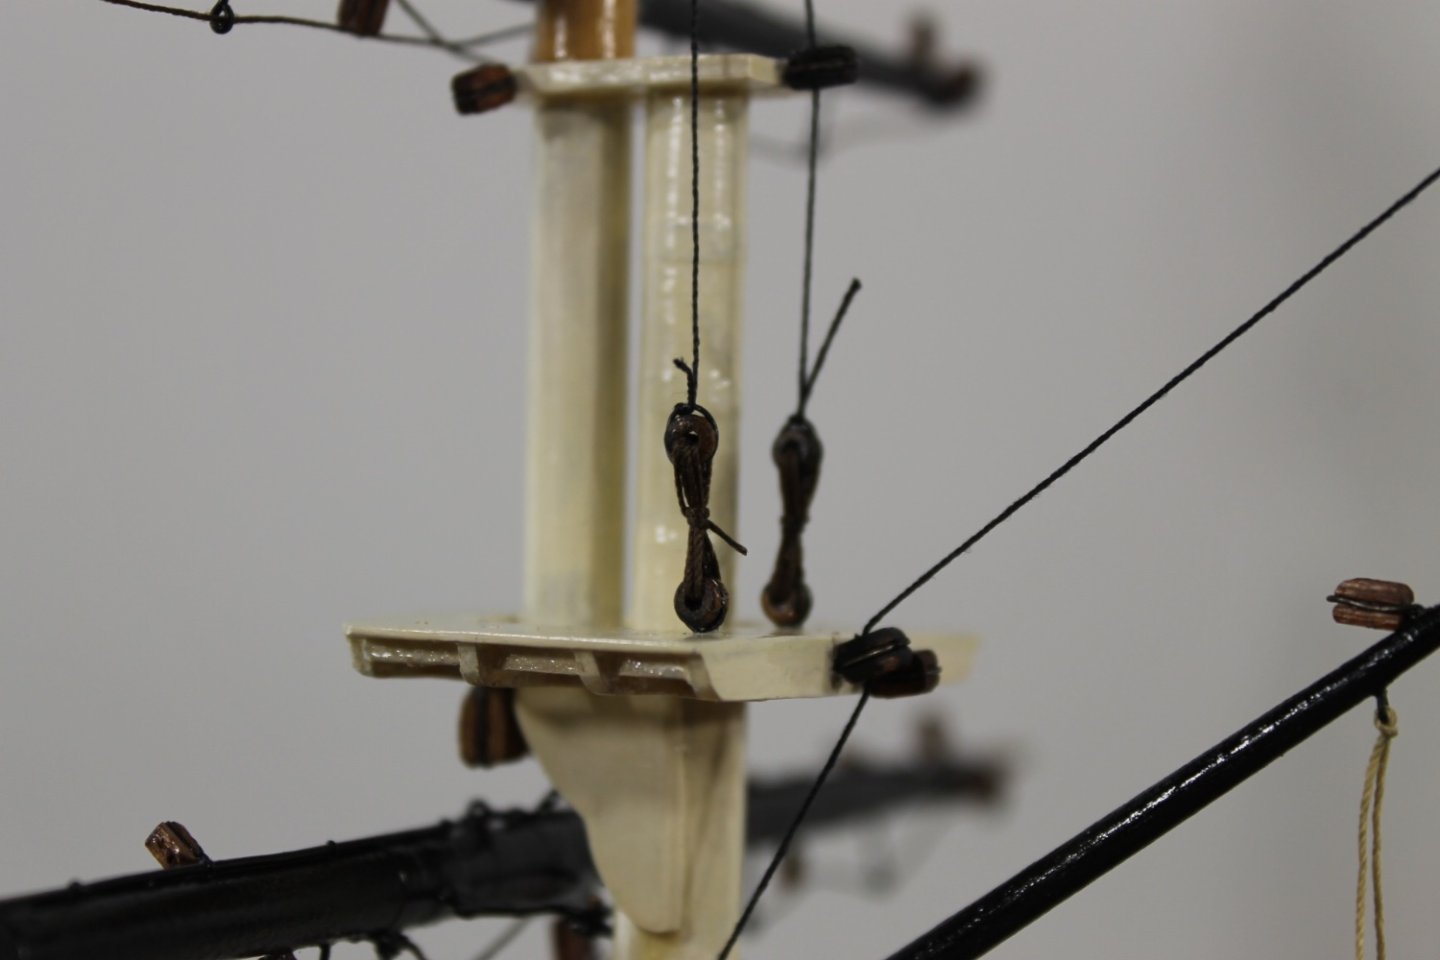
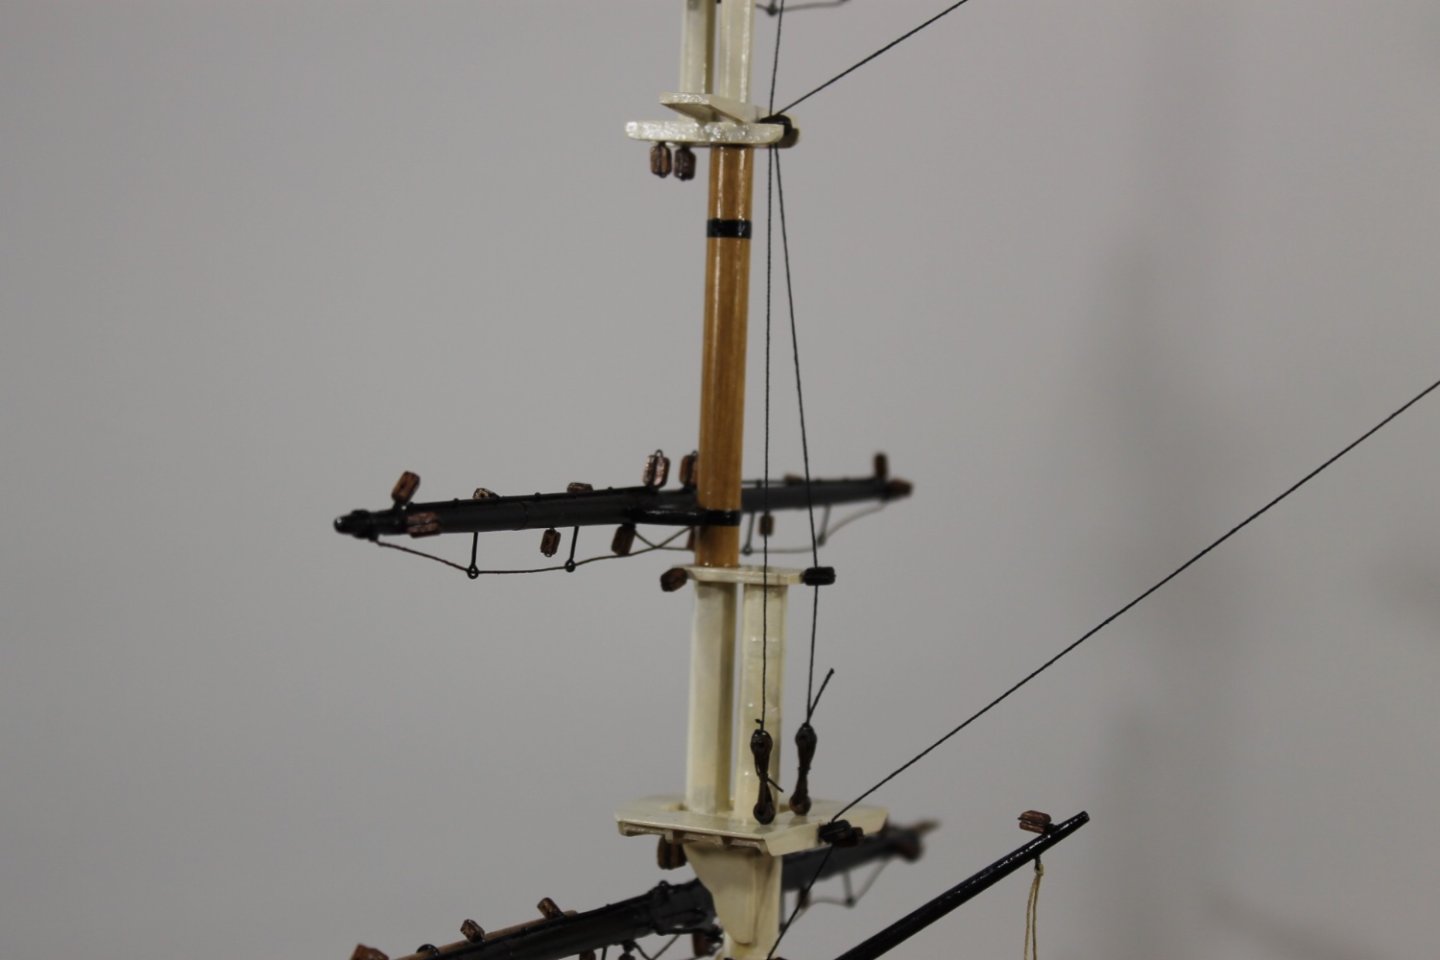
Tom, Brian, Mark, Glen, Pat, Andrew, Andy, and Phil, thank so much for the kind comments and thank you to each one of you for the likes. Your kindness and support is why I was able to start work again on the Tennessee. I am humbled and truly blessed. In my last post I asked that you note the bulls eyes on the tops platform. After looking at the pictures I posted one would be hard pressed to "note the bulls eyes" so I've added a few more photos where you can actually see what "note" is. And I have to apologize for the quality of the photos. My camera is a Canon Rebel EOS T3. I have 7, 100 watt LED daylight bulbs for a light source and I still get less than satisfactory images. If I use flash I get a sharp image image but shadows, if I use the LED lights I get a fuzzy image but it's pretty shadow free. Frustrating to say the least. Again, thank you. Mainmast Foremast
-
Glen and Grant, if you get bored with SIB's you may wanna try this but with a ship instead.
- 194 replies
-
- 3
-

-
-
- Bottle
- Treasure Fleet
- (and 3 more)
-
A long over due of thanks to Roger for his comments regarding the 40 gallon ID tag and to Mark, Andy, and Gary for their thoughtful comments. A grateful thank you to each of you for stopping by and providing support and being a part of my journey. Getting to the where I left off point wasn't easy but I have finally made progress on the Tennessee, both the main and foremast now have all their blocks installed. Almost two years ago I installed a bunch of blocks on the foremast. When I picked back up a month and a half ago I had to remove most of those blocks due to either being poorly stropped or because of incorrect placement. There are 29 blocks on the mainmast and 24 on the foremast. I should have been able to do this work in three weeks but it took time to get focused and my fingers retrained. I have temporarily run the main, top and topgallant mast stays as a dress rehearsal to make sure there won't be any unpleasant surprises once I start rigging. If you note the main top platforms you'll see two sets of bulls eyes, these are for the top and topgallant stays. It works and it's logical but I'm not sure it's correct but right or wrong, I'm moving forward. Once again, thank you.