Jeff T
-
Posts
247 -
Joined
-
Last visited
Content Type
Profiles
Forums
Gallery
Events
Everything posted by Jeff T
-
I agree with Steven about maybe picking a saint’s name. Based on what I’ve read, some galleons even had the same name as previous galleons. For example, there was more than one San Salvador. How about something like San Gabriel?
- 279 replies
-
- 1
-

-
- Spanish Galleon
- Imai
- (and 1 more)
-
Treasure chests prepped and temporarily mounted on painting pedestals: and painted with black enamel for primer:


-
“And on the ship: “ I like the bundled capstan bars set there next to it. I might do that on my own build.
- 279 replies
-
- 2
-
-

-
- Spanish Galleon
- Imai
- (and 1 more)
-
Very detailed painting — looks great! Do you plan to do any lighting or interior work for the stern? (Quite a few windows to see inside.)
-
Yes, and that is why I think that the 1/72 scale chests will work out OK — not too far out of scale.
-
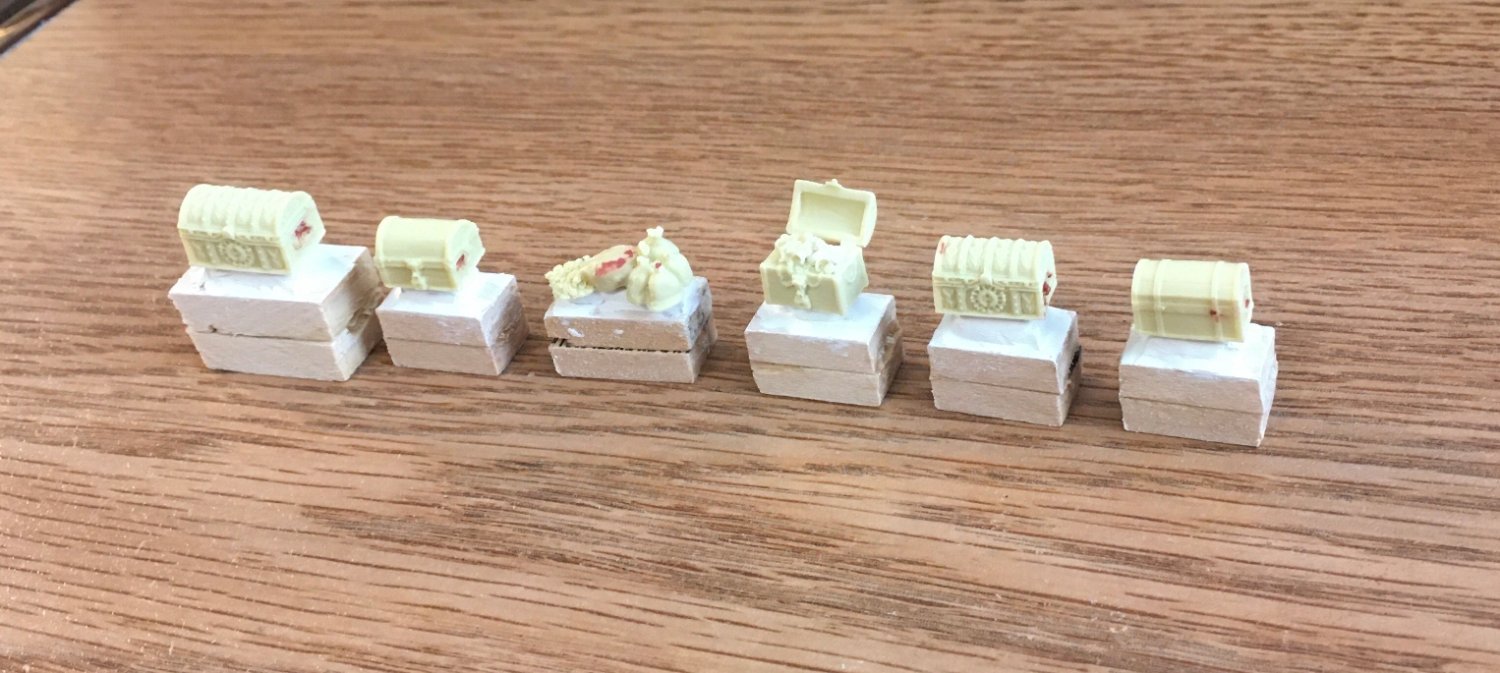
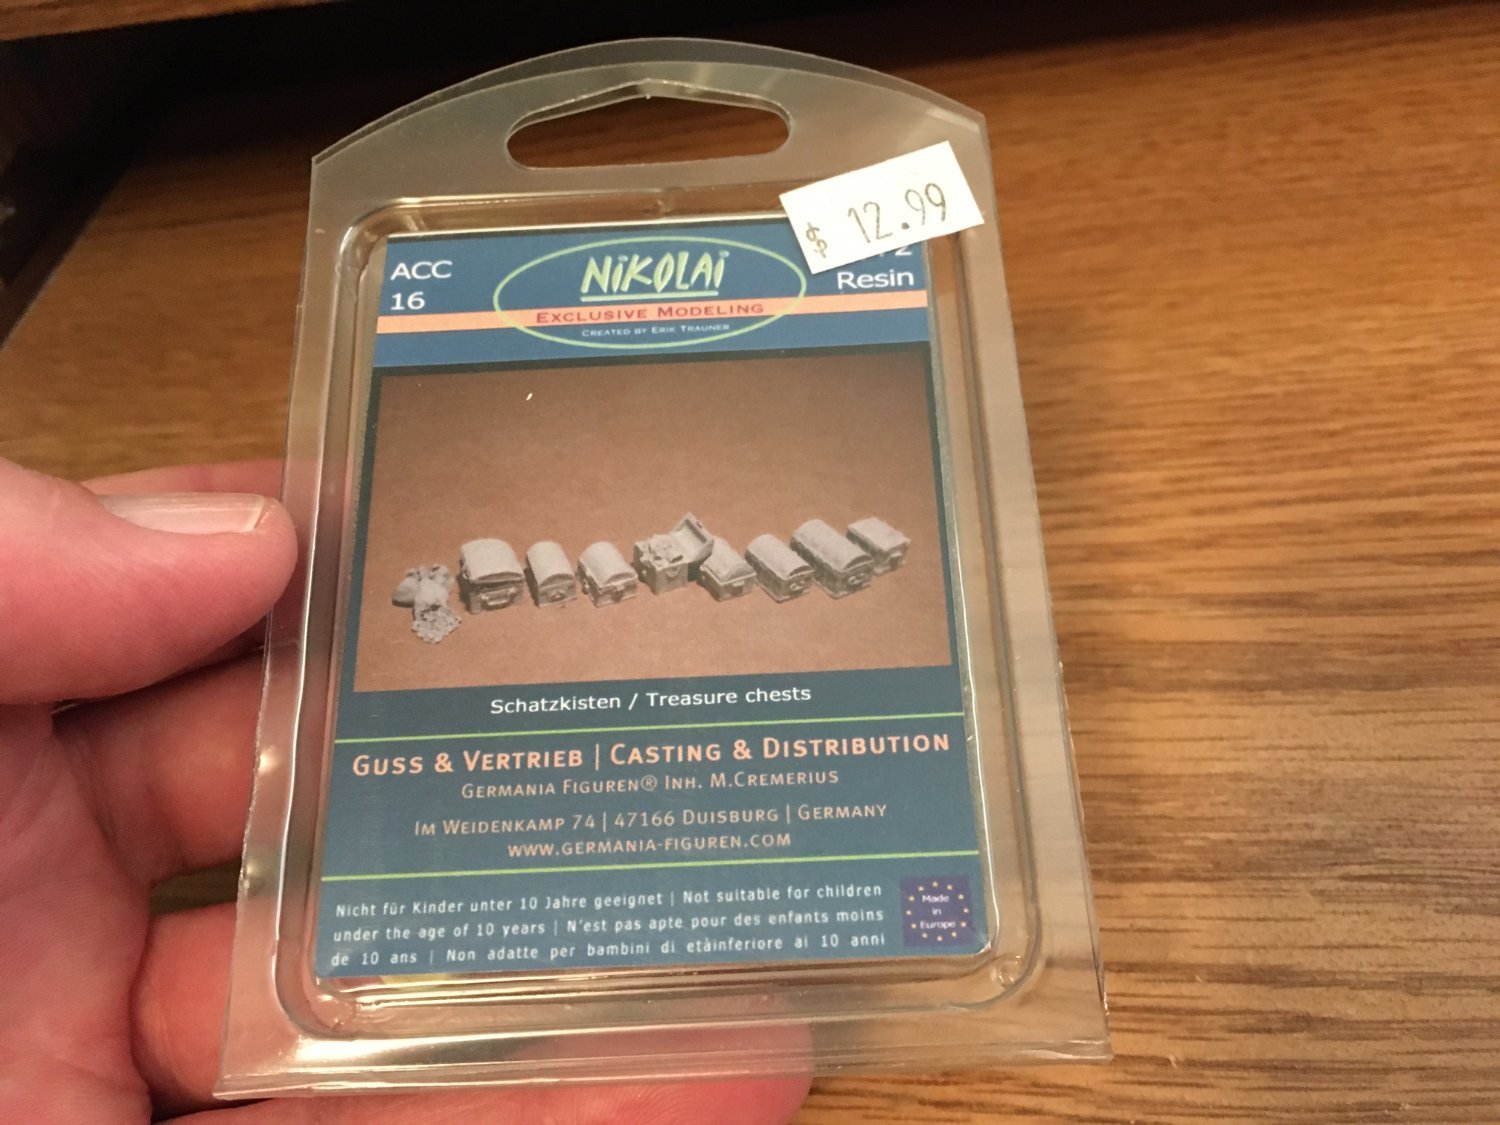
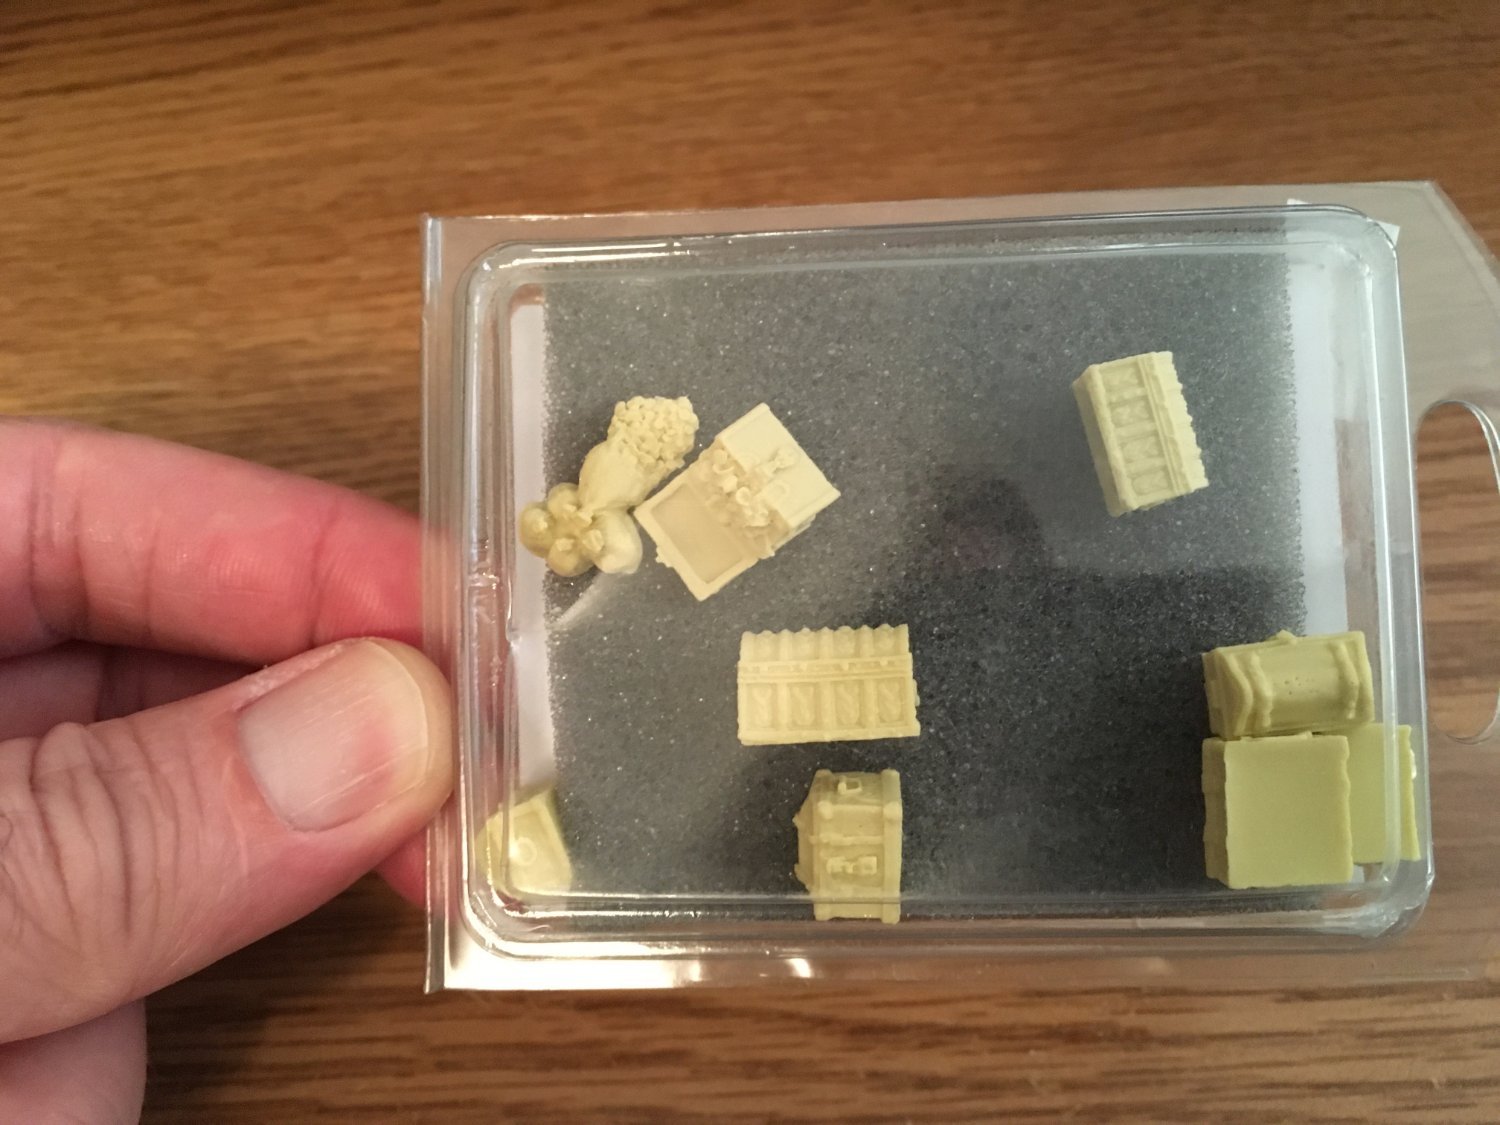
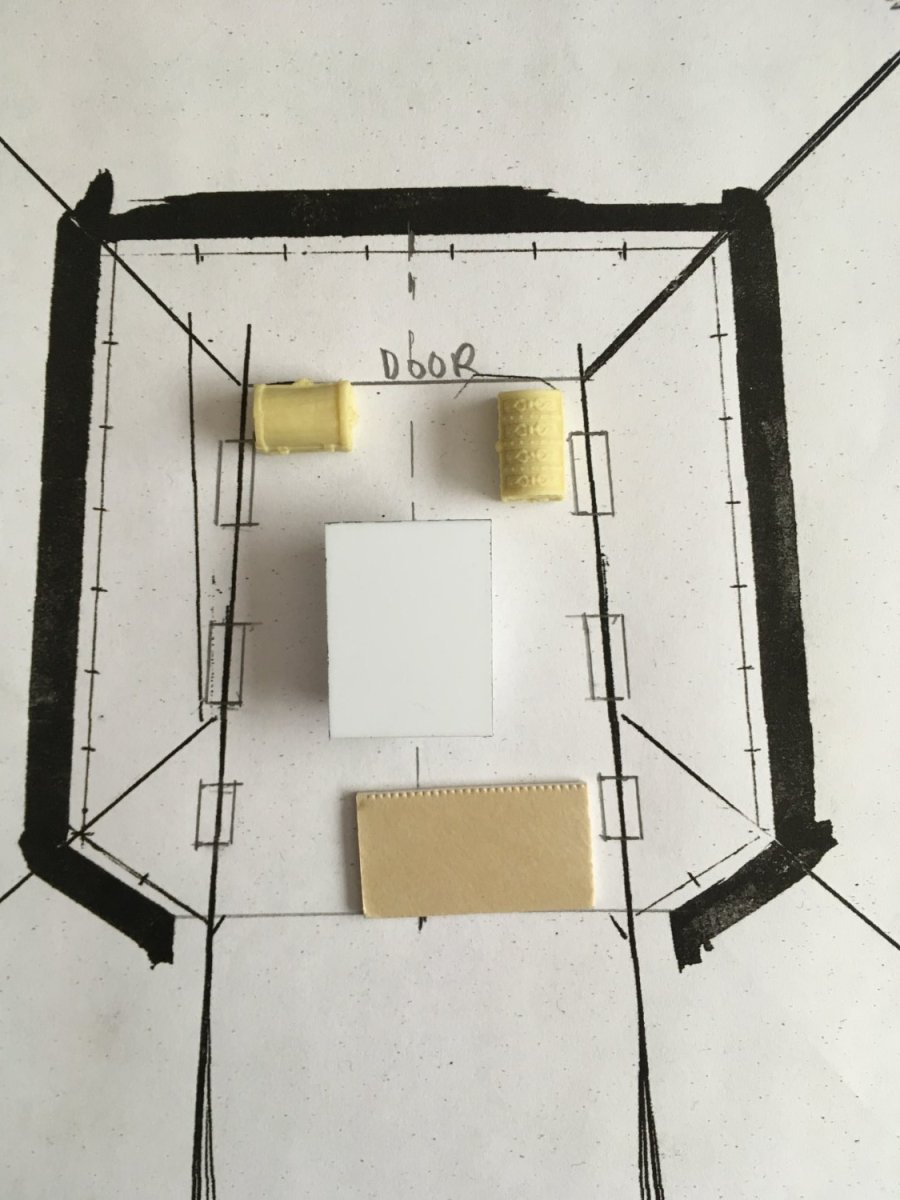
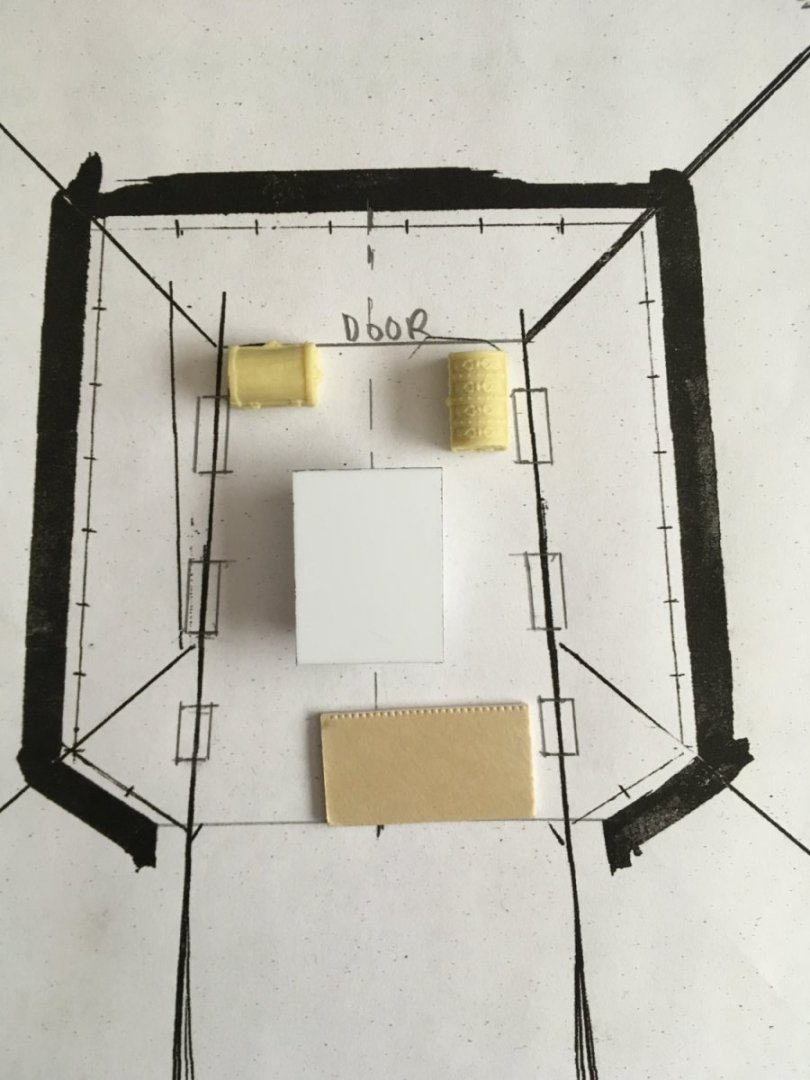
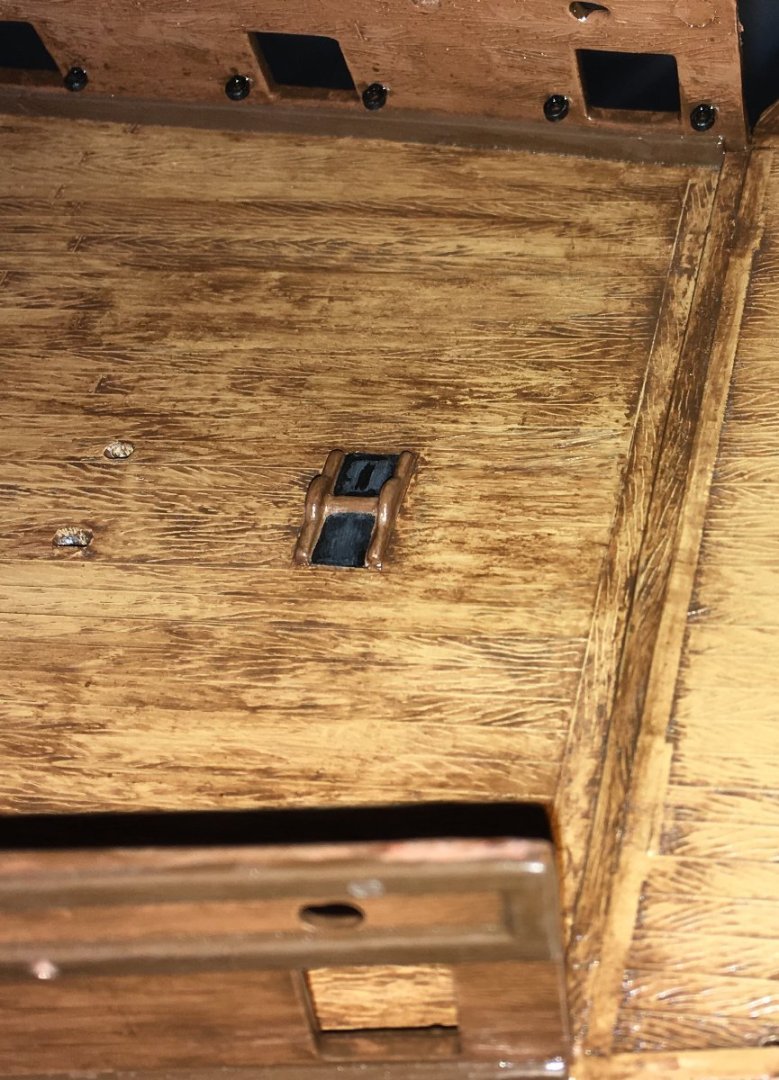
A while back, I ordered a set of resin treasure chests. They are nominally 1/72 scale, but I think they will still go nicely with my current set-up, since any difference in scale is not very obvious. I have chosen a few of them to use inside the captain's cabin and the pilot's house, and have mapped out plans for placing them in each: The small rectangles that I have drawn in along the main lines of the cabin walls show where the windows will be located. The larger tan rectangles represent the places where the beds will be, and the white central rectangles represent the tables. The galleries surrounding the cabins are outlined with the thick black lines, and the thin lines drawn near them with the spaced hash marks indicate the taffrails. So my next "mini project" for the build will be cleaning up six of the "chests" (including one which is a group of bags of coins) and painting them.


-
Thanks, Scott! Thanks to putty in its various forms, I can keep the possibilities open for modifications. Otherwise, the few available poses limit the choices a bit. The modification process can be quite long and tedious, though, so I probably won’t do many modifications for the figures out on deck when I get to that stage.
-
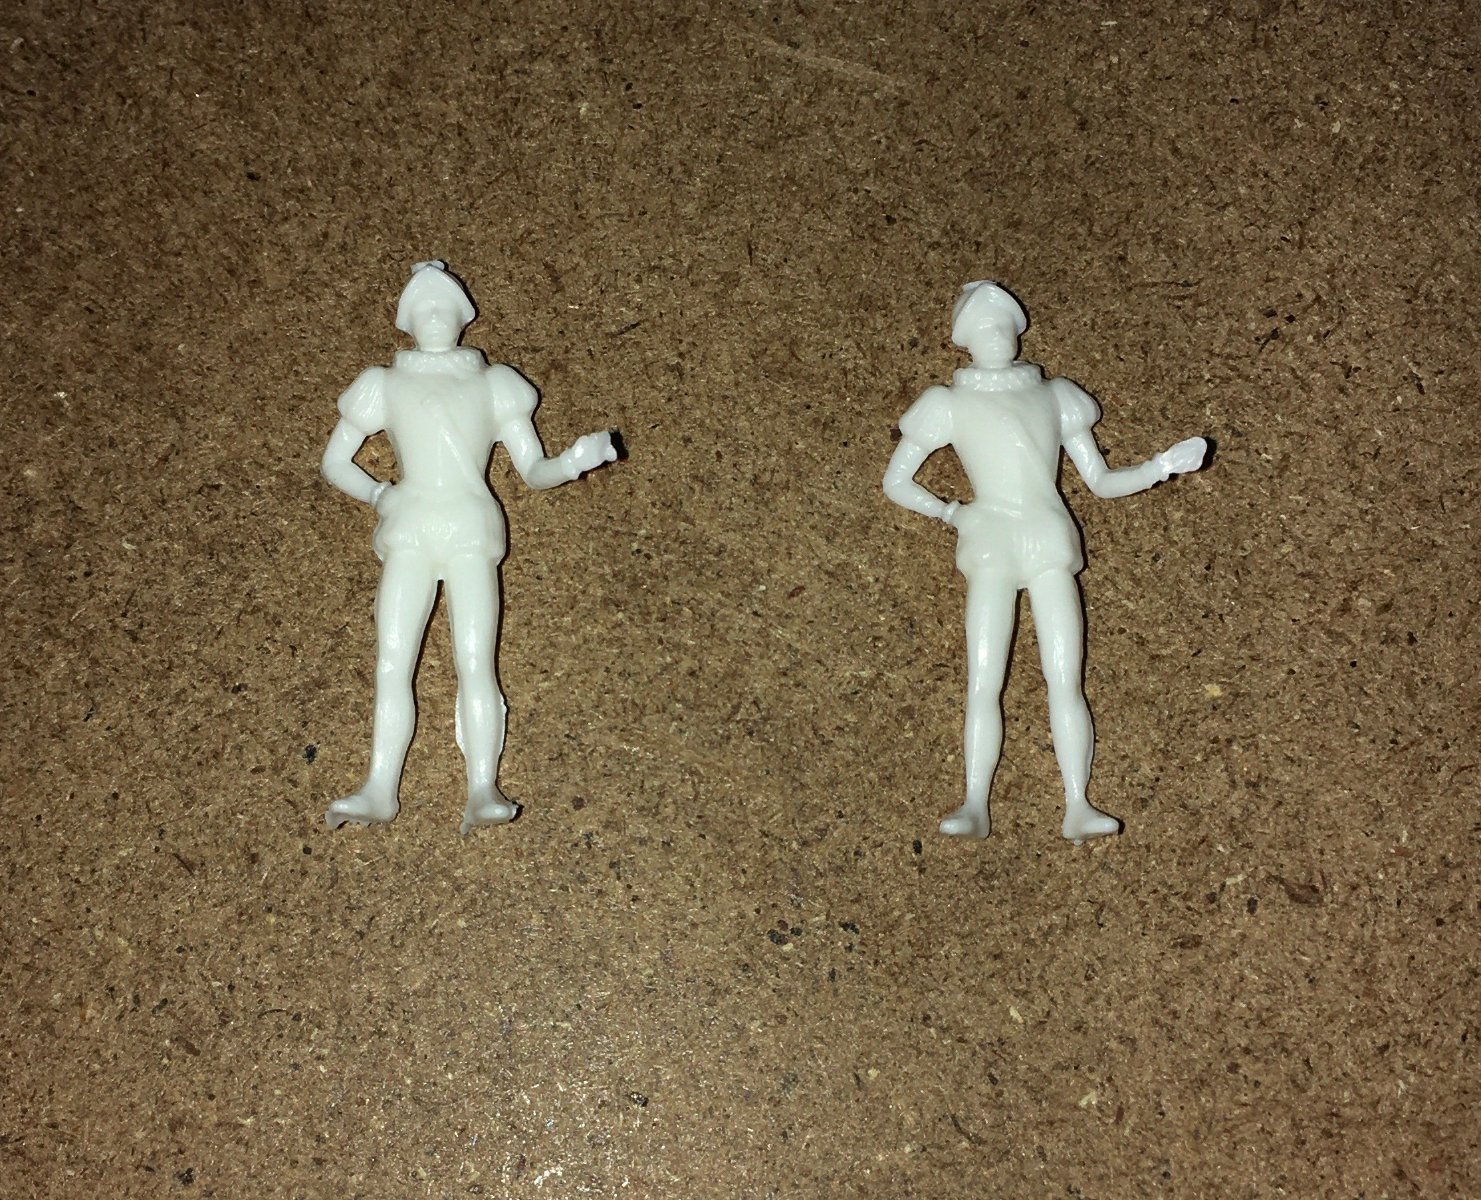
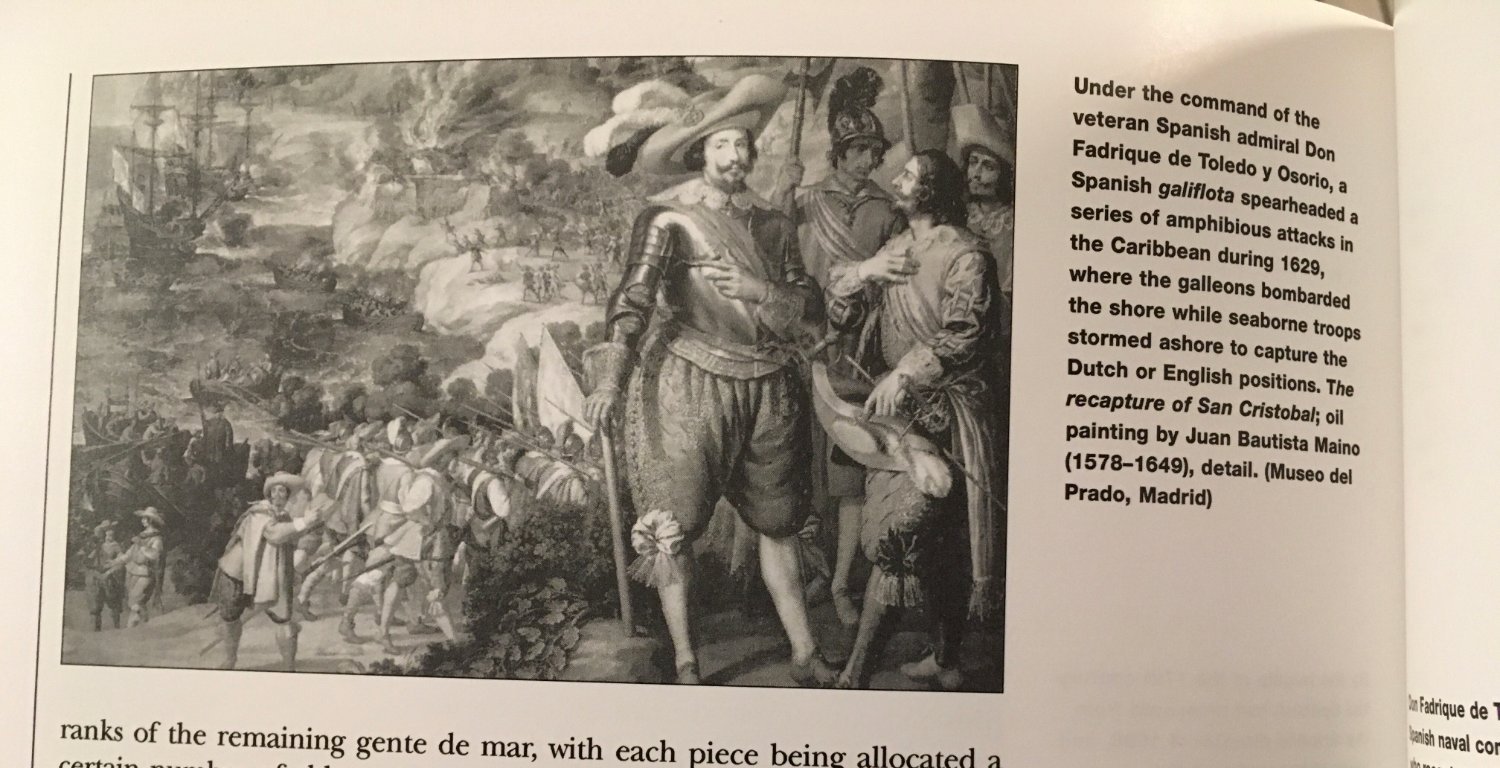
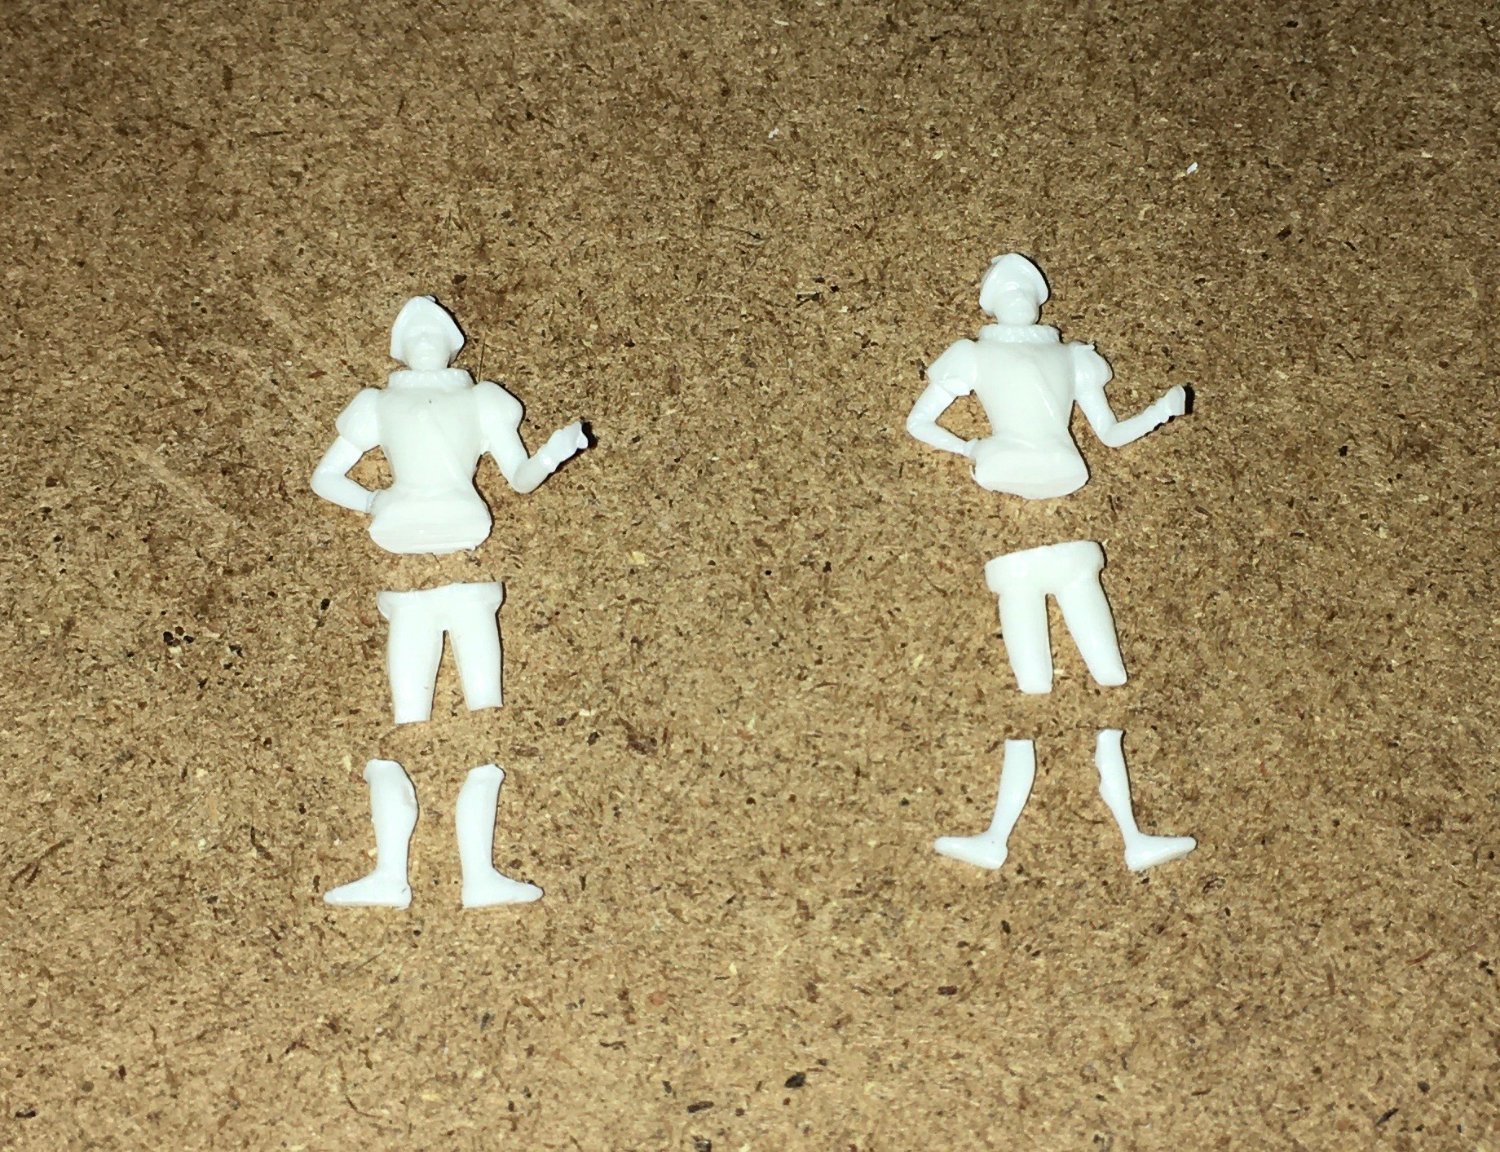
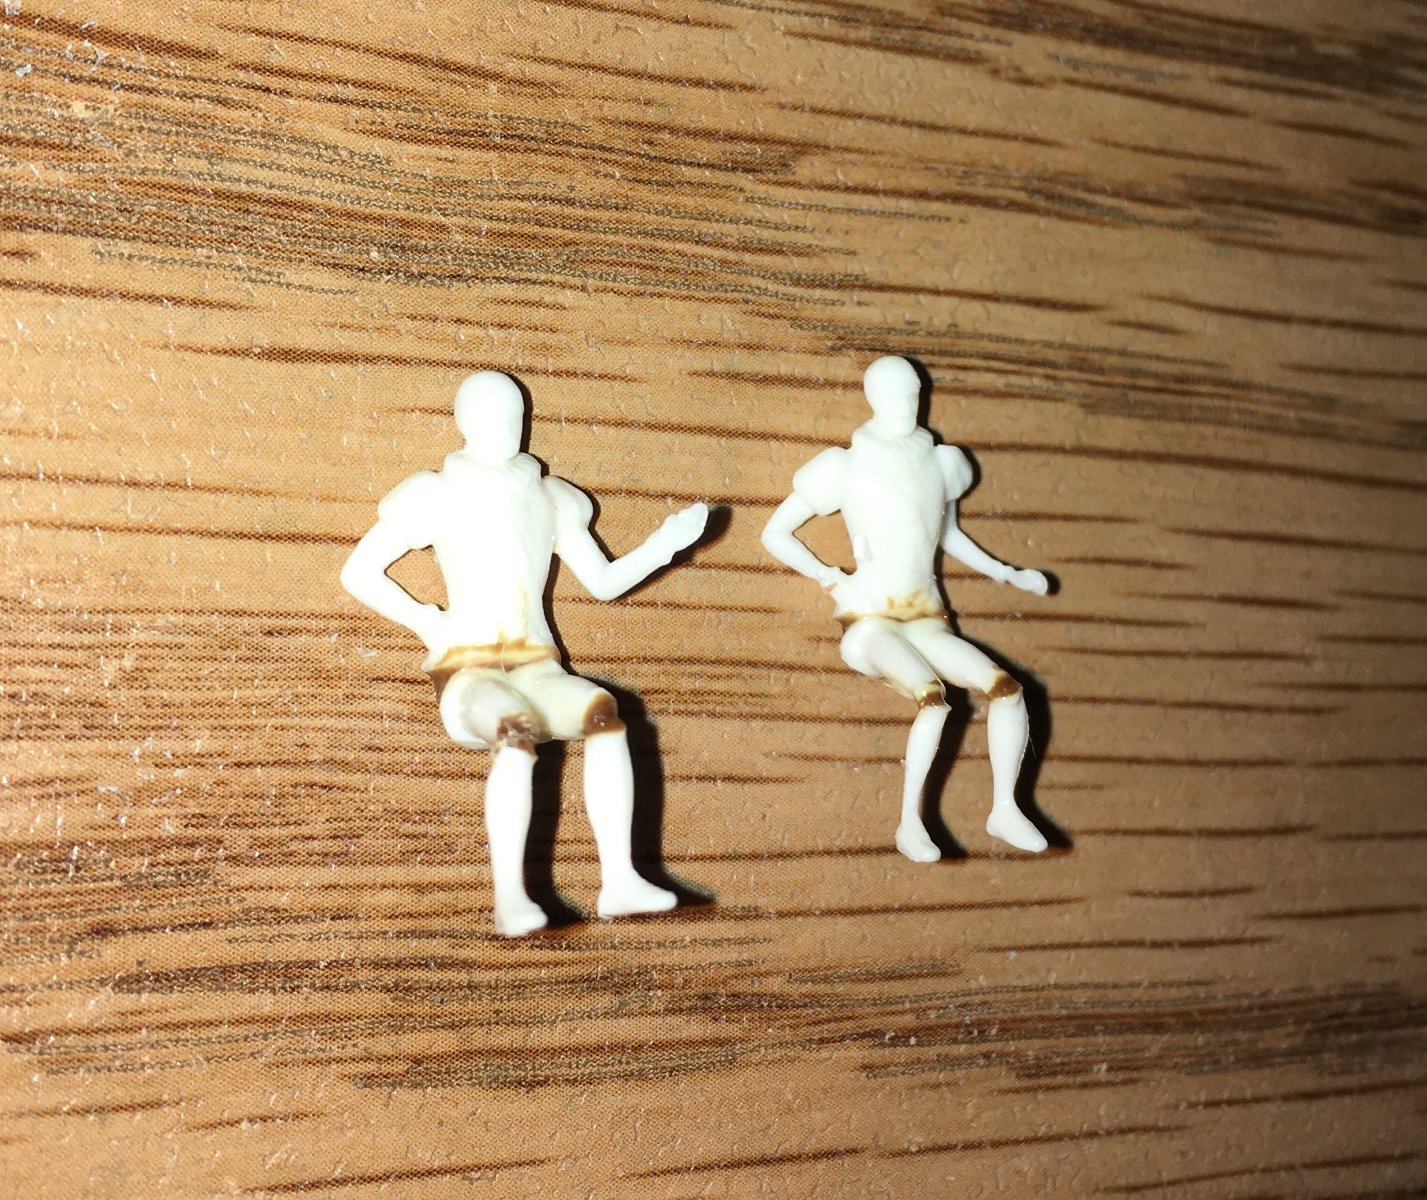
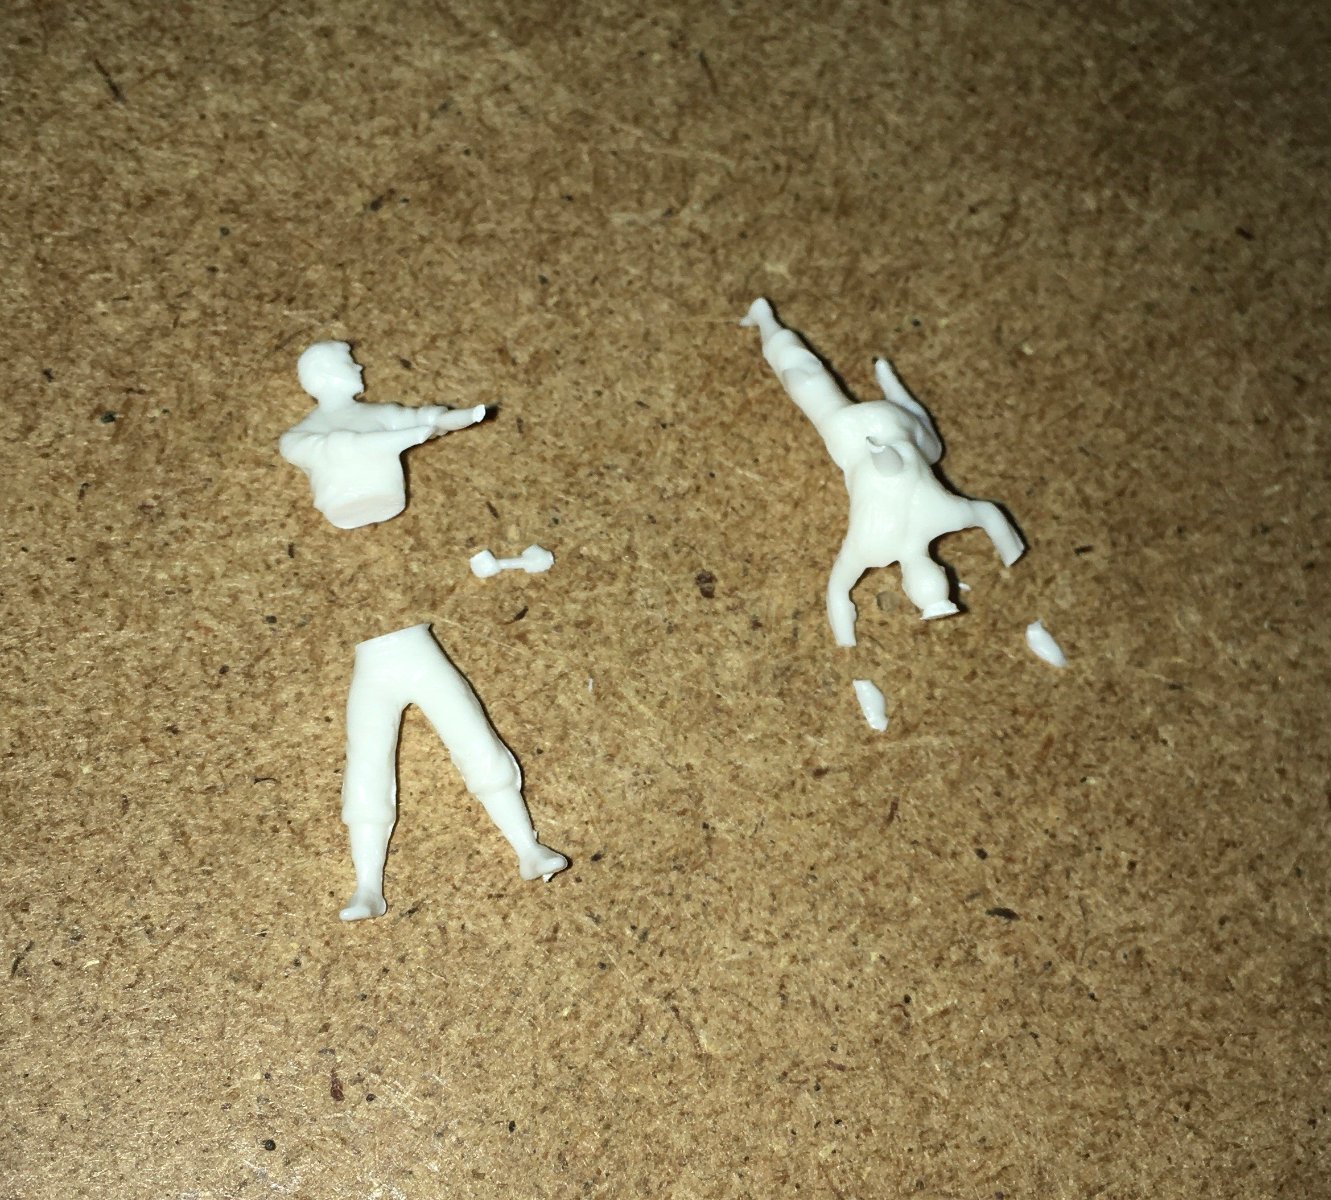
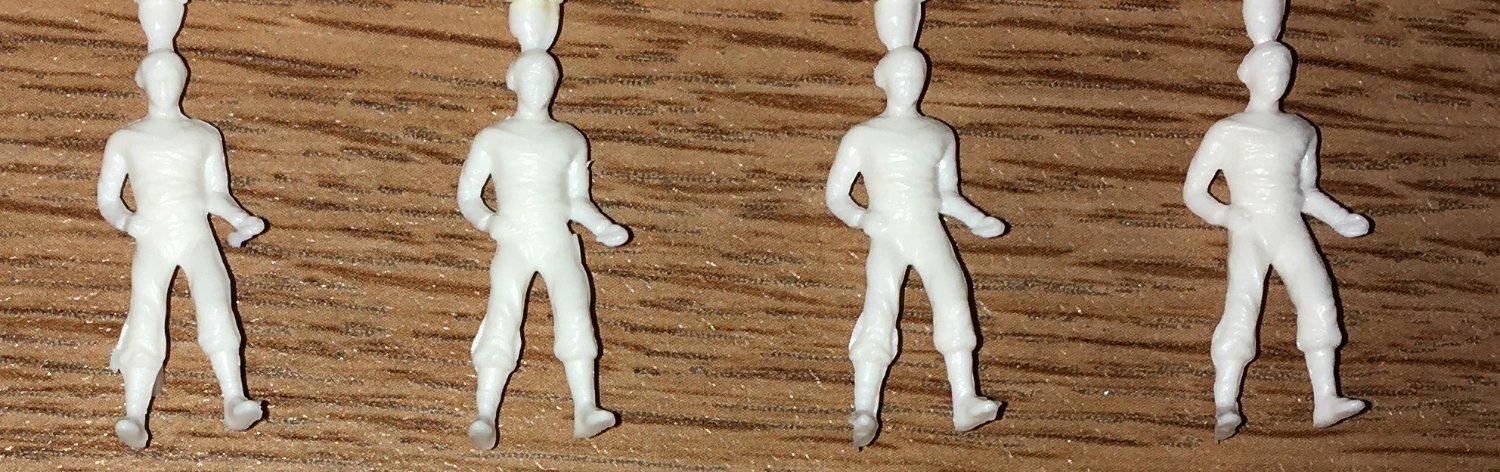
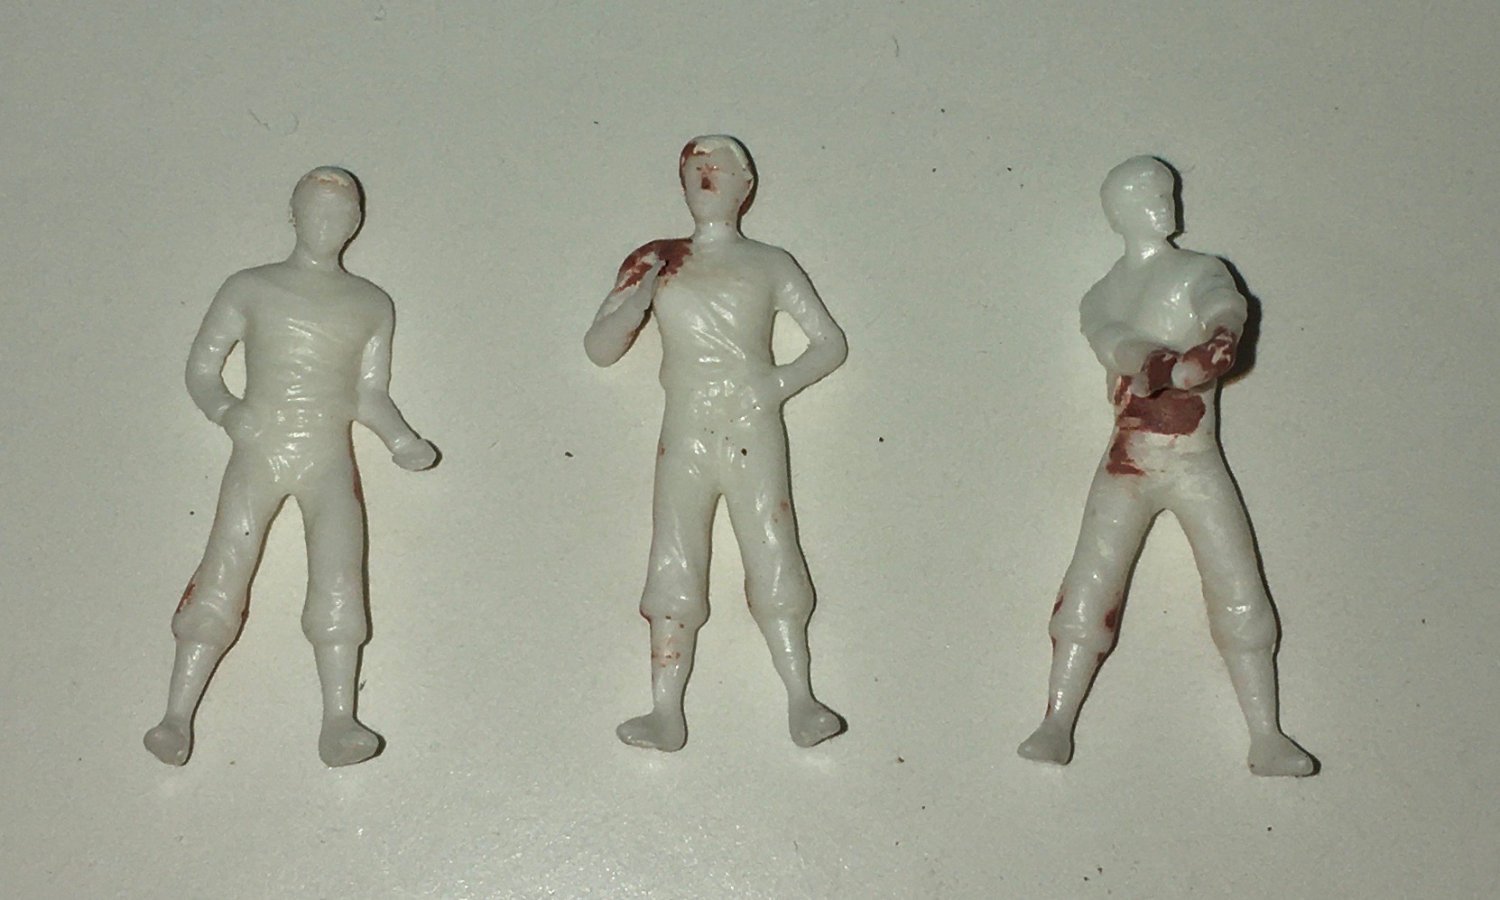
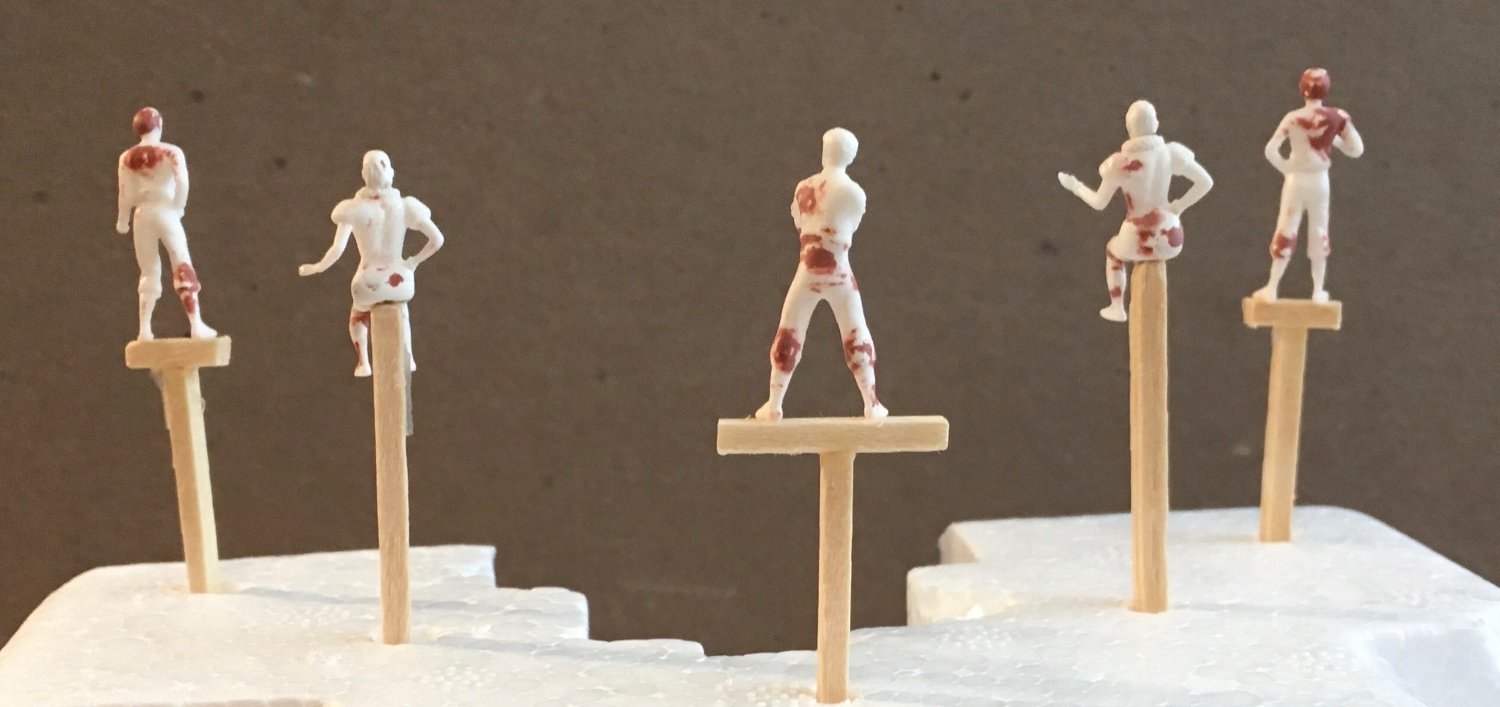
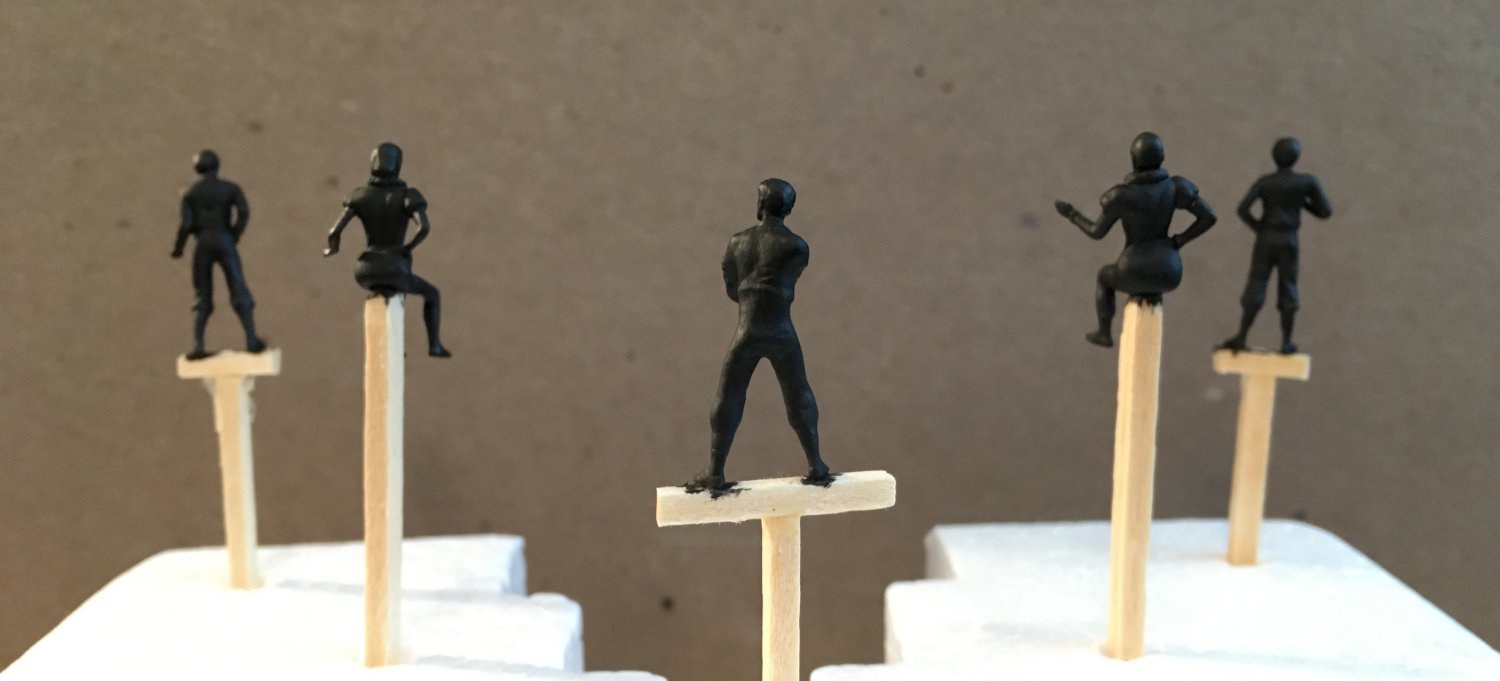
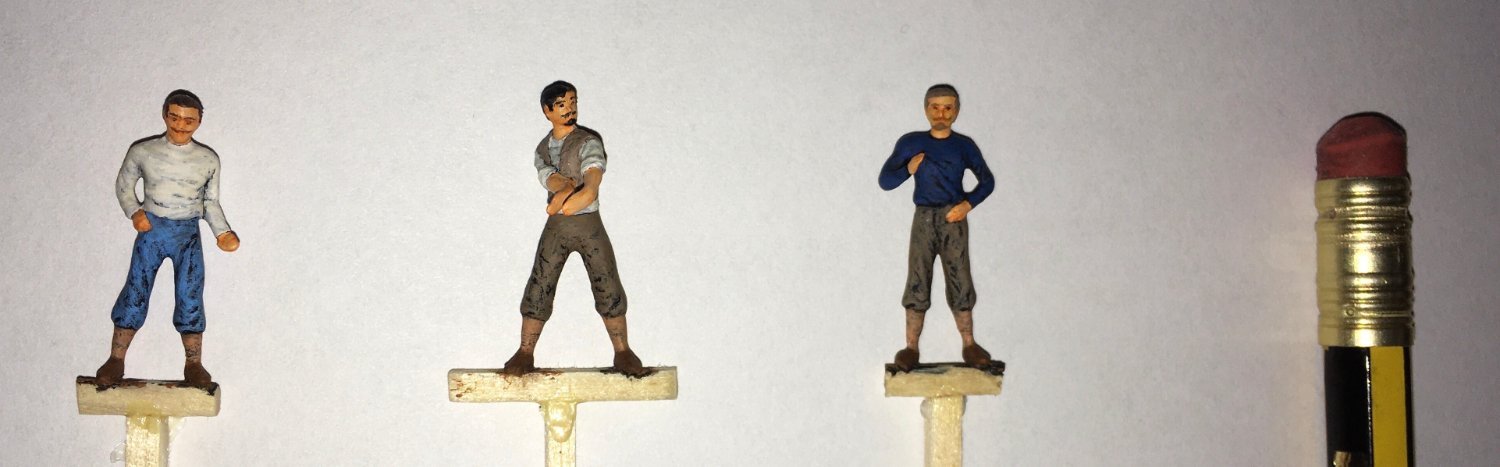
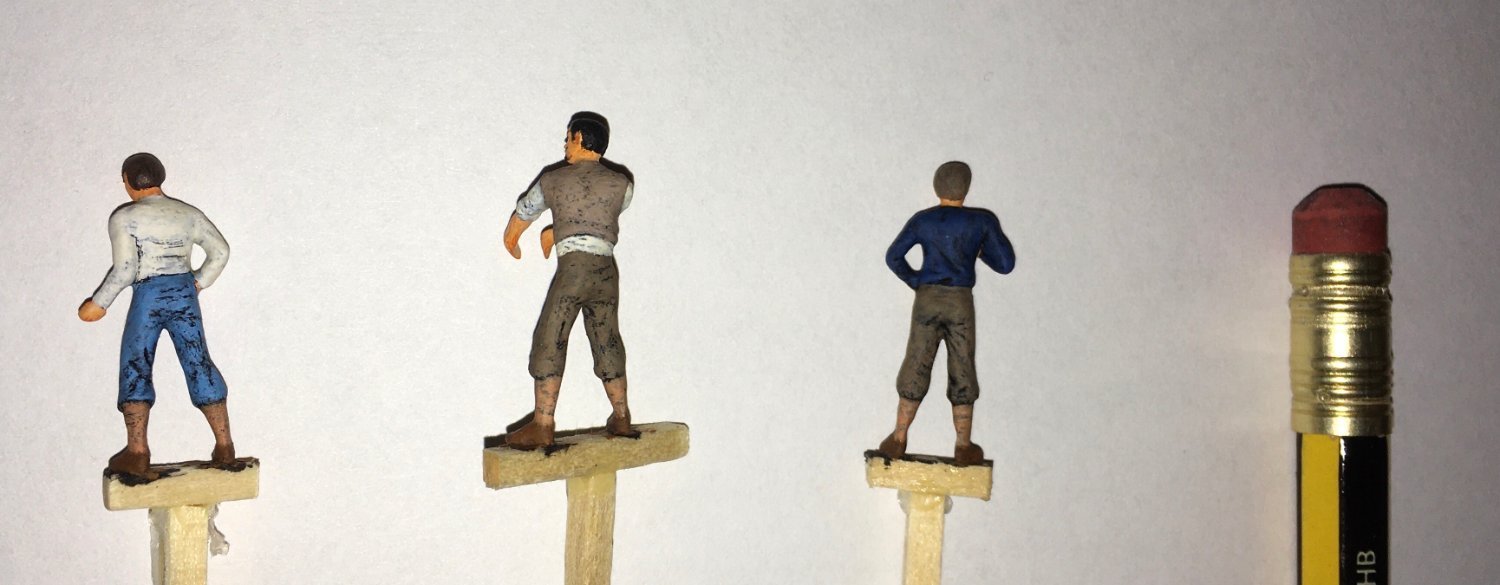
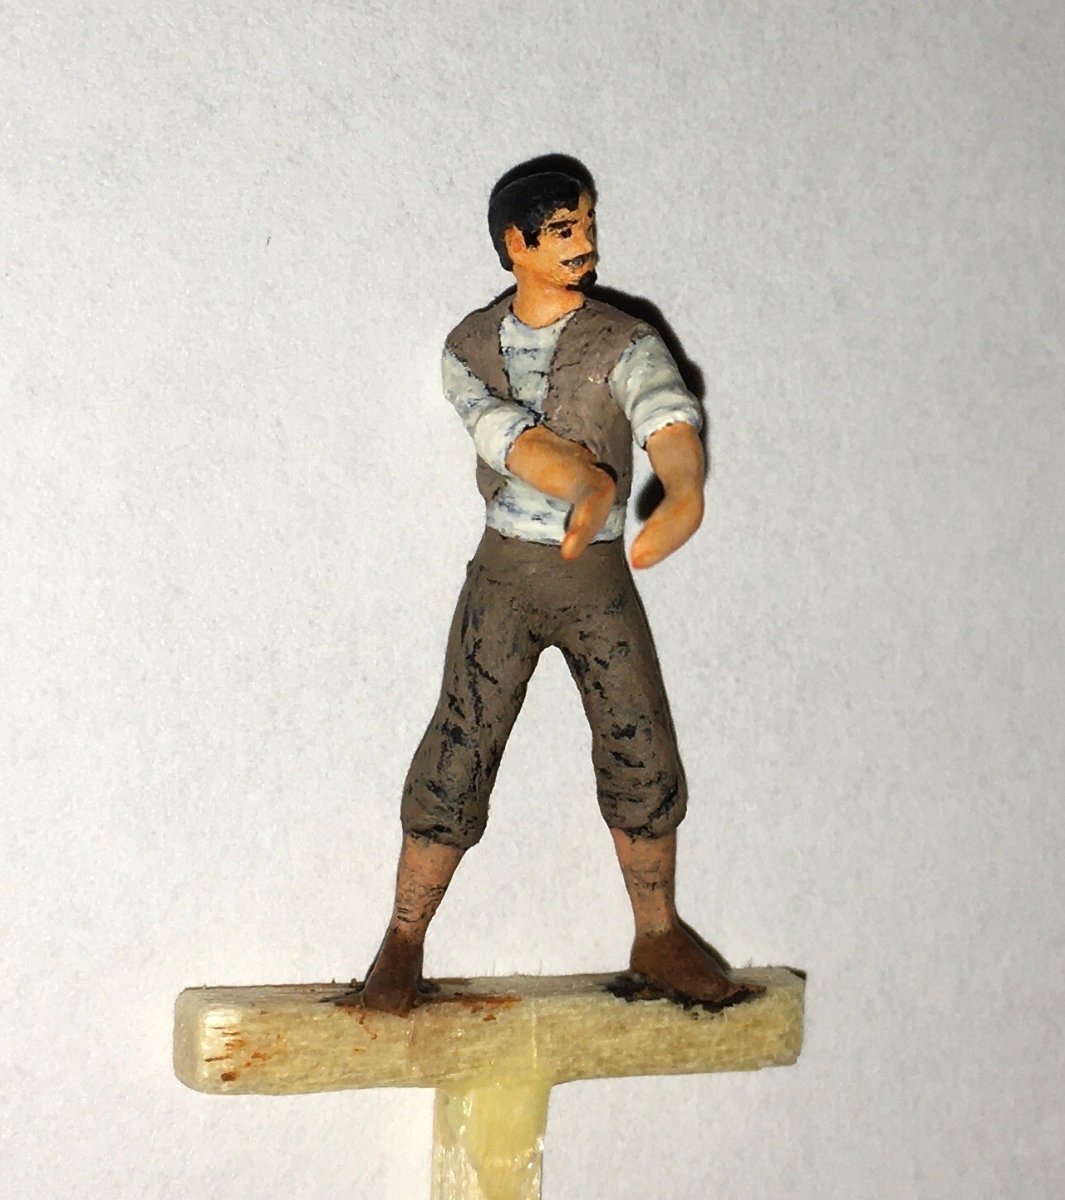
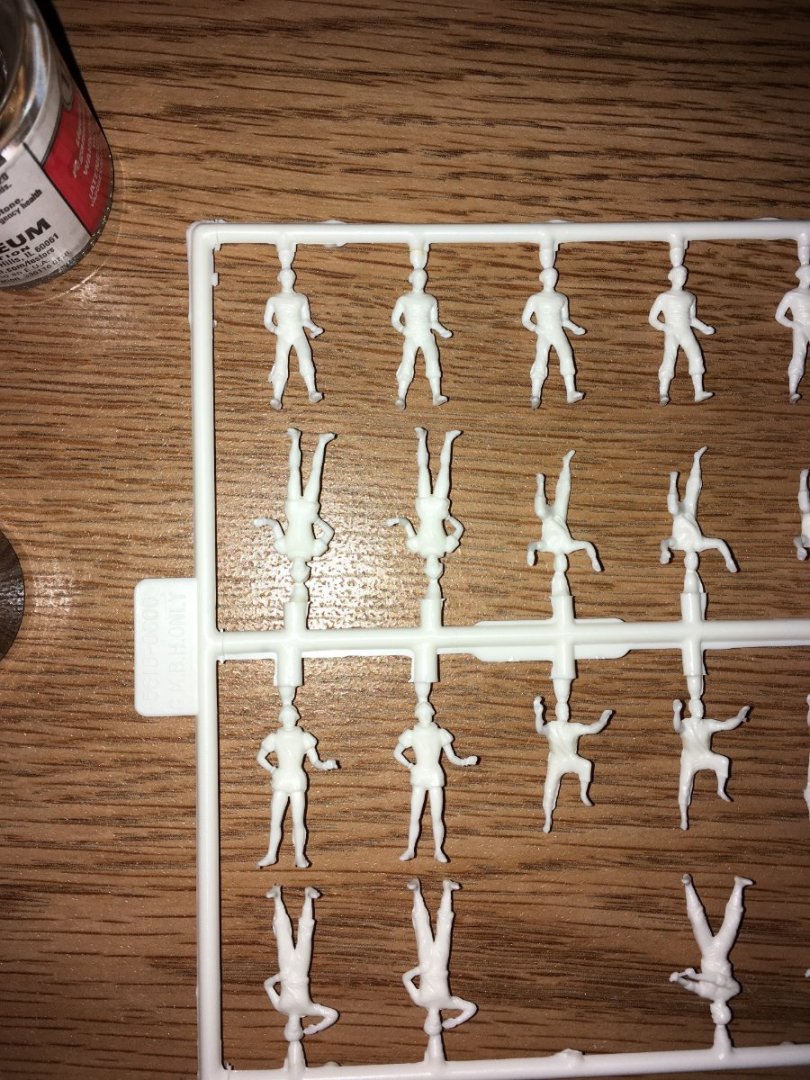
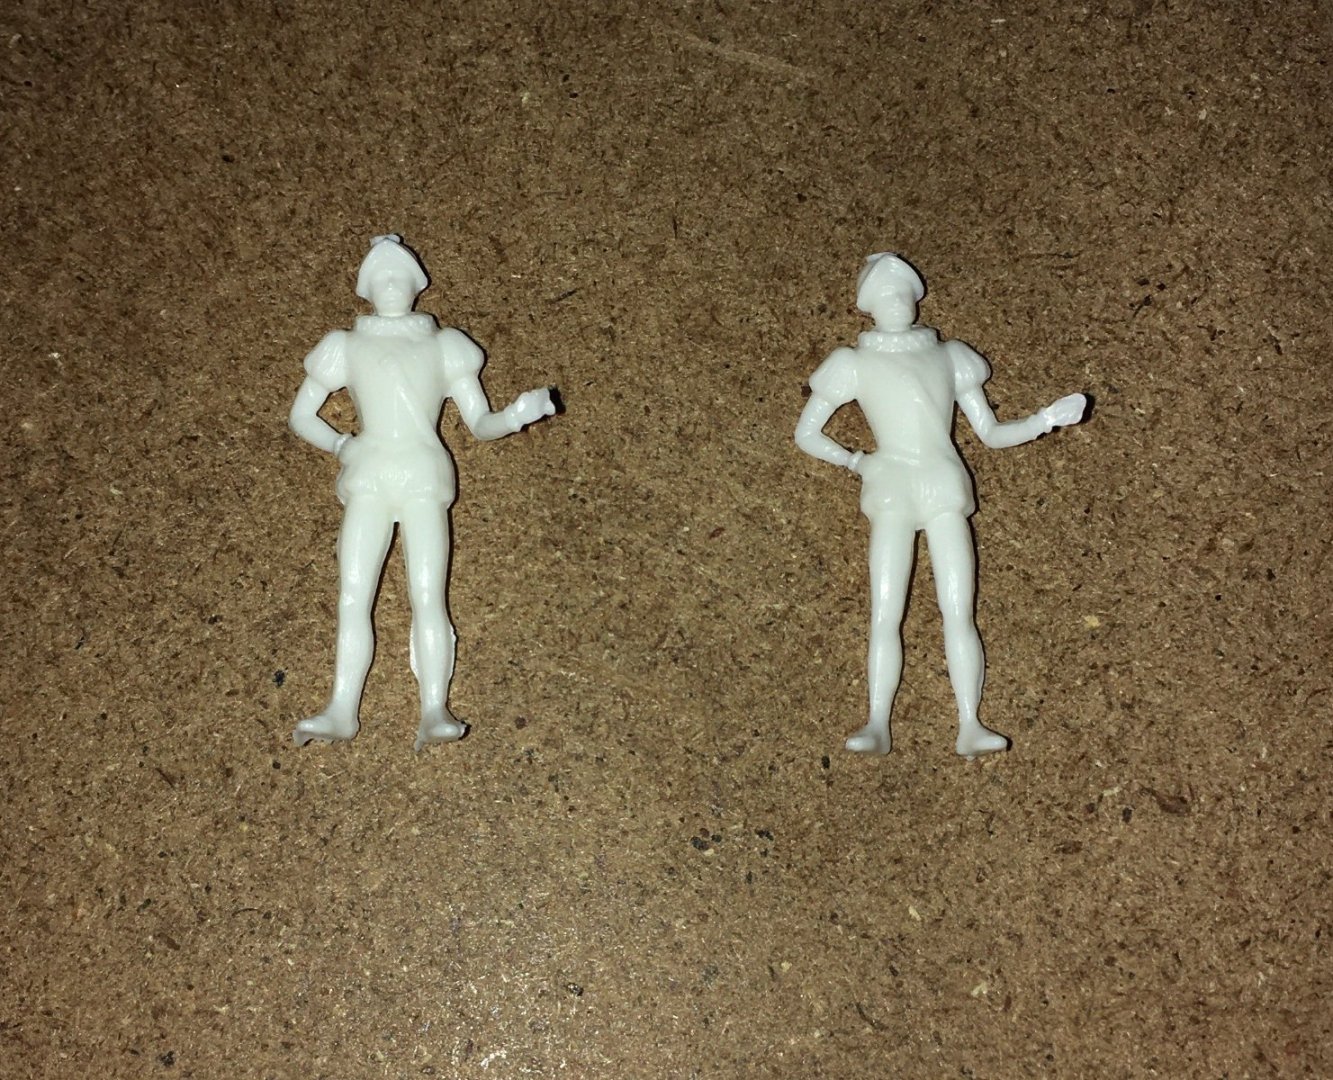
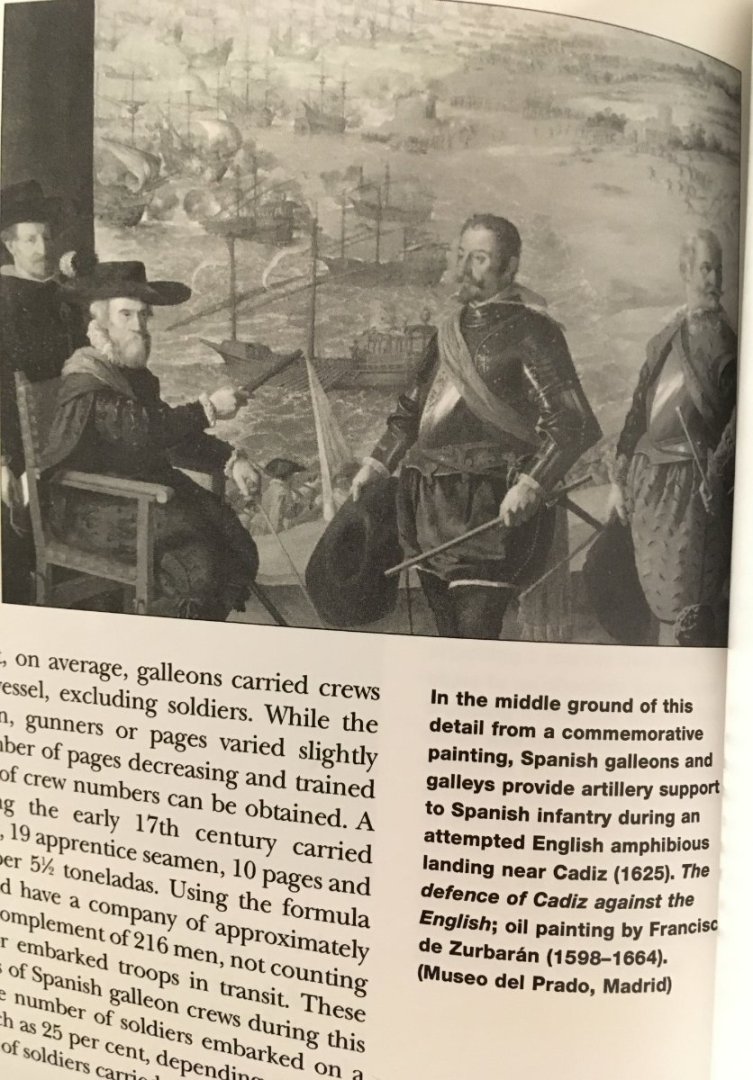
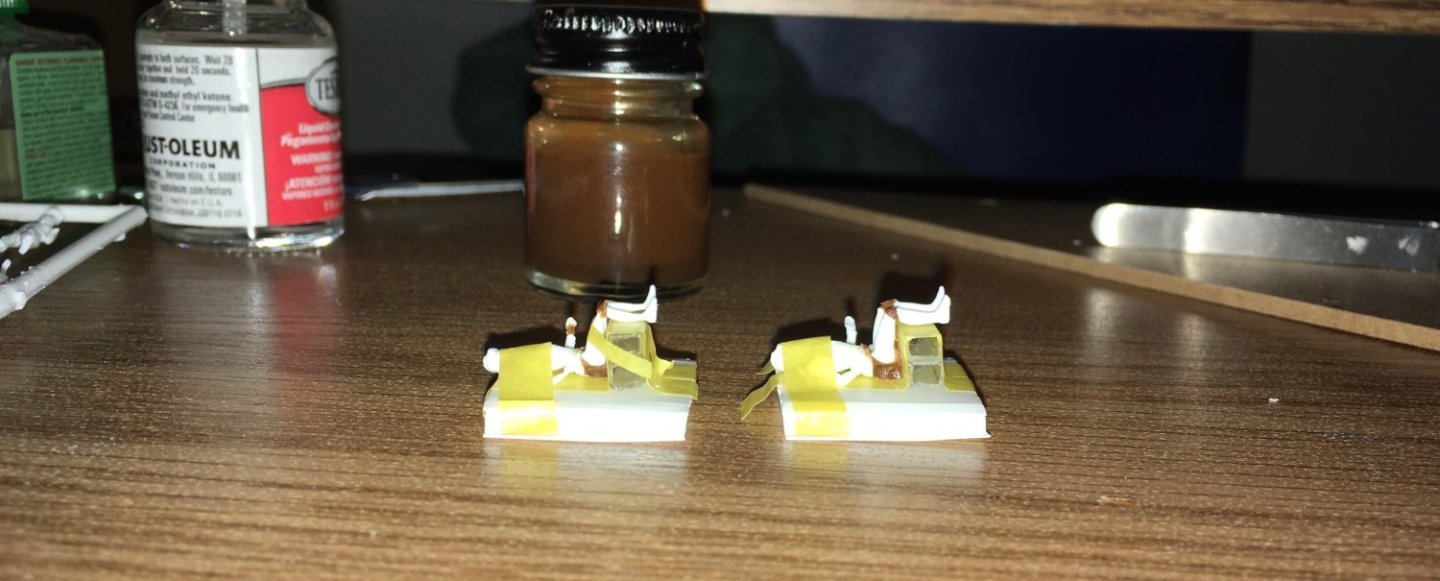
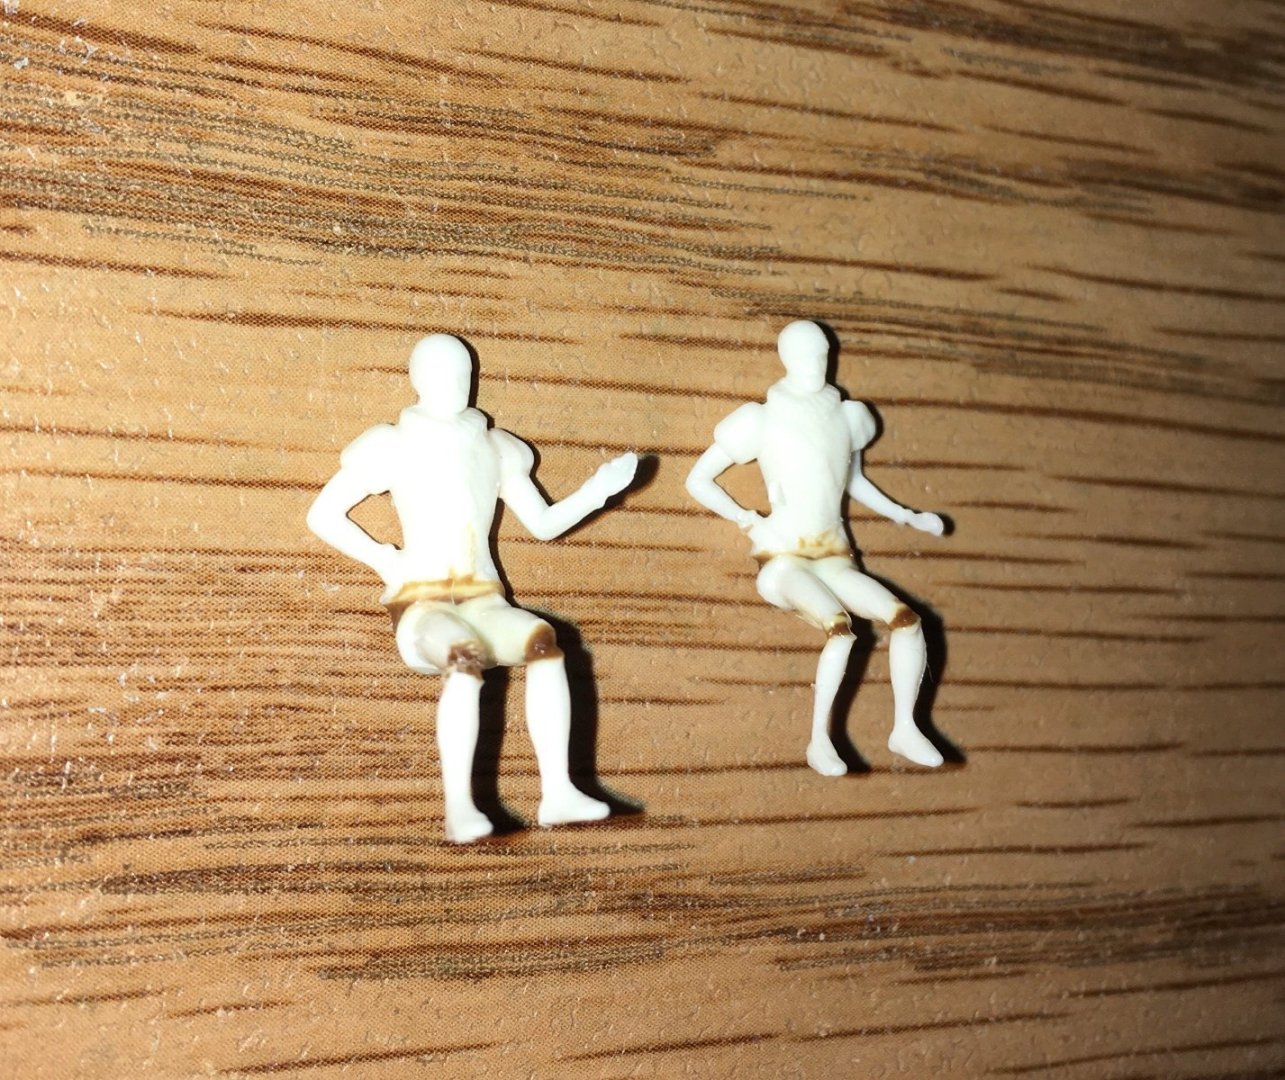
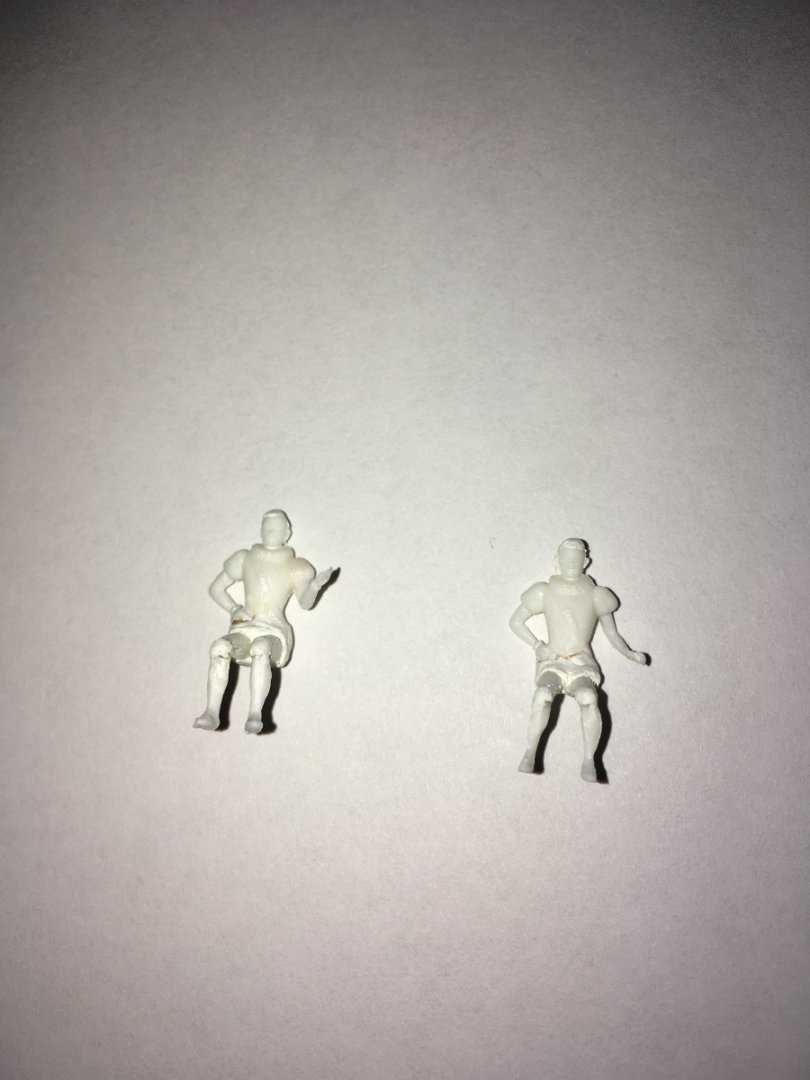
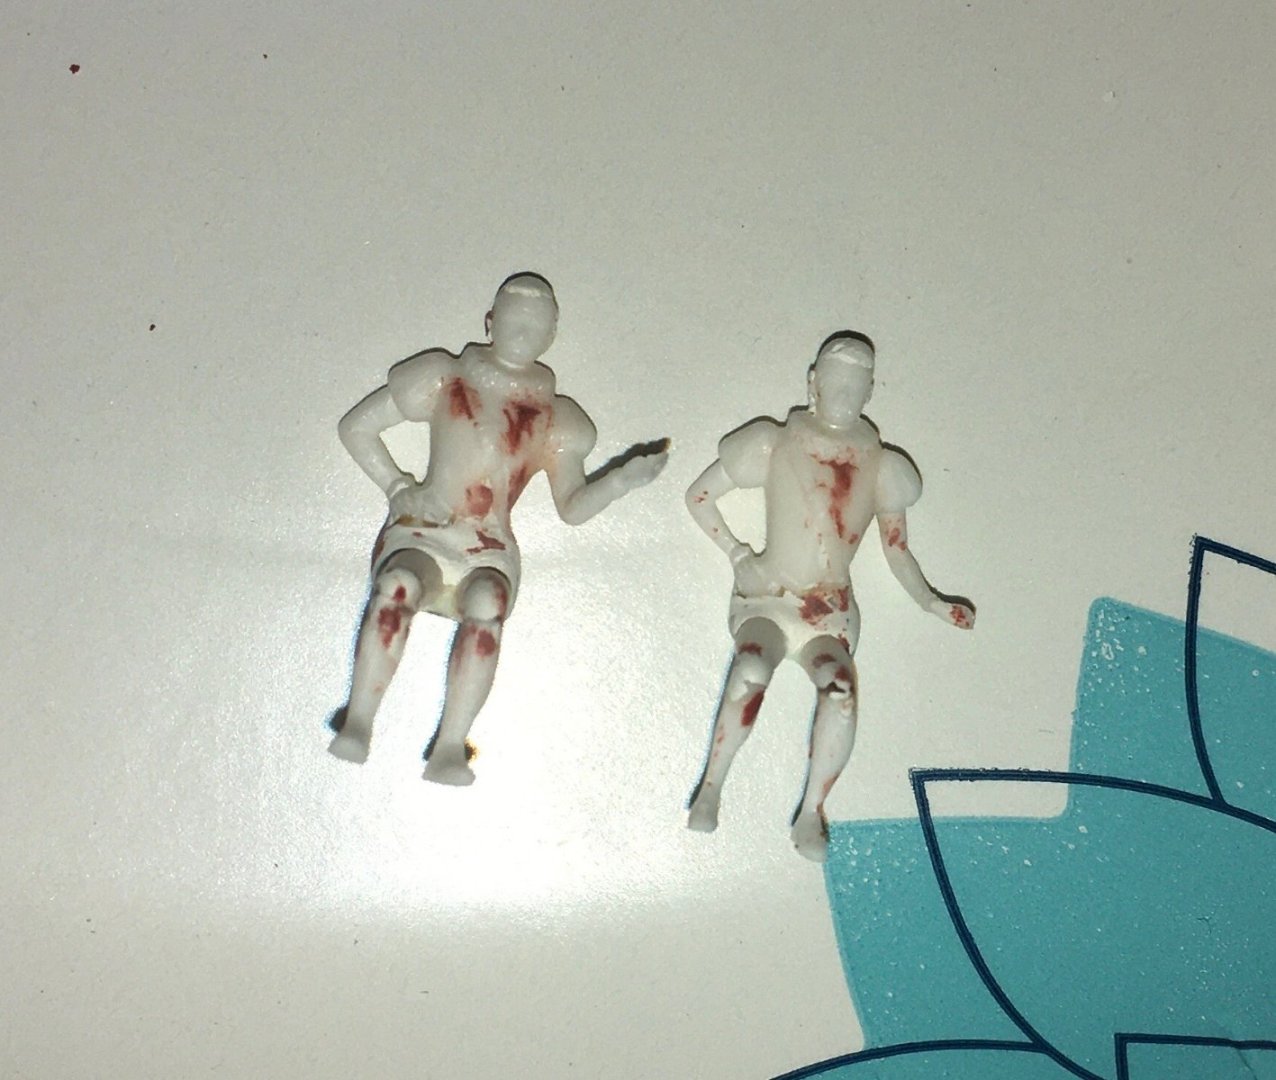
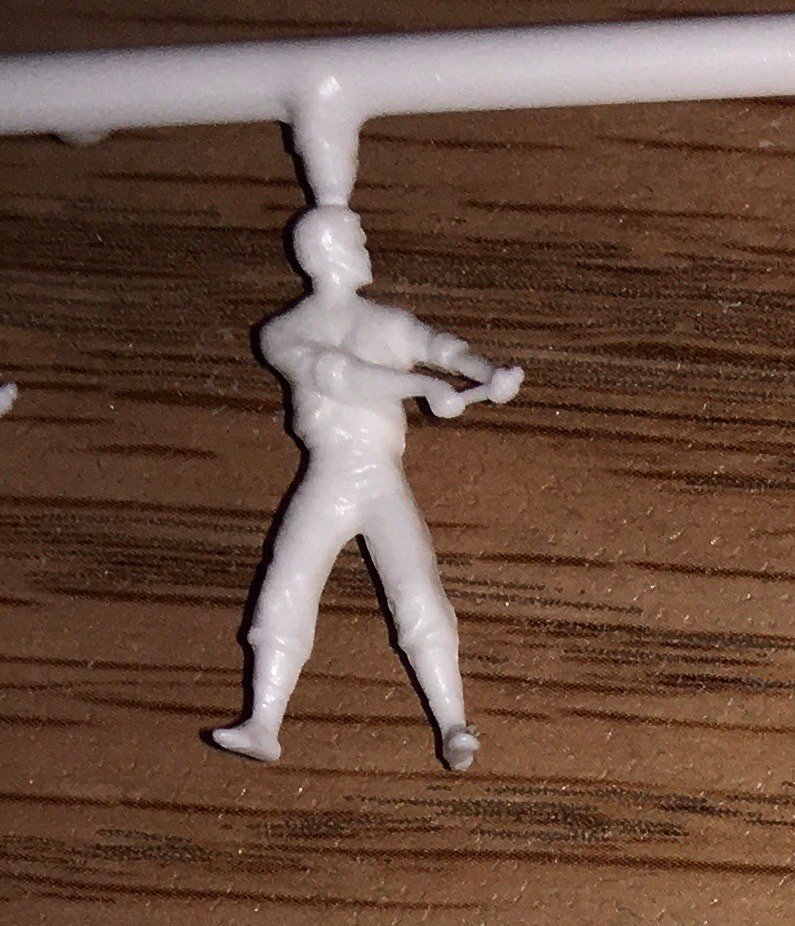
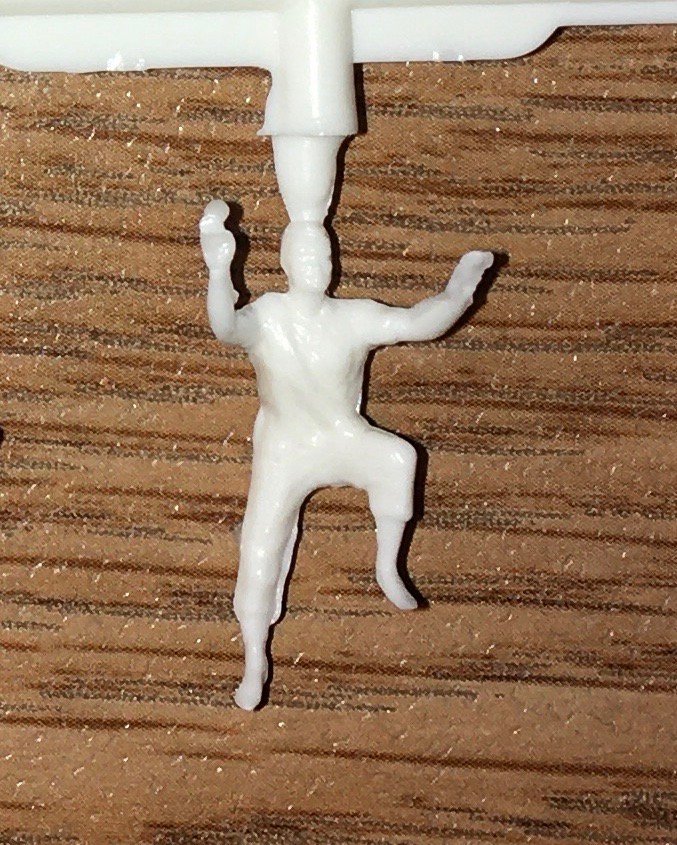
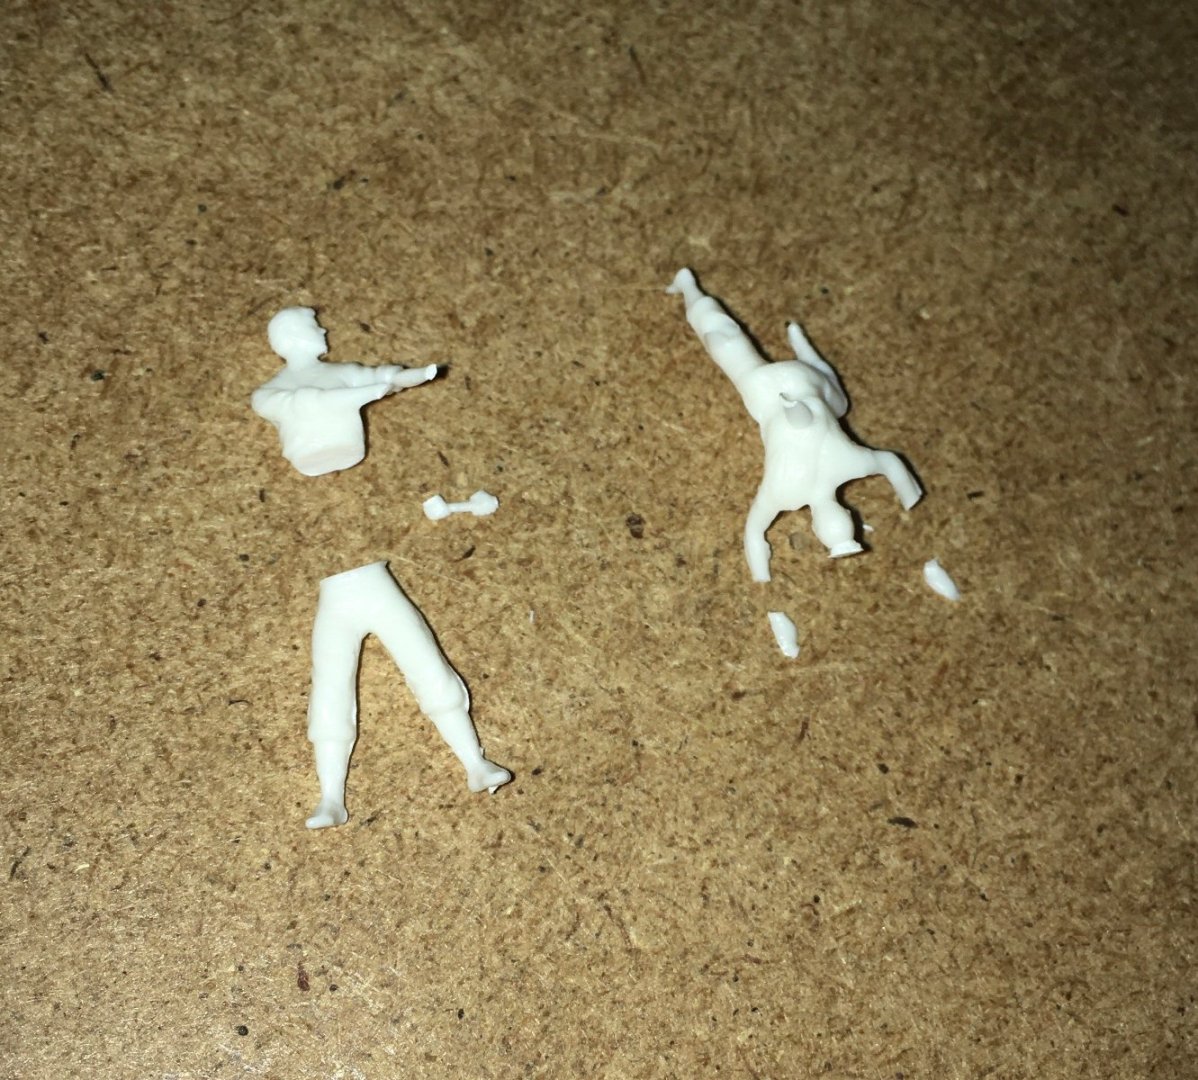
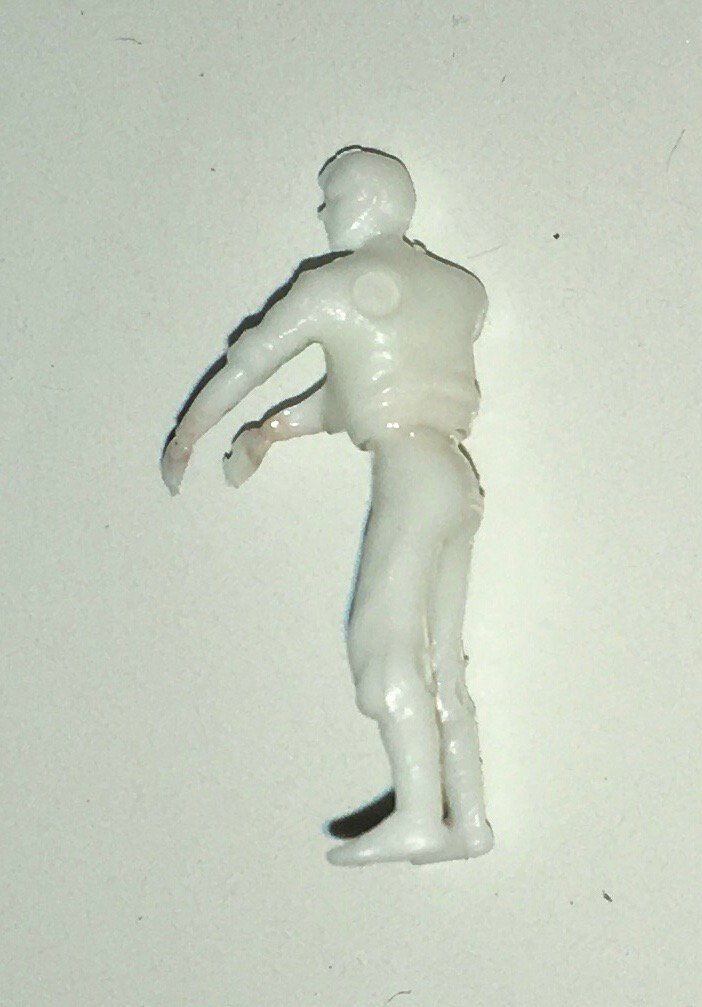
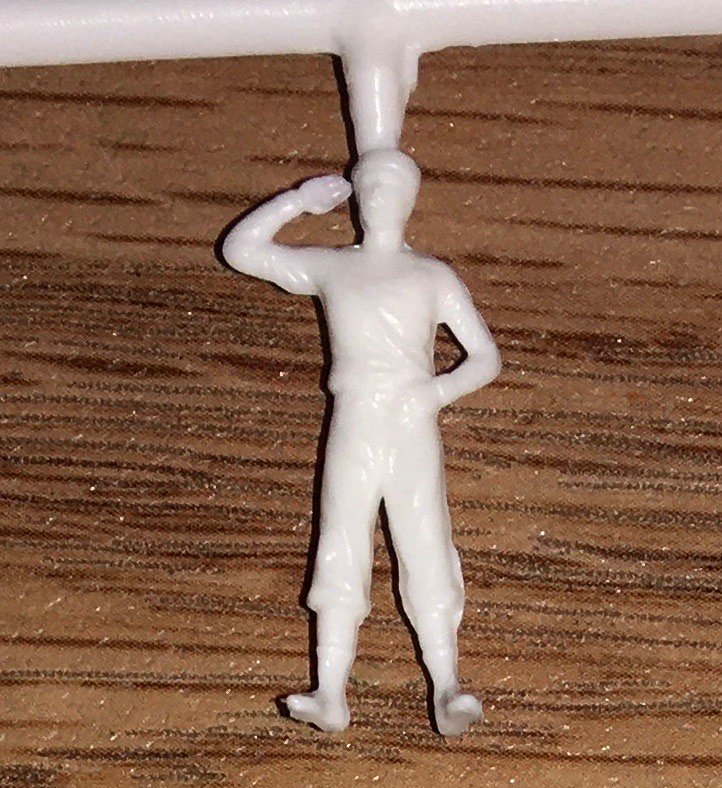
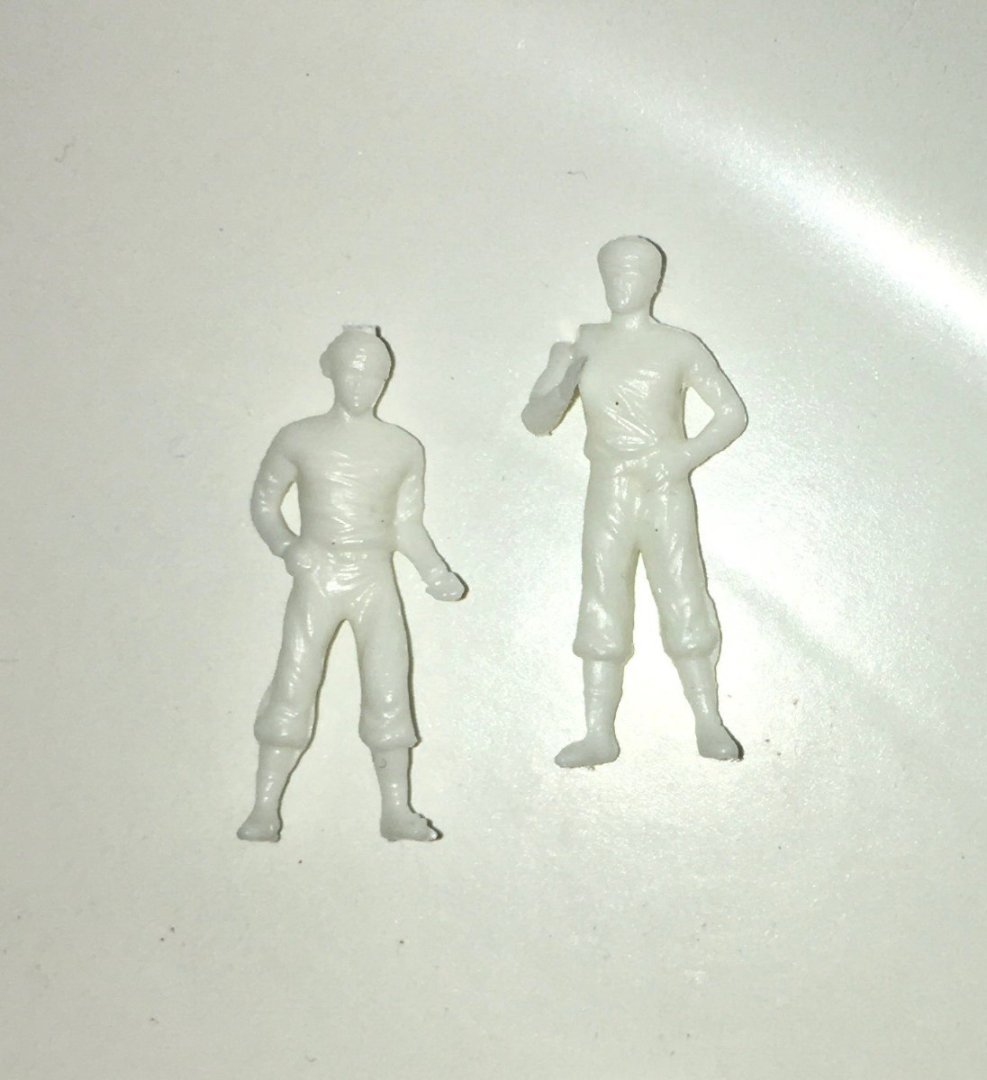
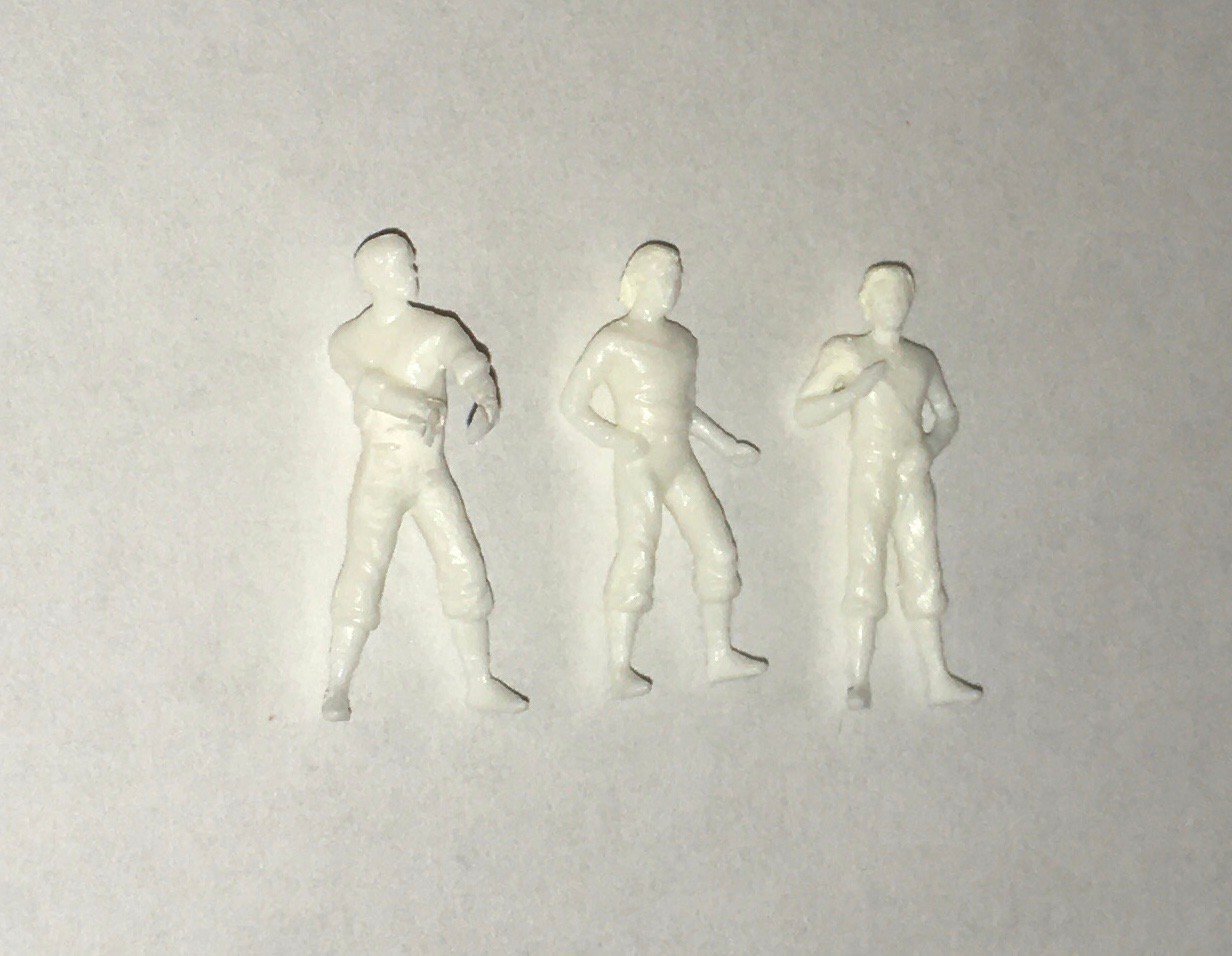
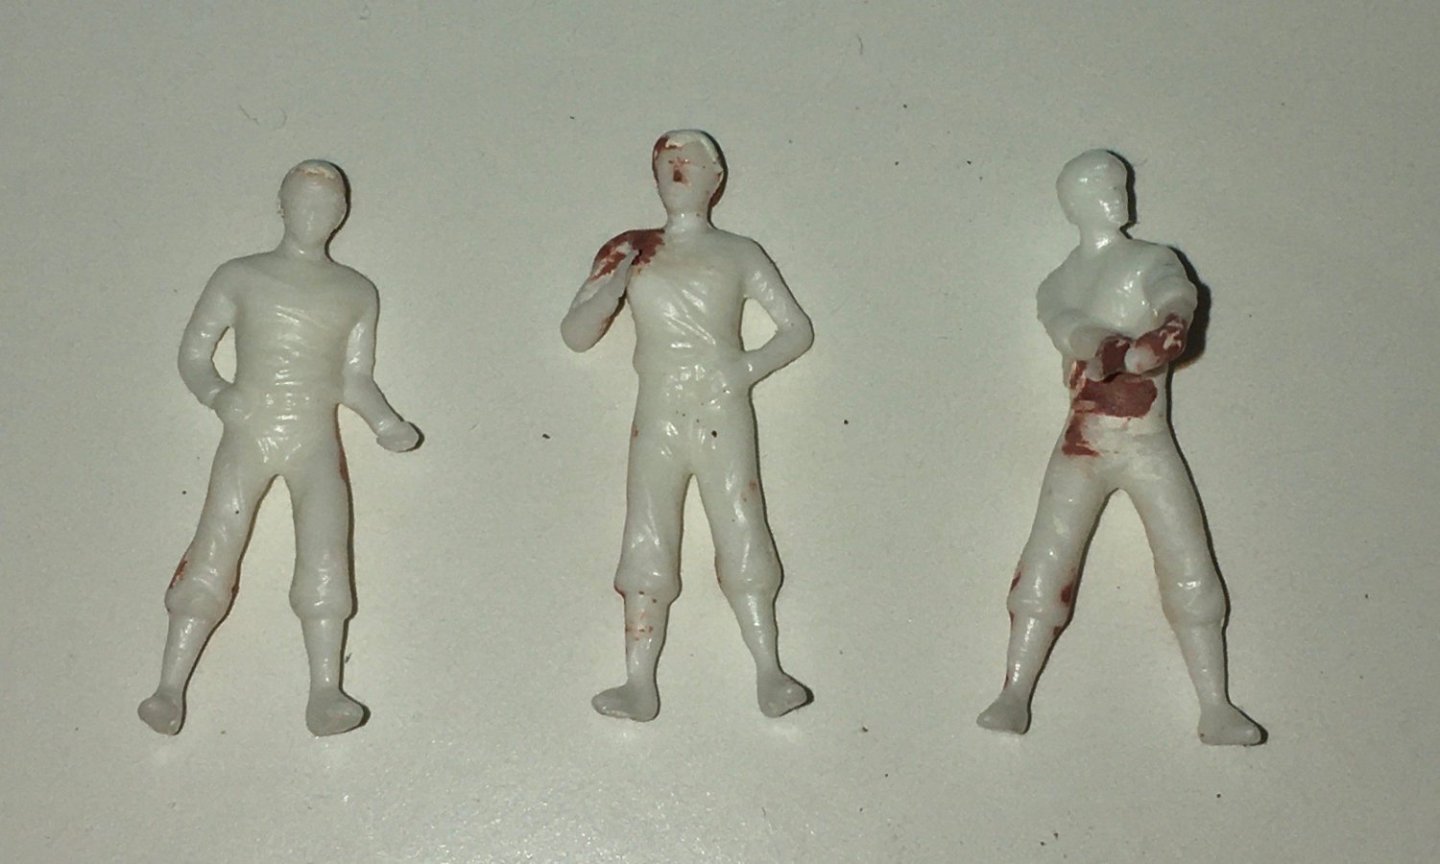
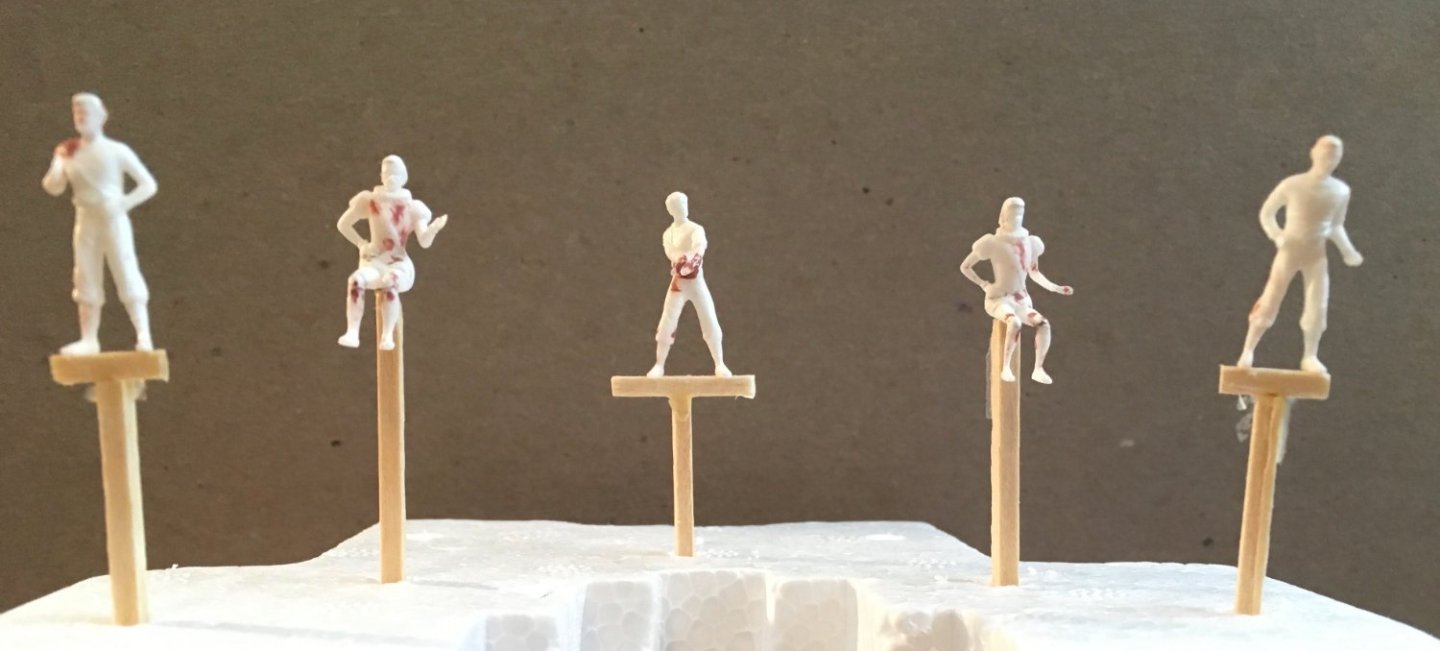
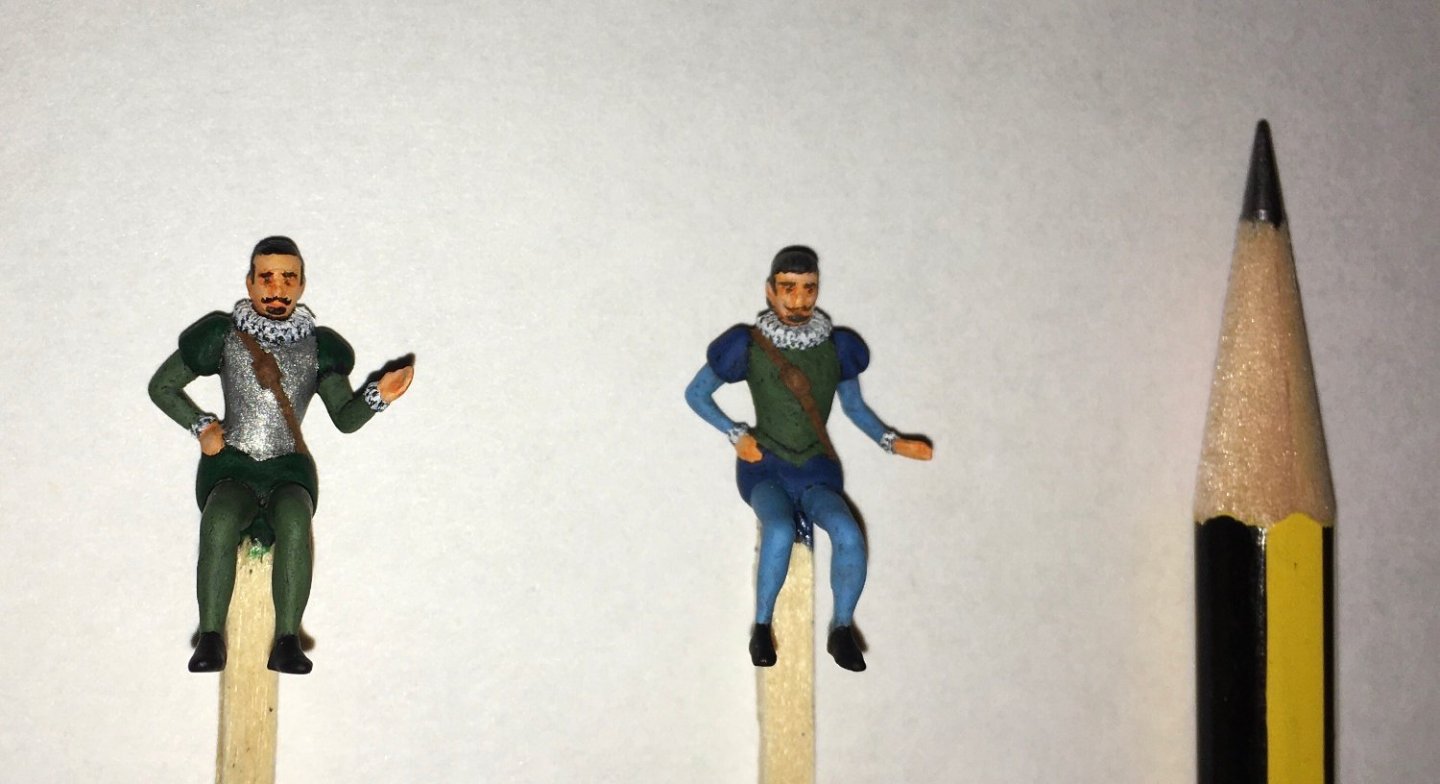
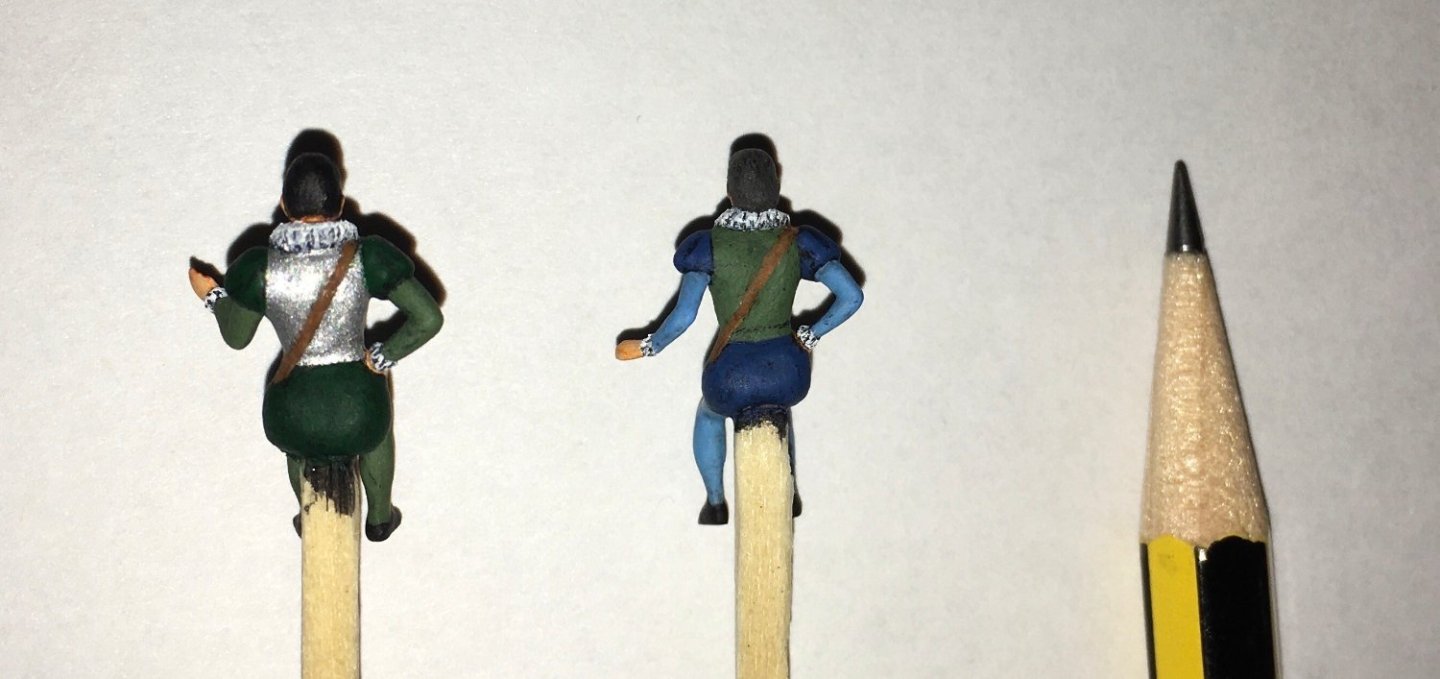
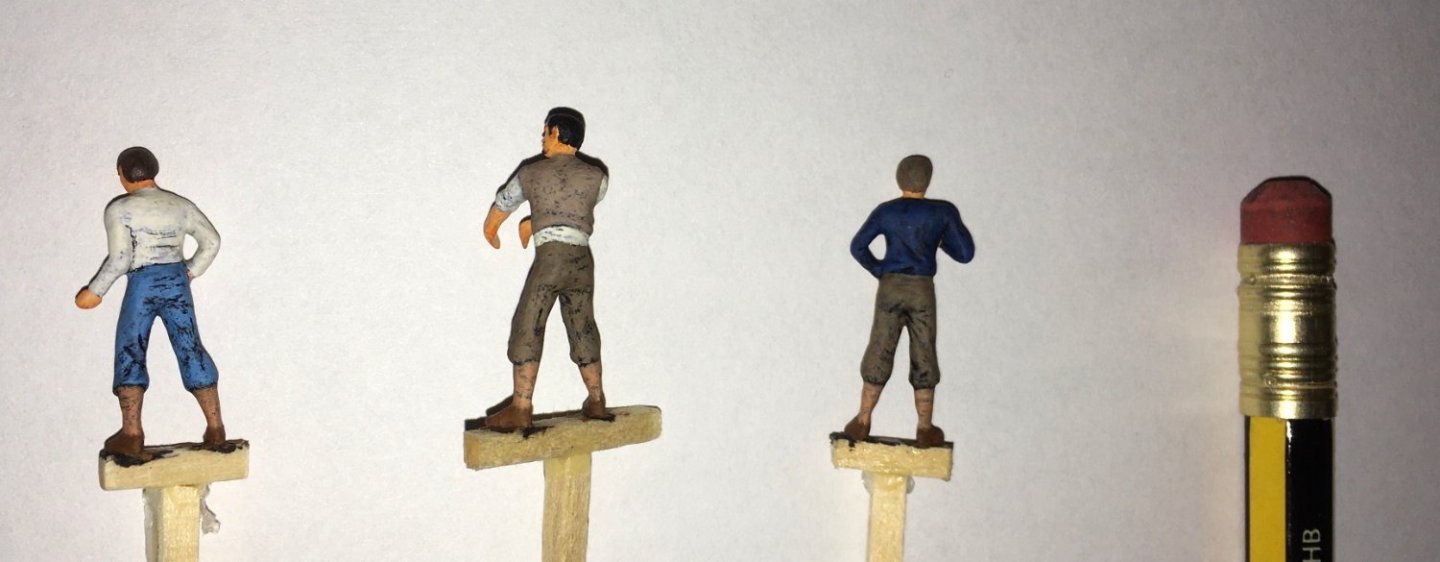
I have finally finished modifying and painting five figures to be included in the stern cabins and the helm. Revell included 40 figures with the kit, but there is a lot of repetition, since there are only 5 different varieties. I chose these two figures for the captain and the pilot: In his book Spanish Galleon: 1530-1690 (Oxford/New York, Osprey Publishing, 2004), Angus Konstam includes reproductions of two contemporary paintings from the 1620s-1630s, one of which, on page 20, shows a Spanish military commander wearing large, almost balloon-like, short Spanish breeches (called greguescos), and half-armor, but without the classic morion helmet (instead, he carries a wide-brimmed hat): On page 40, we see a painting with Spanish admiral Don Fadrique de Toledo y Osorio, who is wearing half armor, has longer, but still balloon-like, Spanish breeches, and a wide-brimmed hat (not morion helmet): I wanted the captain of my ship to to look something like these two gentlemen, and since the pilot is also important enough to have his own cabin and guide the route of the ship, I thought he should also have the same basic attire. The captain would sit at the table in the captain's cabin, and the pilot would sit at his table in the pilot's house. To make them seated required heavy modification. First, I sectioned each of them: Next, I used styrene from sprues of the kit that I had dissolved in liquid cement to fill the gaps and join the knees and waists in a seated position: I left them like that for over a month, because it takes a long time for the dissolved styrene to harden. After releasing them, temporarily seated them on chairs to see how it would look. The chairs may be a little big when compared with the figures, but I would rather they be too big than too small. I trimmed down the styrene and used a hobby knife and sanding sponge to scrape and sand off their morion helmets: Milliput Superfine White epoxy putty was used to apply hair, ears, and fill out the Spanish breeches and the knees: Here they are after "fine-tuning" with Bondo 907 Glazing & Spot Putty (red) and lots of sanding and shaping: Both of these figures are very fragile with the modifications, and I had to re-glue legs when they came loose or came off, and I actually had to replace one of the pilot's legs and one of his arms (using an arm and a leg from another similar figure that I would sacrifice). Also, in order to allow the left arm to come above the plane of the table (captain) or below it (pilot), I removed the arm and glued it (or a similar one) back on in a different position, using putty at the shoulder to make the joint look smooth. As usual with styrene injection-molded pieces, there were a lot of seam lines that needed to be scraped and sanded and ejector pin marks that had to be filled and smoothed. What about the other figures? The kit comes with a rowle molded into the main deck just forward of the captain's cabin. So there is a helm, but no whipstaff is included for it in the kit. Eventually, I plan to make a whipstaff from a styrene rod, but I think a helmsman should handle it. The most likely prospect for a helmsman from the supplied figures was this guy: He appears to be gripping and pulling on a short length of rope, as if he were singing "haul away the bowline" (in Spanish). To handle the whipstaff, he would have to extend his arms in front of his body, rather than to the side, as they are in the figure. Also, his hands would need to be open to come around the whipstaff, rather than be tightly closed around a short length of rope. I found that the hands of one of the crewmen meant to climb the ratlines might work for the helmsman: So I sectioned the first figure at the waist, removed his hands, and also removed the hands of the second figure (which I can sacrifice). I glued the open hands from the second figure onto the first figure (helmsman) and glued the helmsman's torso perpendicular to his waist, so now, by rotating his spine, he can reach out in front of him to handle the whipstaff: I chose two other figures to hang out in the captain's cabin -- this one, and one of this type: But I did not really want the first one to be saluting. Rather, I think he will be standing behind the captain's chair as the captain is looking at a map on the table. I removed his saluting arm and glued it so that it comes in front of his chest as a kind of animated gesture: I did not want the two crewman in the captain's cabin to be wearing head coverings, so I scraped or sanded them off and used Milliput to make hair and ears, and also to fill in the shoulder defect of the former saluting crewman, fill in ejector pin marks and other defects. I also used it to round out the waist of the helmsman and reinforce his wrists: Here they are with "fine tuned" puttying and sanding: The figures have been temporarily mounted on wooden pedestals so I could handle them better while painting them. Before painting: After I brushed on Testors flat black enamel paint for a primer: I used mainly enamel paints for the figures, but sometimes I used acrylic when I needed certain colors that I didn't have with the enamels. With the exception of the heads, necks and hands (and forearms of the helmsman and breastplate of the captain), I primarily used a dry brushing technique (or close to it) to apply the colors. In doing so, I intentionally let the black primer show through in places, to simulate shadows, or grime on the clothes. Here are the final results. For the captain, I painted his torso metallic to simulate a breastplate. For the pilot, I opted for a green doublet. I included a No. 2 pencil in the photos for size reference: At that time in history (circa 1630), long waxed mustaches were popular, as well as goatees. Ruffs were less common by then, but some men still wore them. And I think that the helmsman will be able to hold his whipstaff: I am leaving them attached to their painting pedestals for now so that I can store them upright before bringing them into the ship.


-
Looks like a great start — I like your wood planked decks!
- 44 replies
-
- 1
-
-
- soleil royal
- Heller
- (and 5 more)
-
Looking good!
-
I am working on it, but things are going slowly for me as usual. I will have more soon, hopefully in the next week or so.
-
I agree that some modifications would be needed with this set, as suggested, and, of course, many could not be used. Steven, I am amazed at your ability to carve figures at an even smaller scale!
-
I found this set online, which is apparently not in stock, but it could be ordered. There are a lot of figures in the set, but it looks like only a few of them would work. They are HO scale, though: https://ajckids.com/products/preiser-16359?variant=43541340029165&utm_source=google&utm_medium=cpc&utm_campaign=Google+Shopping¤cy=USD&srsltid=AR57-fBCDq-h7K_XWHu1CRlAFLm3PjsrgIq9Xk4csYsCho8gvFcmUtybKu4&com_cvv=d30042528f072ba8a22b19c81250437cd47a2f30330f0ed03551c4efdaf3409e
- 45 replies
-
- 1
-
-
- Great Henry
- Henry Grace a Dieu
- (and 1 more)
-
Gammoning looks good! Does the polyester line tend to smooth out well, or does it need a lot of tension to straighten it when it is rigged?
-
Scott and OC, I think that both of you did a great job with your figures despite the limitations of the plastic. The modifications really make them work well. I am in the process of painting just 5 figures right now that were included in my Spanish Galleon kit, and modifying them to work out well in the cabins and helm has been a painstaking process. And that is just modifying them before painting, which is another thing altogether at such a small scale. I won't give up, but it is going slowly. I have the deepest respect for both of your work when I see the results of your figures.
-
Very nice summary video! 👍🏻
-
It seems to be a useful technique that is used when sailing replica vessels, such as the Spanish Galleon San Salvador at the Maritime Museum of San Diego, which can be seen in the website link below https://sdmaritime.org/visit/the-ships/san-salvador/ but I also cannot find any contemporary evidence in paintings that shows that it was actually done 400-500 years ago.
- 279 replies
-
- 1
-
-
- Spanish Galleon
- Imai
- (and 1 more)
-
What a neat idea! A rather creative way to fix a little goof! 👍👏
- 279 replies
-
- 3
-
-
- Spanish Galleon
- Imai
- (and 1 more)
-
Thanks, Scott! I am not sure if they had globes at that time, but anyways, I am planning on putting in a wall map, and another map on the larger table.