hamilton
-
Posts
1,915 -
Joined
-
Last visited
Content Type
Profiles
Forums
Gallery
Events
Everything posted by hamilton
-
 Wow Harlequin - talk about making a silk purse out of a serious sow's ear! My hands are nowhere near steady enough to get so accurate a finish! I have to carve out some time in the coming week or weekend to trawl through the local pawn and thrift and craft shops of Vancouver to see if I can't find some fixtures that could sub in for decorations on the Blandford...There is still quite a bit of work to do back there - but I needed to take a break from the scratch work and get back to some more straightforward parts of the build - the rails and frame ends/stanchions for the main cap rail...After this I'll move on to the stern again and to the decorative elements....a little worried.... My present solution to the decorative elements (using brass bare tree frames at a very small scale) is likely to produce an aesthetically "satisfactory" but not historically accurate result - unfortunately, my strategy for dealing with limitations in my craftsmanship is to pretend they don't exust by seeking out convenient solutions....at some point I will have to overcome my limitations by practicing (a novel idea)....! Anyway, good to hear from you! hamilton
 -
Again - really beautiful work here Ferit - everything is finished to such a fine tolerance you would never know you were looking at a model (except for the fact that these photos are on a ship modelling forum!) - excellent craftsmanship! hamilton
-
Hi Brian: The photos certainly don't pick up any imperfections in the planking - the tone and finish of the planking seems really nice to me - very well done and a pleasure to look at hamilton
-
Thanks for the tips Andy! I took a look a while back through the miniature figures at the local train store, but none of them really seemed appropriate....I couldn't imagine adorning the stern of my Blandford with a grocer and a guy with a briefcase....some of the child figures might be turned into cherubs I suppose, but I'm not sure the results would merit the effort and cost required......I'll give it some thought.... hamilton
-
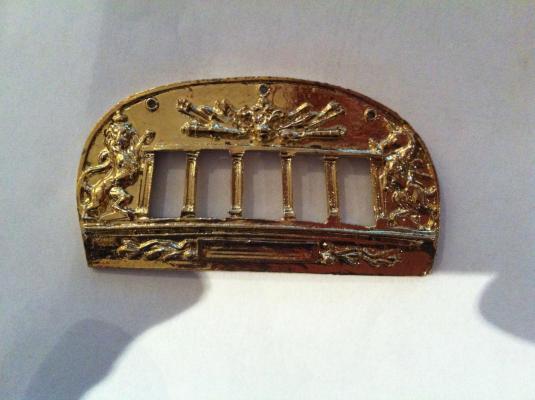
Hi Andy: To tell you the truth I'm not sure....BE also pointed out that Corel seems to have lifted the transom decoration from the Victory. Goodwin shows a few options - some with figure carvings, some with just decorative patterns similar to those on your Pegasus bulwarks.... I've said before that my carving skills are non-existent, so I don't think I'm going to be making anything.....not at this stage of my modelling career anyway. This means I'll have to try and find something....this could prove an endless search. I do have some brass bare tree frames purchased from a model train store a while ago. I had thought of using clippings from the tree branches to render the decorations on the transom and bulwarks, but maybe I'll post a picture of these brass parts to see what the consensus is first....However, I don't really have a backup.... hamilton
-
Thanks Ferit, BE, Augie & Andy! Clearly I didn't do enough research to lead me away from the diamond-shaped windows....though now that I look at Goodwin's AOS Blandford again I see that none of the transom drawings have this type of window frame....I'm not sure I'll replace them, though, since I spent so much money and time on them and despite historical inaccuracy, I think they look alright and add some interest to the build....sorry! I'm actually more concerned with a structural aspect of the model that will somewhat skew the otherwise nice-looking open bulwarks on the blandford...I had the suspicion some time ago that the quarter galleries and forecastle were too high by about 2-3mm...but I didn't do anything about it, since I wasn't really sure and making the adjustments would have involved me cutting new bulkhead frames - for which I do not have the appropriate tools. Anyway, you'll see what I mean in a future post. In the meantime, I still have to figure out the decorative details on the transom and at the bottom of the quarter galleries, so technically this part of the build is not quite over.... Thanks again all for the comments and support - much appreciated! hamilton
-
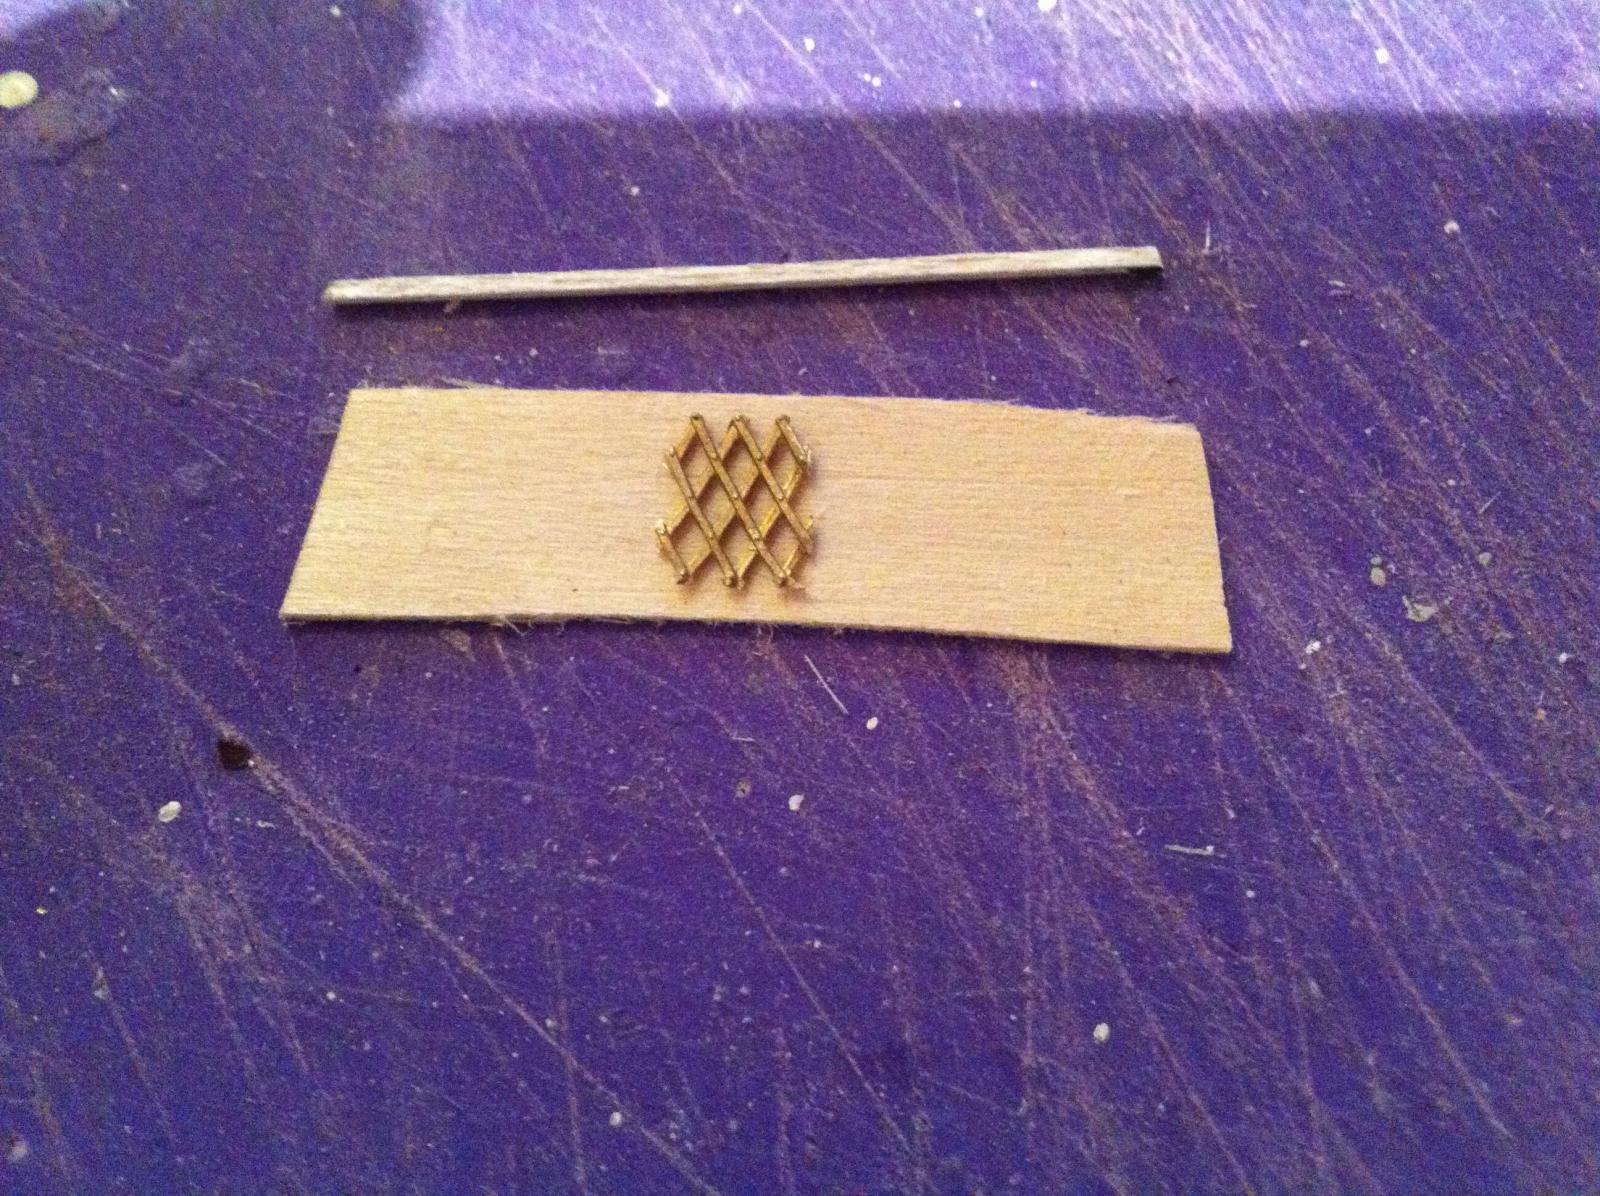
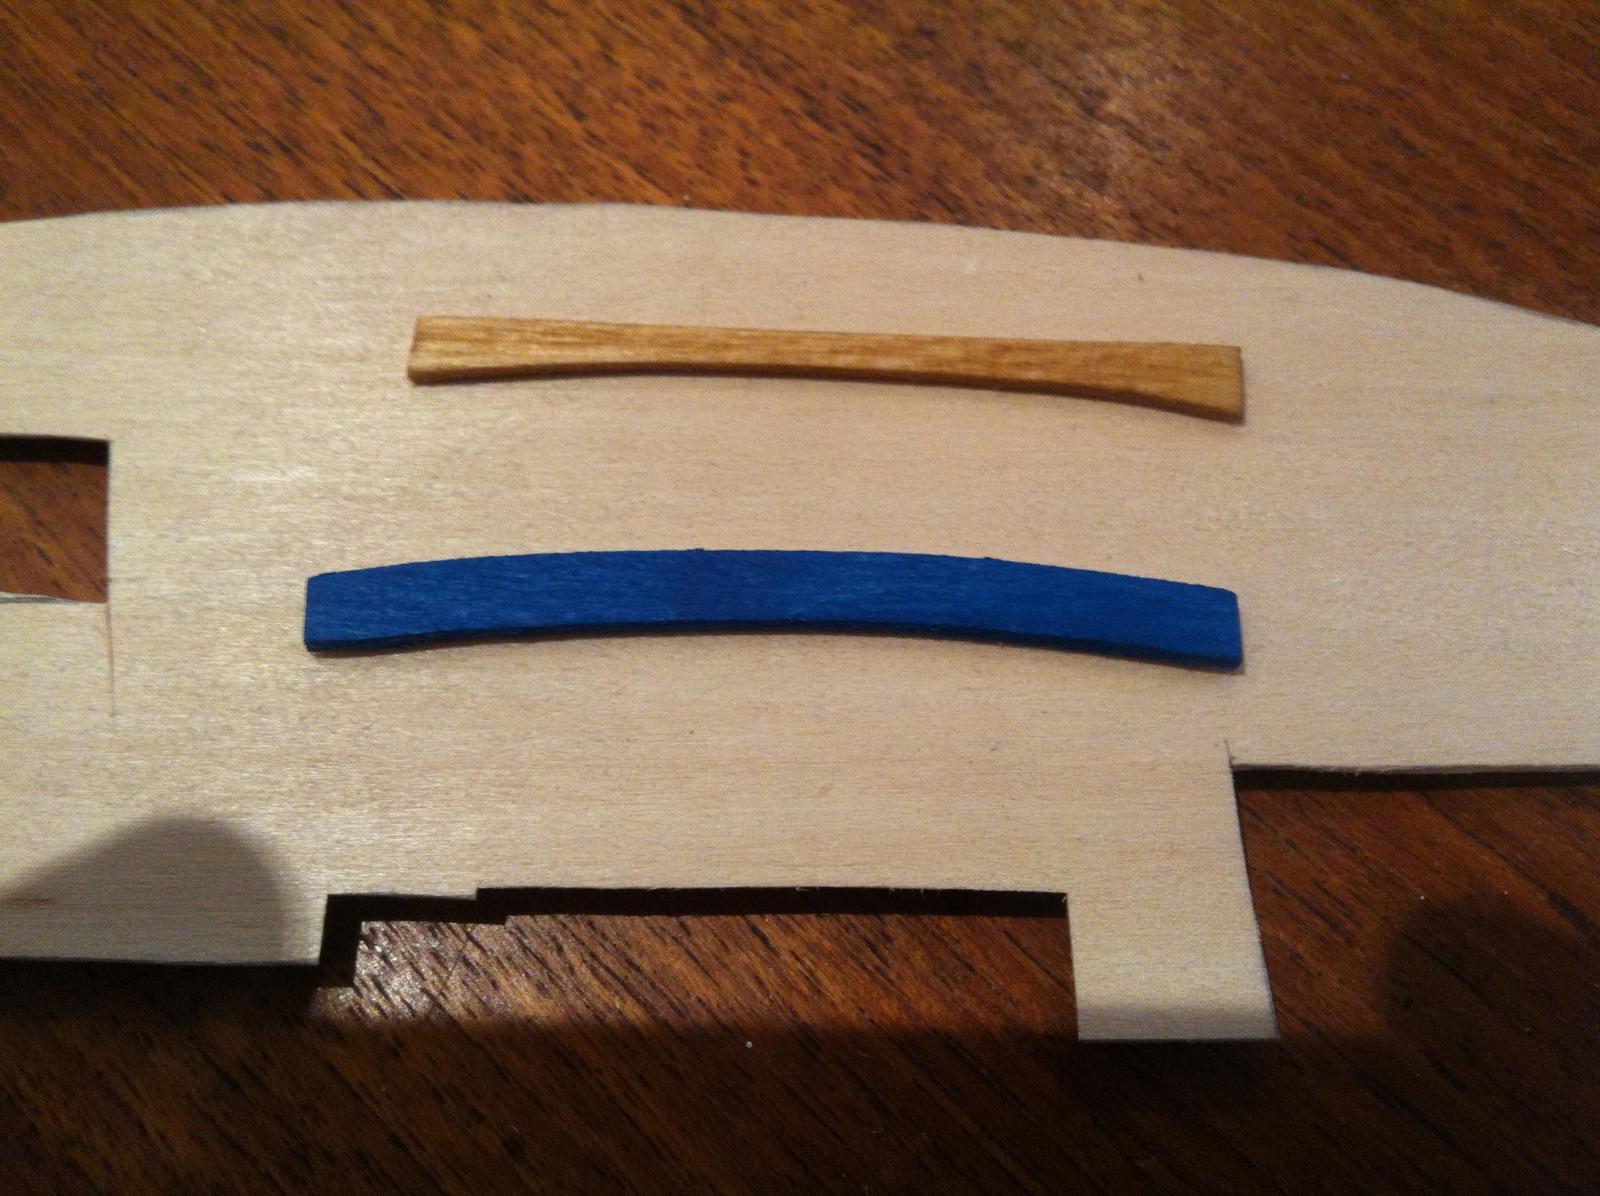
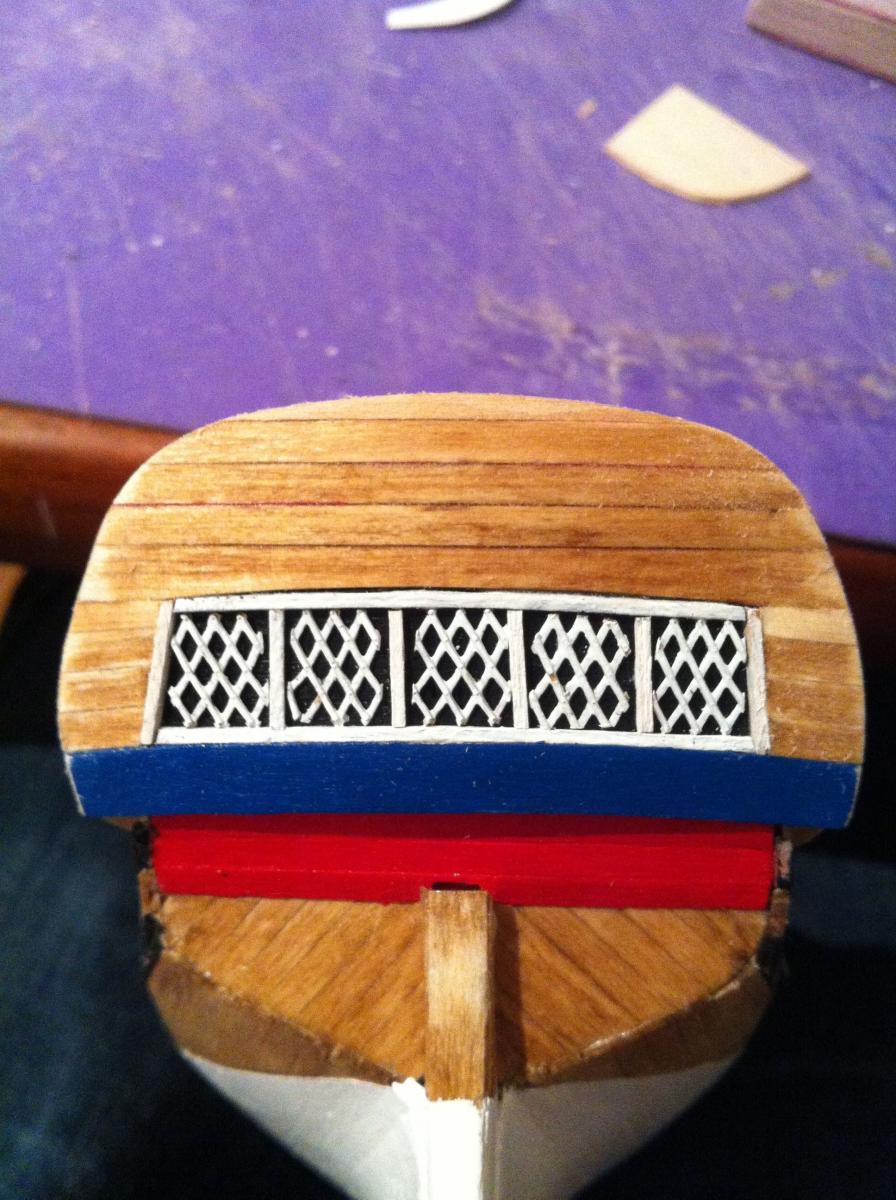
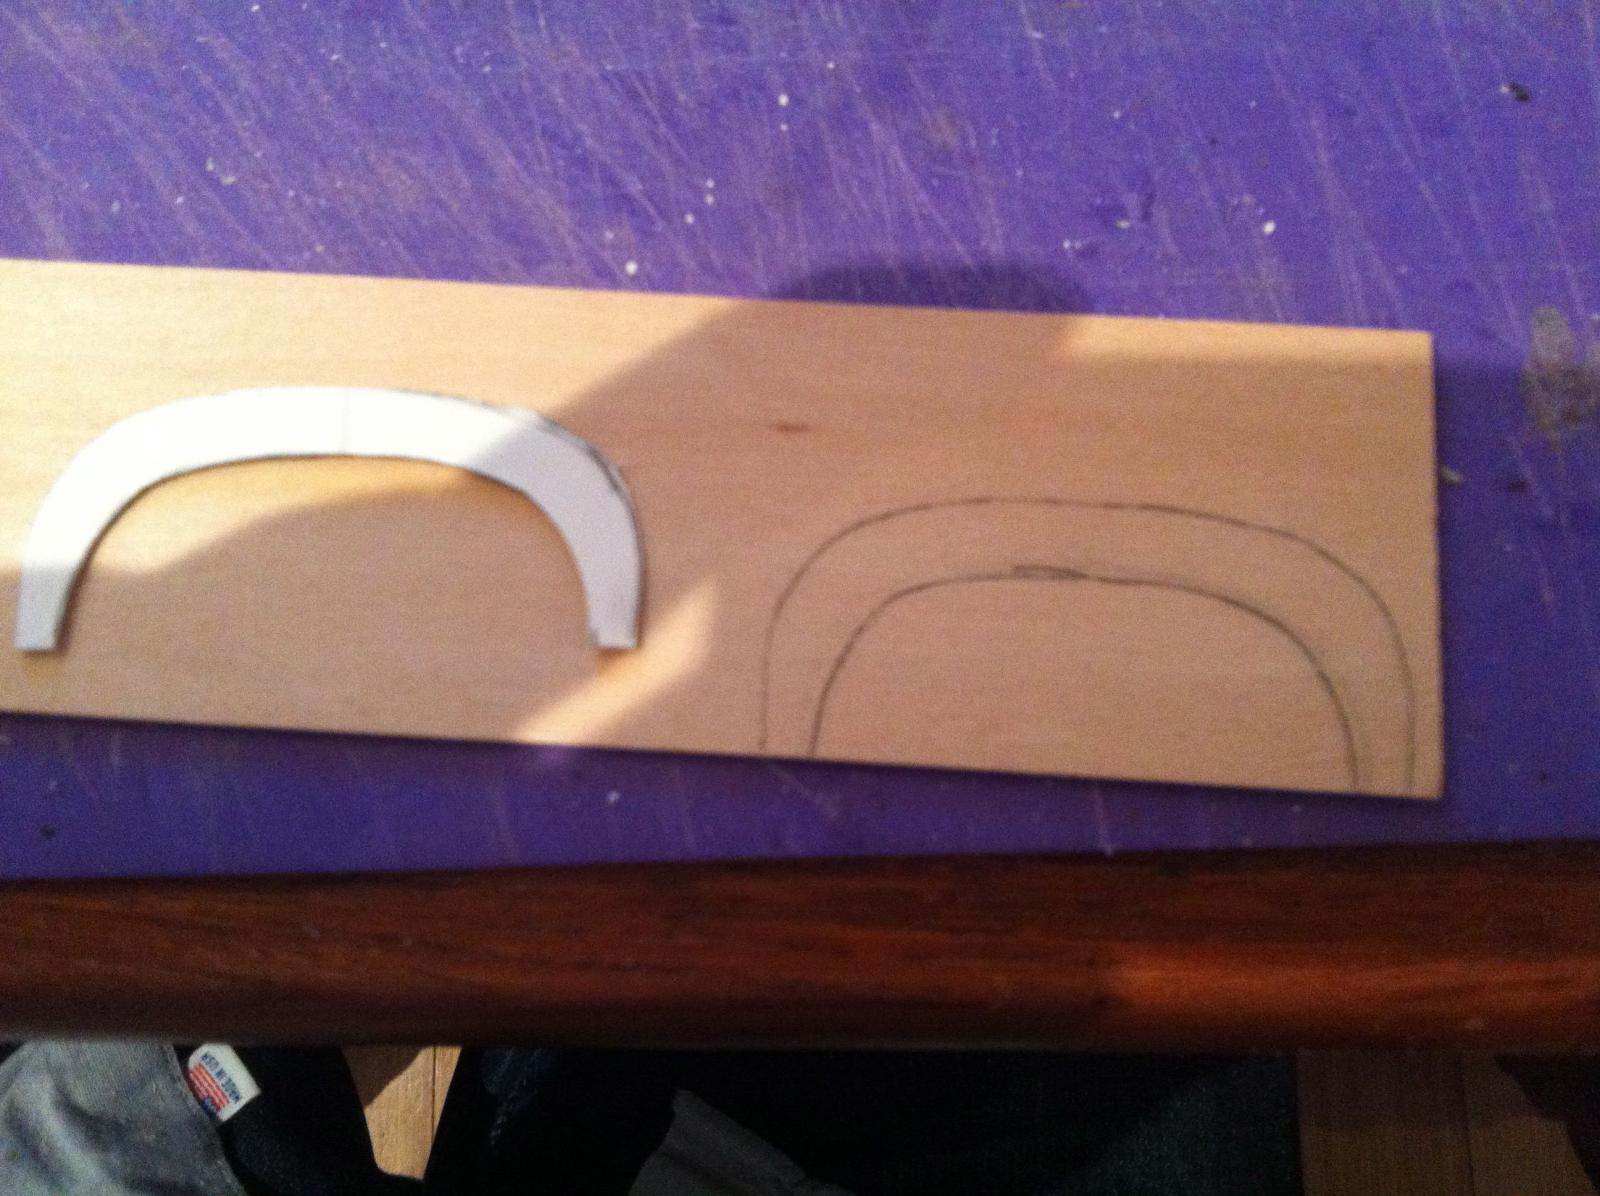
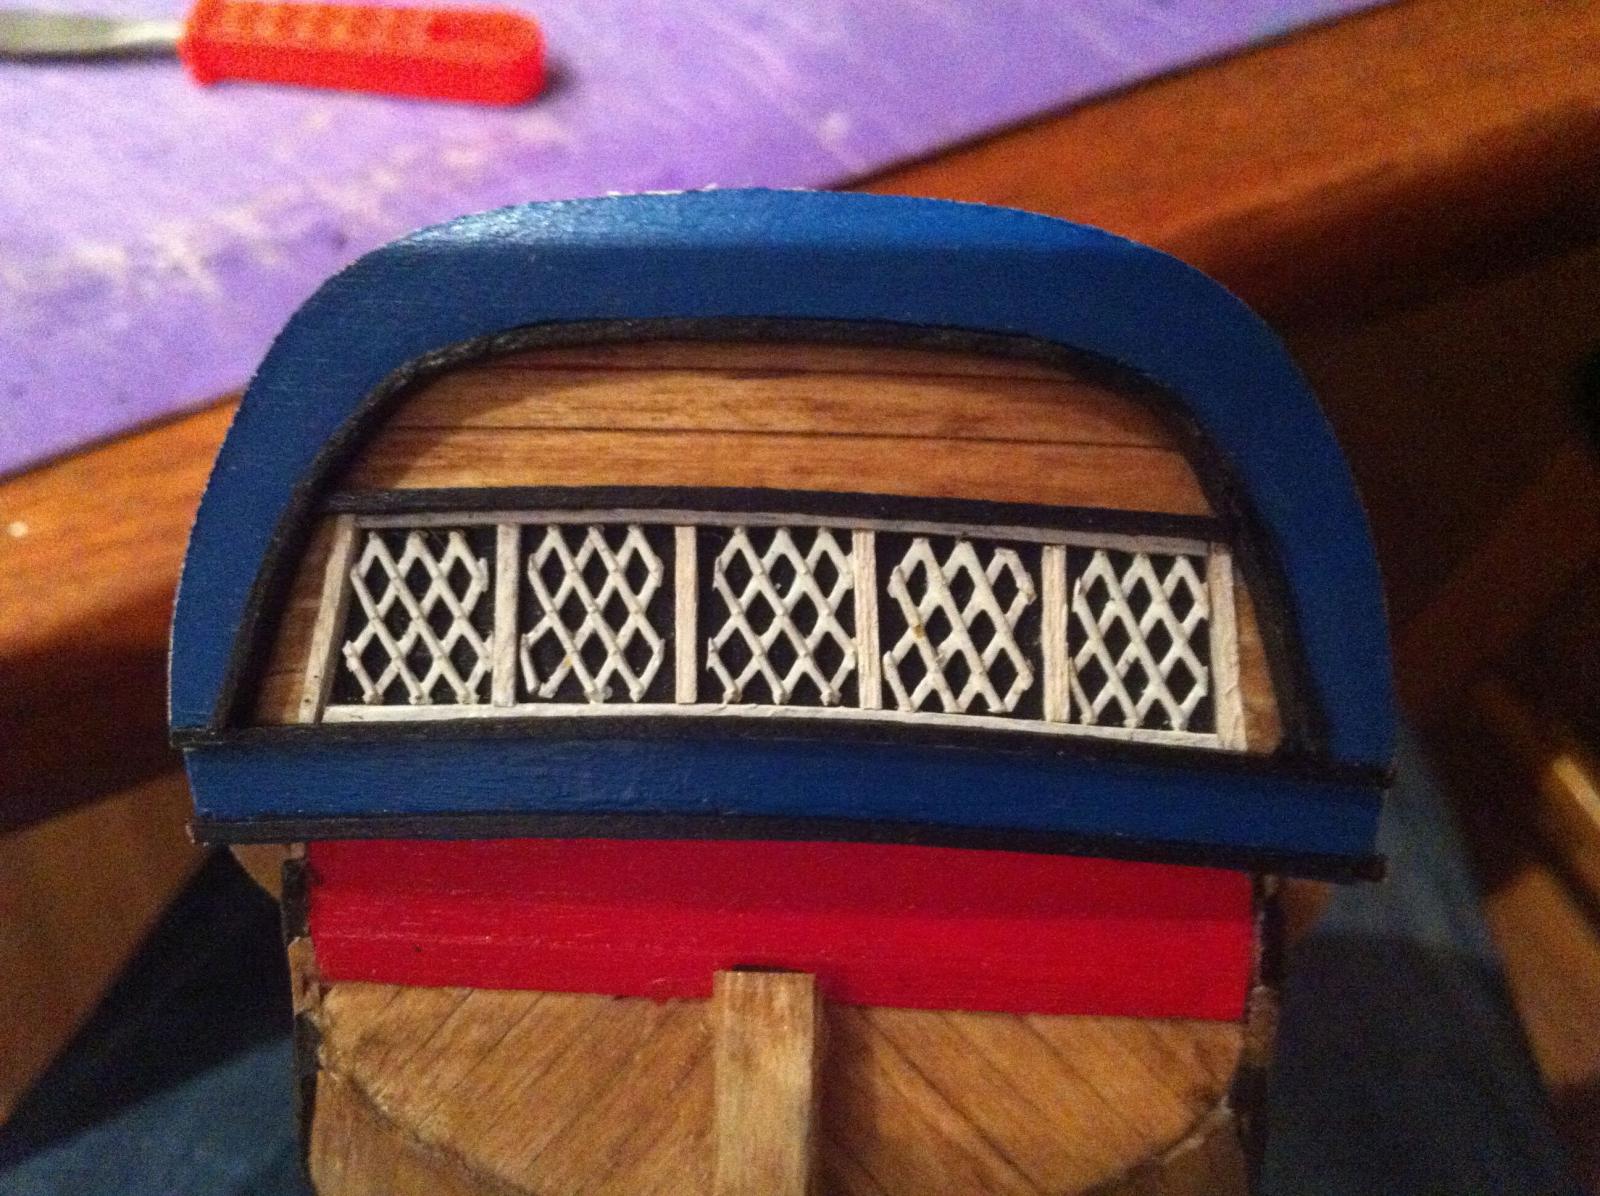
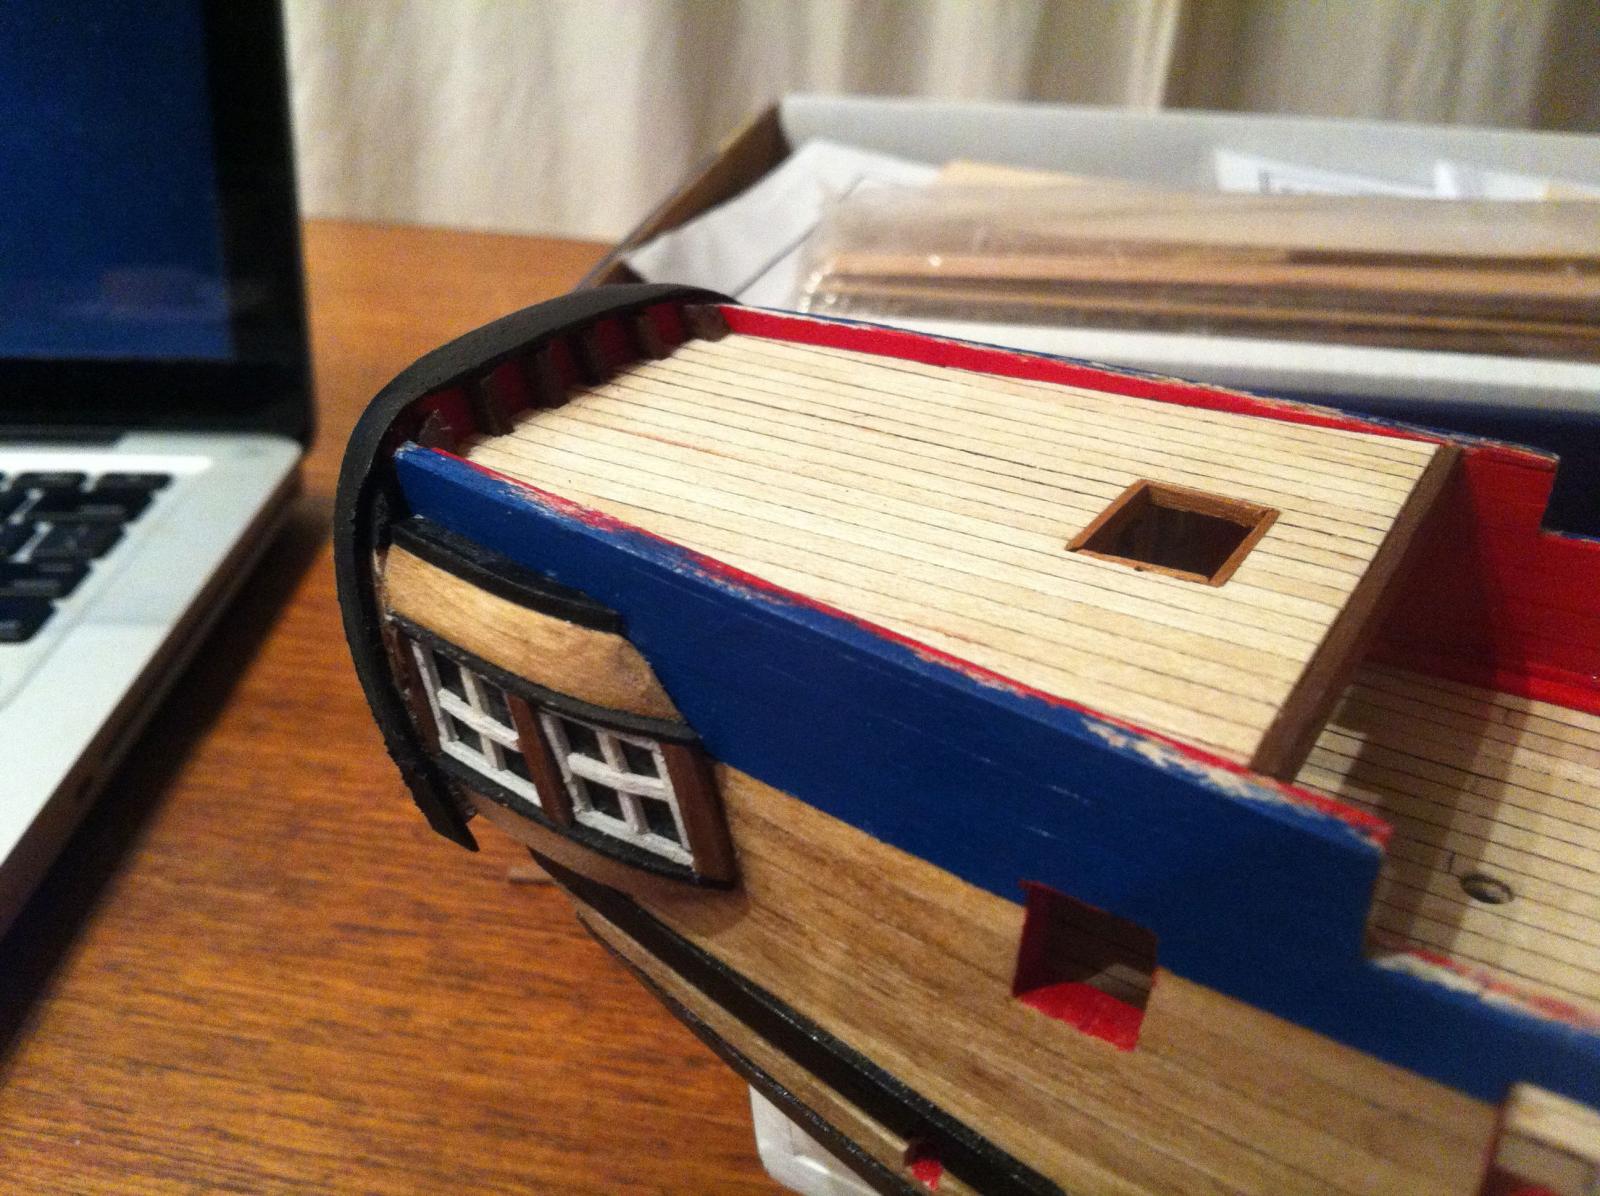
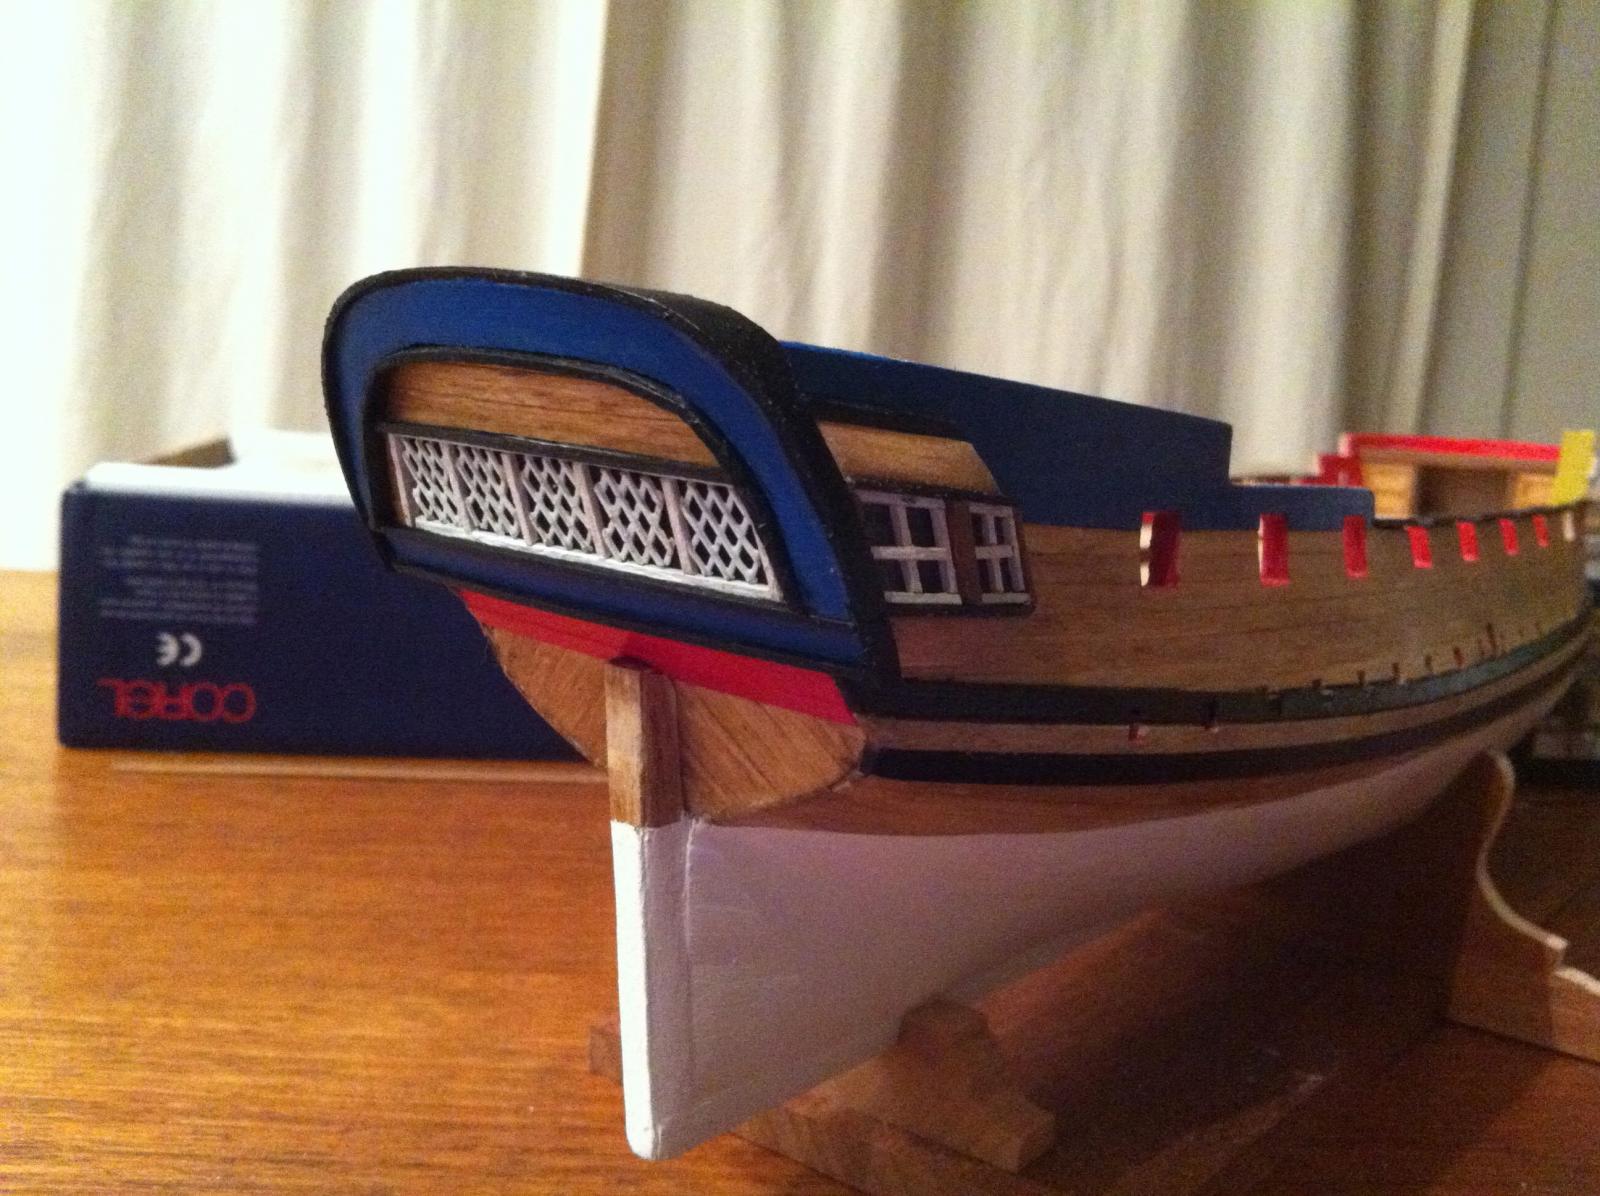
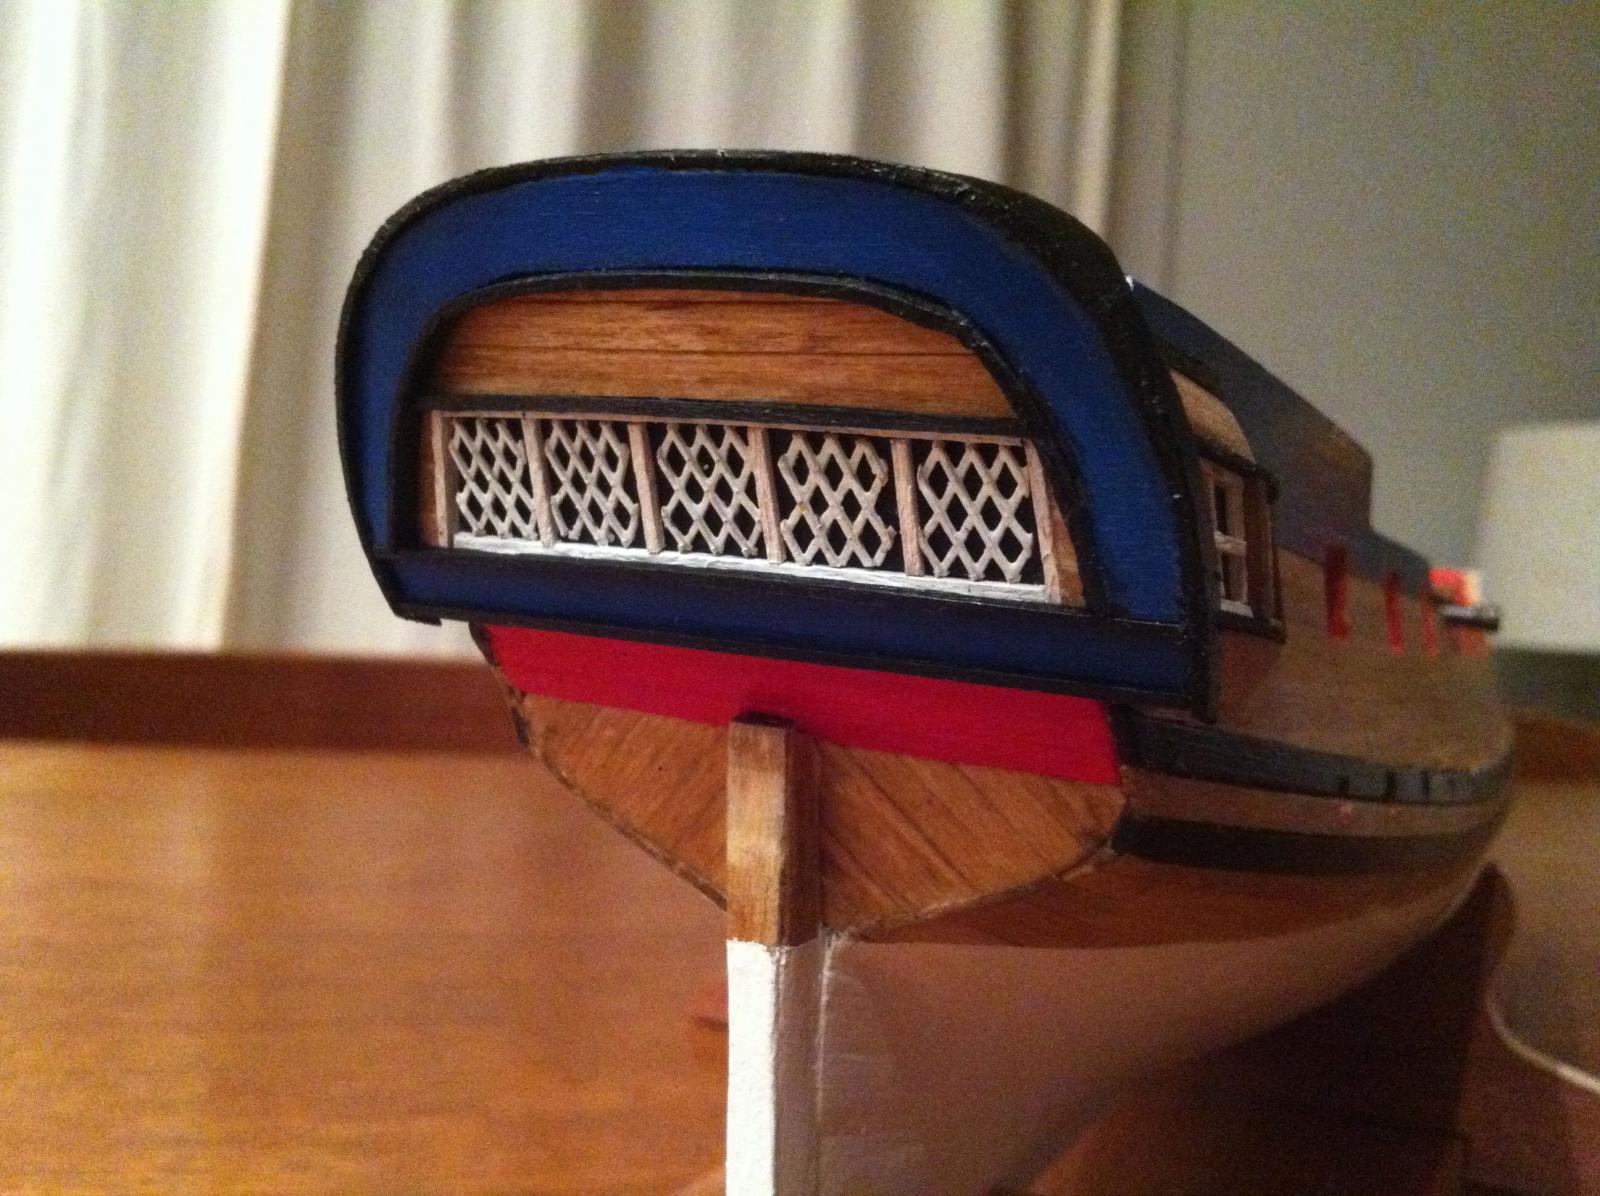
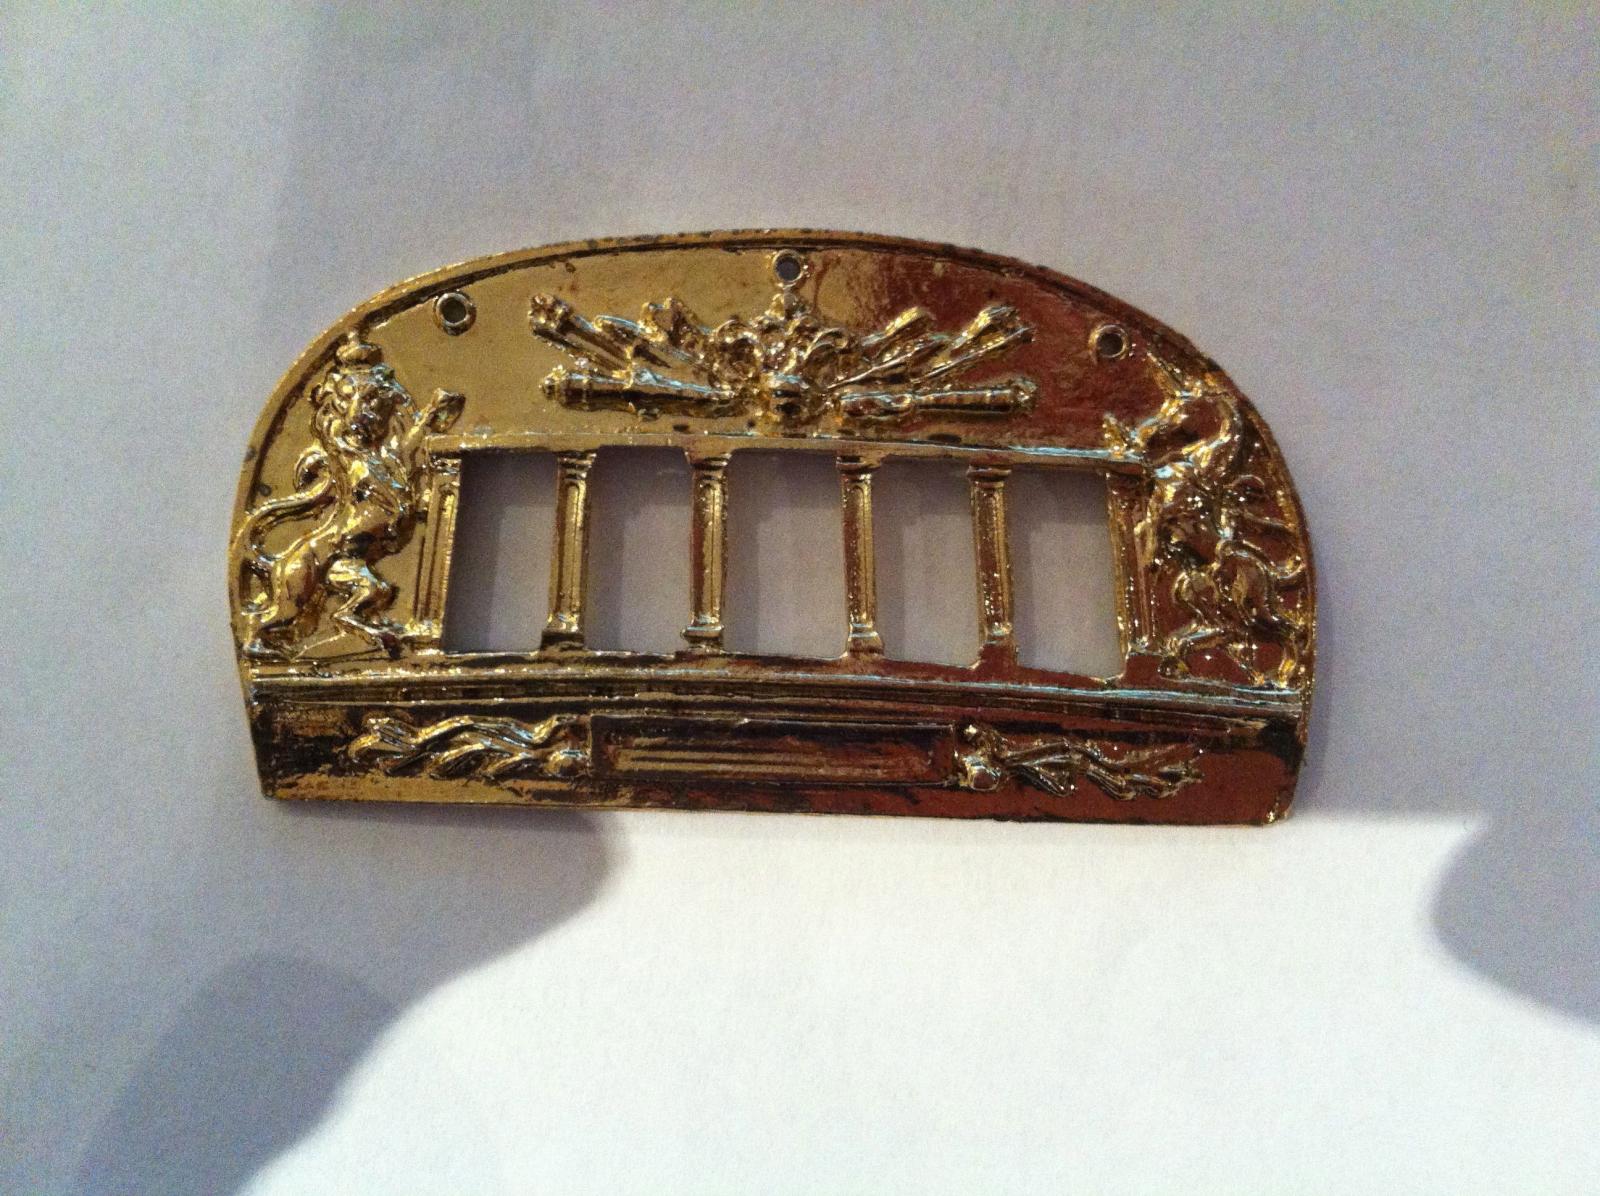
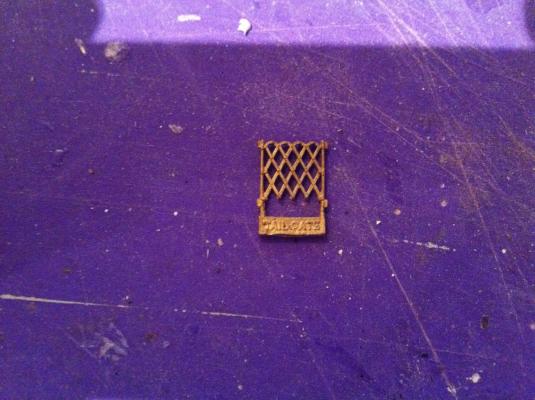
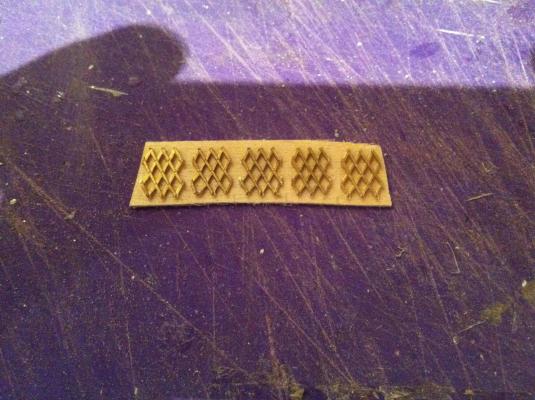
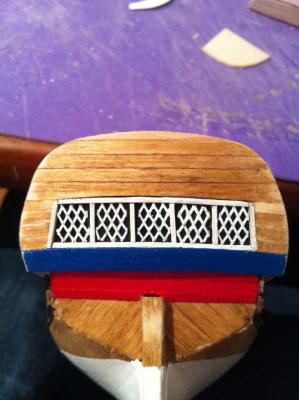
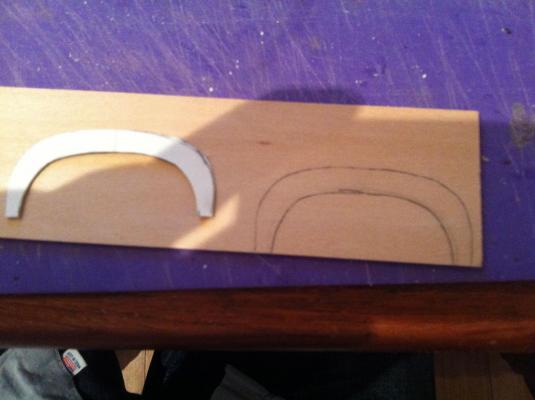
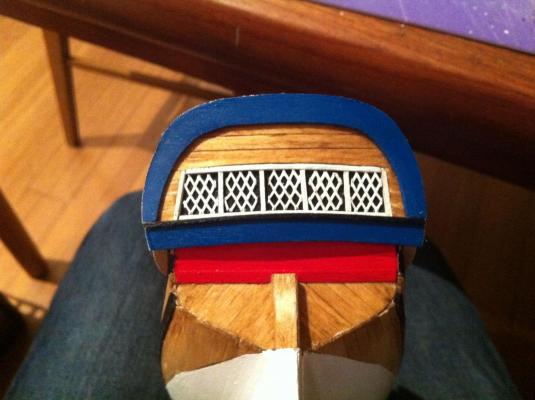
Well everyone, the transom is almost finished - I have some decorations to add, but I'll save this for a future post. For now, I'll explain how I went about things. 1. Cabin windows: after a lot of thought about how to approach things, I decided to first construct and install the cabin windows and then plank around them. I made this backing out of 1/32" basswood - The shape of it was based on the angle of the stern framing installed earlier. The window frames were at first a bit of a challenge - given that the area of the windows is much smaller than the quarter galleries. Fortunately, I found these brass tail gates at a local model train shop - I thought I could adapt them as window frames. I trimmed the brass parts to leave a basic frame - I eventually trimmed 5 and laid them across the window backing to get a sense of spacing. The backing was then painted black, and the frames painted white. I then glued the centre frame and added 1mm x 1mm strips (also white) as vertical frames. I finished off the assembly with some white 1mm x 1mm strips at top and bottom. The whole assembly was then fixed on the model. Here it is. 2. Planking: The planking was done with 3mm x 1.5mm basswood, except for the planks immediately above and below the windows, which were spiled from a 1.5mm sheet. Here they are, with the upper plank stained Golden Oak and the lower one painted blue - this is the strip on which the name plate will be fixed - another future addition. Here is the basic planking finished on the transom 3. Moldings: I added a curved piece around the edge of the transom - cut from 1/32" sheet & painted blue (I don't know if this feature has a name....can anyone enlighten me?). I also added some 1mm x 1mm moldings as well as a 1mm x 2mm curved molding on the inside of the curved transom piece. I started by making a template and tracing it onto the sheet: I then simply cut it out, painted it and installed it: Then the moldings went on - painted black.... 4. Cap rail: I then fabricated the cap rail. This was spiled from a 1mm x 6mm strip. It needed to be thicker across the top (the taff rail) and tapered around the quarter galleries. A little tricky but not too bad - also painted black. Here it is.... And here is the transom again and a closer shot with cap rail installed. And here, for comparison, is the part supplied by Corel.... So that's it...I have to say that I'm quite relived that this part of the build is done. It was a lot of fun puzzling the transom out and putting it together and even though it's not perfect, I'm very pleased with the results. One thing I tried to do and didn't was to apply the name to the lower strip on the transom. I had a sheet of dry transfer letters, but they were black, so they did not really show up - I'm going to try to find some white lettering and apply it to a .5mm x 5mm strip to add later.... I also bought some brass bare tree frames from the model train shop, which I'm going to use as decorative elements on the bulwarks and transom - later for that, though. In the meantime, I've begin to install the cap rails & frame ends for the open bulwarks. I'll update this once it's done. For now - hope you're all having a great weekend and happy summer!! hamilton


-
Really nice work on the sails, Richard! Impressive detail - it'll look great when rigged up hamilton
-
Hello Druxey, Brian, Frankie and Augie: Thanks for the clarification - black it is! hamilton
-
masts used to support ship's boat
hamilton replied to hamilton's topic in Masting, rigging and sails
Hi Janos, Druxey, Dan and Frankie: Thanks a lot for the input - I think I may fashion full lower masts to support the ship's boat....the more detail the better, I say! hamilton -
Hi there: I don't know if this is the right forum for this question, but.... I know that frequently ship's boats were stowed on deck supported by spare masts laid down across gallows bitts. But would these masts have been completely shaped and finished in the same way as the installed masts or would they have simply been poles cut to length and unshaped.....any wisdom on this question would be greatly appreciated. Thanks a lot! hamilton
-
Hello all: I'm working on a modified HMS Greyhound (Corel) and am wondering (in advance) how the channels would have been finished. Corel supplies these as laser cut in Walnut ply - I am tempted to paint them black, which I think will fit better with the scheme of the vessel as I've been building it. I'm assuming this is one of those "up to you" kind of things, but I thought I'd ask the membership just in case. Thanks in advance! hamilton
-
Amazing work here! I've always been curious about this kit and it's nice to see it come alive in such capable hands. Just read through this log with great interest - I'm also happy to hear that you put your modelling work to such good causes!! hamilton
-
Take your time Harlequin! Though pics would be nice...... hamilton
-
Cheers Mobbsie! I'm actually gaining quite a bit of confidence - the trick is not gaining too much!! hamilton
-
Ummm...didn't you say this was your first model? I can't get results this nice and I'm on my 12th!!!! hamilton
-
Thanks ZyXuz - much appreciated! hamilton
-
Thanks Ferit, Andy, Augie and BE!! It was definitely worth the effort, though some refinements could have been made - particularly with the window frames....A thinner styrene instead of 1mm x 1mm basswood might have made for a cleaner finish.... In any case, last night I started on the transom and though my mind is a little muddled on how to put it together and finish it off, I'm confident that it will look at least a little better than the horrendous part supplied with the kit..... I will post photos documenting and explaining my approach to building it once it's all done - I've just got the cabin windows and frames completed now and will begin planking it up sometime soon - maybe tonight or Thursday.....hopefully it will be all done by the end of the weekend and I can move on to some more straightforward elements of the build! hamilton
-
Wow Mobbsie! You weren't messing around! That would have taken me forever to complete and it wouldn't have looked half as good as yours! Very well done! hamilton
- 1,279 replies
-
- 1
-

-
- agamemnon
- caldercraft
- (and 1 more)
-
Hi Jason The knighthead fix is very well done! And it's a good thing that BE clarified the timberhead question (now I can add that to my modelling lore, as well and free myself from many mistakes!). The model now looks even more beautiful than before! hamilton
-
Hi Augie - I don't know what you mean by "doesn't look like a whole lot" - looking at your Syren, this phrase literally makes no sense! It looks like a whole lot to me! hamilton
- 1,668 replies
-
- 2
-
-
- syren
- model shipways
- (and 1 more)
-
Good luck with the planking - head down, eyes open, bottle to hand (but not too close!) hamilton
-
Beautiful work, Jason! Re, the knightheads - I'm not too sure, but the knighthead's I've seen are normally either side of the bowsprit - it might have been different with the Snake, and it's also possible that I get this idea from exceptional (and potentially incorrect) models! Others can confirm. Also - the timberheads would actually be the ends of the frames, so they wouldn't run in line of the gunports, as far as I know....I wonder if you could cut it off, sand it down, refinish and place the timberhead forward of the gunport...again others can confirm She looks fantastic in any case! hamilton
-
Amazing work, as usual Ferit! Isn't it nice to see the ship finally start to move upward? It would be nice to see a profile shot with the mast to get a sense of the height - no pressure, of course!! I know it's far ahead, but are you going to add the sails? hamilton