


GrandpaPhil
-
Posts
5,023 -
Joined
-
Last visited
Content Type
Profiles
Forums
Gallery
Events
Posts posted by GrandpaPhil
-
-
-
Welcome!
- Keith Black and mtaylor
-
 2
2
-
I collect too, but my primary fun in model making is the actual making part.
Then, my Admiral and I decorate with them when I’m done building them.- firdajan, chris watton, mtaylor and 1 other
-
4
-
All carriages have their iron banding, and holes for eyebolts are predrilled:
Working on wheels right now:

I need a total of 20 wheels, times double thickness, so I need 40 wheel pieces.
Then I will make the iron banding for them after I make some axles out of toothpicks.Odds are, you’ll need a borescope to see any of this, but…why not?
- chris watton, Cirdan, John Fox III and 1 other
-
4
-
-
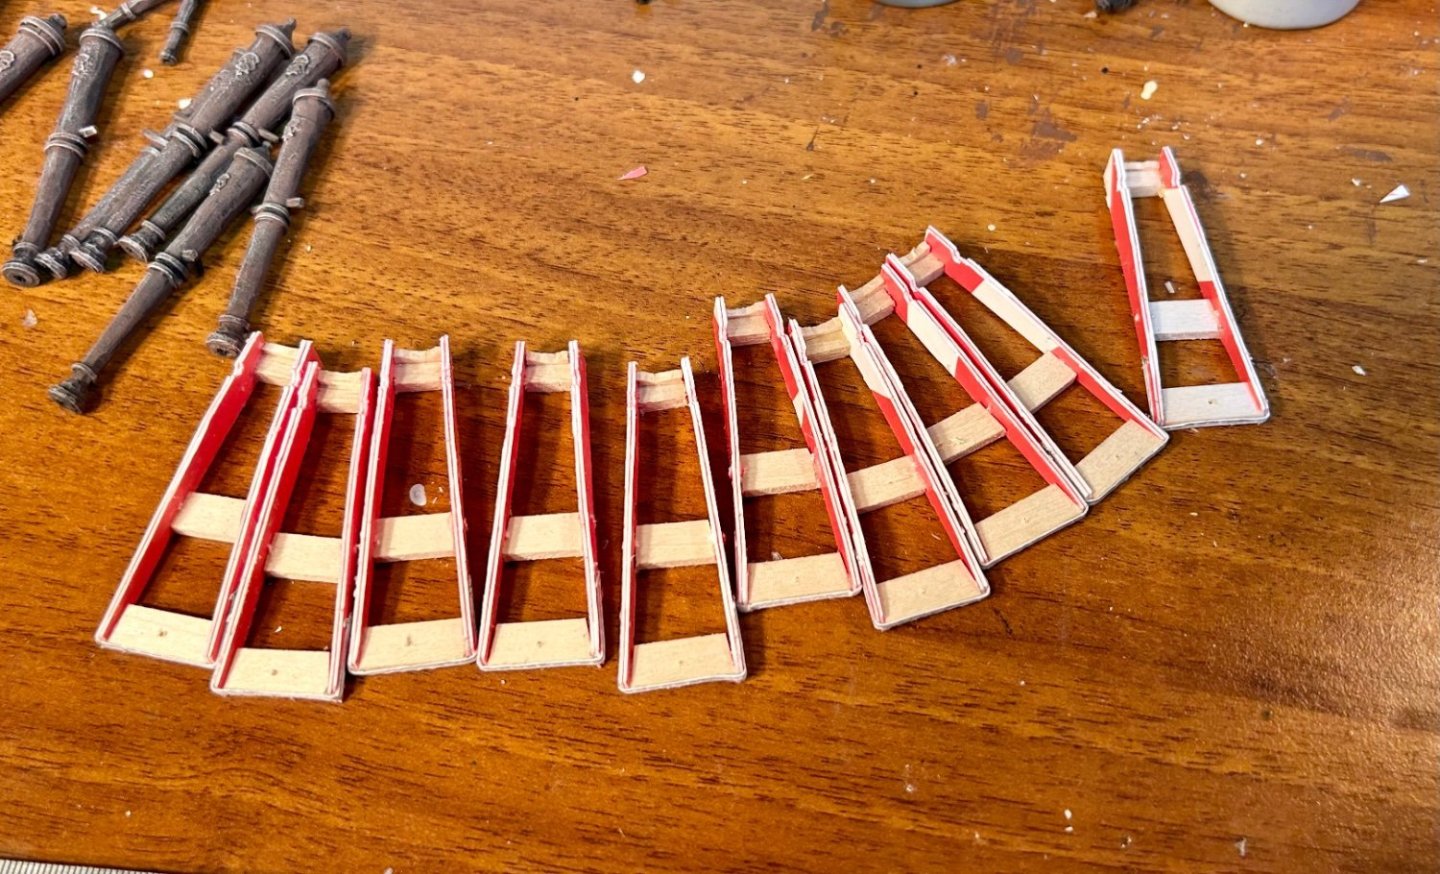
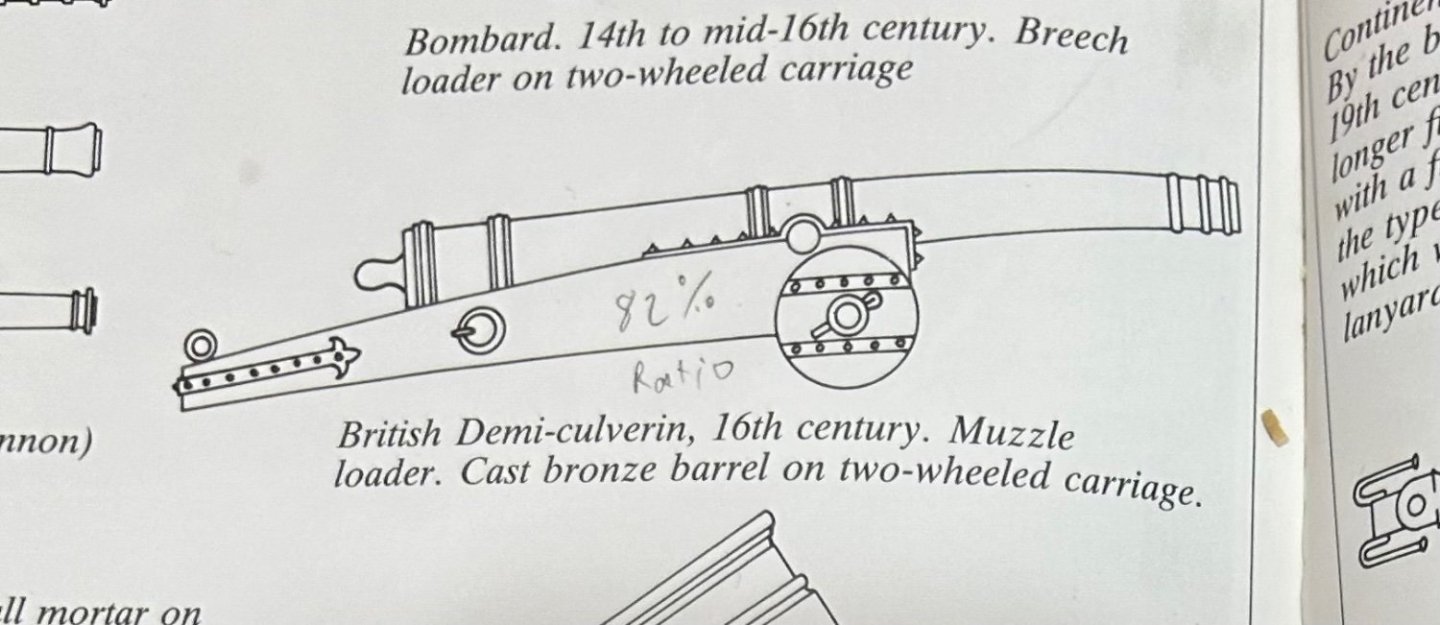
I’m making the first set of culverin carriages.
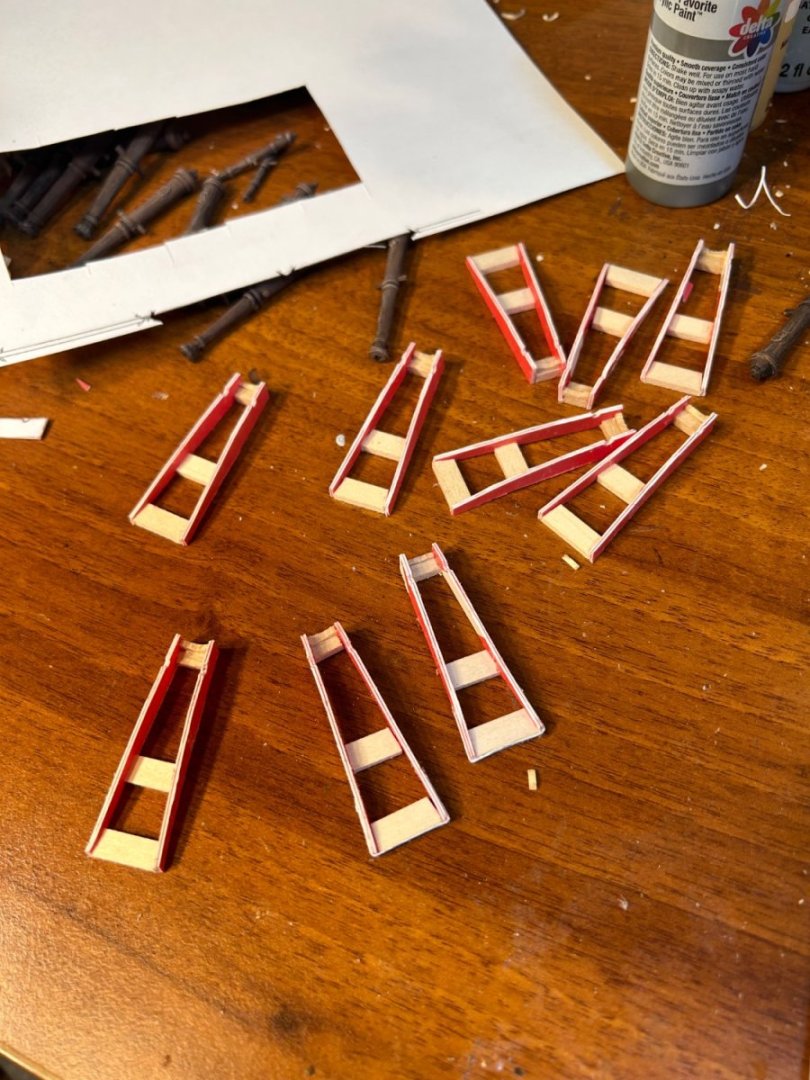
I’m ad libbing a little bit because I am using Zu Mondfeld’s drawing which is side on.
I put the rear bracing on them because of the eye bolt and iron strapping on the back of the carriage.
The guns on the Golden Hinde in London do not have the rear cross brace.
However, those guns are a lot smaller than the culverins on the Revenge.
- firdajan, Glen McGuire, Knocklouder and 4 others
-
7
-
I added the highlight coat:

Thank you @Thukydides for the reminder.
It made quite an improvement.
Nicely done on the Dreadnought miniature.
In other news I have the sides of the culverin carriages traced, scaled and glued down to card.
Pictures will follow when I have something worth showing.
- John Fox III, chris watton, BenD and 6 others
-
9
-
-
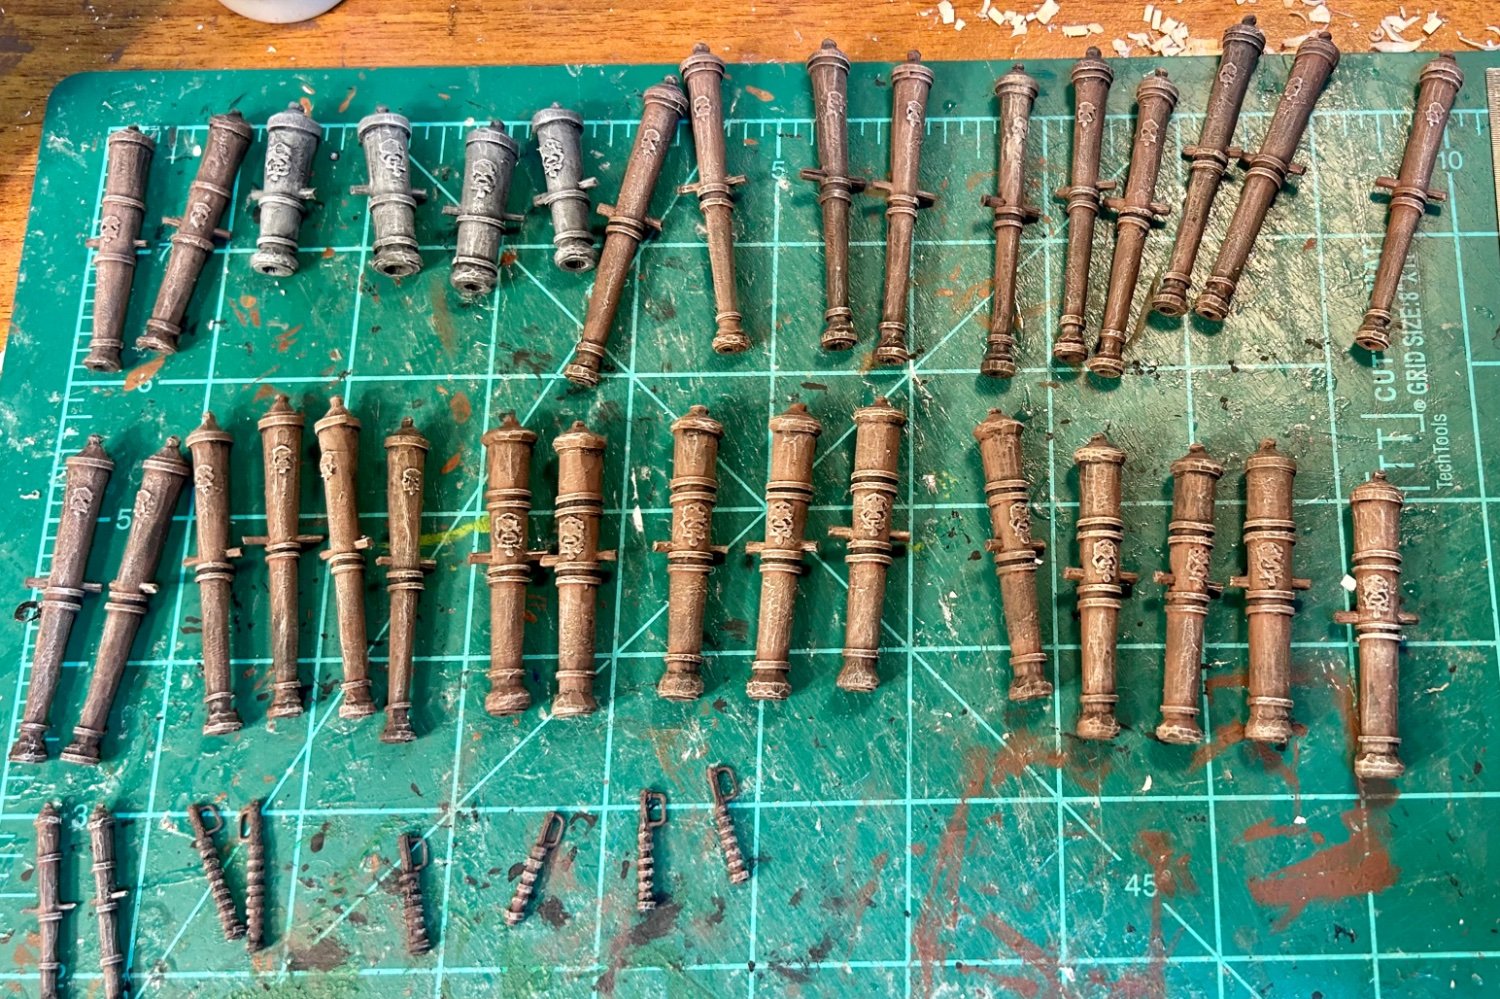
All cannons are painted:
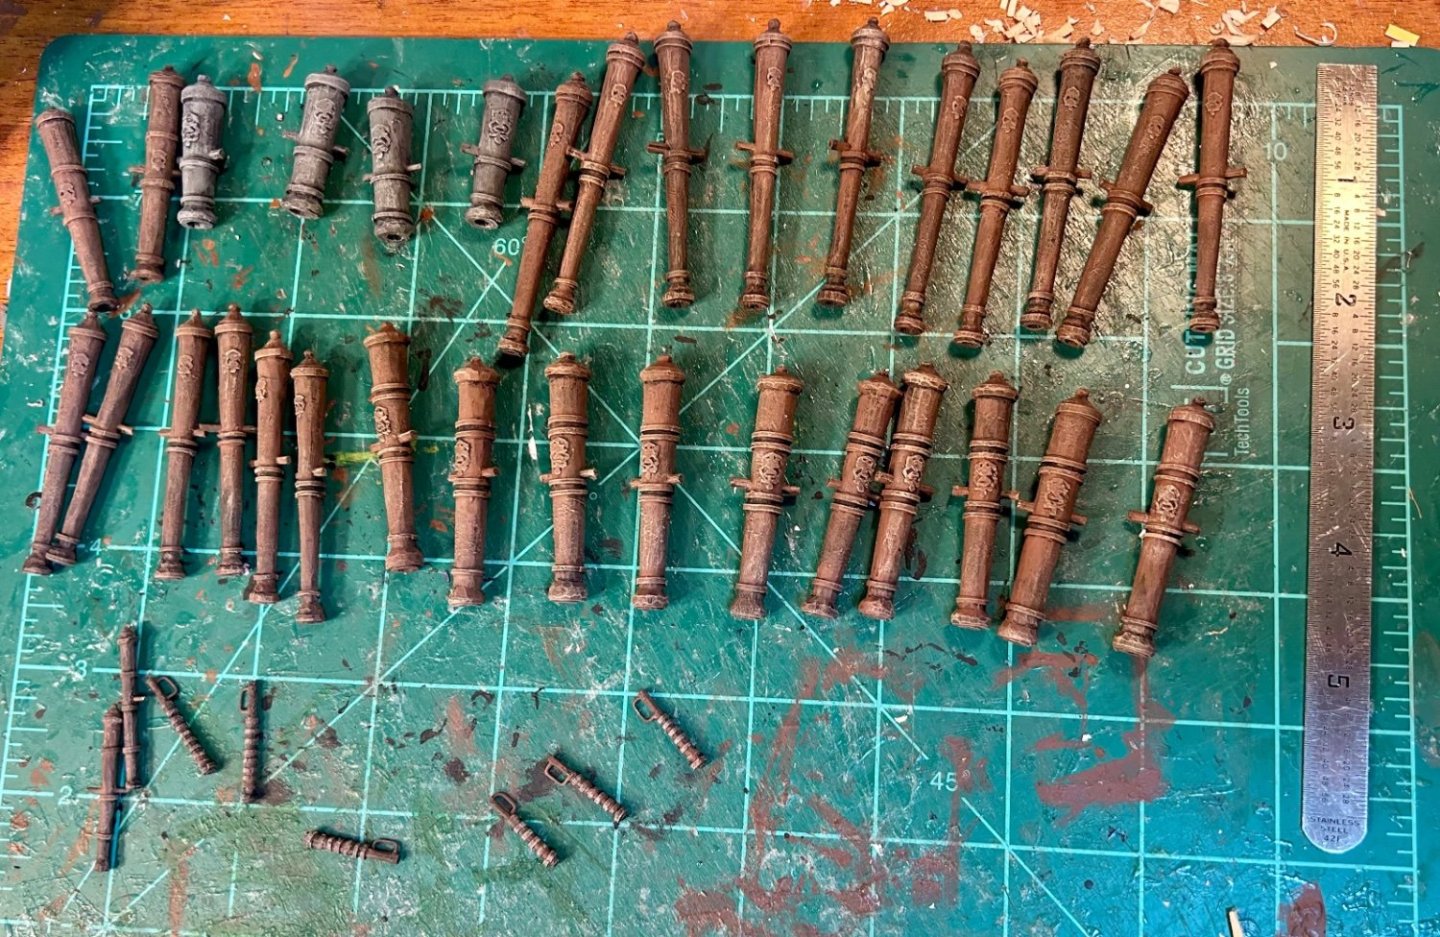
I used wargaming miniature painting techniques to generate the faux metallic look with acrylic craft paints.
I have never painted faux metallic bronze before, but it looks mostly like bronze stuff that I have seen before.
So, I’m happy with them.
Next up will be the carriages.
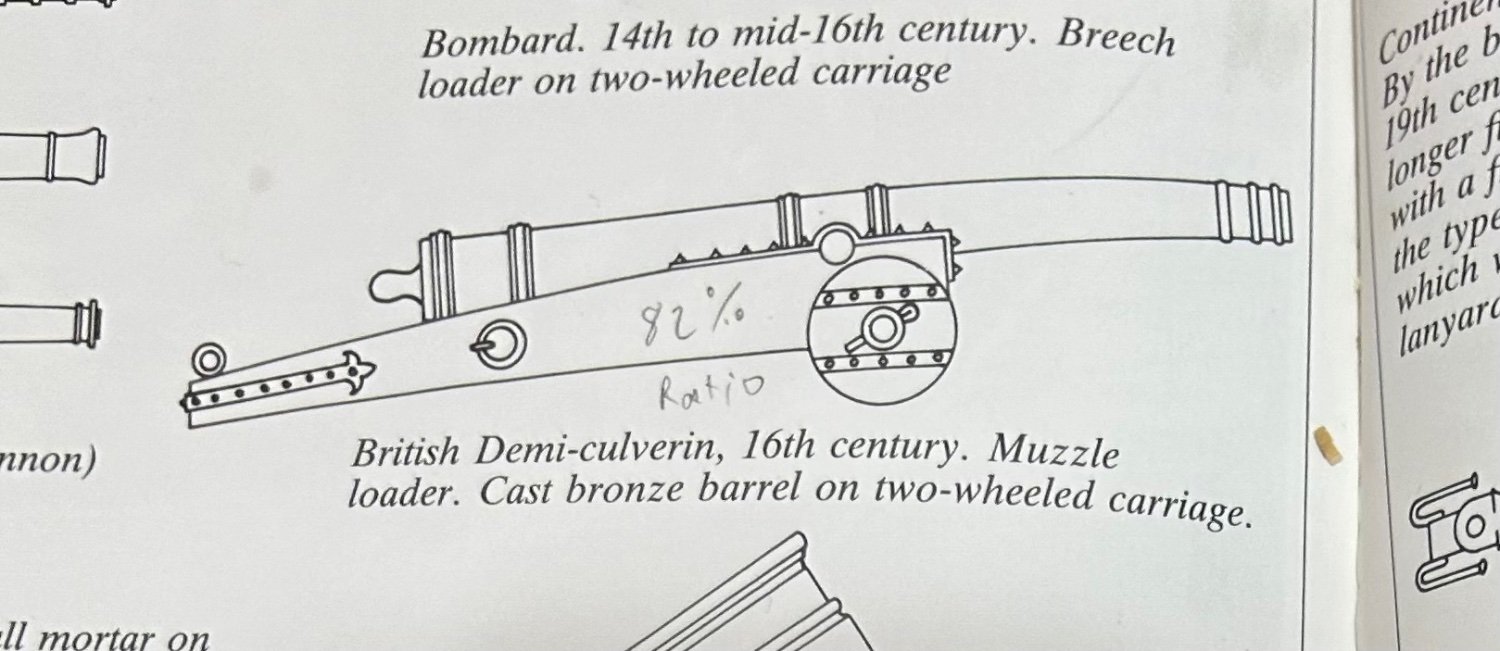
I am going to mount the demi-cannons, canon periers and the sakers on conventional carriages.
The culverin type guns will go on the two wheel carriages.
The breech loaders will get the block mount shown in Zu Mondfeld’s Historic Ship Models.
The two-wheel carriages will come from the same plate.
I will trace the four wheel carriages out of the instruction booklet that came with the plans.
Everything will be sized and scaled accordingly.
After I get all those done, I’ll install the ones I need to preinstall and then get back to covering the hull.
-
The breech loaders are finished:

All cannons are finished and just need painting.All of them but the canon periers will be painted with a faux metallic bronze.
The canon periers will be painted faux metallic iron.
However, they all will start out painted black.
The bronze ones will have successively lighter browns layered up and dry-brushed on.
The iron ones will have grays layered up and dry-brushed on.
- mtaylor, Cirdan, Glen McGuire and 1 other
-
4
-
First port gun:

Using normal paper for the banding worked wonders!
- Cirdan, Glen McGuire, John Fox III and 1 other
-
4
-
-
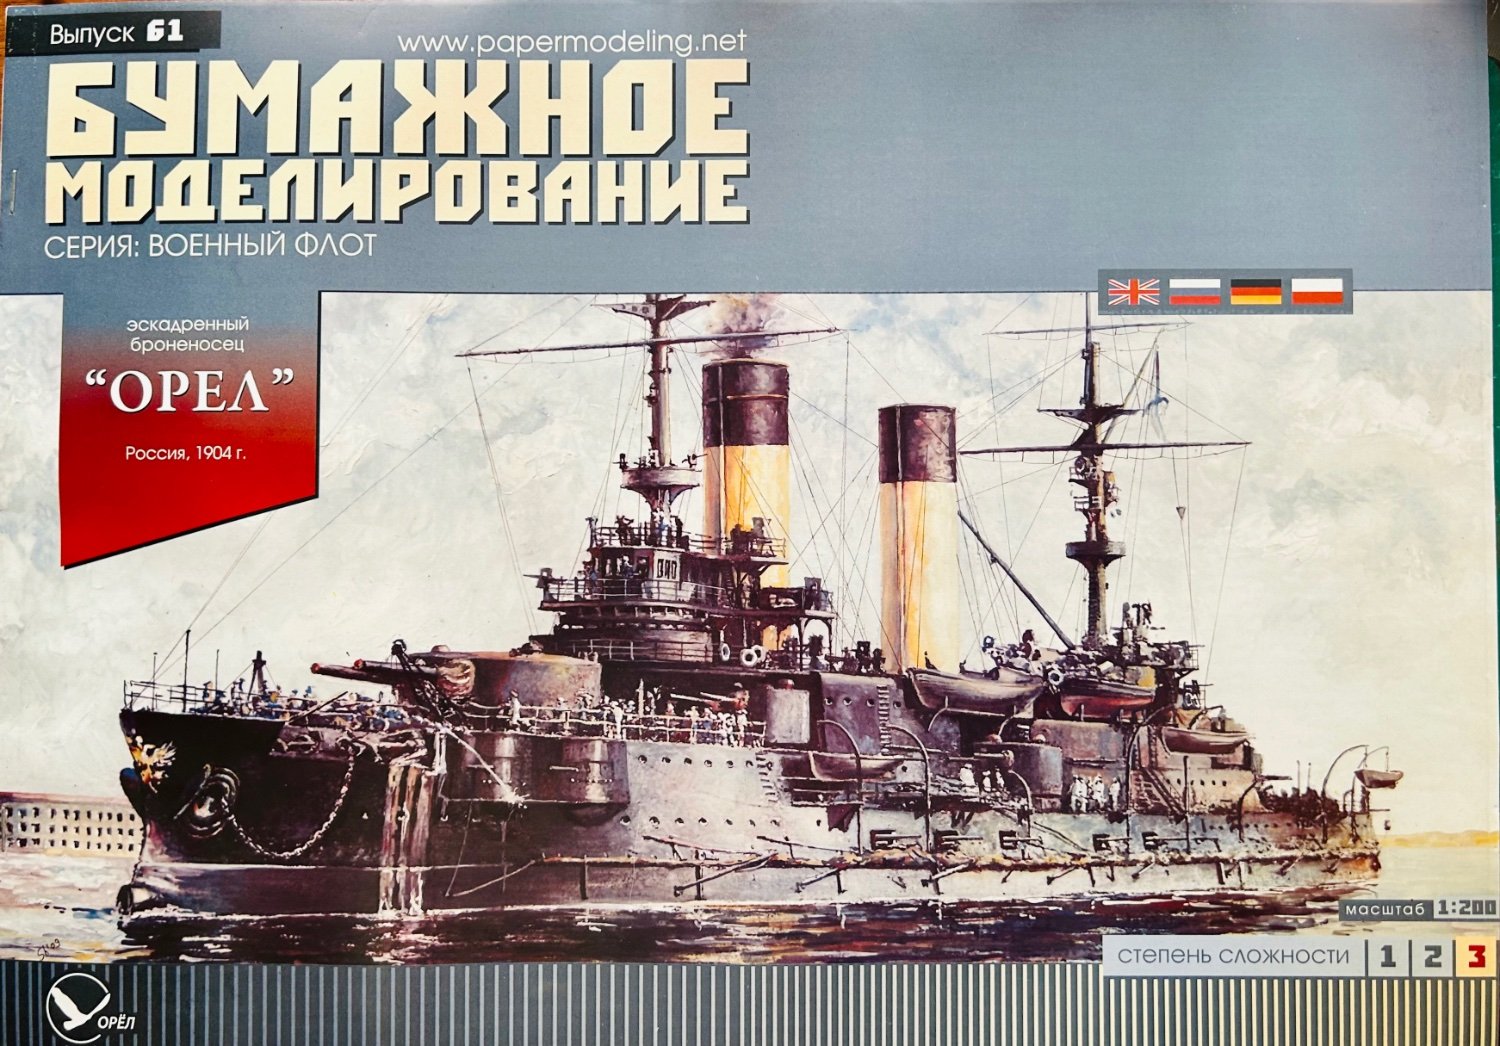
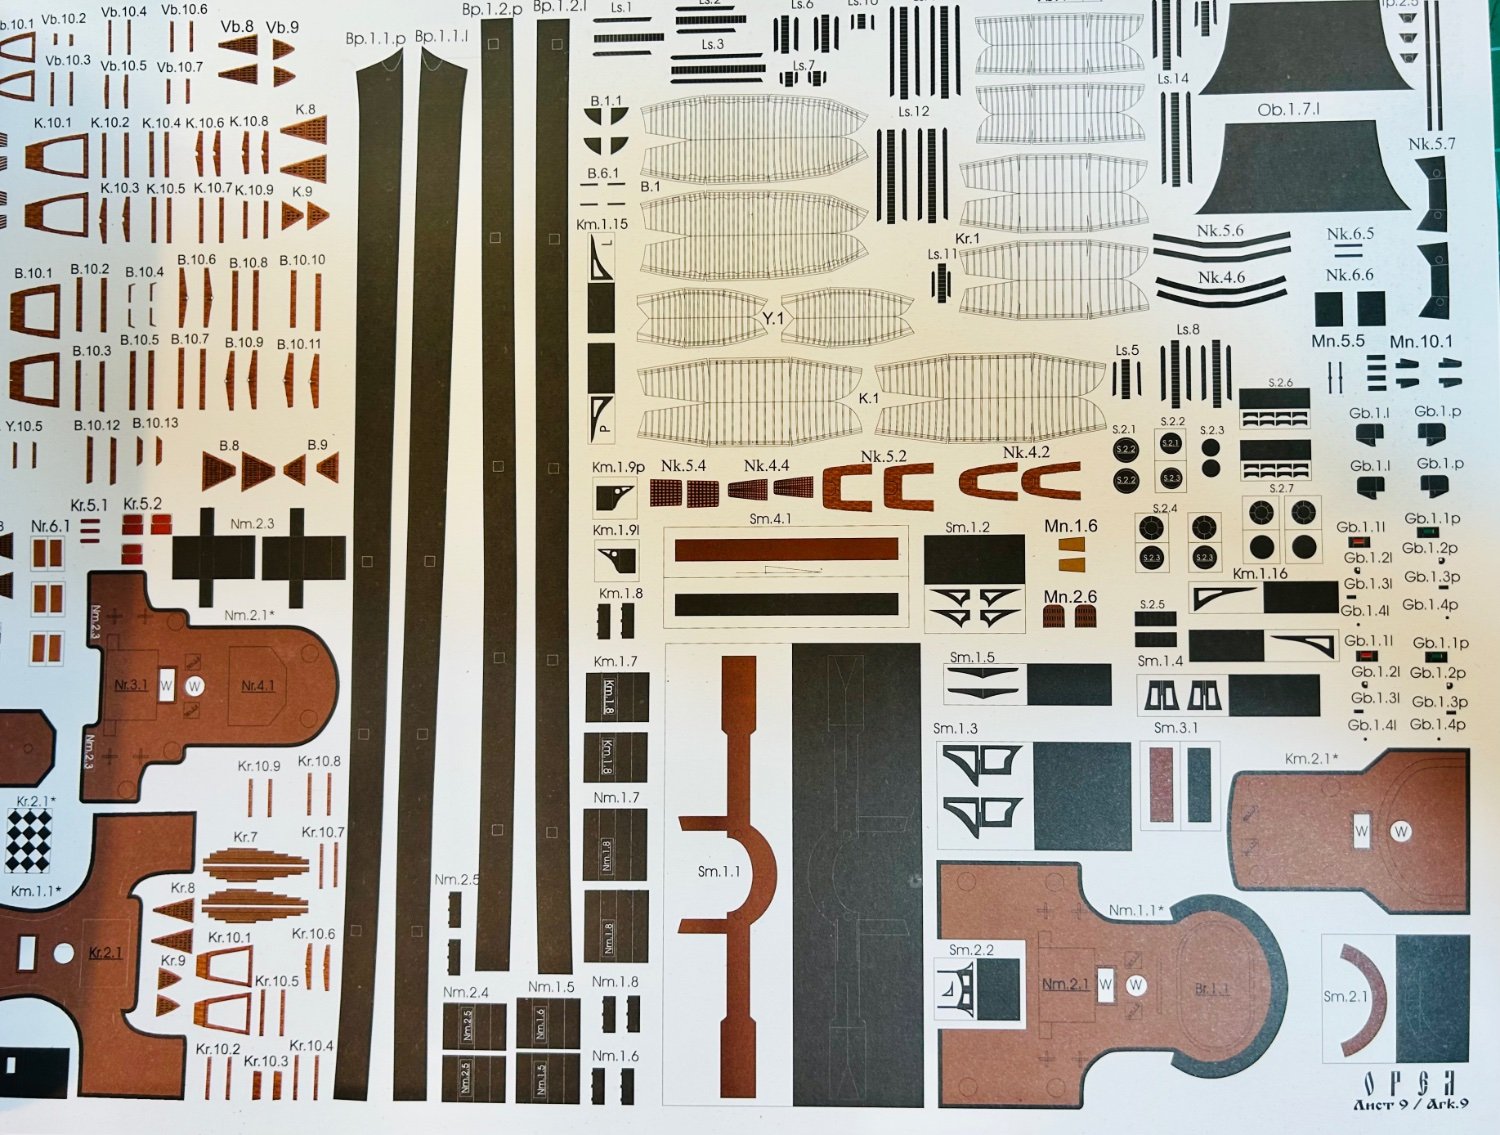
This is the Orel kit of the Battleship Orel of 1904.
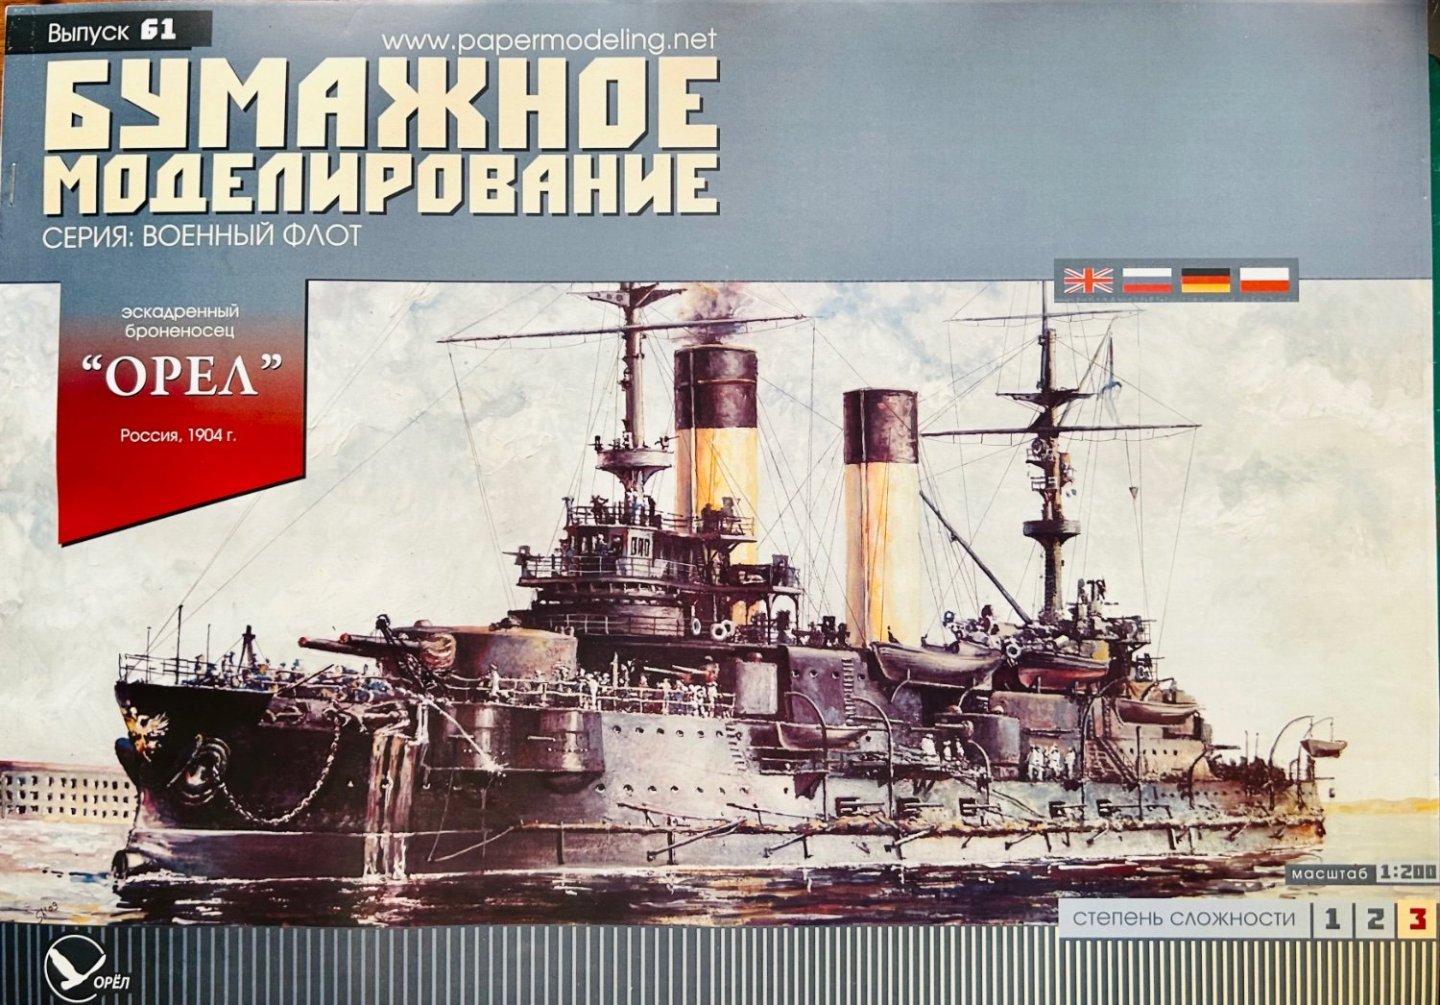
Orel is alternately spelled Oryol and literally translates to Eagle.
Having built an Orel kit before, I can attest that their kits are excellent.
I bought mine off Amazon.
This kit has optional laser cut and photo-etch sets available.
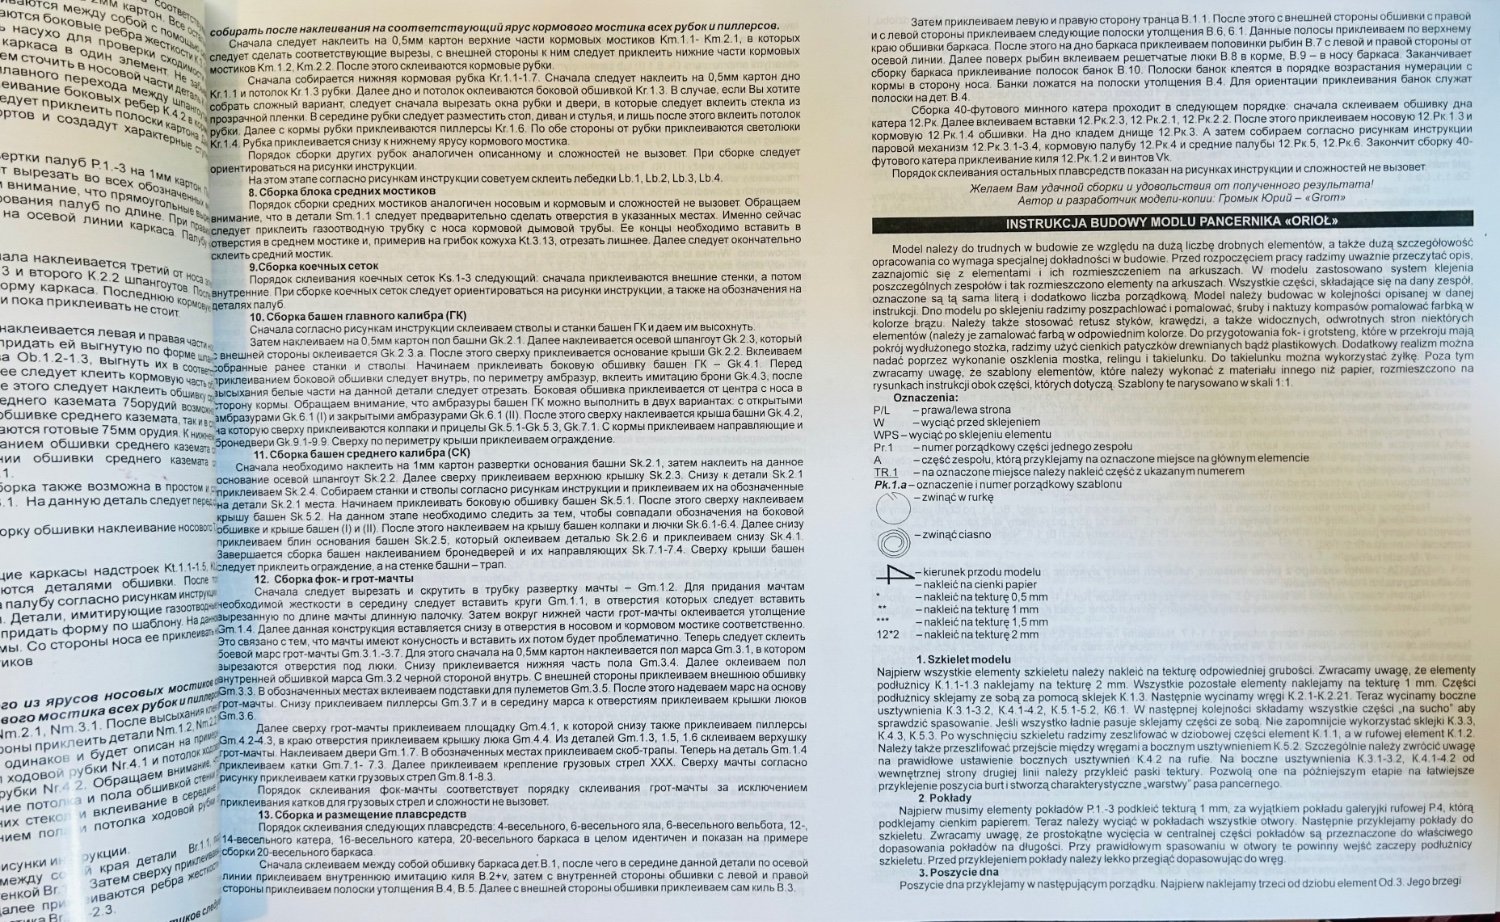
Like the Solferino, the instructions come in Russian (I think), Polish, German and English.

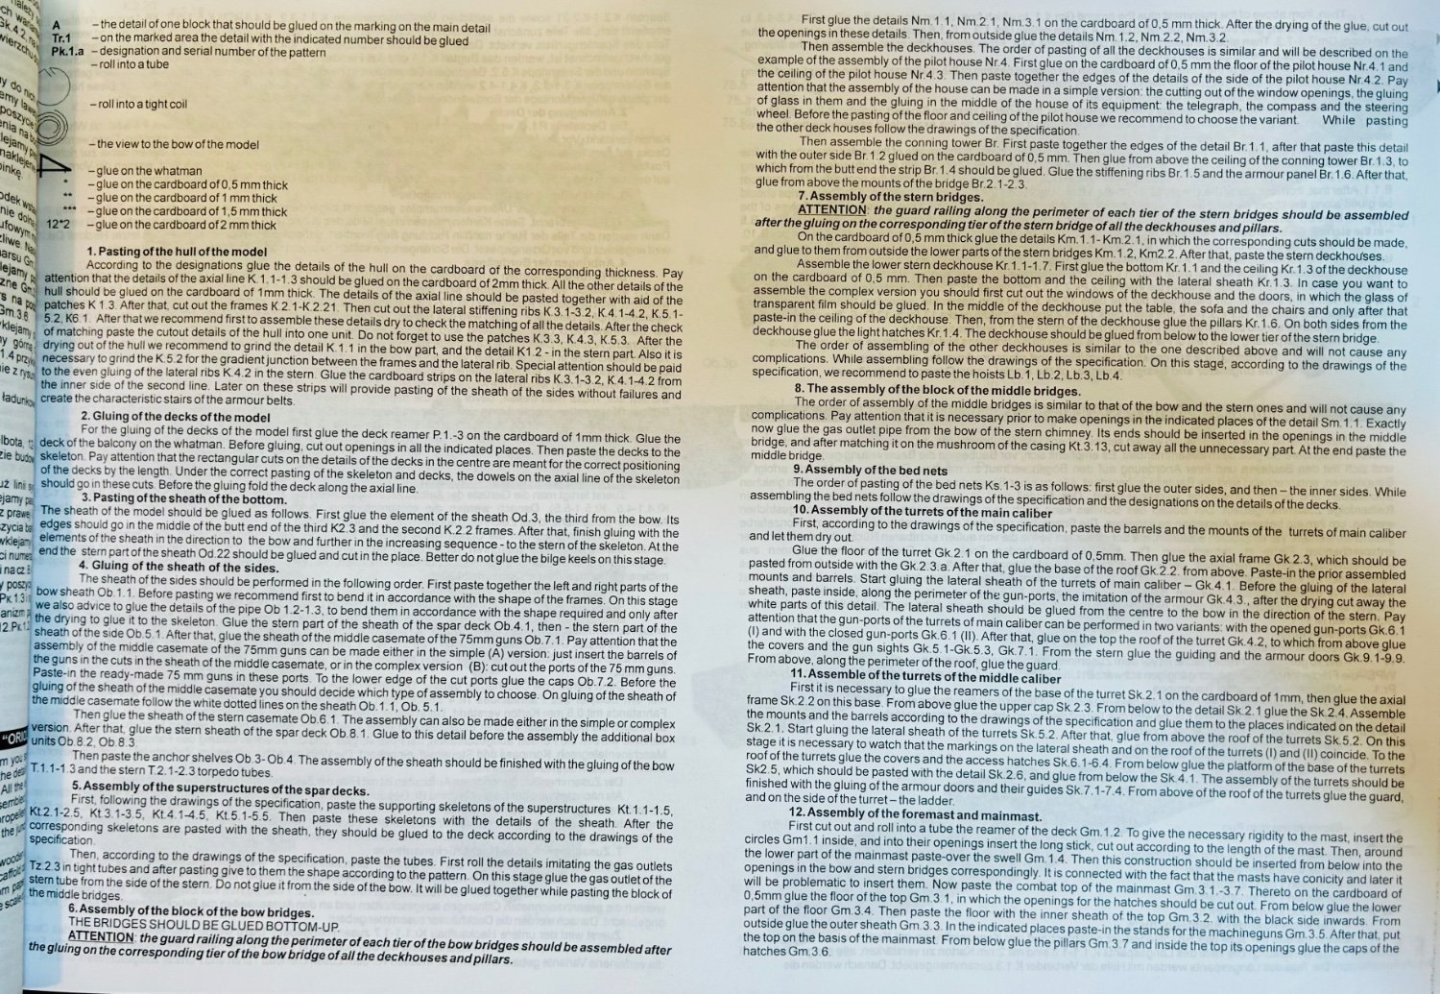
There are construction diagrams at the beginning of the book this time.
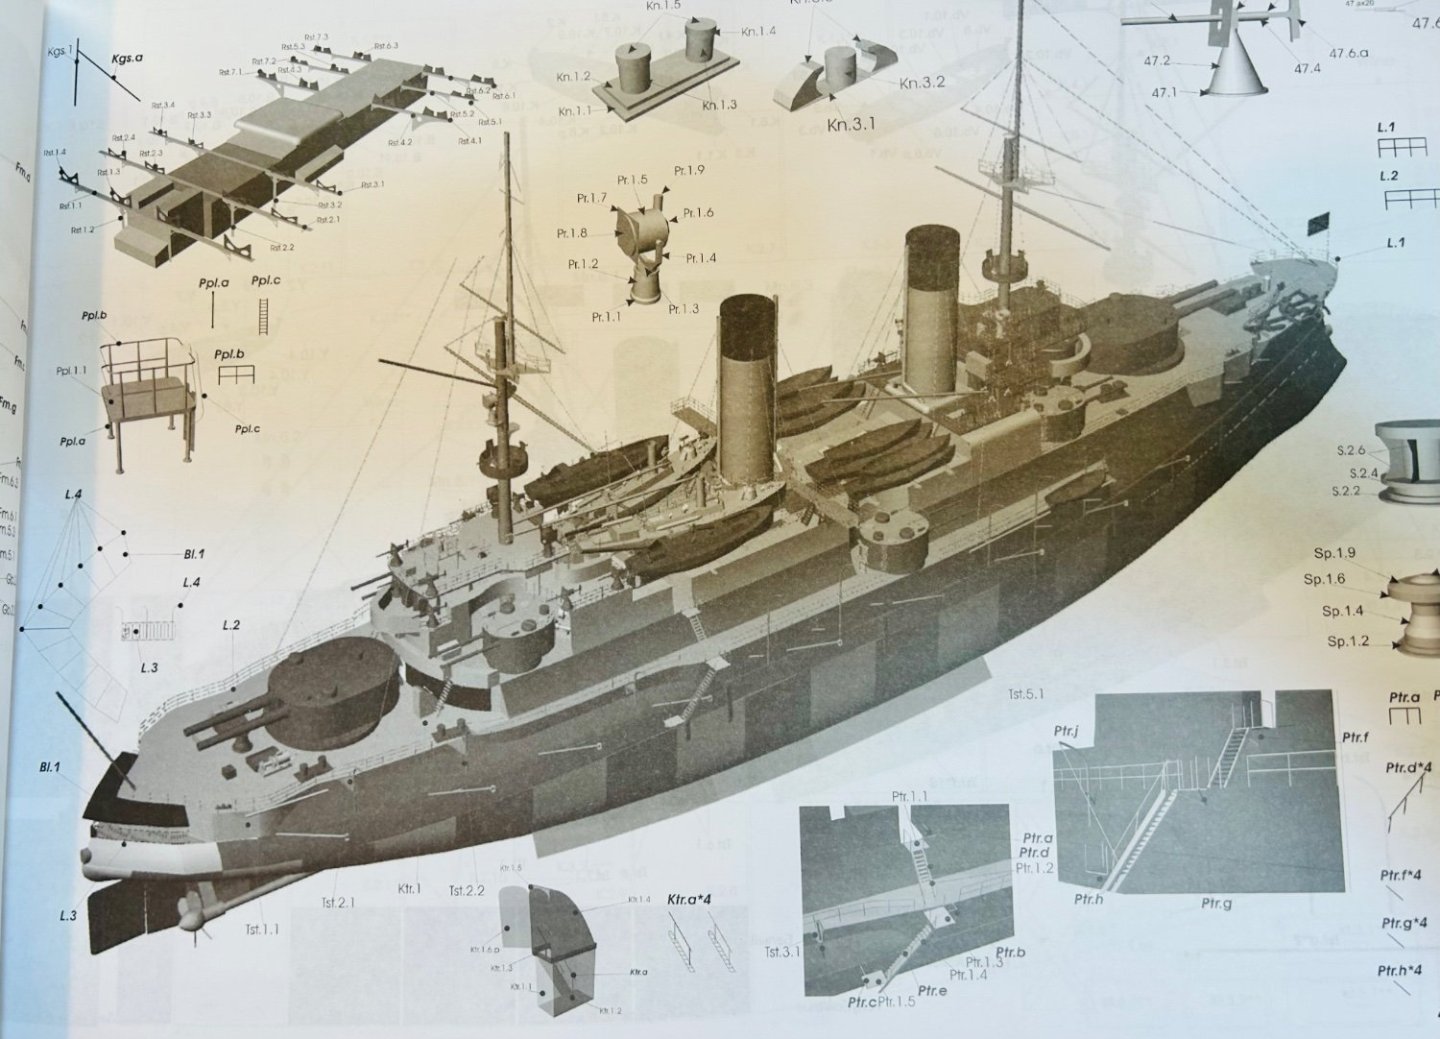
Construction is a modified Plank On Bulkhead.
The quality of the parts sheets are excellent and printed on A3 paper or card.


Most parts are printed on paper for laminating onto card.
Some are printed on card and ready to use.
If you are interested in card models, Orel, a Ukrainian company, makes excellent ship models, in addition to a full range of other card models.
They have a pretty decent selection of ironclads and pre-Dreadnoughts from around the world in 1/200 scale.
Most have optional laser cut and photo-etch sets available.I liked the first model that I got from them well enough that I ordered three more.
When I get the other two I’ll review them too.The price for this particular model was $46.99 with free shipping.
- thibaultron, yvesvidal, mtaylor and 4 others
-
7
-
All cannons that are getting seals have them:
The last step prior to painting will be installing banding on the breech loaders.
- Knocklouder, mtaylor, John Fox III and 1 other
-
4
-
Everything that is getting seals, has them, except for the sakers.
I’ll get the seals on the sakers the next time I work on my model.
I am thoroughly enjoying this build.
Chris did a fantastic job of drawing the plans and making the assembly booklet.
Taking the plans from the Victory Models kit and expanding upon it is working out great.
Plus, they are adapting to card quite nicely.
I know that I didn’t really need to make the guns yet, I only needed a few carriages, but the guns are a major part of any warship.
At least now I have them and I now know beyond a shadow of a doubt that I could do a full set of guns for a much larger warship (like maybe a 2 or 3 decker in the future?).
Carving them is not overly difficult.
It only takes about 40 minutes each starting out.
Once you get the hang of it, carving the cannons goes pretty smoothly and swiftly. -
I am going to try normal paper, cut from scrap, sealed on both sides, wrapped a few times for the breech loaders.
- Thukydides, mtaylor and BenD
-
3
-
Prototype seals:
They look good so far.
The detail is partially cut and partially indented into the seals.
After I make these, I need to figure out the mechanics of banding the breech loaders.
They are so small the card is separating when I try to wrap them.
- mtaylor, Thukydides, BenD and 1 other
-
4
-
-
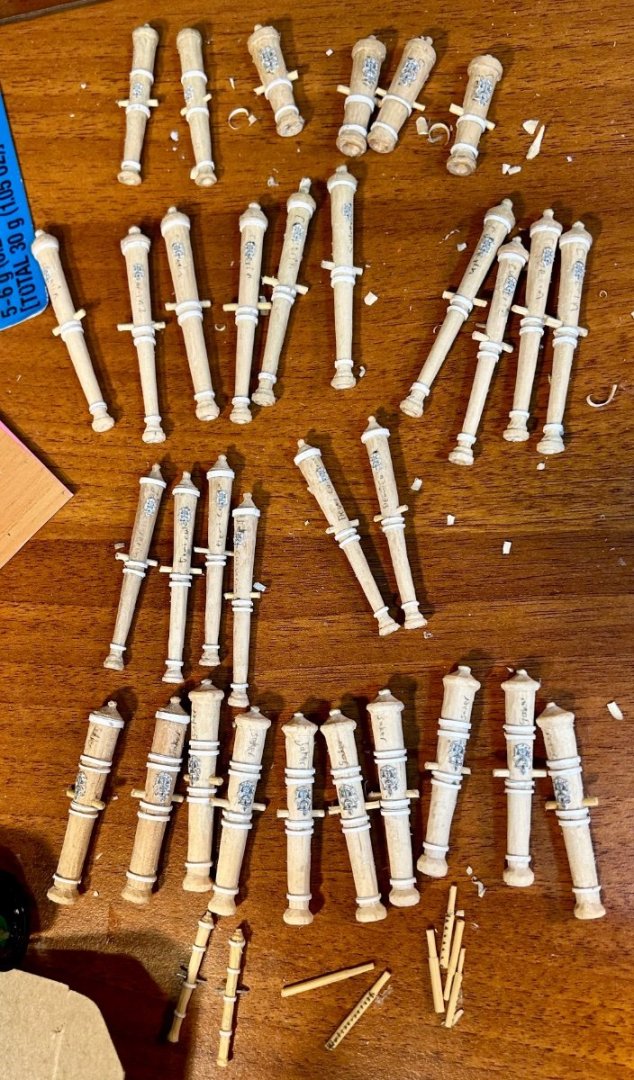
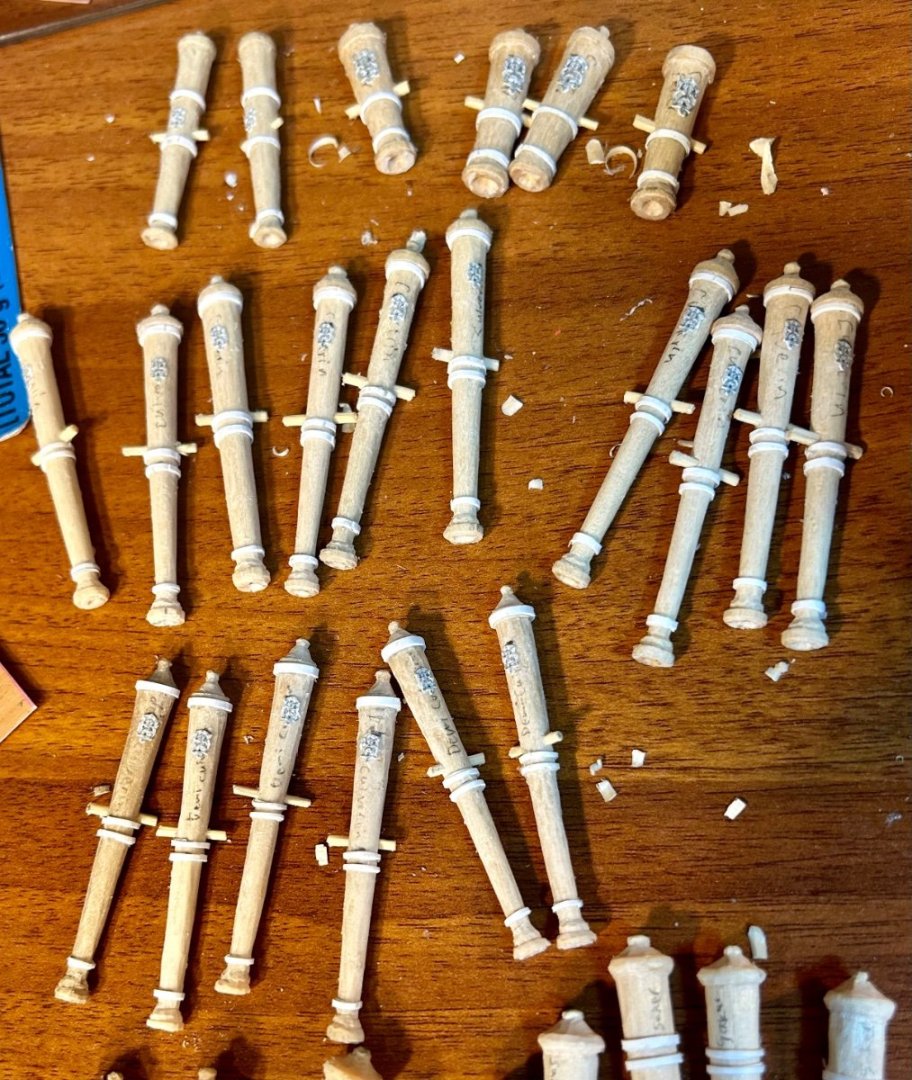
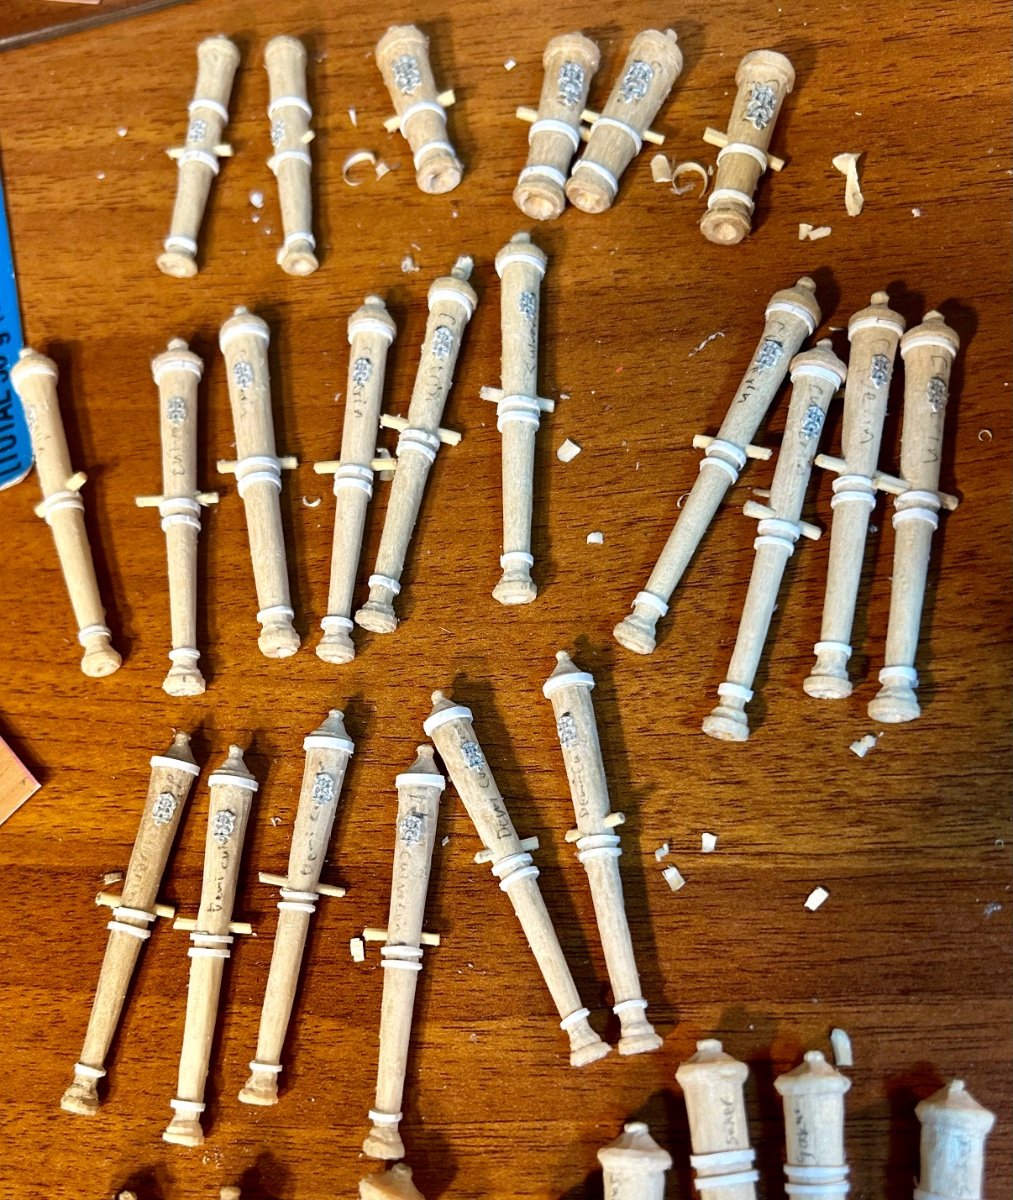
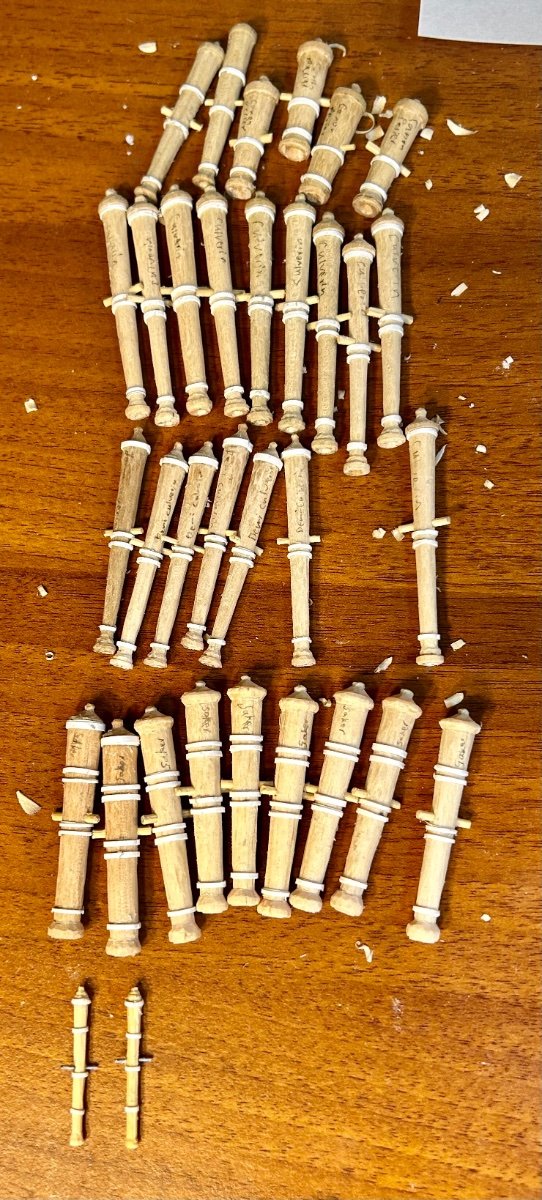
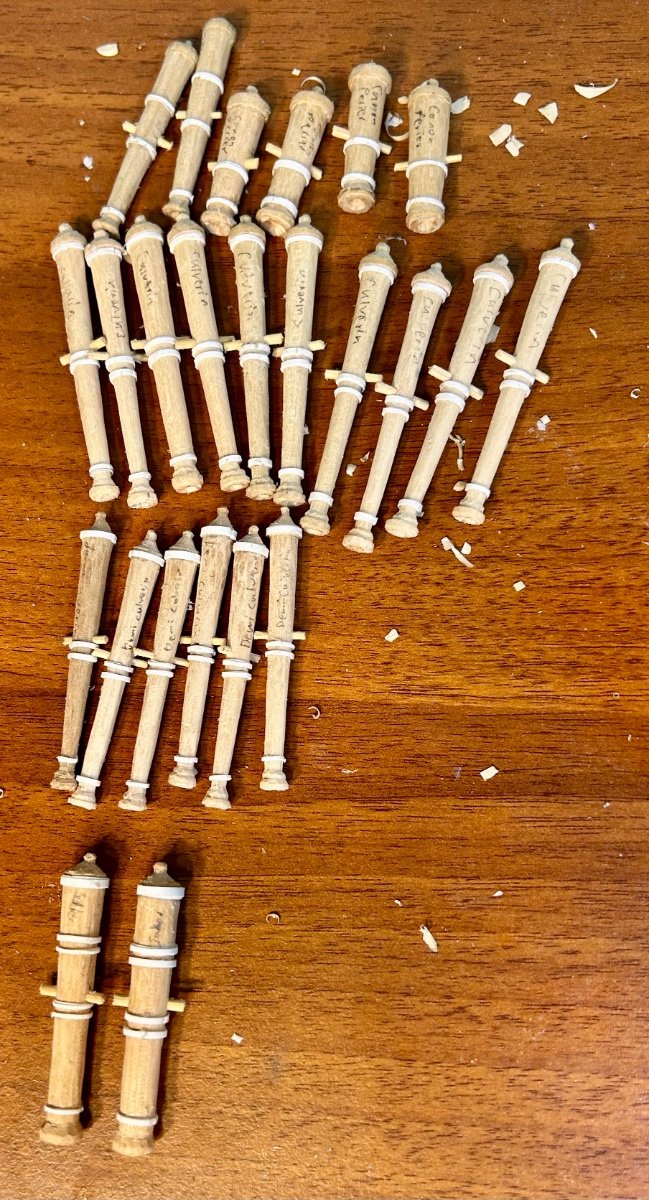
All 40 cannon barrels are carved:
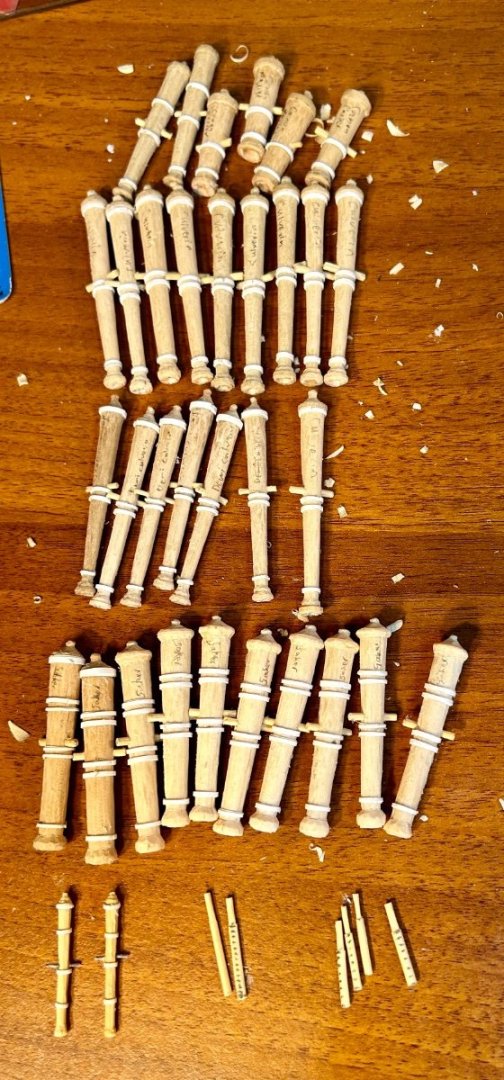
The port guns and fowlers (the breech loaders on the lower right) still need banding.
The rest of the guns, except the falcons, need the royal seal on them.
That will be a task for the near future.
My thanks again to @allanyed for providing the seal.
I will copy the seal into Word, replicate it 32 times, sized for each of the various calibers/types of cannon, and print everything out on cardstock which will be sealed and possibly CA’d to allow for minor carving.
Then, I will glue the seals to the cannon.
- John Fox III, Barbossa, mtaylor and 3 others
-
6
-
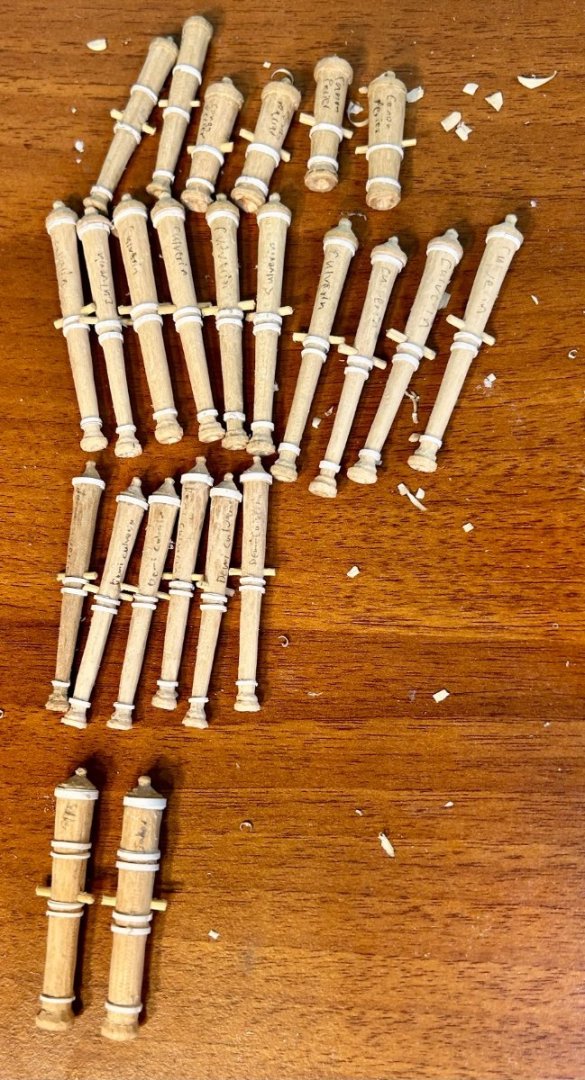
1 saker and a few breech loaders left, however both falcons are made:

The last saker split out on me while carving so I CA’d it.
I decided to get prepped for the falcons and discovered that there was very little carving to them.
So, I decided to carve them really quickly while waiting for the last saker to dry.
They took about 15 minutes apiece.
The breech loaders should be quick, too.
Now, for that last saker.
- mtaylor and John Fox III
-
2
-
Is it the 1:78 or 1:98 version?
- mtaylor and Keith Black
-
2
-
In other news, I just ordered the Orel kits of the pre-Dreadnought battleships Mikasa and Orel, and the Ironclad Battleship La Redoutable!
All 3 will most likely be rescaled to 1/100 scale
- Baker, mtaylor, Glen McGuire and 1 other
-
4
-
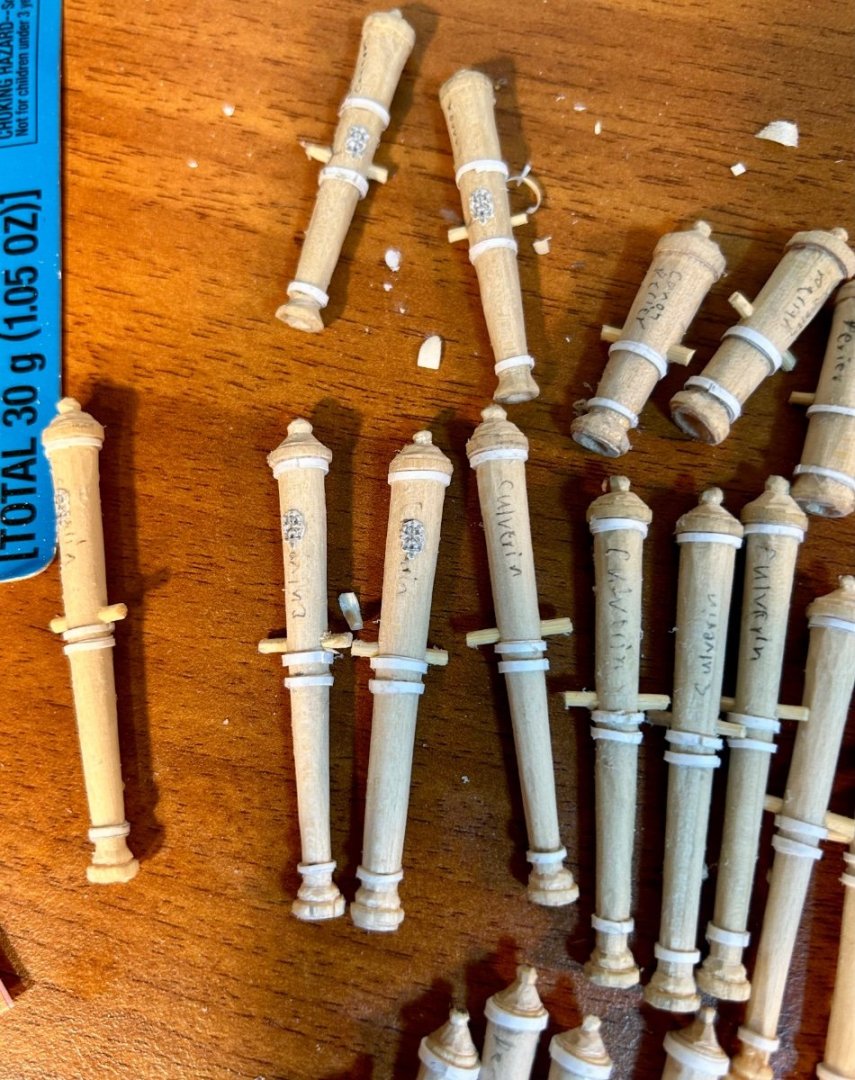
13 cannon remaining:
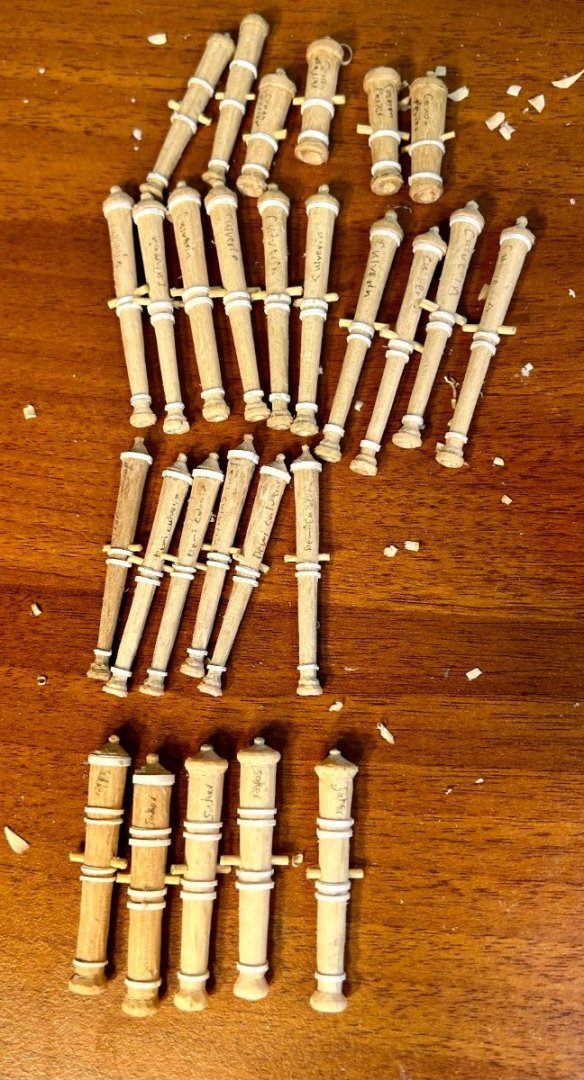
5 more sakers, 2 falcons, 2 port pieces and 4 fowlers are all that’s left.The sakers are going well.
The falcons are small organ pipe style cannons.
The port pieces and the fowlers are the Henry VIII style block mounted breech loaders.
- firdajan, John Fox III, Knocklouder and 2 others
-
5
-
First two prototype sakers are done:
I am going to have to figure out gun placement and carriage construction once I finish all of the guns.The rest of the sakers will have a wood breach reinforcing band.
These sakers did not because I ran out of the heavier dowel rods and have not dropped in on a hardware store yet.
- John Fox III, Knocklouder, mtaylor and 1 other
-
4


Henry Grace a Dieu (Great Harry) by Louie da fly - FINISHED - Scale 1:200 - Repaired after over 50 yrs of neglect
in - Build logs for subjects built 1501 - 1750
Posted
Amazing work! Congratulations on finishing the rigging!