GrandpaPhil
-
Posts
6,161 -
Joined
-
Last visited
Content Type
Profiles
Forums
Gallery
Events
Everything posted by GrandpaPhil
-
Excellent work! The decorations are coming along nicely!
-
Very nicely done!
-
I would personally fill in the gaps with putty, sand everything smooth, feathering in the ridges and gaps, and paint. Use this one as a learning experience to build the next one better, but the most important thing is to finish the model and learn from what you could have done better. I started building model ships in the 1990s and I learn from the mistakes I have made in every model that I build, some mistakes worse than others.
- 9 replies
-
- 2
-

-
- Lowell Grand Banks Dory
- Model Shipways
- (and 1 more)
-
The first rigged model is the most difficult. Once you get your methods down, it all gets a lot easier. Then you keep refining your methods and trying new techniques with each model. Be careful handling blocks and deadeyes, use a wider jaw pair of tweezers with only the force necessary to hold the part to keep them from flying out of your hand.
-
Incredible work!
-
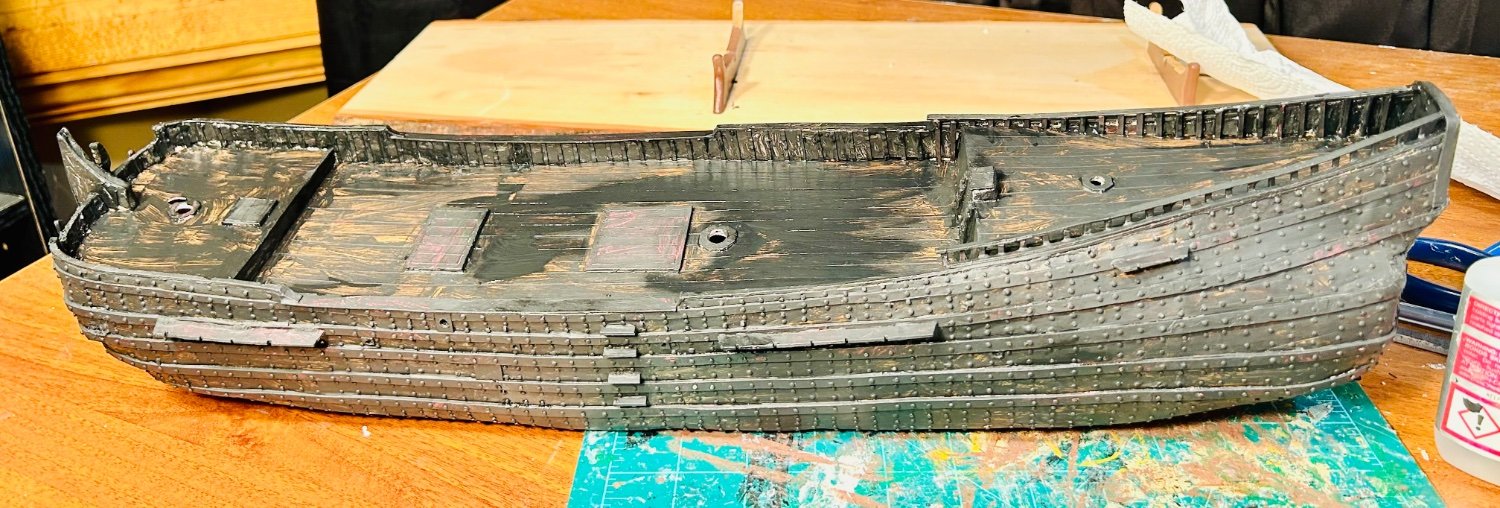
The first coat of black is on: I need to let this first coat dry overnight and then I’ll add another coat tomorrow. For the non-wargamer painter, I am using mostly the same techniques that one would use to paint a Warhammer army. I begin by making the model all one color. I am using the black as a primer coat over a coat of acrylic sealant, which is what is making the black stick to the model. Using black as a primer assists me in doing several things. Firstly, it helps to give the model depth. Secondly, it helps makes the model look a little grungy, since this is a workboat. Lastly, it makes the colors that will be layered on stand out a little more. Once I get two to three layers of black on the model, I will begin drybrushing shades of brown on the model utilizing a makeup brush like I did my Sampang. I will begin with a dark shade of brown heavily applied and work my way through successively lighter shades of brown, successively lightly applied, finishing with a reddish brown on the hull, bulwarks and bulkhead. The deck will be finished with a lighter brown or dark tan, very lightly applied. Several of the wales, and trim, will be painted a dark burgundy. The waterline will then be marked off and the bottom painted a dingy white. Then all bolt heads above the waterline will be finished a medium gray, representing a faux metal iron. At this point I will paint the transom painting depicting a Dutch woman holding a platter of fresh baked bread, representing the wife of the guy who owned this ship (wife, guy and ship are completely fictional, but ship is supposed to be representative of the type in the middle to latter half of the 17th Century). Then the entire model will get sealed and construction will commence again. Later, after I finish the hull and paint the added details I will highlight the hull to give the impression of light hitting the ship.

-
Welcome!
-
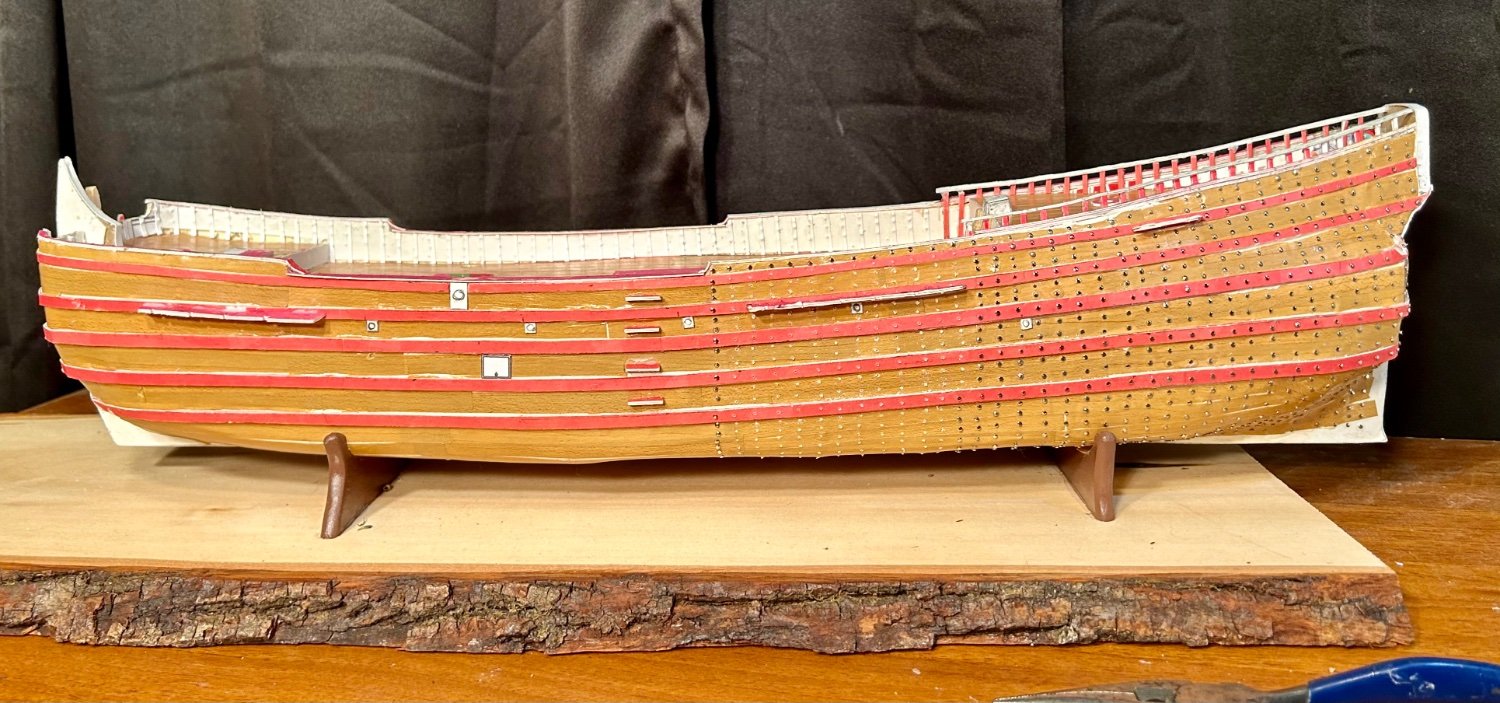
Solferino of 1860 had a band of red above the copper, but below the black of the rest of the ship. I believe that the copper was not painted.

-
Thank you very much, Jan! Esther is sealed and ready to paint: The next step will be to paint the entire model black, after the sealant cures over night.
-
If I hypothetically wanted to build a model that would be made of plastic, primarily, and I wanted it to last 50 years, what sort of paint would I use, assuming that it would be stored and displayed in a mostly climate controlled acrylic case?
-
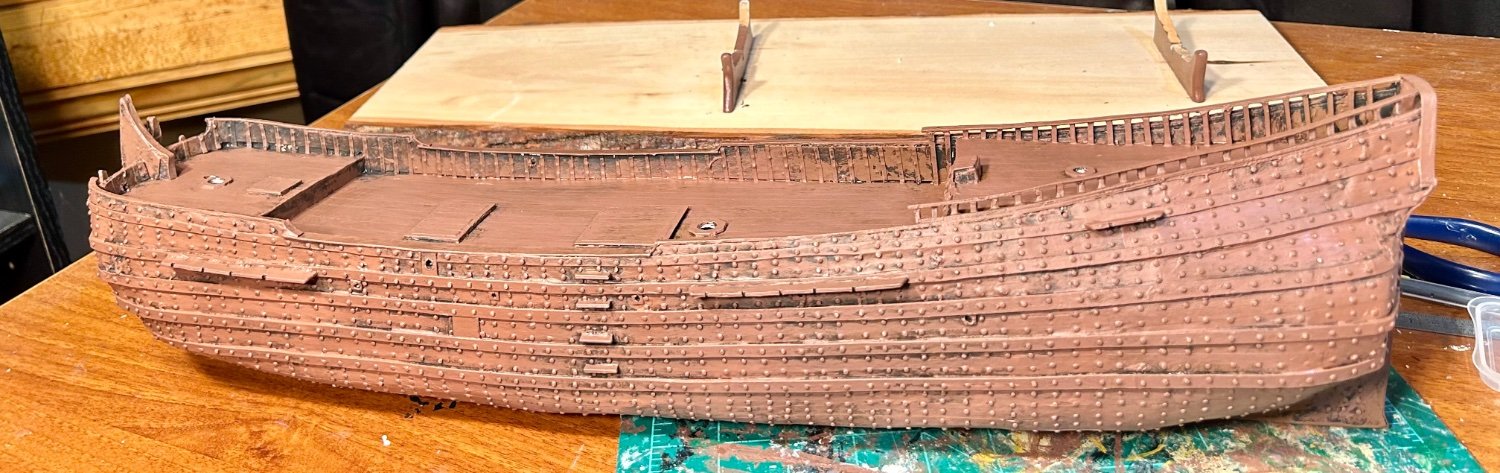
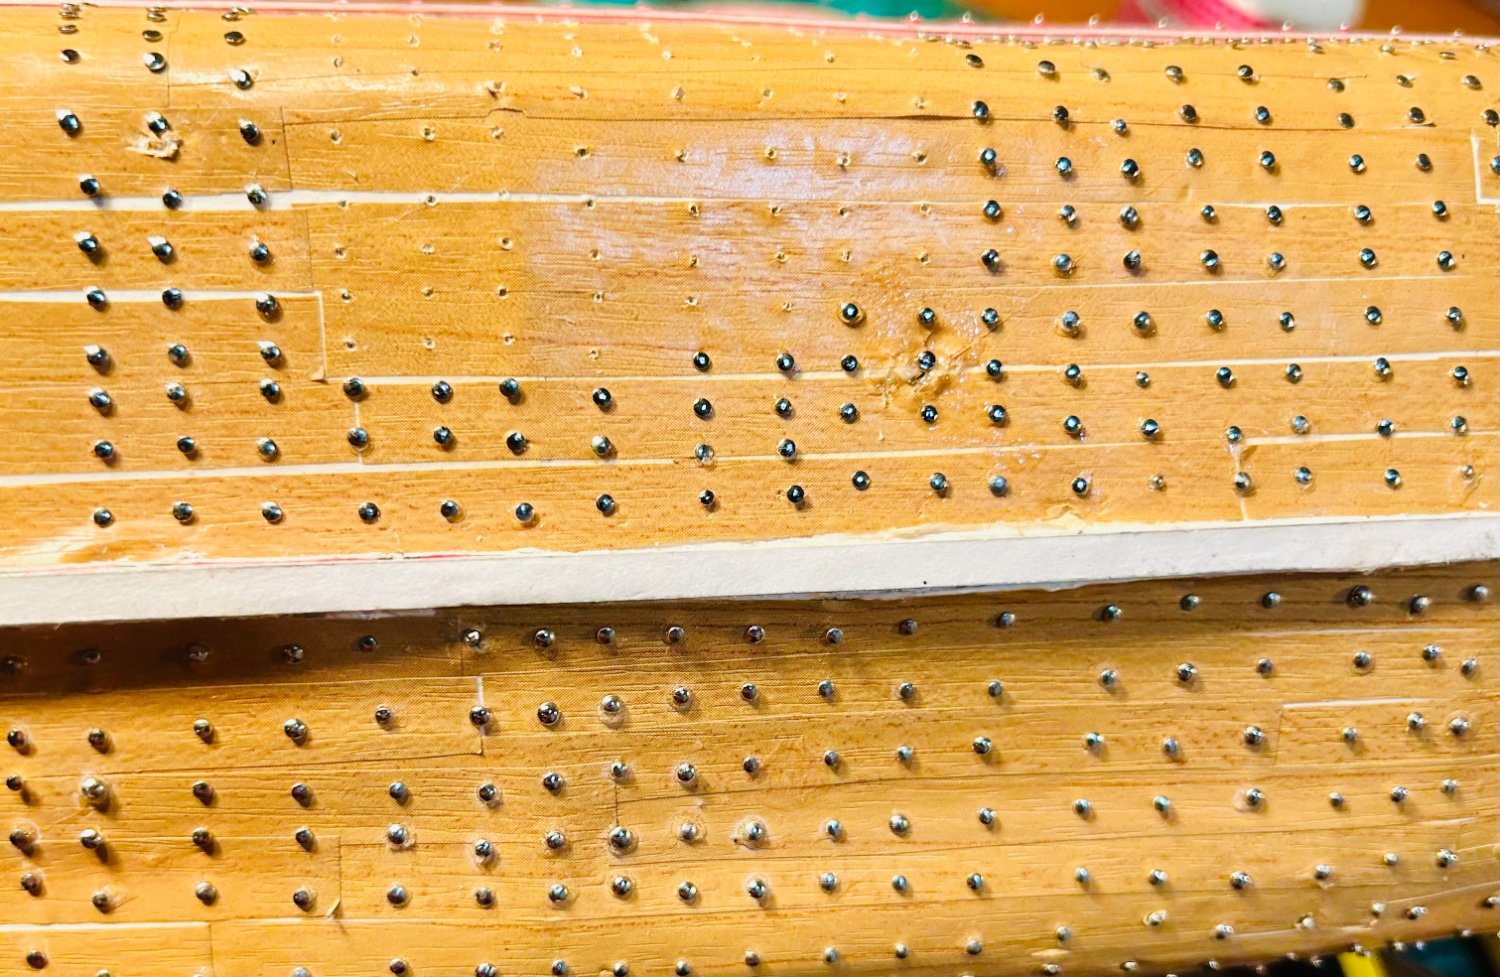
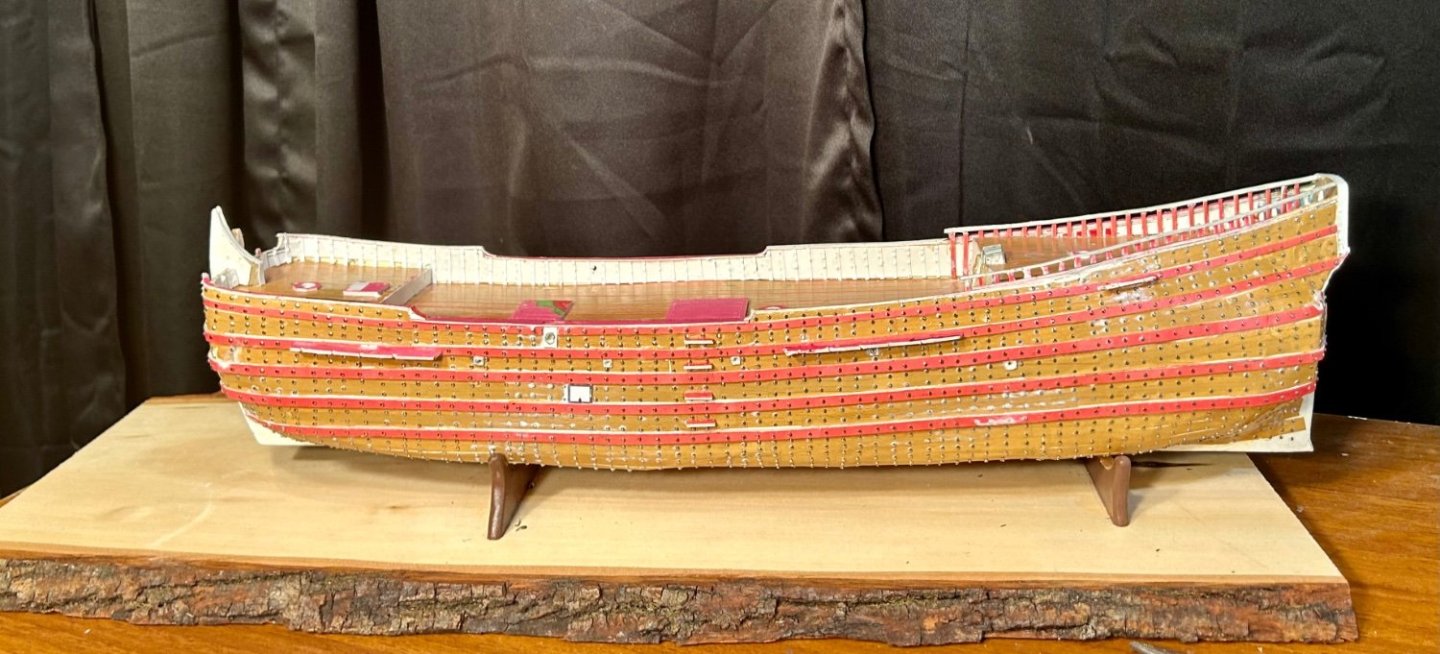
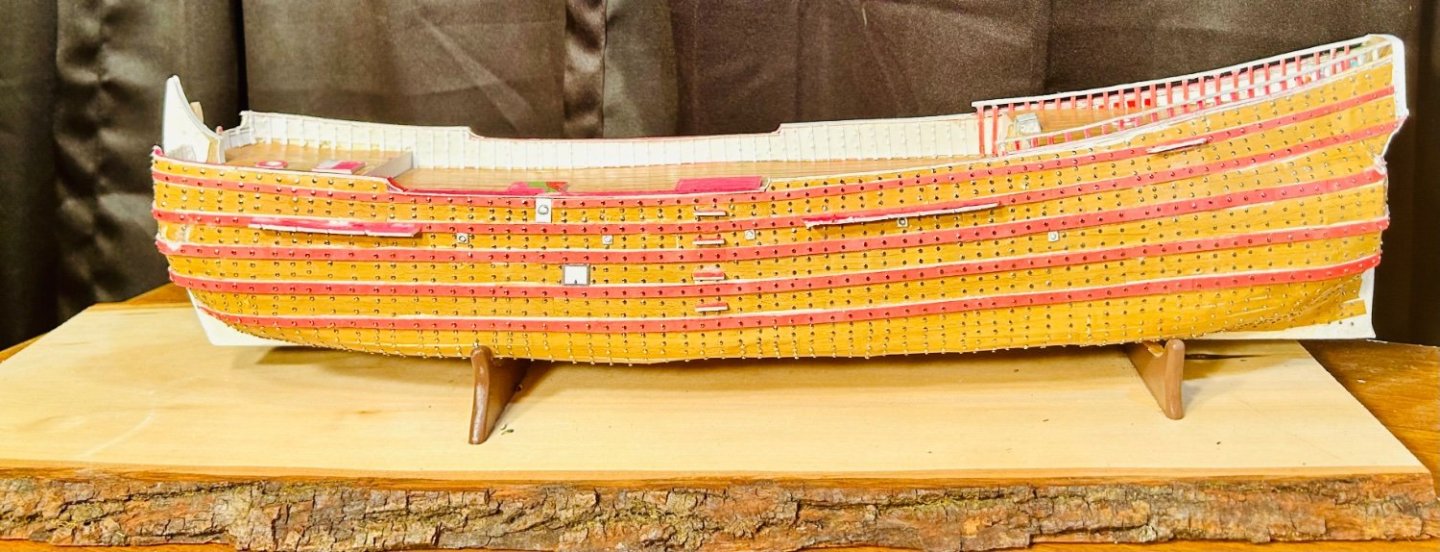
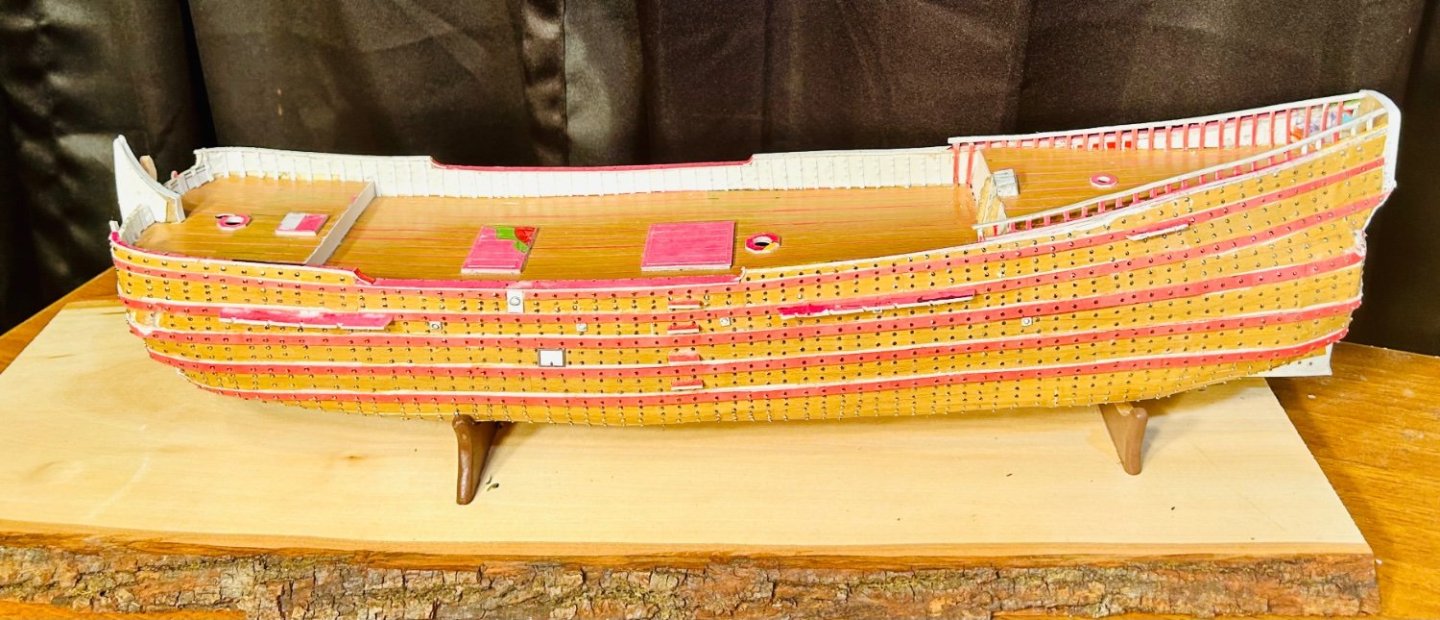
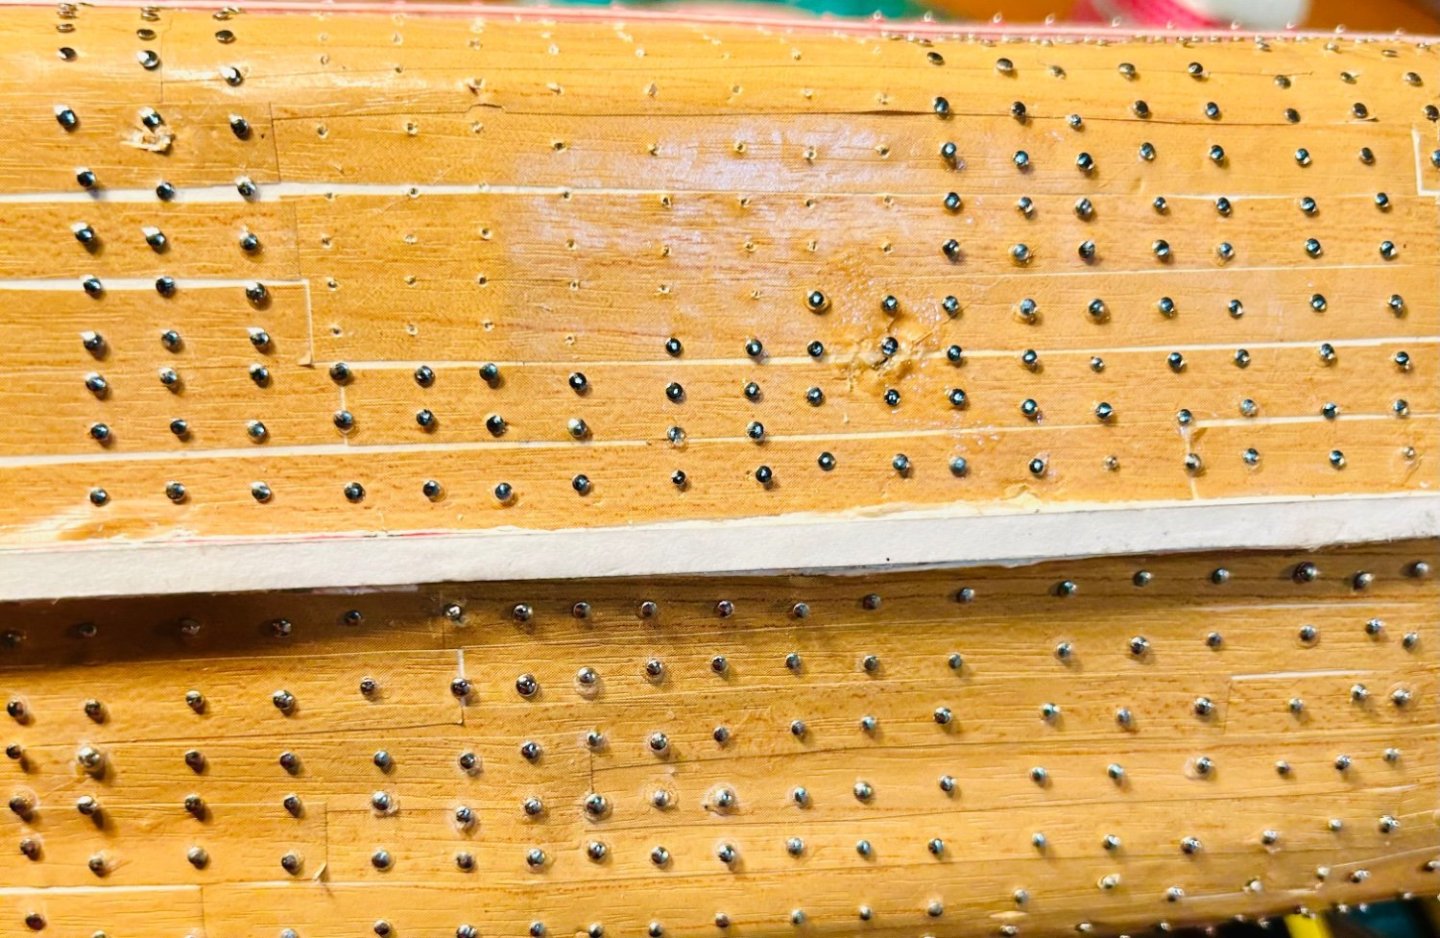
Esther has all of her carriage bolts now, all 4200 of them: The holes are patched and should not be too noticeable. Either way, she will be painted in the style of a wargaming miniature, like all of my models, and will be weathered. This model has been a learning experience and I have been enjoying building it. Next up, I need to cut the holes for the scuppers and the large set of holes that the rigging passes through, and then it will be time to seal and paint the ship.
-
Welcome!
-
Hi from South Africa - novice alert!
GrandpaPhil replied to Ingo's topic in New member Introductions
Welcome! -
Hello from British Columbia!
GrandpaPhil replied to sixtythousandbees's topic in New member Introductions
Welcome! -
I punched another hole in the hull, in the bow area this time. I pulled the sides back out and applied a large amount of max hold CA, so we’ll see how that dries. That bottle of glue is getting old and therefore thickening up anyway, which is working to my advantage here. It’s a good thing that I am planning to make this ship a well used workhorse anyway, so a patch won’t be entirely out of place. Depending on how it looks after painting, I may rough up the rest of the model to make the ship look more well used.
-
Sovereign of the Seas looks amazing!
-
I just made a major mistake. I punched a large hole in the bottom of the hull with a pair of needle nose pliers pushing a stuck stick pin into place. I pulled the “flaps” out, filled the hole with max hold CA and put another pin in place. Hopefully, once the glue dries and I paint the model it won’t be too visible. Fortunately, it’s on the bottom of a model of a flat bottomed ship.
-
Hello everyone, a beginner dips his toe.
GrandpaPhil replied to Gaz's topic in New member Introductions
Welcome! -
Nice recovery!