GrandpaPhil
-
Posts
6,163 -
Joined
-
Last visited
Content Type
Profiles
Forums
Gallery
Events
Everything posted by GrandpaPhil
-
Nice recovery!
-
Congratulations! Well done!
-
Welcome!
-
Welcome!
-
I got my new Excel razor saw blade today and realized that is the third blade I have gotten for that handle. I originally bought that razor saw in the mid 1990’s and model making has always been my go to hobby. That means that 2 blades lasted me nearly 30 years. I’ve definitely gotten my money’s worth out of them, especially with how much I build.
-
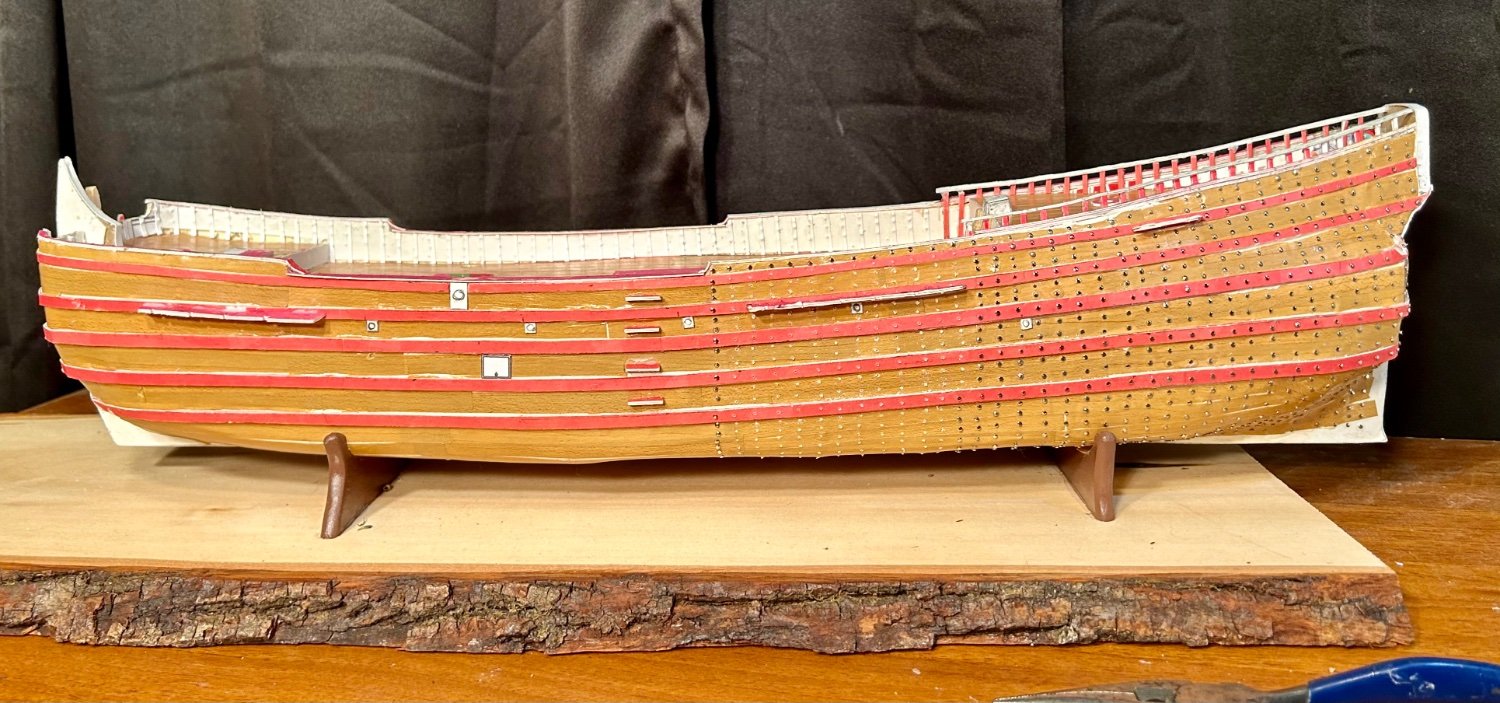
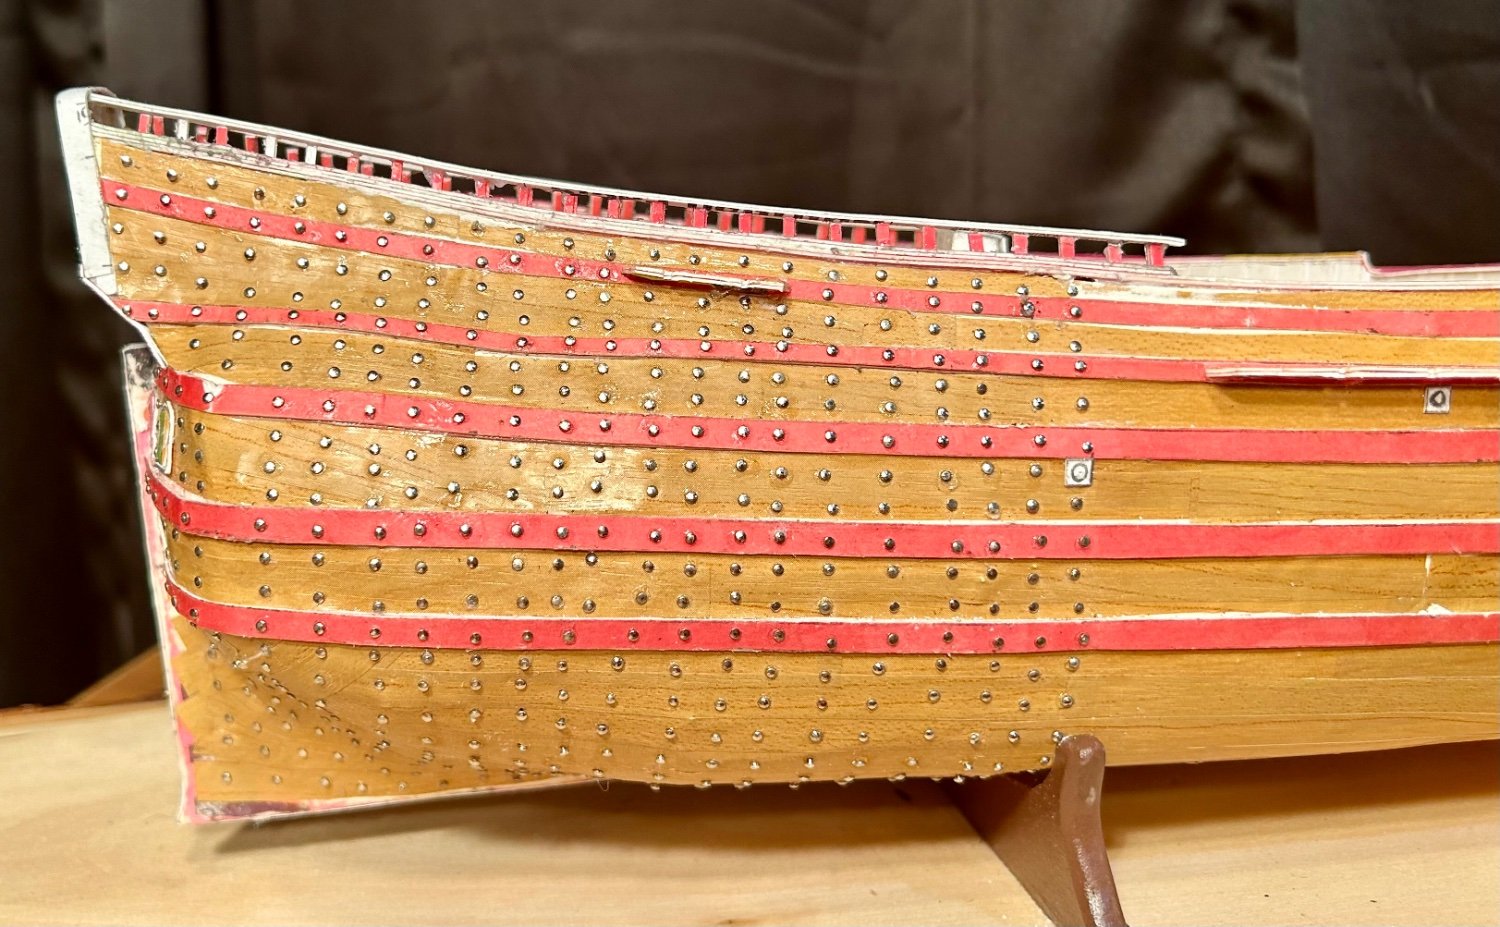
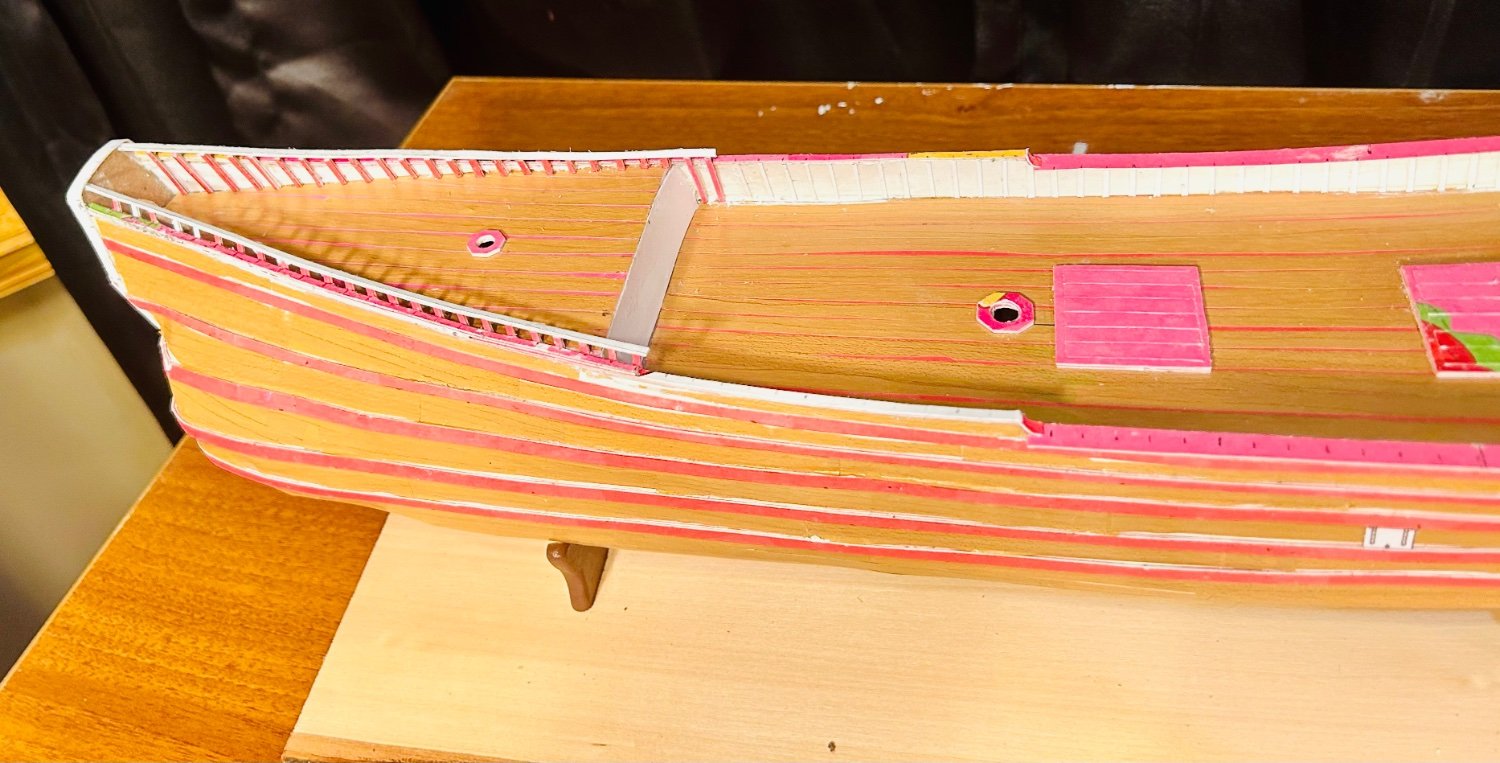
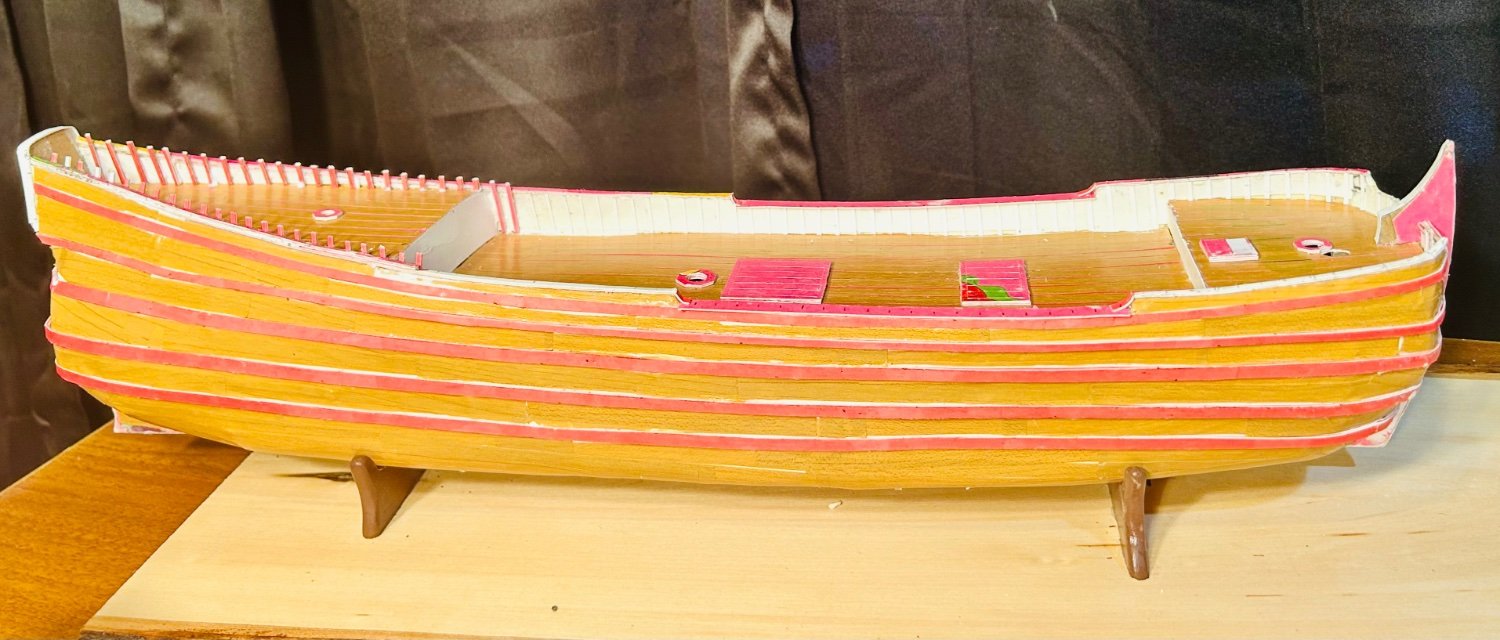
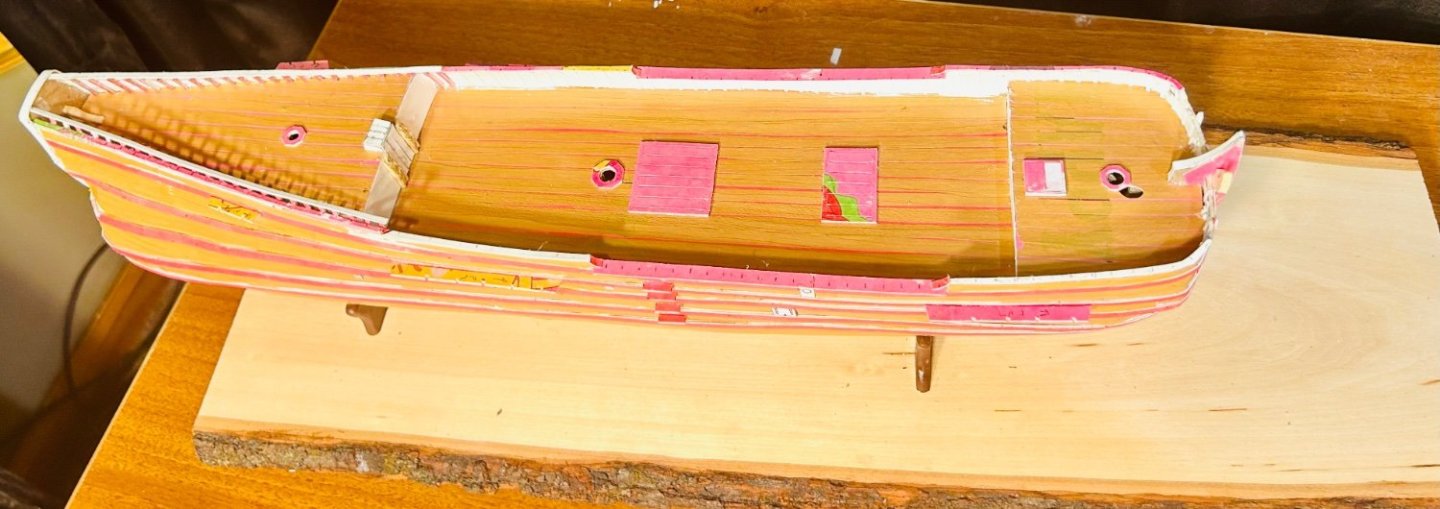
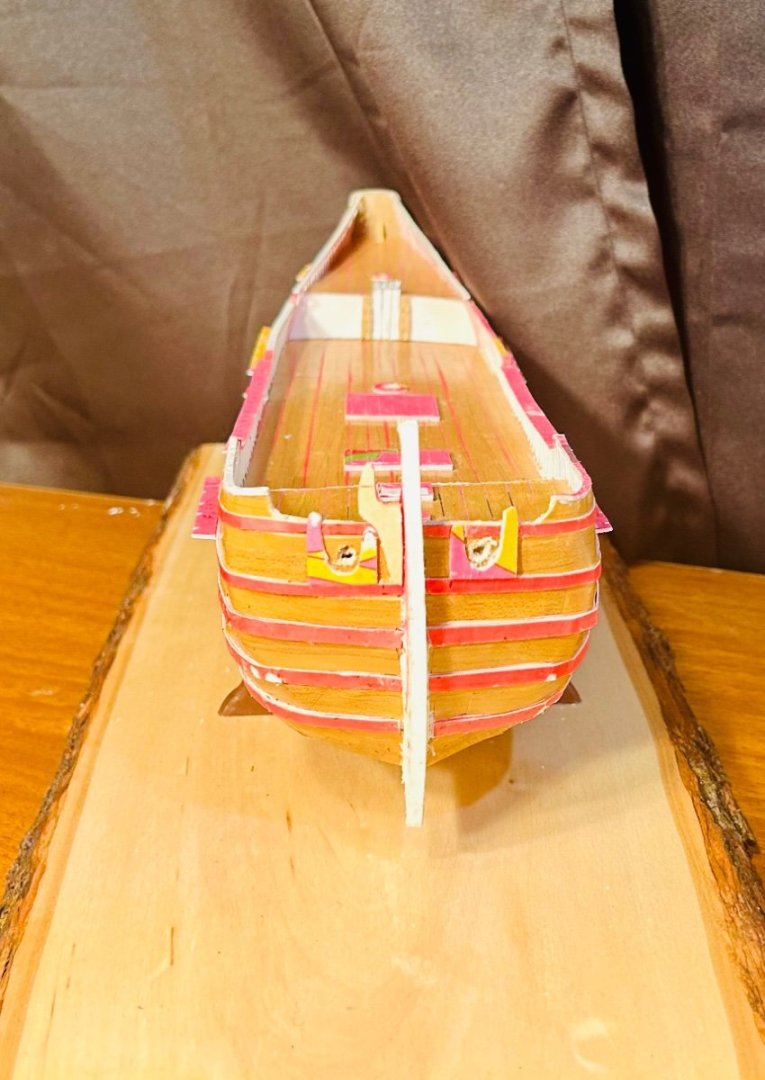
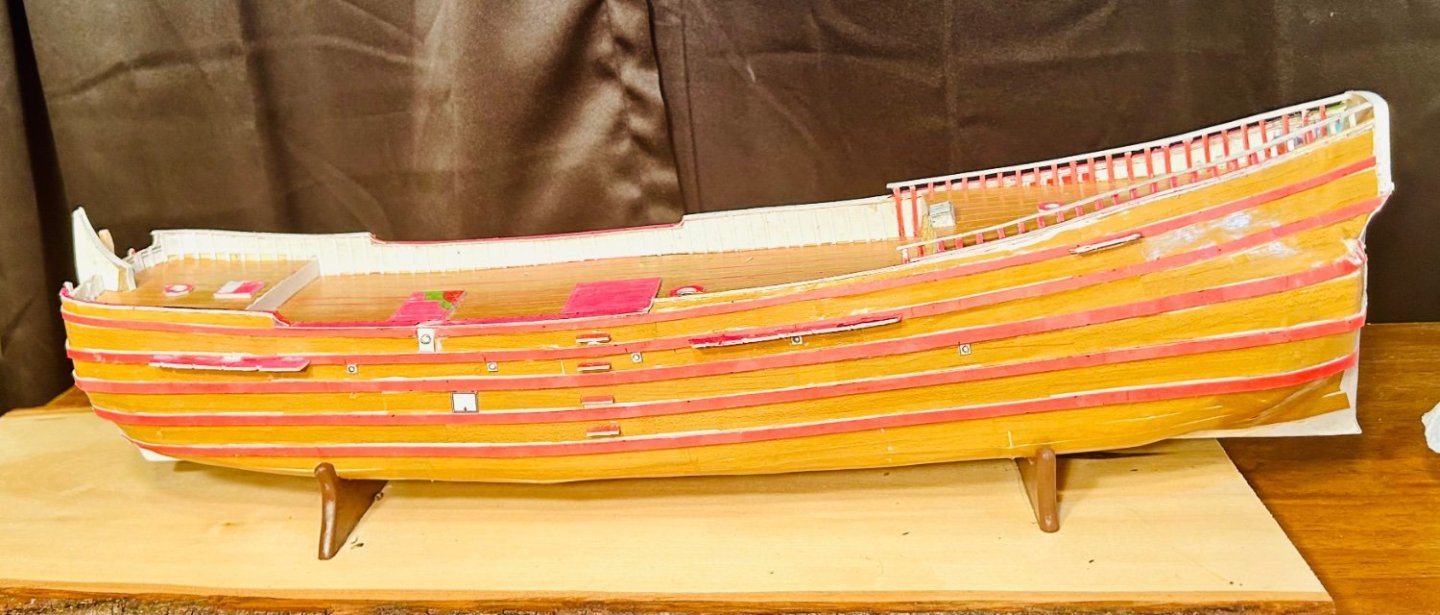
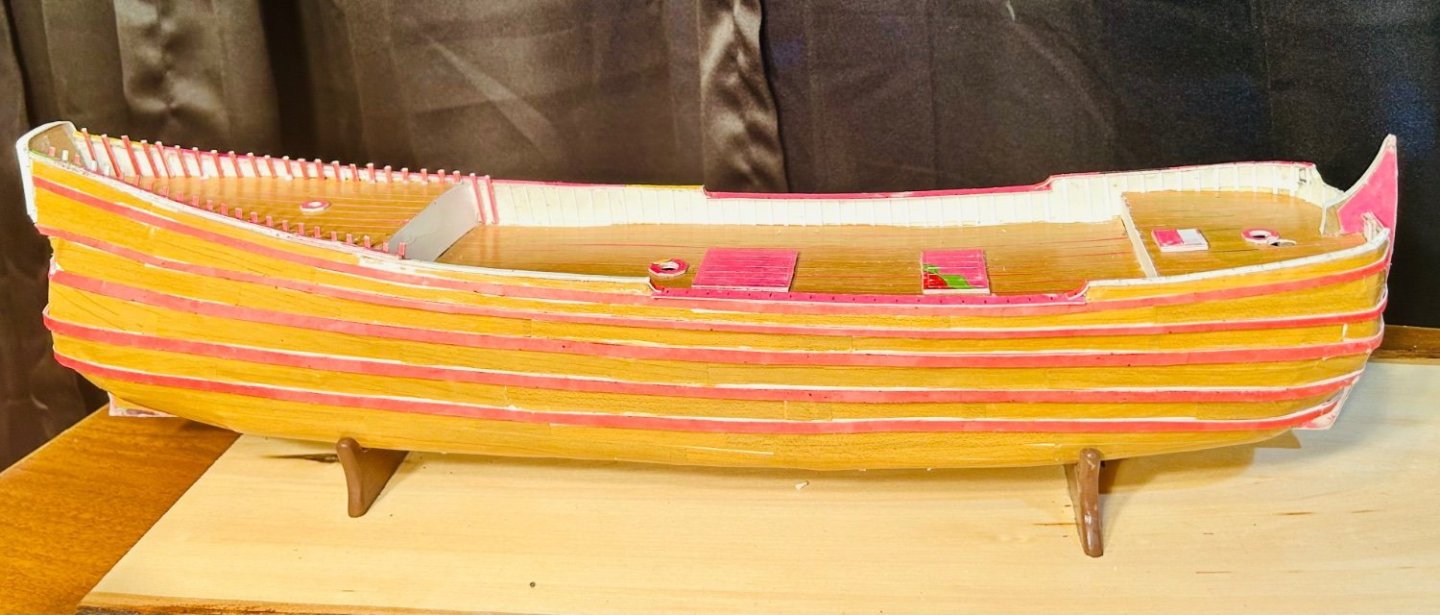
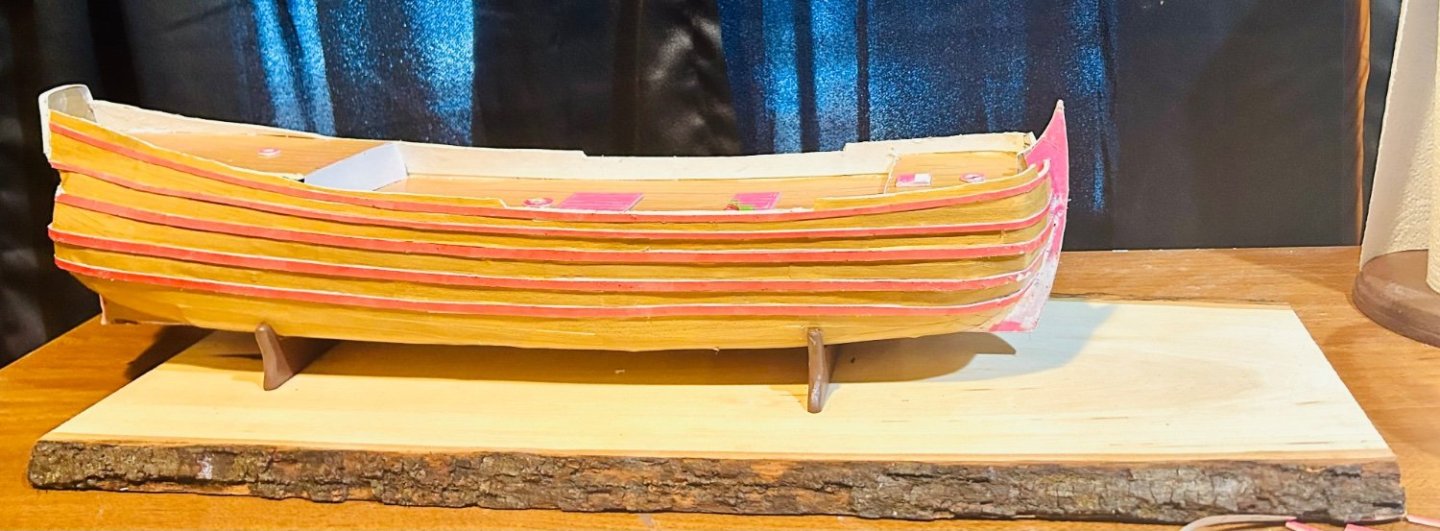
The starboard side has carriage bolt heads. Time to add them to the port side! Then it will be time to paint!

-
Can you add your own longitudinal framing?
-
You’ll enjoy the build! The kit looks similar to the Solferino. The instructions are in the same format and the pieces look like the same design. Those ship’s boats pieces are nearly identical to the ones I had in my kit. The hardest part for me was dealing with the transition era fittings that are similar to the sailing navy ones at 1/200 scale, because they are so small. I enjoyed that build enough that I bought 5 or 6 more Orel ironclad and pre-dreadnought kits and have them in my stash.
-
I’m between a quarter and a third done with one side: I realized that I will need around 4,000 stick pins. One side effect of doing this is that the parts of the hull that had some give to it, no longer has give. I’ve been sticking the pins in whole where I can to increase the structural integrity of the model.

-
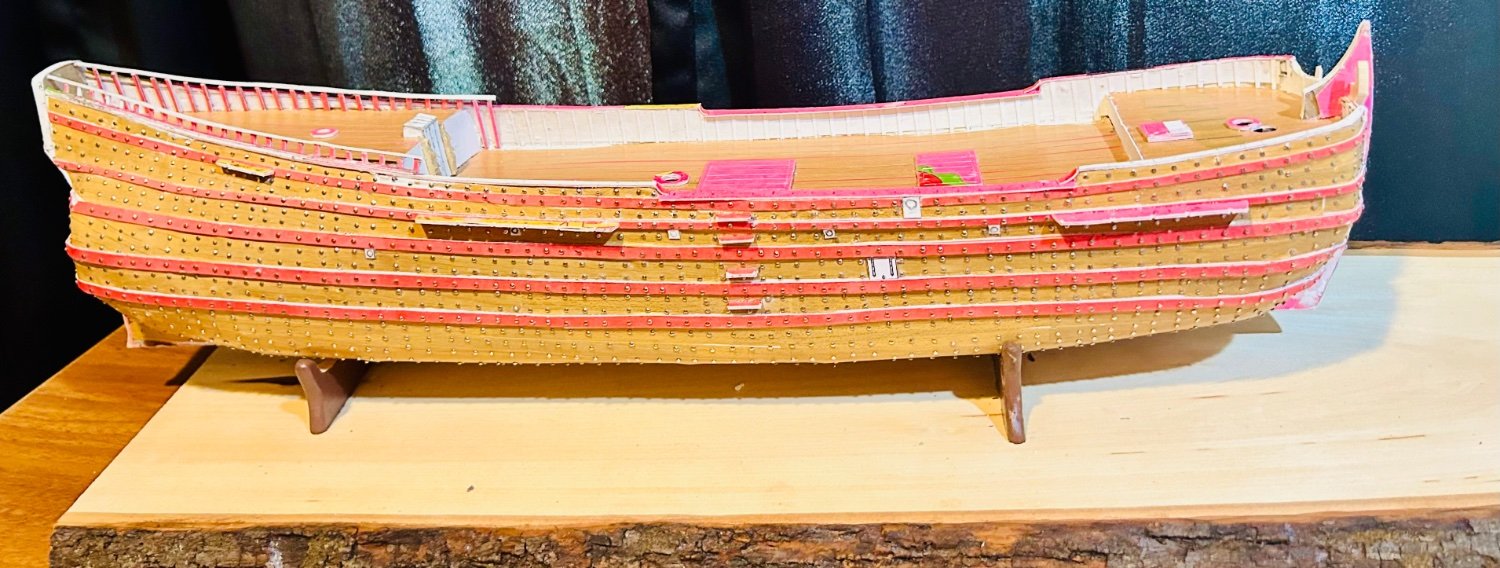
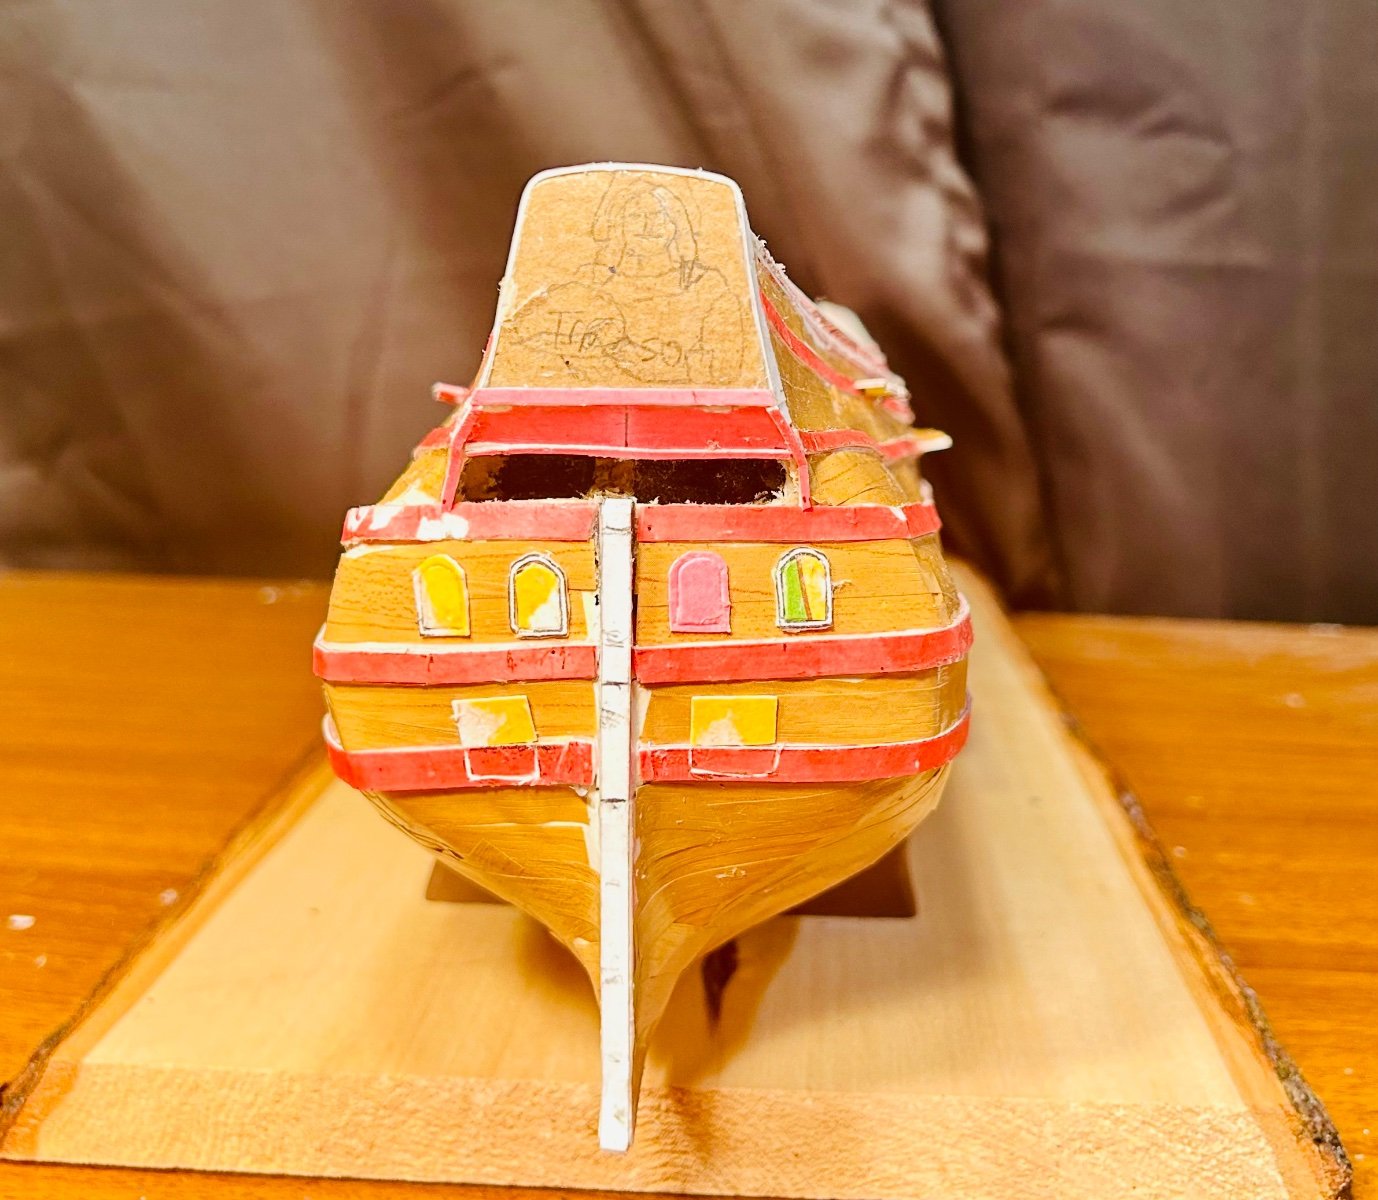
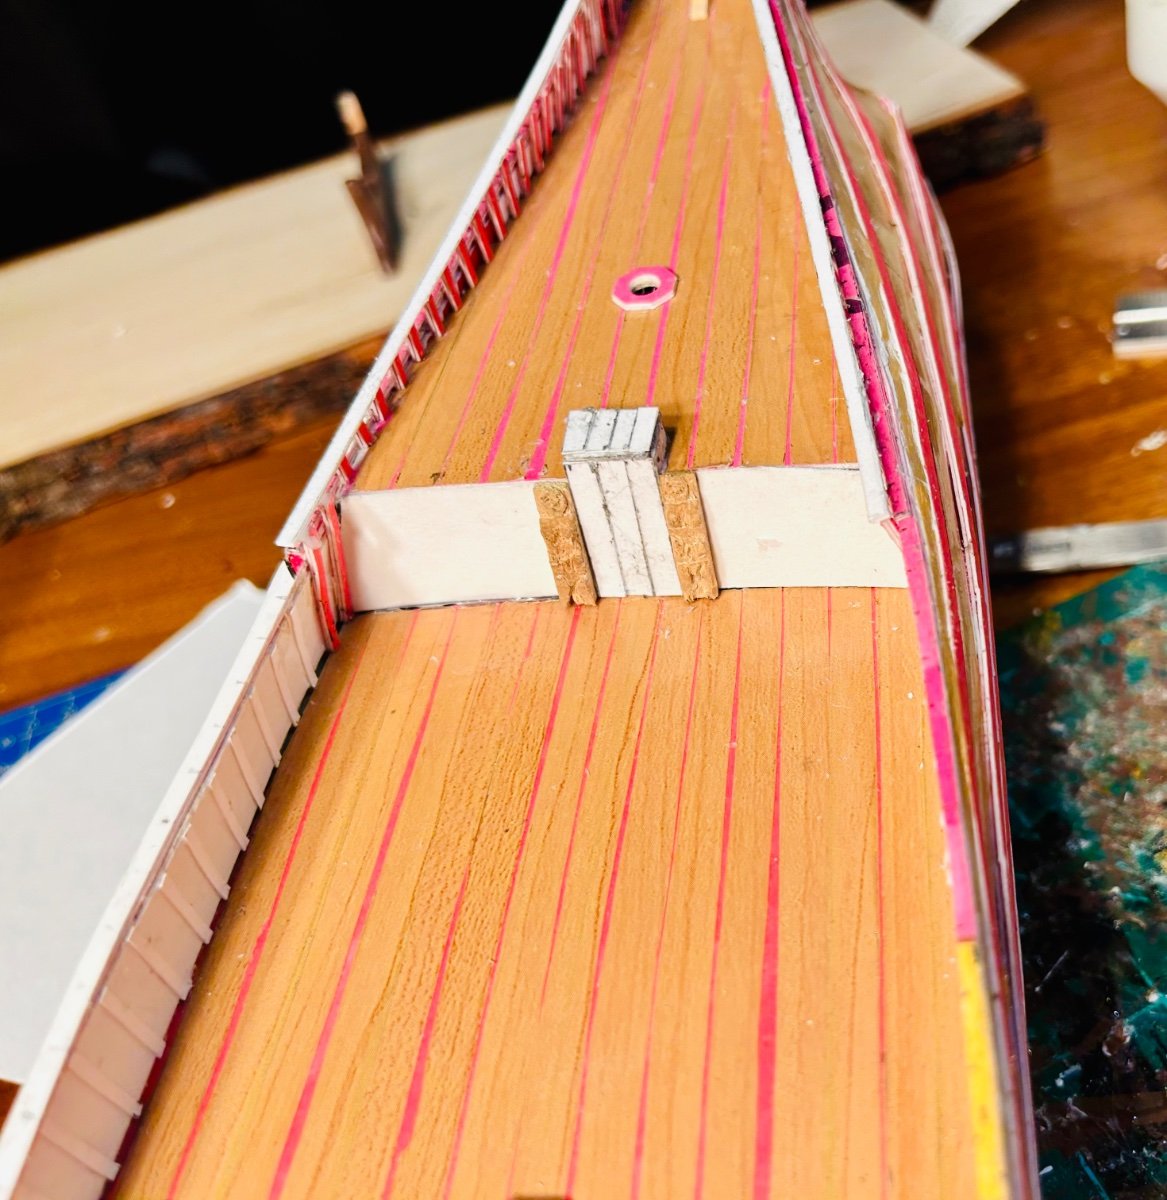
All hull and deck fittings that need put on prior to painting are on: I know the one gunport lid is a little crooked. The transom painting will represent a Dutch woman holding a plate of fresh baked bread. I still need to cut out the holes for the scuppers/sweep ports and the hole for the line feed through pieces, but they need to dry completely first. The last major thing that needs to happen prior to painting is drilling for and installing all the carriage bolts (the heads of stick pins) in the wales and planking. I have never treenailed a model because of scale issues that have been discussed elsewhere in this forum before, however the carriage bolts in the hulls of the models in the book really added to the rugged Mack Truck/workhorse look that appealed so strongly to me that I had to build this model, so I’m going to add them. I think I have between 500-1000 stick pins with 2000 more coming early next week. So, let’s get this built!

-
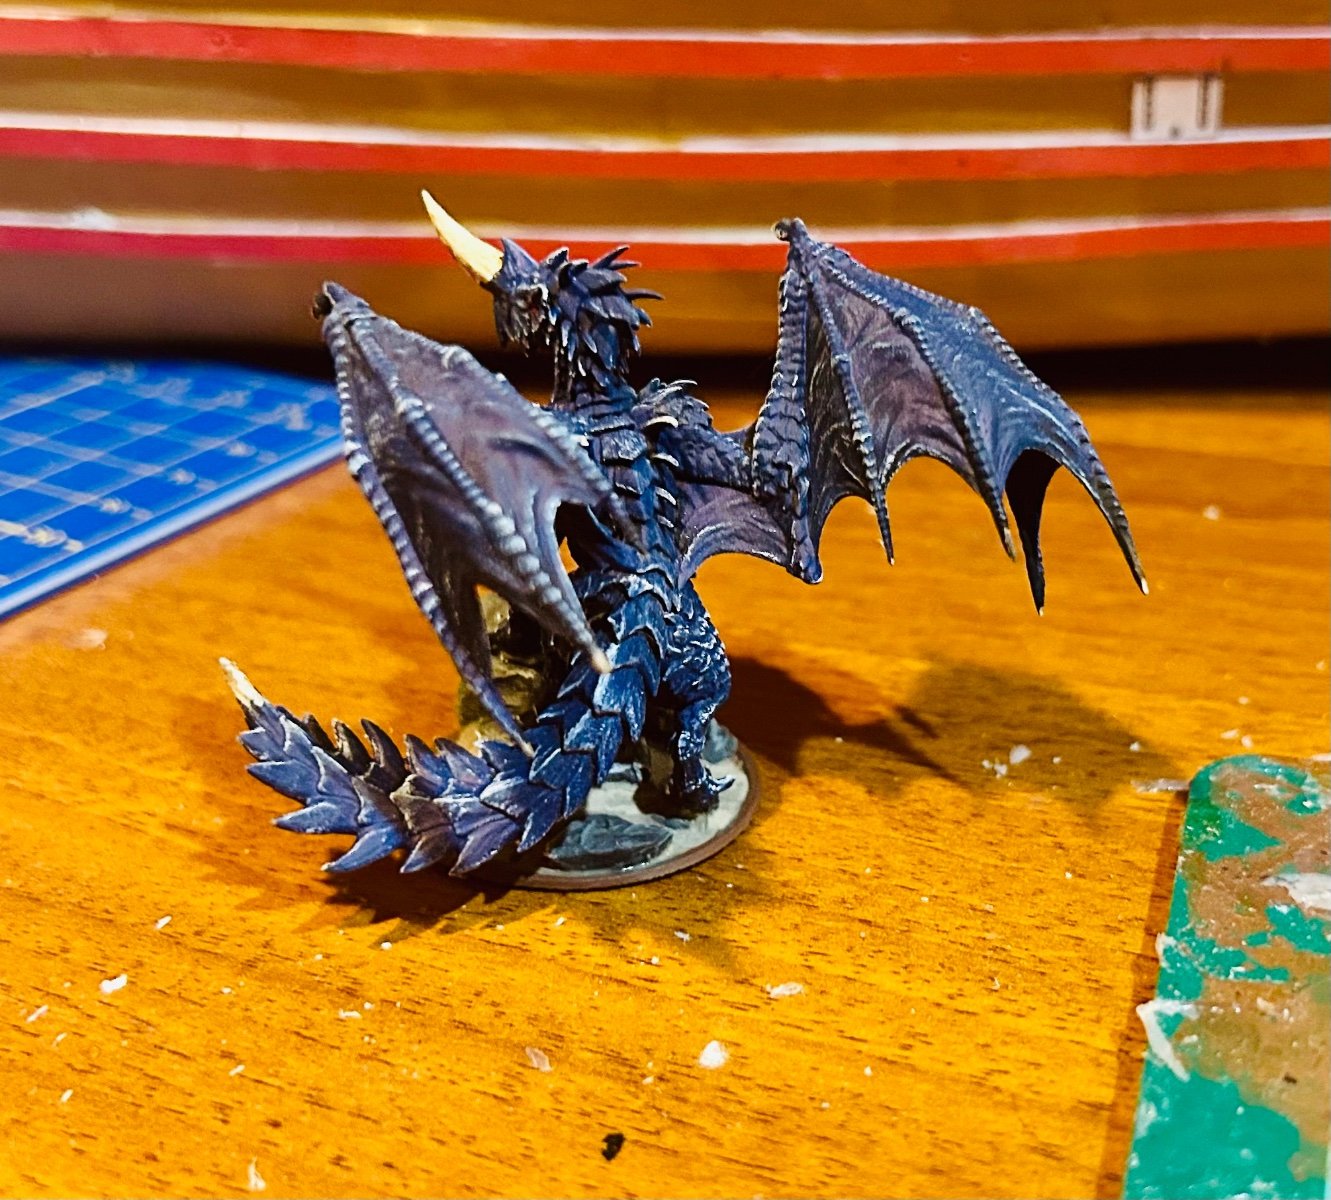
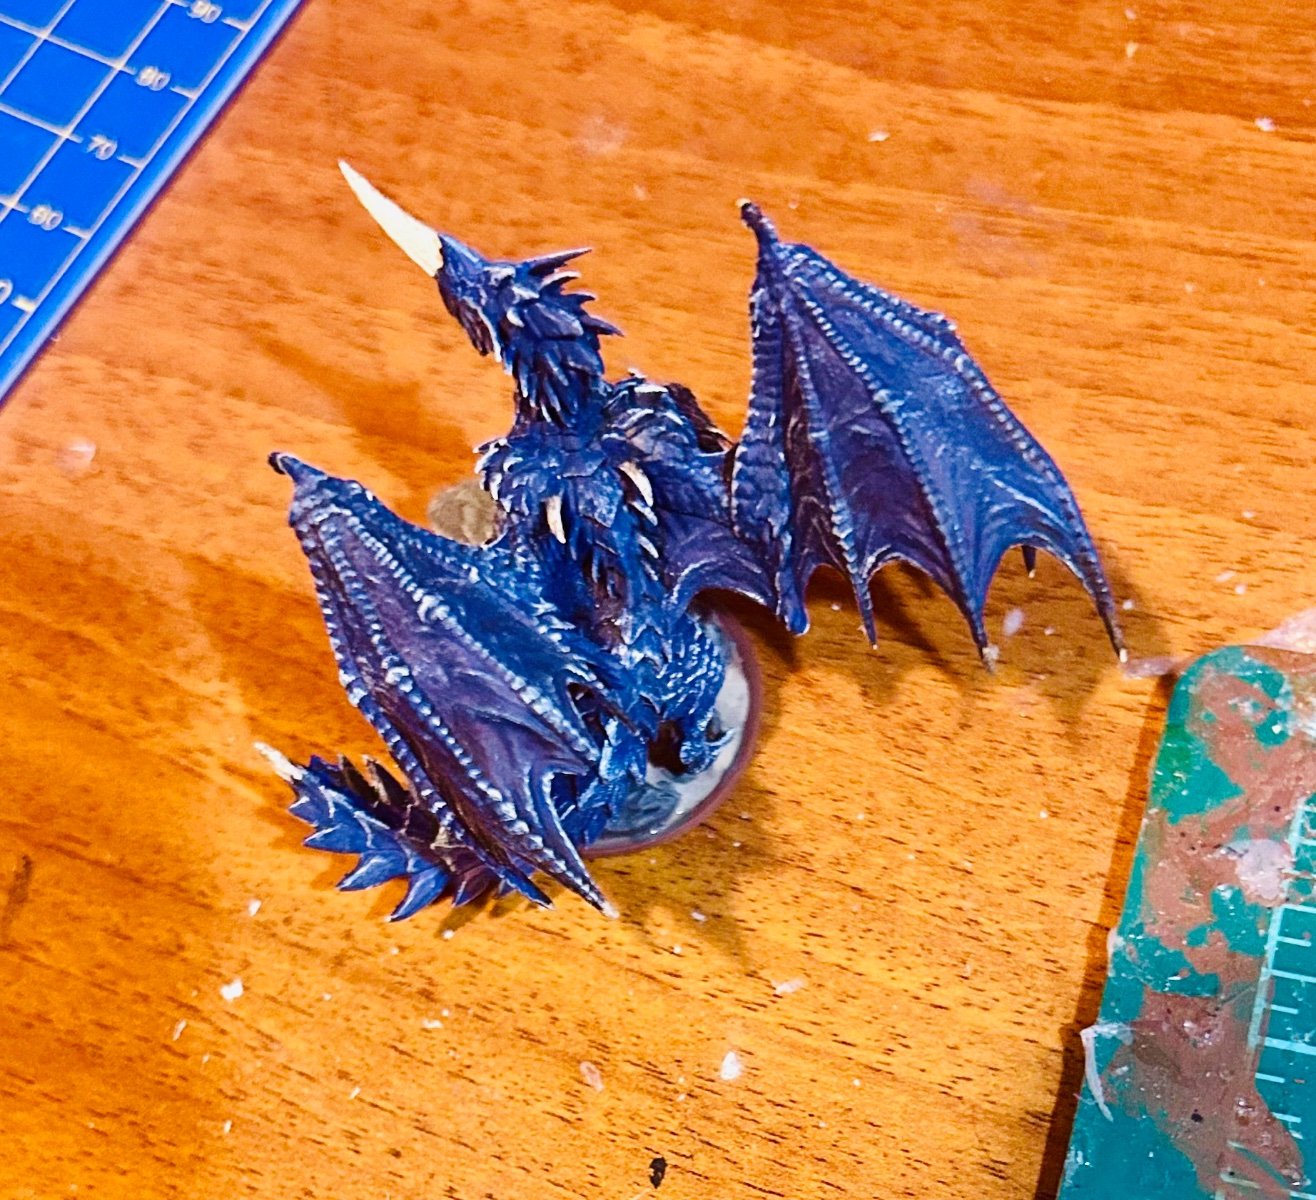
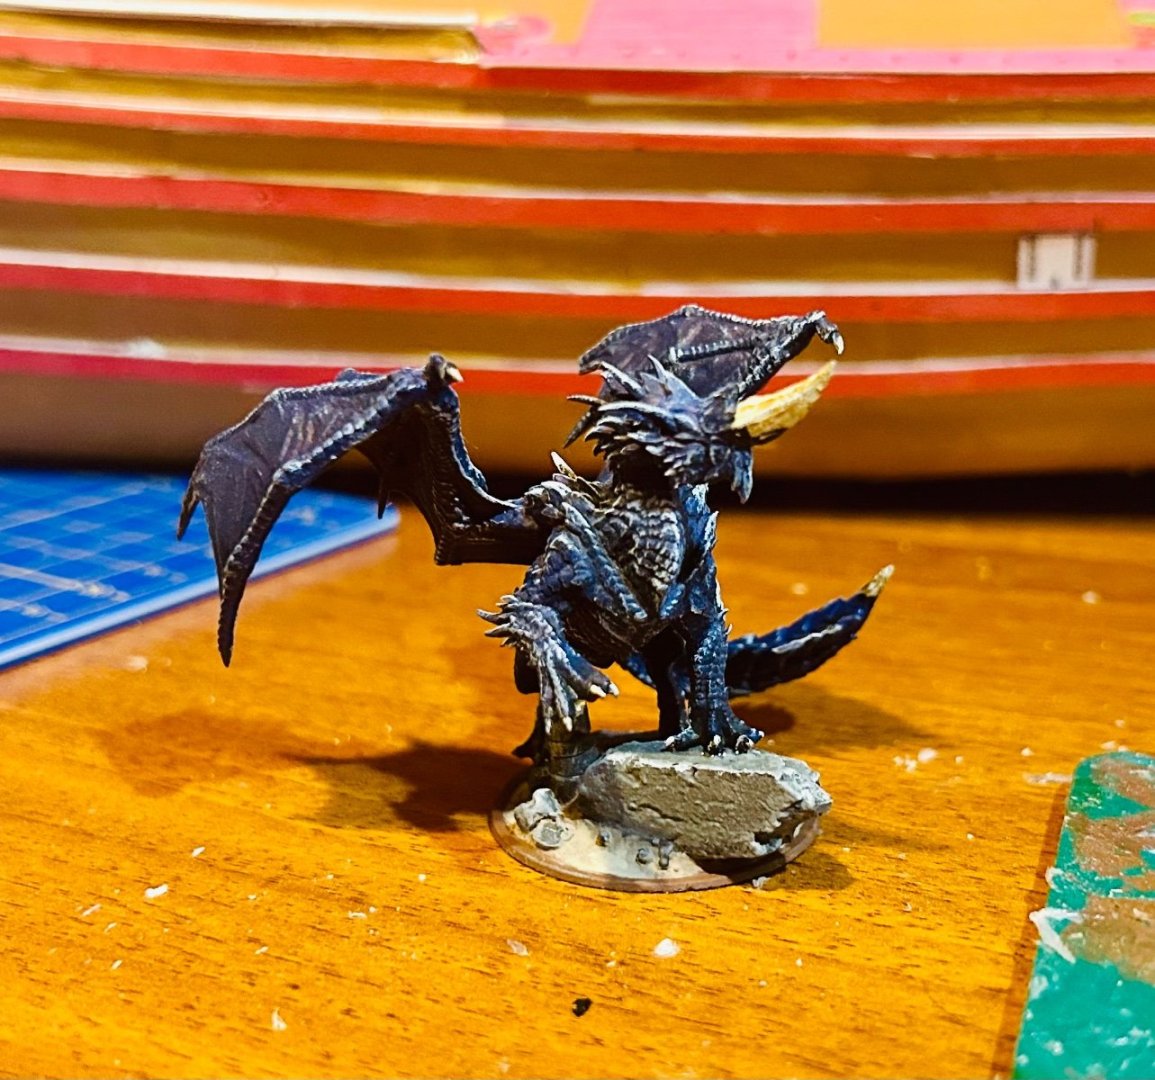
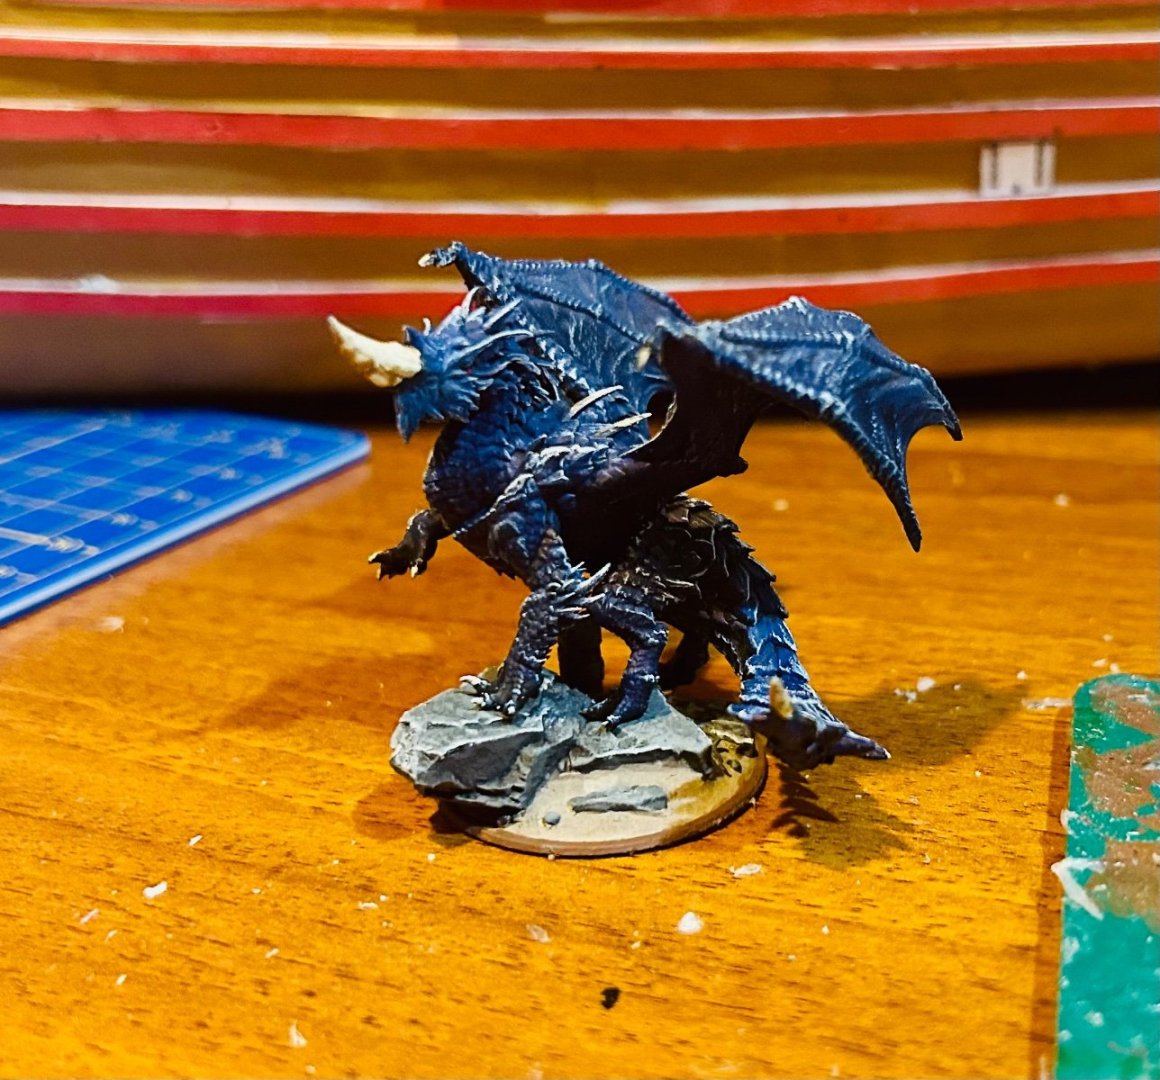
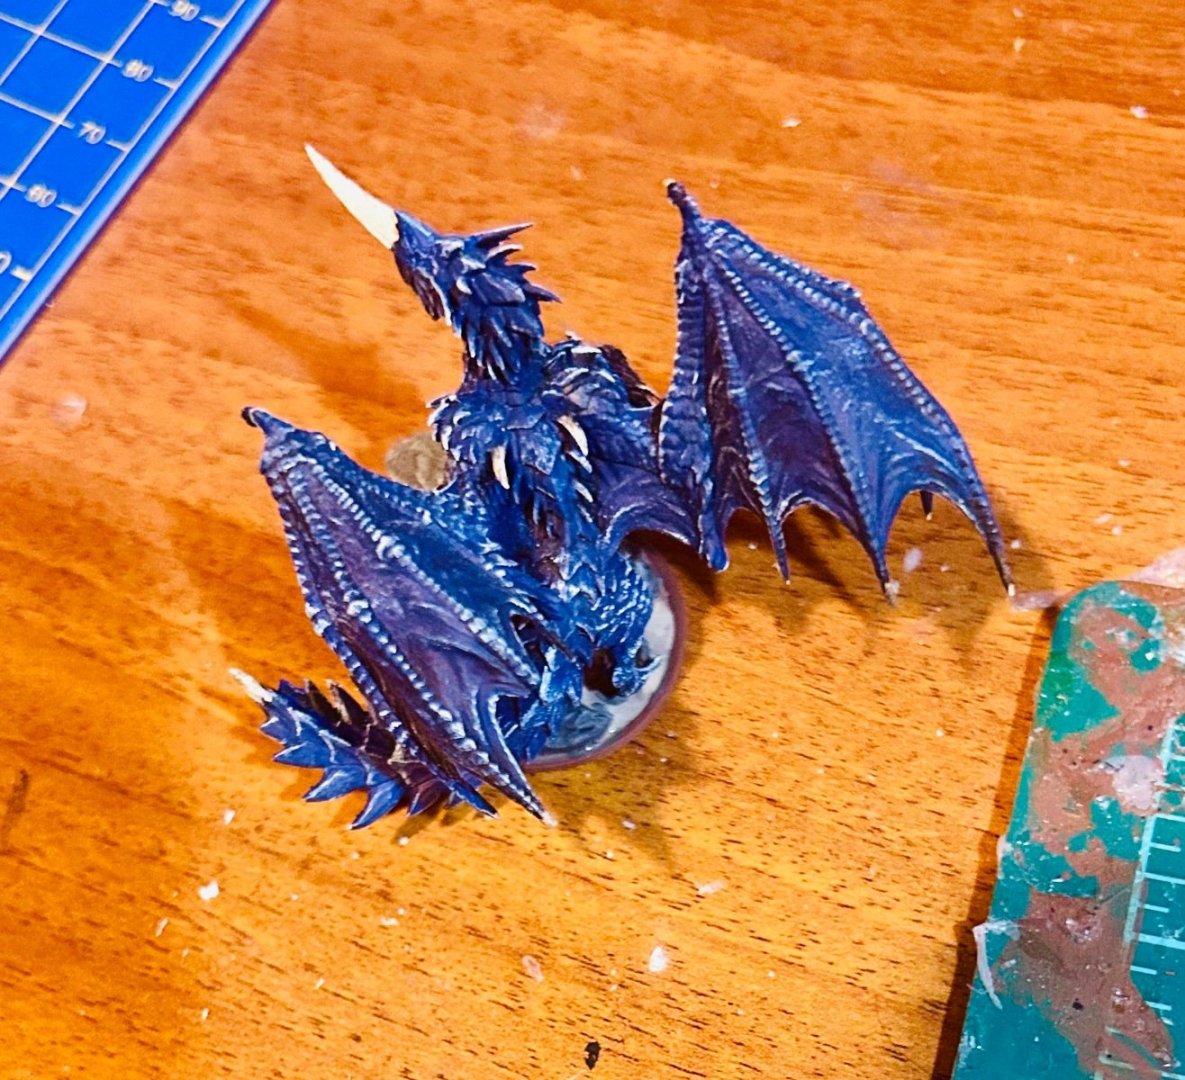
Quick 28mm dragon that the Admiral bought me a while back: I enjoy miniature painting quite a lot and I needed a quick side project.

-
Did 18th and 19th century ships have flat weatherdecks?
GrandpaPhil replied to Rushdie's topic in Nautical/Naval History
Weather decks would have been curved for ships of the 18th and 19th centuries to improve drainage. The water would have gone overboard with holes through bulwarks at the deckline called scuppers. There is an excellent diagram of standard deck curvature in zu Mondfelds Historic Ship Models. -
I’ve bought multiple kits from them, even since the invasion, and had no problems. The kits took about a month to get to me. That particular store is located in Kyiv. My most recent order was last July, but I get their newsletter every month and they said that they were okay as of February 13. Orel is one of two of my favorite brand of model kits so I’ve been following them pretty closely. My absolute favorite brand of kit is Seahorse.
-
Congratulations! Very nicely done!
-
Are you going to fiberglass it?
-
One companionway complete with caryatids: I took the design of the caryatids from the Sovereign of the Seas.


-
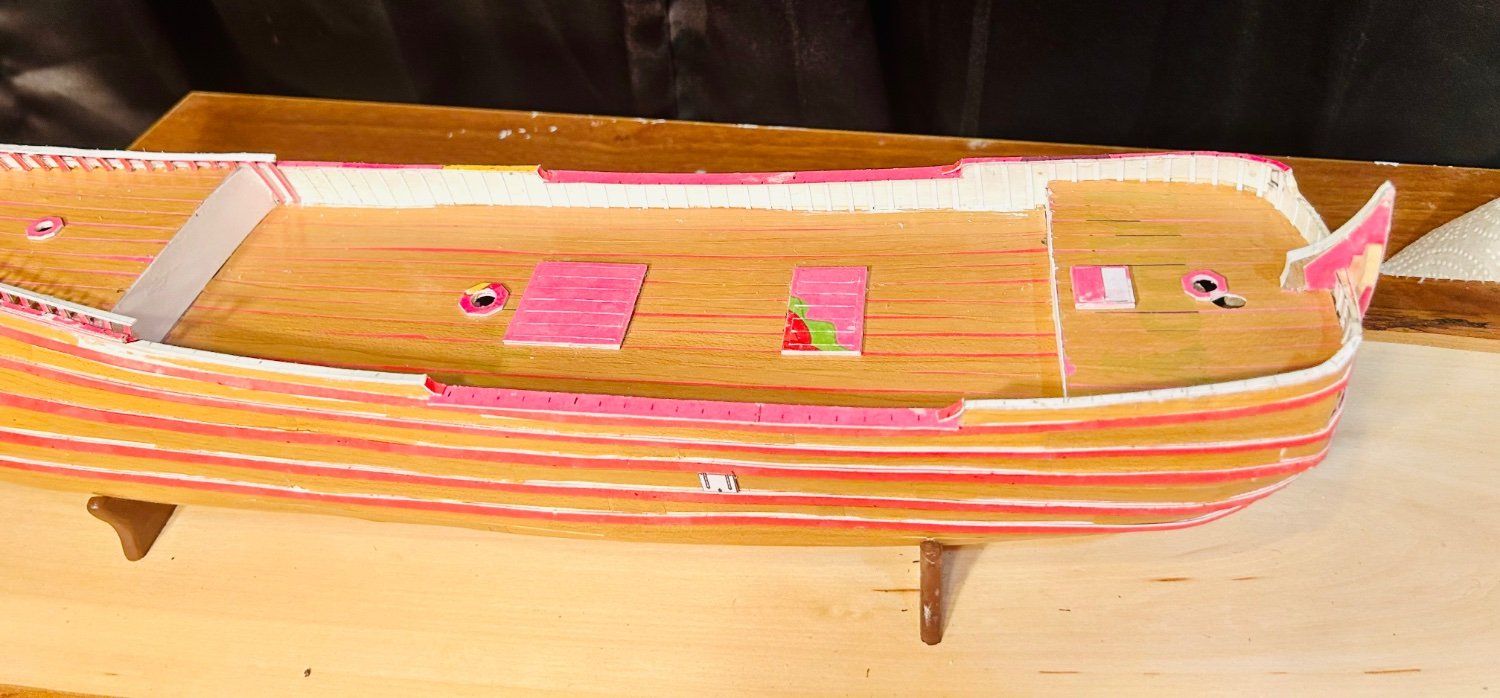
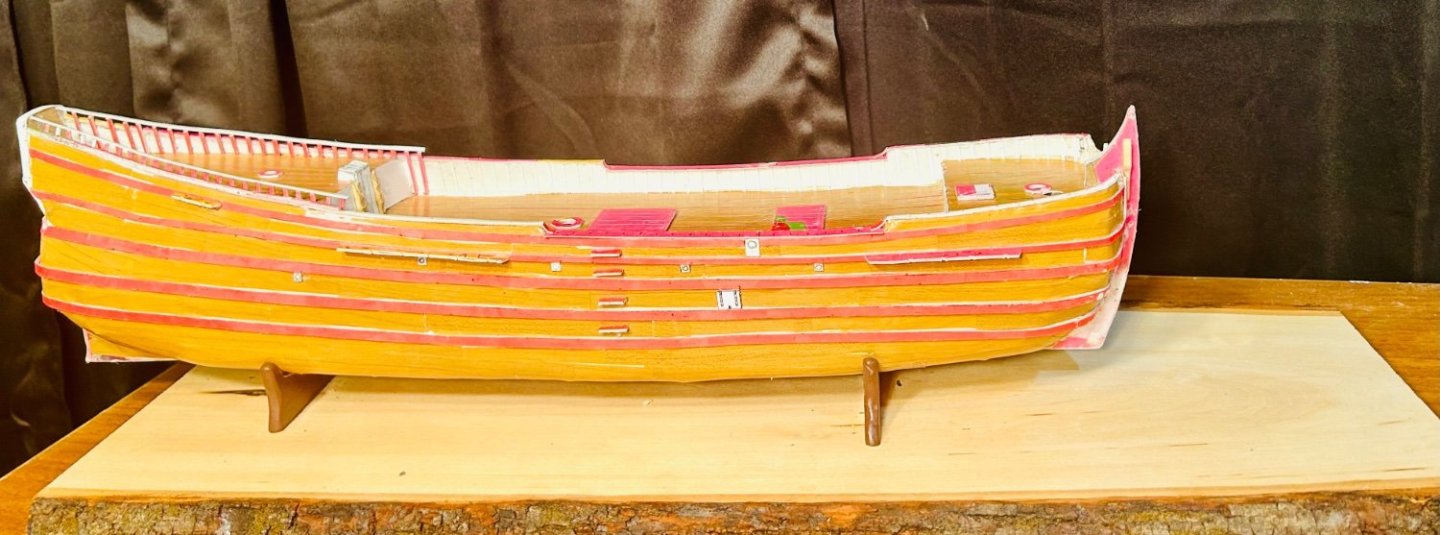
Made a little more progress: Railings are done. Stern trim is done. All gunport lids are just dummy gunports, there is nothing behind them.


- 145 replies
-
- 10
-

-
The railings are nearly complete: The frame extensions are complete. Next I will add the last railings and then the accent trim pieces to the stern. I still need to make the companionway with the associated door in the bulkhead in front of the quarterdeck, prior to the initial painting. I carved 2 caryatids from McKay’s Sovereign of the Seas book for the doorframes. I know this ship is supposed to have only minimal decoration, but I wanted to see if I could make them. I am going to install most of the hull fittings prior to painting as well. I have most of them already copied and drawn out. They just need cut out and installed.
-
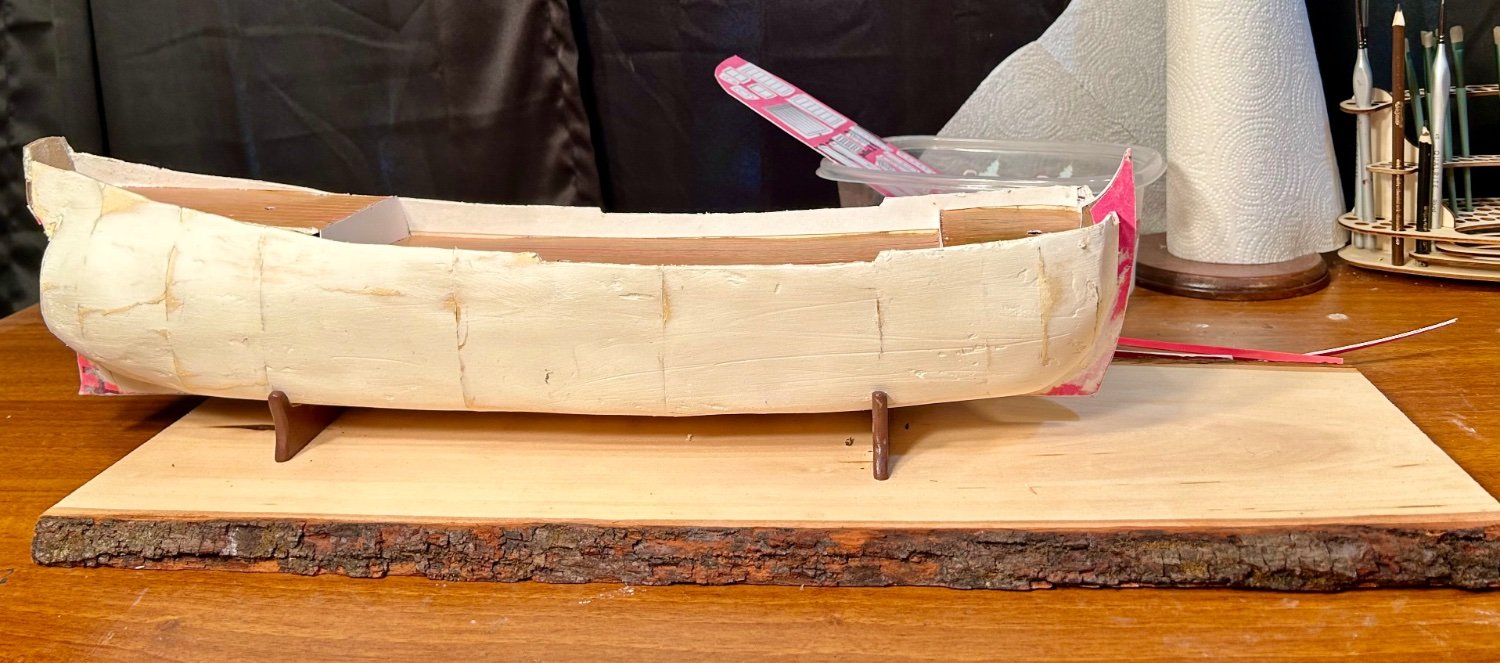
The outer hull covering is on: Been working deck fittings too: The grating is done, but needs painted before assembling and I want to paint everything before it gets installed. I know the run of the “planking” is a little (read a lot) off, especially by the bow and the stern, but it shouldn’t matter. Everything is getting sealed and painted and the last two times I built like this, you couldn’t even really see the run of the planking at all and that was with contact paper with a lot more wood grain than this contact paper. My next step is to seal the entire model again and start to add railings, with their associated supports, a companionway and frame ends. Then on to the hull fittings. Then it will be time for the initial painting!

-
Welcome!
-
Welcome!
-
Chris, They use the pulp board for the laser-cut pieces? So, I can use that for the thicker pieces, like framing, on my Orel kits (I made a run on their ironclad and pre-dreadnought battleships) that would ordinarily be purchased as aftermarket laser-cut sets? I ask because I have a large sheet of the pulp board I bought for the inner hull covering on my cat ship that I am done with now and thought would sit around until I built another one from scratch.