


GrandpaPhil
-
Posts
6,158 -
Joined
-
Last visited
Content Type
Profiles
Forums
Gallery
Events
Everything posted by GrandpaPhil
-
Congratulations! Well done! Looking forward to the next build!
-
Very cool!
-
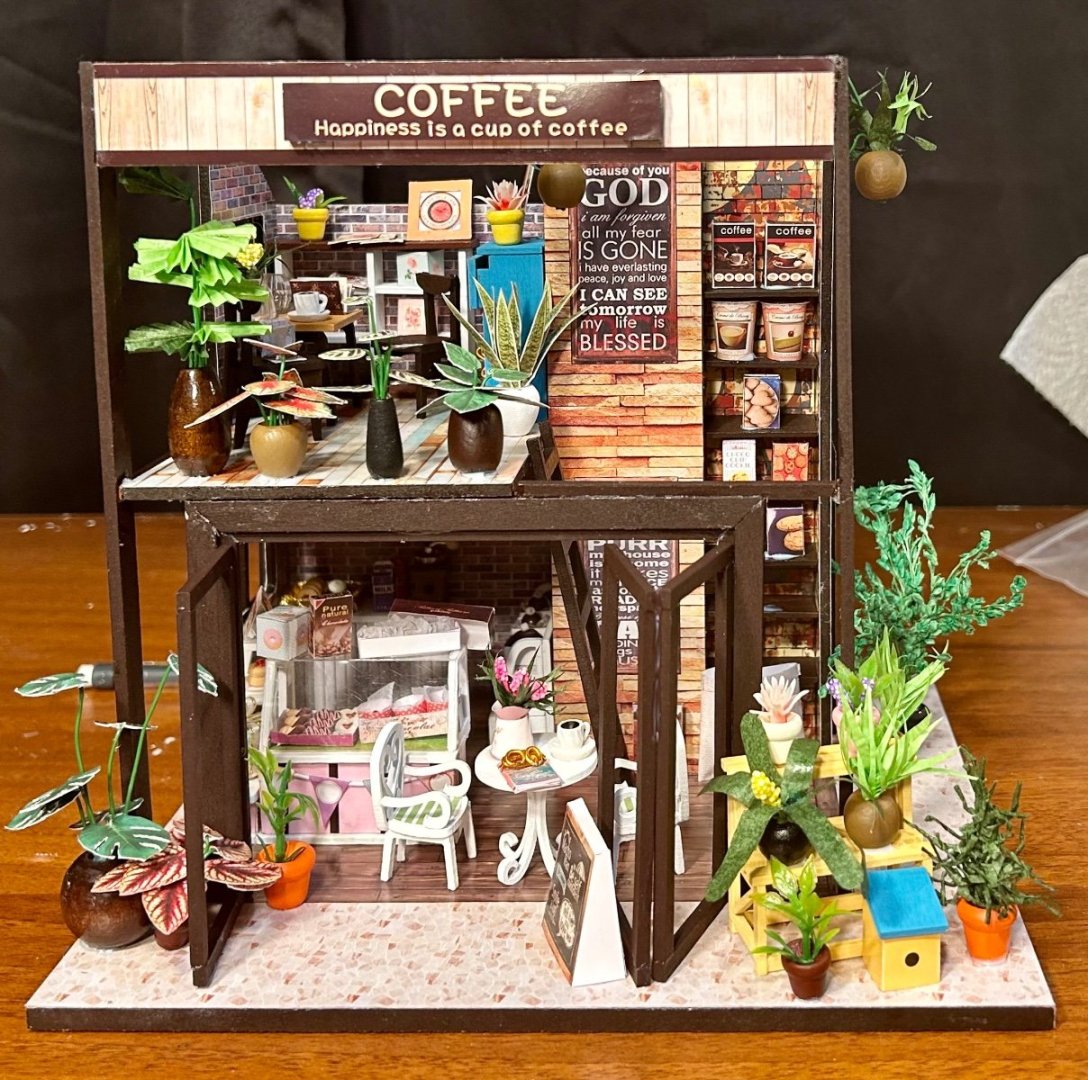
Here is my wife’s coffee shop:
-
Firstly, relax. You are an excellent model maker. You have surpassed many already. This is well within your capabilities if you decide you want to make your own shrouds and ratlines. I made my own shrouds and ratlines in all the completed logs in my signature box. Please feel free to use them. I use my online build logs as a digital notebook for myself so I can recall exactly what I did and how I did it while building a model. Maybe they can help you out as well. In my Prince de Neufchatel build log, I talked about making the deadeyes and discussed techniques so I would remember how to do it. At the scale that you’re building at, I would buy a large number of smaller deadeyes. I cannibalized some of the deadeyes from my HMS Victory kit for the Hannah and bought a bunch for the Solferino. You’re going to need at least 60 for the lower shrouds (15 shrouds on each side x 2 deadeyes per shroud x 2 sides). Ratlines are time consuming but totally worth the effort if you are so inclined. I learned most of what I know about rigging from Wolfram Zu Mondfeld’s Historic Ship Models.
-
Do you think this crazy idea is feasible?
GrandpaPhil replied to Ulises Victoria's topic in Wood ship model kits
Shipyard makes a 1/96 HMS Enterprise card kit that runs about $38 at Ages Of Sail. It will have the exact masting and rigging plans for the Enterprise. Shipyard’s kits are amazingly detailed and designed. Then you could cann materials from your Surprise kit to use on your Enterprise. -
You can tell that you’re a ship modeler when one definition of heavy reading involves the books that you use to make your models dry flat, lol.
-
The dollhouses have been an interesting change of pace. I have learned a few tricks that can be applied to my ships. That is most of the furniture for the coffee shop one, which is the one I’m currently working on.

-
I used Peter Kirsch’s book for my guns on my model.
-
I am building from the Victory Models kit plans for the Revenge right now. The plans are excellent! The instructions are excellent! The level of detail is excellent! I would strongly recommend the Victory Models kit for a model of the Revenge.
-
My condolences for your loss.
-
I’ve got the Revenge on hold because I’m working on my wife’s Christmas gifts. She bought 5 small dollhouse kits and room boxes and asked me to build them for her for Christmas. I’m on 3 out of 5. Out of curiosity, do any of the rest of you make Christmas and/or birthday gifts for your spouse or other close family/friends?
-
Welcome!
-
Loracs, Good on you! Those are looking good!
-
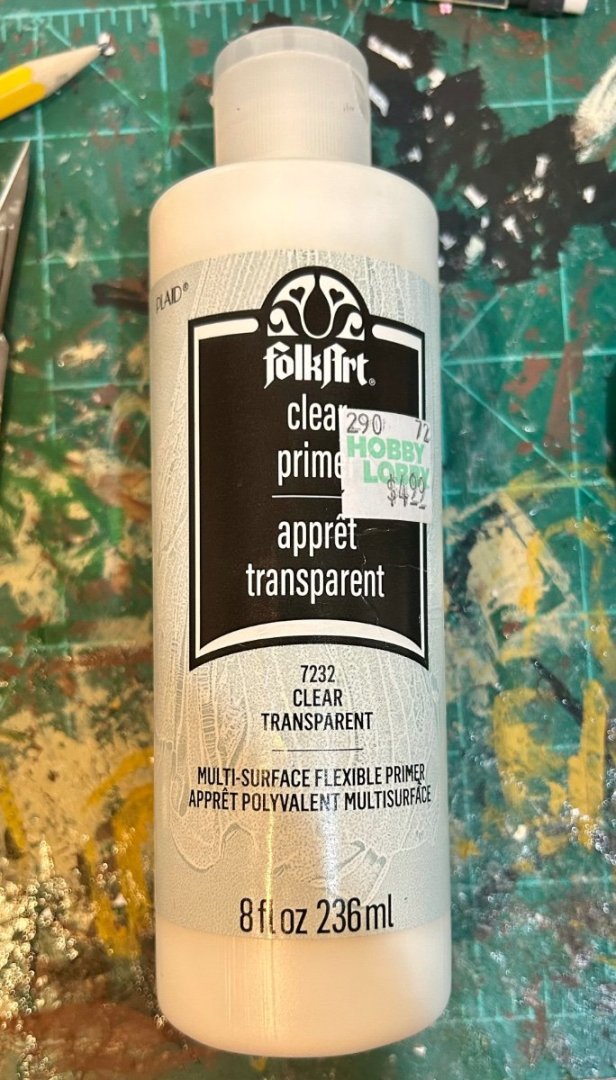
I’ve been brush painting that (or equivalent) onto one side, letting it dry, then brush painting it onto the other side. It works quite well and can be adhered to with standard PVA or wood glue. Plus it holds rivet detail. That’s how I’ve been making my iron parts for my models.
-
For best effect, make sure you seal the card on both sides prior to cutting. It prevents fuzzing and splitting/delaminating of the card. Sealing card parts is especially important for smaller and high detail pieces.
-
Welcome!
-
Very cool!
-
If it follows French design, then the sea chests would have been forward of the engines and boilers. On the Russian Battleship Orel, it looks like the sea chests were about 1/4 of the way aft, from the bow. My Mikasa and Grazhdanyn don’t show them, which I will have to fix when I get around to building them.


