GrandpaPhil
-
Posts
6,166 -
Joined
-
Last visited
Content Type
Profiles
Forums
Gallery
Events
Everything posted by GrandpaPhil
-
Thank you very much! That was very helpful! Matthew Baker designed and built the Revenge. I will utilize that drawing for my basic color scheme.
-
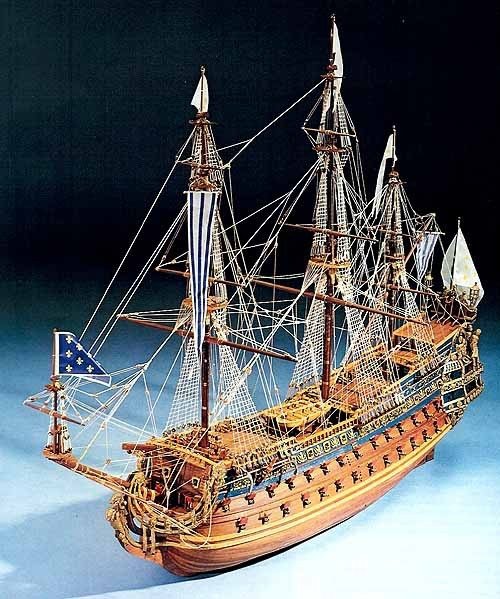
Thank you very much! That makes perfect sense. In other news, I am enjoying this model enough that I just ordered myself the Sergal plan set for the Soleil Royal, from Cornwall Model Boats, for my birthday, so I can execute the same construction methodology that I am using with this model on the Soleil Royal. That will be a fun build in the future! I think that it will be a great build in 1/64 scale. That will make for a 48” model.
-
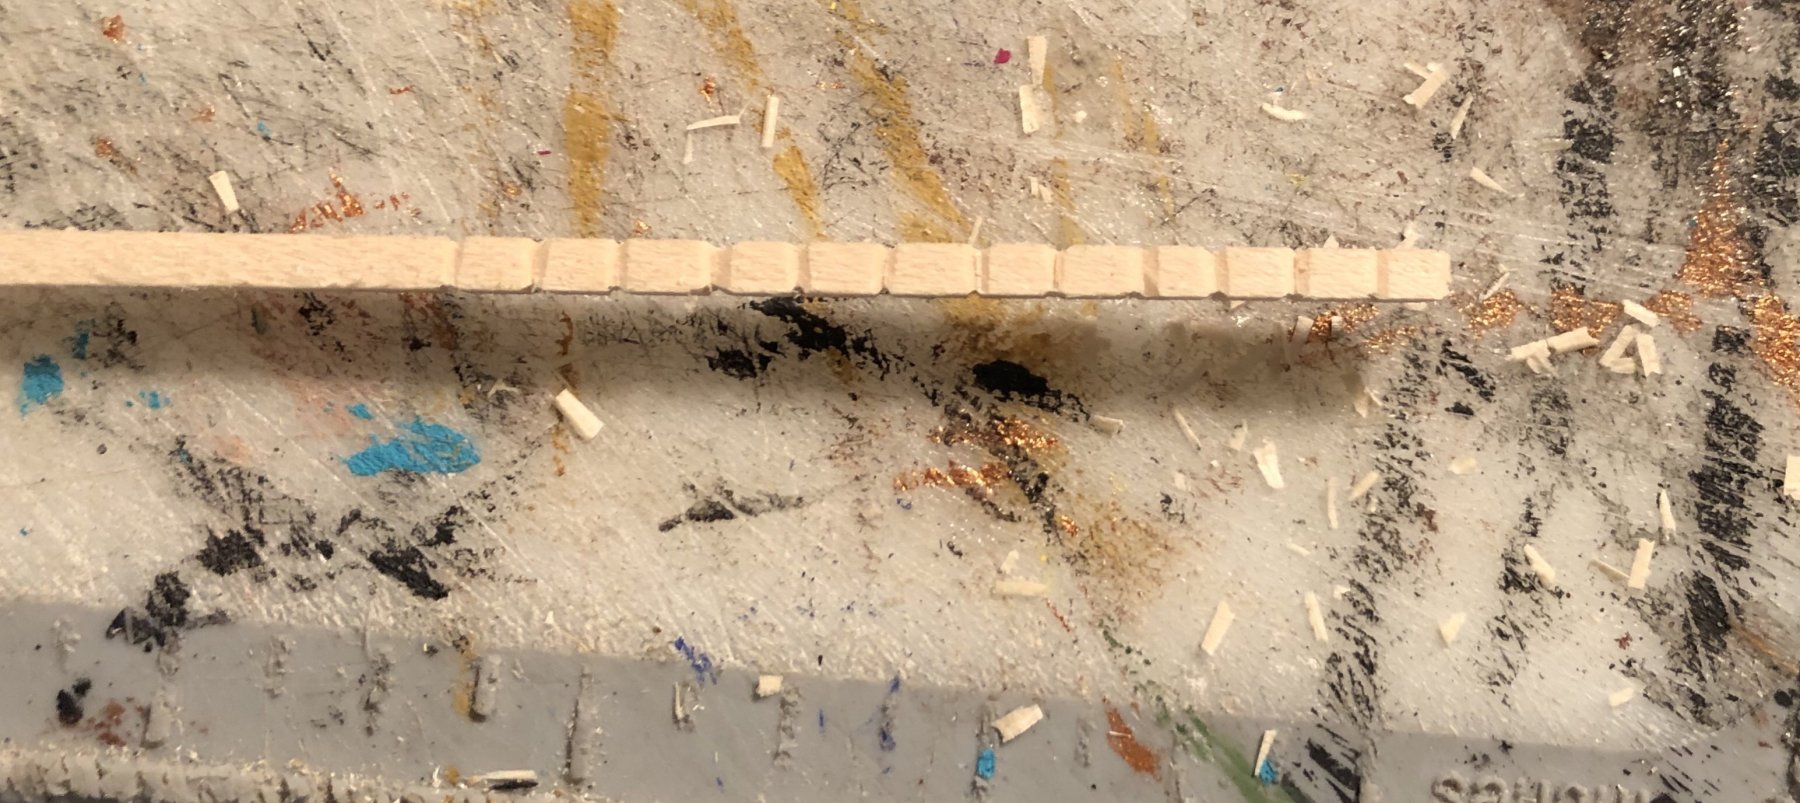
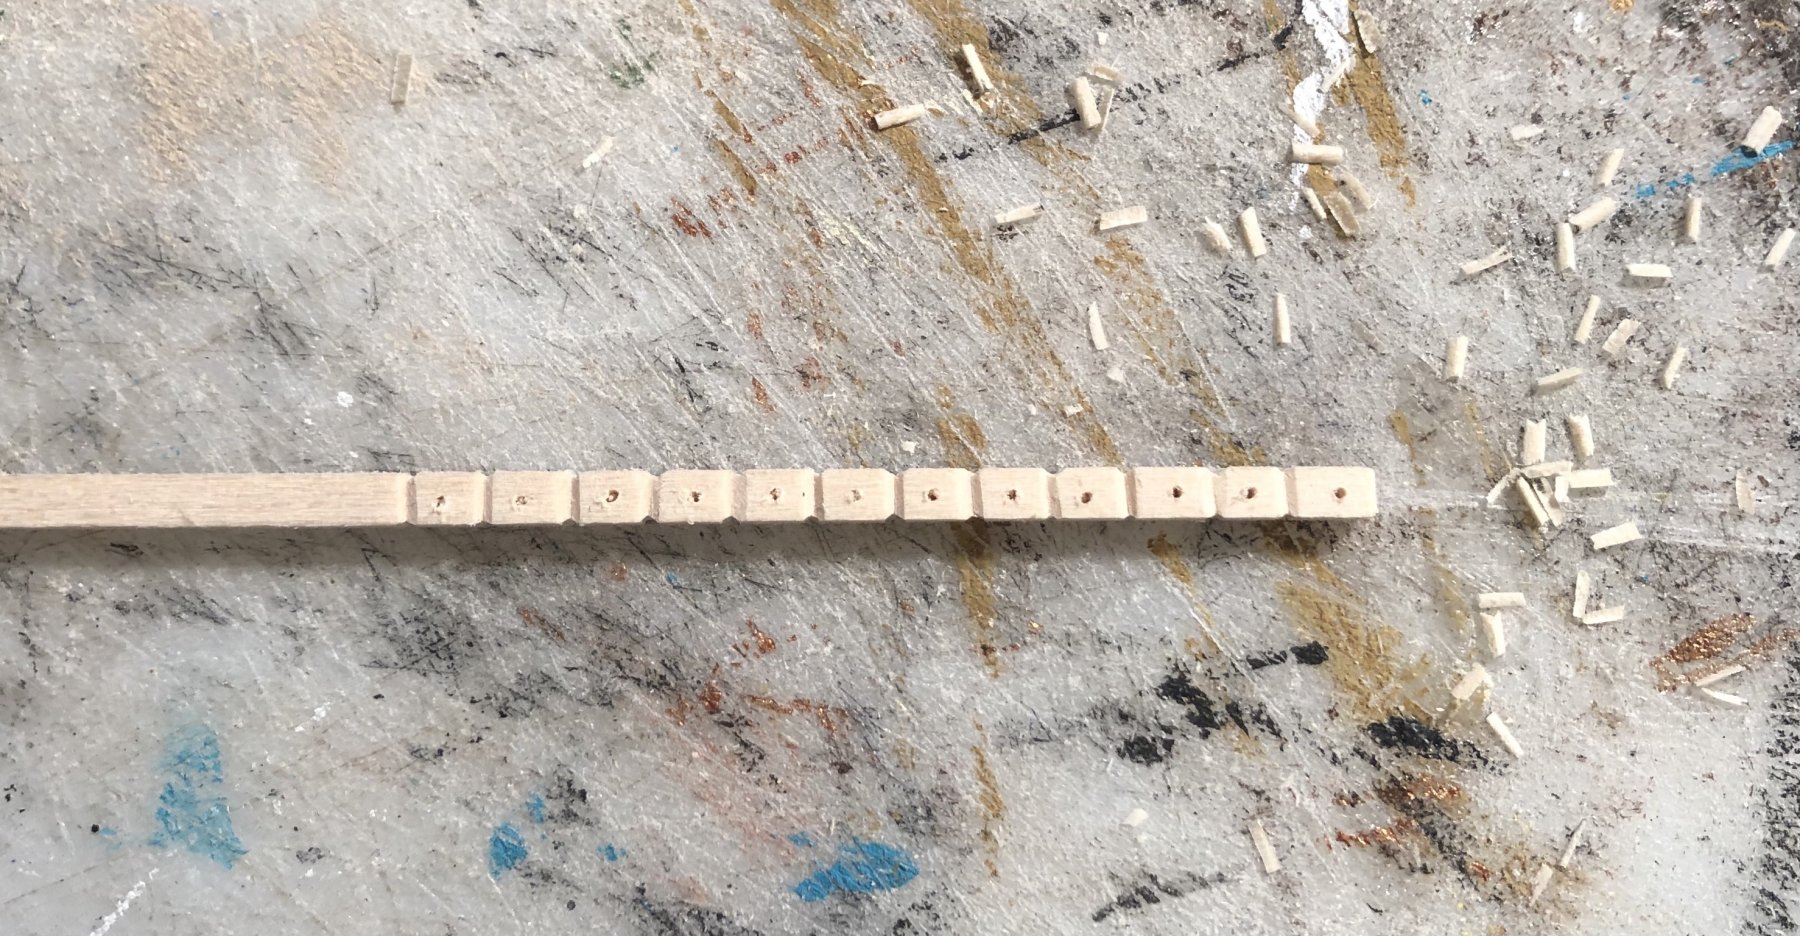
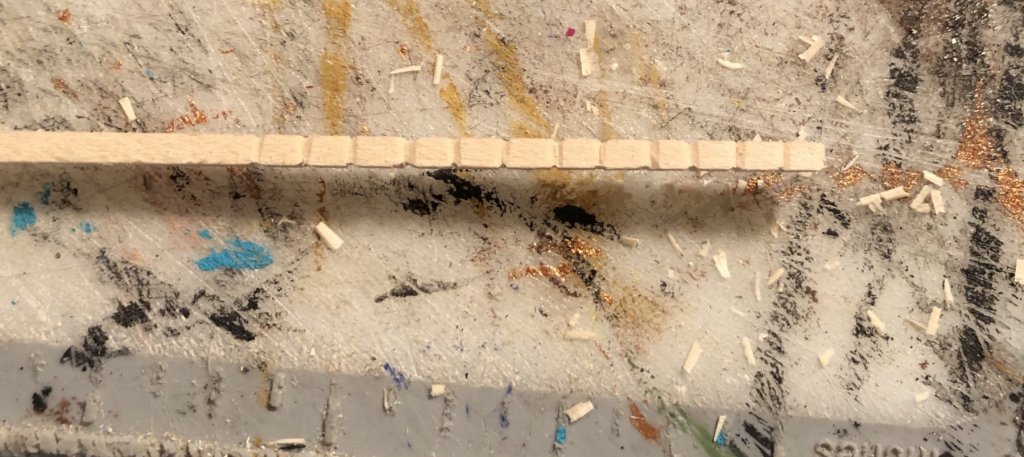
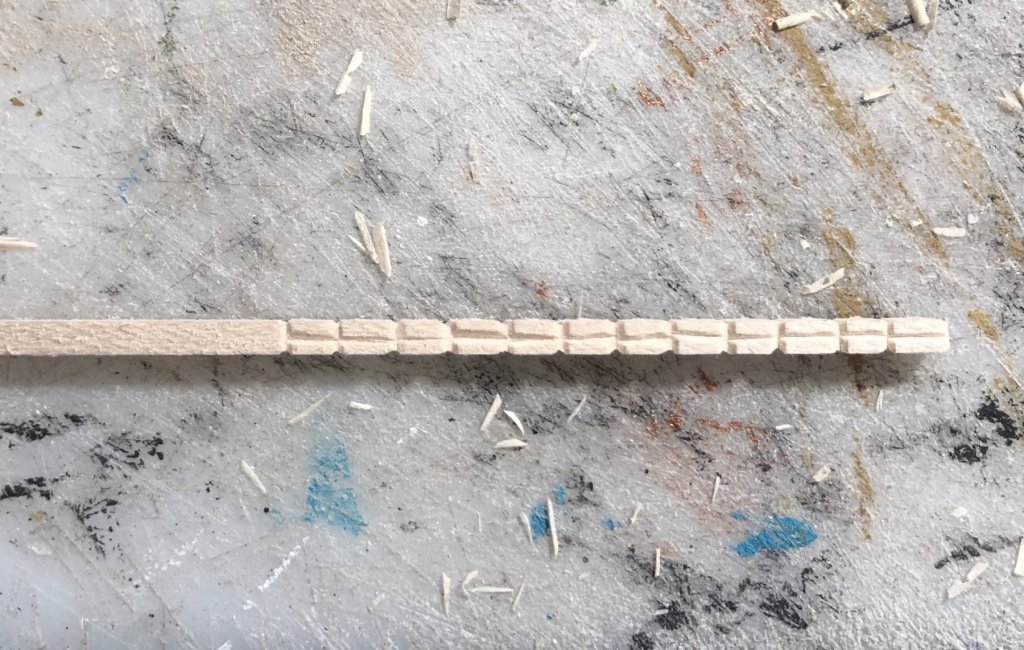
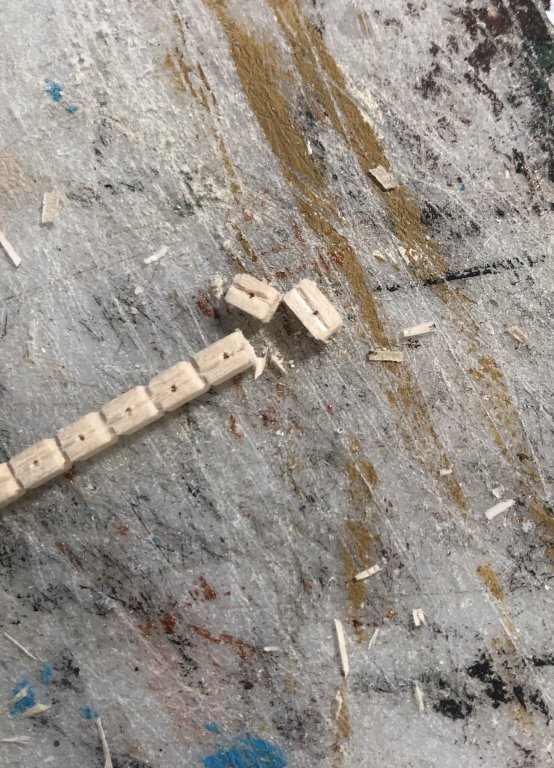
I like making my own from wood strips. They are relatively easy to mass produce. Here is how I do it. I have refined my technique to round them out a bit before cutting them apart.

-
USS Constitution by mtbediz - 1:76
GrandpaPhil replied to mtbediz's topic in - Build logs for subjects built 1751 - 1800
Very cool build, Mustafa! I’m looking forward to seeing it! -
The laser cut gratings would look better and if you have them at hand, I would use them.
-
Edward, Winchelsea is looking good!
-
F4-D Phantom by rvchima - FINISHED - Dumas - 1/25 Scale
GrandpaPhil replied to rvchima's topic in Non-ship/categorised builds
Nicely done! -
In the near future, I will have to select a color scheme for the hull. The Revenge will be painted that dingy white below the waterline, but I am trying to figure out what color to paint the main hull above the waterline, that will integrate with the friezes that were characteristic of the time period. Does anyone have an idea of the color scheme, other than the decorative friezes, that an English galleon would have had in the late 16th century? There is no way that the English would have left the hull bare wood. Salt water is too corrosive and destructive, even on wood.
-
Welcome!
-
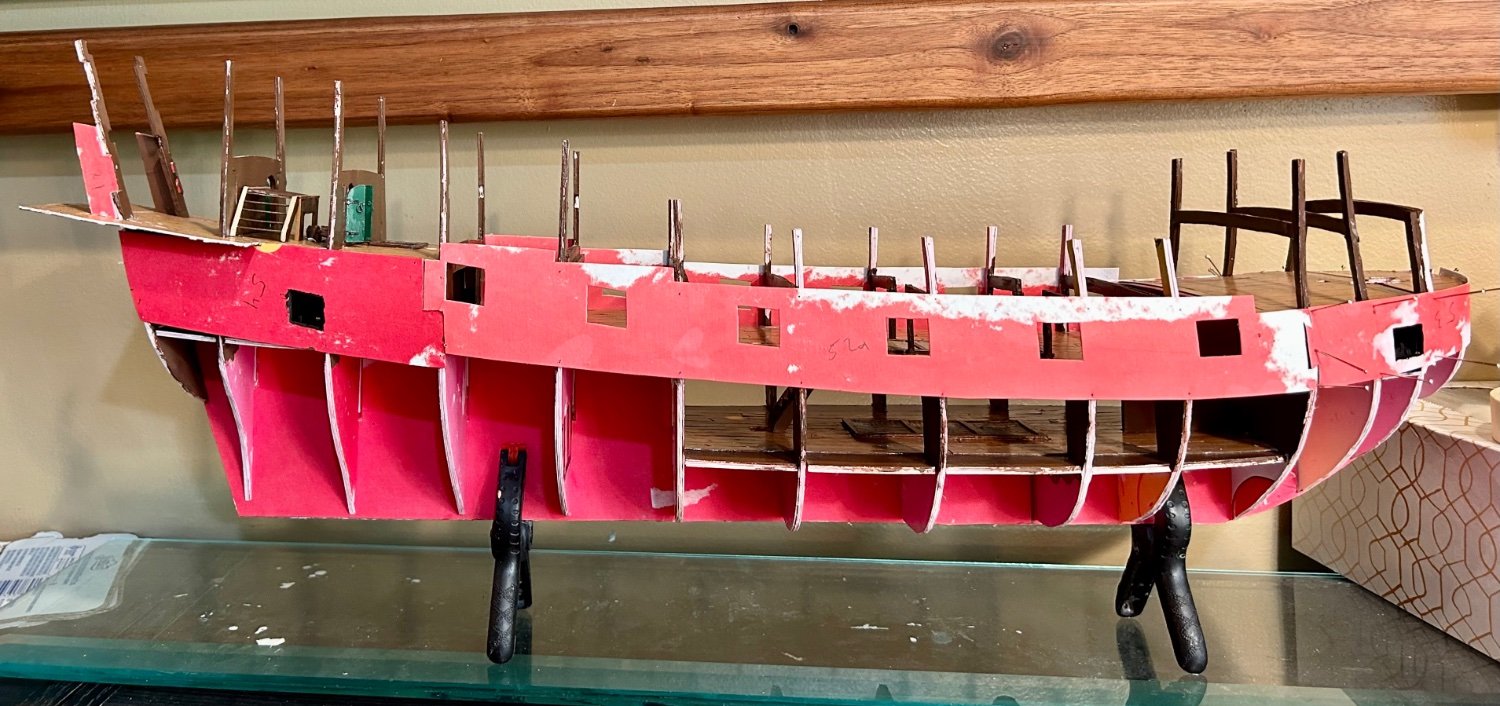
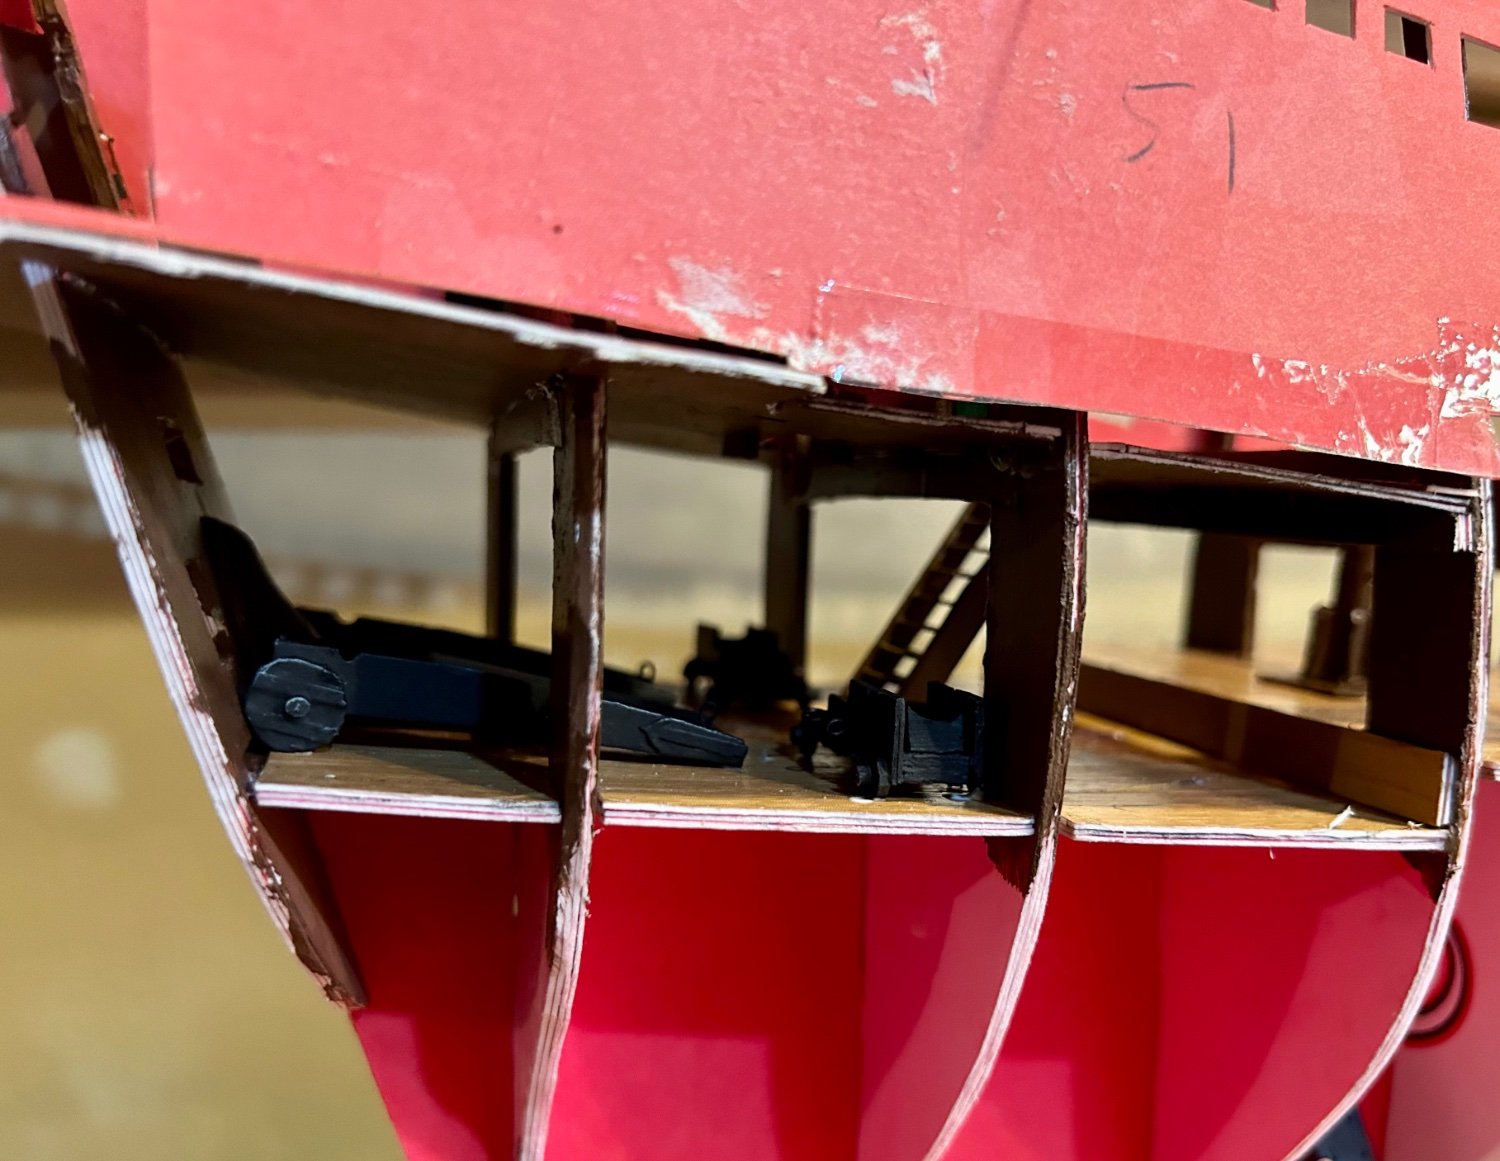
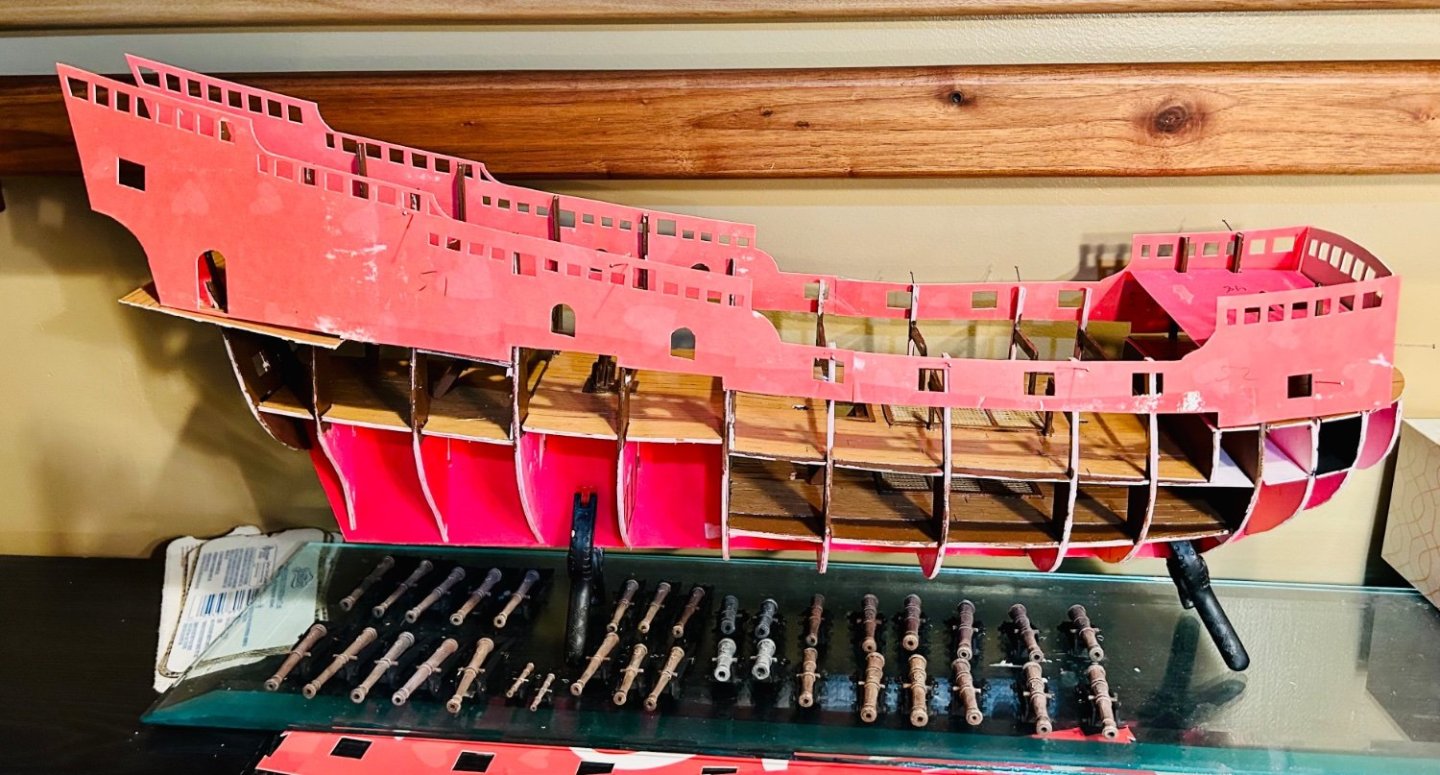
The gundeck gunport pattern is in place: This means that it is about time for the first planking (after a few minor pieces get installed)!

-
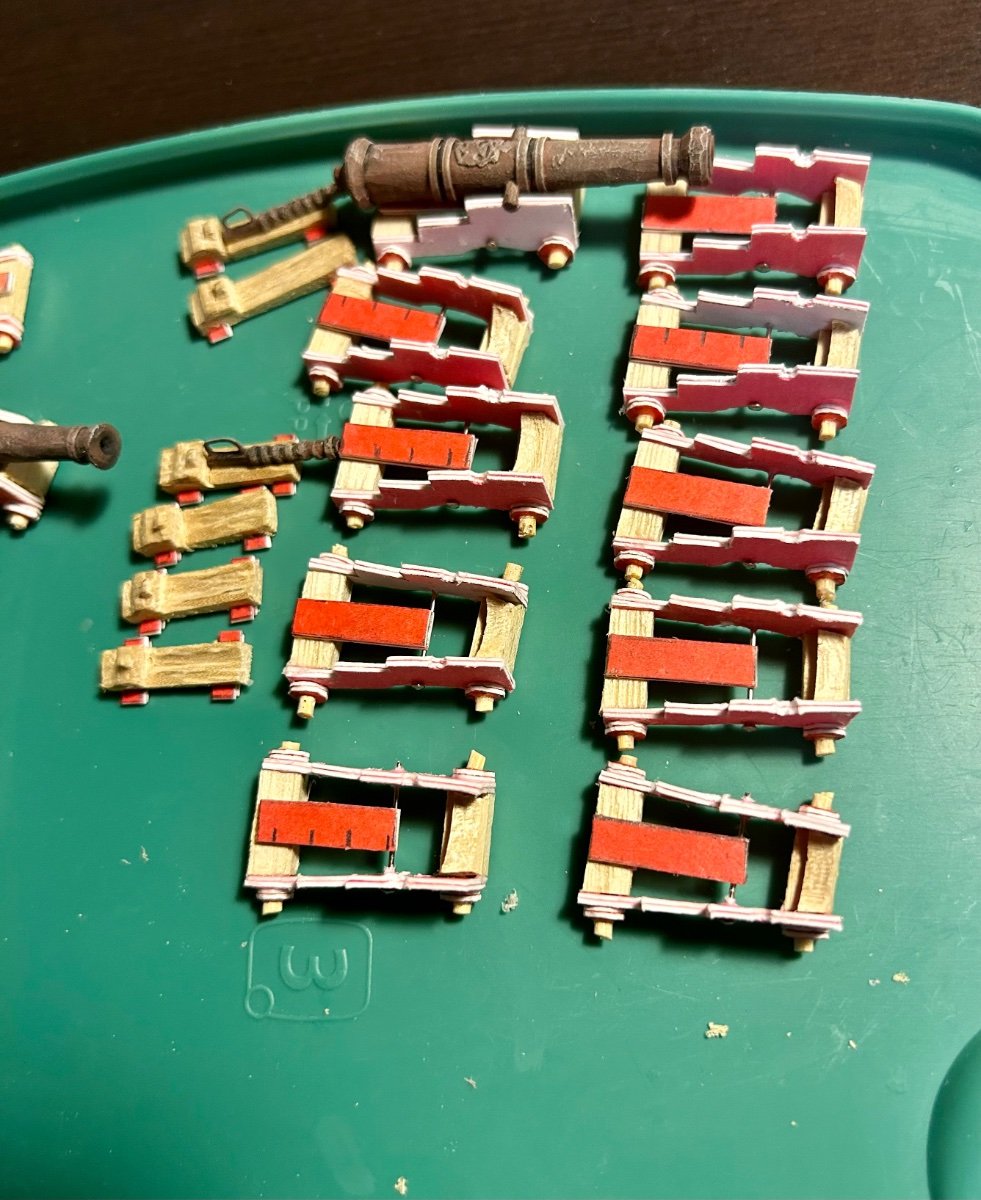
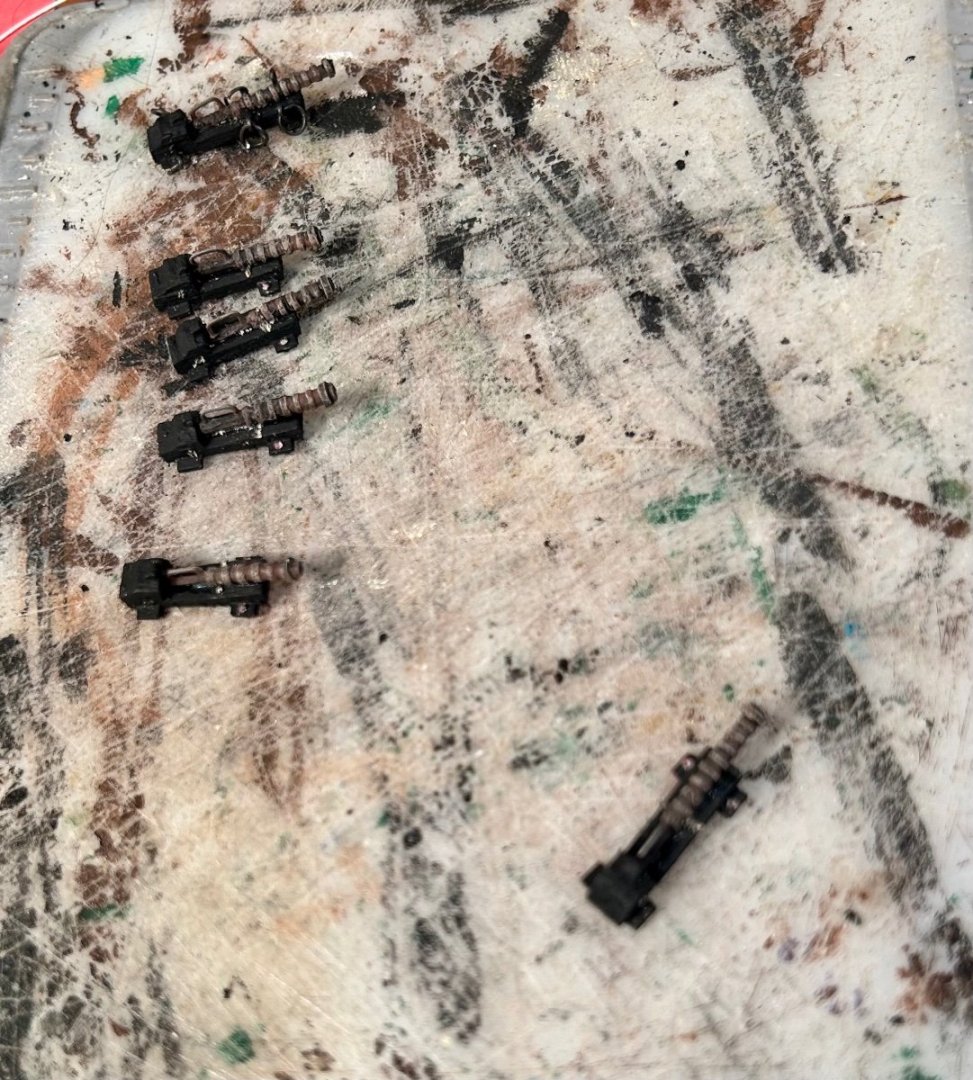
The aft carriages are glued in place: Two culverins and two demi-cannons.

-
All carriage guns are done: Working the breech loaders:
-
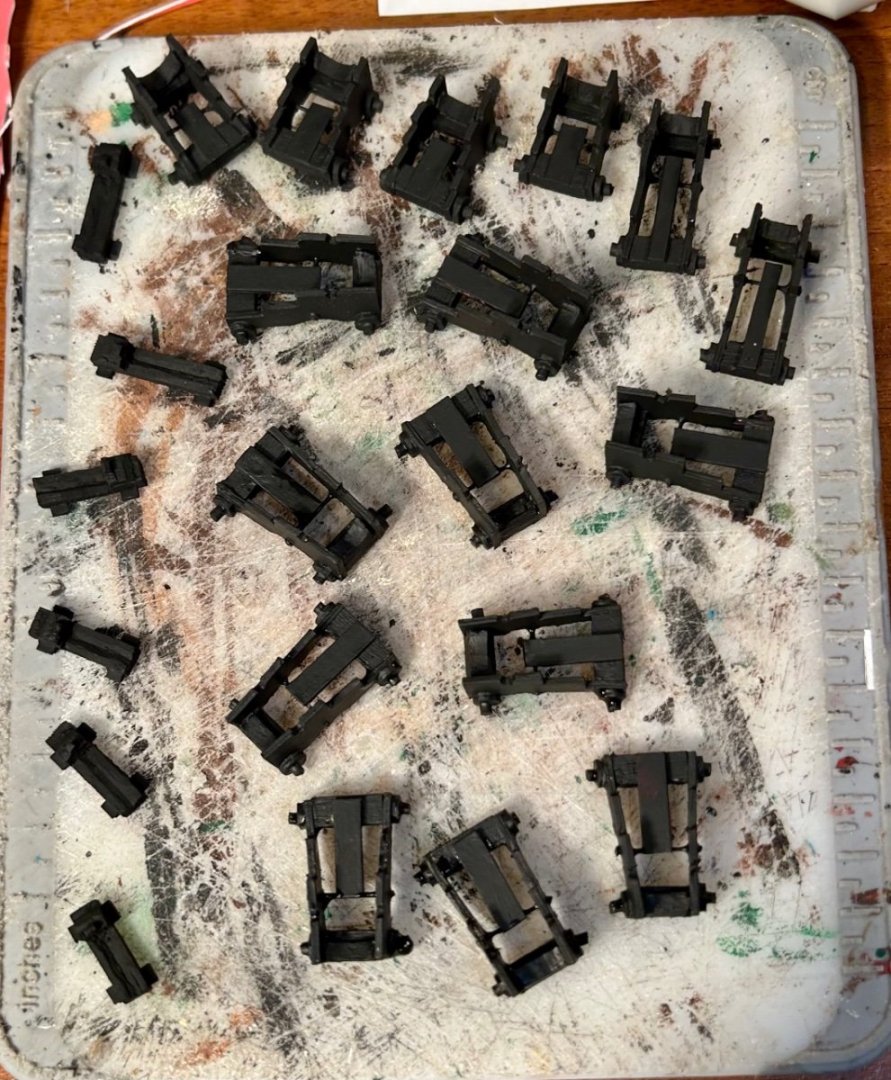
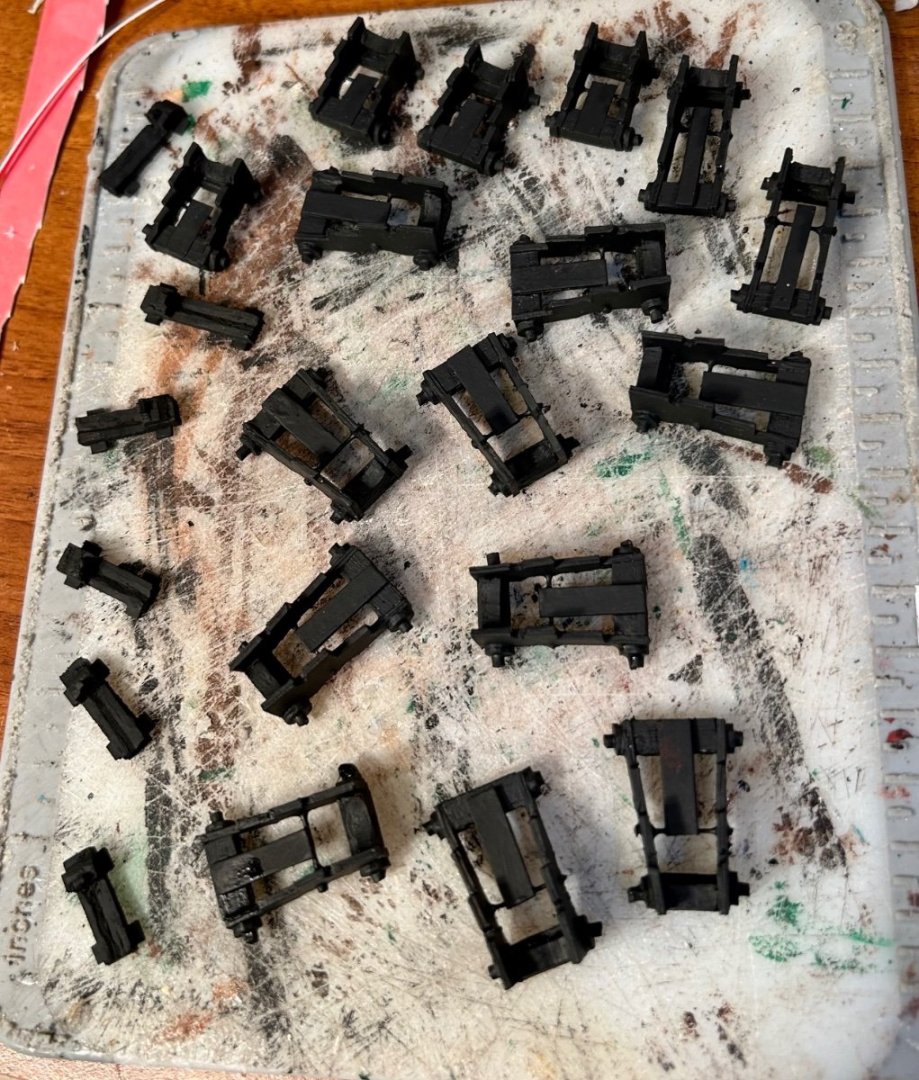
The last 22 carriages are sealed and painted:
-
I use contact paper intended for cabinet refinishing. It works well for me.
- 12 replies
-
- 3
-

-

-
- Muleta de Seixal
- Seahorse
- (and 1 more)
-
Very cool!
-
Elementary school clear glue?
GrandpaPhil replied to modeller_masa's topic in Modeling tools and Workshop Equipment
The Mont Marte is the best one. The Elmer’s has water in it which can warp card models. I have never had an issue with long term durability, but my oldest surviving wood model is only 13 years old. -
I asked Google’s AI about the catenary curve in the keel. This is the response: “The Venetians had a catenary curve in the keels of their round boats because it made them more stable and maneuverable. The catenary curve is the shape that a chain or cable takes when it is suspended between two points. It is a very strong and efficient shape, and it helps to distribute the weight of the boat evenly. This makes the boat less likely to tip over, and it also makes it easier to turn. The Venetians were very skilled boat builders, and they were always looking for ways to improve their boats. The catenary curve was one of their most important innovations, and it helped to make their boats some of the best in the world. Here are some of the advantages of having a catenary curve in the keel of a boat: Increased stability: The catenary curve helps to distribute the weight of the boat evenly, which makes it less likely to tip over. Improved maneuverability: The catenary curve makes it easier to turn the boat, which is important for navigating in narrow canals or through rough seas. Increased speed: The catenary curve helps to reduce drag, which can improve the boat's speed. Reduced stress on the hull: The catenary curve helps to distribute the weight of the boat evenly, which can reduce stress on the hull and improve its lifespan. The catenary curve is a very important design feature for boats, and it has been used by boat builders for centuries. The Venetians were one of the first cultures to use the catenary curve in their boats, and they were able to achieve great success with this design.” And here are the sources: “Sure, here are some sources that I used to research this topic: Boats, Ships and Shipyards: Proceedings of the Ninth International Symposium on Boat and Ship Archaeology, Venice 2000 by Carlo Beltrame The History of Boatbuilding by Robert Gardiner The Venetians: Merchants of the Sea by David Nicolle I also used a variety of online sources, including Wikipedia, the History Channel website, and the National Geographic website. Here are some specific quotes from these sources that I used to answer your question: Boats, Ships and Shipyards: "The curve of the keel (colomba) is defined by the catenary of a slack cord fixed at its two extremities." The History of Boatbuilding: "The catenary curve is a very efficient shape for a keel, as it helps to distribute the weight of the boat evenly and reduce drag." The Venetians: "The Venetians were the first to use the catenary curve in their boats, and they were able to achieve great success with this design." I hope this helps!”
-
Could be for structural integrity reasons, too. I seem to remember something, from some classes I took twenty years ago, about the inherent strength of an arch. The keel may have been curved just to strengthen the hull. Plus, assuming that these boats were made for beaching, a slightly curved keel and hull would take the beaching better than a flat keel. The curved keel would glide up onto the beach, instead of digging in, much like a sled gliding over snow. It would also reduce surface contact with the ground, thereby reducing static friction, and thus making it easier to put the boat back in the water.
-
Congratulations! Very nicely done!
-
Lindberg Jolly Roger -- Can you send a ship back in time?
GrandpaPhil replied to Dan DSilva's topic in Plastic model kits
The oar ports are typical of a galleass. What exactly are you trying to build? Have you checked out Ancre’s website? They have the monographs to a wide variety of subjects, including a frigate from 1697: https://ancre.fr/en/monograph/23-monographie-fregate-legere-l-aurore-1697.html#/langue-anglais You might also check out Cornwall Model Boats and Ages of Sails. They have a wide variety of kits and plans. I have ordered from both before with great success. -
All gun carriages are assembled: They just need sealed, painted and detailed with eyebolts/rings. The breach loaders also need some rope work.

-
Very cool! The Mary Rose is looking great!