GrandpaPhil
-
Posts
6,161 -
Joined
-
Last visited
Content Type
Profiles
Forums
Gallery
Events
Everything posted by GrandpaPhil
-
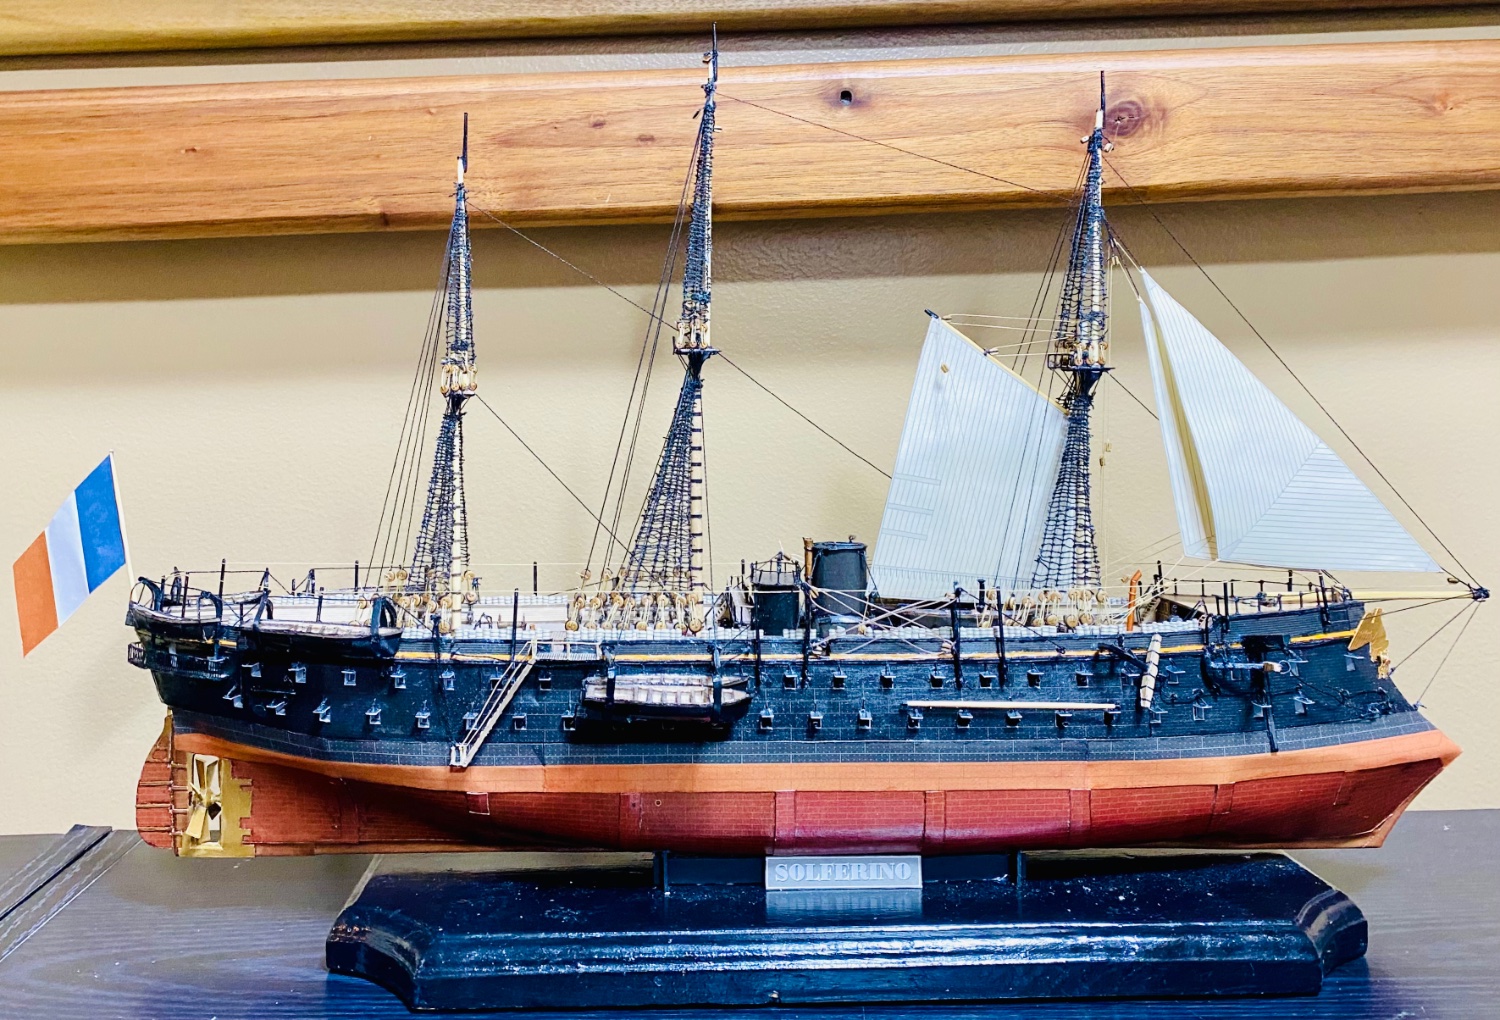
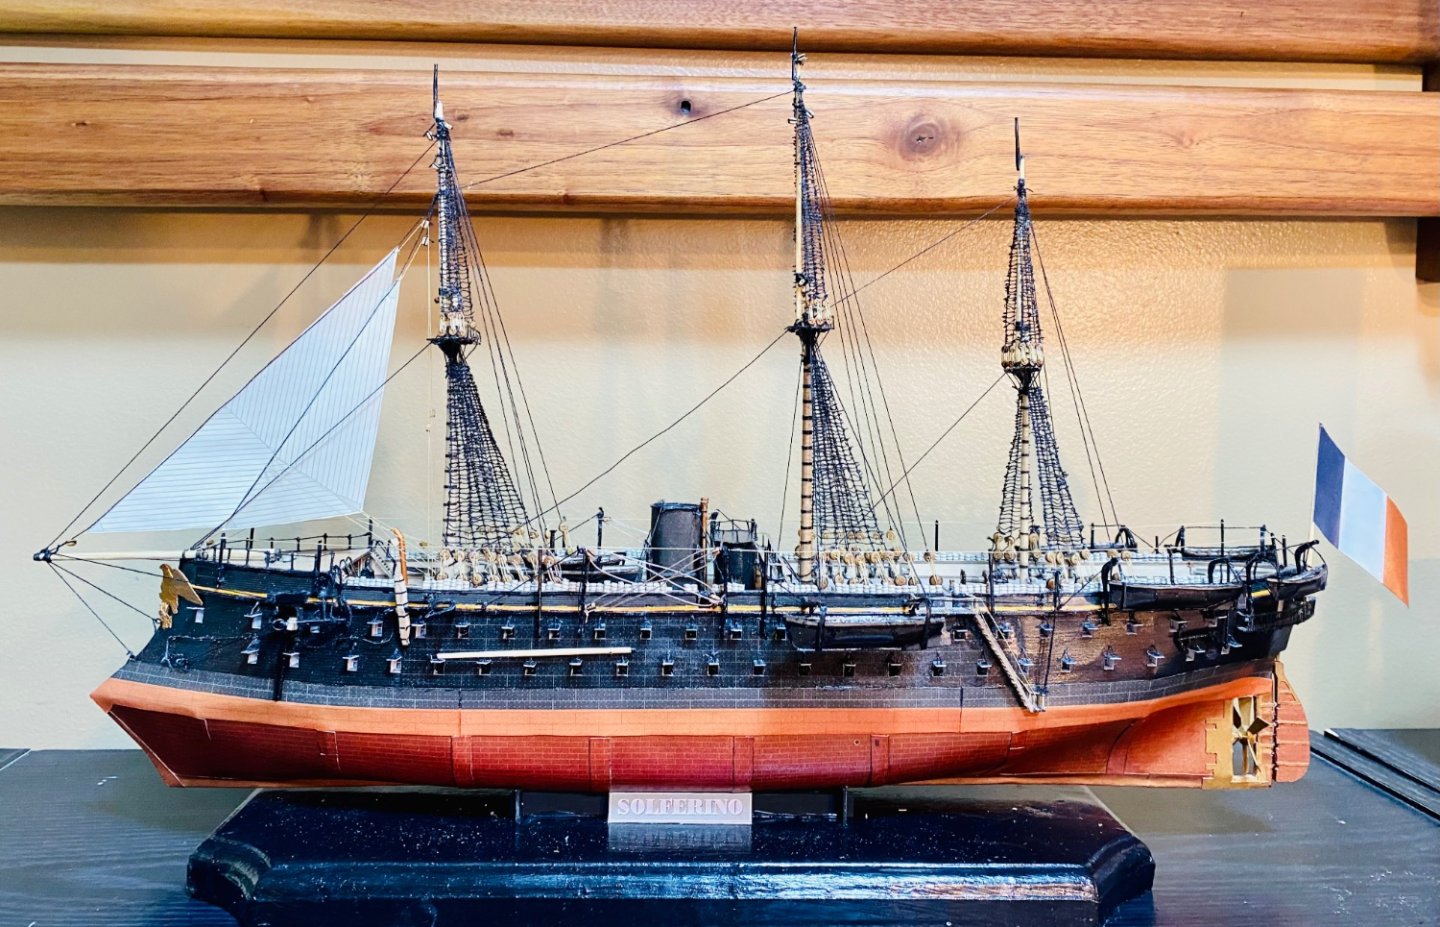
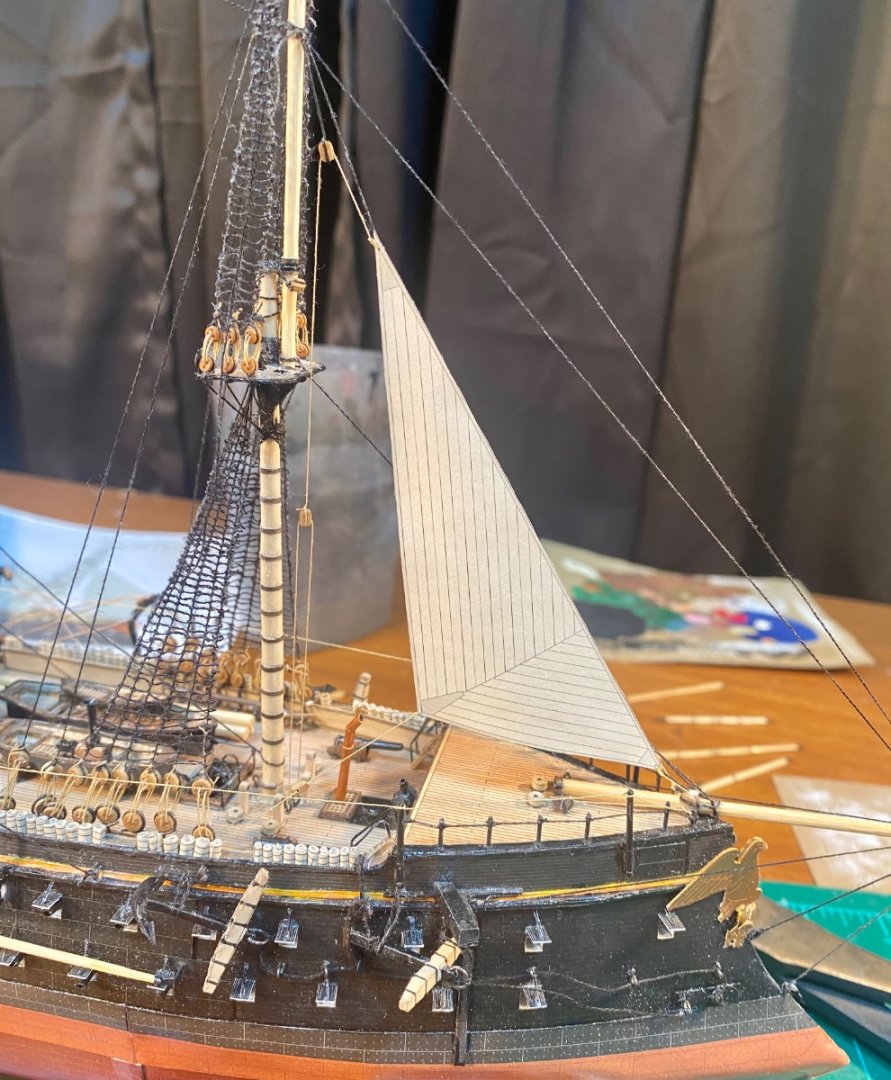
Thank you very much for the comments and for all the likes! Both jib sails are on: I am trying out the paper sails that came in the kit. I was going to make silk span sails, but I took the inspiration to use these, which are very nicely made anyway, from the paper sails on the Great Republic by @rwiederrich. They looked phenomenal on his model! The Great Republic is one of the best models that I have ever seen!

- 278 replies
-
- 16
-

-

-
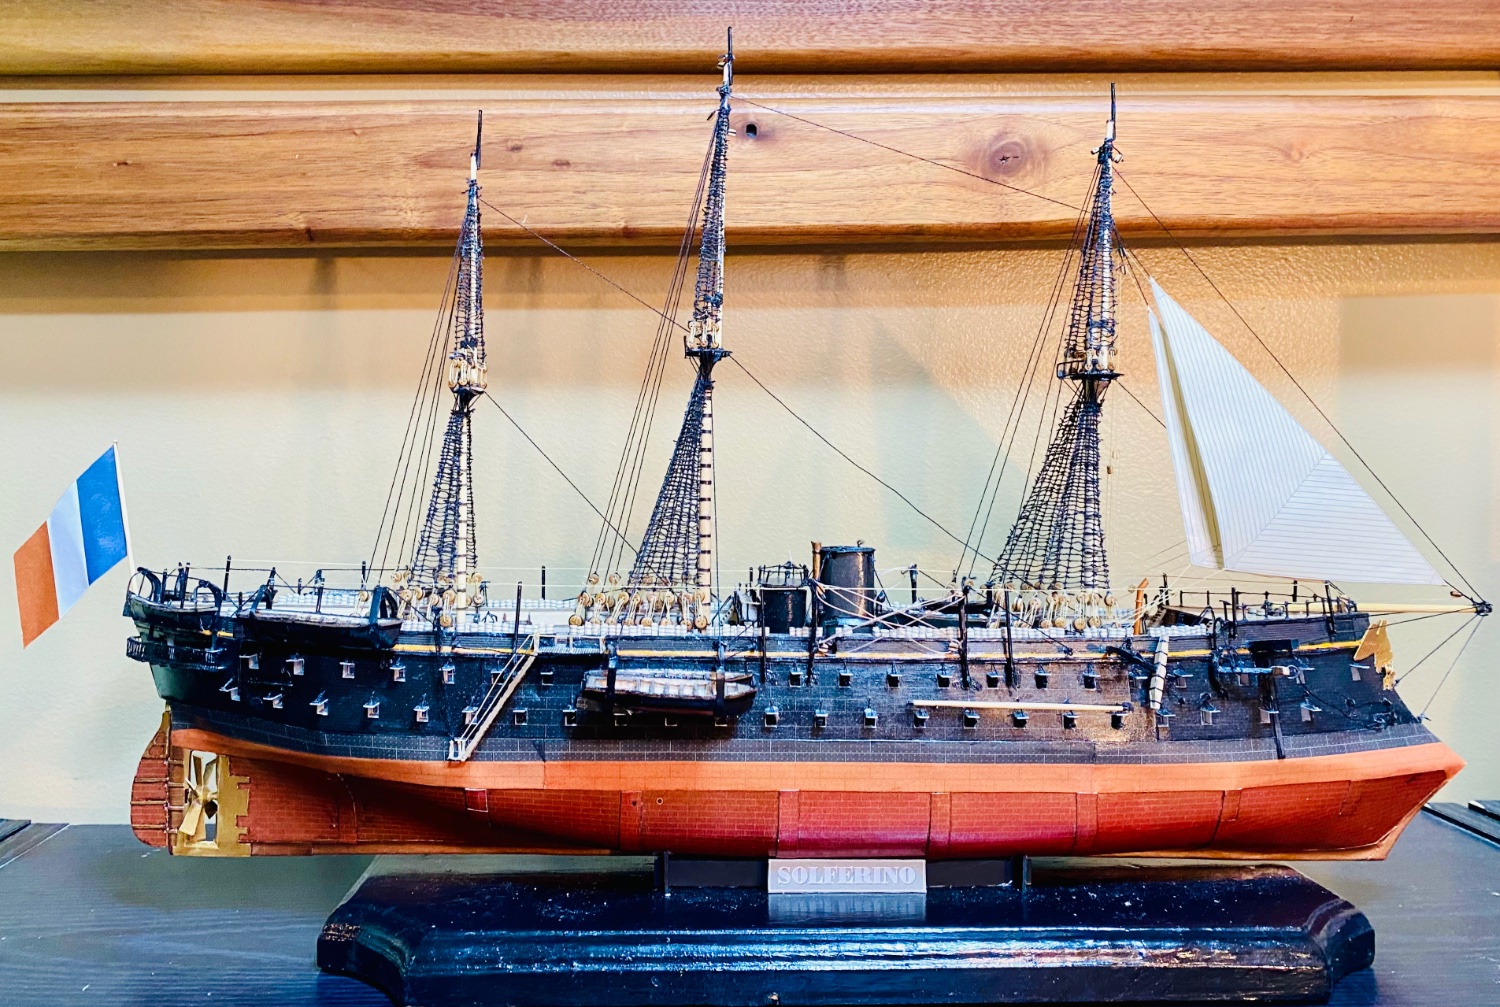
The first jib sail is on and rigged: Tying off to the deck and the rails is really difficult at this scale. I am using the sails that came with the kit.
- 278 replies
-
- 13
-
-
I sew mine from muslin linen with standard sewing thread for my 1/72 scale and larger models. They look good on the models that they are on (to me anyway).
-
I built this kit nearly 25 years ago. It was the first wooden boat kit that I ever built. I had a blast with it and learned a lot! I used an ink wash on the deck after drawing in plank lines. It worked reasonably well.
- 55 replies
-
- 1
-
-
- sharpie schooner
- Midwest Products
- (and 1 more)
-
I got an idea from a conversation at work today. My buddy collects action figures and was talking about the LED lighting for his display cases that he installed recently. I looked at it and realized a variant of it might work for the interior of a model ship. This model is a prime candidate for lighting because of its design and phase of construction. I’ve seen some of the interior lit models on this forum, and in museums, and they are beautiful. I’d kind of like to have one. If it works out well, some of my future models will also get lighting. I’ll make the final decision when I get back to construction on this model.
-
Maybe using a heat gun with the former? If you heated slowly and applied pressure gently, it might take the new shape.
- 2,699 replies
-
- 5
-
-
- heller
- soleil royal
- (and 9 more)
-
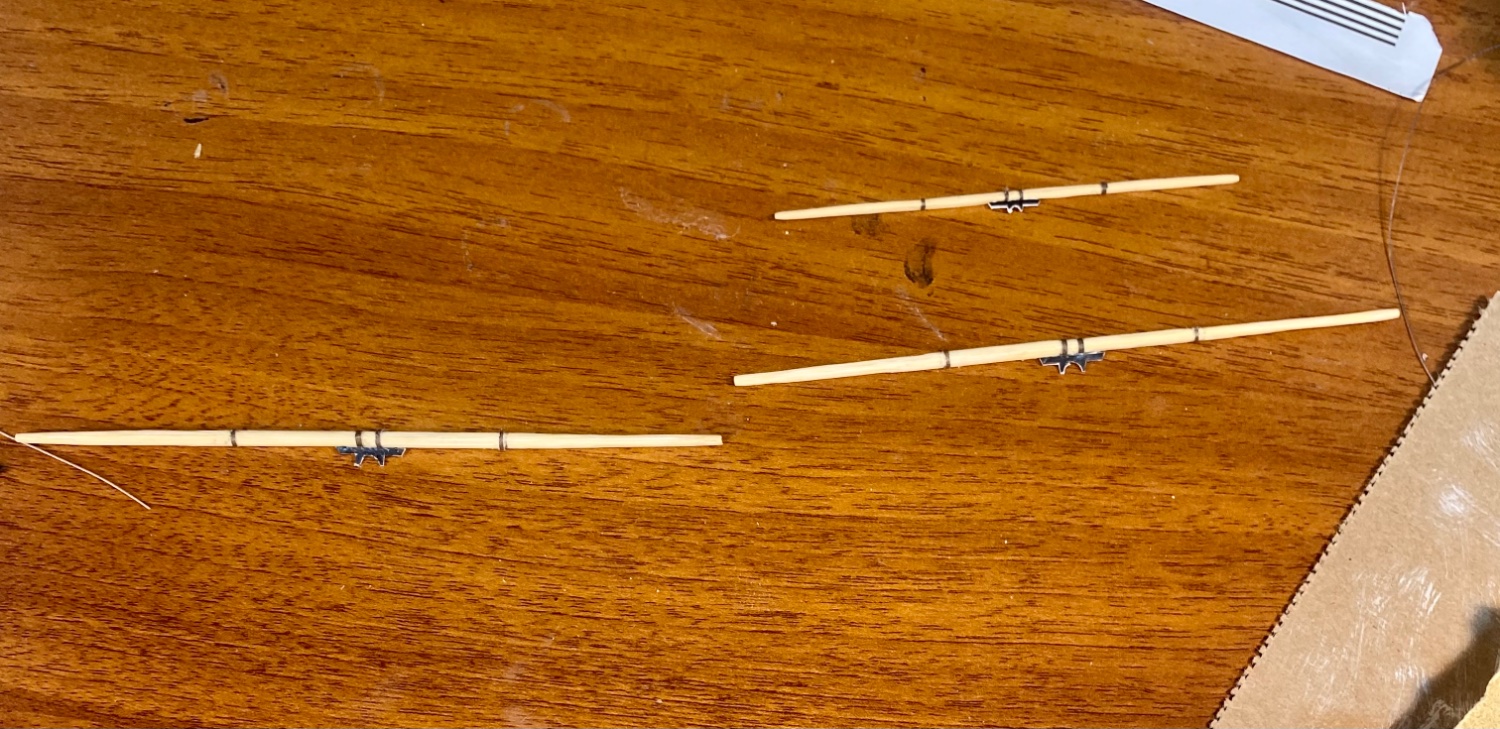
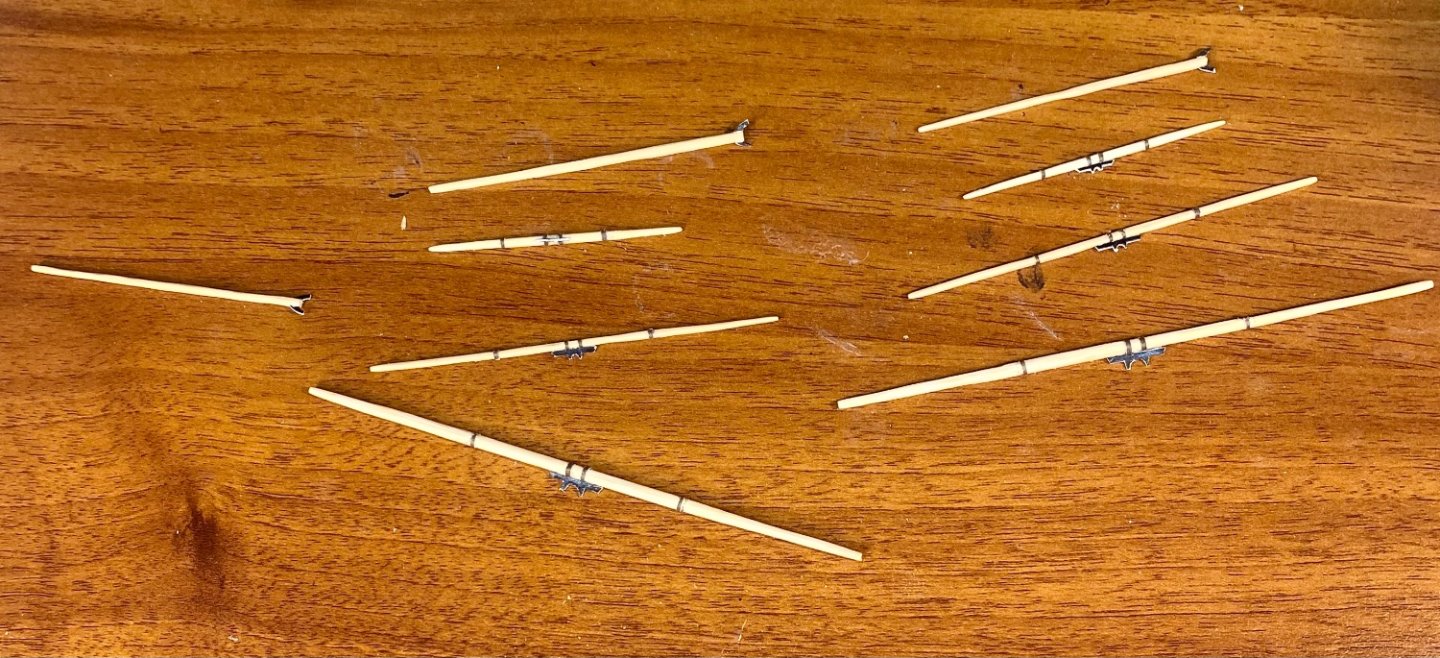
All yards and gaffs are made: They still need paintwork, sealed and blocks installed, but at this point, all the wood parts are made. I used an old dowel rod I found laying around, a kitchen skewer and a couple of toothpicks. They are all carved with a scalpel. I laid them out in order as I was making them. Right to left it’s foremast, main mast and mizzen mast. I already sealed all sails and flags. Those will be cut out, have blocks installed, glued in place (at 1/200 scale, I am not sewing the sails to the yards, due to scale) and rigged, sequentially. As with any other vessel I make, yards and gaffs will be installed with sails already attached, and rigged in place, one at a time. I like to work fore to aft, bottom to top.
-
Look and see if you have a local MakerSpace that has one.
-
I’m looking forward to this build! Safari makes high quality plastic toy animals, including squids, that are cheap and easily modified, and would save you the trouble of sculpting one entirely from scratch. Amazon and Walmart sell them.
-
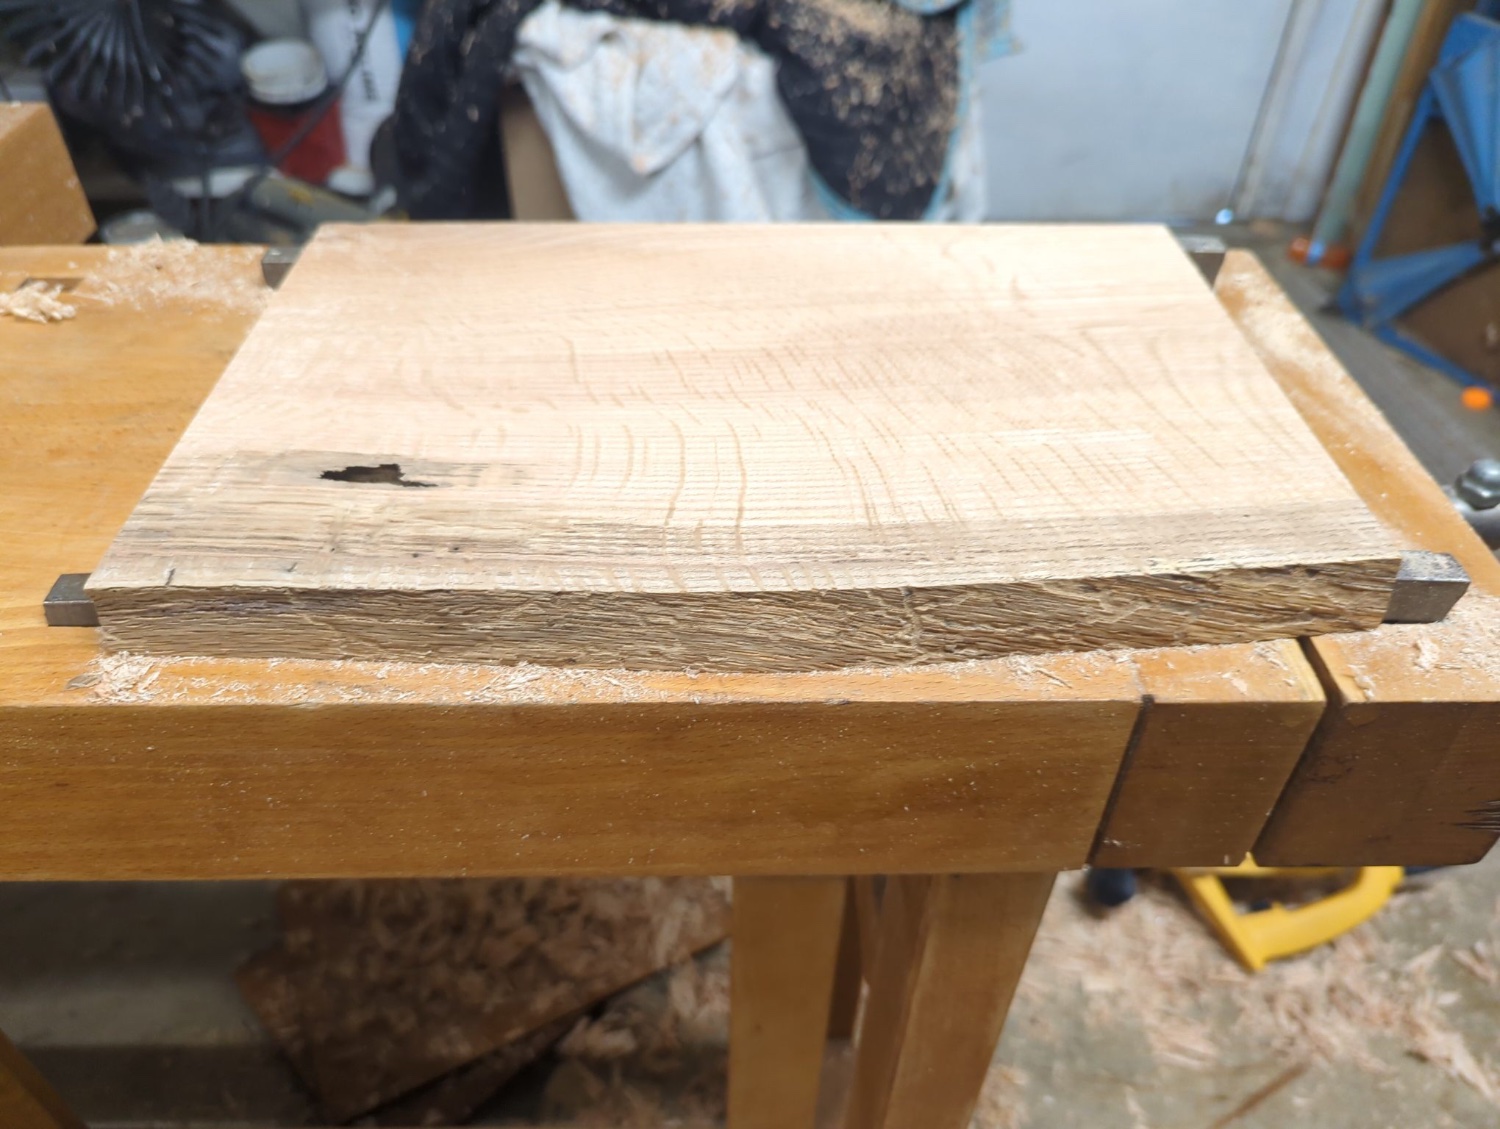
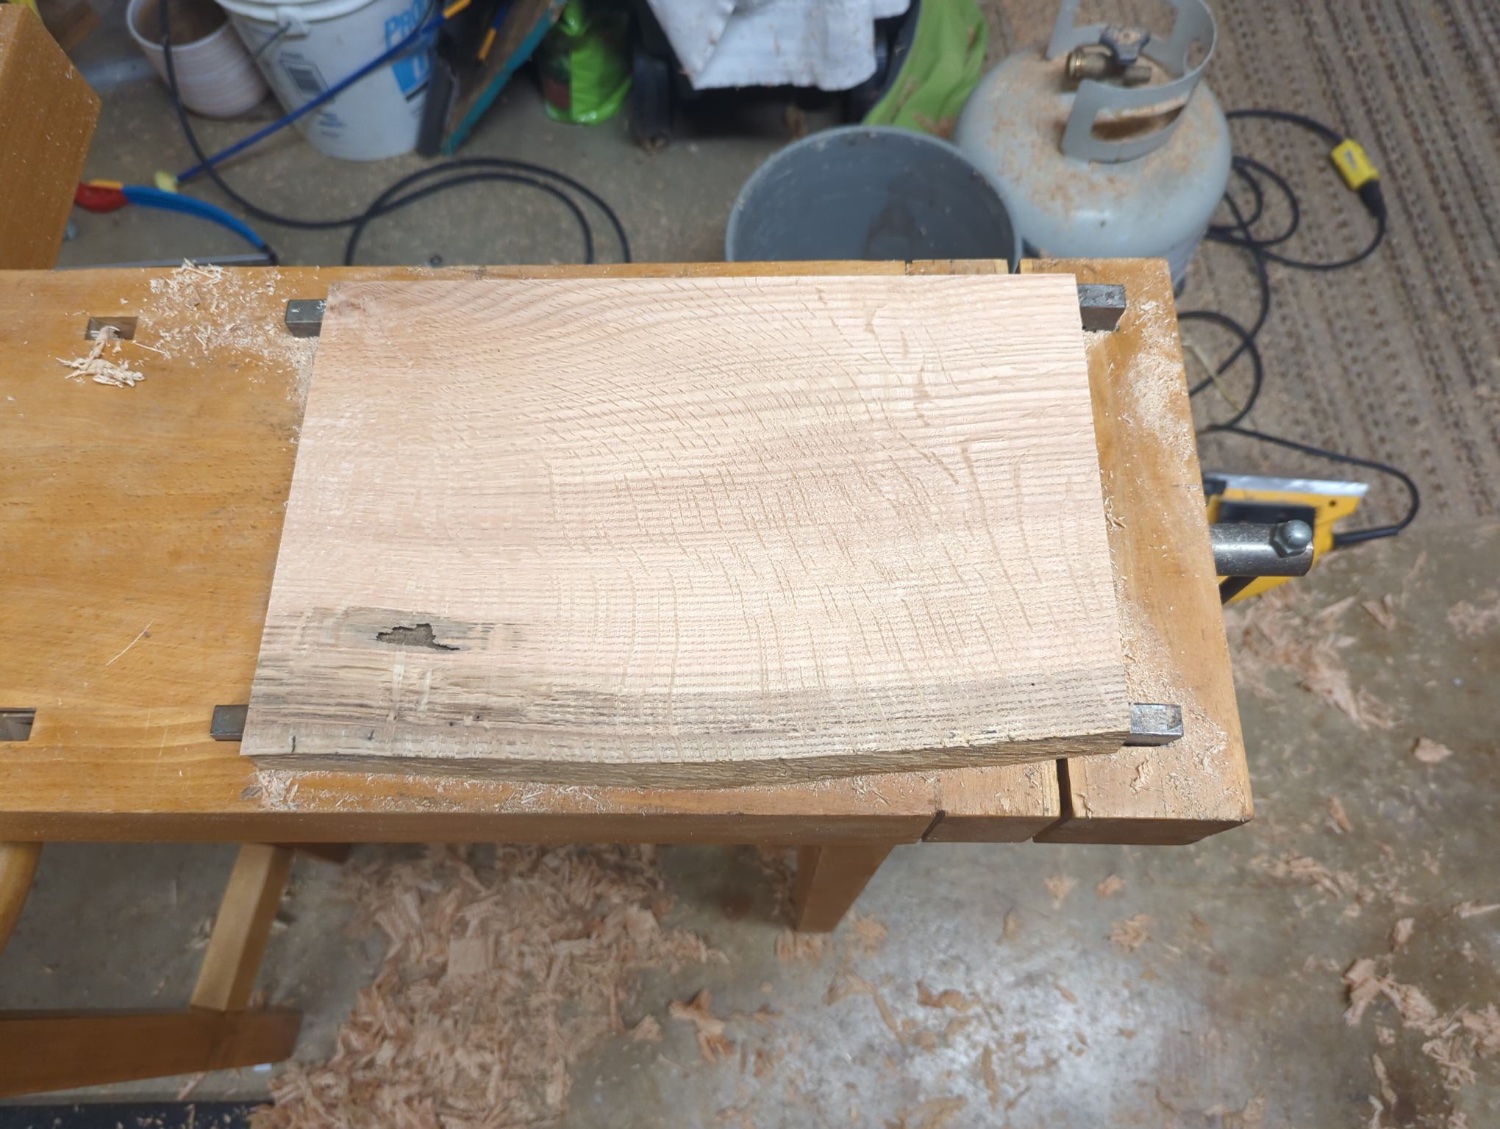
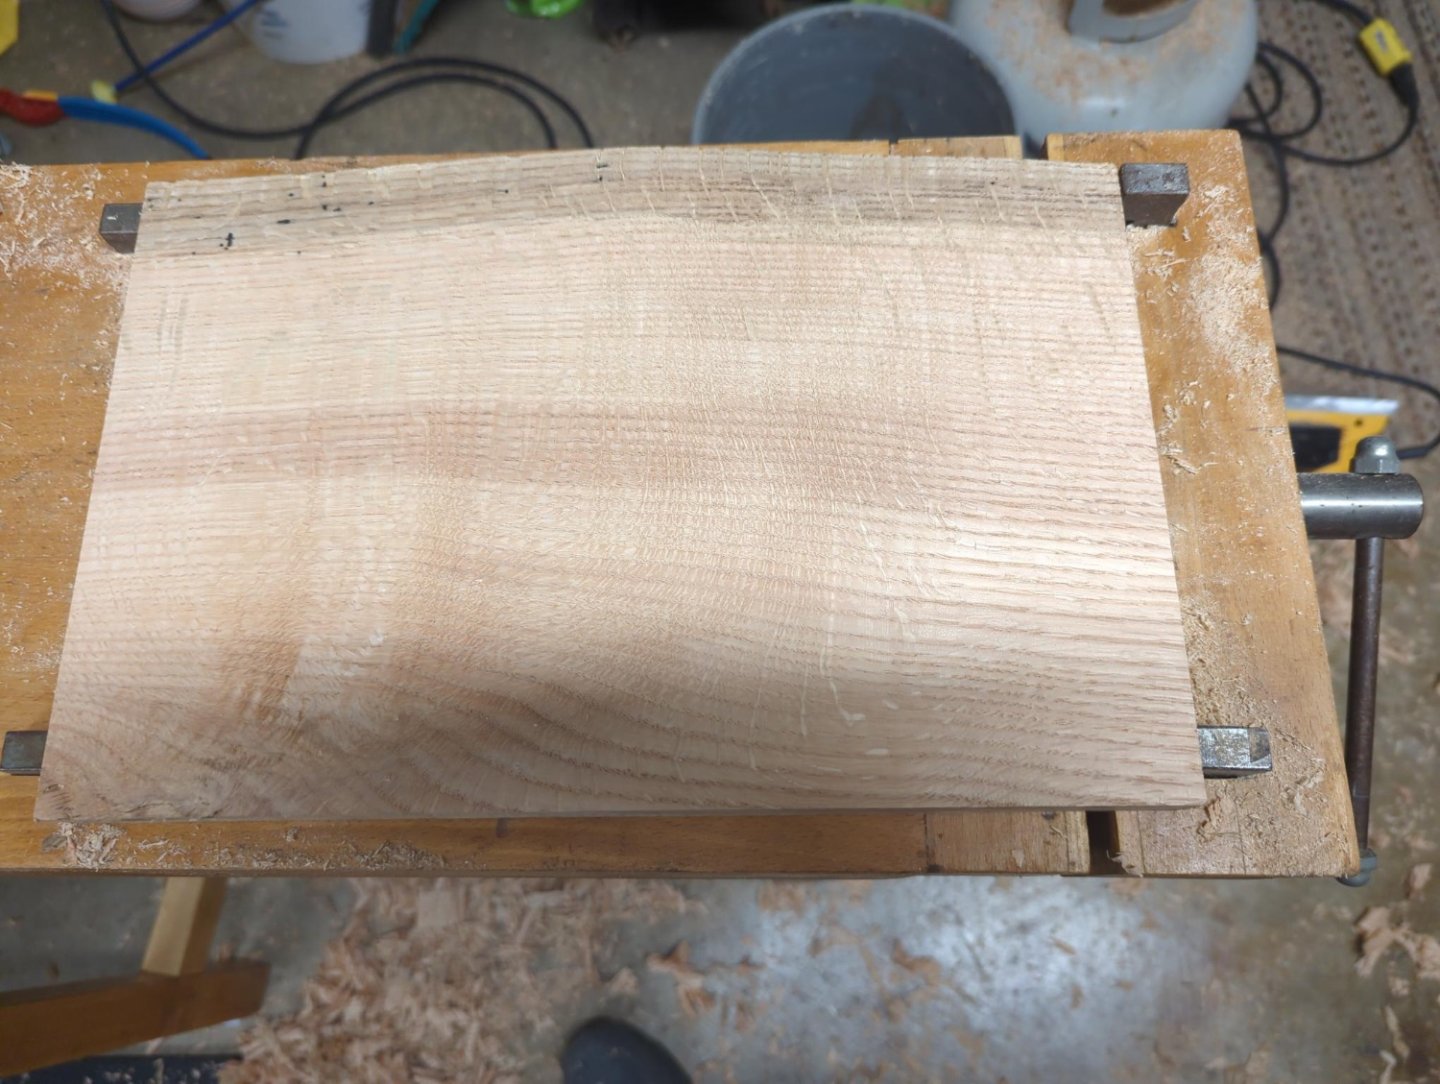
A buddy of mine is making the final display stand for the Victory: It’s a slab of quarter sawn oak. I am going to make cradles for the Victory to sit in and transfer her as one of the absolute last steps.


-
Welcome back!
-
I would use a scalpel and shave it off slowly and carefully. I’ve done that with resin models in the past.
- 113 replies
-
- 5
-
-
- Cairo
- BlueJacket Shipcrafters
- (and 1 more)
-
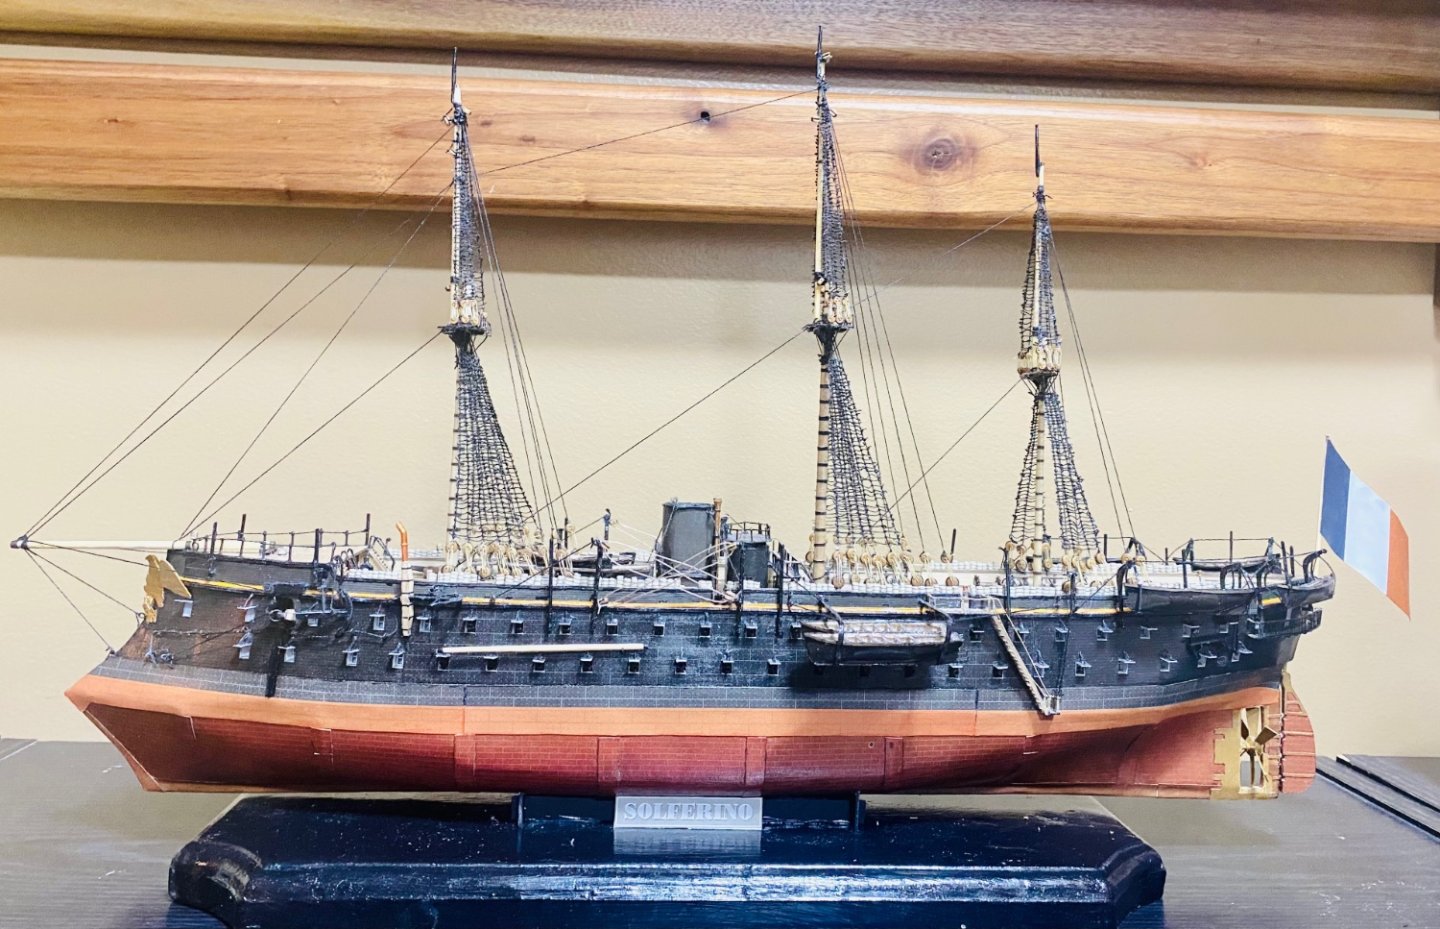
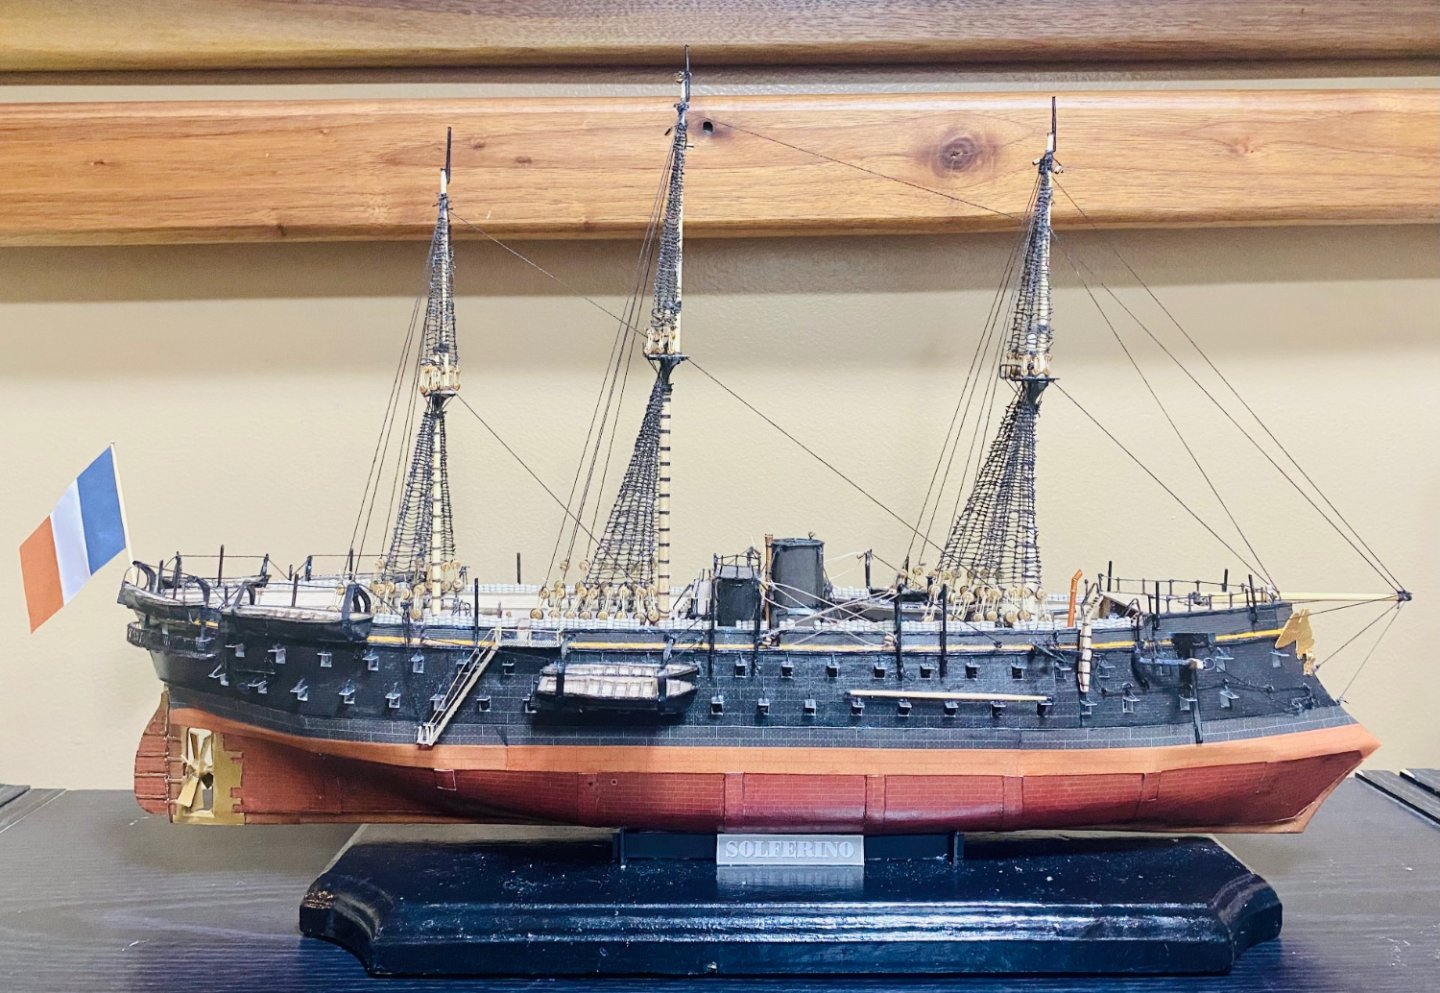
Ratlines are done! I think that these were just about the worst set of ratlines I’ve ever done. They are spaced out between 1/16” to 3/32” apart. That is insanely close and they were very difficult to keep spaced out properly. You are looking at about 60 hours worth of work for just the ratlines, lol. I think that I am close to 300 hours into this one. Loved every minute of it for the most part, though. These card models are fun. They lend themselves to model ships very well. I will say that the next one that I do is getting enlarged to either 1/96 or 1/72 scale, depending on the size of the ship. 1/200 scale is not the greatest for anything smaller than 6-700 feet. Another quick note is that card kits would make great templates for wood models too. The bulkheads and decks are already there. All you would have to do is allow for the thickness of the wood and the planking. With most plans, whether they be shipyard or for models, you have to allow for planking thickness anyway. All the fittings are pre-mapped out. You can just glue the pieces down to wood and cut. I have been doing that with my Mercury. For rolled pieces, just measure each end and divide by pi to get diameter. That’s how I made my masts and some other rolled parts out of wood for this model. Either way, these models are a lot of fun, however you build them. Come join the Card Side!
-
Welcome!
-
Thank you very much! This has been very slow going, but the ratlines are almost done! Then, there are a couple of minor lines for the standing rigging and on to the yards, sails and running rigging!
-
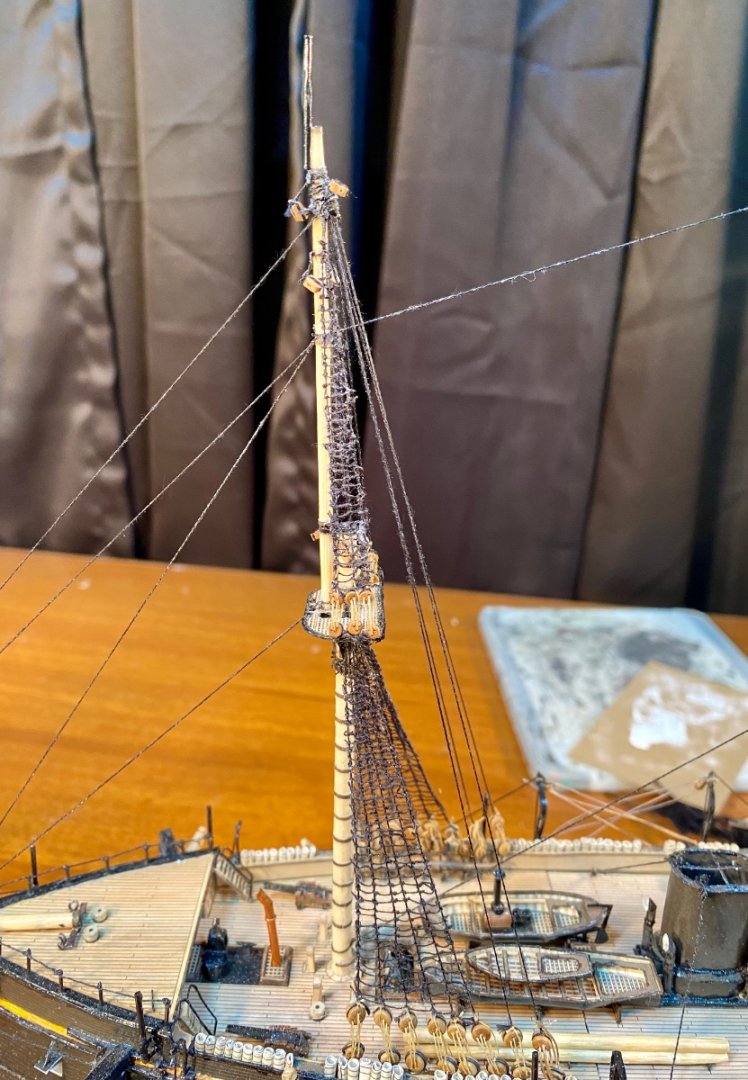
Portside foretop mast ratlines done: This means that top mast ratlines are now 50% complete!
-
It would be a fun purchase if you had the money to burn (I don’t). It would look cool as part of a nautical display in the house. I don’t think you could have it outside, unless you lived in the middle of the country due to city (or village in my case) ordinances.
-
MONTAÑES by Amalio
GrandpaPhil replied to Amalio's topic in - Build logs for subjects built 1751 - 1800
Your work is incredible! -
Main top ratlines are done: Next up, foretop ratlines! The mizzen top ratlines will be last!

-
I see that you have the original rigging plans from 1938. That looks like a standard brig configuration. If you search for brig by title on the search function, for Model Ship World, you can see the other brigs that have been built on this forum. That way you can get a visual idea of how the rigging goes together, which is what I think you are asking for. I have a book called Historic Ship Models by Wolfram Zu Mondfeld. It is a most excellent resource for understanding most aspects of model ship building, but rigging in particular. I use that book so much that I am on my 3rd copy of it.
- 32 replies
-
- 3
-
-

-
- Malek Adhel
- Restoration
- (and 1 more)