GrandpaPhil
-
Posts
6,166 -
Joined
-
Last visited
Content Type
Profiles
Forums
Gallery
Events
Everything posted by GrandpaPhil
-
I like Delta Ceramcoat acrylic paint for wood or card models.
-
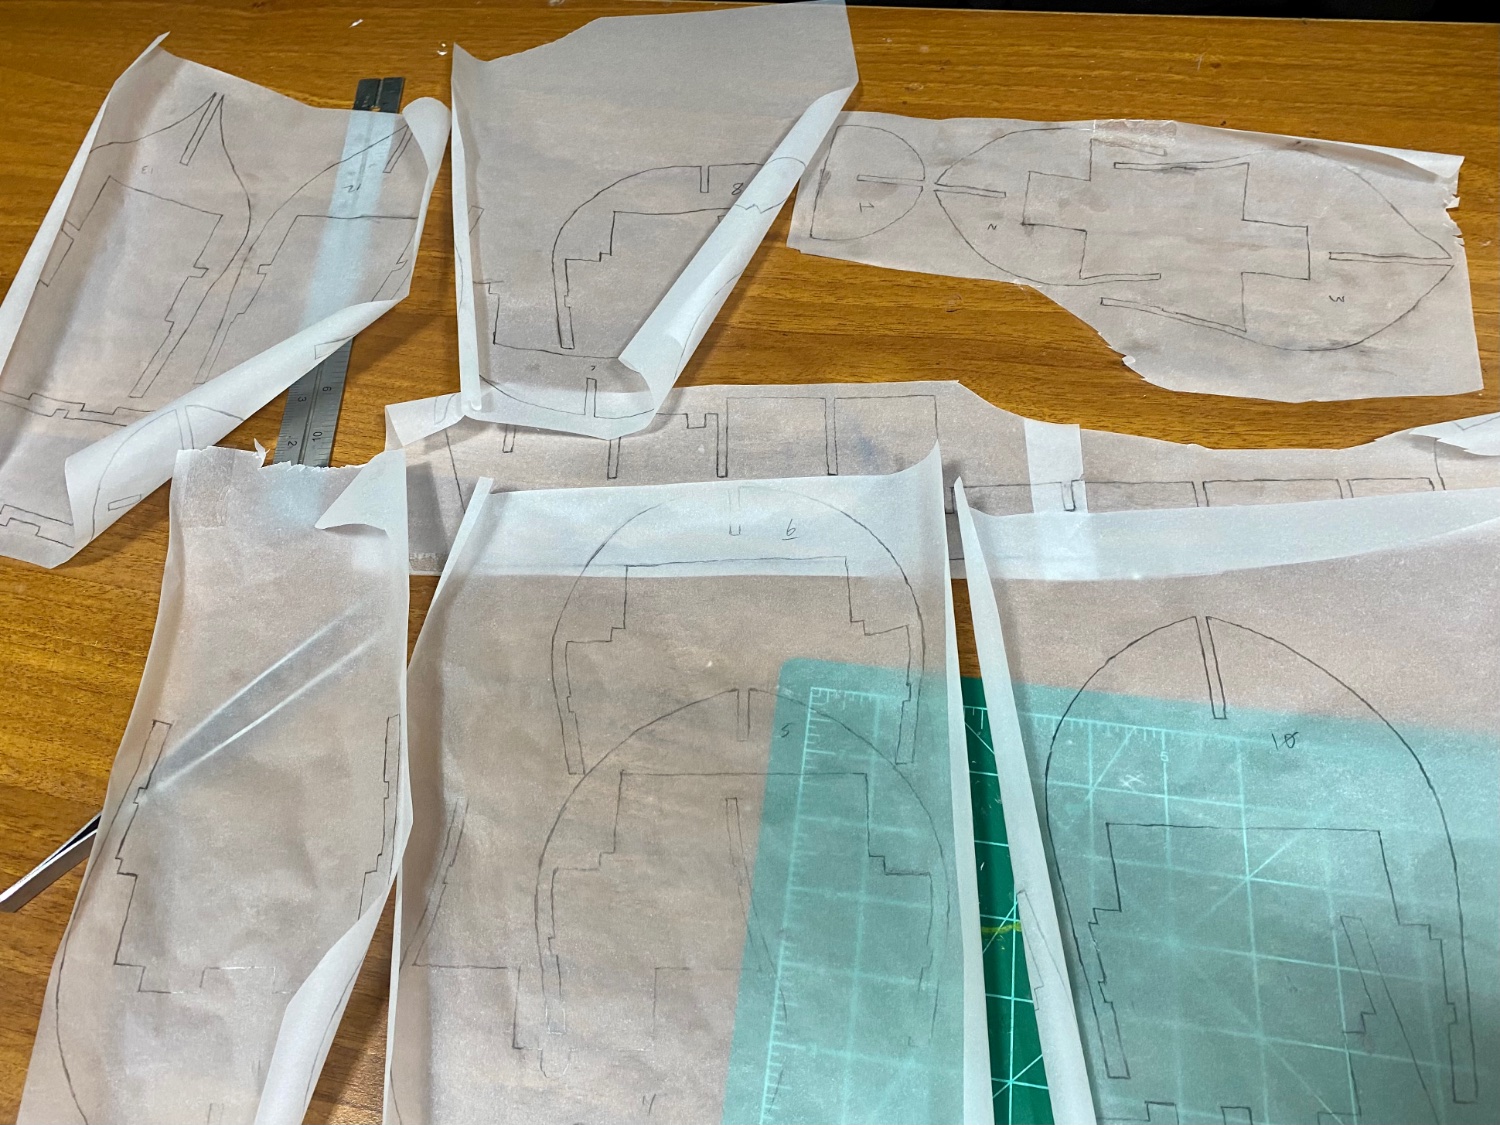
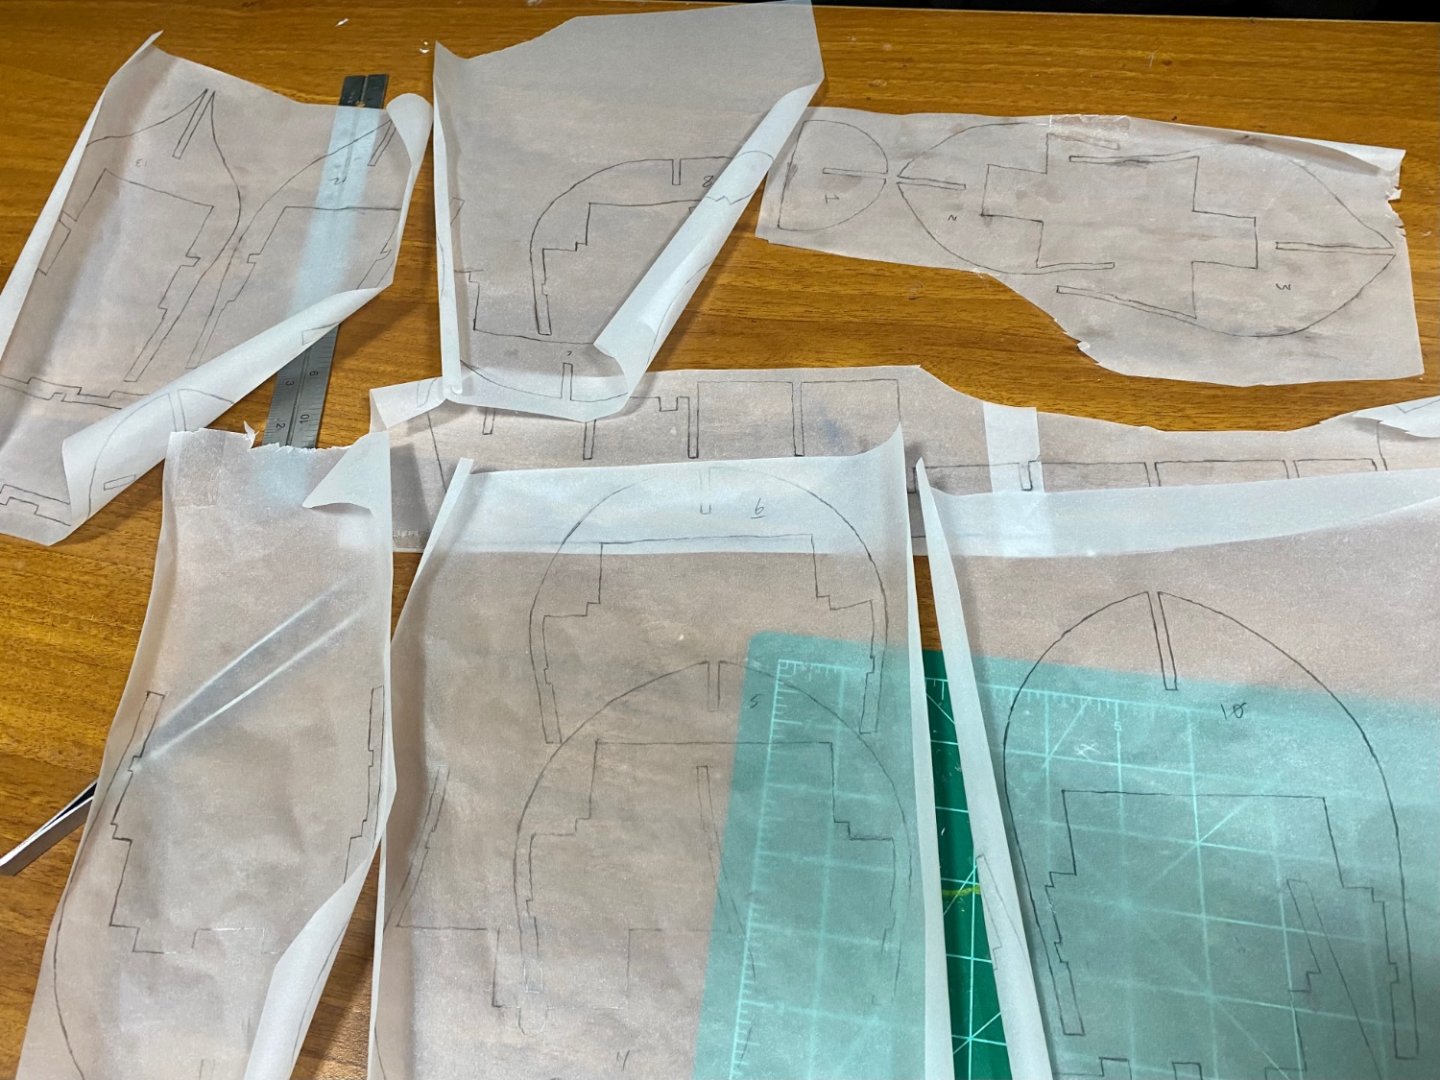
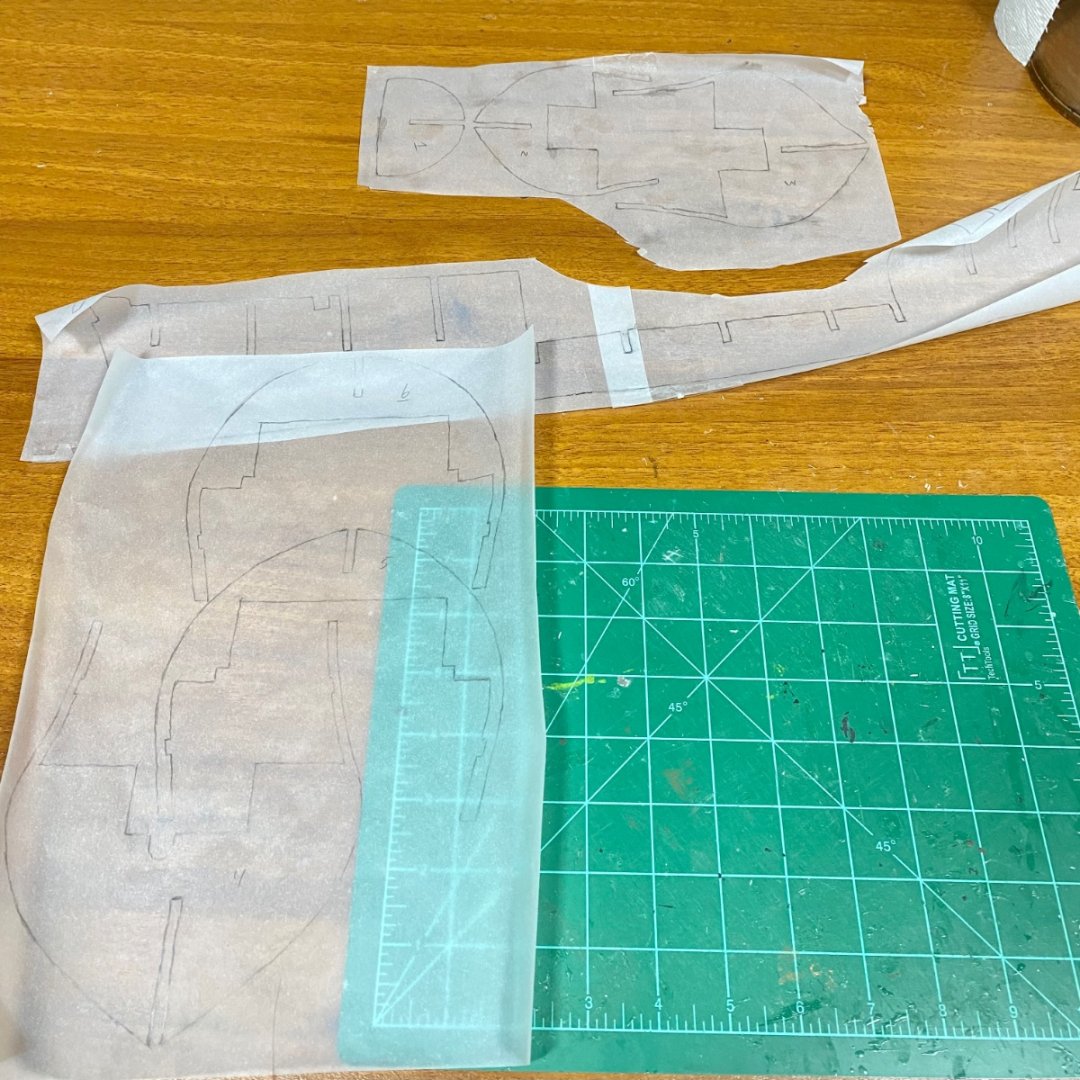
One pile of tracings to be photocopied 4 times each. Each bulkhead and the keel plate piece will be cut out and then laminated together to 4 thicknesses of the 1mm card. This is essentially the same technique I used before, but I am learning how Chris’s locking decks work instead of using the main deck to square the bulkheads.
-
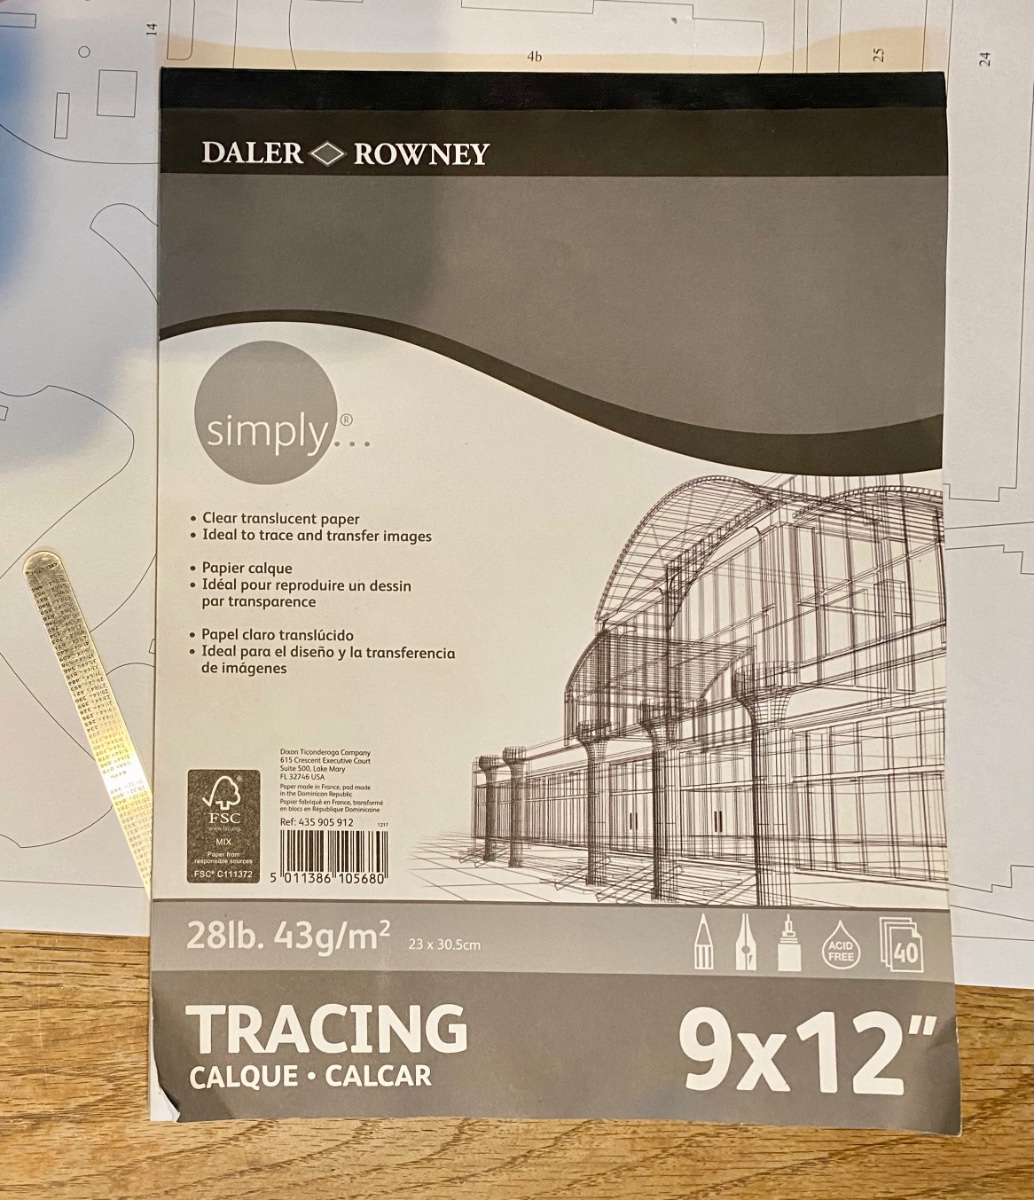
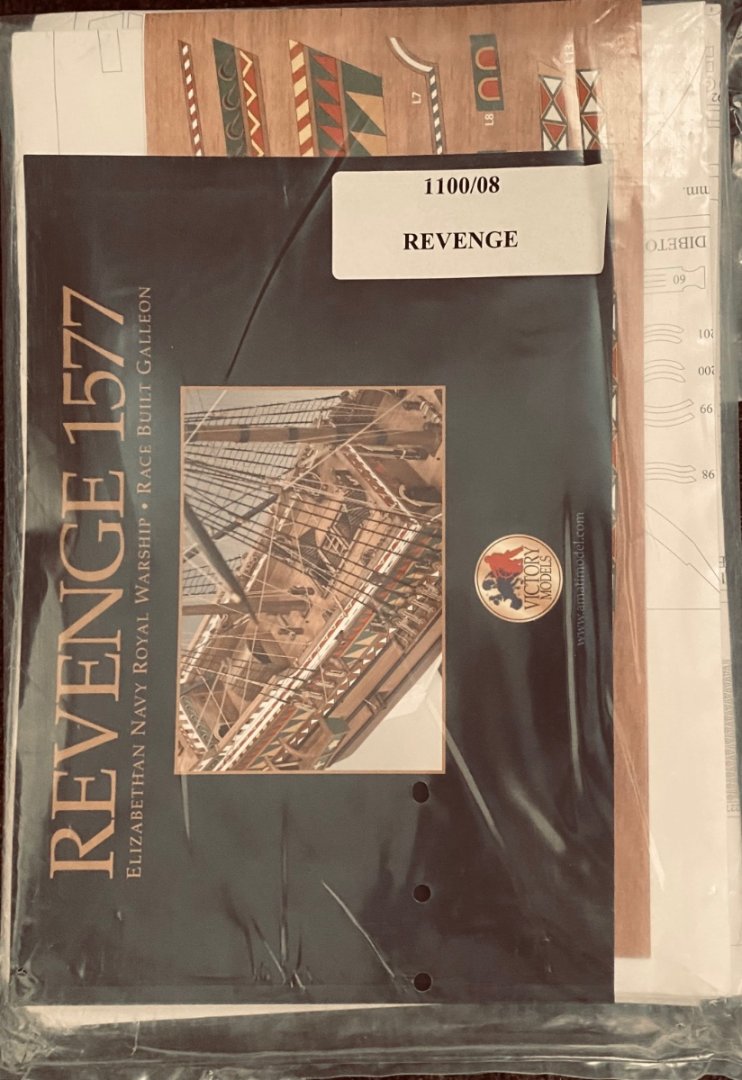
This is my third scratch build. I have a lot more fun with these than I do kits. I should note that this is my first time using model kit plans for a scratch project. The Victory Models series are extremely well designed and I will be mostly following the construction process in the guide book, and using the templates provided, with some modifications. I am building in card because I have been having a lot of fun with card models. I built the Prince de Neufchatel POB in card from a couple different Chapelle books and the Hannah POB in card from plans in one of Harold Hahn’s books. Building the Prince de Neufchatel really opened my eyes about model ship building and what my capabilities actually are. I had the most fun building that model that I have ever had. It is still my favorite model. Hopefully, the Revenge will take the Prince de Neufchatel’s place as favorite model. The scale on the Revenge is large enough that I will not need to buy anything premade. I did not buy anything premade for the Prince de Neufchatel either. And so it begins: I am in the process of tracing bulkheads. I am using the extremely high tech method of tracing paper, pencil and glue sticks, lol: This is going to be fun!
-
I bought the Amati Victory Models plans set of the Revenge, a couple years back, from Cornwall Model Boats. They have been sitting in my closet for a while now and I would really like to use them. Chris Watton did a wonderful job of designing the kit for Amati. The plans are simply amazing. They beg to be used. I have a couple of Amazon boxes that are begging to be cut apart and turned into bulkheads and a keel. I have a bunch of giant Valentine’s cards that I bought in a wholesale lot last year. They are almost exactly 1mm thick. I have recently acquired a bunch of cereal boxes that are about .5mm thick. I also have a couple packs of poster board that are about .8mm thick. Lastly, I have bunch of wood grained contact paper that needs used while it is still self adhesive. I do have a couple other builds on hold at the moment. I’ll get to them eventually.
-
Very nicely done!
-
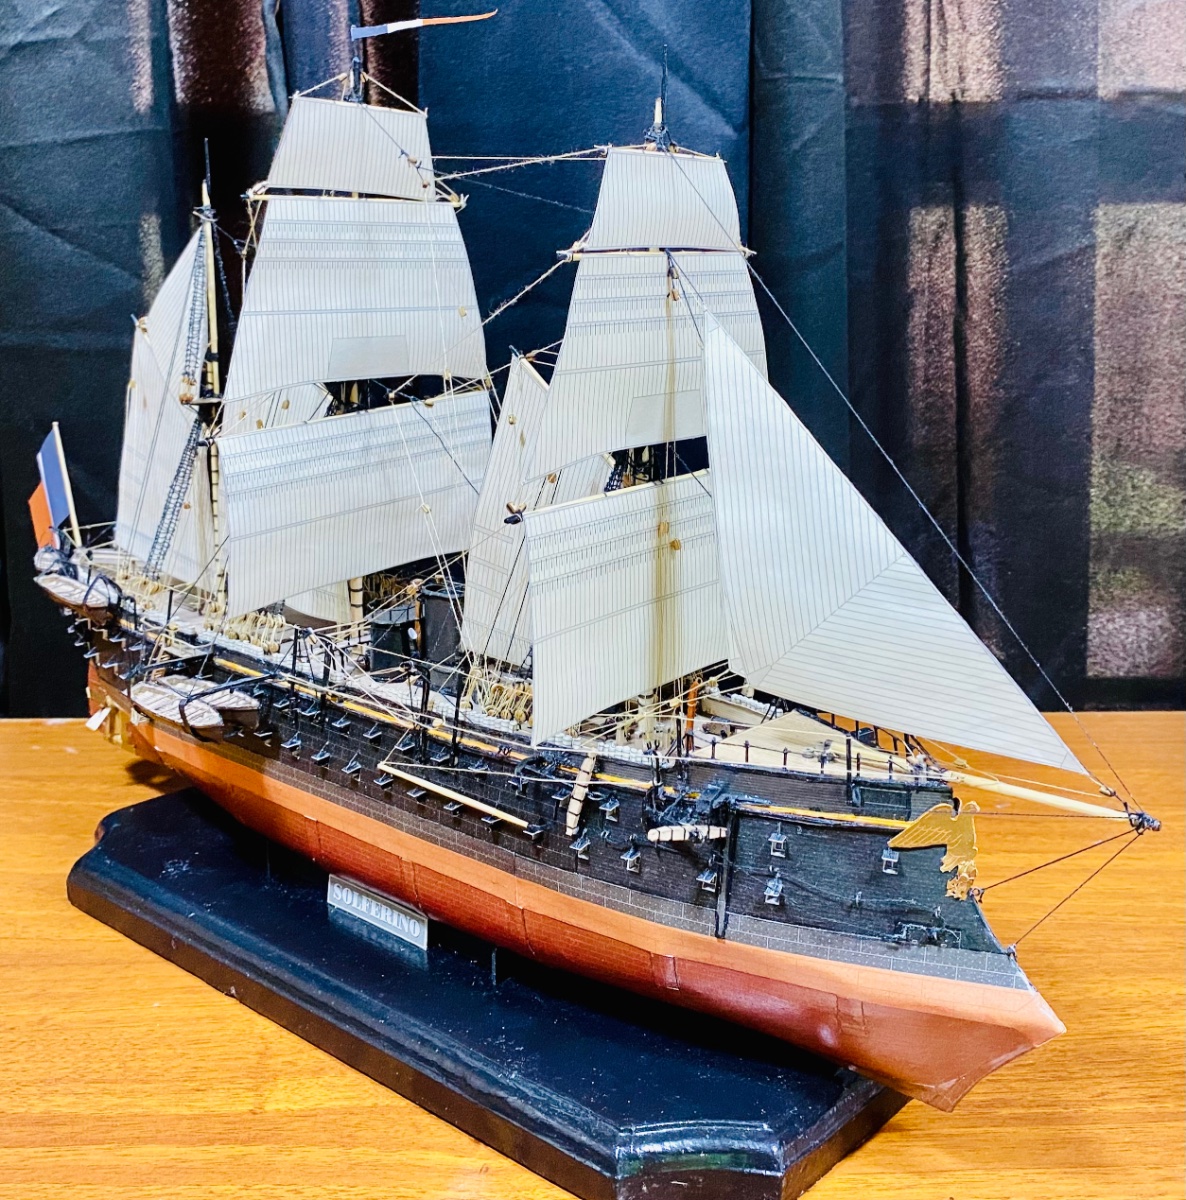
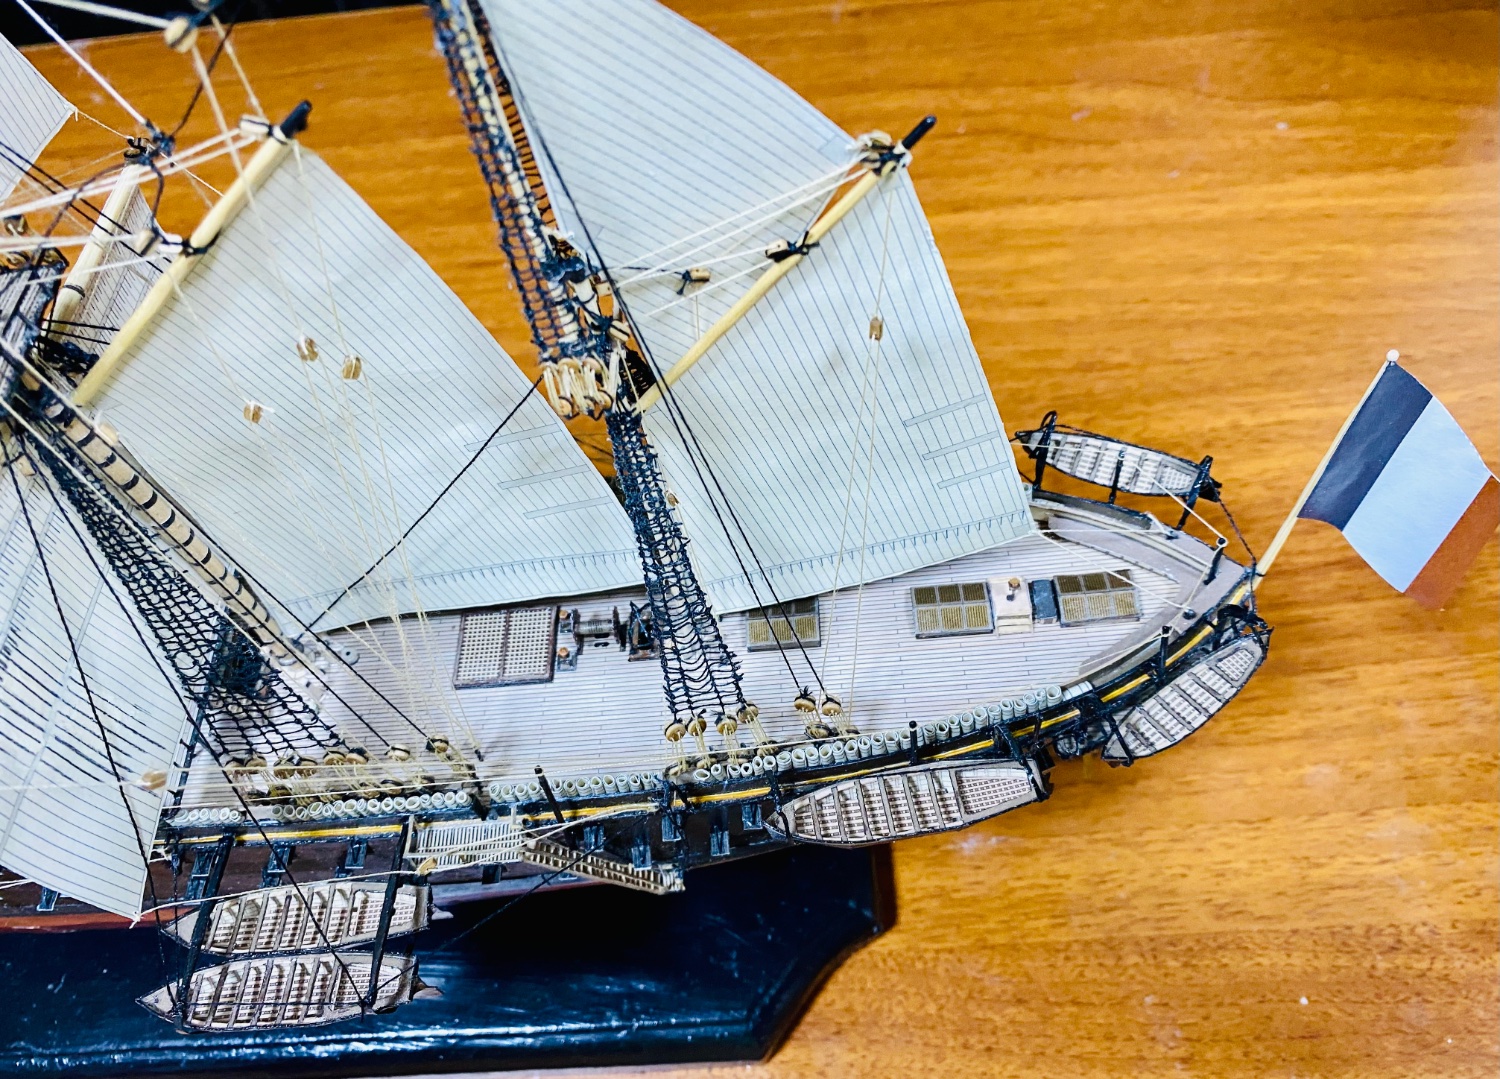
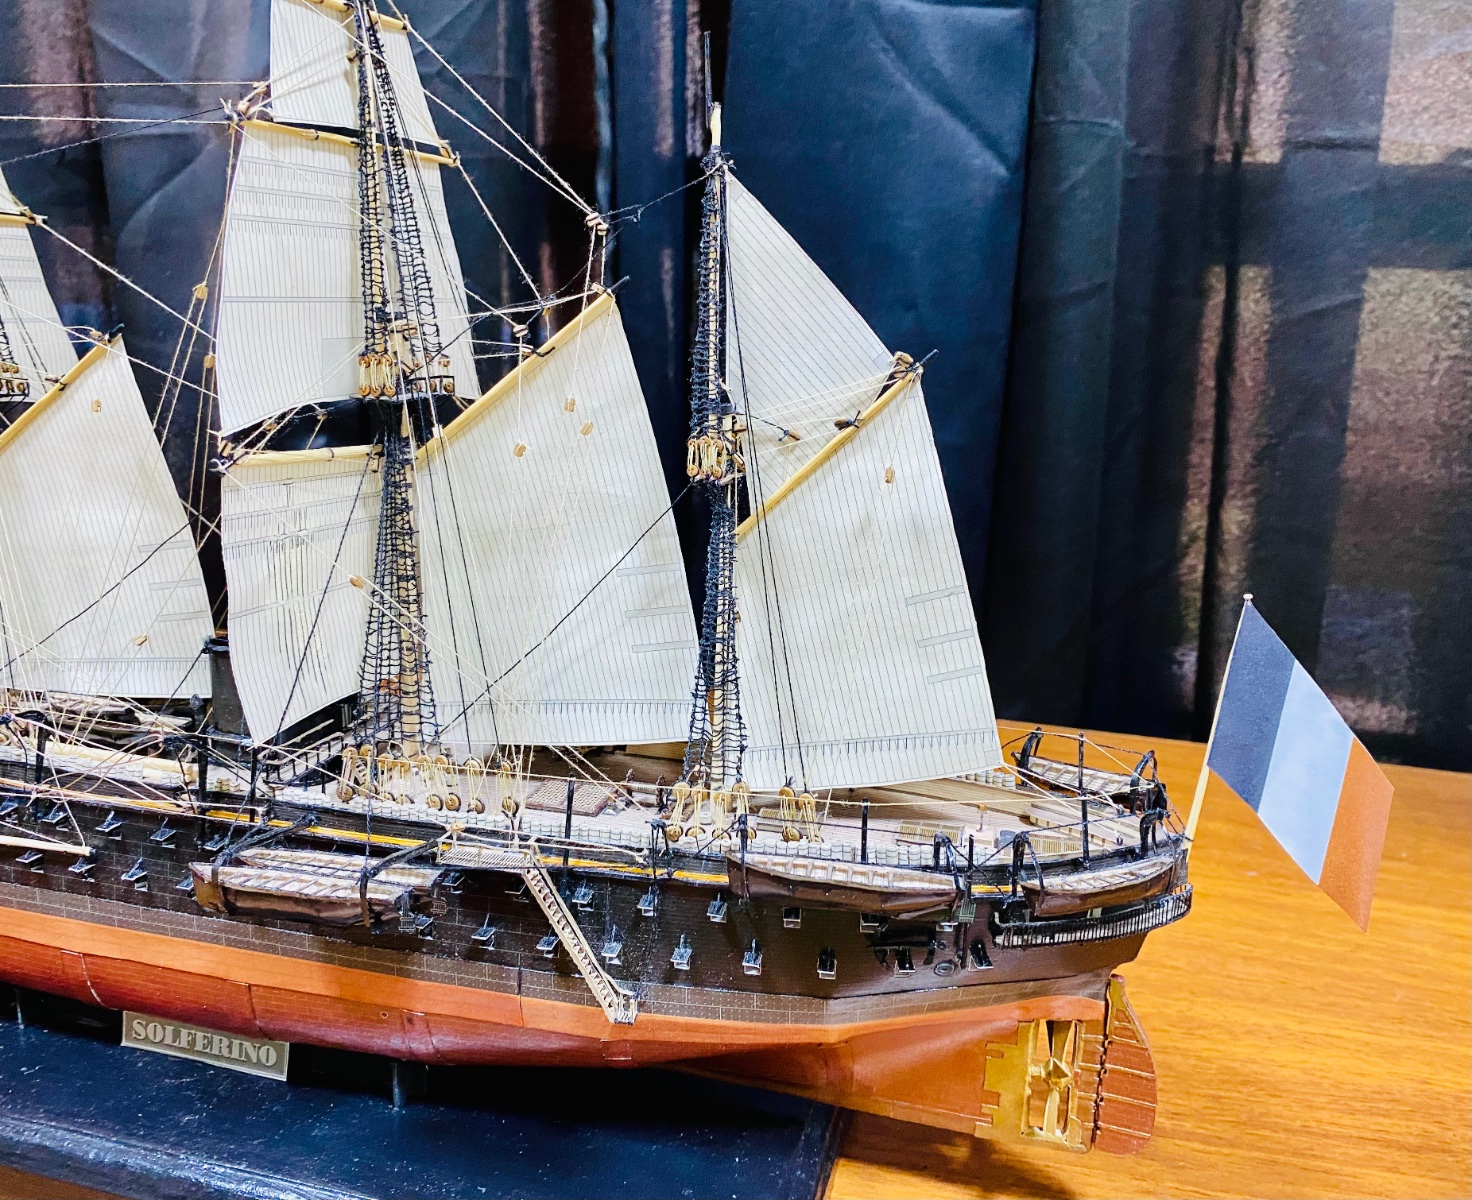
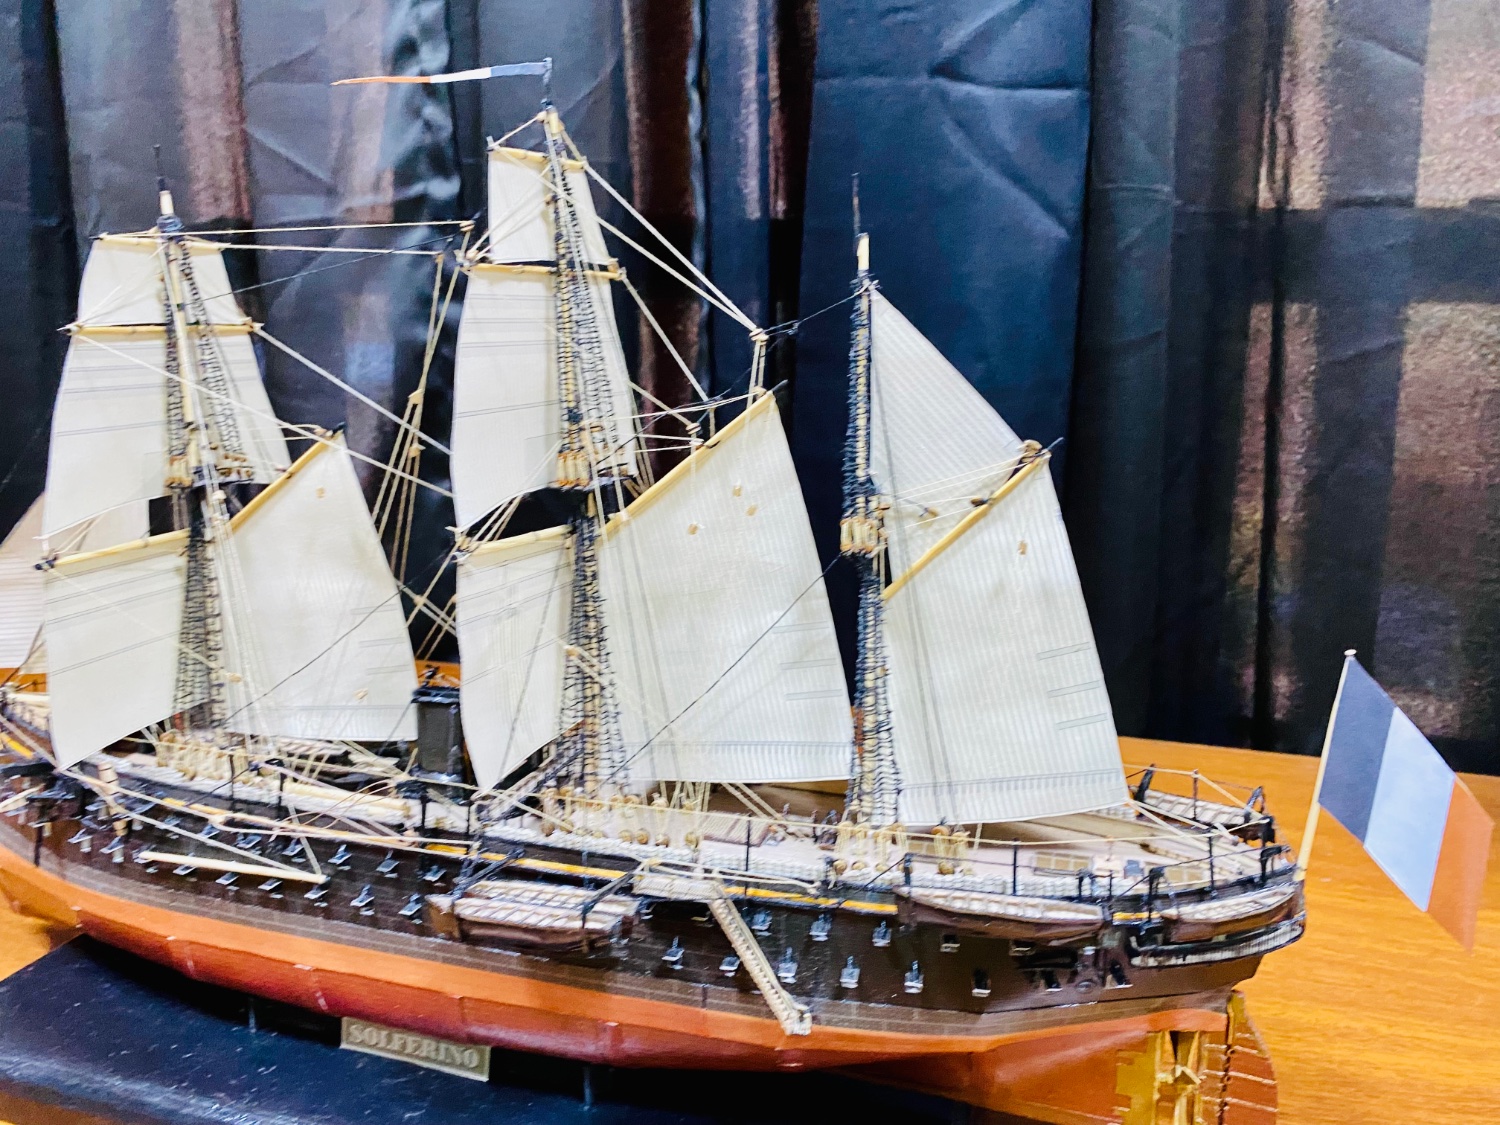
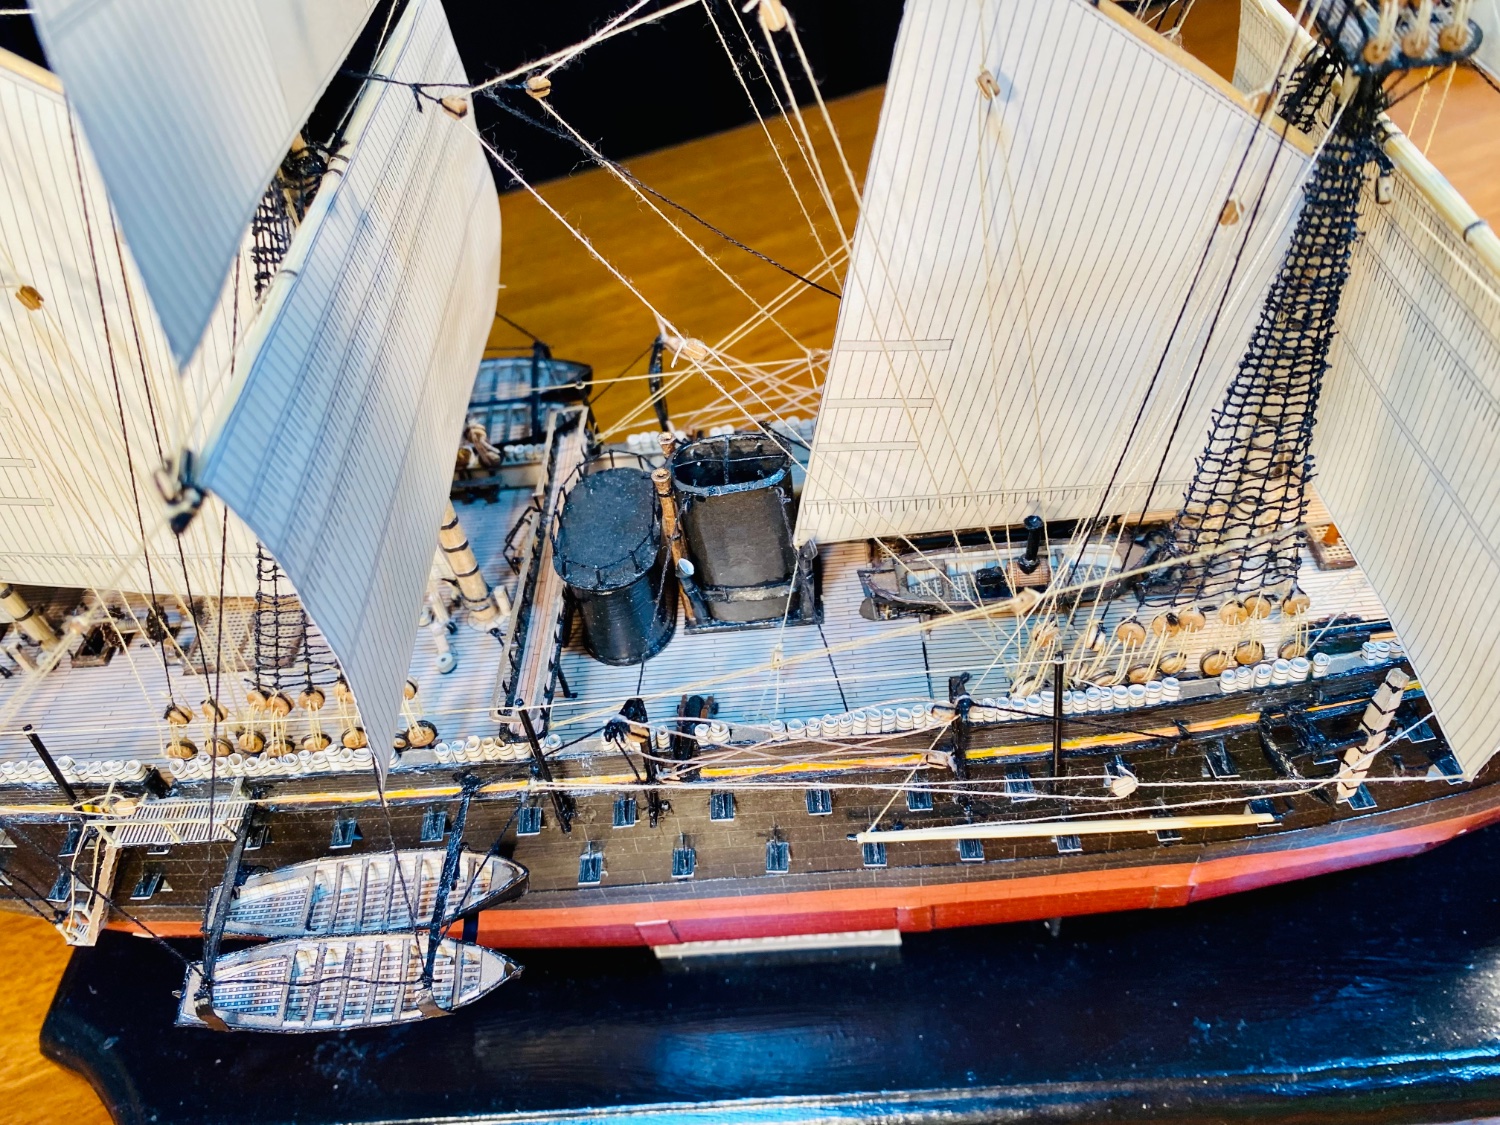
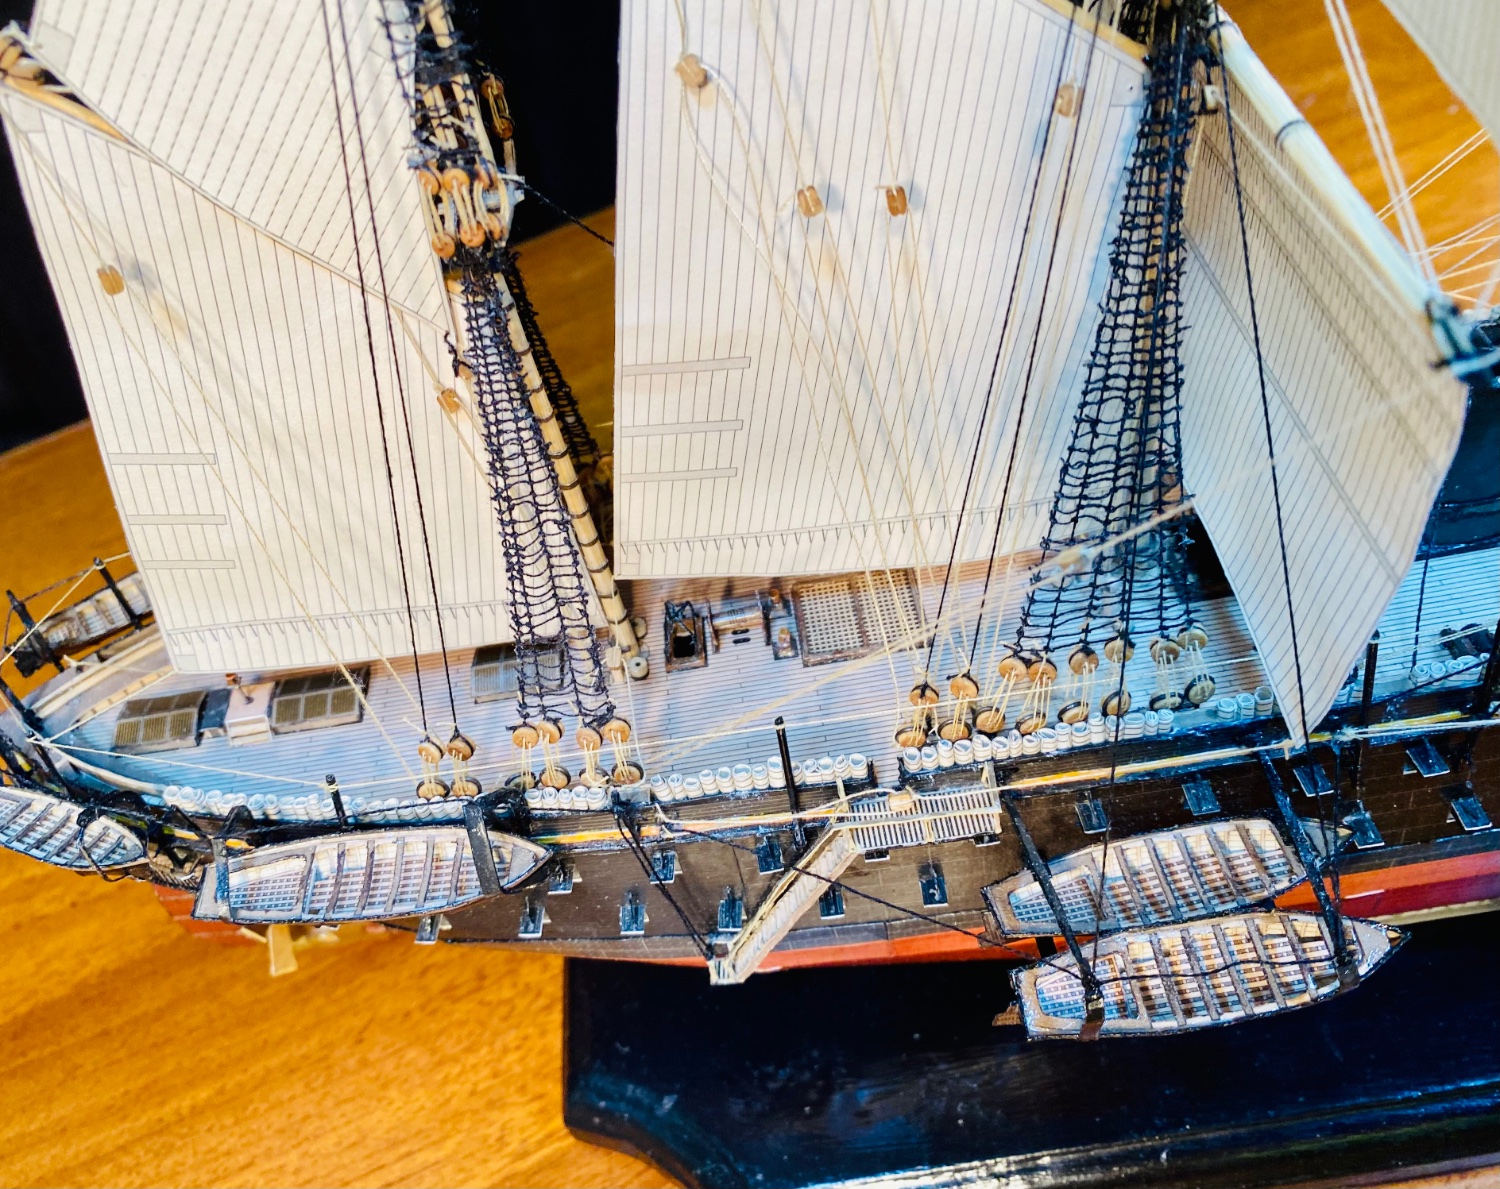
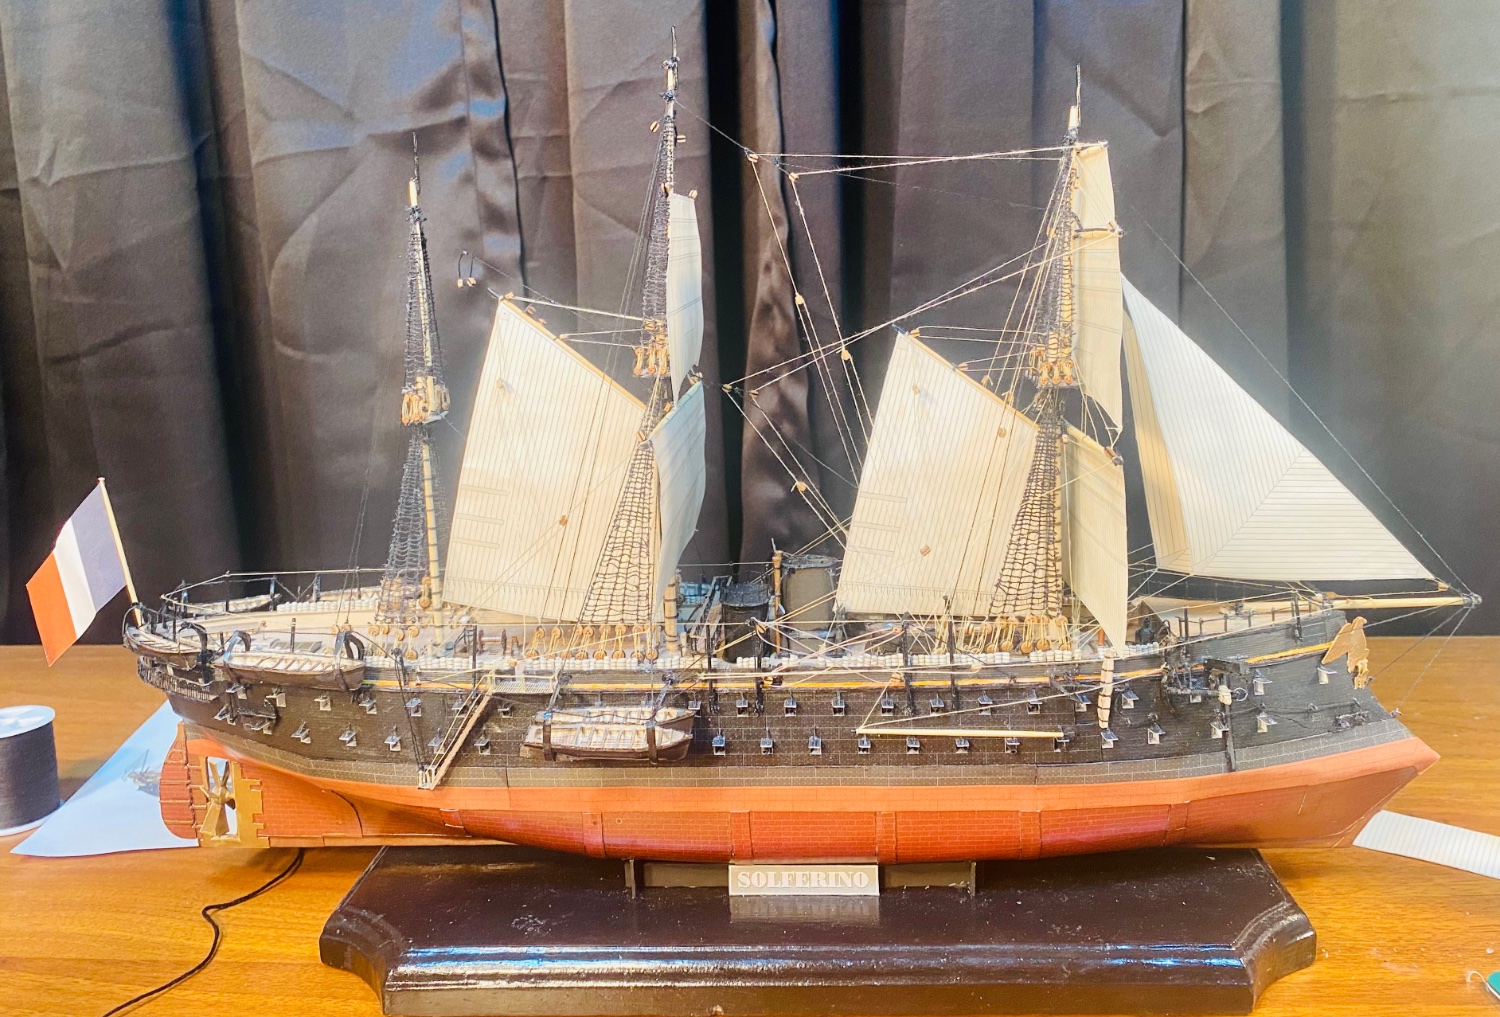
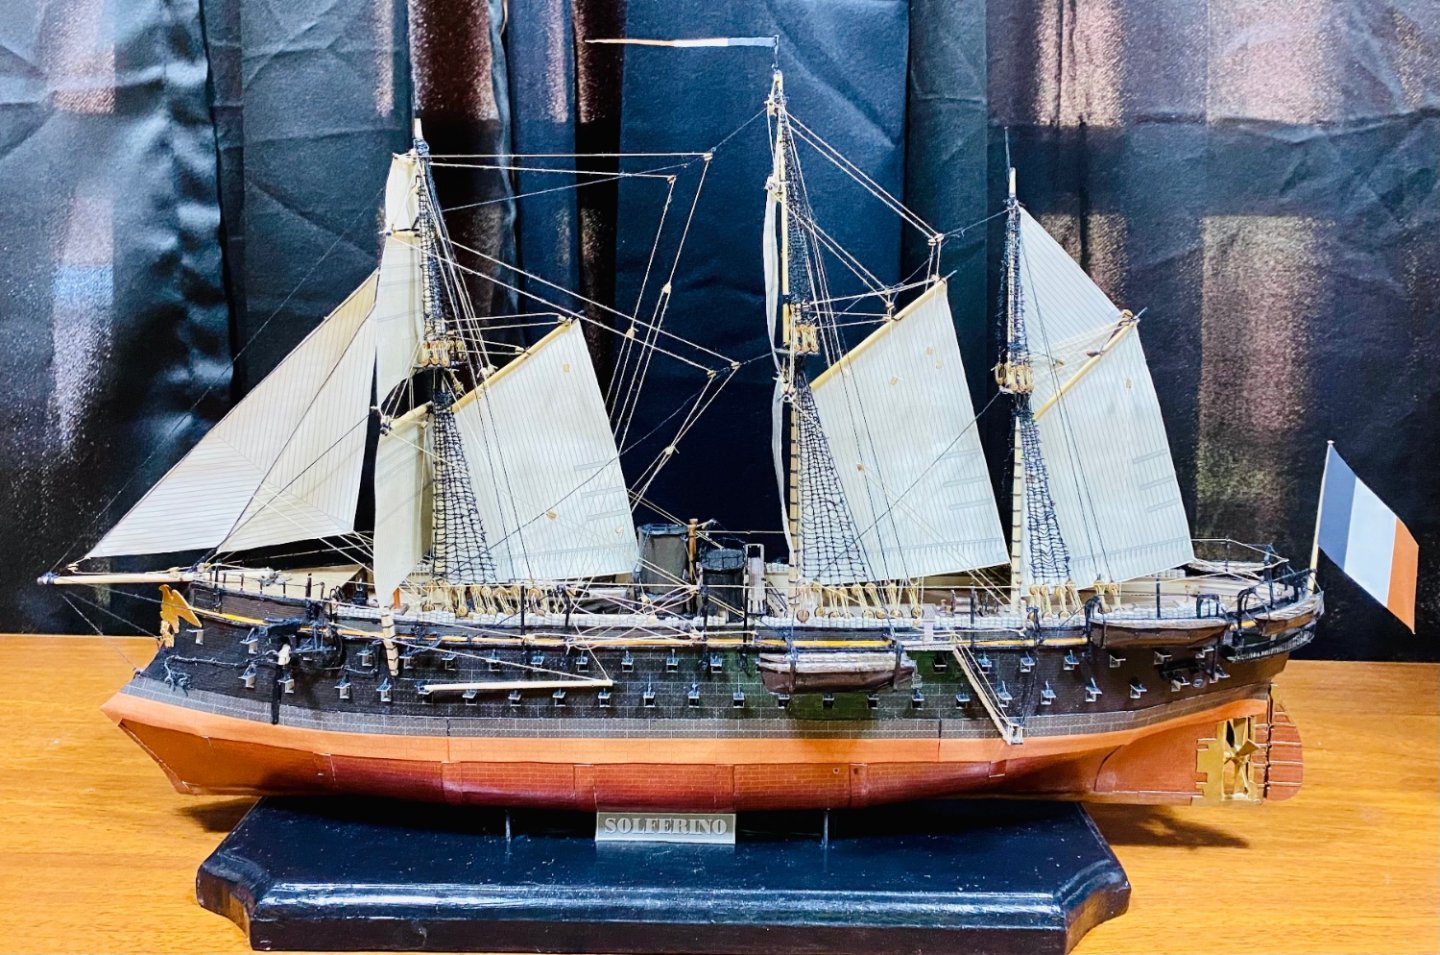
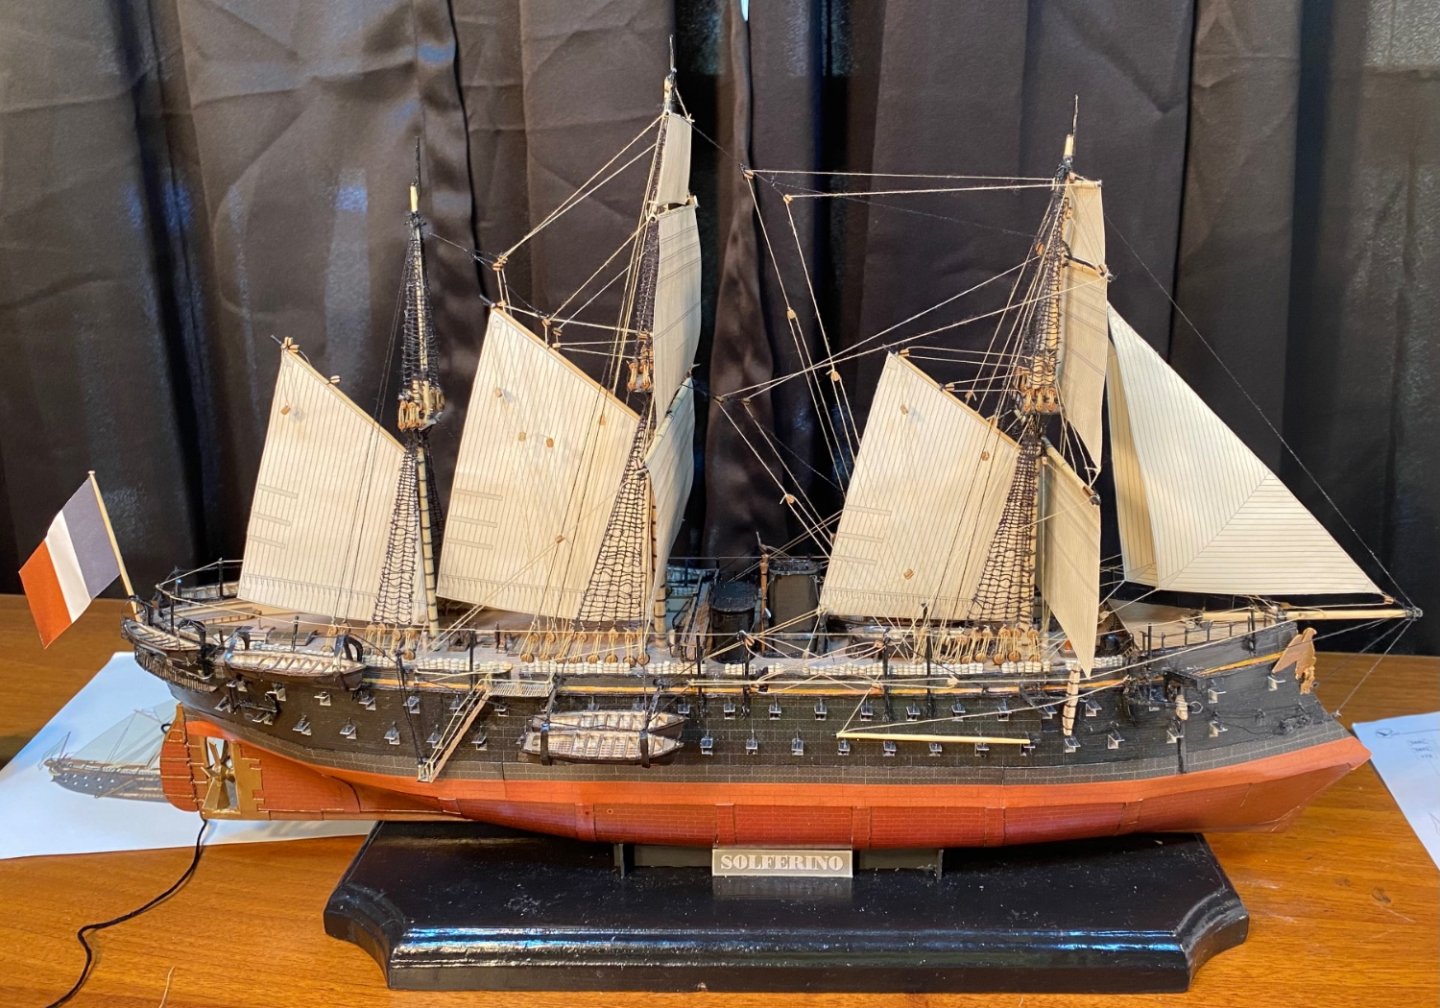
kit review 1/200 Solferino French Ironclad - Orel - Card Kit
GrandpaPhil replied to GrandpaPhil's topic in REVIEWS: Model kits
I had a lot of fun building this one! It is a most excellent kit! -
Does Shipyard Make a 1/96 HMS Bellona?
GrandpaPhil replied to GrandpaPhil's topic in Card and Paper Models
I thought about either building from the AOTS or buying the Corel plans and doing some creative rescaling/reconciling of the two plans. -
Taubman’s has ocean liner plans. If you follow the links for card model sales sites in the Intro To Card Modeling thread, there are multiple liners.
-
I use max cure superglue from just about any hobby house. My last couple batches were Bob Smith Industries off Amazon. It works great for me. It bonds metal to metal and metal to wood without a problem. It takes a few minutes to set up, but once it dries, it doesn’t let loose.

-
Very cool, Alan!
-
Cornwall Model Boats has them too.
-
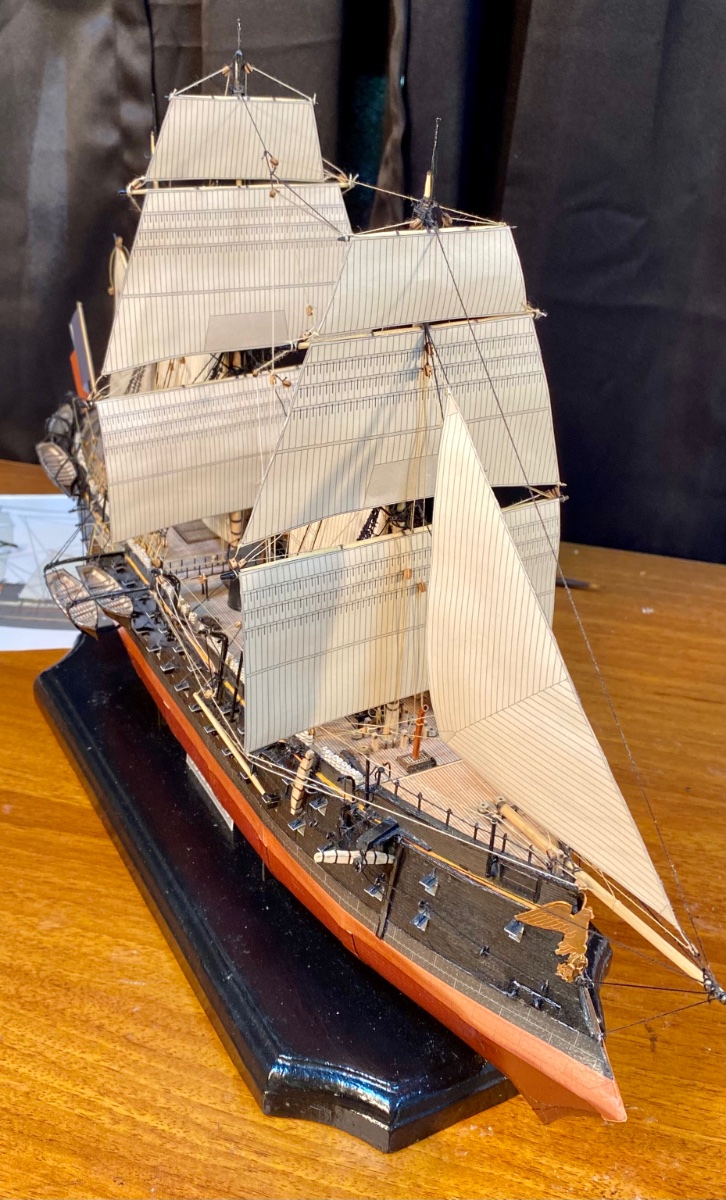
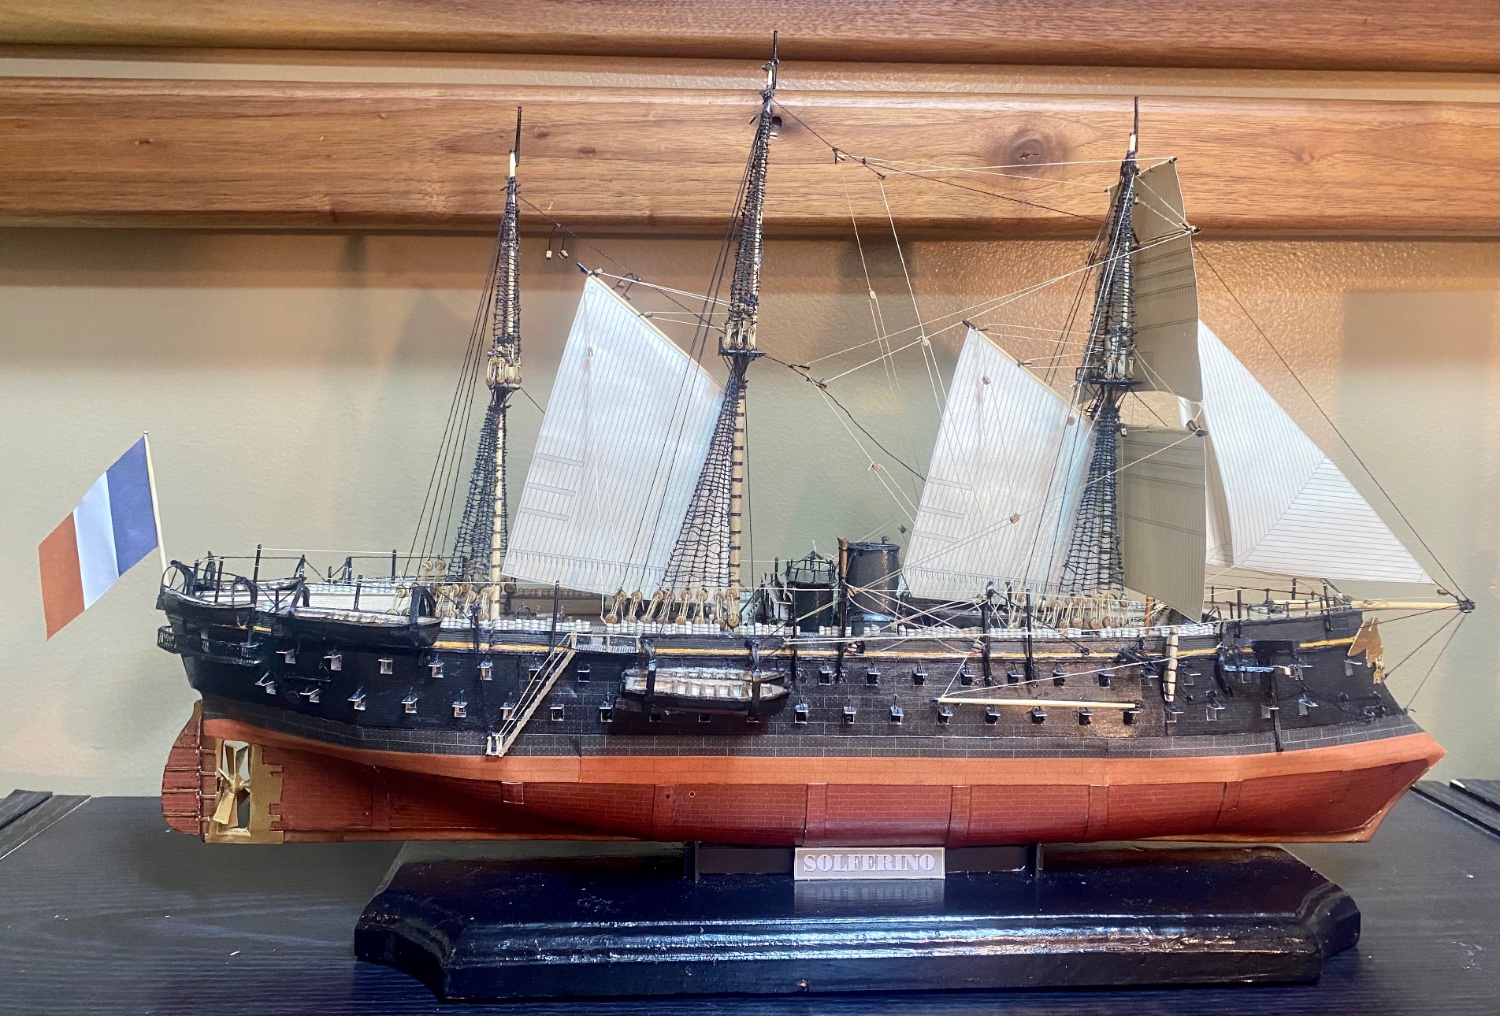
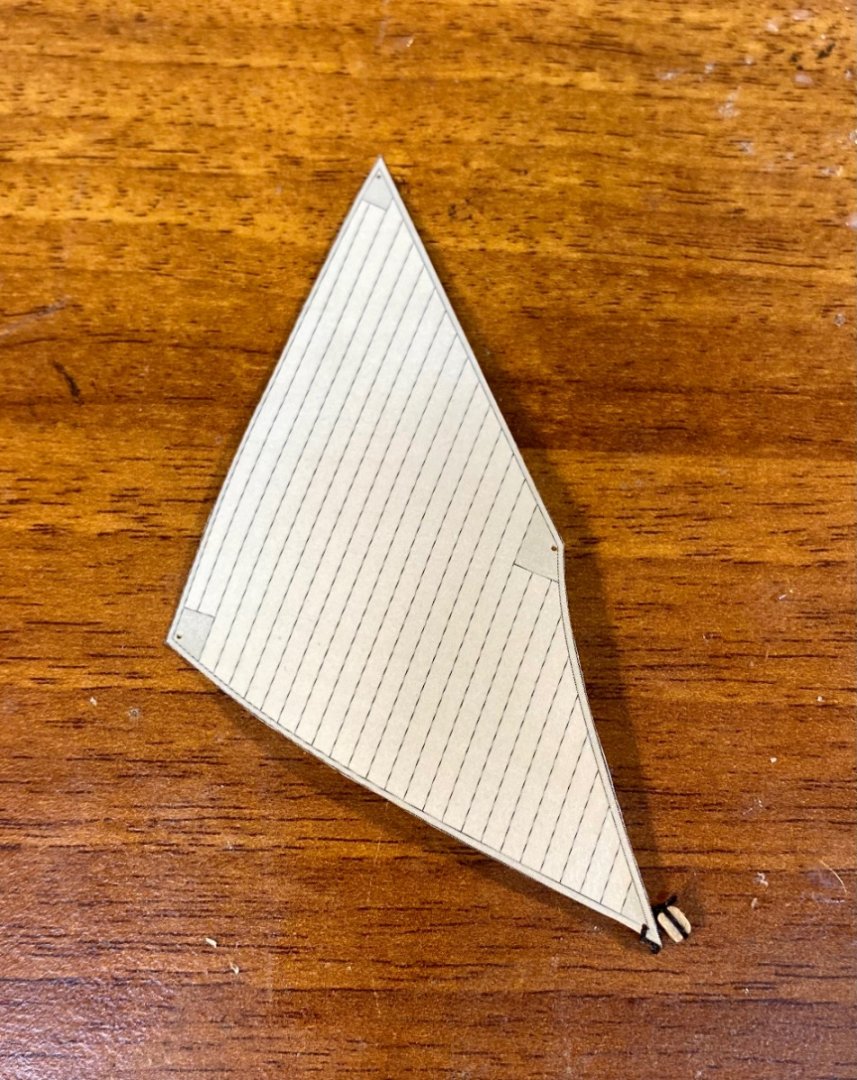
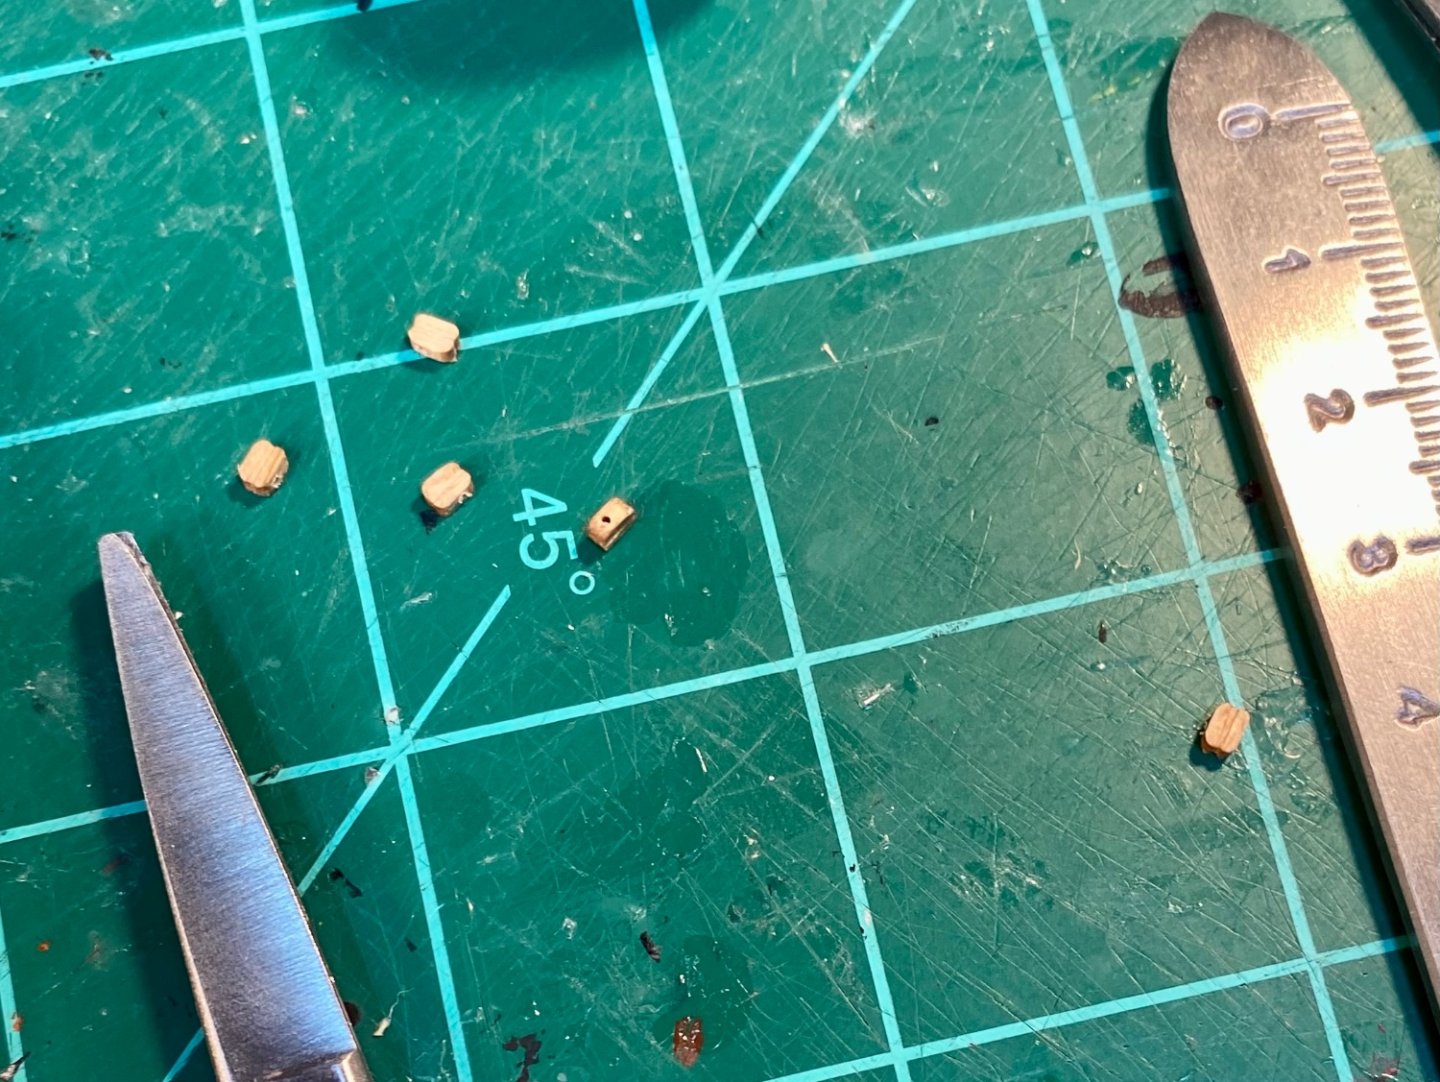
Thank you all very much for the comments, for following along and all the likes! I had a lot of fun with this build and learned a lot! I built it from the base kit, which comes as a booklet. I paid $35 on Amazon for it. From Orel’s website, this kit runs about $20 plus shipping. Orel Models is operational again and back in full production. They also have upgrade sets for this kit, like laser-cut sets, photo-etch sets, masts and decks. I did not buy the upgrade kits, because making and fabricating parts is my happy, and how I relax. Shipping takes a while because Orel is based out of the Ukraine and the current situation there. I used aftermarket deadeyes and leftover blocks from my bits box for the rigging. Eyebolts came out of annealed steel wire. Masts, yards, gaffs, and replacements for a couple cannons that I accidentally destroyed, came out of dowel rods, bamboo kitchen skewers and toothpicks. Lessons learned and notes about card models in general: The ends of toothpicks are great for rolling tiny parts. Be very careful grabbing small card parts with tweezers, they are very easily crushed. Take your time. Monte Mart glue works great and doesn’t cause the problems that American white glue causes, like warping. Edge paint and seal everything as you go. For future models, I will just copper the hull. It’s not difficult and only takes a day or two. It looks infinitely better. Don’t be afraid to bash a card kit, it is a lot closer to a wood kit than you would think. Don’t be afraid to try a card kit, it is a lot closer to a wood kit than you would think. Don’t try to build a model in card if you would not build it in wood. Card models and wood models are very similar. You will run into the exact same issues that you will with a wooden one. Card kits are easily rescaled to suit. Card kits make great templates for wood models if that is your inclination. Card models are cheap, so you aren’t really out much if things go wrong. Lastly, I like card models, from scratch or from a kit. The tooling is a lot simpler. They make less mess and they look as good.
- 278 replies
-
- 11
-

-

-
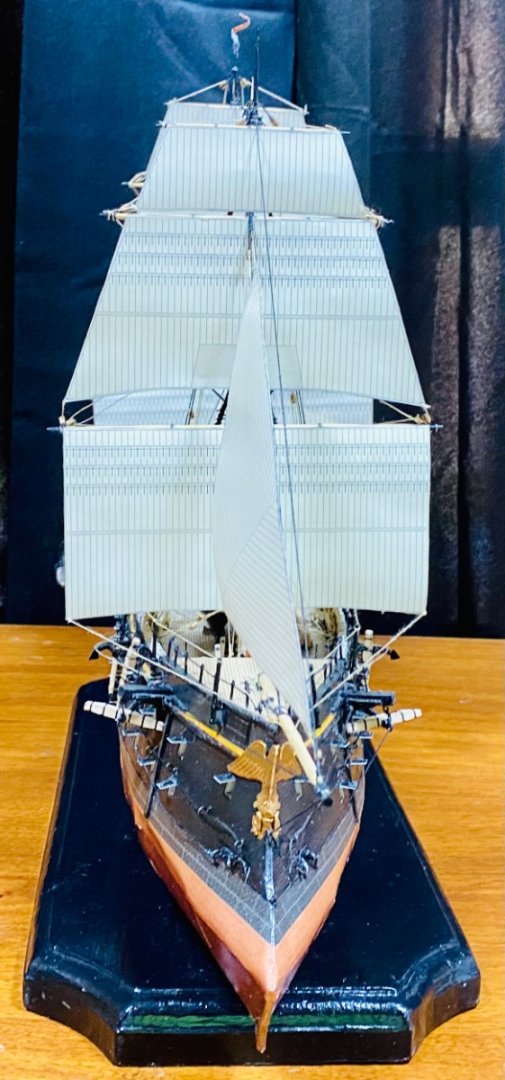
And, 15 months and 400 hours later, done! It’s not perfect, but it’ll do. I never intended to finish the 1/200 version. I intended this as a learning tool to learn about ironclad construction and design, in which I succeeded marvelously. The Admiral wanted this model, so I finished it for her. This is the third card ship that I have built, but only the first card ship kit that I have built. Building from a card kit had its own unique difficulties, like matching paint colors, and worrying about losing detail if you had to repaint something. On the whole I enjoyed this build quite a lot. Thank you very much to everyone who followed along, commented and hit the “like” button! Thank you very much @ccoyle for starting me down this road with your HMV builds!


- 278 replies
-
- 19
-

-
-
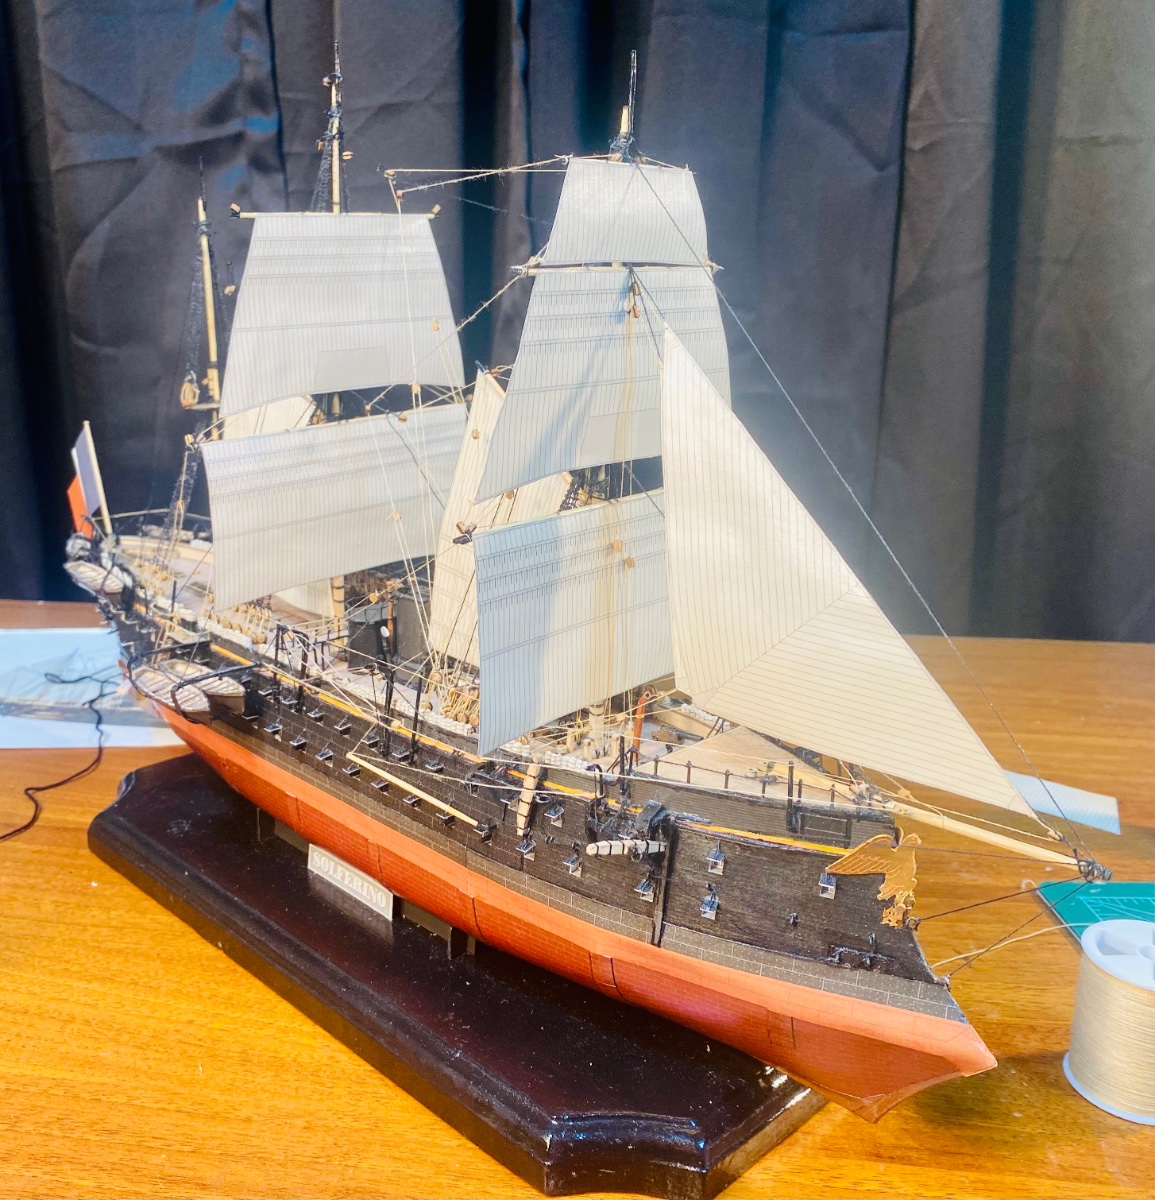
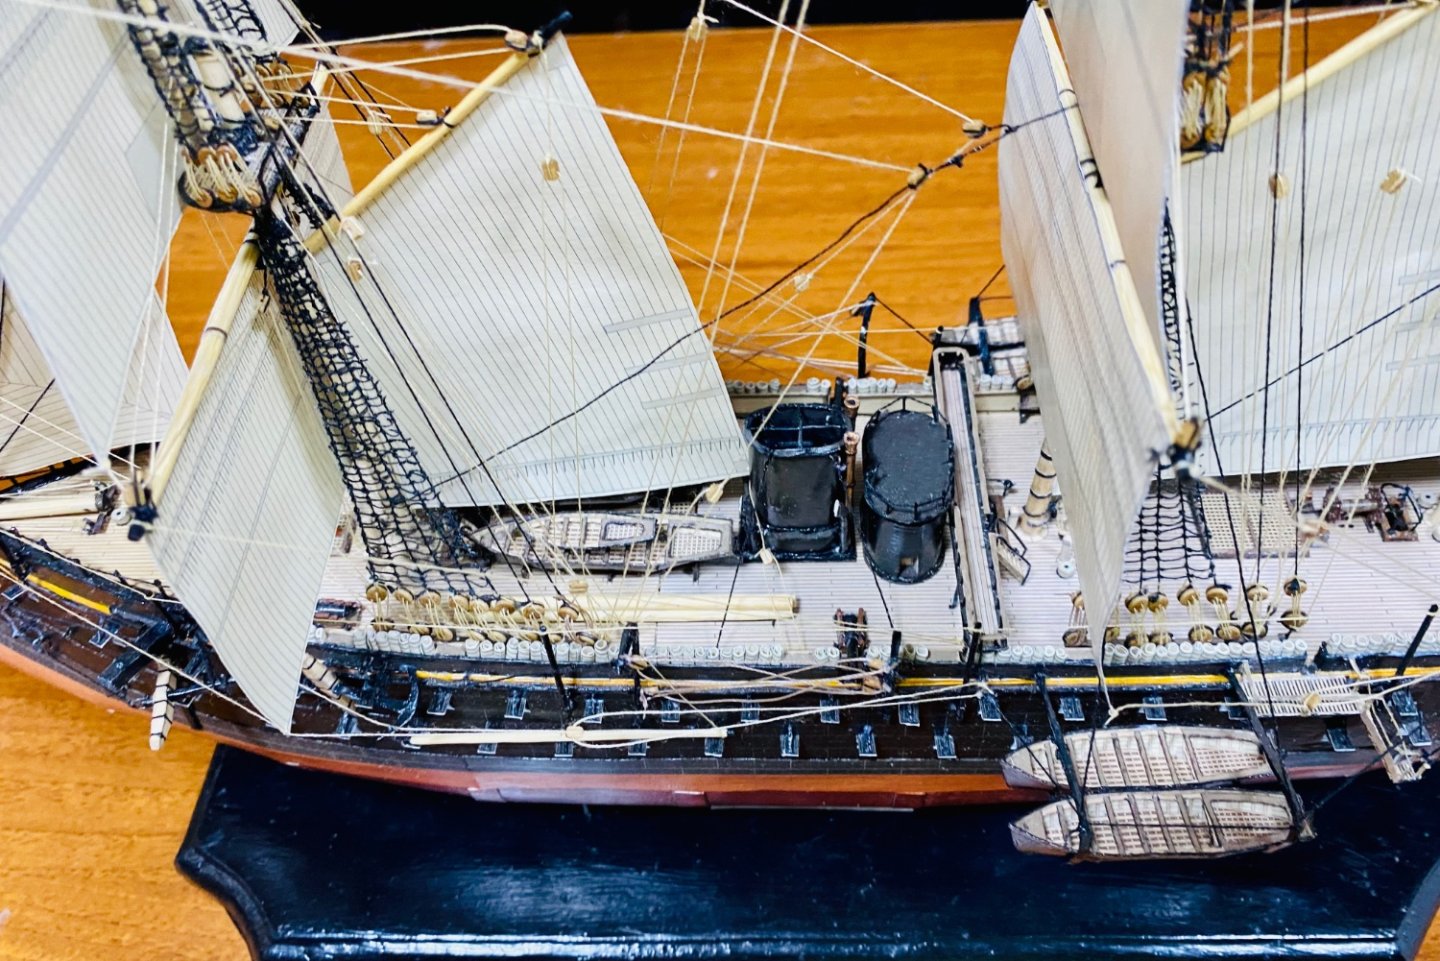
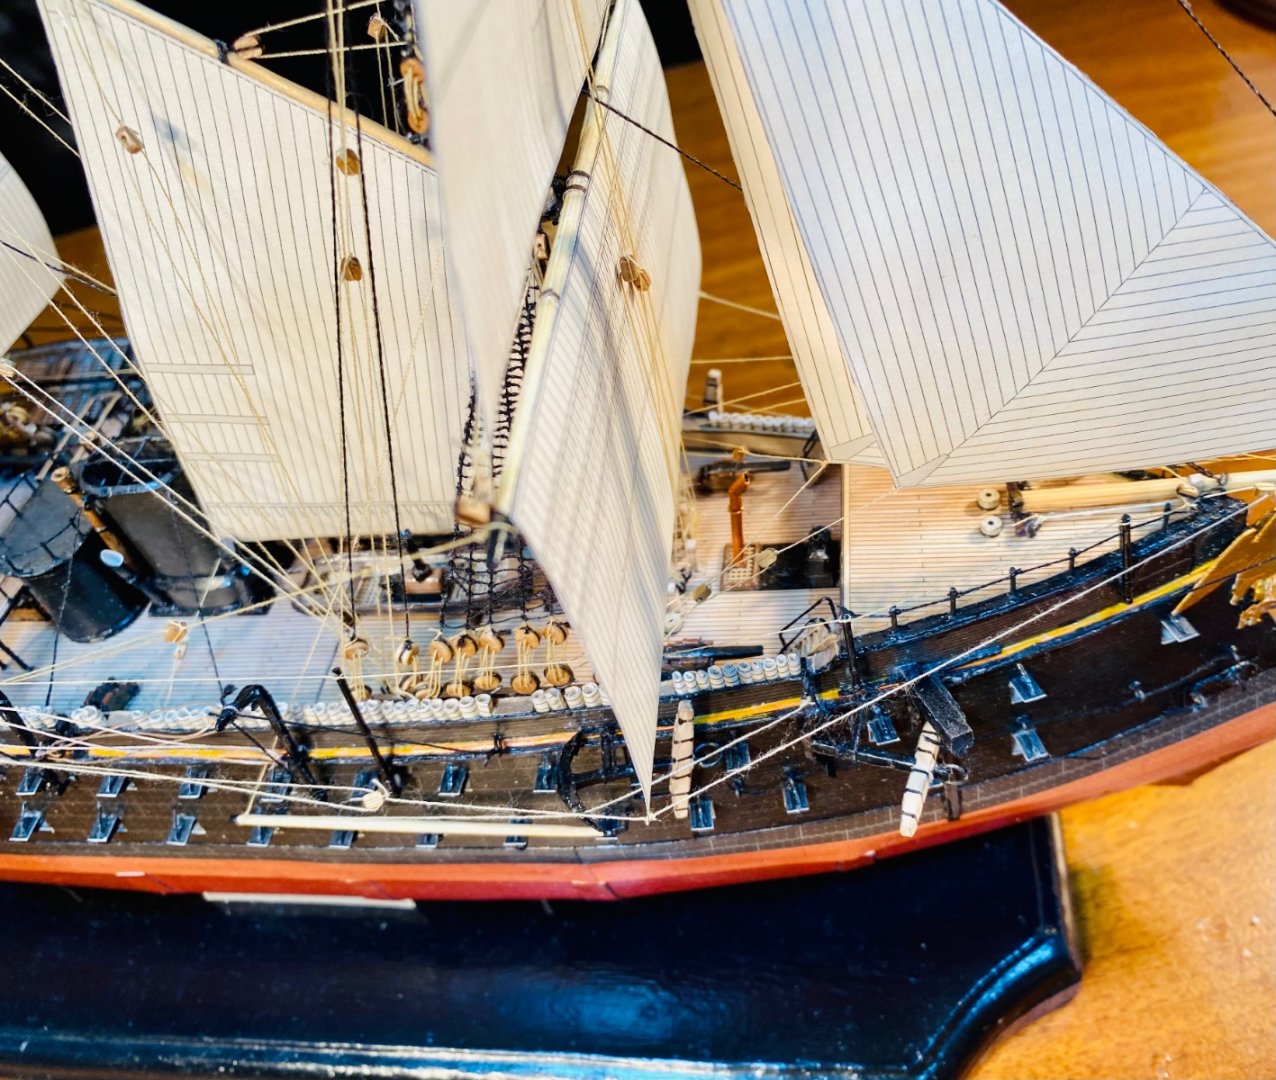
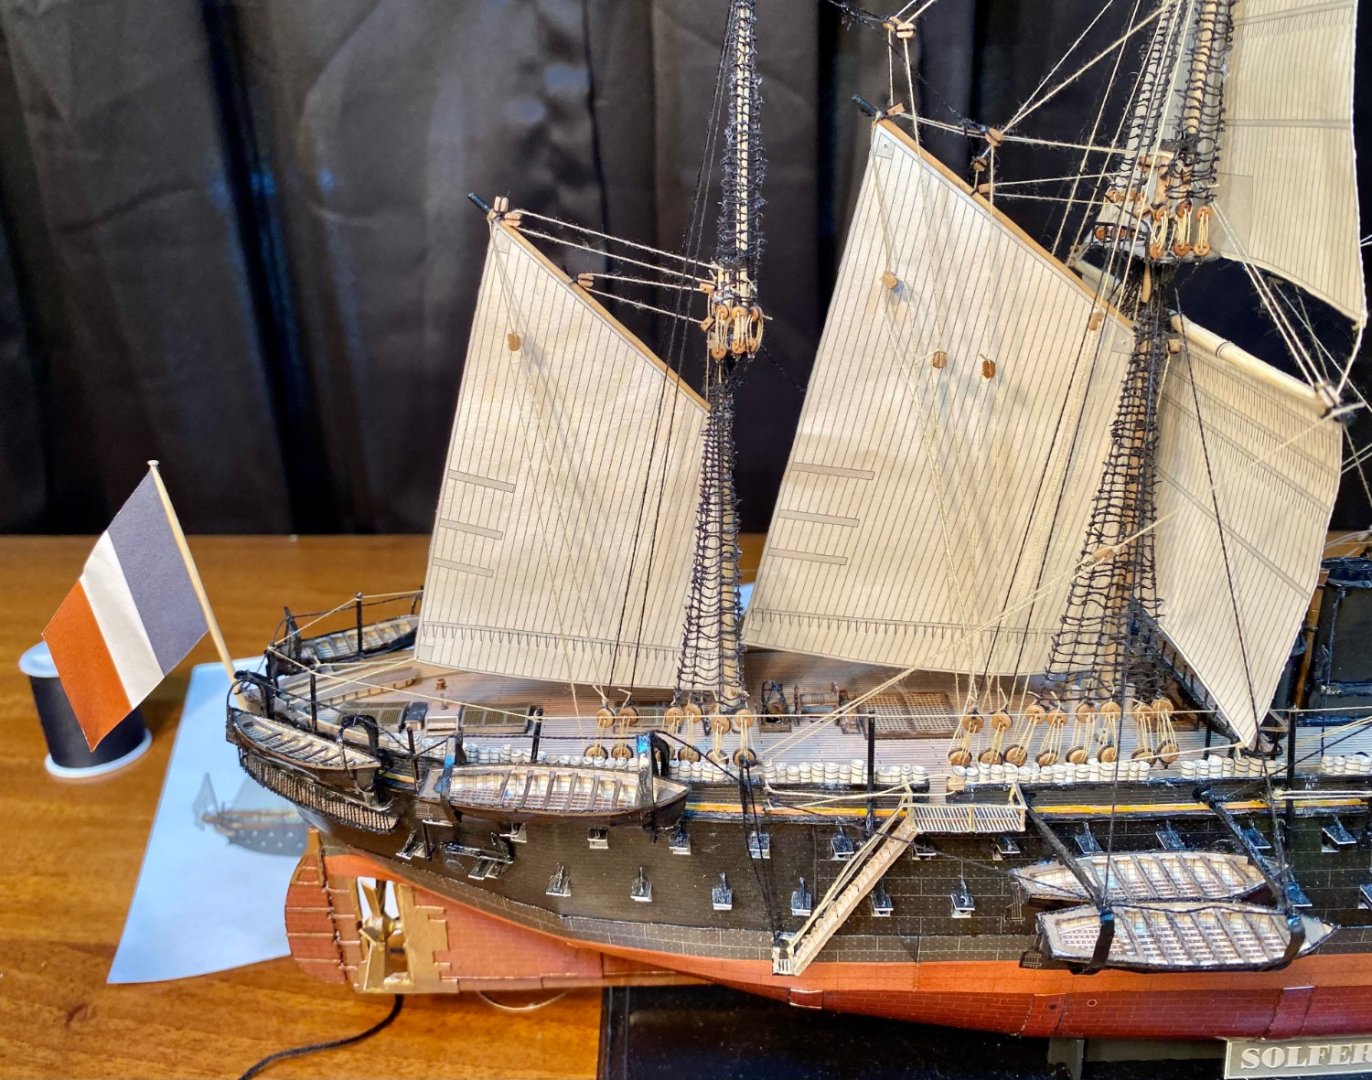
Mizzen gaff sail is rigged! Mizzen top stay sail, coming soon! Five blocks to rig it with:
-
The main mast is fully rigged and the mizzen gaff has been glued in place! All I have left is rigging the gaff sail, installing the mizzen stay sail, and then one pennant, which will be the last thing I do to this model.

- 278 replies
-
- 13
-
-
-
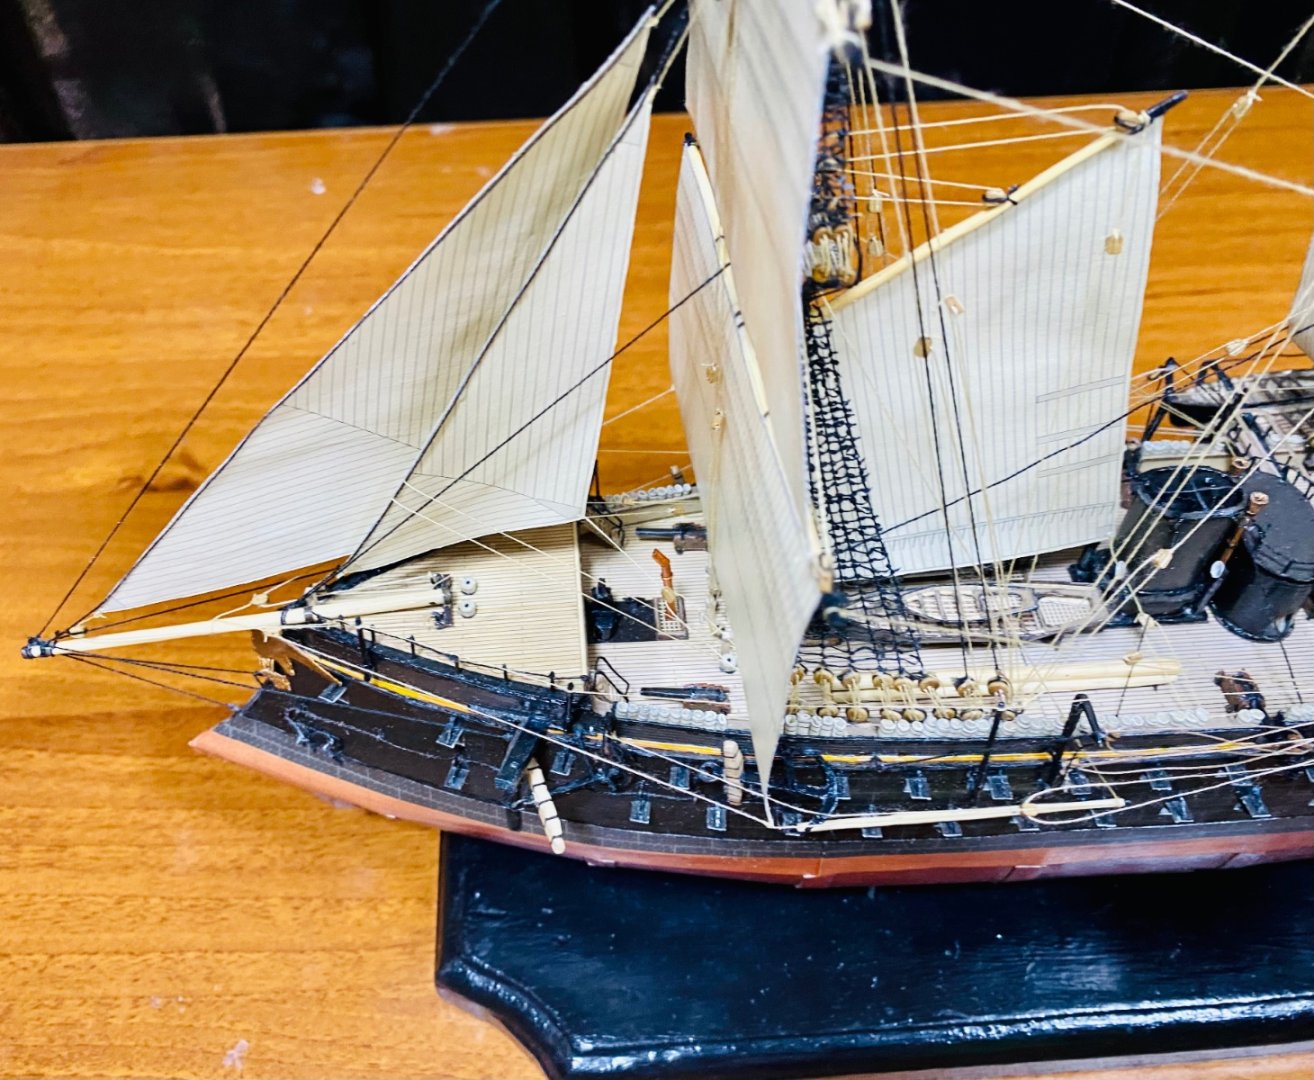
Quick lesson learned from previous builds, always install and rig the gaff sail, or gaff, first, before proceeding with square sails, or yards, on that mast. That way you’re not trying to lower a gaff, with or without a sail, through a cage made from the braces. Also, always work one mast at a time.
-
Thank you very much! The foremast is fully rigged now! For the scale, this model has a lot of rigging. The last time I rigged a barque (Mamoli 1:100 Endeavour), it took me several months, without sails. This one has about half of the rigging that a fully rigged model would have, but at this scale, the deck gets crowded QUICK. So, I’ve been belaying to anything I can find.


- 278 replies
-
- 13
-