MORE HANDBOOKS ARE ON THEIR WAY! We will let you know when they get here.
×


CiscoH
-
Posts
375 -
Joined
-
Last visited
Content Type
Profiles
Forums
Gallery
Events
Everything posted by CiscoH
-
 rope coils look great! I struggle with them at any scale; yours look very realistic
- 112 replies
-
- 1
-

-
- Bluejacket Shipcrafters
- Constitution
- (and 2 more)
-
looks great! i too have back issues and resultantly do all my work standing. a great plan until my knees go.
-
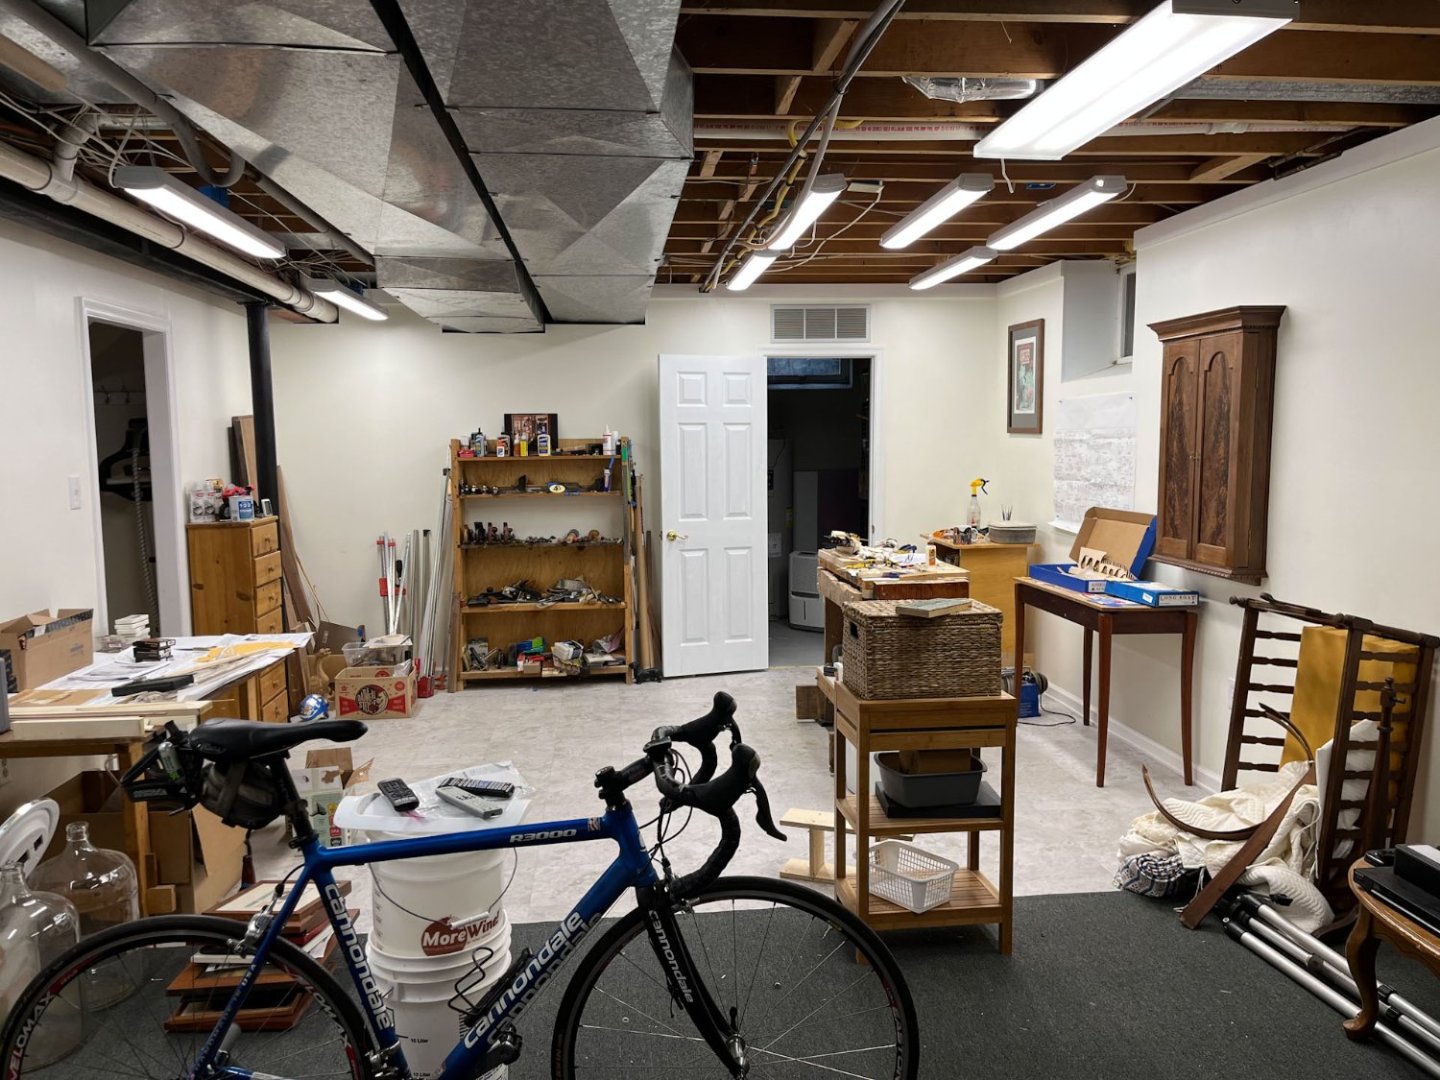
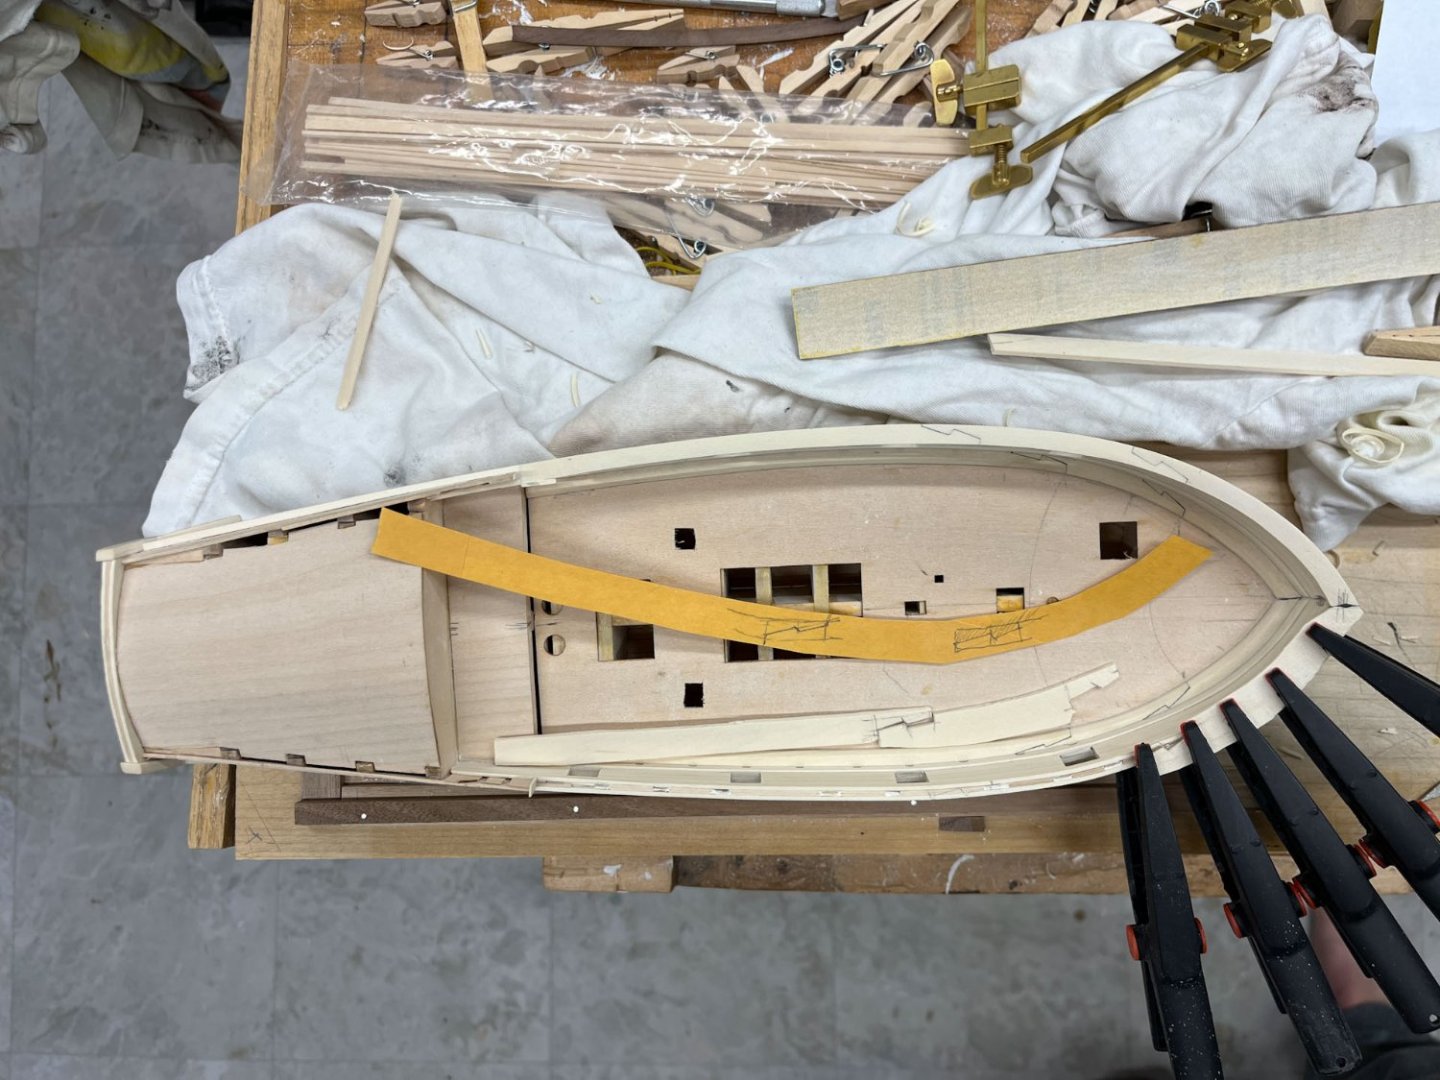
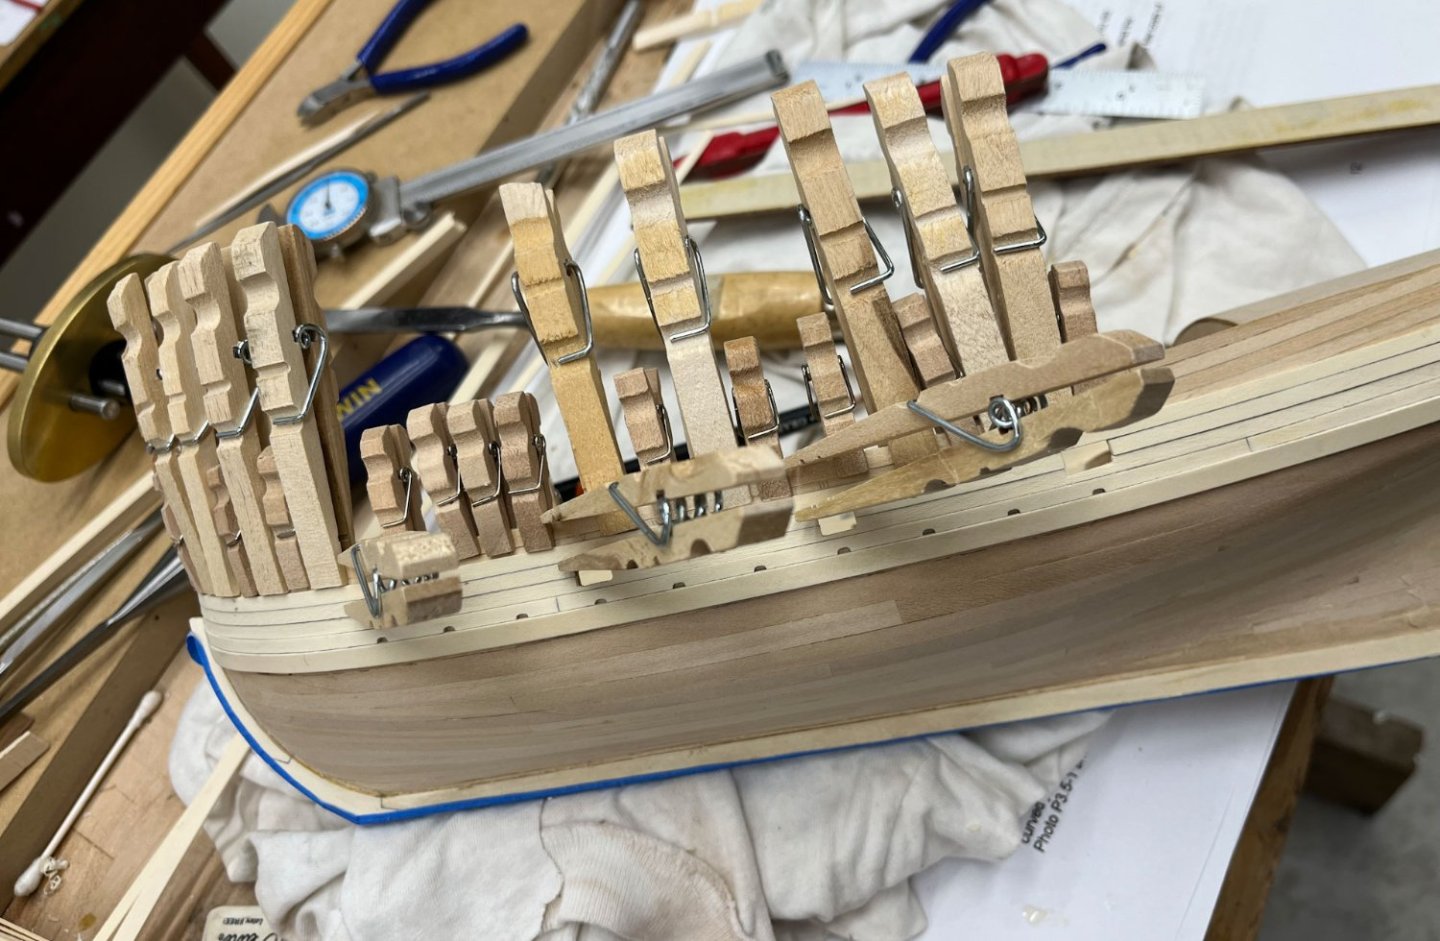
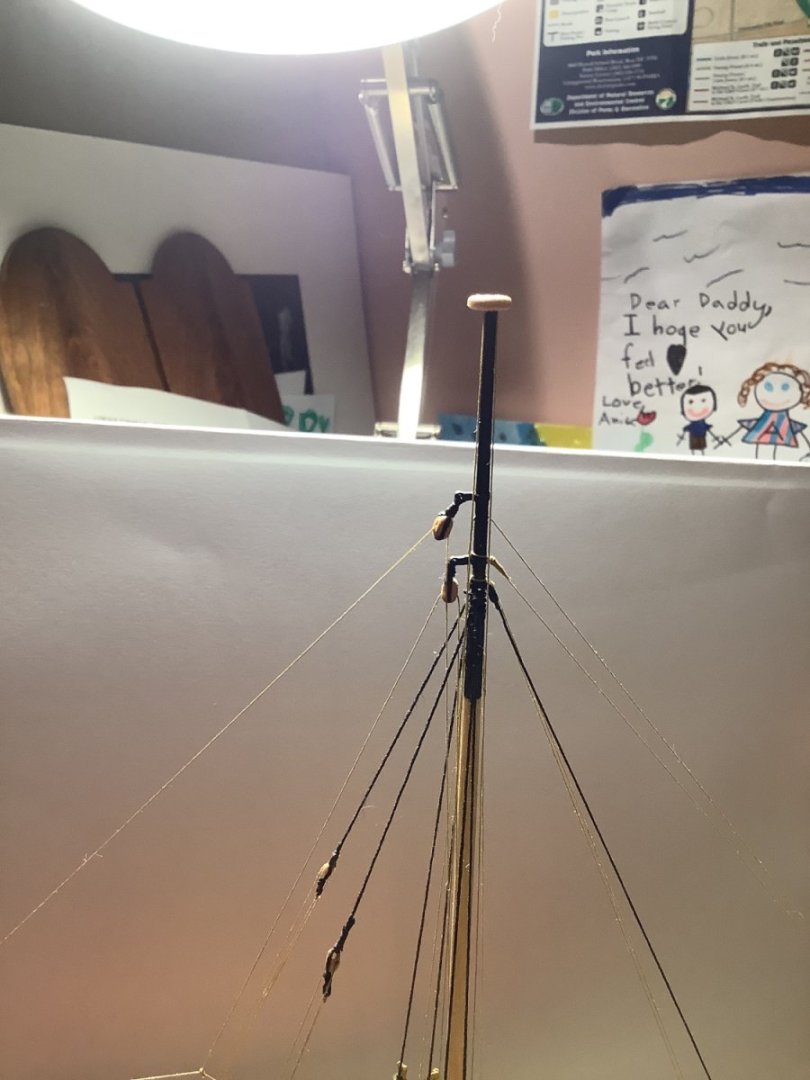
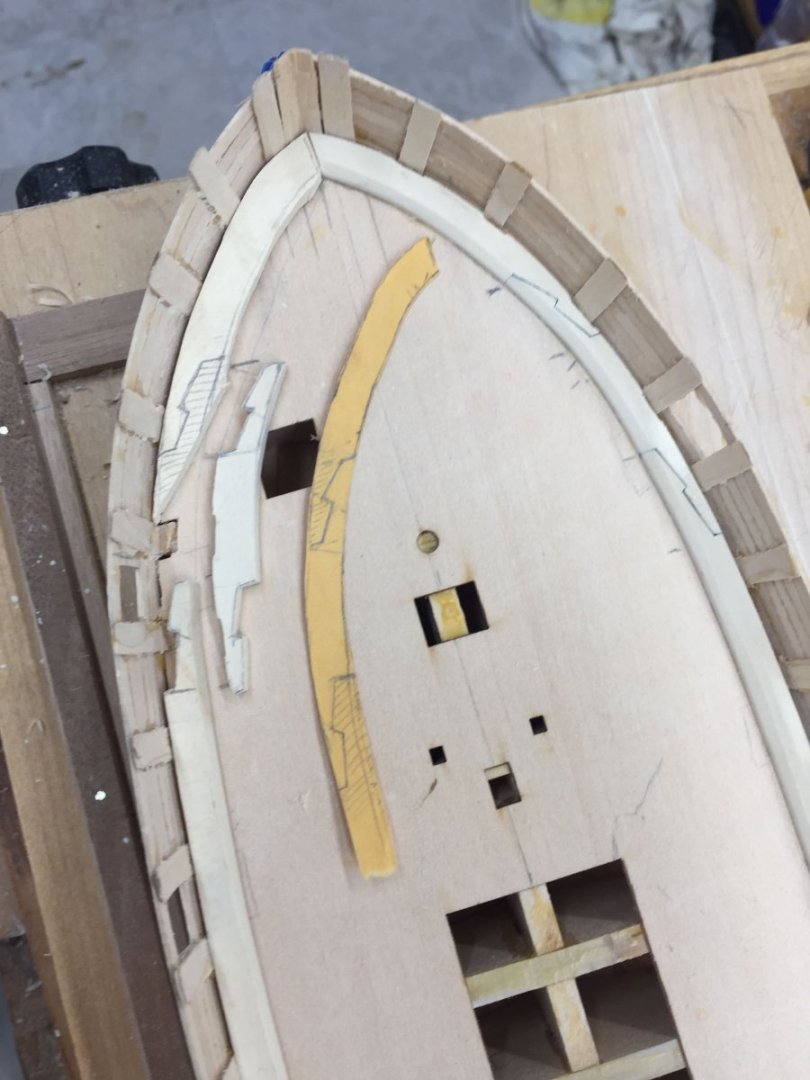
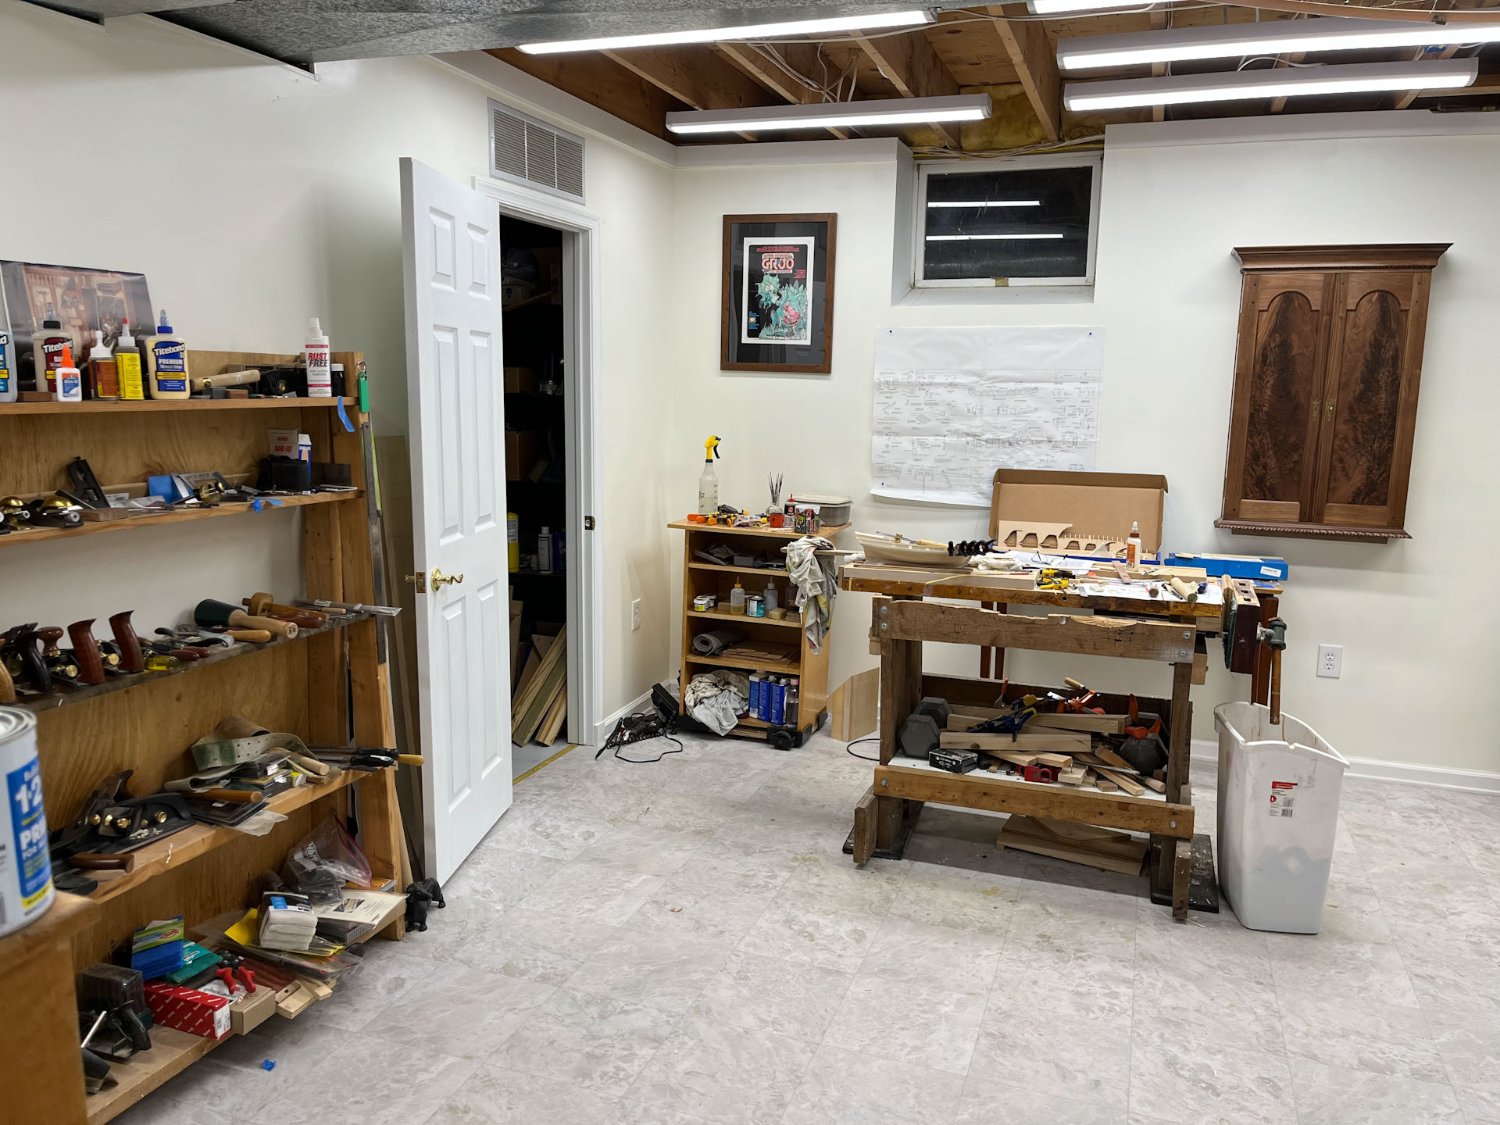
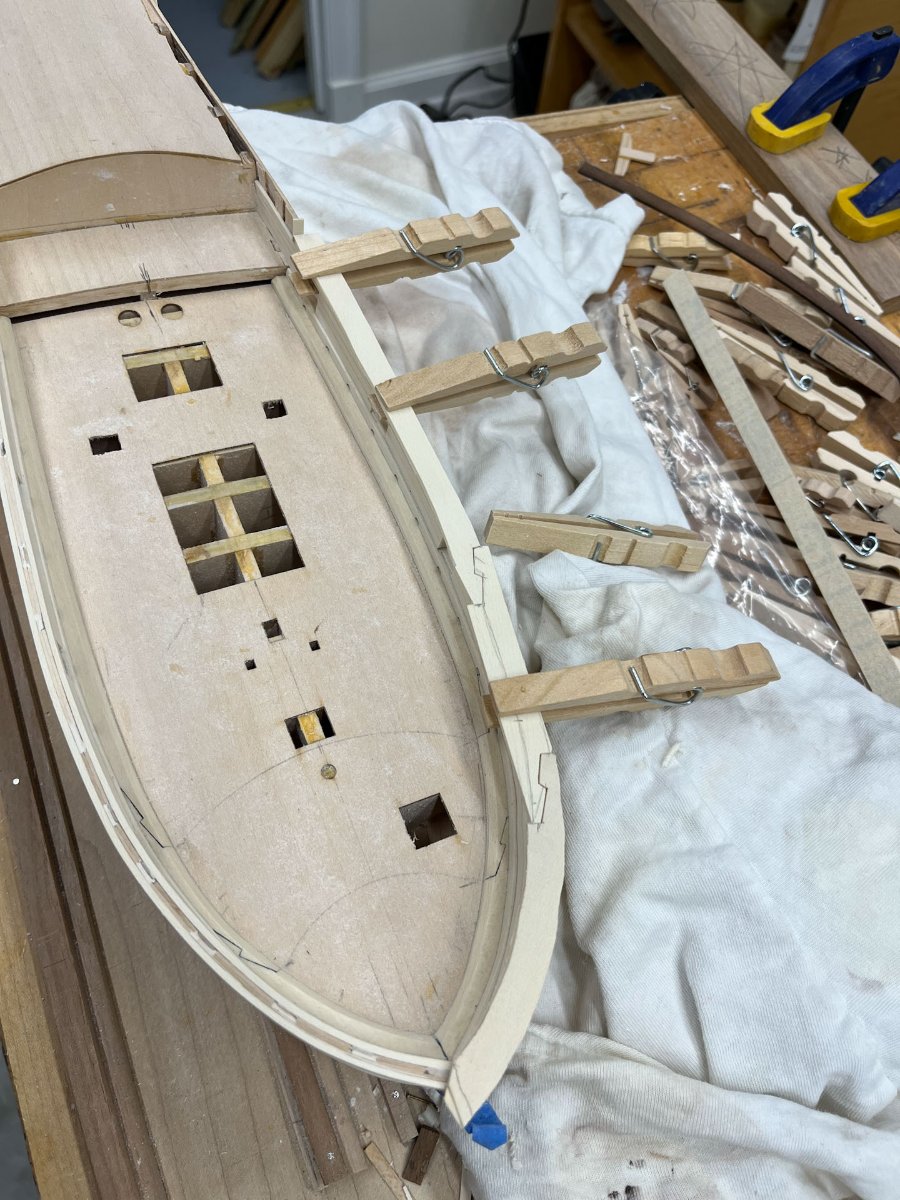
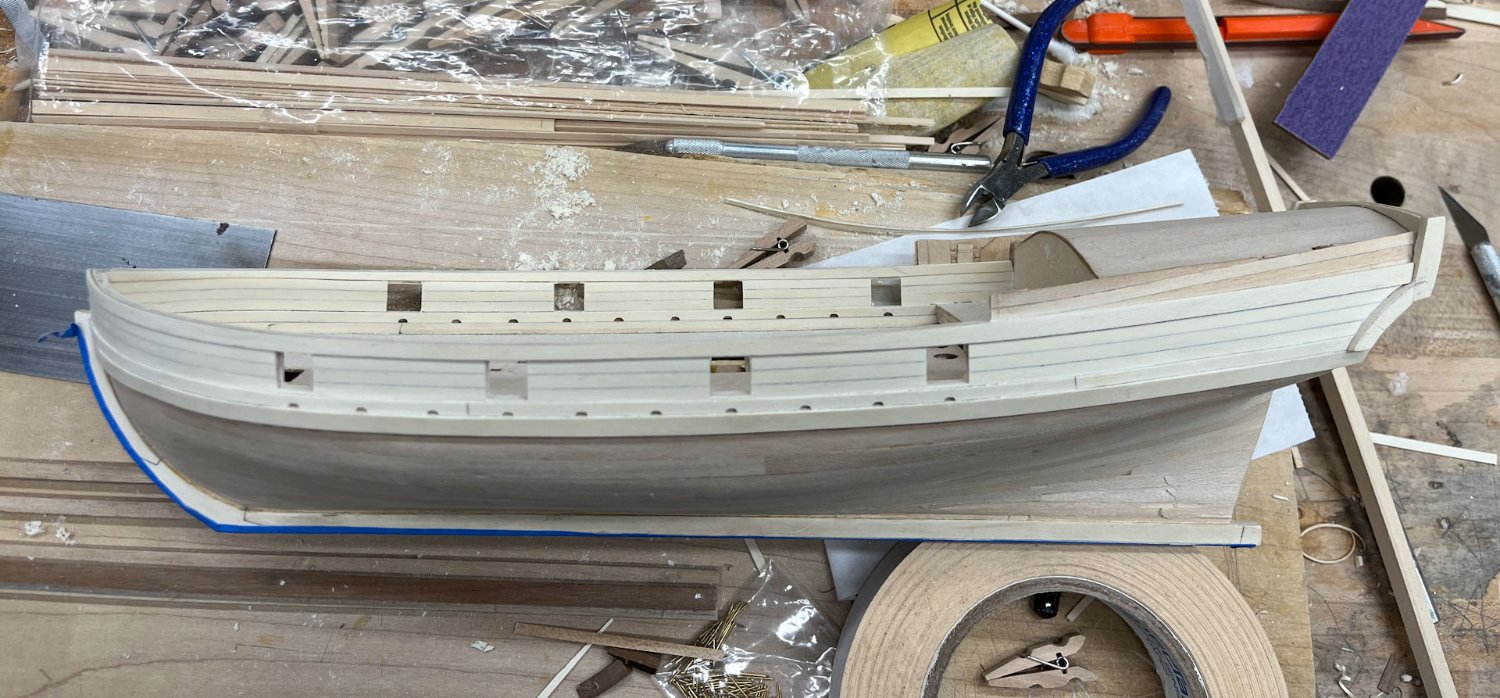
I'm off work for a few days so I got some shipwork in today. Captain_Hook : I am planning on a natural holly-only model. I might paint some parts black, like the strakes, but for now I want it all-white. I even have been using water based polyurethane as my varnish, which doesn't yellow. Due to holly being a bit weak and floppy I plan to use bleached maple dowels for the bowsprit and main mast. Only 1 ship picture this post. I roughed in all 3 starboard cap rail pieces. The stem rail promised to be the toughest to fit so I glued it in first. The other 2 pieces are fitted but since on the port side there was a bit of adjustment needed I left them fat. Below you can see my fitting process- first a rough outline in yellow paper which I used mainly to plan out the joints. I am unable to wrap my head around mirror images so despite having made 6 previous scarfs I still have to draw each one out. I added the cap rail extensions onto the inner and outer bulwarks either side of the port quarterdeck/poop; they still need some trimming. Here are a few pics of my workarea; I always find it interesting to see other people's workshops. We have lived in this house for 8 years and after a brief discussion with the Admiral it was decided I would like to set up part of the basement as my work area. There was a lot of work done that isn't apparent; I tore down the old drywall covered framing which had no insulation and rotting 2x4's set directly on the concrete slab, added 2" of XPS to the basement block walls before rebuilding the 2x4 framing with a base of pressure treated lumber. This fixed the mold smell. I tossed most of the flickery humming fluorescents the previous owners had put in and replaced them with lots of LED lights. Then I pulled up the carpet over half my work area and replaced it with a big roll of vinyl flooring. Good enough for now. Heres the long shot. the work area shares space with my bike trainer, beer making paraphernalia, and a family heirloom crib my mother gave me which I don't know what to do with. Thats it! Cisco

-
Jason i dont think you can reliably straighten a warped dowel. it implies the grain is crooked snd evdn if you straightened it out i would assume next big humidity change it would re-warp. probly right after you got your attached righing balaced . i have a herd of dowels i got from michaels, and i’m replacing the ones that came with my AVS with maple,, so feel free to take some this weekend
-
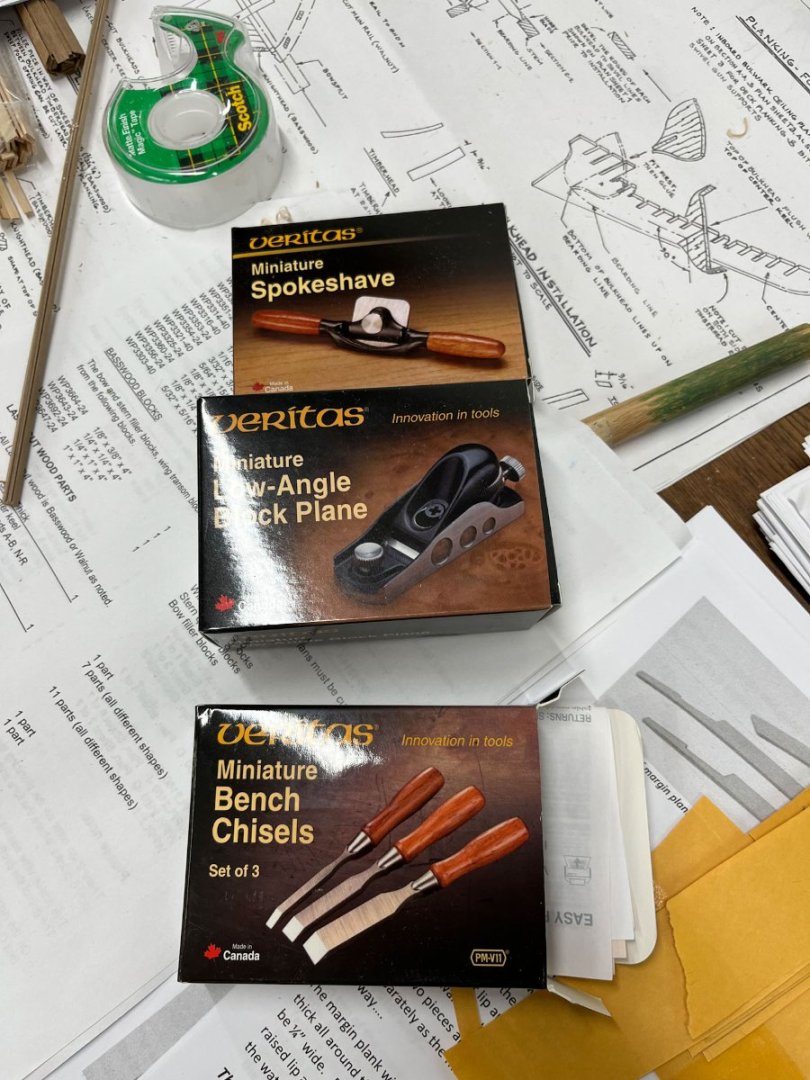
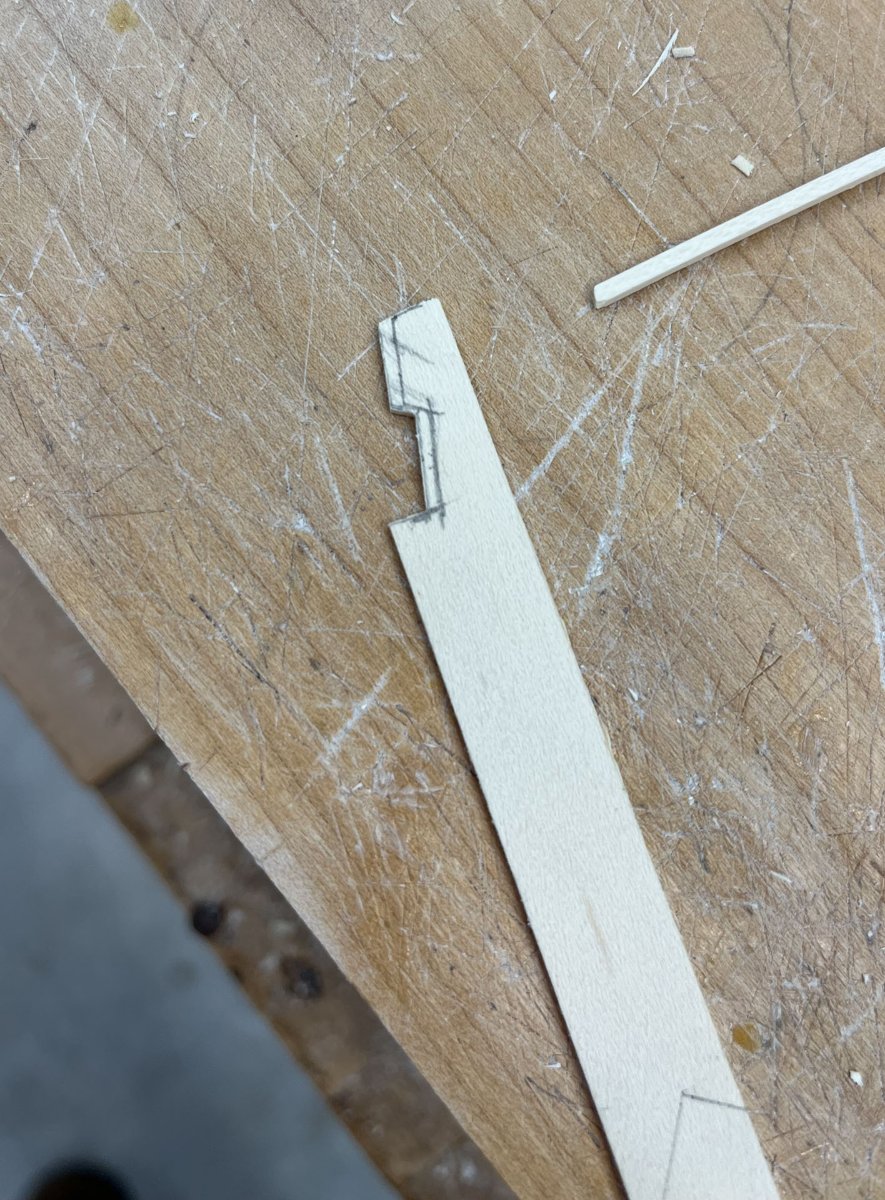
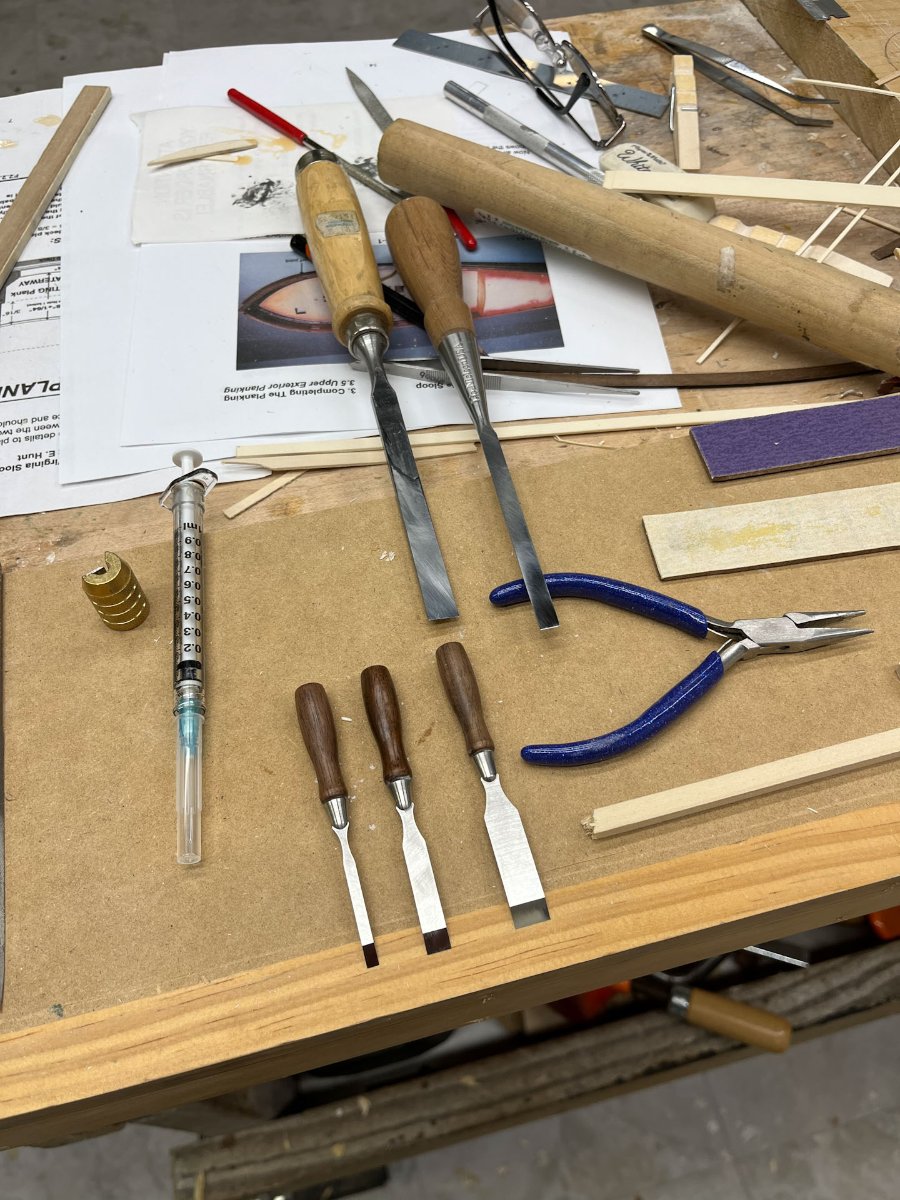
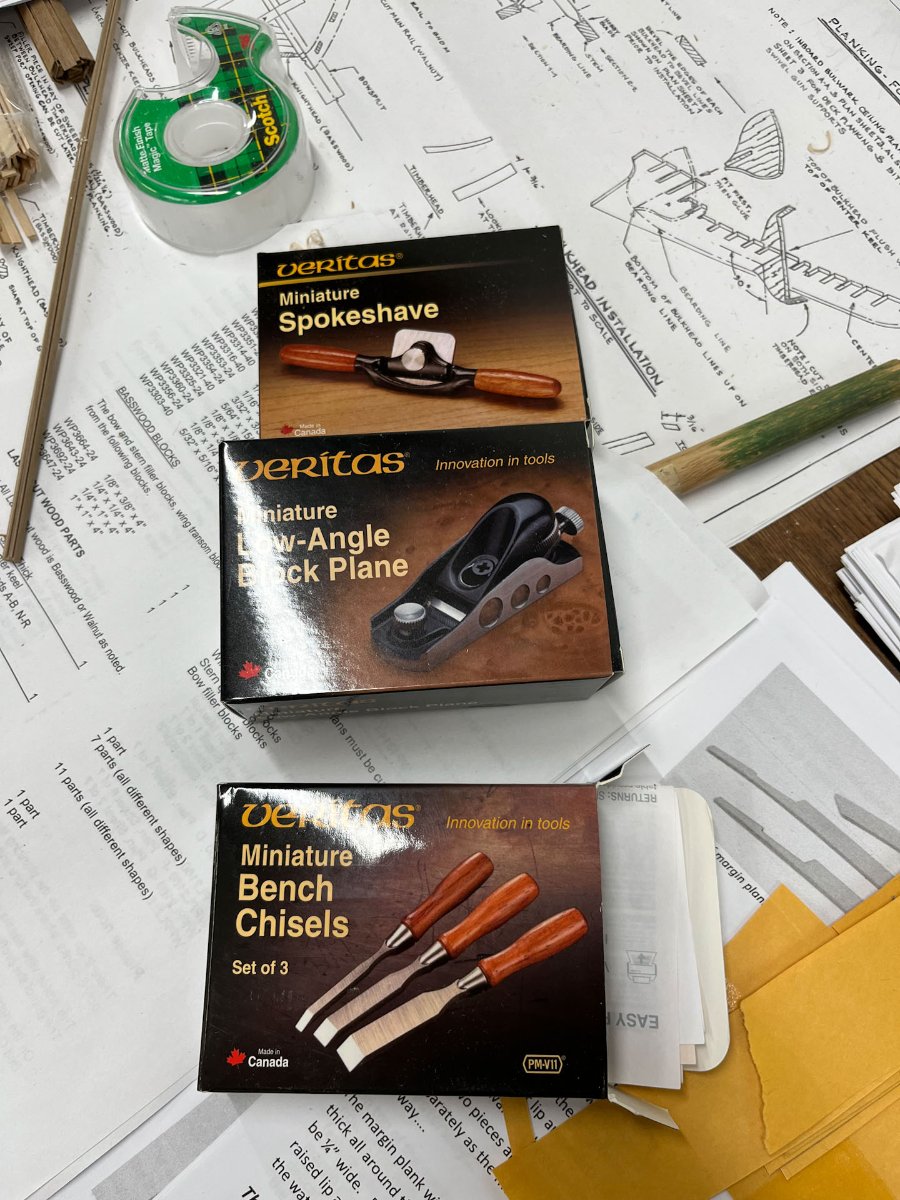
Managing to sneak in one more update before the new year. Today its all about the cap rails. The kit comes with single piece walnut cap rails, one for each side. I am replacing everything with holly which has its quirks as I'm learning. Its a hard wood that tends towards being both crumbly and liking to split, so trimming with a blade must be done carefully. Personally I prefer the look of several planks versus one unnaturally long unbroken rail. Keeping in mind the planks shouldn't exceed 6" in length, the width of my available holly stock, how much do I want to risk on redo's, etc, I settled on a cap rail with 2 scarf joints. Exactly the same as the waterway but unable to be hidden. I had some practice on the waterway scarfs which was helpful. My main takeaway for before was paper templates didn't work well for me for the curved sections. Each time I found my fitted scarfs led to a curved section that didn't curve quite enough. And when I adjusted (trimmed in tiny increments) the scarfs the section now wouldn't tightly conform to the curved bulkhead. So here I went with using excessively wide stock that I would trim back once it was glued in place. But first I had a complete brainlock and could not figure out how I had made the scarfs. Every drawing I did looked wrong. Then luckily I remembered someone had posted a picture and after some searching and with absolutely no permission I stole this post from PRS in his excellent Cheerful build: That got me back on track and I made the first section of cap rail running from the quarterdeck forward. After making the hooked scarf I traced in onto the second piece. It took some adjusting to get the joints centered on the bulkheads so that when the edges get sanded back they look symmetric. After making all 3 pieces I glued the first section in place, waited until it was dry and then added the middle section, using graphite, holly powder, and yellow glue to outline and fill the scarf joint same as before. Below is the final dry fit. Despite being careful I still had to adjust the second and third pieces a little. Leaving them fat was a lifesaver. I also found it helpful to extend the lines some. It made it easier to sight once the joint was almost home. I took the wood away until the pencil line was just barely visible. Next photo is after all 3 pieces have dried and most of the glue squeeze-out removed. not real pretty. But once I trimmed back the rail to close to final dimensions its much improved. Still more trimming left but you can see the shape emerging and I am happy with my scarfs. Now I have to make the other side symmetric AND reverse the joints. Finally, I declared it a long overdue sharpening day. Got out my waterstones and flattened the backs and honed the Veritas minichisels, which took hardly any time they are so small. Also rehoned the 2 bigger chisels I use most and following Cmm4000's advice I turned one of my razorblades into a scraper and it works great. Thats it for today. Hope everyone has a great New Years! Cisco


-
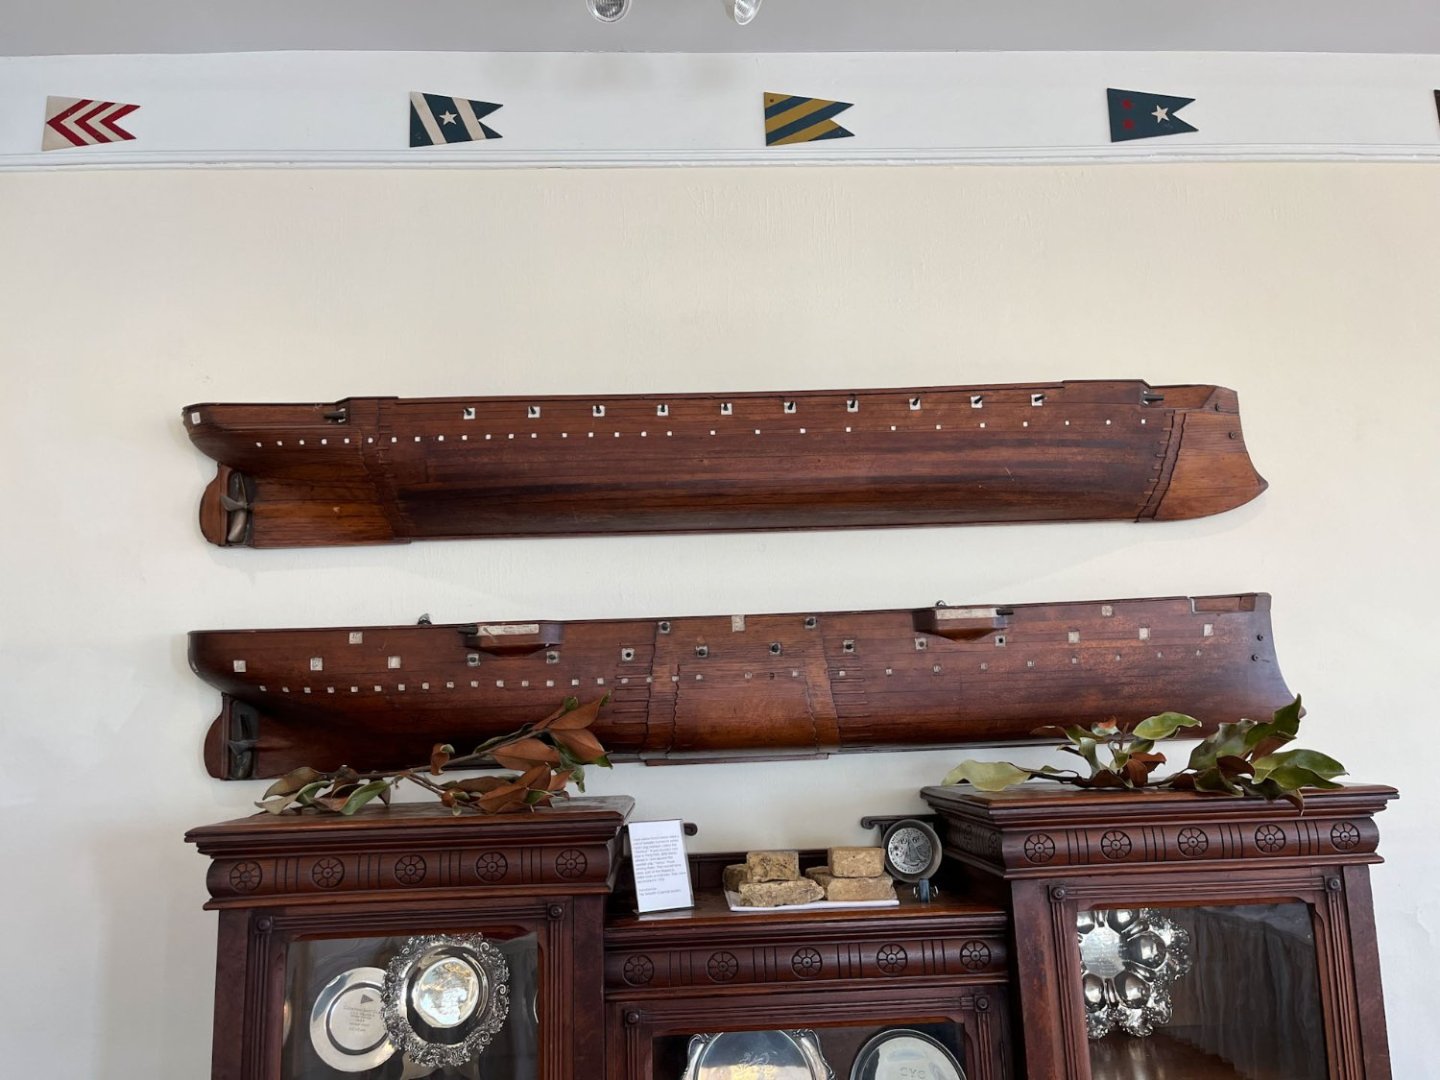
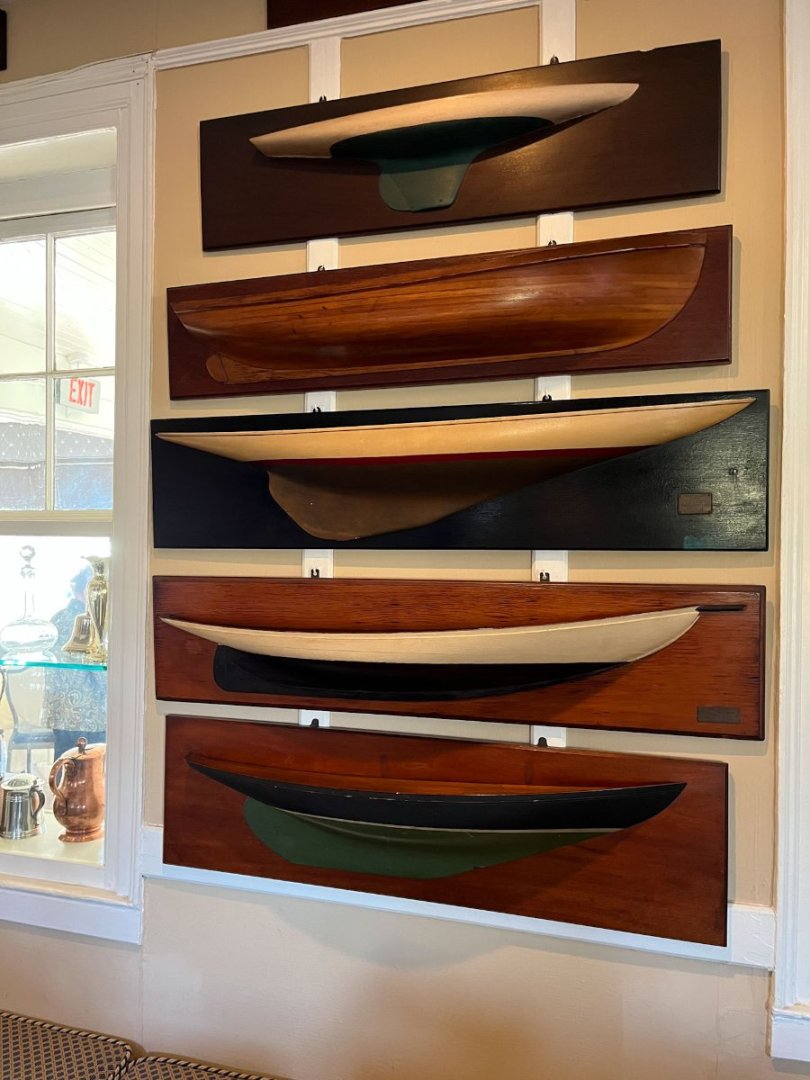
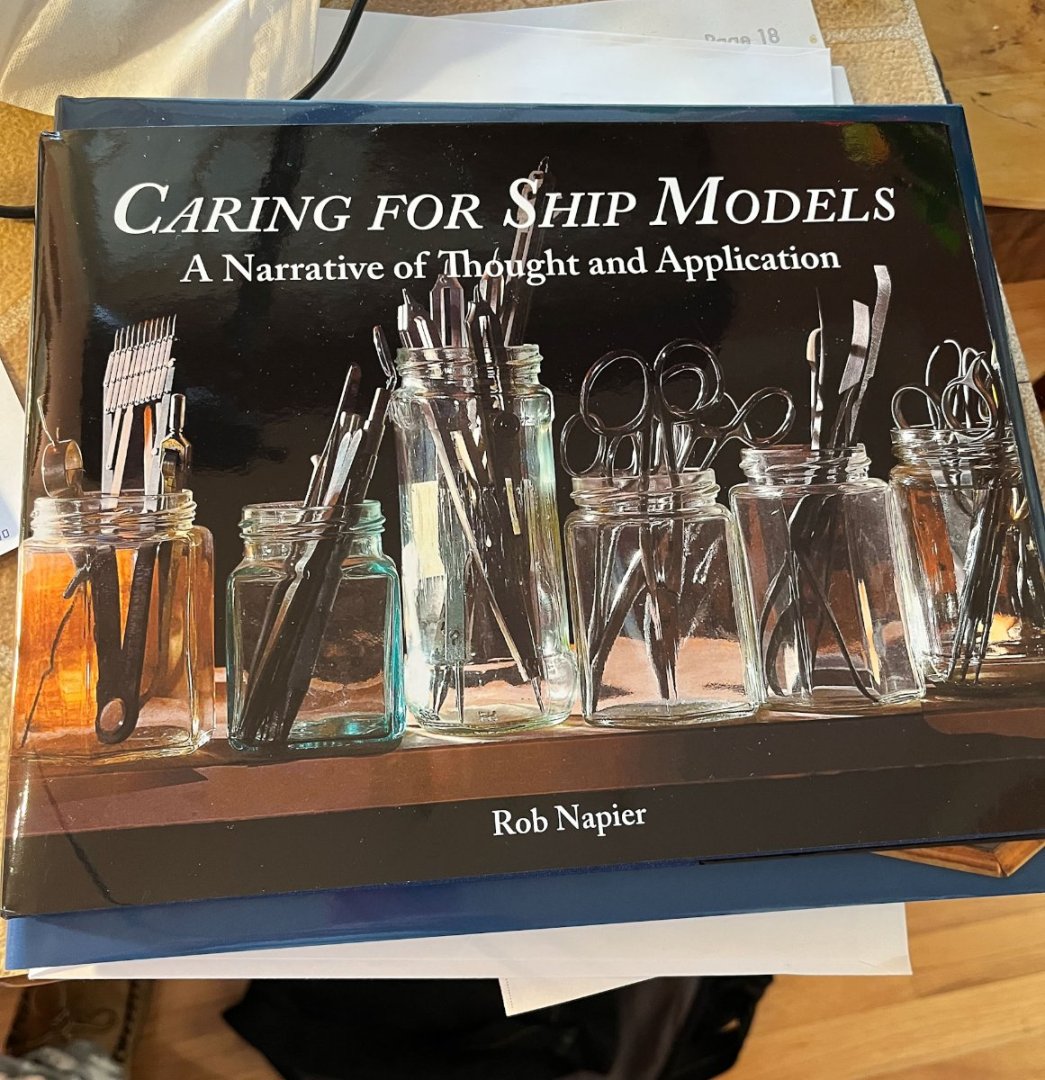
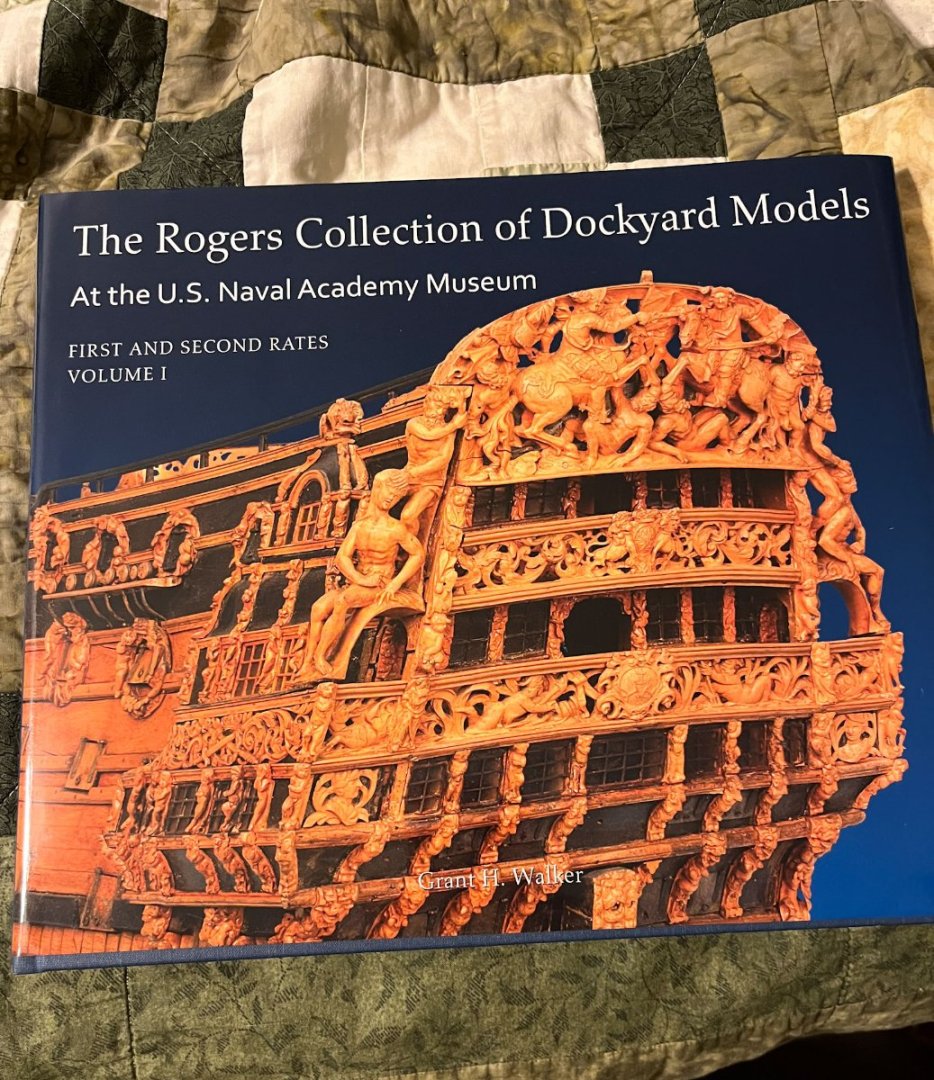
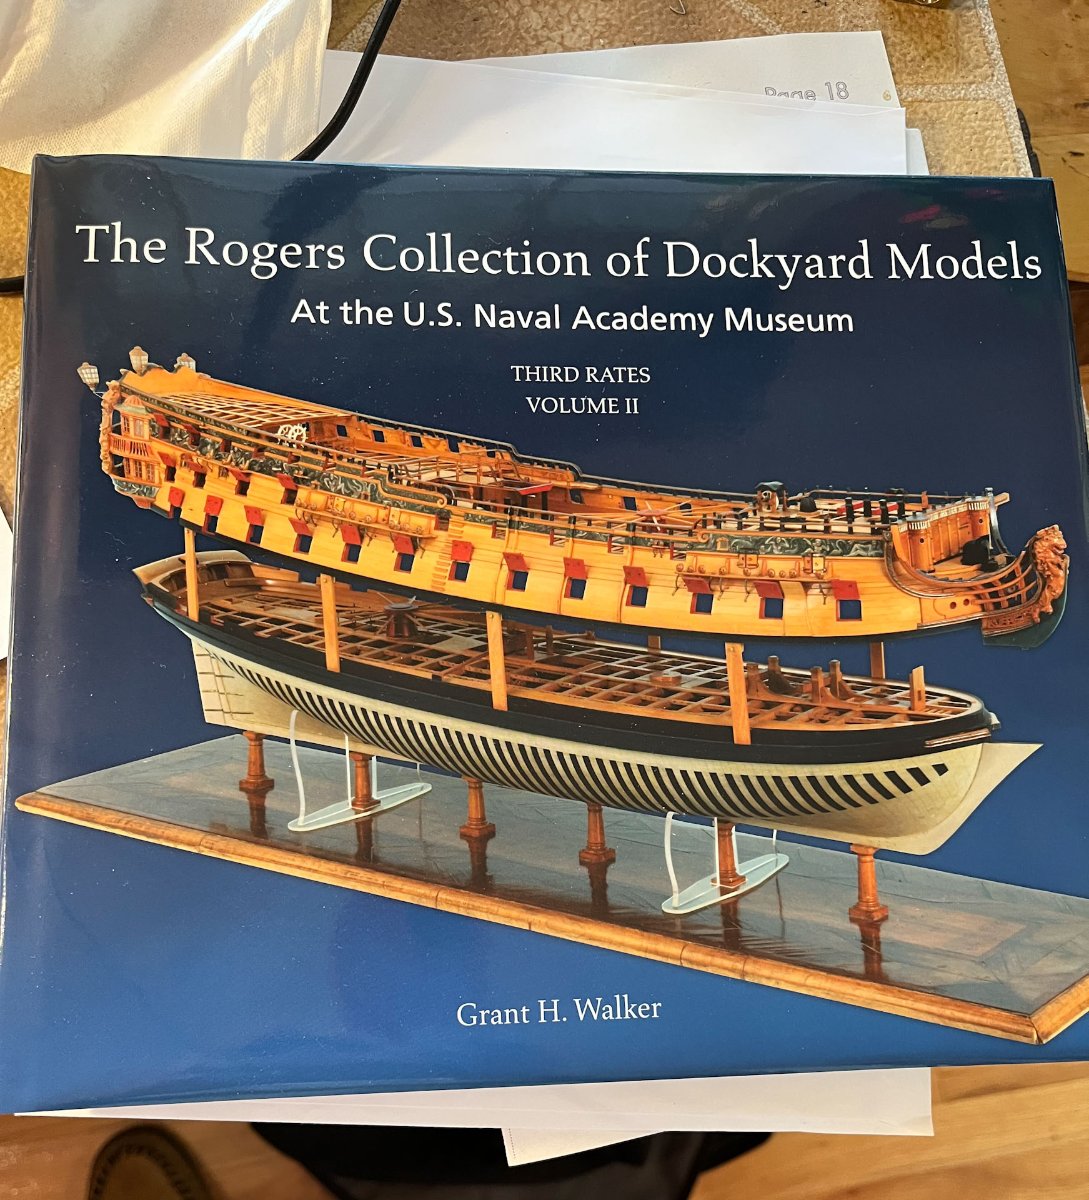
Good Evening Model Shipworlders! The holiday Time Suck has hit full force and I haven't gotten much done. Last weekend I attended a social event for my wife's side of the family (they own, of all things, a tugboat company) at the Corinthian Yacht Club in Philadelphia. There were a lot of really cool half hull models: And in the buffet room the 2 below models. They even had partial outer layers of planking; the top one at each end and the bottom one in the middle. No placards identifying the models, unfortunately. I wondered if they were wooden half hull models of metal ships? On my AVS I finished adding the sheer strakes and cut the gunports with an xacto blade, then various sticks with 220 sandpaper stuck on with double sided tape, and squared the corners with needle files. They are not all the same size or width but its close and I don't think its too noticeable. My past measurement sins have come back to haunt me. The upper inner bulwark planking is supposed to be even with the sheer strake. It almost is. After all the sanding and leveling has been done in preparation for the main rail the port planking is pretty even and about the size it supposed to be. The starboard sheer strake ended up a little fat above the first gunport and the corresponding upper bulwark plank a little thin. Again, no one but me will ever notice. Next step is finishing the poop planking (I assume its the poop, since its above the tiny quarterdeck) and making the main rail. I plan to scarf the main rail like I did the waterways. This joint will really show so no excuses. Currently I am working my way through Grant Walker's Rogers Collection Vol 2. Amazing pictures and a little more relatable than Vol 1 for me as these are models I could, in theory, attempt to build some day. I helped out Santa and ordered some presents for myself- and Rob Napier's new book which I have shown amazing self control and will not start until I'm finished the above Roger's book: and finally a picture of me and family. I don't know where all that white in my beard came from. It sure wasn't there last year. Happy Holidays! till next year cisco


-
Looking good! i solidify my knots with white glue diluted 50/50 with water but this seems to a hotly debated topic. it worked for me on the polyester line that came with the kit even though i had read it might not due to a oil and water type mismatch. to trim lines i used a sharp xacto blade after the glue/water dried. it still left some fuzzies. other posts i saw people using cuticle scissors and castro viejo scissors (sp?).
-
wow. i guess if youre going to do something do it well. thats an amazing diorama
- 542 replies
-
- 2
-
-
- Sphinx
- Vanguard Models
- (and 3 more)
-
Good evening Modelers; A shorter update today. I have been filling in the port inner bulwark planking and the outer sheer strake and cutting the gunports. Of course its never that easy... A few posts ago I decided to extend my fashion pieces so they ended further ventrally than the practicum called for. This made the stern look more like the Model Shipways plan but it altered a lot of downstream items. And it brought up an interesting fact pointed out by Allanyed on Cmm400's build; that the line of the deck did not necessarily follow the line of the exterior planking, and often didn't, and as a result the gunports often did not follow the line of the exterior planking either. Which makes sense but i had never thought about it before. The AVS is designed so the gunports do perfectly fit (without notching planks) into the interior and the exterior planking, I assume because its a beginner built and why make life unnecessarily difficult. Unless you, speaking purely hypothetically, make your fashion piece longer and change the position of the wale and consequently everything above it. To fix this problem I did a couple compromise solutions. I made my gunports a little smaller than the plans, which had them at 3 x 1/8" planks (so 3/8") wide and high. Mine are just a little less than 3 planks high, say 2 and 5/6 planks. And for the sternmost gunport I ended up cutting into the spirkiting strake a little. So my gunports are uneven on the bulwark side but fit nicely between the exterior black and sheer strake. In the picture below you can see the notch in the sternward gunport spirkiting strake. Technically this gunport is a little lower than the other 3 but I think once the cannons are in place no one except me and everyone I point it out to will notice. I don't know if I messed up or the kit has shortcomings (I assume it was me) but I also had to add some extra basswood filler planks at the top of the bulwark planking so my sheer strake had enough support. I also got too enthusiastic with my scraper and overthinned my 3/64" thick sheer strake so had to glue another filler strip on the back to pad it out. Luckily the AVS kit comes with some very thin walnut planking which worked great. And speaking of scrapers, in my last post I said I would scrape the exterior planking. Scraping did not work; I ended up using a 220 sanding stick and it went fine. So far no embedded graphite that I can see. Those of you following this build may remember my new Veritas slicing gauge from last post where the factory supplied blade did not work atall. I spent some time changing the single bevel point to a rounded double bevel and it works way way better now. And finally. I bought Vol 1 and 2 of Grant Walker's Roger Collection of Dockyard Models from Dave B and they are great. Lots of closeup shots of insane carvings, some endoscope interior shots, lots of history. Great stuff, highly recommended. And i have Rob Napier's new book on its way. Well time to get ready for Monday. Thanks for reading, have a great night. Cisco


-
supposed to be in the mail on its way to my house. Mr Napier’s last book was amazing so i have high hopes
-
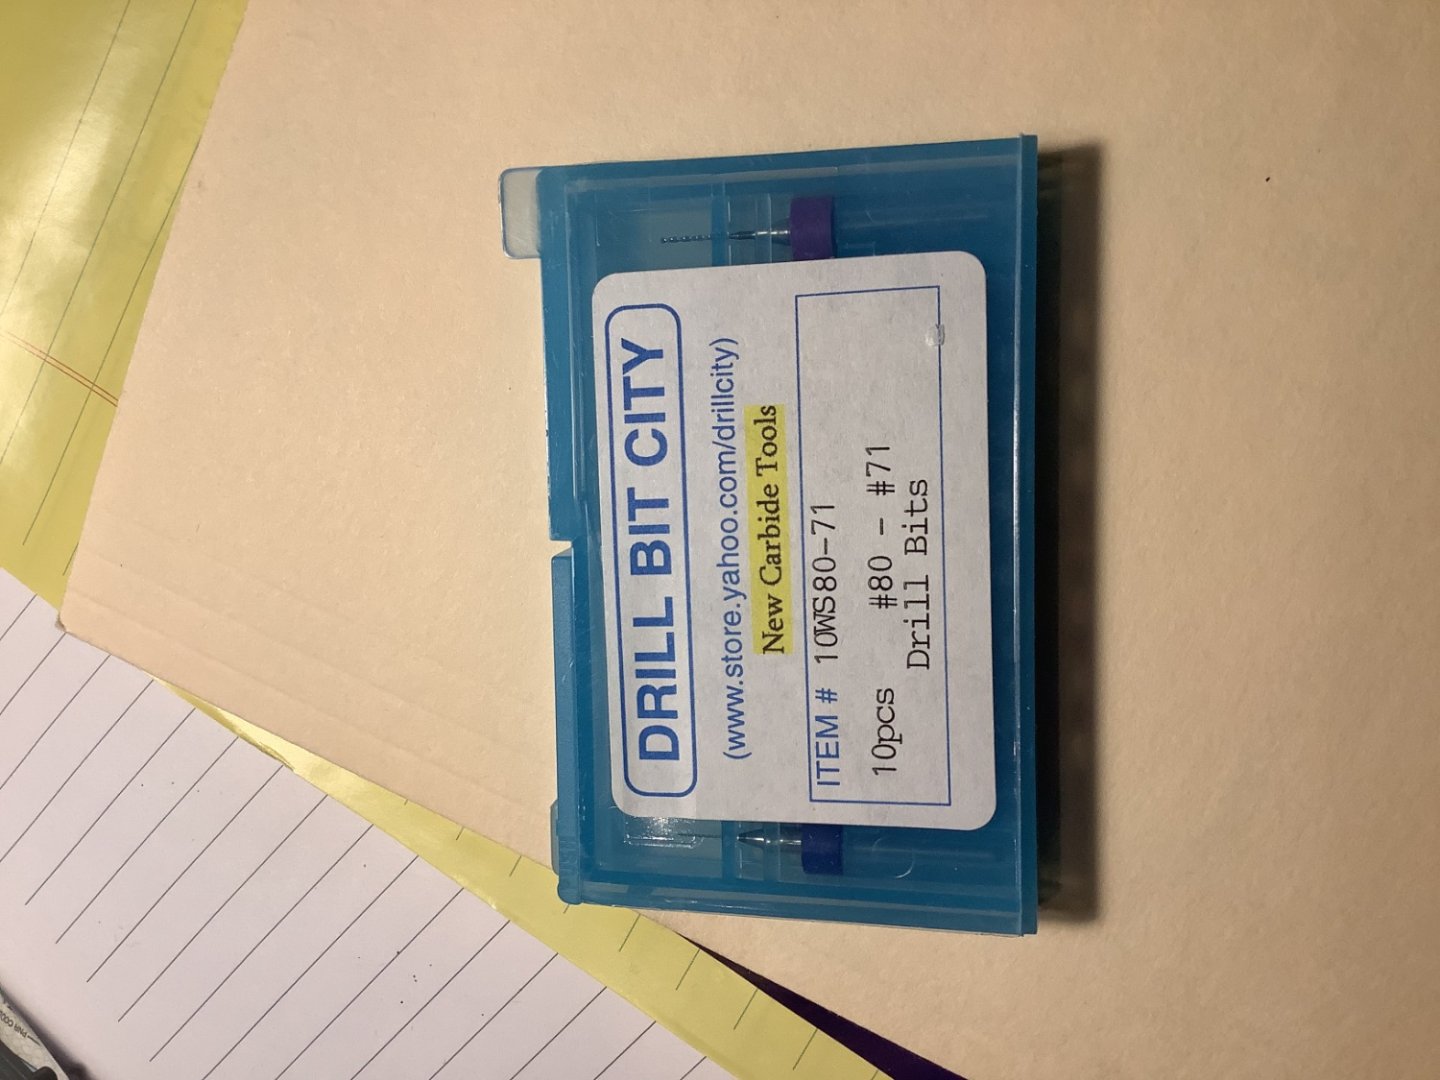
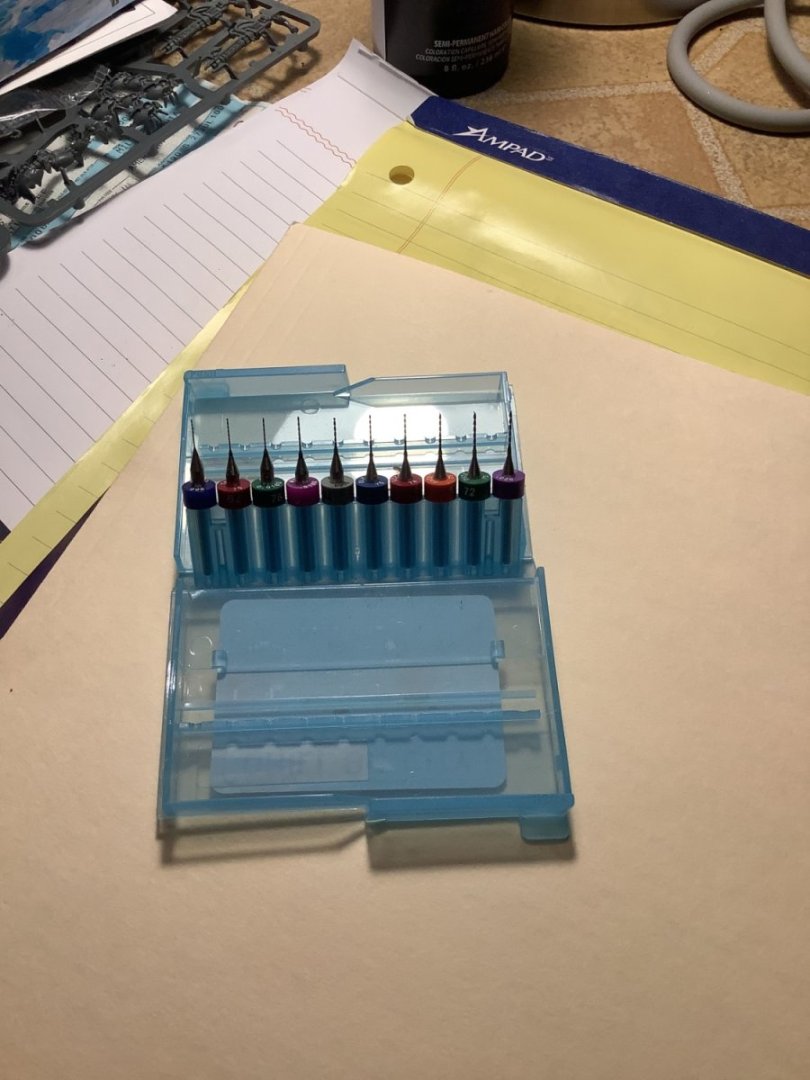
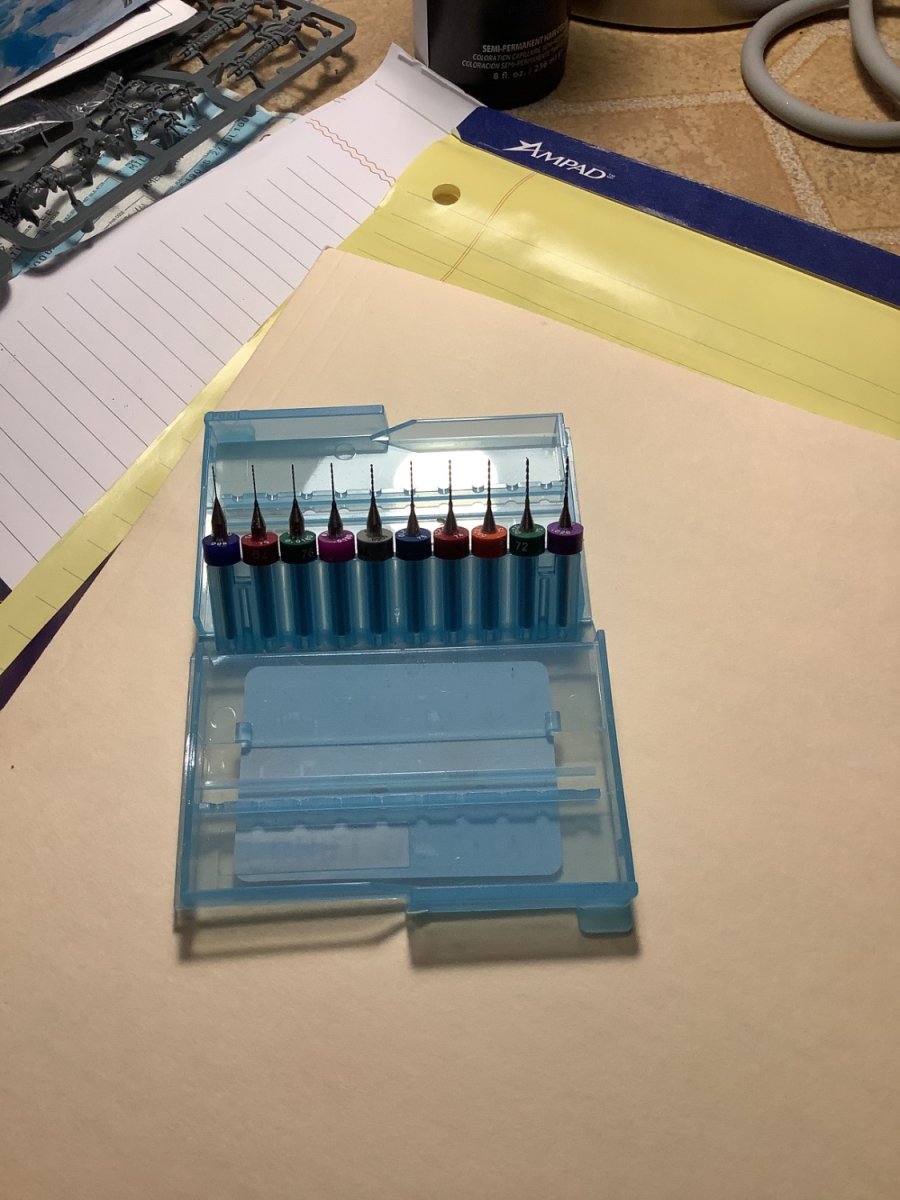
FarmerJohn- as i recall when i built the longboat i had tremendous difficulty drilling a hole through the provided strapping as well. The hardware store drill bits are way too big and nowhere near sharp enough. Eventually i ordered really small drill bits sized #71 - #80 although i dont remember which exact one i used. hope that helps. this was my first shipmodel and i really enjoyed building it Cisco
- 28 replies
-
- 5
-
-
- 18th Century Longboat
- Model Shipways
- (and 2 more)
-
Cmm4000- planking looks great! i agree Chuck Passaro’s planking videos are excellent (in brief he uses the heat from a small travel iron to bend wood. it takes minutes, not days like soaking does). its a great technique which i use in conjunction with water bending. Allanyed- i knew the gun ports followed the deck line, otherwise the cannons would have different height ports. But i didnt know the exterior planking didnt necessarily follow the interior deck line, which sounds obvious when i write it but the thoughts never connected in my brain. Learned something new, thanks for the explanation
-
Derek i know others have already said it but that boxwood hull and masting looks stunning. Beautiful job!
- 345 replies
-
- 1
-

-
- Duchess Of Kingston
- Vanguard Models
- (and 1 more)
-
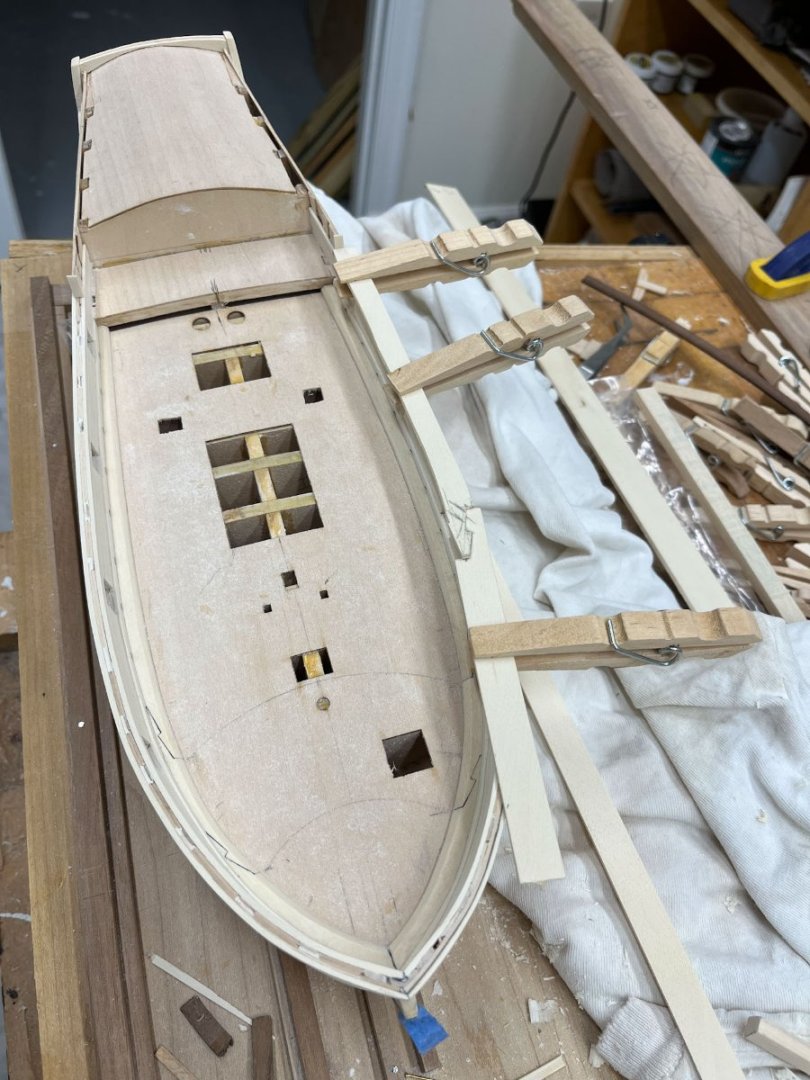
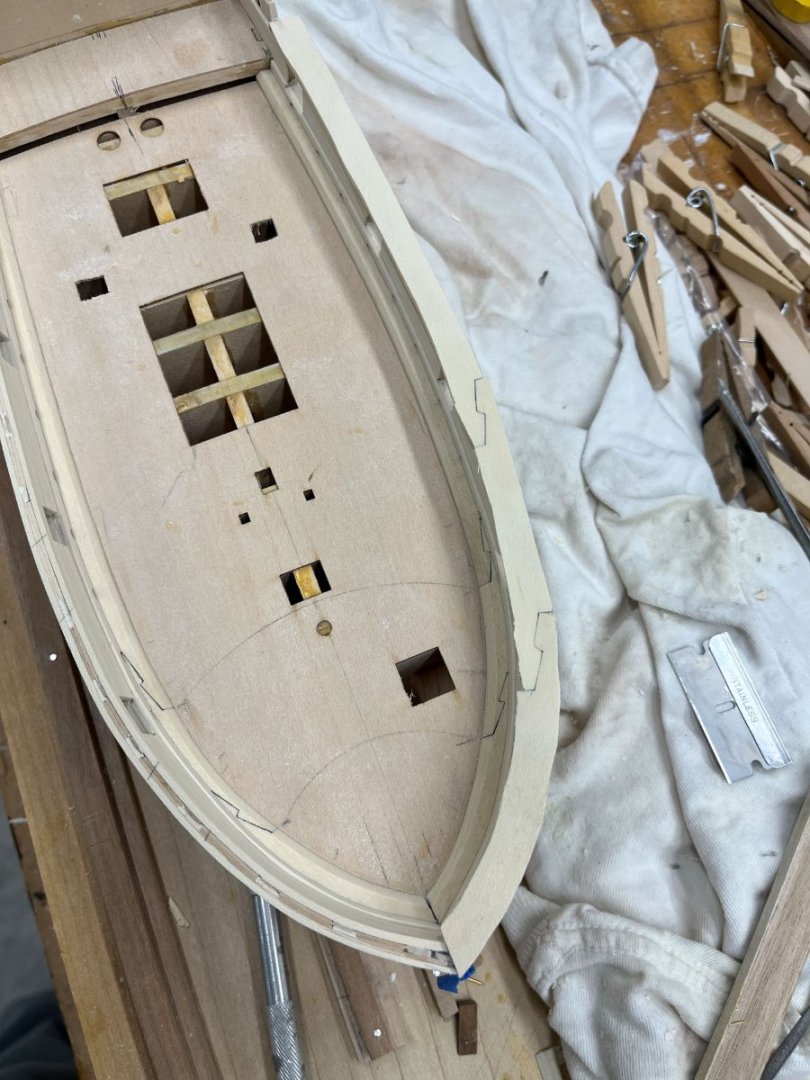
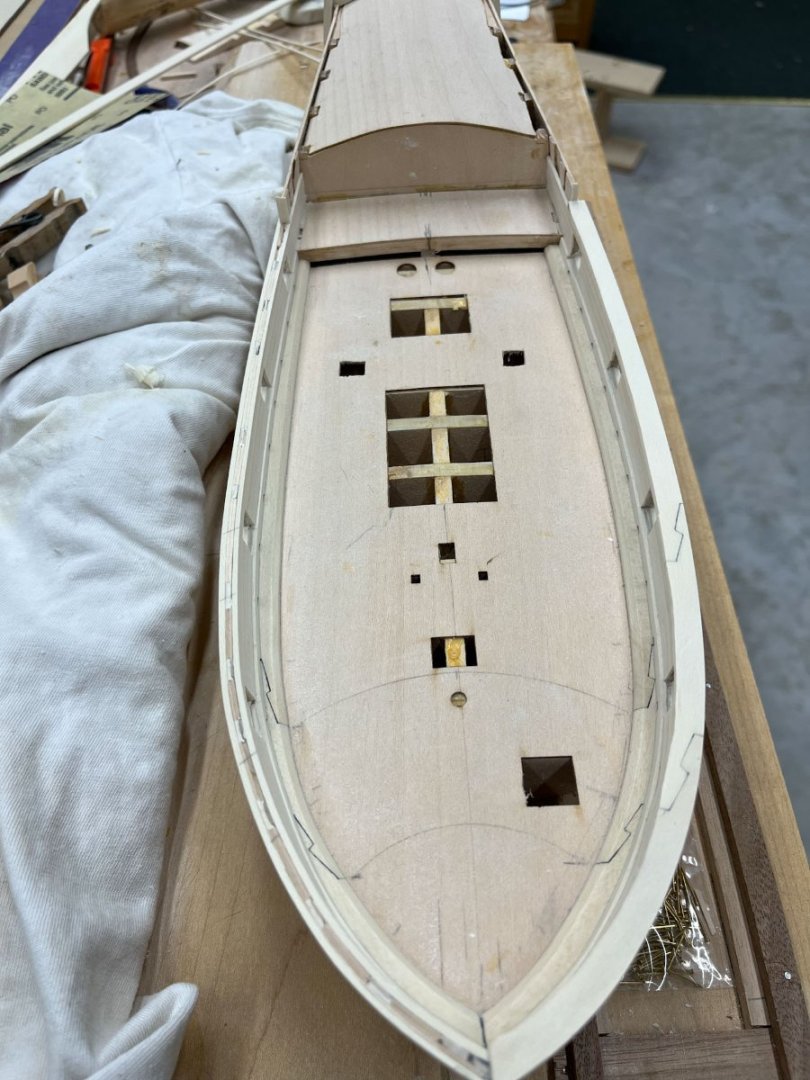
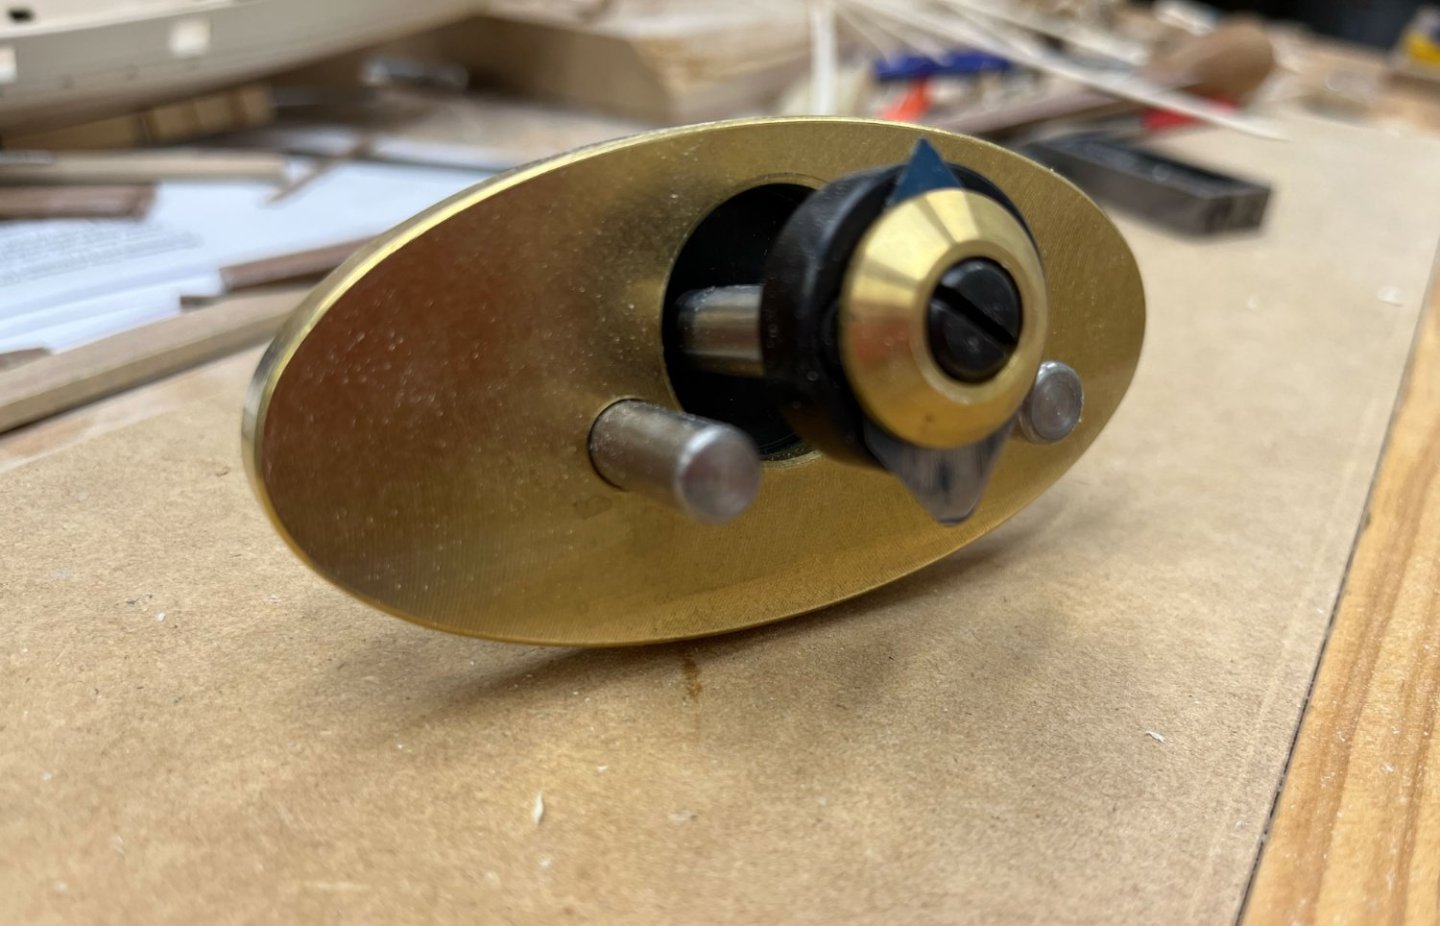
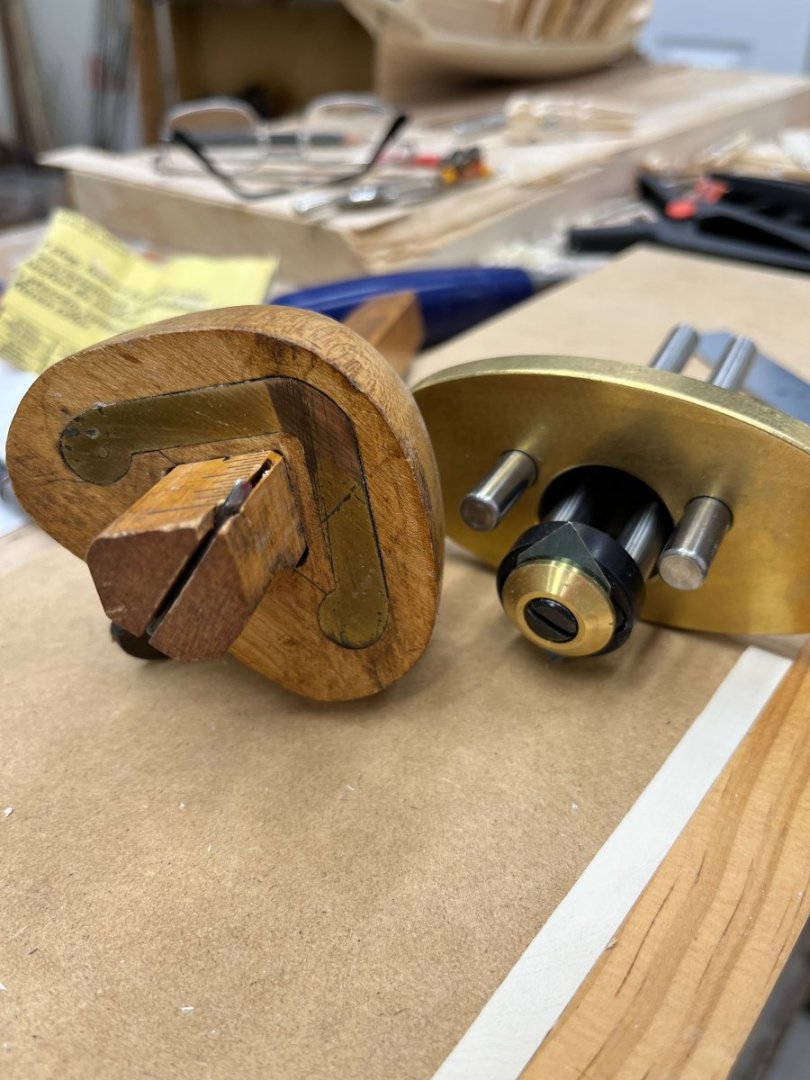
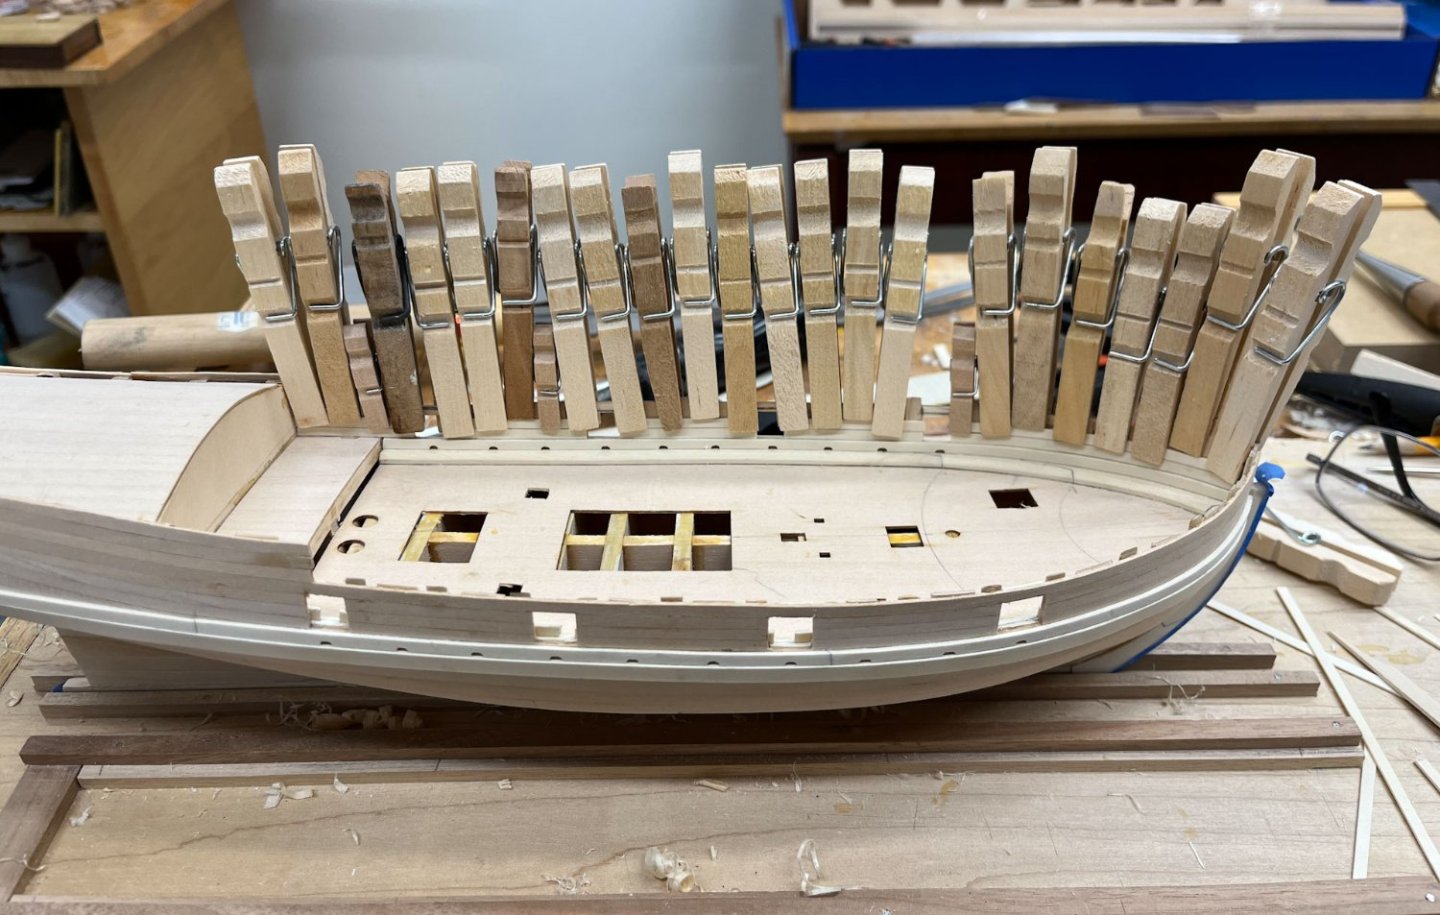
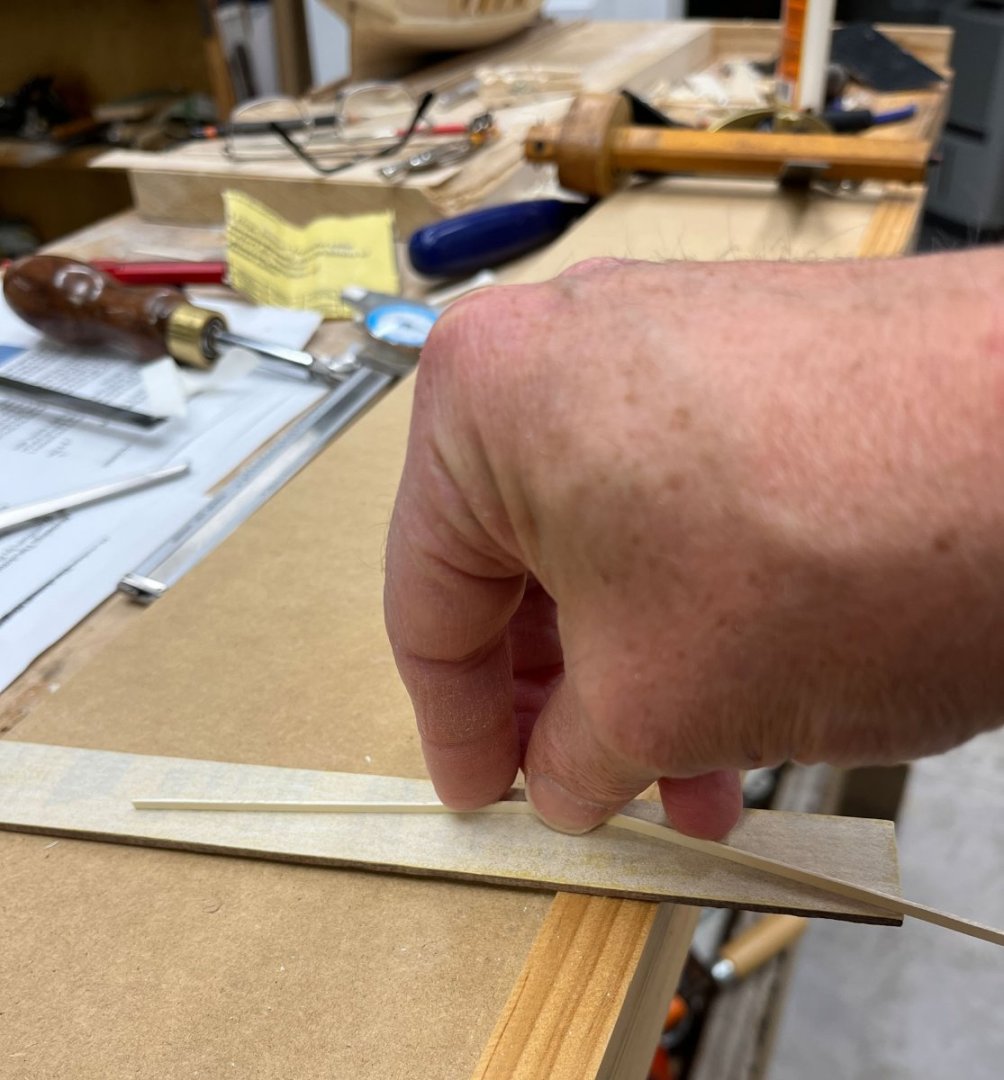
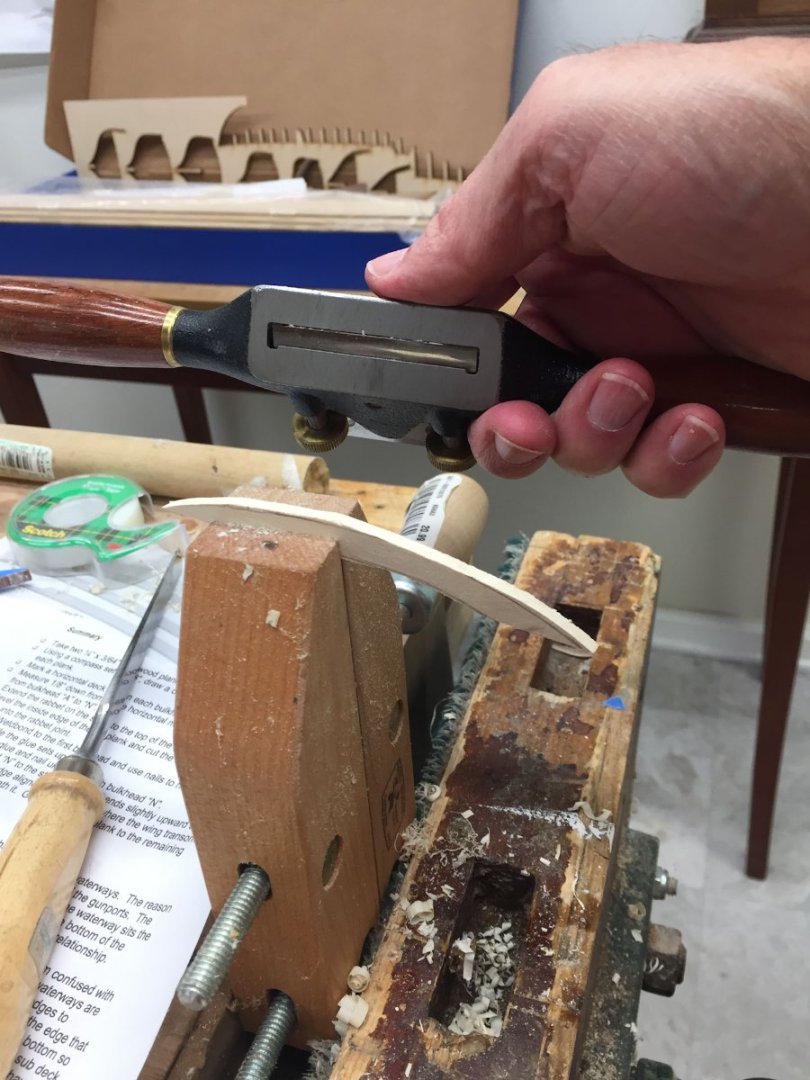
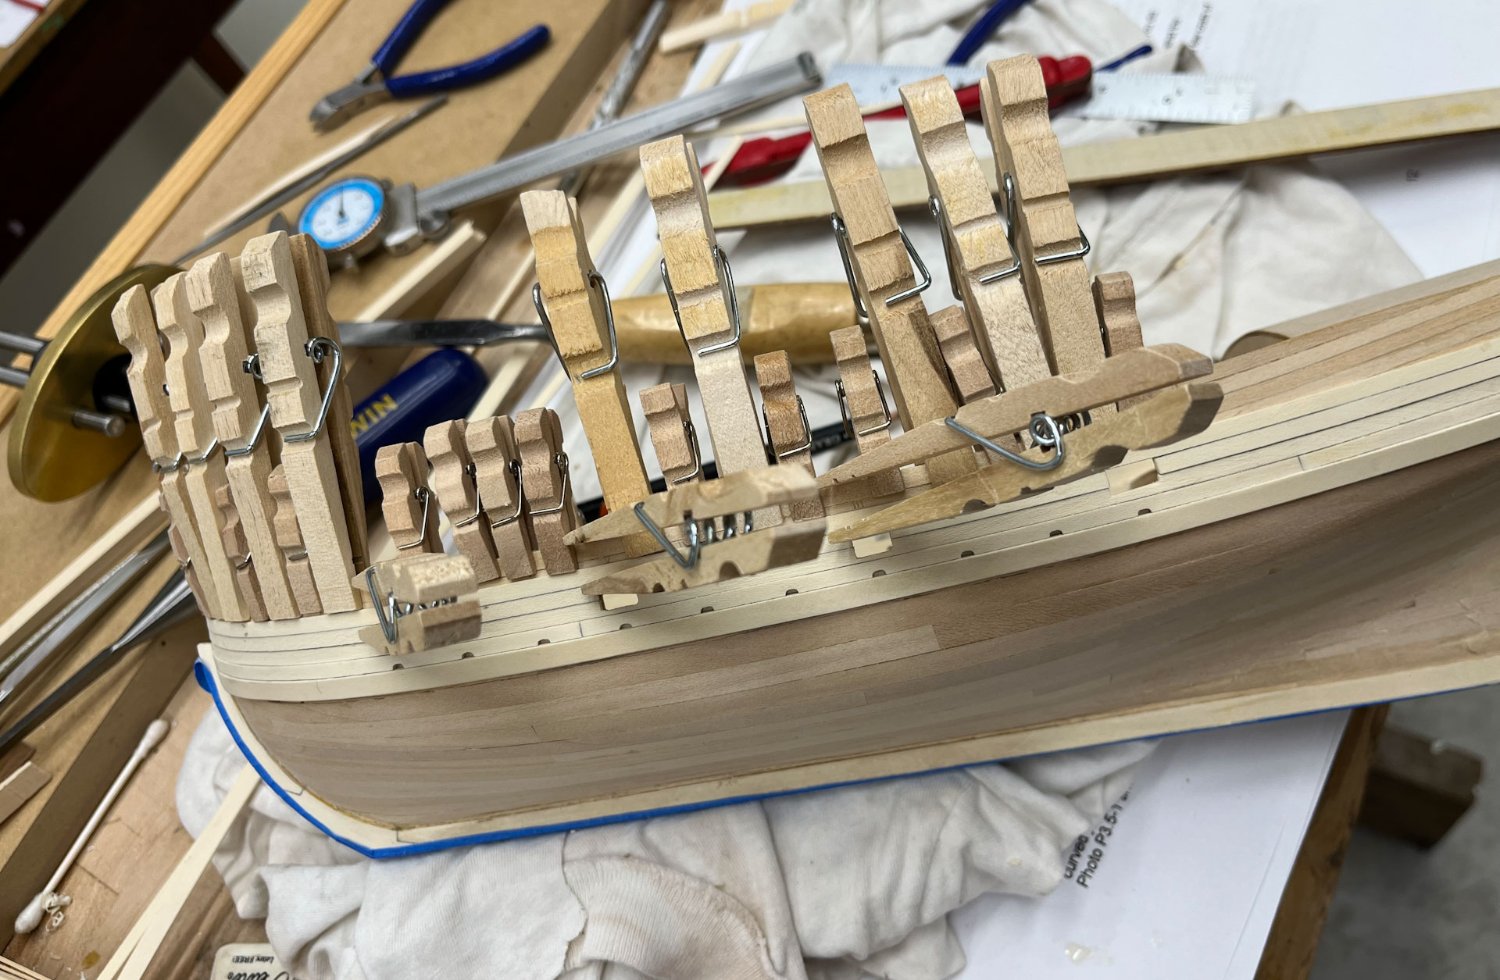
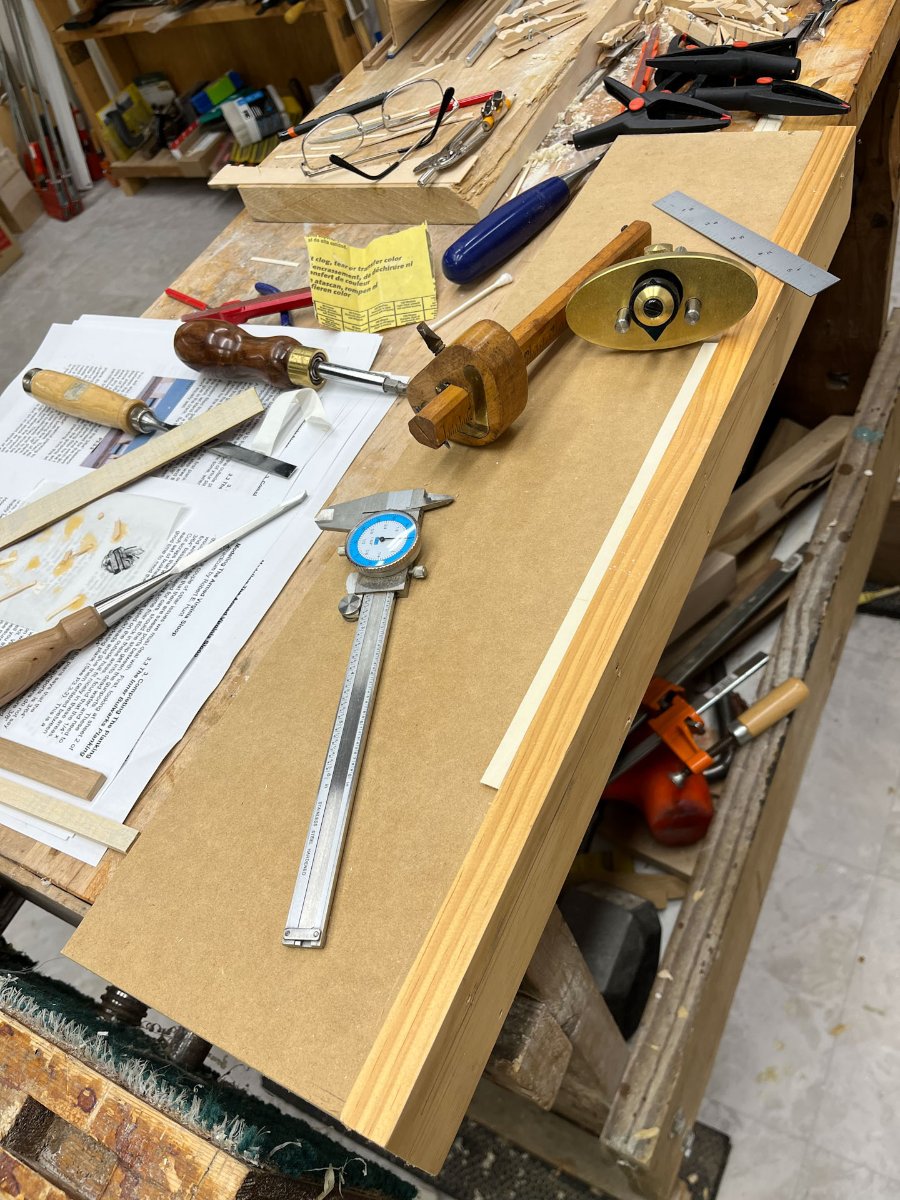
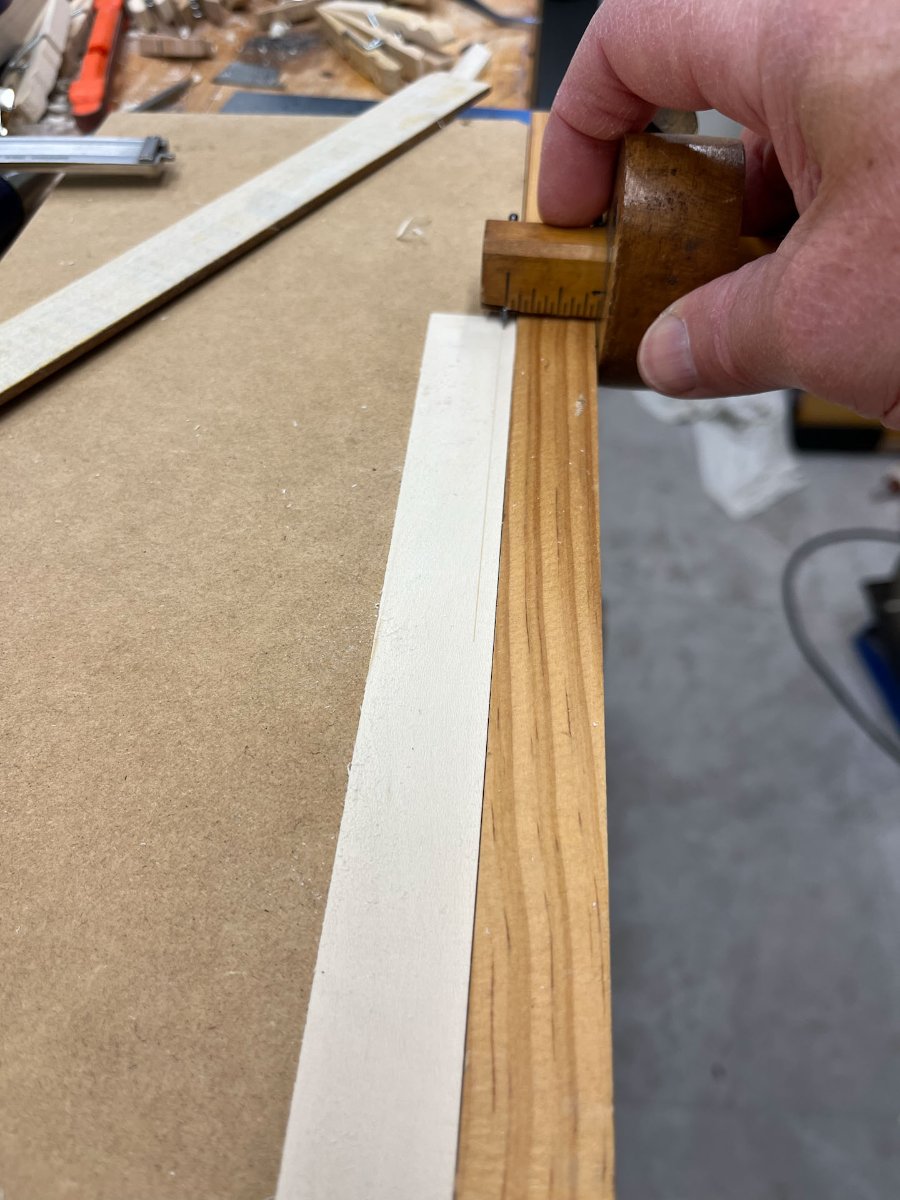
Happy Saturday everyone! It got cold here last week, in the 40s during the day, below freezing at night. And a week ago it was in the 60s. Kids are behaving, wife is listening to a book on tape, time for an update. Thinking about what people post, for me, a complete novice, the best content is a detailed "how I did this." The more detail the better. Thats what I've been focusing on showing in my buildlog. I also like hand tools. Along those lines today's post was influenced by the excellent DVD Fundamentals of Inlay by Steve Latta, through Lie Nielsen Toolworks. Mr Latta demos how he creates stringing in whatever sizes he wants with mostly hand tools and i found it very relevant to creating planking if one doesn't have a mini tablesaw or thickness sander. Presently I am putting on the inner bulwark planking above the spirkiting plank. To create these planks, which are supposed to be 1/8" wide and 2/64" thick I first cut some strips from the holly stock on my bandsaw about 3/64" thick. I then brought it down to thickness with a scraper held a little sideways to bridge any waviness from the bandsaw blade. Then I had to cut the strip into pieces 1/8" wide which I did on my newly constructed cutting board, copied directly from Steve Latta's video. Its very basic; a 3/4" MDF board nailed a piece of scrap wood in a T shape. The top of the T sticks up about 1/16" to provide a lip to push the stock against. To cut the stock I had been using my Stanley marking gauge with a nail as a cutter filed into a half round blade. Recently I purchased a Lee Valley cutter which is a beautiful brass and metal tool. It comes with a triangular blade already sharpened. It looks impressive and weighty and made me feel more like a pro. I tried both. Short story shorter the Lee Valley blade mostly tore out the holly so I have to sharpen it and probably make it more of a round vs its present diamond shape. Ironic a sharpened nail in a piece of wood works the best. Below I am cutting the stock. Usually I use my left hand to push the stock against the fence but in this shot my left hand was holding the camera. Taking several light passes works best. And here's a bigger pic of the cutting board To square the edges of the strips I tried various jigs and upside down handplanes. Eventually I decided the easiest way was to bend the strips some while sanding, which kept them at a right angle. Then cut the strips to length, relieve the back edges with a 200 sanding stick, rub pencil along the bottom edge, and glue them in place. I am still using white (possibly yellow, it doesnt say) Gorilla Glue. Regular clothes pins work well in this area for clamping. And here she is now, finishing the 3rd layer of bulwarks planking on the starboard side. And here she is at present. Next up is the upper bulwark plank that will form the top of the gunports. Next I plan to scrape the bulwarks even (I met Toni Levine at a class this year and she said with Holly sanding is a great way to spread graphite dust that can't be removed). And thats it for now. Thanks for reading; Cisco


-
Tom- I'm facing a similar issue with the windows in my AVS. The kit supplied window frames are very heavy and i was planning to scratch build mine. How are you making your stiles and rails? It looks to me like you have full-height stiles and are placing short horizontal mullions in between (hope i got those terms right). thanks Cisco
- 341 replies
-
- 2
-
-
- Sophie
- Vanguard Models
- (and 1 more)
-
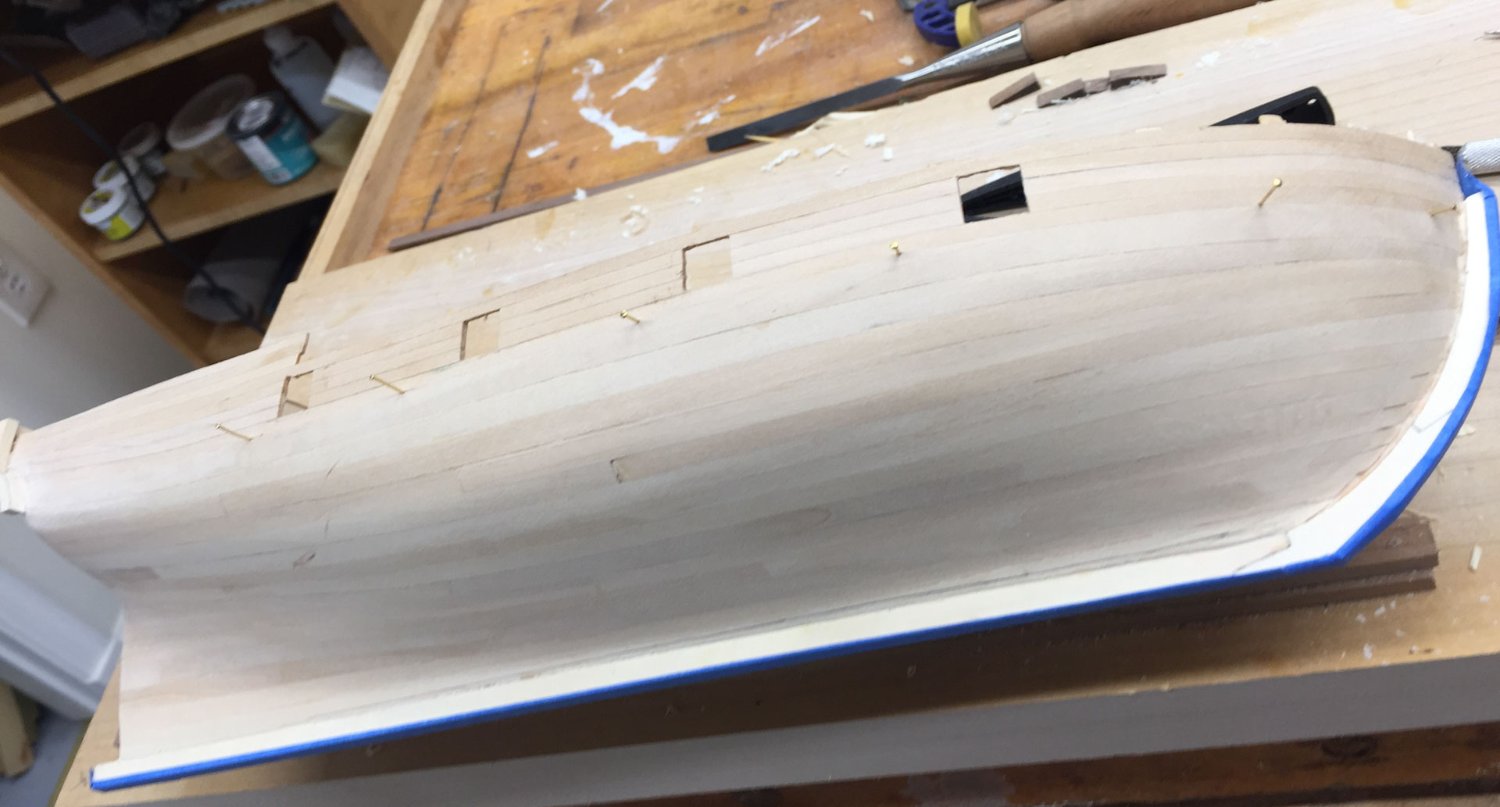
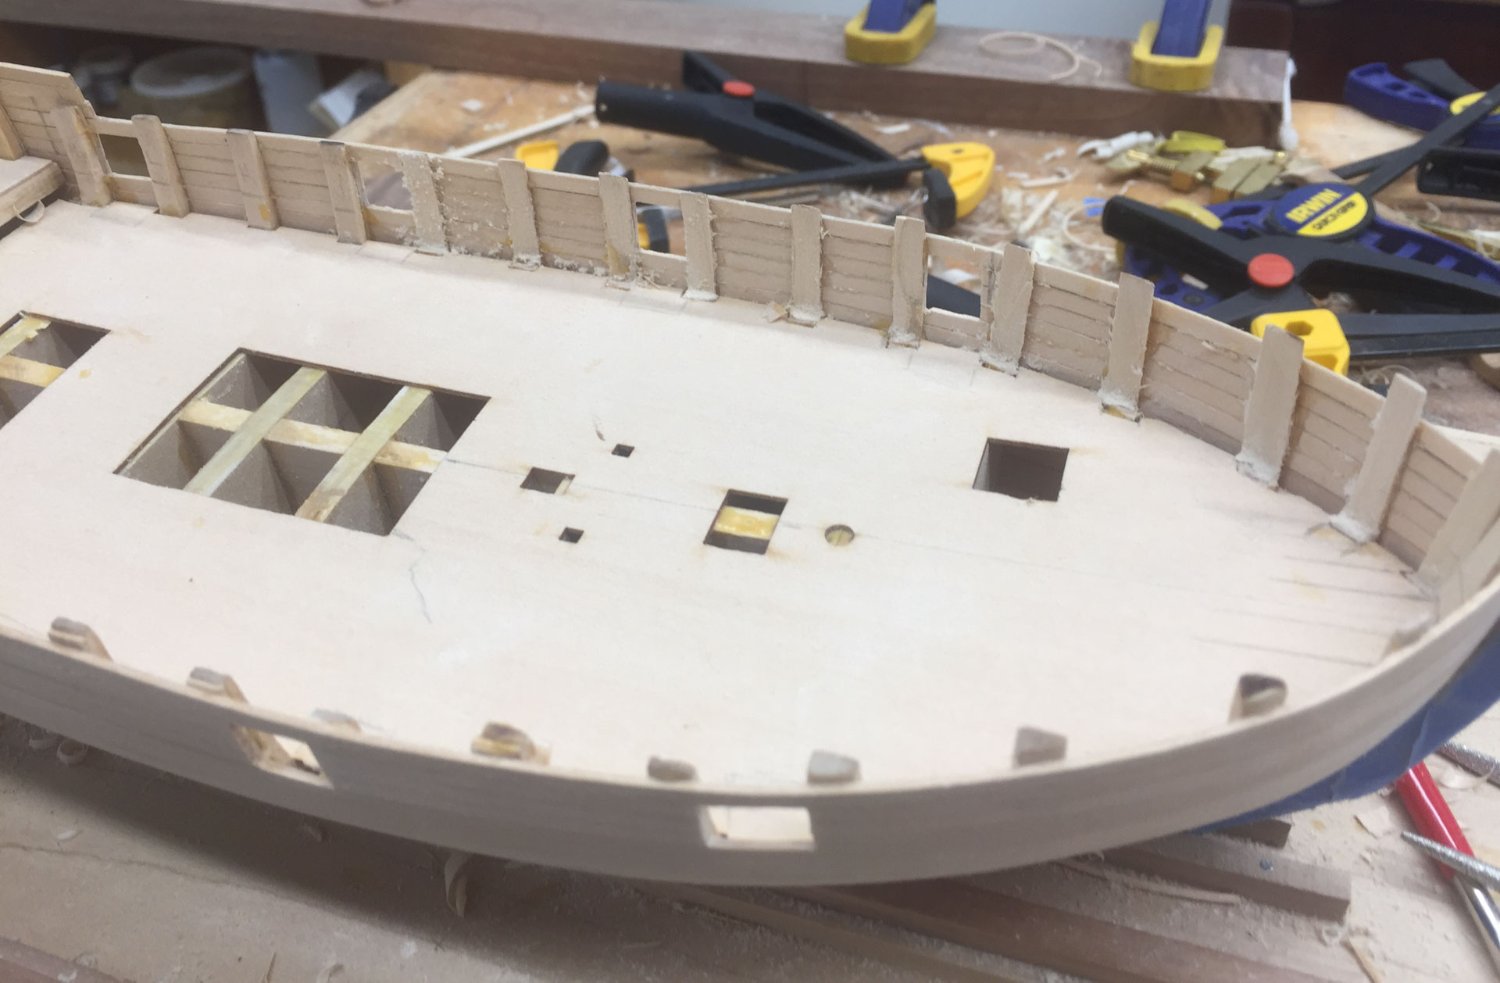
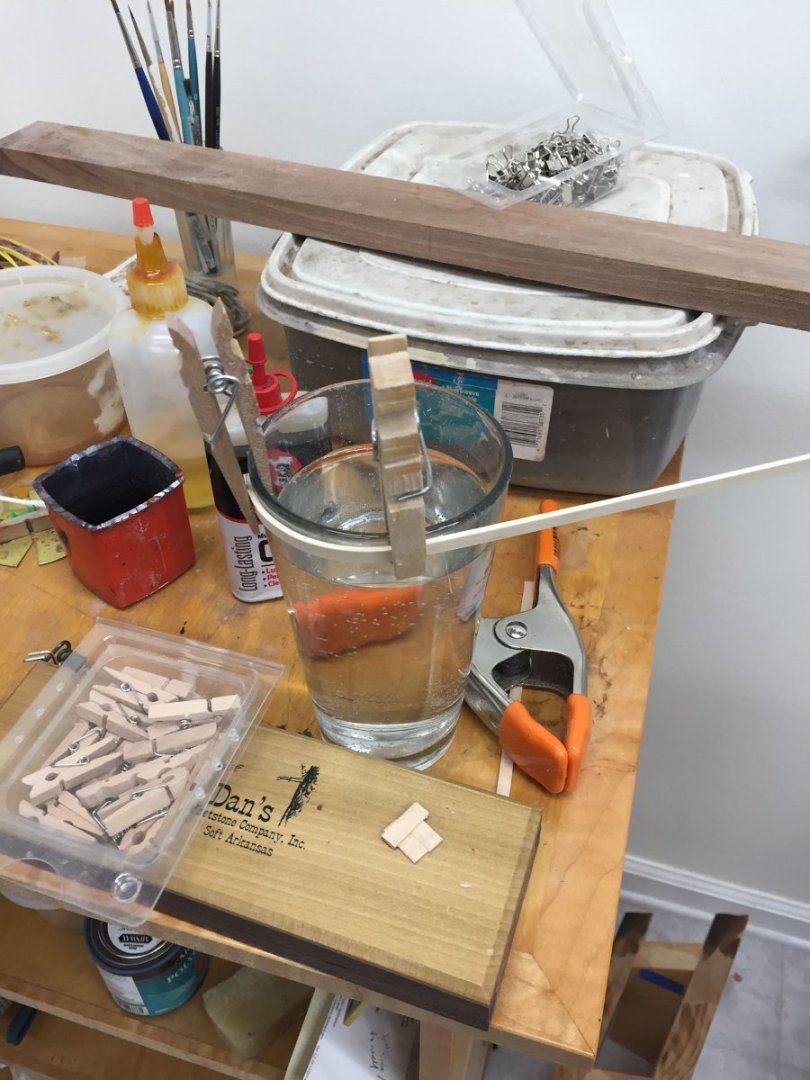
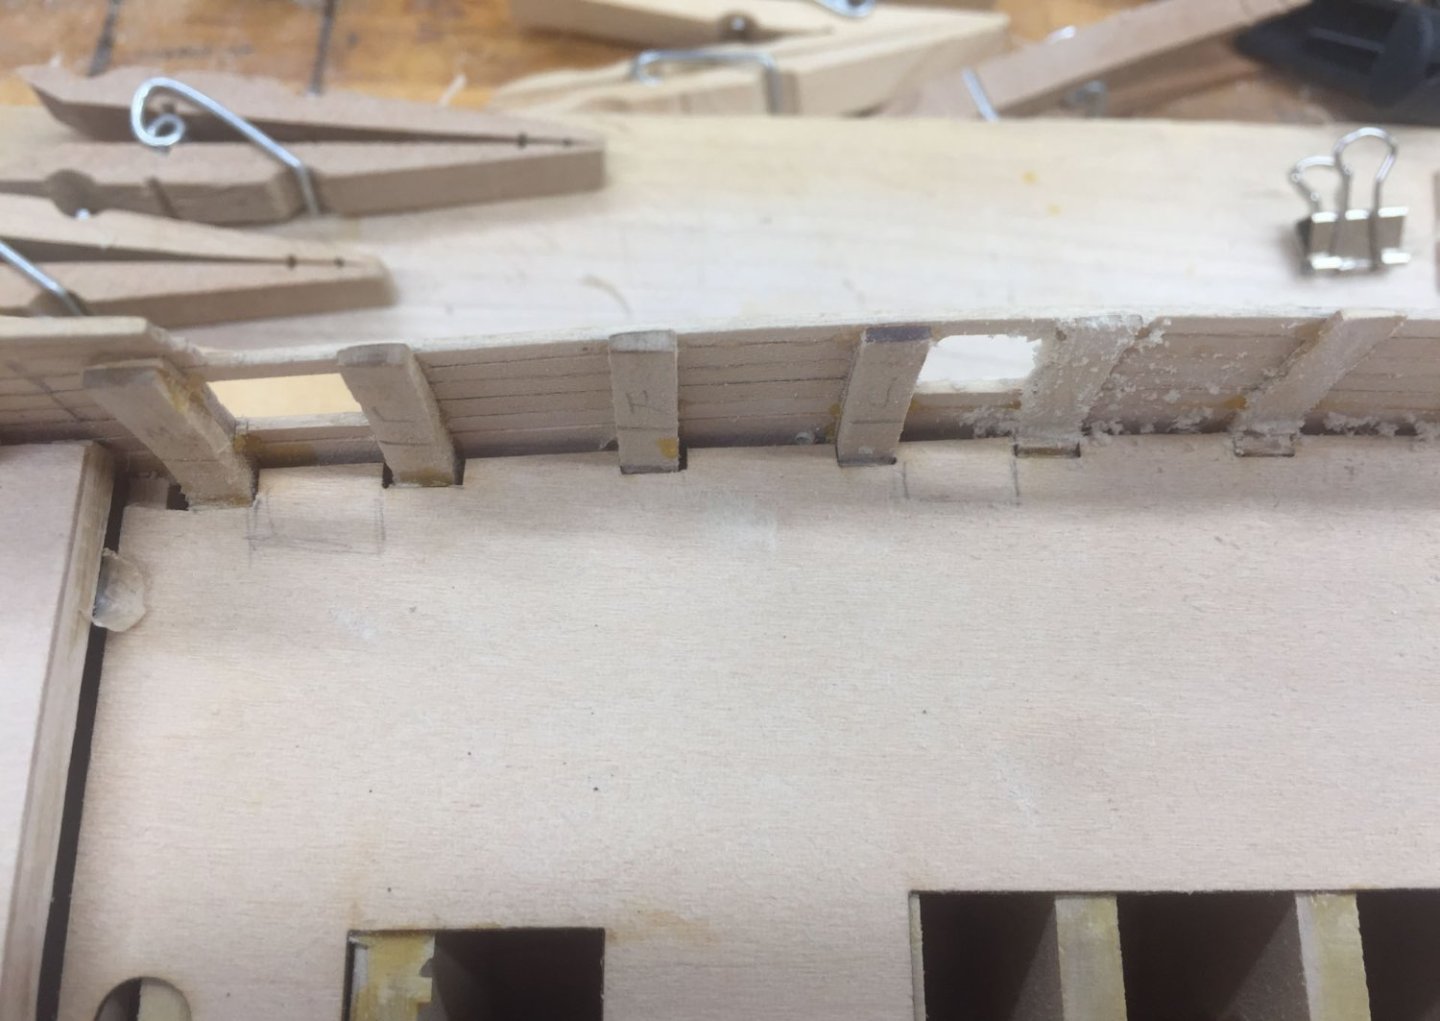
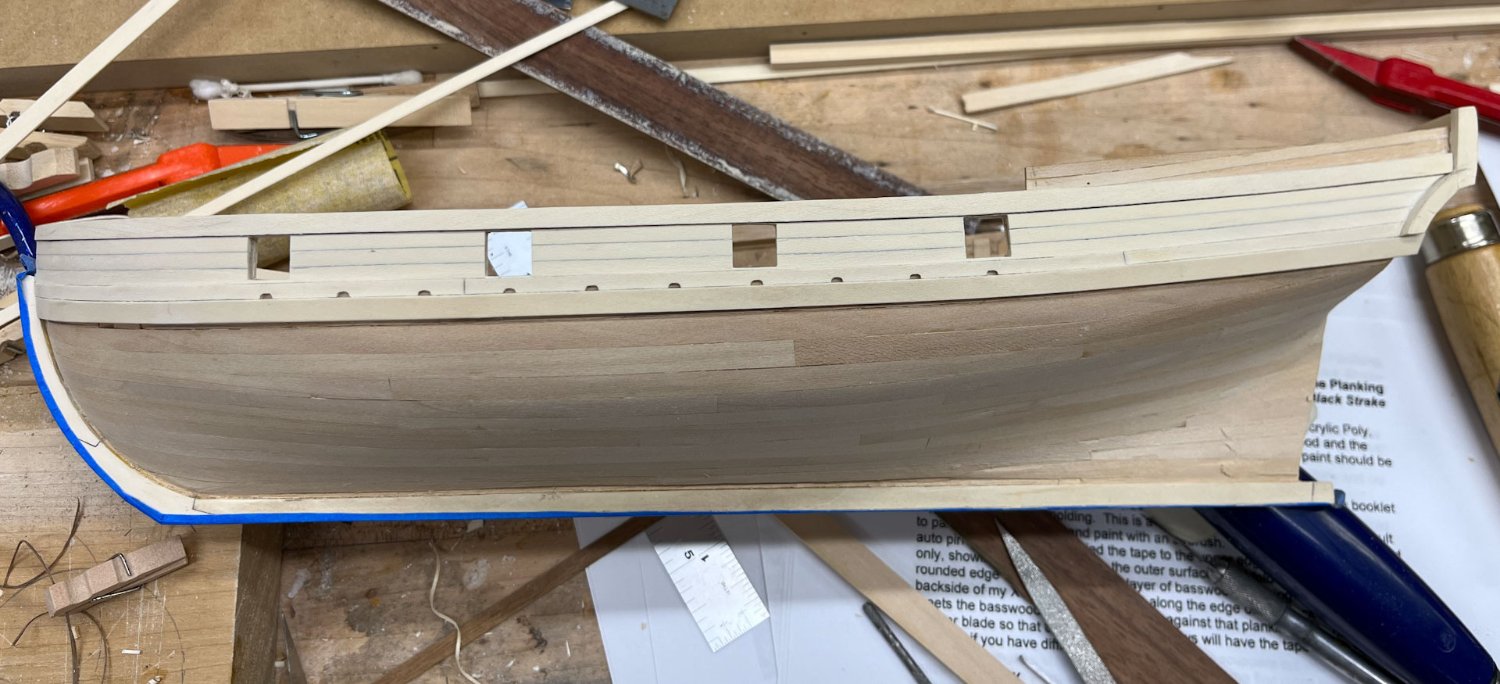
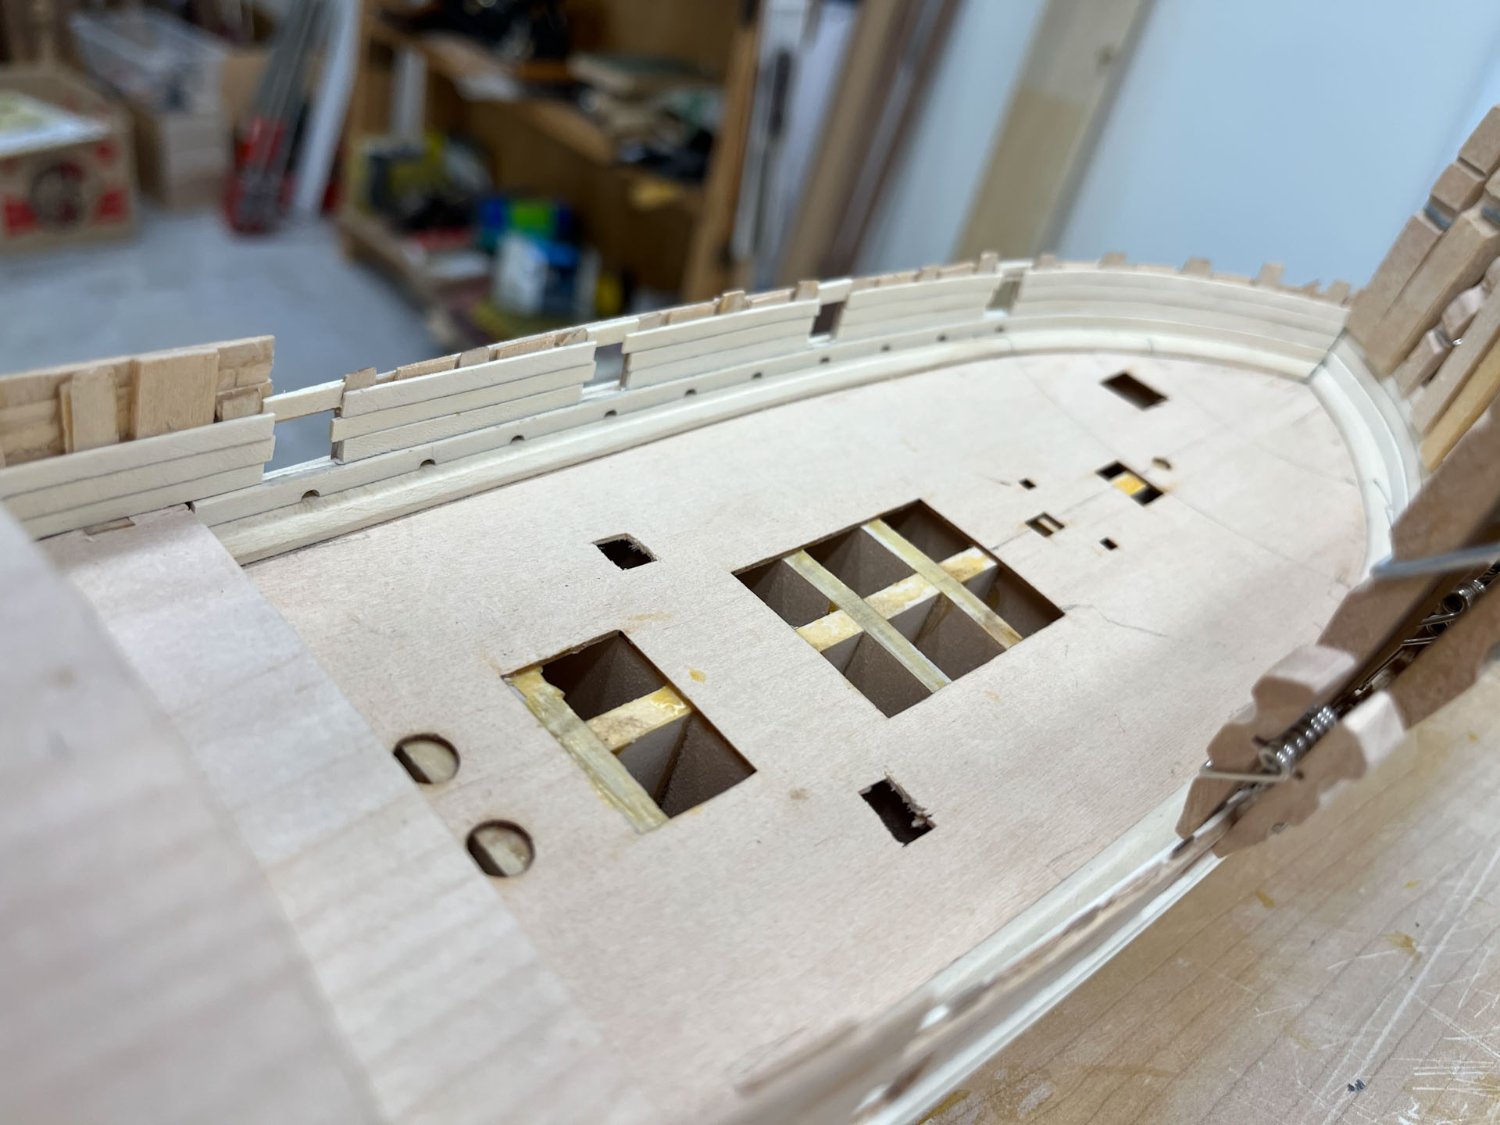
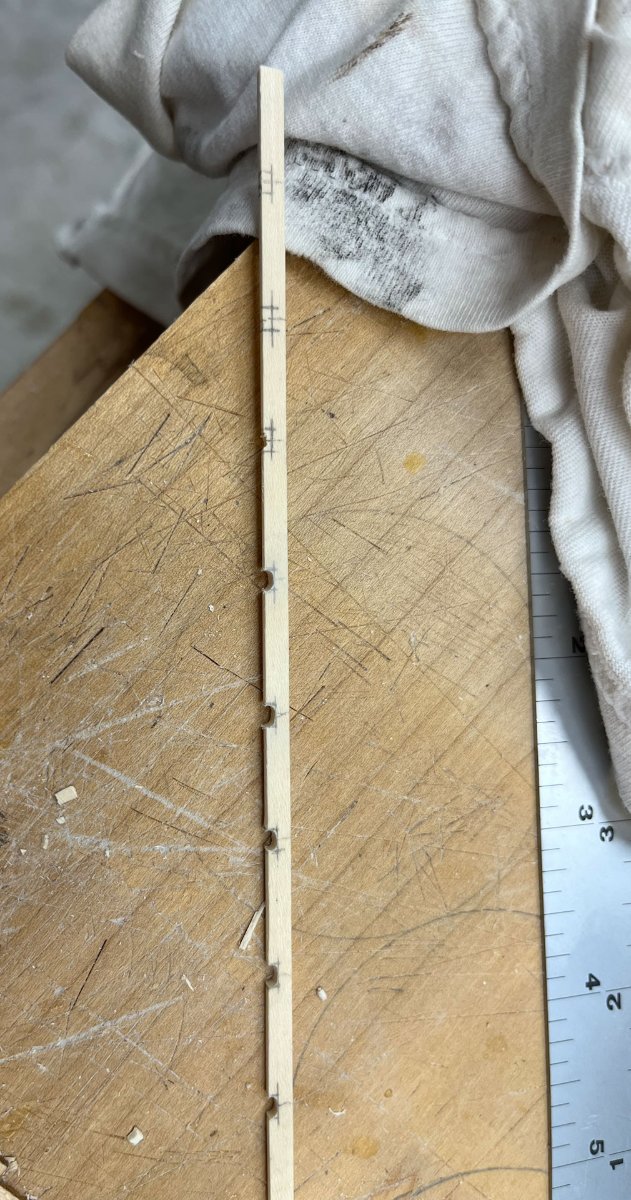
Good Evening fellow MSWers; I finally got a new iphone when the gps stopped working on my old one. The pictures to me seem sharper but I'm struggling with the technology, especially Live Photos which I find creepy. Also, my computer doesn't like downloading these new photo/short video clip files. Technology! Last time I had installed the wales, whose placement determines where everything else goes. So the last 2 weeks has been working on adding the black strake and spirkiting planks, both of which have scuppers cut into them. I quickly decided not to make the scuppers connect through the upper bulwarks; I figured there was no way I would successful line them up and cut connecting holes without scratching up the waterway and wale. The scuppers took a few test tries to get right. The scupper "hole" is a rectangle with rounded edges and you can't form them with square files. So first I wet the stock and bent the sternward end by soaking in water for a few minutes and letting it dry clamped to a round glass. Once I had this plank trimmed to correct length I marked out where each scupper would go, made each one 1/8" wide, eyeballed the height then marked each one using a compass. I then cut out a triangle of wood from the center with my chisel and filed to the pencil marks with a round Vallorbe 140mm file. These files were recommended in a thread a while ago and are worth every penny- they cut beautifully and are very precise. Sorry the above picture isn't perfectly in focus. Right after I said this new camera took better photos... The finished spirkiting plank looked as thus: The plank was fairly flexible but I still had to do a combination of clamping to the bulkheads and wedges to push it flush with the waterway. I did both spirkiting planks (it was hard to get a perfect joint where the 2 planks met at an angle in the point of the bow). Then on to the black strake, which was surprisingly a lot harder. I first made a single long plank, bow to stern, filed out the requisite scuppers, did a dry run clamping, and sweated over the ends. Since the front of the strake fits into the very shallow bow rabbit and the stern end has to be filed to match the fashion piece curve you have very little leeway getting the length wrong. I thought I had it fitted perfect. Actually, I think I did have it fitted perfect. Then I added glue to the back of the strake and clamped it in place starting from the bow --> sternward. And found the stern end of the strake was now too long. I frantically tried to file the end of the strake a little shorter before it dried, but then I worried I hadn't seated the bow end into the rabbit enough. So I removed the whole plank to do over, scraped off the glue, and when I re-fit it - it was now too short. My guess is the water in the glue was enough to swell the wood and make it temporarily longer. Robert Hunt's AVS practicum recommends adding this strake in sections; per his directions most planking would be a scale 4" to 6" in length. So I followed that advice and split the black strake into 3 pieces. Way better to work with! I made each joint a 45 degree scarf, not that it can be really seen, and edged with pencil for caulking. And I managed to re-use my original plank for 2/3 of it. Front Middle and Stern. This was try #3 but I'm happy with the fashion piece junction. Presently the middle starboard section is drying. I noticed an issue - my last gunport was made to low. The bottom of the gunport should be level with the top of the spirkiting strake; as you can see in this picture the red file handle, which is ontop of the spirkiting plank, shows I messed up measuring somewhere. I'll have to add some planking above the gunport too so it can be shifted upwards. And thats it for tonight. Thanks for reading Cisco

_edited.thumb.jpg.446730e84f6d90d69aea5e6b956d8054.jpg)
_edited.thumb.jpg.2d868da9ee02b18055d437148692ef6f.jpg)
-
Swan-Class Sloop by Stuglo - FINISHED - 1:48
CiscoH replied to stuglo's topic in - Build logs for subjects built 1751 - 1800
That looked insanely complicated. Great job! -
Really great job Abelson looks like a ton of painting. do the instructions recommend installing all the rings in the bulwark planking before finishing the deck planking? it seems like it would be much easier the way you did it, especially trying to drill out the holes below the gunports cisco
-
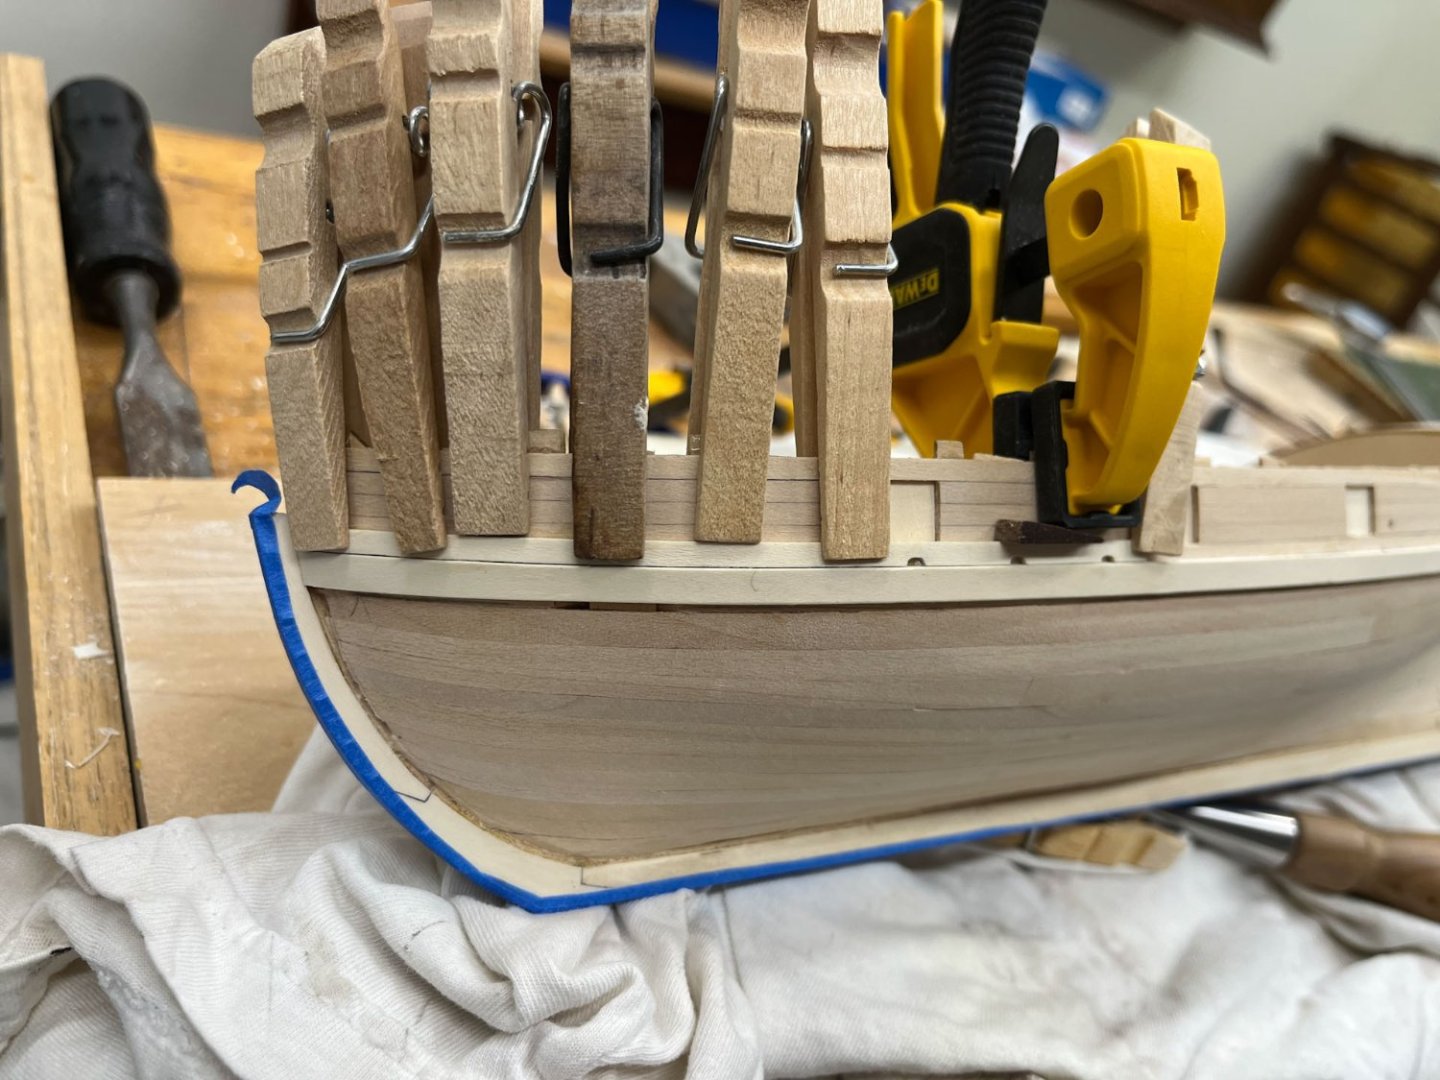
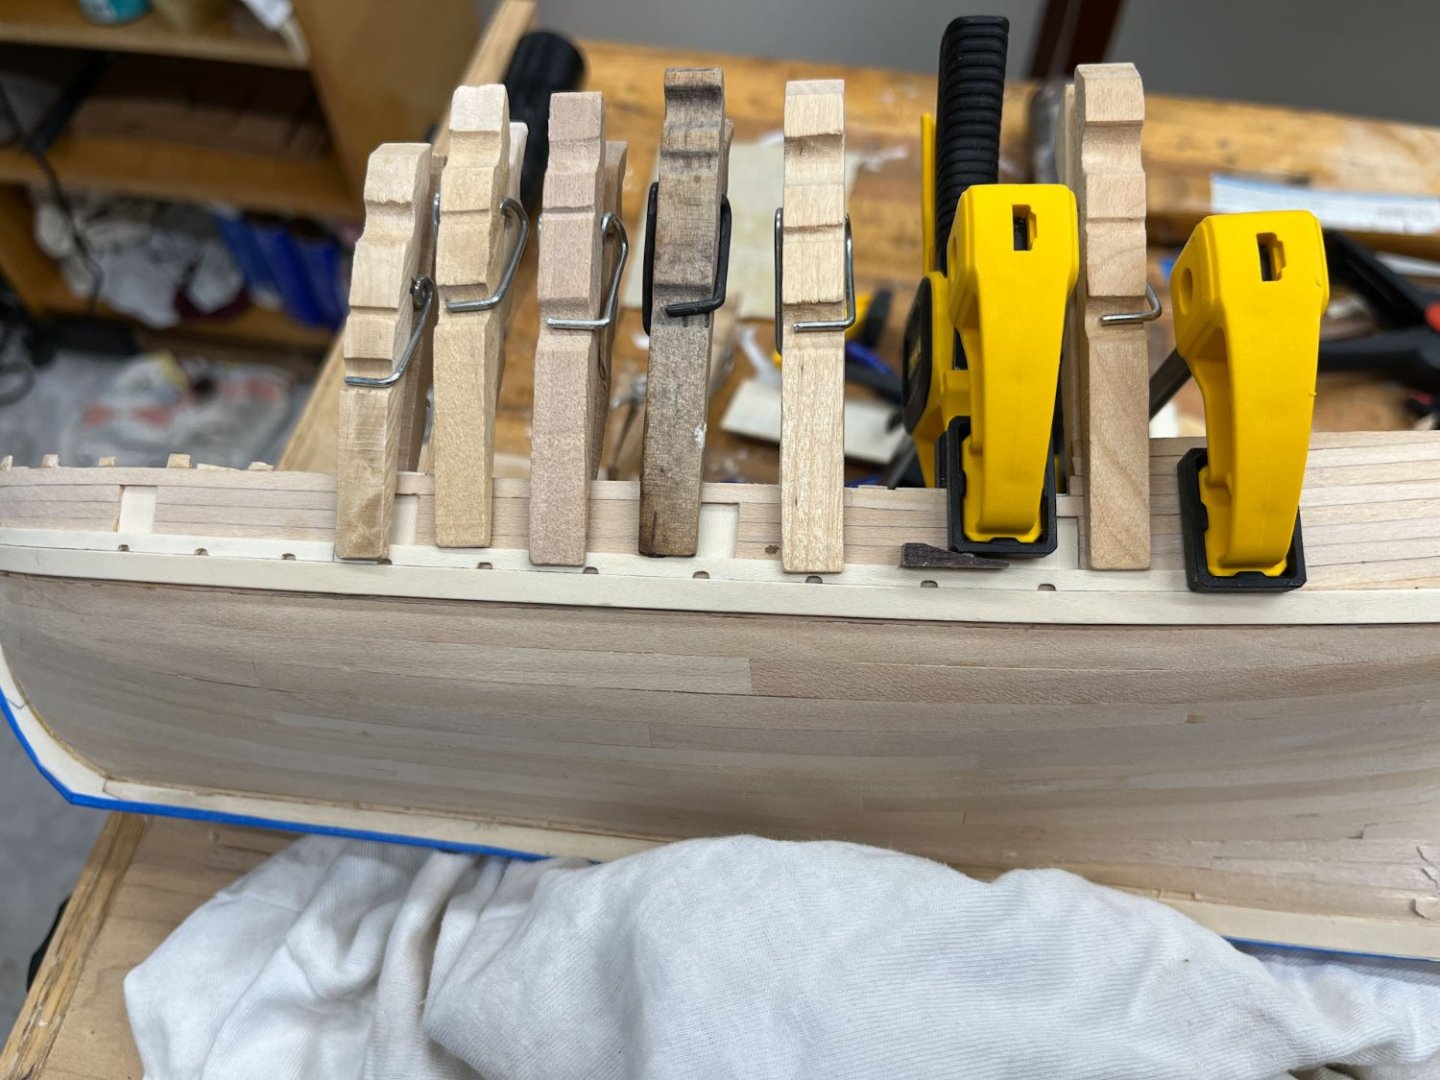
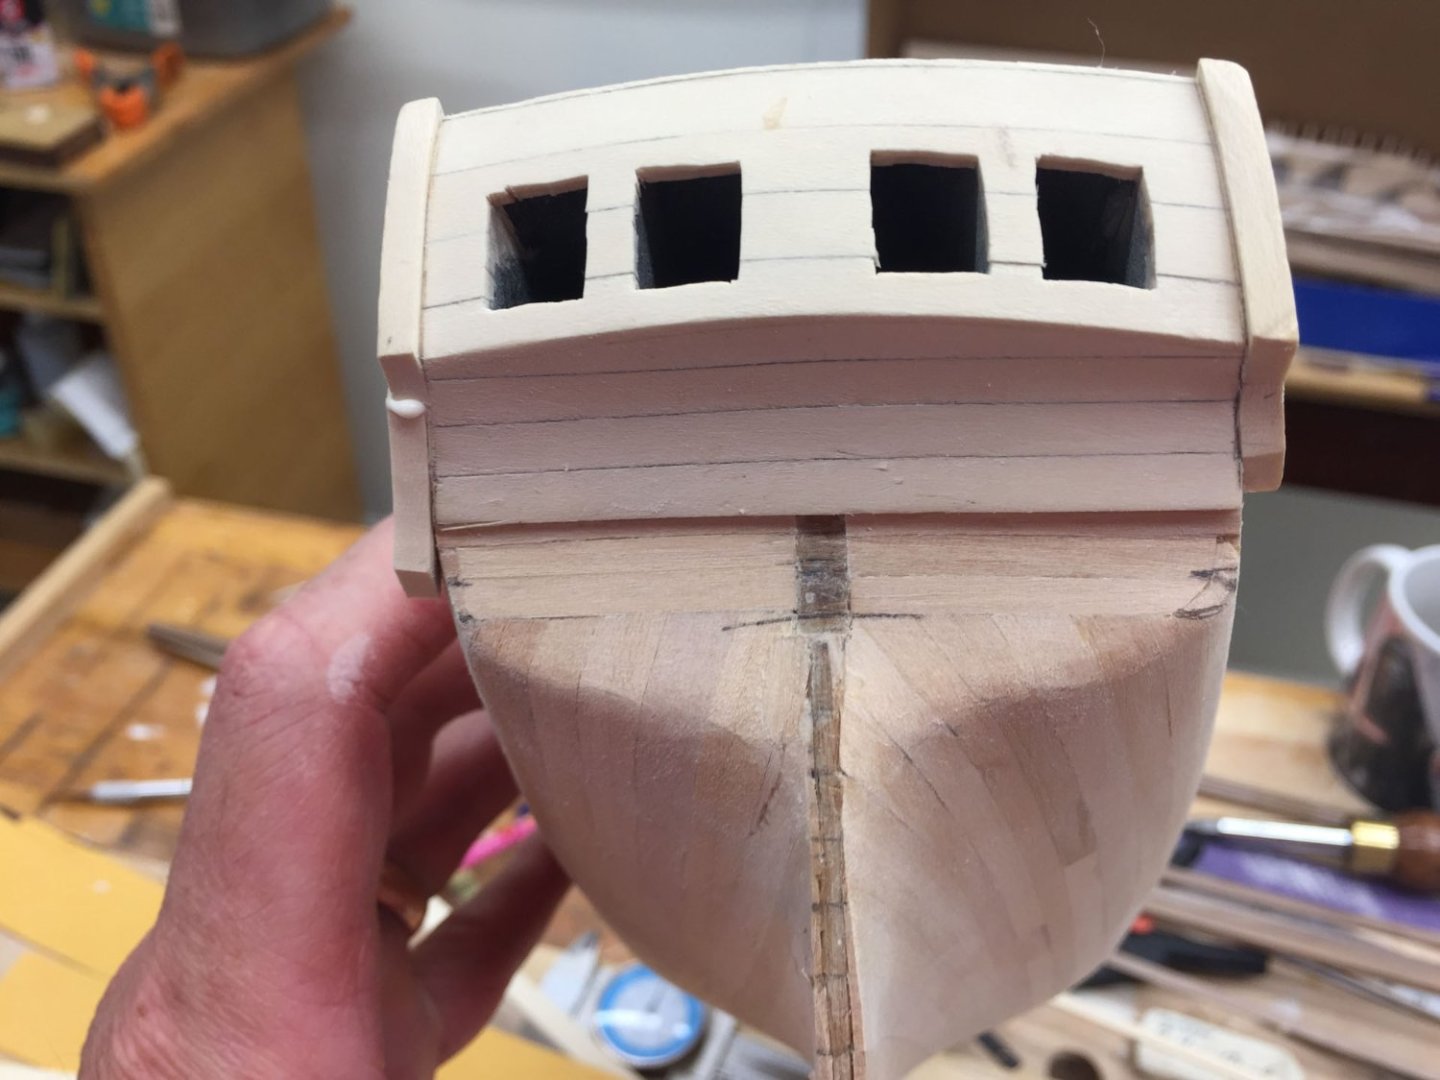
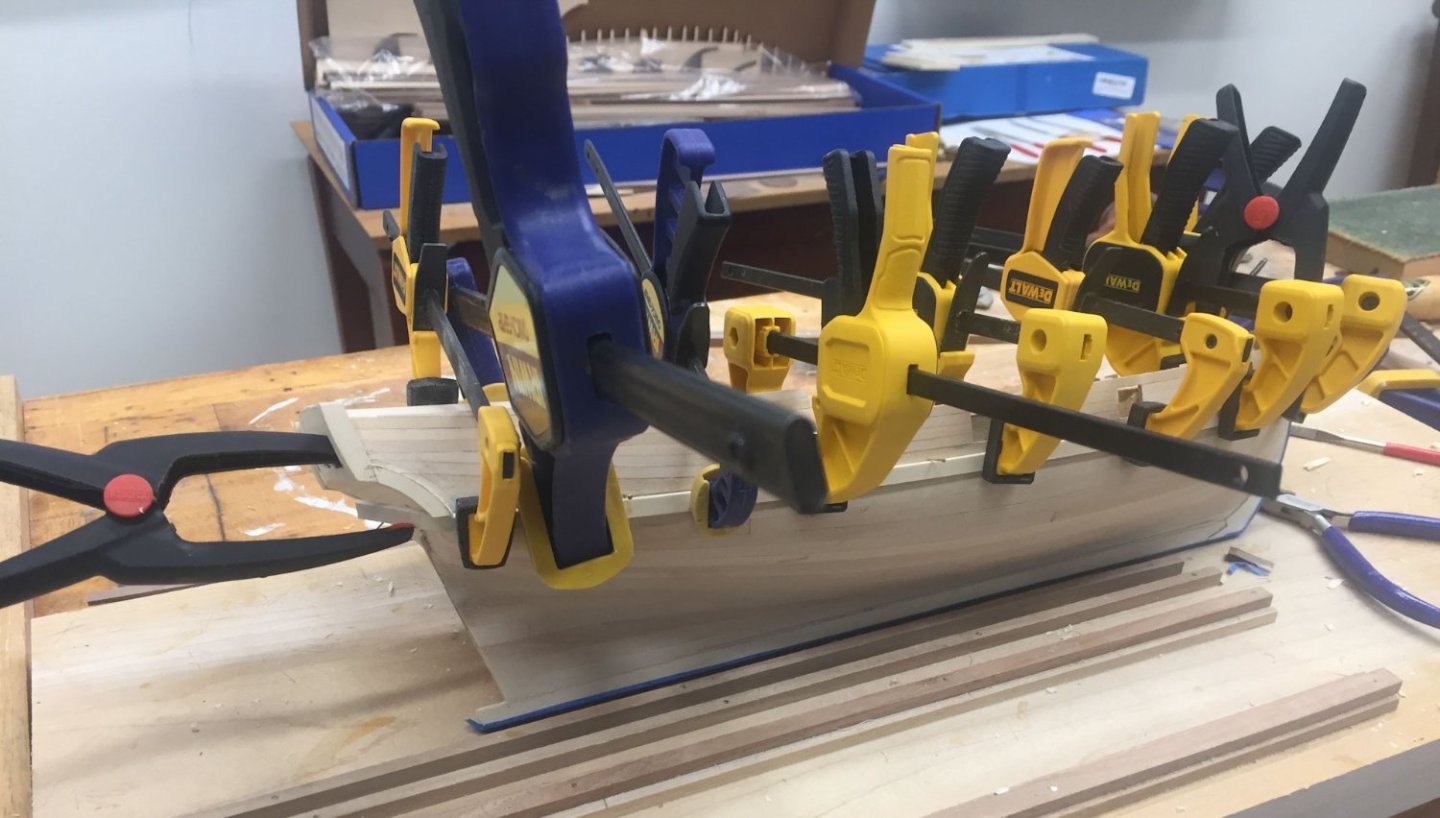
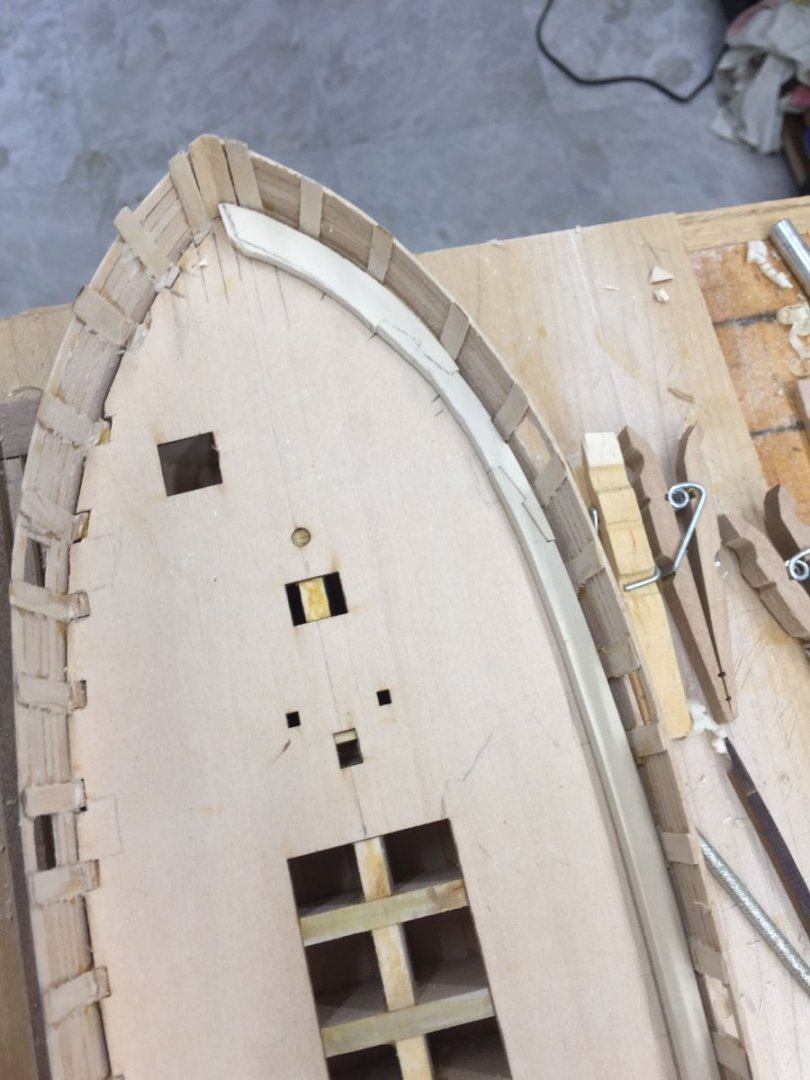
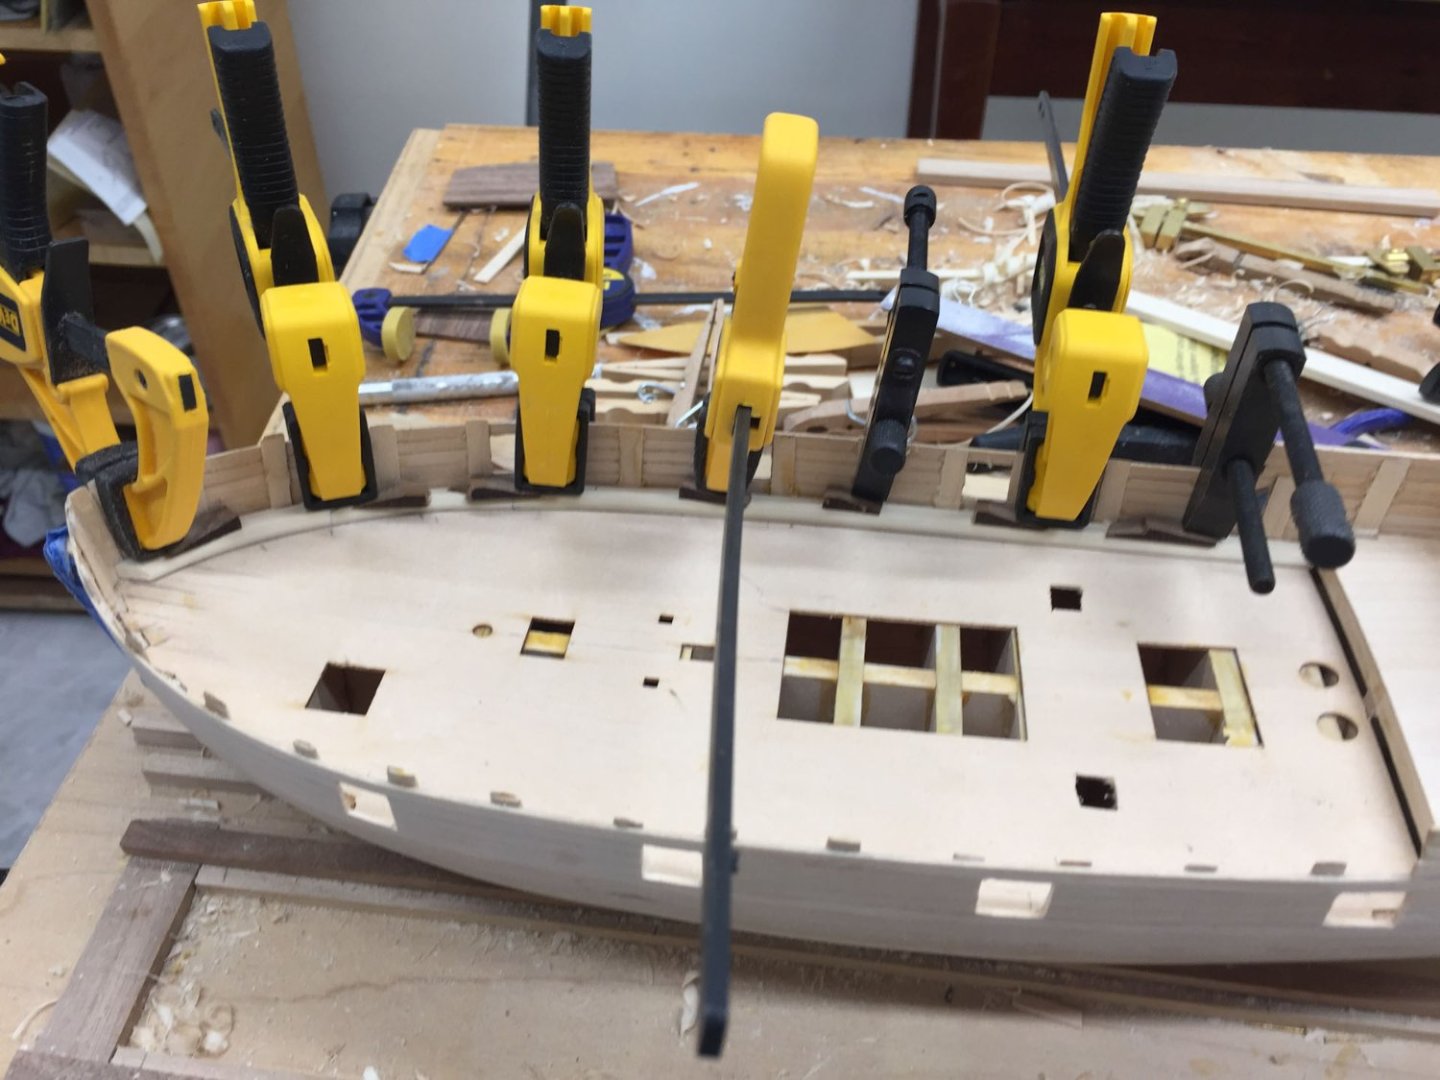
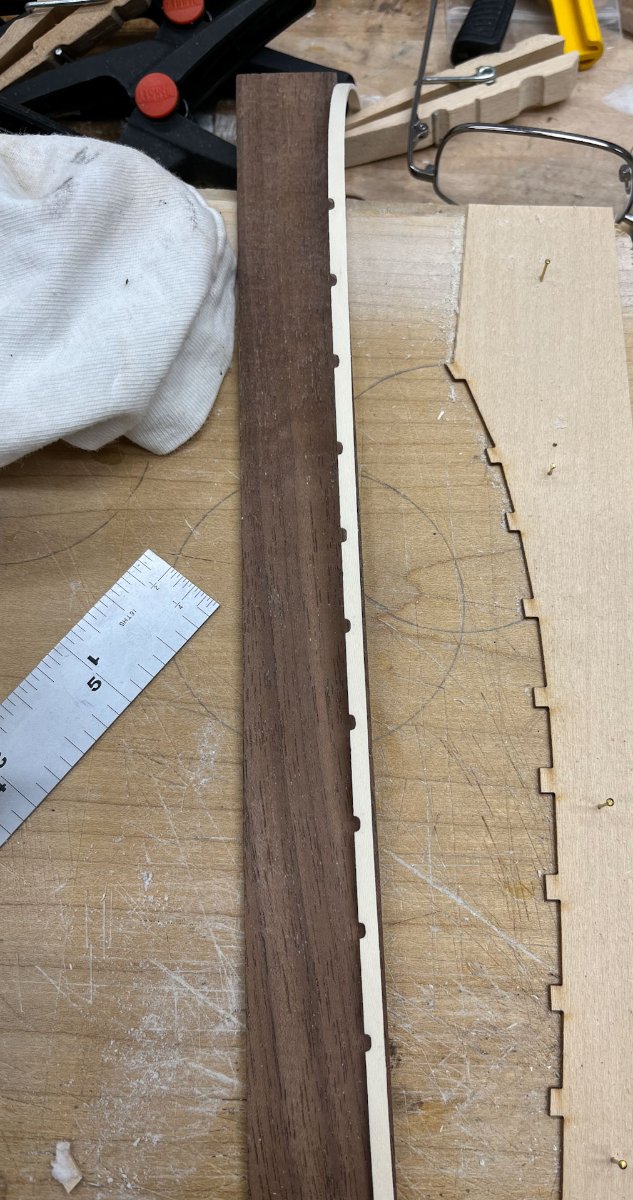
Update time! I spent the afternoon watching my son (age 7) playing his second ever football game, which was right after his second ever football practice. He had little idea of what was going on, along with the other kids seemed to do the opposite of what the coach said, and all had a great time. Then I left him at a friend's house for a sleepover, wife and daughter are napping upstairs, and I am gifted with that rare thing called "free time." Sluicemaster; I meant to practice my hooked scarfs on some scrap but the ones I did for real turned out well enough. I also seem to do really well on the first ones, almost as good on the second, and then the third try I'm either out of karma or overconfident. So I never ended up doing any trial runs. In terms of the practicum (LaukStreetShipyard.com) I have found it very useful as another source of information- the entire thing is 150? pages long. But it also has added some confusion, see below, and I haven't followed all of his advice. He spent 2+ pages talking about how the bullwark planking didn't measure correctly on the plans, which it is pretty clearly because the kit supplied waterway is much thicker than the plans say it is. So you either adjust the other planking widths (what he did in the practicum and what I will end up doing because I didn't understand all this until After I put in my waterway and I ainte fixing it) or measure twice and thin the waterway before installation. I didn't think it was too big a deal but it got him pretty fired up. As Captain-Hook mentioned above, I also have Dr Feldman's "Modeling an AVS" which the kit is directly based on. An enthusiastic read and one of the written sources that got me into this hobby. And the AVS is a good beginner choice due to all the build logs here; Captain-Hook's is one I have referenced many times. So on to this week's "progress" The practicum gets very confusing at the stern. I followed the directions as close as I was able but still must have messed up somewhere. My curved fashion pieces seem too short compared to the sheet plans that came with the AVS and Dr Feldman's pictures (in black and white and a little grainy so hard to see tiny details well). The wales are supposed to end with the top flush with the fashion piece and the bottom even with the bottom of the counter. Below is the wale even with the counter: A pretty big gap. So I chiseled off my old fashion pieces and remade them longer. Below i have just glued the first one in place. Here is a stern shot with the new fashion piece, to port, old fashion piece to starboard. There is a gap as the hull curves downwards but I will cover that space with the remaining counter planking; Dr Feldman does a similar thing. In hindsight I should have made the inside of the fashion piece curve to match the hull but I'm not remaking them for a 3rd time. Next I cut out my wales from holly stock, same as I did in earlier posts (smooth one edge of the billet with my handplane, bandsaw off a piece, bring it to 1/8" thick with my blockplane, then cut off strips with a steel straightedge and an xacto). Very labour intensive. I'm not sure how well that will work with the really thin holly strips for hull planking but thats a future problem. One nice thing about holly is it bends even easier than basswood. I soaked the 1/8" strip in water for 10 minutes then bent it around a glass and left it overnight. Worked perfect. I was concerned about clamping the wale without having it slip about so I put in the kit brass nails along its top border as seen below. This way when clamping, which pulls the strip upwards, the nails would keep the wale in place. Hopefully without denting it. I also cleaned any glue buildup out of the bow rabbit and thinned the last inch of the wale so it fit the rabbit snug. Then I did a trial run figuring out clamps (I need more of the dewalts). I also am really glad I didn't fill in the stern windows (on purpose) so they could be used as clamp purchases; very vital here to clamp the final inward curve of the wale. And that yellow porcupine is currently drying in the basement. I felt that the fashion pieces were too fat so I managed to trim the top edge in place (I cannot believe that worked); if you look closely above you can see the ghost border. Next up is the port wale, then the inside and outside scuppers. Hope you all had a calm, enjoyable weekend. Thanks for reading. Cisco


-
Night and day difference between the kit supplied and your scratched carronade carriages. in my opinion absolutely worth it great job
-
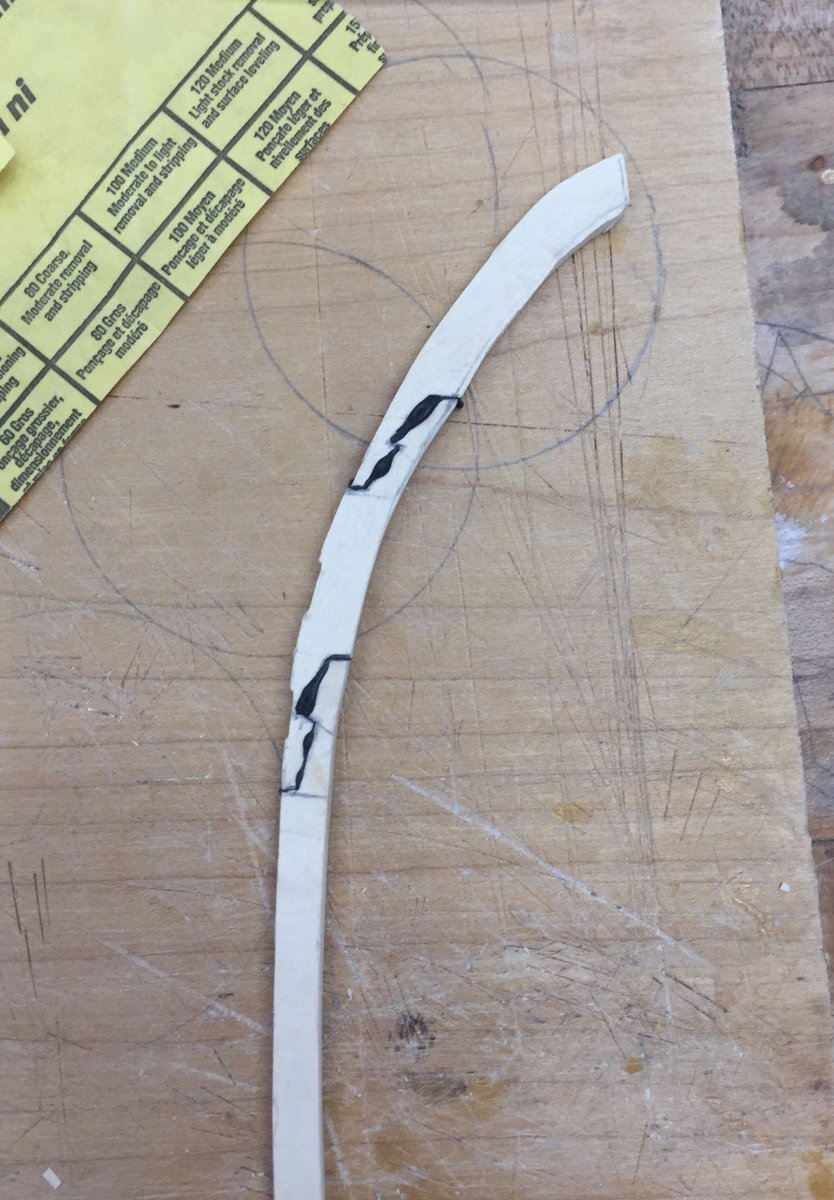
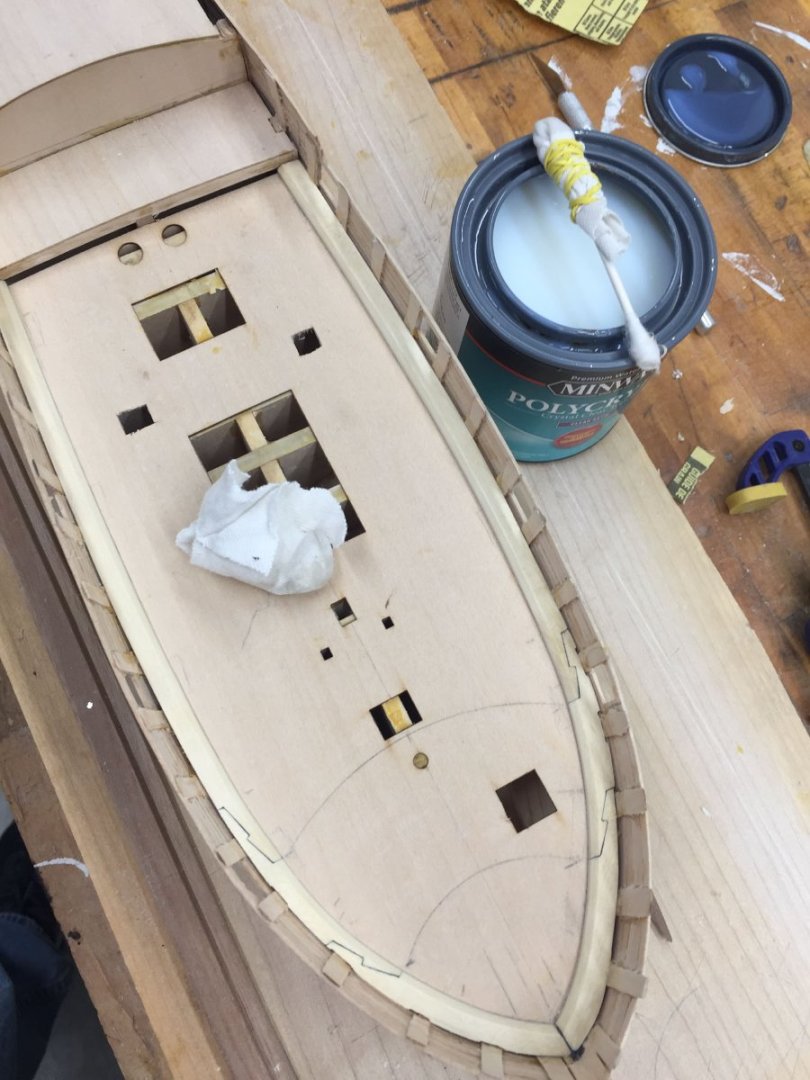
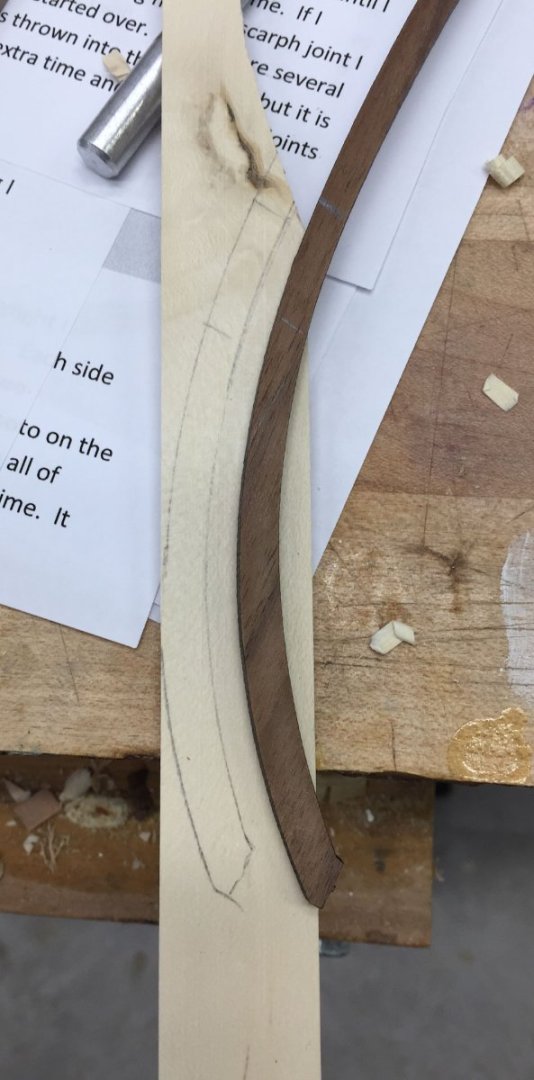
Rainy Sunday morning, wife and dogs all asleep, kids and loaner kid playing board games, perfect time for an update. Jason I have no idea whats going to happen with the cap rails. My hope is once its planked on the inside it'll be fat enough to just glue, but maybe I'll pin it as well. Future Cisco's problem. Sam/SRC I completely agree. For me point of this hobby is to do as much as I can myself with hand tools. But i have to admit its fun seeing what other people are doing with computer aided technology even if I don't want to. The printed cannons have looked pretty interesting... So on to my AVS. This week is a more detailed description of making the port side waterway. In theory it should have gone smoother after practicing on the starboard side. In theory. Here goes: First, after making the straight section of the waterway and forming the first hook scarf, I created a card model of the front section from a cut up yellow folder. Miraculously I managed to keep the scarf orientation the mirror image of the port side. After some adjustments to the scarfs I traced the card onto my 1/8" thick holly stock. The I cut the traced portion out with a hand jigsaw. Sorry this pic is a little blurry. The camera didn't know what to focus on. Then smoothing out the curve to the penciled line with a spokeshave. After fitting the new part I traced the first scarf and chiseled the majority of the waste (holly is very crumbly so you can get away with a lot) then used files as before to sneak up onto the lines. Once I had a reasonable fit I did the same for the final bow waterway piece. After sanding all the pieces I ended up with the following. I left the pieces a little fat for final fitting. The picture makes the scarf joints look tight but holding them up to the light there were definite gaps. You file one side to tighten the fit and it makes the opposite side open up some so it was a definite Walk Away situation before you oversanded. Next I made the gap filler- holly dust mixed with pencil graphite; then mixed with white glue. And here is the waterway after glue-up. The gap filler beads over the joint and has to be gently chiseled and not sanded; otherwise the graphite stains the holly grey. After some chiseling I got to the below stage: I then traced both edges of the miter with my compass and cut to the lines using my spokeshaves and some sandpaper wrapped around a dowel for the very curvey areas, then glued the waterway in place same as last post. I want to keep the holly as white as possible so I used water based polyurethane as a finish. This area seemed like it would be hard to get into the corners in the future without creating glops of finish so I took care of that now. I found a qtip with a piece of cut off t-shirt rubber banded on worked great as a applicator (I hate cleaning brushes) and I used another piece of clean t-shirt to wipe it down right afterwards; my version of wipe on poly. Seemed to work great. I have soft white LEDs above my bench which makes the holly look yellower than it would in daylight. And thats it for this week. I haven't printed out the next chapter of the practicum yet but I think its second planking. Stay dry Cisco


-
looks really good! the stain takes it up a notch too nice job
-
Dave it seems you're moving pretty darn fast to me. Any pics of how you're clamping/bending the hull planking, and what are you using to represent caulking lines? pencil or paint? and what are you gluing with? thanks, Cisco
-
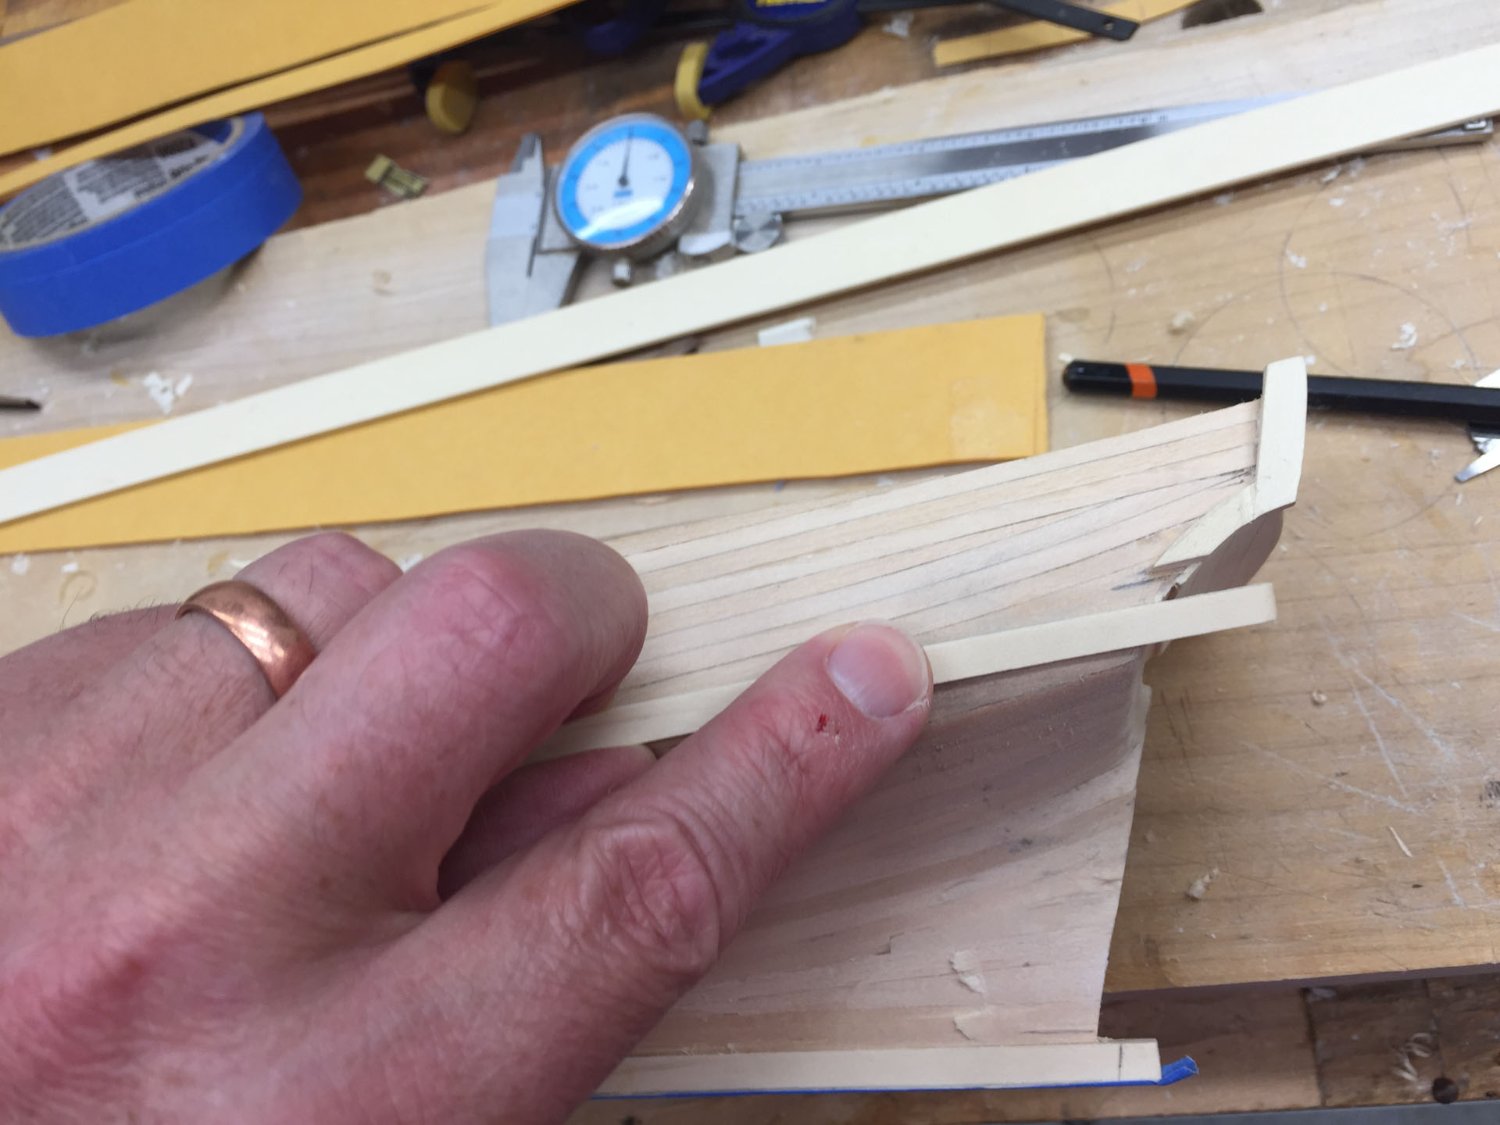
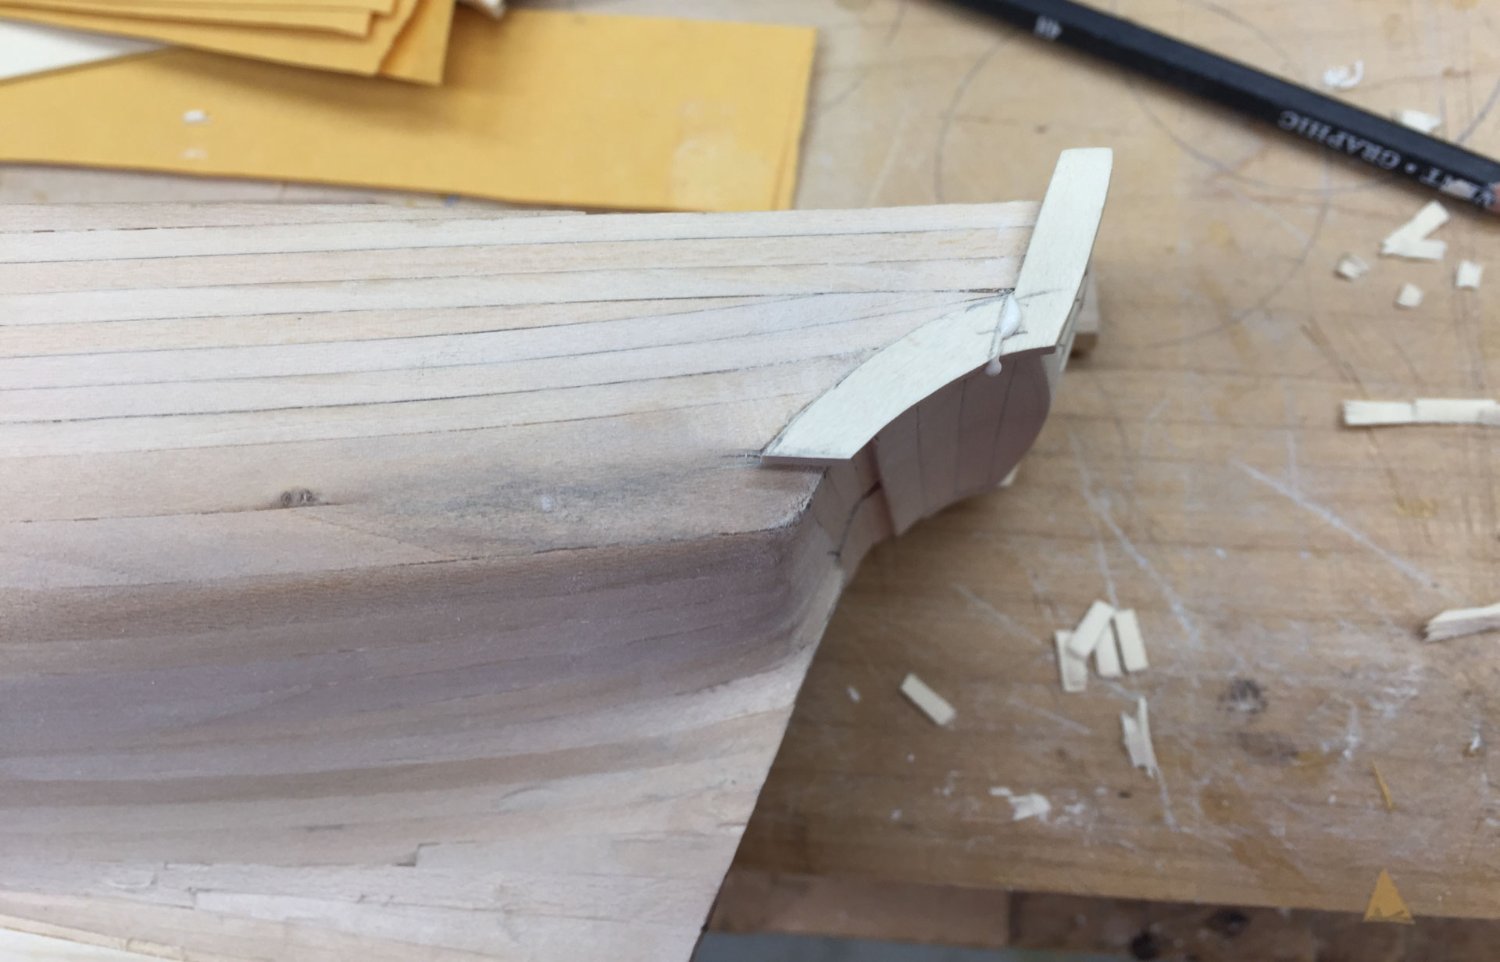
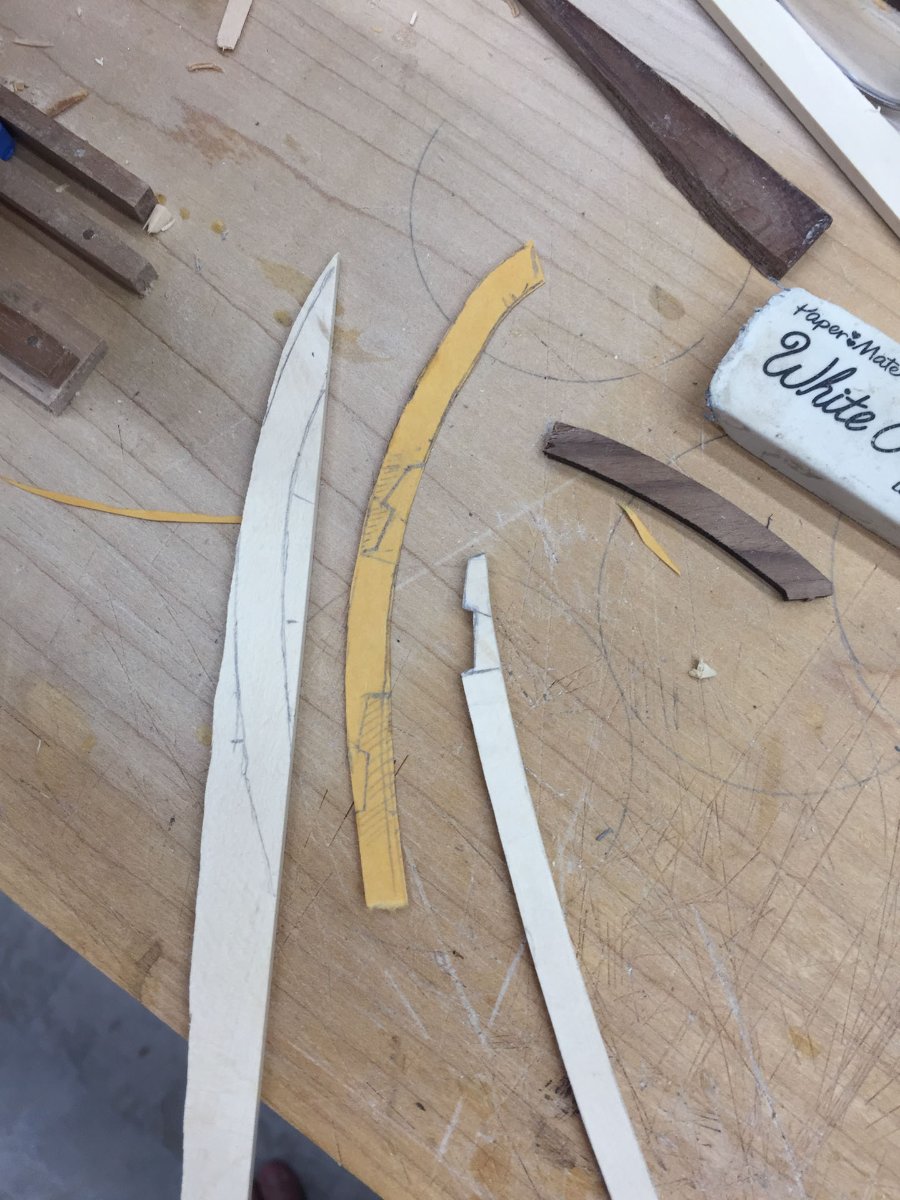
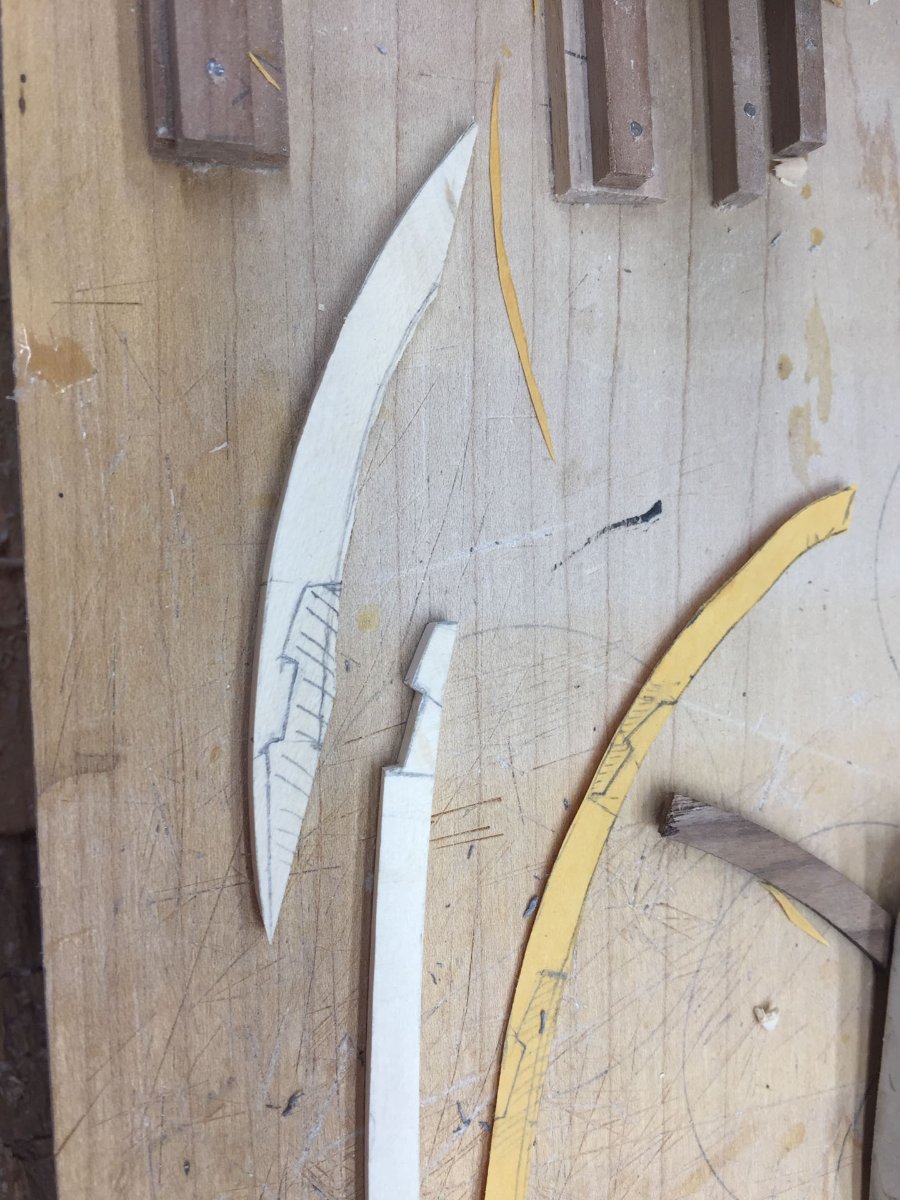
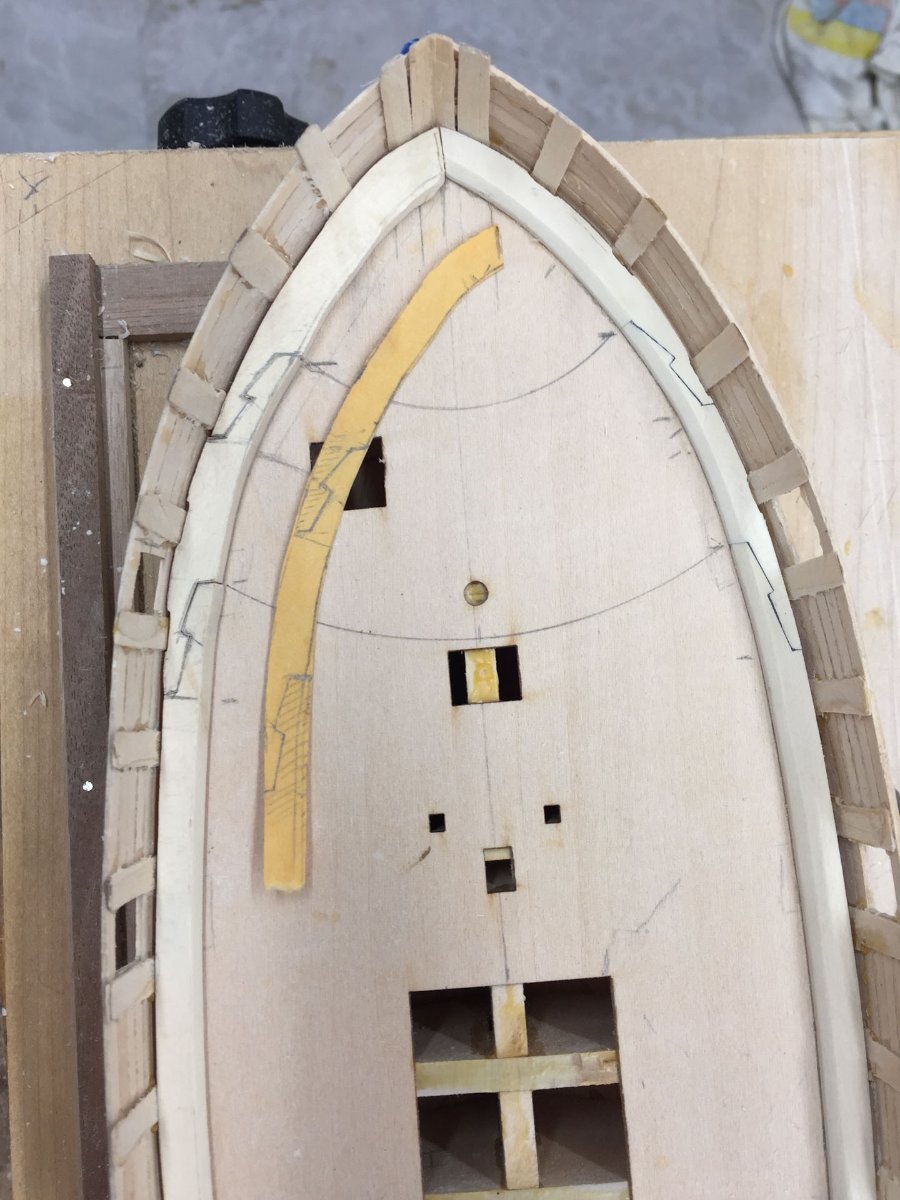
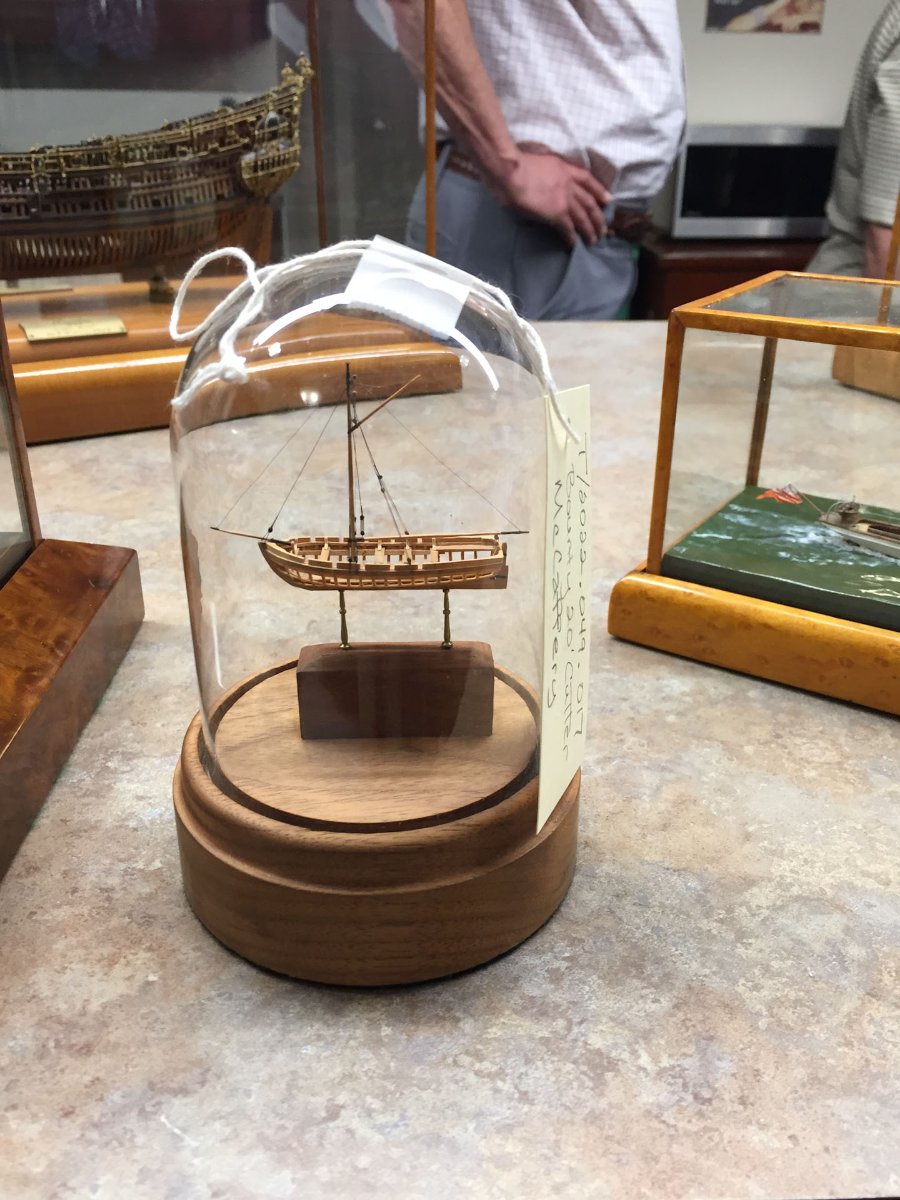
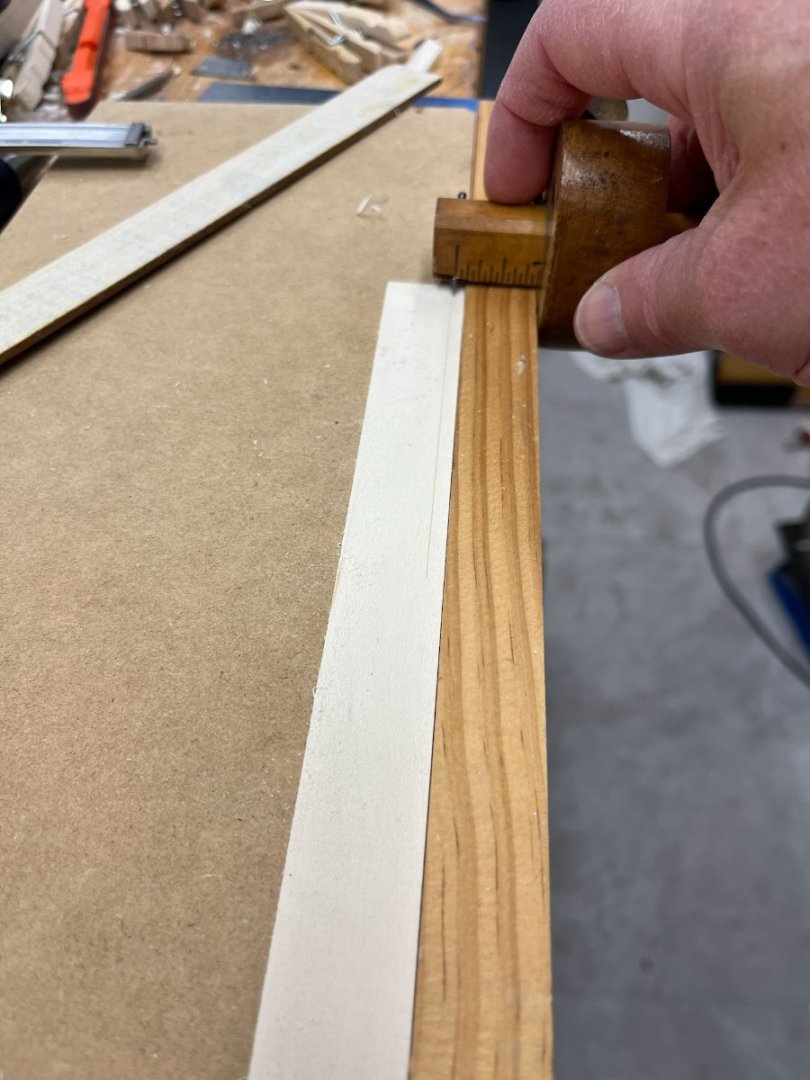
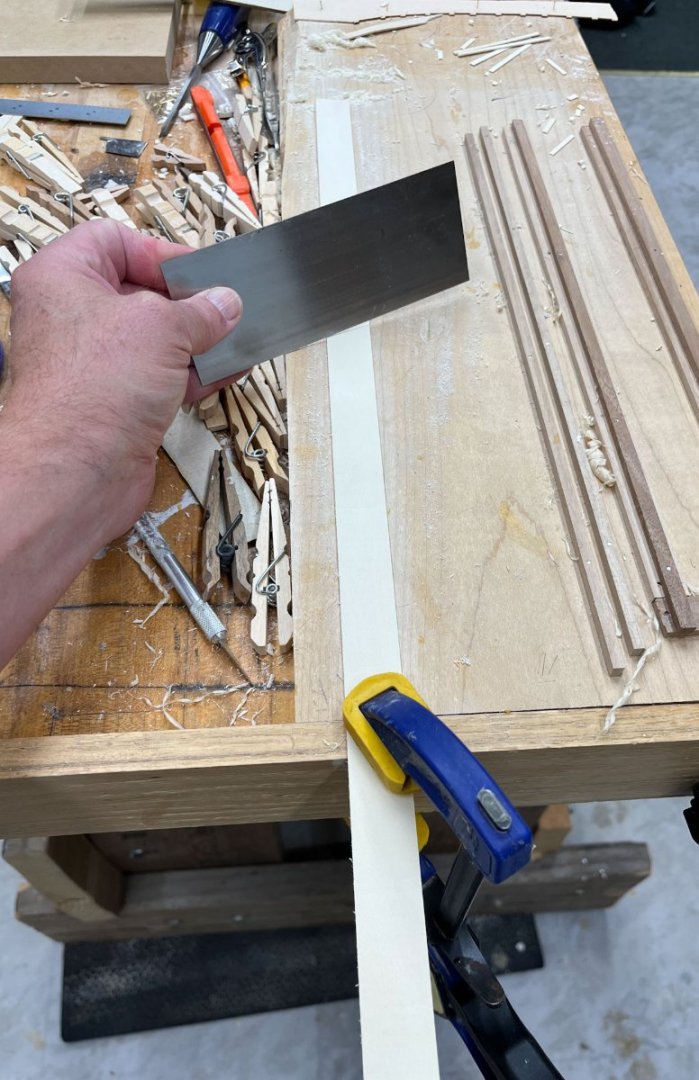
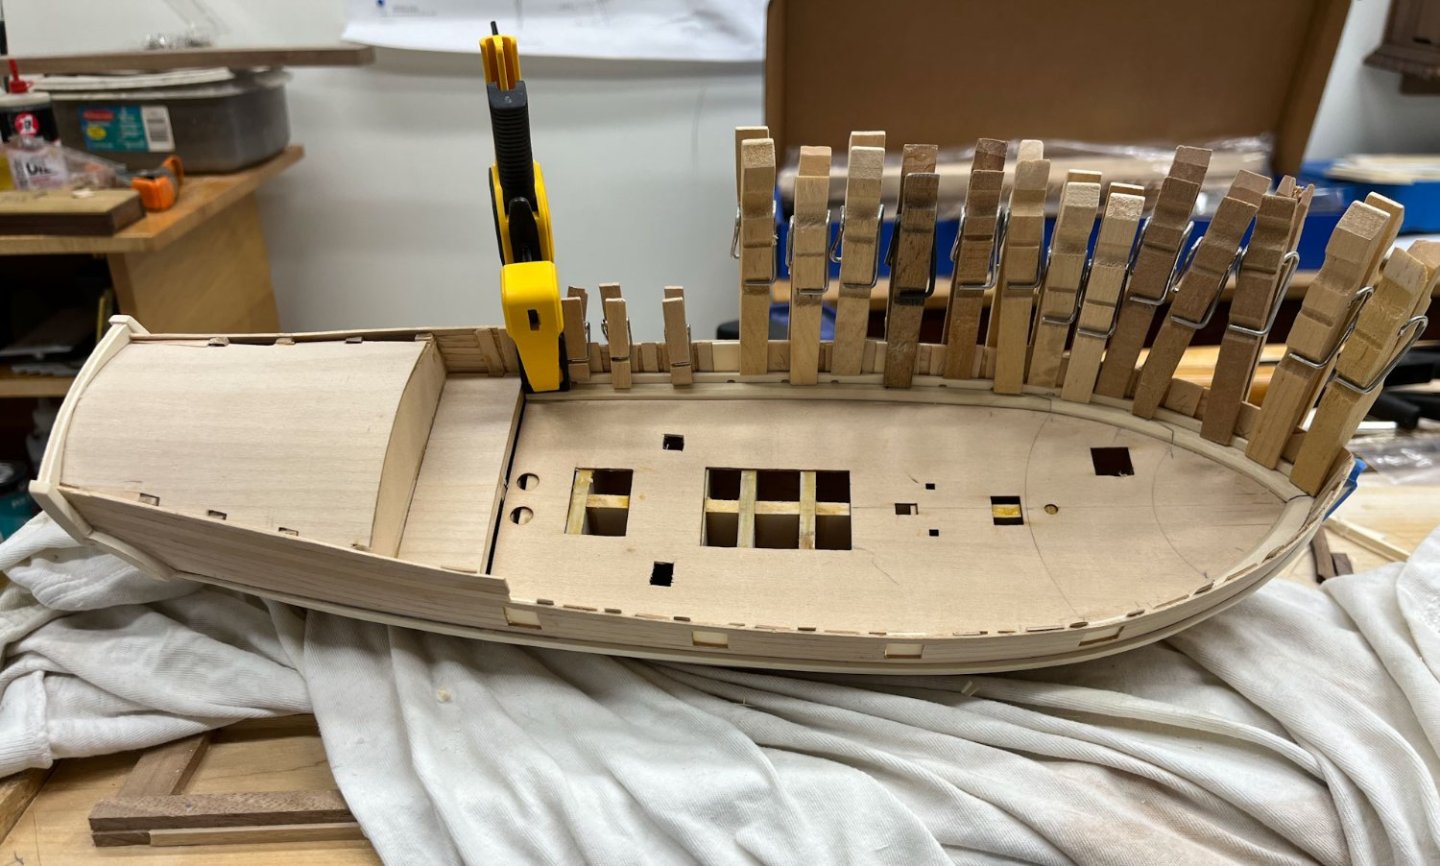
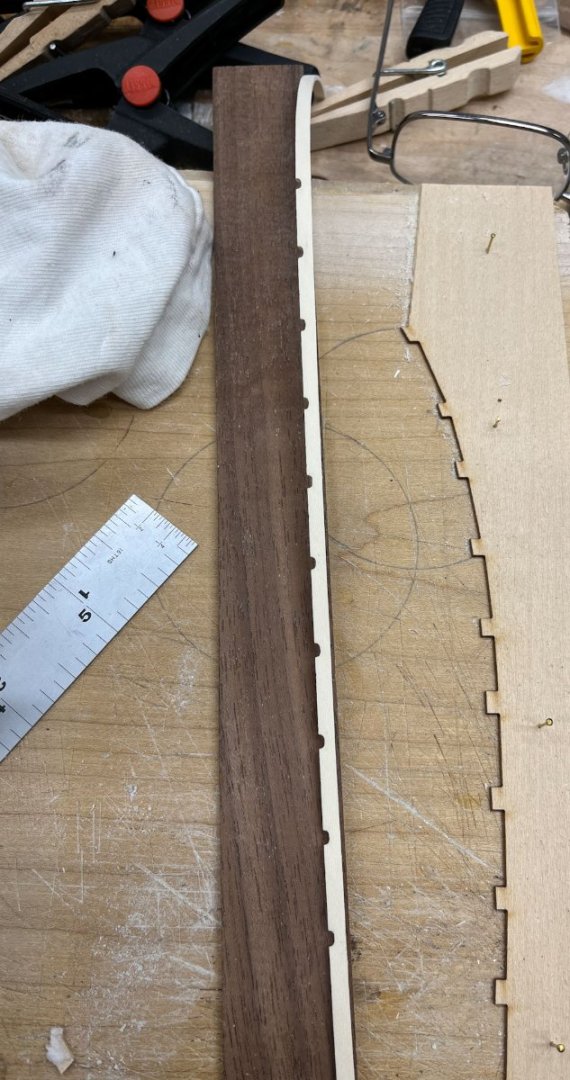
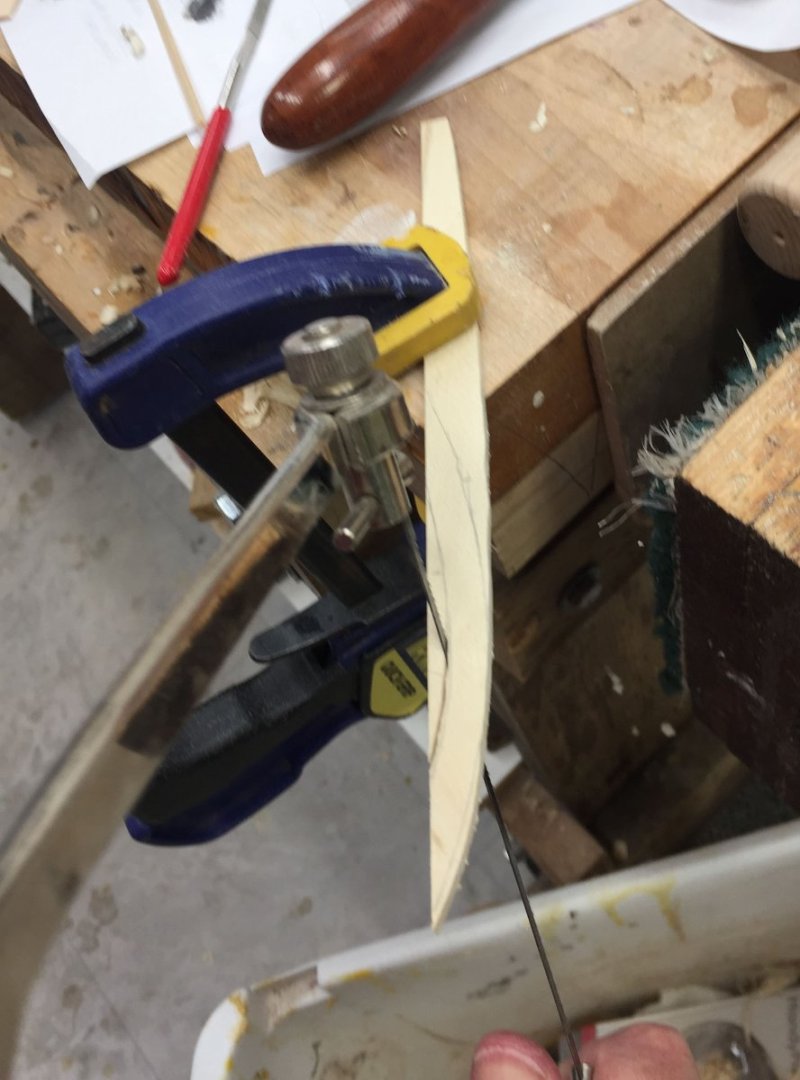
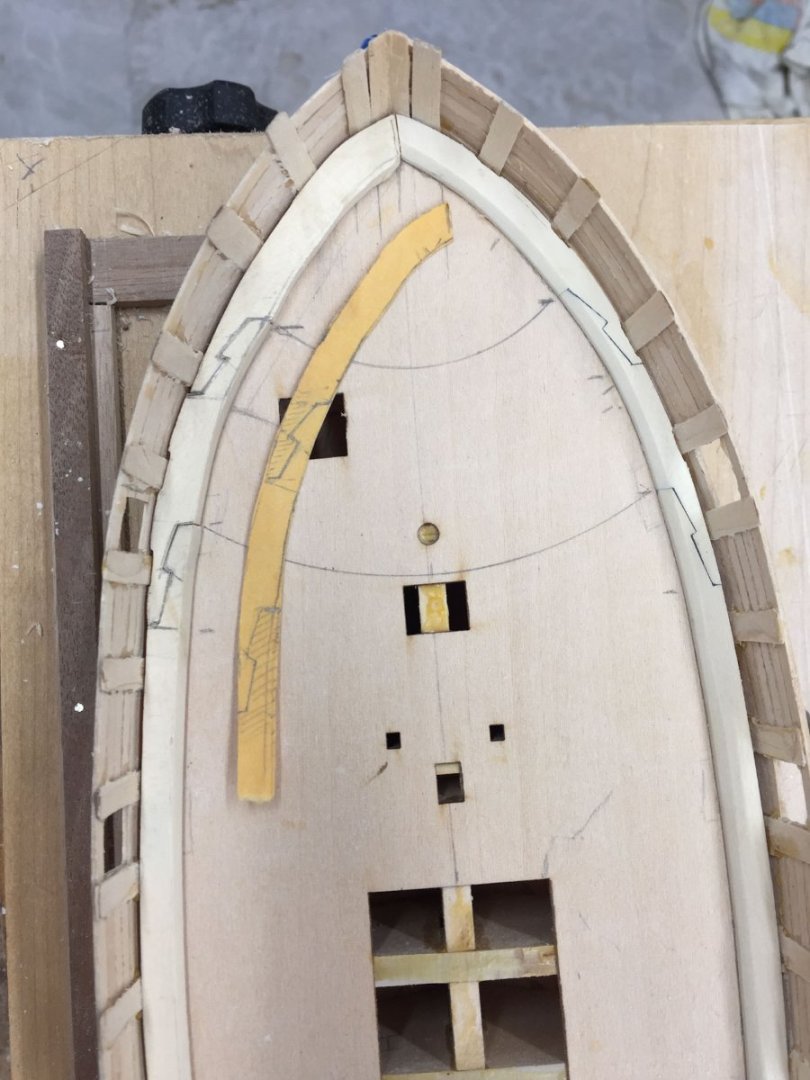
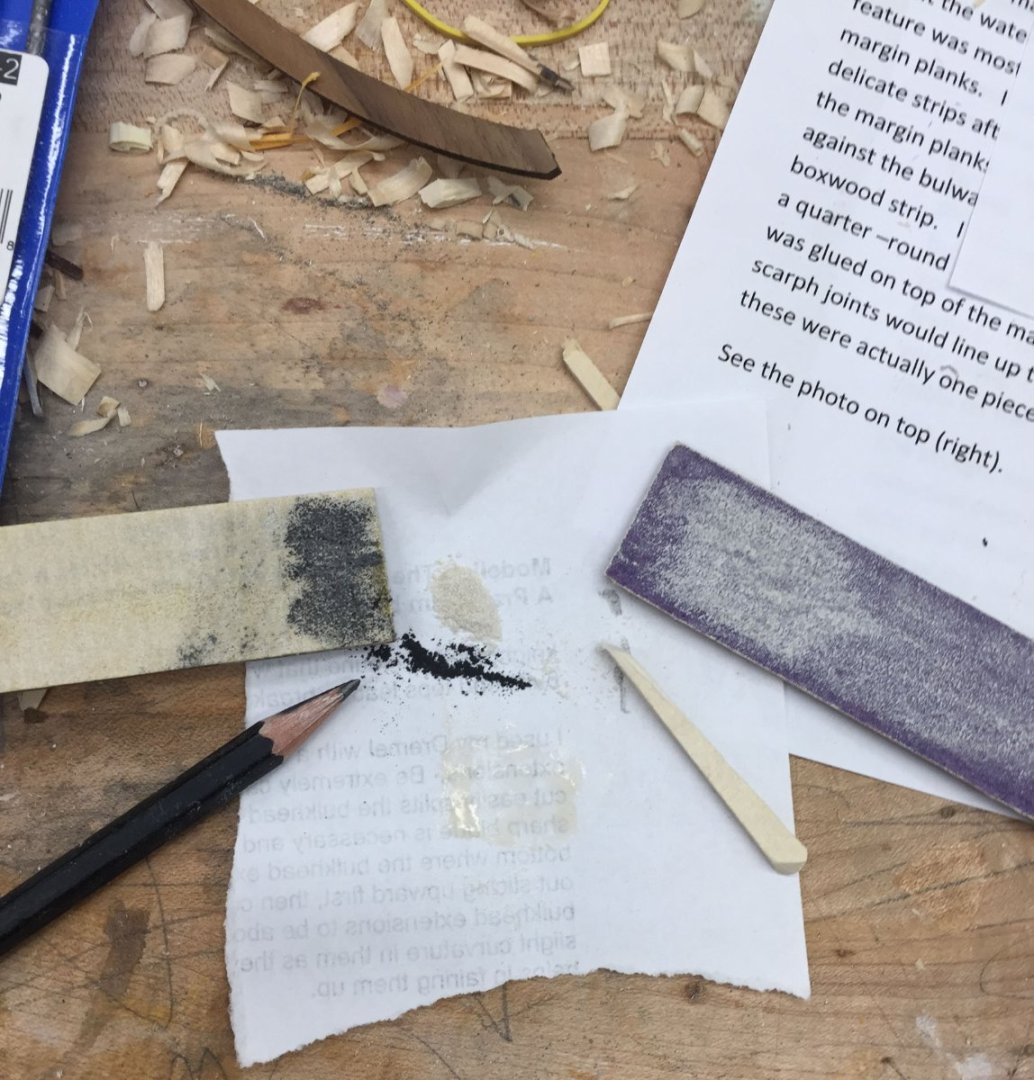
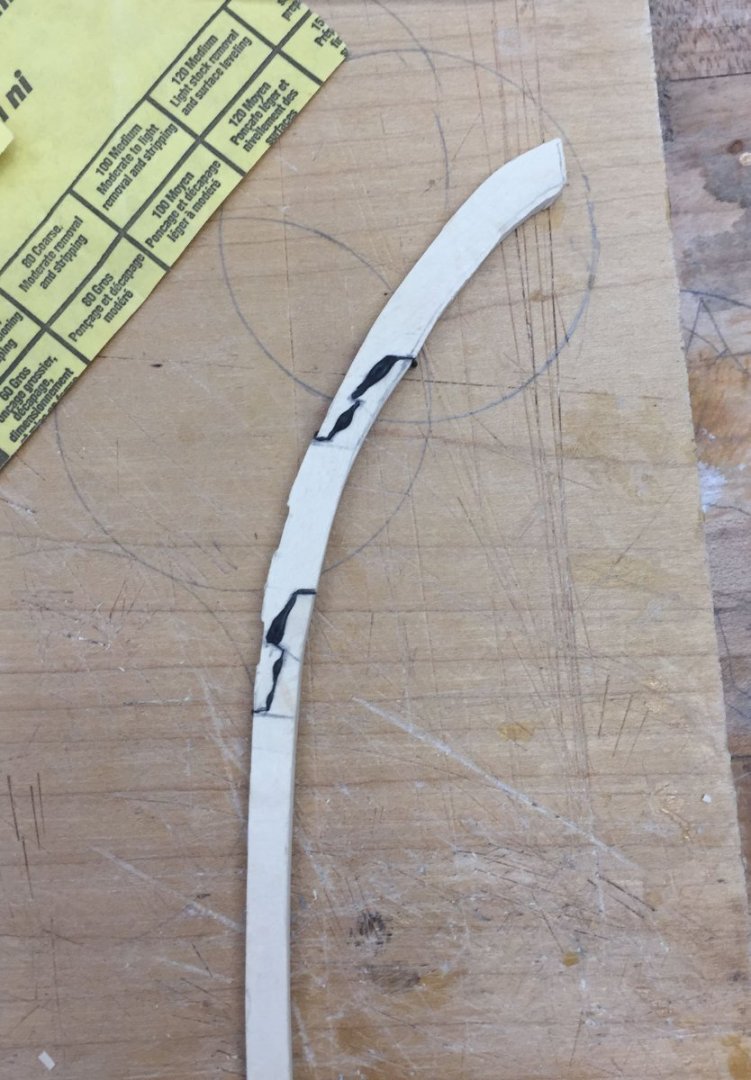
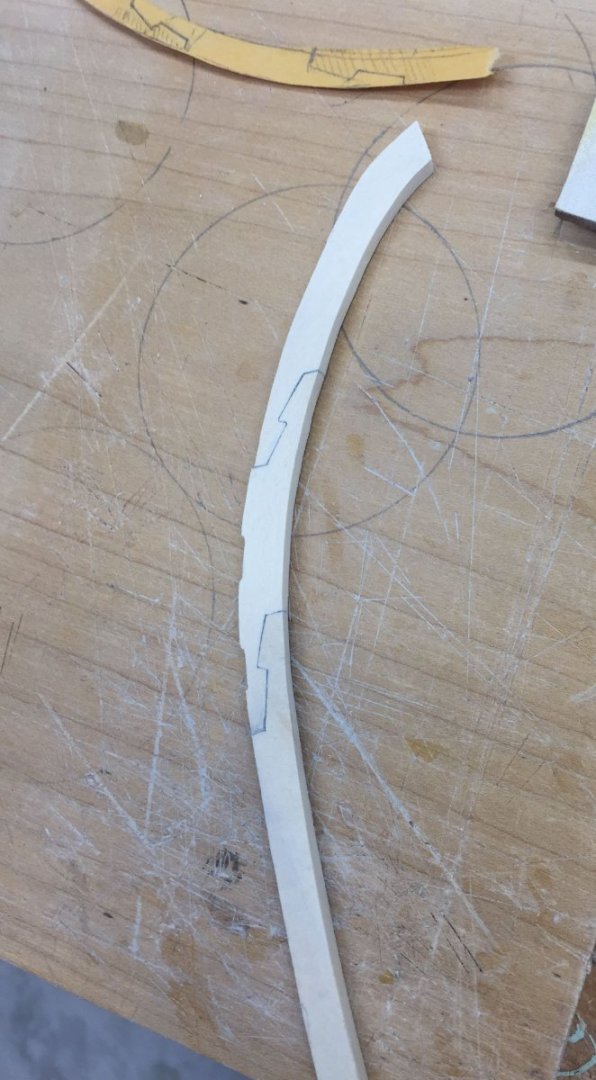
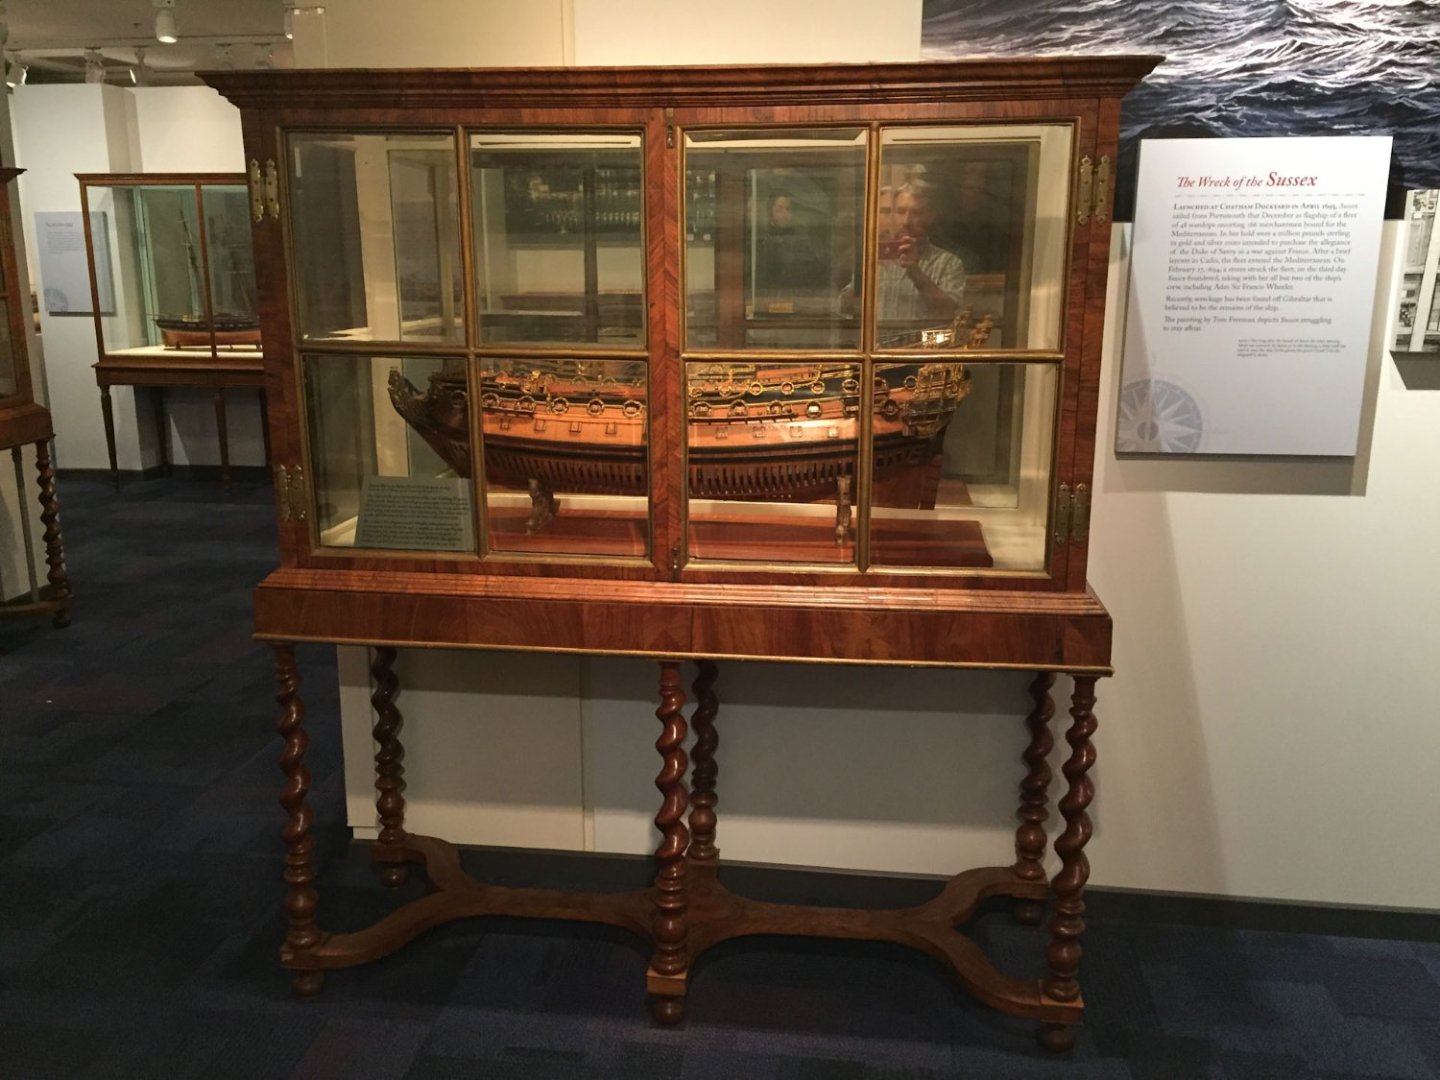
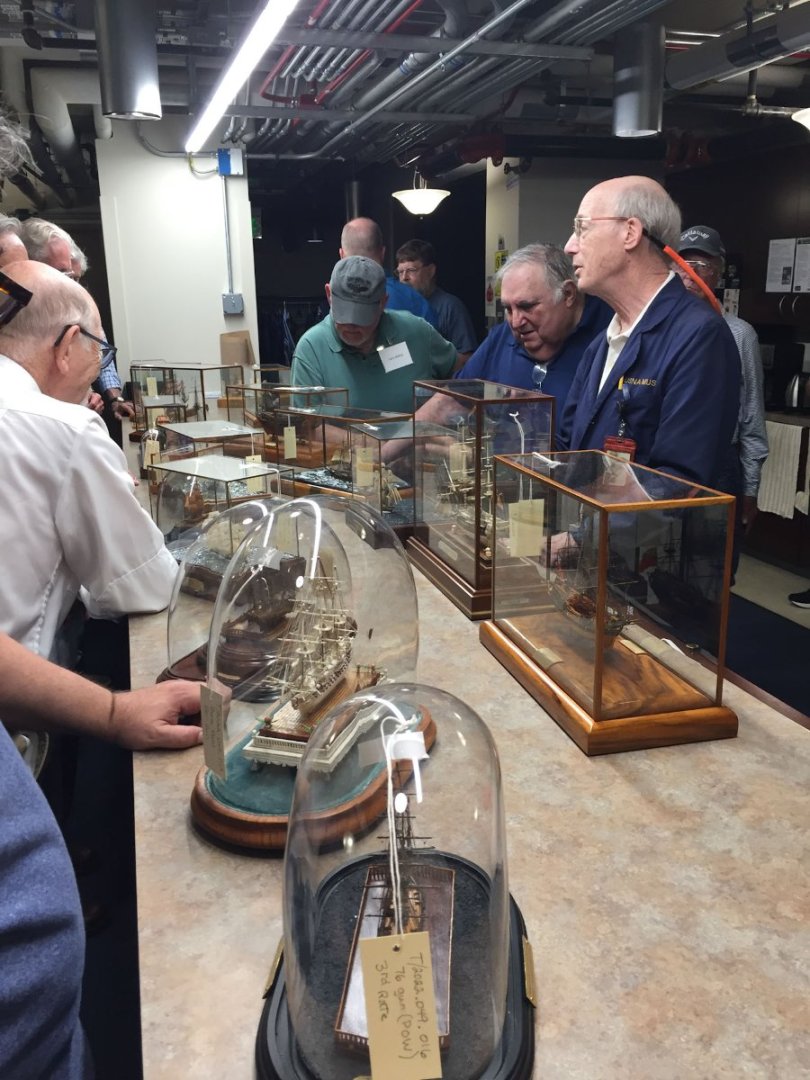
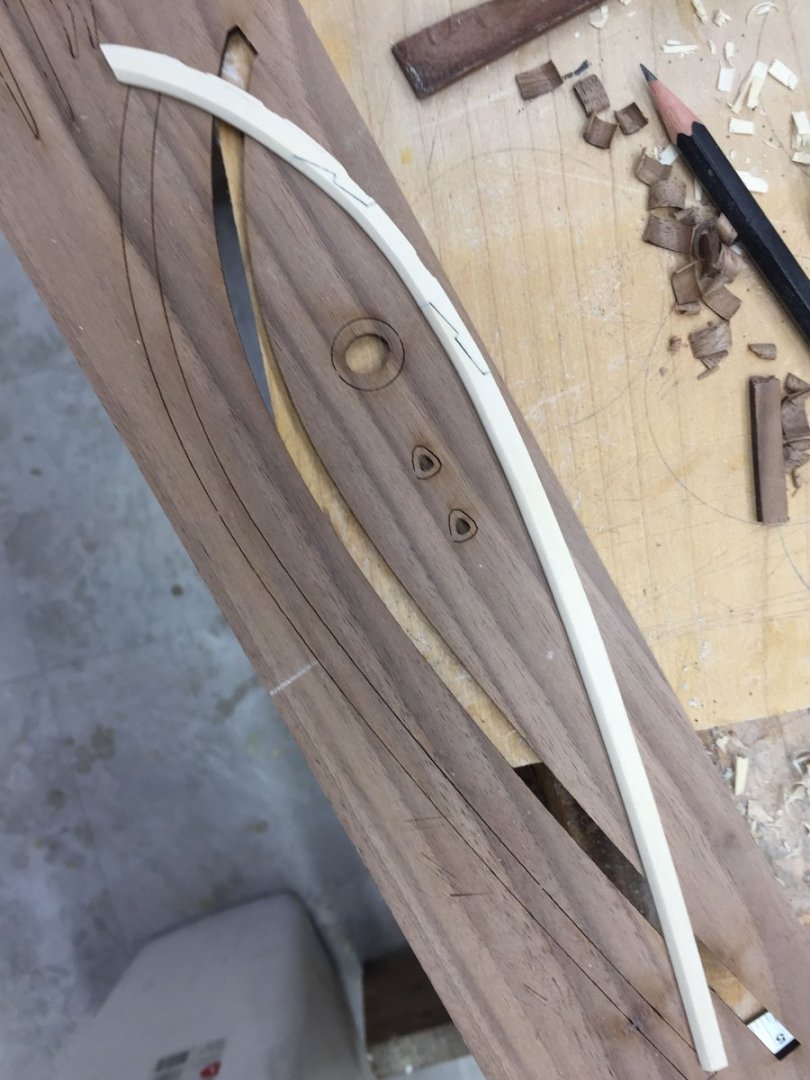
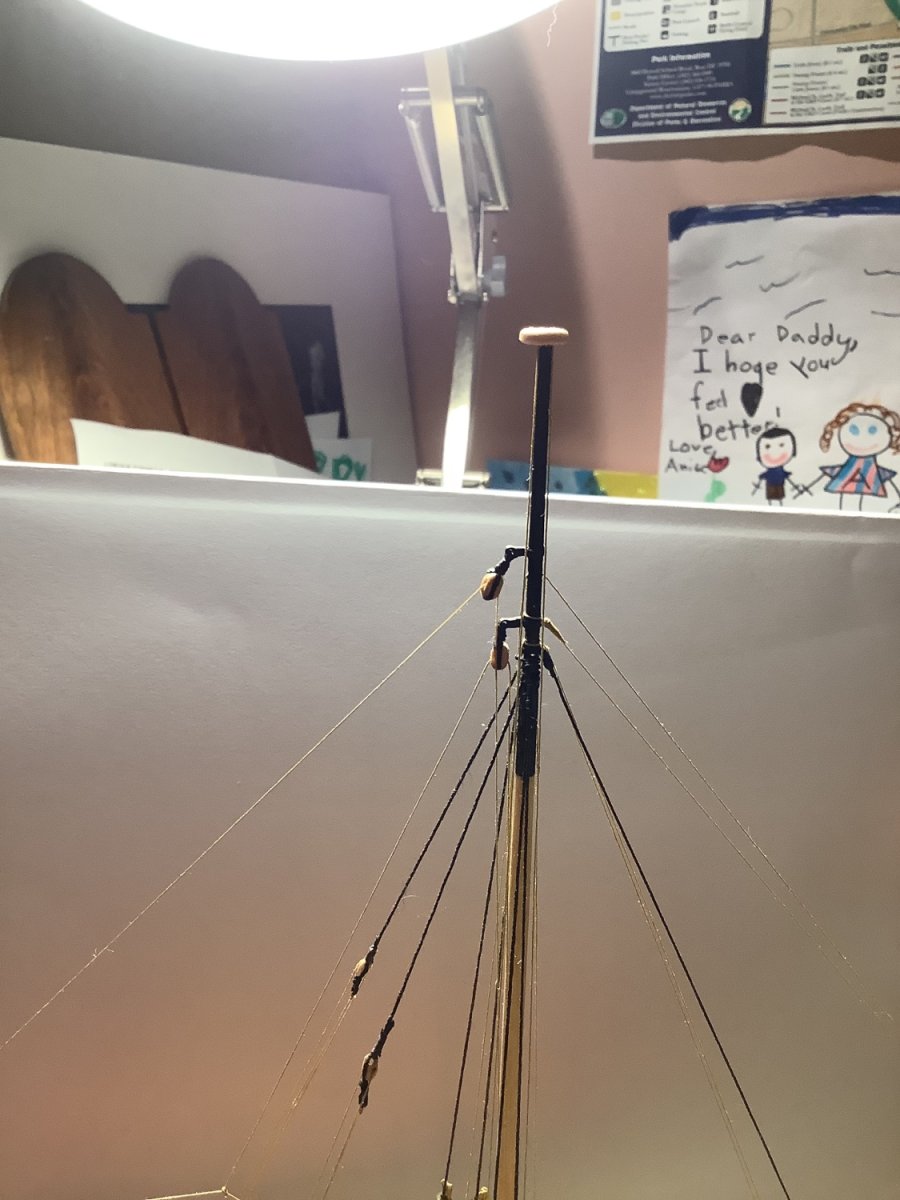
An update! Hope everyone is enjoying the fall weather, if your located on my latitude. I've done a lot since my last post. First, I visited the house of another MSW member, Jason Long (JLong), who lives 20 minutes north of me in Delaware. I got to see his Fair America, which is much further along than my AVS. A great time was had discussing all things shippy and I hope to have him down to my place in the near future. Second, a few weeks ago I attended my first Admiralty Workshop hosted by Greg Herbert and Dave Antscherl with special guest host Chuck and it was a lot of fun. We all made rope with Chuck, then learned how to splice and tie and wrap and seize. My ancient iphone can't take clear pictures of work this tiny so when I finally upgrade I'll try and post some of it. At the end we spent an afternoon getting a tour of the Naval Academy museum in Annapolis by Grant Walker (hope I got his name right, on the right in the below pic). I don't know how but Barry Rudd, the gentleman in the blue shirt behind Grant, seems to be in every picture of this event. I sat next to him in the workshop and he was a very nice guy, and clearly a regular at these events. The museum recently acquired a collection of miniature model ship that have to be seen to be believed. Very tiny and protected by glass cases so ham-fisted people like me can't pet them. The one below is plank on frame and about 2 inches long. Crazy. We also toured the main museum area and got a behind-the-scenes history of various models. I personally find the cases and stands as interesting as the ships themselves. But on to my AVS. Since last post I sanded, mostly, the first planking smooth. I hadn't installed the waterway earlier as the practicum directed because I was worried the bulkhead extensions would be too fragile when clamping the hull. So time to rectify that and thin the extensions. I used a chisel, then an xacto, and finally some sandpaper. The bulkheads curve upwards and the grain likes to runnout so it took a while. Once that was done I went about replacing the kit supplied waterways (walnut) with holly. Initially pretty easy, just trace. Since my billet of holly was pretty narrow I had to make my waterway in 3 pieces scarfed together. To make it more exciting the scarfs are on the curved section, and the kit supplied waterway didn't precisely fit my AVS; my prow was more rounded, so I had to do some finagling. Below is the 3 pieces before being glued together. I followed Cheerful's directions for forming the scarfs. Drawing on and cutting out the first half of the joint wasn't too bad, but it was a bear making the mating joint. I ended up overlaying the first joint and tracing it onto a lower piece of wood with a very sharp pencil, then using my chisel first for rough removal, then files to sneak up to the pencil lines. I still had some tiny joint gaps which I filled with a mixture of white glue, holly dust, and graphite (rubbing the pencil point on sandpaper then dumping the results onto the holly dust and mixing all 3 together). This worked better than I planned. It seemed to fill the gaps and made the joint more visible. After gluing the pieces up and using spokeshaves, a thick dowel wrapped in sandpaper, and the flat of my chisel as a scraper I got my final version. To glue the waterway in had 1 final challenge- the deck isn't flat. After struggling with clamping I came up with the following- I placed clamps along the bulkheads a bit less than 1/8" above the waterway. Then I cut the provided 1/8" thick walnut waterway, which I didn;t need anymore anyway, into a series of short wedges and used these between the flat clampheads and the waterway to push it flush with the deck. And thats it for today. Now I have to make the other side. thanks for reading, Cisco


_edited.jpg.43b74440d09bf4d8a4e936a0a99f0c38.jpg)
_edited.jpg.996663c69aae6bd6beaed04f8d0edc53.jpg)