HOLIDAY DONATION DRIVE - SUPPORT MSW - DO YOUR PART TO KEEP THIS GREAT FORUM GOING! (Only 24 donations so far out of 49,000 members - C'mon guys!)
×


CiscoH
-
Posts
379 -
Joined
-
Last visited
Content Type
Profiles
Forums
Gallery
Events
Everything posted by CiscoH
-
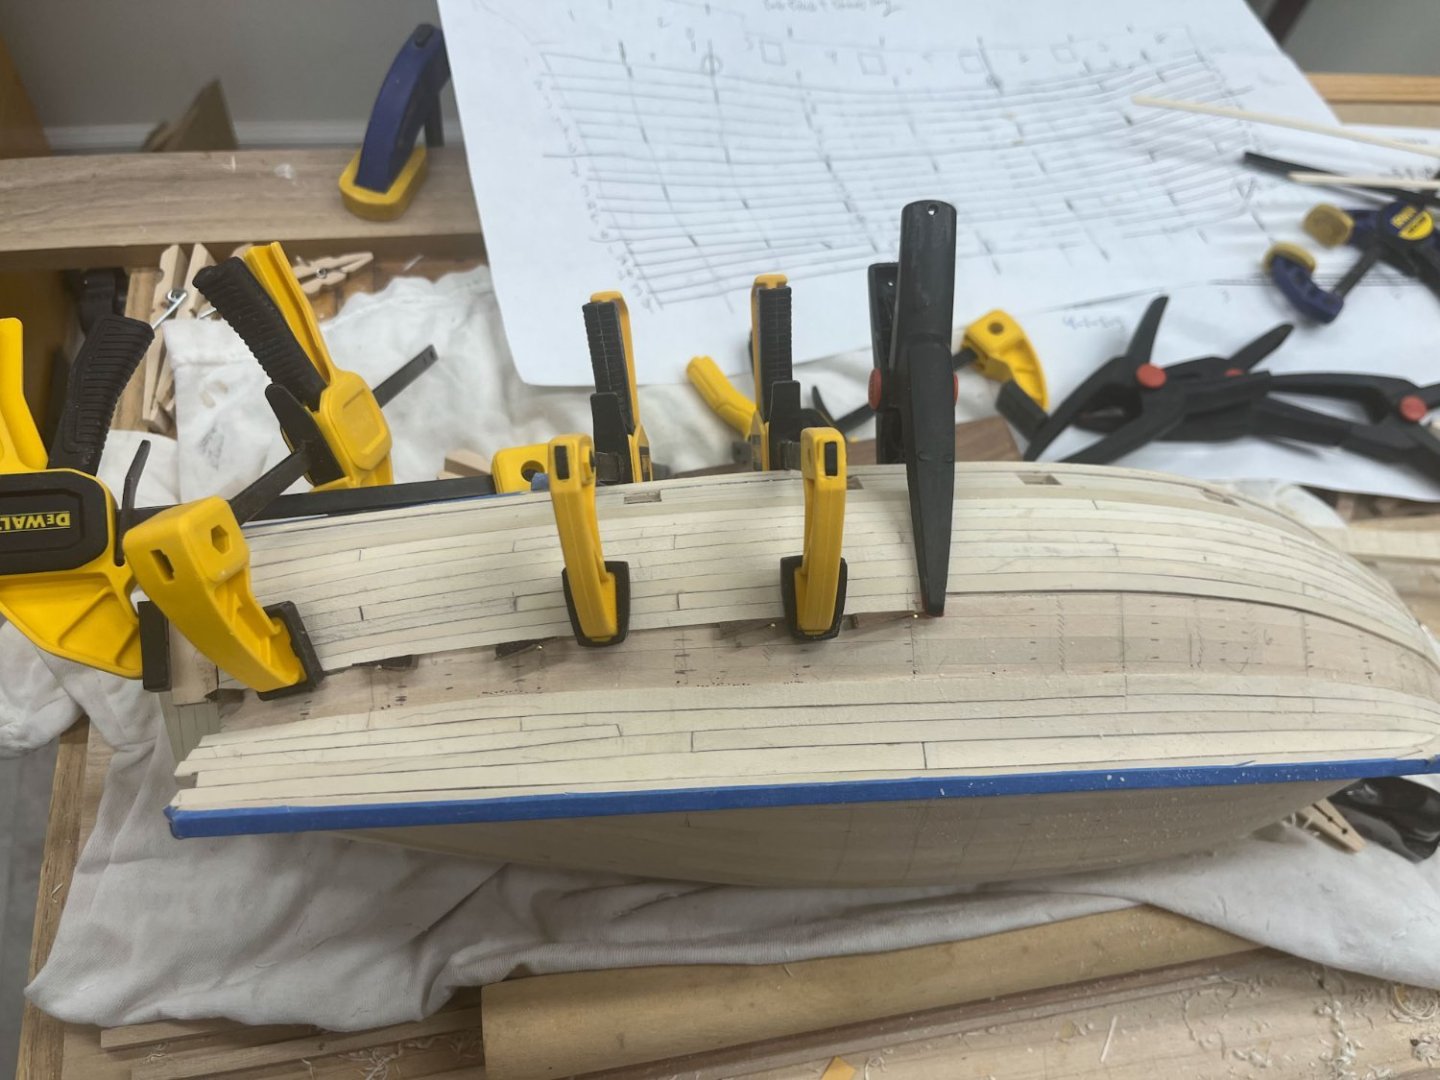
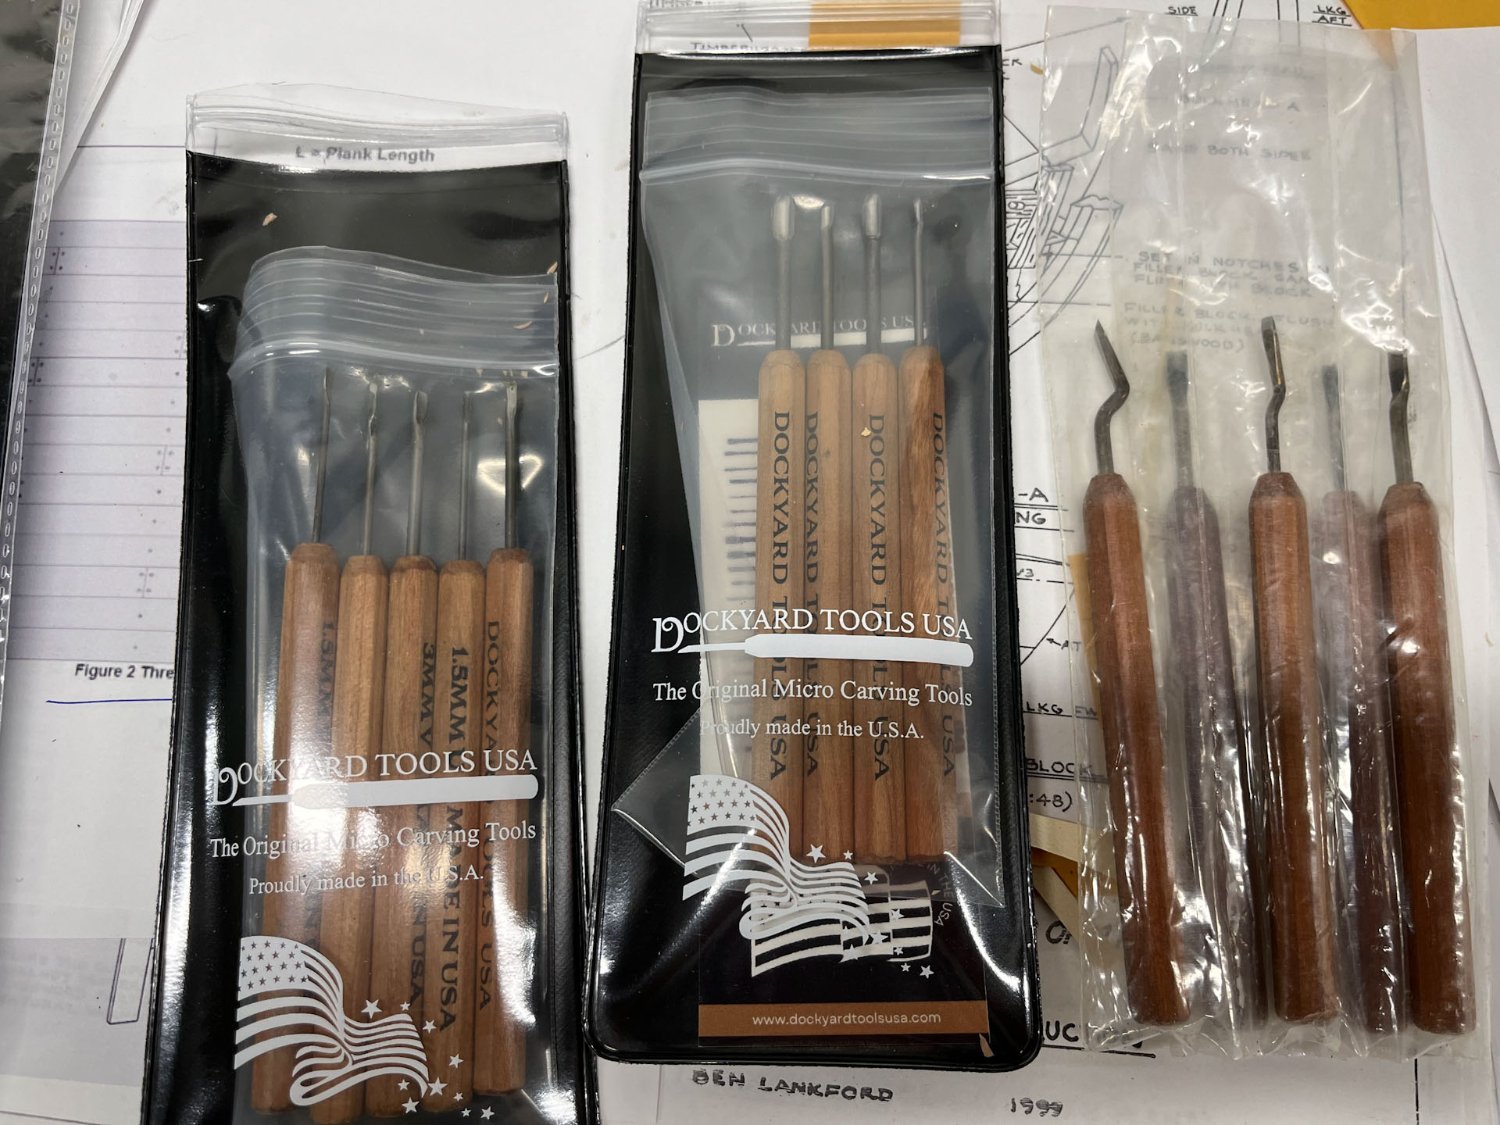
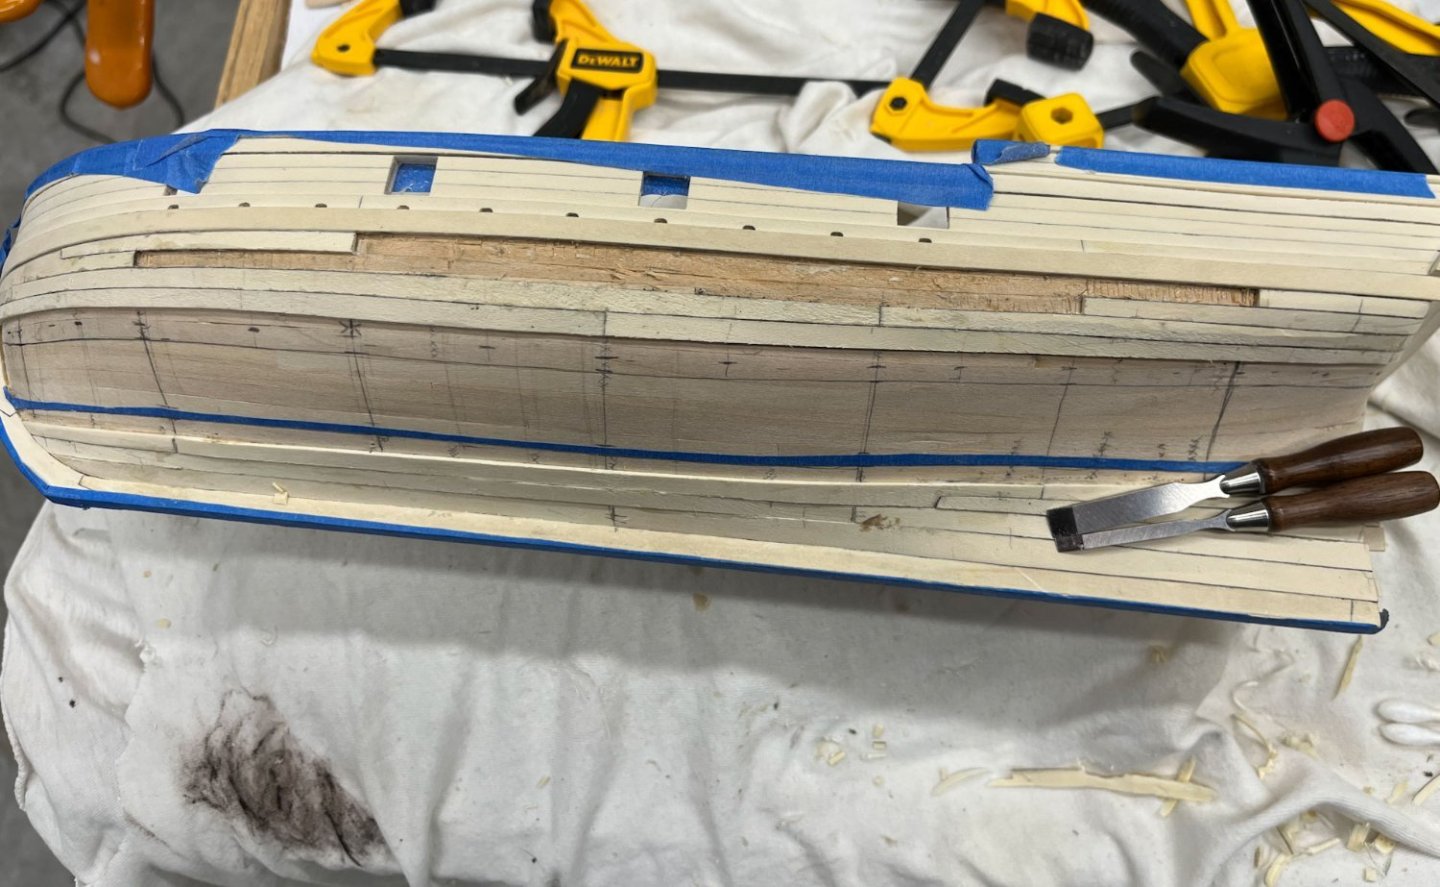
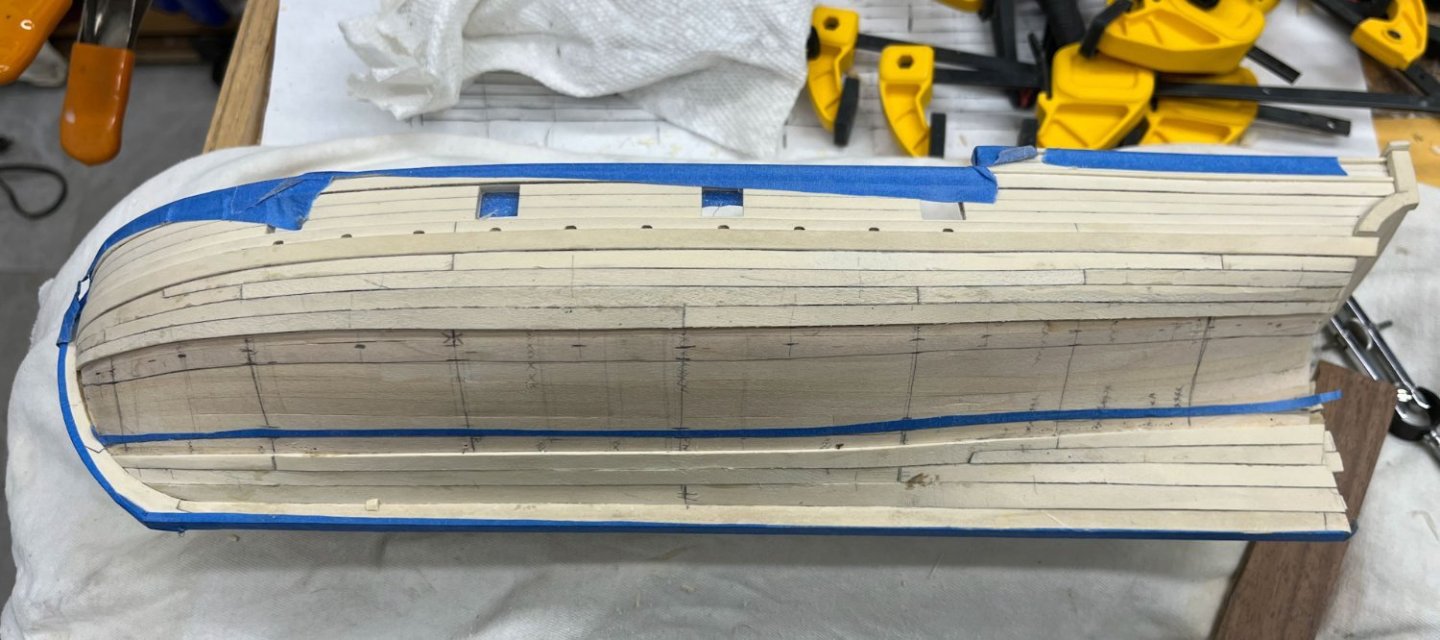
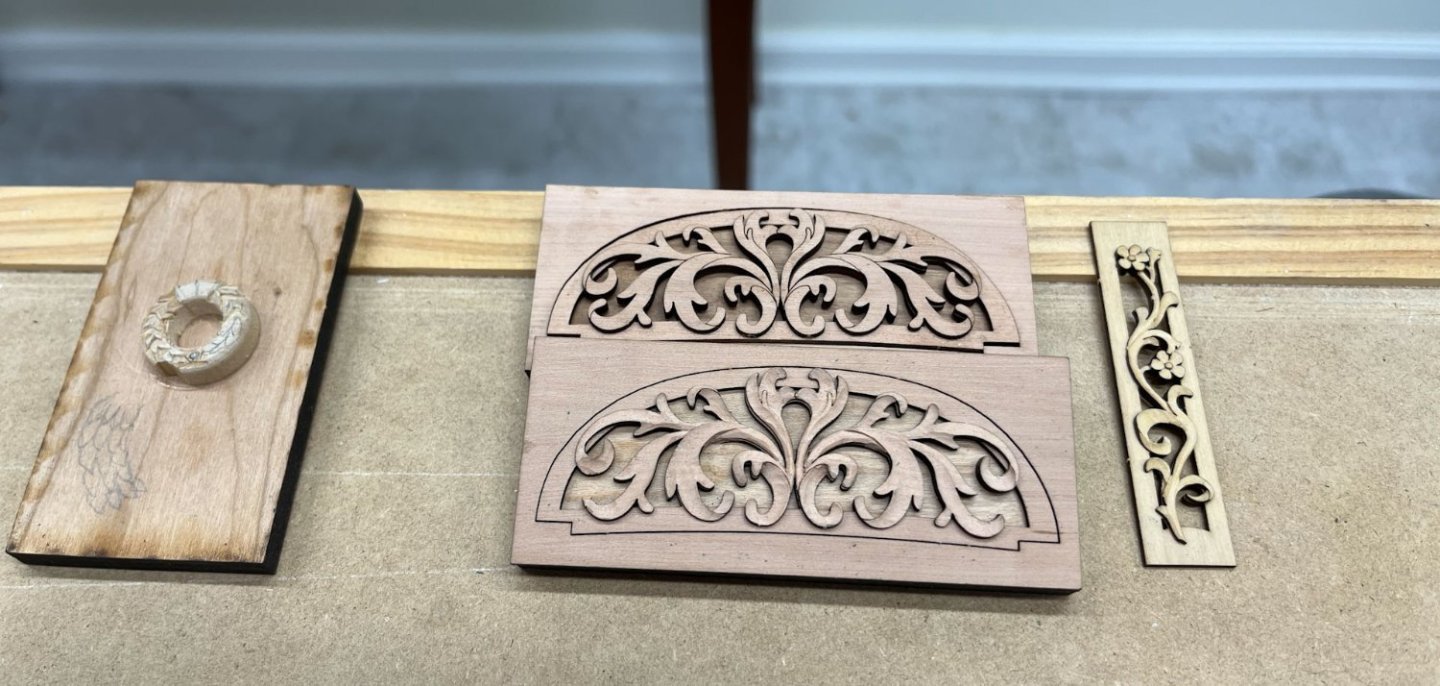
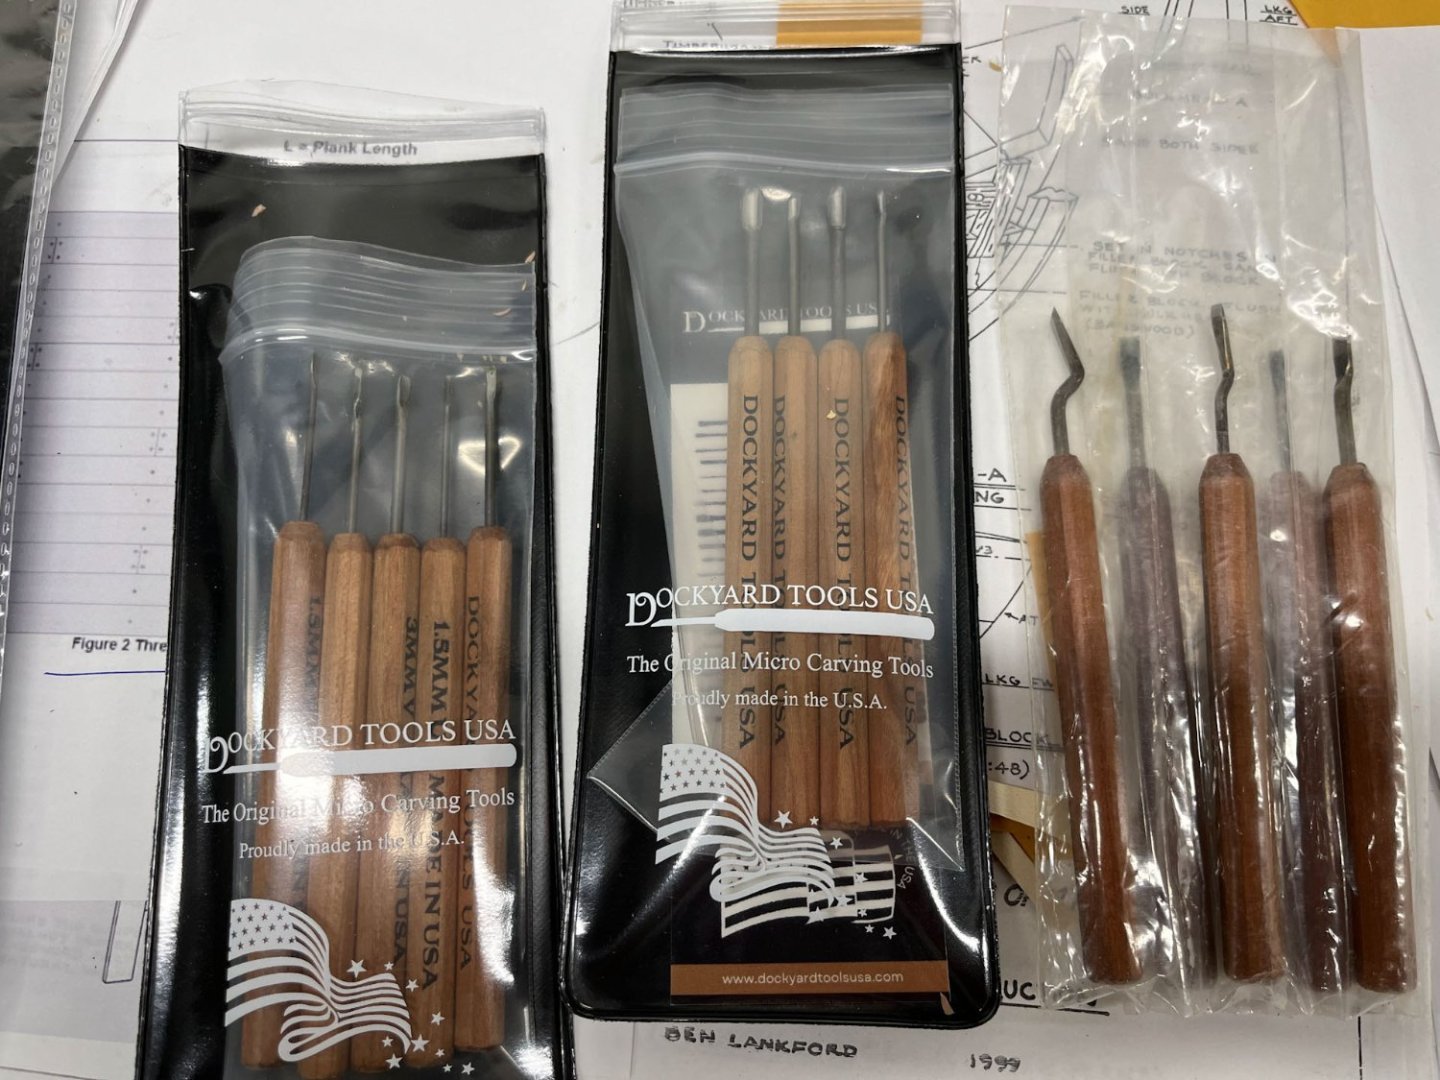
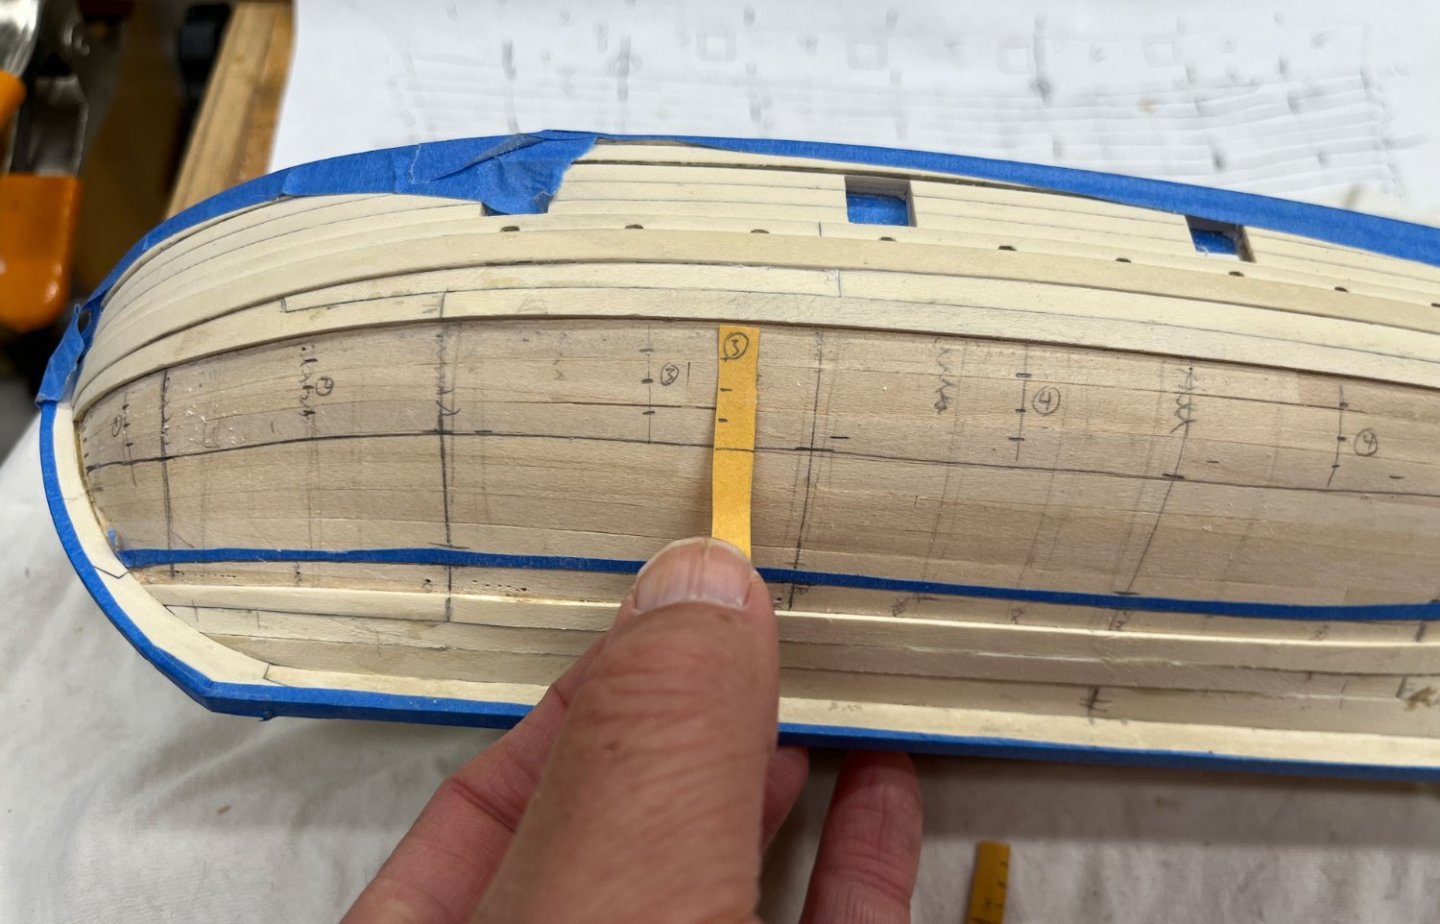
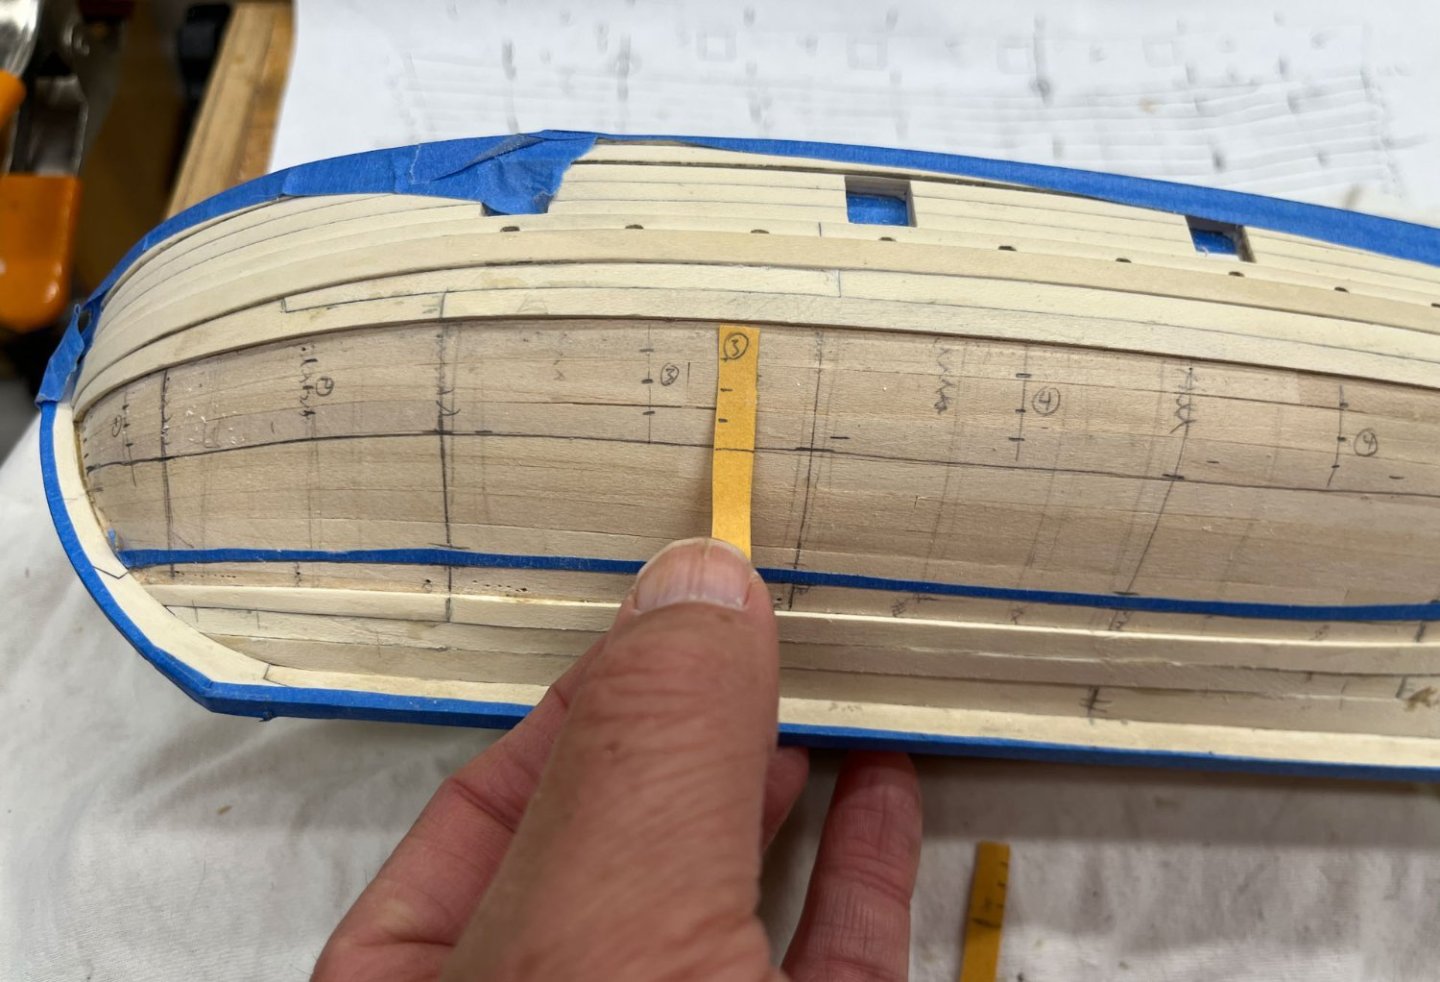
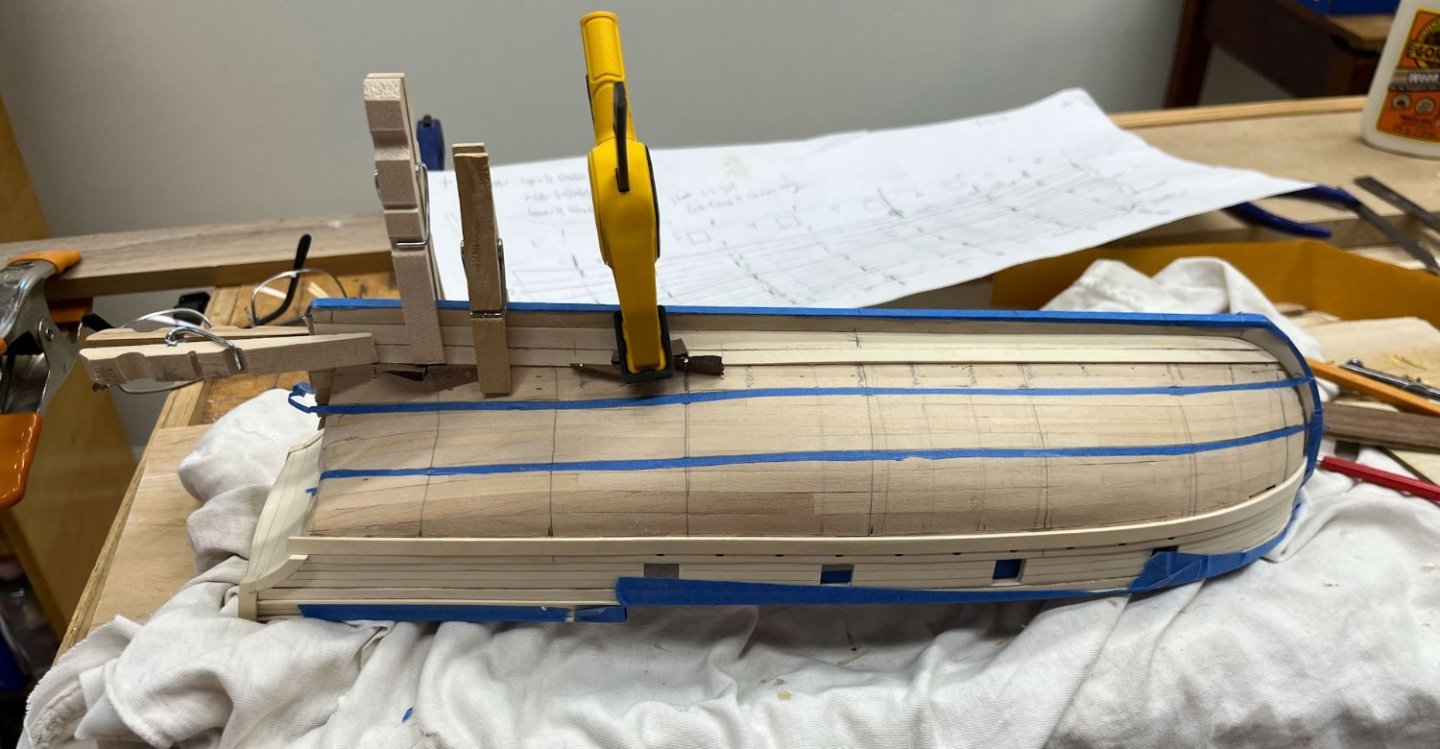
 Happy Thursday night people. I drove back from the Admiralty Workshops Carving class this evening, held this year in Annapolis MD. Chuck showed a bunch of pictures under his Speedwell post of the group hunched over desks with magnifiers on. It may look like a sweatshop in action but was actually very educational and fun. Carving is still intimidating but maybe now a little less so. I didn't take any pics there but here are my efforts. Chuck laser-cut the blanks and then participants cut in the "swoops." The wreath on the left was my least successful effort. And it was a macro practice version; the real ones for the 1:48 ships were about half that size. I fared better in the middle on the acanthus spray. Its hard to see but the top one is the stock laser cut piece; the bottom is my version after cutting. It was an acceptable for a first try/minimum of tearout effort so I was happy. The far right is another acanthus/flower practice piece. These were all panels from David's Fubbs model, which is supposed be an upcoming Seawatch book. For anyone contemplating carving at this scale we found the Micromark gouges to be useless. They come spoon-shaped (why?) and are some sort of stainless steel so will likely never hold an edge. Additionally, I found in my pack one with a broken tip. I am way past the return date so I'm stuck with them. I did, however, like their micro chisel set and have been using them a fair amount. Mostly everyone used Dockyard tools which sharpen well and take an excellent edge. Greg and David run a friendly, encouraging workshop and I highly recommend them. This was my second year attending and I even convinced fellow model shipworlder Jason (JLong) to go too, but sadly he and his wife caught covid 2 days before the workshop so he missed out. My AVS progress was educational as well, if less satisfying. I was all set to add the next line of planking when I realized I had messed up my butt-joint spacing. See the below picture repeated from several posts ago. Above and to the right of my tick strip you can see the highest butt joint, then the main whale, then my topmost hull plank butt joint is clearly not in line. I think I put in the top plank and forgot to trim it back. To make matters worse I had done it again on aft end of the next line of planking. Obviously it would haunt me forever if left alone so I used some alcohol and chisels to work the two offending planks out. I was pleasantly surprised there was minimal collateral damage. After trimming the butt joints to their proper lines I made and installed new planks. I can't tell I did anything so although net 0 progress to me still a success. And thats it. Have a great evening Cisco
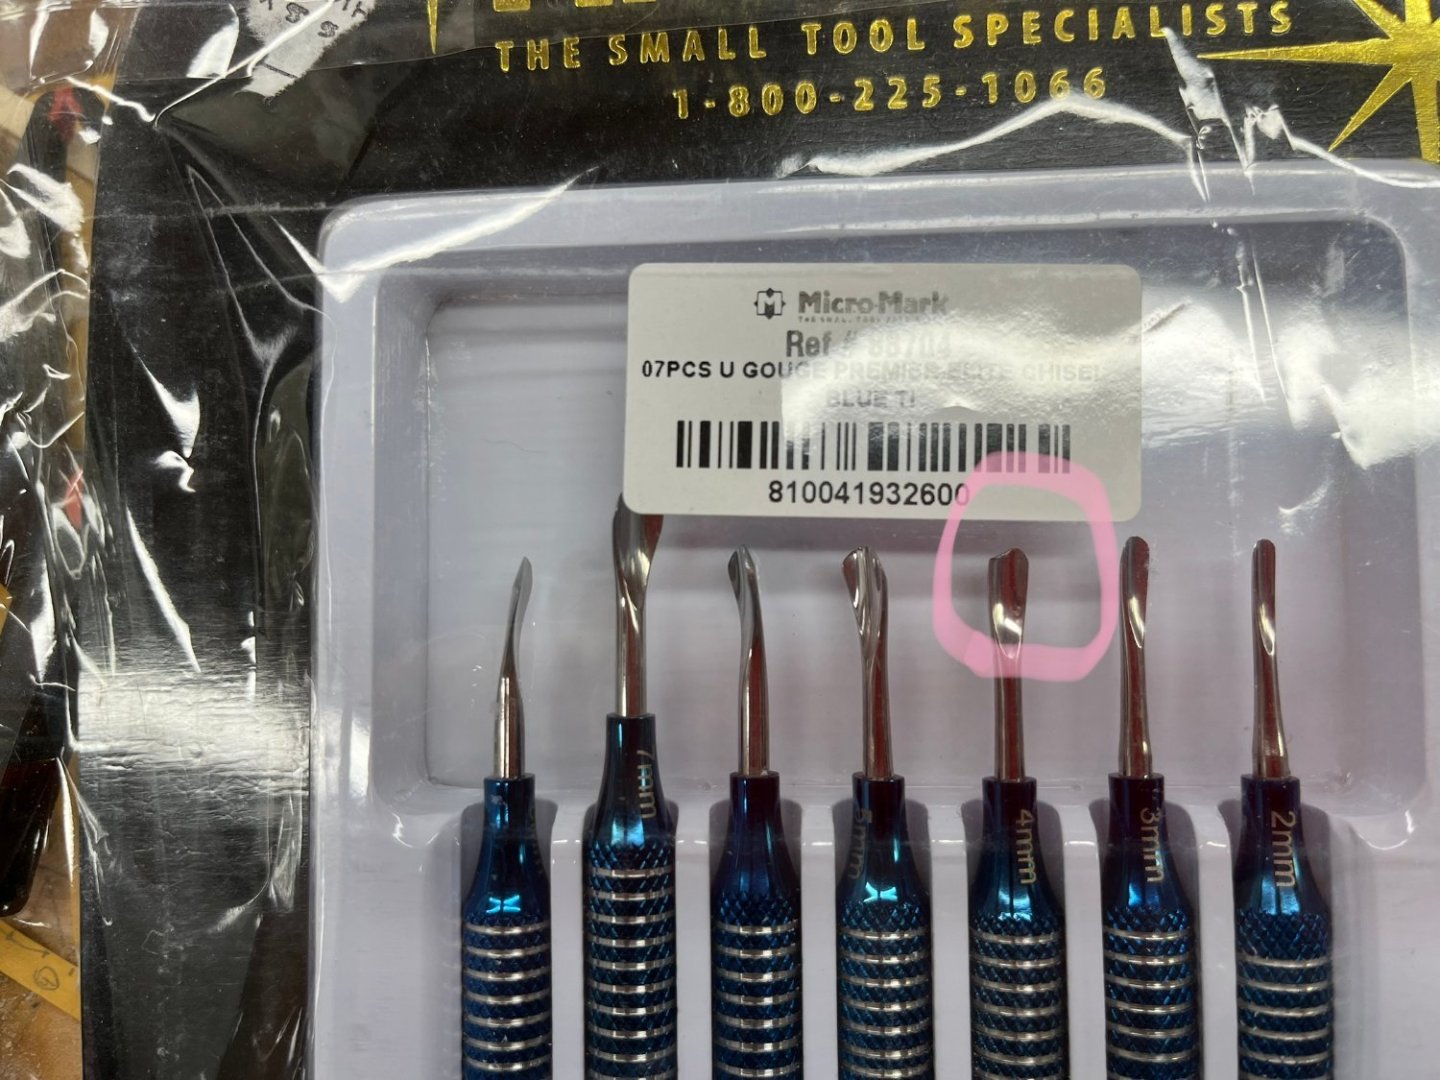
-
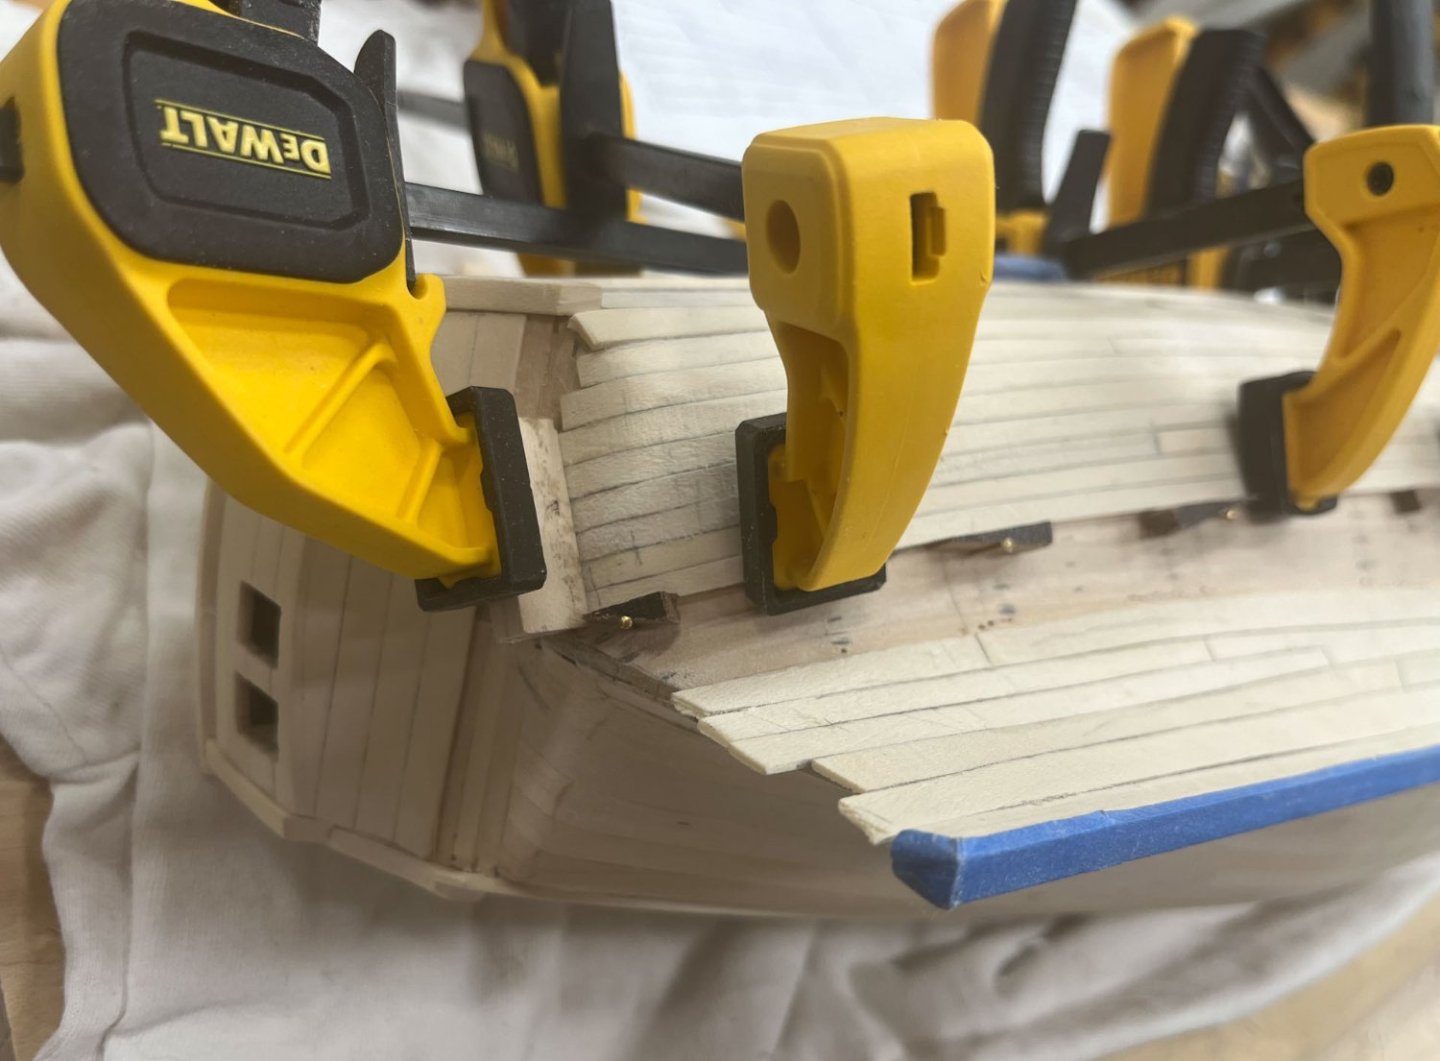
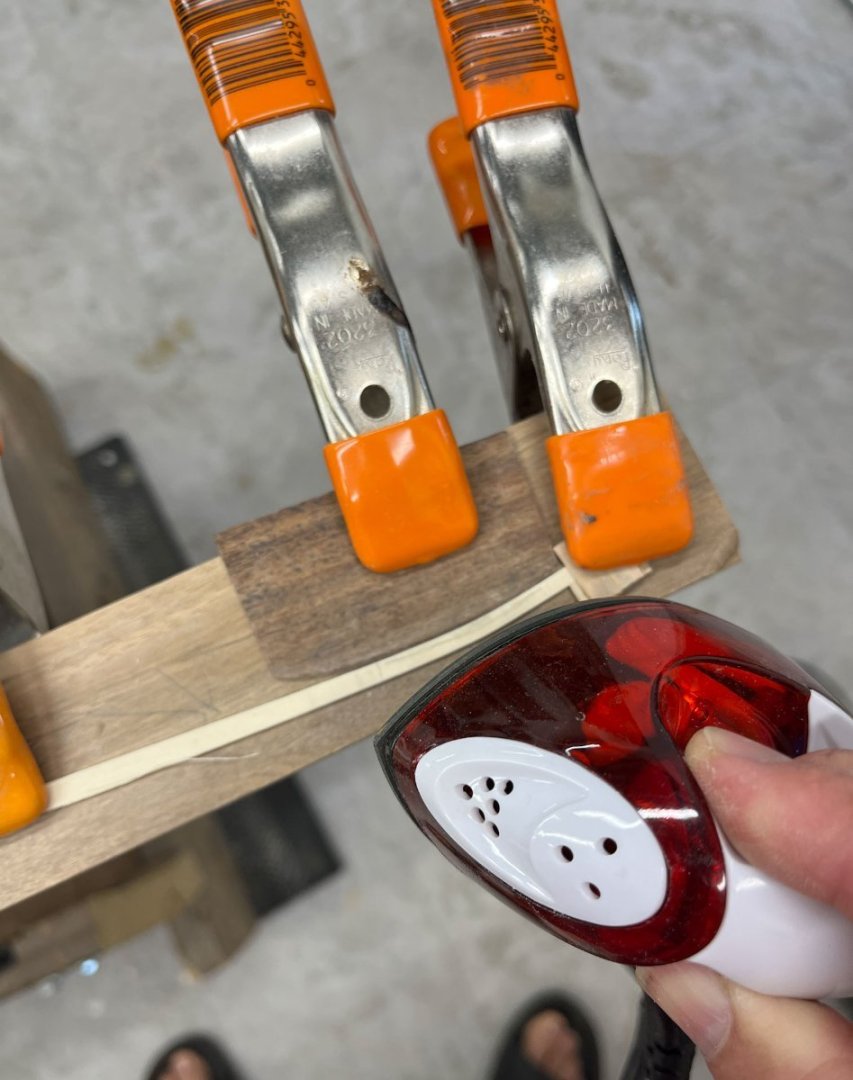
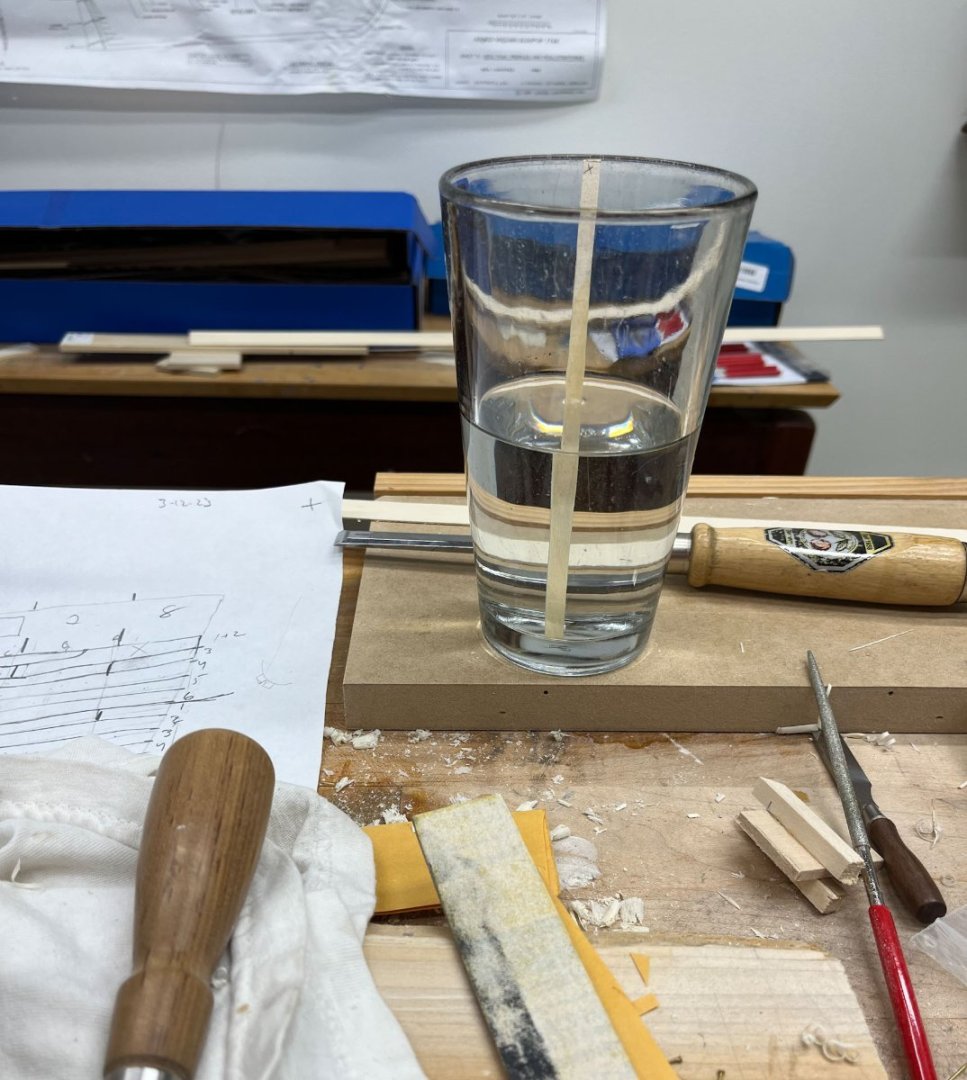
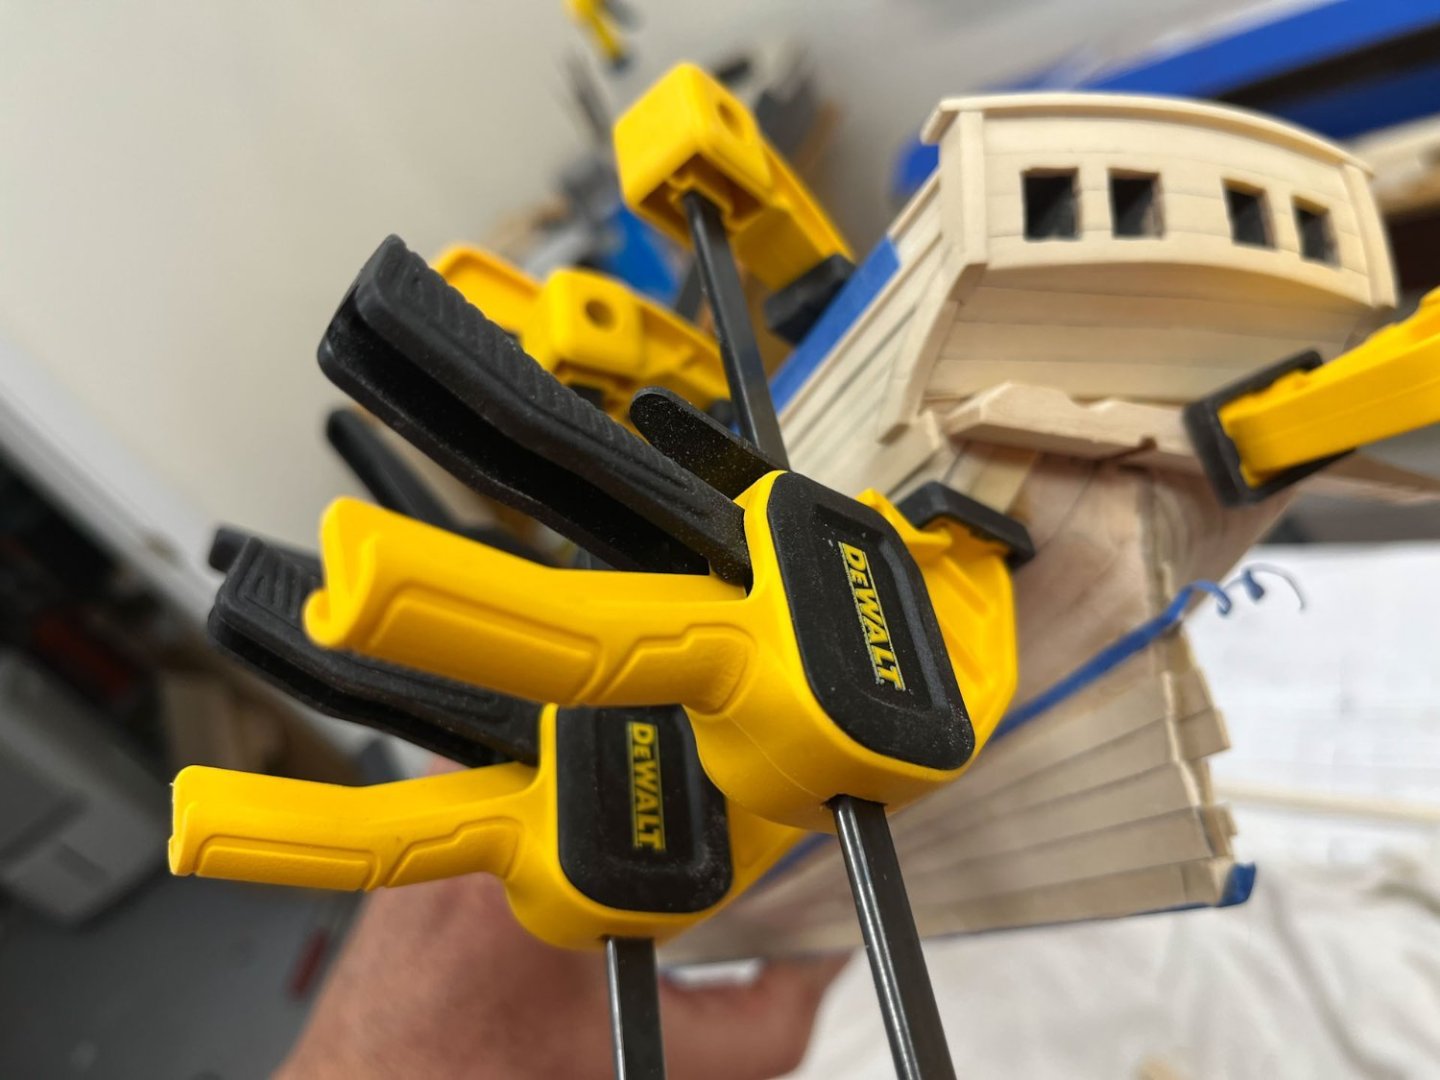
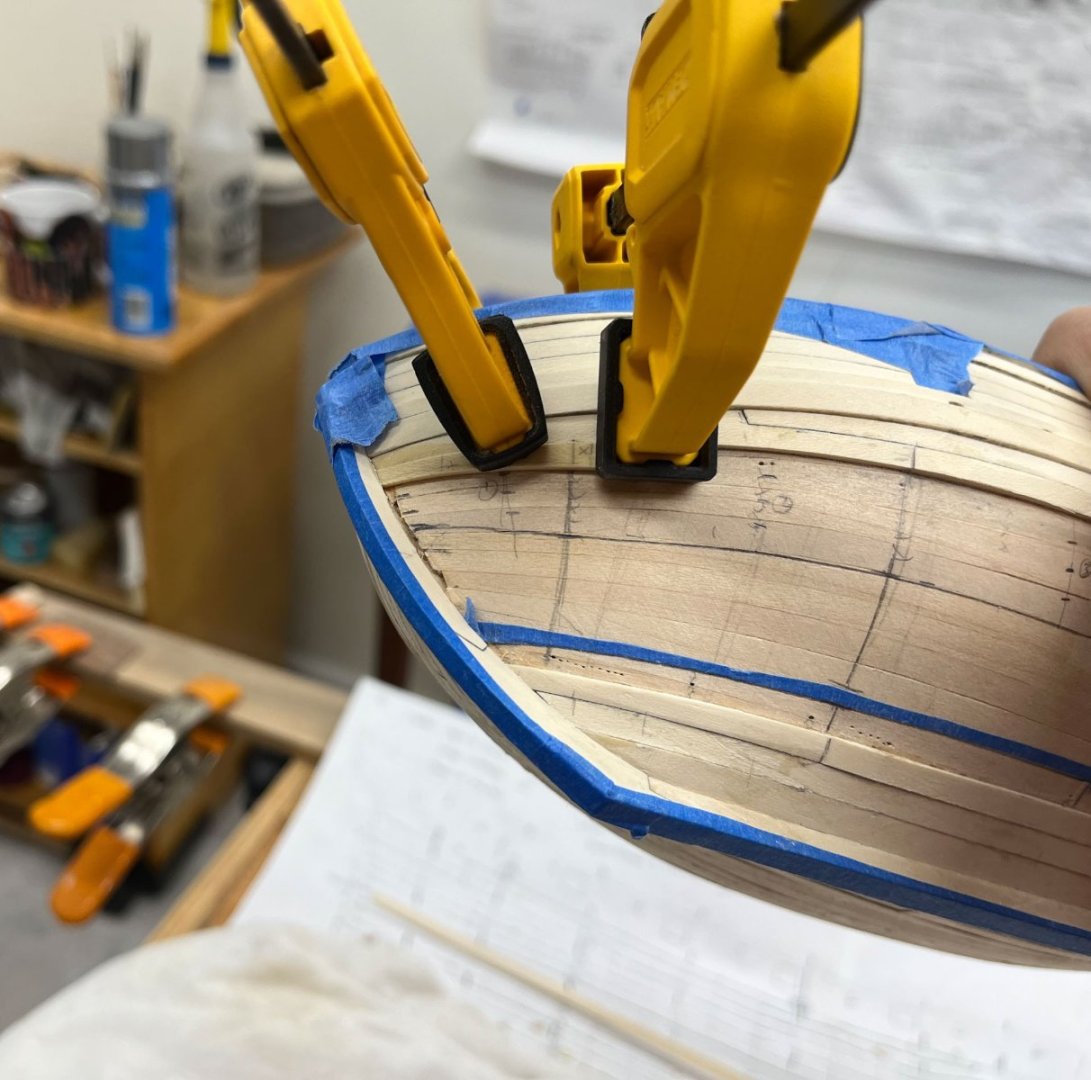
Good Sunday afternoon Model Shipworld Fellows I am plugging away at the port side second planking. Its not going fast, but it is going smoother. I learned a few things from starboard planking. The first 2 planks below the main wale I made by copying from the starboard side. I figured out widths using my small drafting compass. The reason I didn't initially use tick strips to divide up my band like on the starboard side was my small brain. The first stem plank is a 1 plank expanding into 2 planks (stealer? I think) and I initially overlooked this meant at the stem there are 5 planks, while at the stern there are 6. Not a hard concept but it caused me some serious confusion, discarded tick strips, and a lot of erasing on the starboard side. Second thing I did was pencil lines on the hull where my planks will butt. Previously I tried to wrap a tick strip paper across the hull and pencil onto each individual plank where its butt joint should be, which was awkward. I was worried there would be too many lines on the hull after the 5->6 tick strip confusion but I think I'm ok so far. So now that the top 2 planks were in I took the time to divide up the remaining space into 4 planks. No confusion here; 4 at the stem and 4 at the stern. I also had the genius idea (not that genius I guess) of labeling my tick strips 1,2, 3, etc and writing the same number on the hull. Thus I could tell which strip went where in case I wanted to double check down the line. For this line of planking the stem plank is very short; only to the first station line. It still curves so I learned you need to either spile, or bend your plank, unless your hull is to be clinker, which this isnt. Here I used my travel iron to bend the plank, then with files fine shaped it. There is springback but even so I had to sand the curve flatter some. The final thing I learned on the starboard side is patience. Holly bends really nicely with soaking but it has to be DRY before you glue it otherwise it will shrink and suddenly you have gaps. I haven't figured out a good method using heat to put the sharp bend the plank needs to fit around the stern. One thought I had was getting a heatgun and using it to heat the plank up and then while its still hot clamping it to the shape I want? The hairdryer I have doesn't have enough oomph for the job. So I resort to water, which even though it makes the wood swell up some has the advantage of not risking me burning myself or the house down. Here is the stern plank soaking in cold water for 15 minutes. This was plenty of time to become pliable. Then I clamped it to the hull. No splintering or breaking, worked well. The plank is also a bit wider than what the final will be so I can sand it to fit after its dry tomorrow. Bending on a weird sideways curve makes the plank distort a fair amount and I haven't found I can completely clamp it into submission. But it gets it pretty close. Sorry my camera focused on the clamp and not the stern but it was a juggling act. I also dipped the stem plank in water and clamped it in place to dry. This has been the best way I have found so far to deal with curves in 2 dimensions; heat for 1 bend, water for the second. The stem plank is fairly thick because I made the stem rabbit wider than optimal and I don't want the dreaded (well I dread it anyway) stem - plank gap. In this case its snug enough to be tight, even if it means the rest of the plank is thicker than necessary. Easy to sand down even in the future. Tomorrow or sometime next week I will do final fitting and glue both planks in place. Then fit the middle piece in place. Thats all I got today. Hope the weekend treated you kindly. thanks cisco
-
I’m (very) slowly building Model Shipways Armed Virginia Sloop which also has 2 layers of planking. While its a pain to plank two times the first layer was good practice and contained more mistakes than the top layer. As others have commented on there are many ways to deal with the curving and tightening at the bow; I followed Chuck’s planking method (his videos are on this site under Planking I think). Watching the videos and then actually planking with them helped me a lot. in short the planks narrow up to 50% of their width AND have to be bent in a curve to avoid the clinker effect. Here i think the point of the first layer is to Practice and to Provide a smooth solid base for the 2nd layer and it looks great to me
- 152 replies
-
- 2
-

-
- Vanguard Models
- Cutter
- (and 2 more)
-
Archaeological Paper on the Wreck of HMS Swift 1763
CiscoH replied to Steve20's topic in Nautical/Naval History
very interesting, thanks for posting Steve20 -
Planking Book?
CiscoH replied to BWDChris's topic in Building, Framing, Planking and plating a ships hull and deck
18th century longboat by model shipways. basic planking and rigging, its small, and usually 50 bucks. excellent instructions too -
great job Roger. youre moving fast and it looks excellent. i went from the 18th cent longboat to another model shipway’s kit, the Armed Virginia Sloop. its a step up in complexity but not a 74 or something really crazy. Directions are definitely dated though; you have been spoiled by Chuck’s clear directions for this kit.
-
Great start Roger. this model is harder than it looks (small not = easy) but will give you an intro to every skill you need. also everyone breaks off the top of the stem.
- 18 replies
-
- 3
-
-
- 18th century longboat
- Model Shipways
- (and 1 more)
-
guns look great and thank you for the clear explanation Thukydides
- 562 replies
-
- 4
-
-
- vanguard models
- alert
- (and 2 more)
-
simply amazing Matthias!
-
This was my first wooden ship model (now I'm at 1.5 total builds) and I figured since it was small it should be easier. That turned out to be maybe true (versus building the Victory its easier I guess) but overall Chuck's kit has an introduction to every serious modeling skill you need- bending planks being the big one, but also basic rigging, making a base, painting, etc. I got a lot out of it, kinda like a Gateway Drug. You already are paying way more attention to keeping the frame square and flat than I did. Keep up the great work! cisco
-
DB789 I don't want to hijack your log with Tangent Questions but maybe you know. I've read it was normal in big vessels with plenty of space to mix carronades and long guns, but was it common on such small vessels? I could see it being a positive (hit the target from a distance with the long guns, then batter them with the carronades at short range before boarding) or a negative (jacks of all trades can be bad at both tasks). And having written that last sentence both options sound improbable- I thought privateers usually preyed on unarmed shipping where threat alone was enough to induce Heaving To. If you encountered anything big you ran like heck, so maybe having many gun ports and only 4 cannons was plenty; more just weighed you down and made you slower. What are the odds you encounter another vessel exactly the same size and armament where having more cannons would be beneficial? Personally I like the look of your current plan of every gunport filled, even if recoil from the stem cannons would probably wreck the bits. cisco
-
They do look really good and I had to laugh that after all that work they're not the right scale. We've all been there. But when you make them again smaller it'll go twice as fast
-
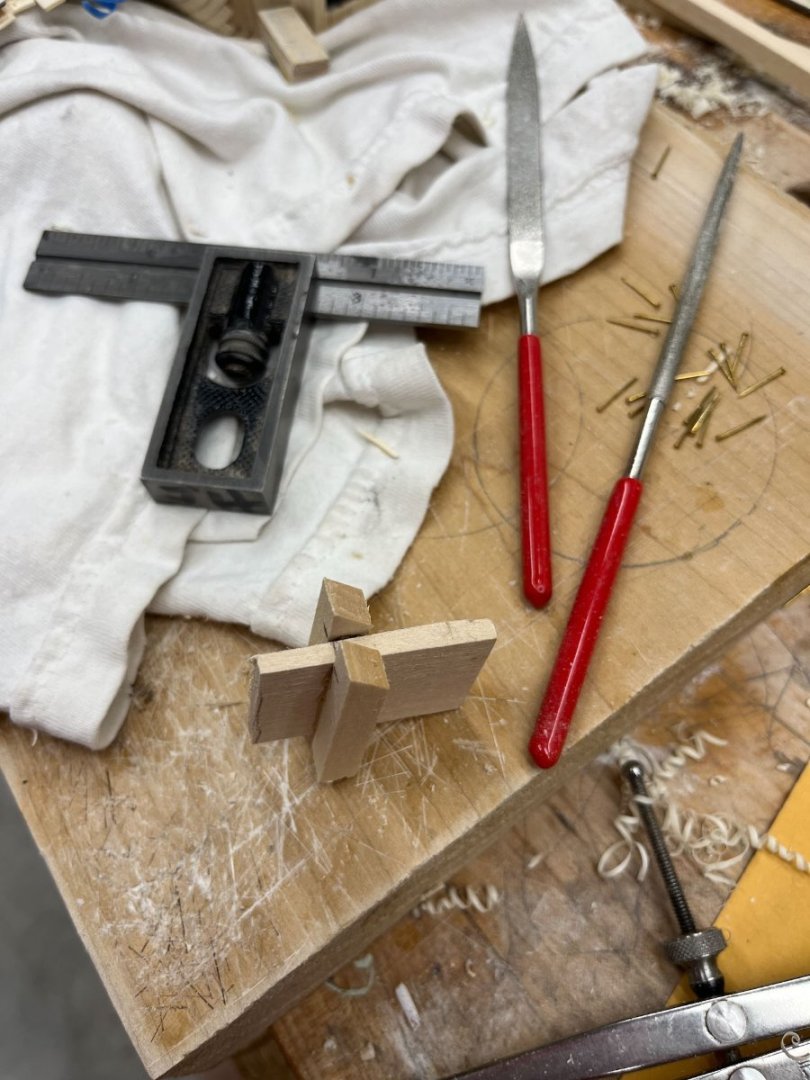
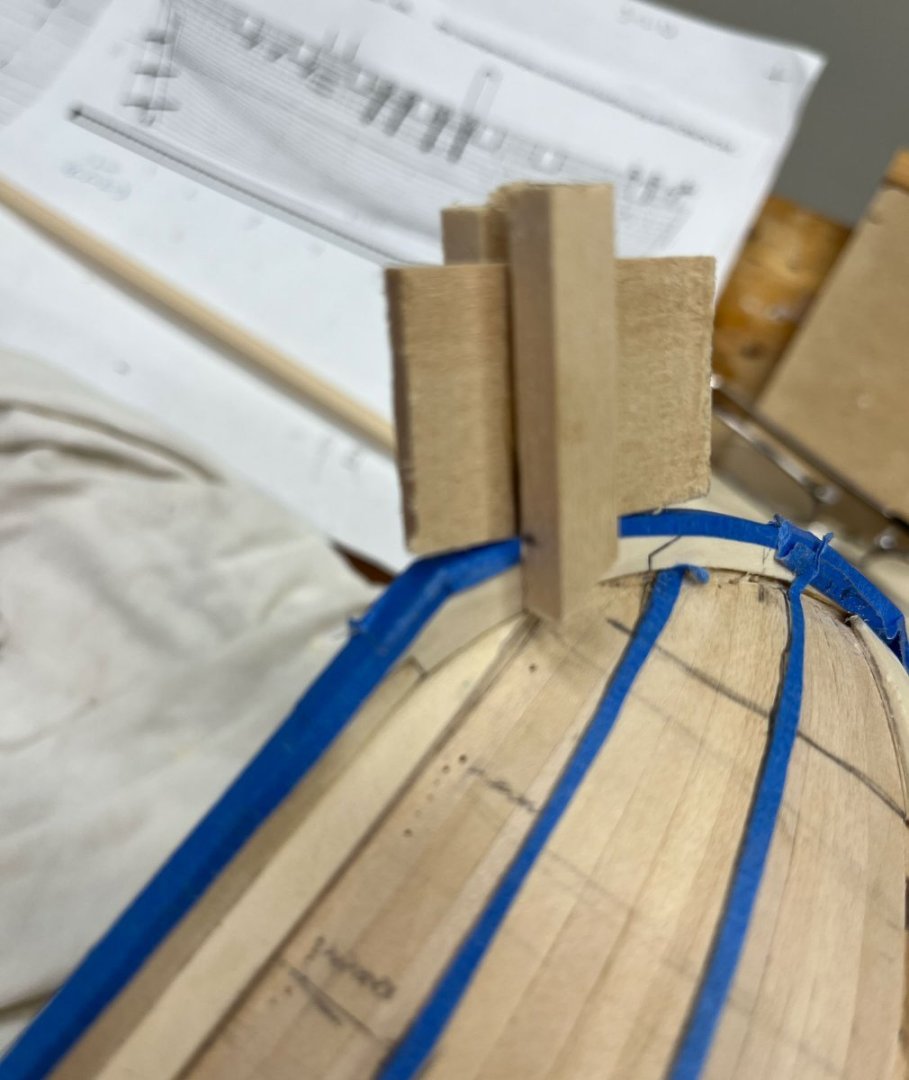
Good Sunday morning readers. Wife's out riding the horse, kids are asleep or at least quiet upstairs, time for an update. I'm starting on the port side planking. I'm again making it in 3 bands and I used my previous method of running thin strips of blue tape lined up with the starboard side planking. Once I had the blue tape running fair I compared it to the starboard side, using a compass and tick strips to make sure both runs were reasonably close. This process led to a new question- how do I line up the planks at the stem so they look relatively even on both sides. I usually eyeball stuff, sometimes to my detriment, so I decided to make a jig. In carpentry I've heard this called a "preacher," I think because it could be imagined as 2 hands held together. But it does work well as a second opinion. Pretty simple device, made of scraps. I put in the garboard first which I believe is often wider than the other planks. As i noted before I made my lower starboard planks probably too wide overall, especially compared to the upper strakes which were much thinner. But rather than do another planking scheme on the port side I decided to do my best matching the widths so the hull planking is symmetrical. Full commitment to "no, i meant to do it that way." Here is the preacher on the starboard side. Sorry if its a little out of focus. You can hopefully see the point of the preacher is just touching the top section of the garboard where it goes into the stem rabbit. And here is the port side. Again I apologize for out of focus pics, but in real life it was clear I needed to remove a little more of the top of the port garboard. I did so with my little Veritas chisels and judicious sanding until the 2 sides matched. Presently I am gluing the next strake, figuring widths with the usual paper tick strips and comparing to the same plank other side with a small drafting compass. You can see I'm using my standard pins, wedges, and gentle clamping which works very well for me. Still using Gorilla yellow glue. This plank had a significant twist which I set in with a hairdryer off the model before final sanding to fit. My kids have been quiet for too long; time to see what they've been up to thanks for reading, enjoy your Sunday cisco

-
i am building model shipways Armed Virginia Sloop and also using Bob Hunt’s practicum and ran into a similar? issue. i think the supplied waterway in the kit was thicker stock than it said in the plans which threw off all the subsequent bulkhead inner planks installed above the waterway. not sure if that applies to your question. i didnt sweat the angle between the waterway and the bulkhead because the above bulkhead plank covered any small gaps. looking great so far cisco
-
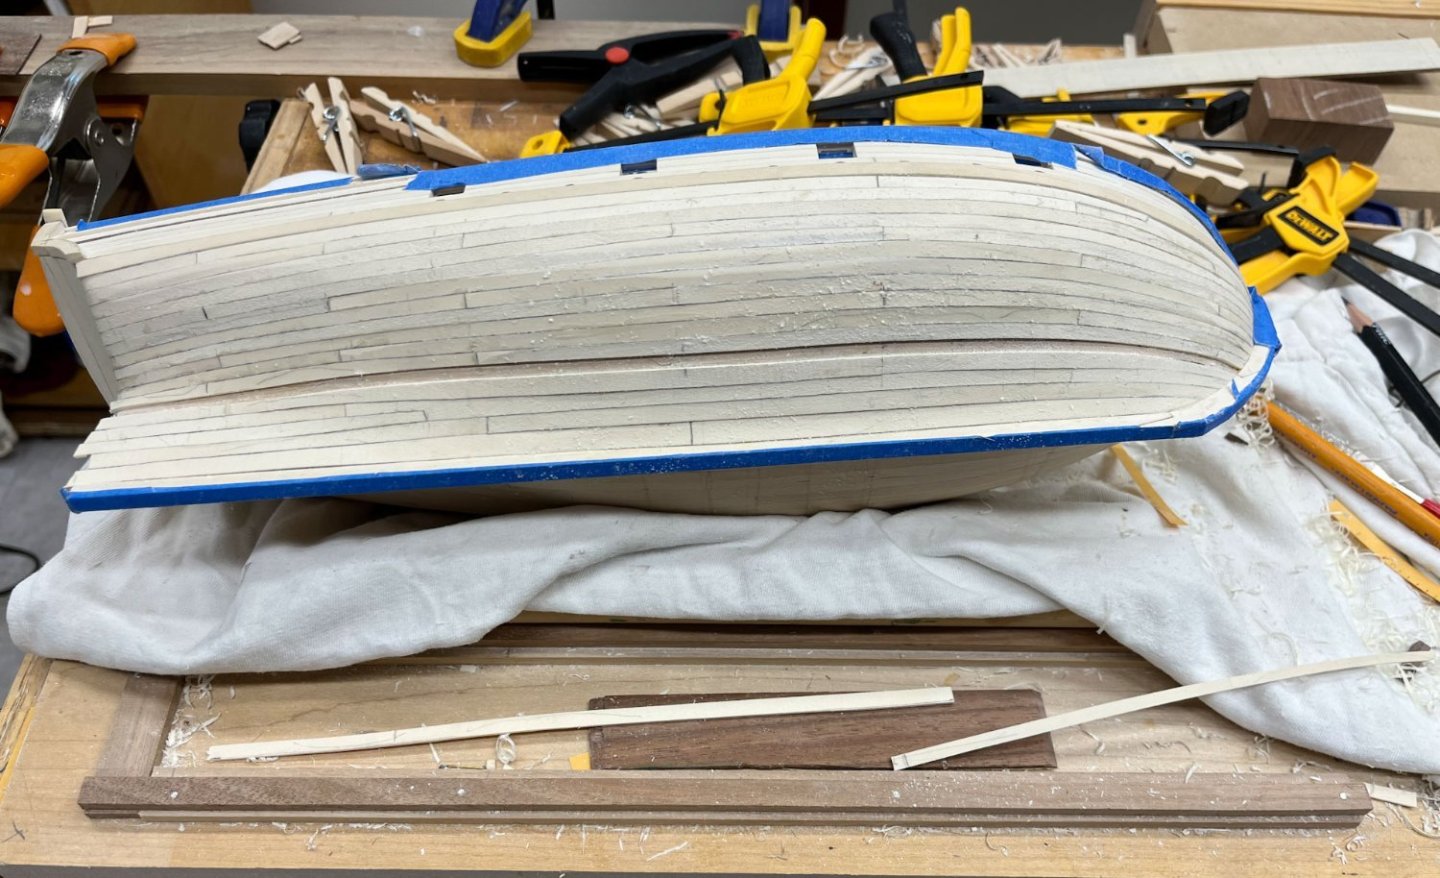
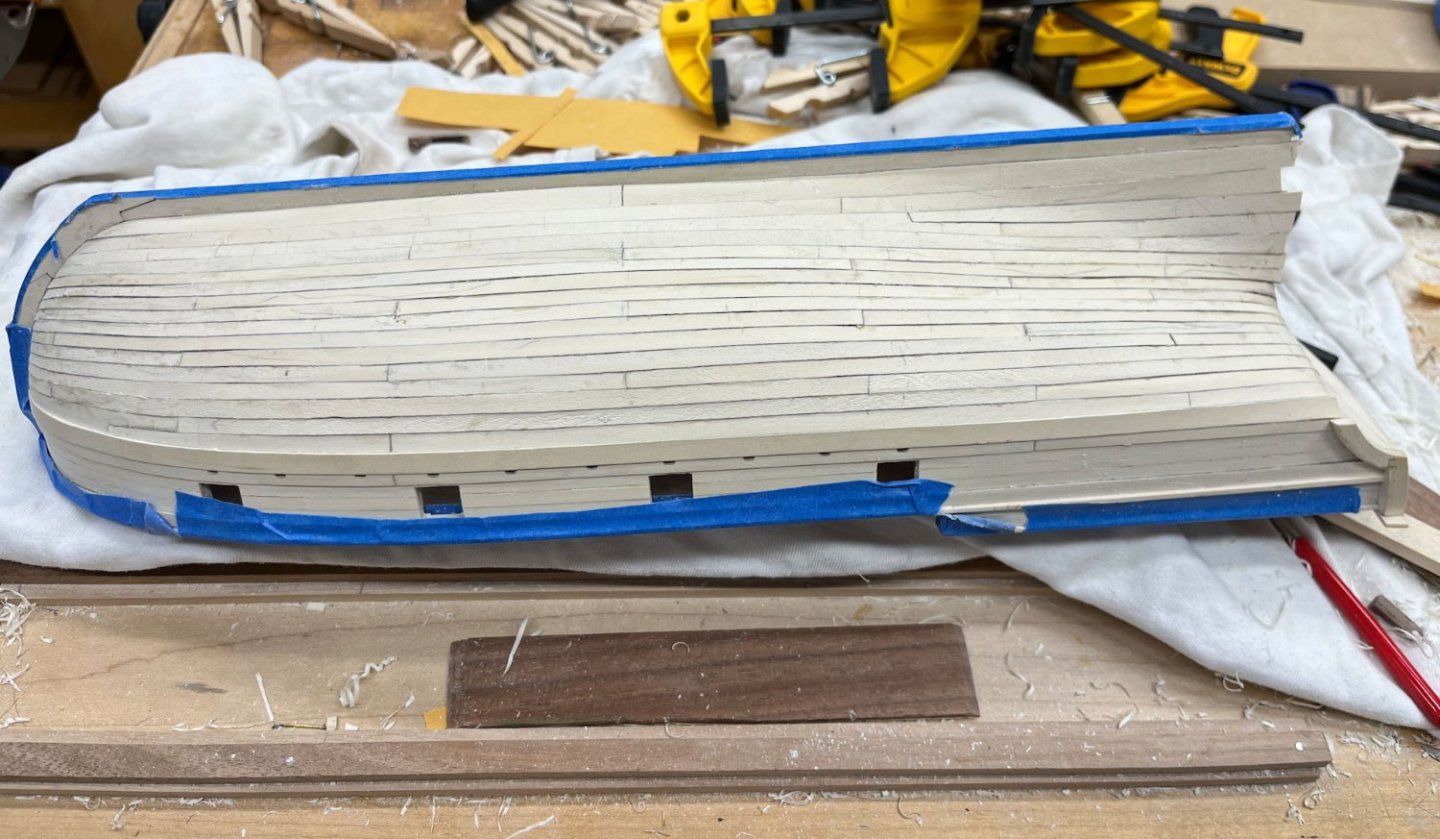
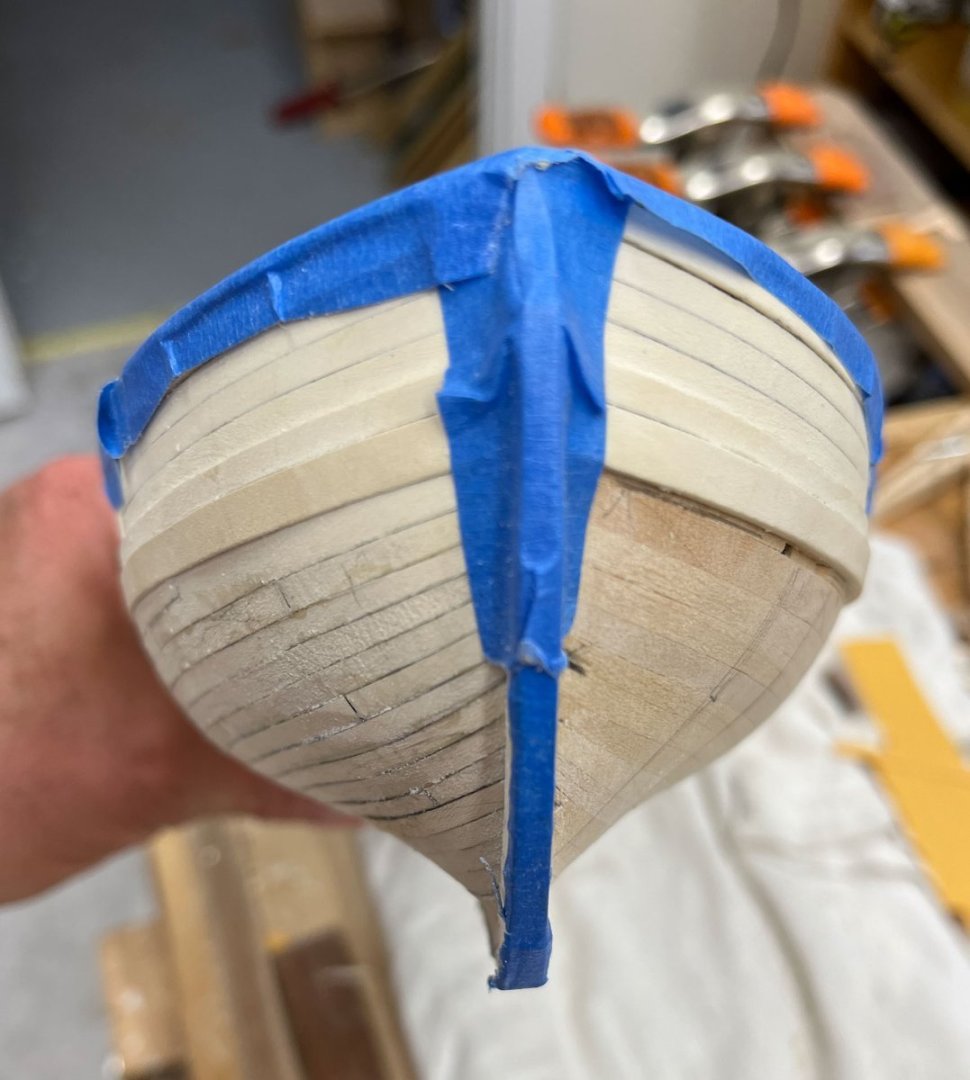
At last I have finished second planking on the starboard side! If my AVS was a real ship her timbers would be fully seasoned and the shipwrights long since starved to death. Hopefully the port side will go a little faster. Below I have 1 strake left; in this case the planking plan calls for it being divided into 2 planks. The front one is already done, the stern one is being fitted. I fit the butt joint first and worked my may sternwards; miniplane to pretty close, sand a little off, fit, when its hard to push in sand a litttttttle more and not too much, keeping in mind the glue will swell the plank a little. In the future I will try to have my last plank be more towards the garboard where its flatter. Here the rudder end of the final stern plank had to fitted into a tight curved space that flared at the end. Live and learn; it fit snug at the end. And here is the final result. I stole Cheerful's planking plan so it follows very closely. I'm leaving it as-is so the inevitable dings after I'm done the other side can be sanded out at the end. I still wish I hadn't finished the upper rails so well; I'm sure I've inflicted clamp marks presently hidden under the blue tape. Some water and the travel iron usually steams them out ok though. Heres the stem shot. I think it looks pretty good. I find it funny that even though in this shot the stem planking curves upwards, to fit them they had to be steam bent to curve downwards. Some sort of optical delusion. And the stern. I left the planking long so I could use a straightedge to cut across the bottom of the counter; even if I cover the transition with a thin molding strip I didn't want gaps. I am going to wait until both sides are planked before trimming the rudder planking flush. Then I'll add the sternpost last. Time will tell if this was a good decision. And now I'm off with the wife to drive the kids to camp. Have a great weekend everyone! Cisco

-
beautiful work Katsumoto you probably said it some posts back. who makes your rigging line? its nice and not shiny and looks very realistic
- 208 replies
-
- 1
-
-
- kitbashing
- Woodcarving
- (and 4 more)
-
that 45 degree sanding thinger is pretty clever. i would have done it by eye and gotten a rounded uneven rabbit.
-
Looking great Tom. i’ve only built the 18th century whaleboat so far which had basic rigging (and only one mast) so i dont have extensive rigging experience. but on that model i did all my lashings without glue so the stay lengths could be adjusted as i went. friction was plenty to hold tension and i didnt end up with a wonky mast pulled out of true so it worked well for me. the supplied rigging rope was polyester (i think) and so far seems immune to humidity changes. my parents came back from Iceland 2 weeks ago with your viral friend. the current strain seems to be much less virulent and they did fine. hope you do as well cisco
-
well heck. after reading this post of course i had to order the book. it arrived yesterday, perfect timing for some relaxed 4th of july reading. thanks bobcat for the review it is much appreciated
-
HMS SUSSEX 1693 by 8sillones
CiscoH replied to 8sillones's topic in - Build logs for subjects built 1501 - 1750
Yes -
Good Afternoon fellow modelers. This wasn't a very productive month for me - too much going on. For starters I flew out to Estes Park Colorado with 5 of my college running buddies to celebrate our collective 50th birthdays. A week of hiking each day at 7500-10,000 feet altitude, mountain biking, an insane Frisbee golf course on the side of a mountain, and a vacation from our grown-up selves. An amazing trip but sadly far from any ships. In the below pic I am most of the way to Black Lake and trying not to slide down the snow embankment into the river. My AVS has added 2 strakes I think. 4.5 to go on this side. I haven't sanded the starboard side yet so the planks look a bit rough. In hindsight I wish I had left some final sanding on the upper rails. I flip the ship around a lot and am probably dinging it up with all my clamps. Another thing I noticed; a lot of thinner planks look more realistic than fewer bigger ones. I tried to divide up the hull up into similar sized bands but some of the planks near the garboard are a bit wider than the upper ones. Something to keep in mind for the future. and thats it for today. Cisco