HOLIDAY DONATION DRIVE - SUPPORT MSW - DO YOUR PART TO KEEP THIS GREAT FORUM GOING! (Only 24 donations so far out of 49,000 members - C'mon guys!)
×


CiscoH
-
Posts
379 -
Joined
-
Last visited
Content Type
Profiles
Forums
Gallery
Events
Everything posted by CiscoH
-
 I just read your entire log juhu- masterfully done! Thank you for posting
- 104 replies
-
- 1
-

-
- Bluejacket Shipcrafters
- smuggler
- (and 1 more)
-
that half-lap jig is genius. I assume there is fine sandpaper on the bottom face of the block. Do you cut the shoulder of the half lap with the hobby knife and then sand up to it? and how are you rabbiting your planks?
-
looks great Sluicemaster! I don’t fully understand why a kit would have you plank 3 layers. My Armed Virginia Sloop has 2 layers and it has been helpful learning how to (and how not to) plank on the first layer but in the future I really only want one layer. Chuck’s planking videos were a game changer for me too keep up the great work
-
This looks like an excellent project for the First Timer* Great job Paul I am impressed * haha no
- 55 replies
-
- 2
-

-
- Nordlandsbaaden
- Billing Boats
- (and 1 more)
-
the digital tour starts at the front door. Go through the doorway that says Enter Here, then bear right. There is a yellow sign on a stand at the entrance to the stairwell. You have to literally keep clicking to go up the stairwell to the next floor where all the good stuff is. I couldn’t find a shortcut. Simply breathtaking exibit. I especially like their collection of stands and cases
-
That’s some tight planking, especially at the prow. Great job
- 53 replies
-
- 1
-
-
- Speedy
- Vanguard Models
- (and 1 more)
-
Really great build! I especially like the sails which usually don’t add much, in my opinion, but in this case they are so well done it pushes your Victory up a level. Well done Sir!
-
La Belle: Archaeology of a Seventeenth-Century Ship
CiscoH replied to bruce d's topic in Nautical/Naval History
Holy molly that was dense geometry i followed some in the beginning but it got a bit intense thankyou for posting! -
Just read your build from the beginning- really great! Thank you for posting.
-
fantastic job Svein Eric, thank you for the great close up shots. Can you elaborate on what you repaired in the lower bow planking? I'm at the exact same spot on my current build thanks, cisco
-
Thanks for reading my post Oldsalt1950. I worry if I don't make at least slow constant progress I might lose momentum and then Bam! 20 years later I find a sad half completed AVS pushed to the back of the closet shelf. But so far I am really enjoying the mix of challenge and fun that building model ships brings. mikiek I get your point. I suspect I took the garboard too far forward which is what led to it curling upwards at the stem; I had read that a lot of beginners do this. When I did model shipway's longboat Chuck specifically stated (i think) to end the garboard just forward of the stem/keel joint, which at the time seemed too far back. Every subsequent plank had to be bent downwards just aft of the stem to follow this curve. It turned out looking fine to me at the time but since I painted the hull white I can't see my planking job well enough to re-asses it. If I'm understanding you correctly you would know when the garboard is in its proper place when the next plank up can rest on it without bending. I'll try it on second layer planking. Luckly AVS only has 2 layers. Only crazy people do 3.
-
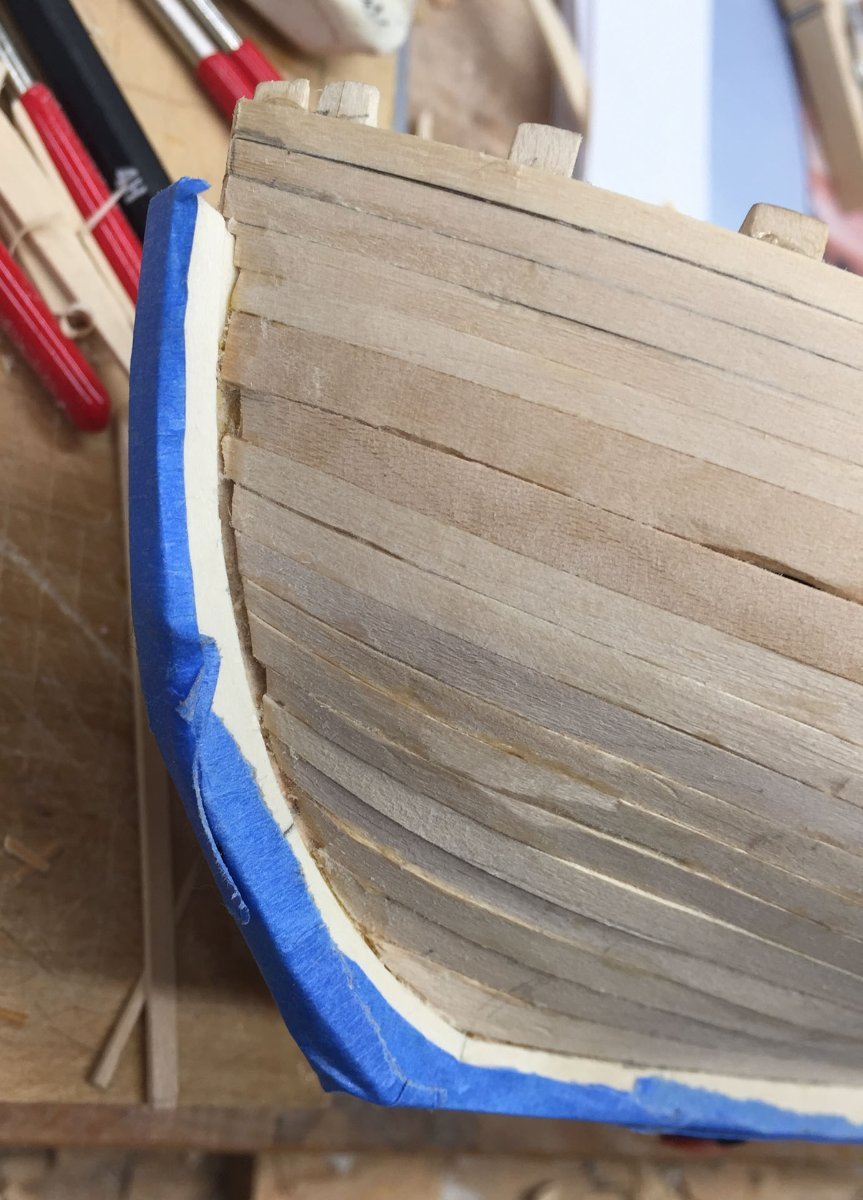
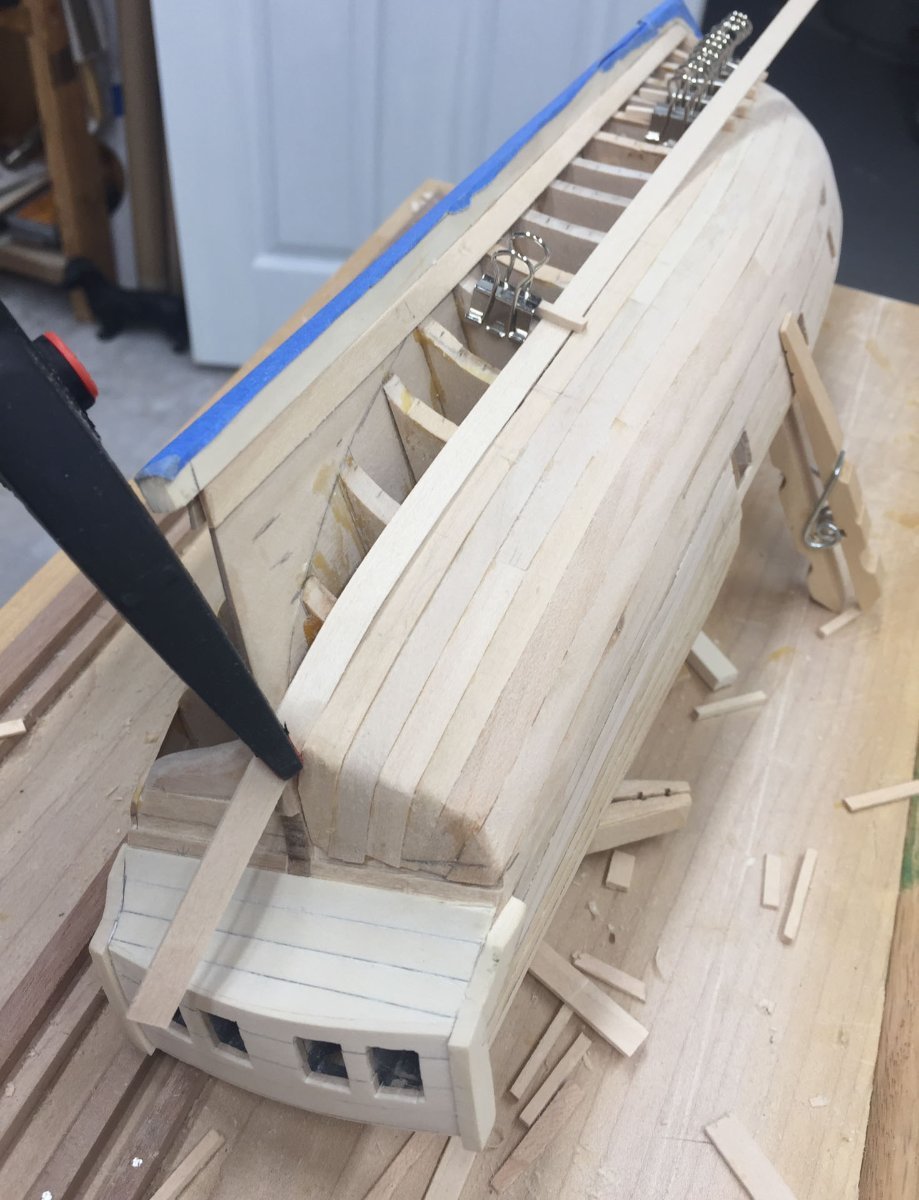
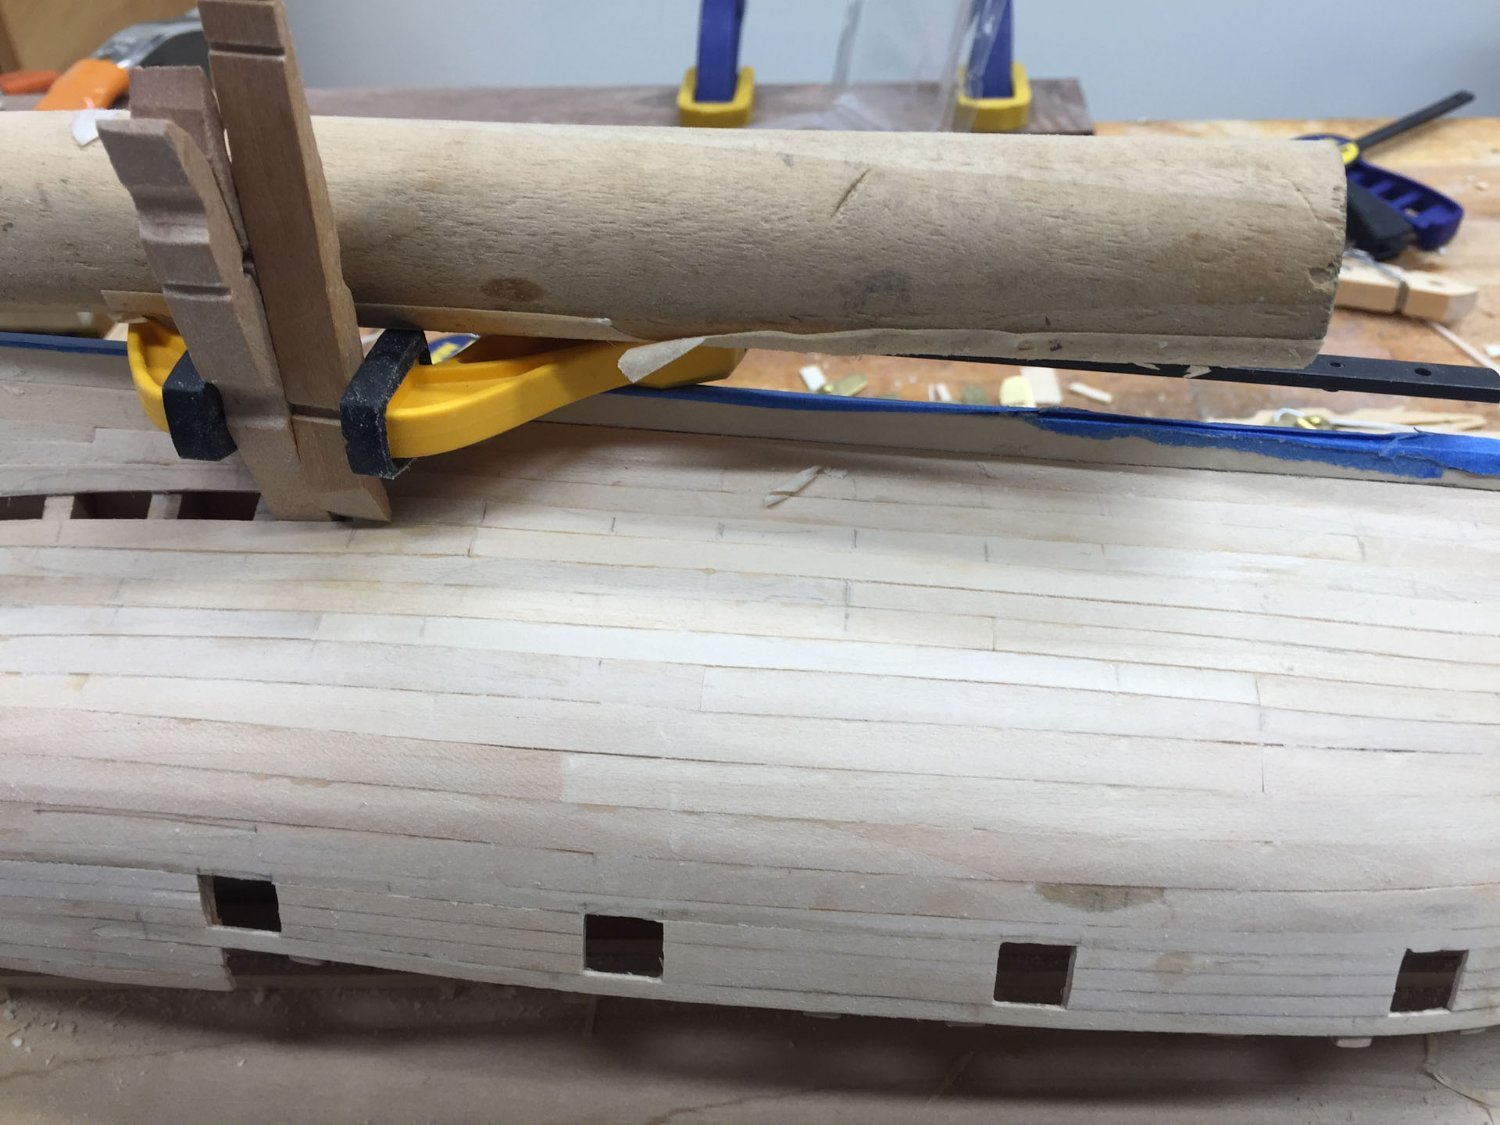
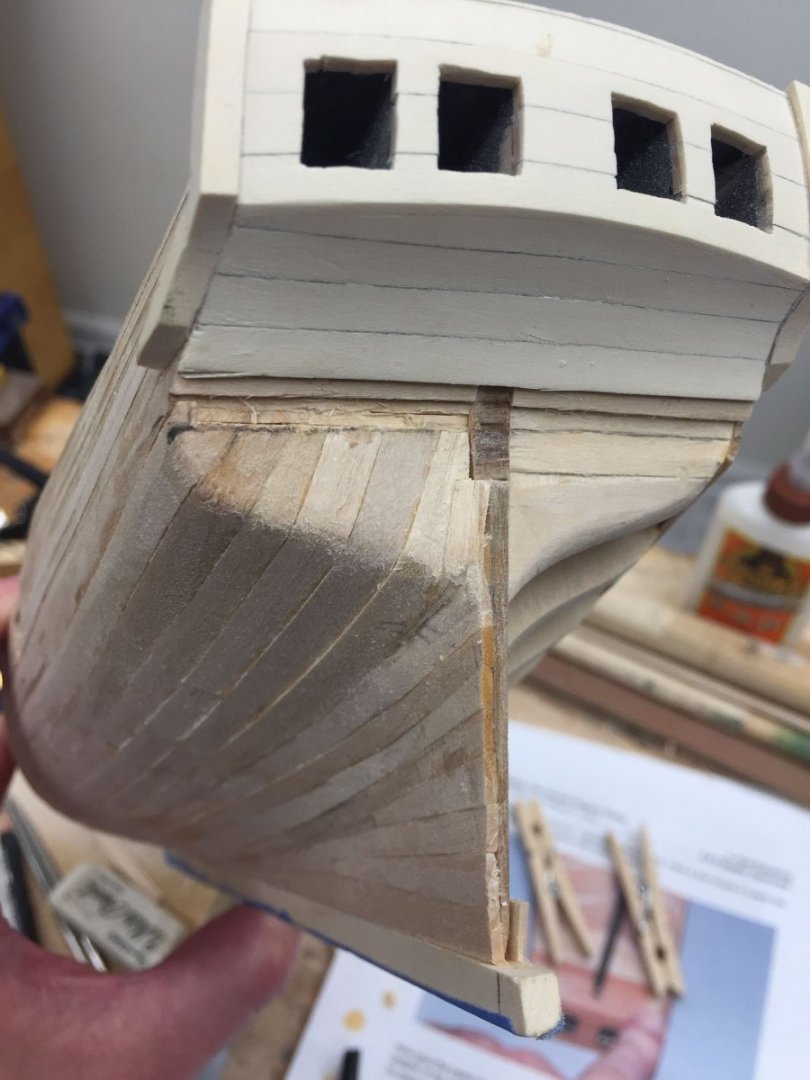
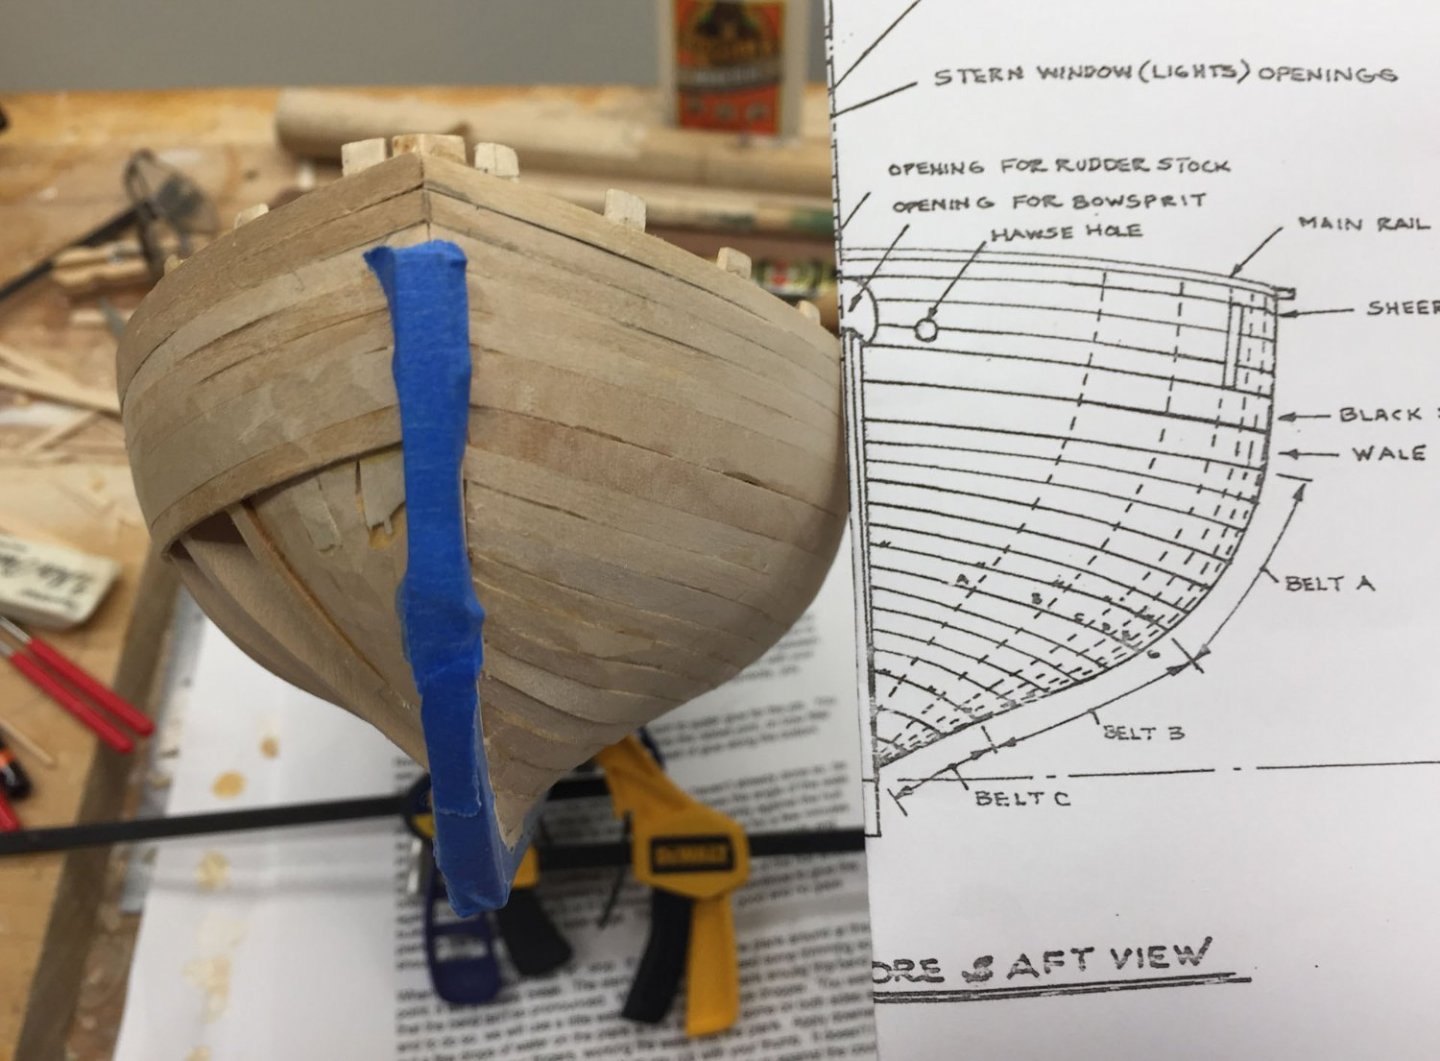
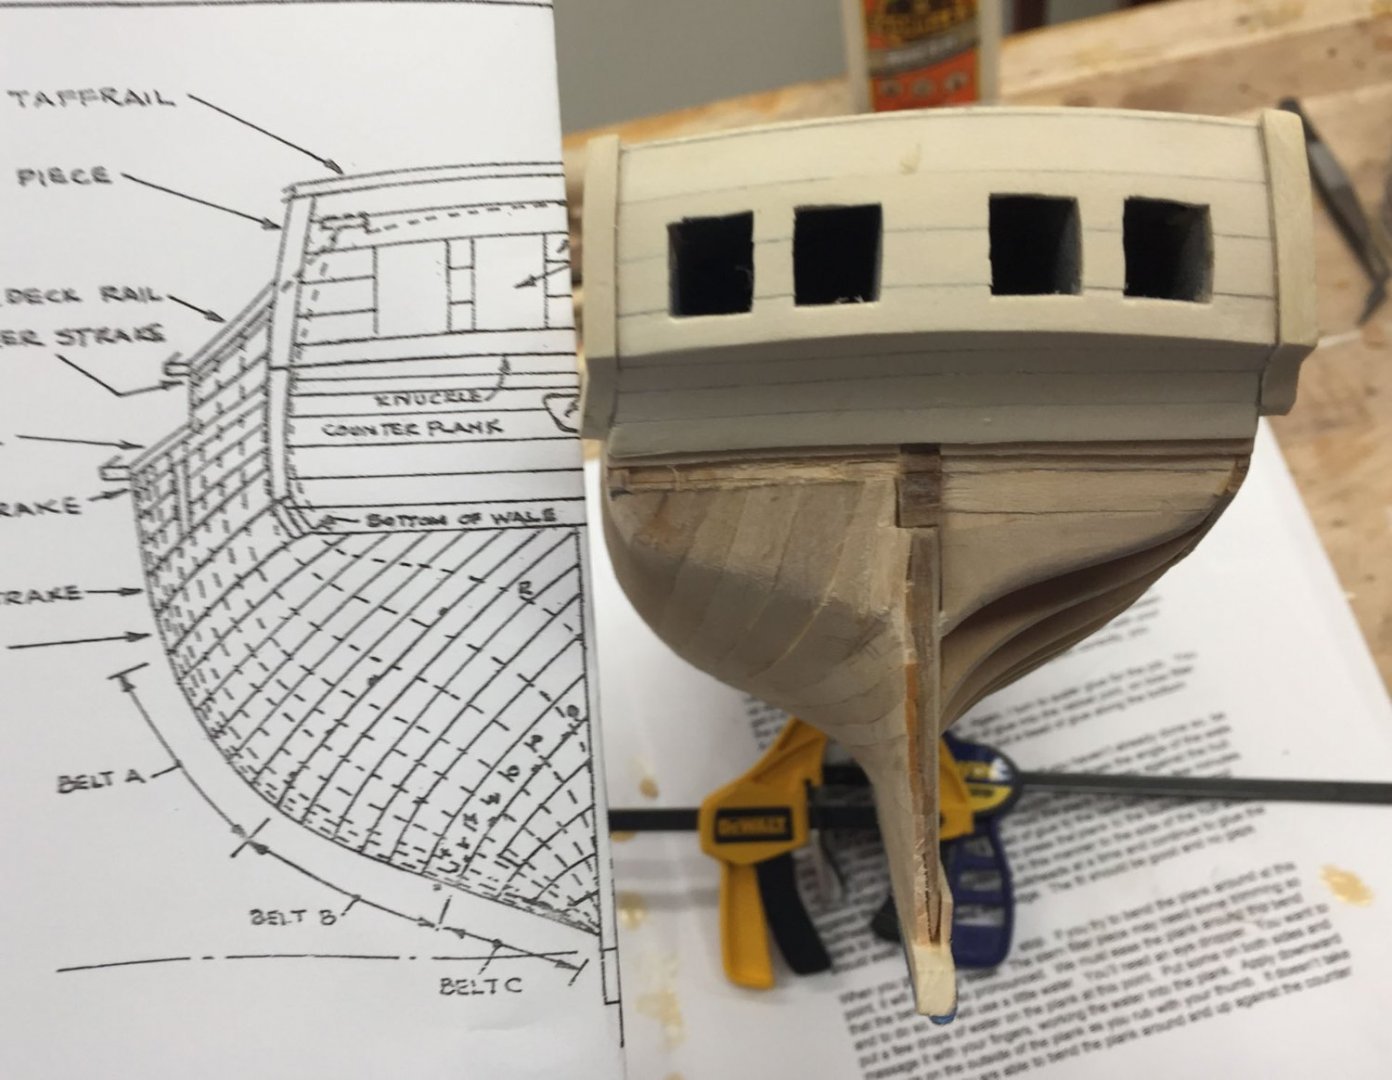
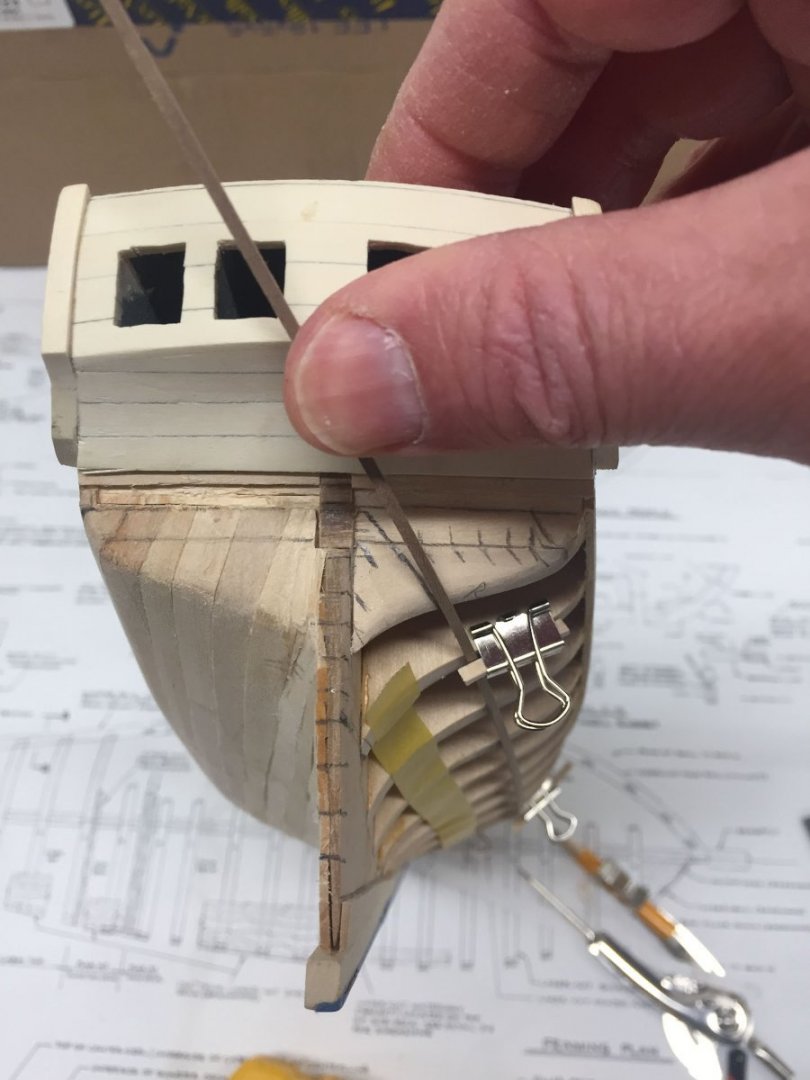
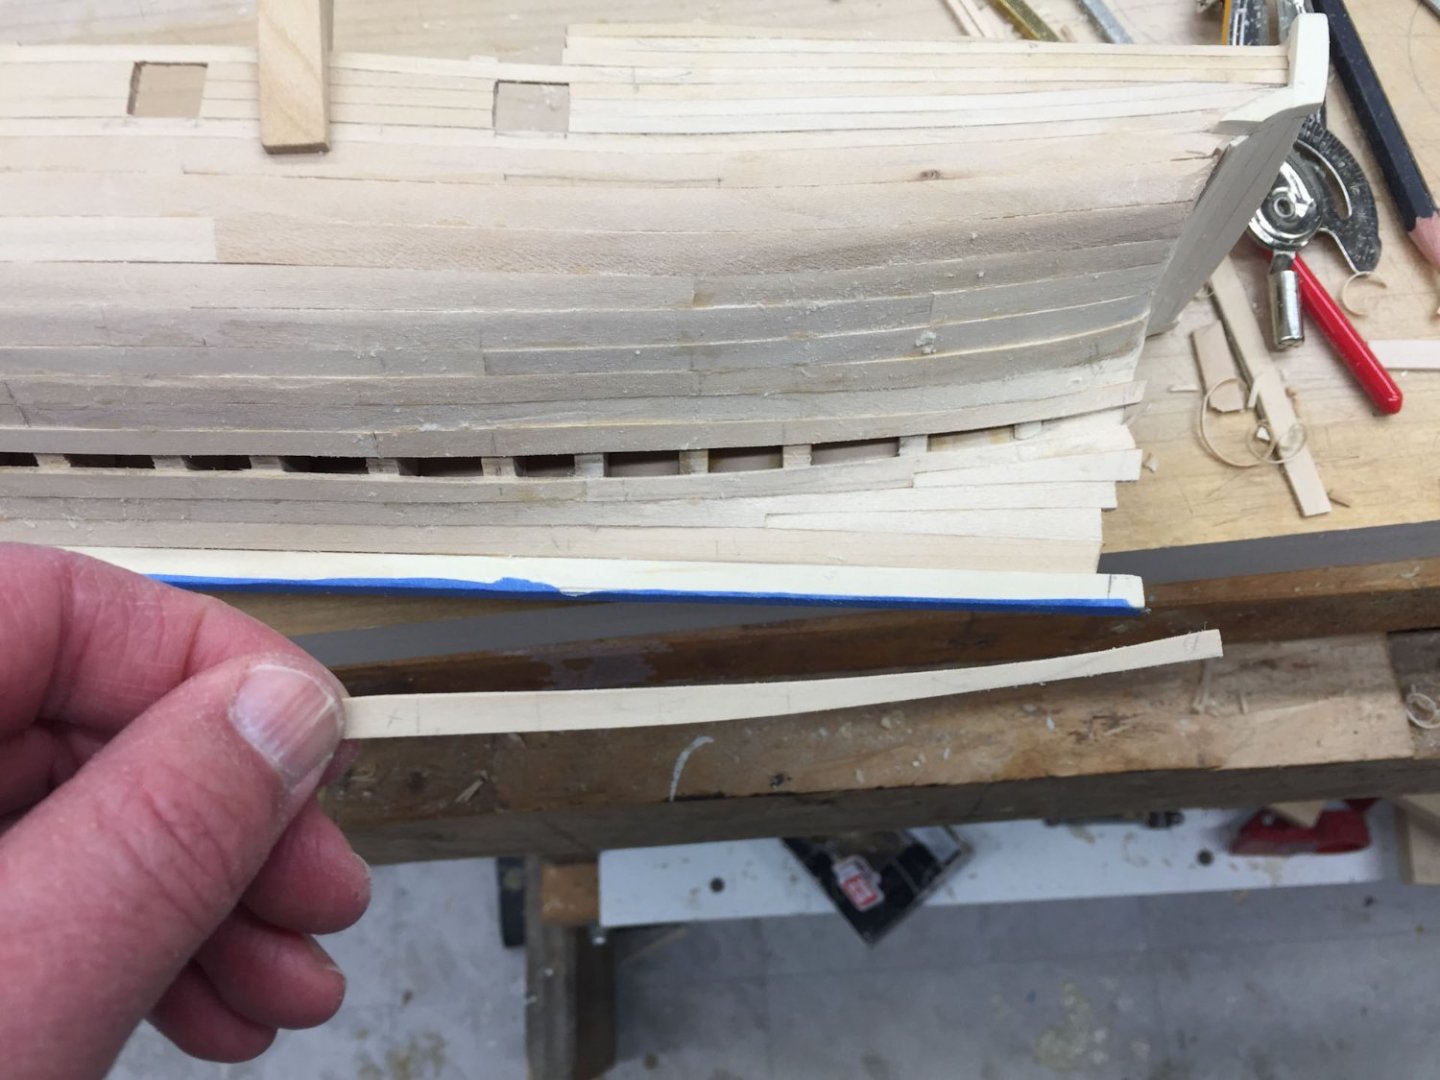
Well its been a while. Work went bonkers, kid obligations, all the usual excuses. But the last 2 hours have been full immersion staring beady-eyed at my AVS, planning like crazy even if I didn't actually build anything. So first a review of my previous efforts planking: Front, I mean bow area Few small gaps, the closeup makes it look rough but overall I'm happy. I haven't sanded yet so the different thickness plankedges cast shadows that make it look worse than it is. I left a deep rabbit along the stem to fit both this first planking and the second thinner planking. It was hard getting the bow tips of the planks flush with the rabbit but I hope to fill the remaining rabbit with the second planking. I may have to widen the rabbit in areas if the remaining gap isn't equal the entire length. Next the stern: This area has been giving me fits trying to figure out landmarks. The practicum adjusts the first layer of planking so its not at the same level along the gundeck as the kit instructions and I got all sorts of confused. Having glared at it for a long time over several days I think I have it figured out, more below on that. BUT the planking it pretty tight here which is what I was concentrating on. Now to plank the other side and do it a little closer to the kit plans. I am not really following the practicum at present so any mistakes are all Me. Here's a pic of my stern with the kit planking picture. Keeping in mind the kit picture shows the final planking not the underlayer, I can see that my garboard strake tip curves upwards, while the kit plans show it, well, not curving upwards. I realized when I bent the bow end of the port garboard strake to fit into the rabbit it had the unintended effect of bending the tip upwards as well due to Obscure Geometry. So of course all the subsequent planking follow this upward curve. Stern shot with the kit planking picture: 1) my fashion piece doesn't come down low enough. 2) I brought my hull planking up way high on the counter. This was a bit on purpose; I plan to place the final lower counter planks after i plank the hull and use a scalpel to trim across to get a good fit. But I brought the planking up about 1 counter plank past what I had planned because of my confusion over landmarks. 3) the kit shows the stern planks coming into the bottom of the counter at about a 45 degree angle. My planks come in at about 60? degrees which made it hard to fit against the sternpost. And now to the starboard side to try and Do Better. The kit instructions divide the remaining space into 3 belts. I measured off the plans with strips of paper to get ballpark locations of each belt, then tried using tape to smooth out the lower belt line. I tried using a thin batten for the upper belt line; I think the batten gives a better run but its harder to keep still. After a lot of measuring and dividing with tic strips I got to a pretty good place. You can see below my proposed stern planking is more 45 degrees where it meets the counter. The pencil line across the stern is the final future lower border of the counter. And below's my final marking for the bands. It doesn't agree perfectly with the kit, especially at the lower stern planking with the 2 stealers. But I'm going with it for now. I will do the lowest band next, then re-evaluate for the other 2 upper bands. The practicum has you make the garboard strake wide at each end and thin amidships for reasons that escaped me, which is what I did on the this side. In the future I plan to leave the garboard wide its entire length so its more like the kit plans. I also trimmed the bow end of the garboard strake so it doesn't curve upwards, so hopefully I will have a straighter run of bow planking on this side. And thats it for today. I was sorely disappointed to not attend the Northeast ship model show in CT this weekend but my wife said I would much rather attend the yearly fundraiser for my kid's school tonight, which she had a part in organizing. Next year I guess. Enjoy spring, those of you in the Northeast USA, and thanks for reading Cisco


-
How are you clamping your second (and third) layer of planks? I saw a few holes from brass knurled round thingers, but most of your planks don't seem to have those holes. If your answer is "superglue" no problems but I hadn't seen which glue you use, or maybe I missed it. In the not to distant future I have to put the second layer of planking on my AVS build and I no longer have bulkheads to clamp to.
-
US Brig Syren by Gahm - Model Shipways
CiscoH replied to Gahm's topic in - Kit build logs for subjects built from 1801 - 1850
Dang that looks good. Great job! -
Very lifelike Paul. Are they as advertised and just coils of rope, or did you coat them in dilute pva on a form, or what?
- 112 replies
-
- 1
-
-
- Cheerful
- Syren Ship Model Company
- (and 1 more)
-
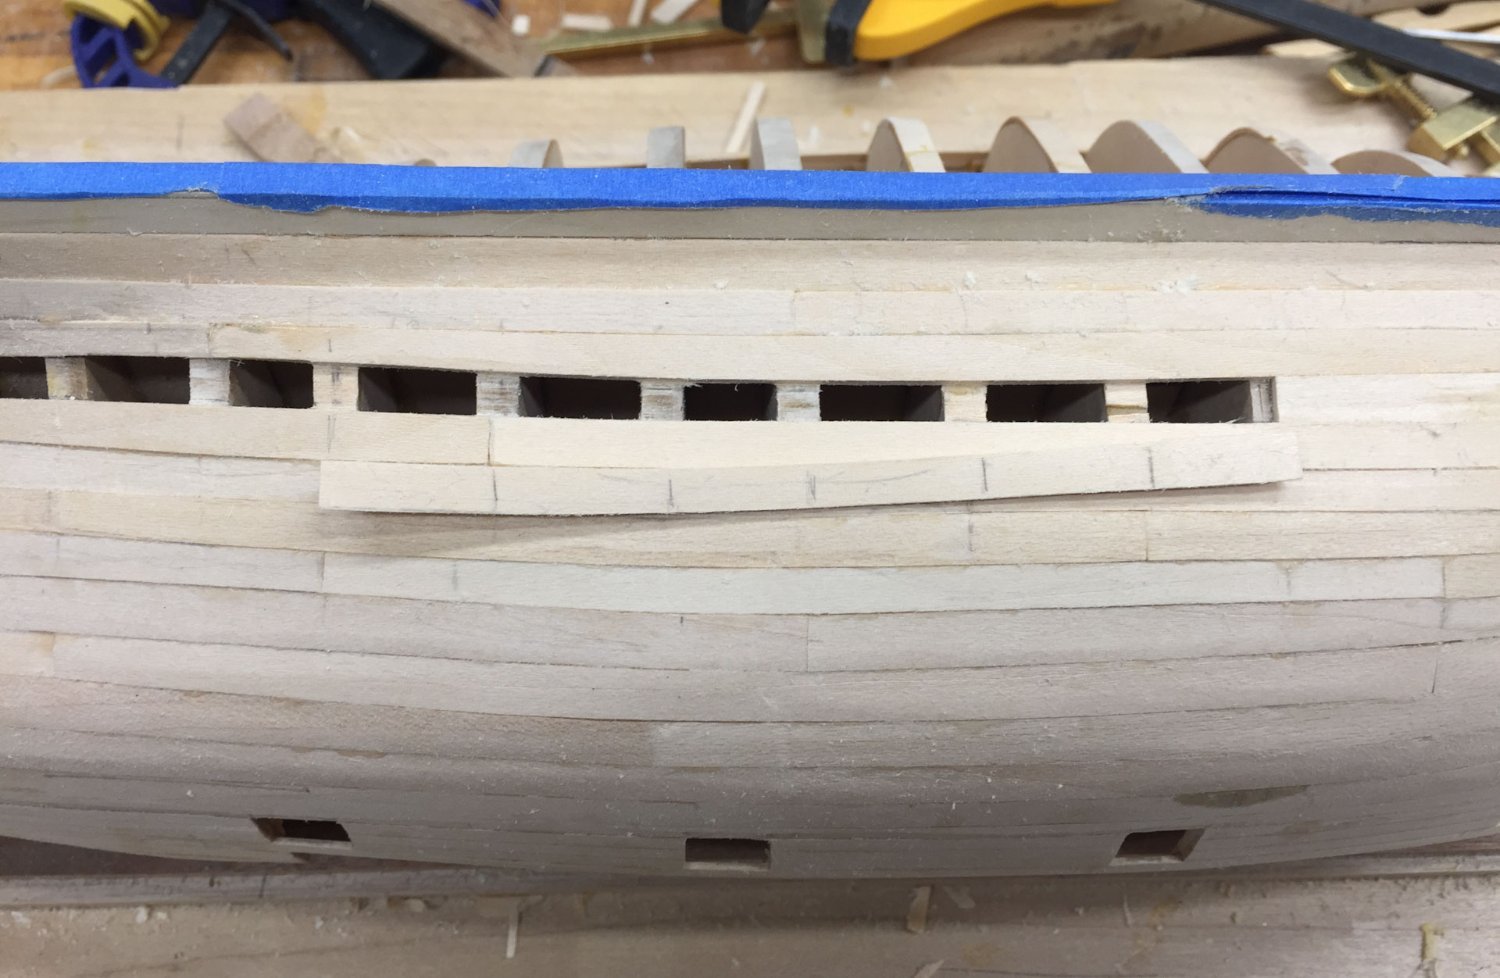
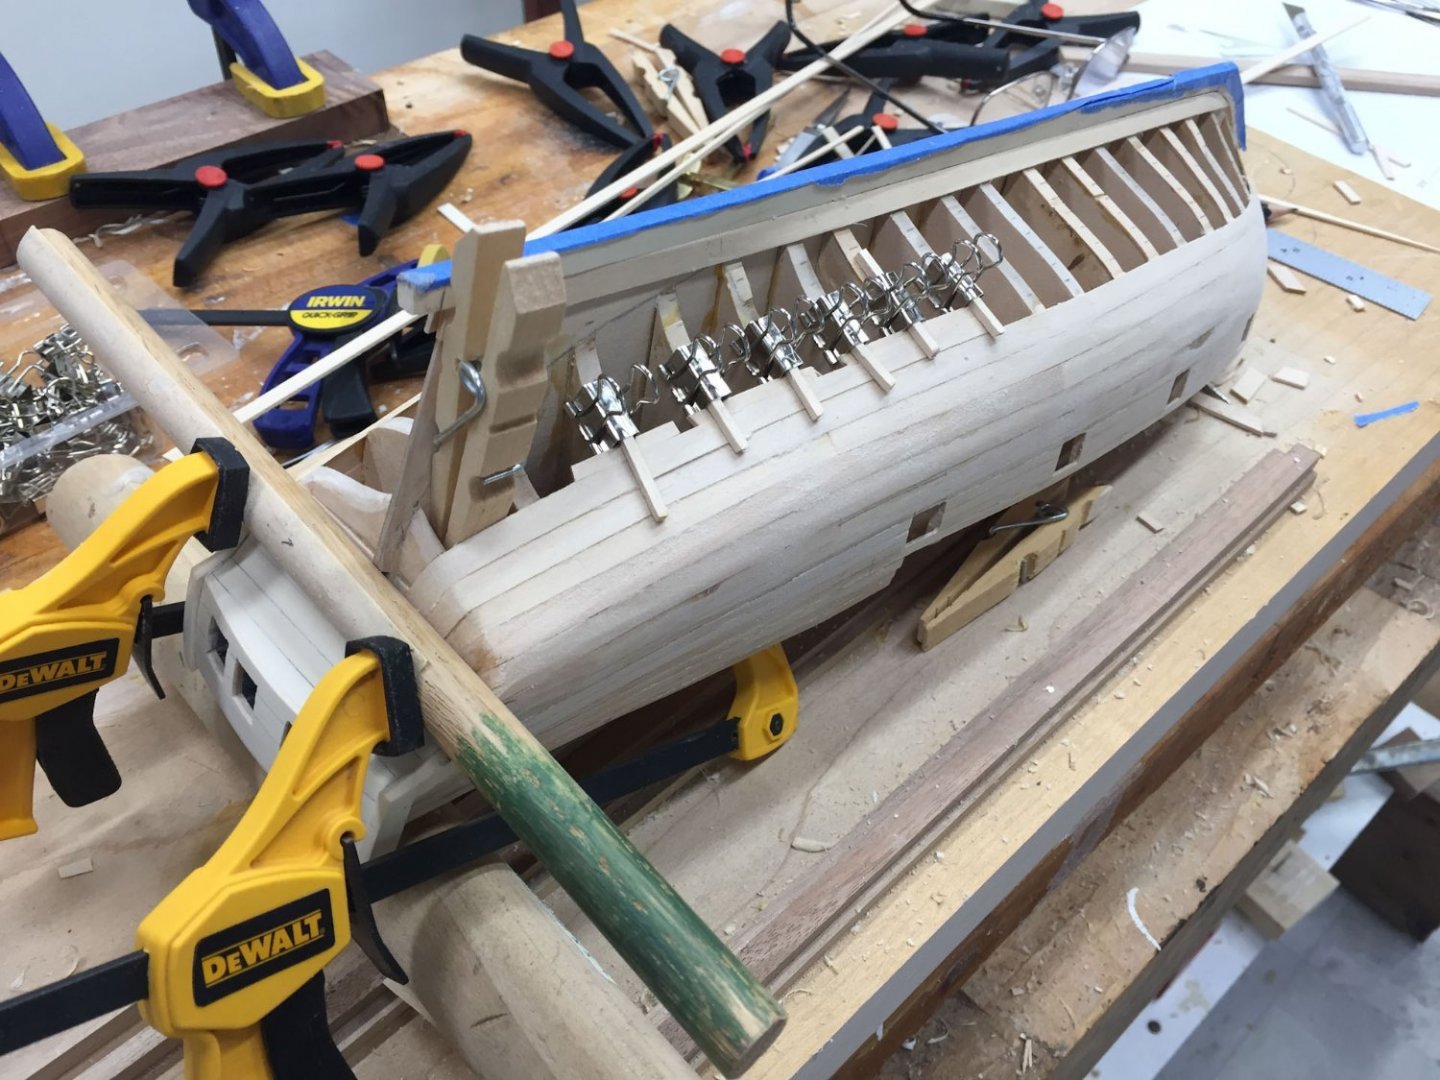
Sunday night, wife and kids upstairs playing a board game so I have time for an update. I'm on my third adult beverage so please excuse any typos... I am almost finished with first planking on the port side! My plan for this side was to not get buried in details and concentrate on learning how to plank without huge gaps while having some degree of symmetry. And then learn and make the starboard side better. I have a tendency towards paralysis by analysis and I don't want to never finish because I was afflicted with Perfection. So here goes: My planking reached the sternpost using 1/4" full width planks. But the angle was wonky; you can see in the pic below that the planks ended up almost parallel to the sternpost, instead of at 45 degrees. This made it really difficult to fit and I had to add slivers of wood into gaps. I didn't download a good pic of this, will do so next post. I decided to split most planking runs into 2 planks. Clamping techniques had to evolve as spacing got cramped. Using clothespins as wedges worked pretty well but man does basswood like to dent. And then I was down to one last row. Obviously (I mean its obvious to me now) if you have 1 row you have to fit both sides of the plank which is harder. I decided to divide this last row into 3 pieces. The first piece towards the bow had some slight gaps due to oversanding- the strip wouldn't fit so I would sand it some and re-fit; after a while I got tired of constantly refitting and trying to wedge the piece into the gap and so would sand more aggressively and then => gaps. So you can't be impatient. The gaps are tiny but definitely there. I conveniently forgot to take a pic of this as well. So for the middle and third piece I went slower. Having shorter pieces helped too. Below is the middle piece. It went much better. I first fitted the top of the strip until there were no gaps. Then I used my compass to measure at each bulkhead width (plus about 1mm) and marked it on the plank. Then slowly sanded down to the mark. Still too big as I was about 1mm too wide. So starting at the fore end I sanded a little, trial fitted, still too big, sanded a little more, trial fit, and kept going removing just a tiny amount each time until I could wedge it in place without too much effort. Then I started sanding at the mark for the next bulkhead, constantly refitting until it finally wedged in. I found sanding the sides of the plank so it was wedge-shaped (in cross section) instead of 90 degrees helped with fitting. Once it started to just slip into the space I sanded the edges to make them 90 degrees, aiming for a finger pressure fit. Below is the middle plank glued in place. It wanted to lift up at the back end so I had to do some interpretive wedge/clamping. But... no gaps. And finally here is the last 1/3 of a plank fitted the same way. You can see its an oddball shape. I haven't glued it in yet. And thats where I am at present. My planking is very slow because I like yellow glue so everything needs a night to set up. I know superglue is faster but I am comfortable with yellow glue and Change is Bad. My next post will examine what I did right (and wrong) planking the port side and ways I can improve on the starboard side. Have a great night and thanks for reading. Cisco


-
Tom i may have missed it but have you chosen a stand yet? I've been following your build log since the beginning. Somehow, reading it always makes me feel calmer and less stressed. Thank you for posting! cisco
-
I have had the same issue on my AVS. Must be some geometrical explanation for those deep curves that develop. Options for "fixing" them are make the next plank have a fat area facing the curve while smoothing out the other side, which makes the plank look a snake that ate a bowling ball. Or keep bending each plank to fit the deep curve, which means the next one has the same problem. I'm excited to see how you deal with it; great job second planking!
-
whats really amazing is how good a job you did on first planking with so few bulkheads, especially at the bow. maybe the thought was by the 3rd planking you have sanded everything into a smooth curve? anyways the 2nd layer is much improved
-
Thanks Theodosius! I appreciate the encouragement
-
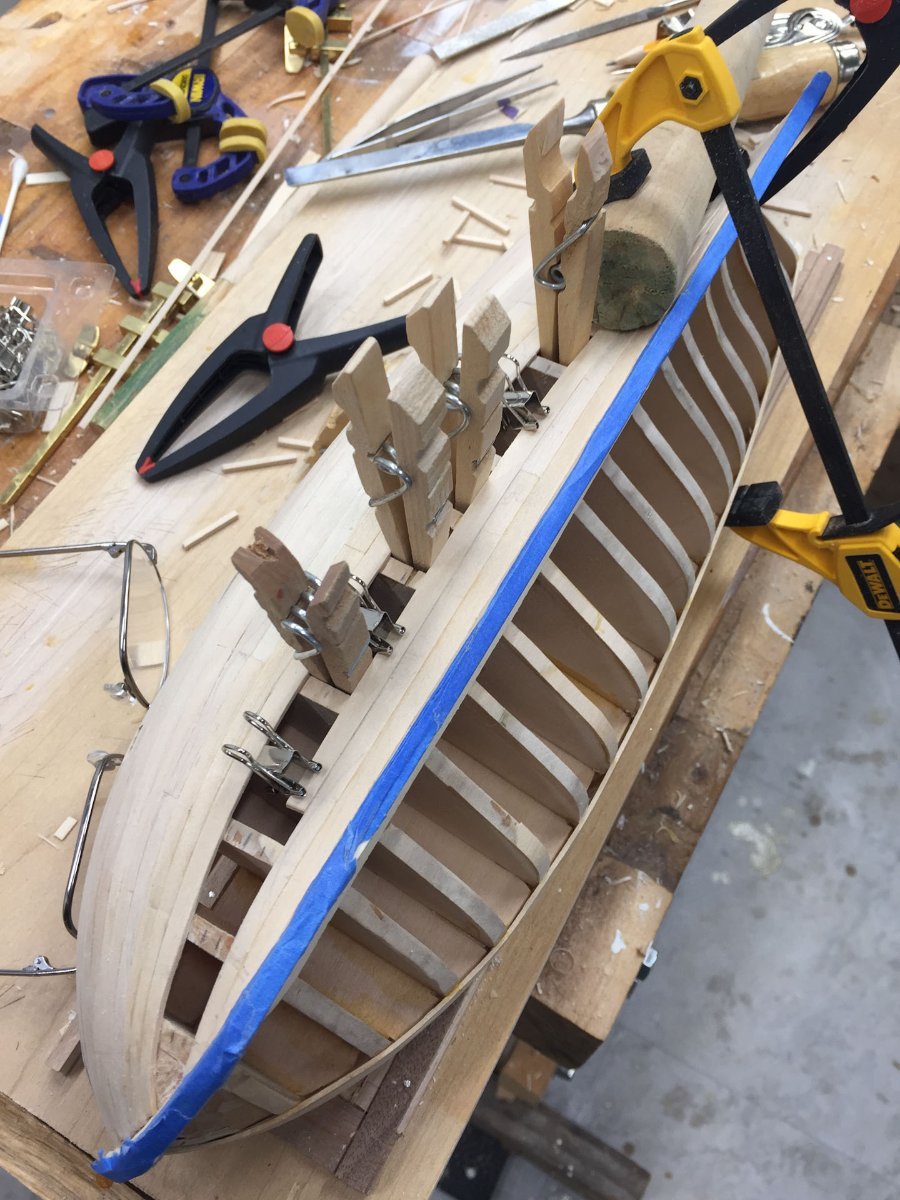
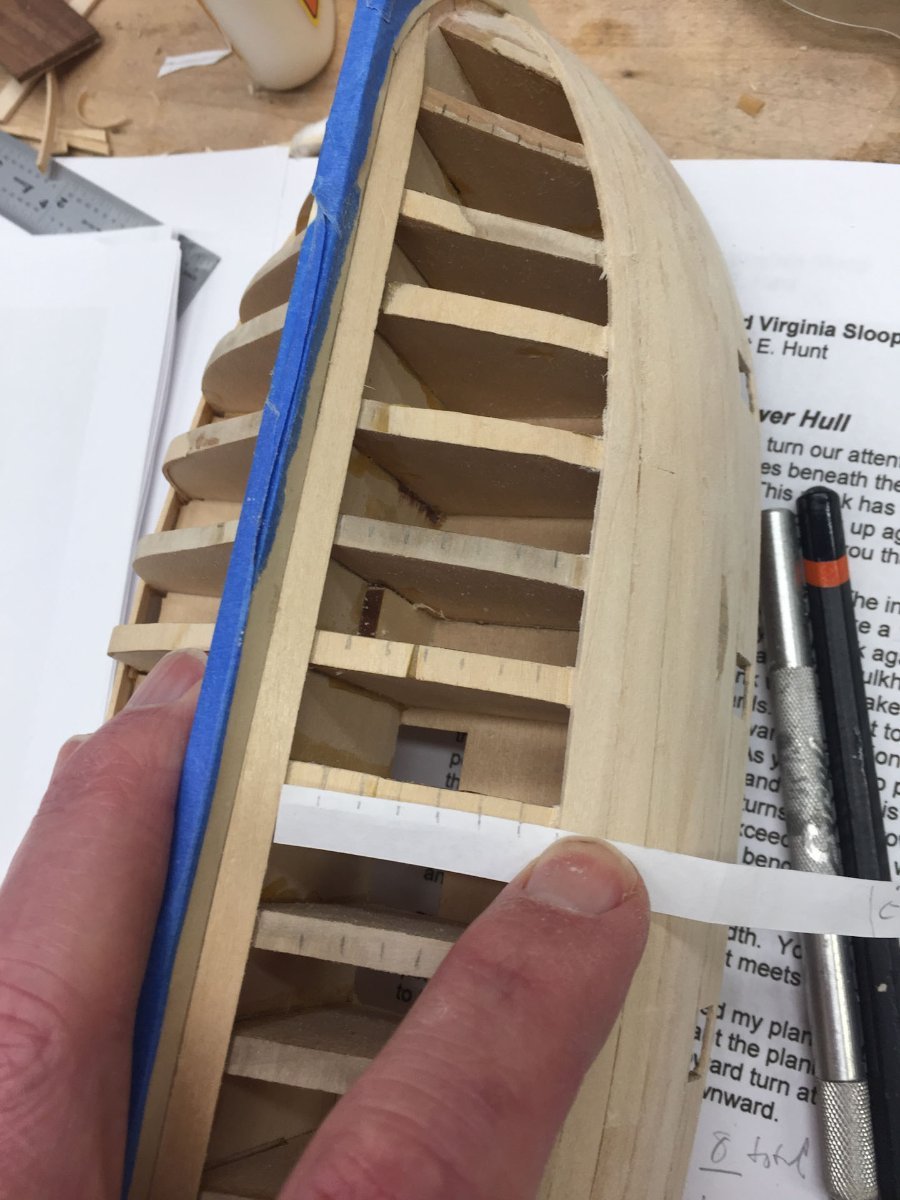
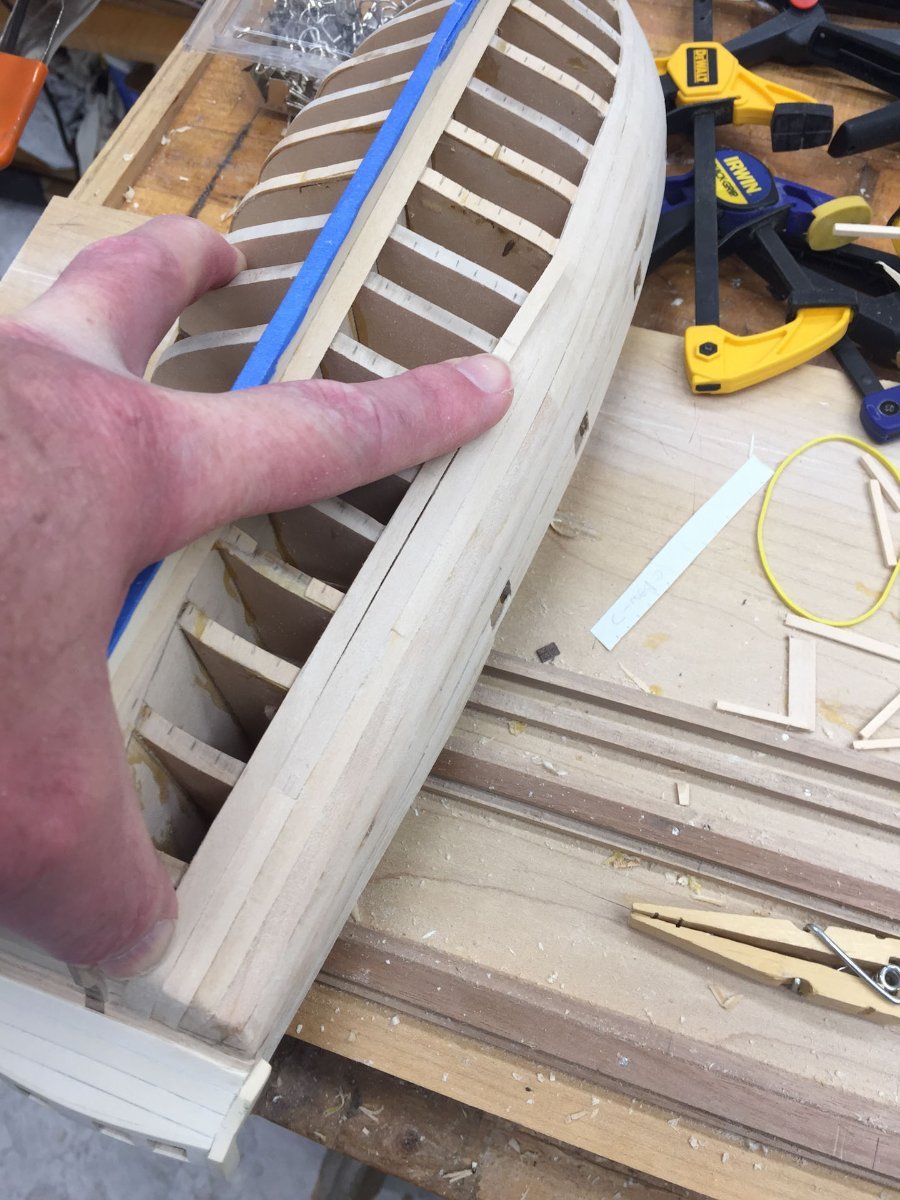
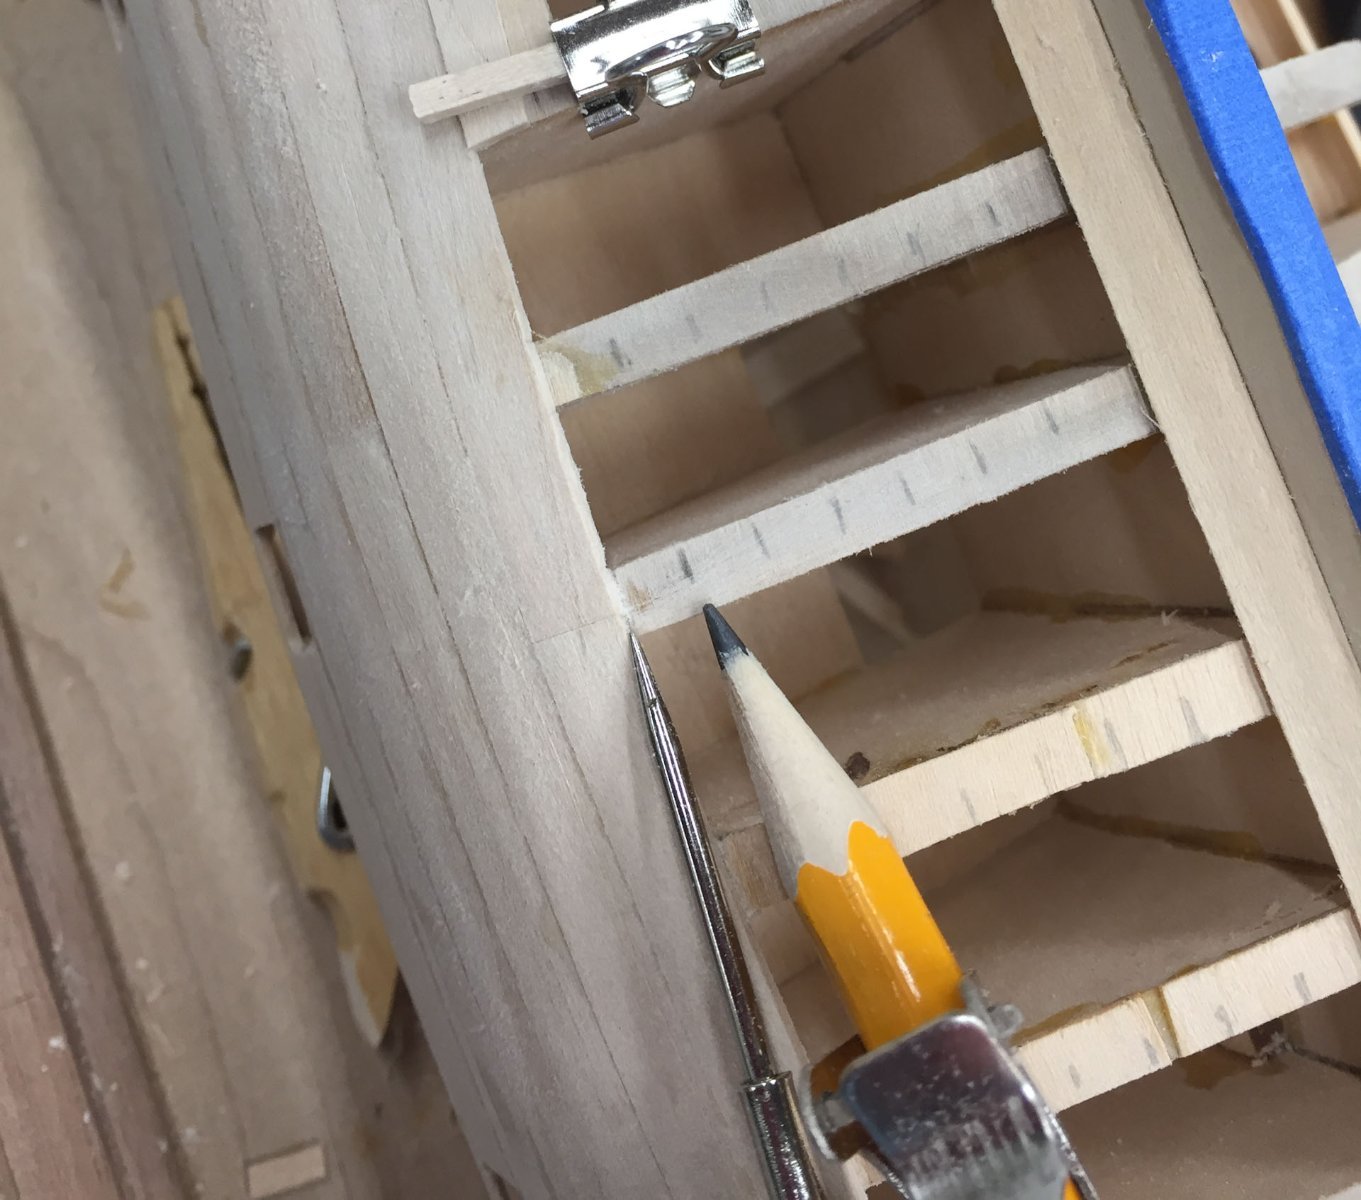
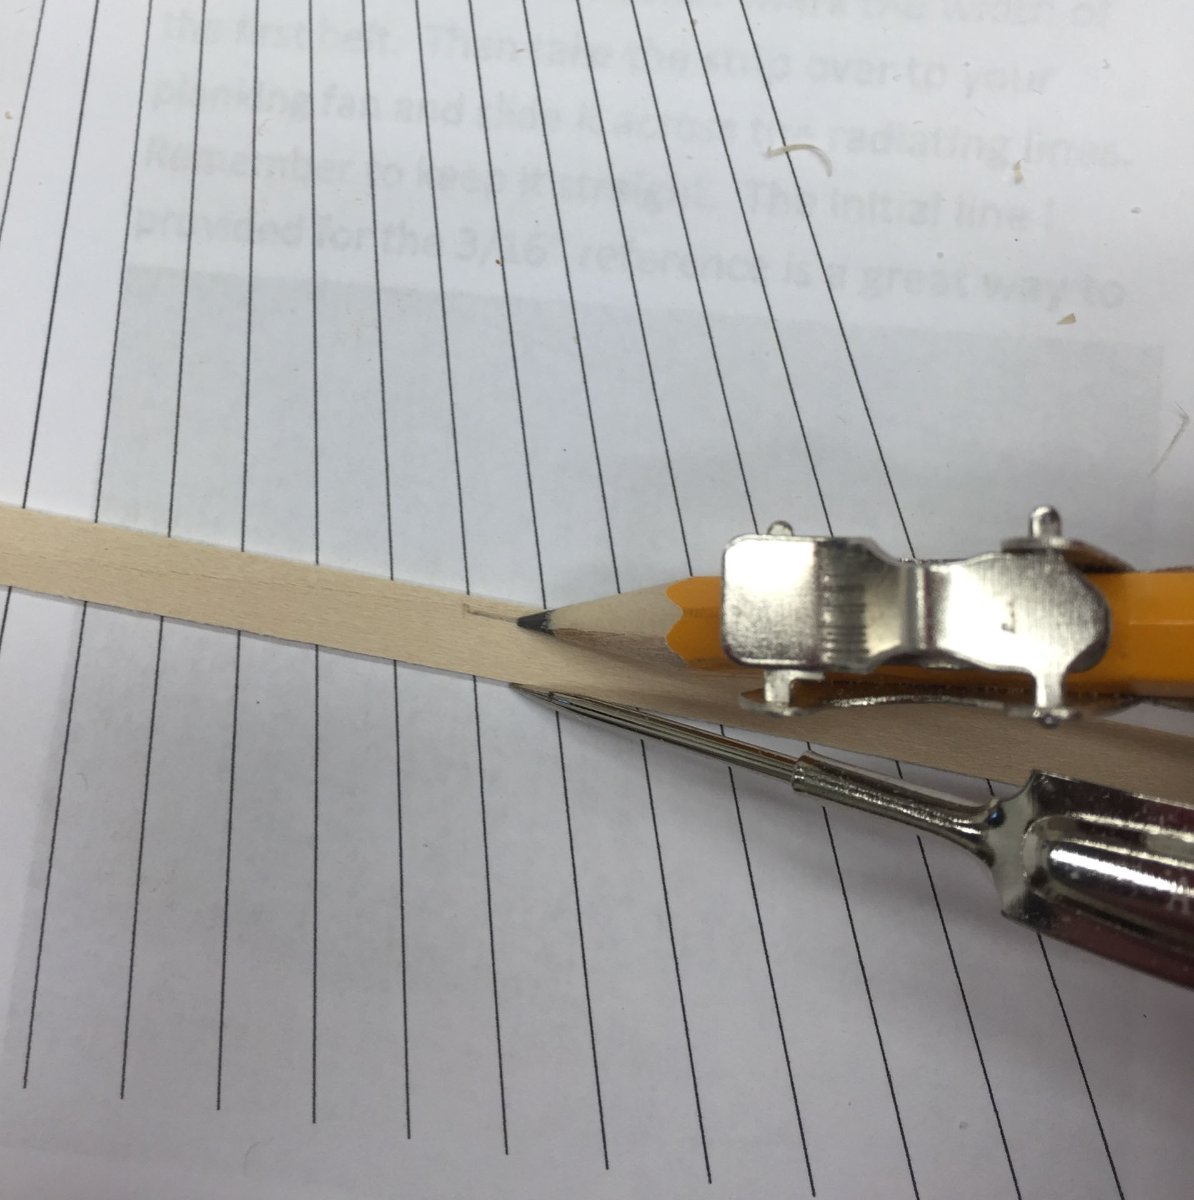
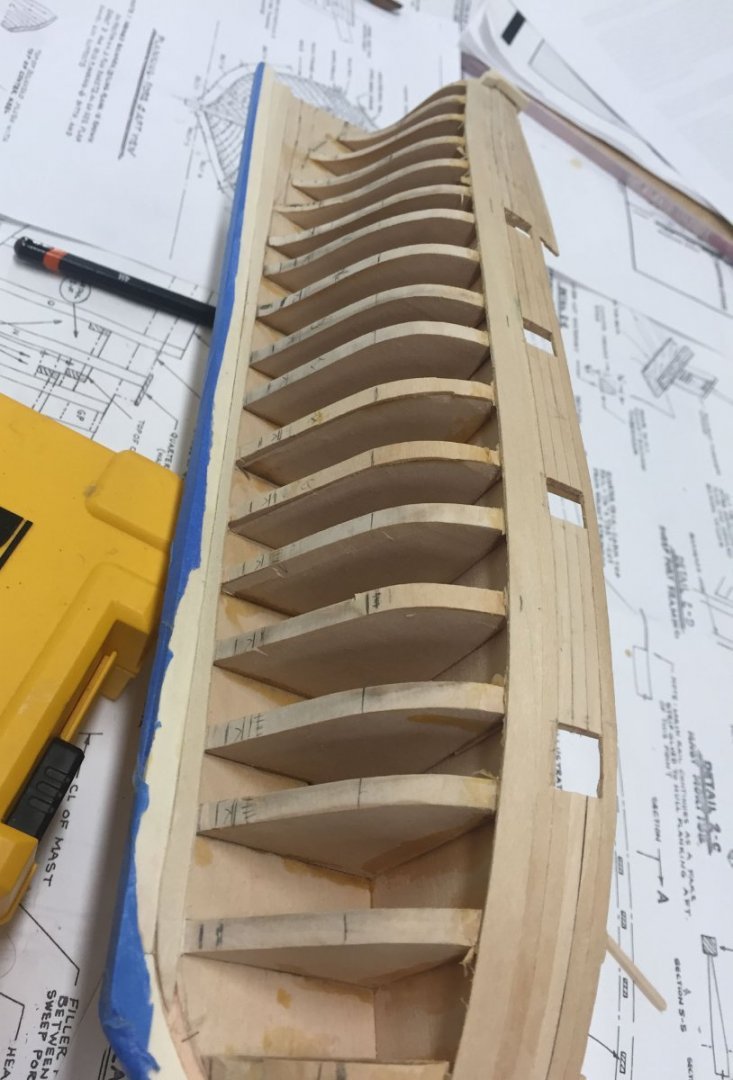
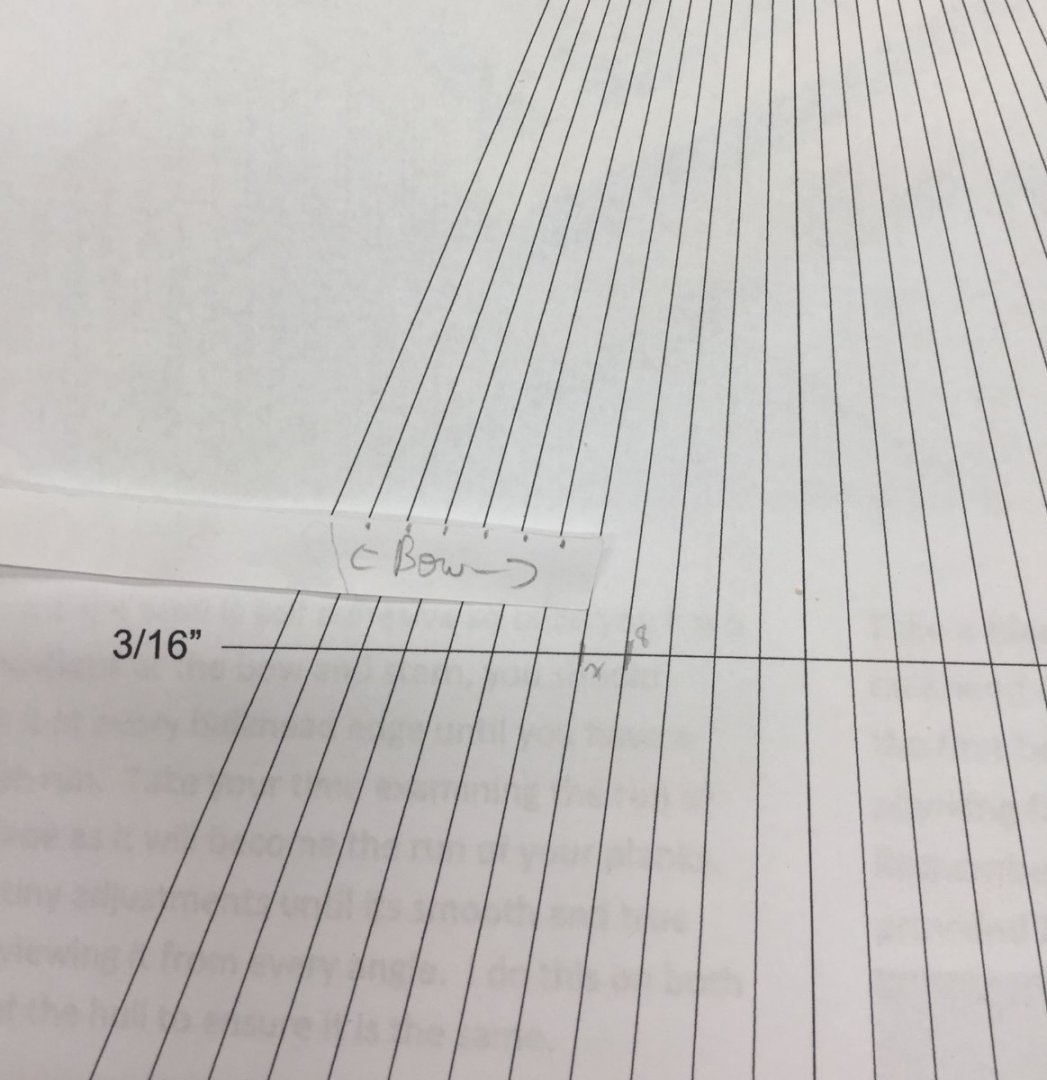
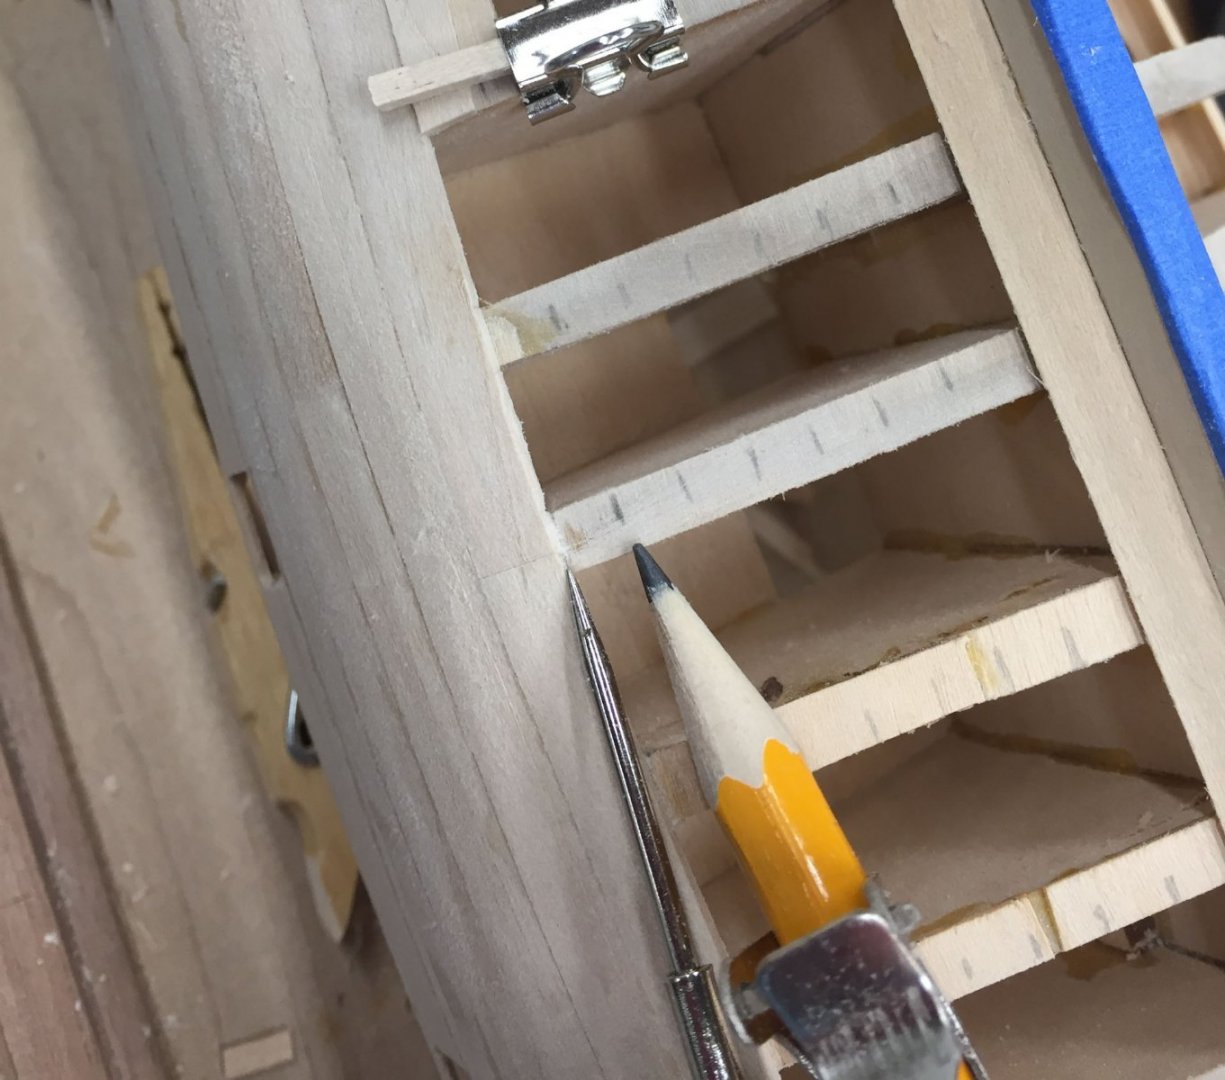
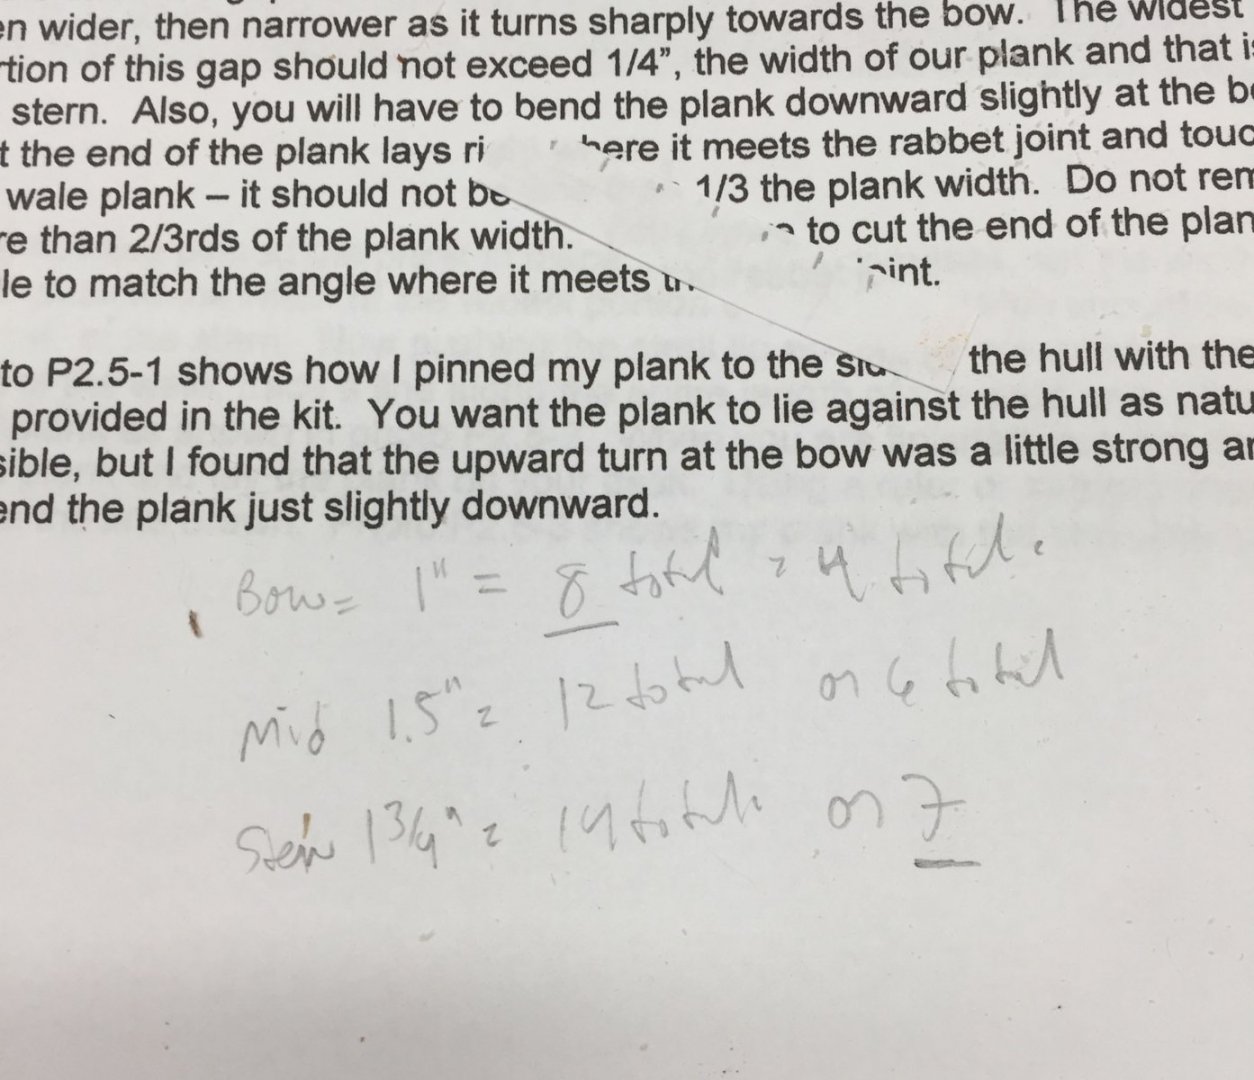
I managed to go 1 week between updates! This is only because the wife and kids are away until tomorrow on an end of the year ski trip so I have that thing called Free Time. Gotta take advantage while it lasts... This week I followed Paul Le Wol's advice and instead of filling in the remaining port side planks willie nilly I busted out the tic strips and planking fan, my first experience using them. I followed Chuck's Cheerful instructions, free to download, chapter 4, which includes the planking fan. It so far has gone easier than I anticipated, words that may come back to haunt me. First I measured the widths I wanted to plank at the stern, amidships, and at the bow. Pretty simple - lay a strip of paper across the width and mark it. (The below picture is a re-enactment as I had already marked it so pretend the tic marks on the bulkheads aren't there). Since paper strips are flexible they will follow the contour of any curves and measure the true width. Next figure out how many planks will fit in these spaces. I measured each width and did some math. For this first layer of planking the practicum has you use 1/4" wide basswood planks, so I divided the measured widths (1" at the Bow, 1.5" amidships and 1 3/4" at the stern) by 1/4" and got 4, 6, and 7 planks wide. And I assumed I wouldn't want to narrow the planks at the stem to more half the original plank width, which would be 1/8", so I divided the original widths by 1/8" and got 8, 12, and 14. So if I want single planks without stealers that don't taper more than half their width I can do between 7 and 8 planks. That led me to trying to use 7 planks total, each of which would be the full 1/4" wide at the stern, and taper to a little more than 1/8" at the bow. I hope I didn't mess up that math. Next I took each tic strip and laid it across the planking fan to create 7 planks. Just like reading a hematocrit. Then I laid the tic strip back across the bulkhead and transferred the marks. I used a separate strip for each bulkhead unless it was really close to the previous one. Next I used a compass to measure each bulkhead mark and transferred it to the plank. I connected the marks and cut off most of the excess plank to make bending easier. The next plank was going to be from the stern -> forward and I had previously soaked it and bent it in place to dry over the transom. The transom upwards curve this far inward is not nearly as pointy as the outside planks so this one bent fine and didn't try to splinter. And here is me test fitting the new plank. You can see it tapers some as it gets amidships and I left it a bit long to make it easier to bend. I sanded my bevels to make it fit tight, trimmed off the excess tip, and glued it in place. For the next round I need to leave the plank a little fatter so there is enough width to bevel the edges. Also I am running out of easy clamp room. Thats all for tonight. Happy modeling and thanks for reading Cisco


-
Thanks for the support Paul. My (new) plan is to finish first planking on the port side as best I can while learning how to best spile and heat bend. Then starboard I will try an up my game with battens first to get a smooth run, then apply tick strips and fans. And I still have to open up the gunports, thin the remaining bulkhead risers, and put in my waterways. No rest for the wicked as they say. Also I made it to Page 2!