
HOLIDAY DONATION DRIVE - SUPPORT MSW - DO YOUR PART TO KEEP THIS GREAT FORUM GOING!
×


Tony Hunt
-
Posts
541 -
Joined
-
Last visited
Content Type
Profiles
Forums
Gallery
Events
Everything posted by Tony Hunt
-
This is the Schlüsselfeld model, made in 1503 (Germanisches Nationalmuseum, Nürnberg, HG2146, Leihgabe der Johann Carl von Schlüsselfelder) Looks a bit similar! But yes, I think this is a decorative model.
-
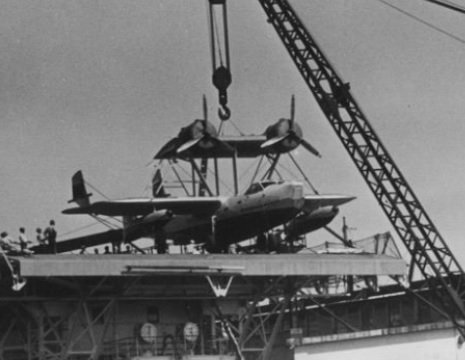
This question has been bugging me, I thought I knew most of the WW2 flying boats but this one I didn't recognise. Sikorsky? Dornier? Neither fits. After some intensive searching, I find it's a Consolidated P2Y Ranger. This is the service history from Wikipedia: The Navy ordered 23 P2Y-1s on 7 July 1931. They were serving by mid-1933 with VP-10F and VP-5F squadrons which made a number of classic long-range formation flights. At least 21 P2Y-1s were modified to P2Y-2s in 1936 and flown by VP-5F and VP-10F until 1938, when they were transferred to VP-14 and VP-15. The first P2Y-3s reached VP-7F in 1935, and this version was flown by VP-4F at Pearl Harbor and in 1939 was in operation with VP-19, VP-20, and VP-21. By the end of 1941, all the P2Y-2s and P2Y-3s had been withdrawn from operational use and were at Naval Air Station Pensacola. So not really a WW2 flying boat. Phew!
- 246 replies
-
- 13
-

-

-
Verisimilitude is such a good word, and it's not often one gets such a valid opportunity to use it.
- 72 replies
-
- 1
-
-
- fishing boat
- Barco Catalan
- (and 1 more)
-
Hey, I'm not that old. 😀 I love some of those pictures, especially the one with the flock of Catalinas sitting on the water in the foreground. The stern view in the drydock is great for detail, too. I seem to recall reading an article on a scratchbuild of this ship (in its CV-1 version, with the wooden flight deck) in Ships in Scale a few years ago?
-
The deck looks really good. Interesting that you've laid it entire - I assume you're going to cut in the hatches and other deck openings later?
- 3,560 replies
-
- 1
-
-
- clipper
- hull model
- (and 2 more)
-
NAIAD 1797 by Bitao - 1:60
Tony Hunt replied to Bitao's topic in - Build logs for subjects built 1751 - 1800
Fabulous. -
"Medium" refers to the fineness of the hull form, not the size. As opposed to an "extreme" clipper.
- 3,560 replies
-
- 1
-
-
- clipper
- hull model
- (and 2 more)
-
Harriet McGregor by Boccherini
Tony Hunt replied to Boccherini's topic in - Build logs for subjects built 1851 - 1900
It's looking really good Grant. A beautiful little model of a beautiful little barque. -
We may need to order more chairs. And more popcorn.
- 321 replies
-
- 6
-
-
- Finished
- Flower-class
- (and 1 more)
-
Nice work on the planksheer and lower rail trim. Lovely crisp profiles.
-
Those hats are going to be a challenge for even the most skilled Photoetch artist.
- 53 replies
-
- 5
-

-
-
- photo etch
- resin
- (and 3 more)
-
Nice work Rob. The scrollwork looks much better. The challenge is to get the curves to flow, yes?
- 3,560 replies
-
- 2
-
-
- clipper
- hull model
- (and 2 more)
-
Looking good Rob! I like the idea of using brass for the naval hood.
- 3,560 replies
-
- 1
-
-
- clipper
- hull model
- (and 2 more)
-
Lots of Australian members here Amy (including me!), I'm sure we'd all be interested to hear a bit more about this project!
-
Hello Doris I've only just discovered these threads about your amazing card models, and I have just spent several very enjoyable hours reading through the Royal Caroline and now the Royal Katherine. Your models are amazing, as so many others have already said. I am very saddened to hear of the passing of your husband George, I hope that you're OK and that one day soon you will feel the energy to start a new model. Like a lot of your readers I am fascinated by your techniques and how effective they are. I'm particularly intrigued by your use of adhesive foils to achieve the surface effects that make your models look so realistic. I have had a look around on the internet and found many different kinds of products, such as adhesive backed PVC films. I couldn't decide which ones were like the foils you are using, so I wonder if you could tell us about the ones you use and which ones you've tried that were best (and which ones weren't, too!)? Thanks for sharing these wonderful models with us, they really are an inspiration. Best wishes Tony
- 1,035 replies
-
- 6
-
-
- royal katherine
- ship of the line
- (and 1 more)
-
Rigging of a the 5 masted bark named France II
Tony Hunt replied to Icarus24's topic in Masting, rigging and sails
Harold Underhill drew a rigging plan for France II, it's available for a small price (GBP9.00) at https://www.skipper.co.uk/catalogue/item/auxiliary-five-mast-barque-france-ii-sail-and-rigging-plan -
HMS Discovery 1789 by Don Case - 1:48
Tony Hunt replied to Don Case's topic in - Build logs for subjects built 1751 - 1800
The two gratings on the right look really good. Job done, I'd say! -
What I like most about Javier's models (and there is a lot to like 😃) is that they are technically accurate models but also have a distinctive appearance that immediately identifies them as models made by Javier, just like the distinctive style of an artist. The seamless combination of accuracy and artistry is an enviable skill.
- 15 replies
-
- 2
-
-
- fishing boat
- small boat
- (and 1 more)
-
I wonder if they're still around? The bone POW model of the Auckland looks very nice, in particular.
- 1 reply
-
- 3
-