Supplies of the Ship Modeler's Handbook are running out. Get your copy NOW before they are gone! Click on photo to order.
×

.jpeg.7d7eba14c97a2e1d9f79cd2c97f6424a.jpeg)
EricWilliamMarshall
-
Posts
986 -
Joined
-
Last visited
Content Type
Profiles
Forums
Gallery
Events
Everything posted by EricWilliamMarshall
-
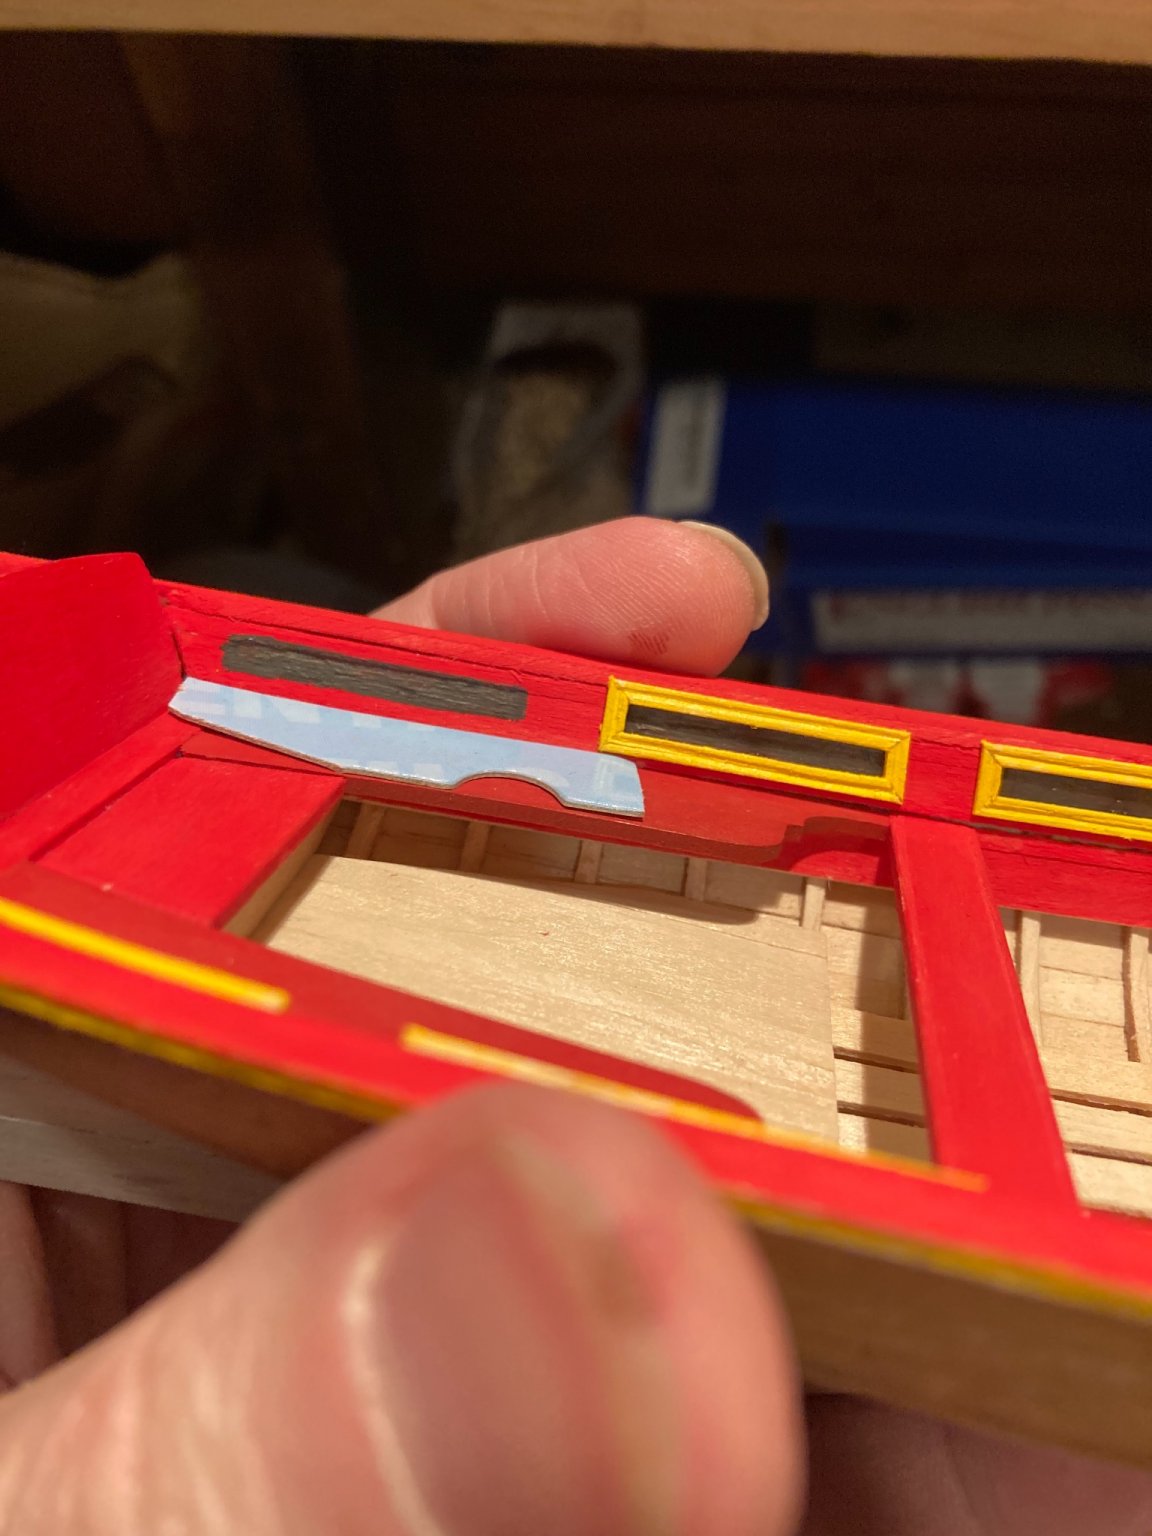
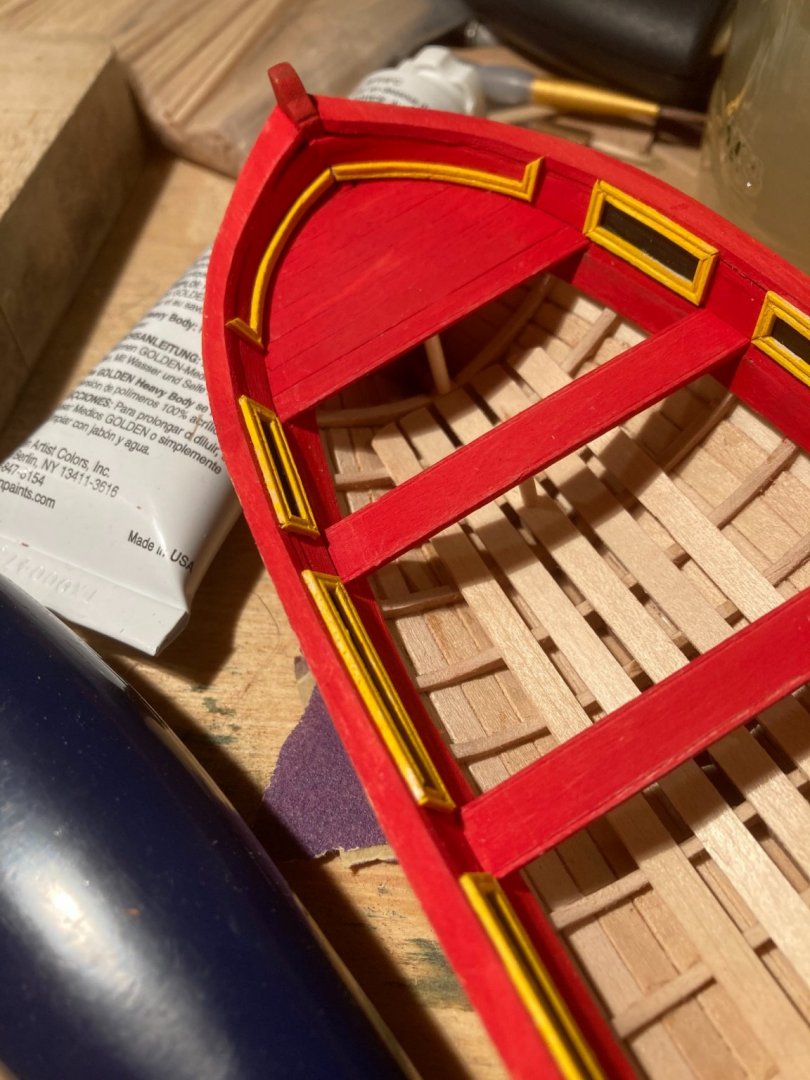
.thumb.jpeg.fc5d633a7b34428fcf19419a73d56d55.jpeg) At this point, after I added the remaining molding, I realized I needed to add some matching black paint. Luckily, a 000 brush and a steady hand did the trick.
At this point, after I added the remaining molding, I realized I needed to add some matching black paint. Luckily, a 000 brush and a steady hand did the trick.

- 123 replies
-
- 6
-

-
- Model Shipways
- Pinnace
- (and 1 more)
-
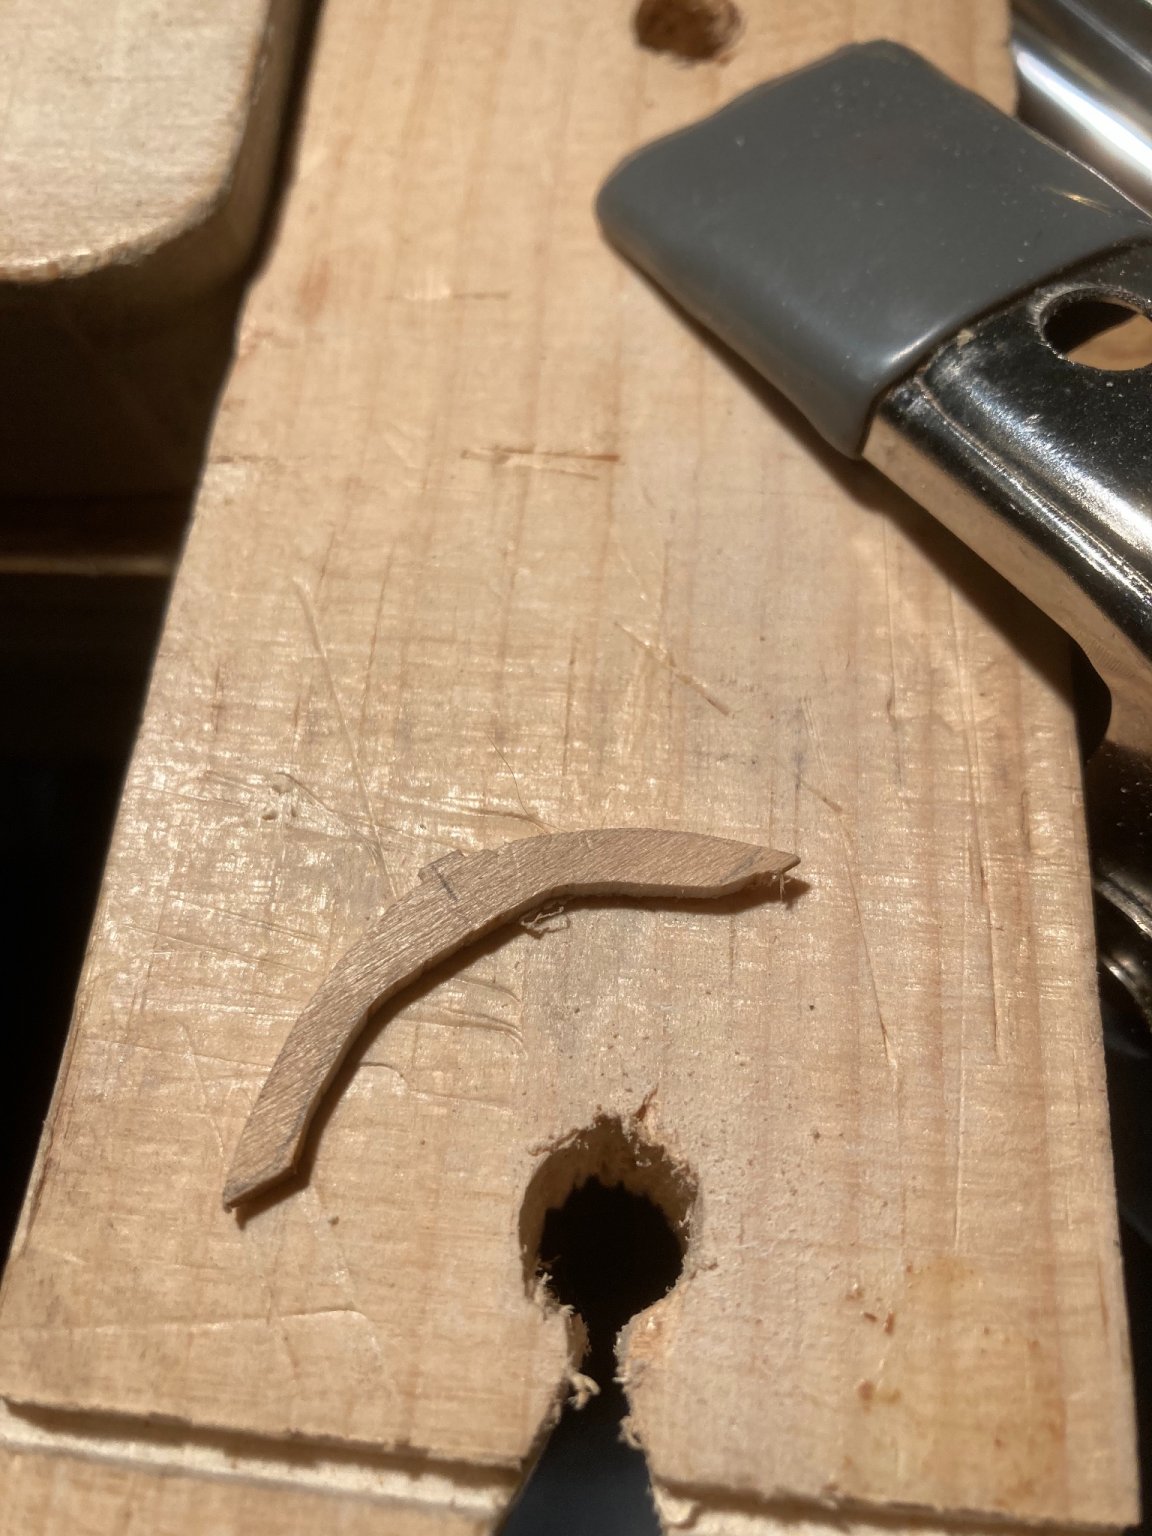
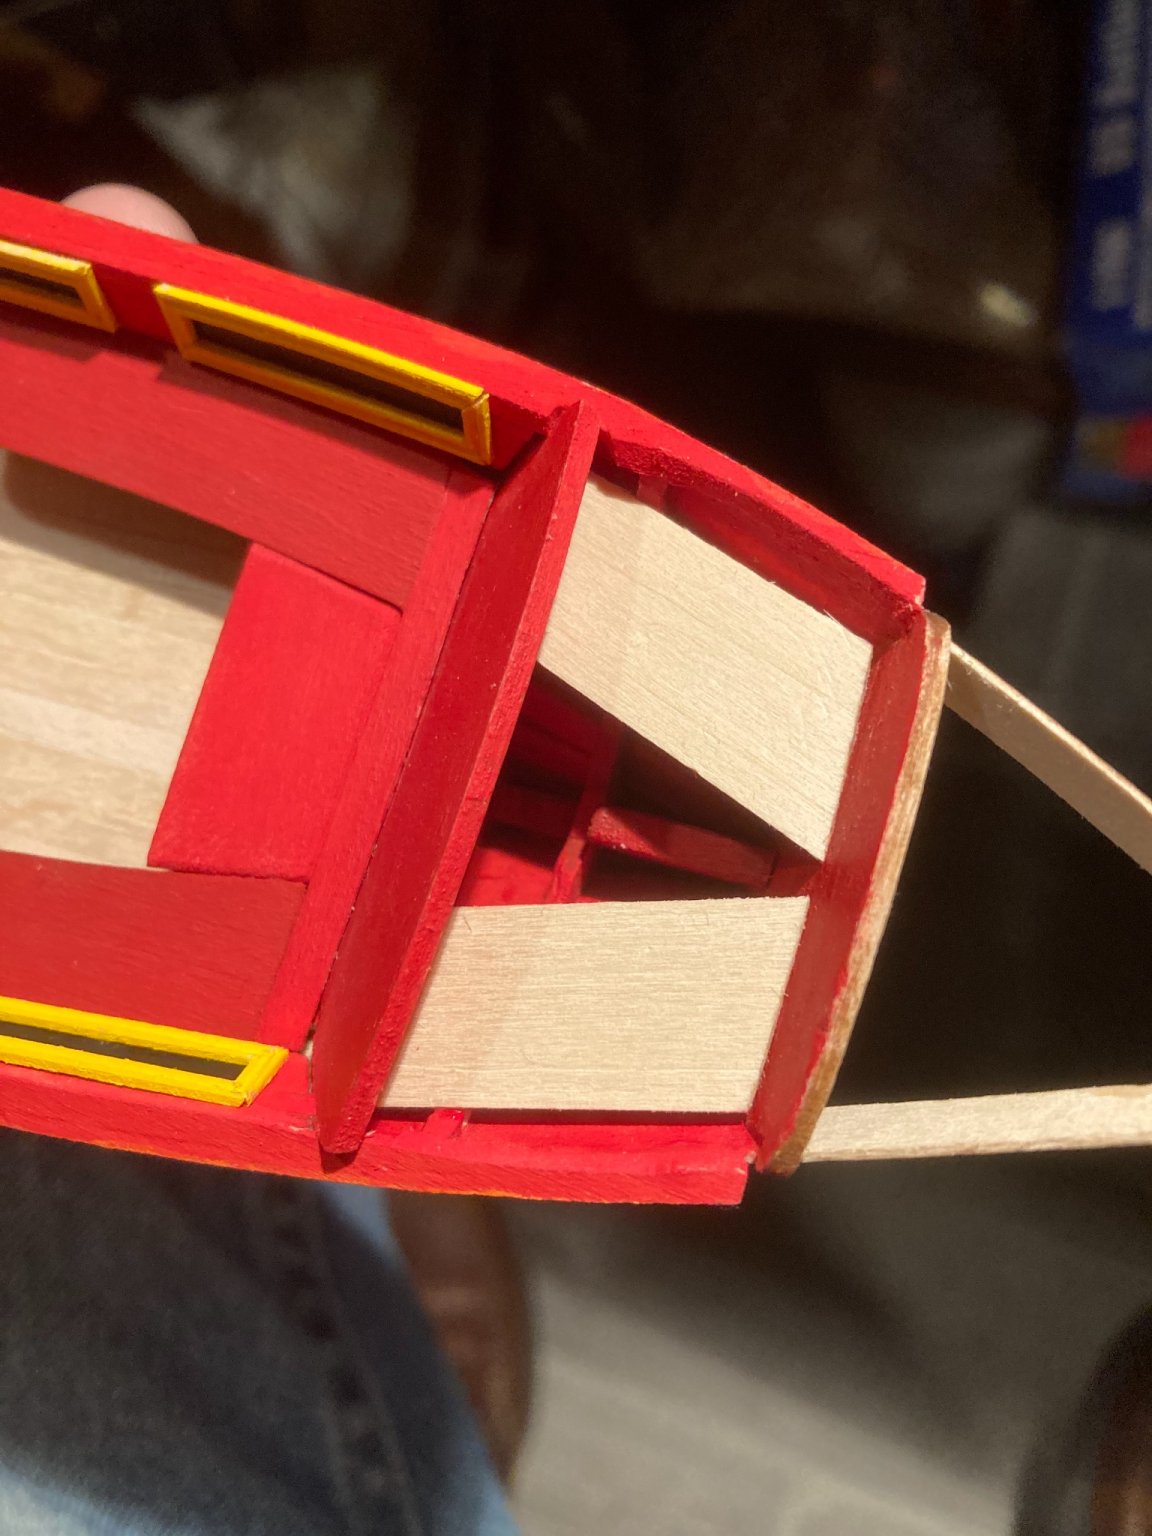
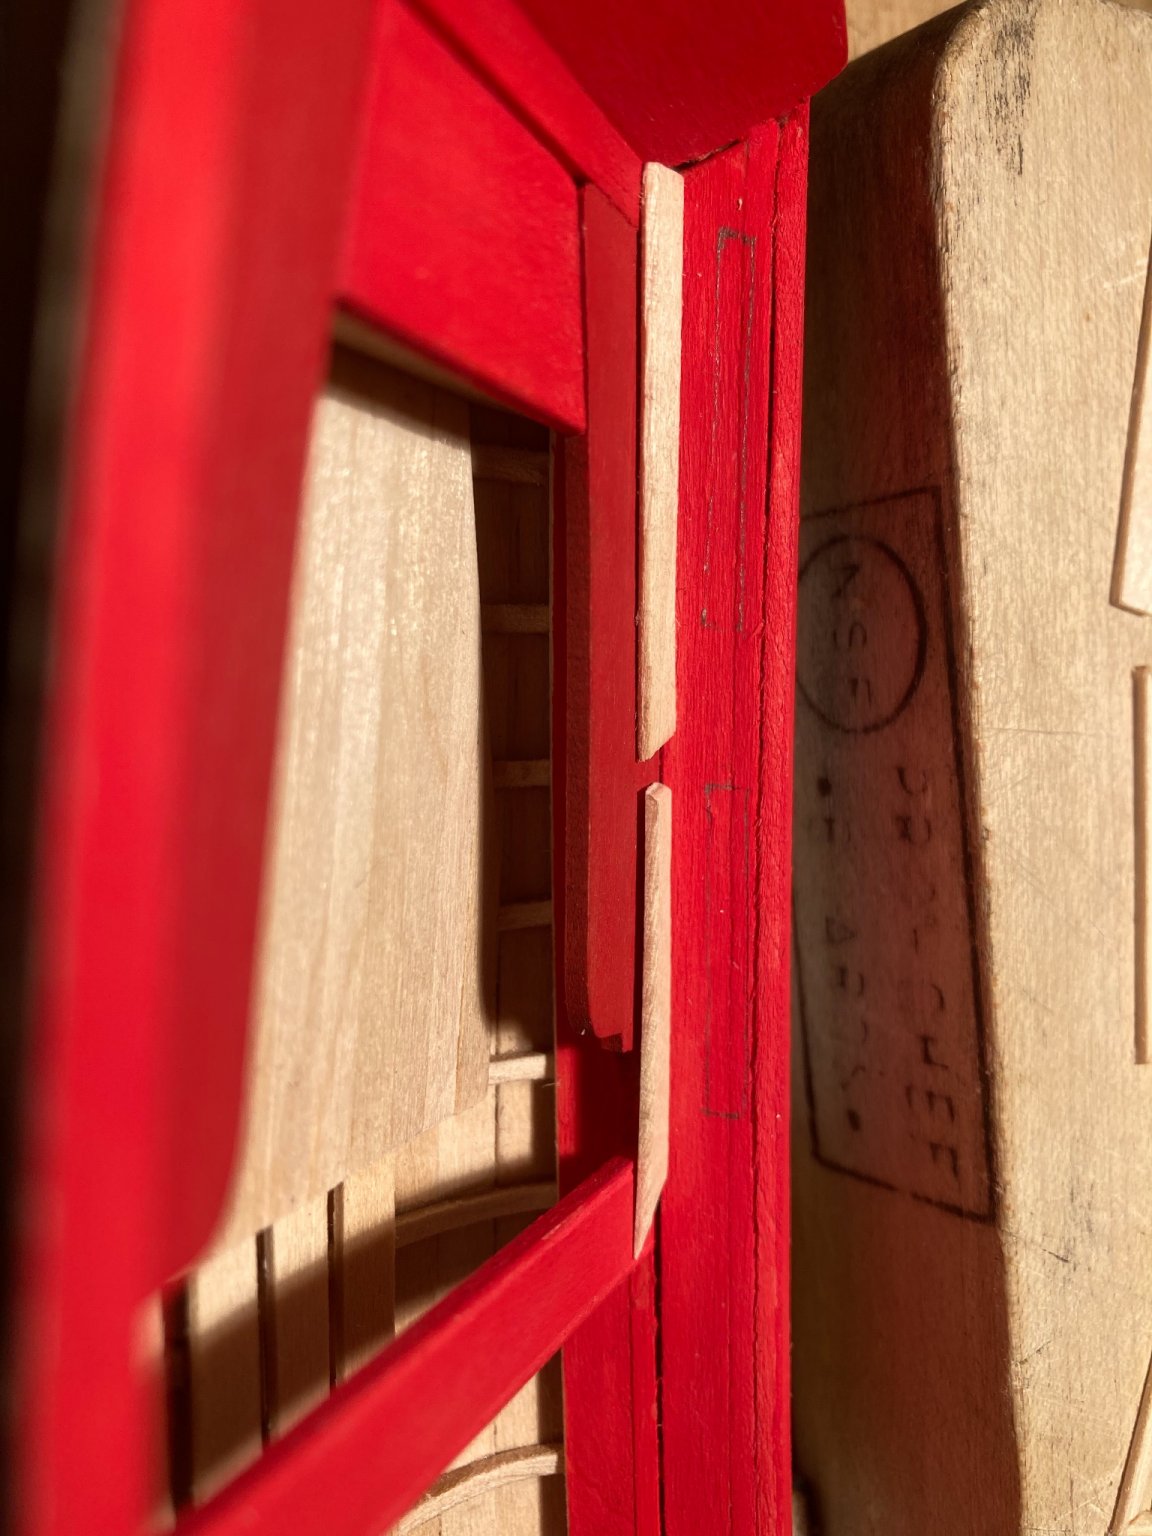
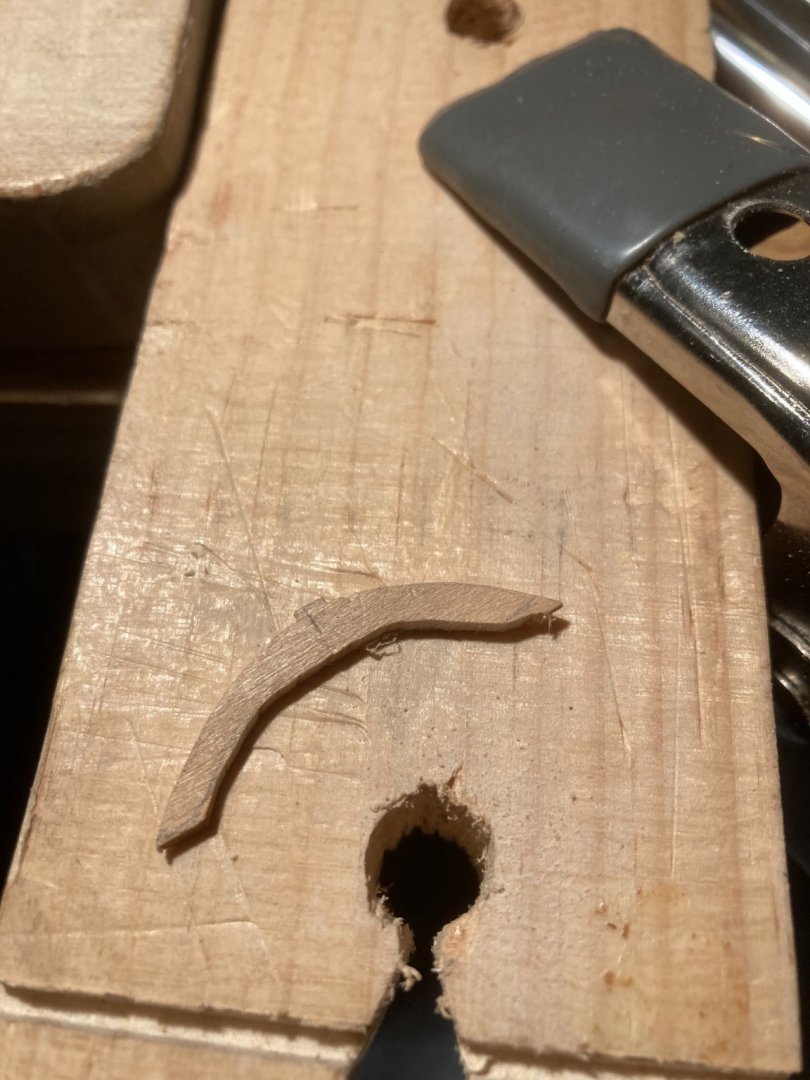
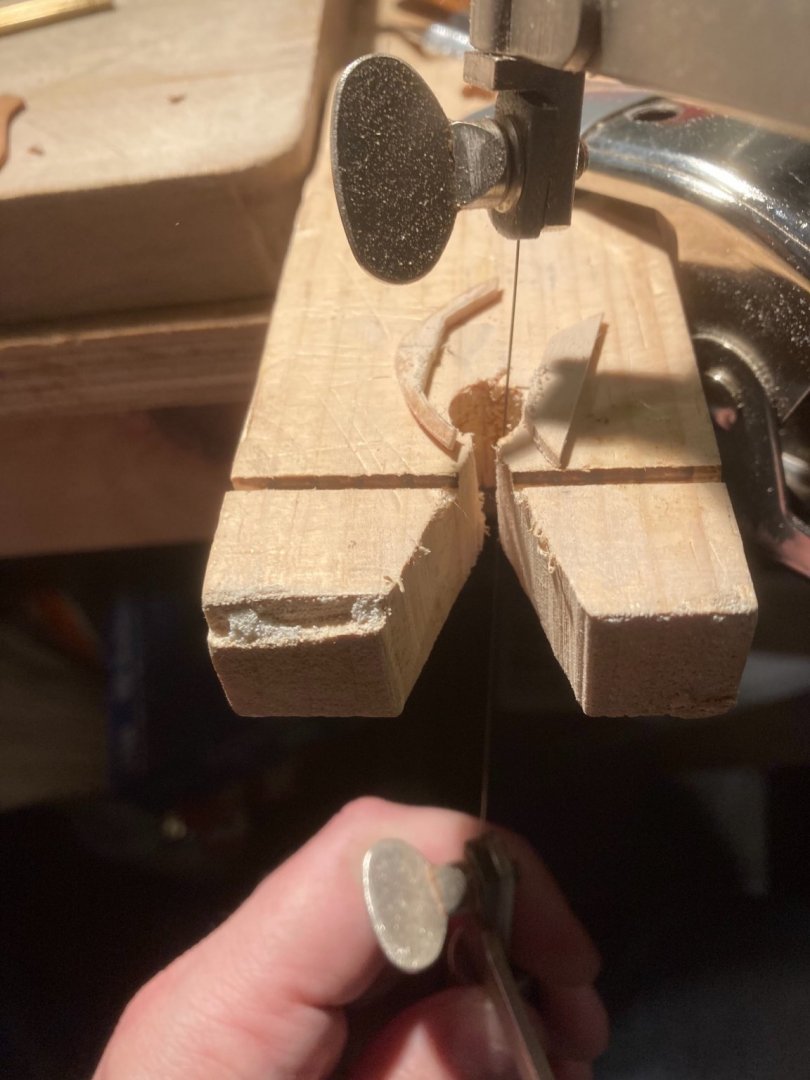
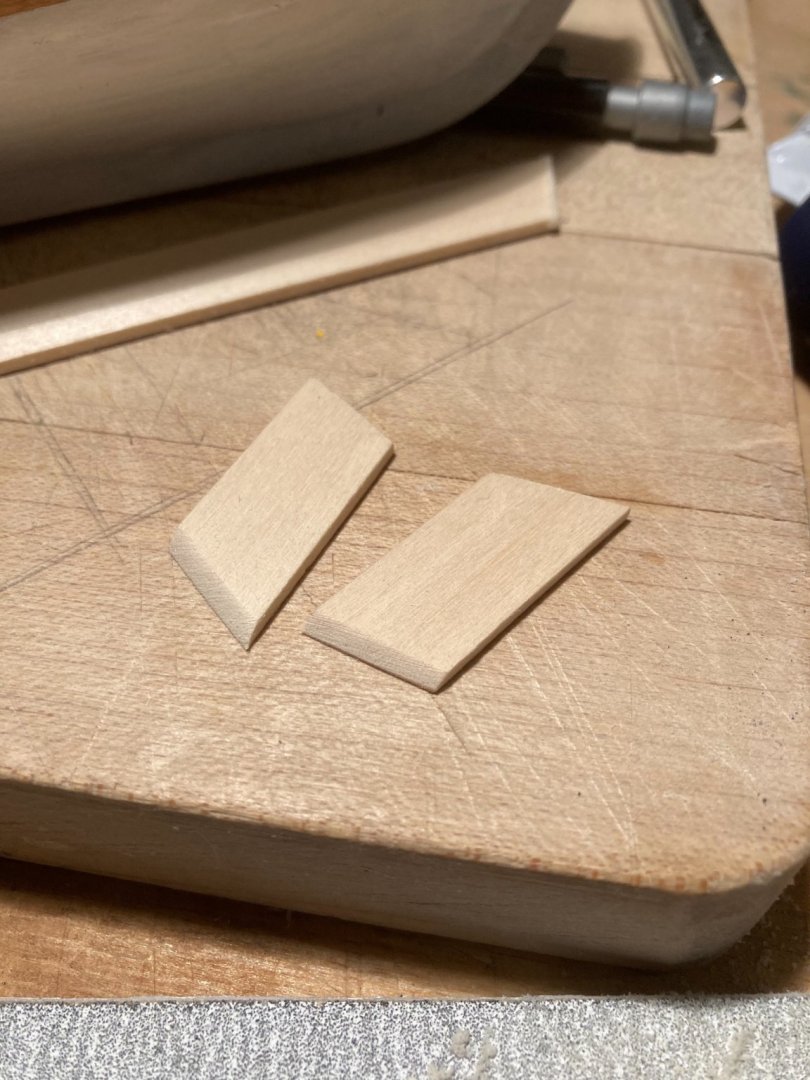
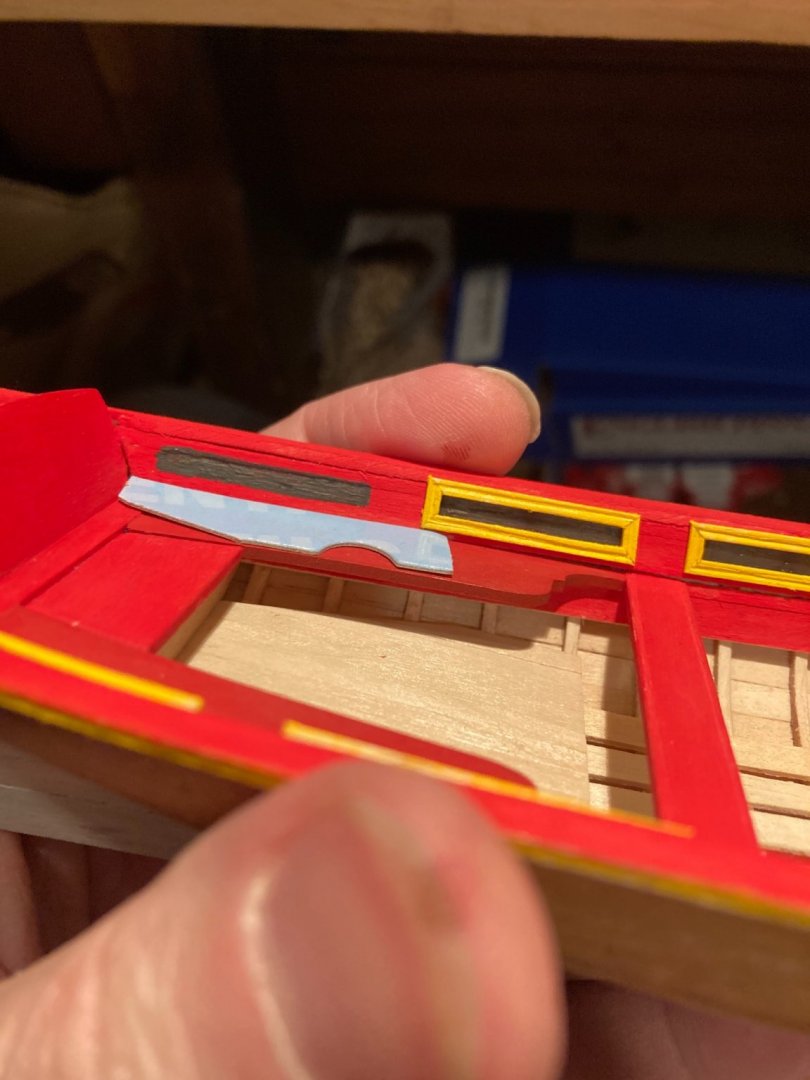
I made a piece for the bow (I’m not sure of the name of such a part!) but I didn’t like it so I redid it. Cut with a jeweler’s saw, filed, glued and then painted.


- 123 replies
-
- 4
-
-
- Model Shipways
- Pinnace
- (and 1 more)
-
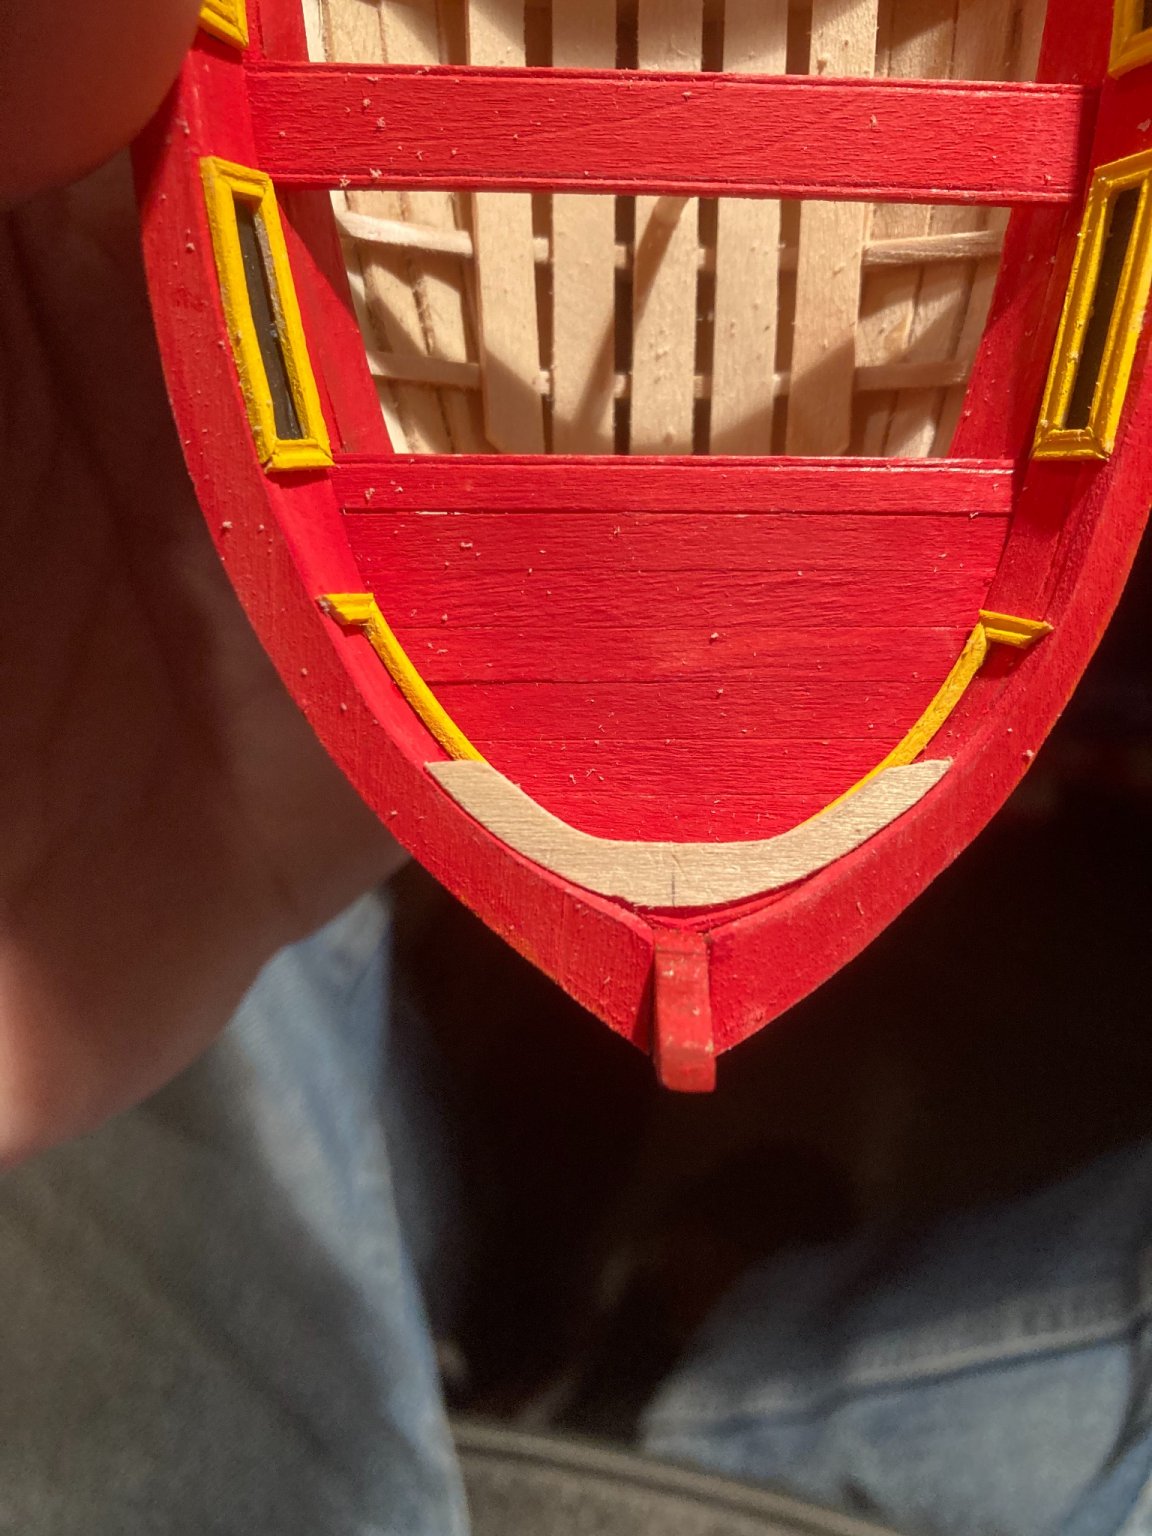
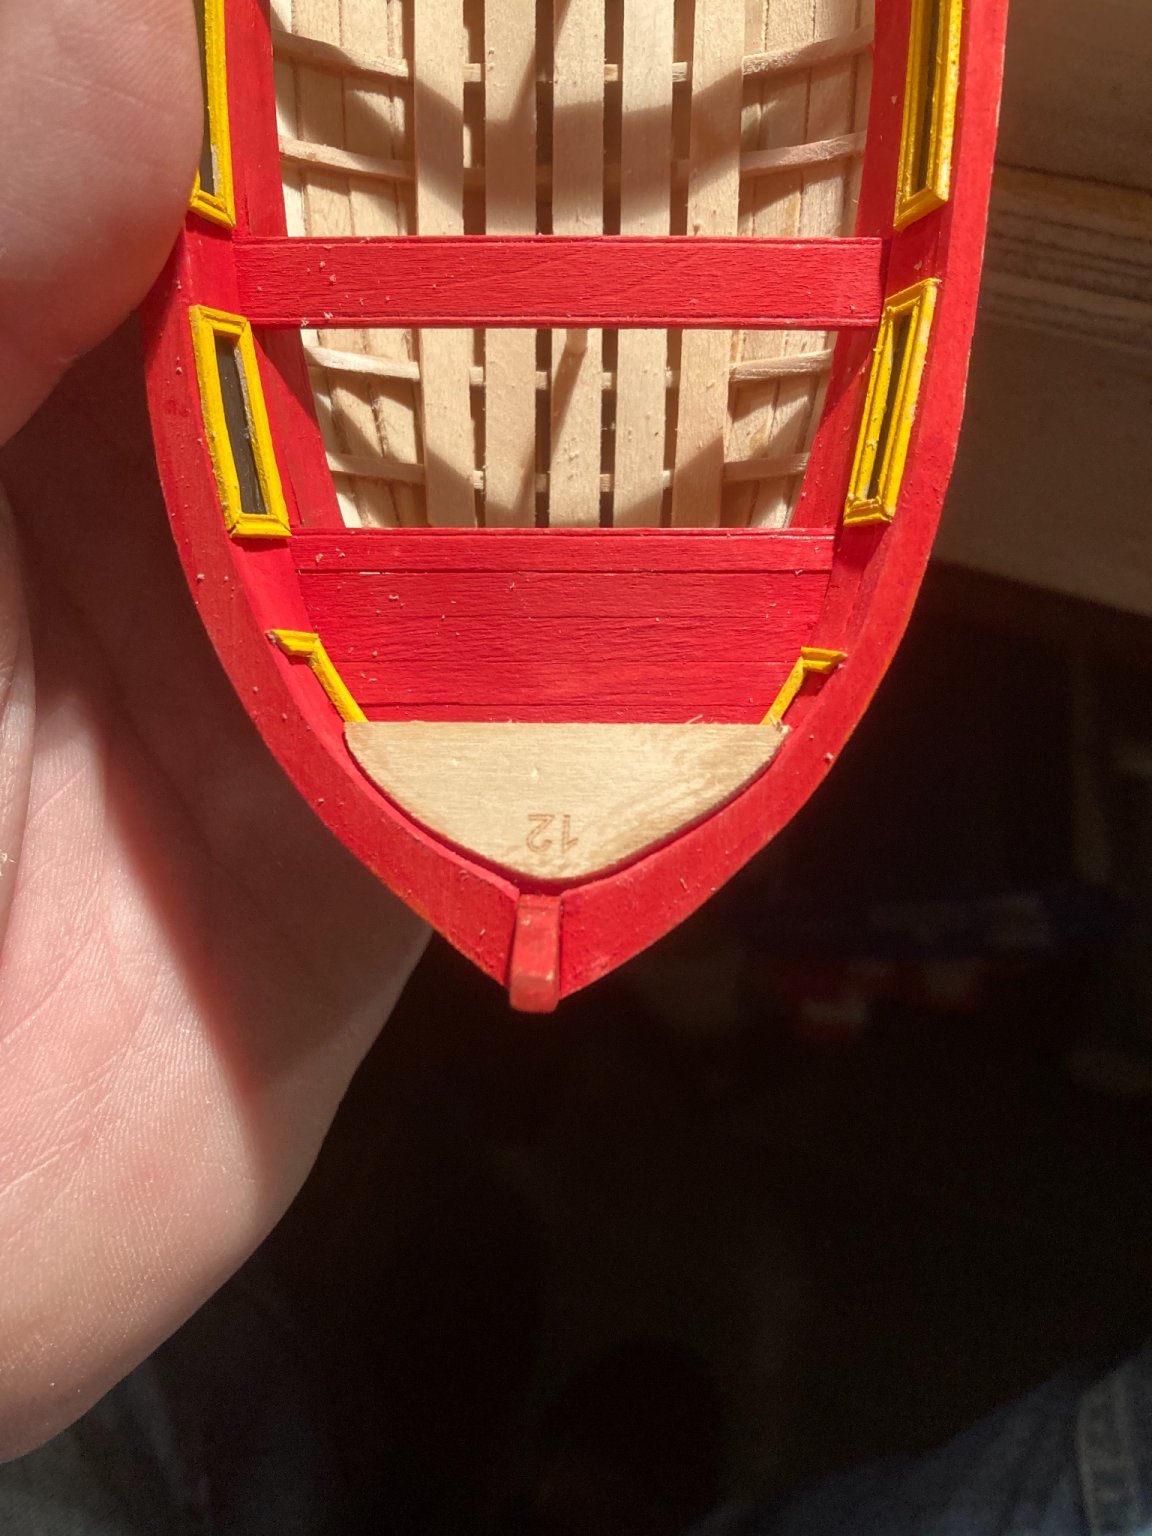
I painted some more moldings and bent them to fit the bow. I also added couple planks in back as well. There wasn’t great surfaces for gluing those pieces so I cut notches in the ribs to support the planks.

- 123 replies
-
- 4
-
-
- Model Shipways
- Pinnace
- (and 1 more)
-
chisels
EricWilliamMarshall replied to Anthony Hearne's topic in Modeling tools and Workshop Equipment
There was a third book I wanted to mention regarding sharpening. No one needs to own all three since they overlap in many respects. (Well, um, yes, I do own all three.) Taunton's Complete Illustrated Guide to Sharpening by Thomas Lie-Nielsen (yes, that Thomas Lie-Nielsen, the famed tool maker). It starts with kinds of tool steel, heat treatment and abrasives. Then machines and jig and then chapters on sharpening various tools. https://www.amazon.com/Tauntons-Complete-Illustrated-Sharpening-Taunton/dp/1631860860/ I also mentioned The Perfect Edge: The Ultimate Guide to Sharpening for Woodworkers by Ron Hock (yes, he is that Ron Hock, yet another famous tool maker). It has a similar range: tool steel metallurgy, heat treatment, abrasives and chapters on sharpening various tools. https://www.amazon.com/Perfect-Edge-Ultimate-Sharpening-Woodworkers/dp/1440329958/ And the previously mentioned The Complete Guide to Sharpening by Leonard Lee. Again similar topics. And again a similarly famous tool maker. https://www.amazon.com/Complete-Guide-Sharpening-Leonard-Lee/dp/1561581259/ I honestly don't have a fav; I find they complement each other. Any one is great but just like reading the build logs here, you might enjoy reading more than one... I have edited this post. I forgot a gem of a book regarding the odd shaped carving gouges and the like: Woodcarving: Tools, Material & Equipment by Chris Pye - Pye has a number of good books on carving but this one has a bible on sharpening and other details regarding the setup and use of carving tools. https://www.amazon.com/gp/product/1861082010/ref=dbs_a_def_rwt_bibl_vppi_i5 There is a reprint (newer and pricer): https://www.amazon.com/gp/product/1635618142/ref=dbs_a_def_rwt_bibl_vppi_i2 -
chisels
EricWilliamMarshall replied to Anthony Hearne's topic in Modeling tools and Workshop Equipment
I also have had success buying used chisels. Sometimes a superior tool is had for cheap! When examining a chisel of interest, I want to see symmetry in profile; if it isn't there, then I have to put in time to correct it. The tougher item to correct is in gouges. Cheap gouges don't aways have the flute (or 'trench') in the center of the blade/shank. It is a lot of work to fix that. The last tough one is symmetry in a couple axises for back bent or spoon bent gouges (generally a rare purchase for most folks). Even these issues can be over come but it's easier to see if the chisel next to it is in better shape and grab that. When I was younger, before the turn of the century, I was taught to go to the shop with the carving tools and ask to see 3 or 4 the same chisel or gouge and compare the shape and pick the best. To @Gyber's point of buying inexpensive, the act of sharpening the tool to your own needs is the same skills needed to make good use of a used or poorly shaped tool (barring adding new handle or similar). -
I wish you well in your search. If you have a moment after you find a solution, come back and share it. While I'm curious, it may prove more useful to someone else with similar needs.
-
Thanks for all the likes! I realize there is ton of wonderful stuff here at MSW and your time could be spent elsewhere more profitably! @shipman, do you have any build logs? I’ve tried to look into the work of the various folk who were kind enough to stop by, and I couldn't find any.
- 123 replies
-
- 1
-
-
- Model Shipways
- Pinnace
- (and 1 more)
-
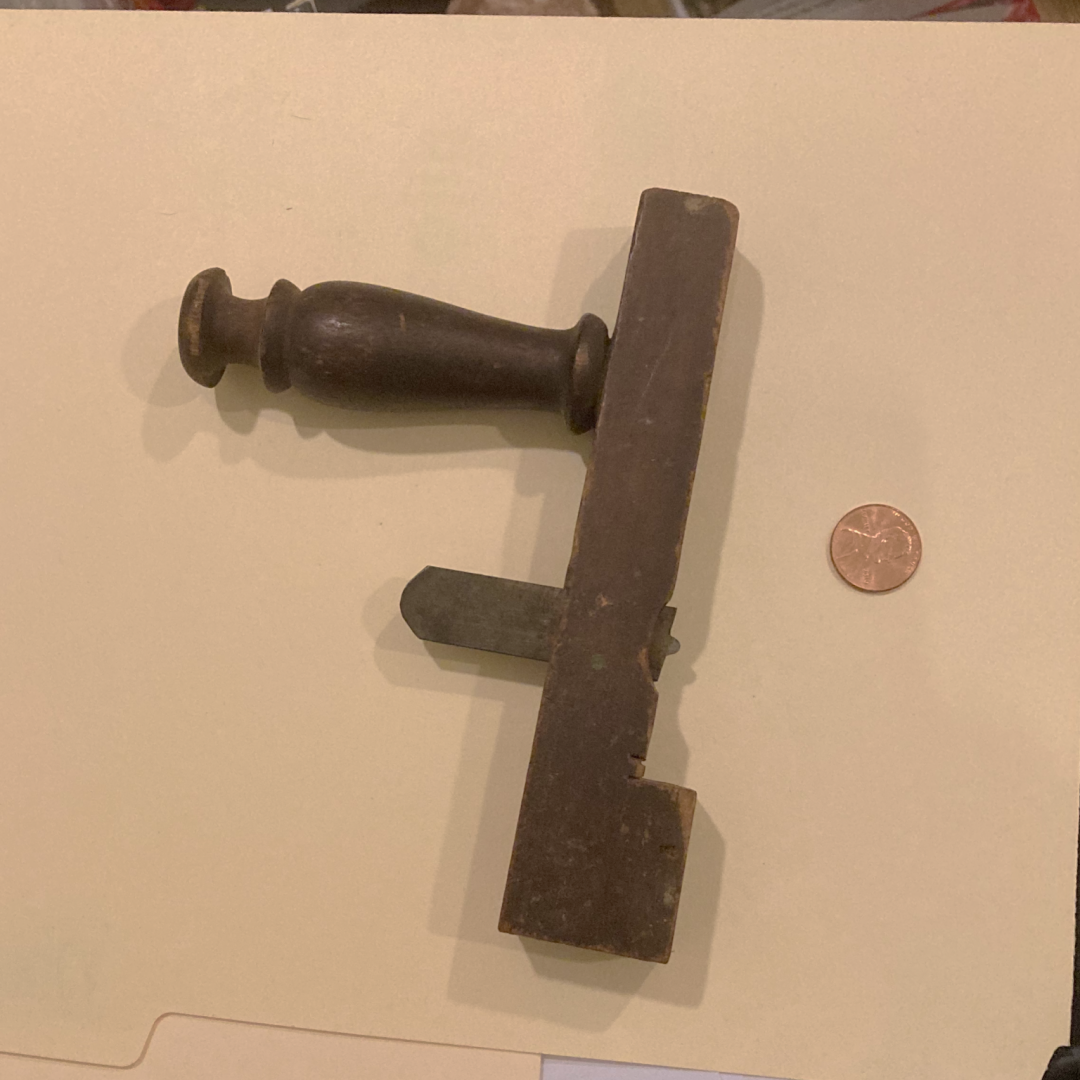
In the previous bit of work where I used a scraper to make a molding, I used a bit of metal. Here is an antique version used to make moldings for furniture.
- 123 replies
-
- 4
-
-
- Model Shipways
- Pinnace
- (and 1 more)
-
I have ordered some photo etch for a 1/700 battleship I have and it’s your fault! The ship looks great painted!
- 179 replies
-
- 8
-

-
-
- hatsuzakura
- pit road
- (and 2 more)
-
Yikes! I'm glad you are undaunted!!
-
I thought this site might be of interest: https://hirstarts.com/index.html They sell an astonishing array of molds. There are also a surprising number of tutorials and projects to be found, https://hirstarts.com/tipsmain/tipsmain.html https://hirstarts.com/projects.html Their market is RPG folks and some war gaming folks.
-
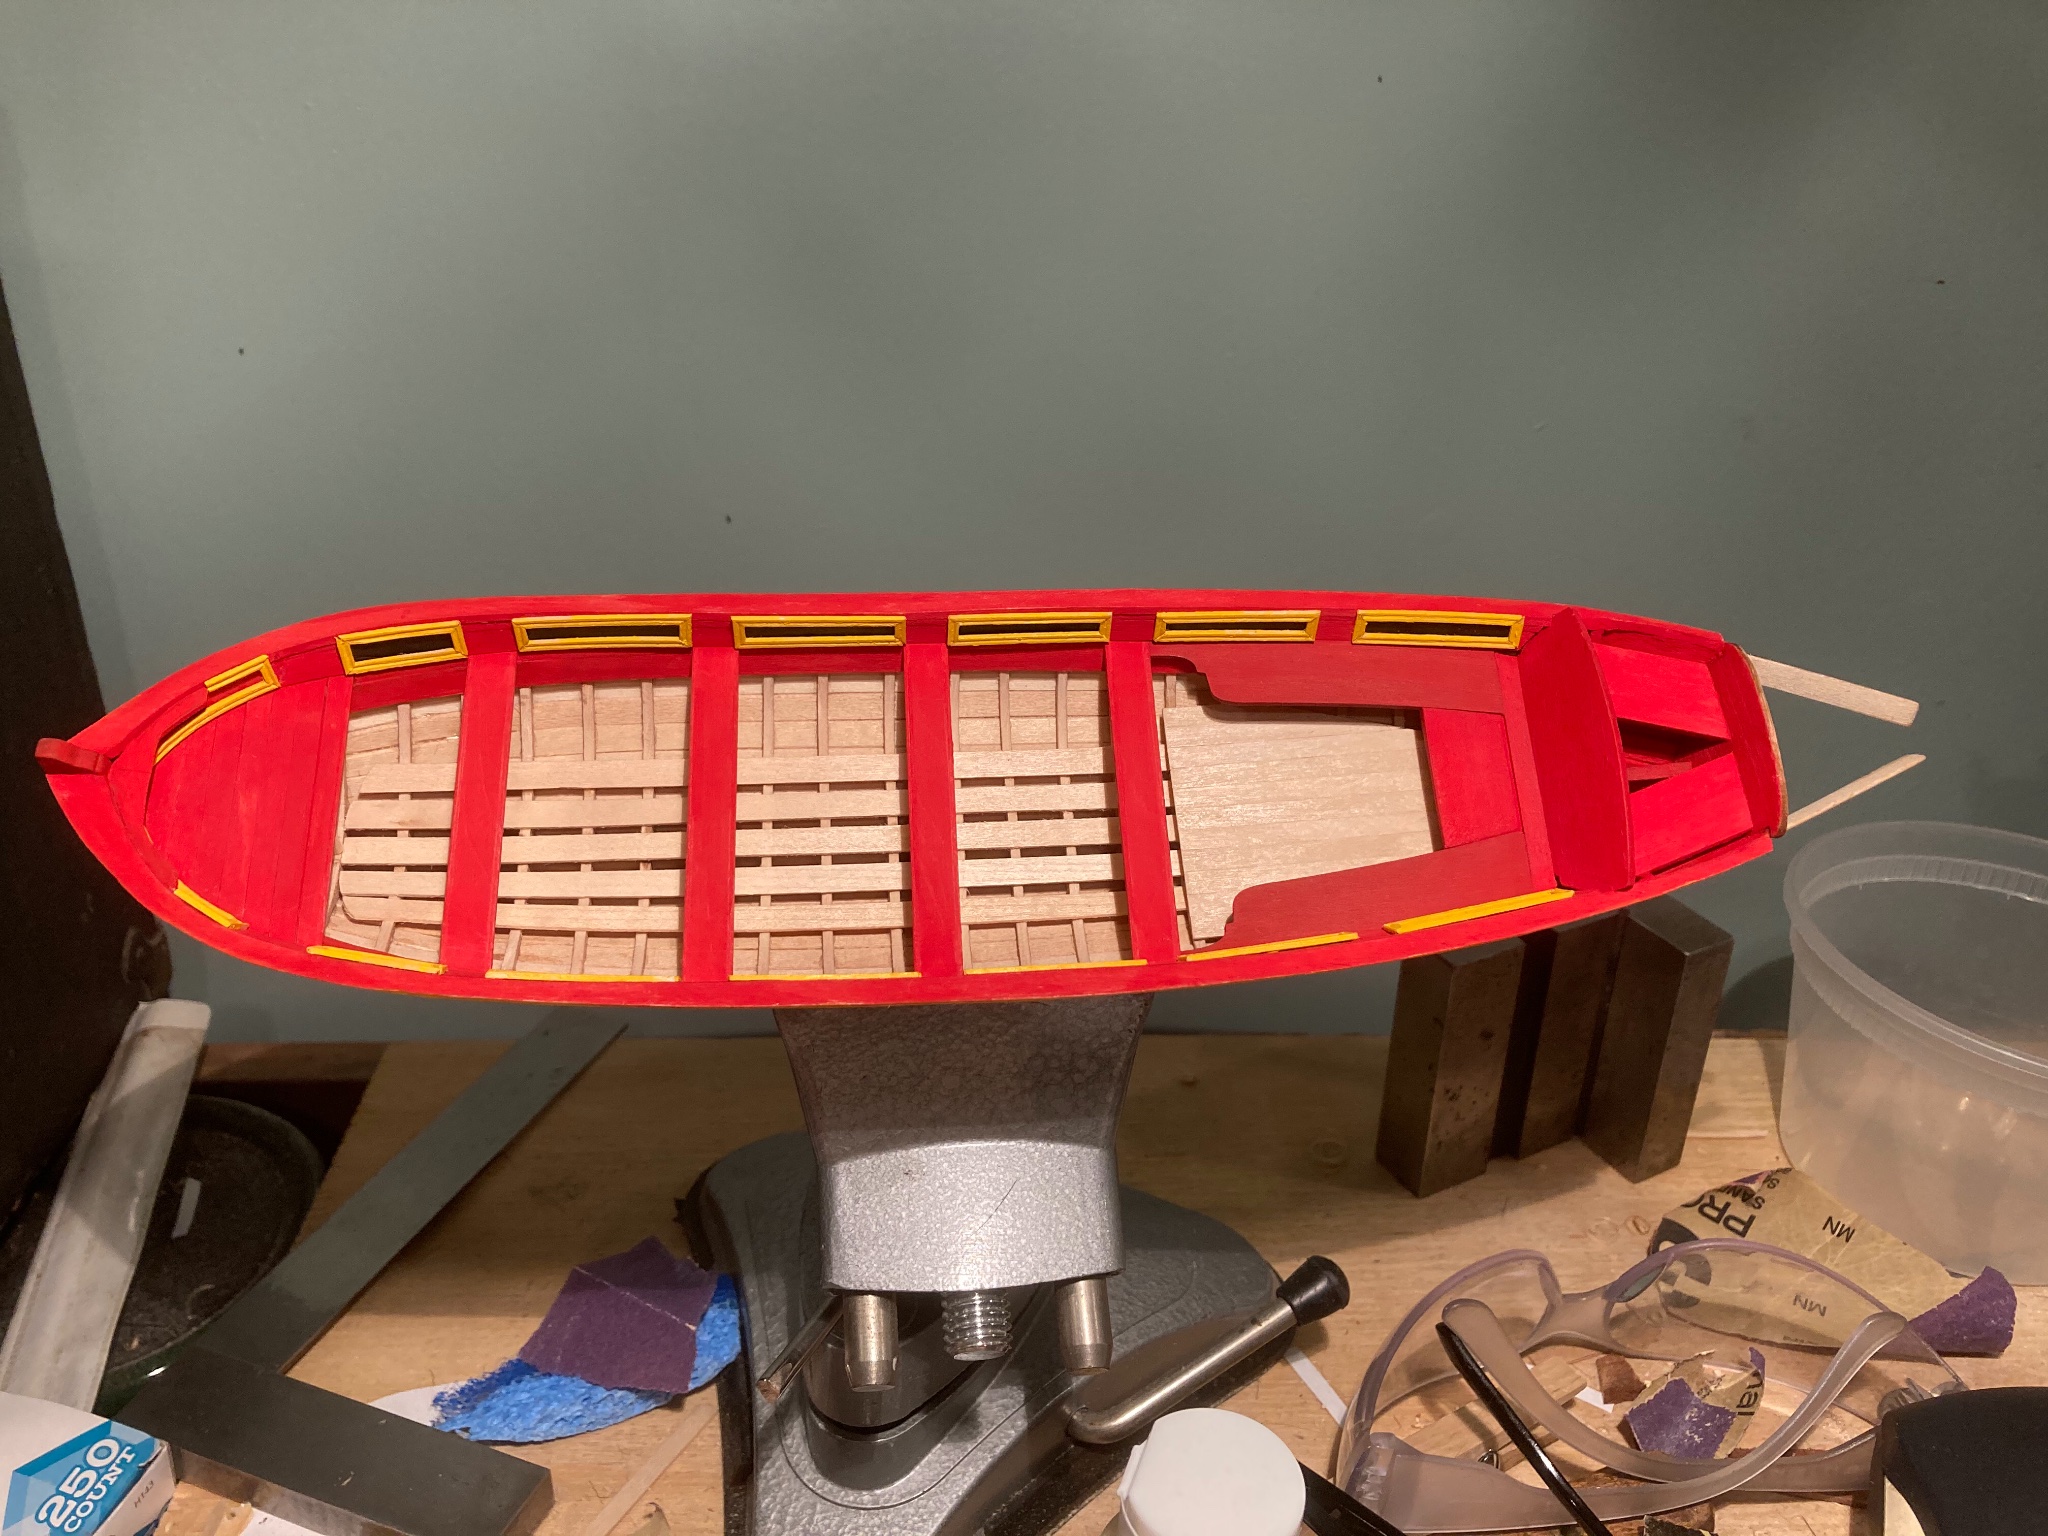
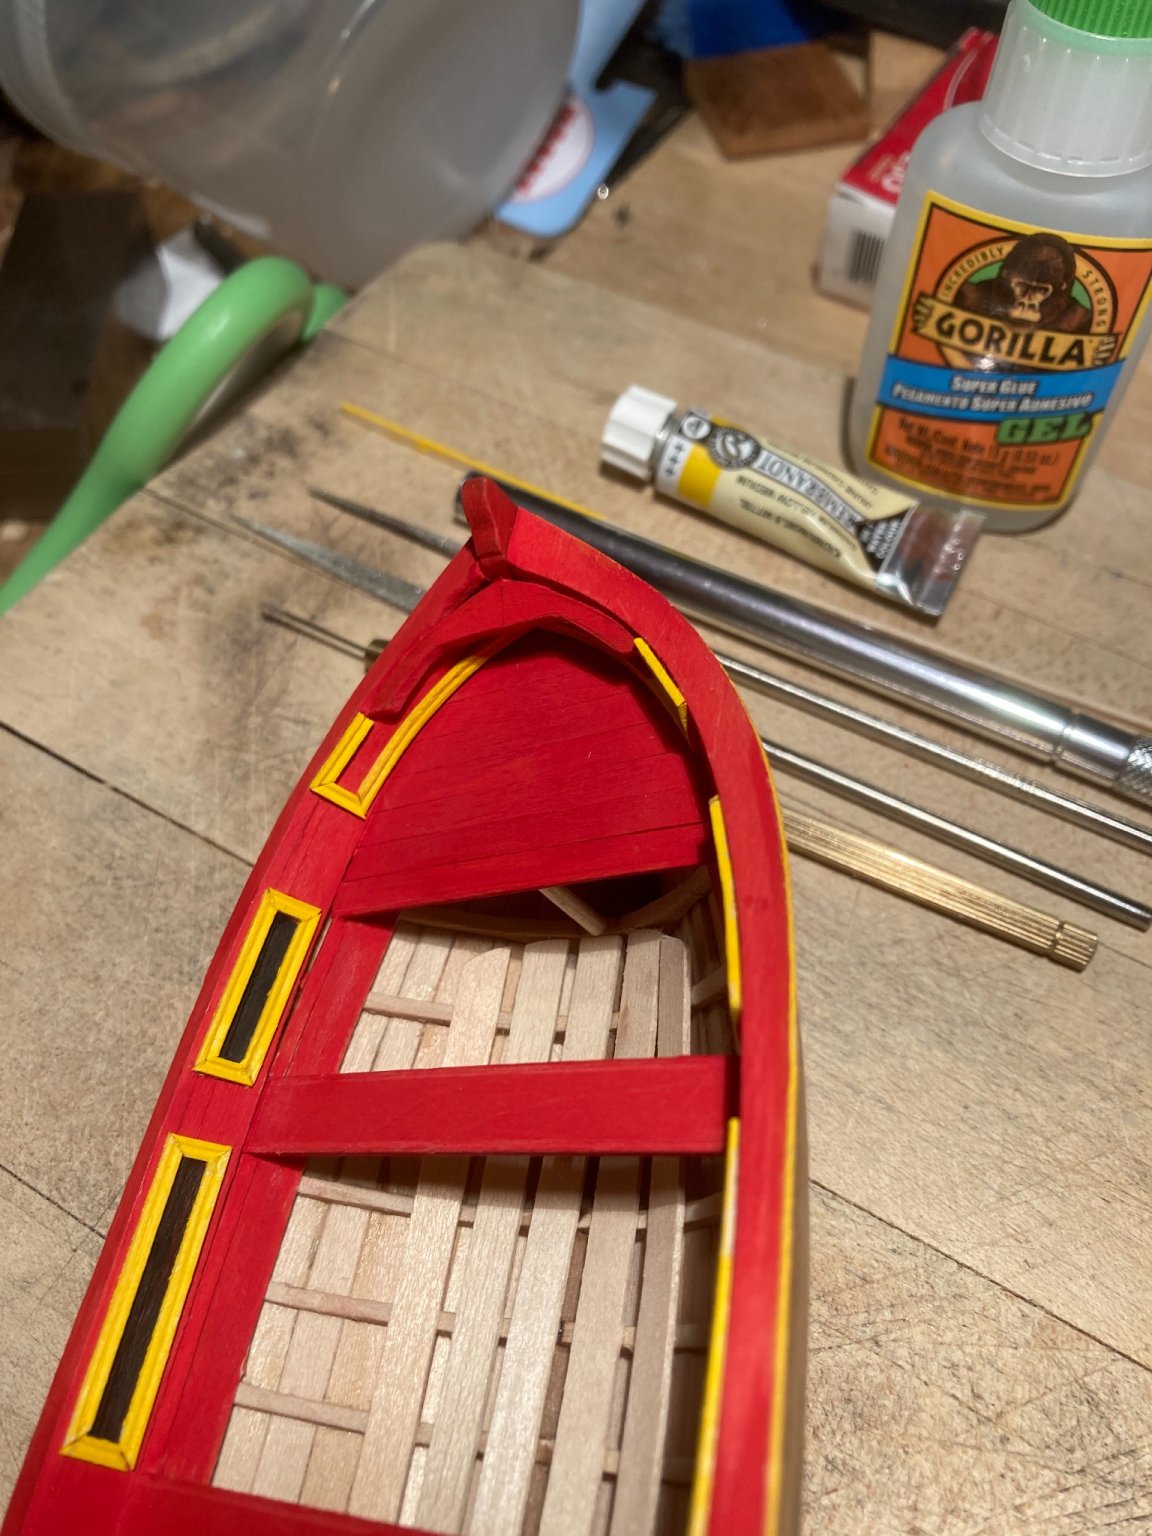
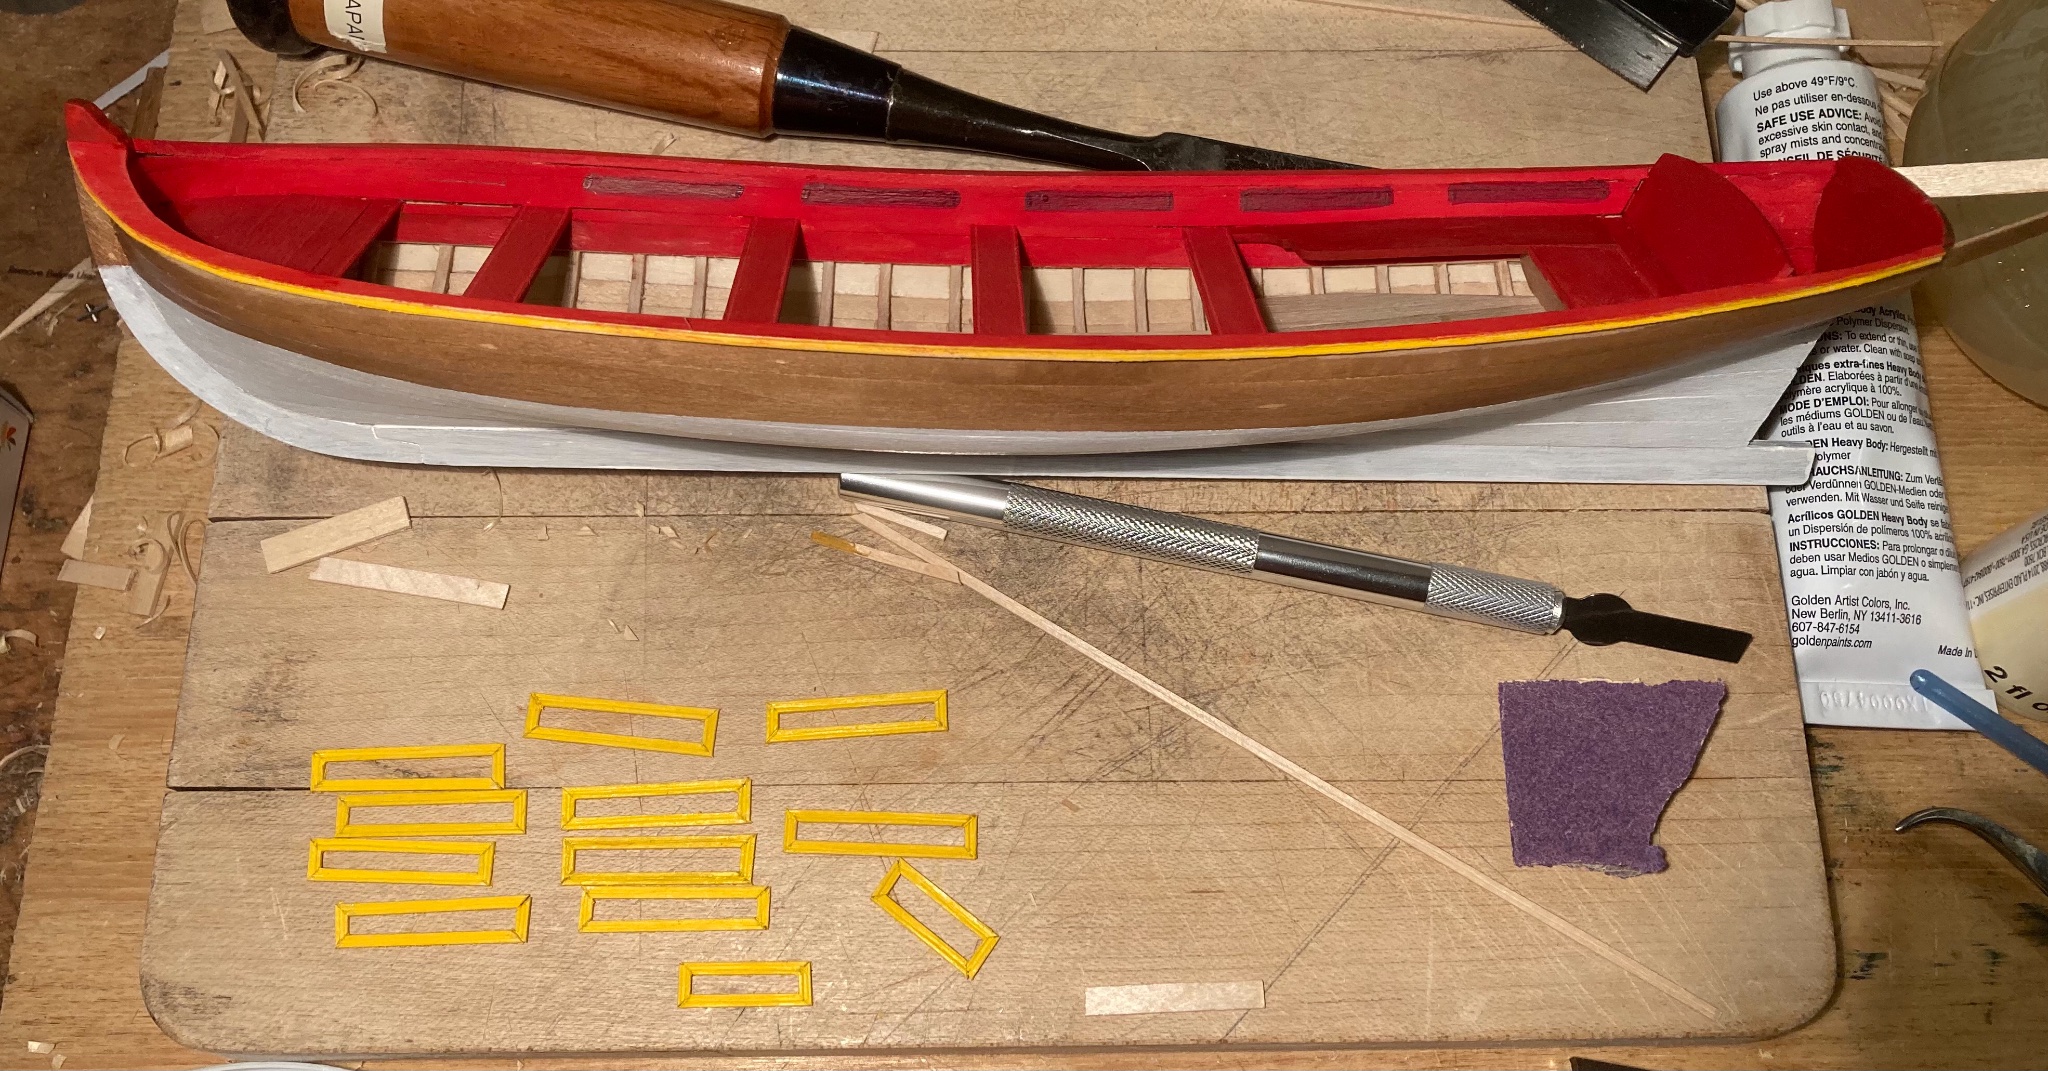
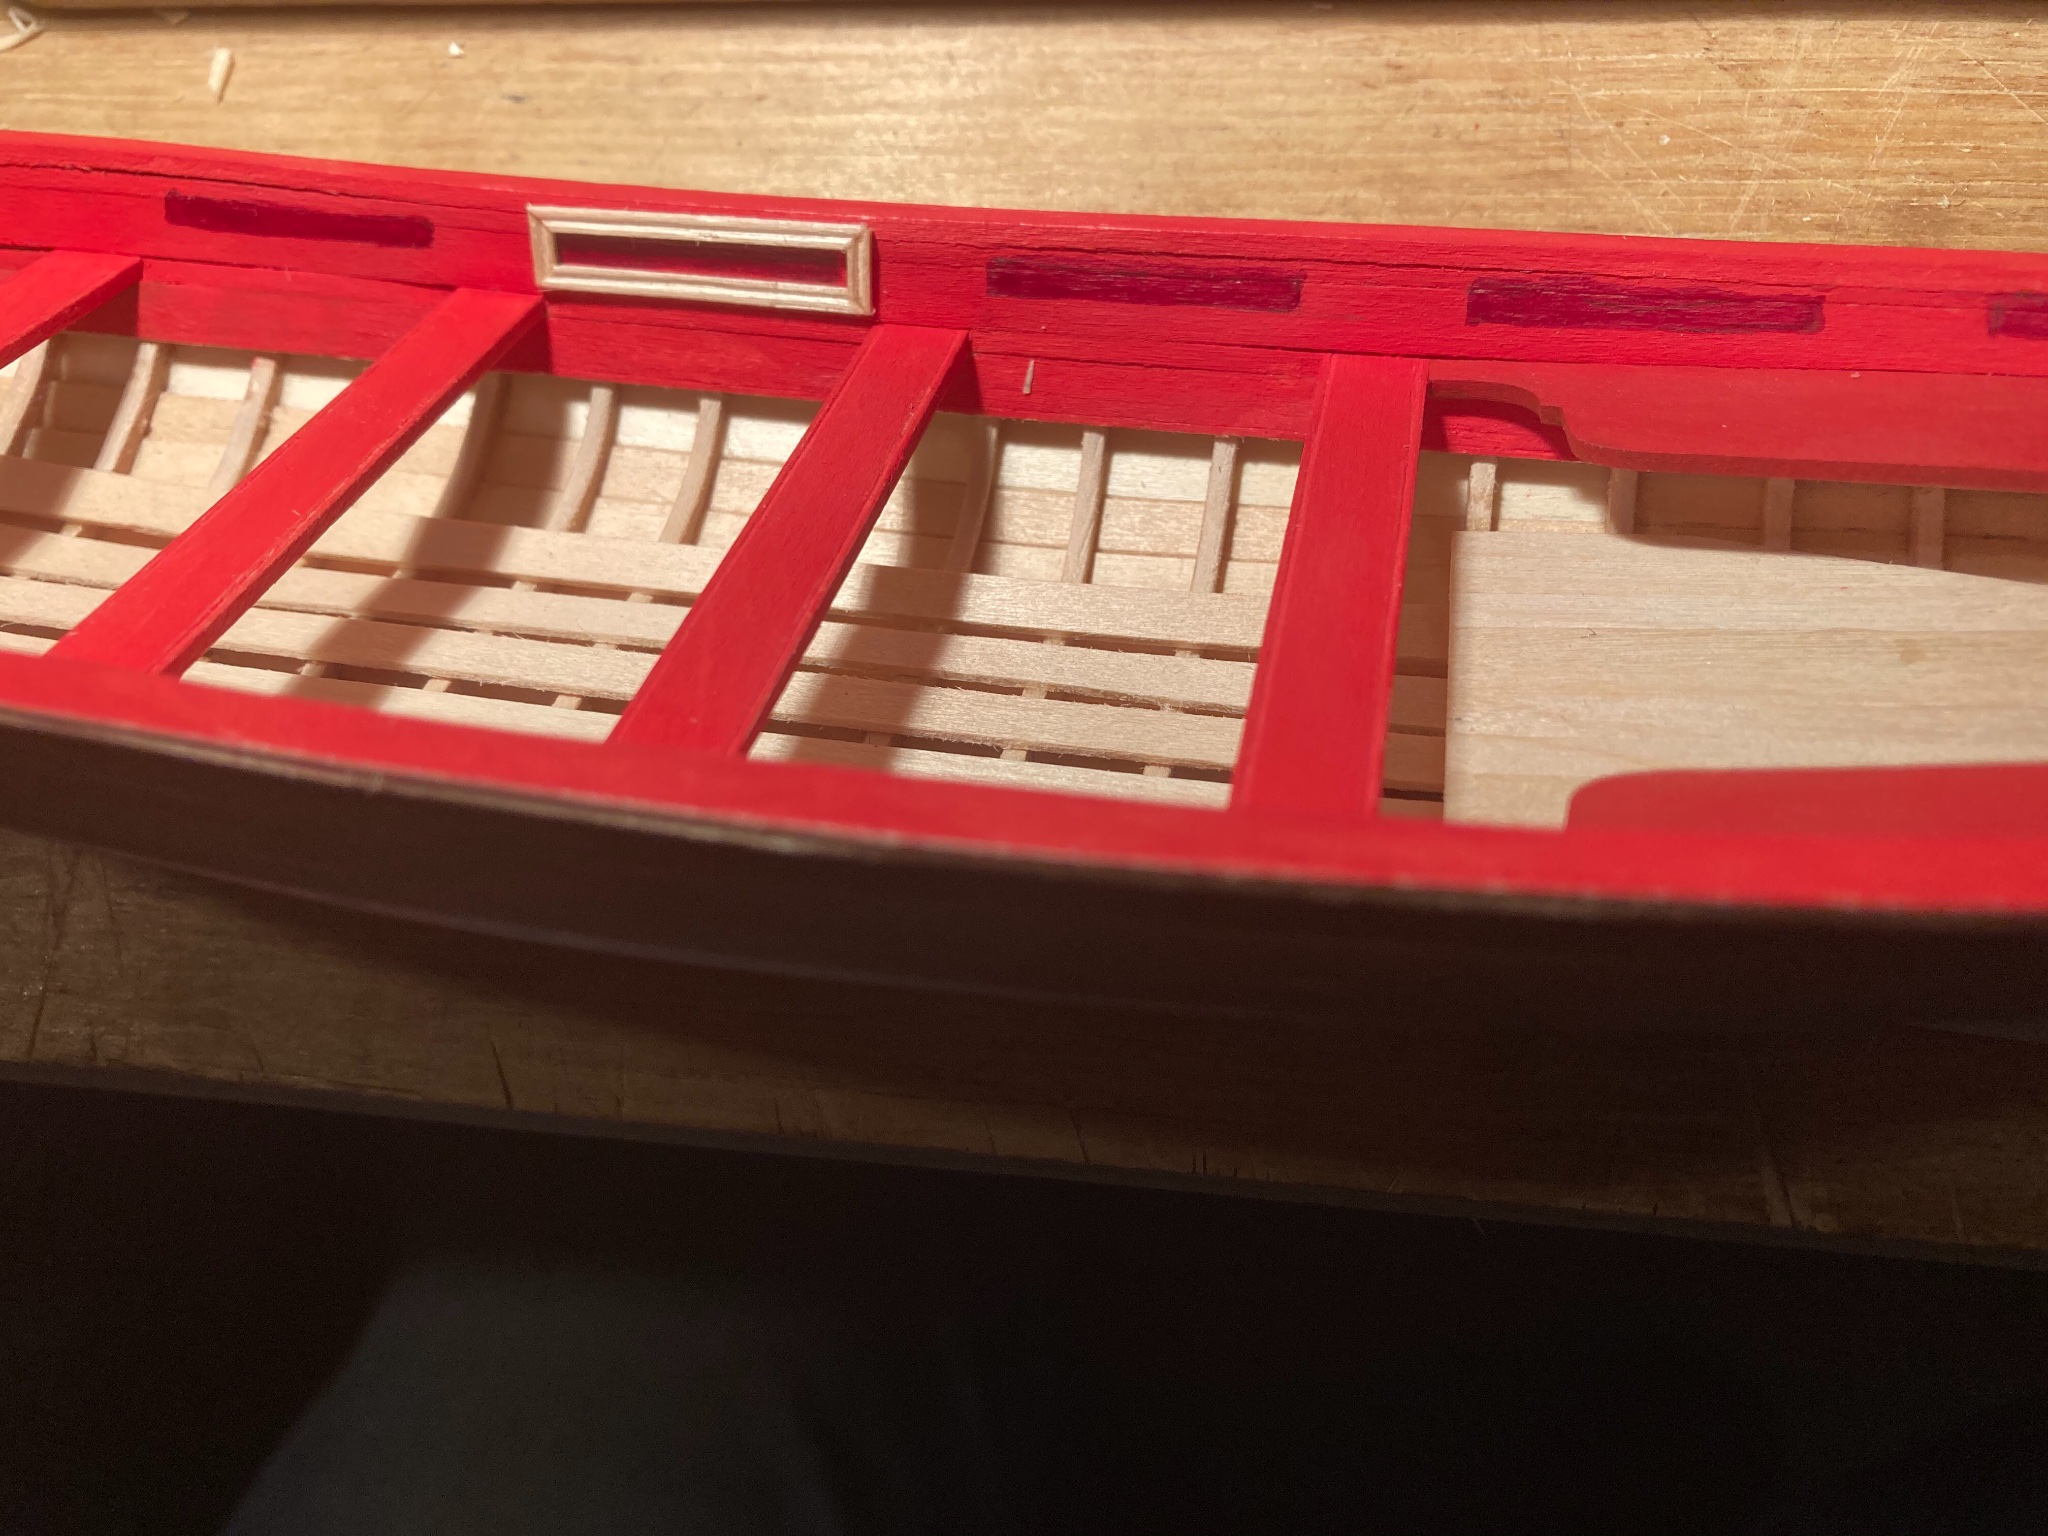
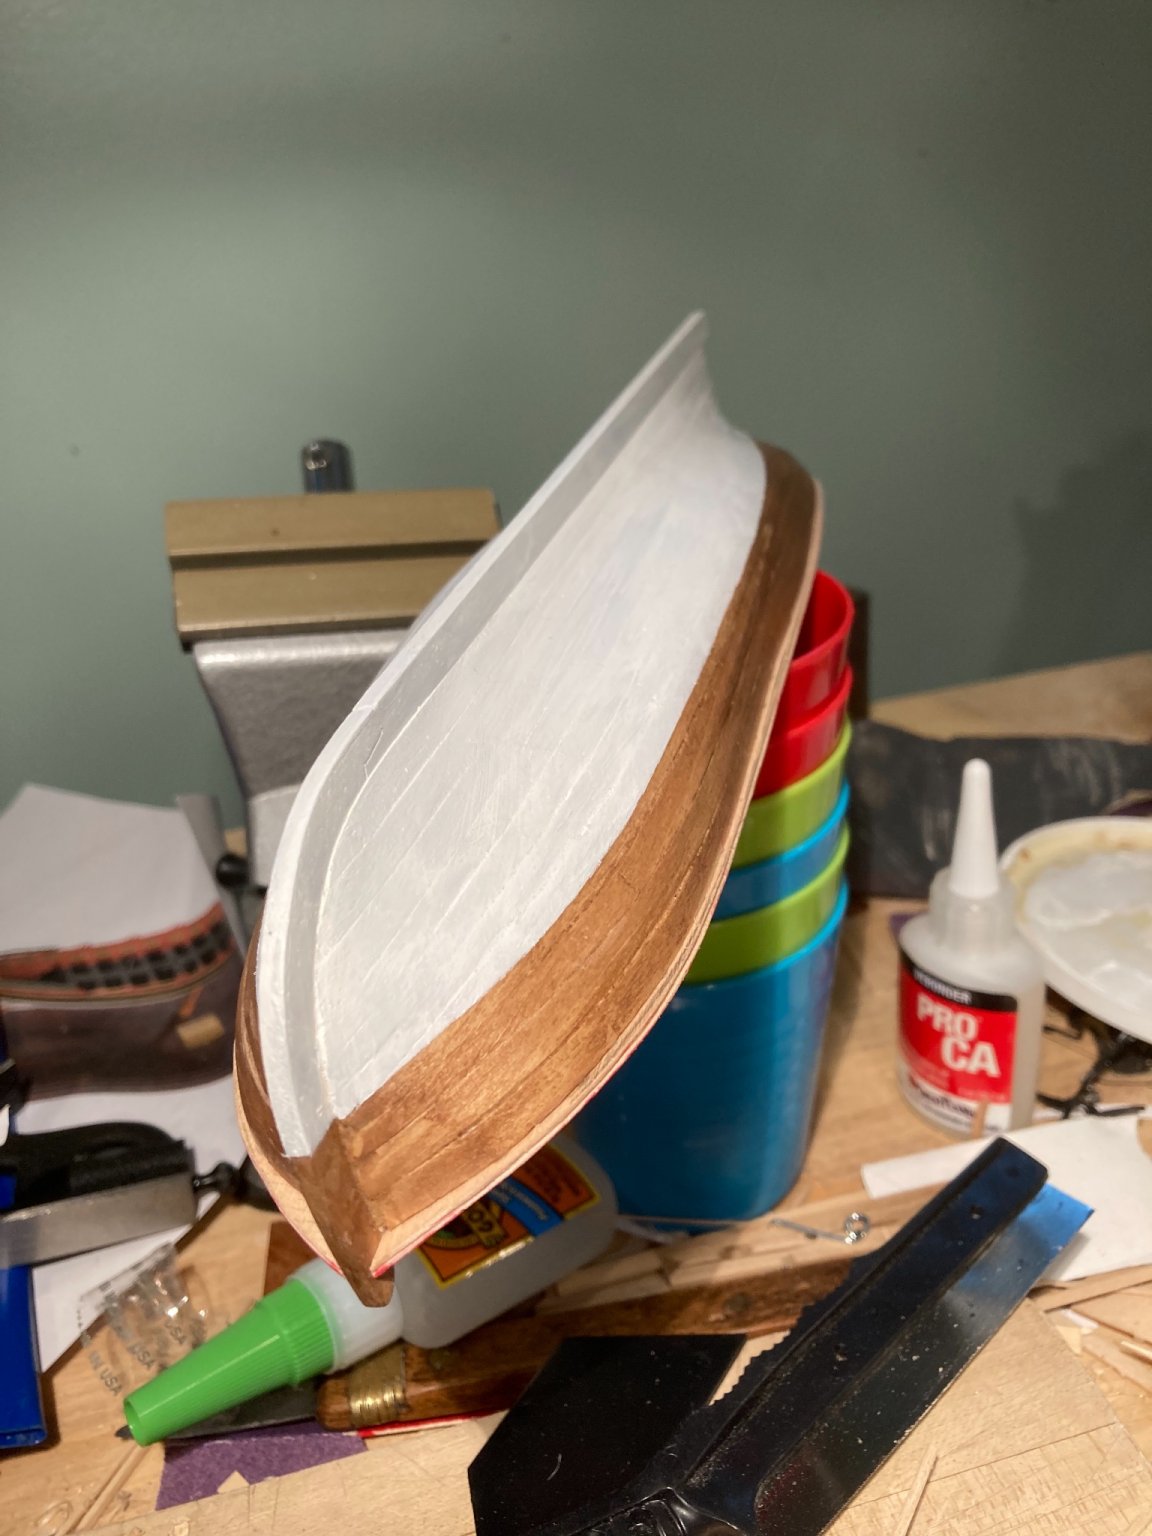
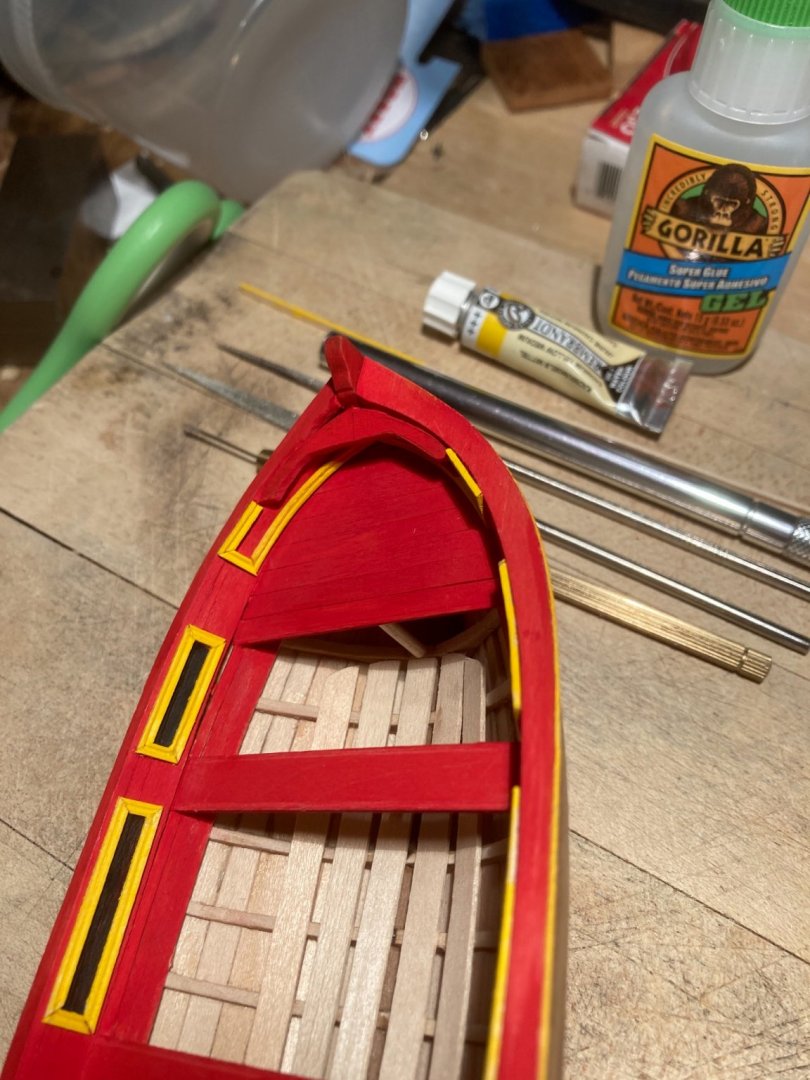
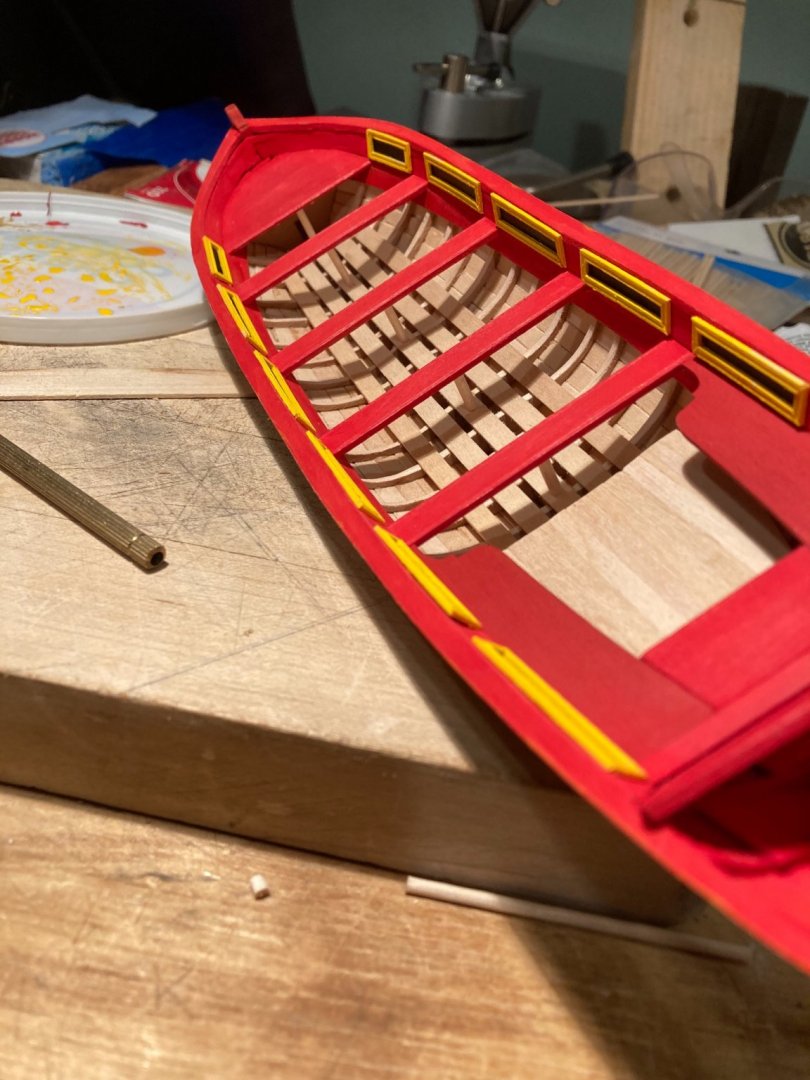
I added the frames to the interior. I used a bit of cardboard to measure the height above the seats I wished to have. I chose to have uniform frame height unlike the model prototype. Yet again, as I look at the photos now, I feel I rushed this and it could have been better. But I’m pleased well enough (or lazy enough) that I won’t bother to yank it out and redo it. I also added the posts under the seats.

- 123 replies
-
- 9
-
-
- Model Shipways
- Pinnace
- (and 1 more)
-
@Tigersteve, I have already wandered off! Sorry about that! I hope to come up with something you find interesting.
- 123 replies
-
- 1
-
-
- Model Shipways
- Pinnace
- (and 1 more)
-
Miniature Russian carving tools
EricWilliamMarshall replied to druxey's topic in Modeling tools and Workshop Equipment
Will do, thanks! -
Miniature Russian carving tools
EricWilliamMarshall replied to druxey's topic in Modeling tools and Workshop Equipment
I would love to get in contact with Mihail Kirsanov to order a set. If someone would be so kind as to share his contact info! Thanks! -
She looks great. I’m work towards having the skills to do justice to this kit. I’m glad you restarted!
- 109 replies
-
- 2
-
-
- medway longboat
- Syren Ship Model Company
- (and 1 more)
-
Most of my work is by hand and I do it sitting. My suggestion is any surface that does not shake or wobble at a height you might write a letter. I believe the best answer is to try a few heights and see what is best. I generally find having my working surface at about elbow height works best for me, for light detailed work. If I’m using more force like sawing or planing large boards, then lower is better. Good luck and let us know what worked for you. Also there a few other folks here who work from wheel chairs here at MSW; you might wish to direct message them for advice.
-
MicroLux/Micro-make power chisel
EricWilliamMarshall replied to wlell's topic in Modeling tools and Workshop Equipment
I also vote for the well-sharpen chisel. I will also mention that there are also larger block planes (with or without adjustable mouthed) that are also delightful to use. -
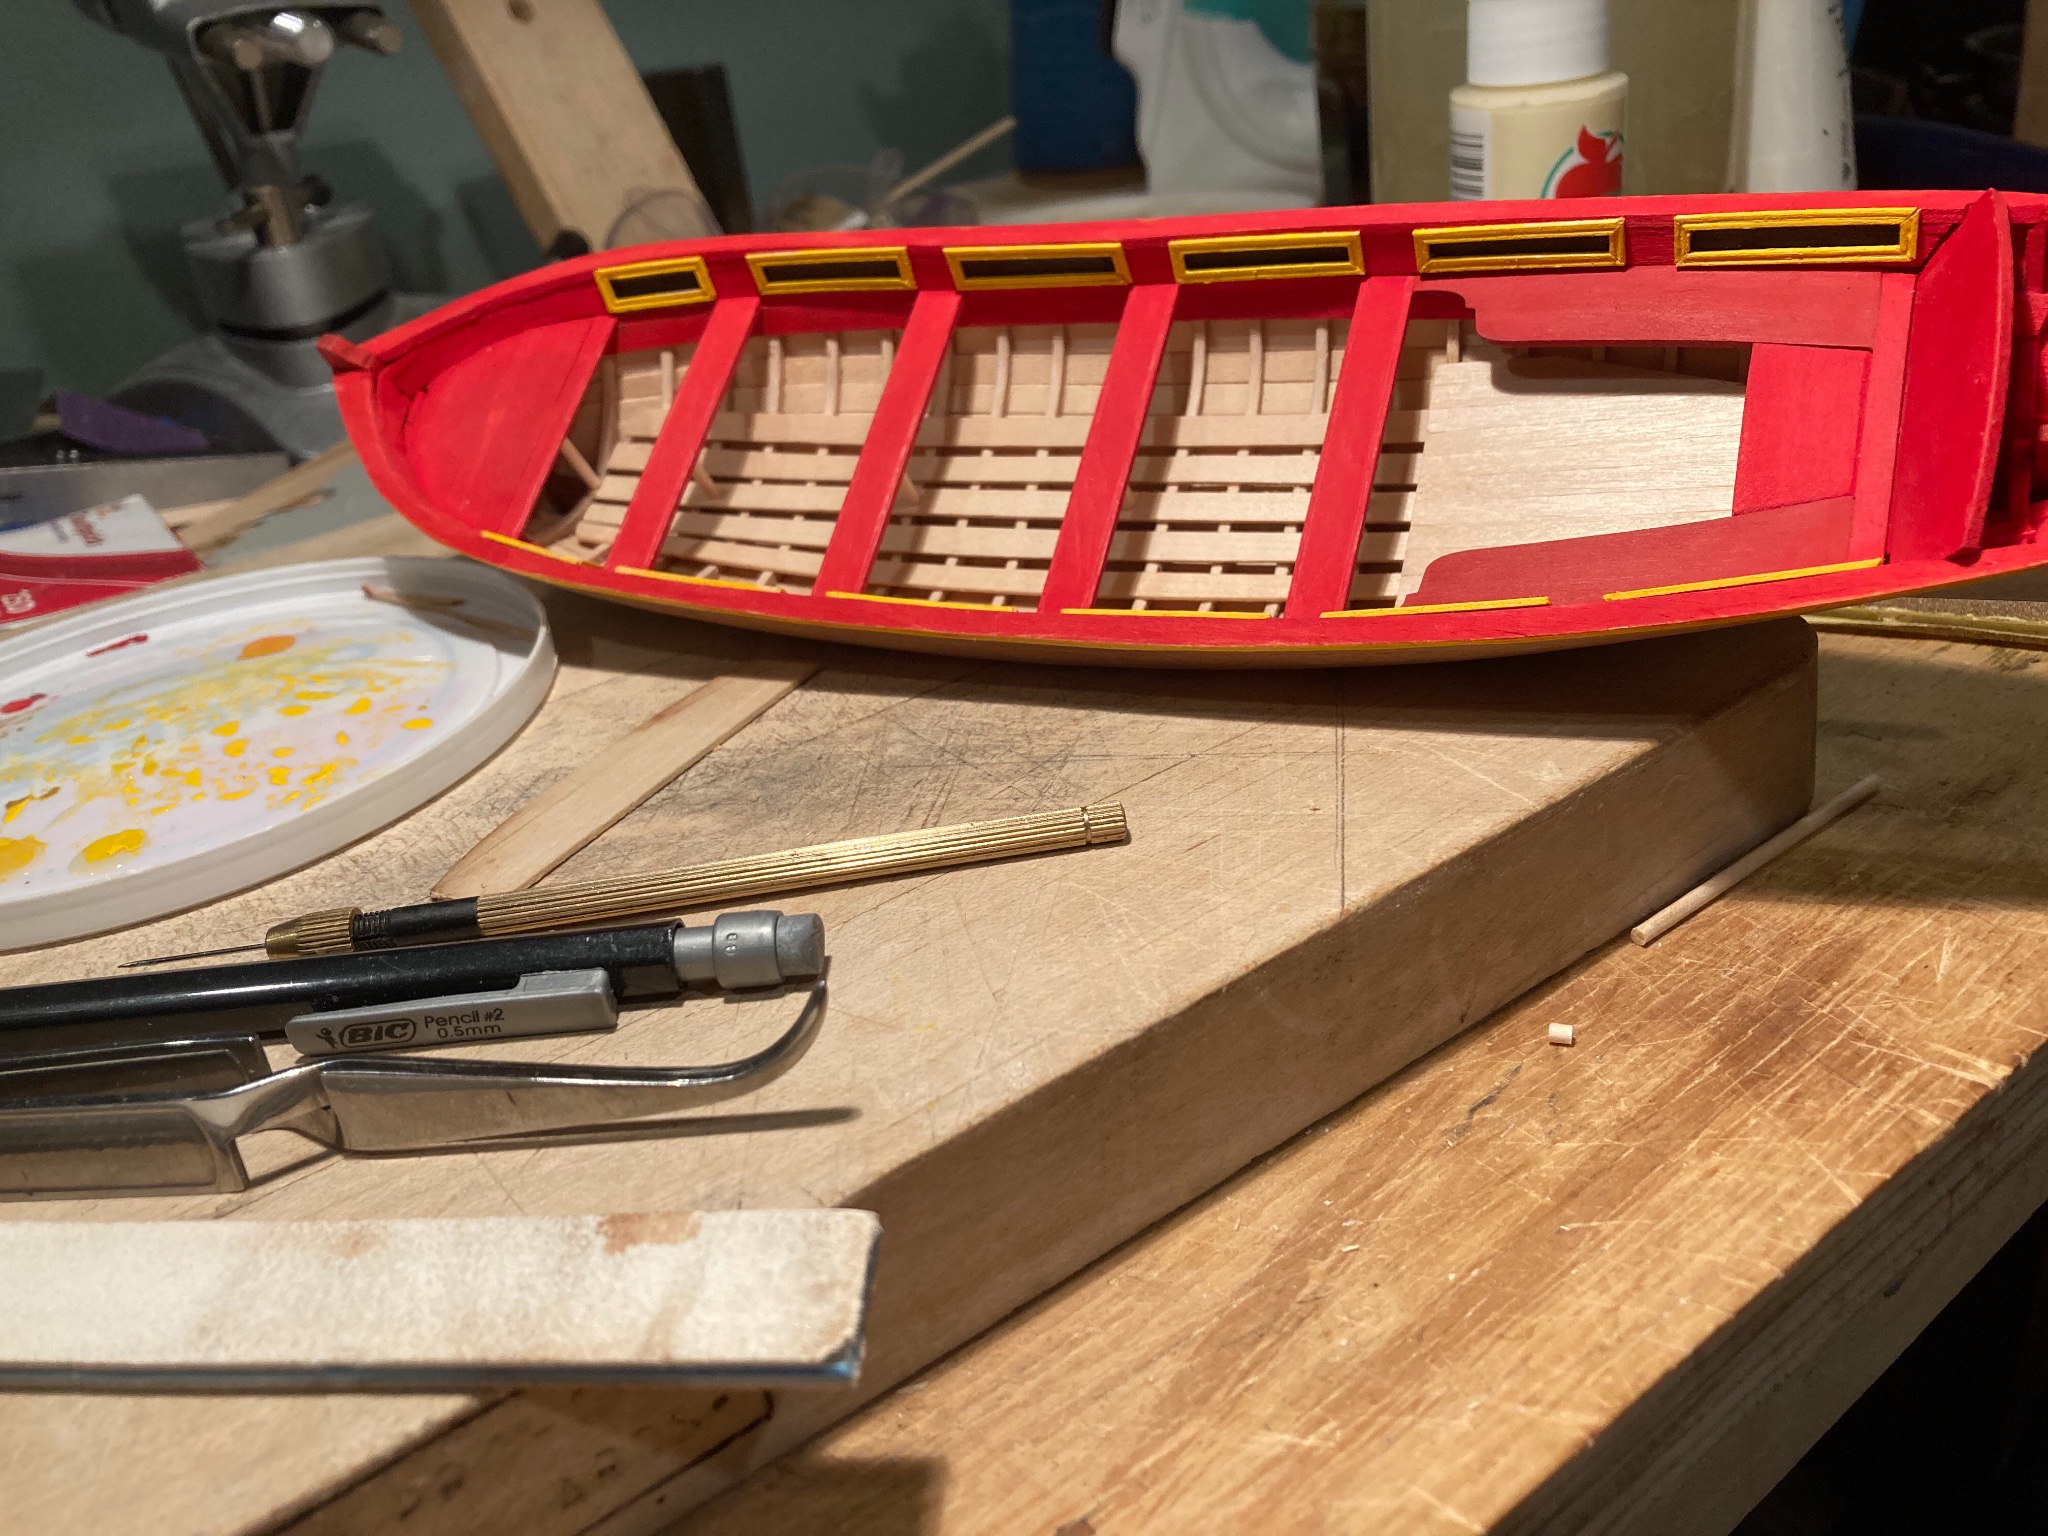
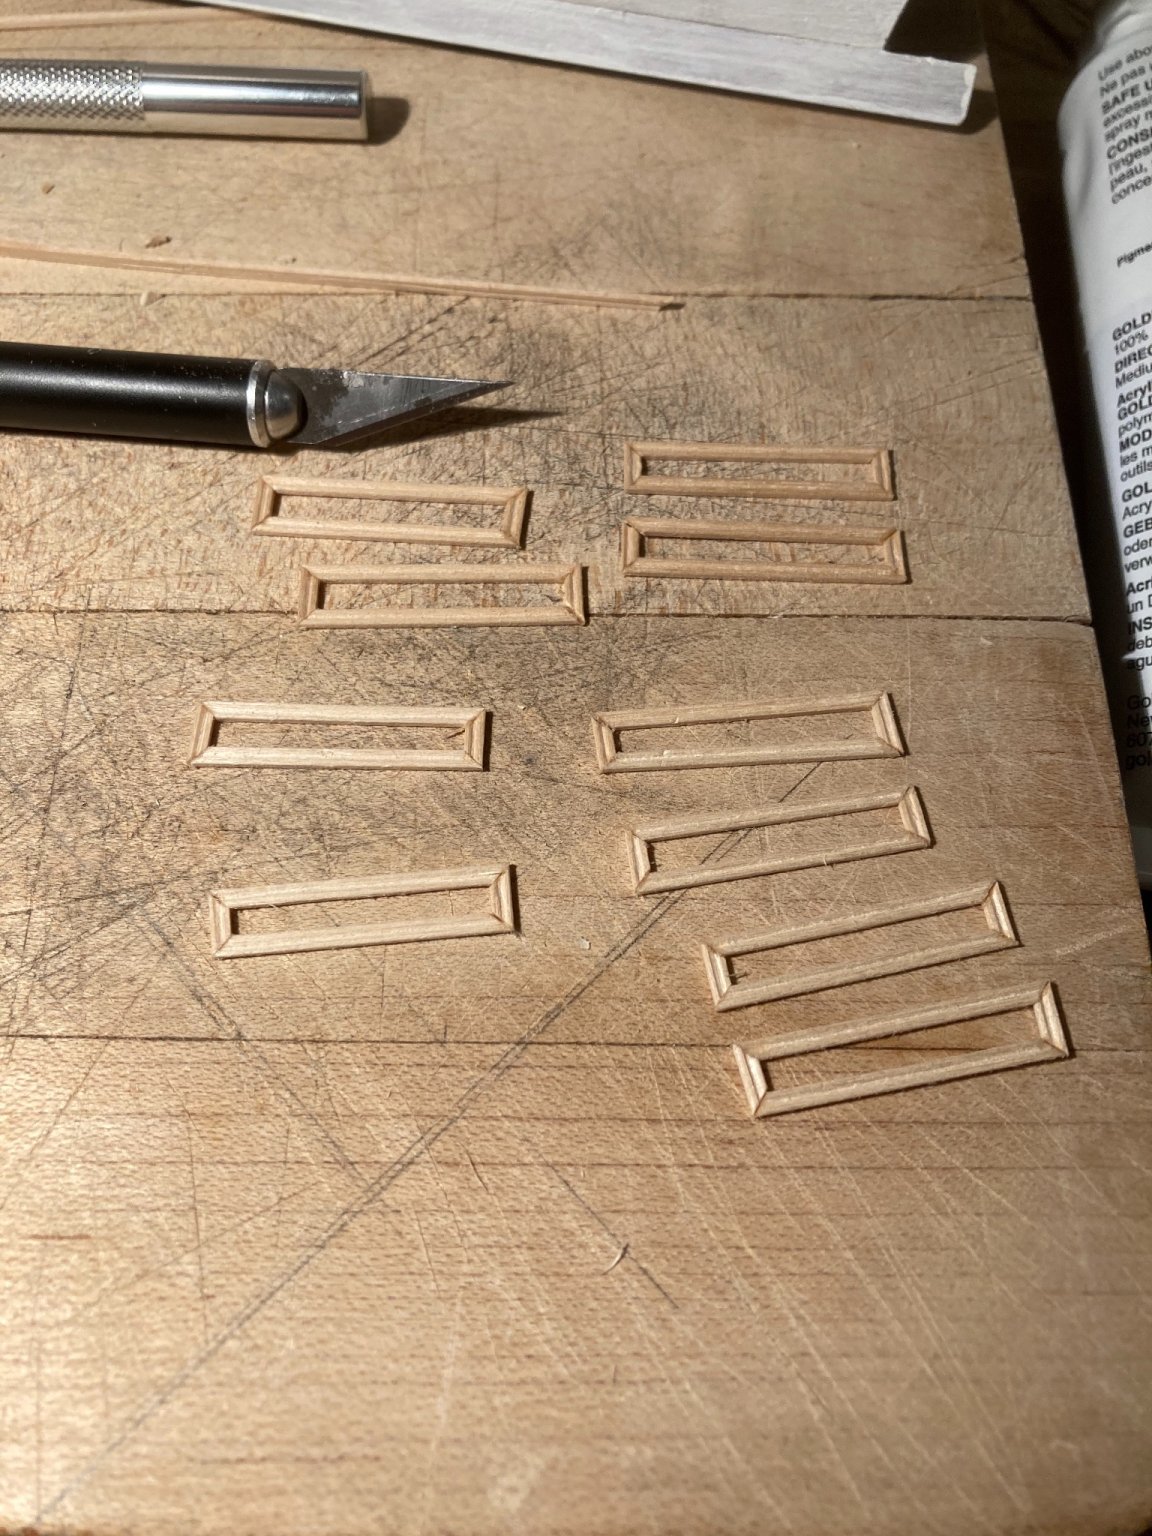
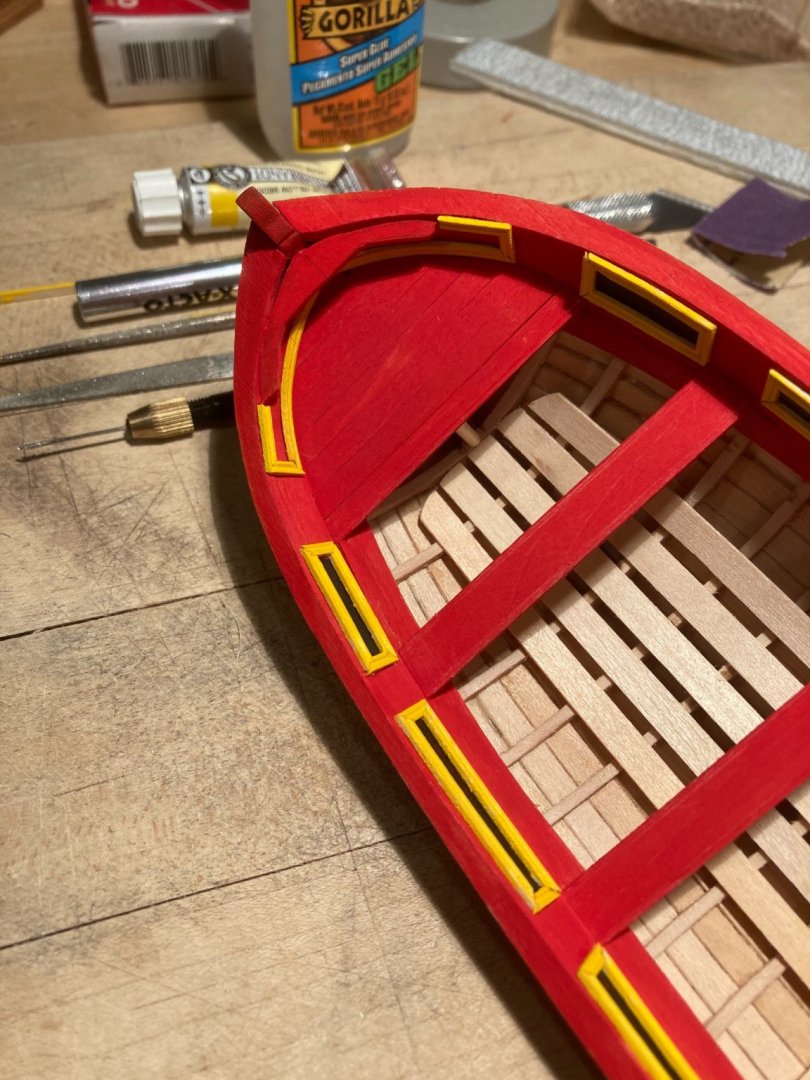
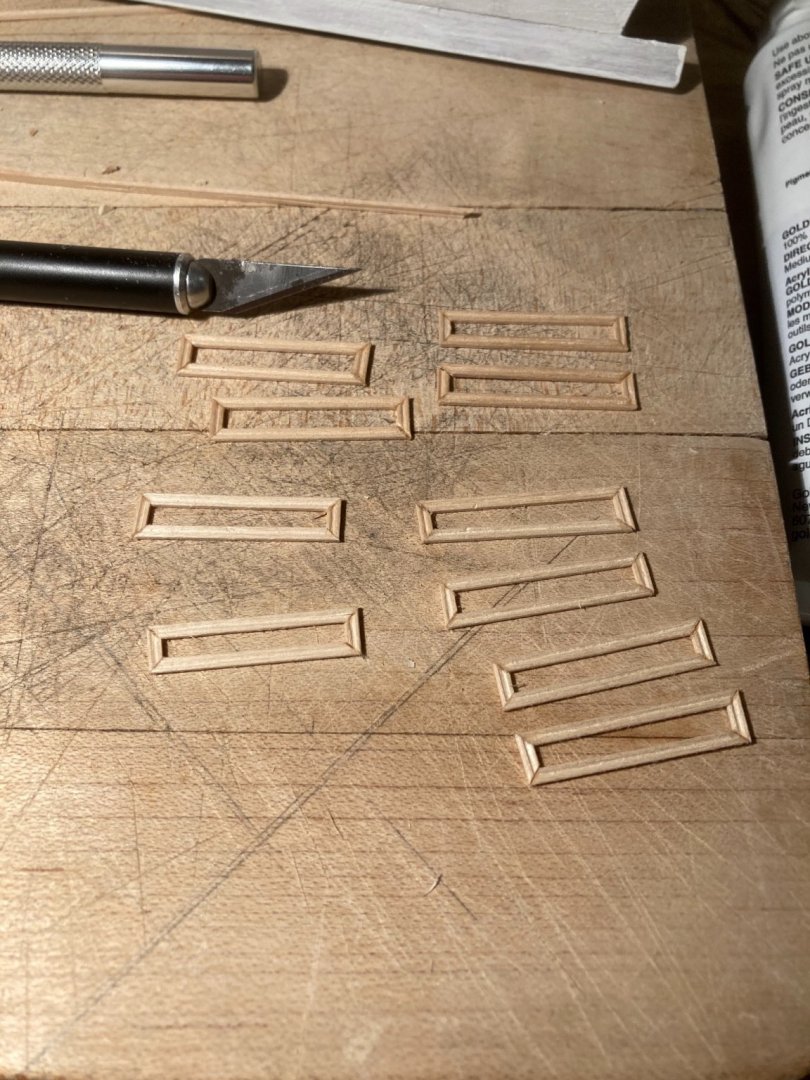
I made some more of the frames that decorate interior. Gluing was a little fiddlely but yielded to practice. I traced the shape from the frames on to the boat. I then added some paint to what will be inside of the frames when attached. The one frame in the boat is just a dry fit.


- 123 replies
-
- 11
-
-
- Model Shipways
- Pinnace
- (and 1 more)
-
I approve! Honestly, I haven’t ruled it out, just that ease of use regarding the red/scarlet water color has spoiled me - no flumes, nor little white specks in places they ought not be.
- 123 replies
-
- 3
-
-
- Model Shipways
- Pinnace
- (and 1 more)
-
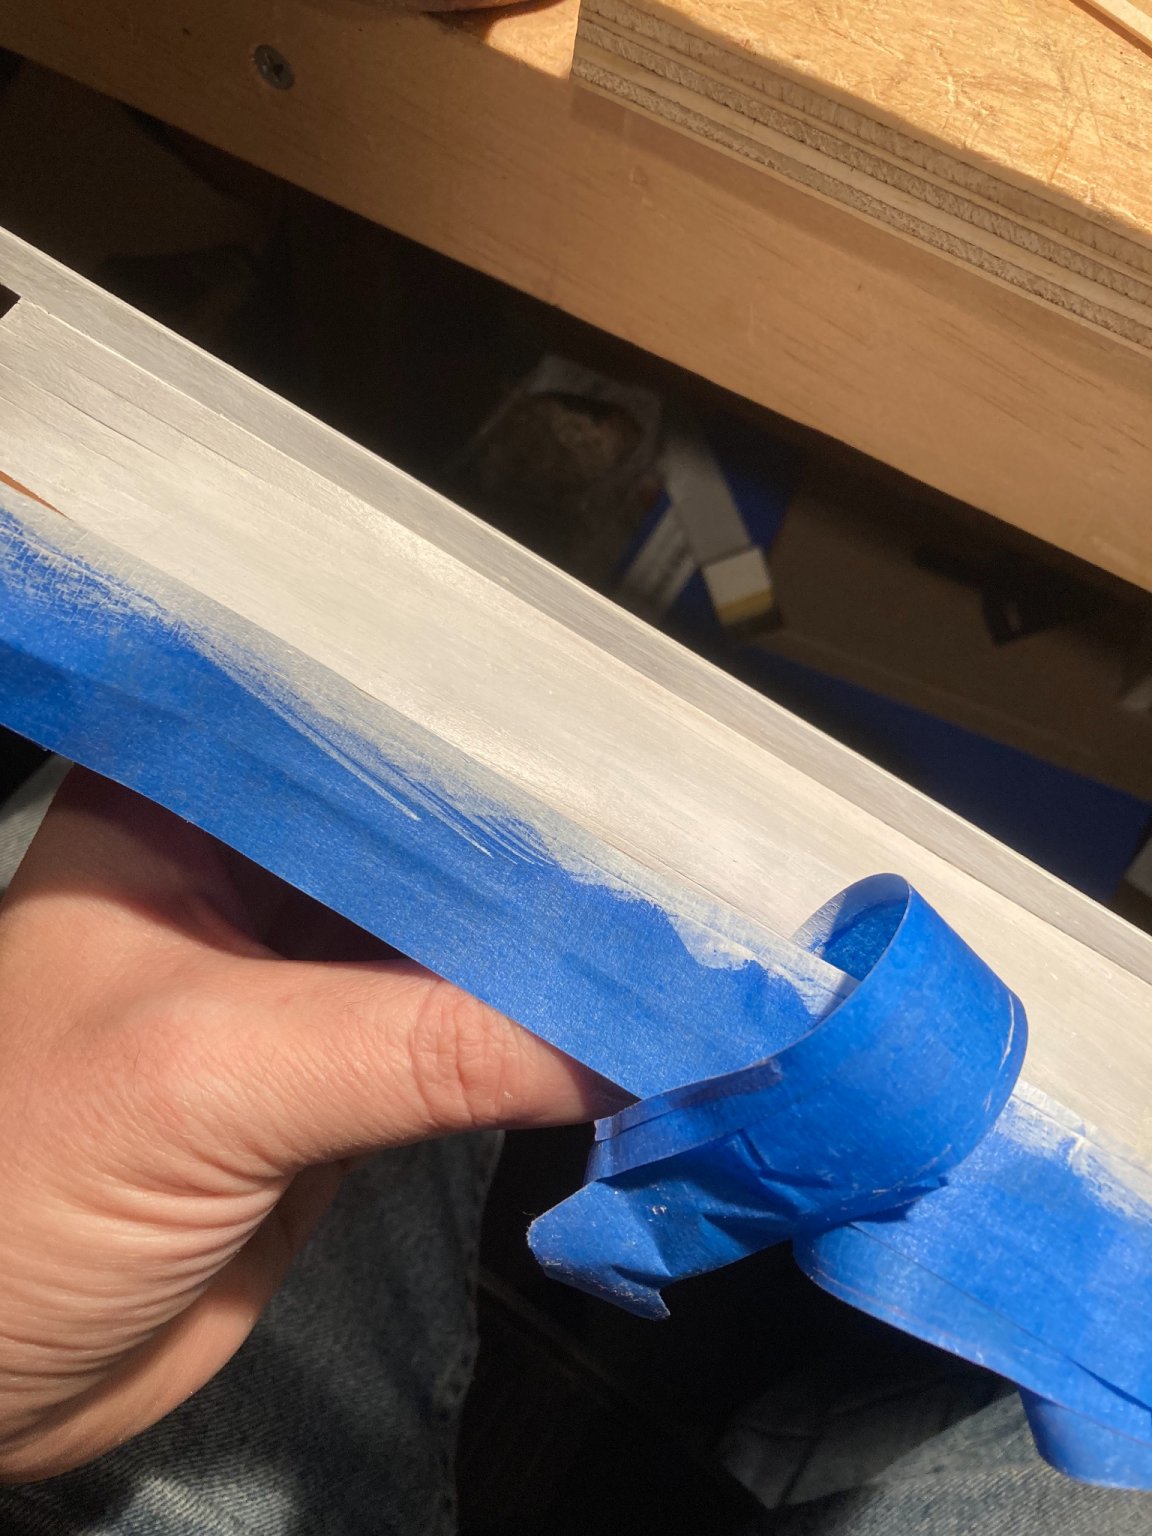
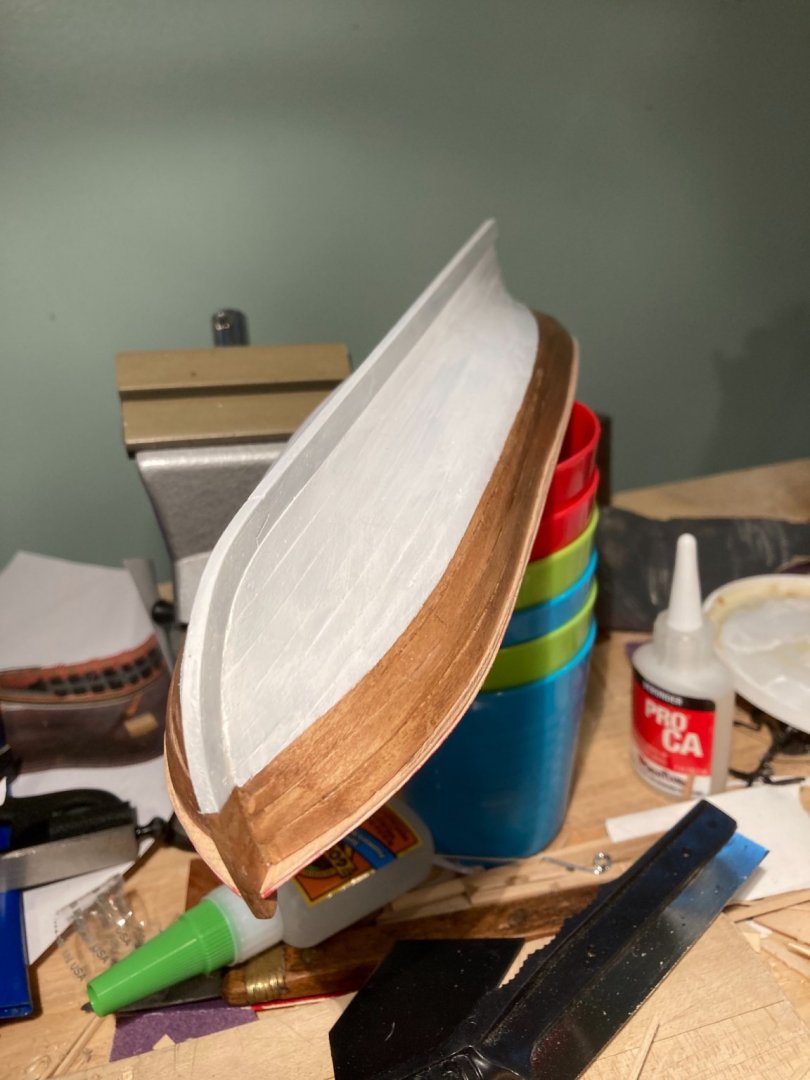
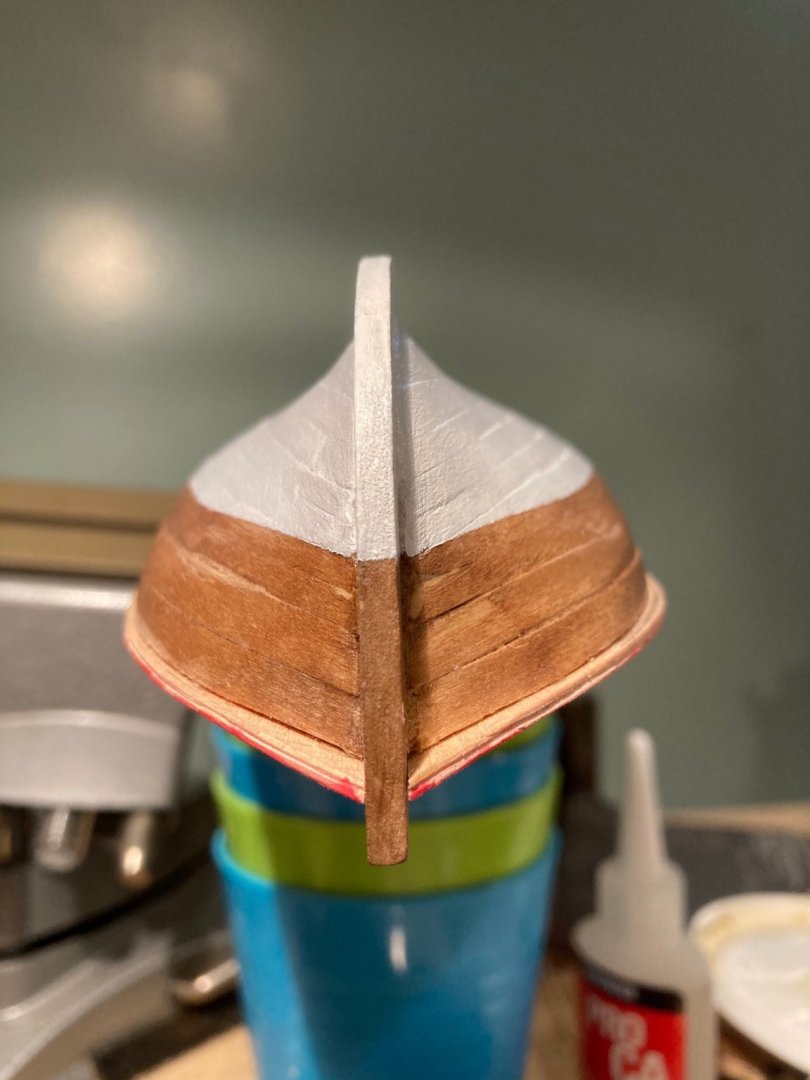
Given there wasn’t wide range among the results, I took all the white paint on my “pallet” - a cottage cheese container top - and painted the hull. I used the same brush, brushing from tape to wood, to keep my taped line clean and reduce bleeding.

- 123 replies
-
- 5
-
-
- Model Shipways
- Pinnace
- (and 1 more)