mikegr
-
Posts
831 -
Joined
-
Last visited
Content Type
Profiles
Forums
Gallery
Events
Everything posted by mikegr
-
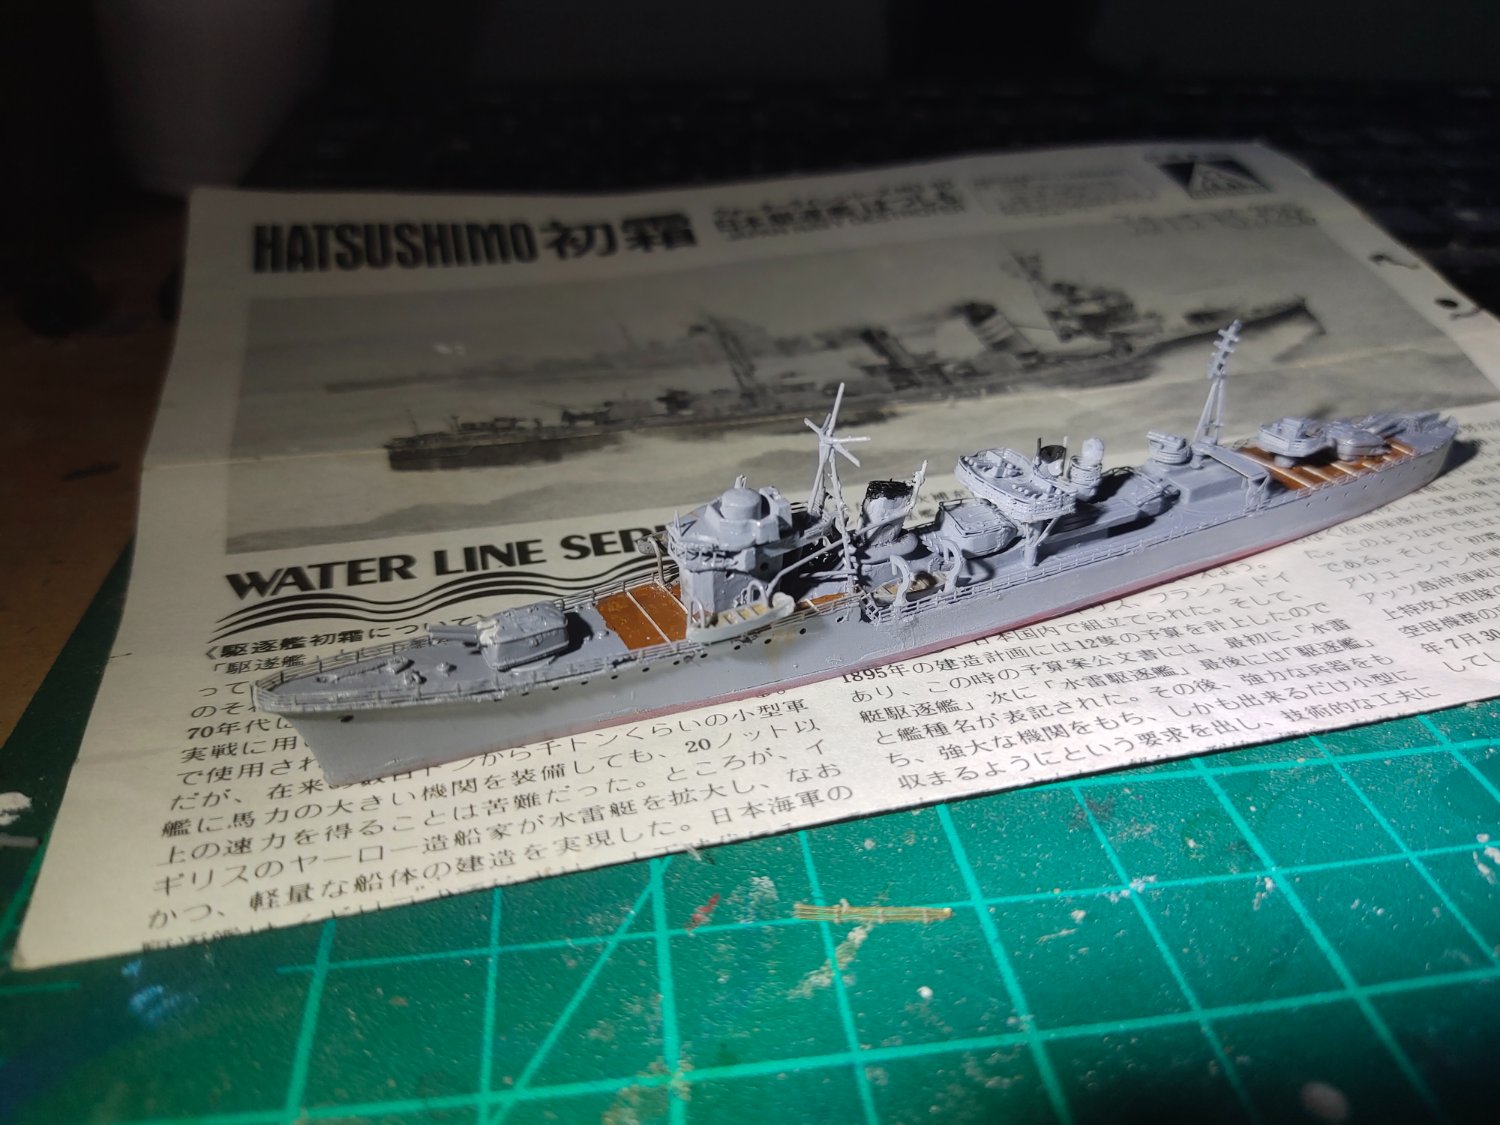
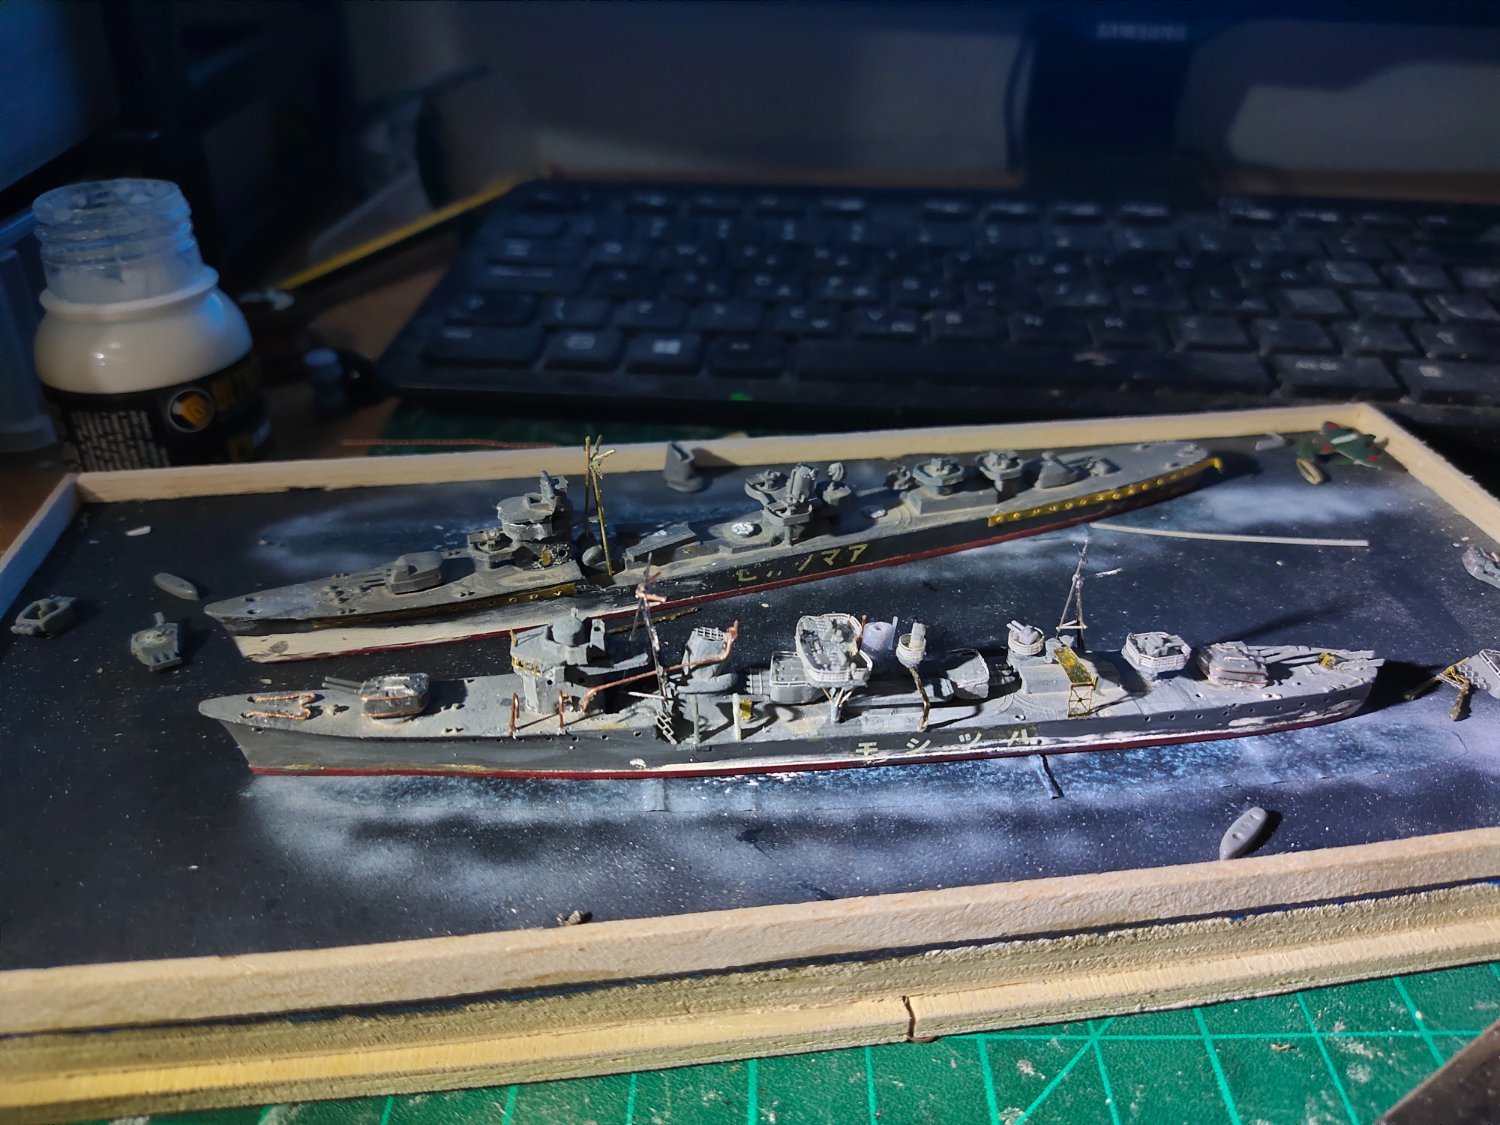
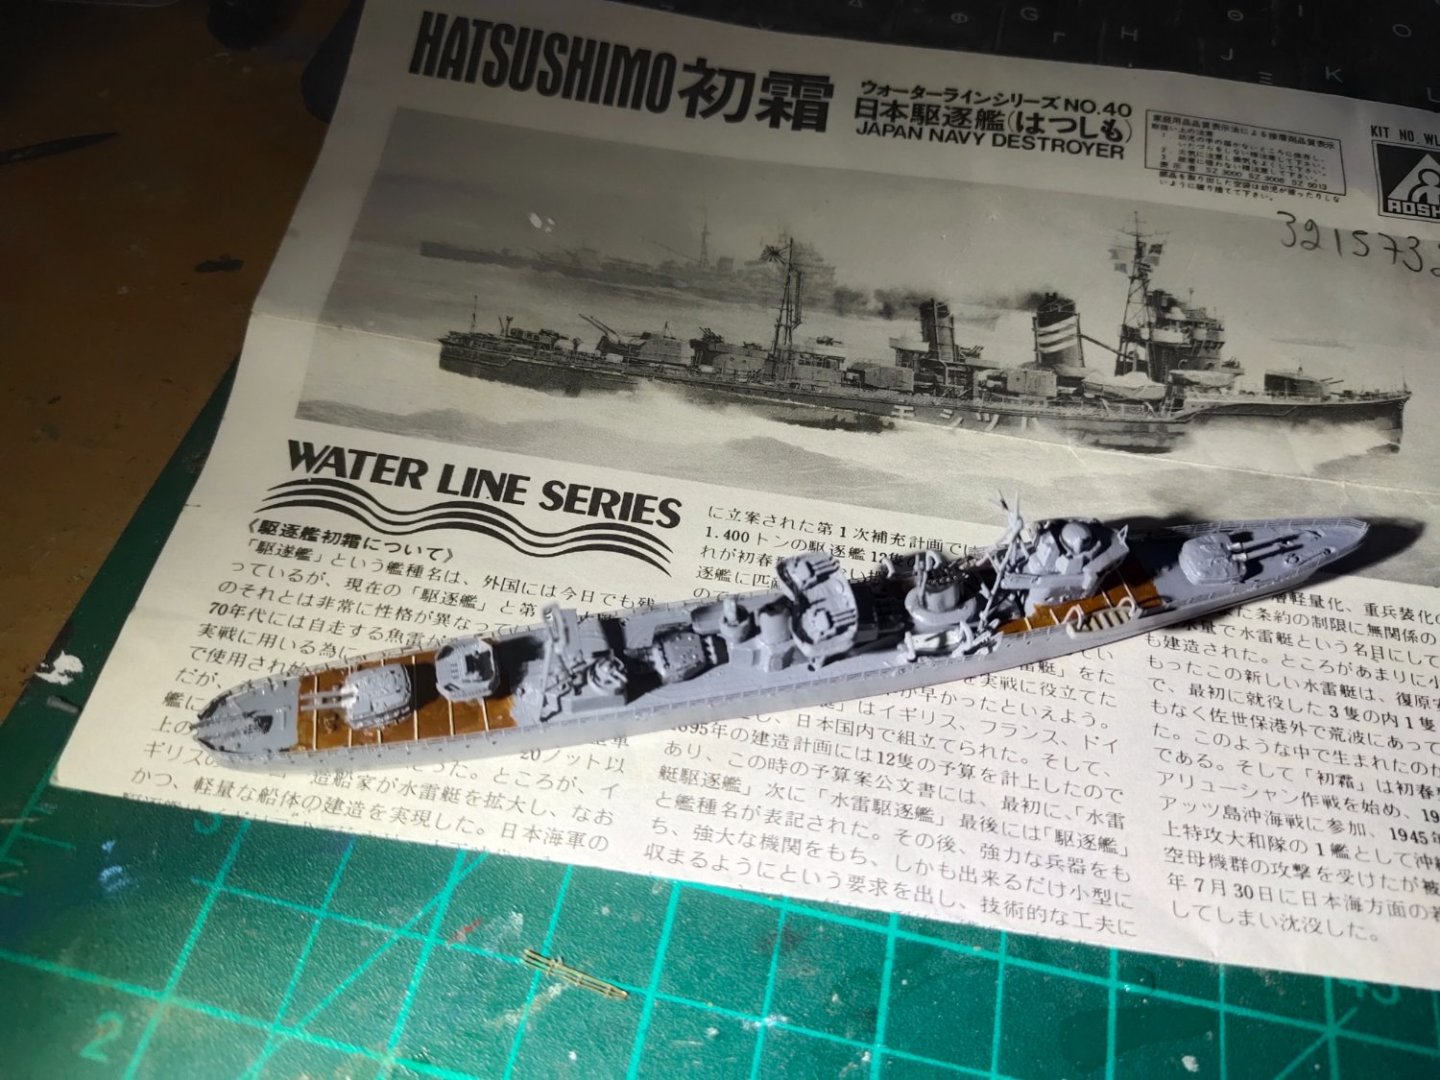
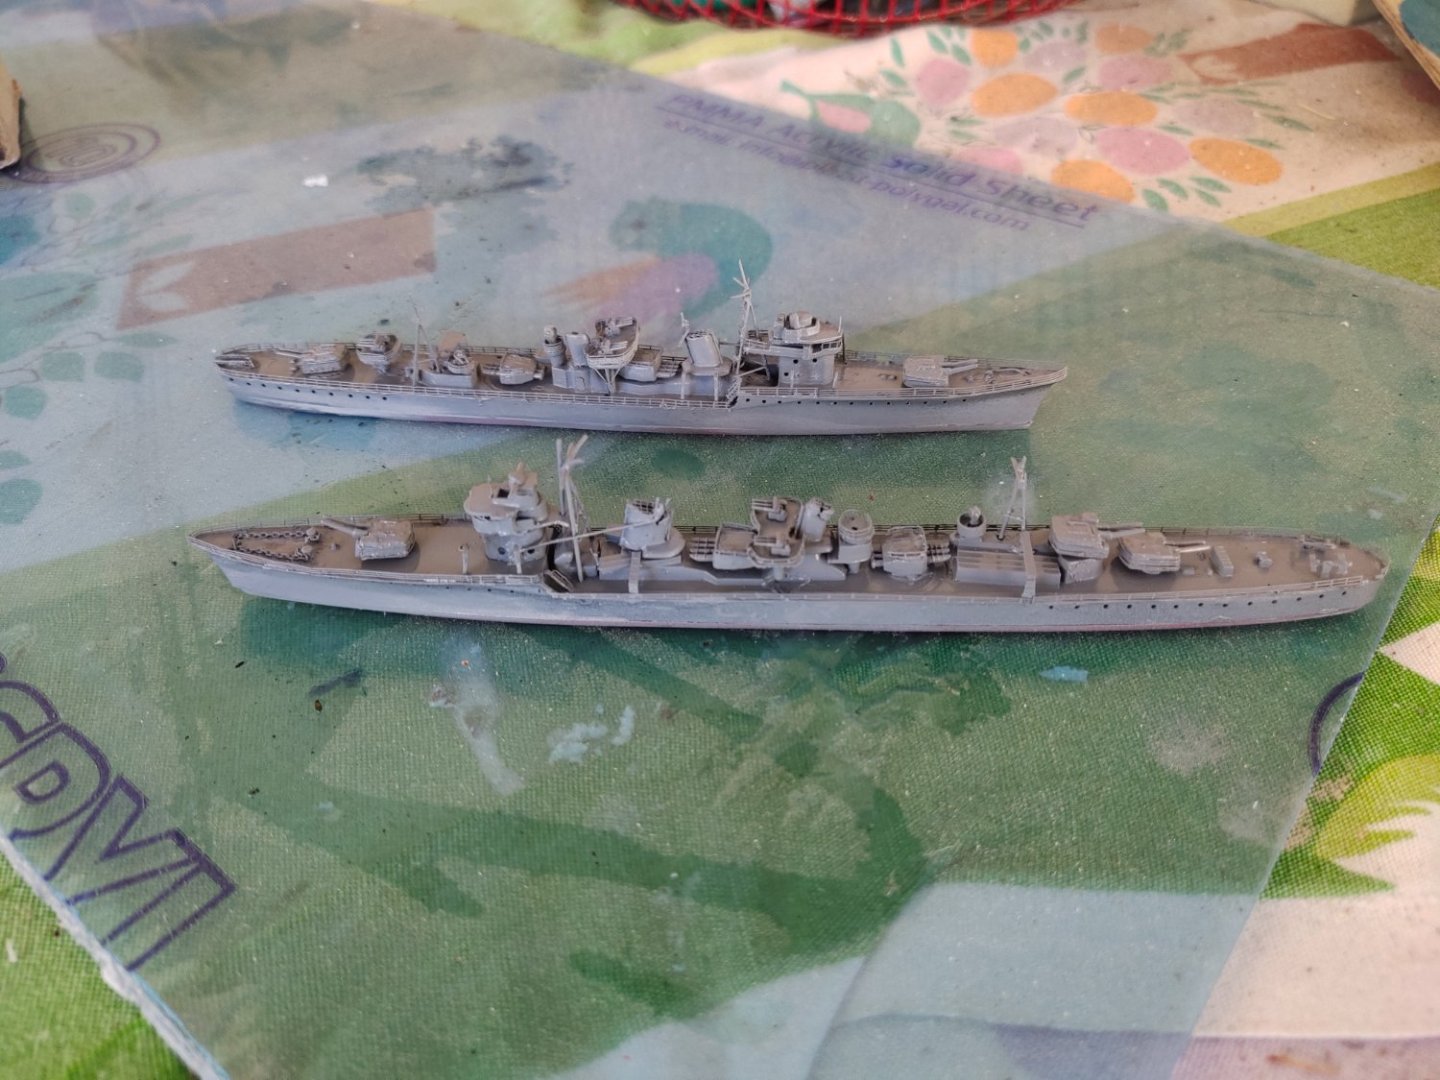
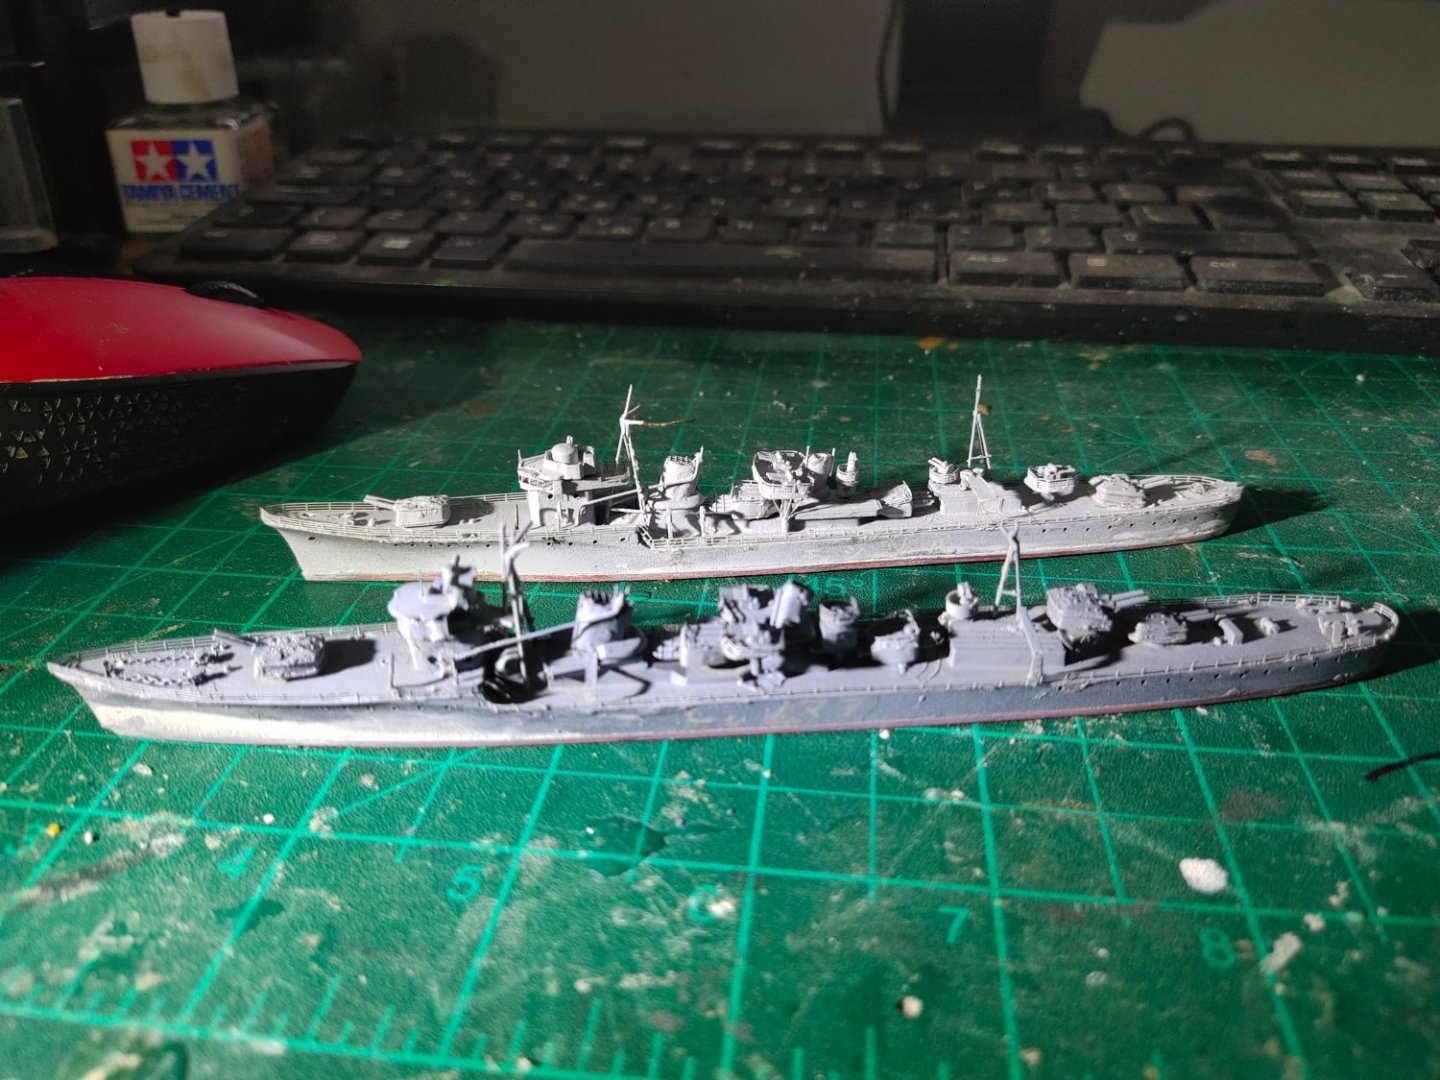
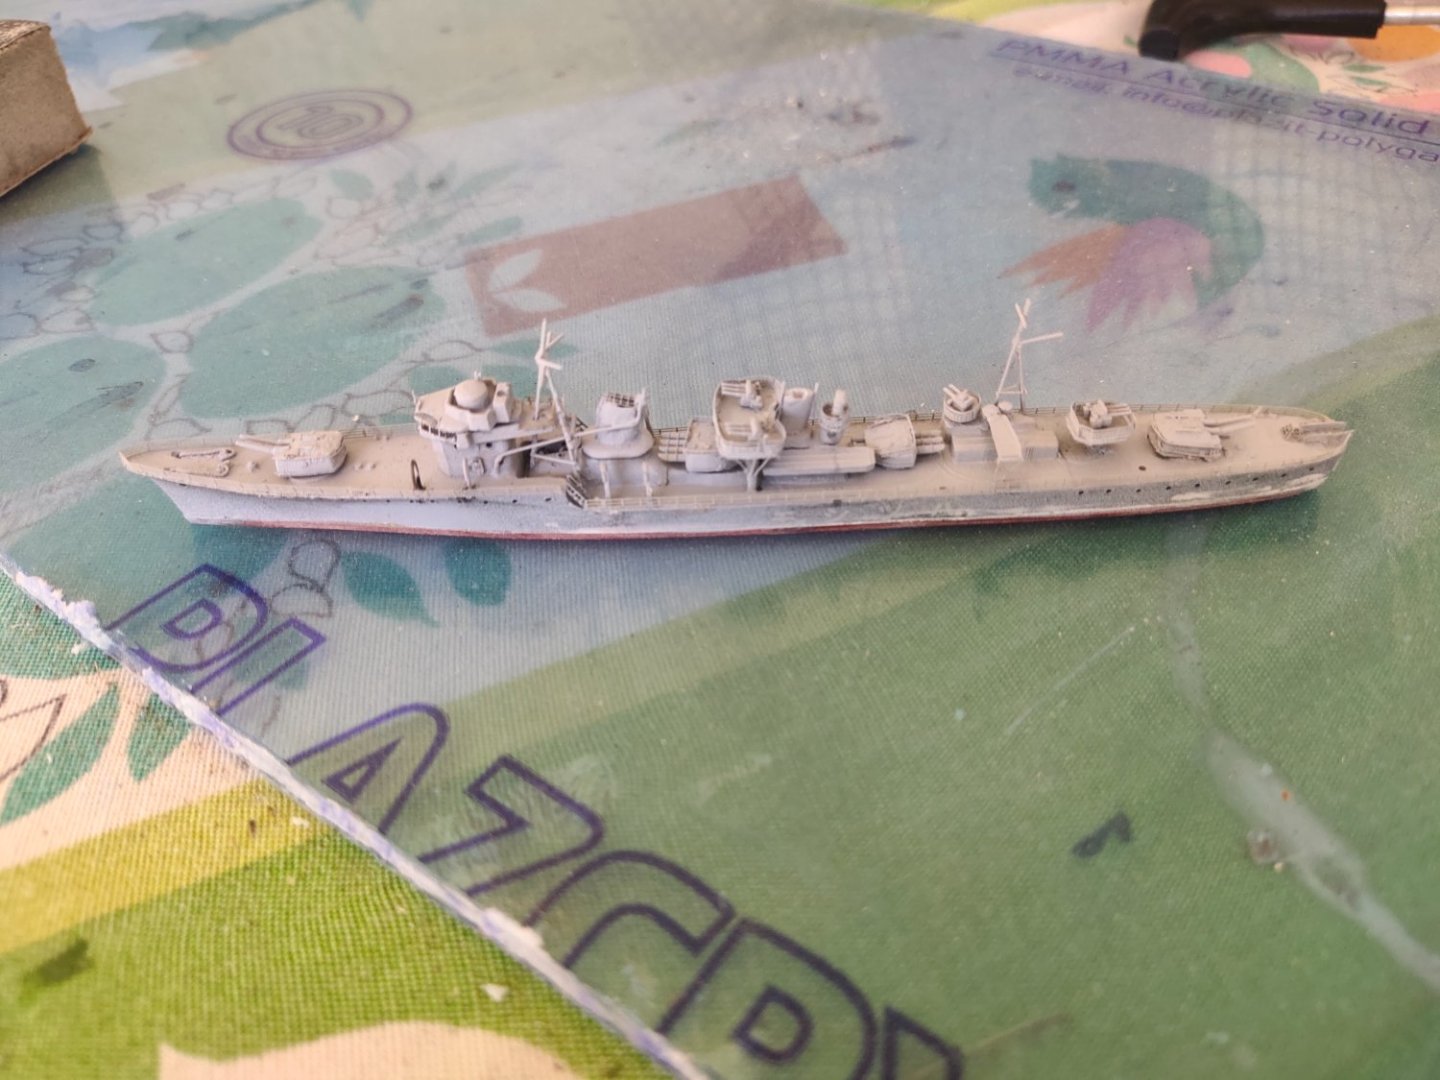
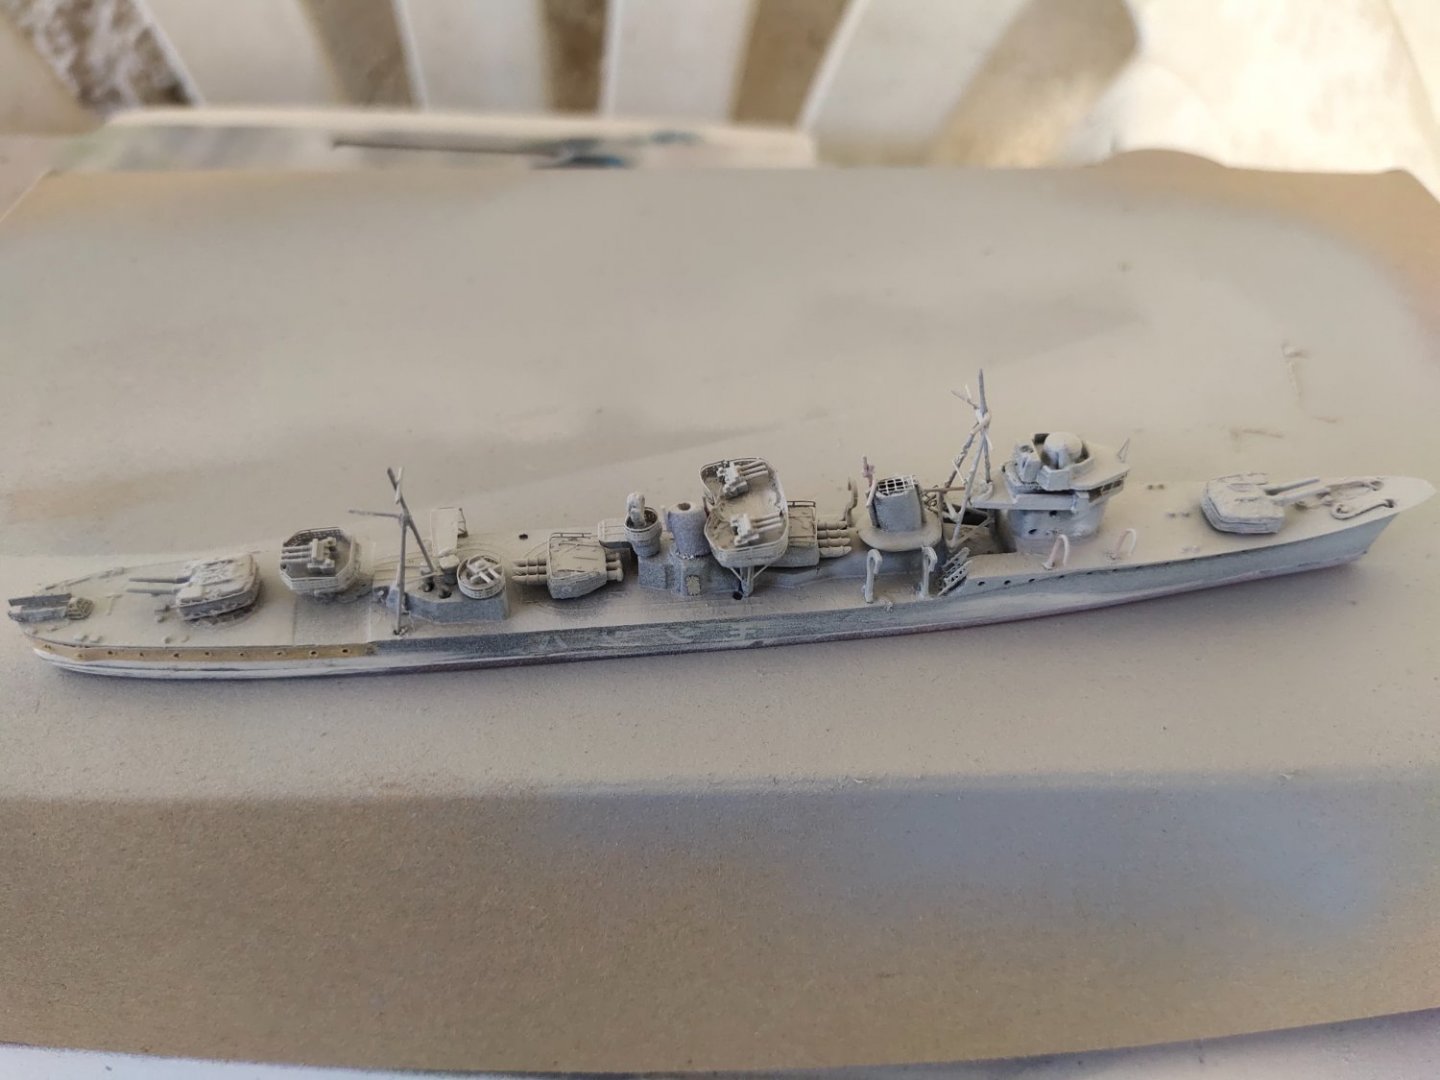
Back to work Project Hatsushimo is almost done, need rigging and weathering. It wasn't easy to paint the deck, used a 0000 paintbrush and a pin. Will continue work on Amatsukaze now

-
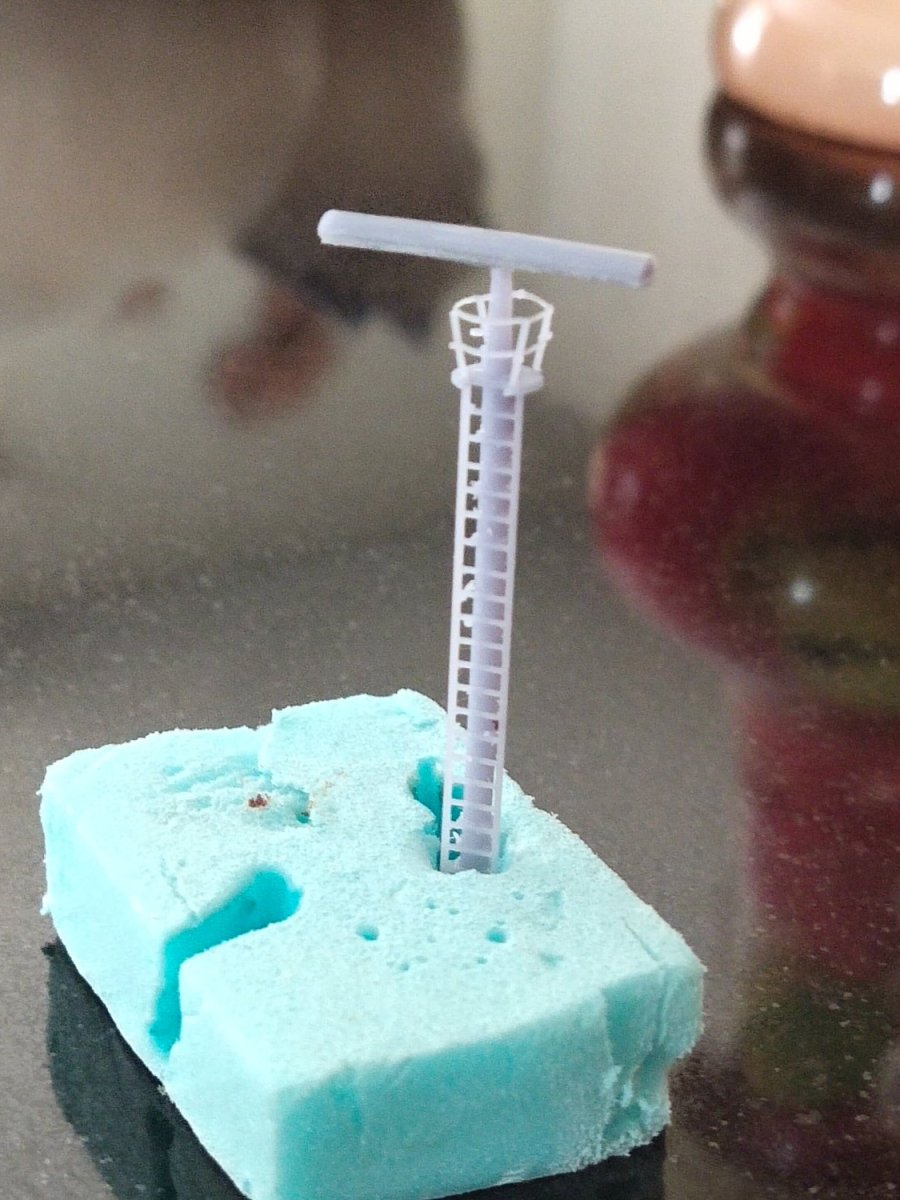
nice combo work of scratch work and 3d printing the large scale of the model allows the great usage of monofilament printer
- 460 replies
-
- 3
-

-
- Finished
- Flower-class
- (and 1 more)
-
great and carefully job done on deck painting and aircrafts. As a straight out of the box built, cant be done much better that this.
- 16 replies
-
- 4
-
-

-
- Italeri
- Theodore Roosevelt
- (and 2 more)
-
1/200 Trumpeter IJN YAMATO - issued by MRC/Gallery Models
mikegr replied to yvesvidal's topic in REVIEWS: Model kits
you can print out a pic of a Christmas tree and glue it over the box. This is what i am going to do. And after completion i would do the same, like this
- 104 replies
-
- 4
-
-

-
- MRC/Gallery
- Yamato
- (and 1 more)
-
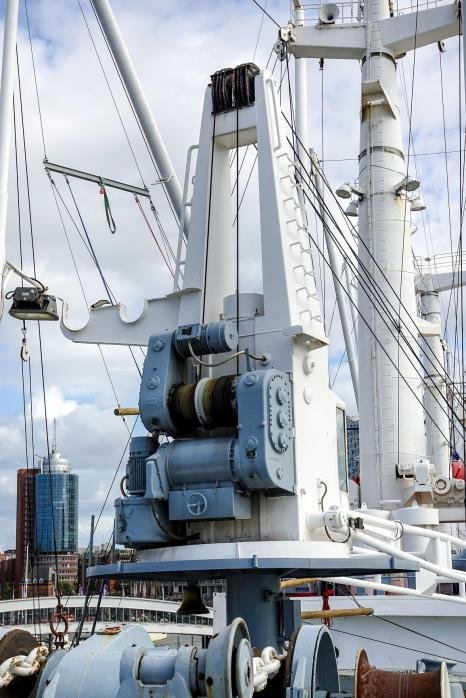
They remind me of hatches for missile tubes in modern submarines
- 203 replies
-
- 4
-
-
- Roma
- Micromaster
- (and 4 more)
-
Cap San Diego by mikegr - 1/160
mikegr replied to mikegr's topic in - Build logs for subjects built 1901 - Present Day
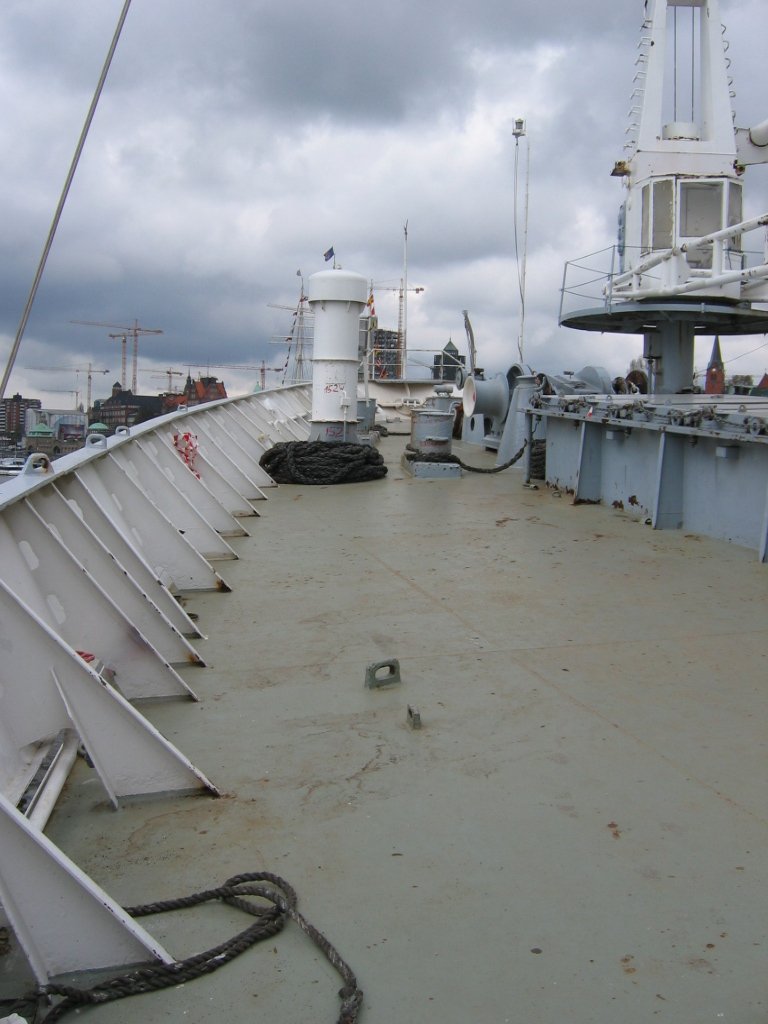
The "flat" finish of your bulwarks is nice, i will probably need to do the same as there are some pulleys that need to be tied there. Not sure if i can present such detail in 1/160 but i will go for it.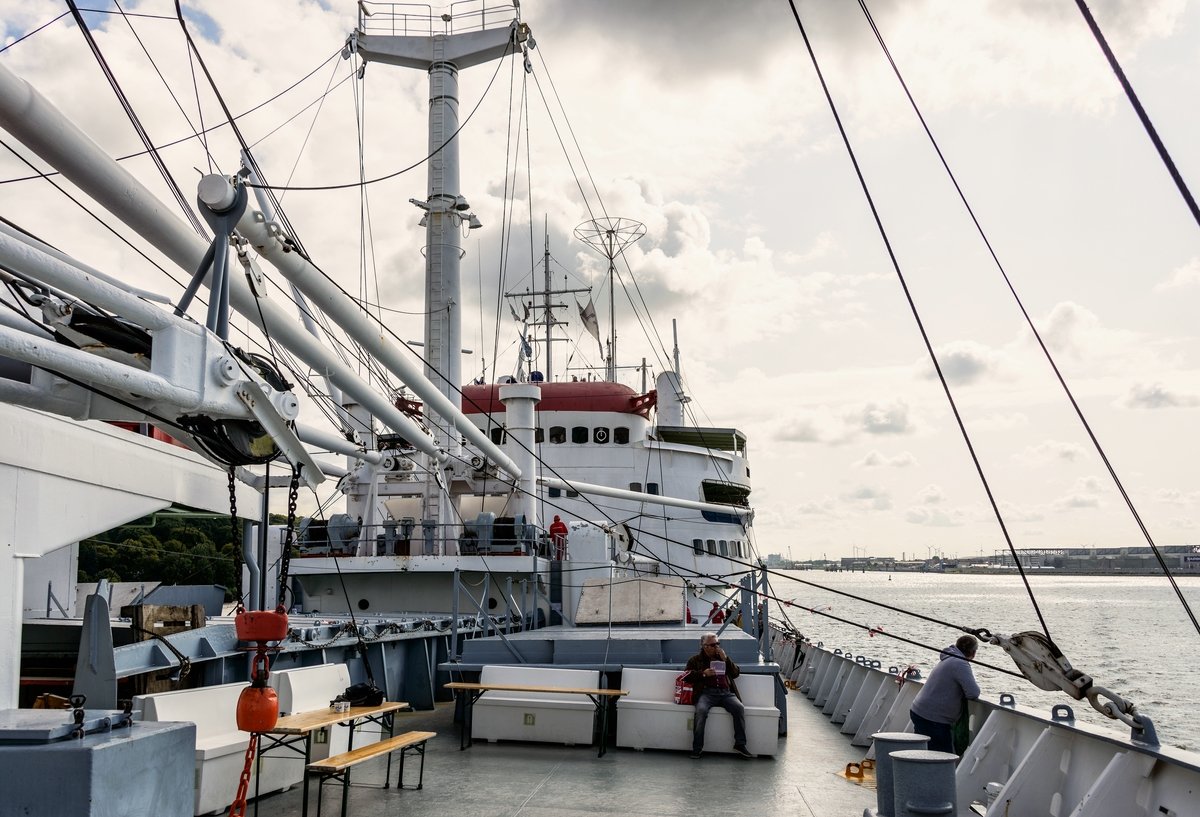
-
From what I can remember it seems that IJN didn't use many of these kind of rafts
- 203 replies
-
- 4
-
-
- Roma
- Micromaster
- (and 4 more)
-
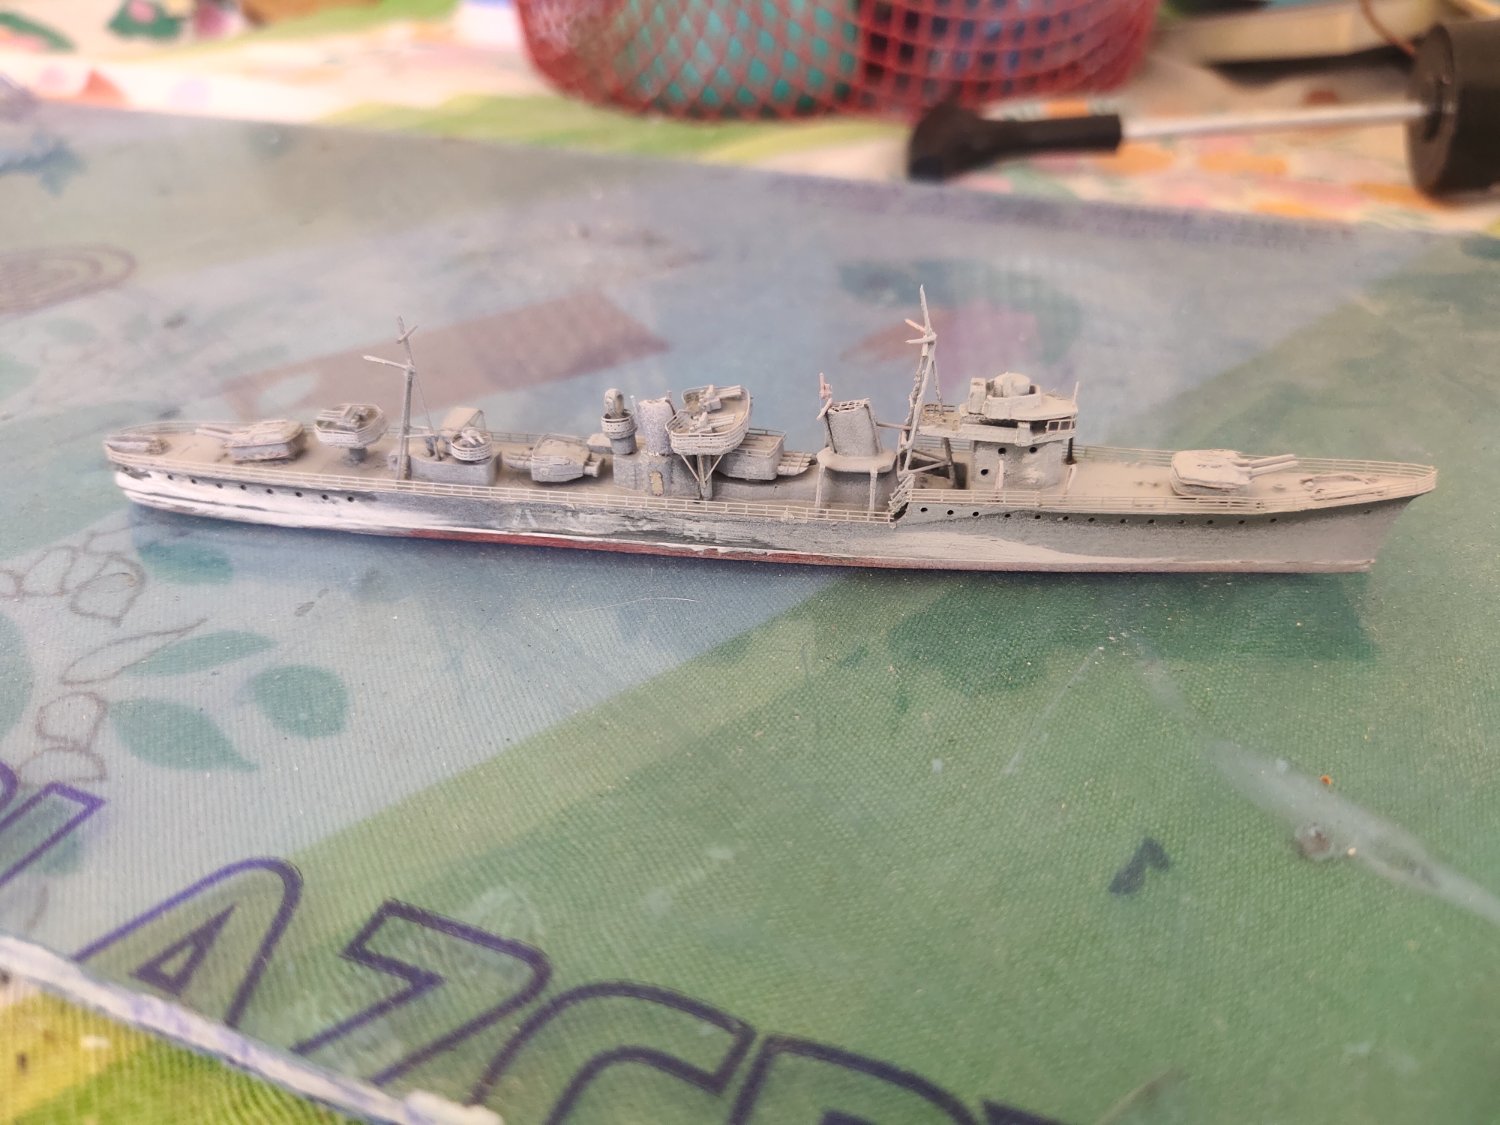
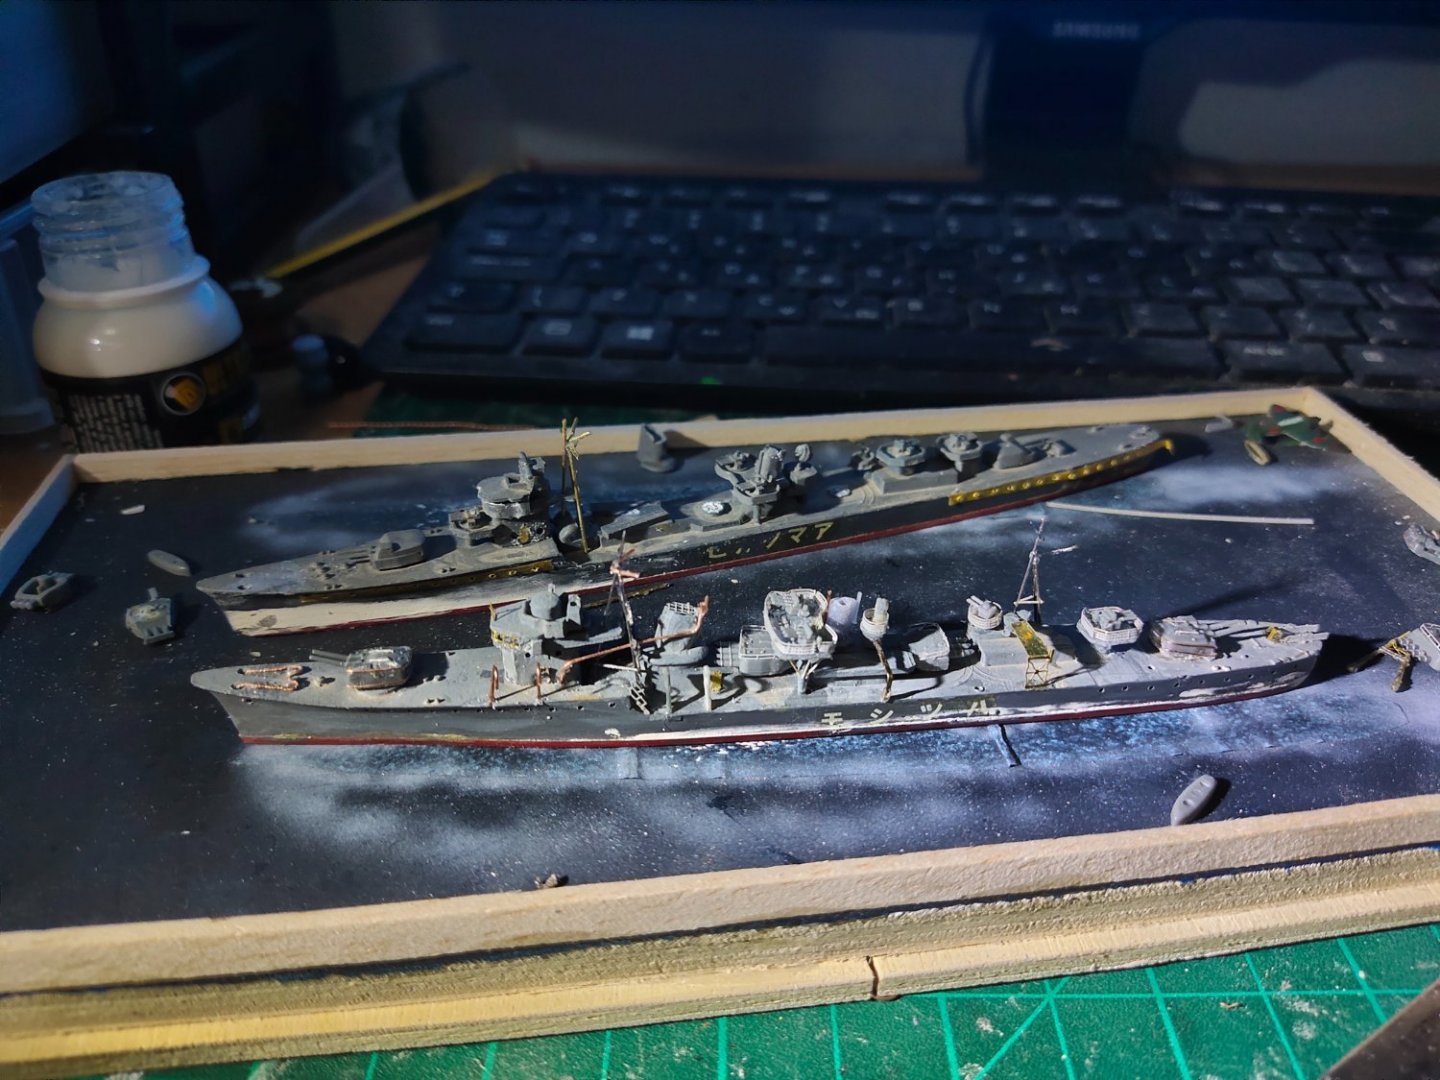
I done some detailing in Amatsukaze, same style. Added bridge windows, put new AA guns, railings, depth charges and paravanes on stern as I show on a 3d detailed model online. Then I sprayed them with IJN grey. I will paint again, add some minor details like boats then finish paint and weathering. But after o get back, in two weeks
-
Cap San Diego by mikegr - 1/160
mikegr replied to mikegr's topic in - Build logs for subjects built 1901 - Present Day
I was thinking of balsa coated with gel coat for strengthening because its easier to work with. I do have some 0.6 and 1mm aviation plywood but I don't know if I can bend it. Note that the bulwark stands vertical to the deck and as it goes to stern it also twists somehow, so I need a flexible material.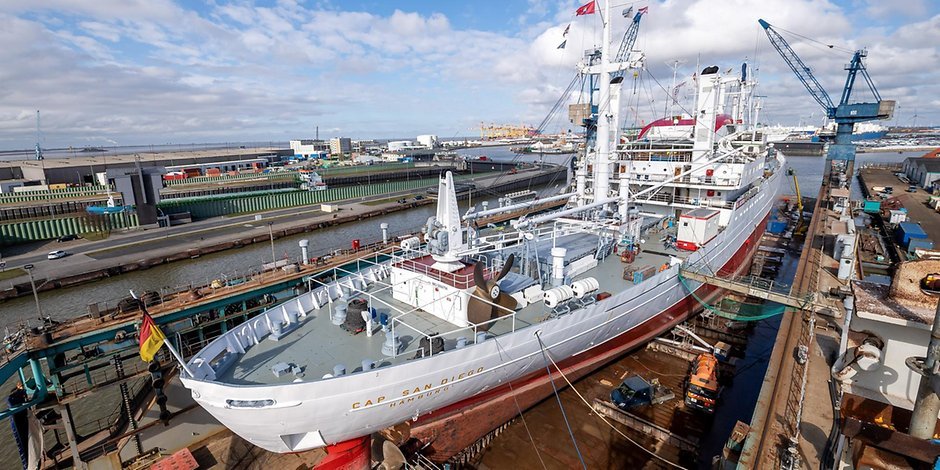
-
i think the high angled AA gun are not that much an upgrade. Because they look as a single piece. I think those provided in the kit can look great with some extra work like adding blastbags, drilling etc. Are these made of plastic or resin?
- 203 replies
-
- 2
-
-
- Roma
- Micromaster
- (and 4 more)
-
Nevertheless the living conditions in the US Navy ships remained fairly good. Even quite cramped is some cases, there was A/C in most ships and food was quite decent with servings ok cokes, ice cream, fresh bread making machines etc. In IJN conditions were not that good especially in certain units like submarines. Some claim, that was an psychological factor which affected negatively crew's combat performance, although i believe Japanese sailors had great self discipline and control. However even today they are building merchant vessels with less comforts for crew, small cabins with low ceilings etc. On the other hand they offer high standards of automation so even a 300K DWT oiler can fully operate with less than 20 crew members
- 203 replies
-
- 4
-
-
- Roma
- Micromaster
- (and 4 more)
-
Cap San Diego by mikegr - 1/160
mikegr replied to mikegr's topic in - Build logs for subjects built 1901 - Present Day
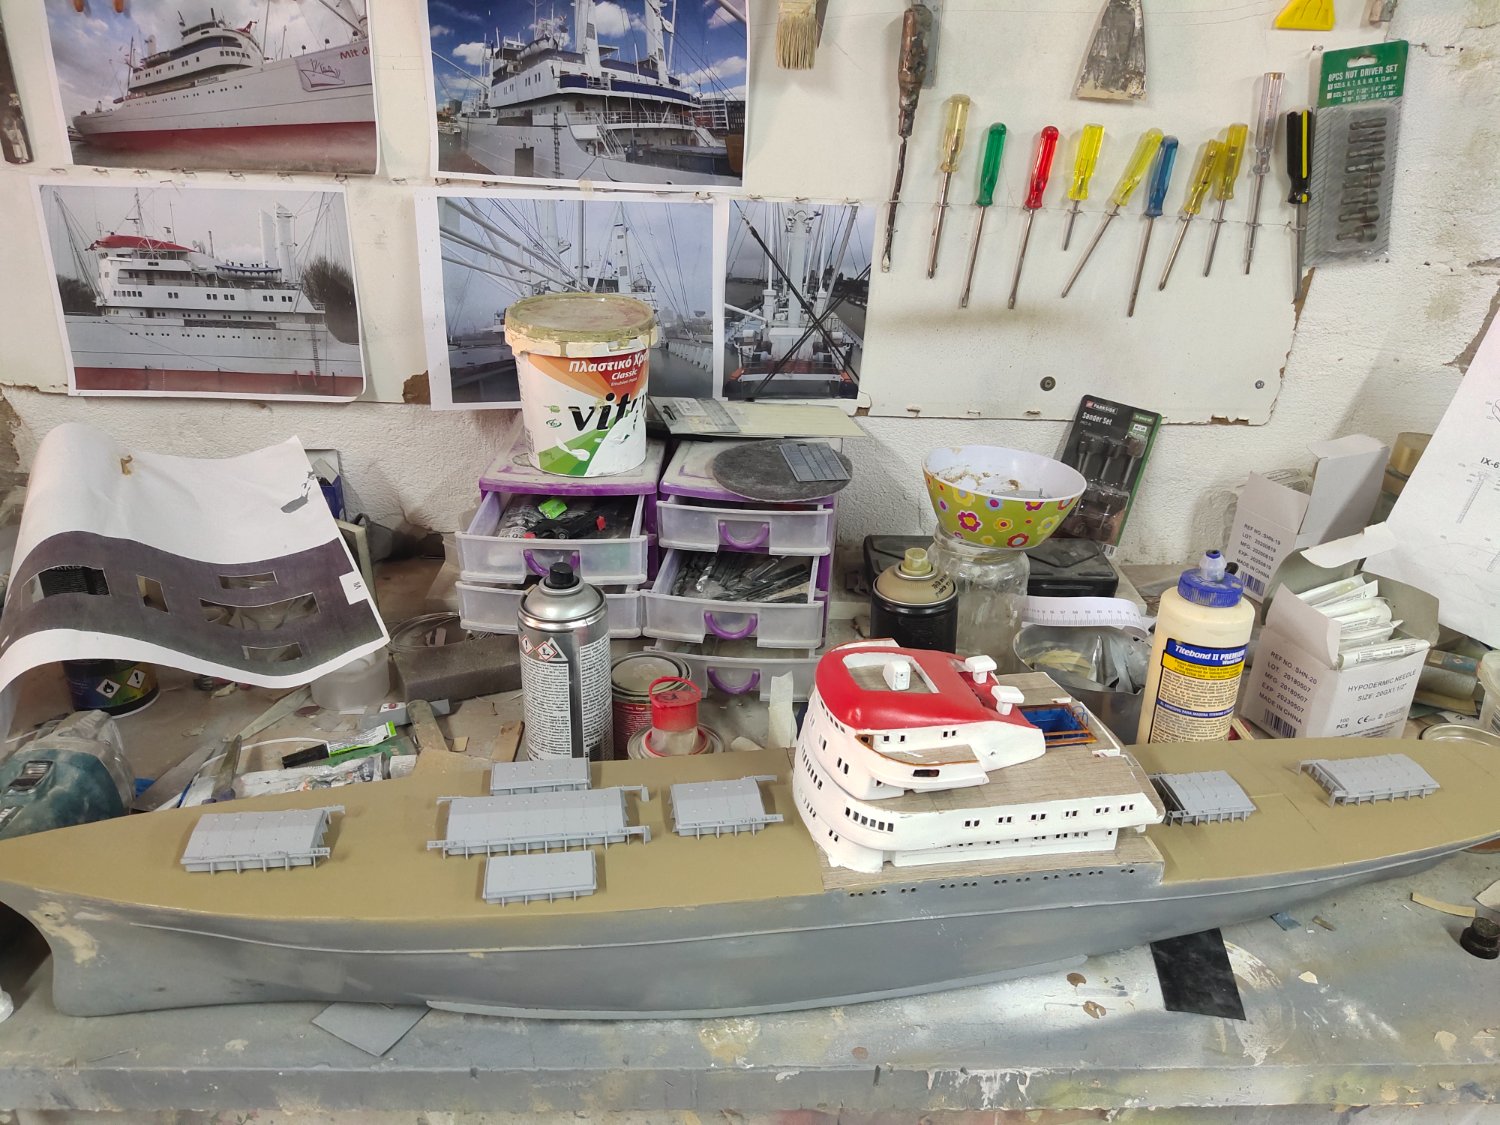
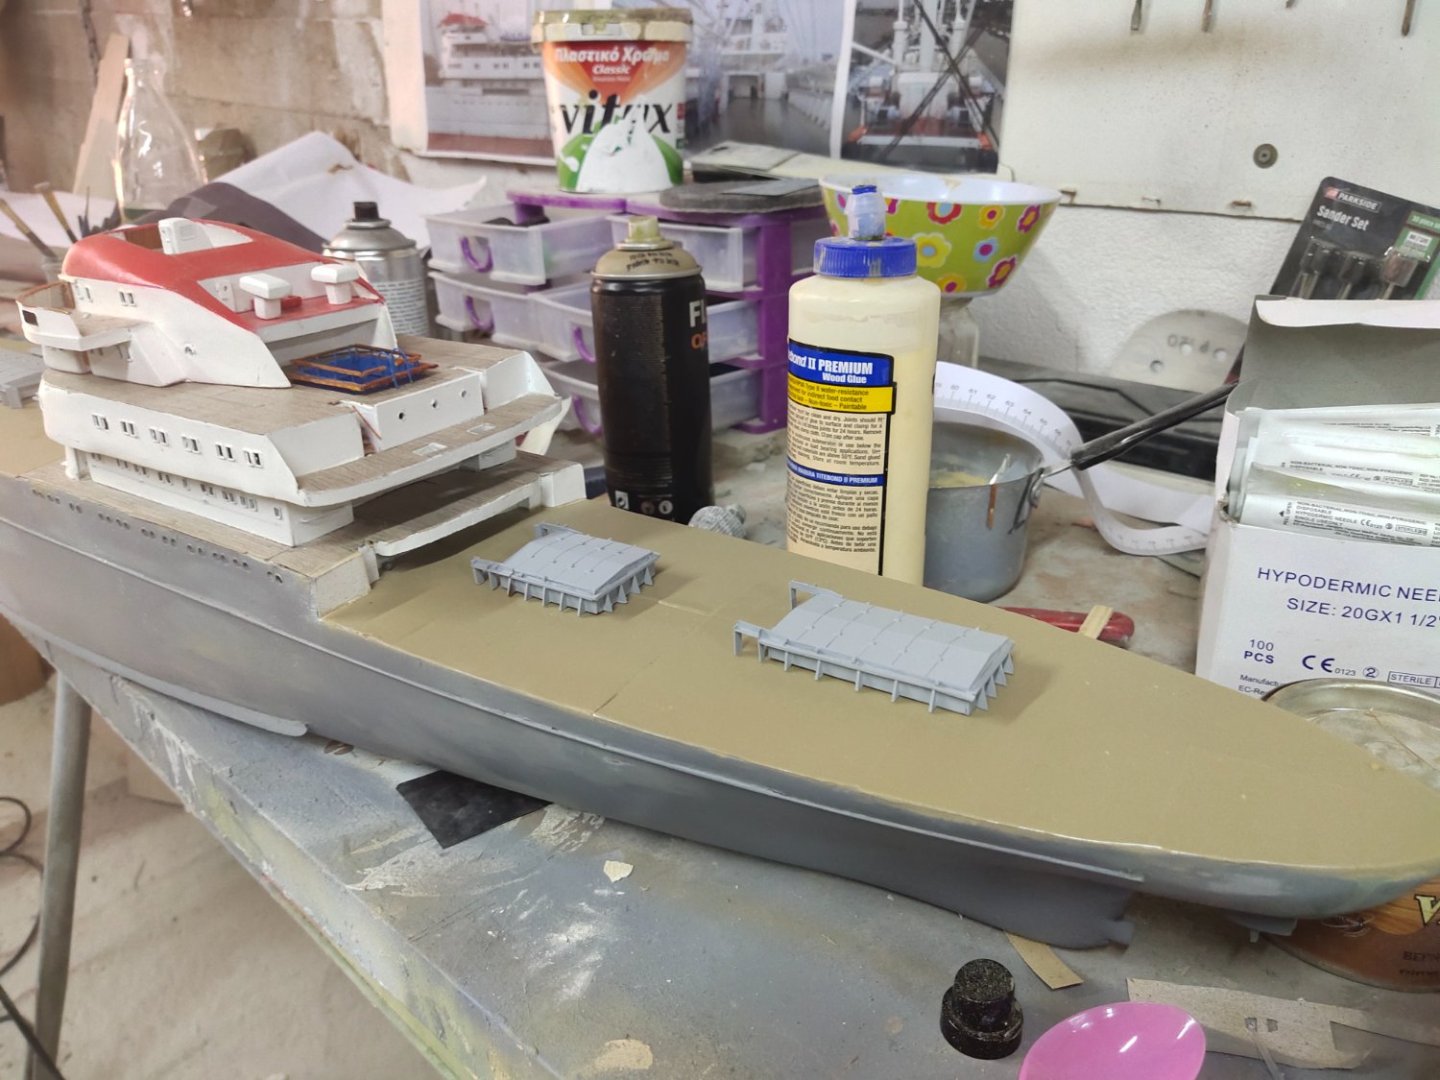
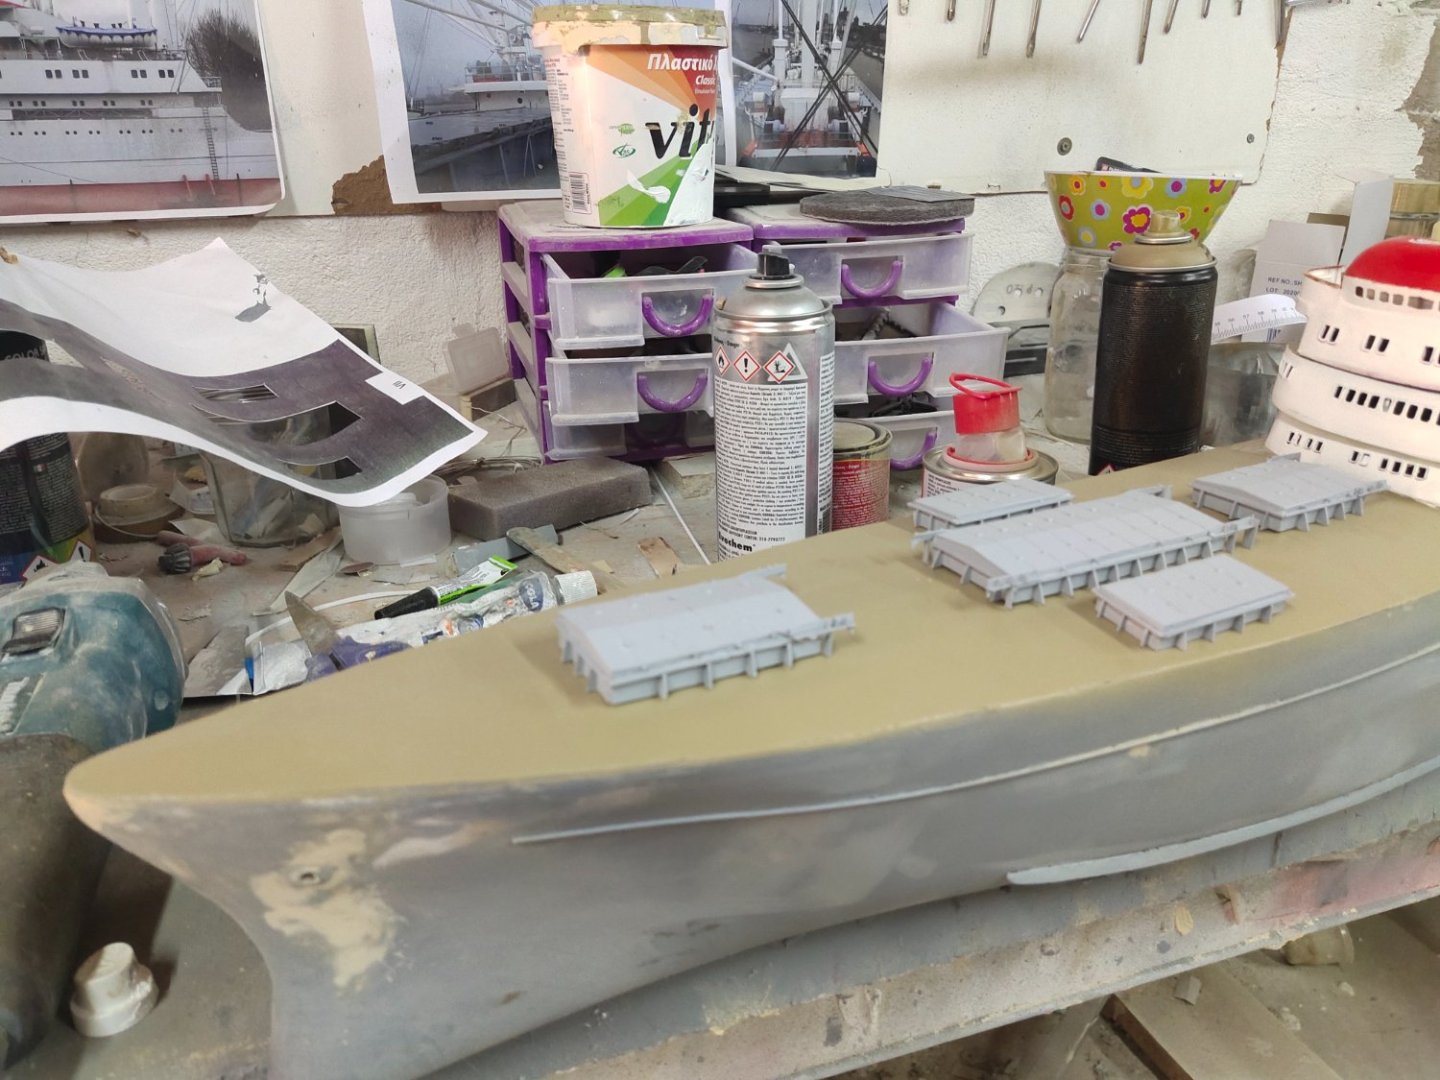
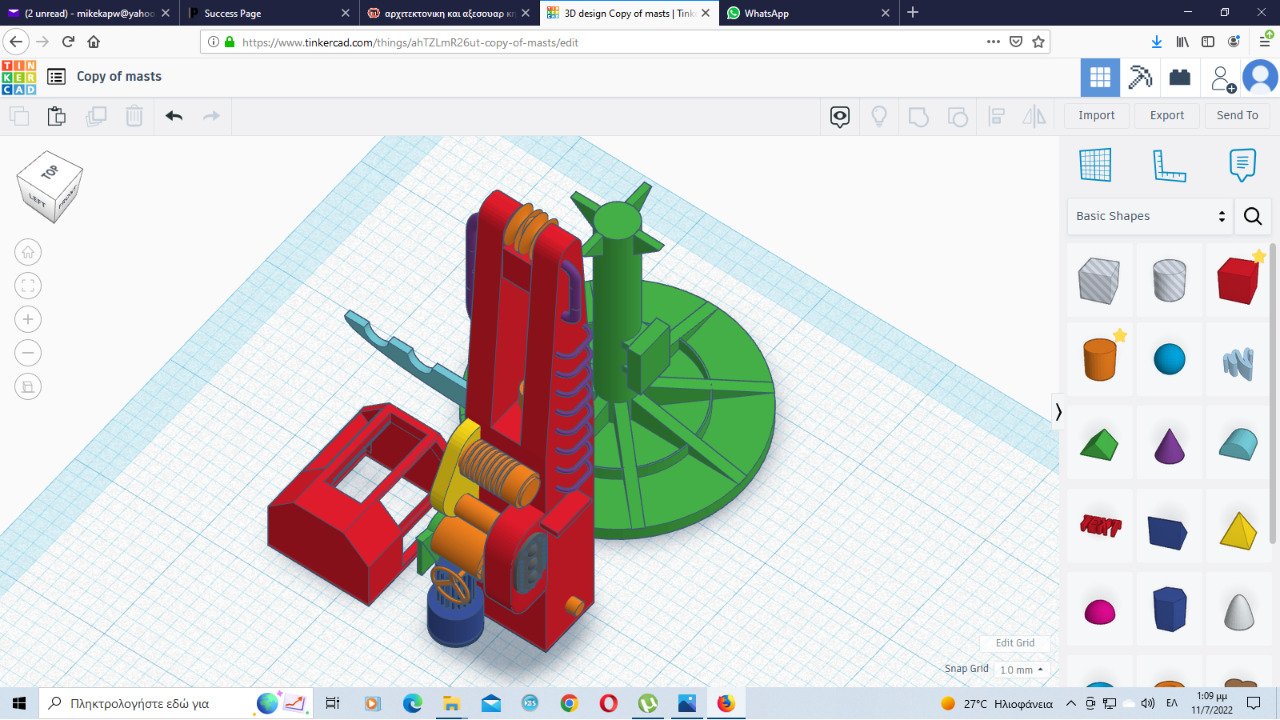
The progress in 3d is going on. I put all things together as a preview although I will print the cranes in separate pieces. However it seems that i prefer spend time on this and avoid to concentrate on a more challenging project. To built the deck frame, present on all cargo ships of the time instead of rail bars Because of the curvy shape that follows the hull, I'm not sure how to design it yet. And still I am worry about the overall fitting of the triangle supports to the deck. A last worry would be to find a glue for resin that won't also make a mess to the deck. For scratchbuild this piece I face the problem of finding the proper material. Metal strip would be too thin to handle and the tiny supports too hard to be made equally. The overall look of it may not look satisfying to my eyes. Balsa over 1mm would be more stable and still easy to work but too thick while thinner would be very optically ideal but easy to break unless fortified with some material like gel coat.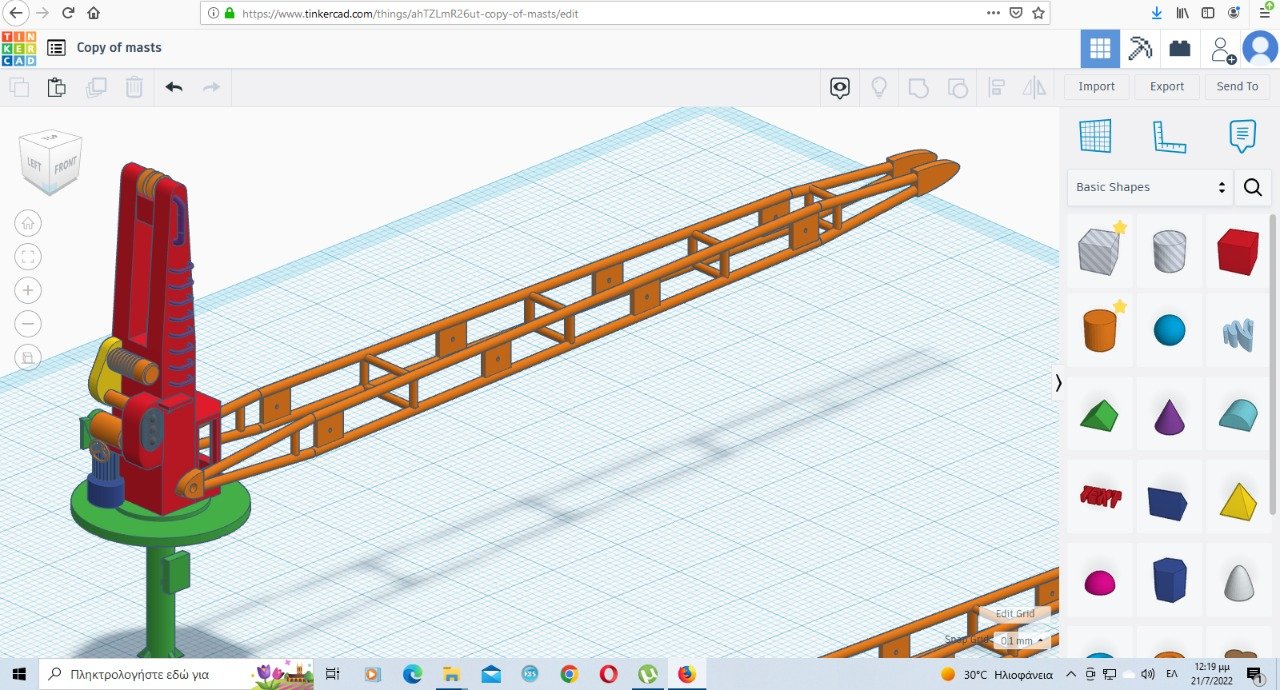
-
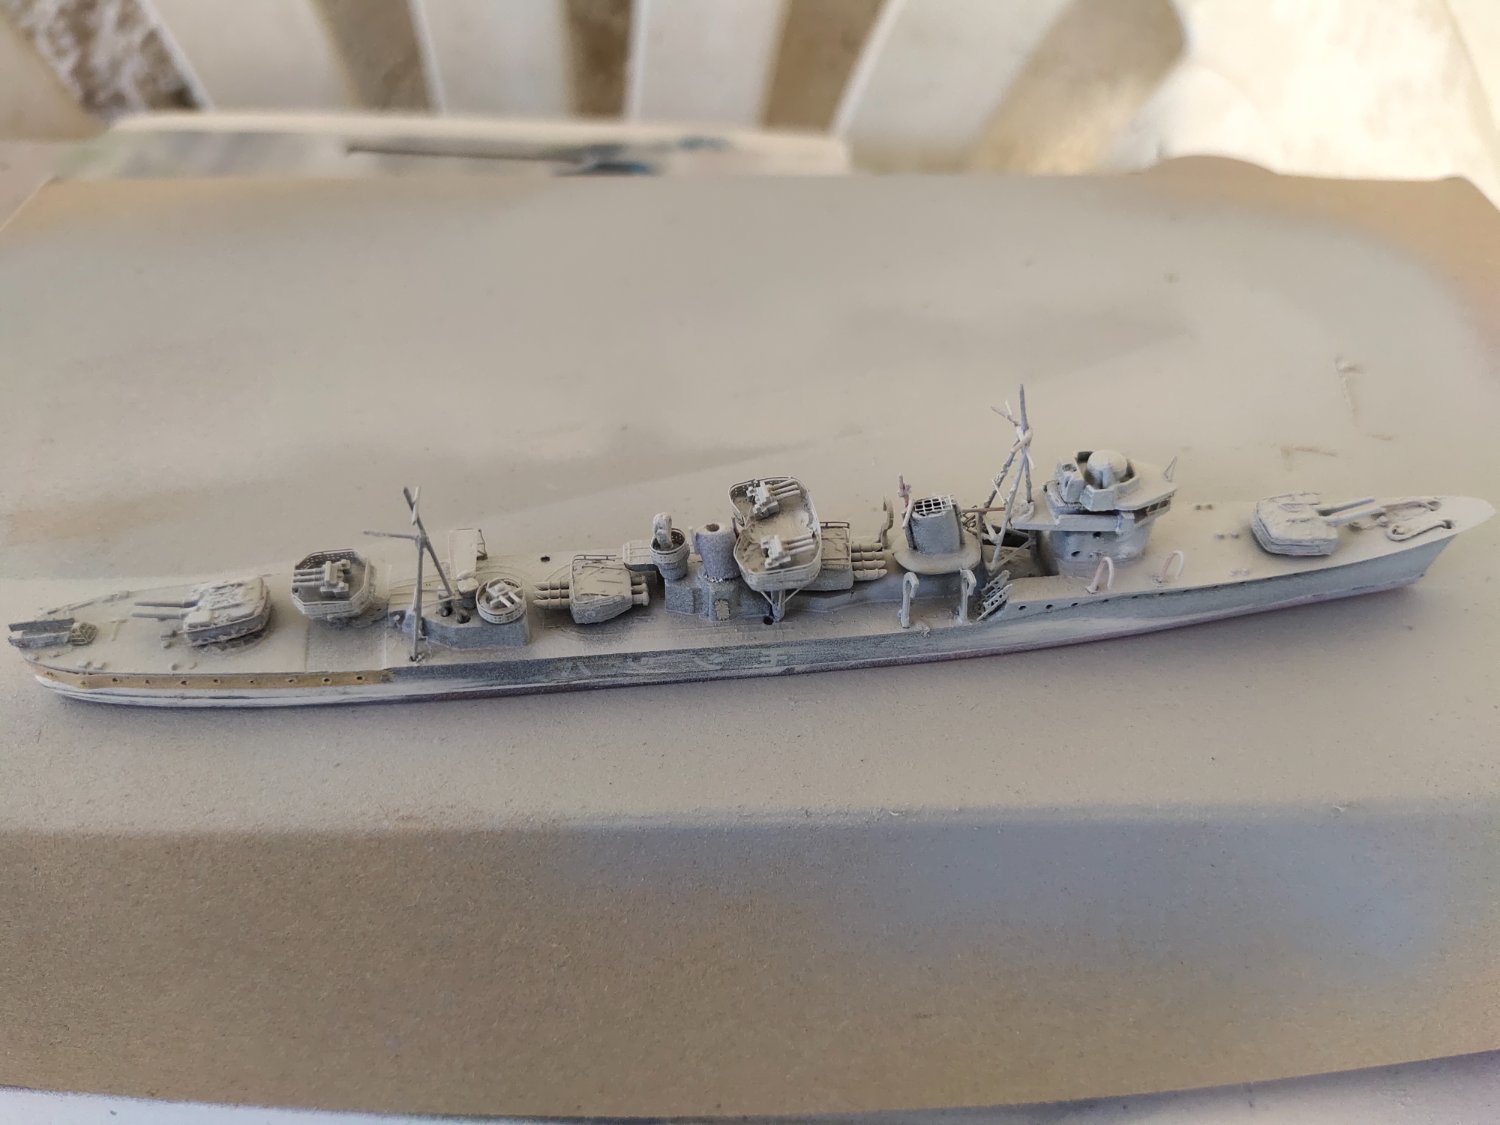
I almost done with Hatsushimo Need only to paint, add boats, rigging and weathering. I used general ww2 railings. Hopefully when visit Malaysia this winter again will stock up with supplies from nearby China and Japan. I will paint it with IJN Gray later along with Amatsukaze

-
Cap San Diego by mikegr - 1/160
mikegr replied to mikegr's topic in - Build logs for subjects built 1901 - Present Day
I am test fitting the cargo holds while experimenting in 3D design amd printing.
-
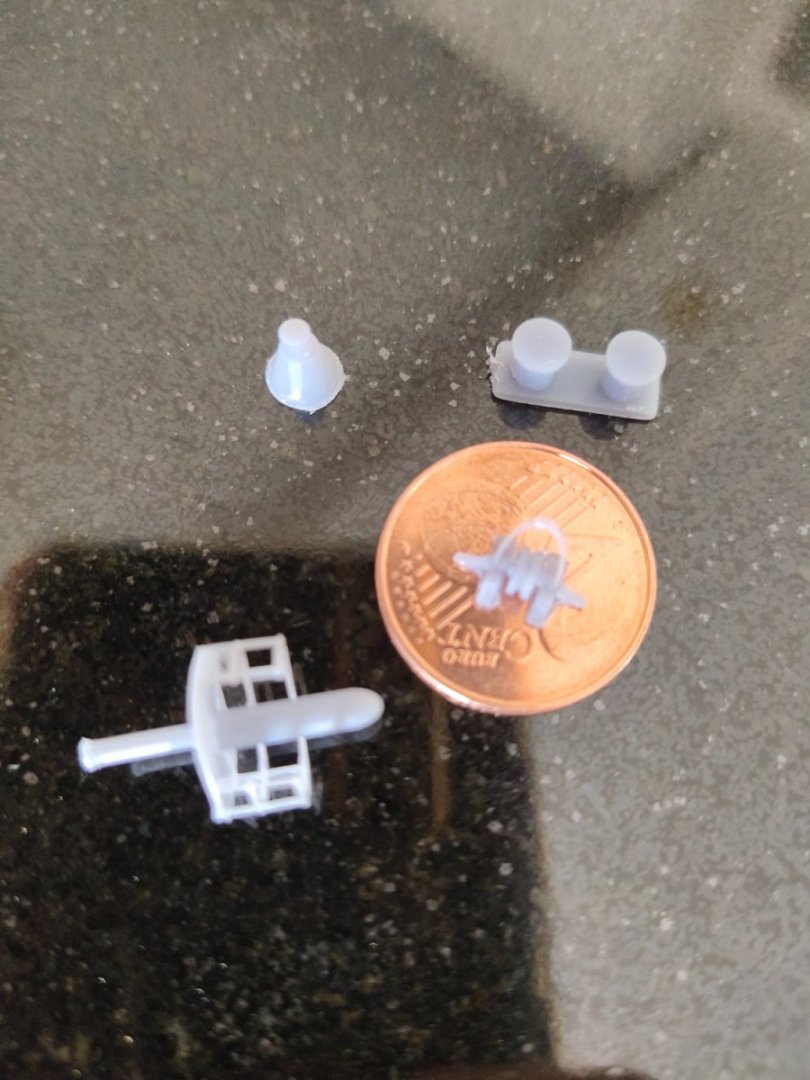
I think Flyhawk produces the best plastic in the market, turrets, funnels, airplanes, all comes in great detail even in 1/700 scale, plus the PE Now for the 3D parts I found myself enjoying design and print my parts. I This may take more time than scratchbuilding but while increasing my design skills hopefully the overall time will be shorten. Results are satisfactory although there's always space for improvement

- 203 replies
-
- 9
-
-

-
- Roma
- Micromaster
- (and 4 more)
-
The detail difference in the turrets even noticeable in not something that cant be reproduced in plastic. If Flyhawk would release a 1/350 Roma i'm pretty sure it could compare with the fine Micromaster product
- 203 replies
-
- 4
-
-
- Roma
- Micromaster
- (and 4 more)
-
Russian T-62A Tank by CDW - Tamiya - 1/35 Scale FINISHED
mikegr replied to CDW's topic in Non-ship/categorised builds
i really hope one day to visit back London and tour the RAF Museum, HMS Belfast and the Naval Museum nearby. -
I done added some extra details. I also found out that I was rebuilding Hatsusimo not Amatsukaze as I thought. Therefore the mistake with the rear turret. Back to the plan, second rear turret replaced again with AA gun.😁 Better concentrate on one ship each time. Added ladders, doors and few other PE details. Then I sprayed photo etched primer. Now will finish up details by adding rails and prepare for final paint
-
1/200 Trumpeter IJN YAMATO - issued by MRC/Gallery Models
mikegr replied to yvesvidal's topic in REVIEWS: Model kits
It depends on the criteria used. If we take under consideration the purpose of built, then Bismarck was a disaster as her task to destroy enemy merchant vessels was never accomplished. Had the Germans used its steel to produce several dozens U boat instead, the war in the Atlantic may would have a different outcome. Same for Vanguard , that was built to fight in a war that finished too early for her. But if you consider the technology involved things may appear different. Bismarck was the Yamato of its time being the most armored ship ever created with 42% of its weight dedicated to armor. Vanguard built finally in 1946 was a state of the art ship with the most extended battle damage control.- 104 replies
-
- 3
-
-
- MRC/Gallery
- Yamato
- (and 1 more)
-
1/200 Trumpeter IJN YAMATO - issued by MRC/Gallery Models
mikegr replied to yvesvidal's topic in REVIEWS: Model kits
Yamato, Bismarck, Mogami. All these seems to be in the black list for Antony Preston. Not that we, modelers, care much though https://www.worldcat.org/title/worlds-worst-warships/oclc/52131104- 104 replies
-
- 4
-
-
- MRC/Gallery
- Yamato
- (and 1 more)
-
1/200 Trumpeter IJN YAMATO - issued by MRC/Gallery Models
mikegr replied to yvesvidal's topic in REVIEWS: Model kits
Yes it is a bayonet fight variation, called Jukendo in fact https://en.m.wikipedia.org/wiki/Jūkendō But my wonder is different. Are these big kits really complete? Or extra PE are required to get the most details out of them?- 104 replies
-
- 3
-
-
- MRC/Gallery
- Yamato
- (and 1 more)
-
1/200 Trumpeter IJN YAMATO - issued by MRC/Gallery Models
mikegr replied to yvesvidal's topic in REVIEWS: Model kits
Not even. This is Kendo- 104 replies
-
- 2
-
-
- MRC/Gallery
- Yamato
- (and 1 more)