HOLIDAY DONATION DRIVE - SUPPORT MSW - DO YOUR PART TO KEEP THIS GREAT FORUM GOING! (Only 13 donations so far - C'mon guys!)
×


mikegr
-
Posts
815 -
Joined
-
Last visited
Content Type
Profiles
Forums
Gallery
Events
Everything posted by mikegr
-
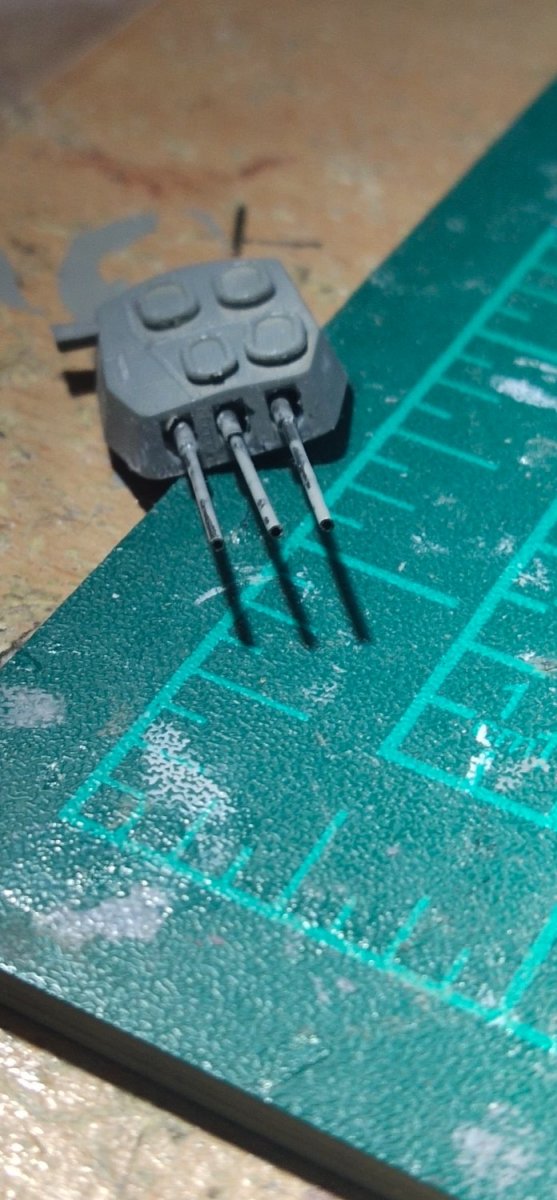
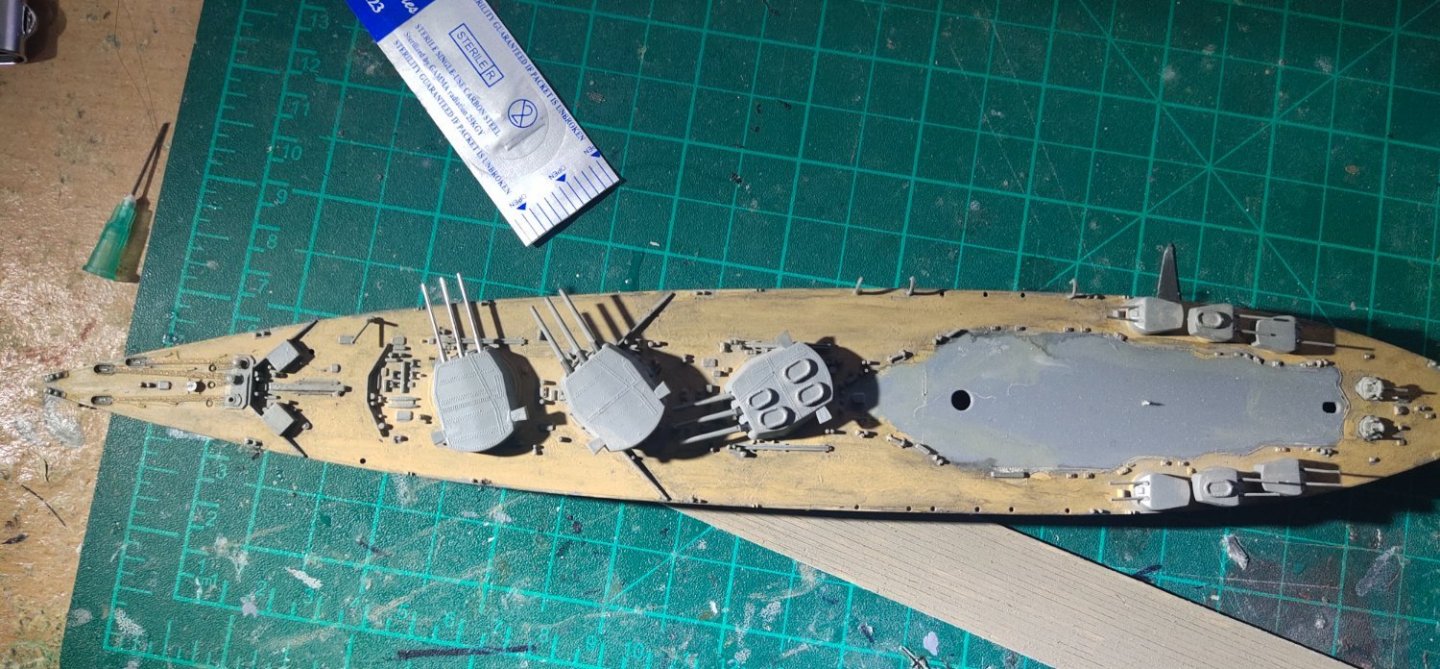
For something more flexible only brass or copper wire will do. The recoil is a bit of fantasy thing. In 1/700 maybe can be omitted but in 1/535 you need to scratch it or think of it something ready available. Here's a recent work of how I use needles to make barrels. They are coated with humbrol oil based primer

-
for barrel improvement i use brass. I think 0.4-0.6mm would be ok in your case. Also sterile needles are good as they come in even smaller diameter. I cut them with a rotary tool with a disk cutter. Then sand a bit the edges.
-
An average Trumpeter kit in 1/700 would give more detailed AA guns not to mention high end brands
-
Cap San Diego by mikegr - 1/160
mikegr replied to mikegr's topic in - Build logs for subjects built 1901 - Present Day
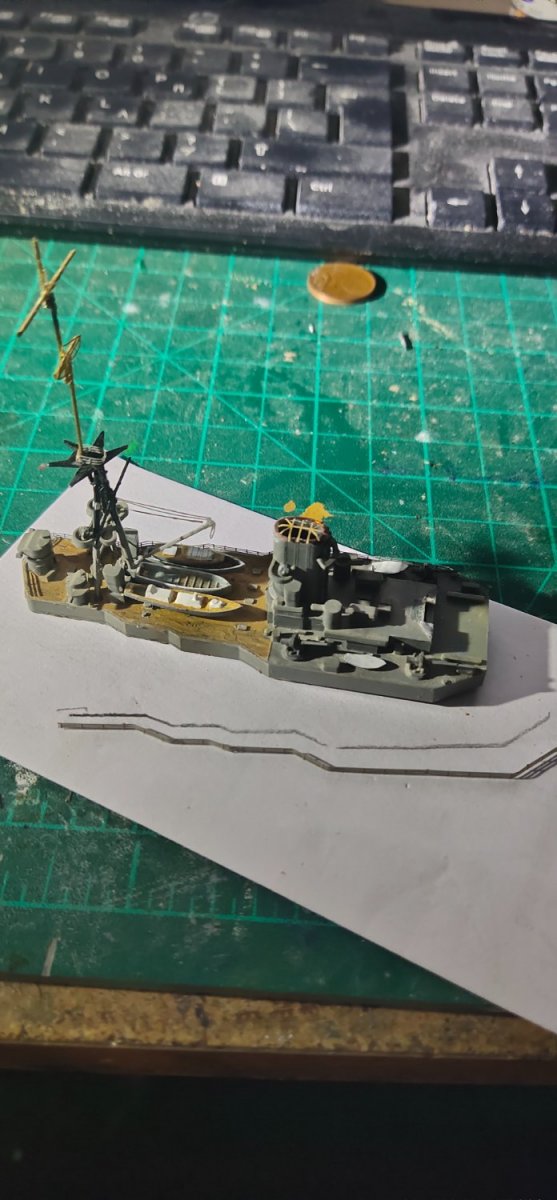
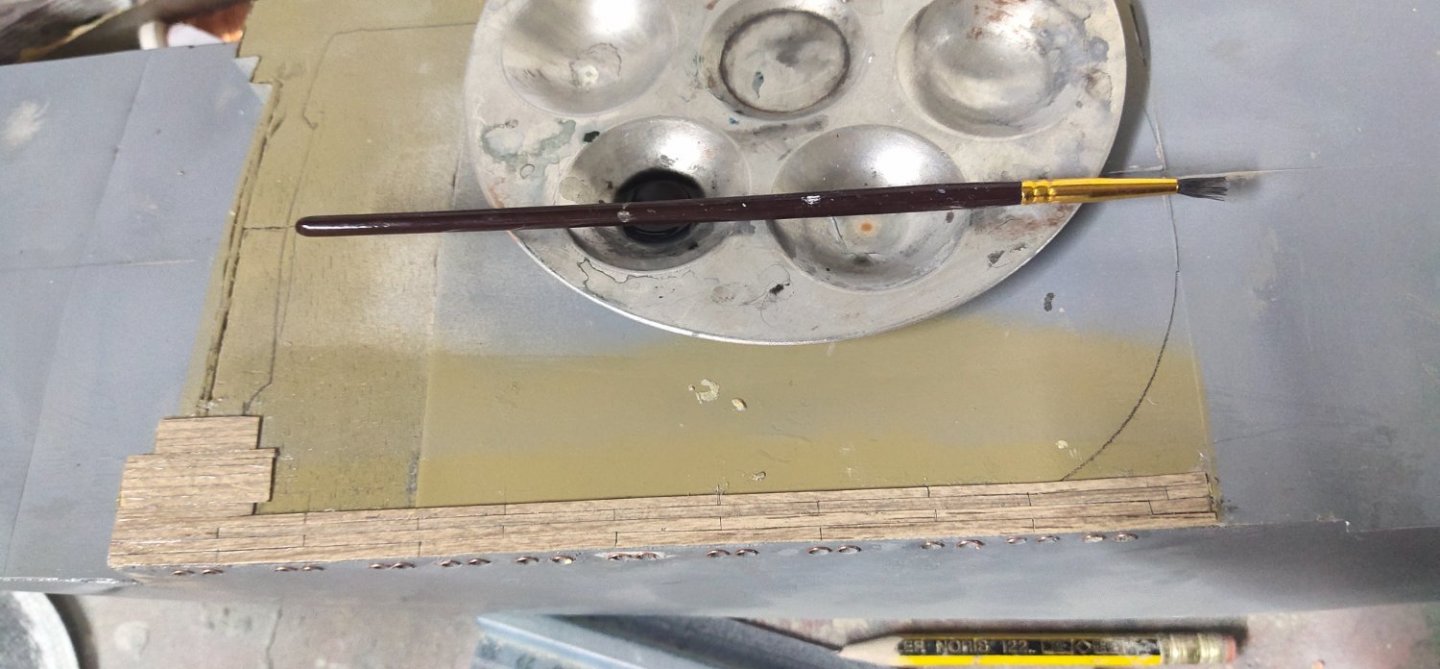
I keep working following the rule for scratch build rookies. Two steps forward, 1,5 steps behind. Even I used a mask, It took me several attempts to open portholes in correct alignment. Then I installed the frames over them. For deck planking I found an easier way. I cut a long stripe veneer and glued. Then cut it vertically every one inch. I repeat the process. Finally I used black wash to emphasize cuts and cleaned the excess wash. Sorry for the wrong shoot but itseems I have a problem with pic rotation
-
Indeed not much building info about it online, even its an old but decent for the price, kit. I have finished the replacement of barrels. I drilled anchor chain holes and replaced davits, some from my stash, some scratch built by copper wire

-
Done weathering the deck and scratch building metal barrels. A dedicated sticker for this class would be good because the engraved deck lines are very thin and are invisible after the initial thick brushed paint.
-
Cap San Diego by mikegr - 1/160
mikegr replied to mikegr's topic in - Build logs for subjects built 1901 - Present Day
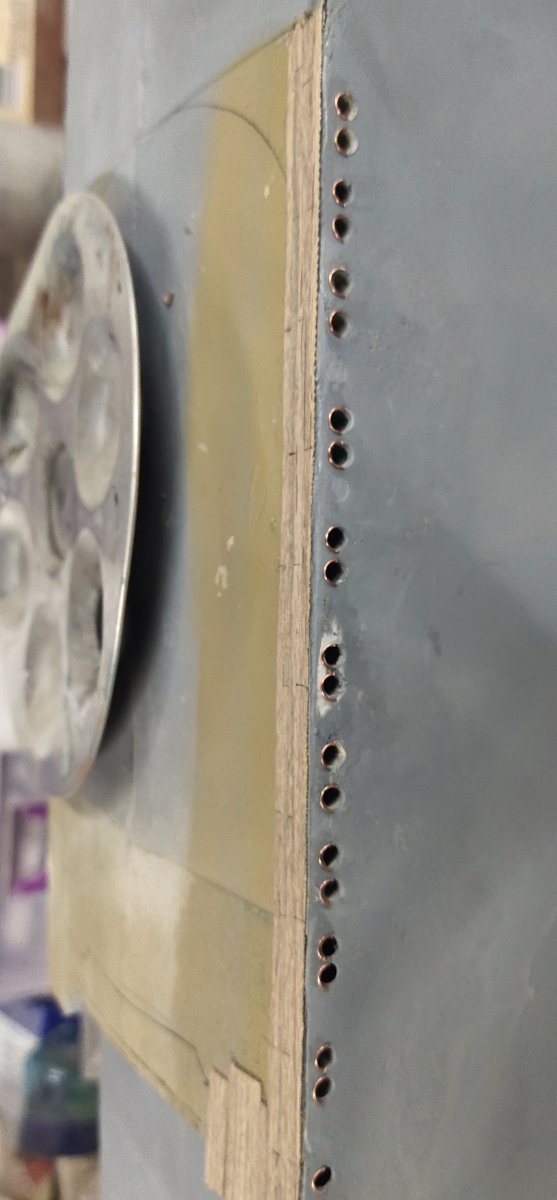
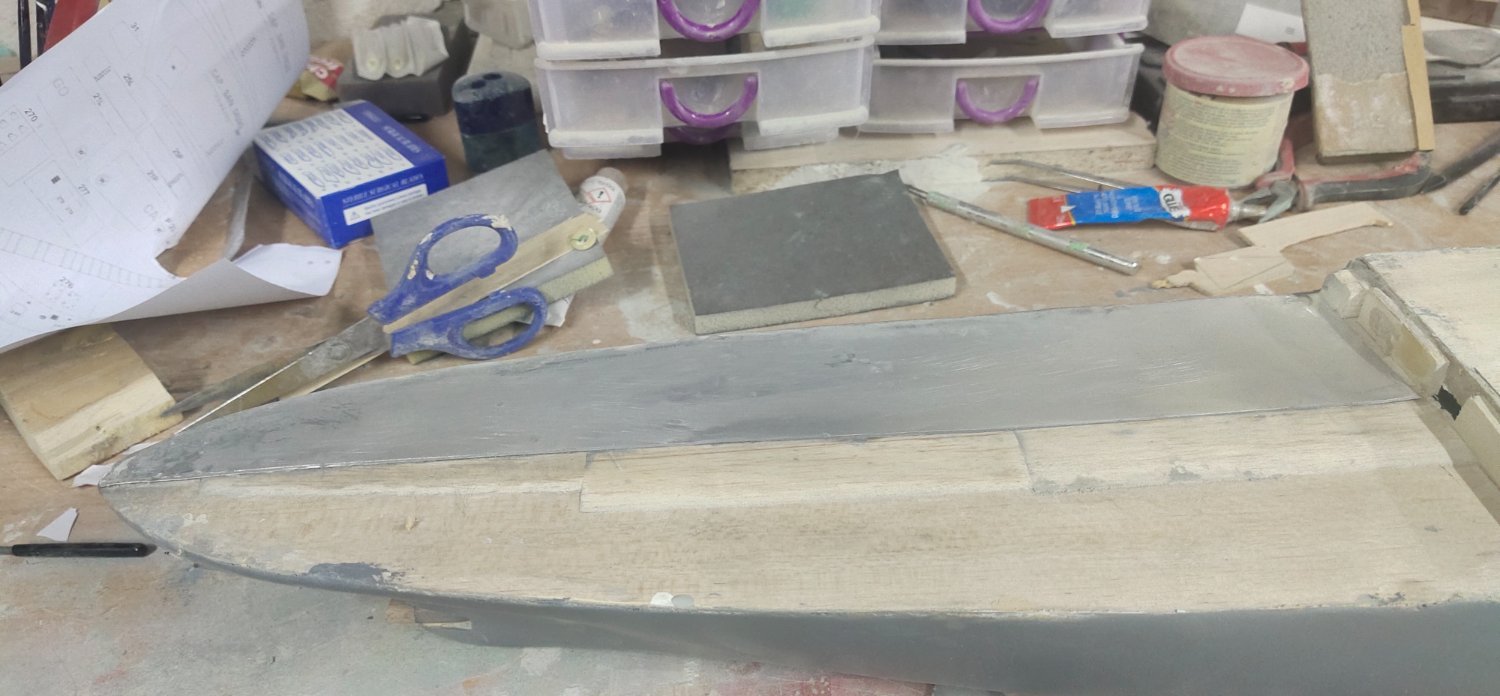
I finished the decks, have them covered them with aluminum sheet 0.10mm thick. several pieces were being used. I will fill in some putty and try to simulate the soldering effect between deck pieces. If not feel happy after paint then I will an extra one piece layer. I just need to find a few long ones somehow, about 50 cm each. Some work on hull has need done also especially at deck-hull join line.
-
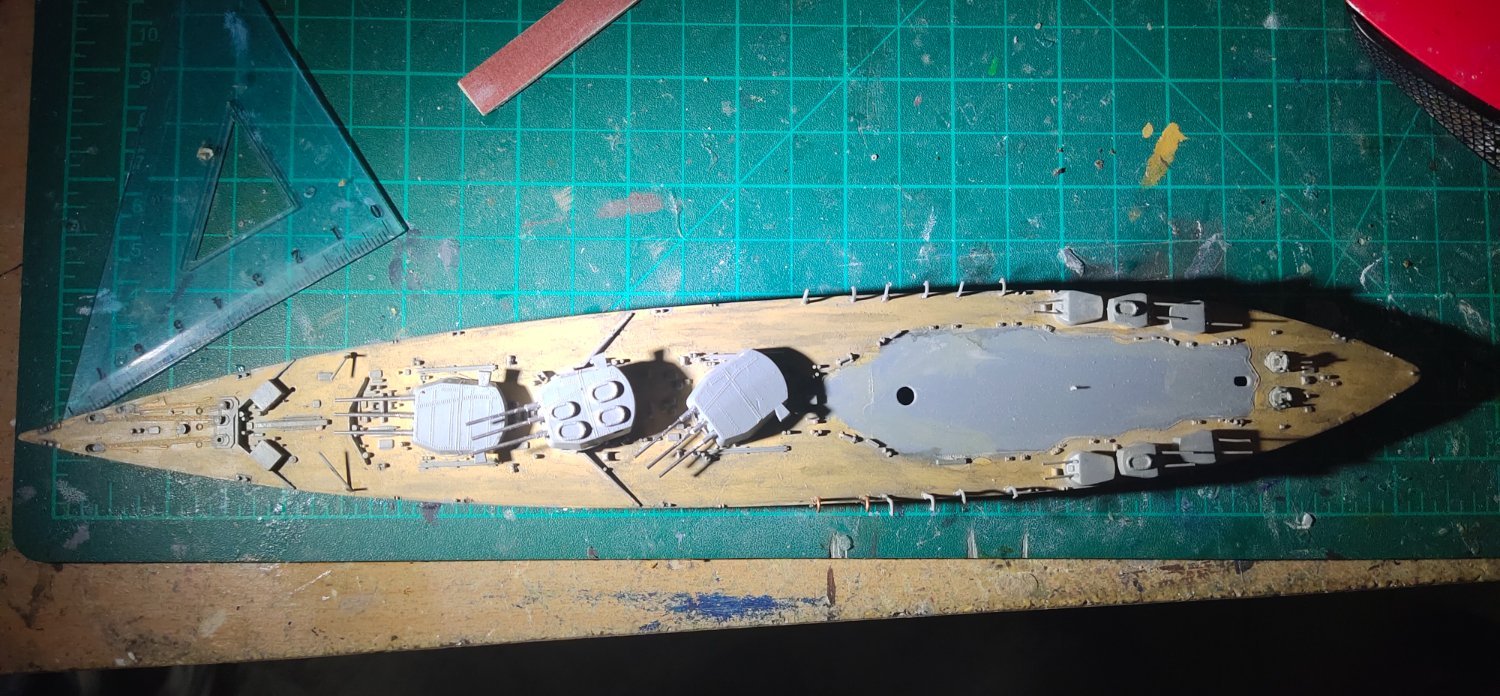
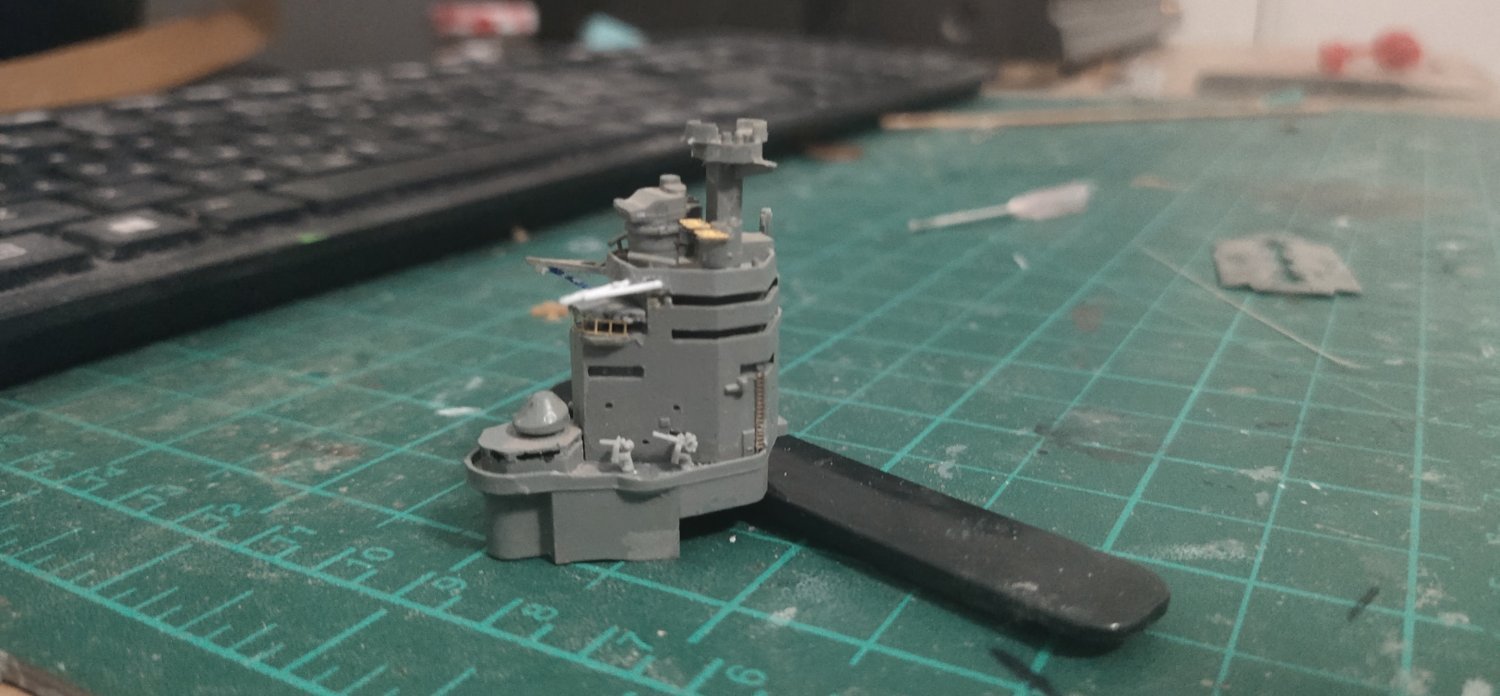
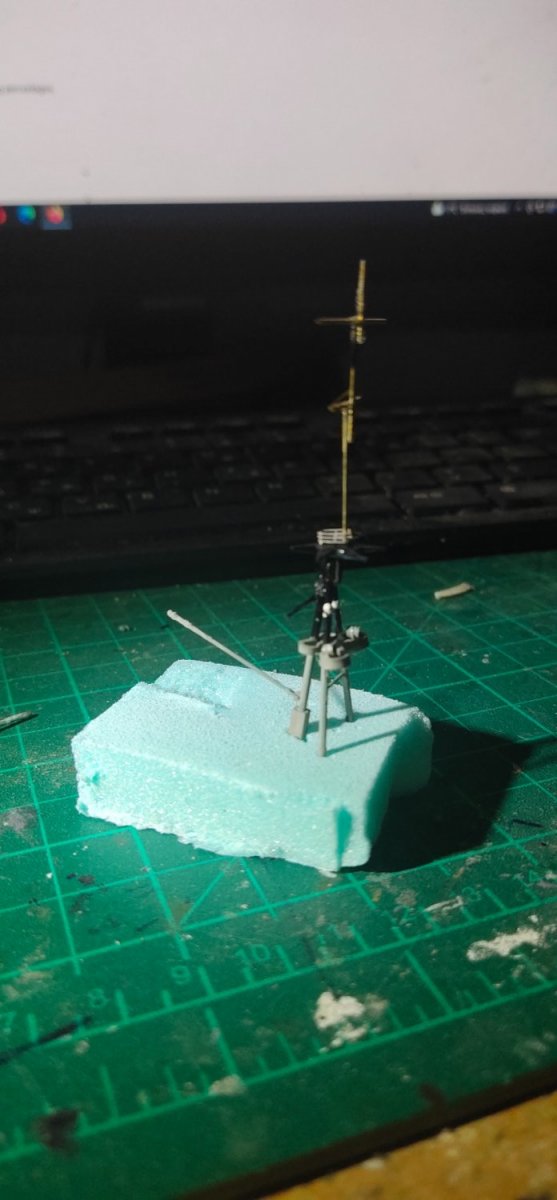
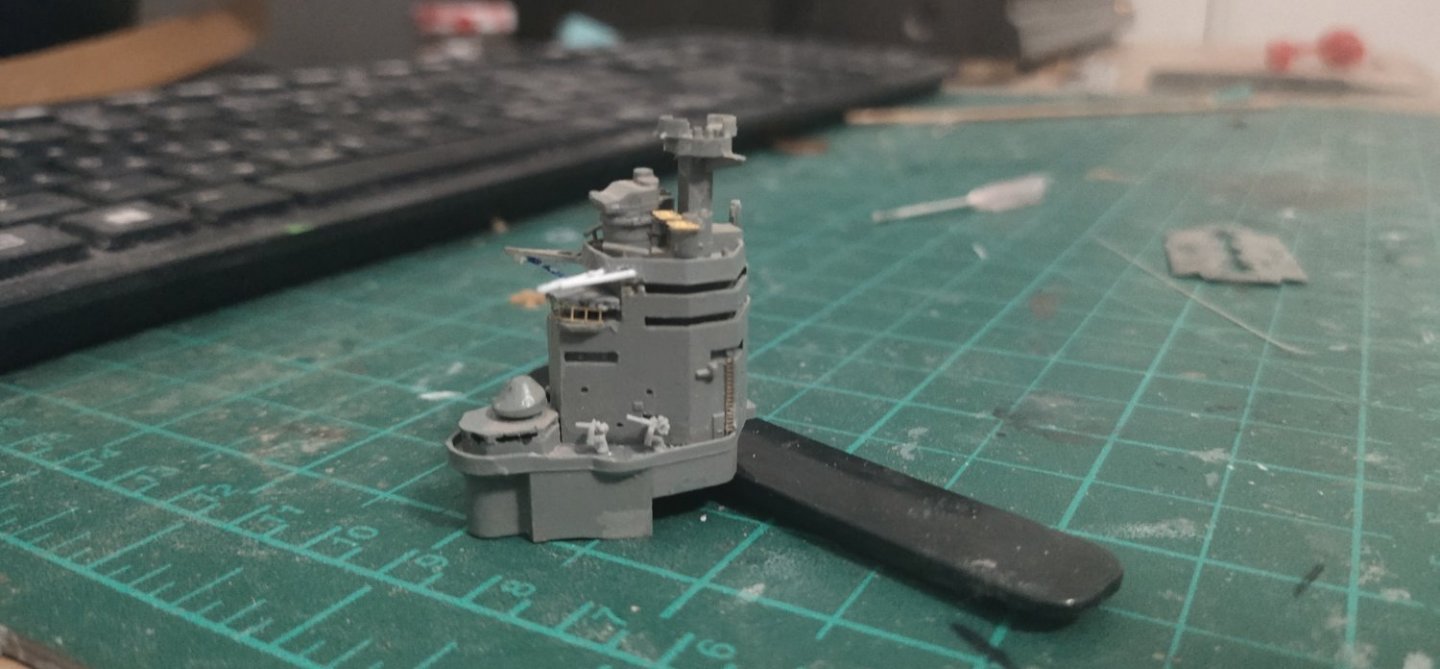
I have started upgrading the bridge. Did some scratch built, added PE and replaced some moulded aa guns with separate ones. I lost two rangefinder antennas during process so no PE set for the rear ones. I think I will start assembly my next model on the floor. I found an easier way of bending PE precisely. I draw the lines of the piece on a paper then I bent the part according to the line. Wherever this is applicable though.
-
Its absolute real. F22 is more expensive and B2 is 100-150k per hour. Just before collapse of the Soviet Union, US had invested on such multibillion projects. Another one was the Seawolf class. The use of computer took the project design in a different level but then it wasn't extended until today. This along with large production numbers for export can drop the price of the F35 below 90 million dollars. A forth generation Eurofighter cost no less than 100. Japan's planned stealth fighter, 170+ millions.
-
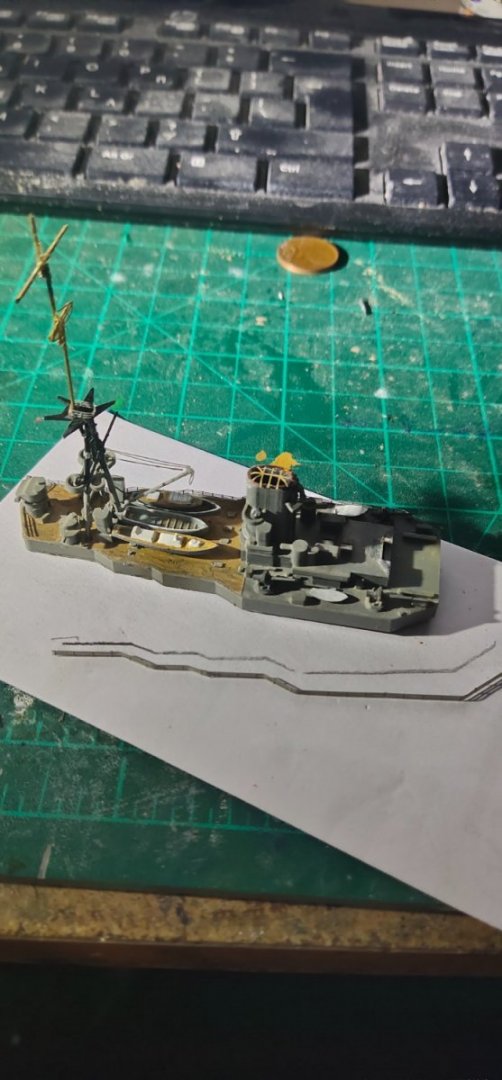
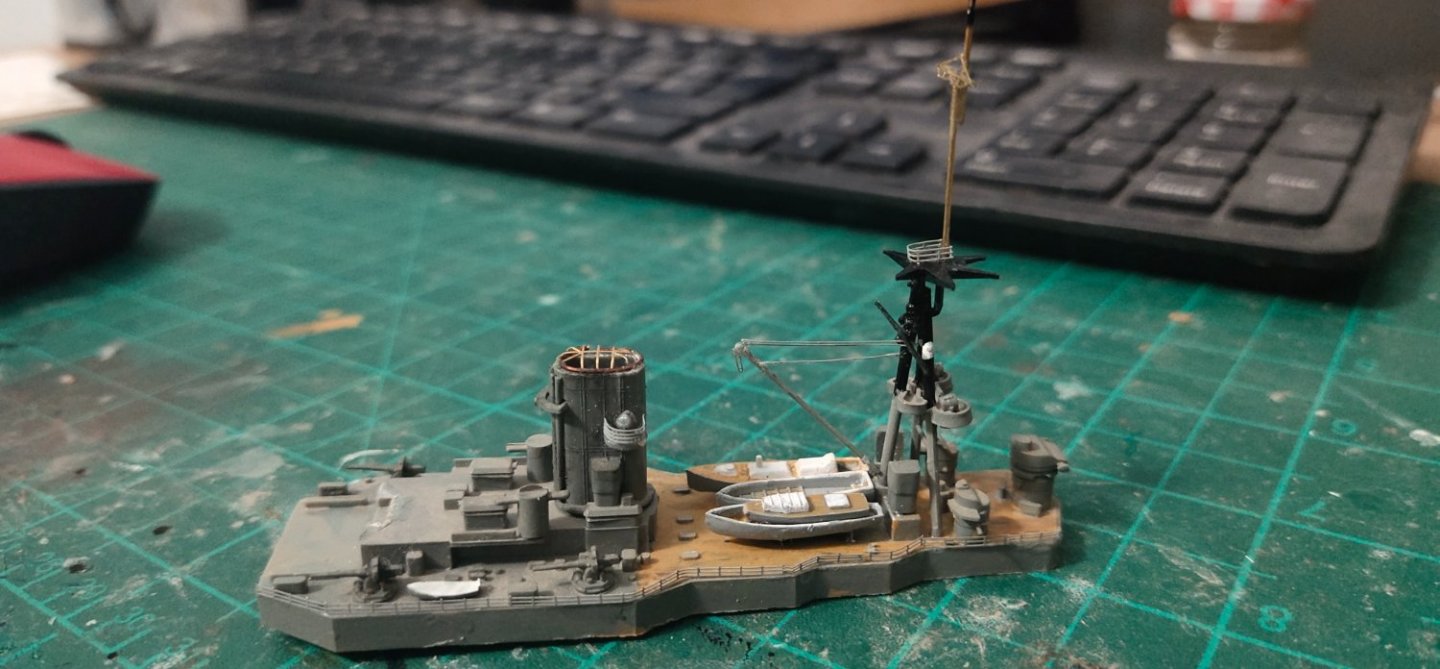
I did some work on the upper deck. Weathering,boat upgrade, rails and added the rear mast-crane set.
-
Cap San Diego by mikegr - 1/160
mikegr replied to mikegr's topic in - Build logs for subjects built 1901 - Present Day
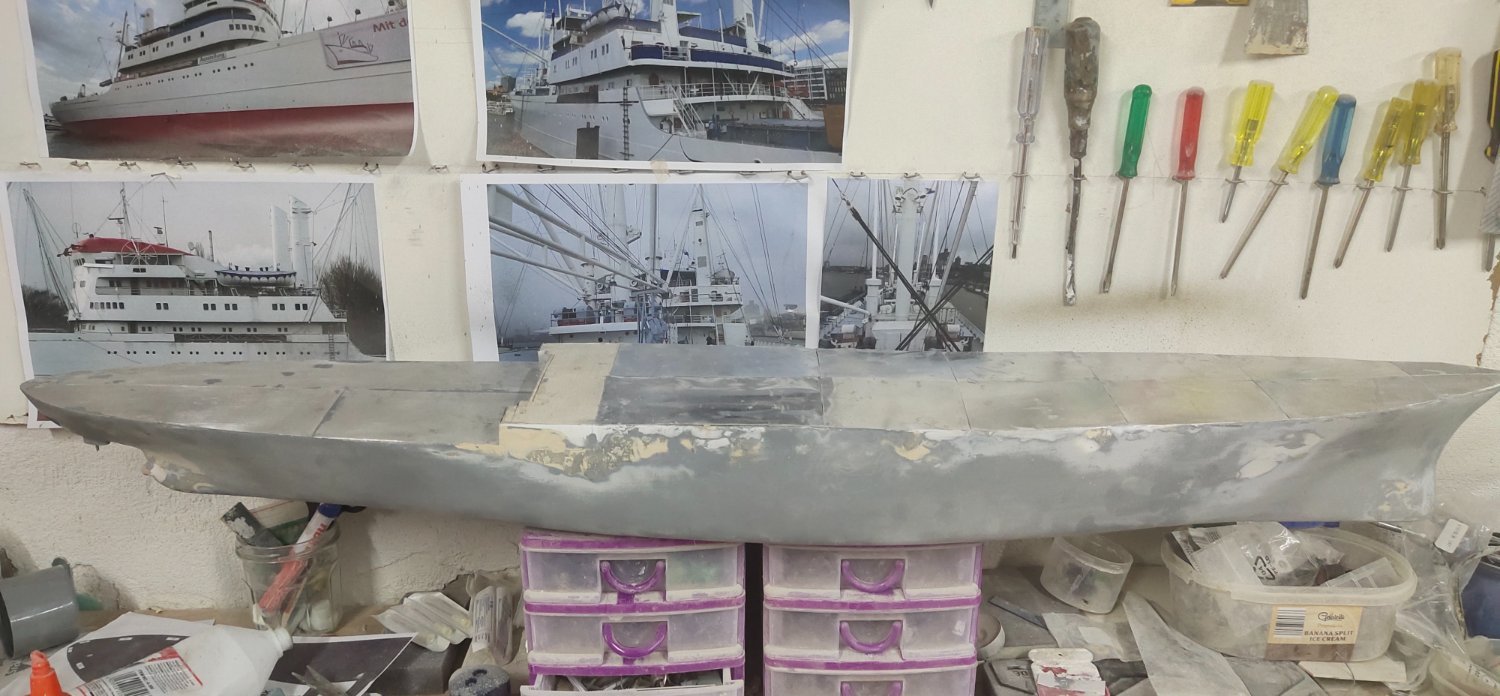
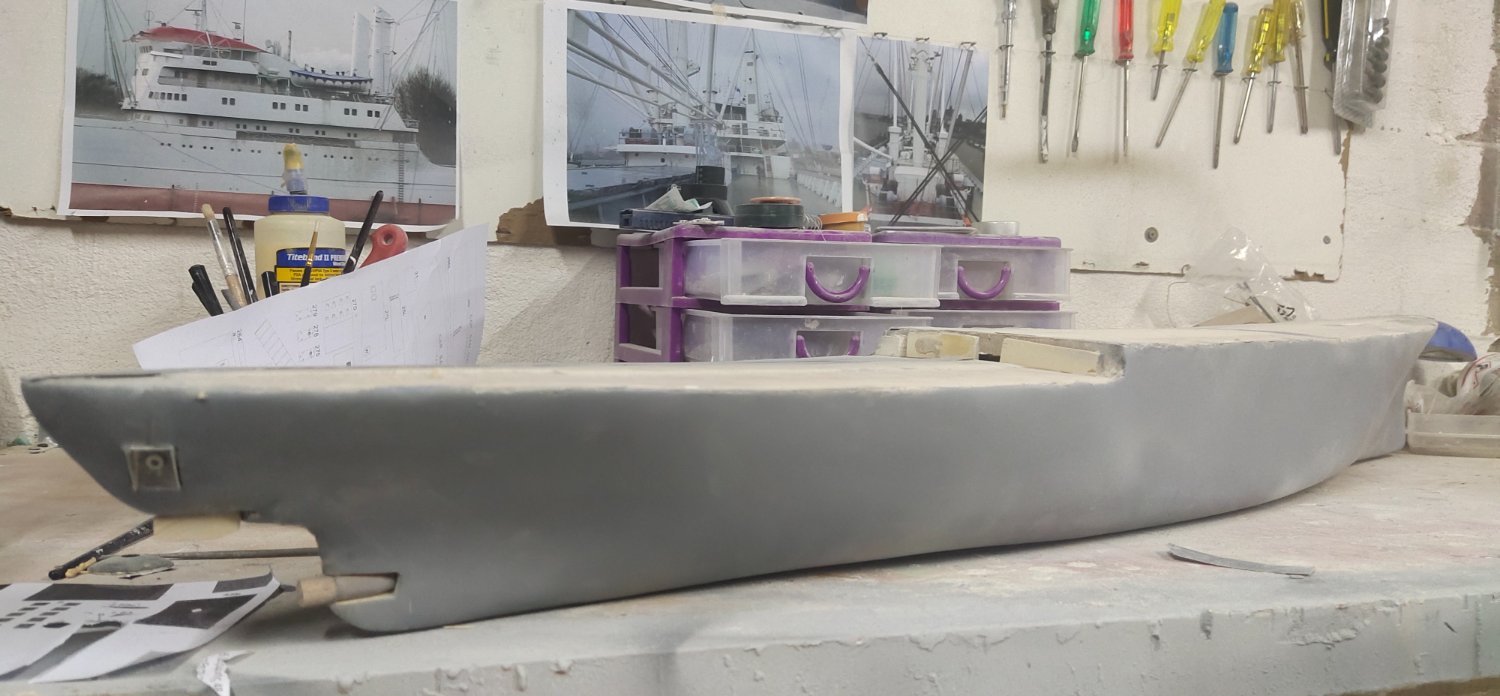
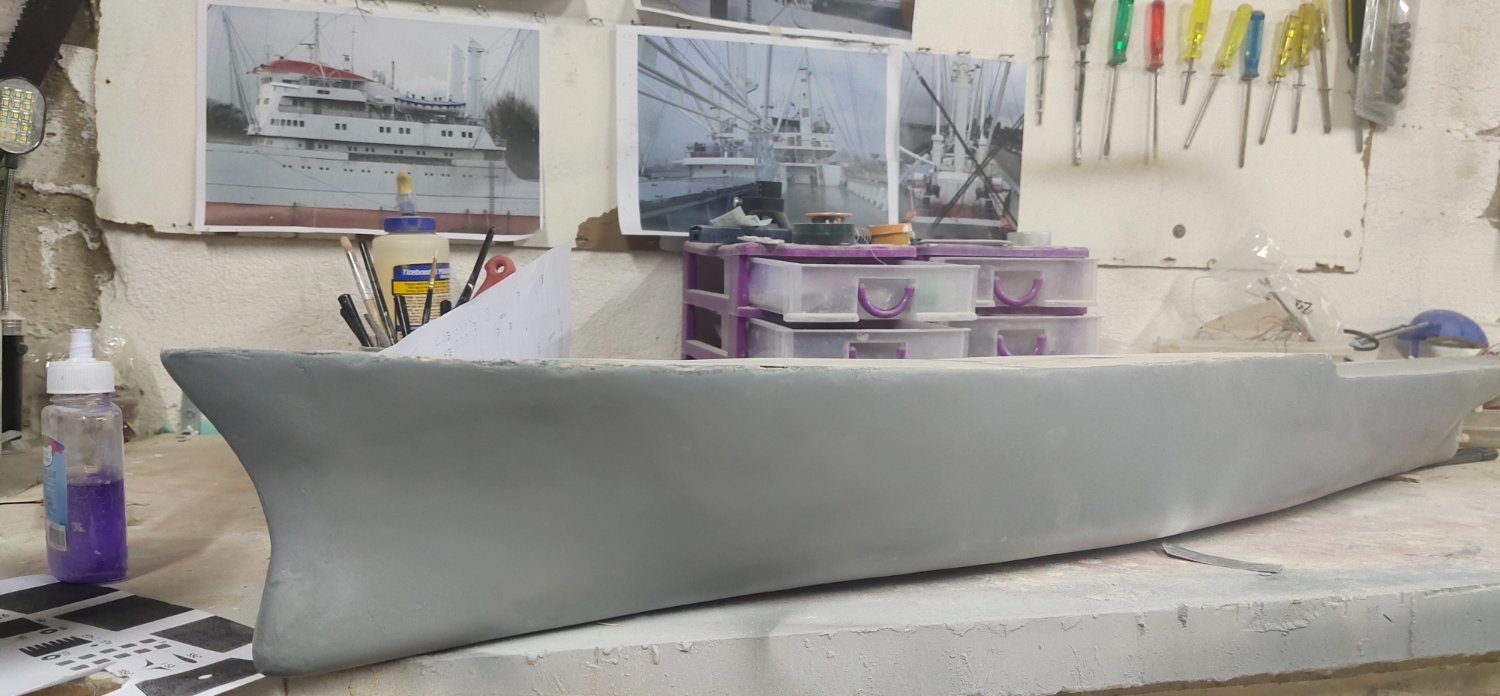
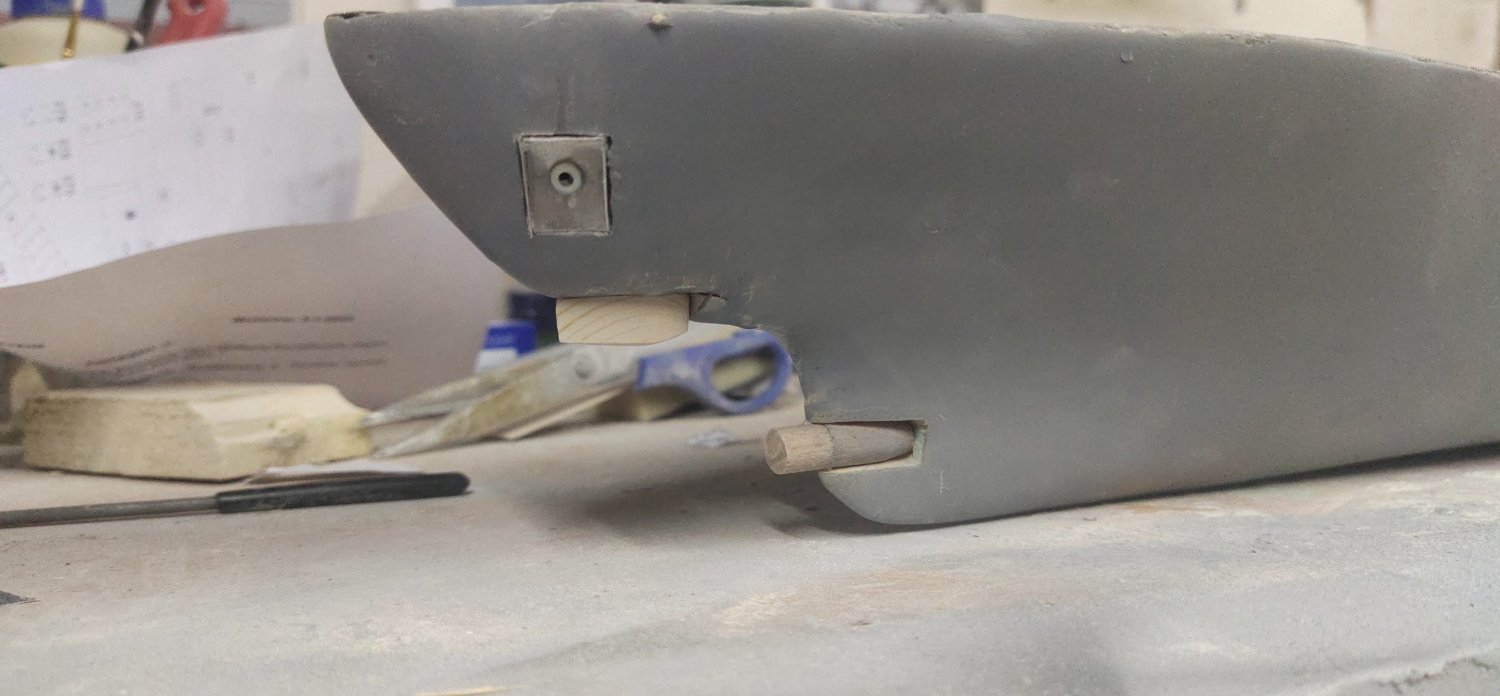
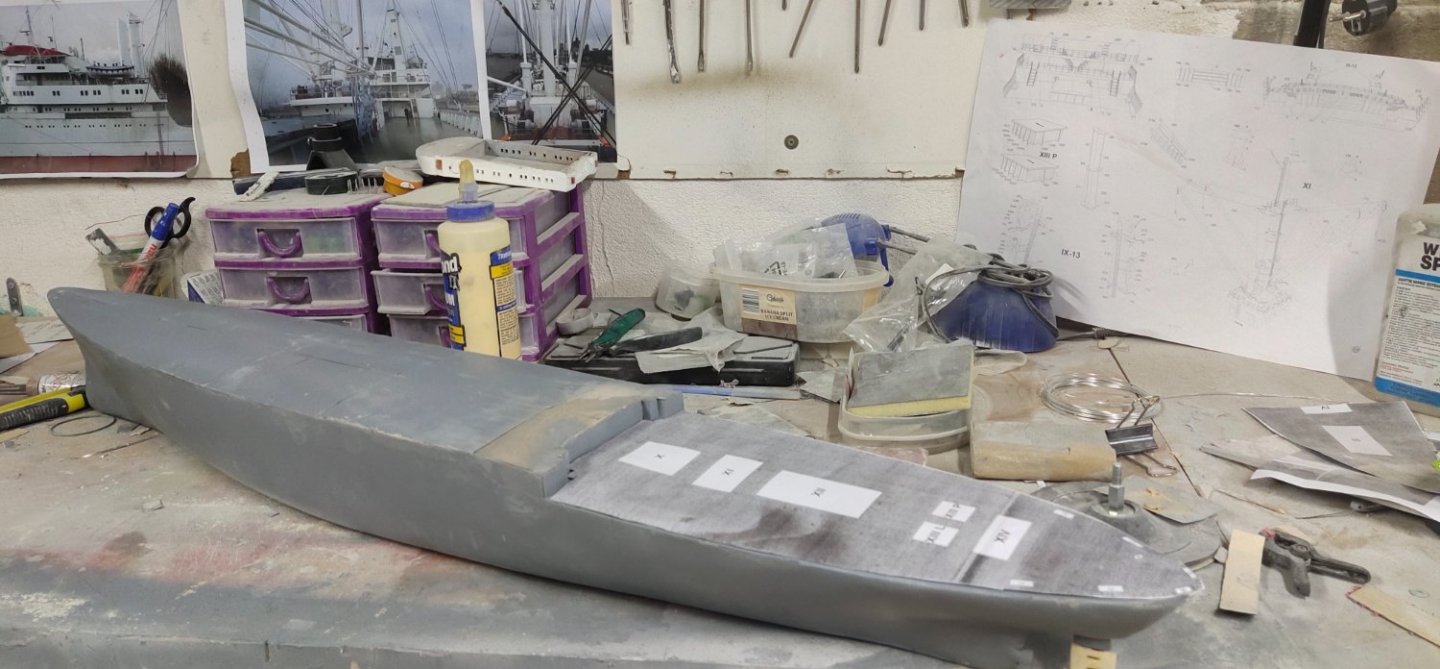
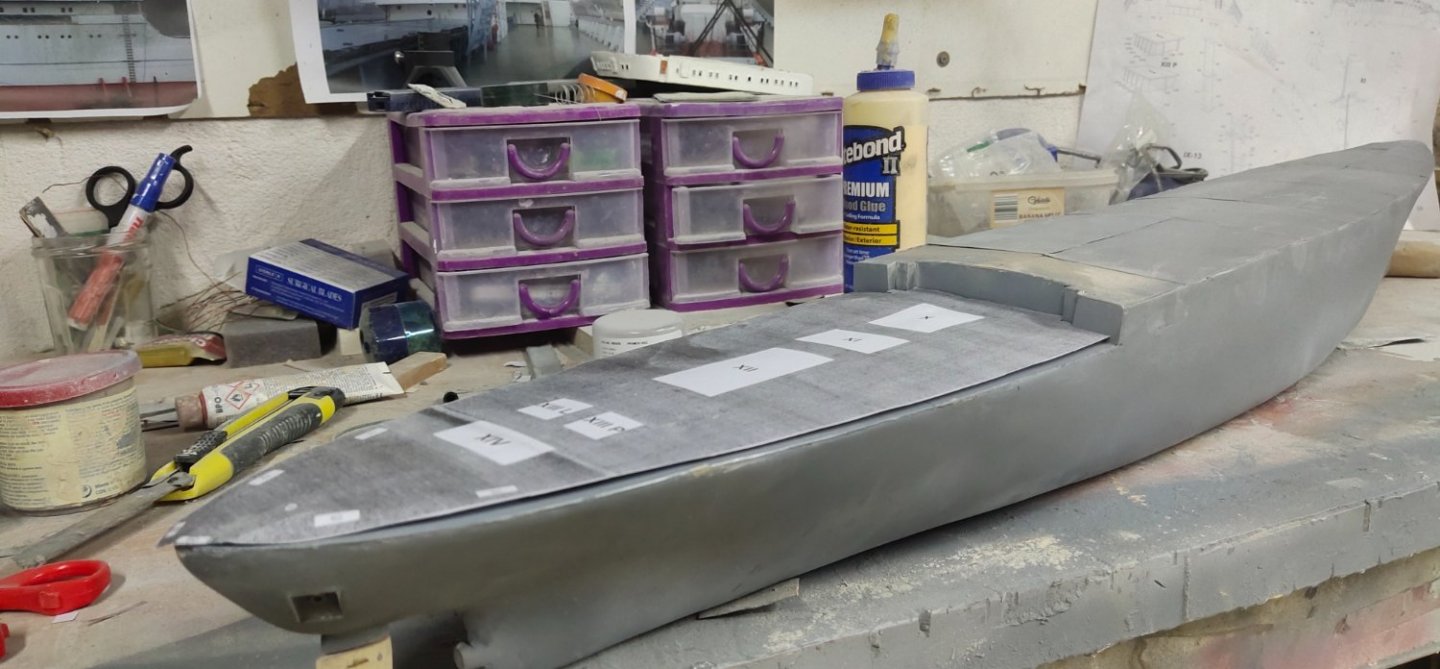
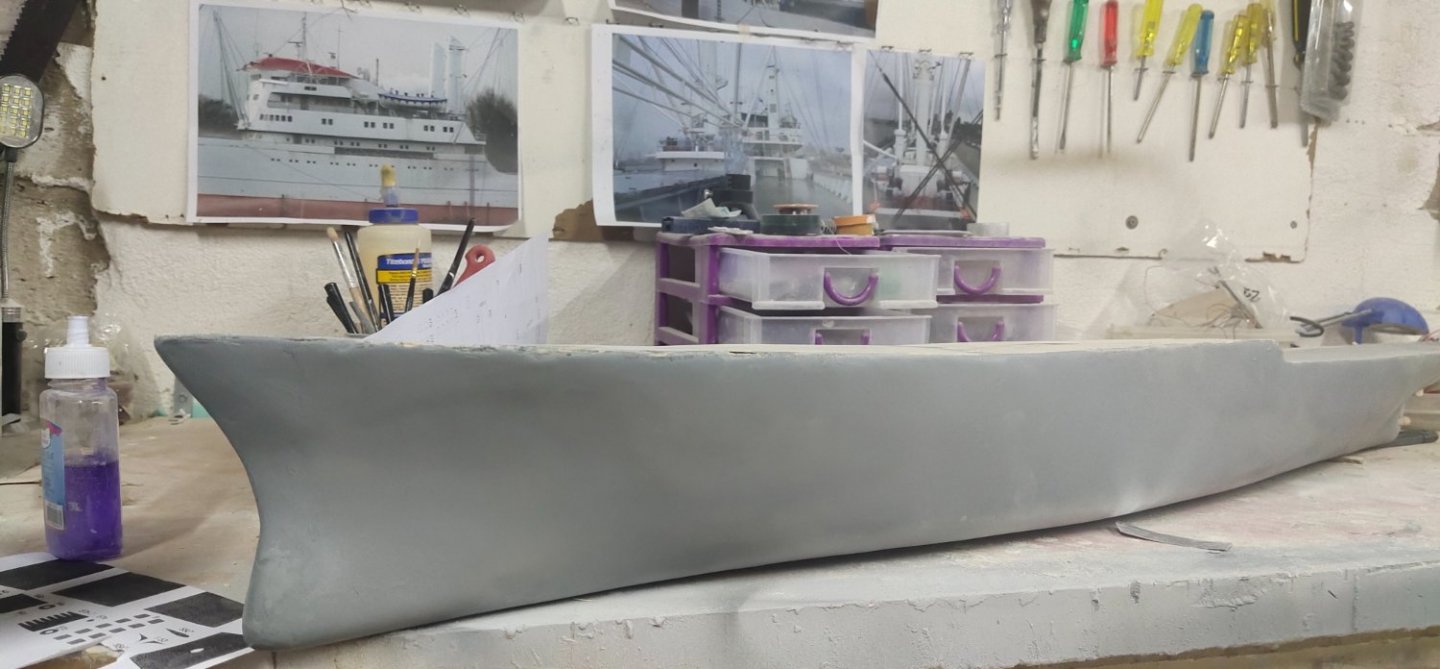
So after some weeks of struggling with the hull I managed to take it to the desired level. I will polish it with 600 grit paper tomorrow. There's work to be done on the joint with the deck but I also have to add the deck frame with supporters there so I will deal with it later. I did though some -off hull- work after long time. I added the propeler base , rudder base and test fitted the box in the bow which I don't know what it stands for, maybe for a third anchor. It wasn't great progress but it was pleased that I switched back to creation for a while. Last thing, I need to strengthen the deck by adding aluminum sheets. To give also the desired pitch I put underneath some balsa pieces. At the deck centerline they are 1mm thick trimmed down to sharp edges towards ship's sides. Hope you got my point.


-
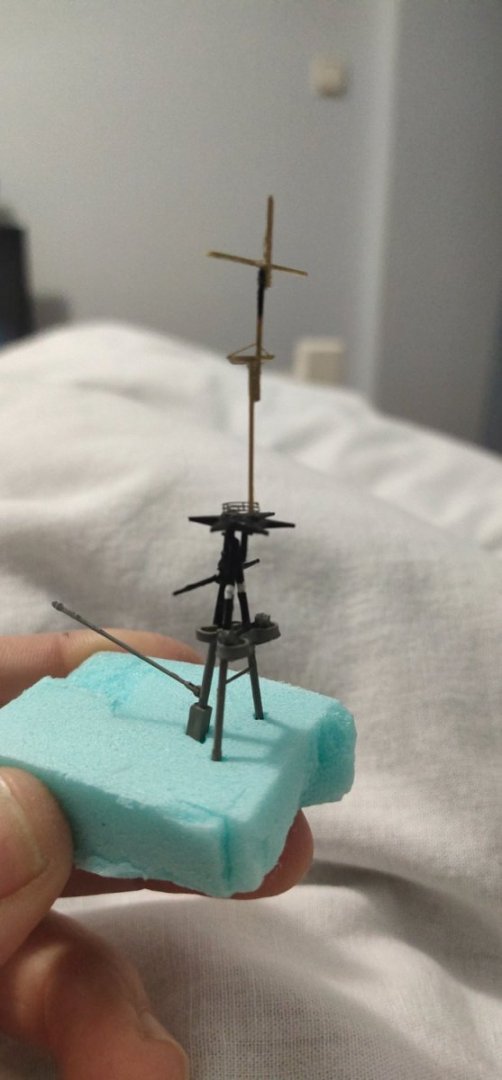
Ι scratch built the upper part of the rear mast. Since I don't have soldering skills yet I made it in 3 parts. At the 2 joints, the vertical masts are glued. This, will offer some extra strength required for the rigging tension. As extra precaution I will use stretched sprue instead of elastic thread.

-
I see some pencil lines of first set from left. That would be ideal for vertical alignment. I guess a final check would be by checking the hulk from the stern to make sure they put in the correct depth. So basically we are talking for a 3 dimension check. Definitely bit more complicated task that bend and glue as it seems initially. Not to mention that after some sets (or models) you will be able to put them by hand without the need of any tools.
-
Close photos suggest some alignment but once painted they may look ok. You can use a spacer while installing them let's say a toothpick for example to make sure they are put evenly.
-
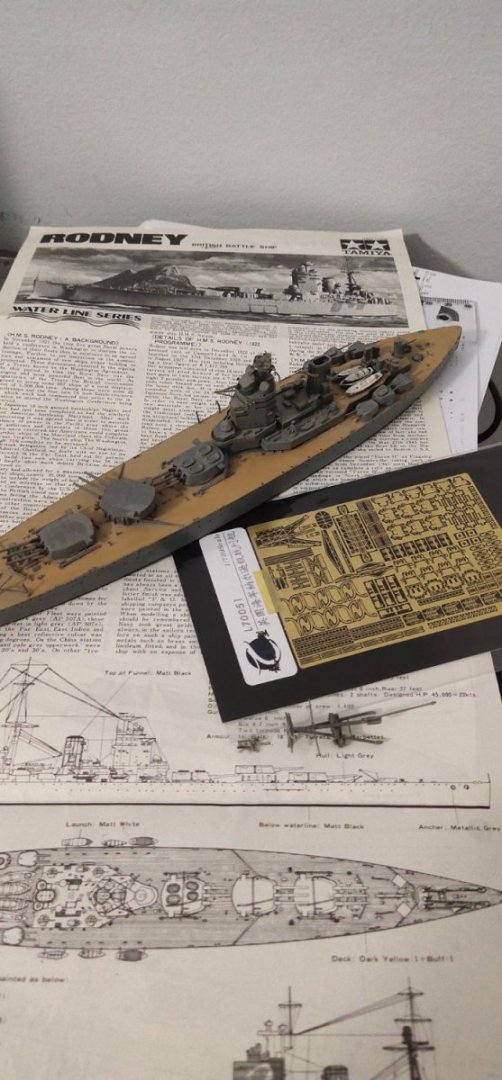
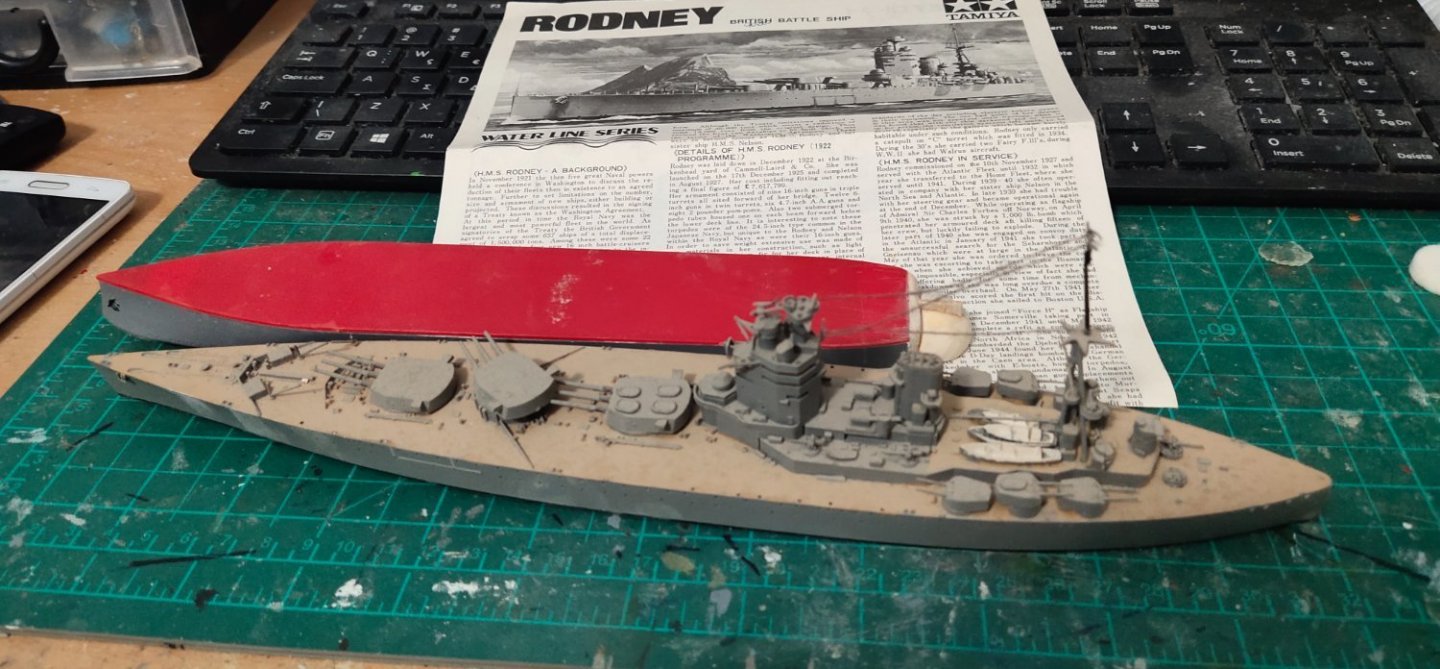
I was thinking that this is one of the least damaged models while an accidentall fall caused some breaks. The paint is in great condition the challenge would be to match the color with the added parts so I skip repaint. The PE parts are for the "Nelson Class" which means they include 40mm aa guns which Rodney never received. J will use some of them, railings and whatever I could find on my spare parts stash.
-
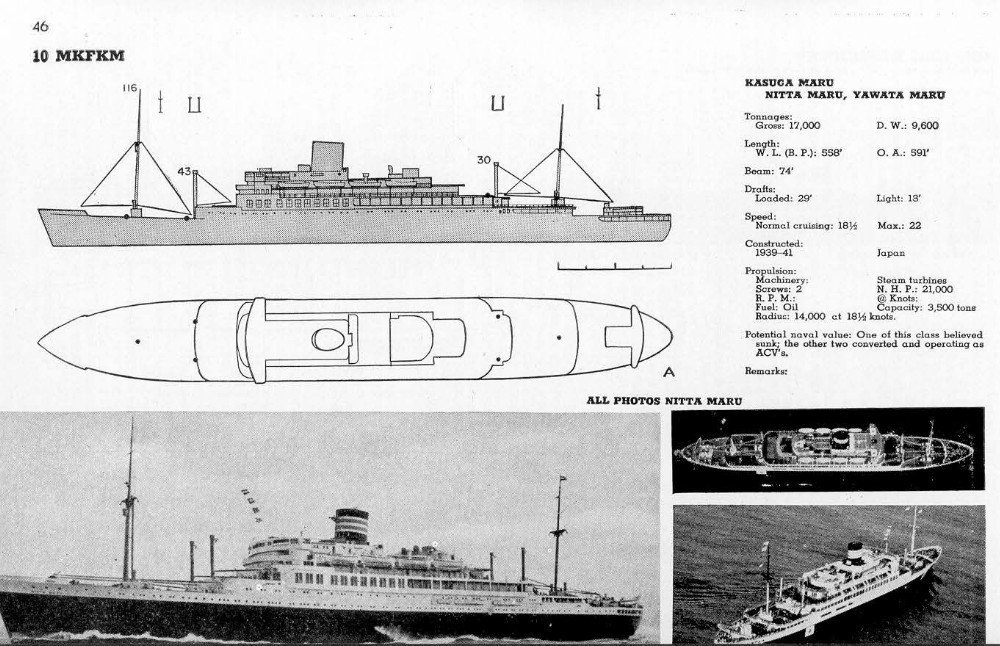
As I was searching some plans I noticed the bow was quite different than it should be. I considered it as a model fault so I cut it and tried to make a new one shaping some wood. Then while a friend called and ask some info on painting a Fletcher, I researched my instruction sheets which I have kept for years. To my surprise I found out that the kit was not Hikawa Maru but Yawata Maru by Aoshima, a cargo liner converted to Unyo, the sister ship of previous built, Taiyo. Under these circumstances a conversion would be out of question. I put it aside for experimental purposes and proceed with a more classic built, HMS Rodney by Tamiya.
-
modern container ships and cruise ships are considered less beautiful comparing to past builts, although they remain impressive cause of the enormous size. Tankers have shrunk in size while their basic lines remained unchanged. Cargo ships have new modern cranes which makes them look somewhat different than in the past. One of my favourite sites for ships built 19060 afterwards with lots of infos and pictures is this http://www.aukevisser.nl/
-
you can have a silent built. Then if you like it you can post your work. You will learn a lot in the process
-
the complexity of the turret frames reminds me of card models where more strength is required. It seems battleships should be strongly made even if these are just models.
-
you mean this? Dont mind the arrow, i just found this pic like this

- 32 replies
-
- 3
-

-
- tamiya
- king george v
- (and 1 more)