Mirabell61
-
Posts
7,418 -
Joined
-
Last visited
Content Type
Profiles
Forums
Gallery
Events
Everything posted by Mirabell61
-
 Hi Mike, love your deck, very nice and accurate work, those cut and milled openings also are very precise.. Nils
 -
Cutty Sark by NenadM
Mirabell61 replied to NenadM's topic in - Build logs for subjects built 1851 - 1900
Hi Nenad, I like your way of cladding / paneling the deckhousings, Looks very good... Nils- 4,152 replies
-
- 5
-

-
- cutty sark
- tehnodidakta
- (and 1 more)
-
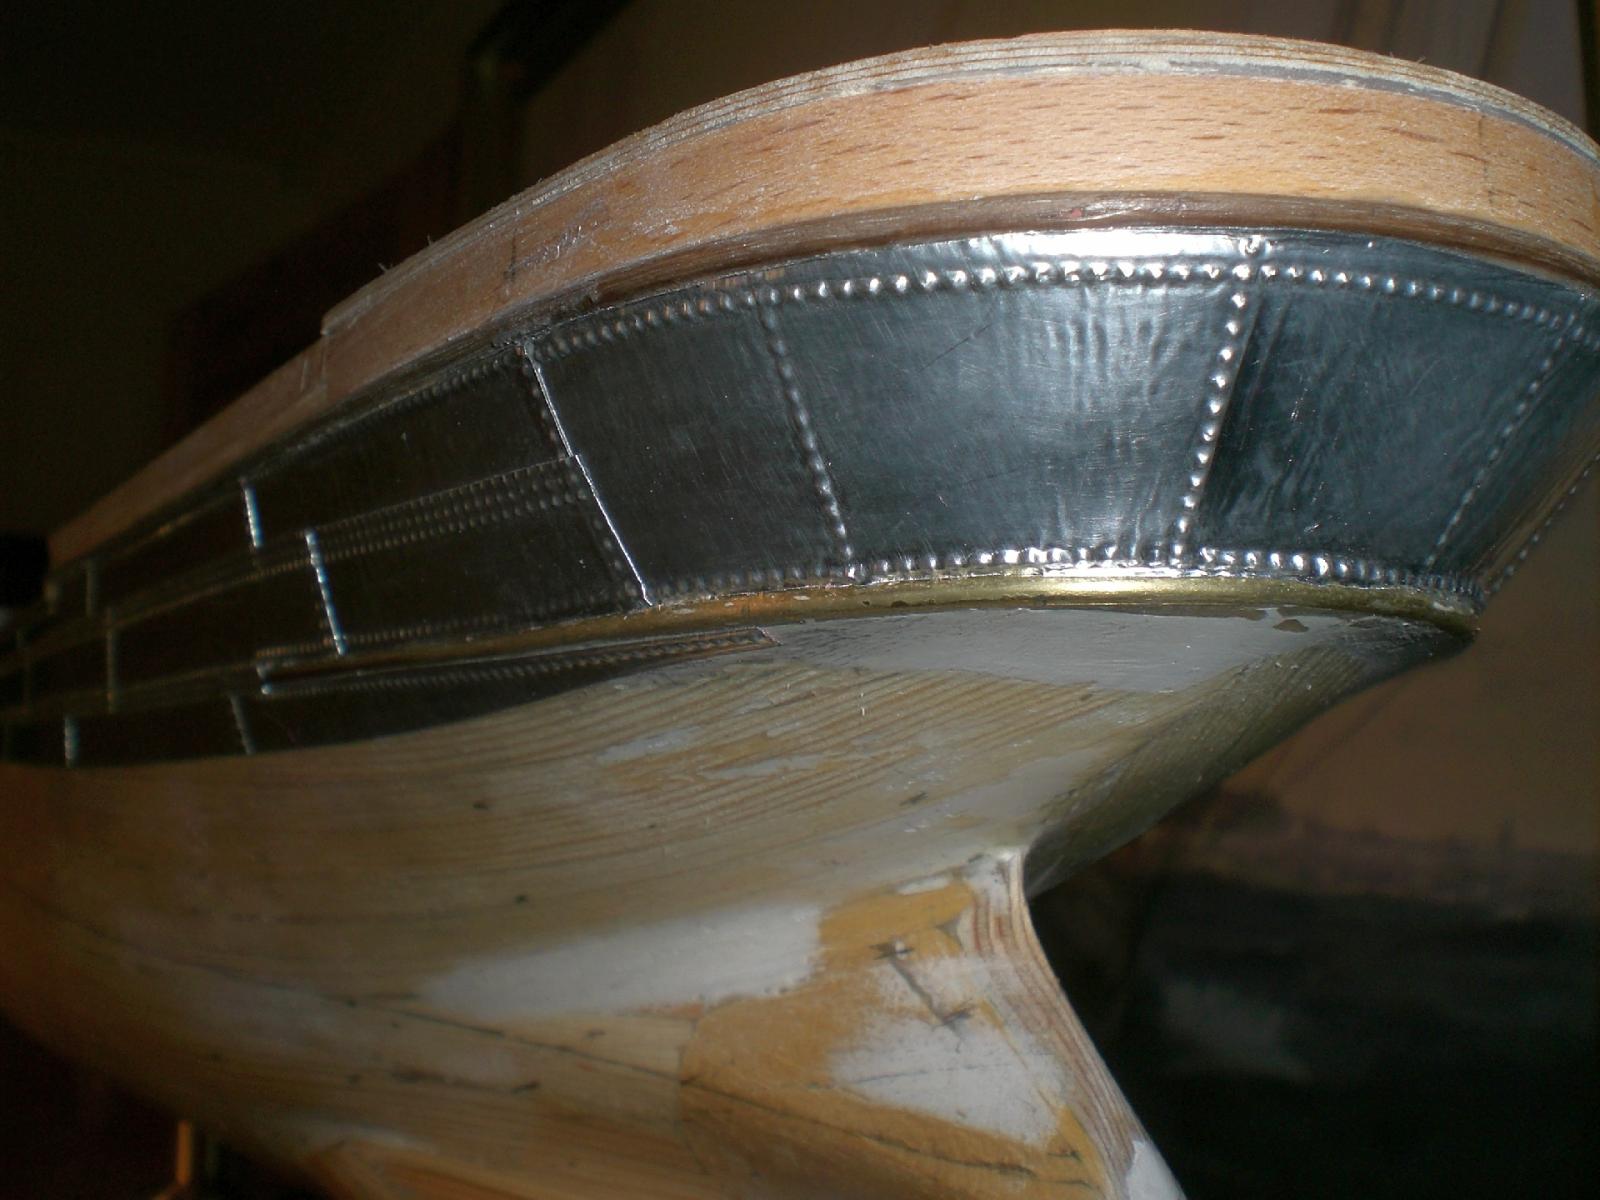
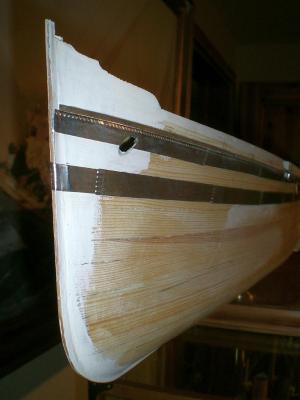
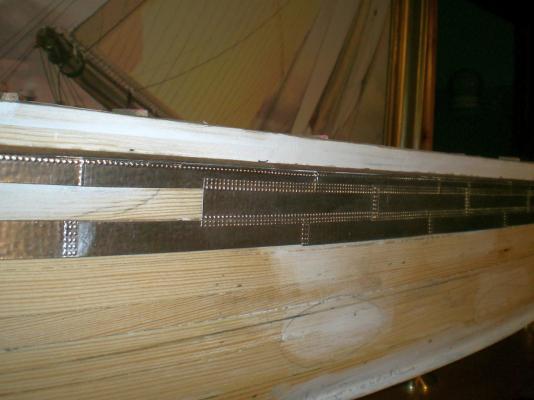
Thank you for your nice comment David, and yes of course the rivets are a bit oversized at scale 1:144, but as I wanted them to be this way, I`m not worried at all. The Skin appeal will be same as my other plated "riveted" models. With the KWdG I`m quite pleased with the look. The riveting is well visible, even after the paint is on and in appr. 1 m distance. The port side is now plated down to the waterline. Nils
- 2,625 replies
-
- 5
-
-
- kaiser wilhelm der grosse
- passenger steamer
- (and 1 more)
-
Many thanks for your Kind appreciations Pete and Nenad, knowing that the rivets may be a bit large in scale, I simply like my model to show them this way. Trust it does`nt look too much out of the way after all.... Nils
- 2,625 replies
-
- 5
-
-
- kaiser wilhelm der grosse
- passenger steamer
- (and 1 more)
-
Thanks for your nice comment Patrick, Nils
- 2,625 replies
-
- 2
-
-
- kaiser wilhelm der grosse
- passenger steamer
- (and 1 more)
-
Cutter Cheerful 1806 by rafine - FINISHED
Mirabell61 replied to rafine's topic in - Build logs for subjects built 1801 - 1850
Bob, planking and treenailing, what wonderful and beautiful work, I love it... Nils- 525 replies
-
- 3
-
-
- cheerful
- Syren Ship Model Company
- (and 1 more)
-
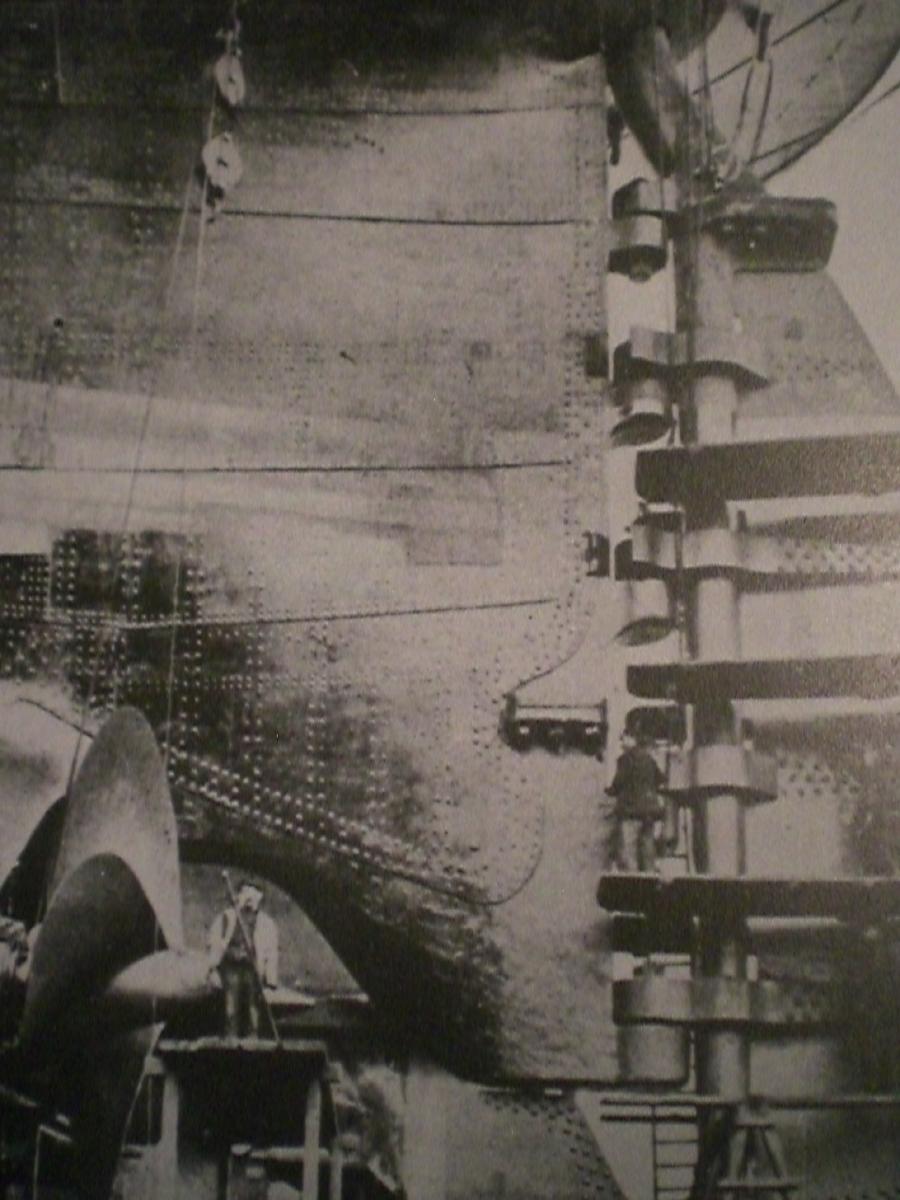
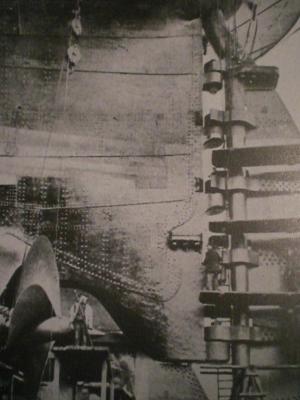
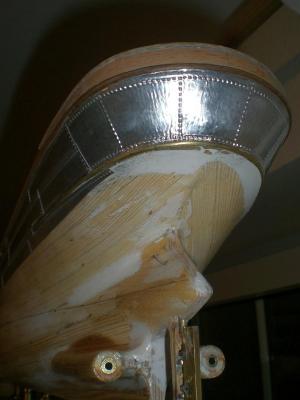
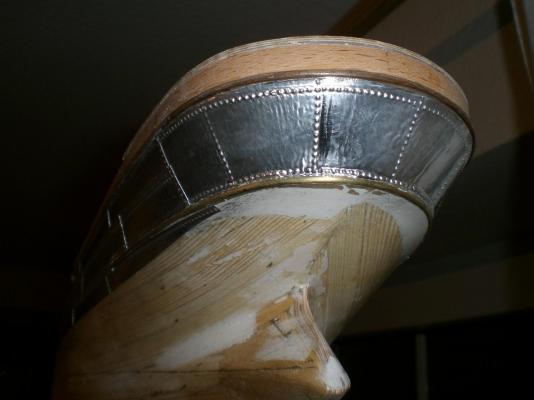
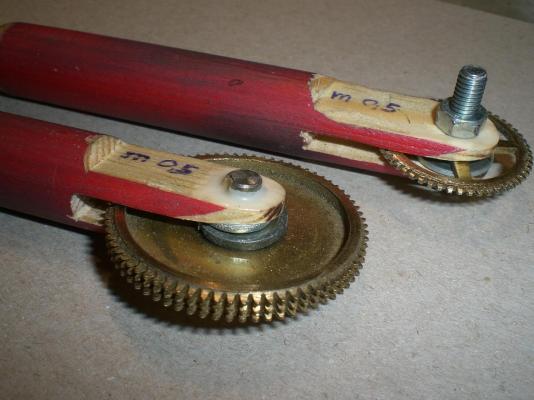
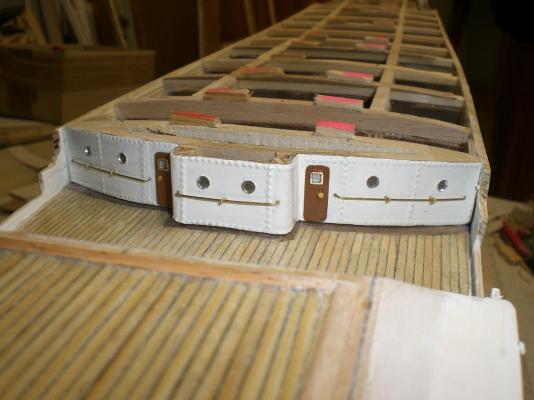
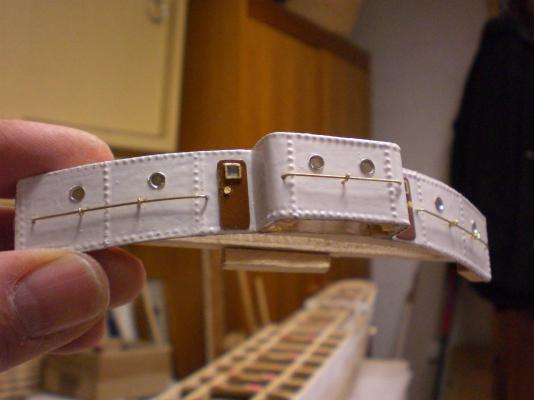
Build log part 21 Update : begin of metal-plating..... after determining the positions and hights of the horizontal belts with the dummy tapes, the metal plating can begin. I chose the technique with leaving a gap between first and third belt, and then mounting the second overlapping the other two in the riveting areas. The downward next shall be done likewise..... The rivets are ponced with modul 0,5 watchmakers toothwheel (single-row and tripple-row) Nils Unfortunately I do`nt have a close up pic of the KWdG riveting, but this is showing a close up of the "Imperator`s" plating single- and tripple row ponce toothwheels, modul 0,5 larger plates around the stern... shows the gap between first and third belt for withstanding the high stresses in length direction, here the second belt`s edges bears riveting fields on top and bottom. The middle section of that belt will take the portholes afterwards the hull rails are not overplated

- 2,625 replies
-
- 34
-
-
- kaiser wilhelm der grosse
- passenger steamer
- (and 1 more)
-
Many thanks for your Input to Dan, Druxey and Bob, I`ll be haveing eyes open for better historic close up photos of the hull.... Perhaps Peter (Mr. Hollom) has a better Detail pic of the riveting, as he has built the wonderful 1:100 scale model for a museum Nils
- 2,625 replies
-
- 2
-
-
- kaiser wilhelm der grosse
- passenger steamer
- (and 1 more)
-
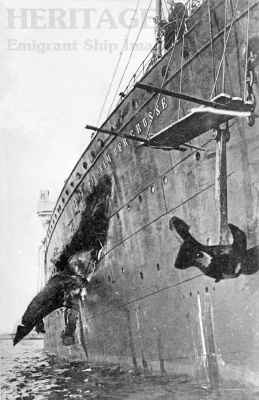
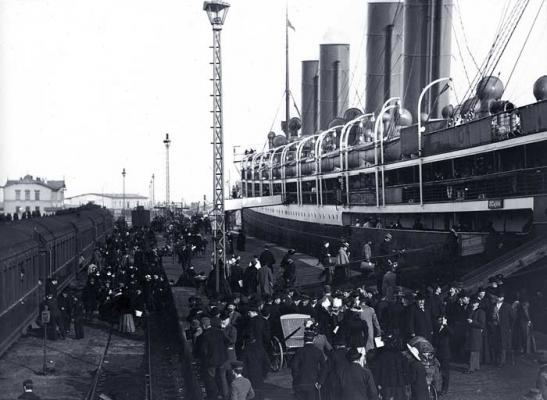
Thanks Dan, having those pics from the web as well, I was asking myself the same question with ref. to the time of build...(year 1897), perhaps with sunk rivet heads.... ? unfortunately I have no close ups. The two enclosed pic (when zoomed up on the Monitor) look like there were rivetheads. Perhaps some fellow builder would have Close up historical pics he or she would like to share with me... I made up my decision for showing rivet heads, like there can be seen with RMS Titanic, many years later Nils
- 2,625 replies
-
- 9
-
-
- kaiser wilhelm der grosse
- passenger steamer
- (and 1 more)
-
Sitzbank aus Eisen (Bench made of iron)
Mirabell61 replied to merchen's topic in Metal Work, Soldering and Metal Fittings
Hi Merchen, aus welchem Material sind die Bank-teile ausgesägt ?, und wie wurden die Sägekanten so schön abgerundet ? Transl. from what material did you cut the bench parts? , and how did you round off the saw.edges so nicely ? Nils -
thanks Michael, your comment is much appreciated, I hope the plating will work out as intended... Nils
- 2,625 replies
-
- 2
-
-
- kaiser wilhelm der grosse
- passenger steamer
- (and 1 more)
-
Good looking gunports Martin, Looks like you`ve found what you were after.... Nils
- 467 replies
-
- 1
-
-
- fly
- victory models
- (and 1 more)
-
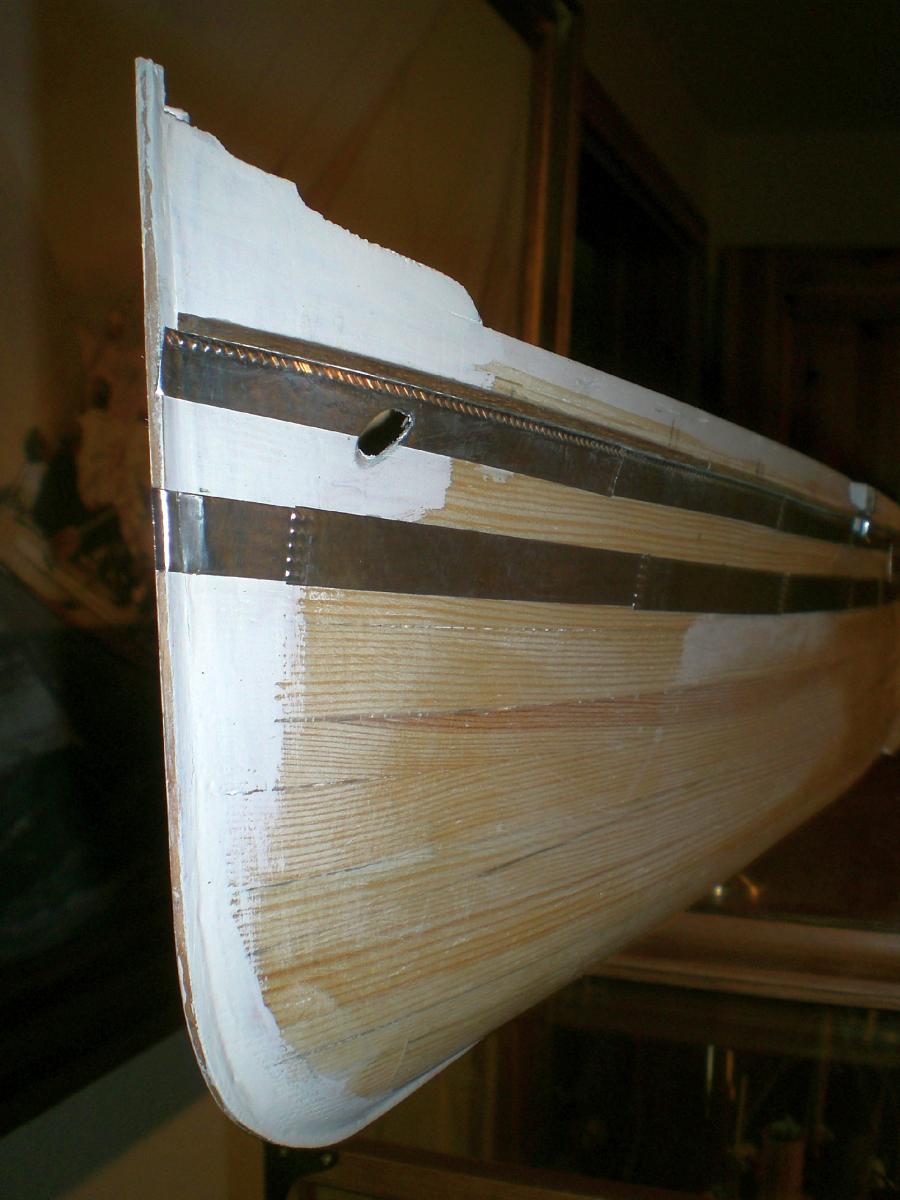
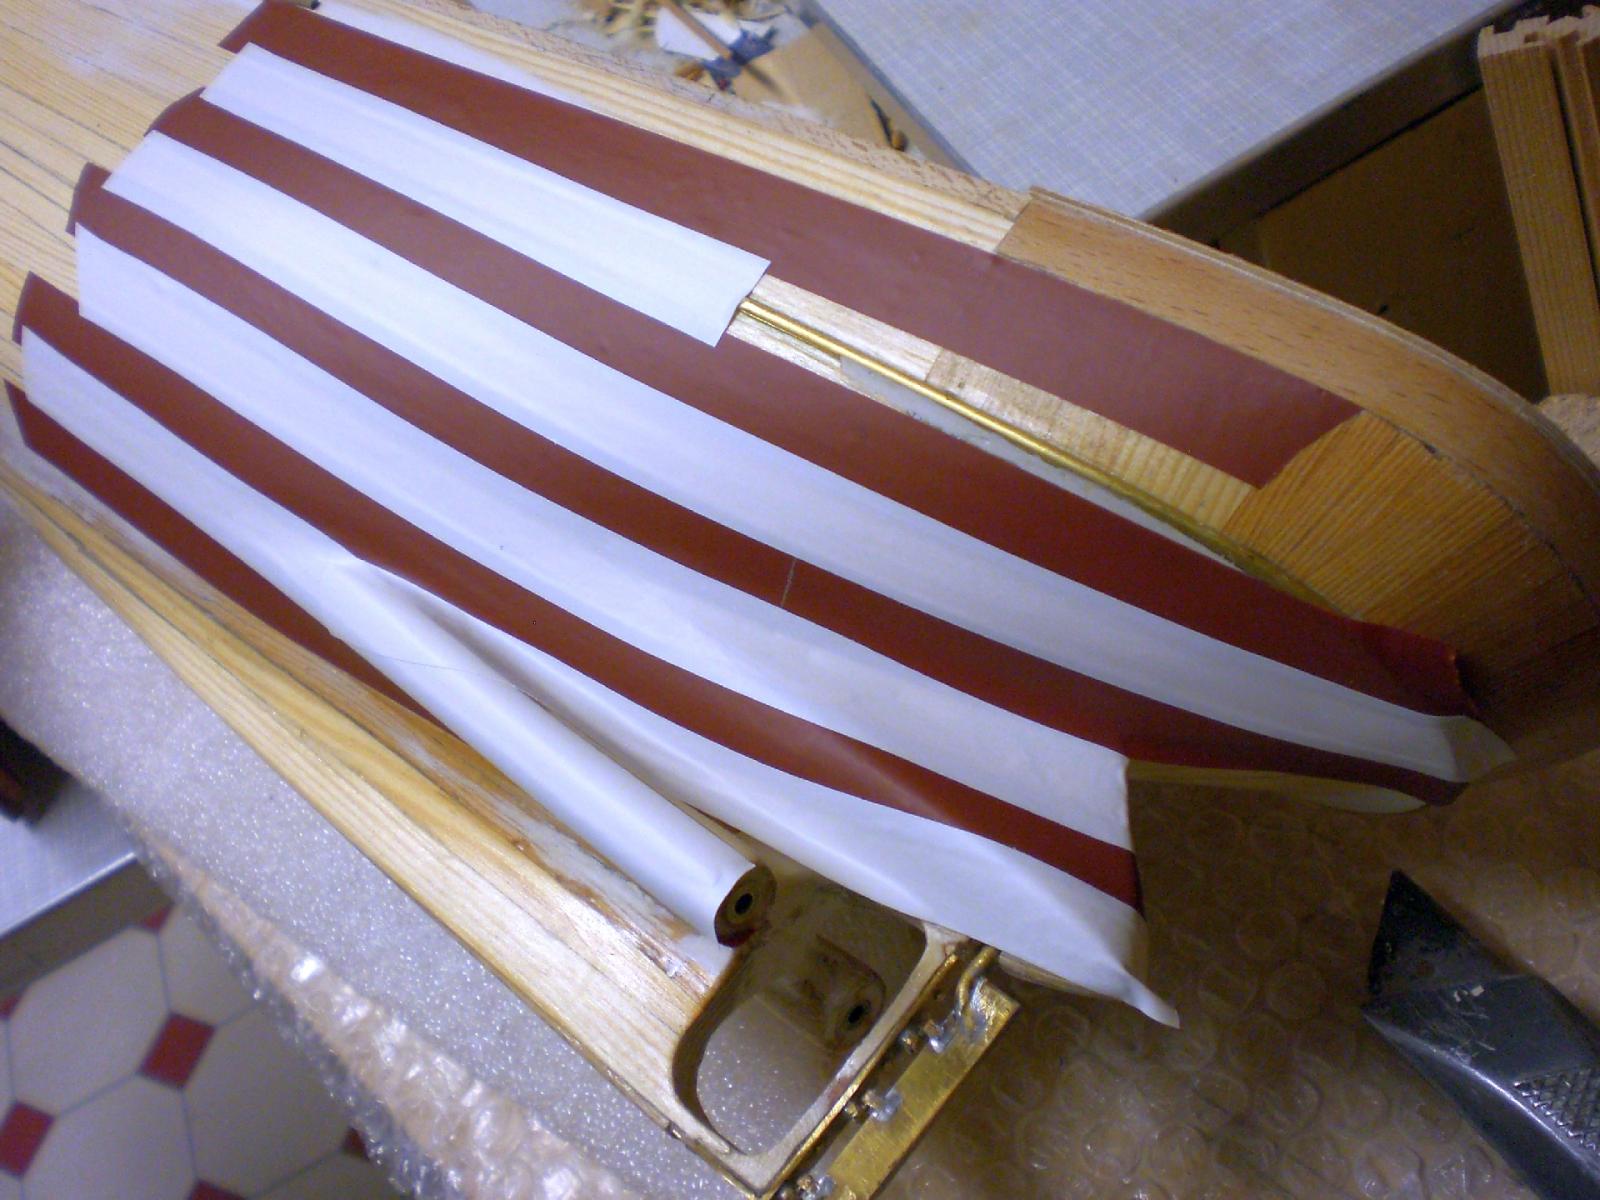
Many thanks Oystein, it`s nice to know a fellow mate watching from Norway, I`m glad you like the build logs so far...., and you are very wellcome to drop in whenever you like. For the KWdG I am working at the plating pattern in the moment, by by doing trials for the "belts" geometry with dummy tape. Here a good compromise must be found for getting the horizontal portholes alignment levels in scale ....., if possible in the middle of the "belts". Also it must be avoided to half-hit a frame or bulkhead when drilling the holes here one of the first trials with 2.colored plastic electricer`s isolation tape (easy to remove before plating) These trials must be done upfront, in order to get a good optic look with the plating afterwards, as the metal plating with resembled riveting ca`nt be ripped off several times. Also my roll of aluminium foil is slowly coming to an end and does not allow much scrap for the bin... Nils these stripes are 15 mm wide, shall probably reduce to 13 mm width, the trial shall show... the overlapping of the white "coverbelt" is appr. 1 - 1,5 mm


- 2,625 replies
-
- 11
-
-
- kaiser wilhelm der grosse
- passenger steamer
- (and 1 more)
-
there have been so many nice and appreciated comments the last days, thanks to Bob, Grant, Patrick, Pete, and all the "likes" Bob and Grant, thanks very much, I`m glad that you like the Progress so far... Patrick, I have`nt made up my mind yet about painting the handrails, chemical blackening is not considered, but maybe painted brown Pete, trust and hope you had a nice time sailing. I always enjoyed sailing as well, but I sold my boat several year ago, Thanks for dropping in, you`re always welcome Nils
- 2,625 replies
-
- 5
-
-
- kaiser wilhelm der grosse
- passenger steamer
- (and 1 more)
-
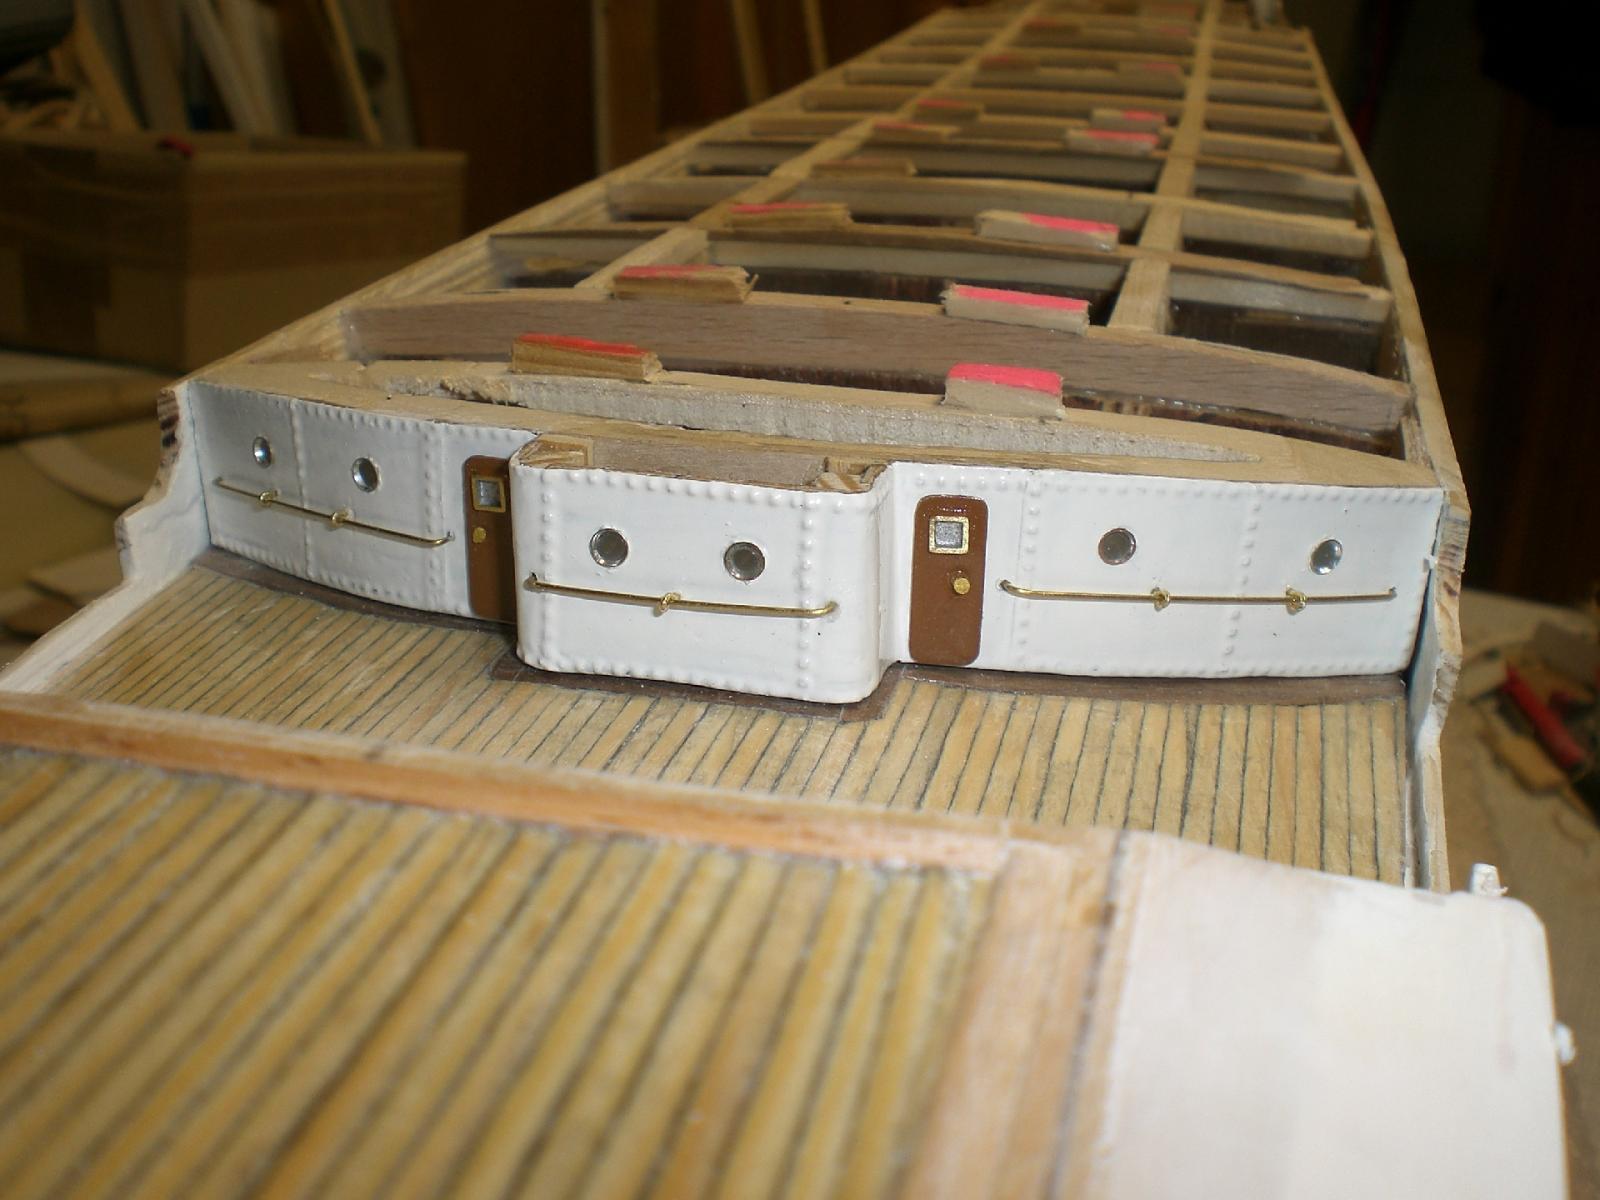
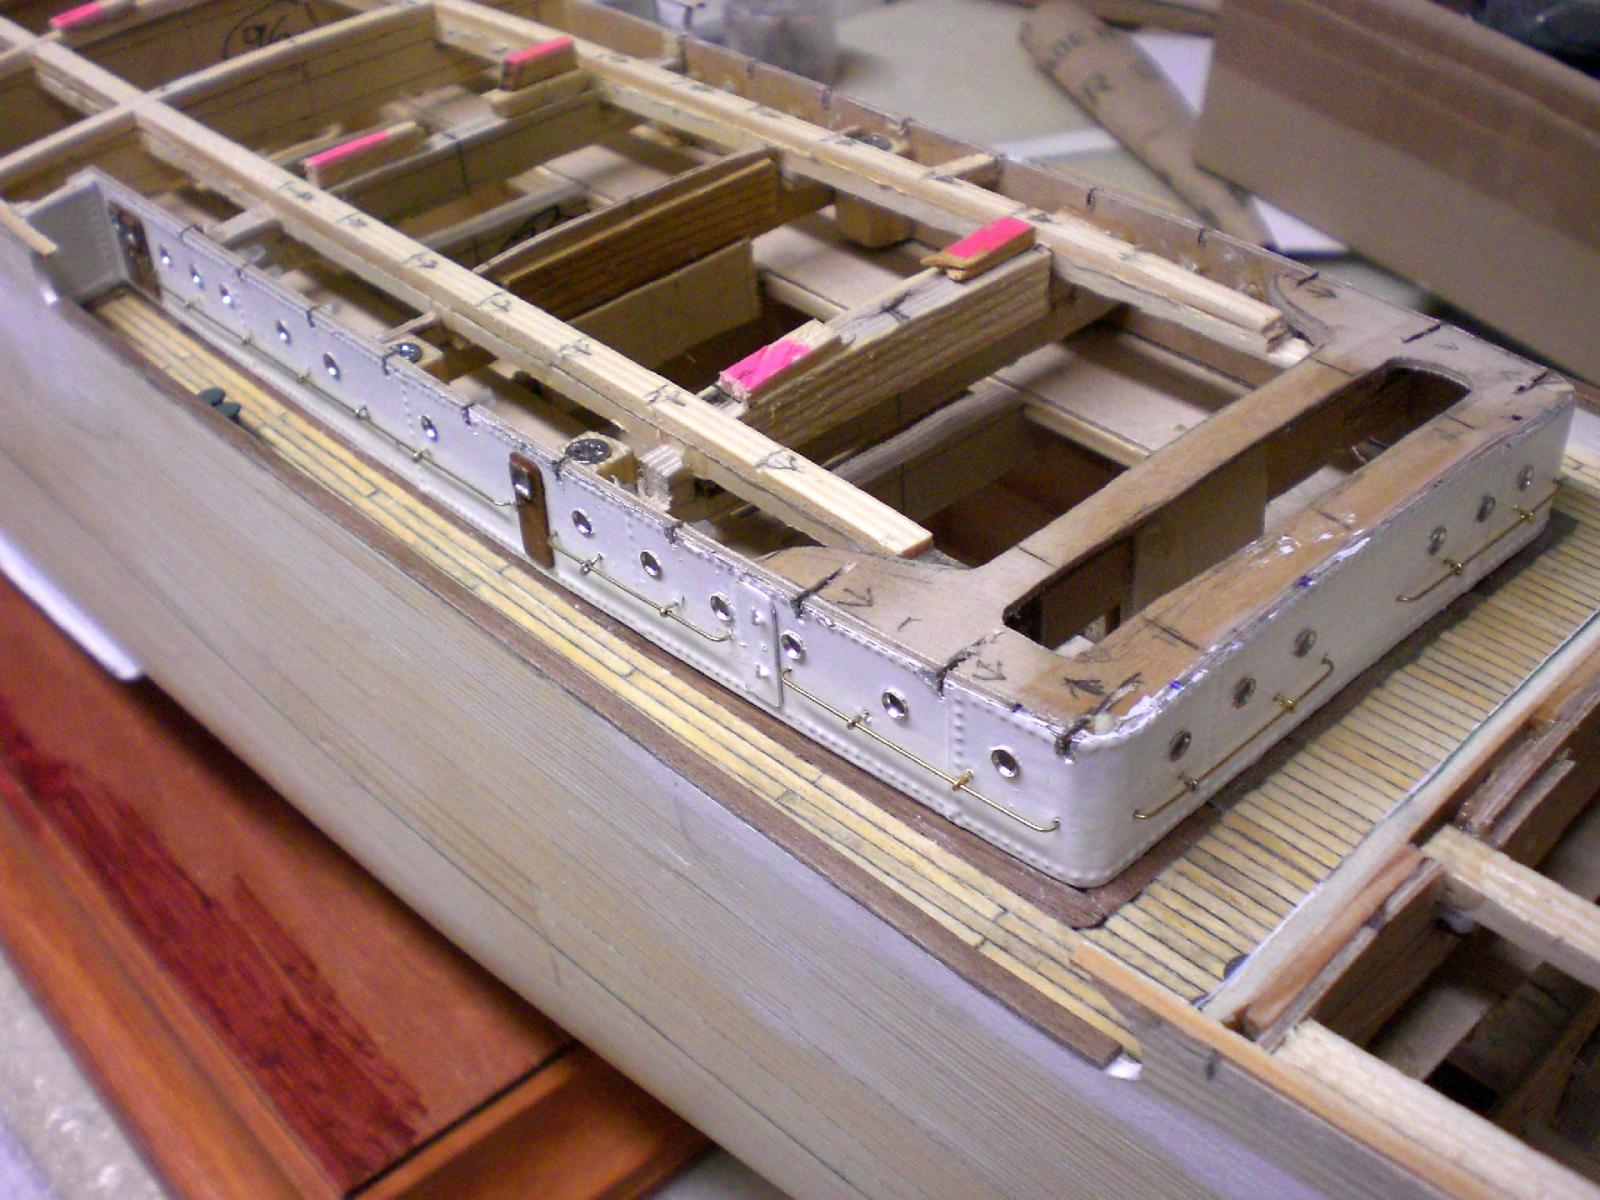
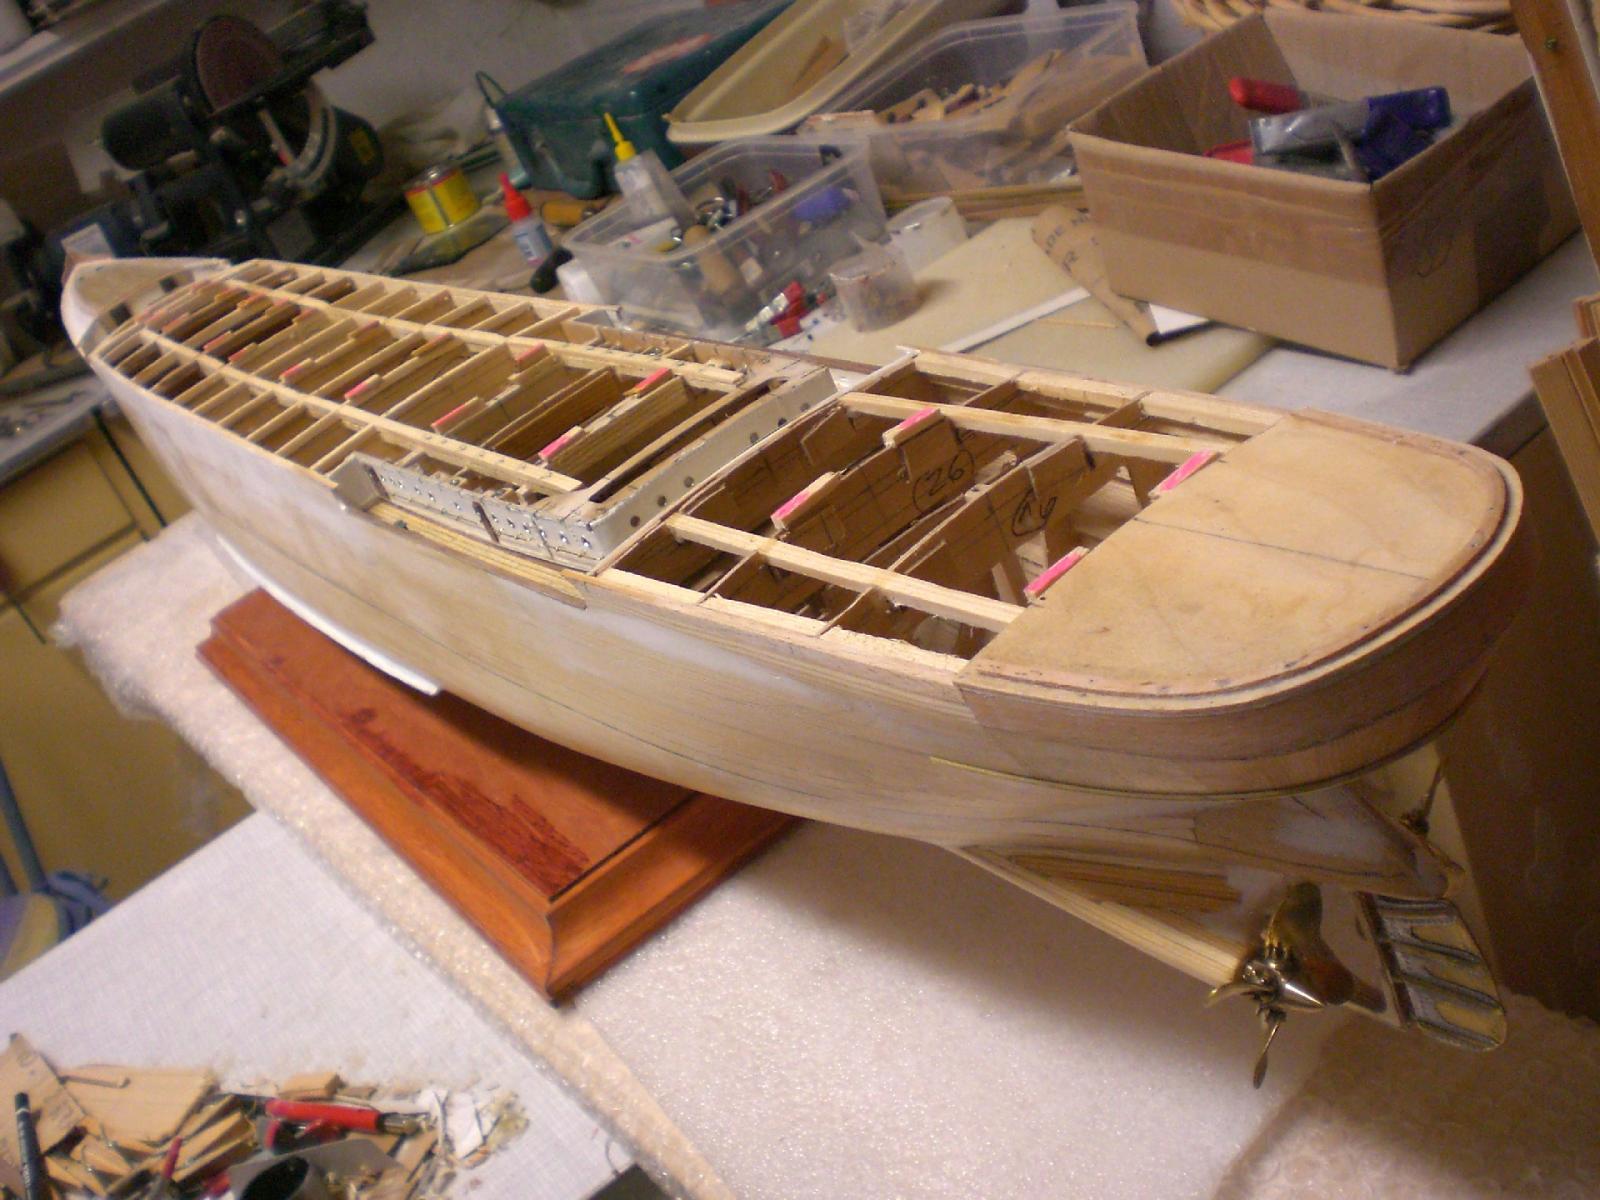
Many thanks for your appreciation Mick, it wo`nt take long any more with the "skin" ...... Here is a little update, the front of the lower deck housing, and the top small bulwark at the bow Nils this complete rounded section fits in and closes the front of the lower deck housing The handrails are from 0,5mm brass wire the little red chocks (removed later on) are only for precise positioning and aligning the sides of the promenade deck for smooth transitions I preferably use 2K polyester filler this deck housing is held down and in place by 4 screws Unfortunately the surface of the stands upper plate carried away a bad stain failure, I`ll have to grind the whole surface over, or glue / iron a sheet of veneer on it, but that will wait untill all other is done the last aft part of the poop is covered by ply, with a coaming rail to surround the deck planking later on. The step at the edge is to take up the L-profile where the railing will be soldered against. I intend to do the entire promenade deck edge to the sides in this way


- 2,625 replies
-
- 24
-
-
- kaiser wilhelm der grosse
- passenger steamer
- (and 1 more)
-
Igor, unbelieveable !, how did you fix the crack,... did you go to a "Car-Glass" shop ? Nils
-
what a pitty Igor, can imagine what you felt...but the saying says "no risk no fun"... was that the end of your beautiful Flacon I lked so much,..... do you have another suitable one for the next Trial, and resin with less hardener? Nils
-
Stunning work Igor, hope all goes well when the Magic Moment Comes (glueing down the hull layers in the flacon and hoisting the mast with the pre-rigged sails). Would love to look over your shoulder that Moment..... Nils
-
Very nice Progress Mike, clean accurate work on deck-Planks as on whole of ship... Nils
-
A lovely model Patrick, guess you can be proud that you built and shaped her exactly as you had in mind before your eyes, the Moment you began the first sequences of this Beauty. well done !! Nils