


DocBlake
-
Posts
1,811 -
Joined
-
Last visited
Content Type
Profiles
Forums
Gallery
Events
Posts posted by DocBlake
-
-
-
I planked the deck on my AVS with Zap-A-Gap medium. I made a mistake on one plank and had to remove and replace it. I had to move heaven and earth to get the plank out! In the end, it came out in multiple small pieces, pried out with a #11 blade. I suspect the unless the chemistry of the bond changes over a few decades, the bond with CA, if applied correctly, will hold.
Dave
-
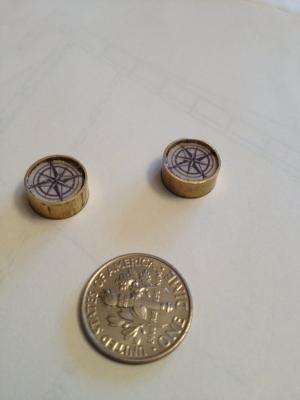
I finished up the compasses. I cut off two lengths of brass tubing and two lengths of wood dowel which were about 1/16 shorter than the brass. I Zap-A-Gapped the dowel inside the tubing. I then found some compass rose clipart and reduced it to the appropriate size, printed two copies and cut out the compass faces. These were glued to the wood dowel with Weldbond. I then filled the space from the cpompass face to the top of the dowel with Weldbond. When it dried, it looked like the glass cover on a compass. I may mount the compasses in shallow holes drilled into pieces of rosewood to simulate a wooden case.
-
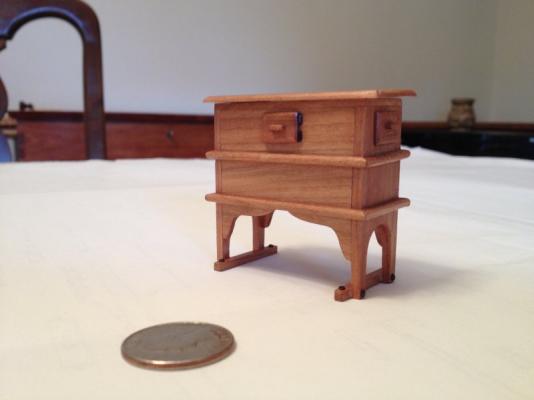
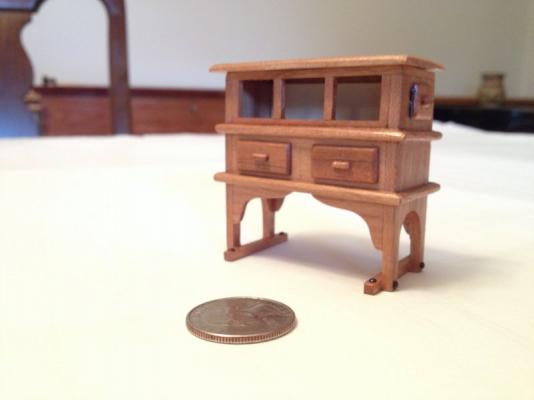
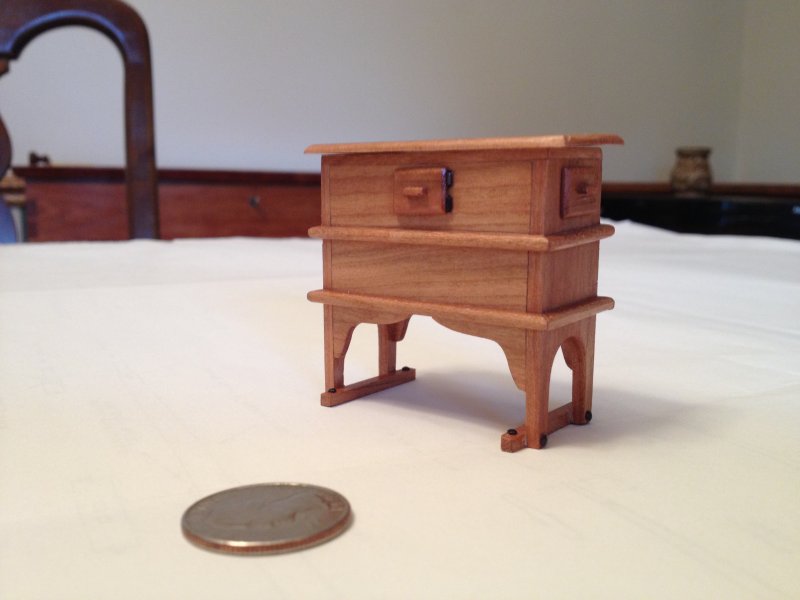
Working on the binnacle. The compasses and lantern aren't done yet. They will sit in their compartment which is lined in holly. There will be an acetate window and a brass chimney with a conical top. The binnacle is cherry.
Dave
- mtaylor, harvey1847, AntonyUK and 5 others
-
 8
8
-
I had the same problem with some bulkheads not approaching the bearding line. The best solution is to add shims to the lower part of the bulkhead to bring it to the bearding line. Shimming the deck is tricky. Using shims on the lower part of the bulkhead is relatively easy and the fairing process takes care of any irregularities.
Dave
-
The basic boat is the same, but there have been some minor revisions. Some of the fittings are different, the lower deck is much larger etc.
Dave
-
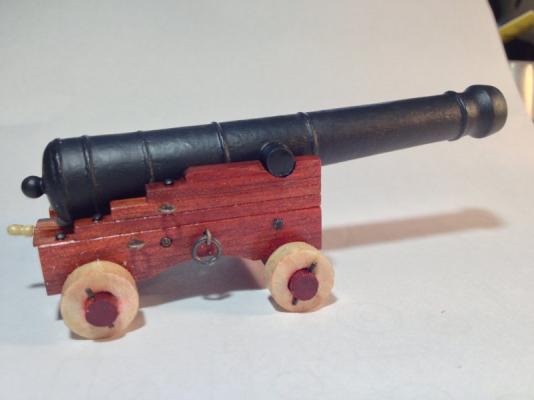
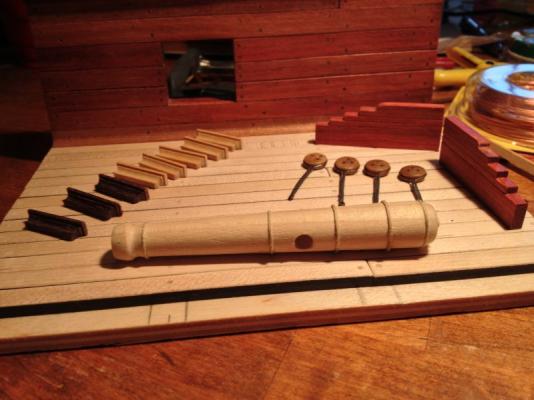
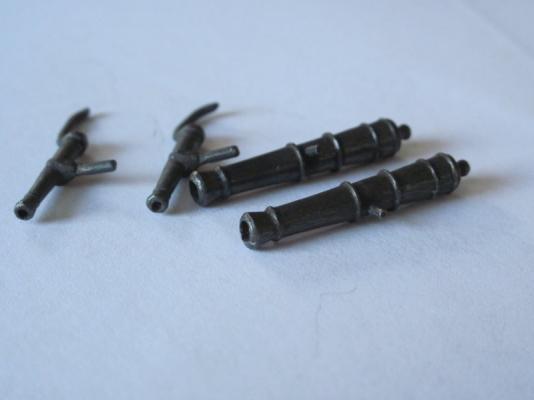
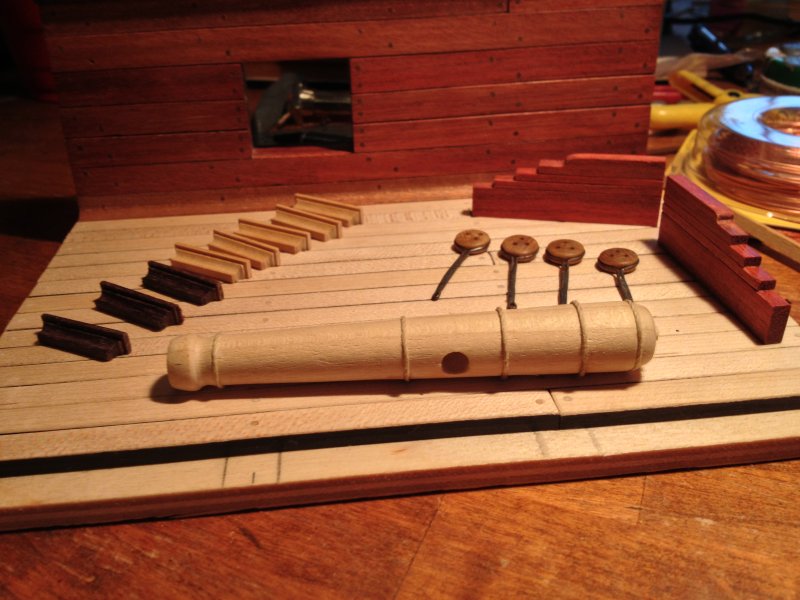
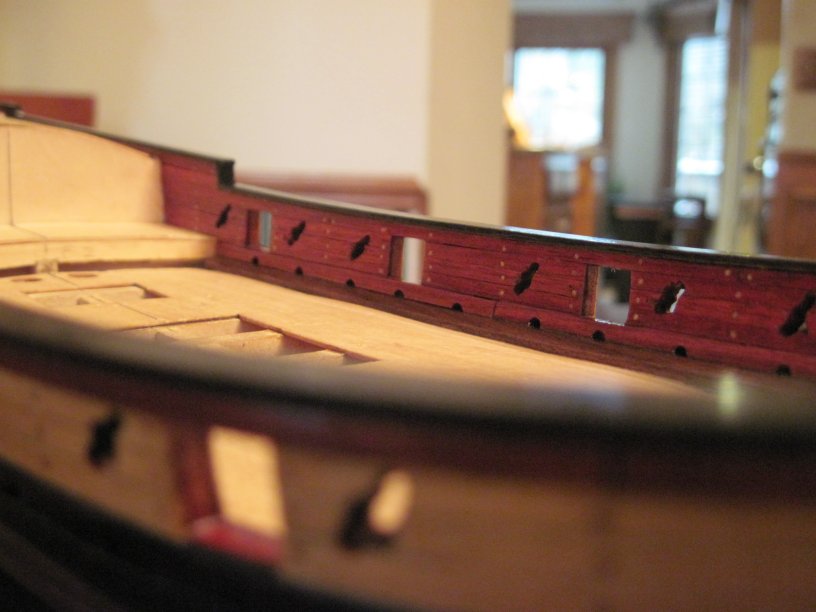
 I finished the cannon. Not rigged and the cap square is not installed. i turned two barrels. I'm not sure which one I like better. I added the boarding steps and the channel. The deadeyes and chain plates are just lying in place. final installation after applying finish
Dave
-
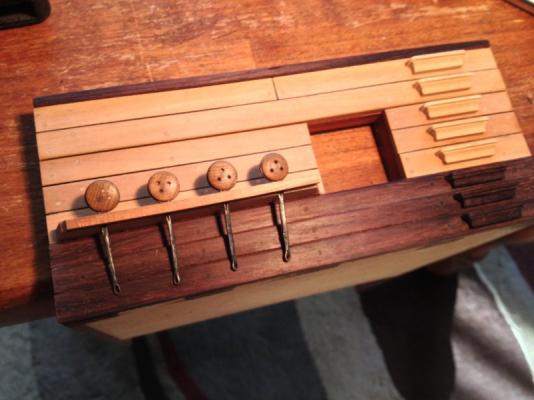
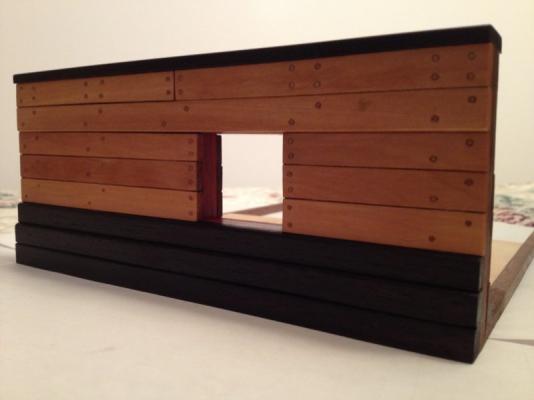
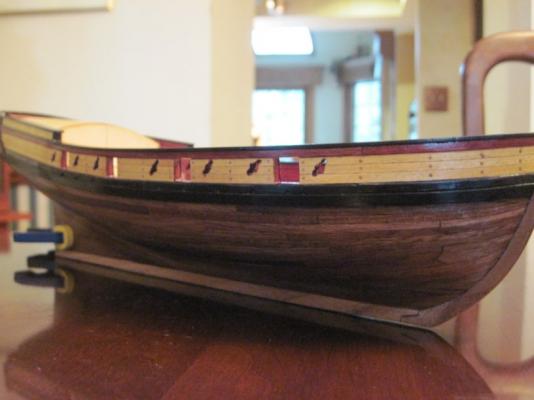
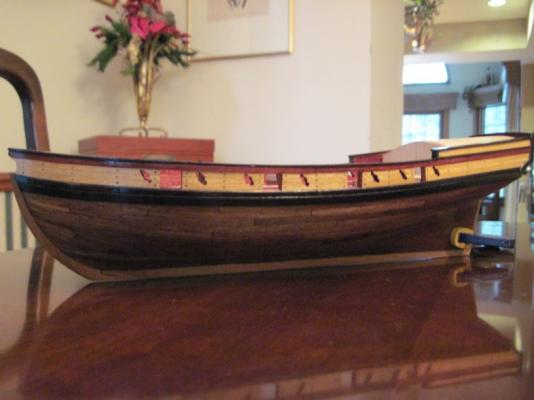
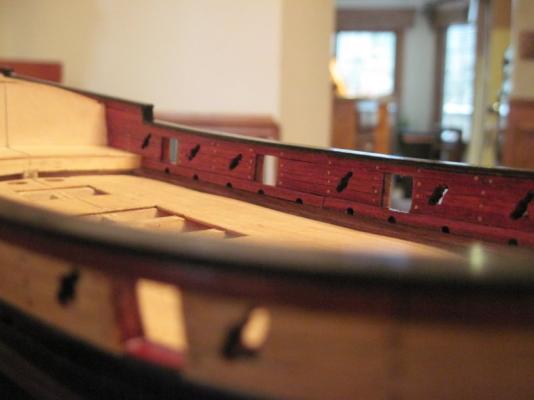
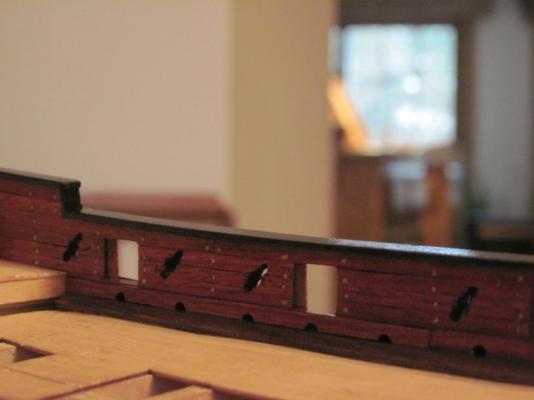
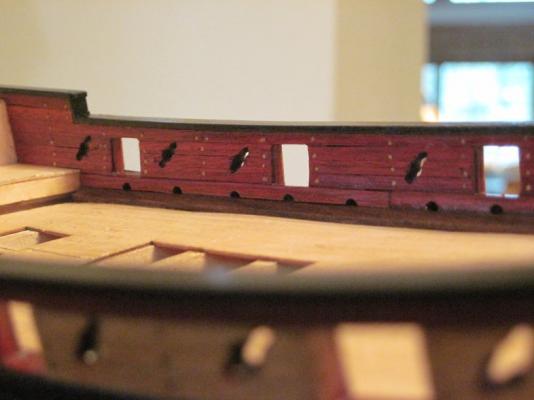
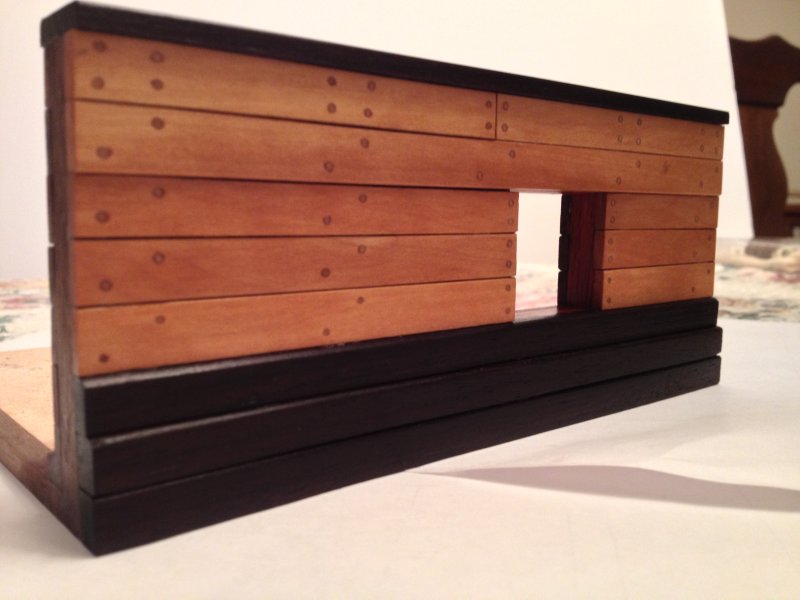
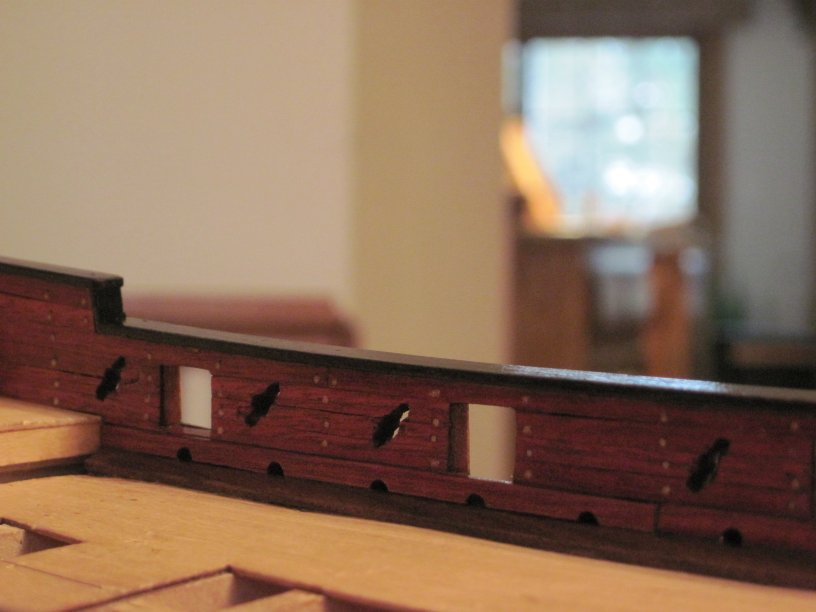
I'm beginning a build of the battle station posted on the NRG's website. I plan several modifications to the original, andI have increased the scale to 1/2" = 1". I started by cutting out the base, as well as some walnut and bloodwood for the bulwark frames
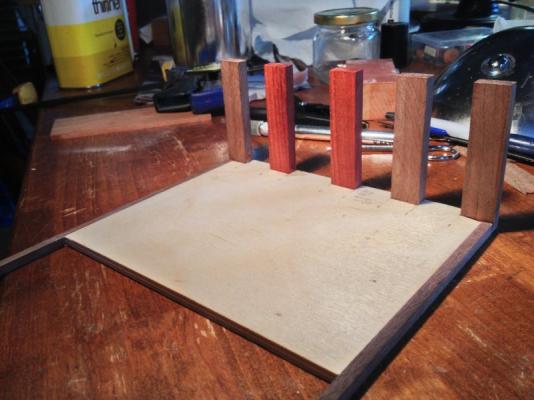
I then dframed in the gunport with bloodwood.
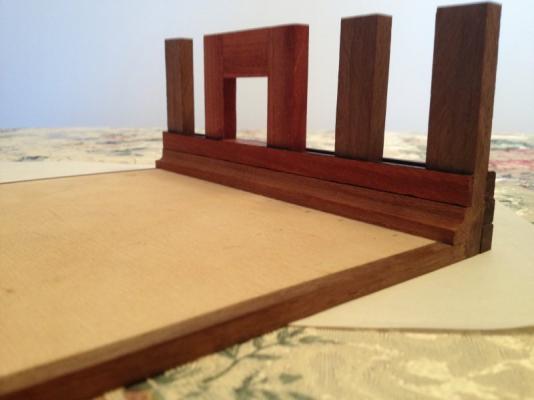
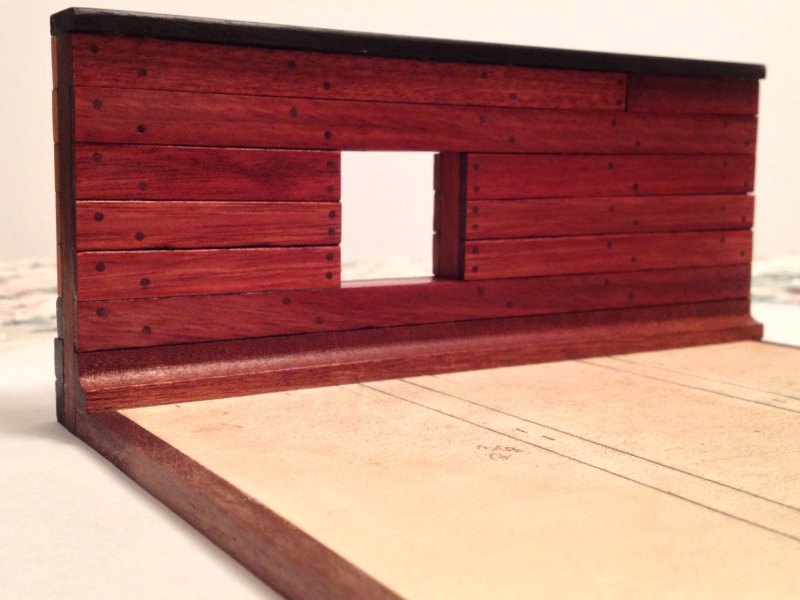
Next came a mahogany waterway. The photo shows it shaped, but not yet cut to size or installed.
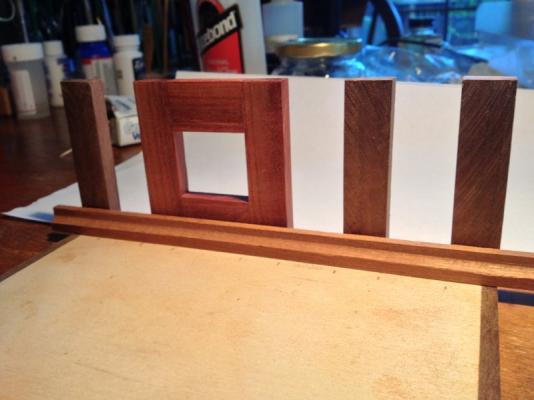
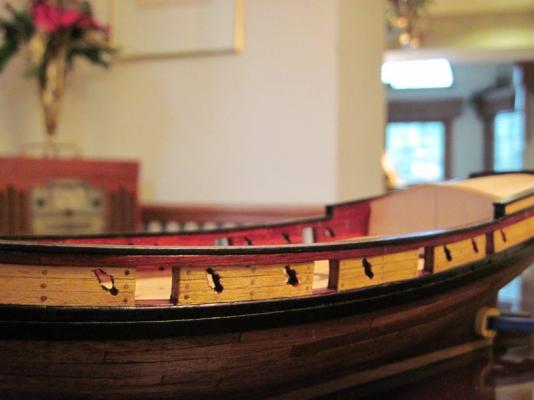
I then planked the outside using rosewood for the wale, black strake and rail and boxwood for the planking. The inner bulwark was planked in bloodwood.


I'm now working on details. The photo shows boarding stairs, deadeyes and cannon parts.
Dave
-
I'm beginning to rig my AVS. I have Bob Hunt's practicum and it was invaluable in the build process. I would be happy to help, adding my two cents worth if you have questions. I learned a lot the hard way!
Dave


- GuntherMT, egkb and zoly99sask
-
3
-
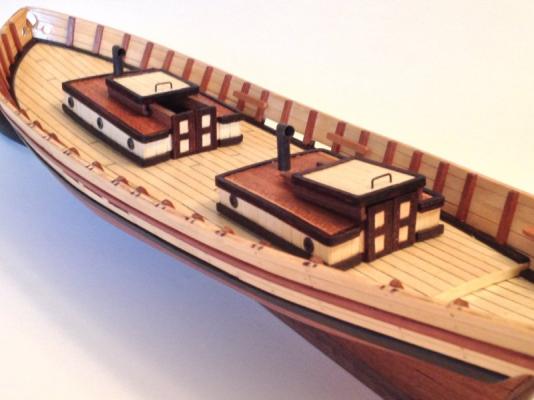
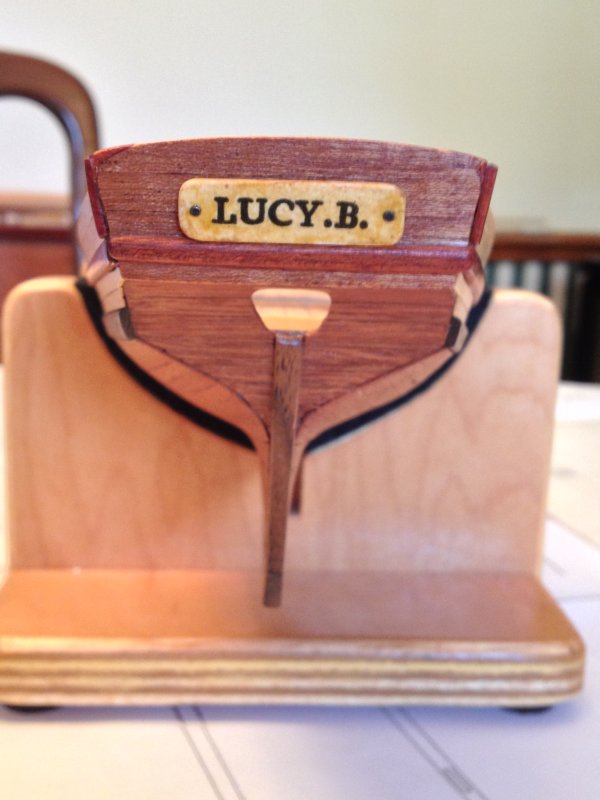
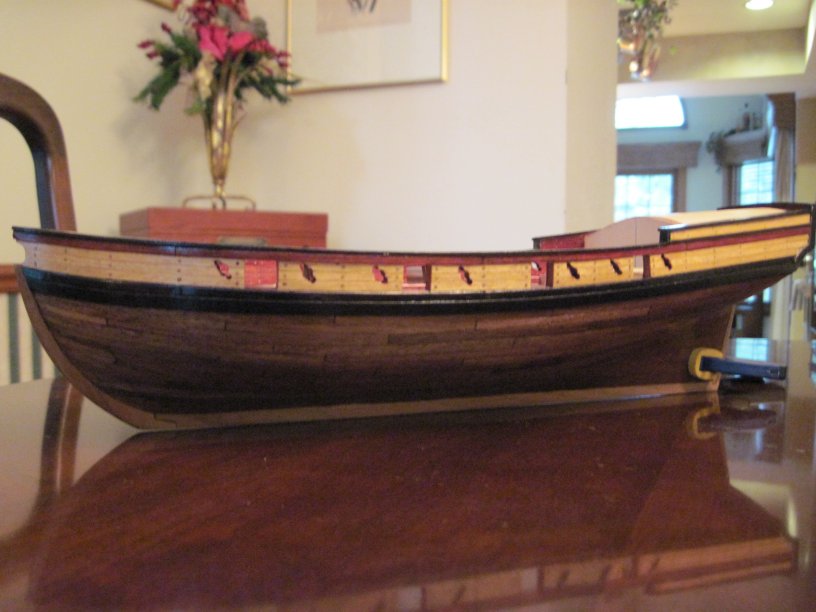
Since I'm changing a number of things on the model, I've decided to change her name from "Swift" to "Lucy.B.". I added a name plate to the transom. I found an appropriate period font (Essays 1743) and typed the name out in various sizes and printed out the results. I chose the best size, cut it out and glued it to a shaped piece of holly with Weldbond. The result was too starkly white! To tone down the color, I gave the plaque 2 coats of orange shellac, added two nailheads and glued the plaque to the transom. The result looks like a varnish finish, much more appropriate than stark white.

-
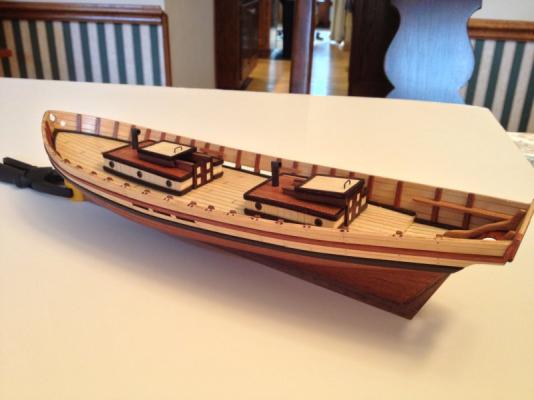
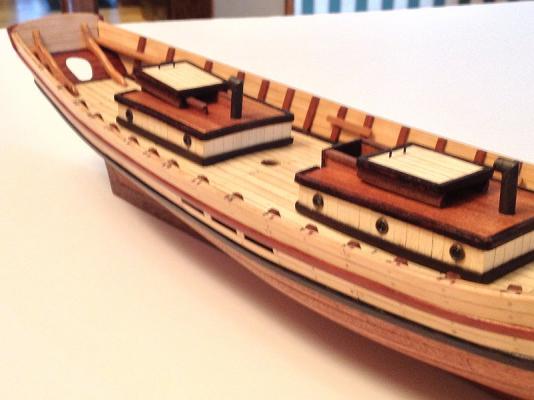
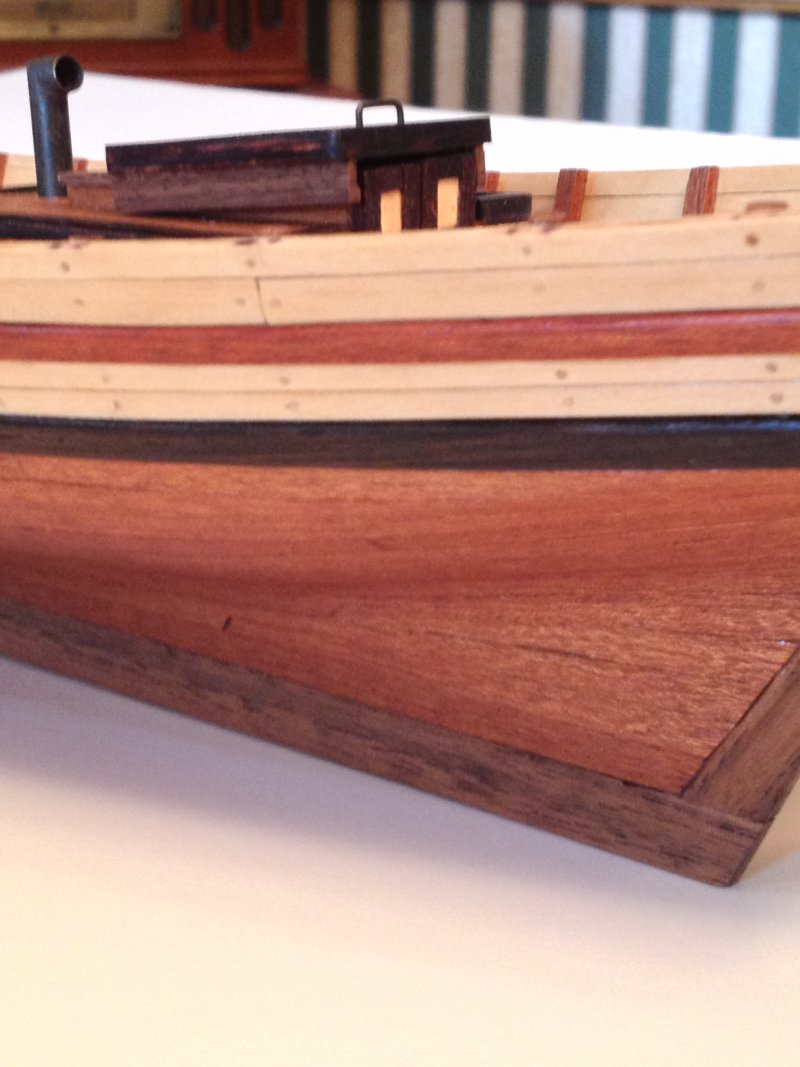
As a diversion while rigging my Armed Virginia Sloop, I started building AL's Swift. I switched out some of the wood: Boxwood planking above the wales, bloodwood trim, wenge wales, cherry and holly details. I like the contrasts in the wood. Progress so far in the photos.
Dave

- sygreen, GrandpaPhil and Foultide
-
3
-
-
One place I think CA glue works great is planking the hull, especially the second planking. I uses green label ZAP-A-GAP. It allows you to work quickly, because it dries quickly. But not so quickly that you can't adjust the planking a little if you need to. Some people worry about durability and holding power of CA 's in this application. If you glue to the first layer of planking, as well as to the adjacent plank's edge, there is no way that plank is coming off. I know, because I tried it! I pulled off some of the first layer of planking with the second when I tried to remove it.
Dave
-
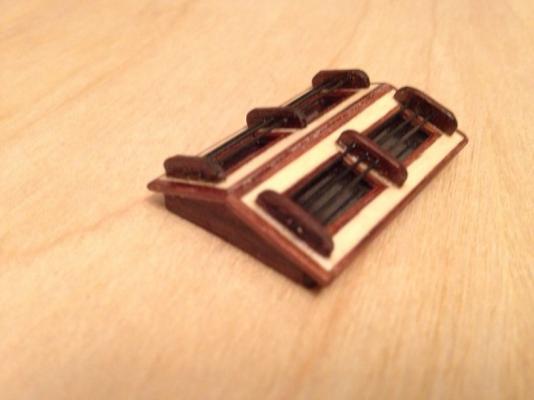
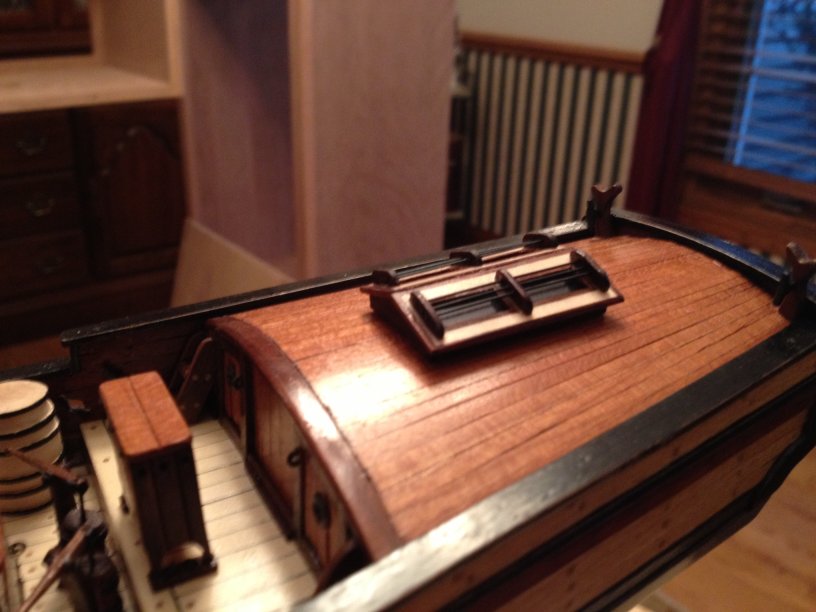
I don't have drawings of the skylight, but it was not tough to build. I started with a 1" X 1-1/2" piece of basswood (or whatever) that was 1/8" thick. This was the "frame" I built the skylight around. I added walnut planking to the sides, and made walnut gables for each end. You now have a house with no roof. Sand the sides and gables flat so the 2 roof panels can be glued to them. Paint the upper face of the wood block flat black. Then build the actual skylight panels. I used 1/16" basswood rectangles, sized to your frame. Carefully cut out areas on each panel where the "glass" will be. You now have a pair of window panes with 2 panes of glass each. I lined the inside and outside edges of these panes with 1/16" X 1/16" walnut. The glass itself is just acetate glued to the inside of the window panes. The trickiest part was building the protecting rod apparatus the guards the windows against accidental breakage. I fashioned the 6 walnut strips that support the rods. I then ganged then together using double sided tape so I could drill 3 hole through each that would line up perfectly. I used my Dremel drill press (a wise investment if you don't own one, and not expensive). Music wire, which is stiff, was blackened and used as the metal bars. I found it at my local Ace Hardware store, but you could use pins or needles, or even brass rod painted black. The bottom of the skylight was sanded to a curve to mach the curve of the poop deck and glued in place. Hope this helps. Contact me if you have any questions.
Dave
- mtbediz and mort stoll
-
2
-
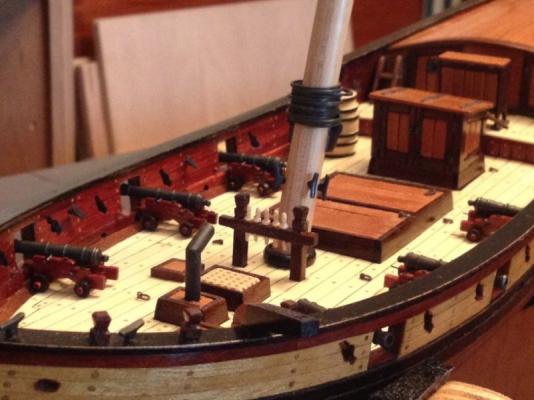
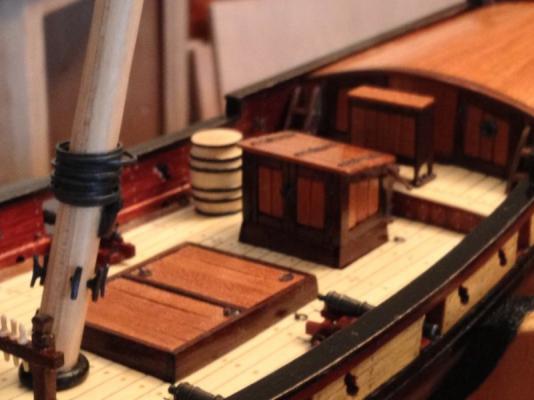
Currently building an AVS. Here is my progress so far. The cannons are just sitting on the deck. I'm working on the rigging right now. I even added a skylight to the cabin roof!
Dave


- jdbradford, mort stoll, Harvey and 9 others
-
12
-
Progress in my AVS build to date. I'm using wood, no paint. Cherry, blood wood, rosewood, yellow heart , walnut, holly, boxwood and African black wood. Next step is rigging the cannons.
Dave


-
I wanted to avoid painting my Britannia metal fittings. Black paint on the guns just didn't look realistic. If I used Blacken-It, a dark crust would form, which rubbed off with a paper towel, leaving a barely darkened piece of metal. What to do?
I started by soaking the parts in a 50:50 solution of muriatic acid and water for 10 minutes. This cleaned and I think etched the surface a bit. Then into Blacken-it, full strength, for 10 minutes after rinsing. I polished the pieces with paper towel and Q tips, and while darker, they weren't where I wanted them. The last step was to soak the parts for 10 minutes in "Brass Black" Metal Finish by Birchwood Casey. After cleanup with paper towels and Q tips, almost no finish came off and the parts were a dark gunmetal color. Perfect! In certain lighting they almost have a faint bronze cast to them Here is a photo
Dave
-
Thanks, all. I think it reasonable to include a small skylight on the cabin roof/poop deck for the AVS. Now I need to get to work designing and building it.
Dave
-
When were skylights introduced on wooden sailing ships? I'm asking because I'm working on a model of the Armed Virginia Sloop of 1768. It's a typical vessel and not a particular historic ship. The cabin roof is a large boring space. I'd like to add a small skylight. Is it historically appropriate?
Dave
-
I'm well into building the AVS (just finishing deck planking). My advice is to purchase Bob Hunt's practicum. The kit instructions are often vague or misleading. The practicum is extremely detailed and step-by-step. Also, you can access the practicum's forum for questions, and get a quick response from Mr. Hunt. Just my two cents, but I think the practicum is worth it.
Dave


Rigging cannons
in Discussion for a Ship's Deck Furniture, Guns, boats and other Fittings
Posted · Edited by DocBlake
I FINALLY finished rigging and installing the cannons! Way too much time spent. I used the frapped line technique I described here, based on Clay Feldman's "Lexington" rigging. I did make a big change, though. I thought the frapped line look straight and unnatural, so what I did was change the solid wooden core of the block assembly to two fake blocks with thin wire threaded through them. I could then bend the assembly to get a little "sag" in the frapped line. It looks more natural. Now, finally on to rigging!
Dave