Glen McGuire
-
Posts
1,985 -
Joined
-
Last visited
Content Type
Profiles
Forums
Gallery
Events
Everything posted by Glen McGuire
-
 Thank you to Grant, Mark, Pat, Keith, John, Steven, and Javelin for the well wishes. I needed them more than ever for this one! @John Fox III - The tissue wrap idea for the lines sounds brilliant. I wish I'd read your post before I dove head first into the insertion process. It might have saved me a lot of time and angst! @Javelin - I've actually added water texture both ways you describe. For my Independence, I put a fake hull in the bottle, then textured the water with acrylic paint all around the fake hull, leaving a nice open spot for the real hull after the fake one was removed. For my Adventure Galley, I had a split hull (like this project), so I needed a really wide bare spot on the water which meant I'd have to apply texture after the ship was in anyway, so I decided to do all the texturing after the hull was glued in place. I used bent q-tips and prongs to maneuver around the ship. It ended up being easier than I expected, so I don't think it will be too difficult for this one. On to the main event, man vs model. The insertion and final assembly process was a 15 round title fight that carried on throughout the weekend. The model put the man on the deck a few times and had him on the ropes thinking about throwing in the towel. Against better judgment, the man kept crawling back up and staggering his way back into the fight. After the fracas was over, it was a tense moment waiting for the judges, but in the end, the man squeaked out a narrow, split decision. Whoa! Following this post, I will do a couple with pictures and descriptions of the process. Actually, most of it went ok, but I made a historic mess of the rigging lines and that's where the real hours-long battle took place. I took 3 fairly short videos of the process (7-10 minutes each) if anyone wants a front row seat. https://www.youtube.com/watch?v=Pm8UEENgyj4 https://www.youtube.com/watch?v=yQ4hzk_aKkU https://www.youtube.com/watch?v=jF5HEW64x-c&t=2s
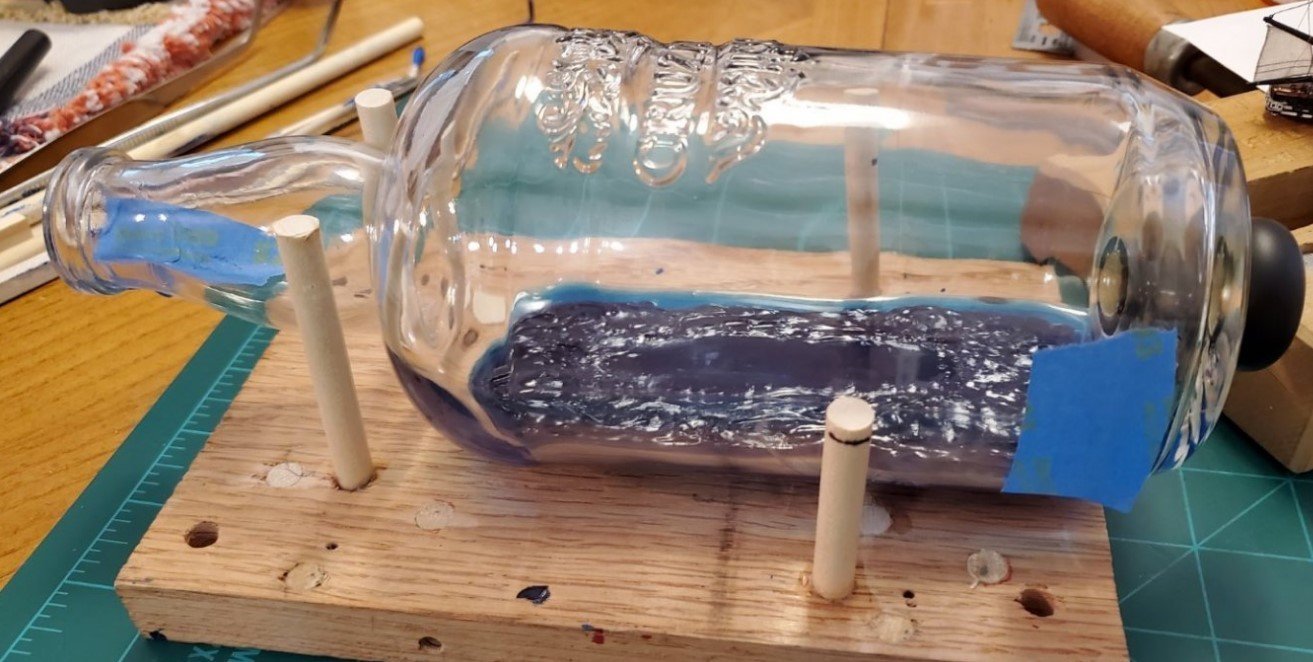
- 290 replies
-
- 9
-

-

-
- Quinquereme
- Finished
- (and 1 more)
-
Somehow I missed this whole project! Dang! But caught up on it now. Well done, Bob! Fantastic job on the entire fleet. And once again, I must say how much I like the clamshell name plates. So creative and a nice decorative touch!!
-
Ship modeling vs going to work. Hmmmmm. A difficult choice but I like your decision! 😃 Looks like a very interesting project. However, I'm concerned that I don't see Marvin the Martian overseeing your work again. Is he ok?
- 261 replies
-
- 6
-
-

-
- Victory Models
- Pegasus
- (and 3 more)
-
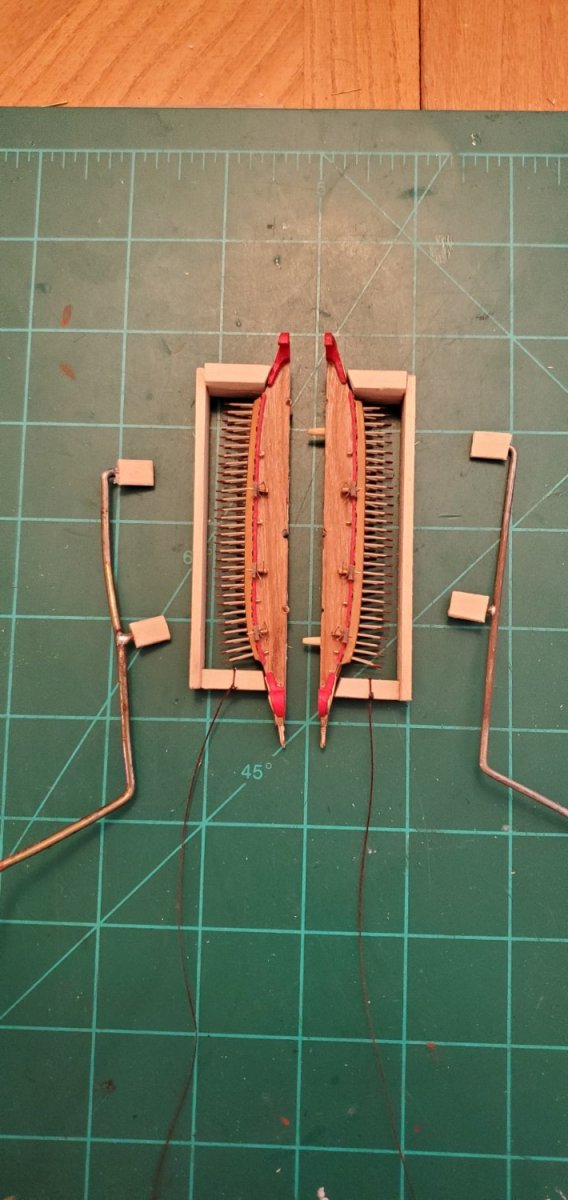
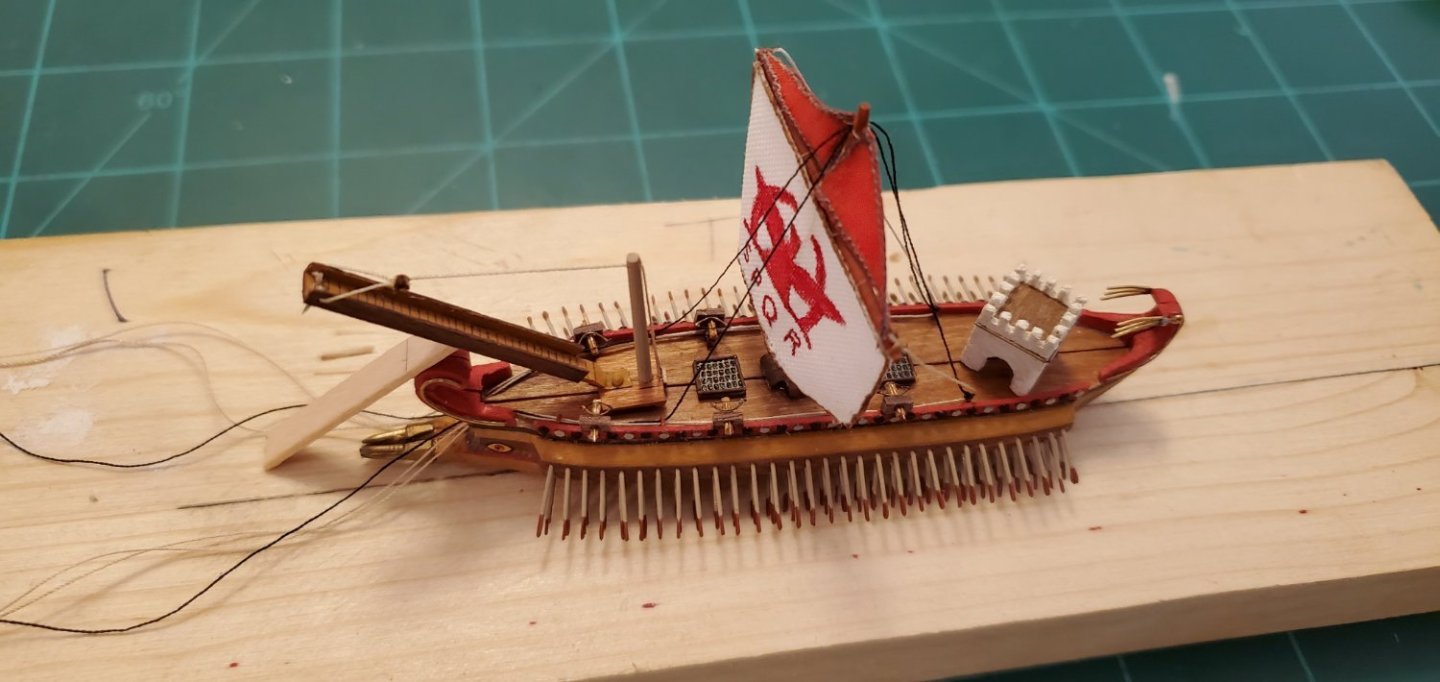
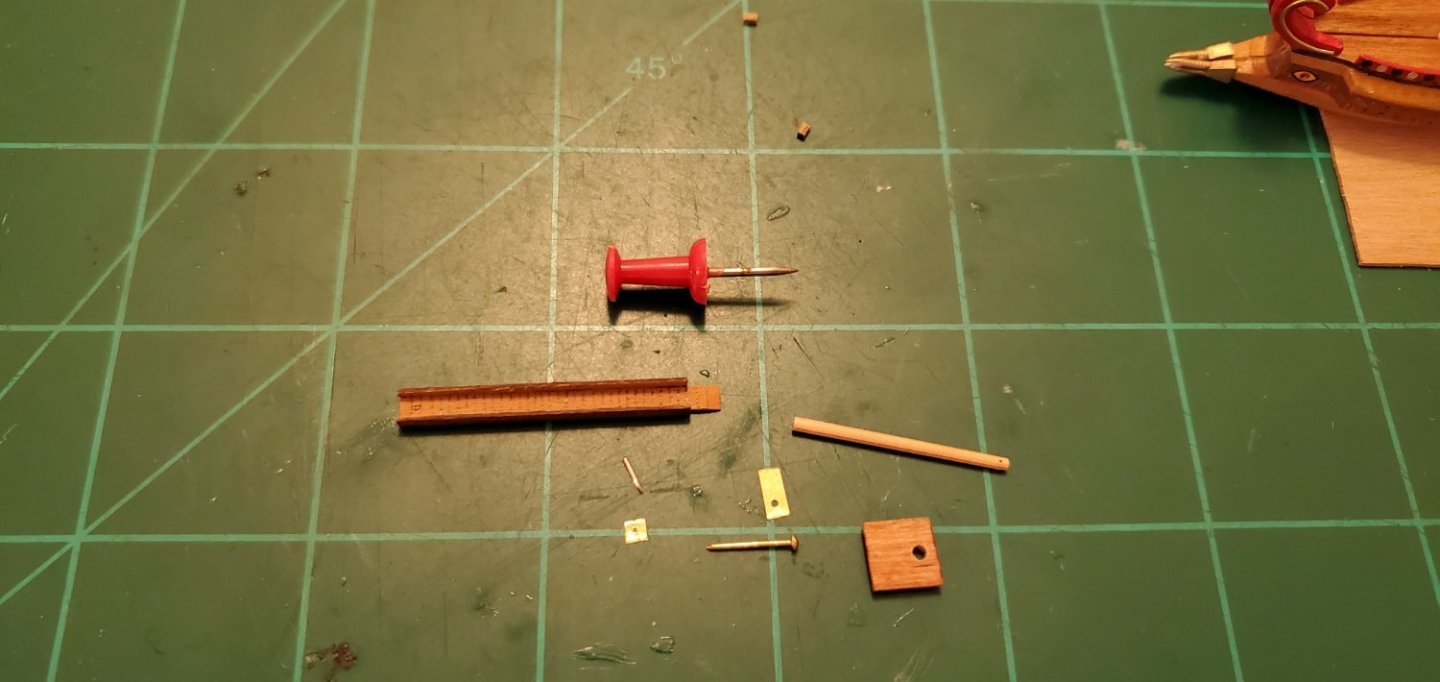
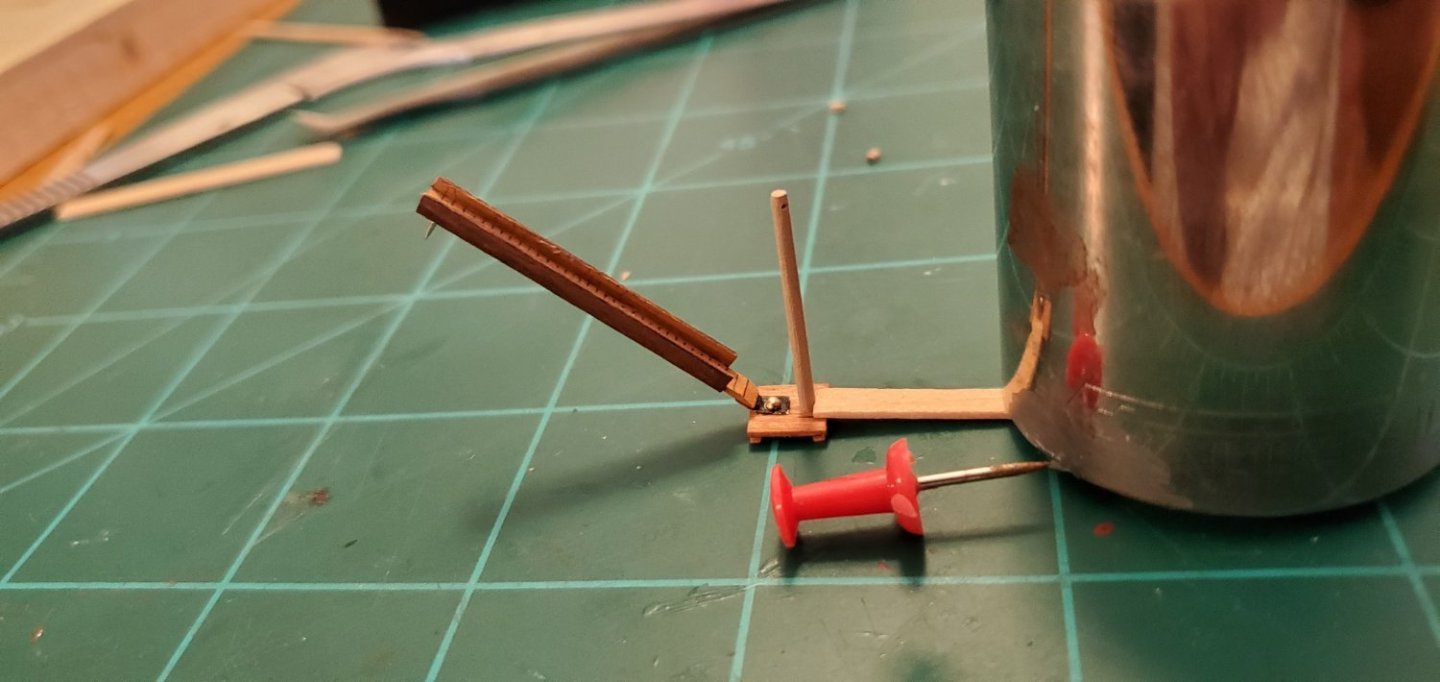
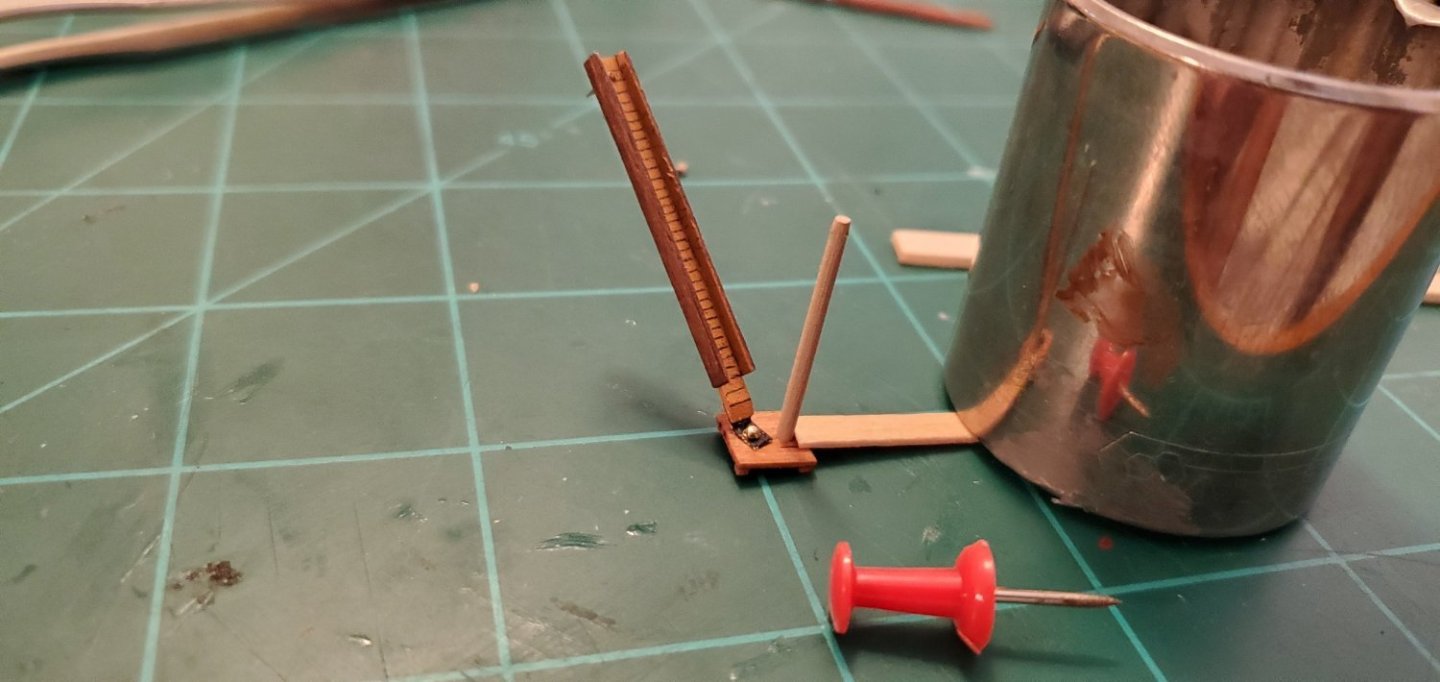
With the ship almost complete, I circled back to the issue of how to join the 2 halves of the hull once they are in the bottle. I experimented with the noose idea from @Keith Black and @Javelin as well as my first thought of building little platforms and sliding them together. Those proved more difficult that I was comfortable with. I came up with another plan which I believe is more manageable. I made 2 small frames which fit around the oars and press against the tapered part of the hull just short of the bow and stern. Then I'll use 2 prongs to press against the frames pushing the hull halves together. Strings are attached to help me retrieve them from the bottle after usage. See below. Next was adding the rigging. With only 1 mast and sail (not counting the 2 little tringle ones at the top), the rigging is pretty simple - 2 back stays, 2 front stays, 2 braces, and 2 clewlines. The 2 back stays are tied off to an eyebolt short of the archer's tower. All lines run along the base of the bulwark, thru small holes in the bow, and out the bottle. I almost forgot to add the decorative tail pieces on top of the stern post! They were the last pieces of the puzzle. Here are pics of the complete ship with everything dry-fit in place. And with that, the moment of truth is at hand! This one will be unlike most of my previous SIBs where squeezing the ship inside the bottle without destroying anything was the make or break moment (literally). The 2 halves of the quinquereme fit thru the bottle opening fairly easily. The real difficulty comes from having to insert the 2 halves of the hull with all the rigging lines attached to each piece, while the mast/sail remain outside the bottle. There will be a lot of slack in all the lines so when I push the mast/sail assembly inside the bottle and into the hull, it will be very hard to keep the lines from tangling up and/or pulling off the oars or ballistas. This has the potential to turn into a real mess. Adult beverages will be nearby and ready for the result, good or bad!


- 290 replies
-
- 14
-
-
-
- Quinquereme
- Finished
- (and 1 more)
-
Yes, the penguins live on and somehow find their way into each project regardless of the subject!!
- 290 replies
-
- 5
-
-

-
- Quinquereme
- Finished
- (and 1 more)
-
Excellent build! The working lights are a very nice effect!
- 118 replies
-
- 1
-
-
- sanson
- artesania latina
- (and 1 more)
-
Good question. I will not pour another layer of resin. I will glue the ship directly to the resin and then add acrylic gel on top of the resin around the ship for water texture.
- 290 replies
-
- 5
-
-
- Quinquereme
- Finished
- (and 1 more)
-
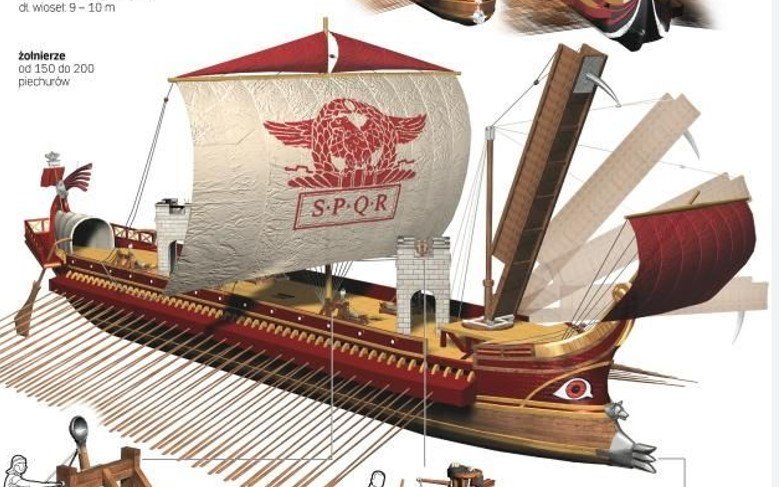
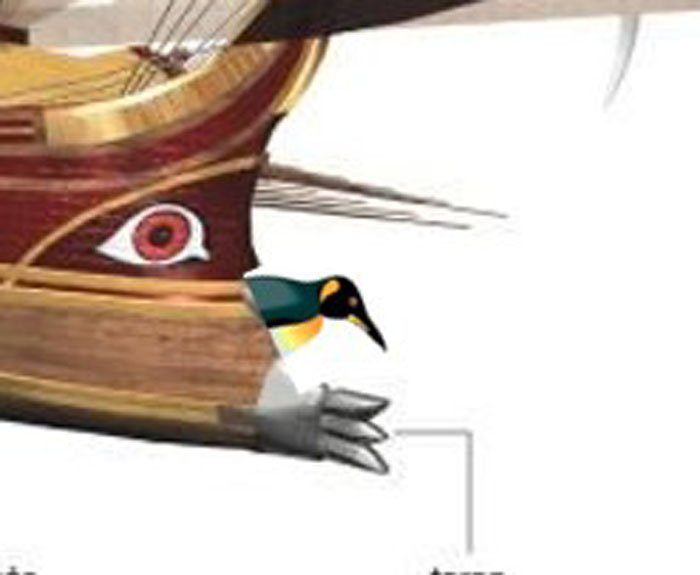
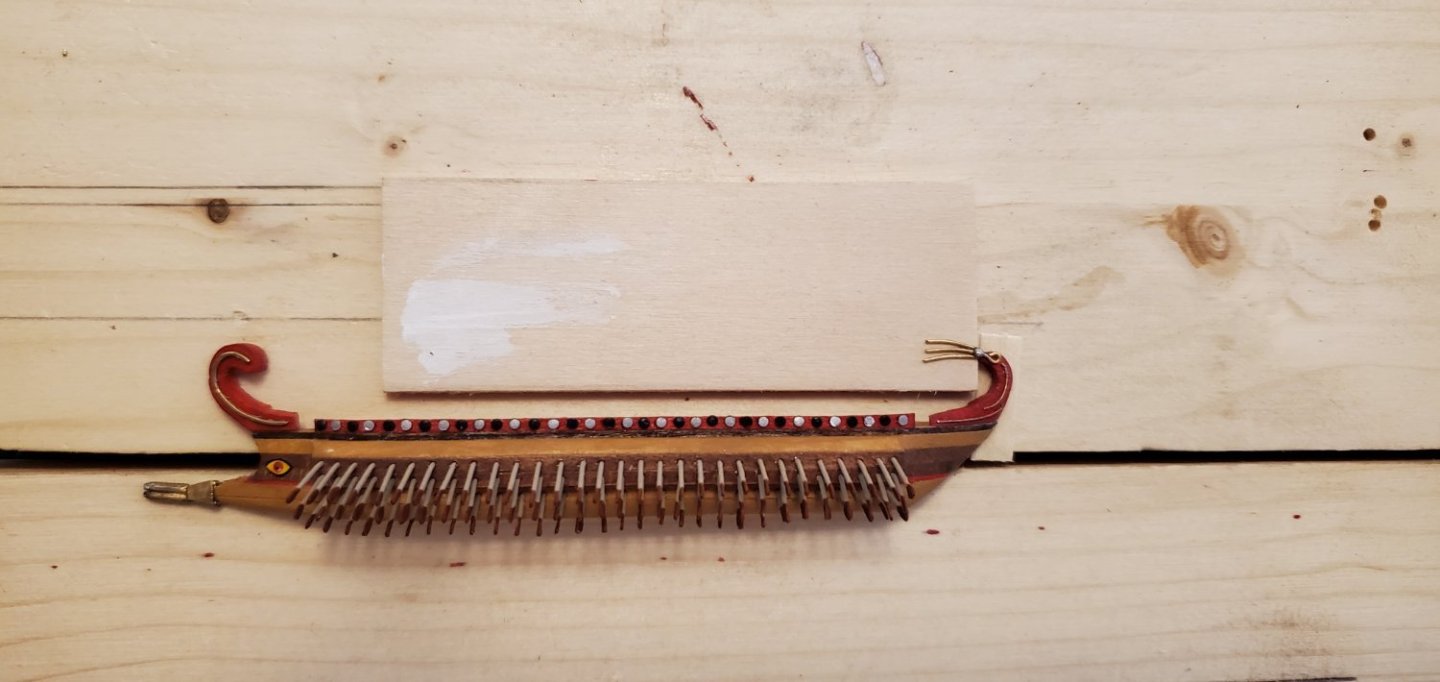
Thank you, Pat, Mark, and Bob for the kind words! As for the last part of Pat's comment, I did give consideration to adding a "buffer" which is an ornamental piece on the bow. In the picture below, you can see it in front of the eye, directly above the spikes of the ram. The buffers were usually some type of animal head. Hard to tell from the picture above what animal head was used so I zoomed in:
- 290 replies
-
- 10
-
-
-
- Quinquereme
- Finished
- (and 1 more)
-
Hello from lake constance, Germany
Glen McGuire replied to Boerscht's topic in New member Introductions
Welcome, Boerscht! Looks like you did a great job with the Goletta Elisabeth. I hope you will start a build log for your Endeavour so we can follow your progress. -
Hey Thierry! I don't know what a Froggy is, but glad to have you on board here at MSW!!
-
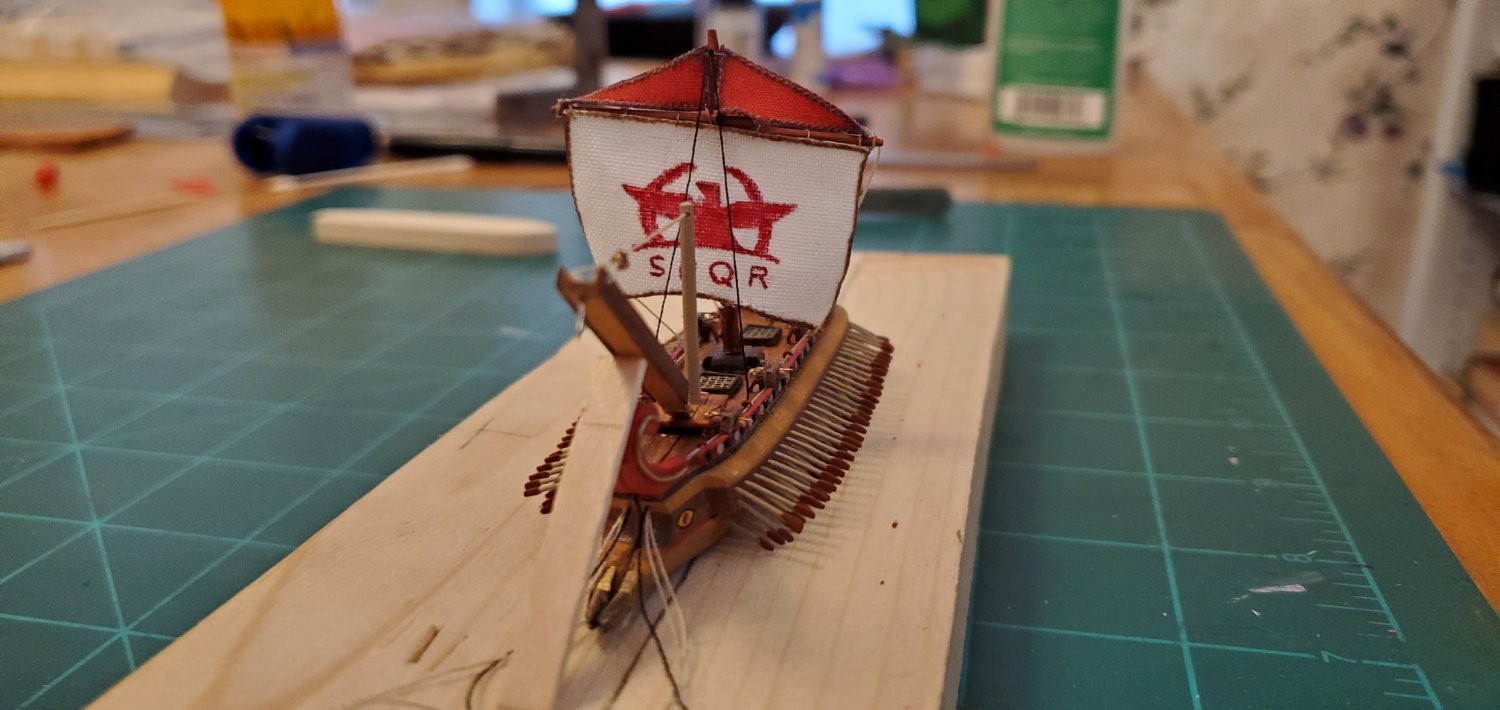
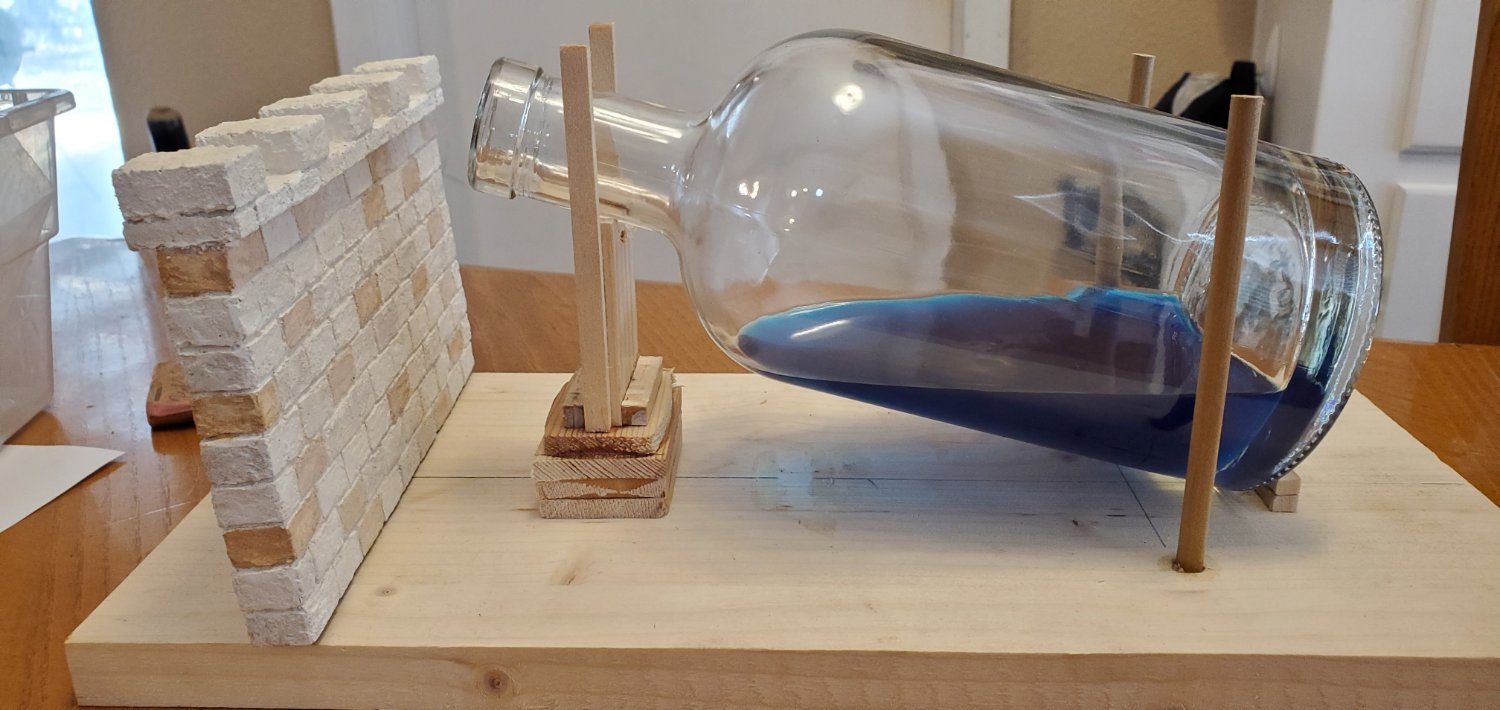
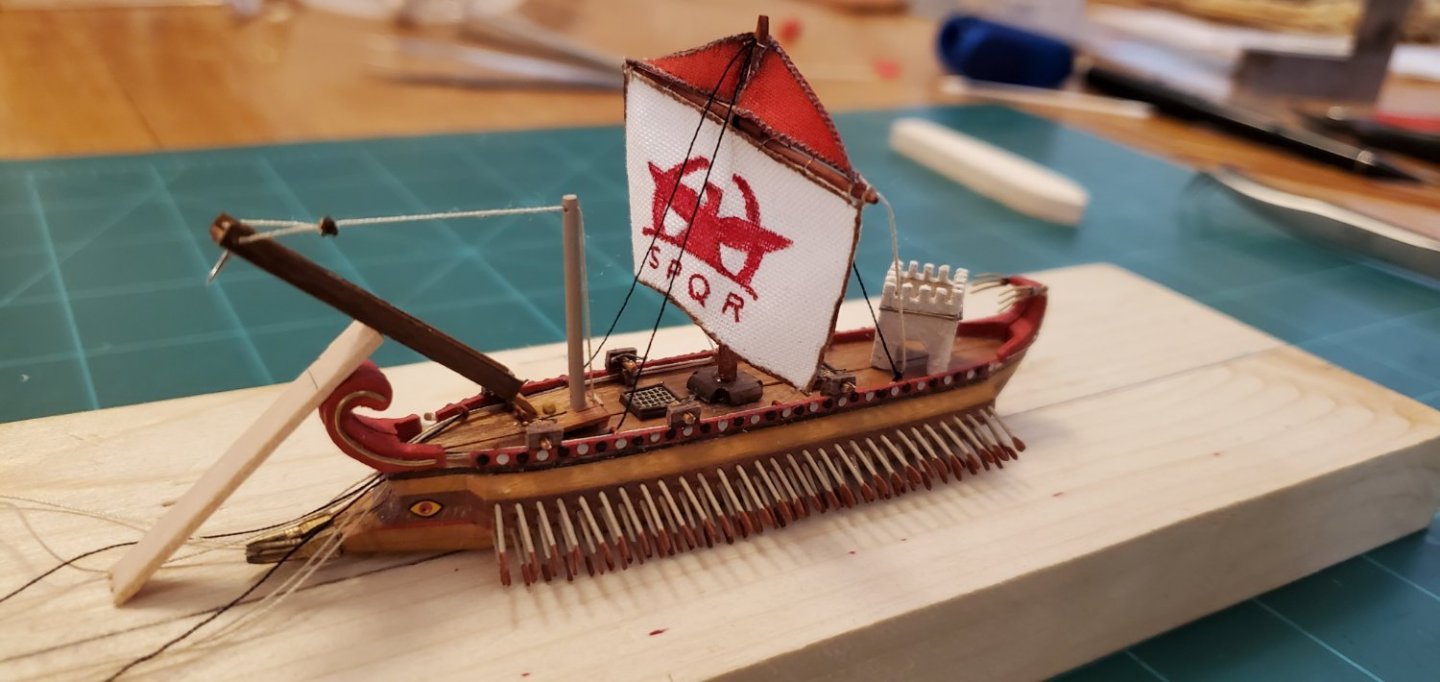
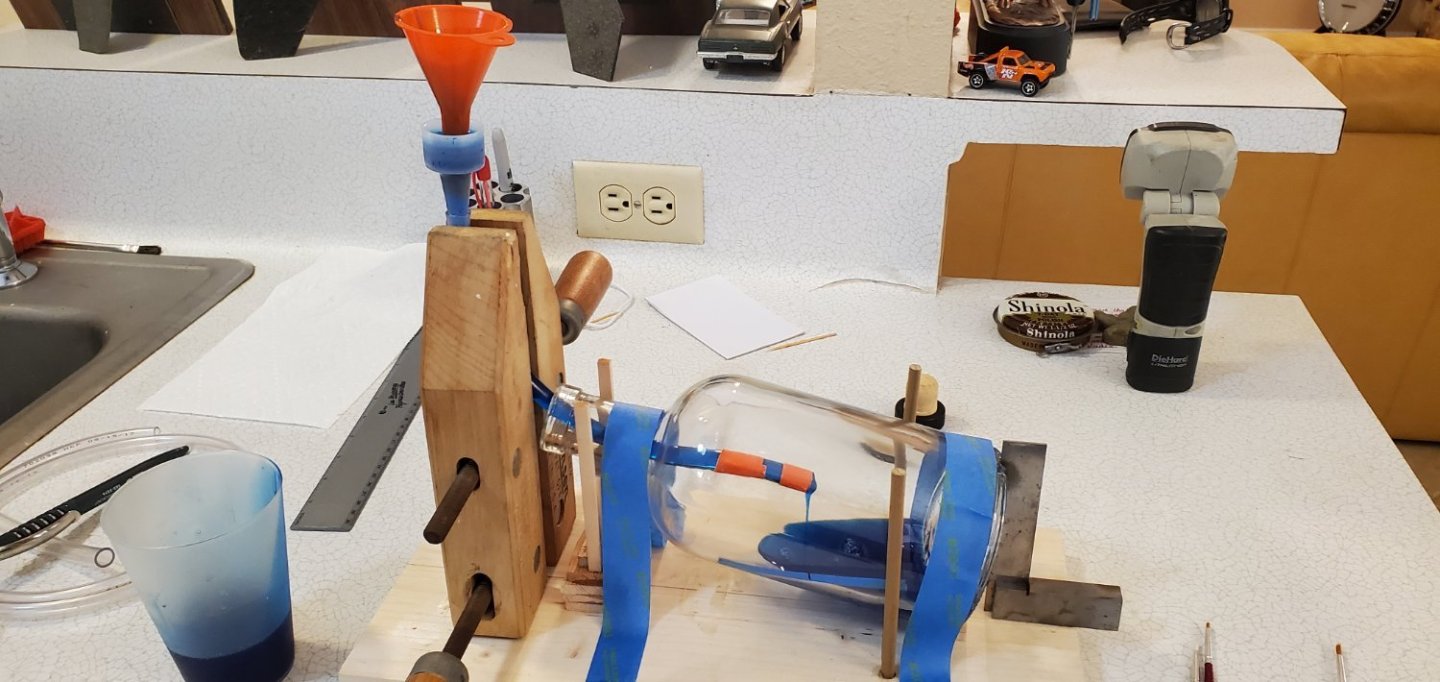
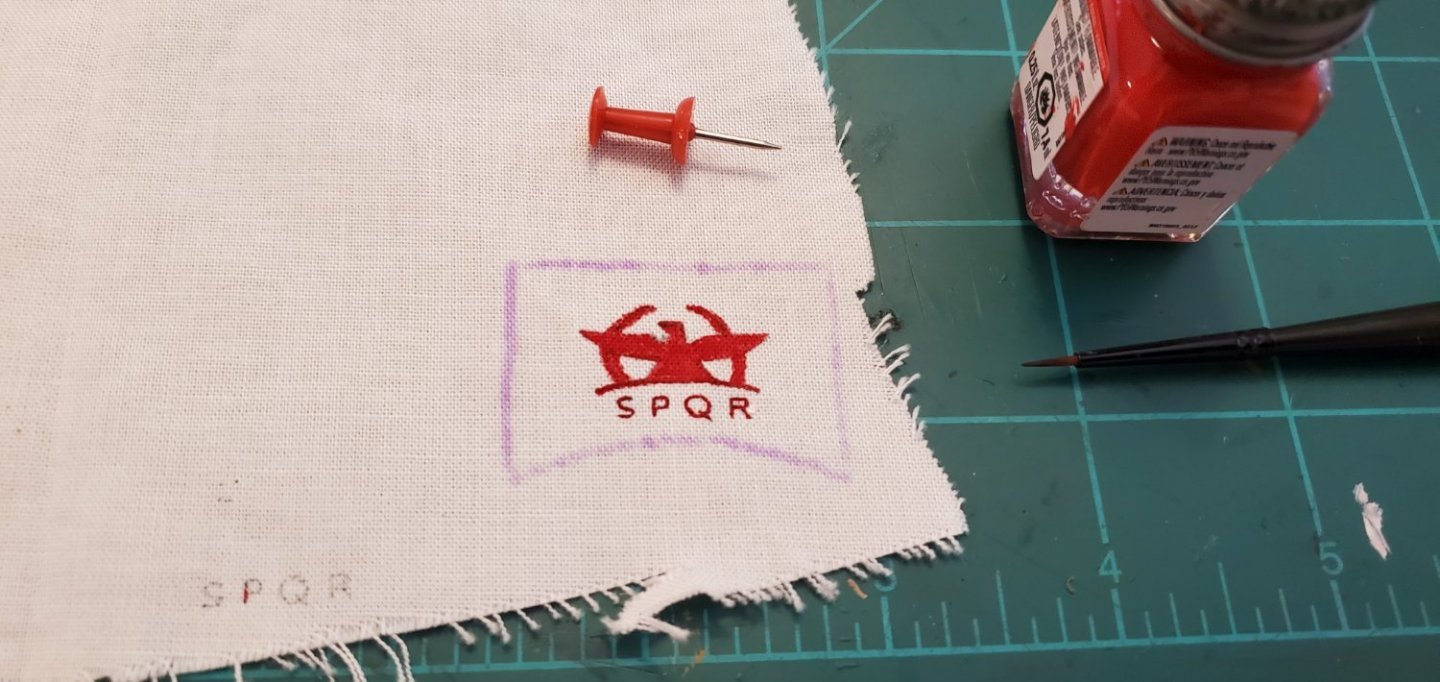
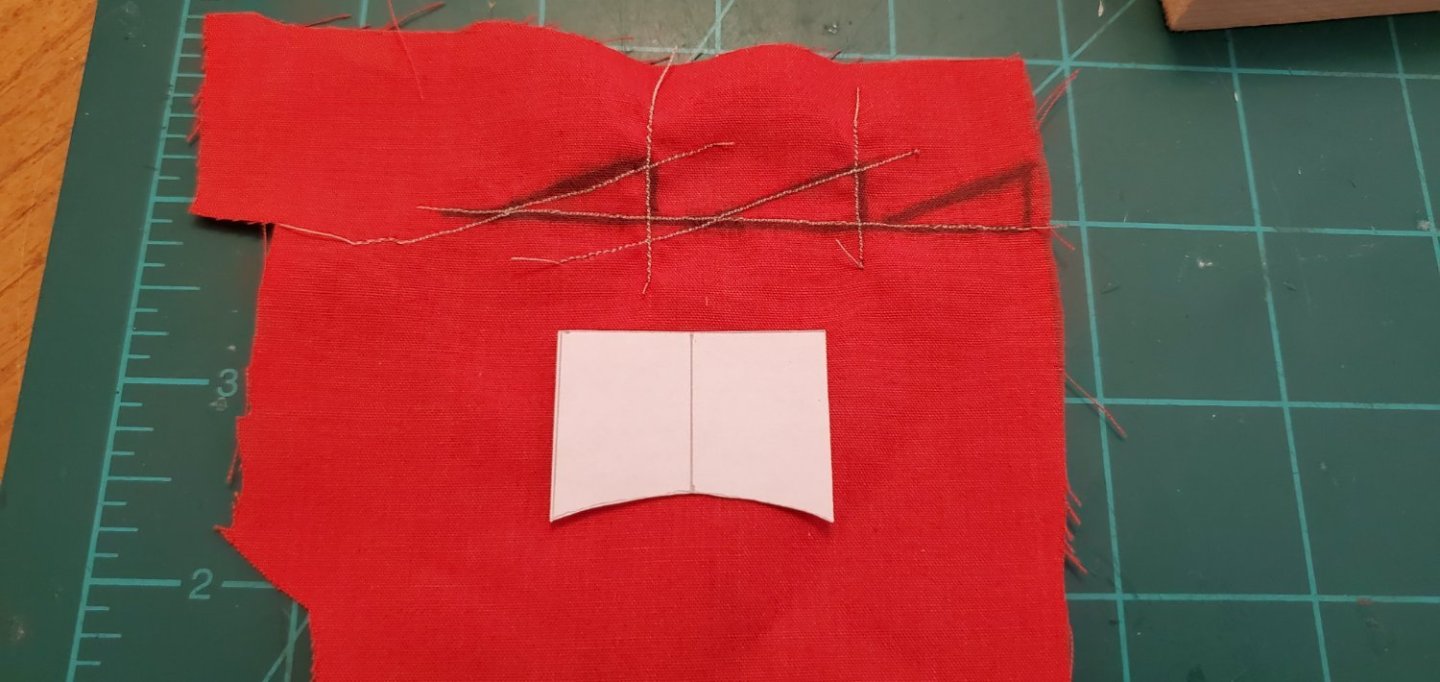
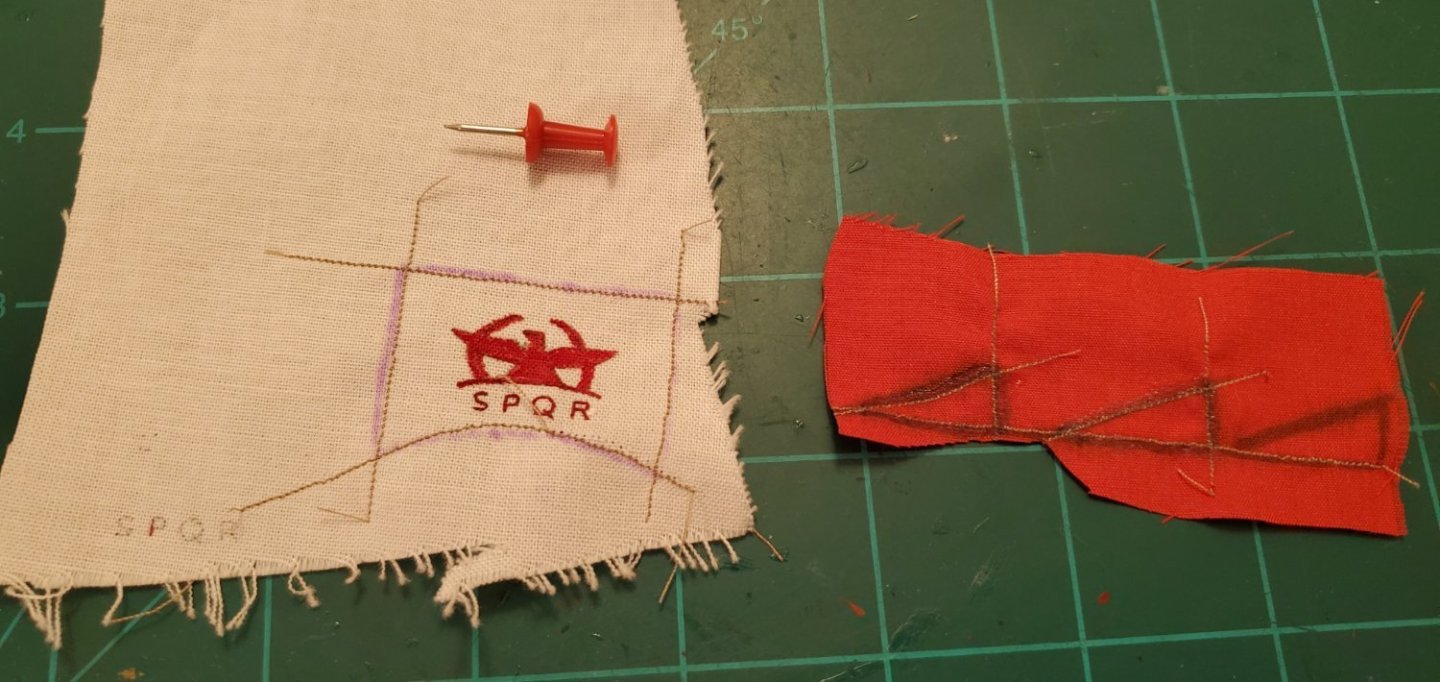
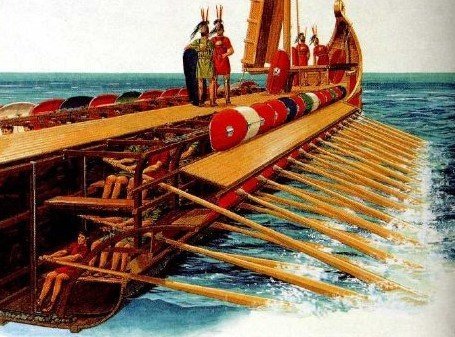
Water time! Once again I'm using blue-dyed epoxy resin for the water in the bottle. I'm getting better with my set-up, this time using a handscrew clamp to hold the funnel in place while I pour. And on to the sail(s). I went back and forth on what I wanted to do for the sail or sails. Most pictures of the reme ships feature a single mast and main sail. However, some show 2 triangular sails above the main sail like in the picture below. I decided I liked that particular look, so that's what I tired to replicate with a slightly different emblem on the main sail. If anyone knows the correct names of those 2 sails, please educate me. Here's some of the steps along the way. I started out by overextending my limited painting skills. I took a fine point brush with some Testors enamel and tried painting the emblem onto some muslin fabric. The further you are from the sail, the better it looks! But I was ok with how it came out. Next, I used red shirt cloth for the 2 triangular sails and sewed a bolt rope around the perimeters. Same for the bolt rope on the main sail.


- 290 replies
-
- 15
-
-
-
- Quinquereme
- Finished
- (and 1 more)
-
I agree with you about the importance of ventilation and I believe you came up with a reasonable and interesting solution. I also ran across a quinquereme illustration that took your alternating deck planks a little further. So who knows, maybe they had missing deck planks rather than gratings? Alas, that time machine...
- 290 replies
-
- 5
-
-
-
- Quinquereme
- Finished
- (and 1 more)
-
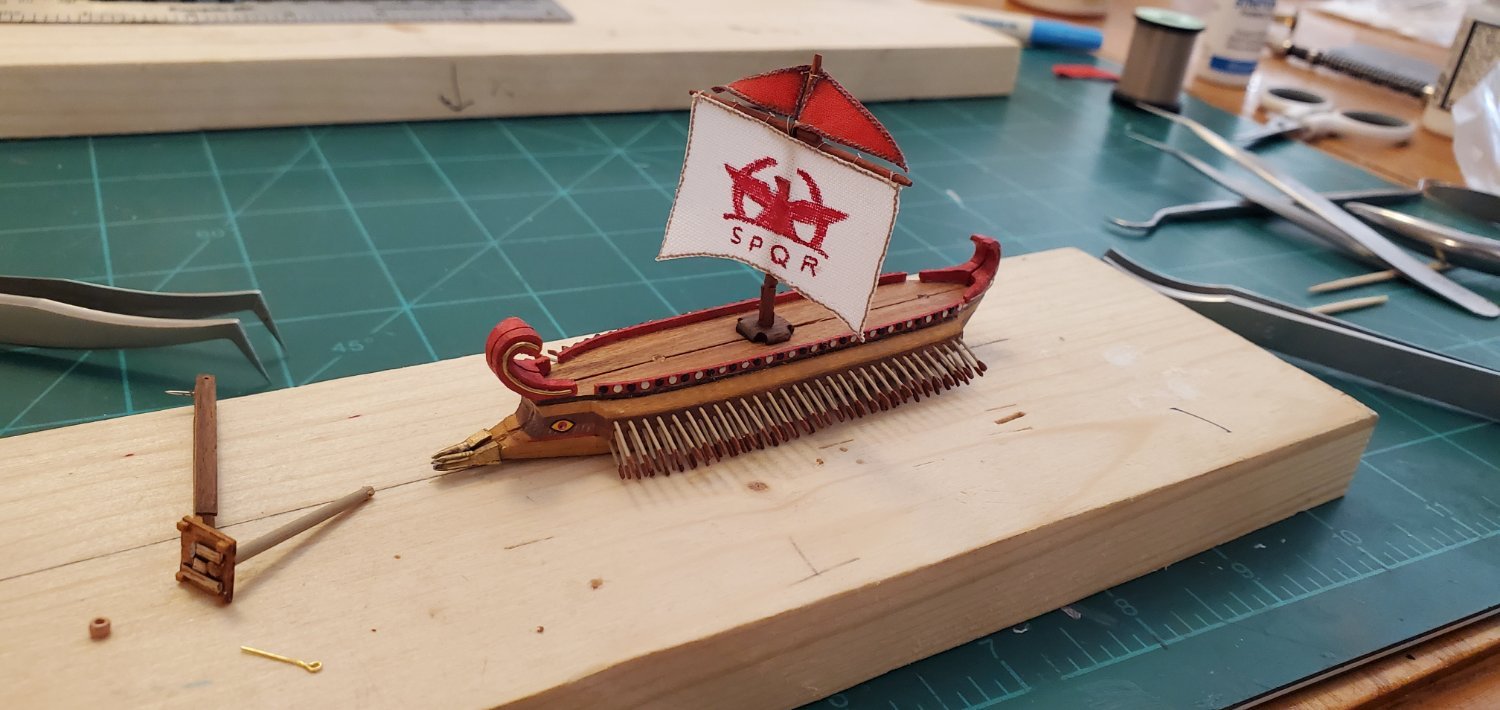
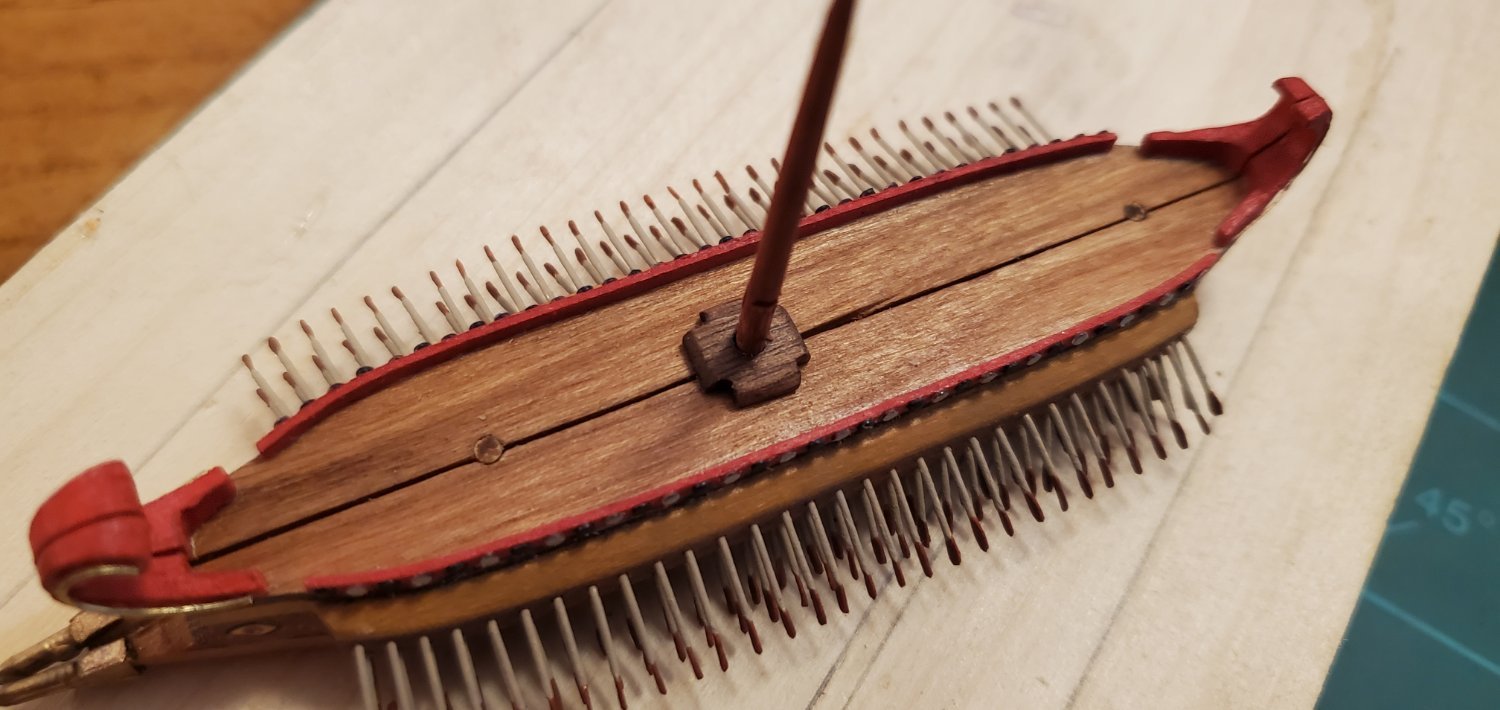
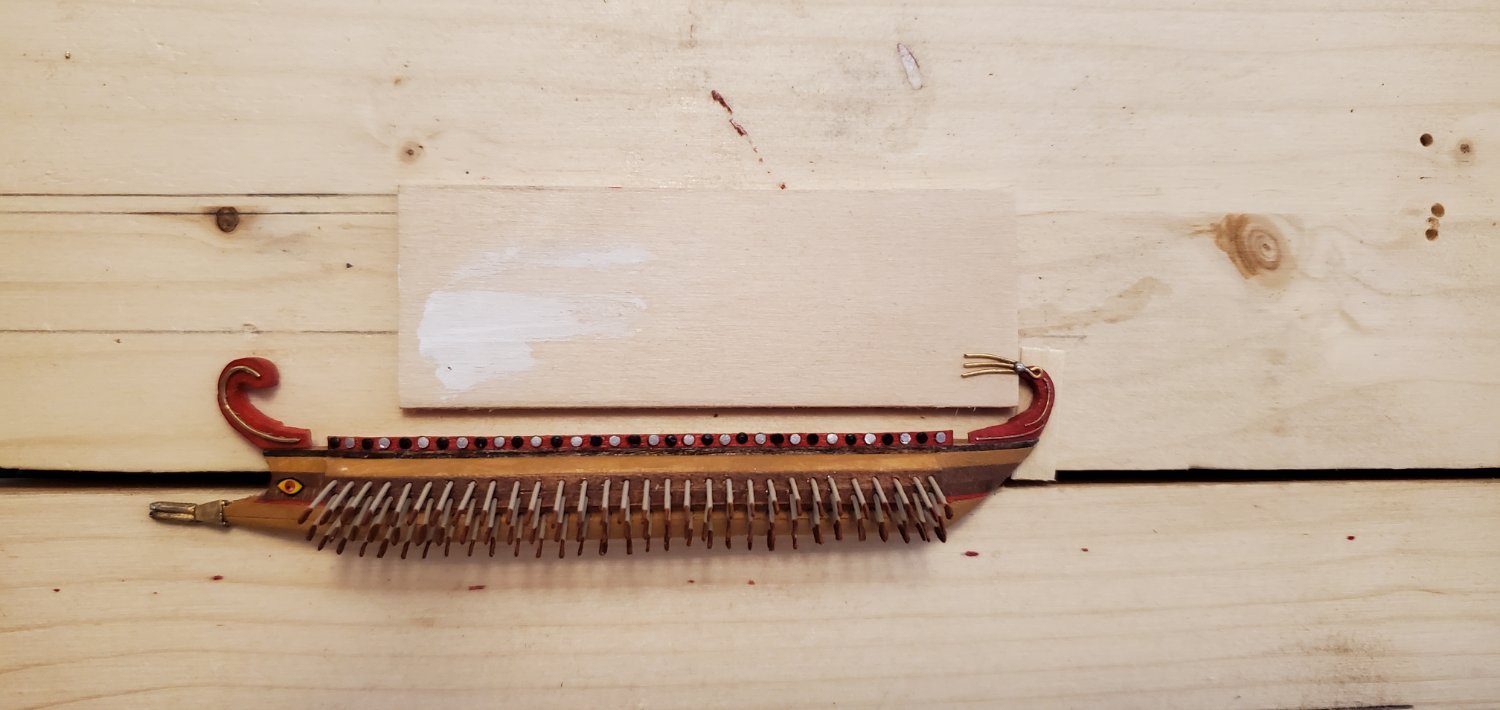
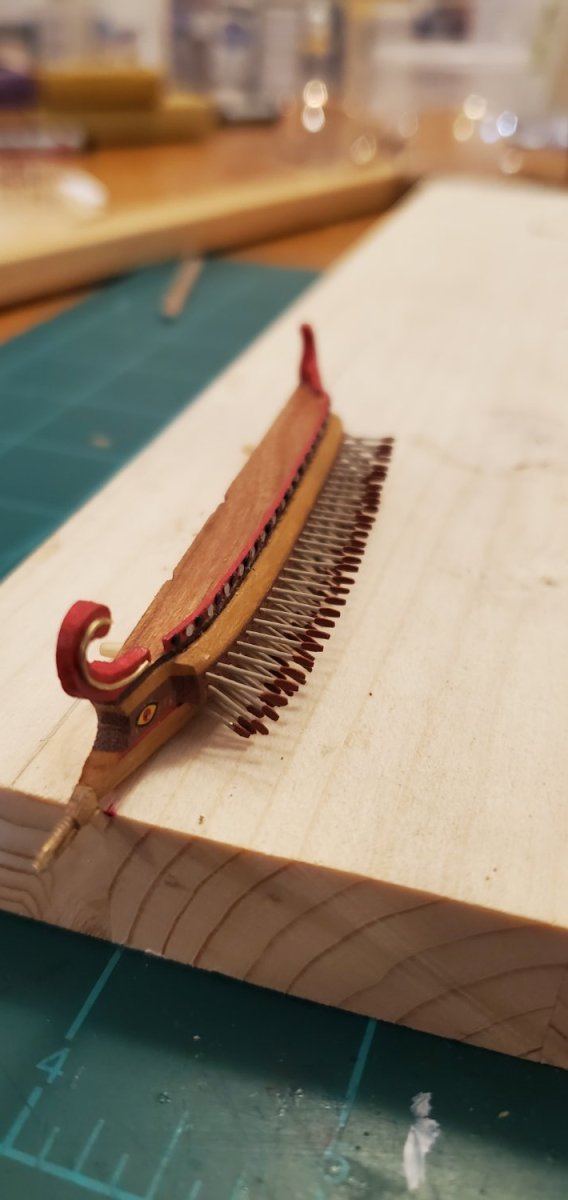
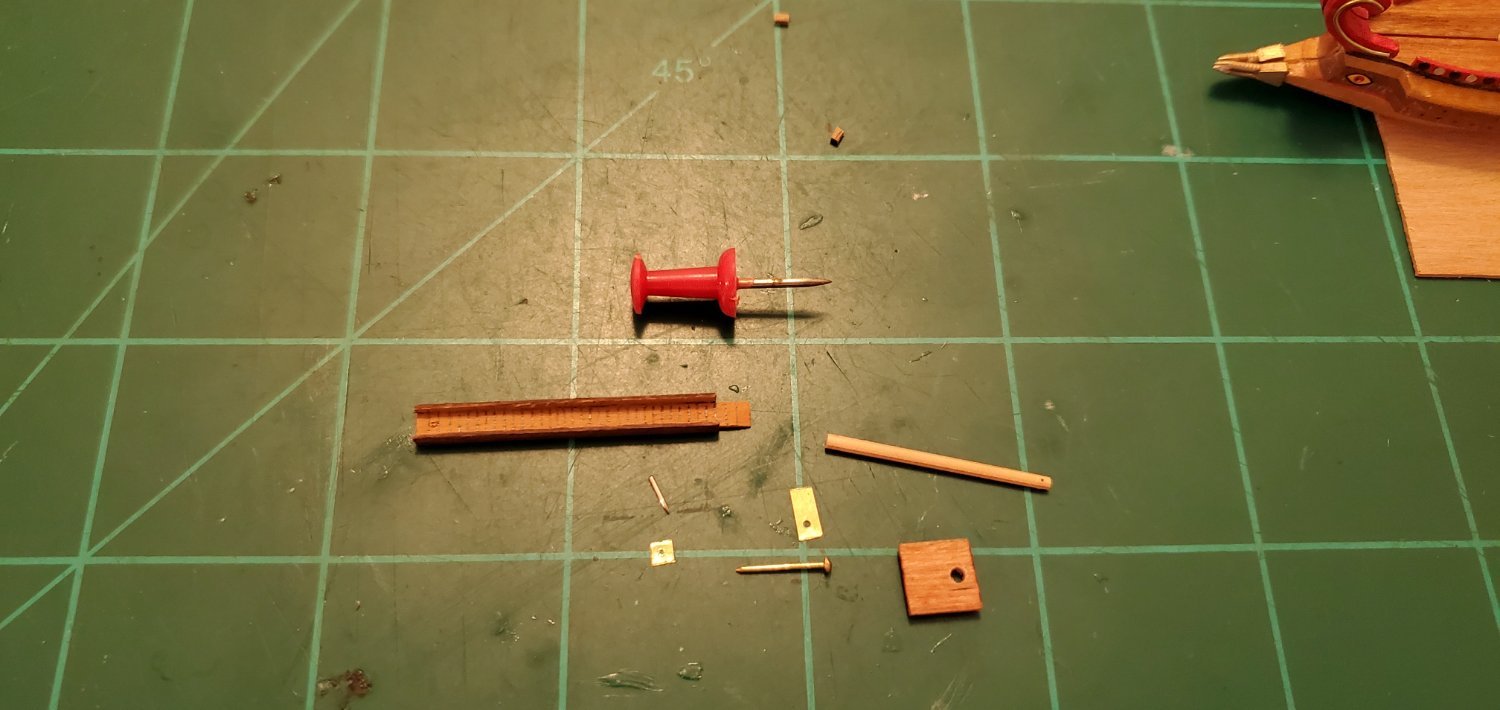
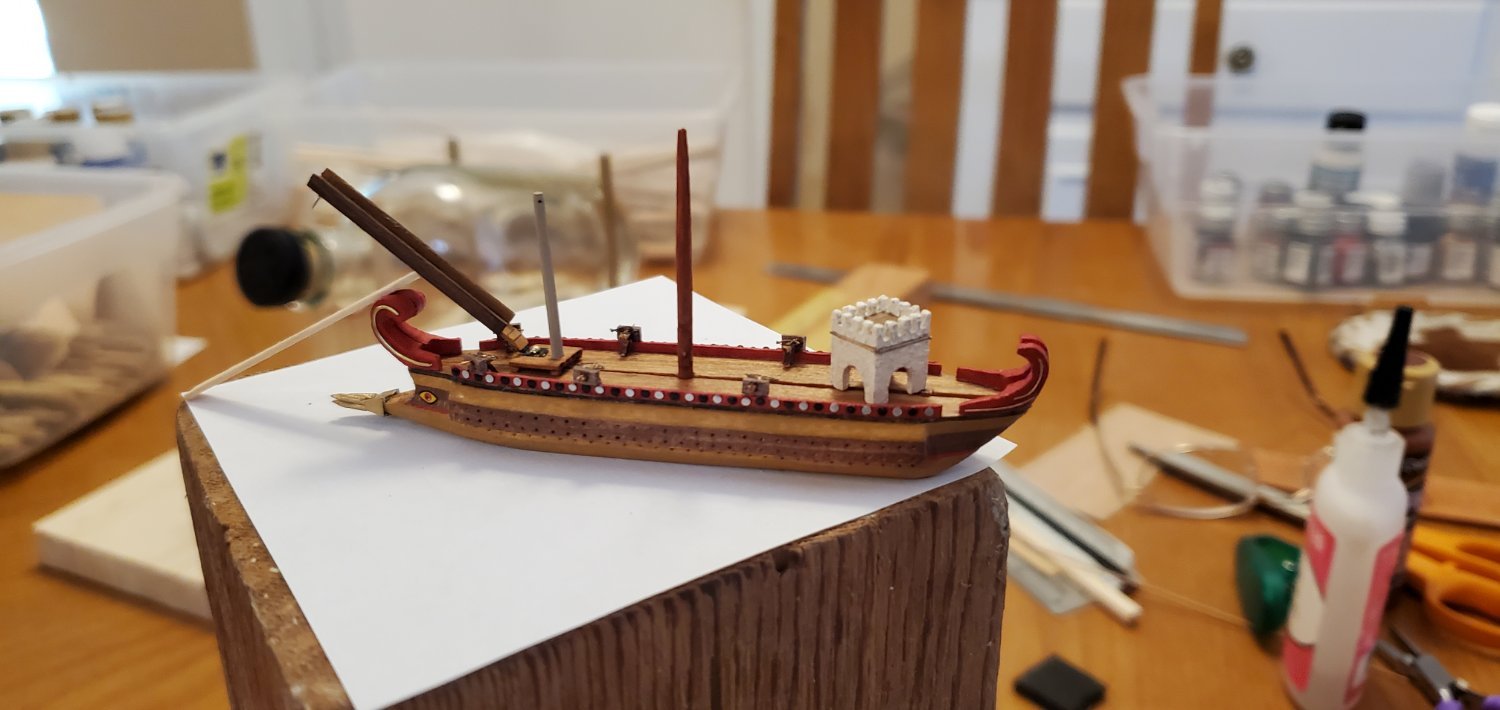
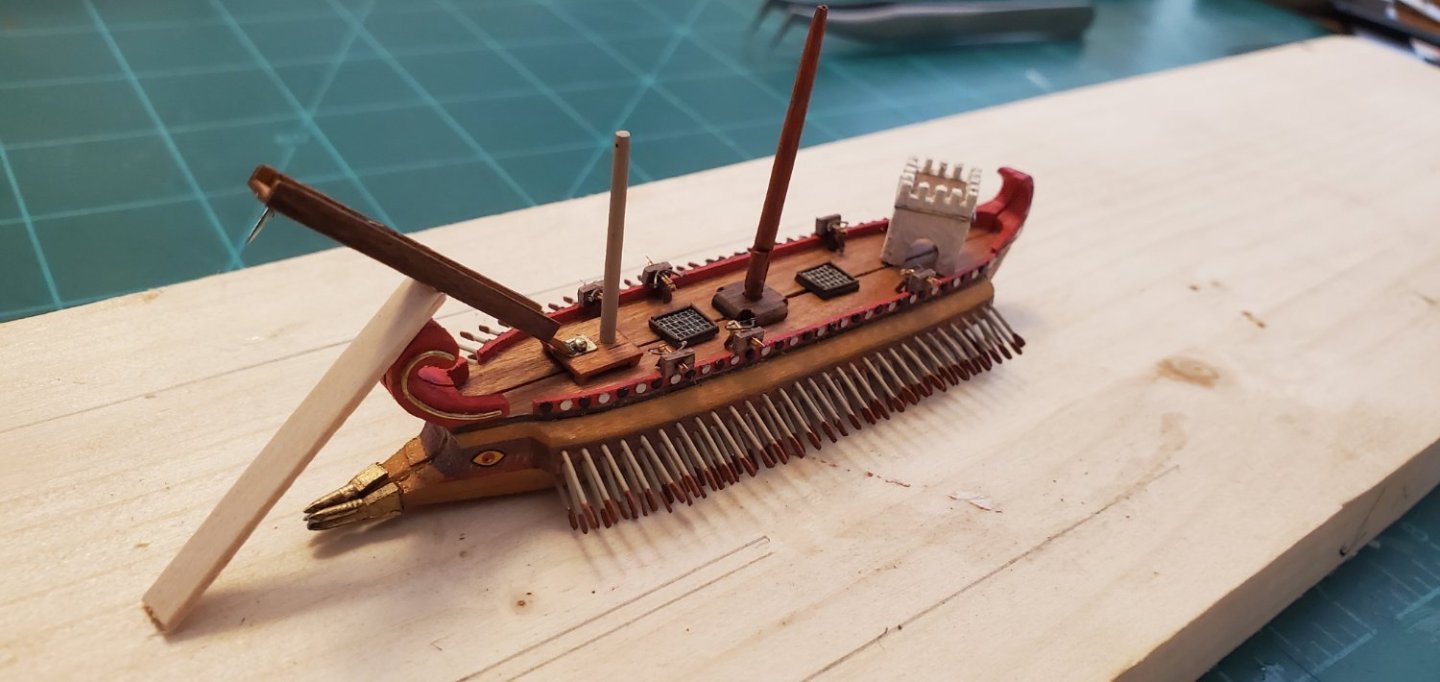
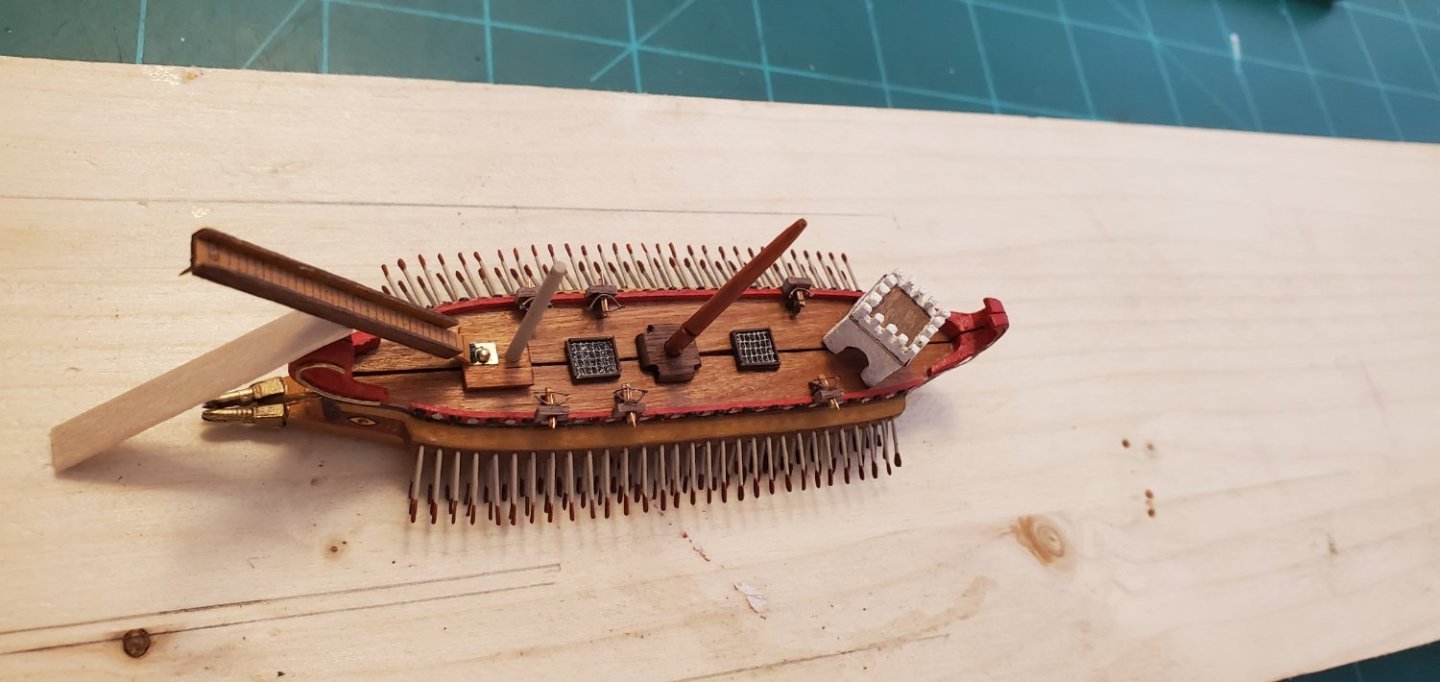
Thank you Keith and Javelin for the assembly suggestions. I was getting a little ahead of myself there so I will revisit that process after I get a few more things done. First up was finishing the oars on the starboard side which happened without any real fanfare (yay). I also made a small mast step while waiting for the oar paint to dry. Next, I made a couple of gratings to fill up some of the deck space between the mast step and the archer's tower and corvus platform. I don't know if the actual quinqueremes had gratings or not as half the pictures I see of the ship do and half do not. But it makes sense to me that there would need to be some kind of ventilation for the rowers on the oar decks within the hull. Here's a couple of pics with all the deck fittings placed in position (nothing glued down yet). Next, I revisited the decorative tail on the stern post. In previous post #102, Steven (a.k.a. @Louie da fly) suggested that the tail should curve upwards rather than just stick straight out like I had planned. I liked his idea as I thought the flare would give the stern a little extra flair (ahem). But when I started looking at quinquireme pictures to model it after, I found that some curved upwards but just as many, it seemed, curved downwards. So as usual when I find myself in a moment of artistic indecision, I turn to my dear friend and get her opinion. I showed her pictures of 6 different quinqueremes - half upward curve and half downward curve. She immediately said downward. To her eye, downward was a natural extension of the curvature of the sternpost as well as the curved brass wire I'd already affixed to the side. I know better than to argue with her, so downward it is! Plus I think she is right, as she usually is! But I must say thank you to Steven for his suggestion because ether way, up or down, it's better than straight.

- 290 replies
-
- 12
-
-
-
- Quinquereme
- Finished
- (and 1 more)
-
Hmmm. That's an interesting idea, Keith. I'm also thinking about a process like below where I drill holes in the bottom of the hulls, make 2 small platforms with upright dowels that fit into those holes, insert the platforms into the bottle, insert each hull half onto each platform, slide them together, then lift the joined hull off. I'll have to do some test runs to see which will be easier.

- 290 replies
-
- 10
-
-
- Quinquereme
- Finished
- (and 1 more)
-
LOL! Had not thought about it that way, but it does kinda look like one! Thanks, Bob. What I have yet to figure out is how I'm going to push the 2 halves together once they are both inside the bottle. All those oars are in the way of the surface area I would normally use. I'll have to come up with a custom tool of some sort.
- 290 replies
-
- 5
-
-
- Quinquereme
- Finished
- (and 1 more)
-
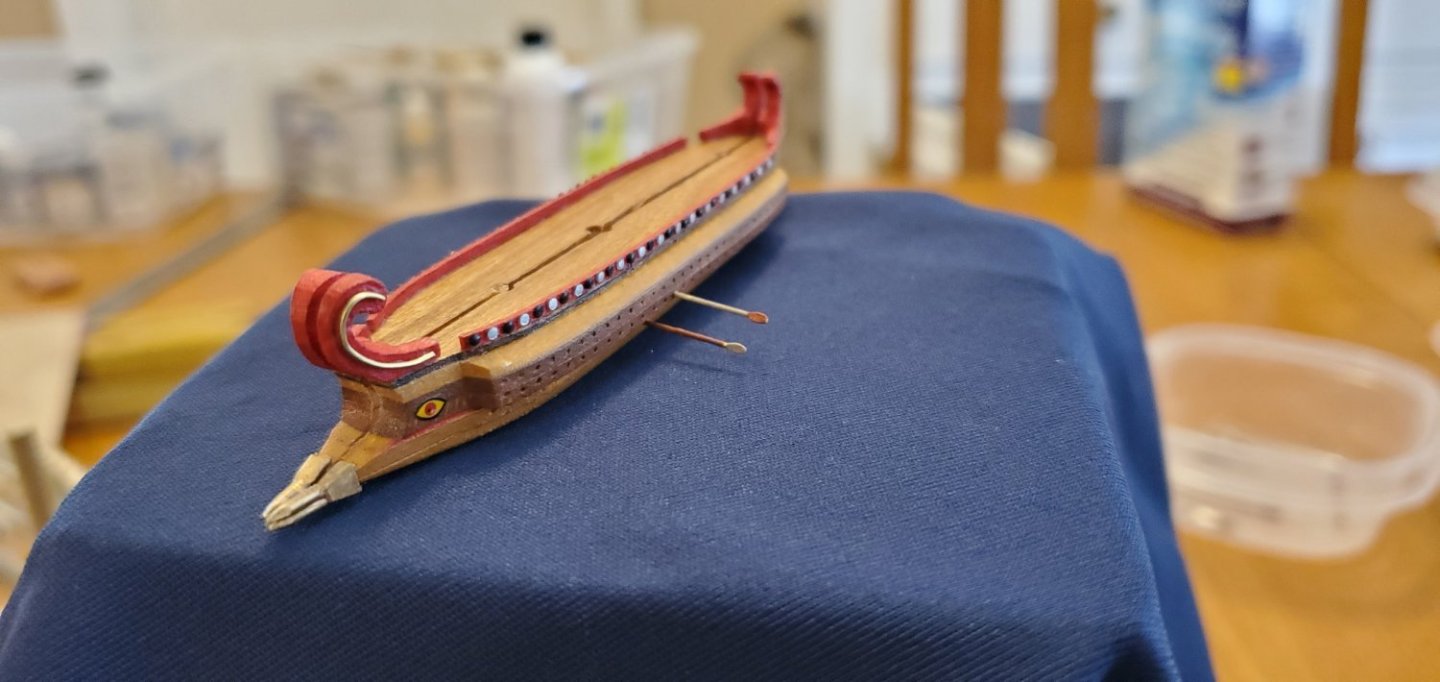
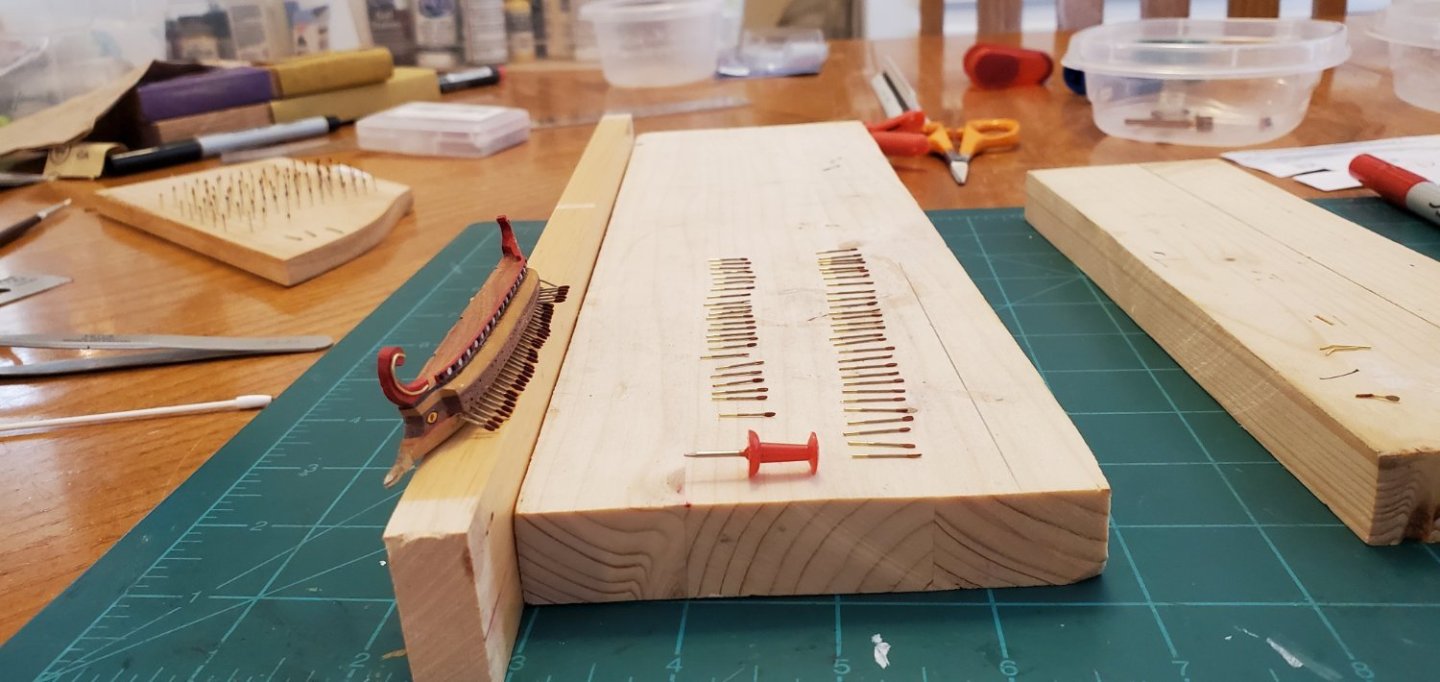
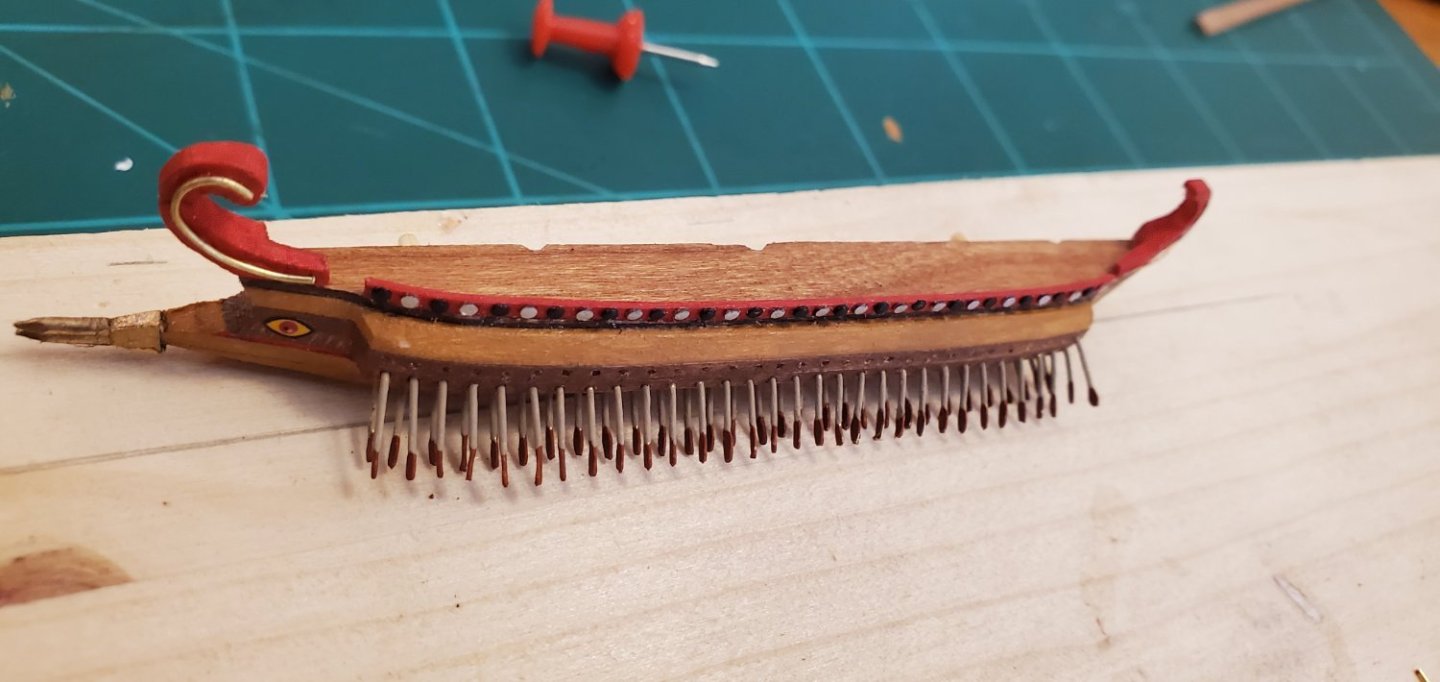
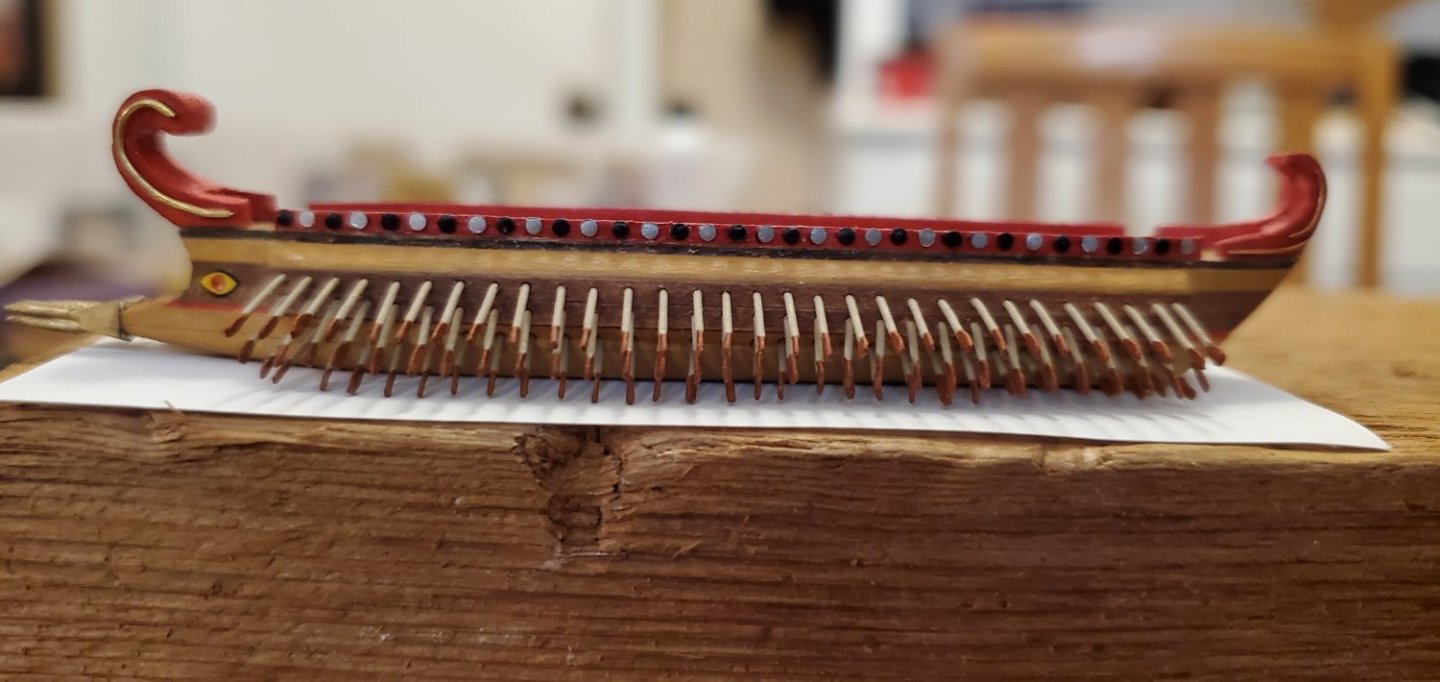
Back from a wonderful week spent mostly in Olympic National Park where the temps in the 50s (F) felt like frostbite weather to me. Back home and back in the Texas shipyard where the 180 quinquereme oars have been patiently waiting. Right off the bat, as I got back into the project, I made a big mistake. I revisited @Ian_Grant’s build log for his quadrireme to check out his oars. I really liked how his oars were two-toned with darker wood for the paddle and lighter wood for the shaft. Even though it would more than double the time required for painting my little oars, I knew I had to have a similar look. I also tried doing the reverse with a dark shaft and light paddle, but I decided the way Ian did it was better. At the end of the day, I think it was worth the extra painting effort. So thank you, Ian, once again! The next step was deciding how long the oars could extend out from the hull and still fit through the neck of the bottle. When I look at the illustrations of quinqueremes, the oars are very long and extend far from the hull. Unfortunately, I’m restricted significantly by the bottle opening, so my oars are going to deviate from the norm and look pretty blunt. The following pics show some steps of the basic process: paint, cut the shaft down to size, insert each oar into its oar port (one row at a time starting with the lowest row), bend the oar downward to its proper angle, go back and touch up the paint. And then a test fit for the port half of the ship. It's tight (wouldn't want it any other way, right?) but it works! Now on to the other side.


- 290 replies
-
- 14
-
-
-
- Quinquereme
- Finished
- (and 1 more)
-
I agree that the uprights look like frame extensions. But the small loops hanging outside the gunwale don't look like rope loops to me, since the other rigging ropes are all dark. The small loops being so bright, it seems to me like they were made to stand out, perhaps an illustration of some of the relics that were transported with St Mark's body? Or maybe trade beads? Certainly an interesting question to ponder!
-
Your painting skills are extraordinary! Beautiful model.
- 562 replies
-
- 3
-
-
-
- vanguard models
- alert
- (and 2 more)
-
Enjoy your vacation, Ian! And I'm sure you won't think about your quadrireme while you are gone!!
- 536 replies
-
- 1
-
-
- Quadrireme
- radio
- (and 1 more)
-
Thanks, Mark. First, I'm going to Washougal, WA for a motocross race. High temps are supposed to be near 90 which sounds amazing considering we hit 109 in Austin this afternoon, something like our 10th day in a row over 105. Then I'm headed to Olympic Natl Park where the temps are supposed to be similar to Keith's Michigan description, lows in the 40s and highs in the 60s. This cold weather sissy will be packing my heaviest winter clothes for that!
- 290 replies
-
- 5
-
-
- Quinquereme
- Finished
- (and 1 more)
-
You got off and running on another epic project and I missed the start. But I'm caught up and fully on board now. Let er rip, Grant!
- 57 replies
-
- 5
-
-
- live steam
- radio
- (and 2 more)
-
Bottle or no bottle, this is still a very intriguing project and the detail of your components is superb. So glad you are continuing work on this!
-
I finished up the corvus and its associated mast. I decided to give it the capability of rotating on its platform like the real ones appear to do. Not sure if this will help get it in the bottle later, but it certainly won't hurt. After dry-fitting everything, I'm pretty sure the castle, main mast, and corvus assembly will have to be added after the hull is inside the bottle and its 2 halves joined together. Also, this will probably be my last post for a couple of weeks. At the risk of further admonishment from @Javelin for doing something besides working on my model 😃, I'm heading to the Pacific northwest for a vacation. It will be nice to escape the Texas heat for a little while!

- 290 replies
-
- 14
-
-
-
- Quinquereme
- Finished
- (and 1 more)