

Gregory
-
Posts
3,168 -
Joined
-
Last visited
Content Type
Profiles
Forums
Gallery
Events
Everything posted by Gregory
-
 There would have been any number of pieces. Mainly for strength, and also because it was not always desirable to obtain one dimensioned piece from a single piece of timber. Here is a little snip from Chuck's cheerful. Note the two long pieces of the keel have an overlapping( there is a technical term for that, but escapes me at the moment) joint. That joint ( scarf ) might have looked something like this on other ships/boats. One way to add more detail to a kit, is by scribing lines on the pieces provided in the kit.
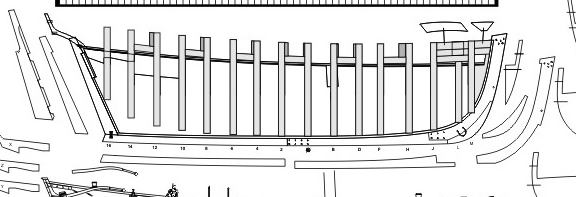
-
Great results for a first shot at rope making! I don't think I've seen better scale rope.
-
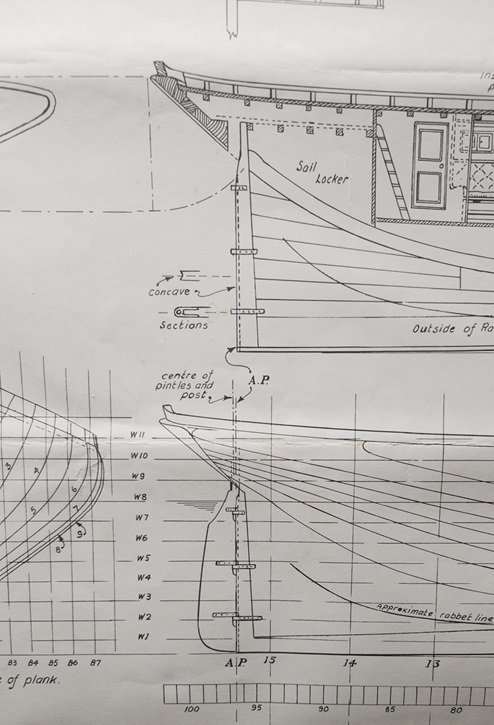
If it's any help, here is how Campbell drew the stern. Campbell says his drawings are based on lines taken in 1856.
-
Looking forward to seeing your progress.
-
Your America trail boards and transom eagle might be a nice 3D printing project.
-
There are some great laser options out there. They will only get better as time goes on. The accuracy still comes from your drawings. The laser can only cut what you send it. I am still trying to refine my 2D skills, which is all you really need for laser, but I would like to dig a little deeper into 3D so as to get a better fit before wasting wood. My Rattlesnake has stalled because I’m not that happy with the details, my excuse being it’s my first scratch attempt. I hopefully will have some progress soon with some insight on how I got there. I appreciate your interest, and welcome any further discussion.
-
HM Cutter Cheerful 1806 by JpR62 - 1:48 scale
Gregory replied to JpR62's topic in - Build logs for subjects built 1801 - 1850
I really like the color of your planking. Is that cherry? -
This is when you build the model you want to build. If some one question's you about the lack, or inclusion of a detail, you whip out a drawing or a painting that supports your vision and you ask " are you calling the artist of this drawing a liar? " 😁
-
Do you have a source for HSS smaller than #80
-
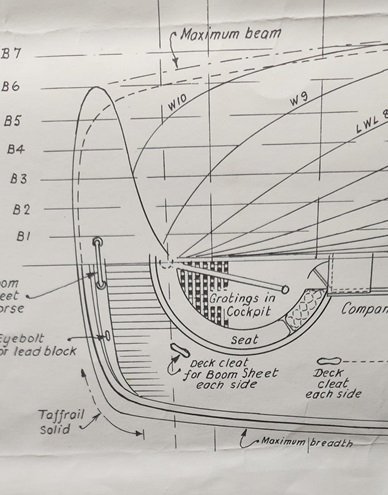
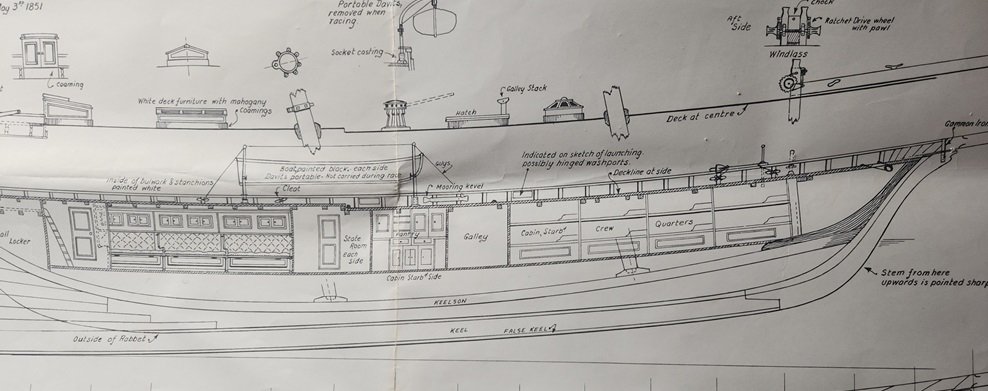
Shaping up Very Nicely. Mamoli has that forward companionway that I haven't seen in any other drawings. Does it show up in any of your other references? Campbell doesn't show it in the MS plans. A ladder down to the Crew's quarters doesn't seem out of place, IMO, as they wouldn't be trapsing through the master cabin and the galley.
-
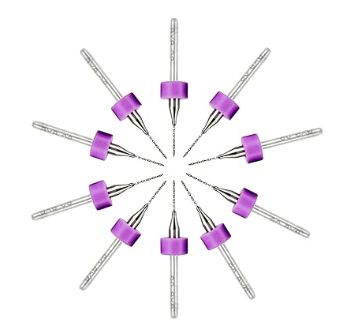
They show .5mm as the smallest. Another concern with the costly bits, even though the quality is there, breaking of the small bits, is not uncommon in the modeling environment. Ten of these, .3 - 1.1mm, for $6 might be a better investment. ( yes, they do break easily. It pays to be careful )
-
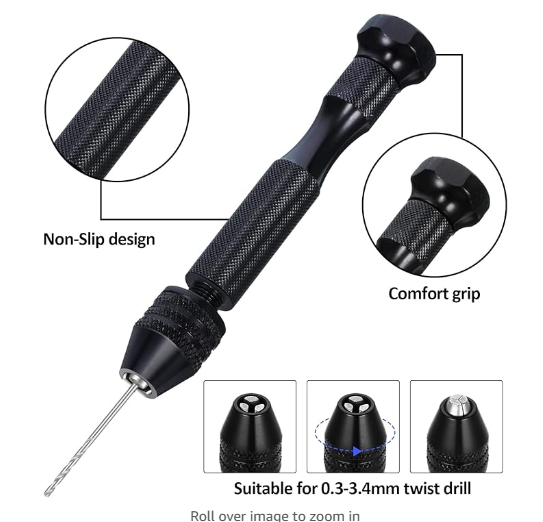
I have a couple of these, and they work fine from 0 to 1/8 size bits. It uses a mini chuck, so no collets needed. Pin Vise Hand Drill
-
You might also look at the NRG Half Hull Planking Project Skip down to here to see the start of planking:
-
Those printed QG’s would be a great addition to any number of kits, and few kit builders would hesitate to use them
-
I’m going to have to check out QCAD…
-
Which software are you using to trace the lines?
-
Have you considered a jig similar to what Chuck uses wit Spetedwell?
-
Autodesk Fusion ( formerly Fusion360) is still free to hobbyists. Autodesk Fusion for personal use I'm using it now, and just beginning to explore it's powerful features. I have a couple of topics just started in this forum. I use Photoshop Elements for my 2D work because I have used it for years and it is really in my comfort zone. For free, something like Inkscape would probably be a good choice.
-
What CAD software will you be using?
-
Ship Ribbing with CAD?
Gregory replied to Sanjith_D's topic in CAD and 3D Modelling/Drafting Plans with Software
In my experience so far, 1mm would be a bit much at the 1:48 scale I am working at present. There is some trial and error working with 2D for my laser, but getting the notches for assembly nice and tight is a matter of a pixel or two thickness at 600ppi in my drawings. The laser software I use, LightBurn, actually has an offset to account for the laser kerf. Depending on the job it is typically .07 to .09 mm for me. I'm hoping with 3D, and Fusion360, that the actual fairing I have to do will be a lot less than I have been experiencing with 2D. Fusion is accurate to 6 decimal places, so I don't expect to run into any problems there. When I trace a pattern and specify a certain distance from A to B, it will be that size when I render it for cutting. If I'm not doing a good job of addressing your concerns, it's because I'm still pretty new to 3D. When I get to the point where I'm ready to do some cutting, I'll be better prepared to report some results. -
Great work on that railing.
-
Ship Ribbing with CAD?
Gregory replied to Sanjith_D's topic in CAD and 3D Modelling/Drafting Plans with Software
@Dr PR, I'm resurrecting this discussion because I have developed a lot more appreciation for your thoughts in this regard, particularly when it comes to model ship building. I feel like I may have been unjustly argumentative about the usefulness of a 3D work environment for laser cutting. Was I ever wrong. My 'scratch' build of Rattlesnake based on the MS plans has stalled after 3 iterations of trying to resolve the shortcomings of the plans in a 2d design environment. I've been spending a lot of time lately learning Fusion360, now officially just " Fusion ", but try Googling " fusion ", and see how much help you get for Fusion360. I have a lot to learn, but I feel I can now manage the workspace well enough, and can easily create the basic shapes needed for bulkhead type parts. Being able to manipulate a form and see exactly how the parts fit together before you start making sawdust or smoke ( in the case of laser cutting ) , is another world compared to working in 2D. I'm looking forward to reviving my actual model building I plan to start a discussion soon about some of the things I've learned about Fusion360, and also get some feedback from other users. -
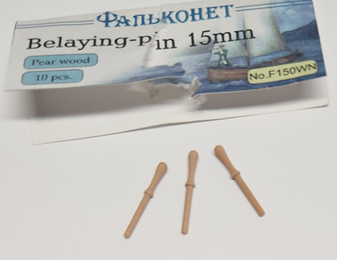
While we're at it how about some decent belaying pins? The really good ones from Falkonet are not readily available anymore.
-
You may have already realized this, but the only points you have to cut are the 'tabs'. These keep the laser cut parts from falling out of the sheet during cutting. It's standard practice for laser cut parts. I've found they can usually be cut with a hobby knife, but going from both sides makes it easier.
-
I'm glad I was able to help. I really like your refinements. I think this method could be adapted for tapering spars and masts. I must confess, I use a laser cutter for most of my tapering.

