Gregory
-
Posts
3,155 -
Joined
-
Last visited
Content Type
Profiles
Forums
Gallery
Events
Everything posted by Gregory
-

Forming a rabbet
Gregory replied to DaveBaxt's topic in Building, Framing, Planking and plating a ships hull and deck
If you go the route of replacing the stem and keel, my FET method will work. You can see in my Resolution build where I replaced the stem and keel, but I didn't have the FET, I used an added strip to form the rabbet -
Forming a rabbet
Gregory replied to DaveBaxt's topic in Building, Framing, Planking and plating a ships hull and deck
Dave , after looking at your build log I have to ask, is the stem and keel part of the backbone? If so, my method of using the FET for the rabbet in the stem area probably would not work after all. -
Forming a rabbet
Gregory replied to DaveBaxt's topic in Building, Framing, Planking and plating a ships hull and deck
Dave , I actually used the Proxxon FET to form a rabbet on the MS 1:48 longboat, including the stem/bow. I'll have to get back to you later with some pics. -
Cordless Micro Drills
Gregory replied to CLovehitch's topic in Modeling tools and Workshop Equipment
Along with what Bob is saying, I don't see that being much more useful than a pin vise. It is going to stall very easily and the tool selection is very limited compared to devices with a 1/8 collet sharing the Dremel type tools. While not cordless, I have found this to be very useful for light work. It weighs in at 6.8 oz, so is very easy to use. Dremel 2050-15 Stylo It also takes the Dremel keyless chuck eliminating the need to change collets for the smallest drill bits on up to 1/8 for all Dremel type accessories.
-
Allan, do you disagree that block size is determined by rope size? The type of ship shouldn't matter.. Here is a basic table from Mondfeld
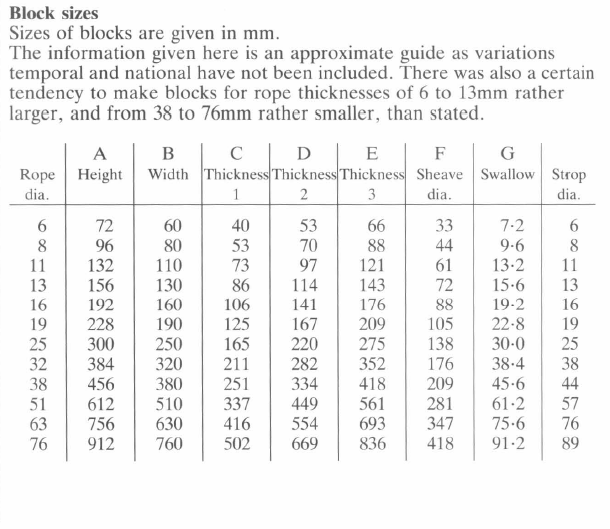
-
The size of the blocks are based on the rope size being used, not the other way around. You find the rope size you are using then find the block for that size rope.
-
This might help from a recent discussion:
-
Jiggling or Nibbling
Gregory replied to CLovehitch's topic in Building, Framing, Planking and plating a ships hull and deck
I have found these mini heat guns to work well. Mlife Mini Heat Gun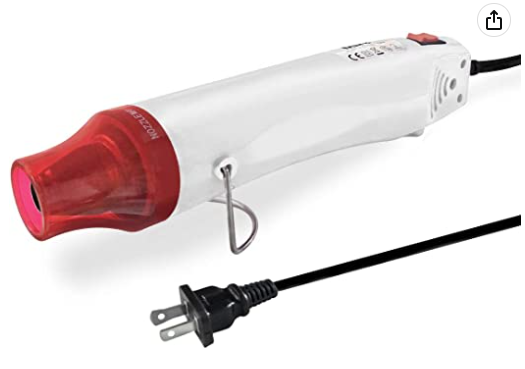
-
Jiggling or Nibbling
Gregory replied to CLovehitch's topic in Building, Framing, Planking and plating a ships hull and deck
The Jiggling or Nibbling didnt show up till late 18th century.. The hook method that Allan illustrated may have been used. -
Split ring making process
Gregory replied to Dave_E's topic in Metal Work, Soldering and Metal Fittings
While I'm sure soldering produces a great result it introduces a another set of tools, materials and skill set, and the result requires blackening. It might fit better in another topic, as the one who requested help said: -
Split ring making process
Gregory replied to Dave_E's topic in Metal Work, Soldering and Metal Fittings
Thanks for starting this. I have struggled with making these look good. I really like CPDDET's fine cut-off disks.. I now have some on order. Like everything he does, Chuck makes it look so easy. He's probably made thousands of these. If only he would start selling them..
-
Split ring making process
Gregory replied to Dave_E's topic in Metal Work, Soldering and Metal Fittings
Coating with CA might work as well. -
The best place could be anywhere depending on where you are located.. As for the 2nd question, a good scroll saw has been the best option for many years, decades, now. Next up would be a laser cutter, but it has a lot of accompanying skill requirements with the software it requires..
-
From the link: "The Ropewalk Machine itself is no longer available"
-
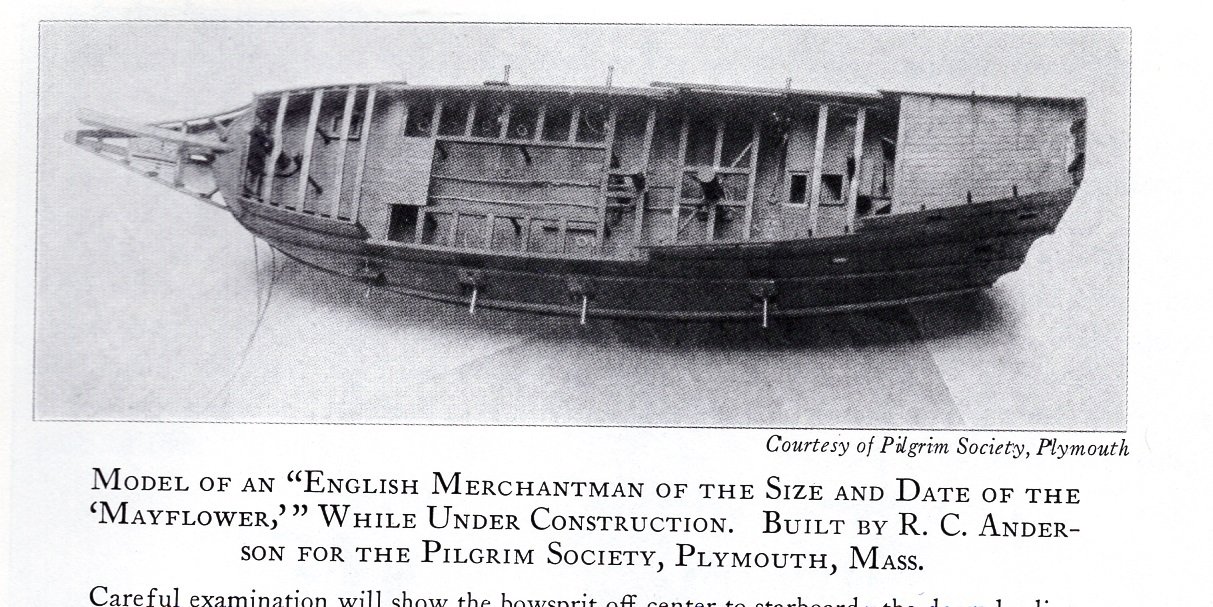
This is another excerpt from the Magoun book. While nothing specific, the impression I get from the book is that it w as an English built ship. I have no knowledge of the expertise of R.C. Anderson.
-
Roger, The Mayflower was possibly built before 1600 and definitely before 1620 . Is there any good reason to believe the capstan location was similar to a Basque built ship of 1780?
-
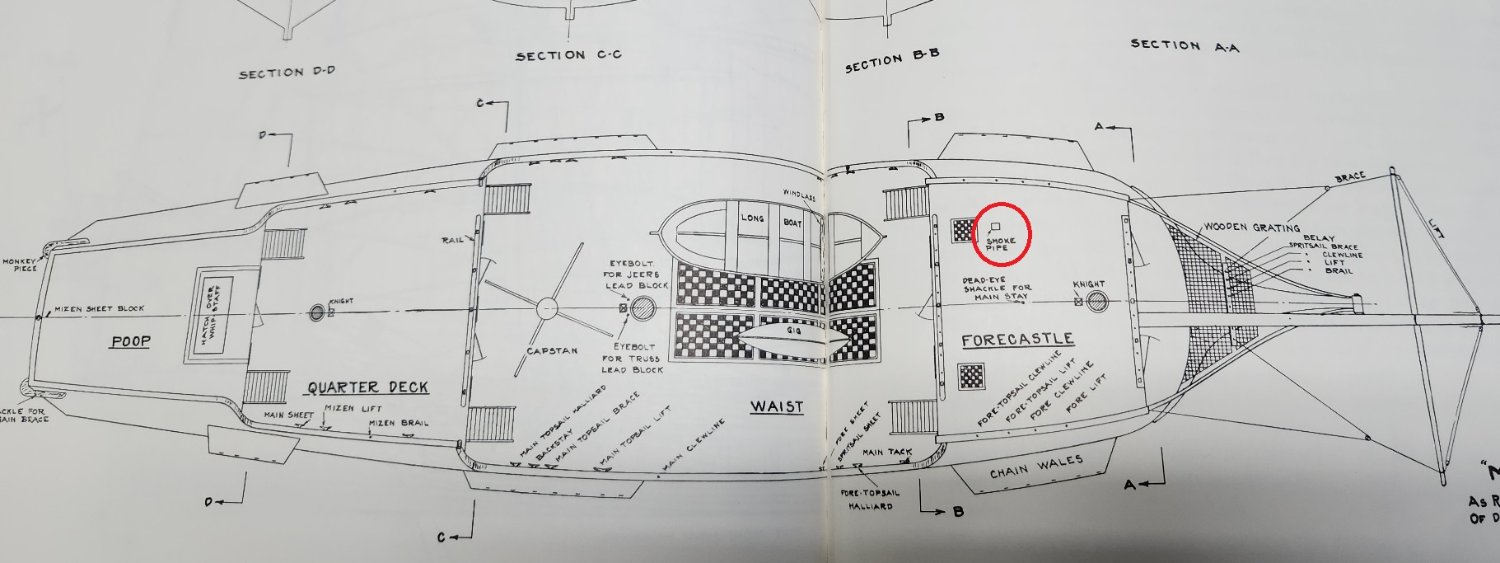
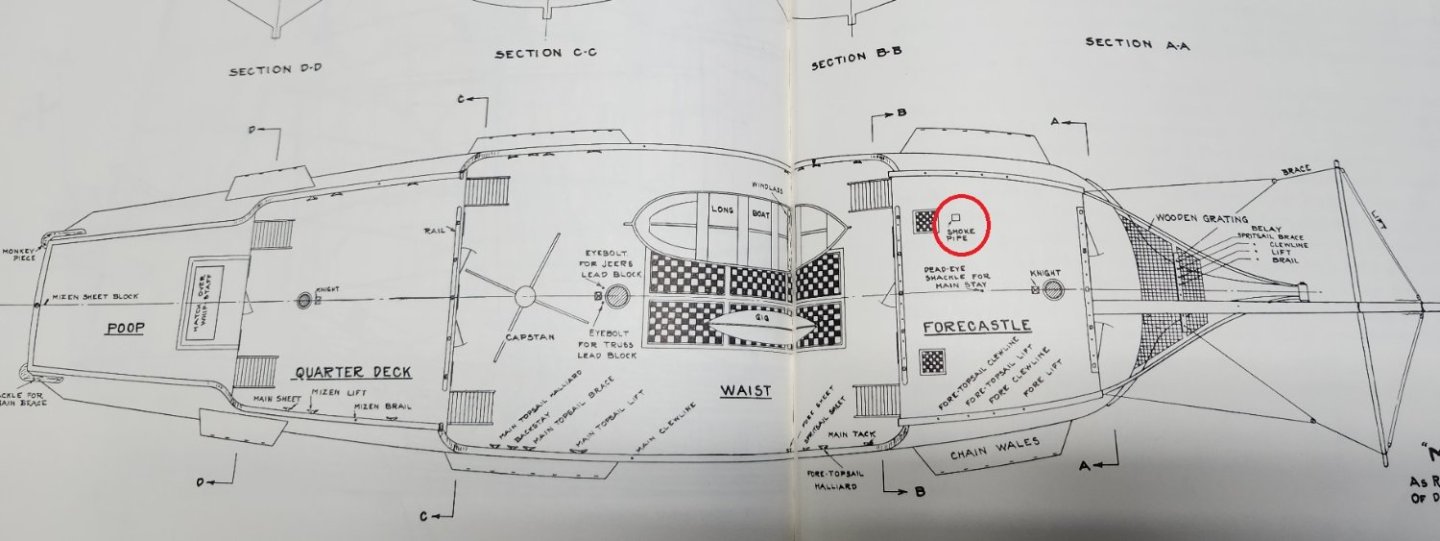
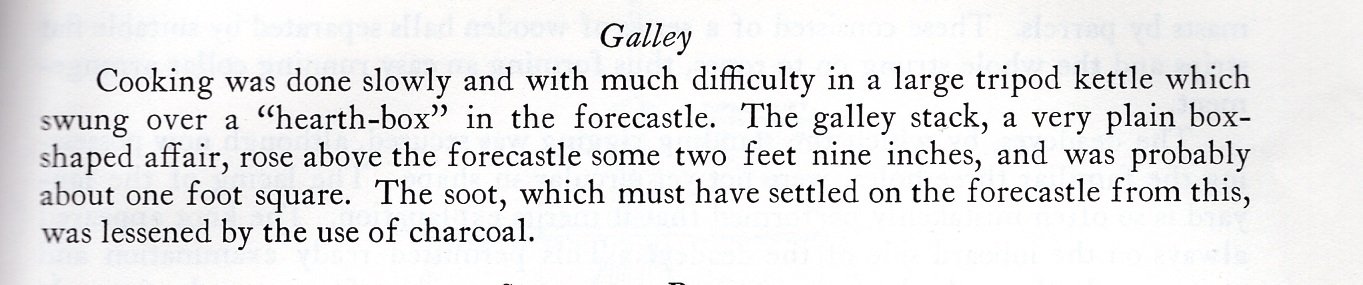
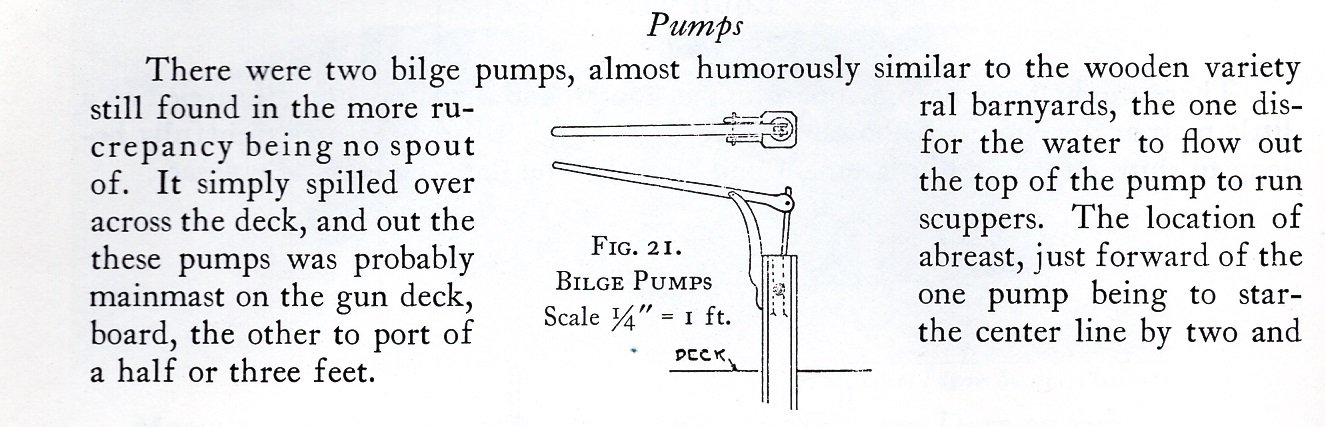
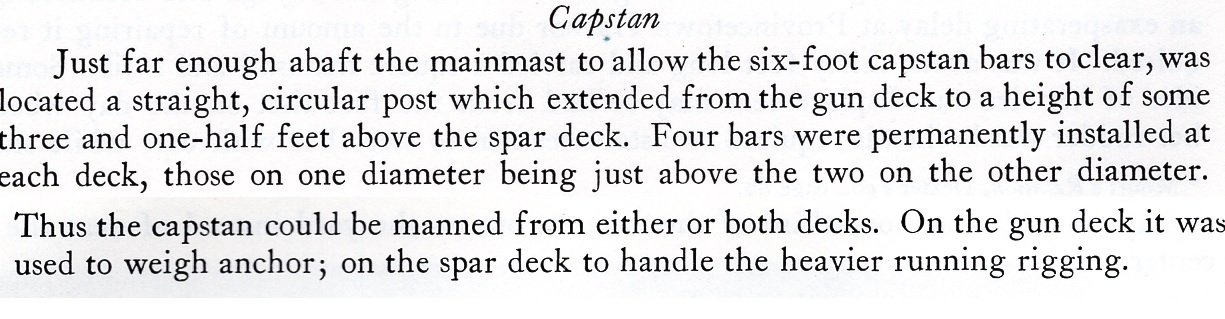
In the book " The Frigate Constitution And Other Historic Ships " F. Alexander Magoun has a chapter on the Mayflower. The information seems to be based on standards for similar vessels, with no mention of documented facts, but he speaks of some features as if they are facts. He offers a plan for the deck. I have circled where he shows the ' Stove Pipe ' However, he wrote of a 'galley' that must be under the forecastle deck show above. This is what he writes about the pumps. The ' gun deck ' would have been below what he shows as ' The Waist ' in the plan above, so the pumps he describes would not have been visible if your model is similar. Here is what he says about the capstan. It seems unlikely that the bars would have been mounted permanently, but others may know if it was in fact the practice on these type of boats. There is no mention of a binnacle, so it is possible just a compass in a box was used as needed. In lieu of other trusted sources, I think you will be safe in following these suggestions, and making it look good to satisfy your goal. I notice in the image Allan provided you can see the kettle and pumps as Magoun describes, but with the capstan forward of the main mast.
-
Feibig is alcohol based, and I have used it successfully on polyester line.. I would think using it before making the hanks would be best.
-
That would cause a problem with porosity..😁 Your suggestion might fix that...
-
For PVA or CA not to work suggests a problem with lack of porosity.. Sounds like the wood is sealed one way or another.
-
I have seen kit instructions that actually call for this..
-
Once the outer planking first layer is in place, those frames can be thinned as much as you need to..
-
Typically on kits, the strength of the bulkhead gunwales extensions come from the planking; inside and out. You should see the ModelShipways Rattlesnake. I have stopped counting how many I have had to replace. They are only 1/8" @ 1:48. Additionally, reinforcing those pieces can interfere with gun port framing.
-
What reference is this? Rope measurements were typically circumference, but I have seen exceptions. What does your table say for breeching on 6 pounder? Lavery says the breechings for 4 and 6 pounders were 4 inch circumference.. The tackle was 2 inch for less than 24 pounds.
-
Makes no difference to me.. What matters, is how oakheart wishes to proceed.. There seems to be a lot of differences of interpretations of these ship's boat plans. Some seem to worry about the smallest detail, but I have yet to see anyone model the details of transom construction. Most seem content to show it as one big piece, when it surely wasn't built that way. I plan to address this with my build.