Gregory
-
Posts
3,173 -
Joined
-
Last visited
Content Type
Profiles
Forums
Gallery
Events
Everything posted by Gregory
-
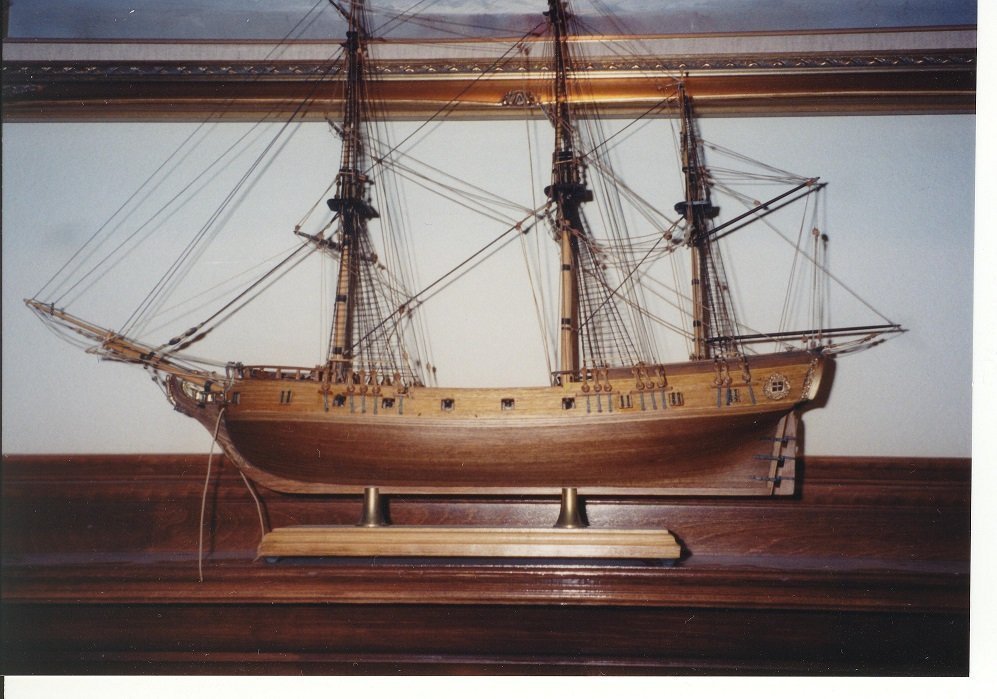
 I've read that the garboard should end before the stem/keel begins to curve upward.. Does that sound right? Here is an example from Glenn's Cheerful.
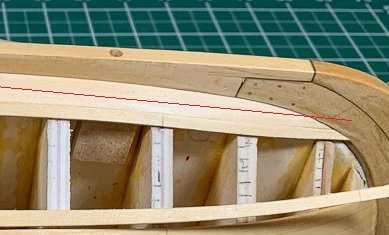
-
That is correct, and where a drop plank would be used. It reduces the number of planks by 1..
-
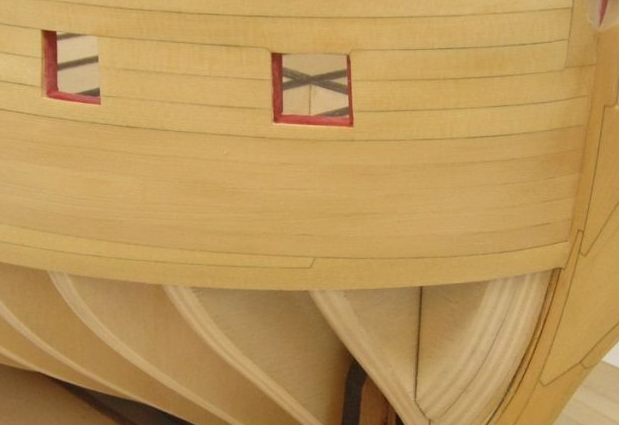
50% May or may not be enough. In the planking resources you will find that you should count the number of full planks amidships. Measure the space available at the bow and divide by the number of planks. If it looks like the planks at the bow are going to be too narrow then you may need a drop plank which will reduce the number of planks at the bow by one.
-
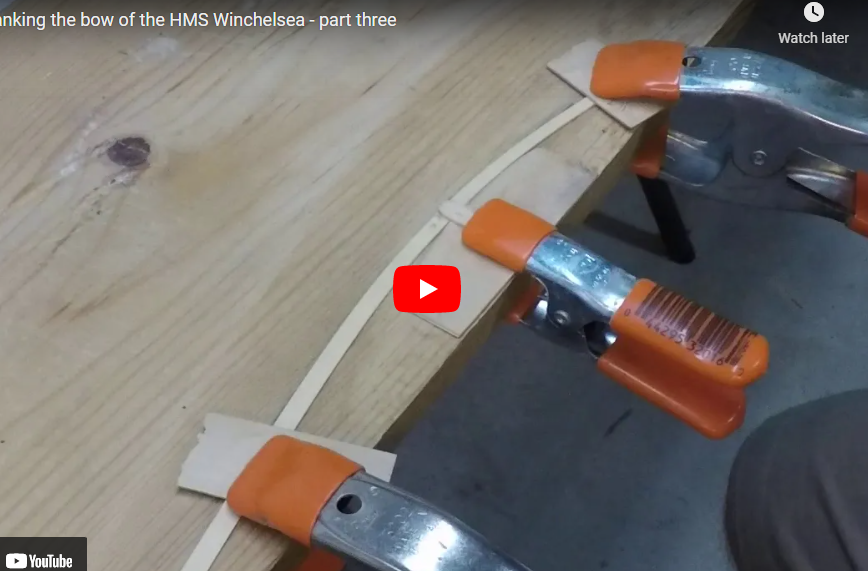
At the link provided above, did you look at the video regarding longitudinal bending? It accomplished the same thing as spiling. ( Image from link above.. Not a video )
-
Here is a link for you: https://modelshipworld.com/forum/98-planking-downloads-and-tutorials-and-videos/ Here is another recent topic where another member was given some help regarding of shaping planks to lie flat on a curved hull.
-
Size of Rope and Serving for Stropping blocks
Gregory replied to Peter6172's topic in Masting, rigging and sails
With regard to serving block strops, I would suggest it's a matter of getting it to look right rather than going with convention. At 1:65 scale you face some challenges. Some great examples of very detailed rigging, although at 1:48, is by Johann in his La Creole build. I will point to some of his stropping work, but the rest of his build has a lot of rigging detail. -
For sail cloth, I have used fine, high thread count shirts or dresses I have found at the thrift store. I also like tulle for getting an interesting effect for windows when the subject calls for it.

-
Tips on prepping masts, spars, etc for tapering
Gregory replied to Capella's topic in Masting, rigging and sails
Another option whether drilling or lathing, is to make the spar in two pieces which can be joined together after the tapering is done.. -
This is pretty close.. I would visit a fabric shop and try to find a little smaller mesh tulle..
- 35 replies
-
- 2
-

-

-
- Constitution
- Revell
- (and 1 more)
-
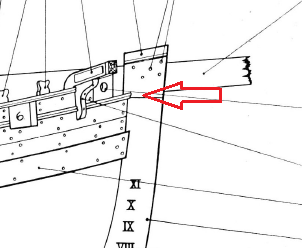
I skimmed through the instructions and see no purpose for that hole.. Perhaps Chris will chime in.. It doesn't show up in the AOTS book as a hole... It seems to coincide with some molding, but I can't tell to what extent the molding is modeled in the Vanguard kit..
- 562 replies
-
- 1
-
-
- vanguard models
- alert
- (and 2 more)
-
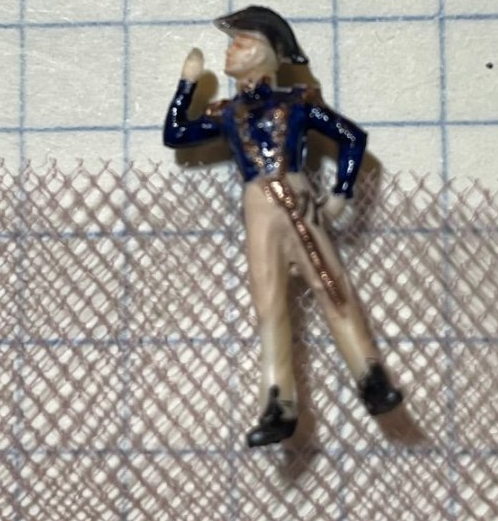
Note how the text also says there is a breeching loop, of which there is none..
-
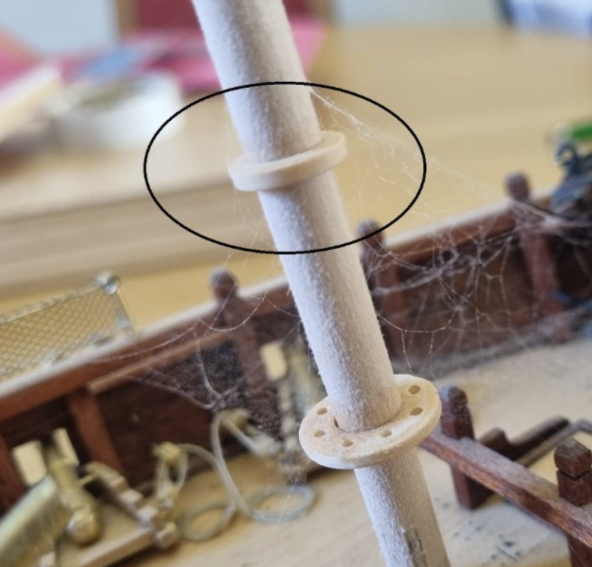
One more note about the ring on your foremast.. Your ring might be a misplaced shoulder for the main boom. The fore mast doesn't have a boom so the shoulder would be out of place there. P.S. If you haven't seen it already, a real nice log for this kit with a lot of detail is this one by Sam (SRC )
- 89 replies
-
- 3
-
-
- Enterprise
- first build
- (and 2 more)
-
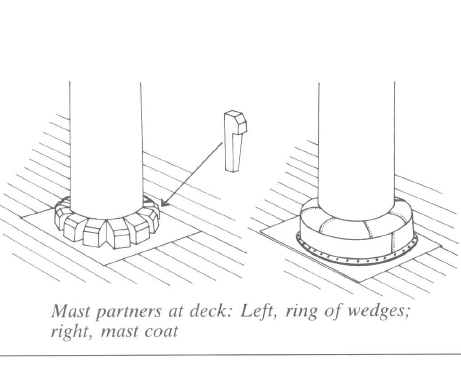
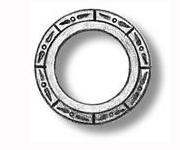
There was rarely if ever a continuous ring of material around the mast at the deck. What you usually see is a modeling convention. The mast coat might have been tarred canvas placed over a series of wedges. Here is an example decorative looking fitting from AgesOfSale Just use the ring on your mast, or cut another one to make some wedges to place around the base of the mast and embellish them as you see fit. Your shroud rigging at the channels really looks good..
- 89 replies
-
- 3
-
-
- Enterprise
- first build
- (and 2 more)
-
Very nice macro photography.. What camera are you using?
-
Your New "cautionary tale" posterchild here!
Gregory replied to Valkyrja68's topic in New member Introductions
With everything I said, I think cloth can be used to good effect depending on the subject. If you take a look at my Mary, I am happy with the way the sails came out. They provide a look I was going for that had nothing to do with a concern that the stitching is way out of scale. I was just being preemptive, knowing there are those here who are prone to advise against sewn sails. I think you should explore your creative goals when it come to model ship building. -
Your New "cautionary tale" posterchild here!
Gregory replied to Valkyrja68's topic in New member Introductions
While not the final word, you will find the use of cloth, that requires sewing, is not well received here due to the challenges of achieving a scaled look. The weave of the cloth and the size of stitches detract from an otherwise finely detailed model. There are some models displayed with fairly decent cloth sails, but I don't recall anyone sharing technique to any extent. There is an excellent tutorial on making sails with silkspan to be found here: Considering this project ( Medway Longboat ) is 1:24 scale, it reflects the limitations of trying to get a good effect with cloth. I searched for 'cloth + sails' and got a few pages, but it remains to be seen what you might filter out of it.. https://modelshipworld.com/search/?q=cloth %2B sails&quick=1 -
Ancient anchor found in Yucatan.
Gregory replied to Eugenio Treviño's topic in Nautical/Naval History
Two or three hundred years is pre-historic as far as I'm concerned.. -
The SI plans ( which I haven't seen ) must have been derived from the NMM plans which are available at the link I provided above. The MS plans and the Mamoli plans which I have, match the NMM plans very closely as far as the general arrangement is concerned.
-
@Dave_E If you have decided to go with MS, I'm sure you have searched up some of the logs. I hope you found this one: It' stalled for now, but there is a lot of progress and some great examples of technique..
-
Nice work Dave.. What is the official name of that chuck fixed to the Proxxon mill? It looks really useful..
-
I have never seen a topic here where someone talked about " bashing " and had to explain what they meant. I could have missed it, though. Terms and languages, evolve. I always take " bashing " to mean adding something or improving (subjective ) on something that was not included in the kit.
-
Your New "cautionary tale" posterchild here!
Gregory replied to Valkyrja68's topic in New member Introductions
Post pictures in your log and I'm sure you get will plenty of help. We have many members who have built the Revell Connie. -
I am inclined to vote for the MS kit.. It will have the best plans and fittings in general. Try to catch it on sale when ModelExpo is having a ' free shipping ' add on.. Subscribe to their news letter. I don't know if you are aware of ModelExpo's policy of replacing any parts for any reason. it's a great reason to do business with them.
-
Your New "cautionary tale" posterchild here!
Gregory replied to Valkyrja68's topic in New member Introductions
A good thing to remember, is if you have a particular kit in mind, just run it by us here and we can tell you if it is not welcomed here for some reason. -
The Mamoli kit was my first wood kit over 25 years ago. No internet, so I relied on what I gleaned from Seaways Ships in Scale and several books I acquired. I found it to be a great learning experience. I just wasn't aware of the shortcomings of the kit because I didn't have anything to compare it to. Here it is, mostly finished. I gave the finished model to a relative, and have since recovered it in very bad shape. If I get around to doing a scratch POB model, this would be high on my list.. I think the ornamentation would be an interesting CNC wood carving project.