-
Posts
3,141 -
Joined
-
Last visited
Content Type
Profiles
Forums
Gallery
Events
Everything posted by Gregory
-
Help with 5mm deadeyes on Bounty
Gregory replied to JayDee24ca's topic in Masting, rigging and sails
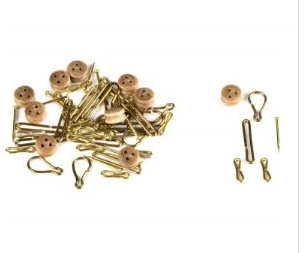
You will be looking for something like this.. Brass Chainplate with Deadeye Your components should be similar.. -
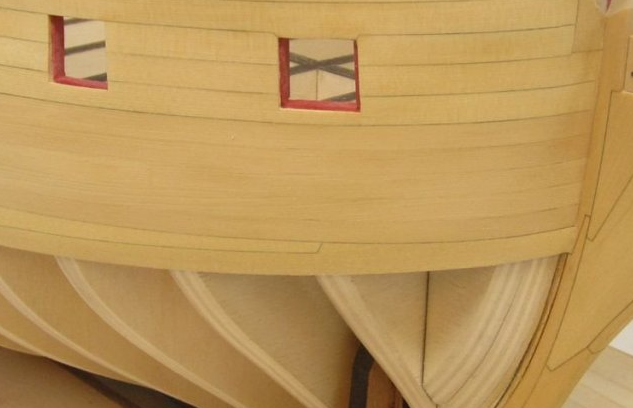
You might consider Cheerful.. It requires more or less scratch work depending on which of mini kits you decide to go with.. If you are not ready to mill your own strip wood Another of our sponsors Modelers Sawmill has a wood package for Cheerful.. PS If Cheerful seems a bit ambitious, any double planked kit that appeals to you, and appears to have a good framework, will give you a chance to practice the planking twice, as you can use 3rd party wood to cut and shape proper planks. The draw back of most plank on bulkhead kits is that they don't have enough bulkheads to form a smooth one planking approach. This can be overcome to some extent by filling in the space between bulkheads with some suitable wood.
-
There is lots of interest from those who are buying kits from our members Chuck and Chris, owners of Syren Ship Model Company and Vanguard Models, respectively.. Take a look at The Winchelsea project and the many Sphinx logs to see what these kit designers have accomplished with Lasers. I have done a lot of laser work in my Resolution build..
-
Artesenia Latina Printed Instructions Needed
Gregory replied to Aj73's topic in Modeling tools and Workshop Equipment
The link for me goes to the Bounty page. Note that the word " Bounty " is part of the URL. Scrolling down I see: When I click on "Instructions And Downloadable Contents", I see: So, hopefully there are some instructions in there.. -
Artesenia Latina Printed Instructions Needed
Gregory replied to Aj73's topic in Modeling tools and Workshop Equipment
Downloadable instructions here: https://artesanialatina.net/en/ships-elite/486-wooden-model-ship-kit-hms-bounty-frigate-8421426228106.html -
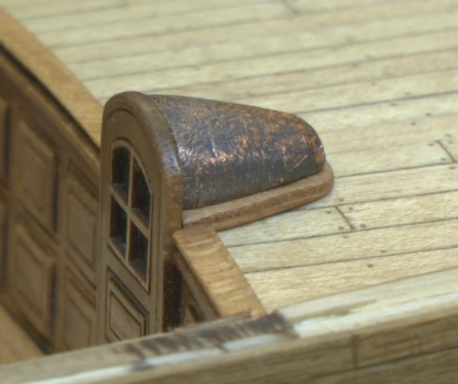
Have you ever worked with copper leaf? The link above starts off talking about gold, but makes it clear it is copper if you choose it from the various options. It might make a good covering for your existing work. My experience is that it goes on almost like paint and is seamless. I used it to cover the the cupola of the companionway on my Resolution. It goes on as very shiny copper, but a patina can be created in various ways.
-
Copper plates
Gregory replied to Barbara's topic in Building, Framing, Planking and plating a ships hull and deck
Might be a little hard to find if one doesn't know their way around the site.. You have to go to the NRG home page and look at Resources, then find your way to "ARTICLES AND HOW TOS", then find the article by Gene. https://thenrg.org/resources/Documents/articles/CopperSheathingaHull.pdf -
MAKING EYE'S AND HOOKS
Gregory replied to Peter6172's topic in Modeling tools and Workshop Equipment
I've found the twisted end can be twisted into a hole like a screw and require no glue.. -
That looks real good! As long as you let the headstock move you shouldn't have to worry about breakage.. If it gets too tight it will start to kink..
-
Need help making eyes, loops, etc.
Gregory replied to Michael Scarborough's topic in Masting, rigging and sails
For those who want to be more challenged, here is a fine example by Johann . -
Goodwin shows a mouse on Alert in his AOTS.. He references a rigged model, Hawke, but I can't tell from the images if the mouse is on the model..
-
Don't forget, Chris is a member here and always quick to answer any questions...
-
You might consider one of the smaller boats from Vanguard like Erycina, Nisha Fifie ‘Lady Eleanor’, Zulu ‘Lady Isabella’.. You can download the manual for free for some if not all of these at the Vanguard site. The vanguard manuals are like practicums, and there are many logs here at MSW.. If you want to order in North America, another of our sponsors Crafty Sailor has many of these kits..
-
Back when I was building my first kit almost 30 years ago, and there was no internet, I came across the idea of beeswax dissolved in turpentine. I think it may have been Longridge's Anatomy of Nelson's Ships, or an article in Seaways. This allowed it to really soak the line, and the turpentine would evaporate after a while. I still had to use an alcohol lamp to get rid of the fuzzies. I still have that ship ( in pieces ) and the rigging line, I believe it is cotton, is quite stiff. It looks OK.. I believe the beeswax helps it from being affected by moisture, which is not a problem with polyester.. The fuzzies are not as much of a problem with polyester, depending on the thread. Seems to be minimal with the Gutterman I use for making my own rope..
-
I have experimented with bees wax but did not find it to be a solution to the fuzzies.. The flame ( alcohol lamp ) is the best way , but takes practice and care. For the UK, I have heard Amati sells pretty good rope. Available at Cornwall Model Boats.. Most kit supplied rope leaves a lot to be desired, If you are planning on building more boats, kits or otherwise, you might look into making your own rope..
-
Less costly rigging rope for Pride of Baltimore II?
Gregory replied to Brewerpaul's topic in Masting, rigging and sails
If you don't want to make your own then one of the sources already provided would be the way to go.. -
Why do you feel this is important at this point? Small variations can be taken care of with shims or fairing to get a smooth run of the planking. The only legitimate way to get symmetry is to have templates that you use to compare to both sides.. Did the kit come with bulkhead drawings.. These could have been used before assembly to make corrections. At this point they could be used to make templates.
-
-
'Knot' is also a verb..🙂
About us
Modelshipworld - Advancing Ship Modeling through Research
SSL Secured
Your security is important for us so this Website is SSL-Secured
NRG Mailing Address
Nautical Research Guild
237 South Lincoln Street
Westmont IL, 60559-1917
Model Ship World ® and the MSW logo are Registered Trademarks, and belong to the Nautical Research Guild (United States Patent and Trademark Office: No. 6,929,264 & No. 6,929,274, registered Dec. 20, 2022)
Helpful Links
About the NRG
If you enjoy building ship models that are historically accurate as well as beautiful, then The Nautical Research Guild (NRG) is just right for you.
The Guild is a non-profit educational organization whose mission is to “Advance Ship Modeling Through Research”. We provide support to our members in their efforts to raise the quality of their model ships.
The Nautical Research Guild has published our world-renowned quarterly magazine, The Nautical Research Journal, since 1955. The pages of the Journal are full of articles by accomplished ship modelers who show you how they create those exquisite details on their models, and by maritime historians who show you the correct details to build. The Journal is available in both print and digital editions. Go to the NRG web site (www.thenrg.org) to download a complimentary digital copy of the Journal. The NRG also publishes plan sets, books and compilations of back issues of the Journal and the former Ships in Scale and Model Ship Builder magazines.


