-
Posts
3,176 -
Joined
-
Last visited
Content Type
Profiles
Forums
Gallery
Events
Everything posted by Gregory
-
Fairing the bulwarks
Gregory replied to Bill Madison's topic in Building, Framing, Planking and plating a ships hull and deck
Here is a link for you: Ship Model Framing and Planking -
FWIW, I heard that Bluejacket makes the frames by creating a full hull with CNC, then slices it up to make two kits.. Maybe Mr. Bluejacket will see this and clarify if I'm wrong.. I can't visualize at what point the errors you are seeing would creep in. It certainly speaks of a lack of quality control..
-
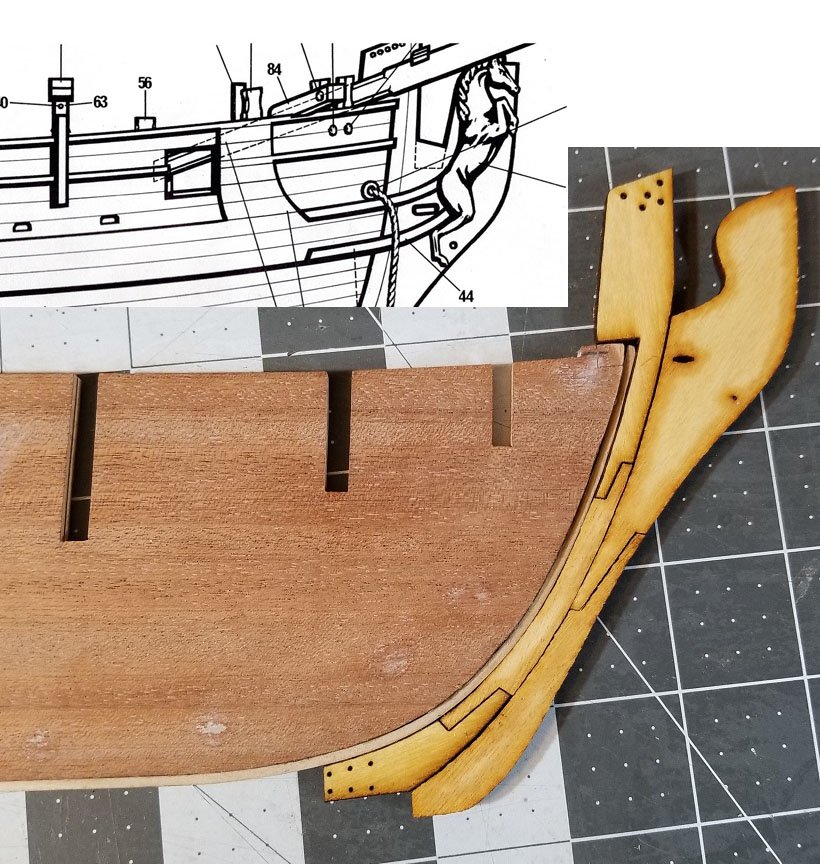
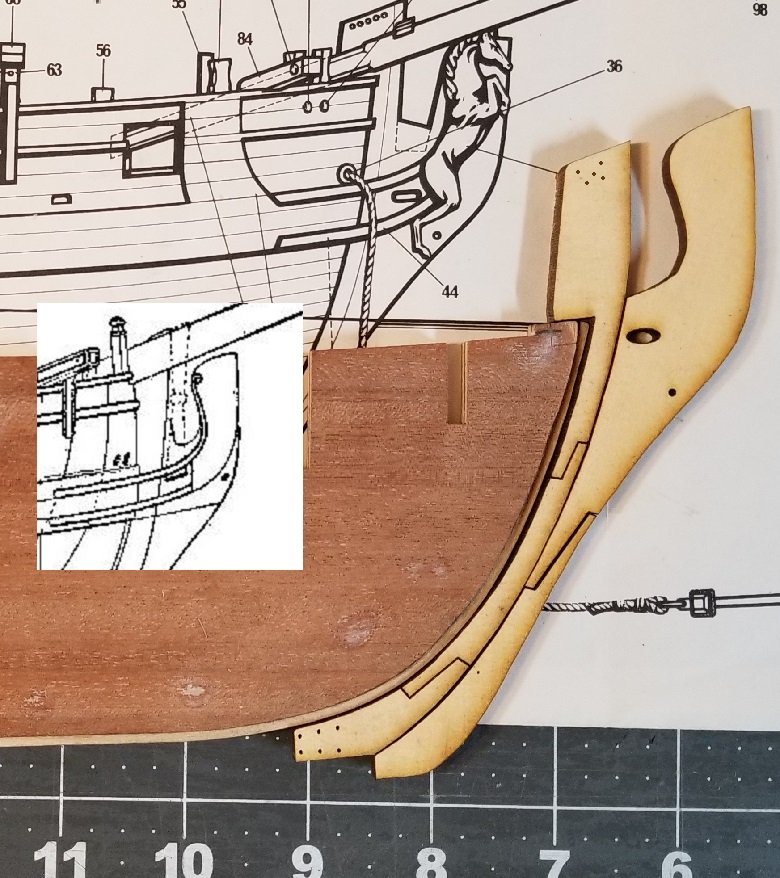
A few subtle changes. I cut some pieces from my new yellowheart . Not glued, and not cleaned up, so we can compare the difference afterword. The discoloration is from the smoke created when cutting.. That should change with the cleaning.. I realized I shaped the forward-most stem to sit too high as seen in the previous post, so I scaled that back..I should have the rest of the keel finished soon
-
I'm working on the prototype for the stem pieces. I decided to use the stem profile from the Chapelle/NMM drawings, as I don't plan on using the figurehead provided in the kit, and the NMM lines appear to reflect a common shape of the period. The char has not been cleaned up, and I may not bother, as I will be using some other wood, yet to be determined. The joint on the two front pieces does not look tight because it isn't glued. The back piece is just one piece at this time. I decided to just engrave the scarfs instead of cutting three desperate pieces. Depending on how the grain looks on the wood I settle on, I may decide to make separate pieces.
-
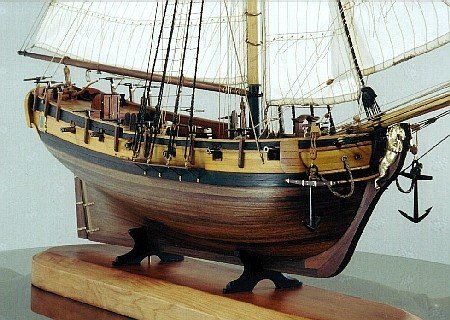
In your image of the contemporary model, do I see another step at the stern post, or is that an illusion?
- 1,784 replies
-
- winchelsea
- Syren Ship Model Company
-
(and 1 more)
Tagged with:
-
Basically , with double planking. the first layer lets you make mistakes that you can sort out and create a smooth basis for the finishing layer. Up until recently. most of the kits aimed at beginners had too few bulkheads to get a good basis for a successful single planking. Kit makers had to keep costs down, which means less material. For the most part, double layer planking became a convention based on the majority of kits kits that were available. People would buy the kits and try to follow the instructions, that called for double planking. Single planking has only become a reasonable option with the growth of sites like this, where people can actually learn how to do it. At this stage in my model building, I prefer double planking because I can use a variety of veneers that wouldn't be available as strip wood for a single planking effort.... Bruce, From your link, I really like these comments by Kurt. There is a lot of good information in that topic..
-
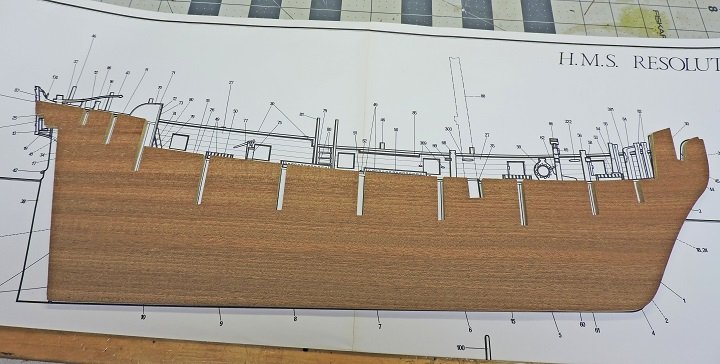
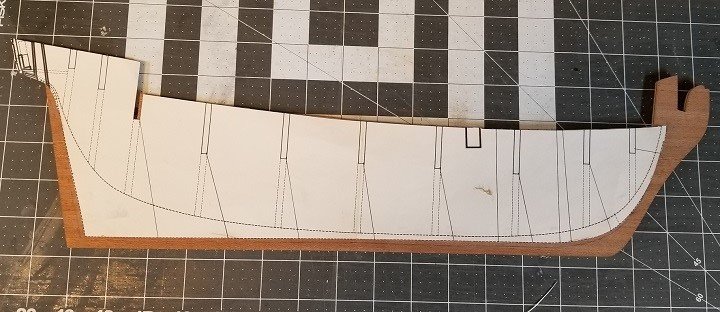
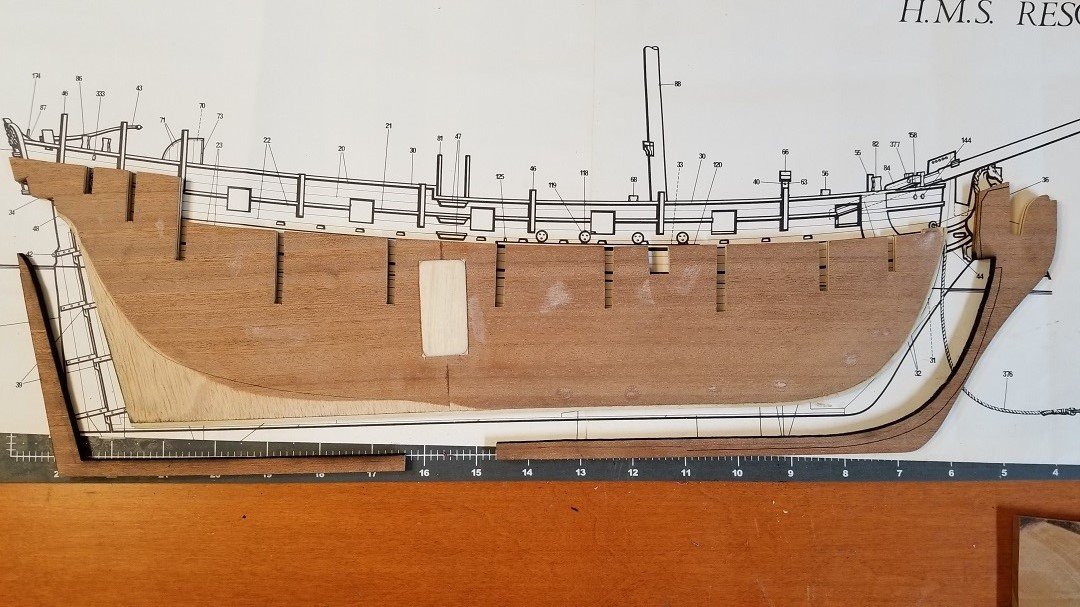
Corel's plans call for the stem, keel and stern post to be covered with veneer at some point. I'm fortunate to have acquired a laser cutter not too long ago, so my intention is to create a built up stem and keel parts with some wood stock yet to be determined. First, I cut out part of the plans to define my cutting area. I had to cut the frame into two pieces, because my laser bed is not big enough for the full size frame. I put it back together, added a rabbet strip and started defining the bearding line. You can see the pieces I cut off with the laser; they will help me shape the new parts. Here are the tentative lines for the stem parts.
-
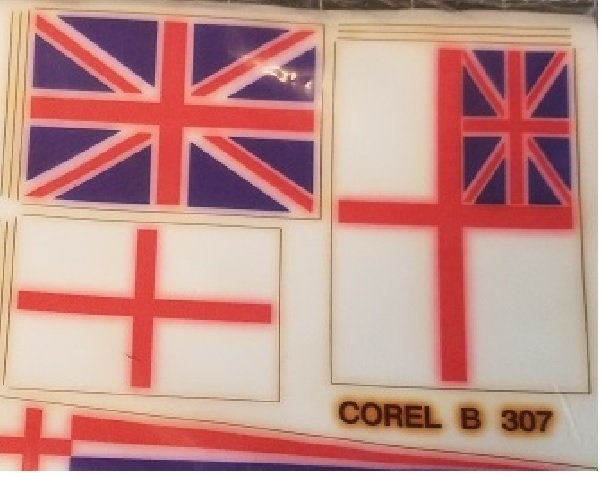
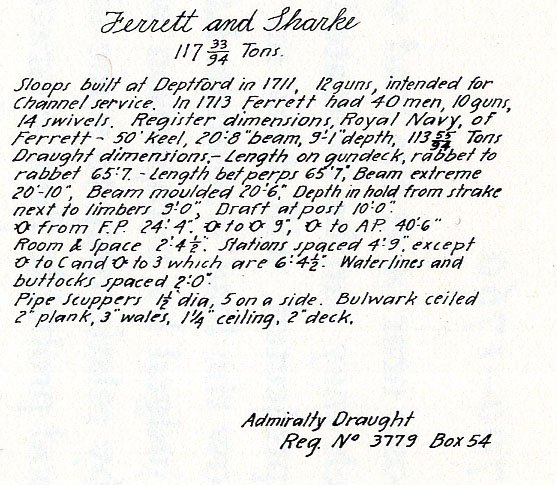
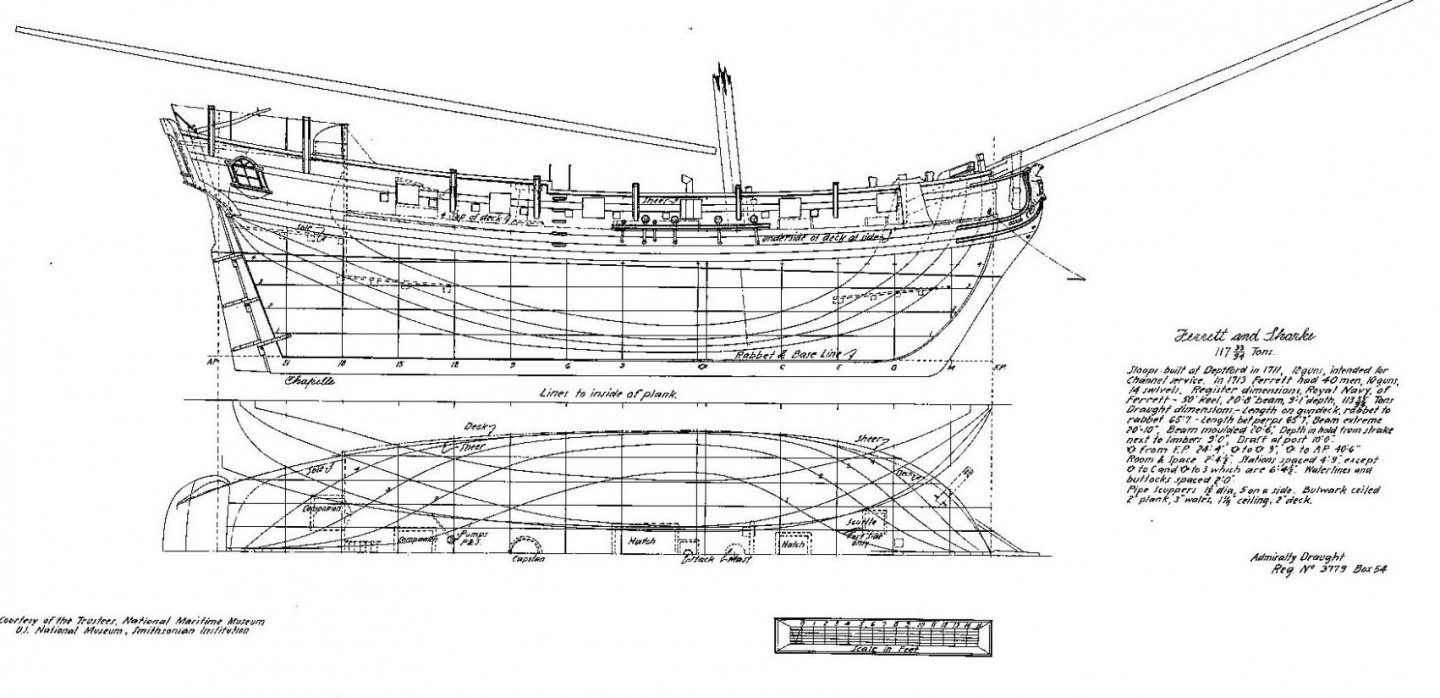
Seeing your build inspired me to get this off the shelf and get busy. I just looked at your flag on speedy. It looks really good. Was that out of the box? The red is all bled out on mine and I can't think of any easy if any way at all to fix that. Here is a readable version of the text from one of the Chapelle drawings.
-
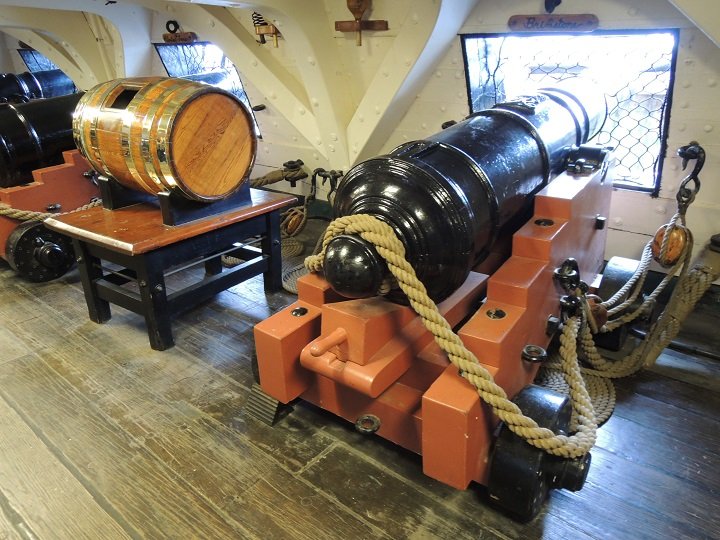
Something to keep in mind. The cannon rigging on the gun deck will not be visible on the completed model for all practical purposes.. You might consider not bothering with the eye bolts and breeching ropes as shown on the plans. Just go for a nice look on the cannon barrels, as seen from the gun ports..
-
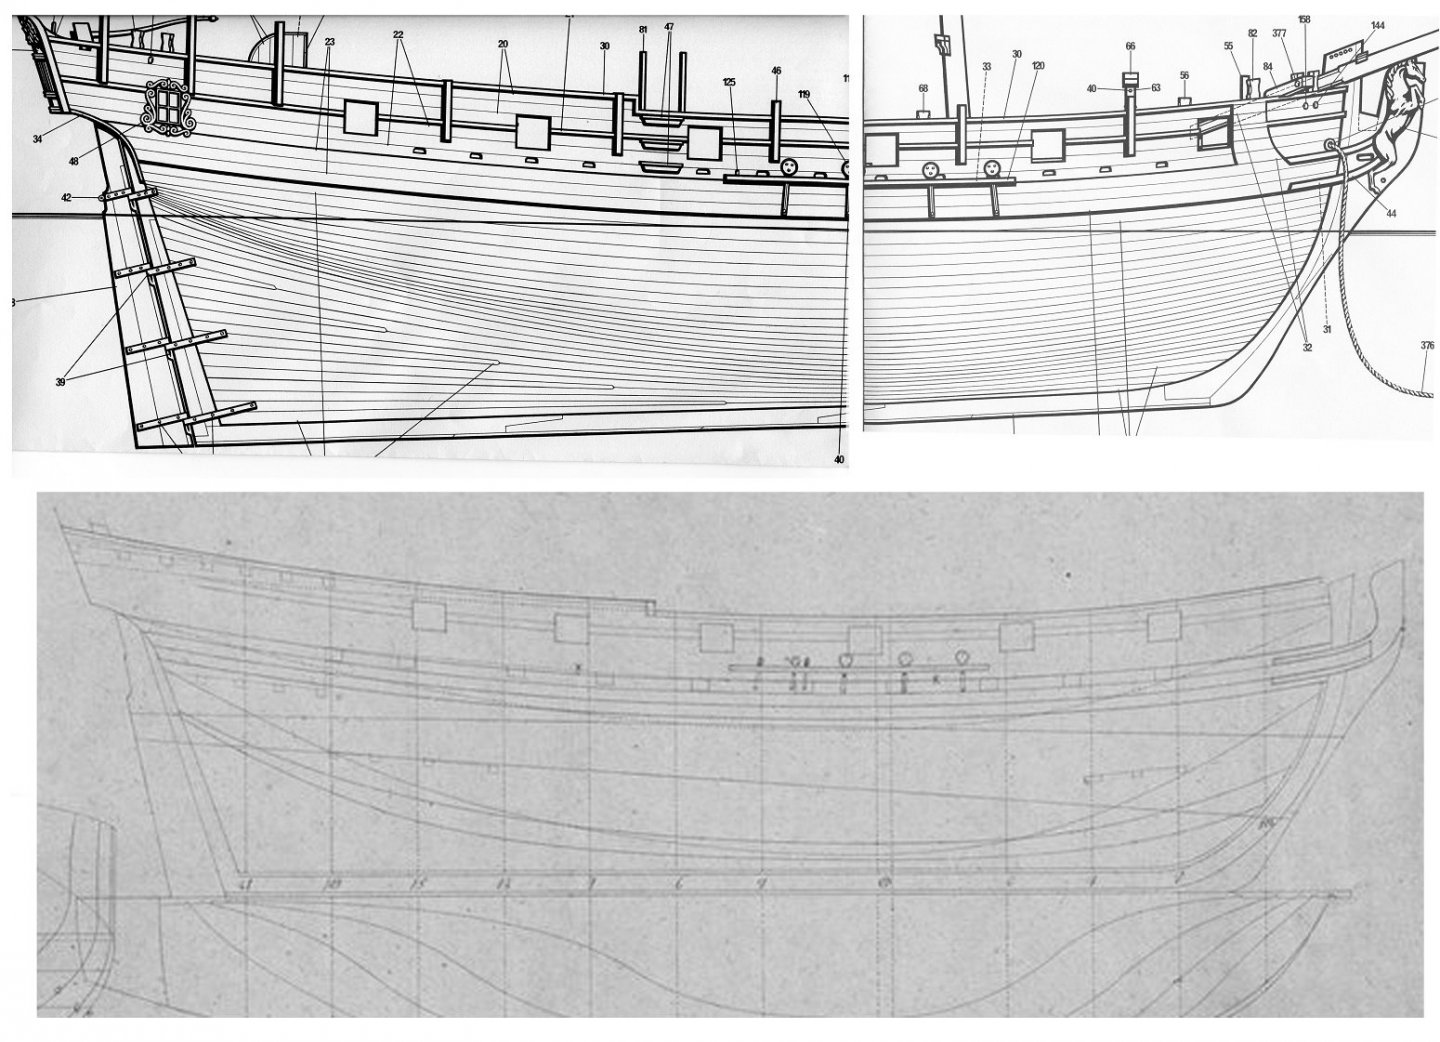
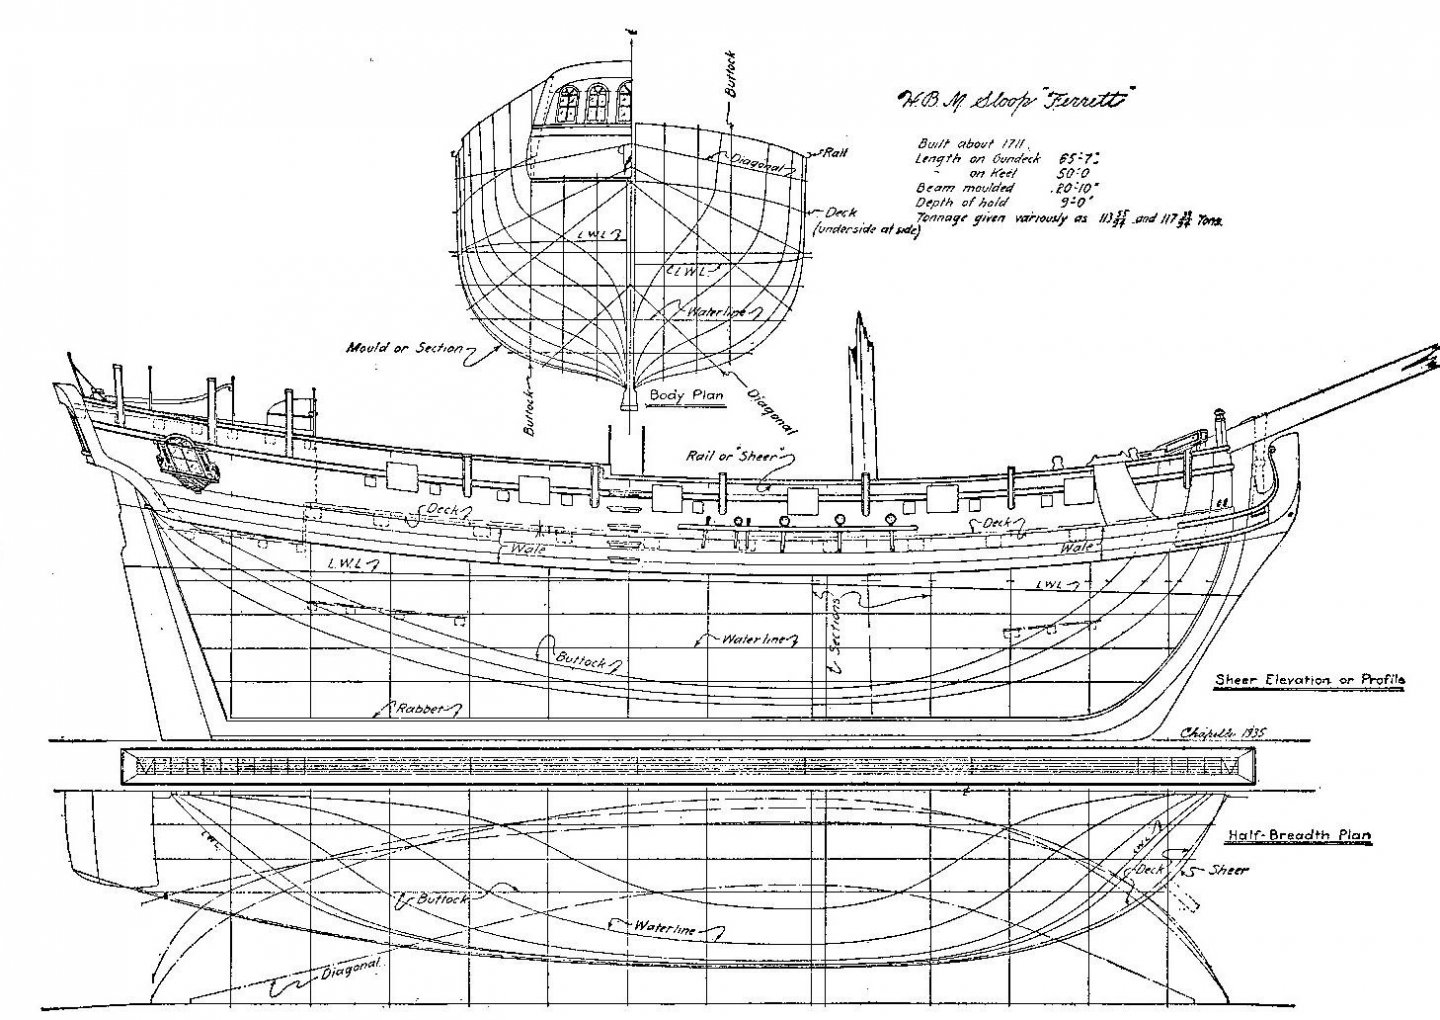
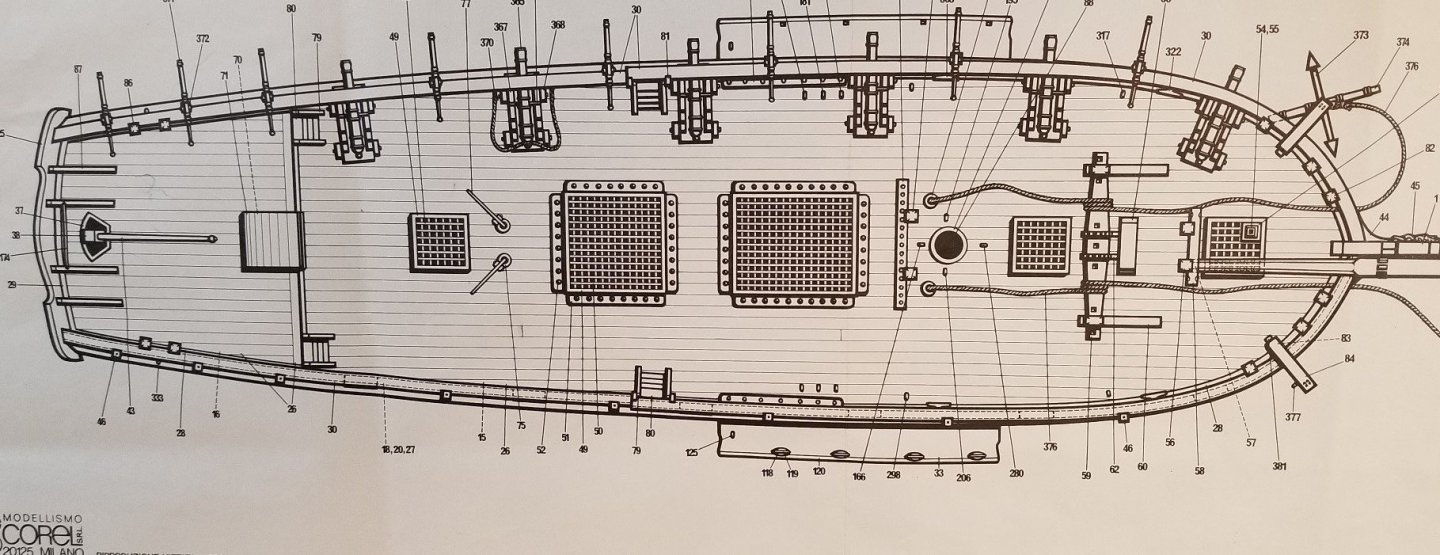
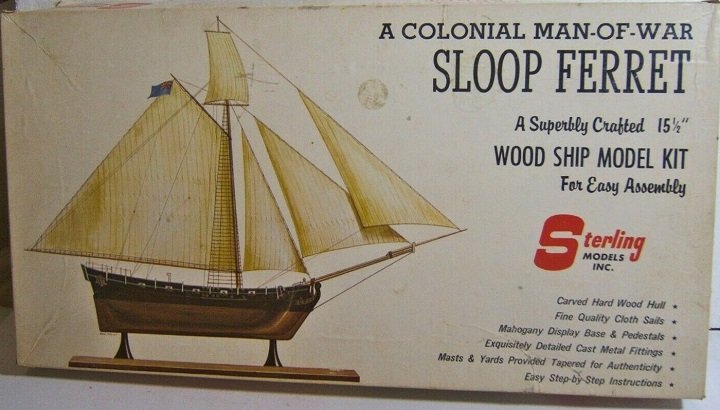
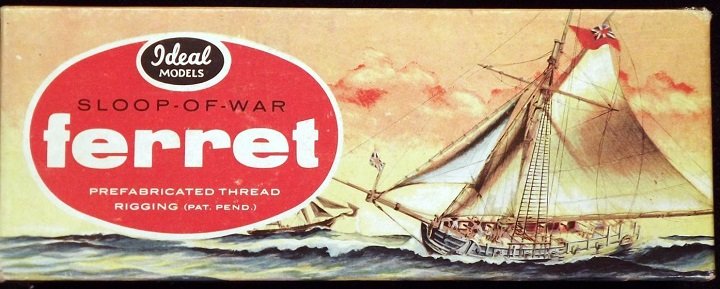
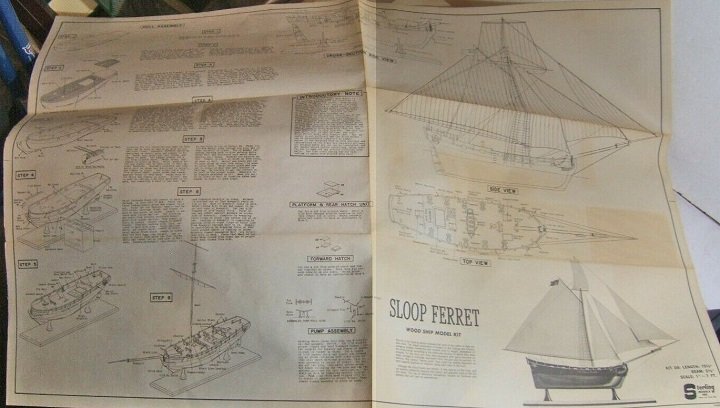
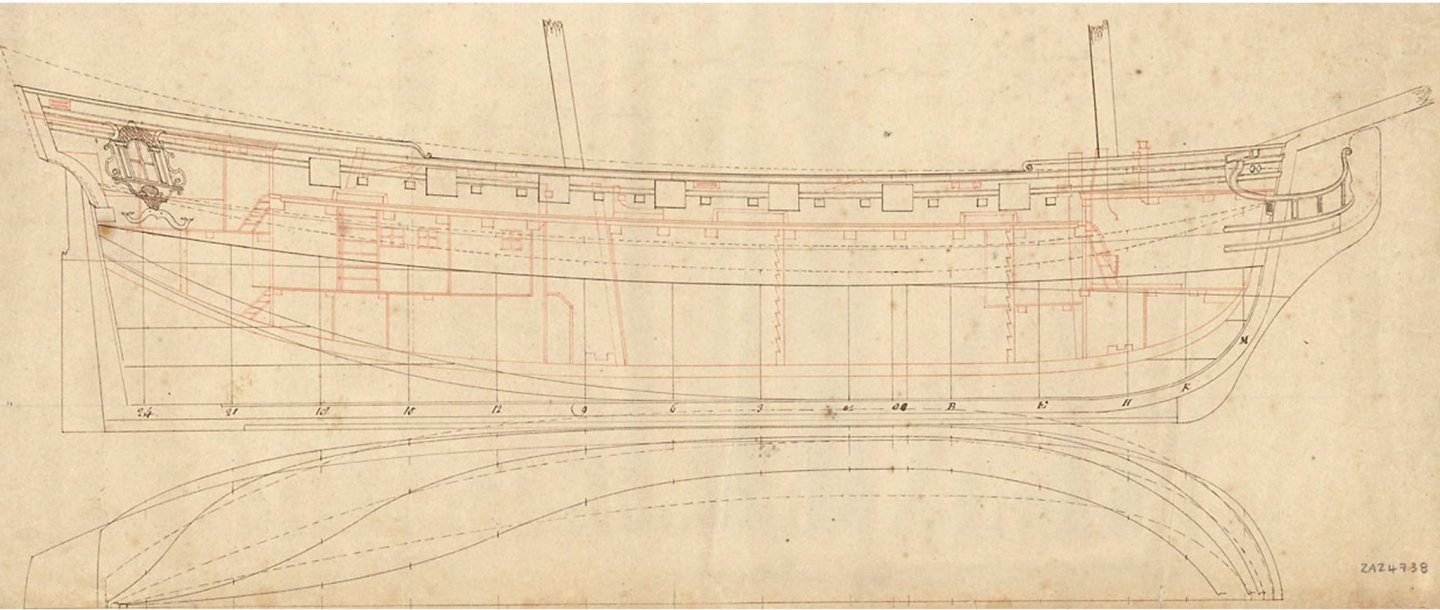
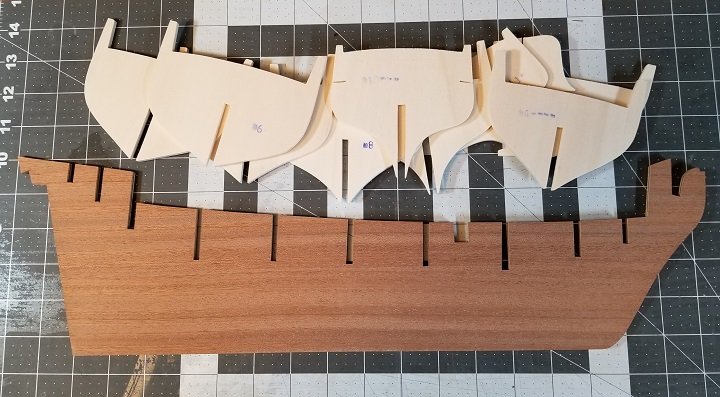
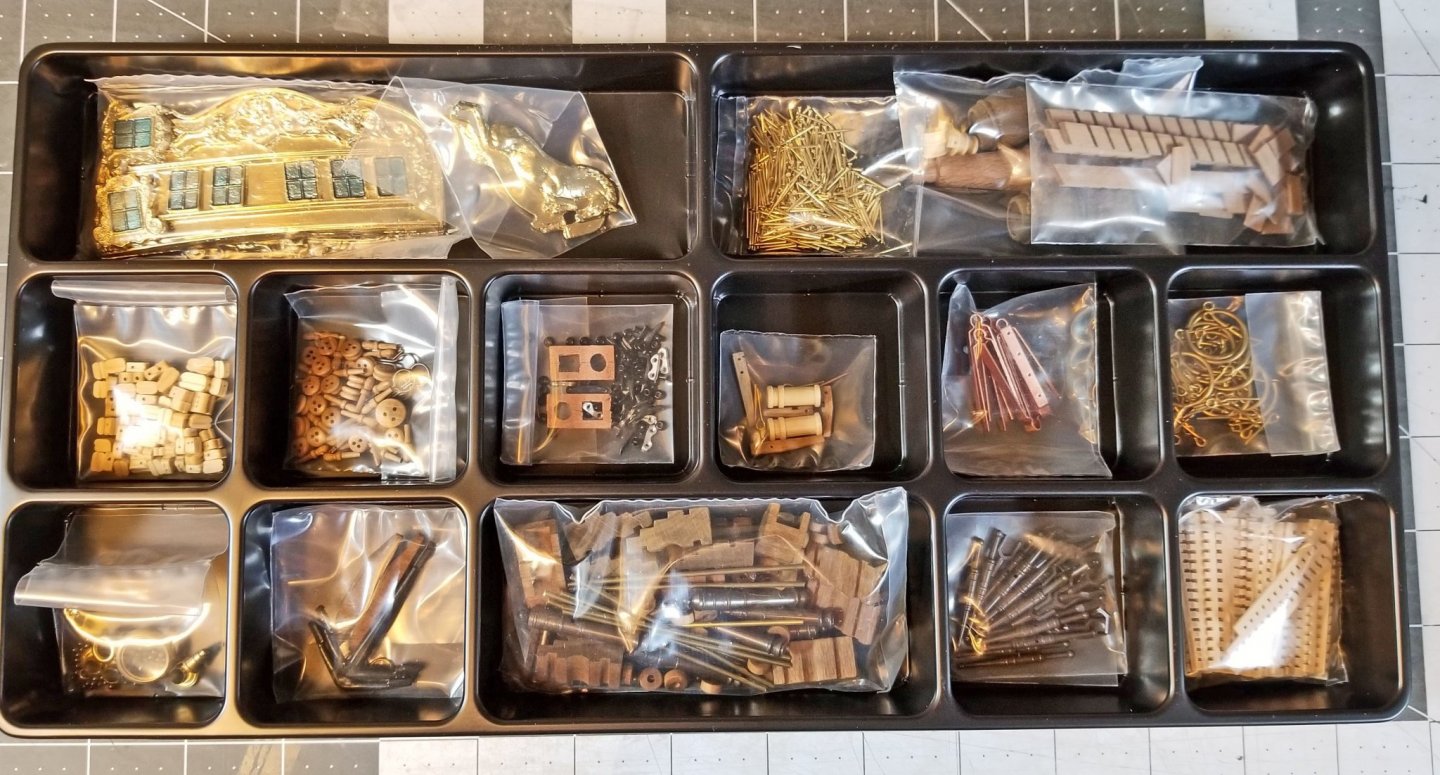
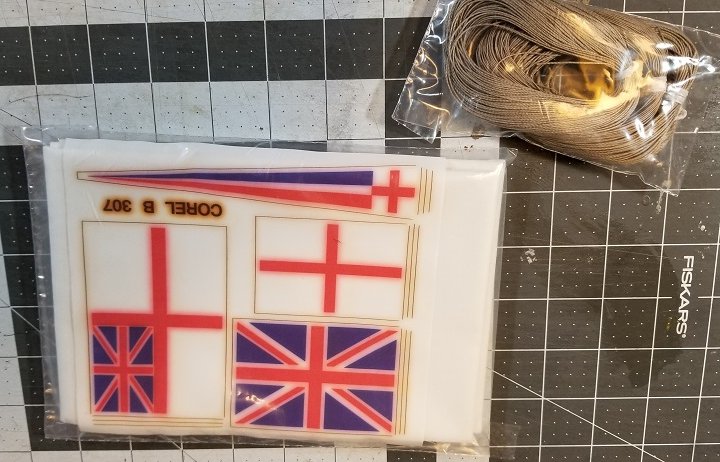
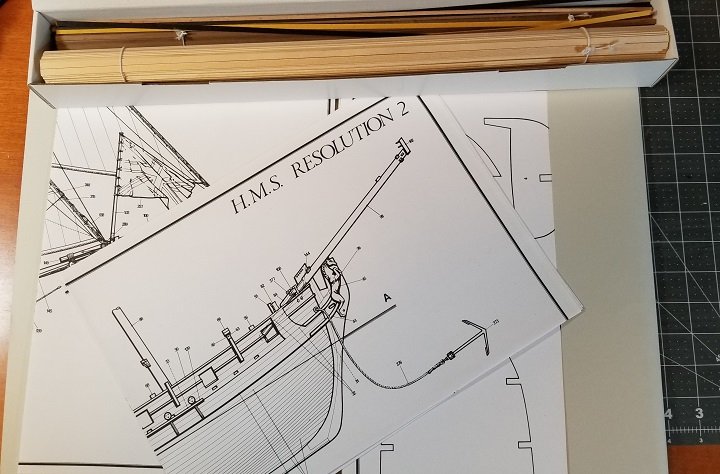
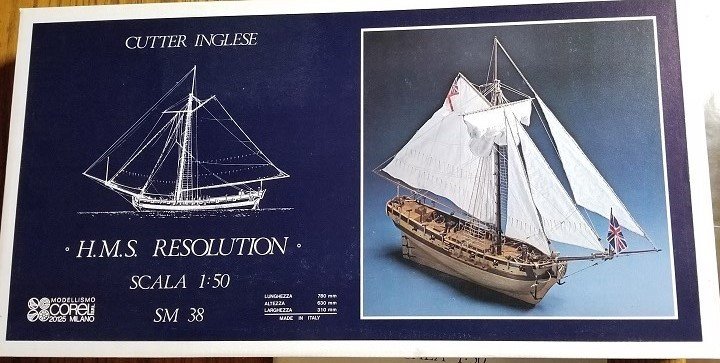
This will be my build of the Corel Resolution kit. I was attracted to this kit based on a build I saw at Model Ship Builder This is a Japanese site with many very nice models represented. I favor the natural wood/antique look with my models, so the style of this build serves as inspiration for what I hope to accomplish. I have a rather long winded prologue that follows, so feel free to skip to the actual build description that should show up down there somewhere… There has been some discussion here at MSW about the basis for this kit design. It is pretty much agreed there was no actual ship of this configuration named HMS Resolution. Resolution Solved There are some plans from the National Maritime Museum of a sloop named Ferrett ( 1711 ), a 10-gun single-masted, cutter-rigged Sloop.. We also found some plans drawn by Howard Chapelle, that are clearly based on the NMM plans, embellished somewhat, but matching the basic lines perfectly as far as I can tell. Corel appears to have used those lines, and embellished the ship even further, which I will discuss more as I go along, because I will not be incorporating some of those embellishments in my build. There is more. Chapelle drew another set of lines and wrote: “ Ferrett and Sharke “ ,with more detailed information pictured below. I assume Chapelle had access to some resources I haven’t been able to identify, or he speculated based on convention at the time. There are some plans of “ Shark ( 1732 ) “ from the NMM which say: “ A ketch-rigged 8-gun Sloop. “The lines are very similar to Ferrett, but not a 1 to 1 match. A major, but not the only difference, being two masts, which fits the “ketch “ designation. Corel calls the ship a ‘ cutter ‘ . I wondered what makes a sloop a “ sloop “, and found it was very ambiguous.. I settled on this from Wikipedia. In part: “ A sloop is a sailing boat with a single mast typically meaning one headsail in front of the mast, and one mainsail aft of (behind) the mast.” We also find: “ If the vessel has two or more headsails, the term cutter may be used, especially if the mast is stepped further towards the back of the boat.” On the other hand there are a lot of ships called sloops, that have two or three masts. I’m not uncomfortable with the designation of a cutter because the sail plan seems very similar to other cutters, as well as the notation on the NMM collection article which says :“ Cutter rigged sloop. “ The NMM plans say the length of the gun deck from rabbet to rabbet is 65 feet, while I calculate the scaled length of the Corel model at about 70.. I imagine the other dimensions will not match any better, but not an issue as far as I’m concerned. Chapelle provides some deck details in one of his drawings that differ significantly from what Corel calls for. Since there are no deck details on the NMM drawings of Ferrett, I would lean toward the Chapelle interpretation, but I may mix and match as I go along, and point it out when I deviate from the Corel plans. The two large grates do not look typical to me, and I will have to see what I will do with that deck space. I can’t resist the urge to also note, that in my research, I found a Sterling kit of Ferret on eBay.. It looks like it was probably based on the Chapelle drawings, but the deck plan seems a bit absurd with some sort of ship’s boat athwartship with no capstain or windlass. I have also found two Ferret kits from the Ideal Model Co.. One plastic, and the other wood. They both appear to be based on the Chapelle drawings. Continuing on, here is a brief rundown of the Corel kit contents. If anyone has any questions, I will do my best to provide an answer. The box art.. The framework is well done, but I have some modifications in mind, which I will document later. There is a generous fittings package. Unfortunately, the provided sailcloth is too heavy, and the flag set is un-usable.. I make my own rope, so the provided stuff is of no use to me. There are eight sheets of well drawn plans. The strip wood and dowels appear to be of good quality, but I will have to see what is usable as the build progresses. (To be continued.)
-
Just my $.02 .. I have both of these kits, and while I think they both make nice decorator pieces, they have serious technical issues.. I won't elaborate unless you would like for me to..
-
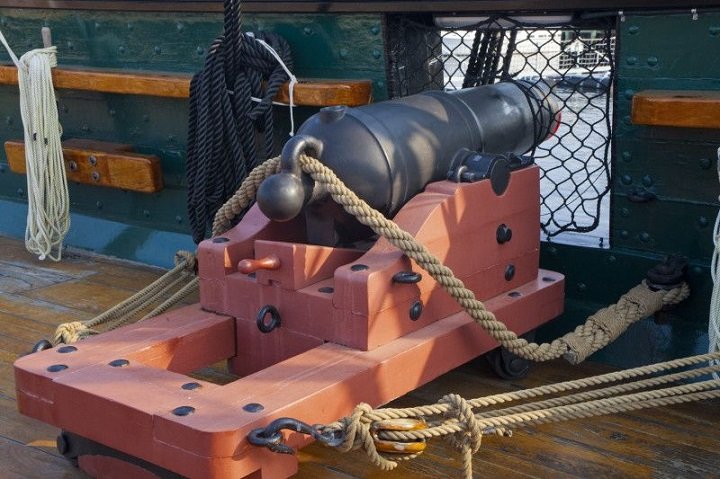
Which kit do you have? Did it provide rope that will look like the picture above if you lay it next to the cannon provided in the kit. You can get bogged down in precise measurements based on practice, but in the end does it look good? You only stand to suffer disappointment if a crew member from the Connie inspects your build with a micrometer and informs you that the breeching ropes are all wrong..
-
I think you are on the right track.. I really like the method shown here by Dubz..: Rigging by Dubz While he is showing attaching a line to a block that is already stropped, I think the same method could well be used for stropping the block..
-
USS Constitution (Mamoli 1:93) What to do?
Gregory replied to Techsan's topic in Wood ship model kits
You might check with Daniel Dusek who is a member here, and the owner of Dusek ship models which also owns the Mamoli line now.. -
Need CAD type program
Gregory replied to Sambini's topic in CAD and 3D Modelling/Drafting Plans with Software
Sketchup is free for personal use.. You can Google " free CAD " and see what you can find... -
That breeching rope looks realistic, and ready for the captains inspection... It's nice to see some variation from the usual arrangement ..
- 315 replies
-
- master korabel
- avos
-
(and 1 more)
Tagged with:
-
Your gun rigging is something I will refer to for my work.. Very nice!
- 315 replies
-
- master korabel
- avos
-
(and 1 more)
Tagged with:
-
That's an interesting looking drill press... I don't see any kind of dynamic motion mechanism..
- 14 replies
-
- south africa
- wood
-
(and 1 more)
Tagged with:
-
Here is a quick link for you.. Look down the list for Badger builds... Build Log Index For Wooden ships..
-
Peta, May I ask what is the color number for that thread?.... ( The tan shade )
- 315 replies
-
- master korabel
- avos
-
(and 1 more)
Tagged with:
-
When you build your Victory model, who is going to call you out on the curvature of the stern?
About us
Modelshipworld - Advancing Ship Modeling through Research
SSL Secured
Your security is important for us so this Website is SSL-Secured
NRG Mailing Address
Nautical Research Guild
237 South Lincoln Street
Westmont IL, 60559-1917
Model Ship World ® and the MSW logo are Registered Trademarks, and belong to the Nautical Research Guild (United States Patent and Trademark Office: No. 6,929,264 & No. 6,929,274, registered Dec. 20, 2022)
Helpful Links
About the NRG
If you enjoy building ship models that are historically accurate as well as beautiful, then The Nautical Research Guild (NRG) is just right for you.
The Guild is a non-profit educational organization whose mission is to “Advance Ship Modeling Through Research”. We provide support to our members in their efforts to raise the quality of their model ships.
The Nautical Research Guild has published our world-renowned quarterly magazine, The Nautical Research Journal, since 1955. The pages of the Journal are full of articles by accomplished ship modelers who show you how they create those exquisite details on their models, and by maritime historians who show you the correct details to build. The Journal is available in both print and digital editions. Go to the NRG web site (www.thenrg.org) to download a complimentary digital copy of the Journal. The NRG also publishes plan sets, books and compilations of back issues of the Journal and the former Ships in Scale and Model Ship Builder magazines.


