HOLIDAY DONATION DRIVE - SUPPORT MSW - DO YOUR PART TO KEEP THIS GREAT FORUM GOING! (Only 75 donations so far out of 49,000 members - C'mon guys!)
×


Theodosius
-
Posts
345 -
Joined
-
Last visited
Content Type
Profiles
Forums
Gallery
Events
Everything posted by Theodosius
-
Wow, those garborad-planks are beautiful! And I like the colour of your boxwood-deck. Sory, no experience in deck covering 🙂
- 562 replies
-
- 3
-

-
- vanguard models
- alert
- (and 2 more)
-
From my own experience and what I have read here in all the logs, it seems to be not a real first ever model ship project, if you not break a pice at some point :-). Good word so far!
- 38 replies
-
- 2
-
-
- Nisha
- Vanguard Models
- (and 1 more)
-
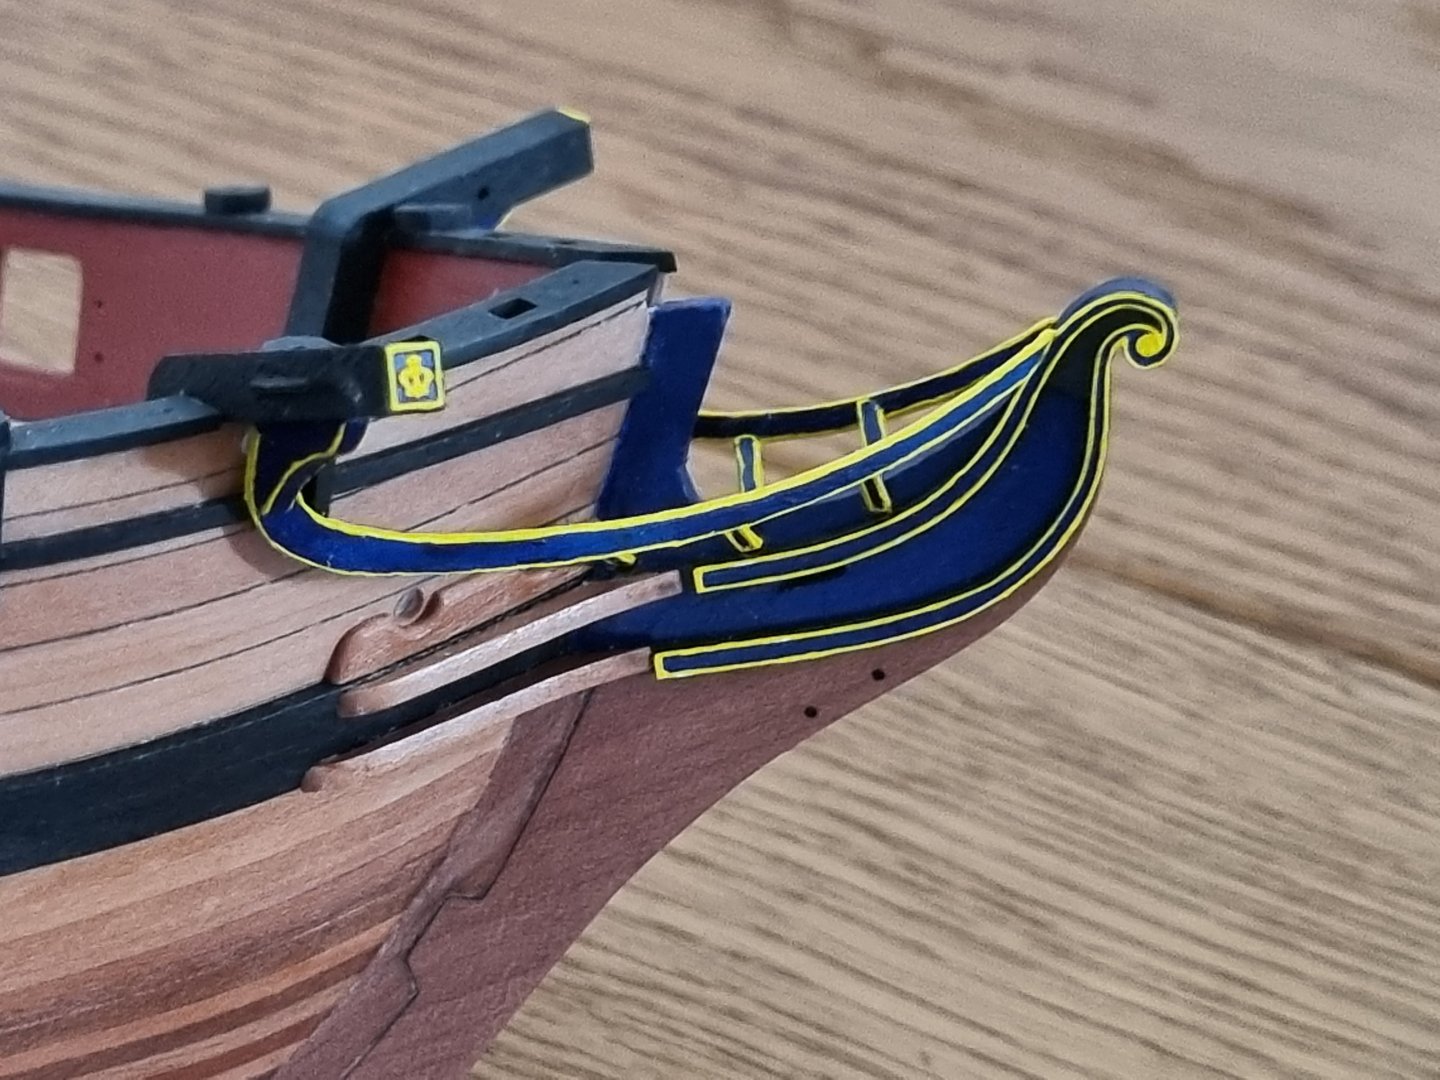
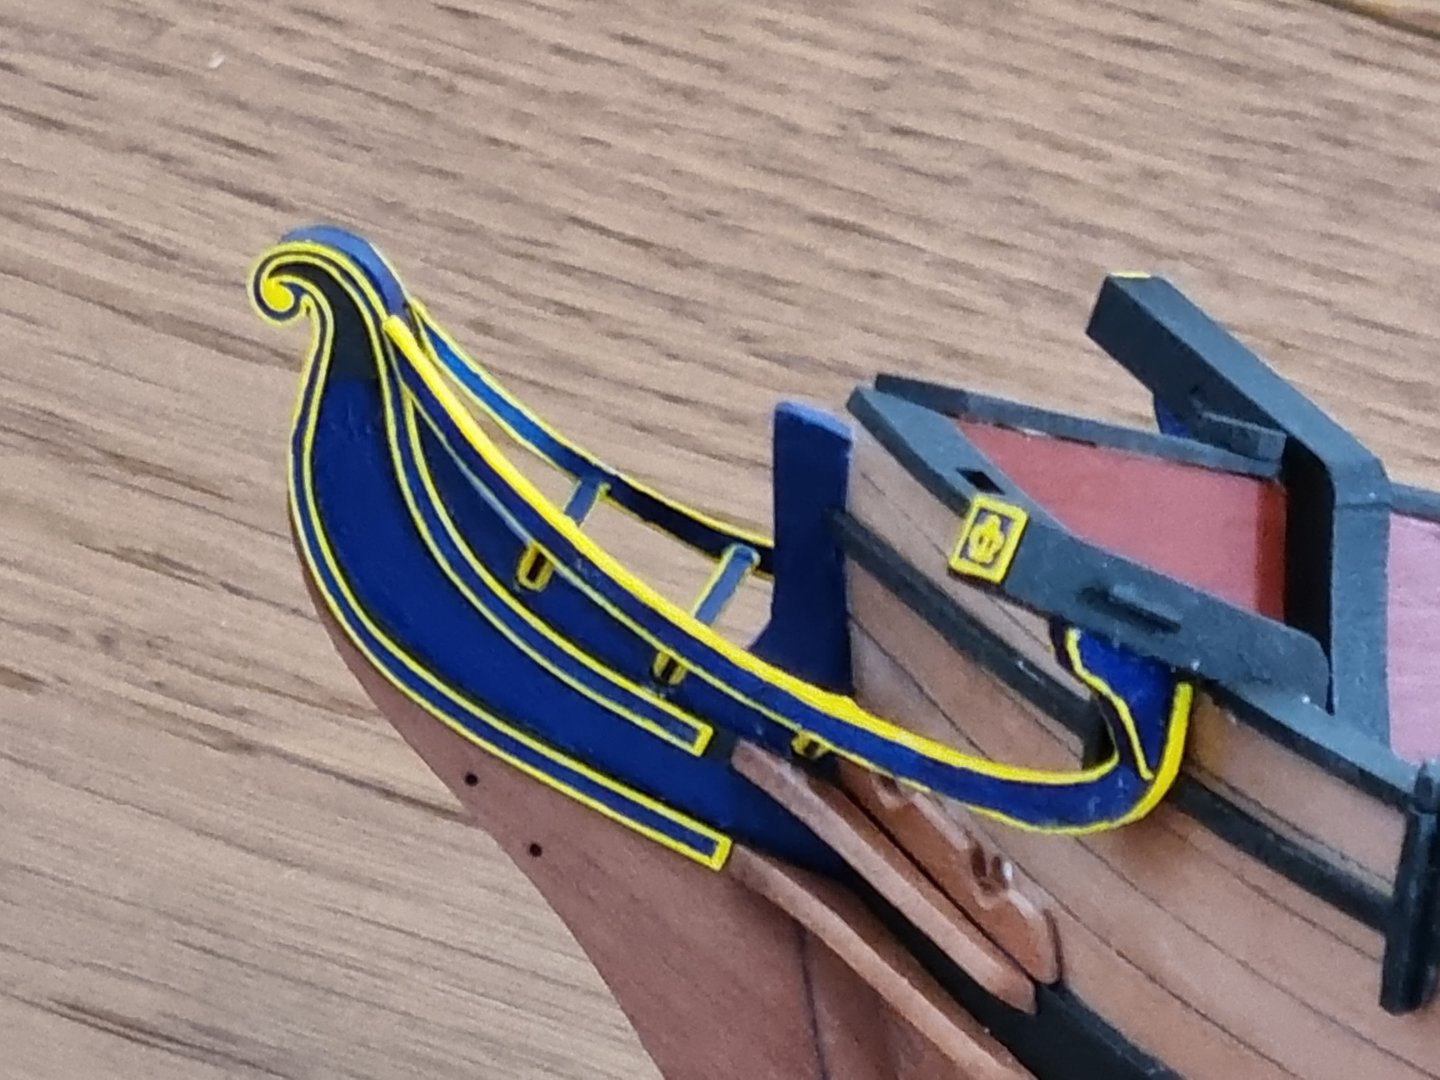
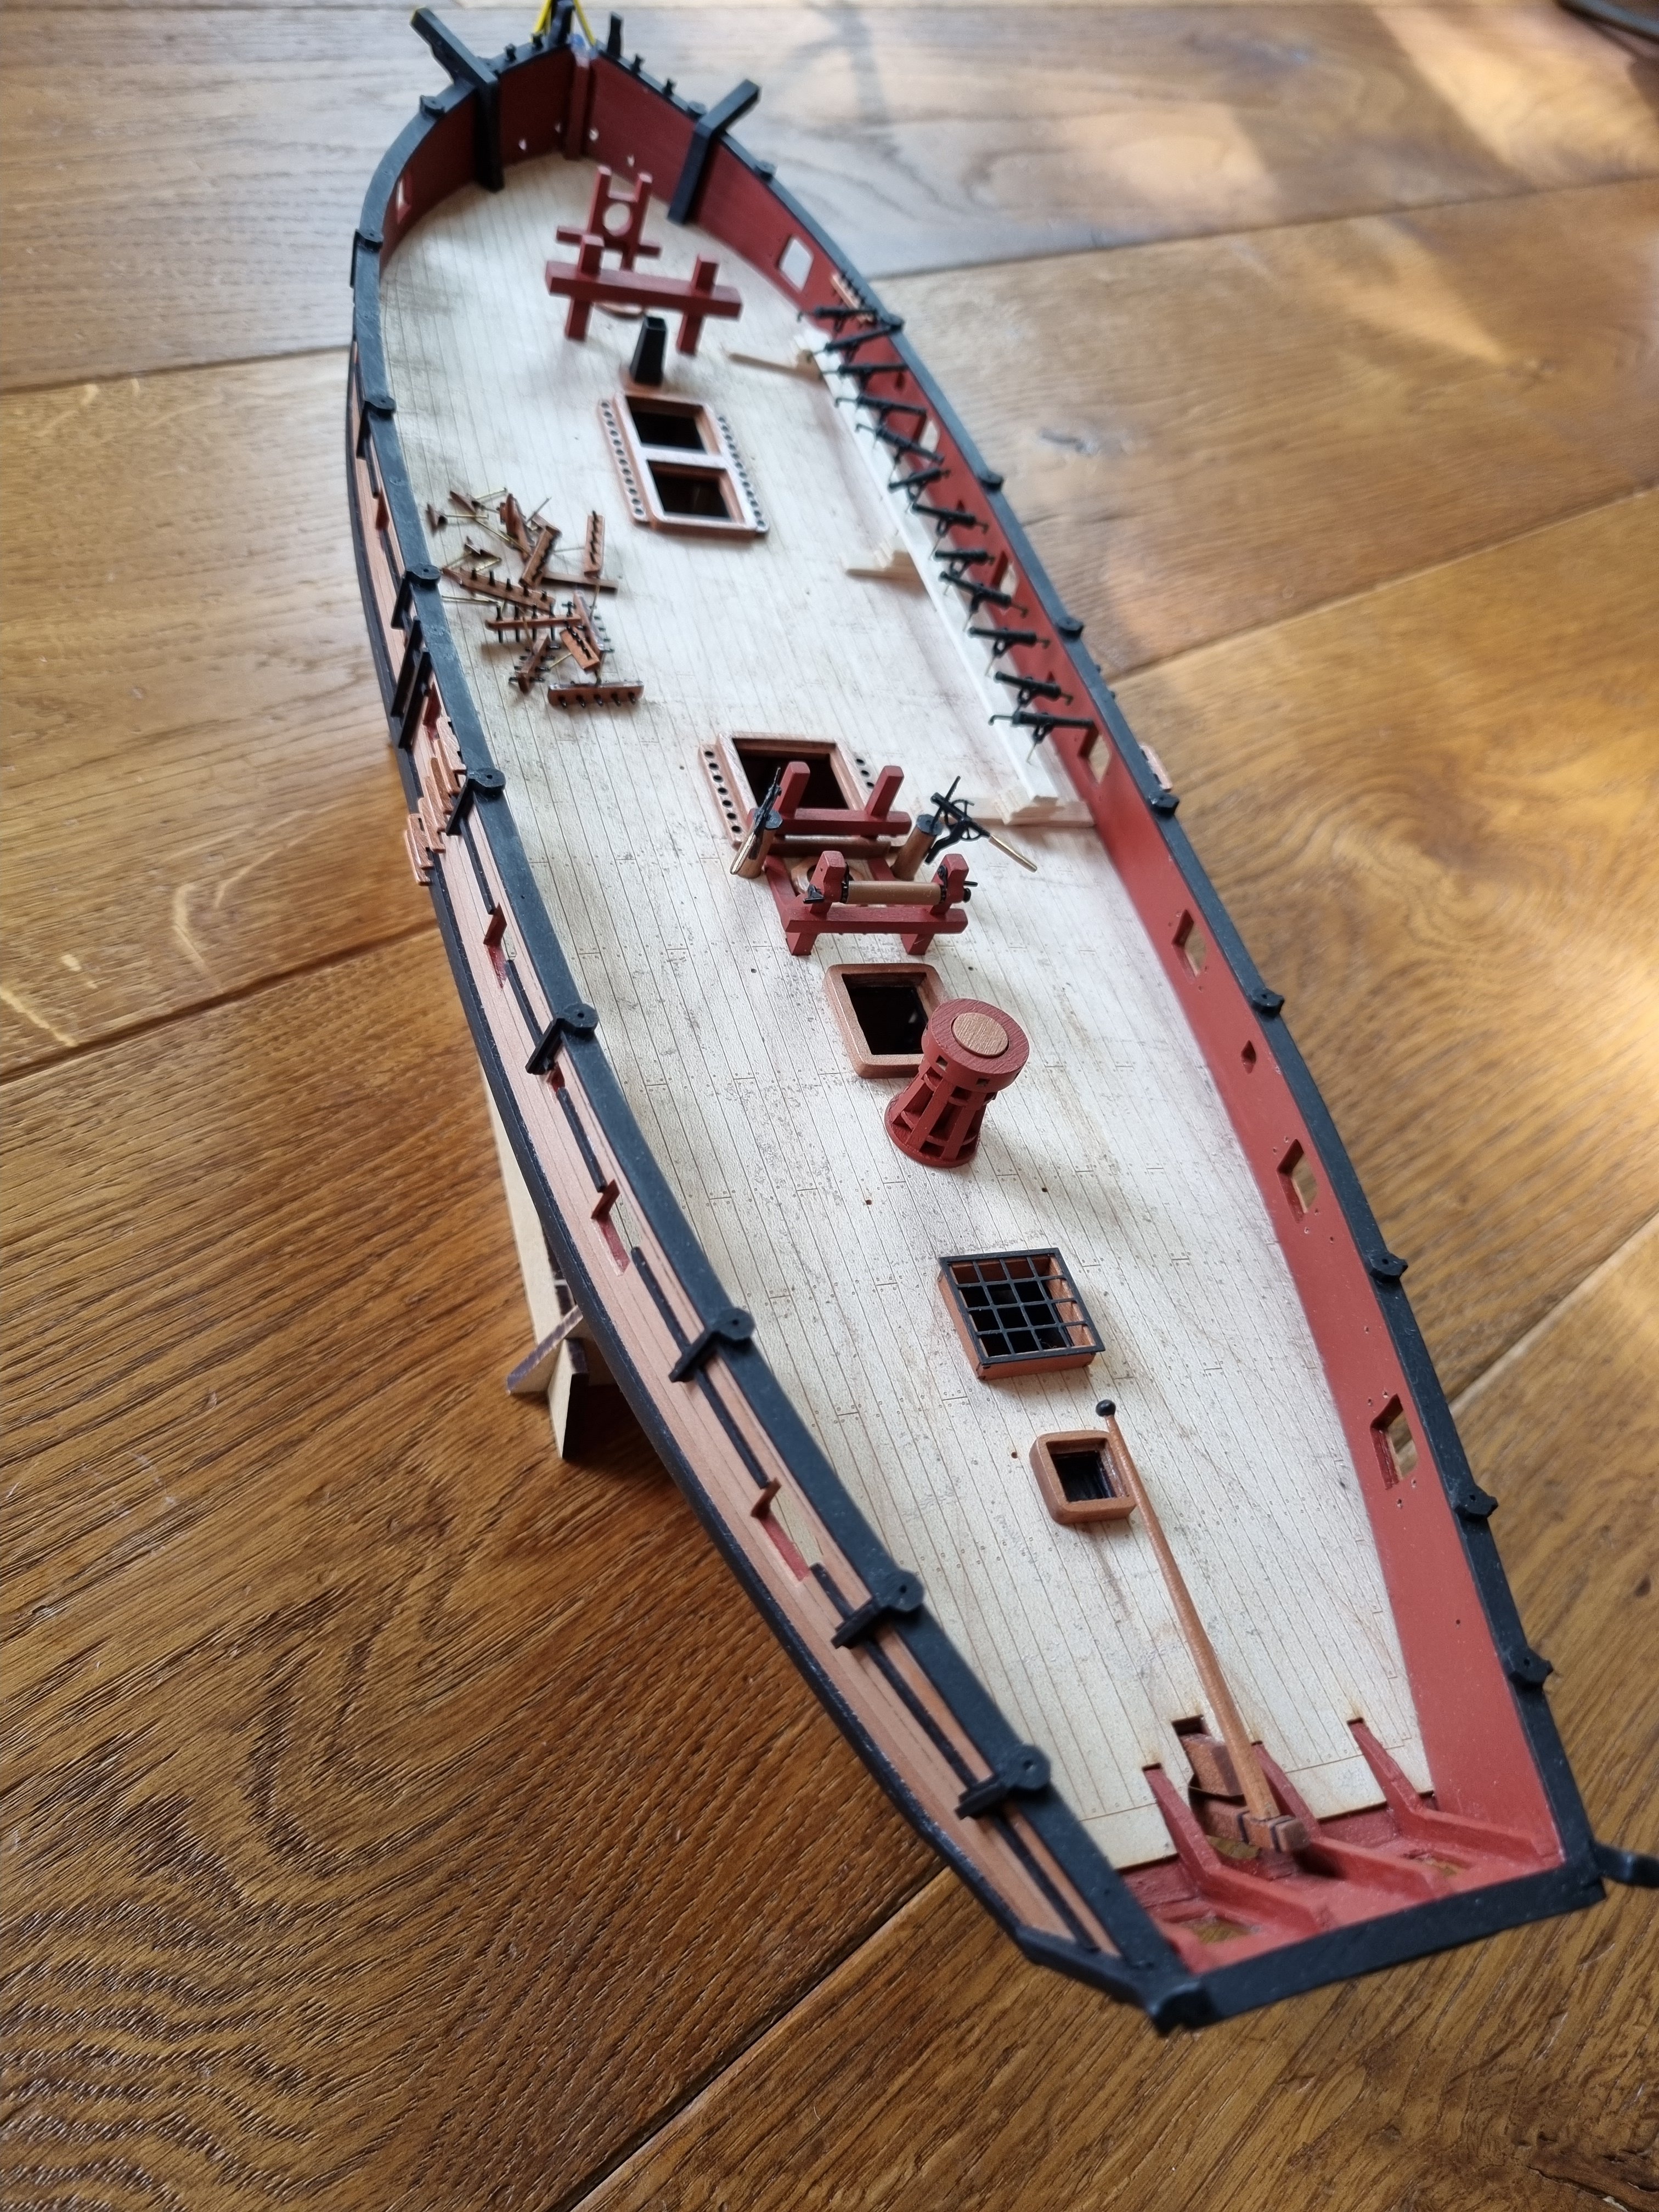
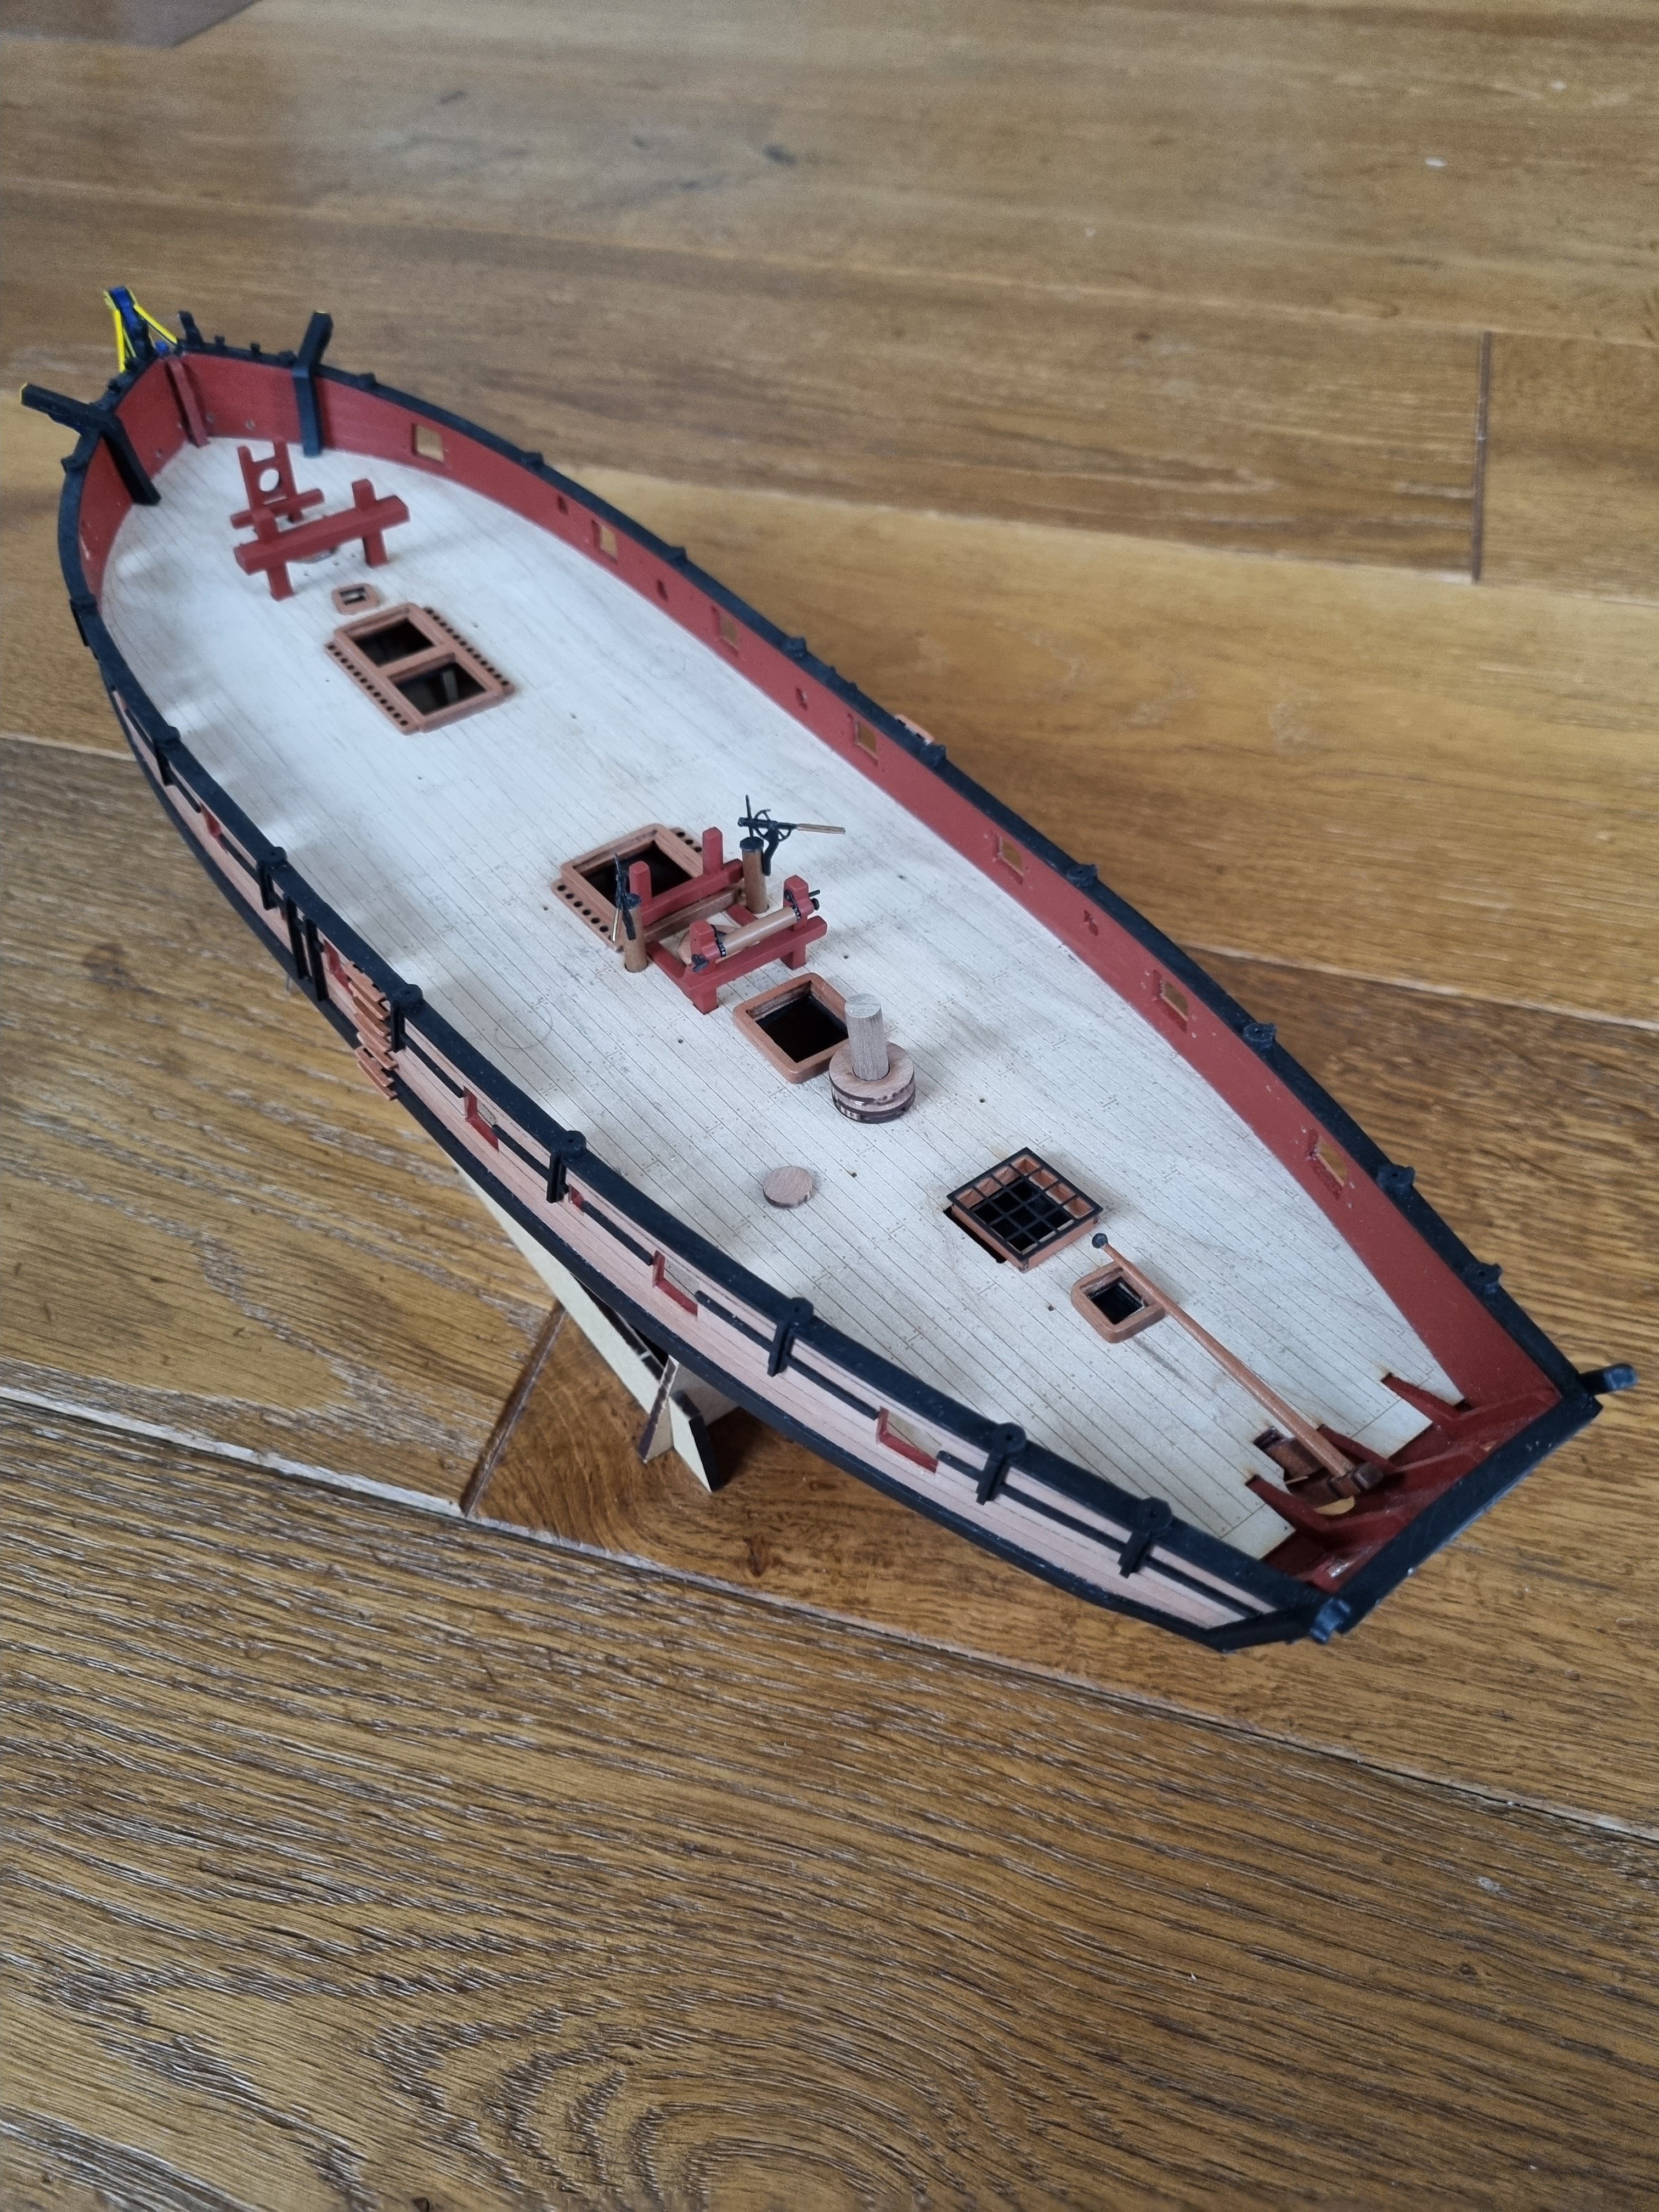
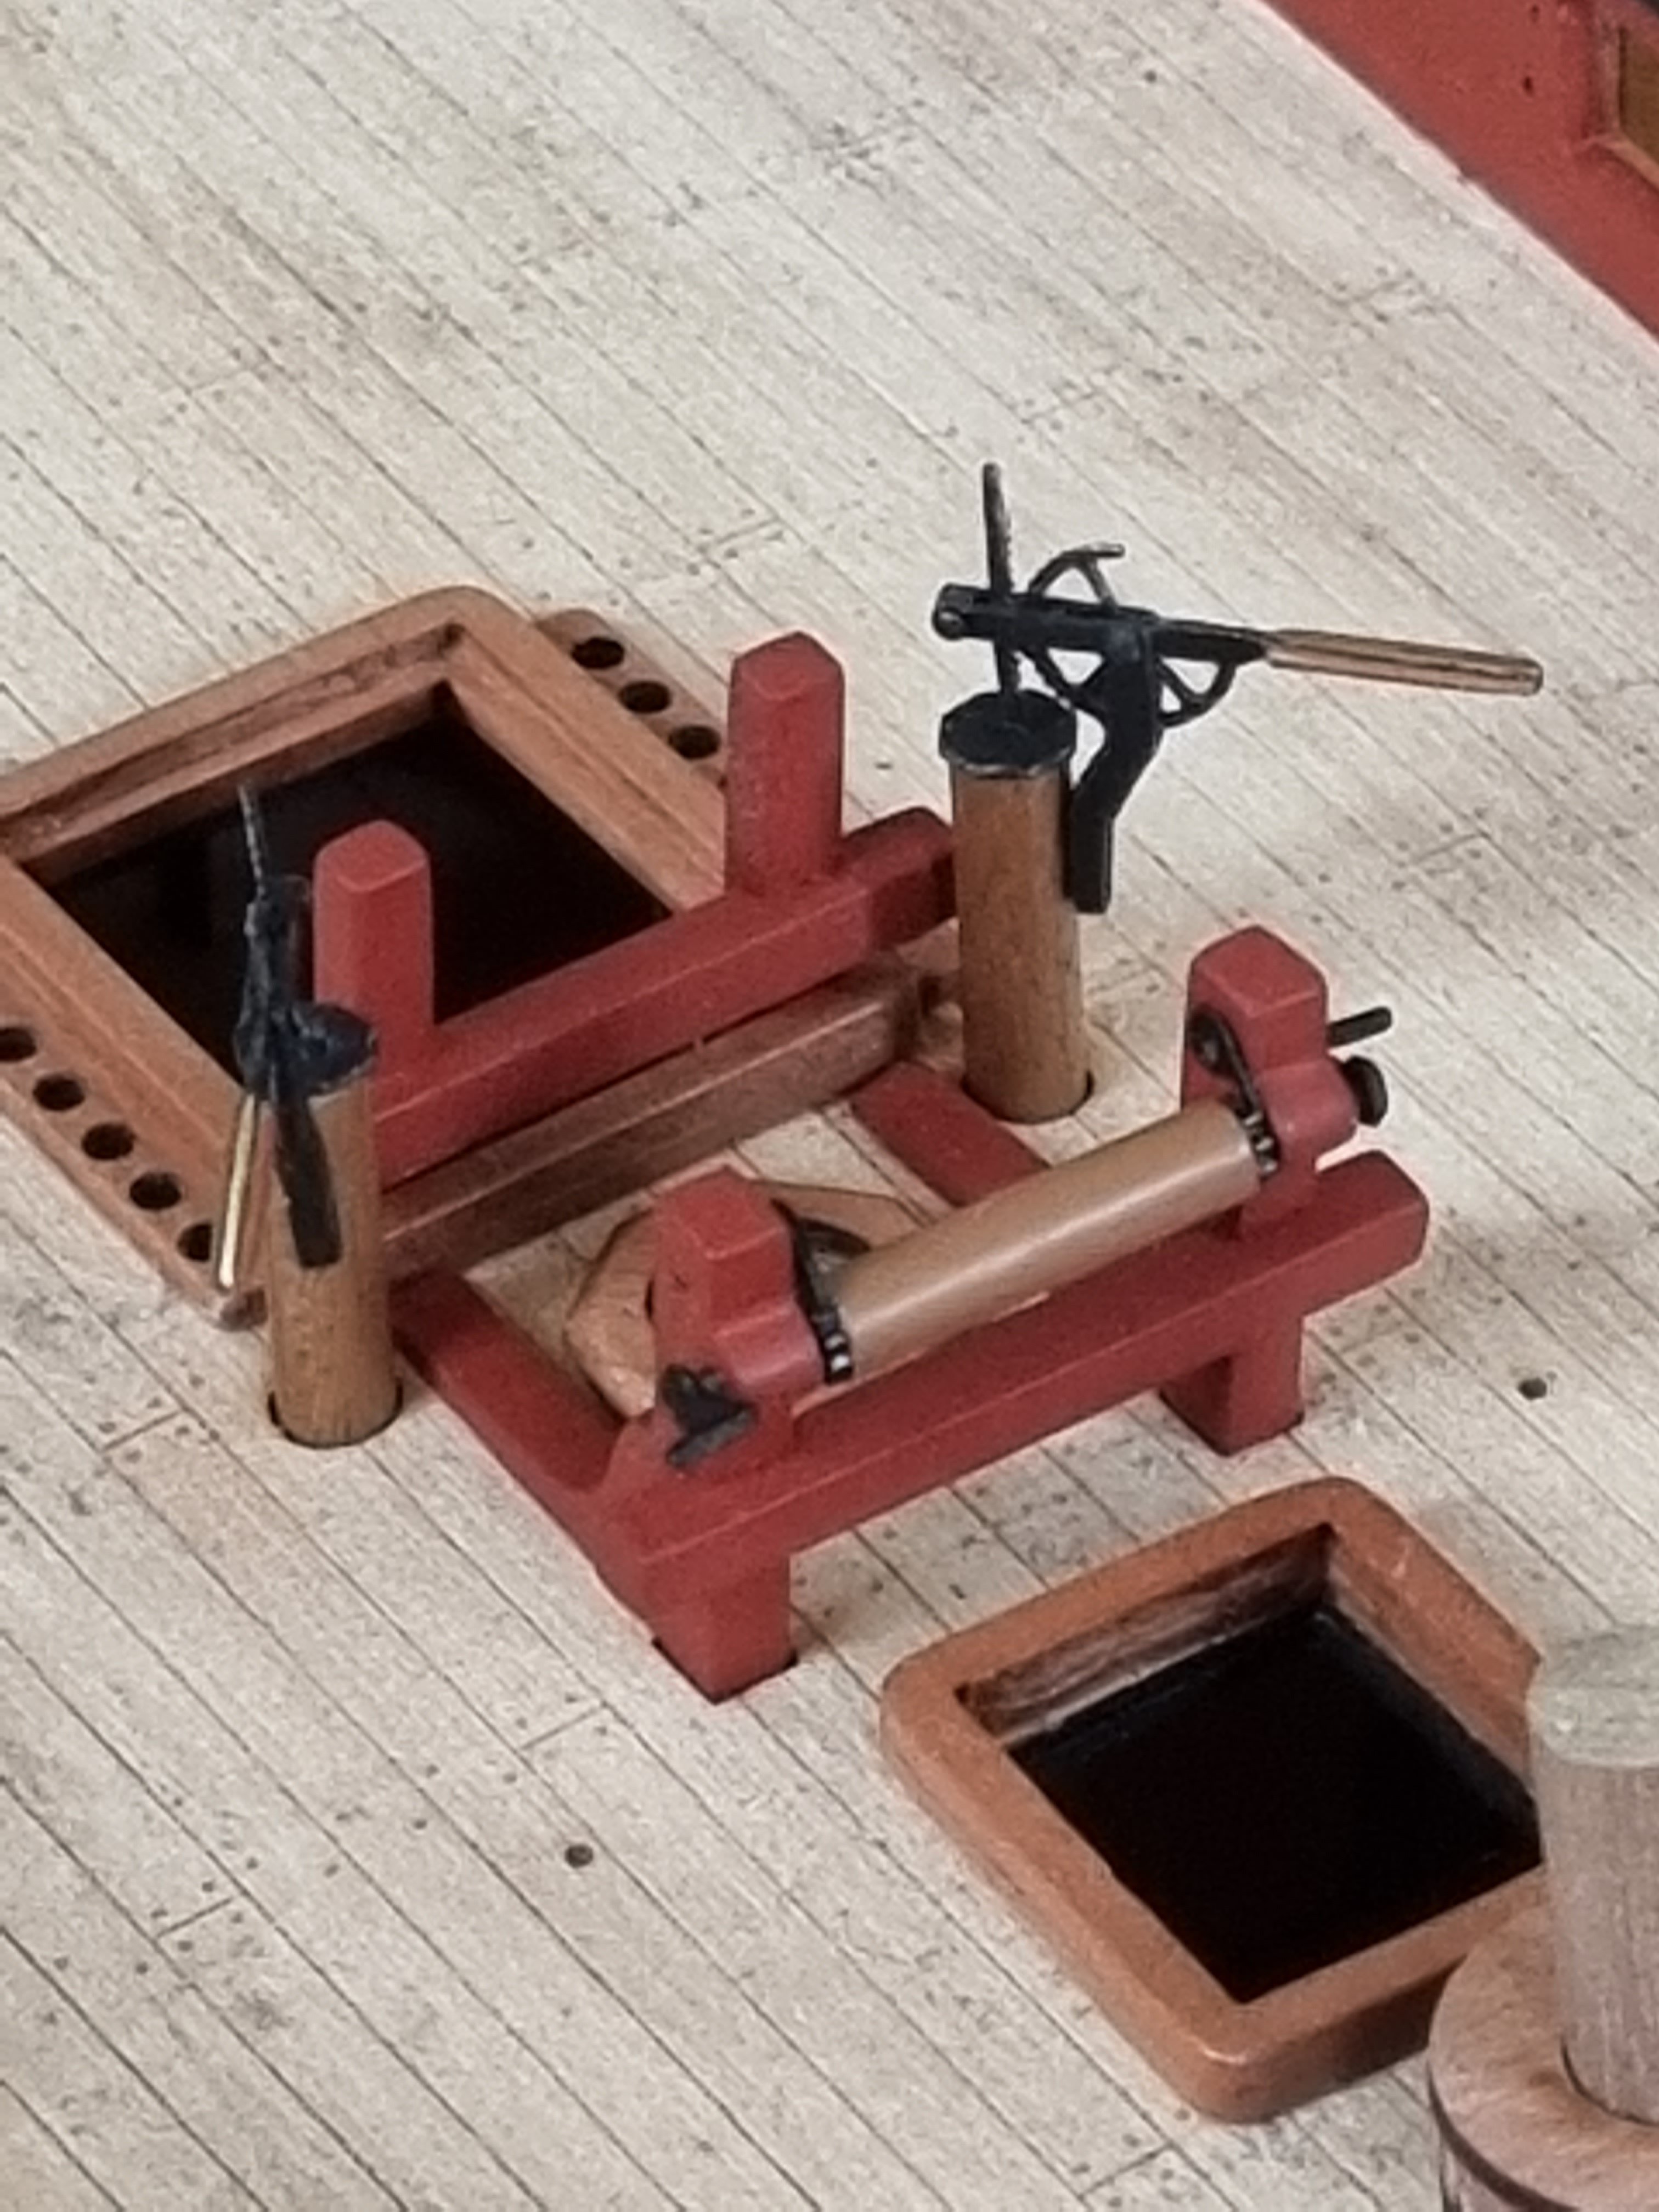
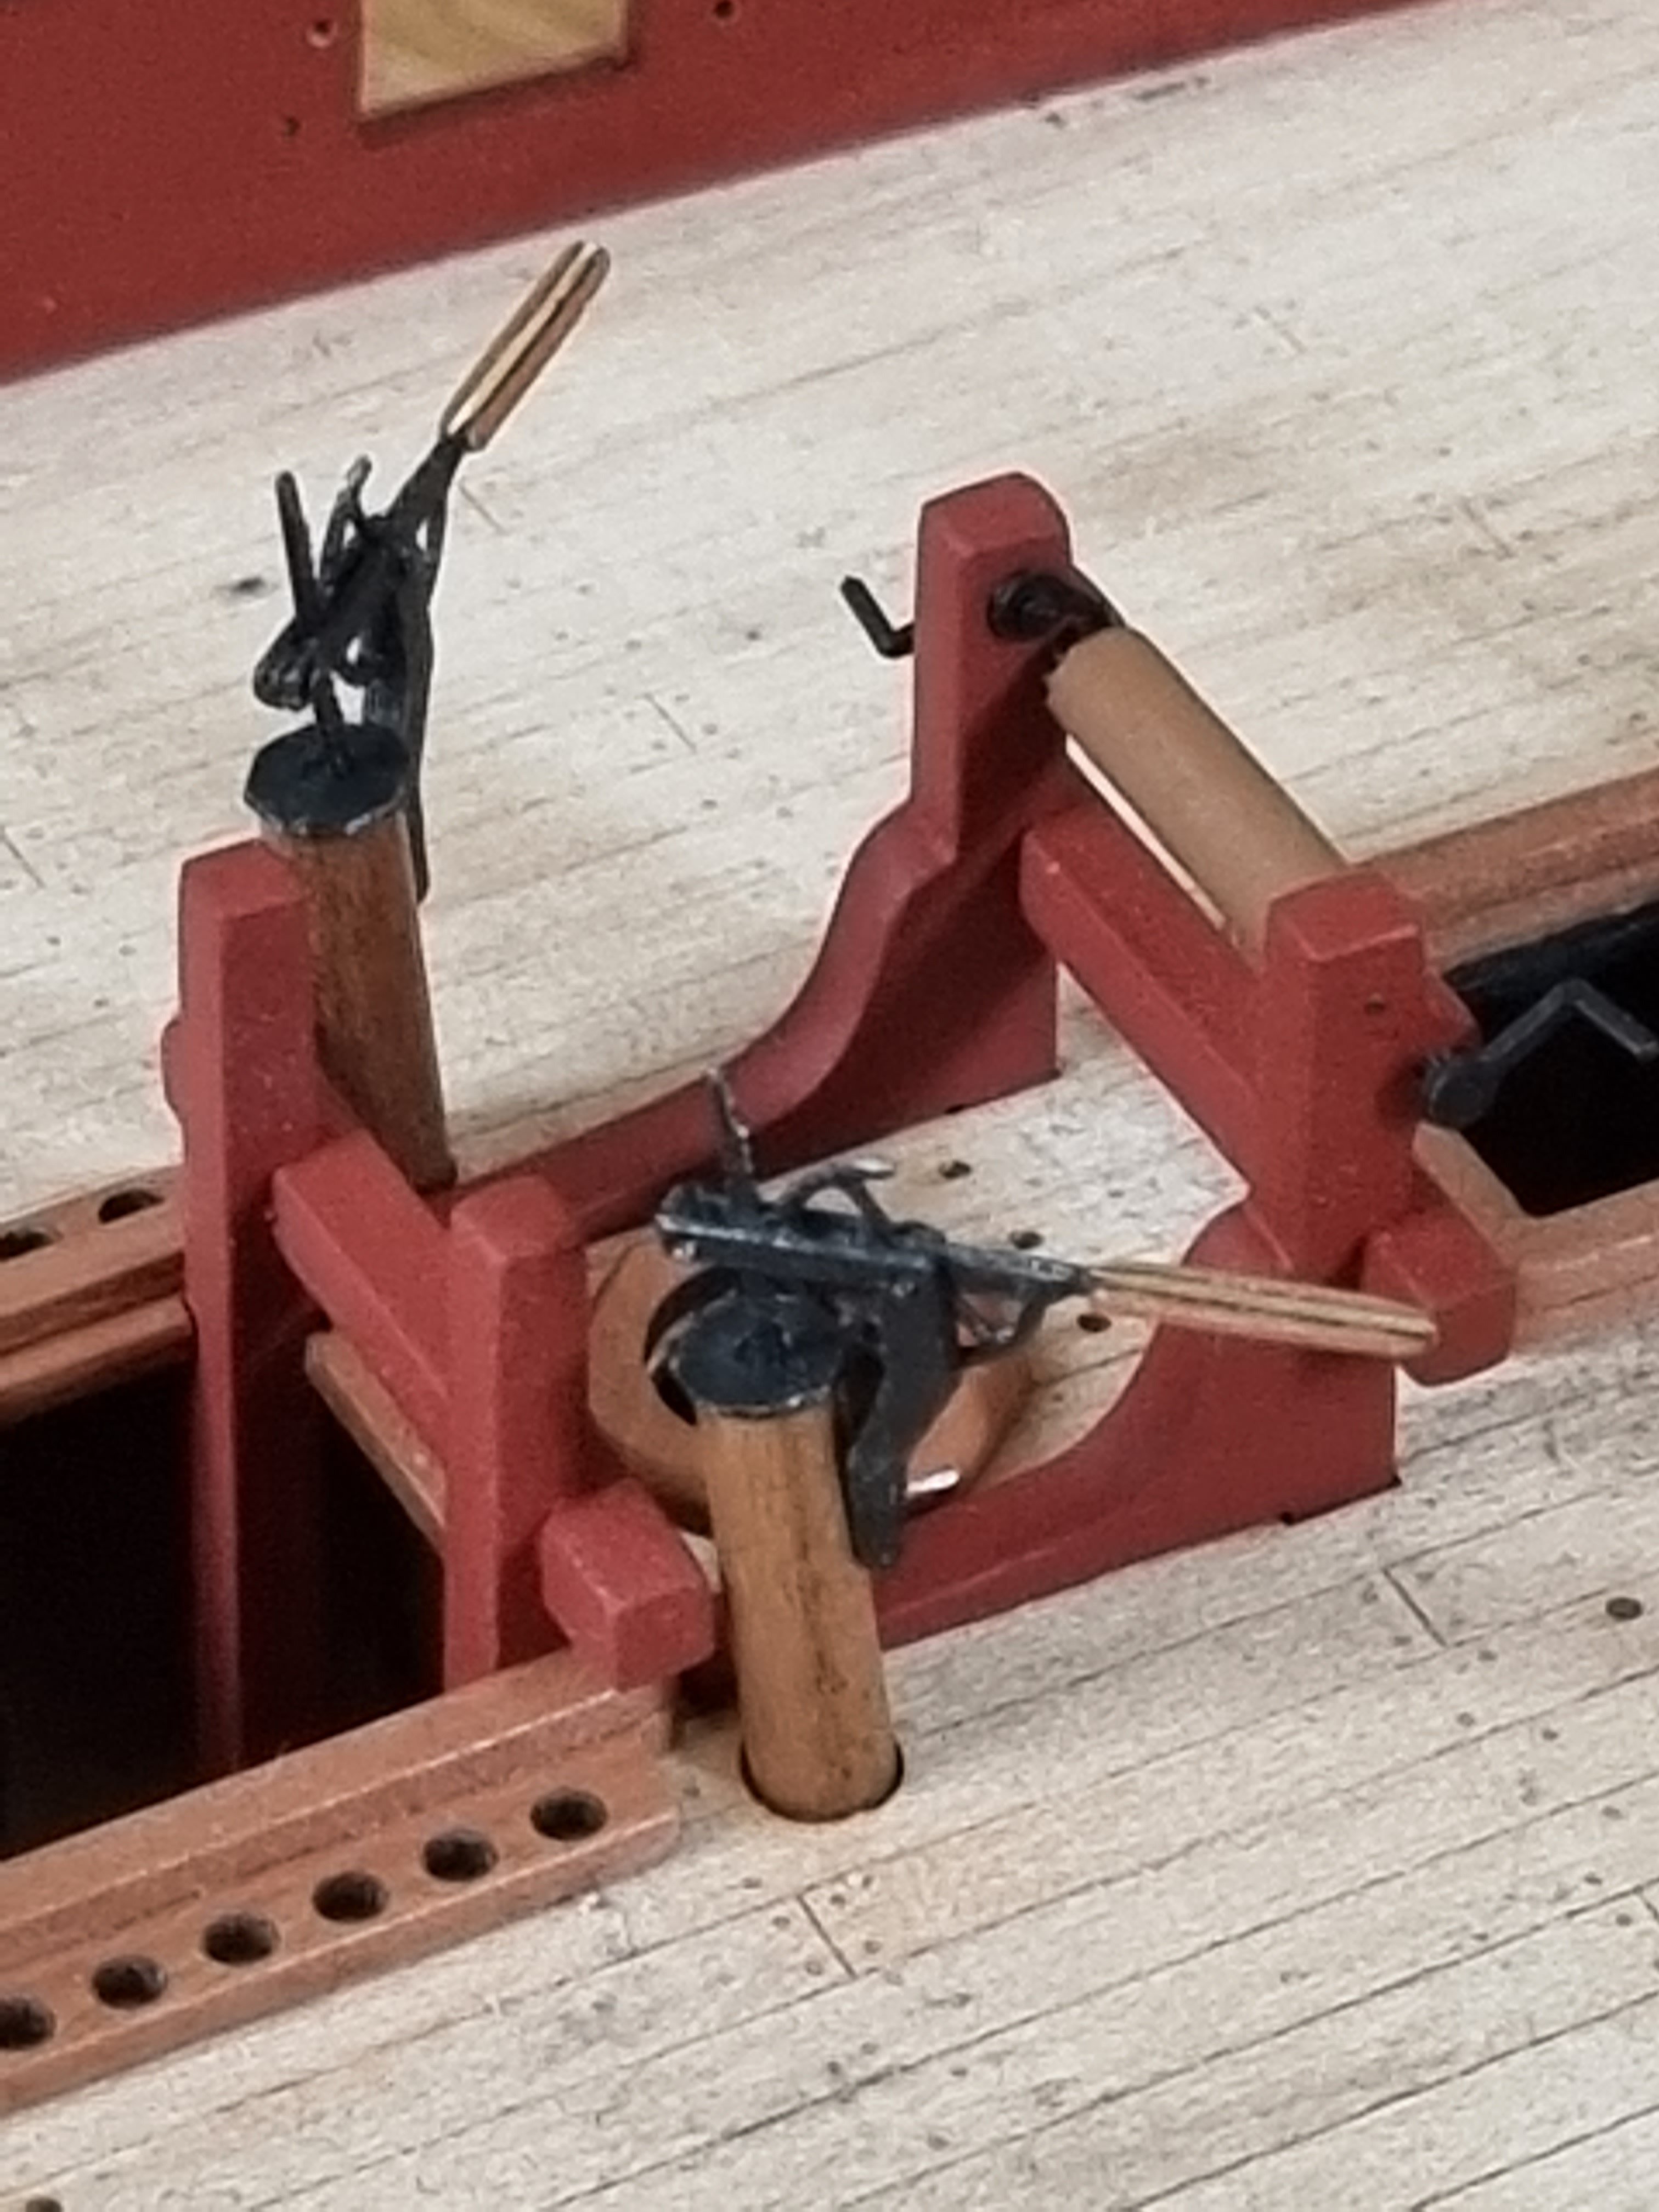
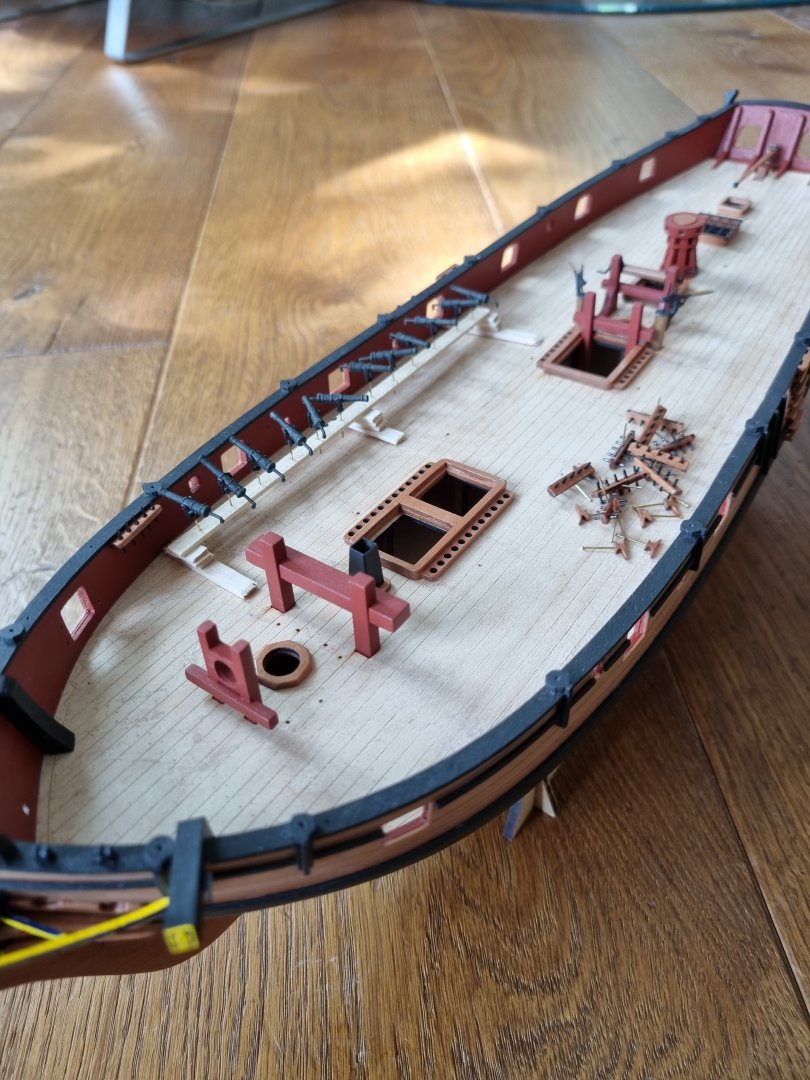
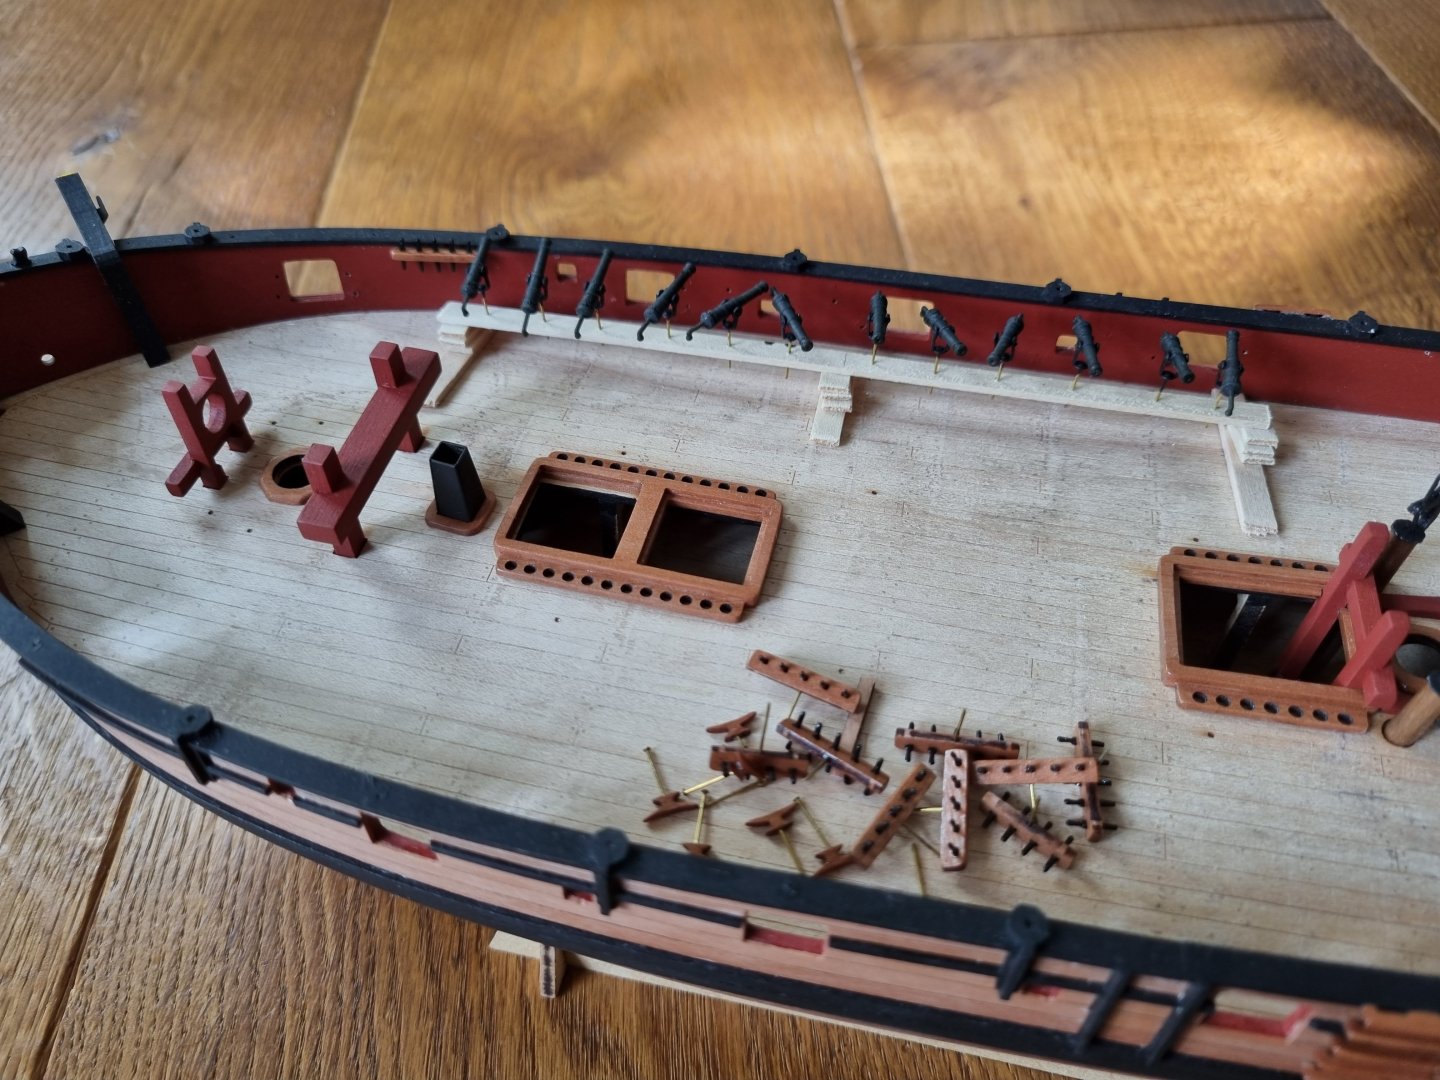
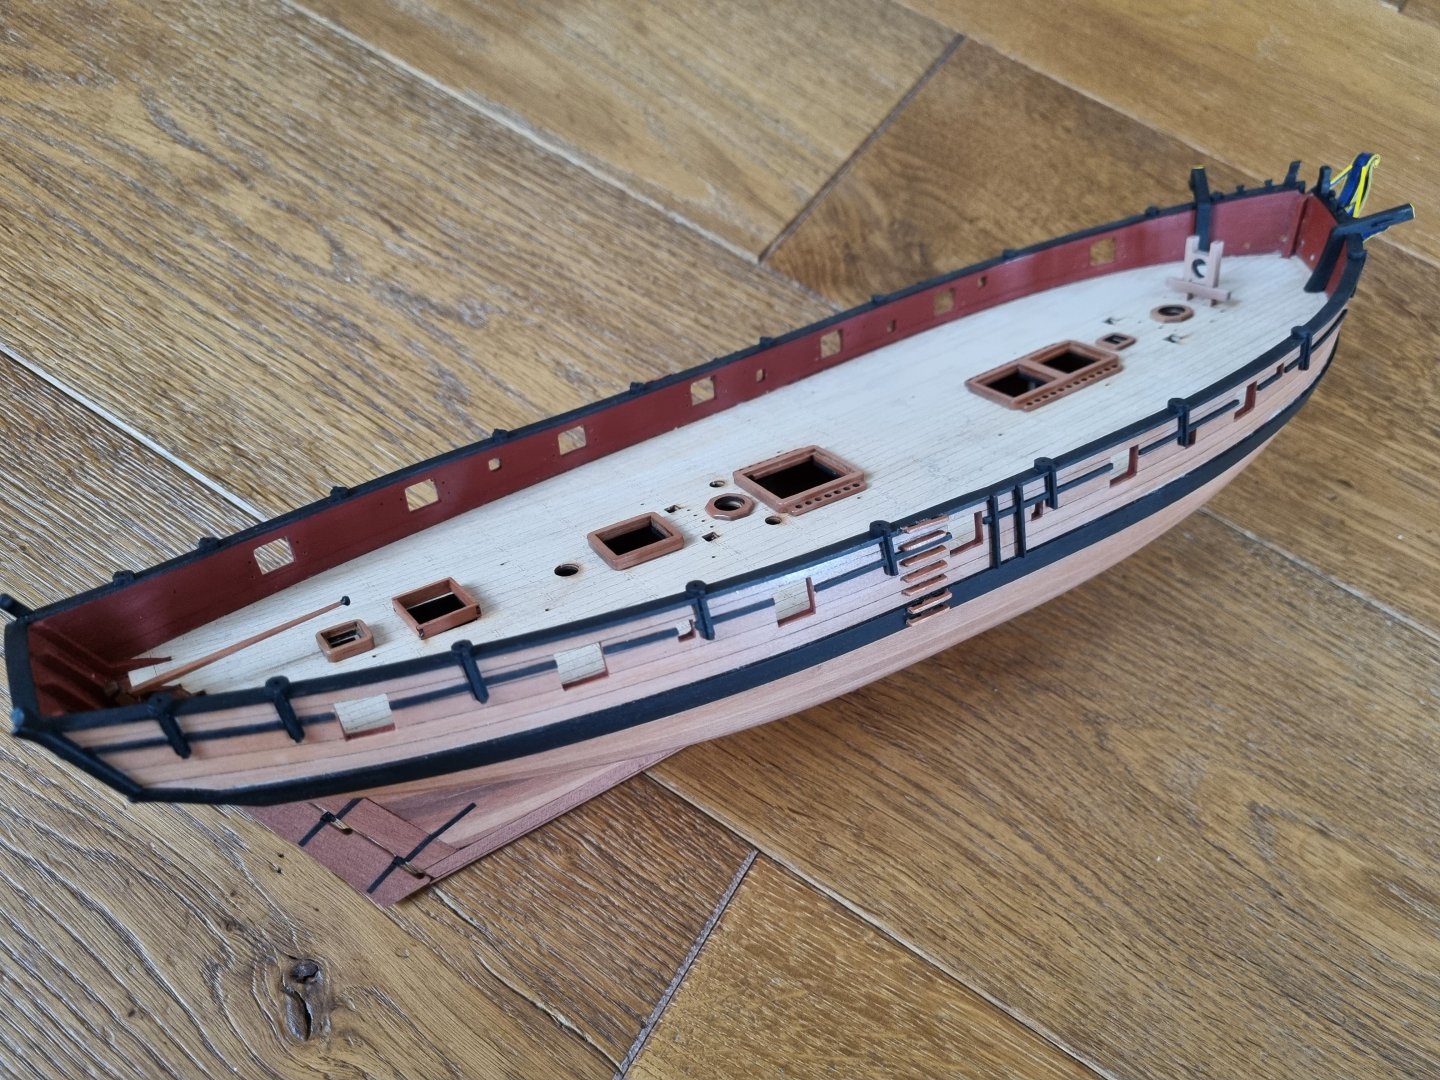
@Thukydides, @CiscoH: thanky you for your thumbs up! 🙂 @Thukydides: thank you very much for your suggestions, and you are right! I will overdue this, when I'm at the point to make the metal-parts of the guns! I allways fail, when I want to go the 'cheap' way, and in the end this makes more work instead of less. But there a things, one will never learn in his life :-). Most of the furniture is finished (ladders and gratings left, but they might be done later, don't know at the moment), but I thought, after reading in the other build logs herer, it would be better to install the guns at this point. And when the guns are inside, then glue the rest of the deck fittings. So this is how it looks at the moment, and the main guns are next:

-
Your first ever second planking is great! It looks very smooth. And when you paint the hull anyway, you can use filler, as you do! I had exact the same problem as you had: Theory is one side, but I was not ably to cut and form the wood as good as I would have wanted to. More practive will help. And then I think that the instructions for the planking in the manual were all that I needet. Just let the strips follow they're own way, and when the want to run above another plank, that is the point to start tapering. But then I have an elektrical plank bender, that was a very helpfull tool to bend the planks in both directions.
- 42 replies
-
- 3
-
-
- vanguard models
- lady eleanor
- (and 3 more)
-
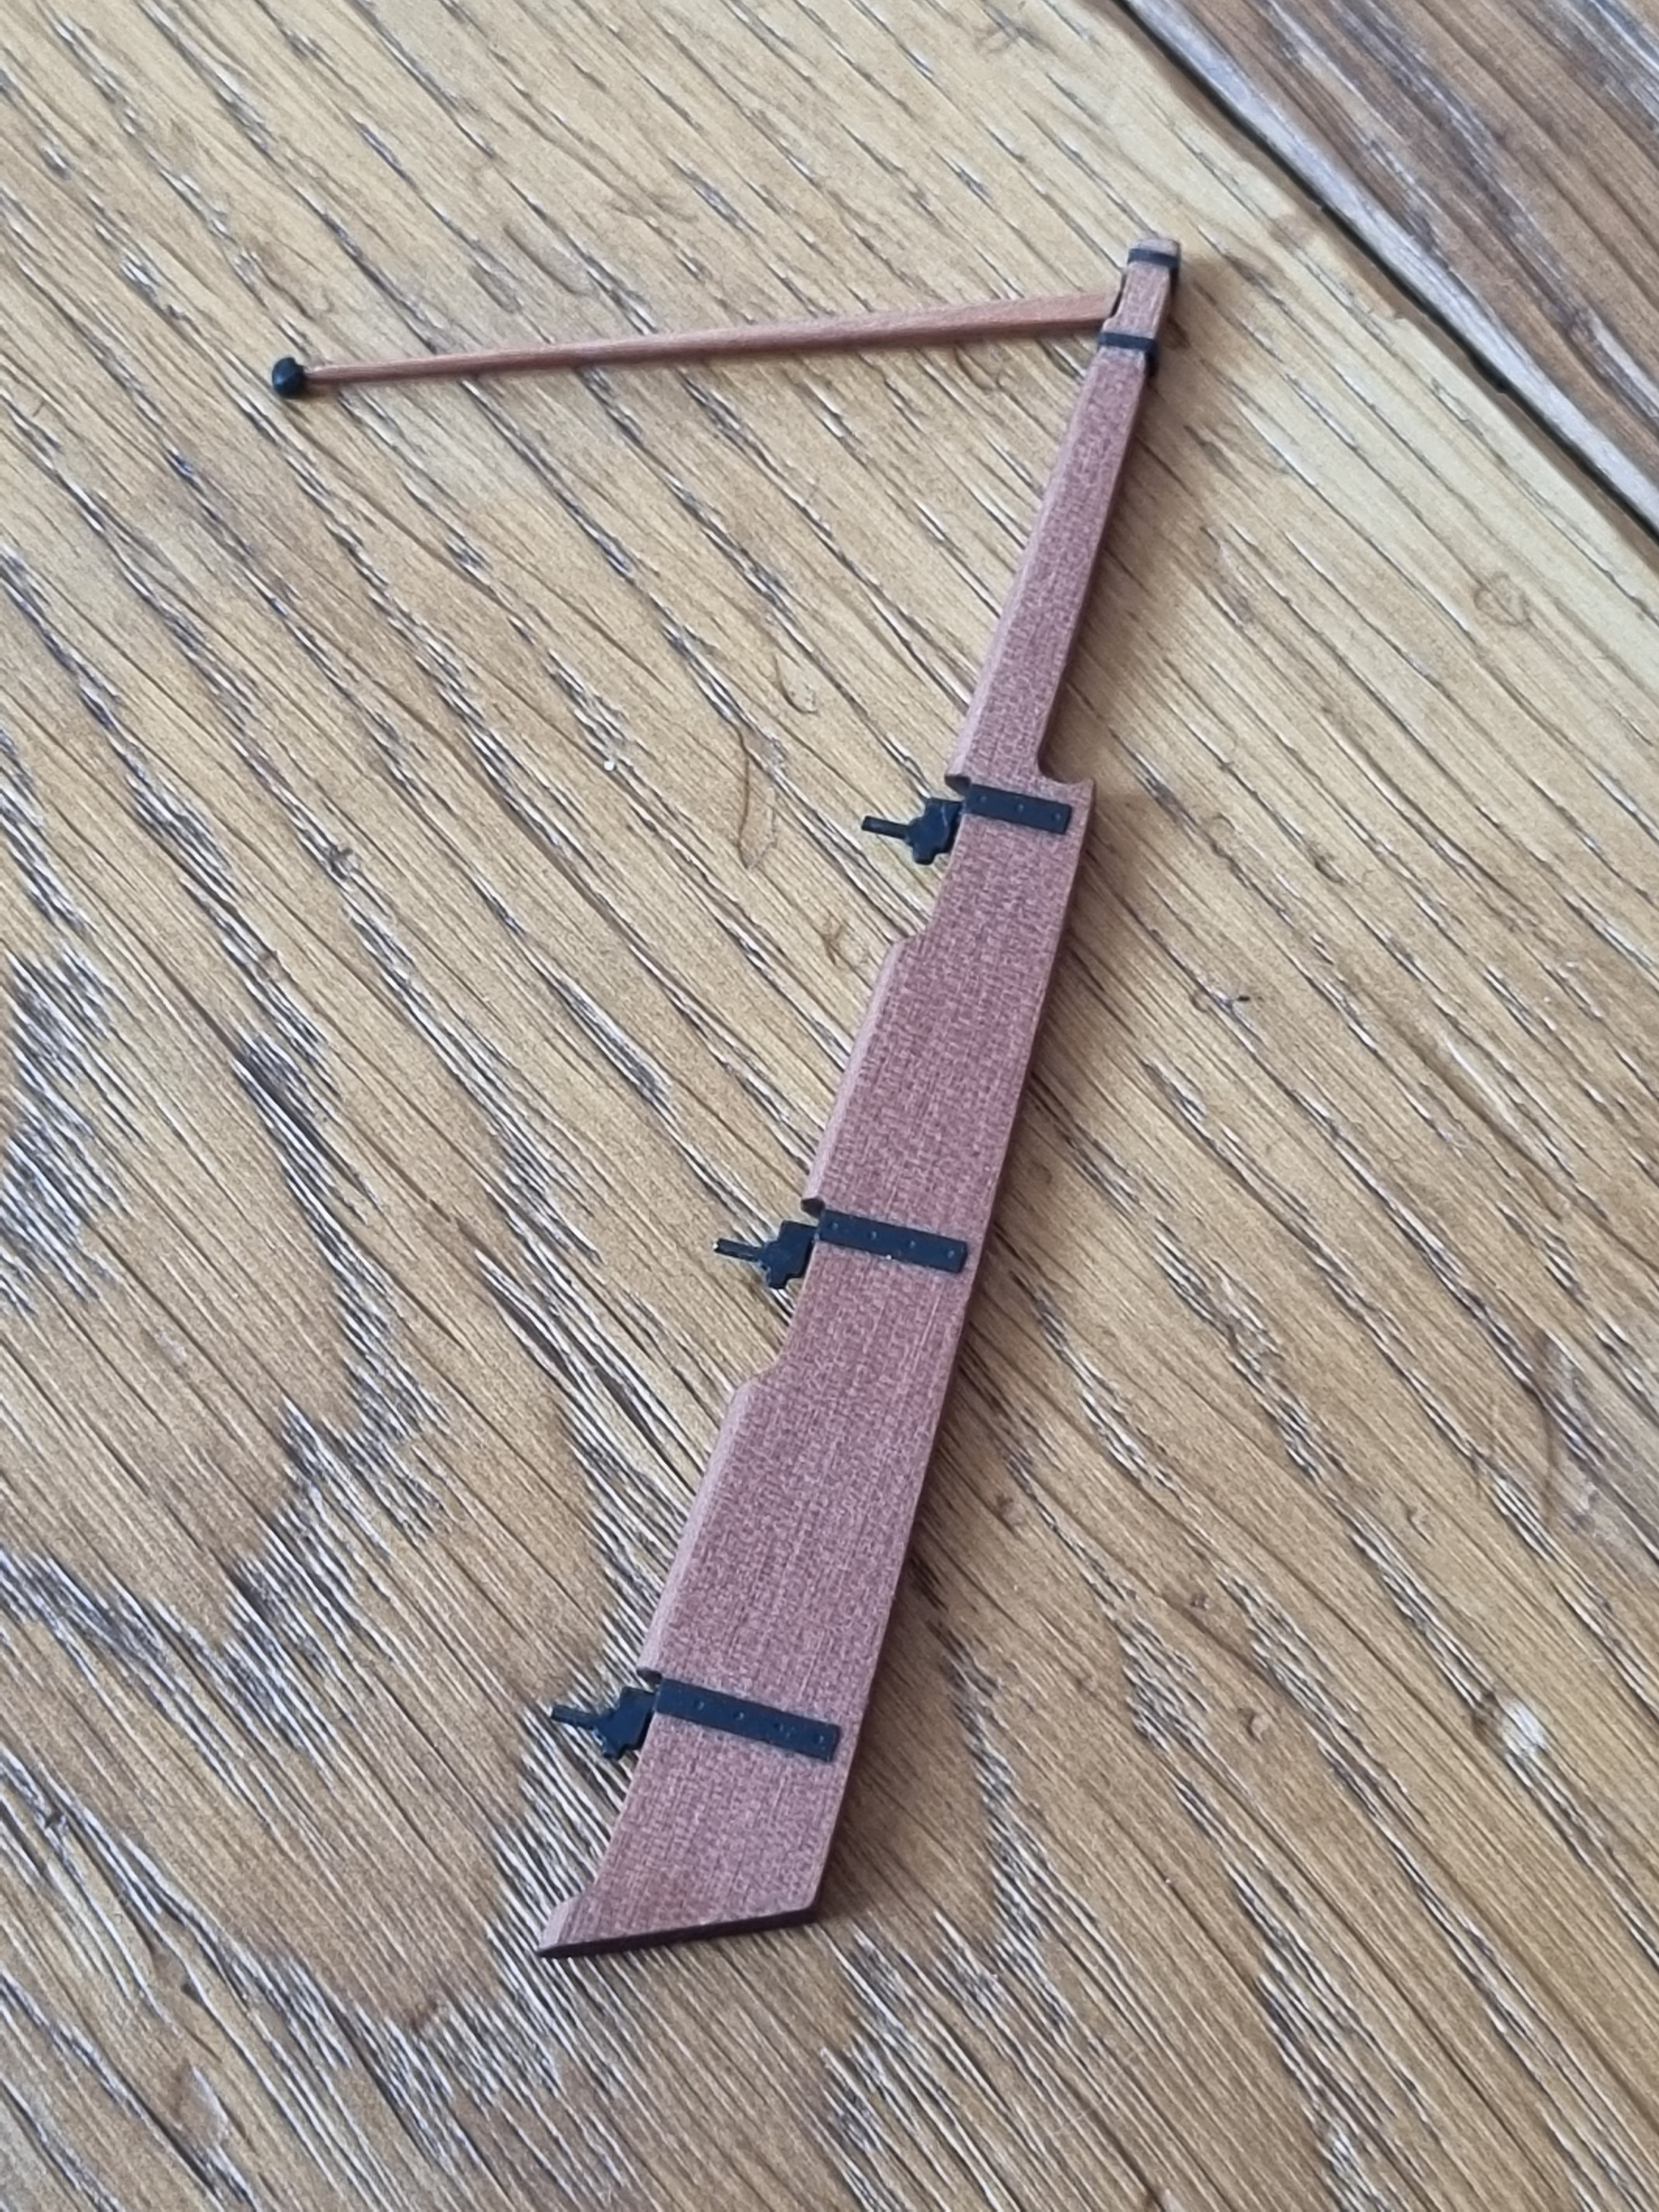
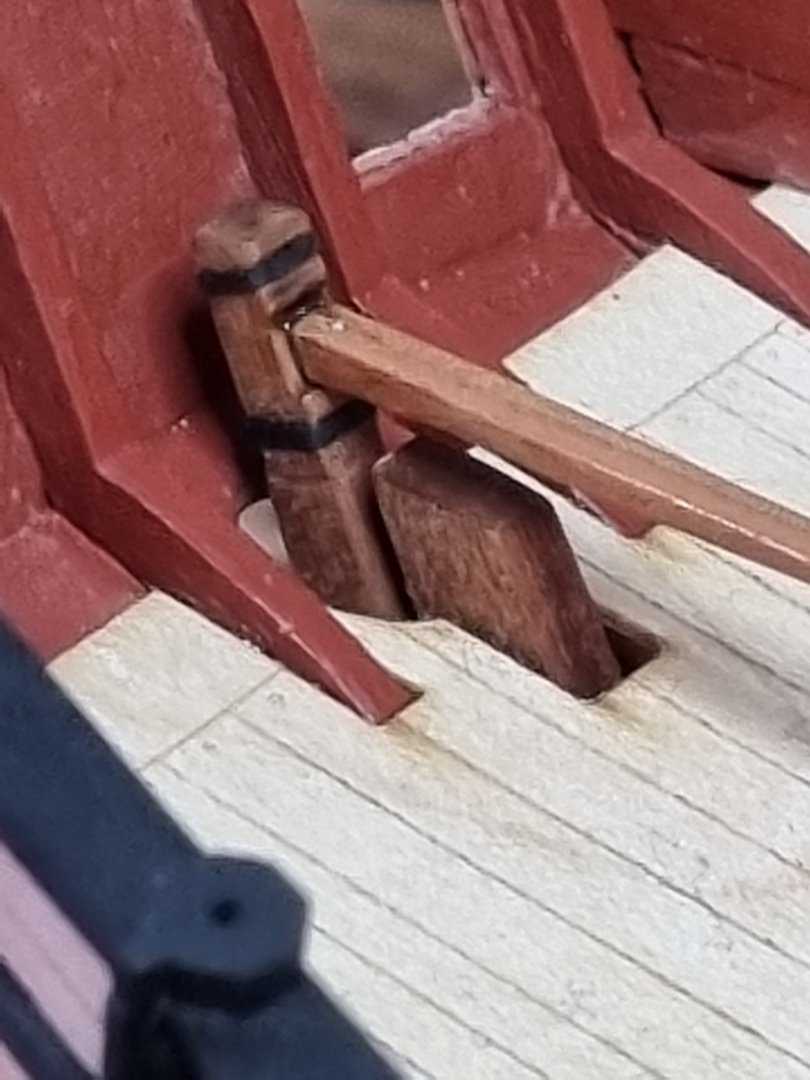
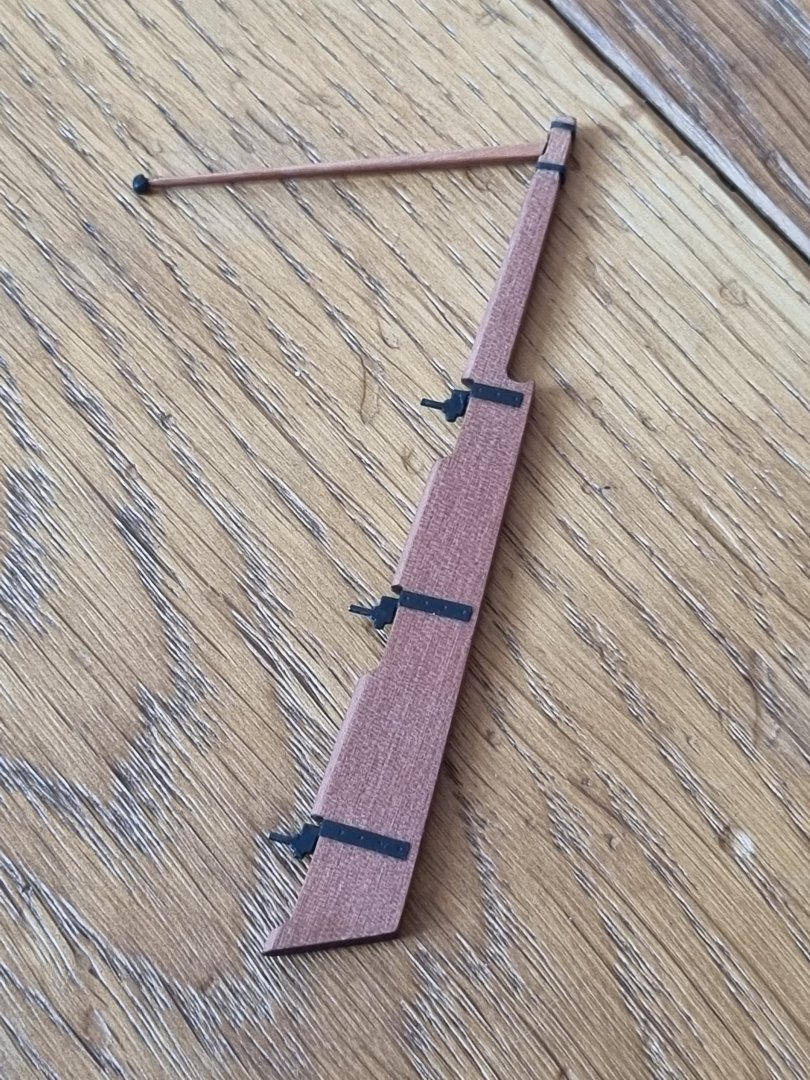
@BobG, @SpyGlass, @CiscoH: thank you for the thumbs up! 🙂 My very first upgrade: I added some wood to the pump handle to prevent some calluses during working the pumps. One side with the bare wood, the other side already sandet: And in place (all the bits are a little bit wonky, because they're all not glued): I think the edge-highlighting on the pumps is a little bit to prominent and not clean enough, I will overdue this.


-
You have made a good way, and the result is something to be proud of! I also need the help of a magnifying glass lamp...
- 362 replies
-
- 3
-
-
- Amati
- Lady Nelson
- (and 2 more)
-
Thanks a lot for your description of the used sewing. Yesterday, I went also to a lokal sewing store, and they sell me Gutermann too, that seems to be the common thing. Perhaps it is the same, don't know jet, but if I am at the point to start the rigging, I will use this brand and will tell how it worked out :-).
- 91 replies
-
- 1
-
-
- Speedy
- Vanguard Models
- (and 1 more)
-
I like the not painted stem, I did'nt had that idear, a perfekt solution for this smal boat.
- 102 replies
-
- 3
-
-
- Flirt
- Vanguard Models
- (and 1 more)
-
You are crazy! I like that... 🙂 Do you plan to make it a static diving RC-model?
-
Roter Löwe 1597 by Ondras71
Theodosius replied to Ondras71's topic in - Build logs for subjects built 1501 - 1750
Not my period of time, this ship, but this log is one of my 'go-too's', just because of your wonderful craftmanship! 🙂 -
Wow, the raising rig looks great to me! May I ask what kind of line (brand, diameter, what kind of material?) do you used for serving the shrouds? I don't think so, that there is stuff for this in the kit, and the stuff you used thems to be perfekt for this scale! Thanks a lot! 🙂
- 91 replies
-
- 1
-
-
- Speedy
- Vanguard Models
- (and 1 more)
-
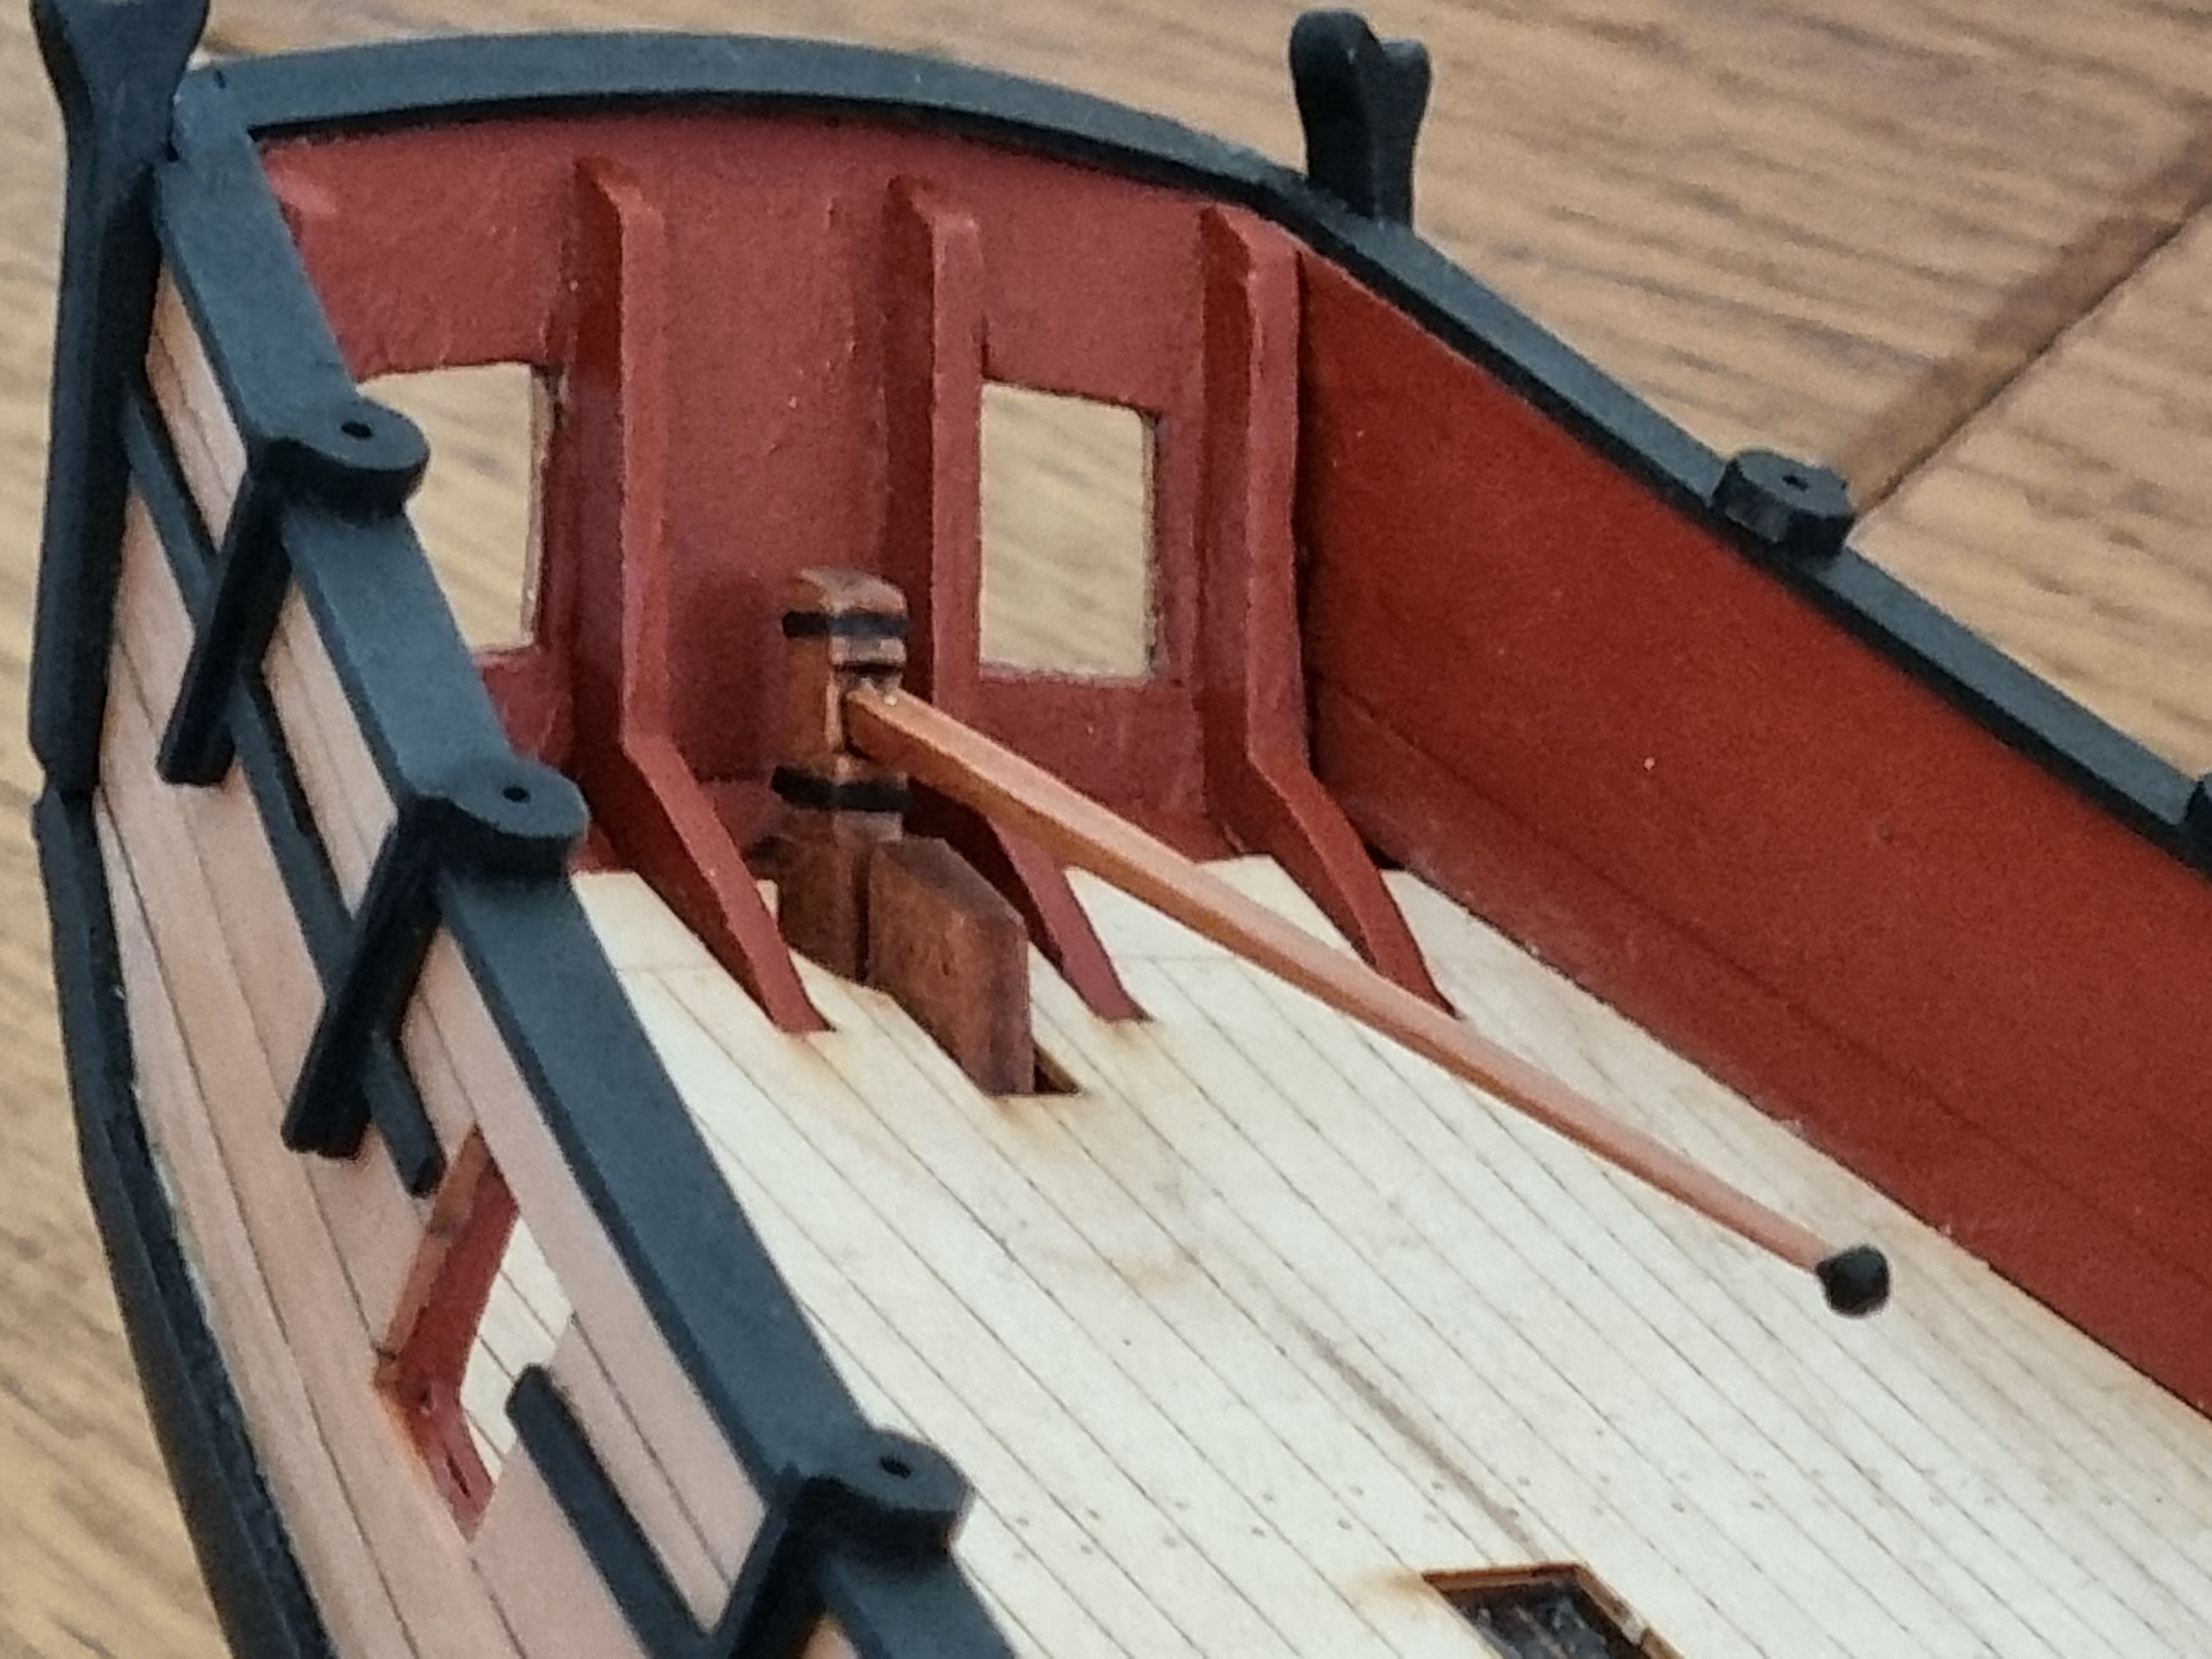
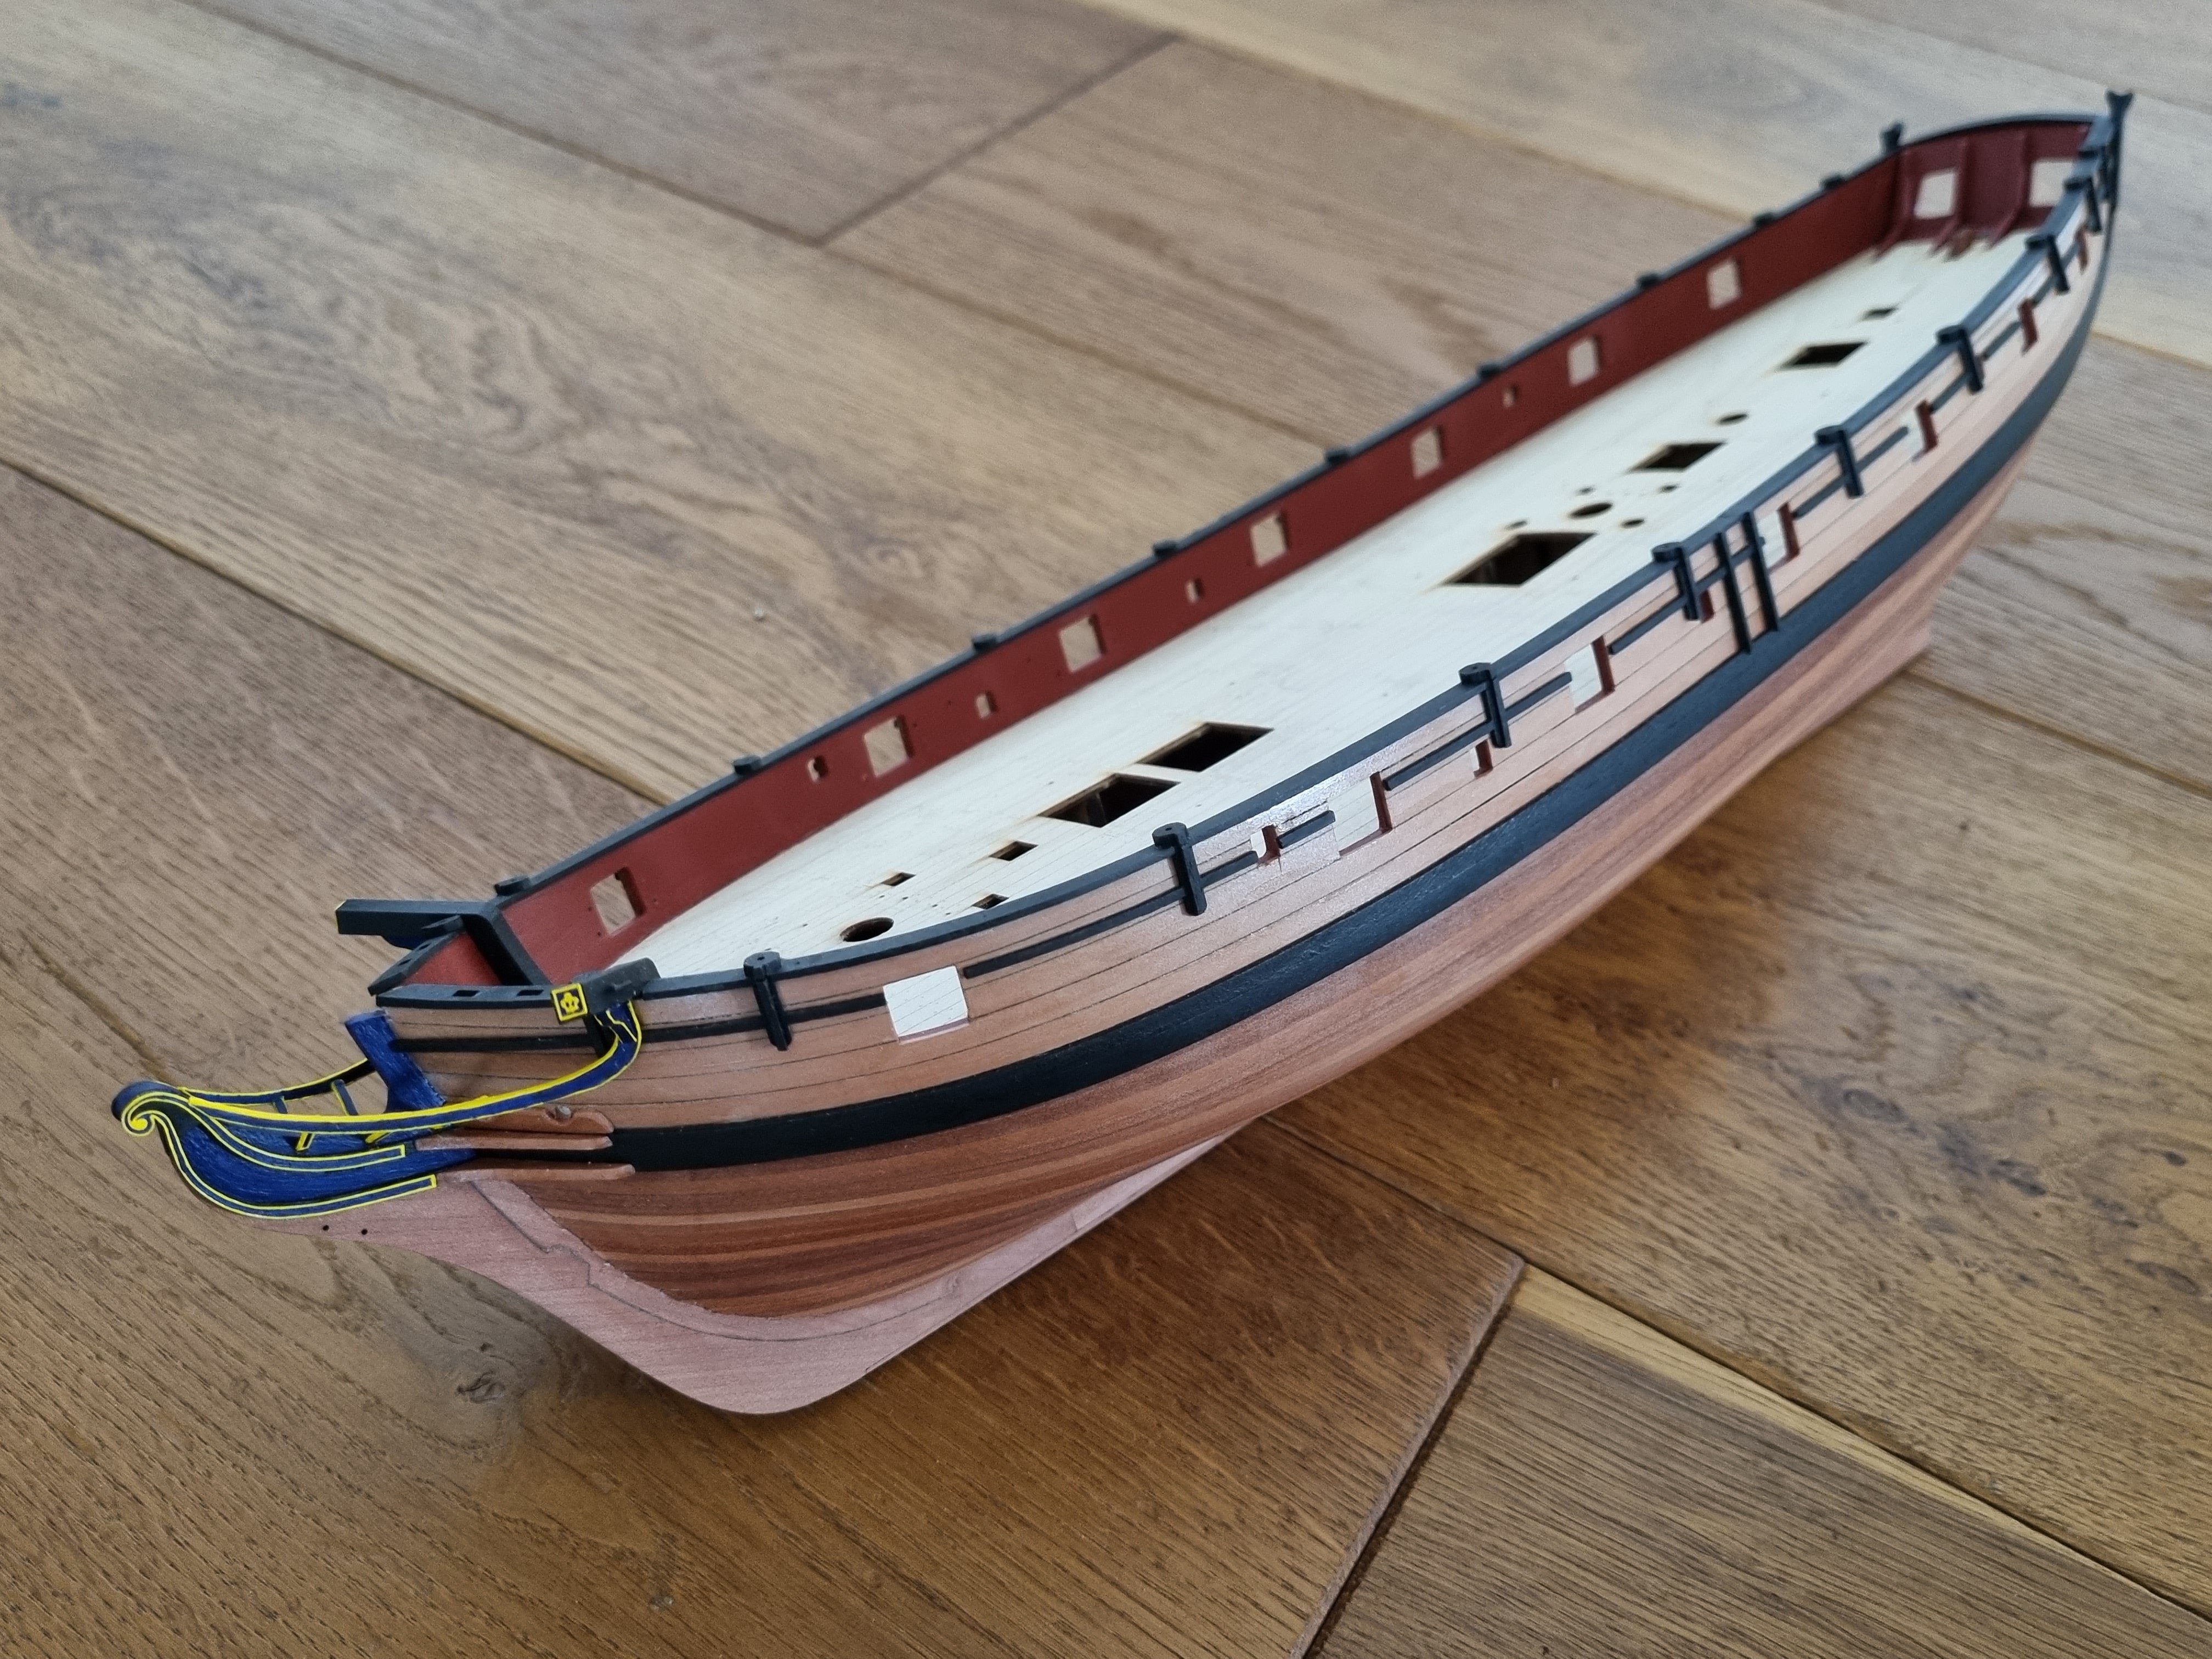
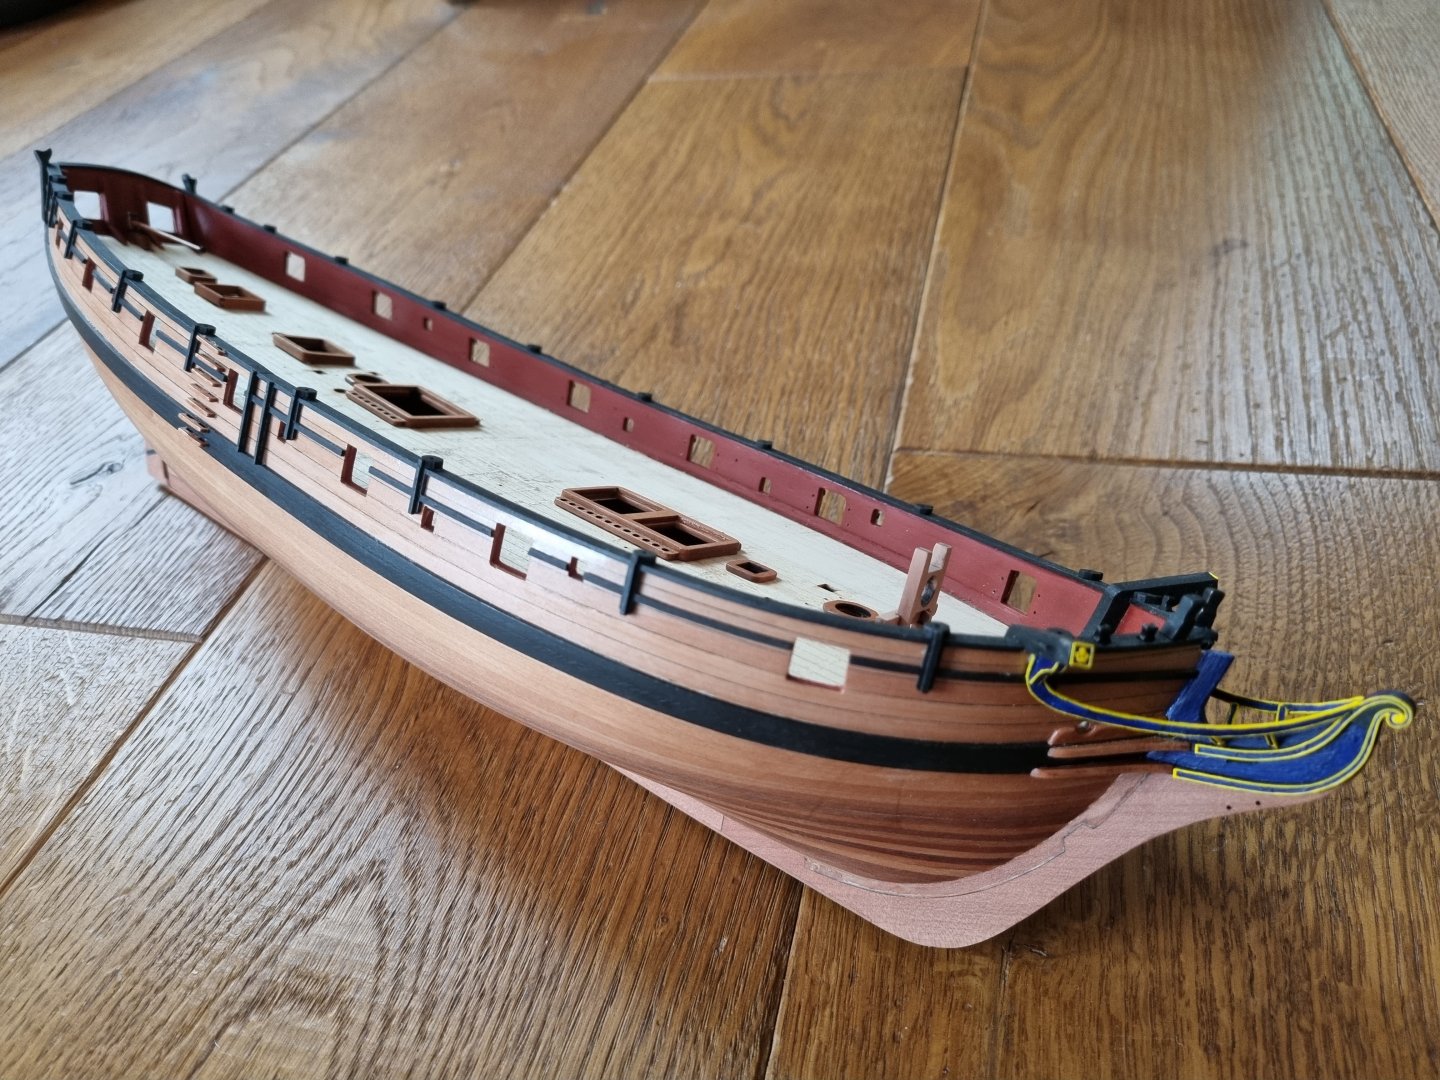
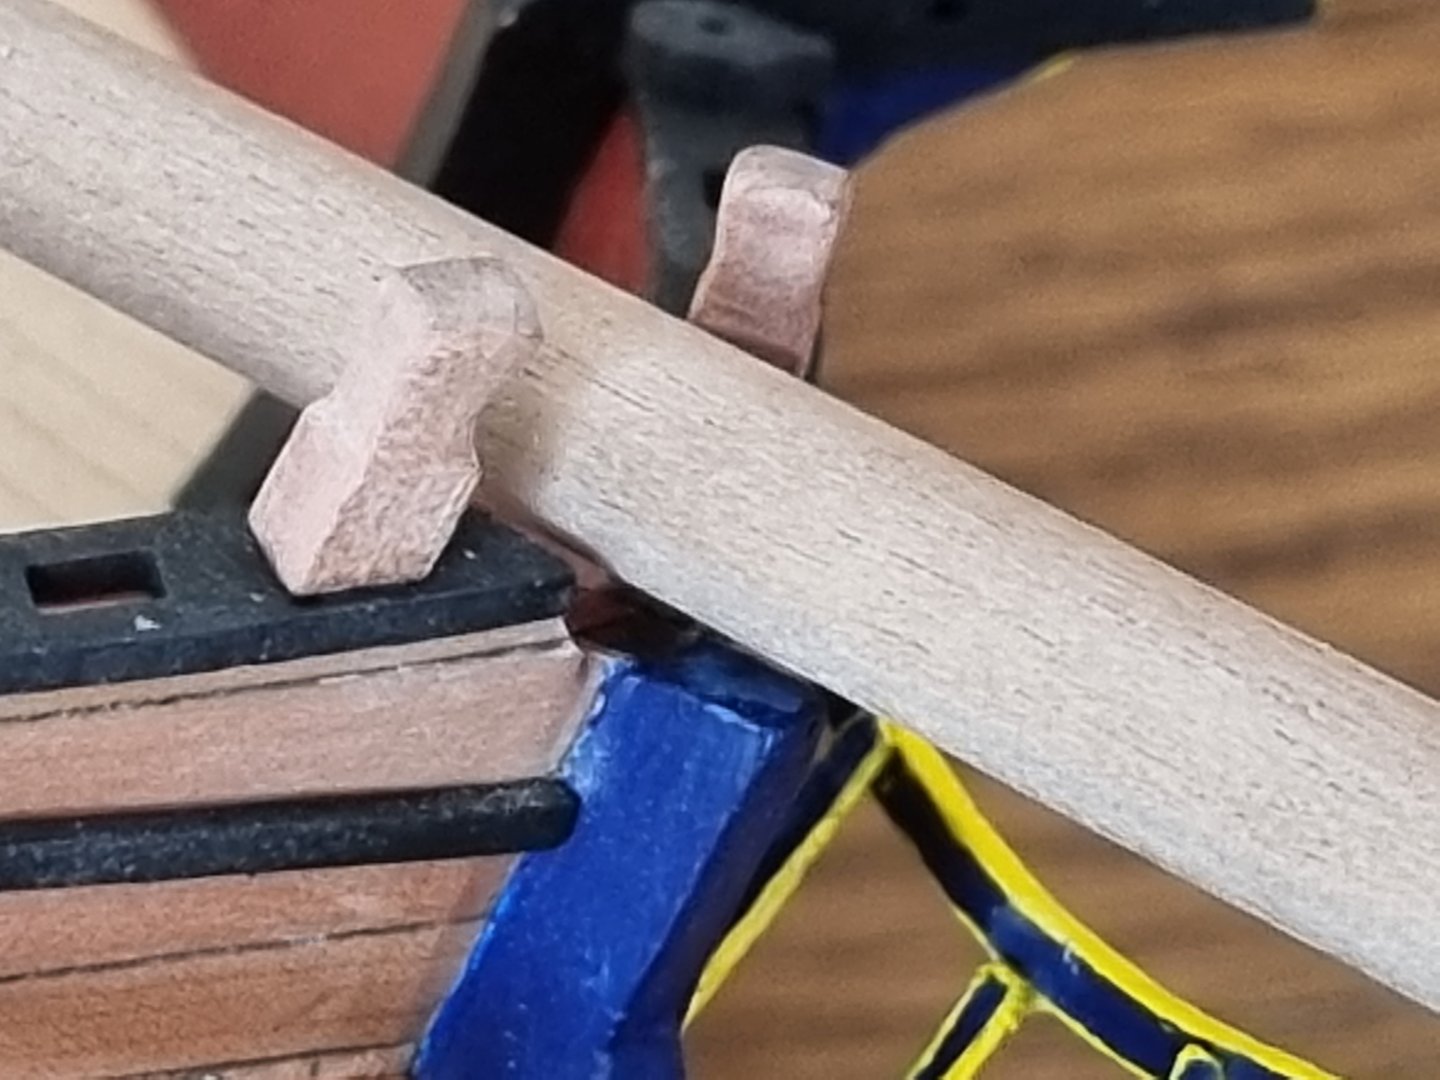
@PhillH, @Dfell, @Thukydides, @David Lester, @SpyGlass, @Paul Le Wol, @ChiscoH: thank you all very much for your thumbs up! 🙂 I saw in one picture of my last post, that I managed to twist the tiller. Fixed that one: Because this is not enough to justify a log entry, here is also the finished, or not (paint?), steps outside the hull: The work on the deck furniture and the bits has also started (nothing glued to the deck jet): Again, I'm not sure about the colors to go. At the moment I go into the direction to leave the furniture in wood and paint the bits red-ockre, but this changes a lot during a week, and even more during my reading and looking at the pictures of other build logs... 🙂

-
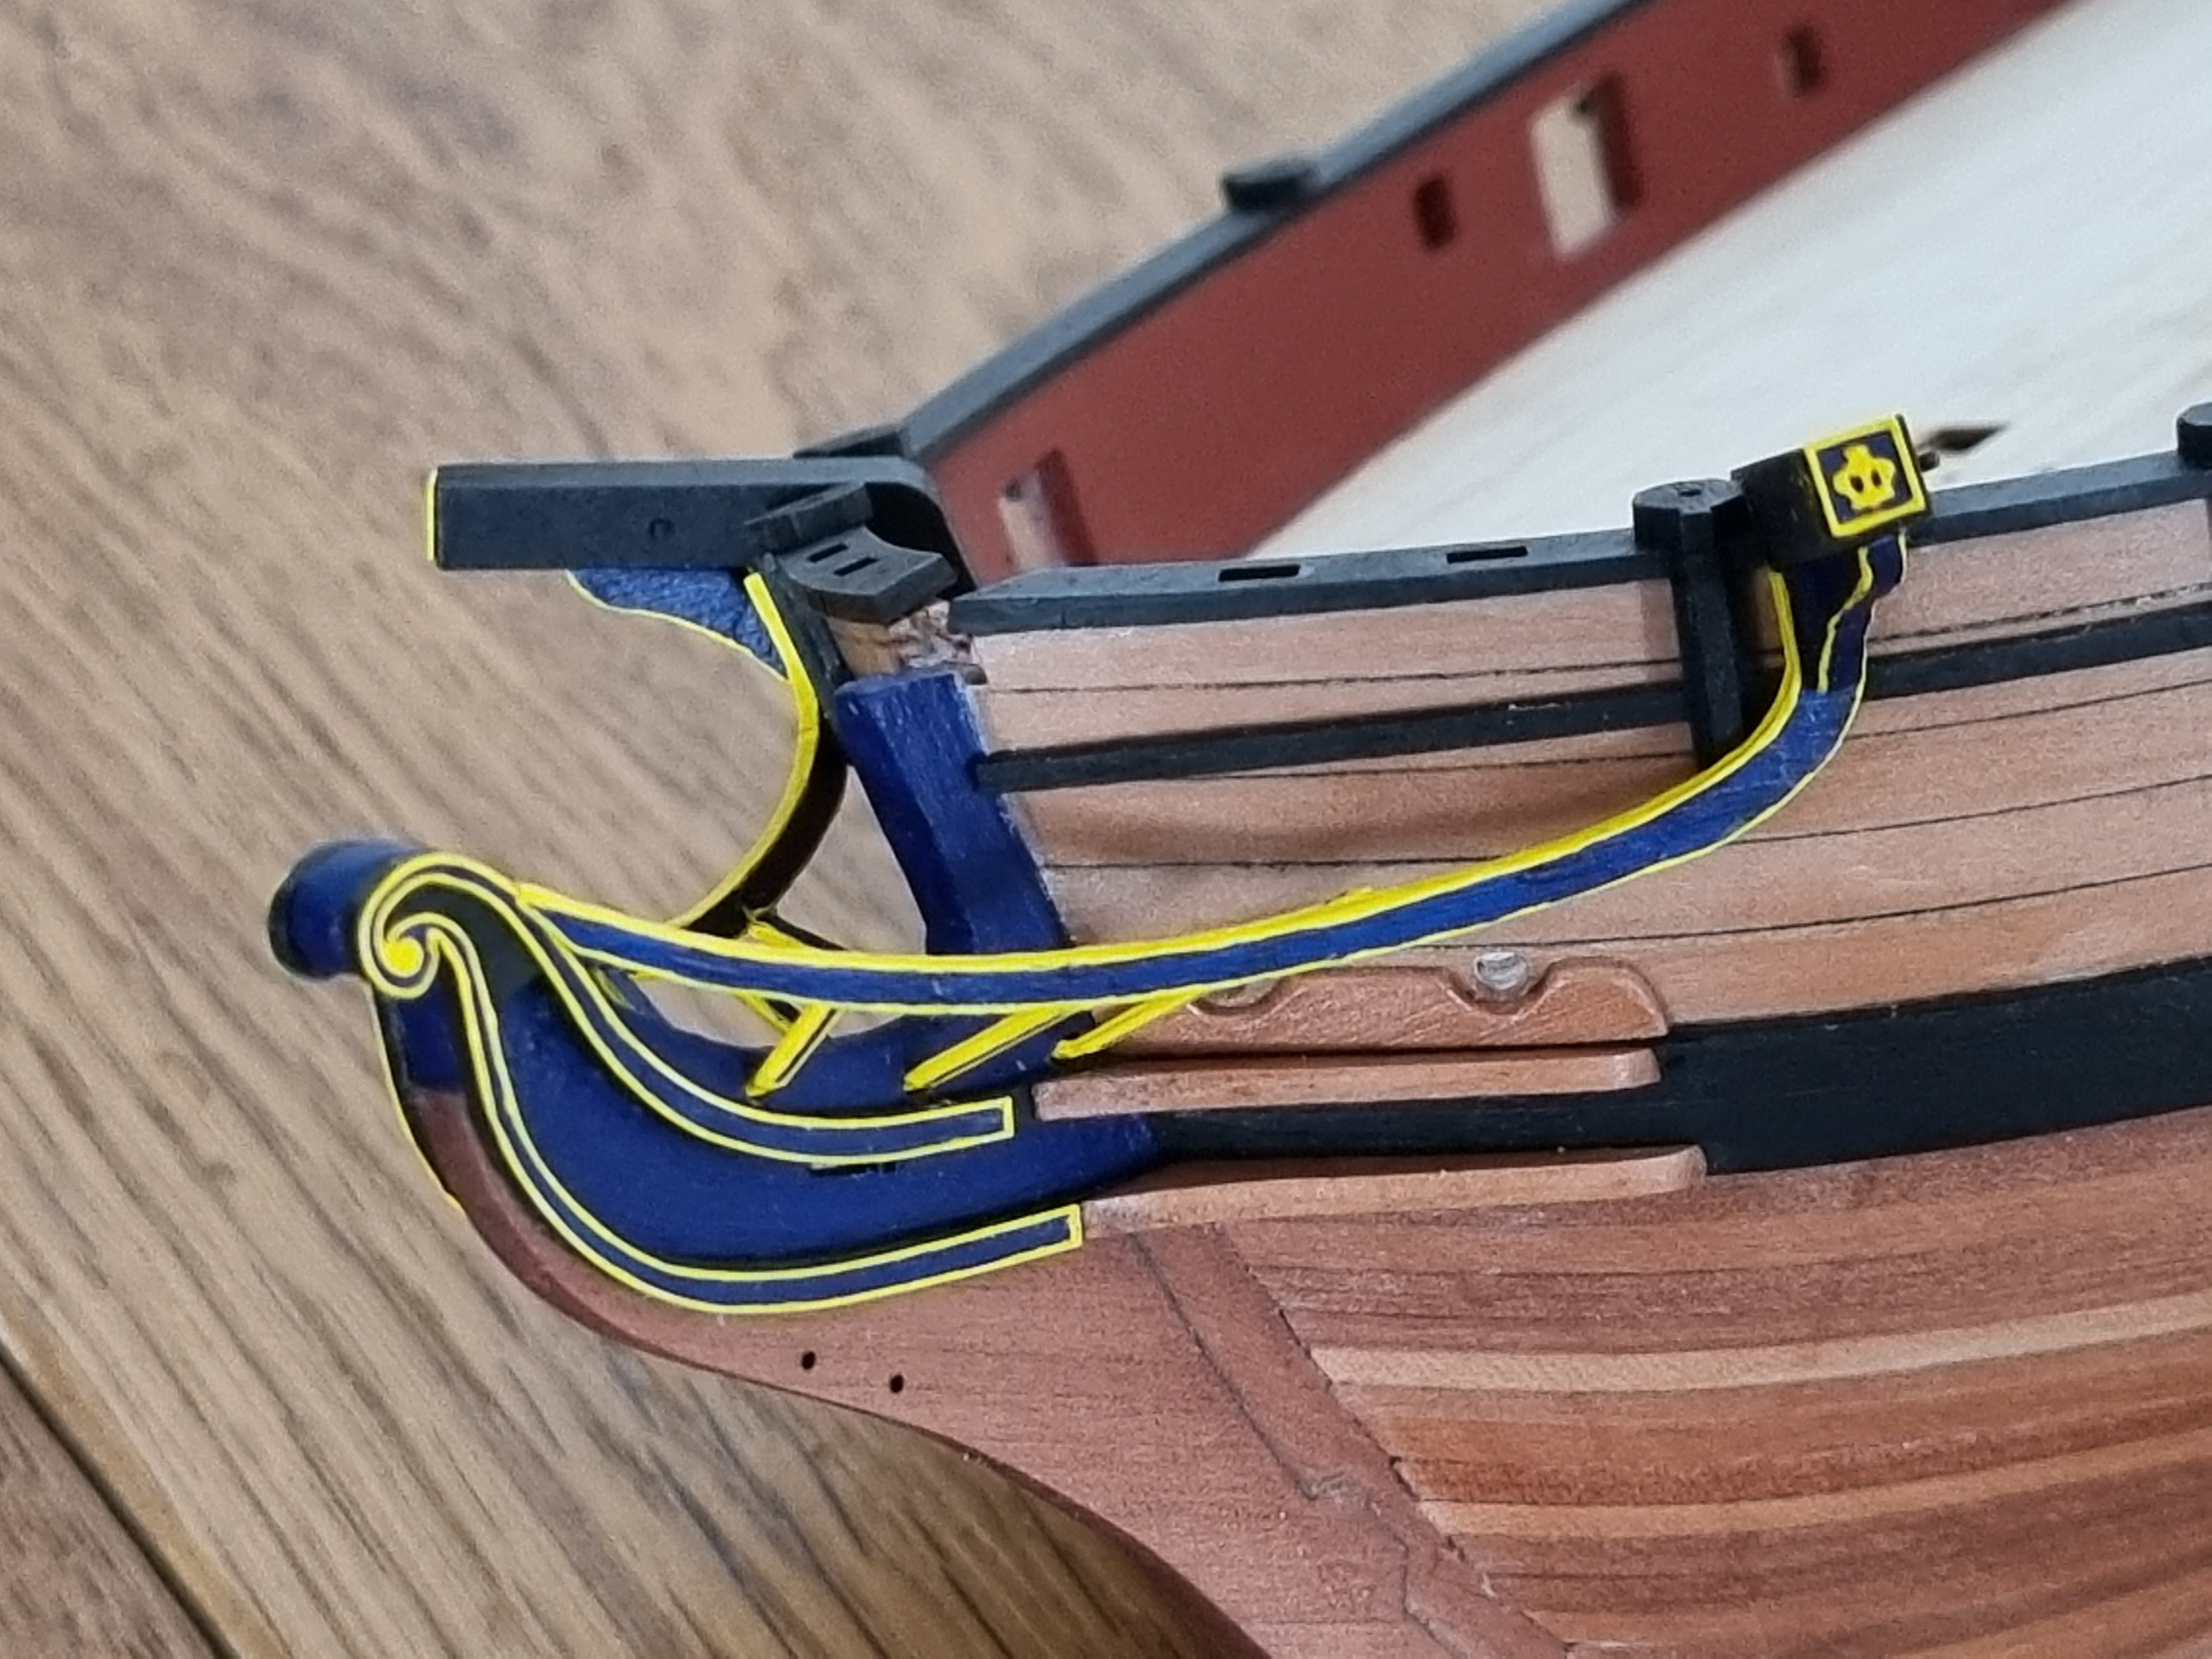
I'm realy thinking about to steal your idear with the gun tackles in a 'stored' position 🙂
-
Wow, this is an mostly underrated form of art! When I was younger, I dreamed of and RC-modelship with an steam engine. At least, I'm building historical ships, ok, one, lol, out of wood 🙂
-
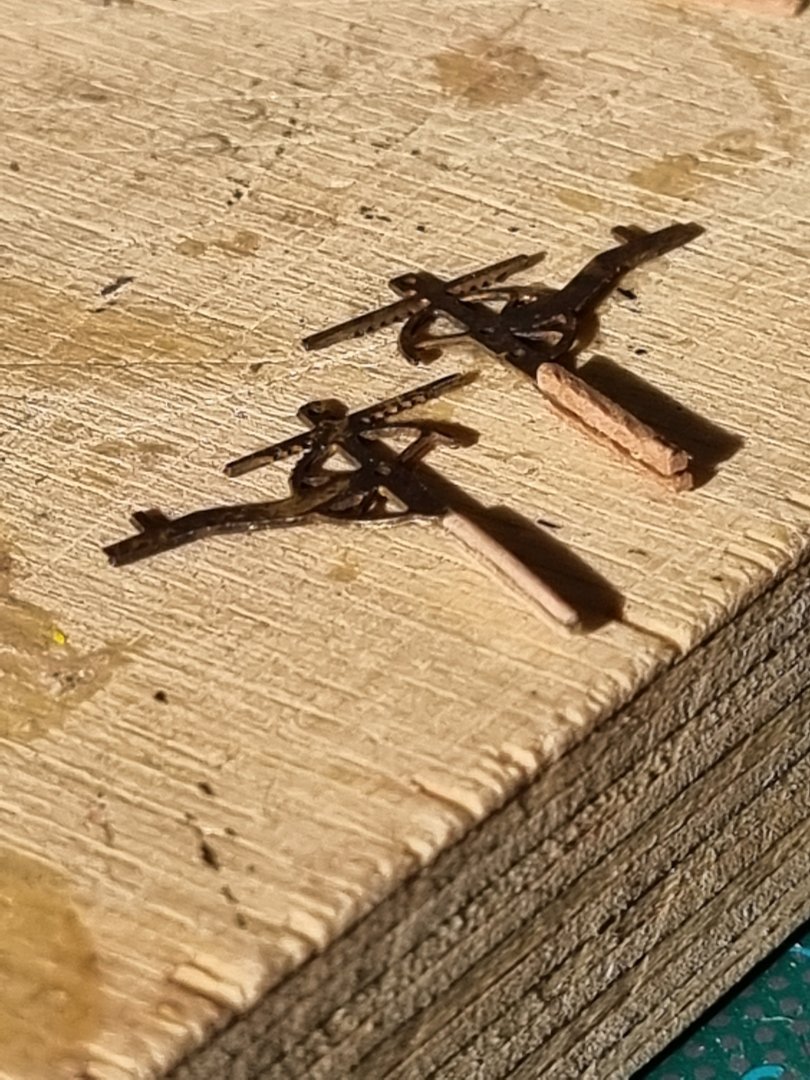
If you would'nt have written about your 3-d-printed gun-cars, I would have thought that they are of course of wood! So, from my (unexperienced) point of view there is no need for more improvement 🙂
-
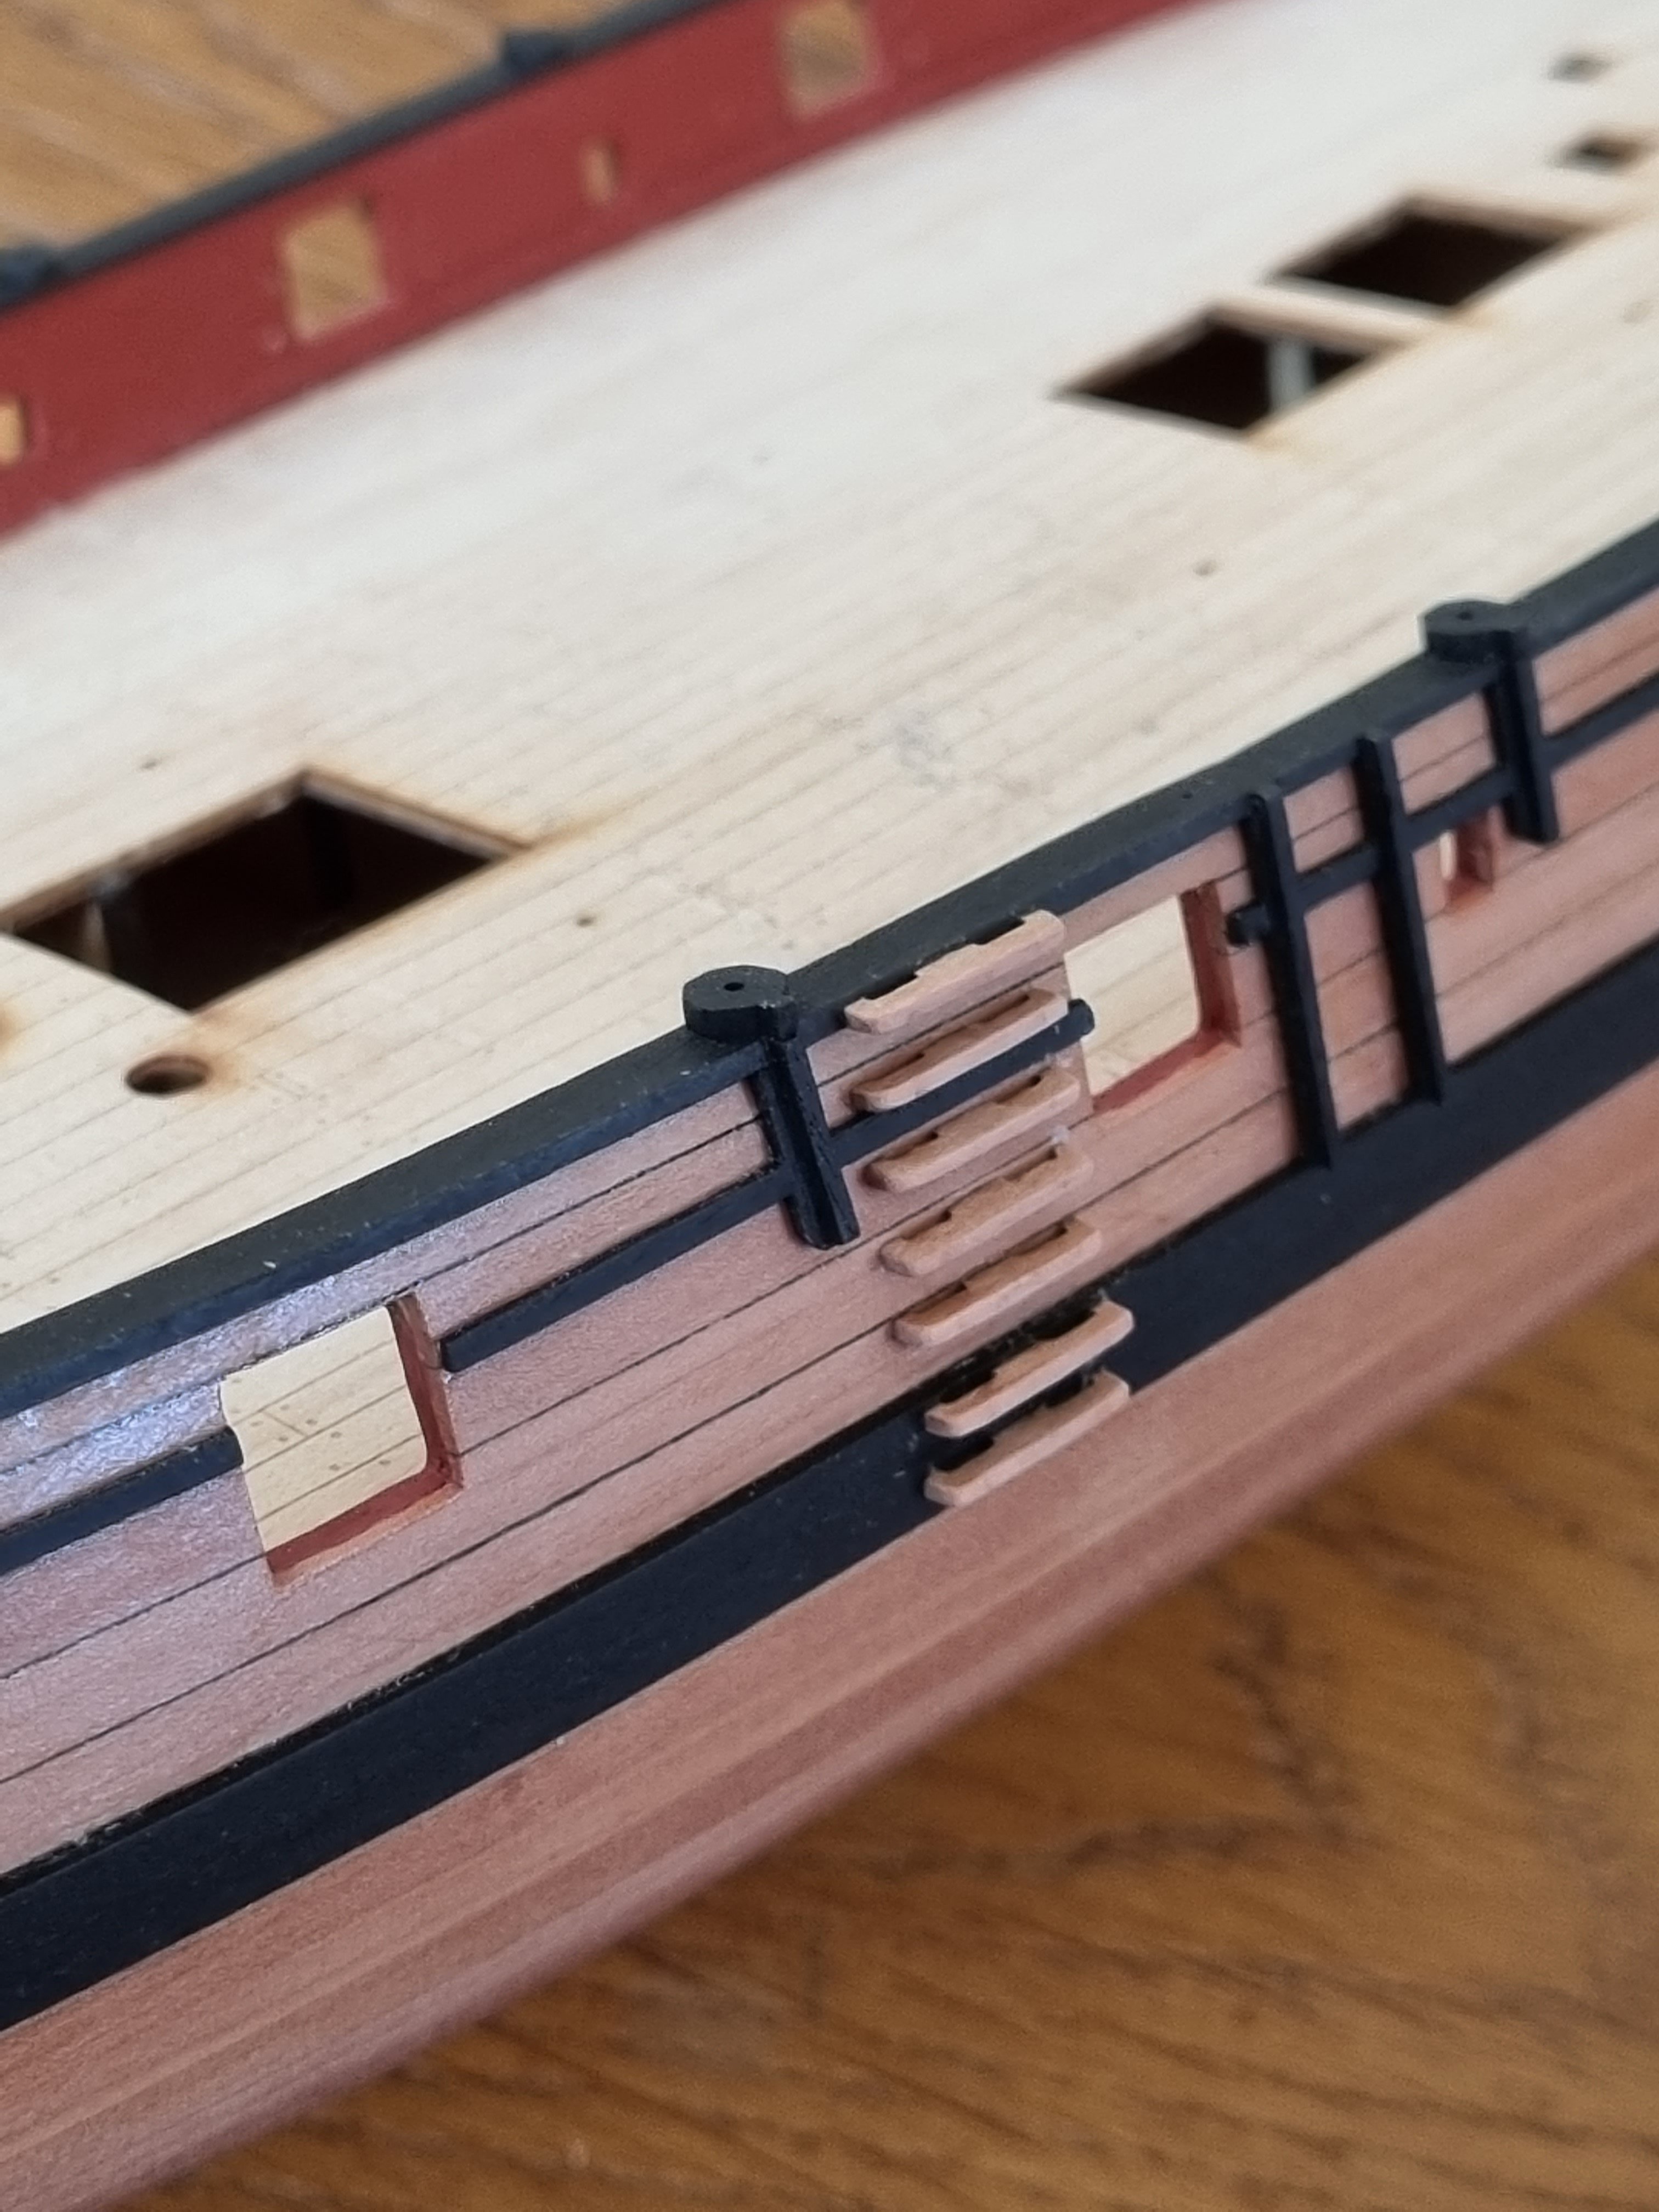
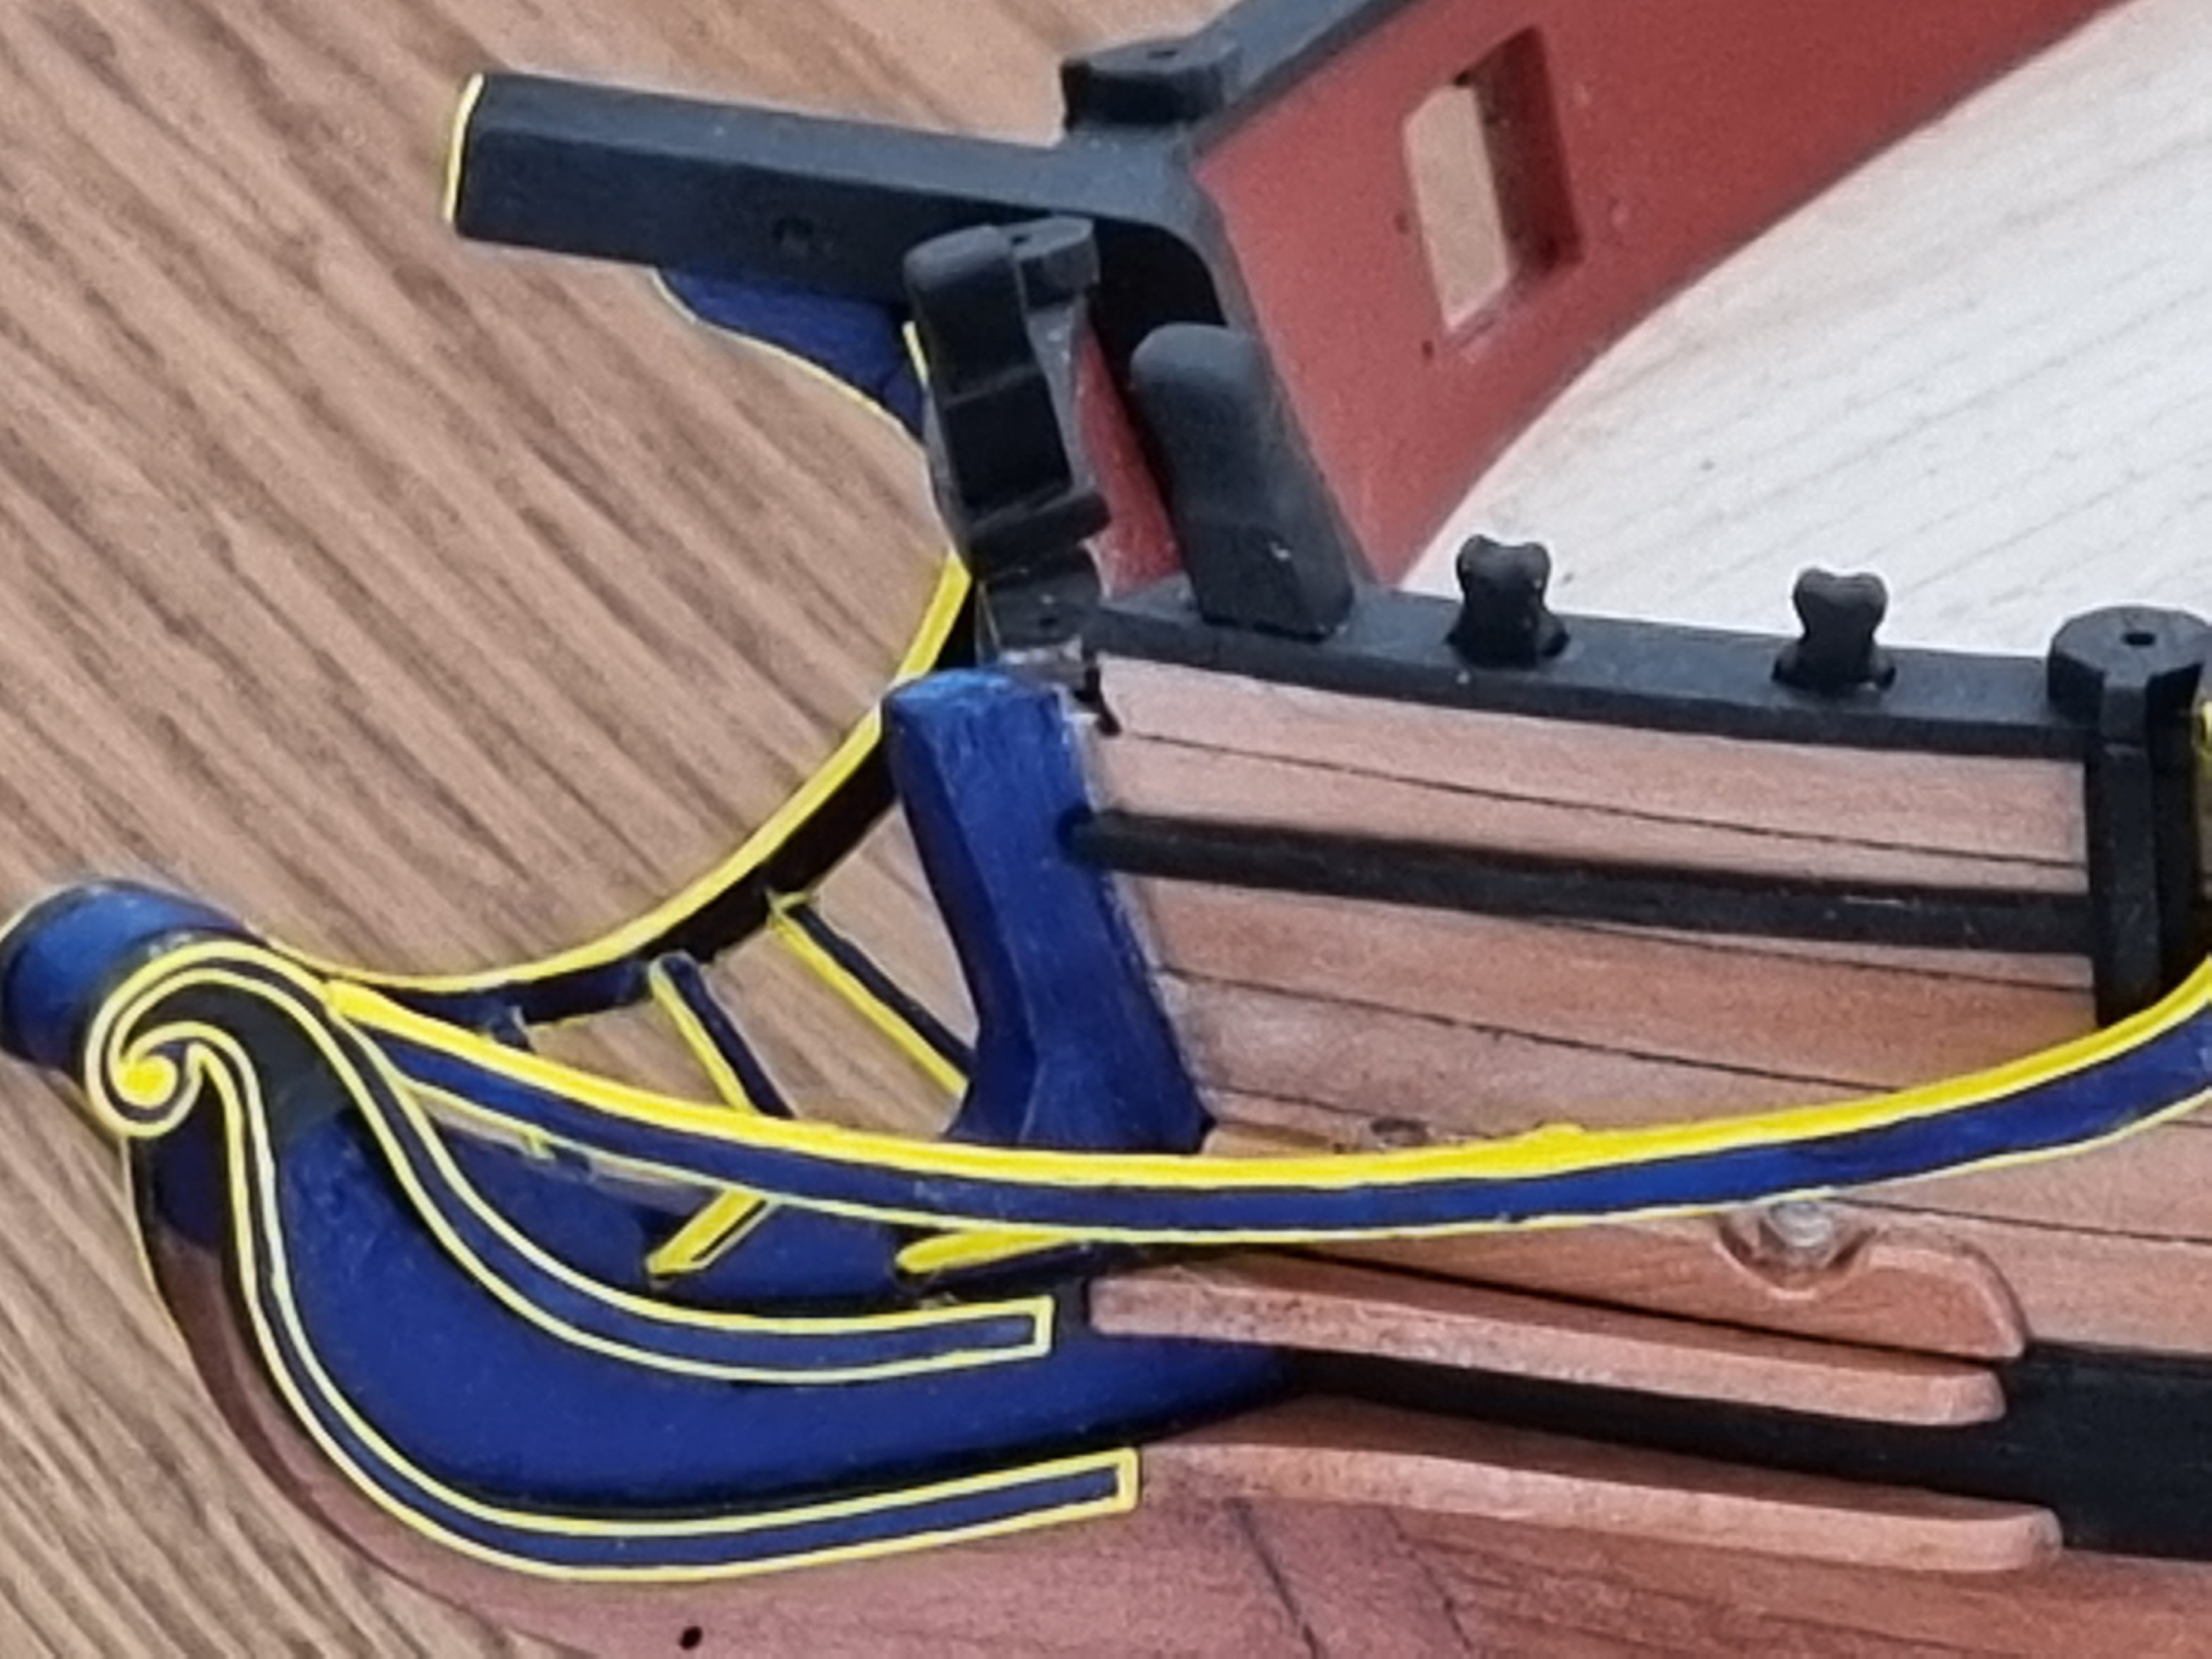
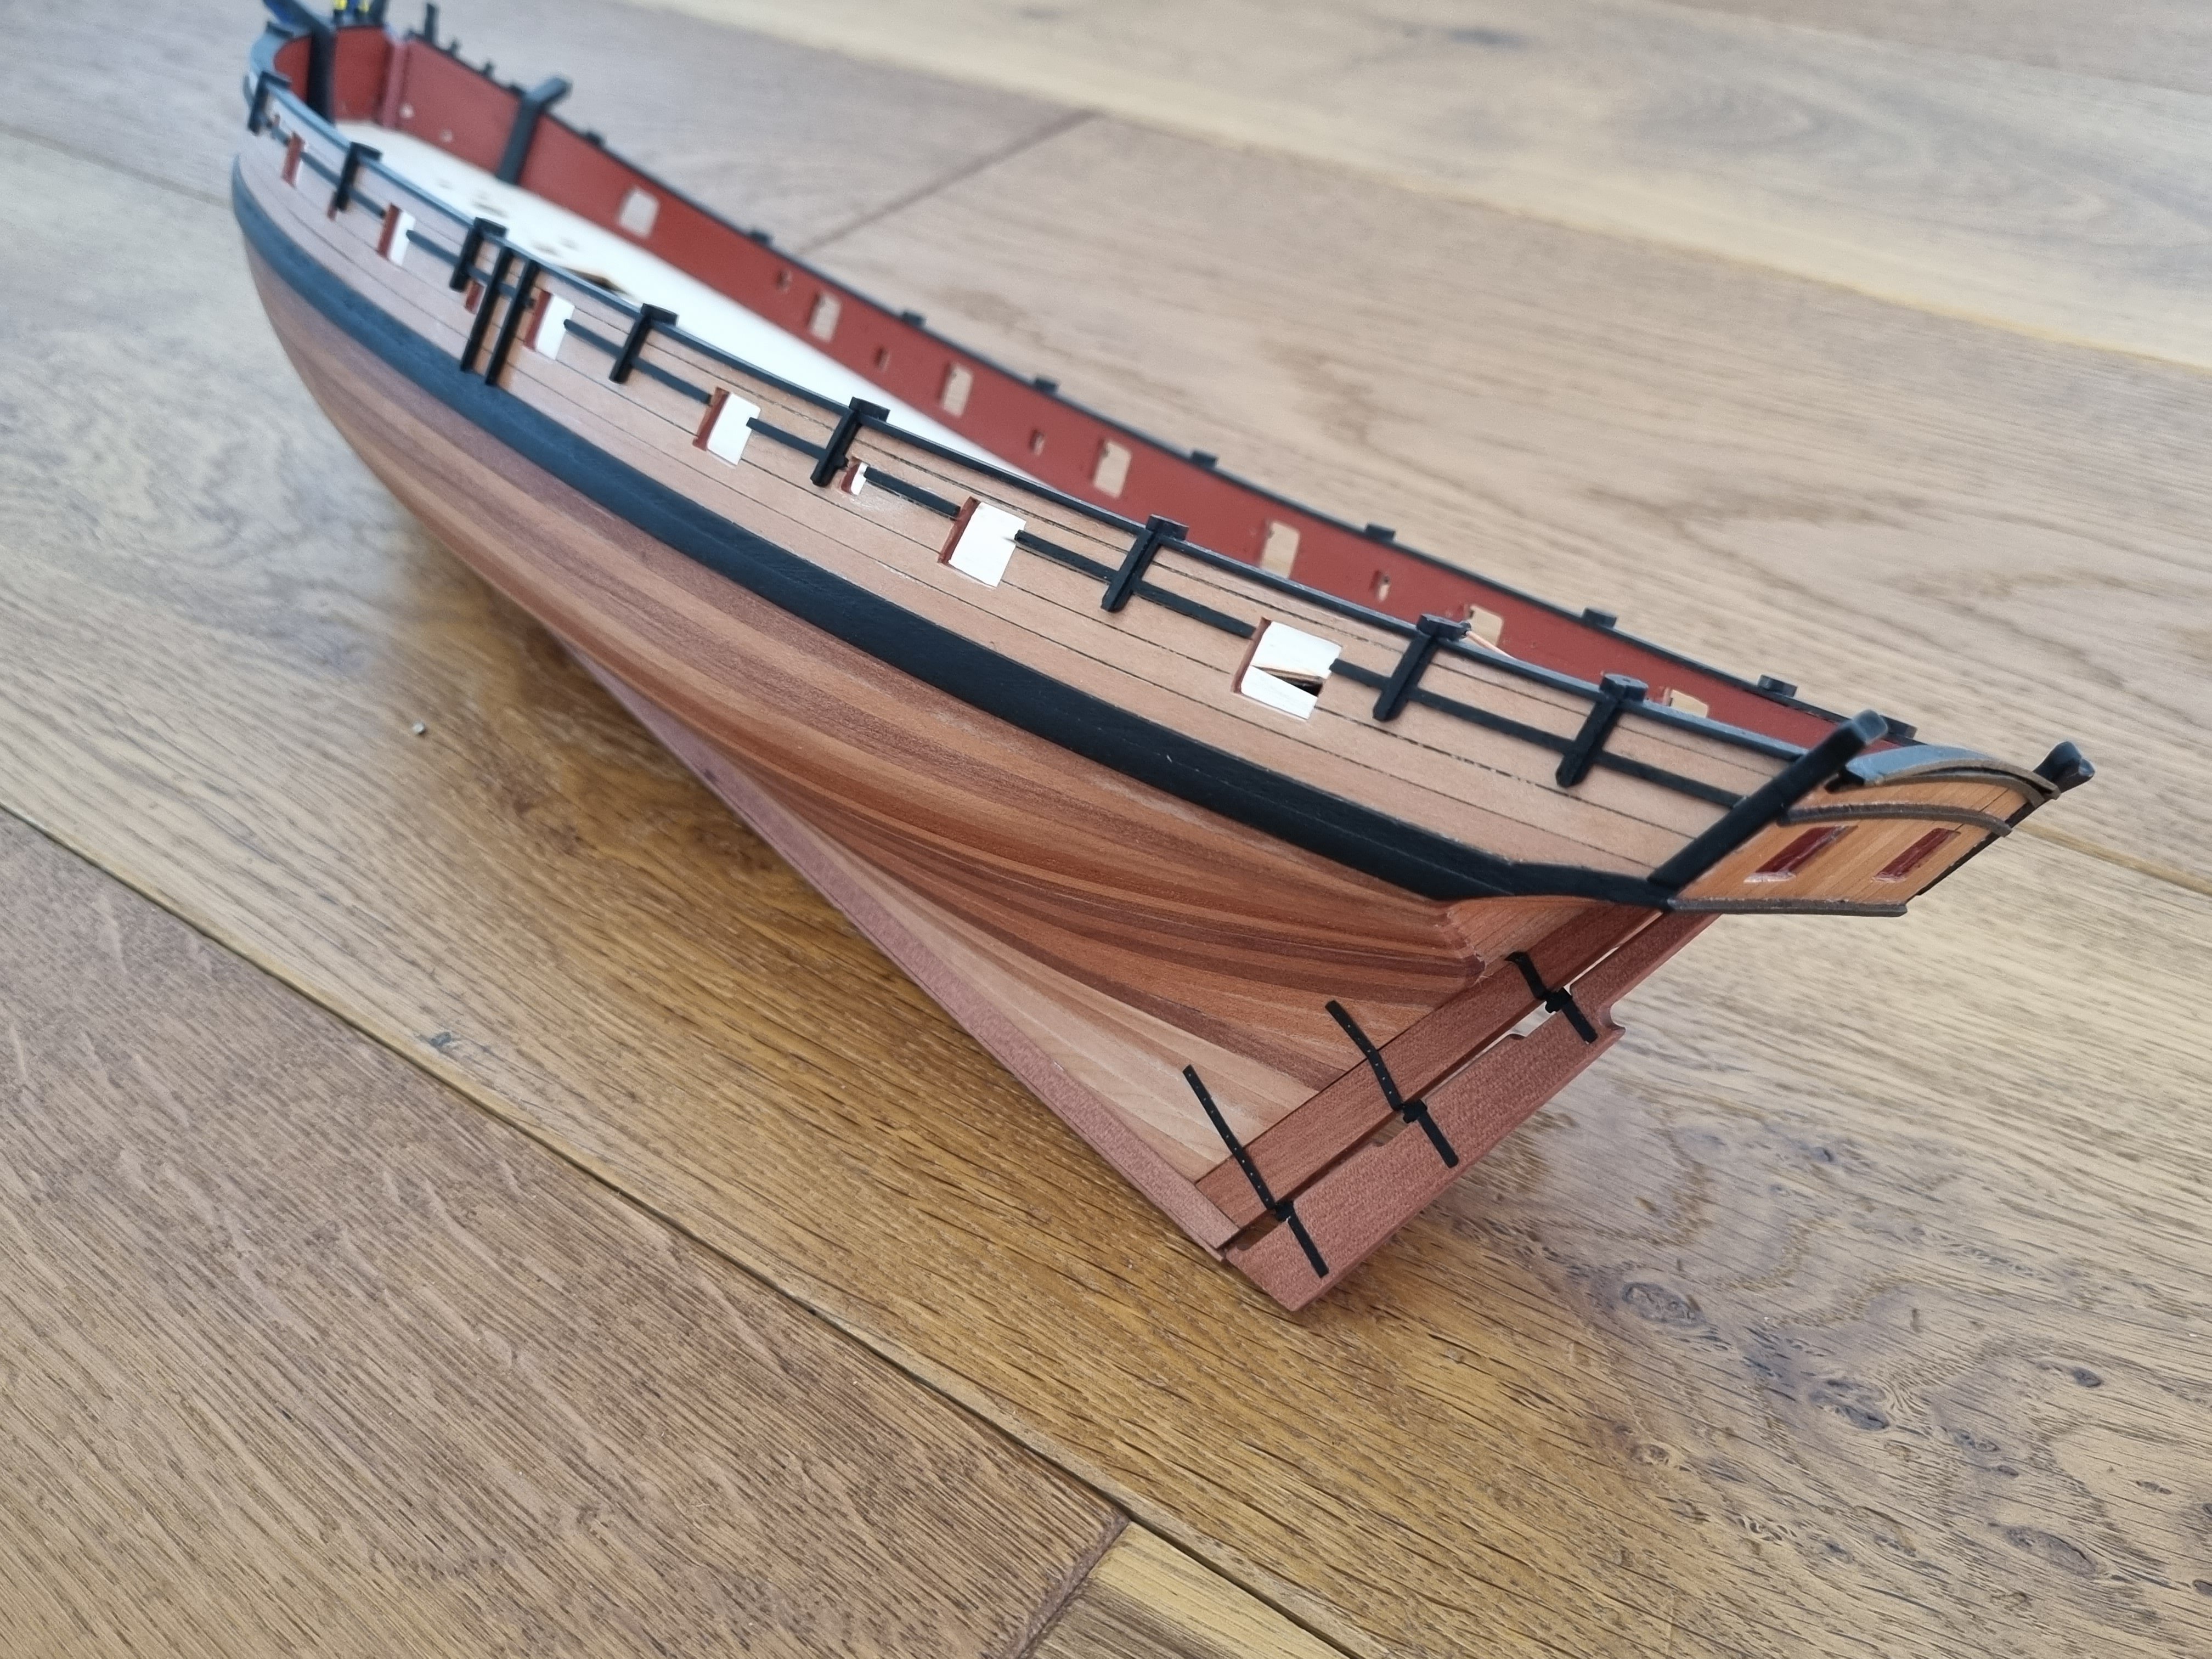
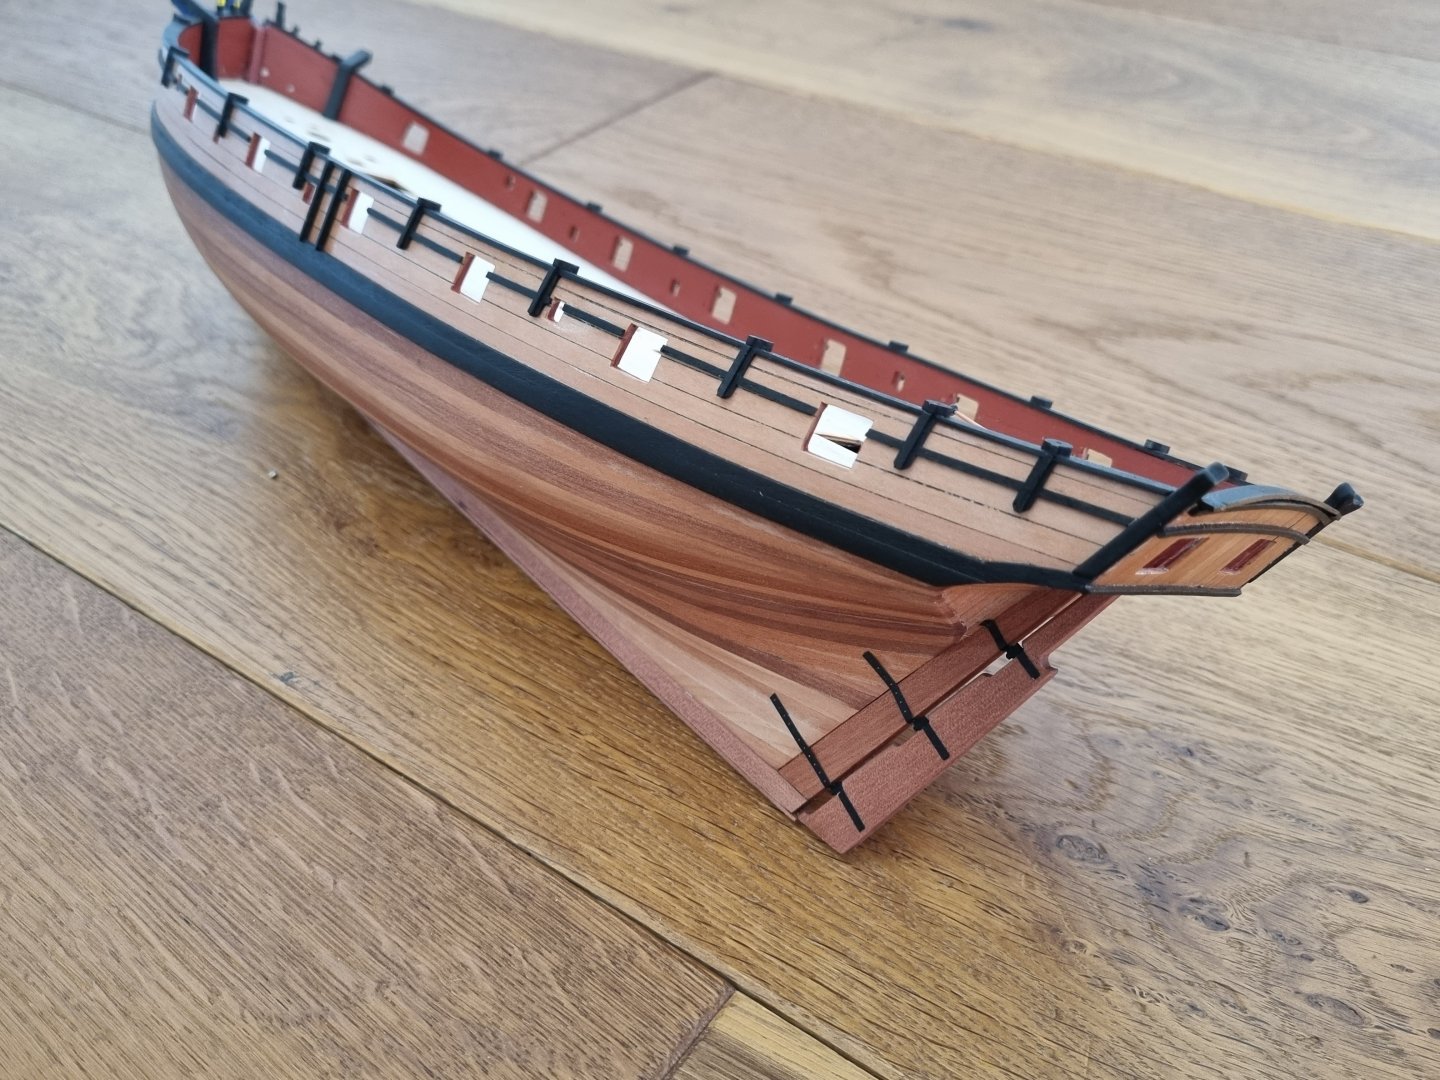
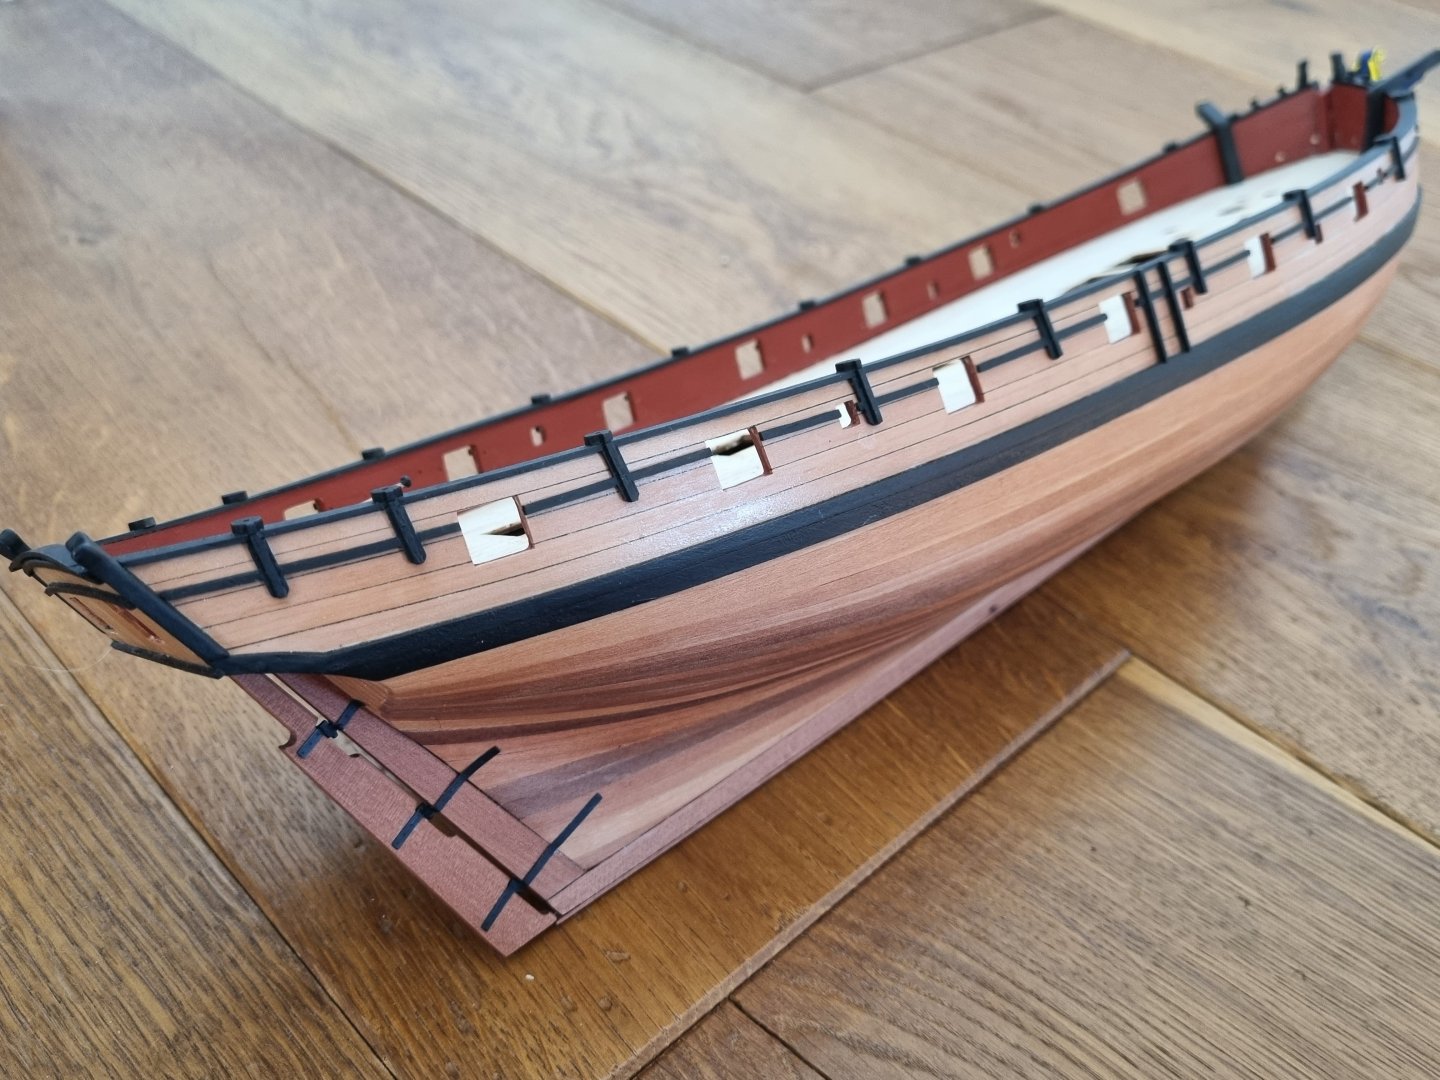
@DelF, @CiscoH, @BobG, @BenD, @David Lester, @ccoyle: thank you all for your tumbs up! Much appreciated! 🙂 I think, now I entered into a great phase of wooden model shipbuilding! 🙂 As it seems, to equip the model now, there is allways a relativley small amount of work in comparison to the planking for example, but there is much to see with this little work. This is a great fun phase for me :-). So, I cleaned these forward bits, because I wanted the wooden look: But they looked like an outsider, so in the end, they were also painted black: Next was the rudder: And installed: Ok, the gap between the rudder and the hull is a little bit to large, but the overallook is good I think. And then I always forgett to clean up the messy gunports in the stern :-).


-
Incredible, how you reach this level of quality with your insane building speed! 🙂
-
@Thukydides, @David Lester: thank you both for your thumbs up! 🙂 Catheads and supports installed, for now I call the galeon finished 🙂