HOLIDAY DONATION DRIVE - SUPPORT MSW - DO YOUR PART TO KEEP THIS GREAT FORUM GOING! (78 donations so far out of 49,000 members - C'mon guys!)
×

Knocklouder
-
Posts
2,943 -
Joined
-
Last visited
Content Type
Profiles
Forums
Gallery
Events
Everything posted by Knocklouder
-
 Great job, Bob M.
 -
Best of luck glad your back Knocklouder
-
Nice work , definately going to be poking around your Harpy build. well done indeed . Bob M.
-
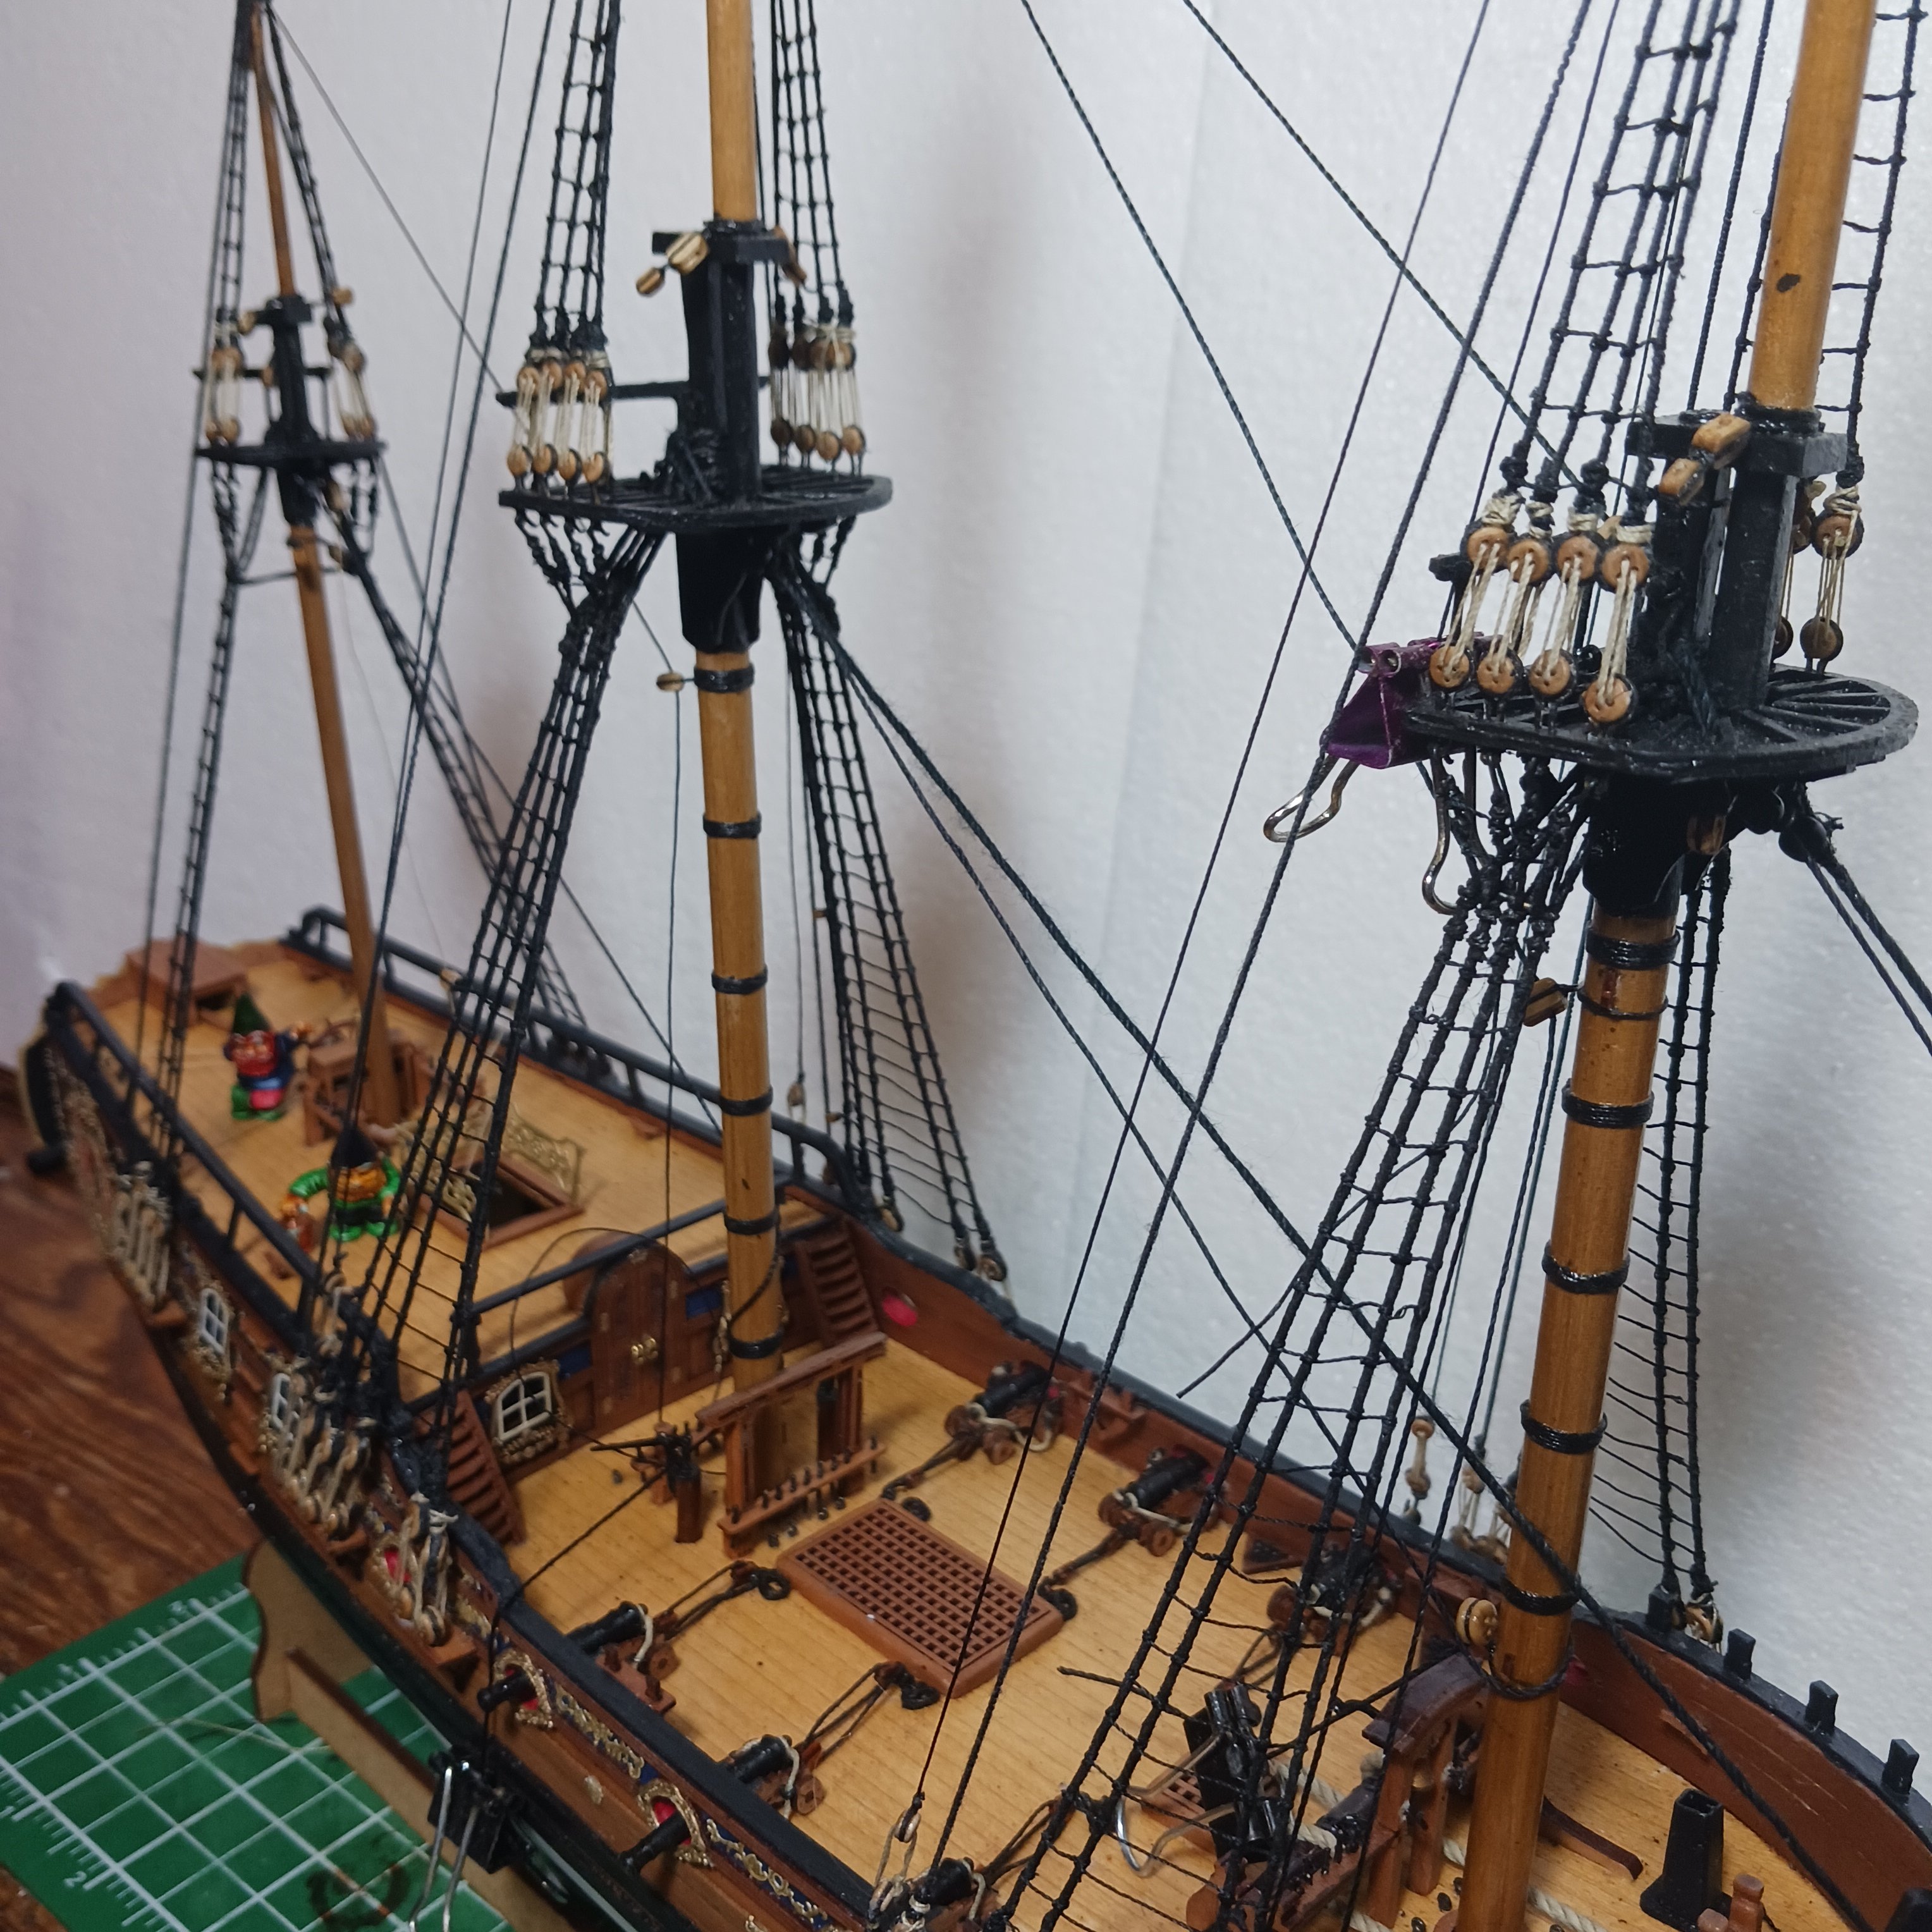
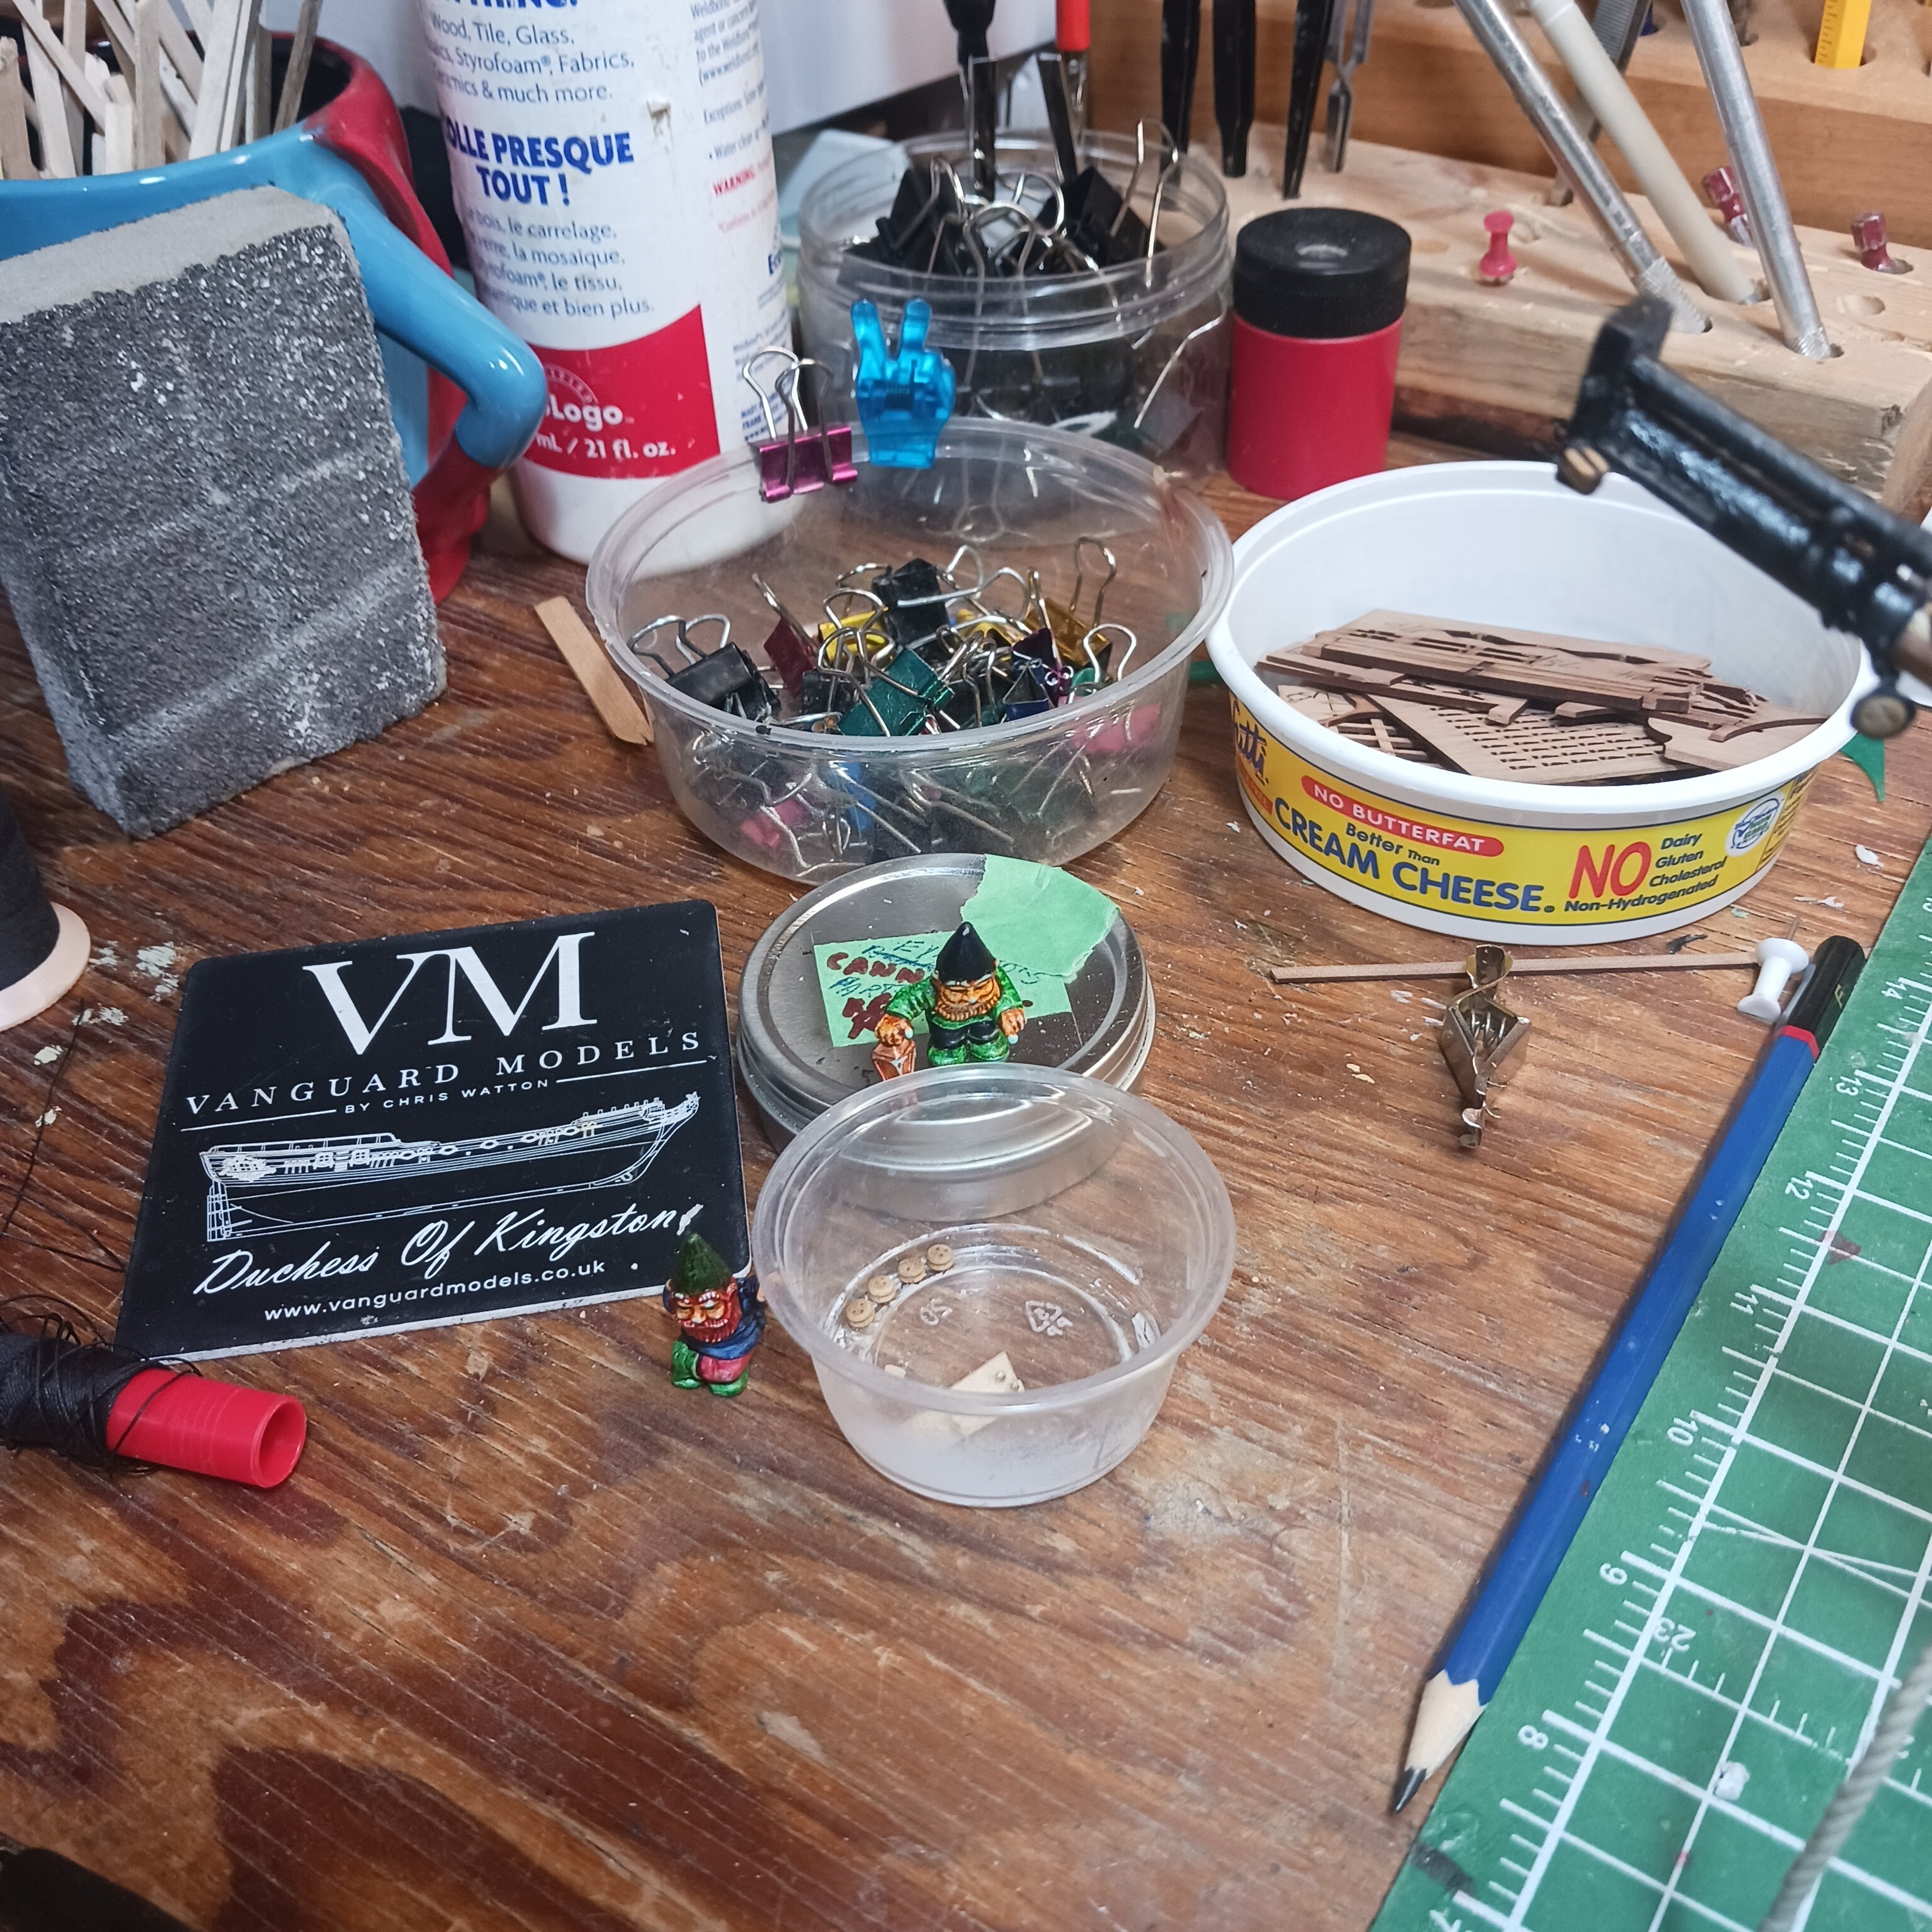
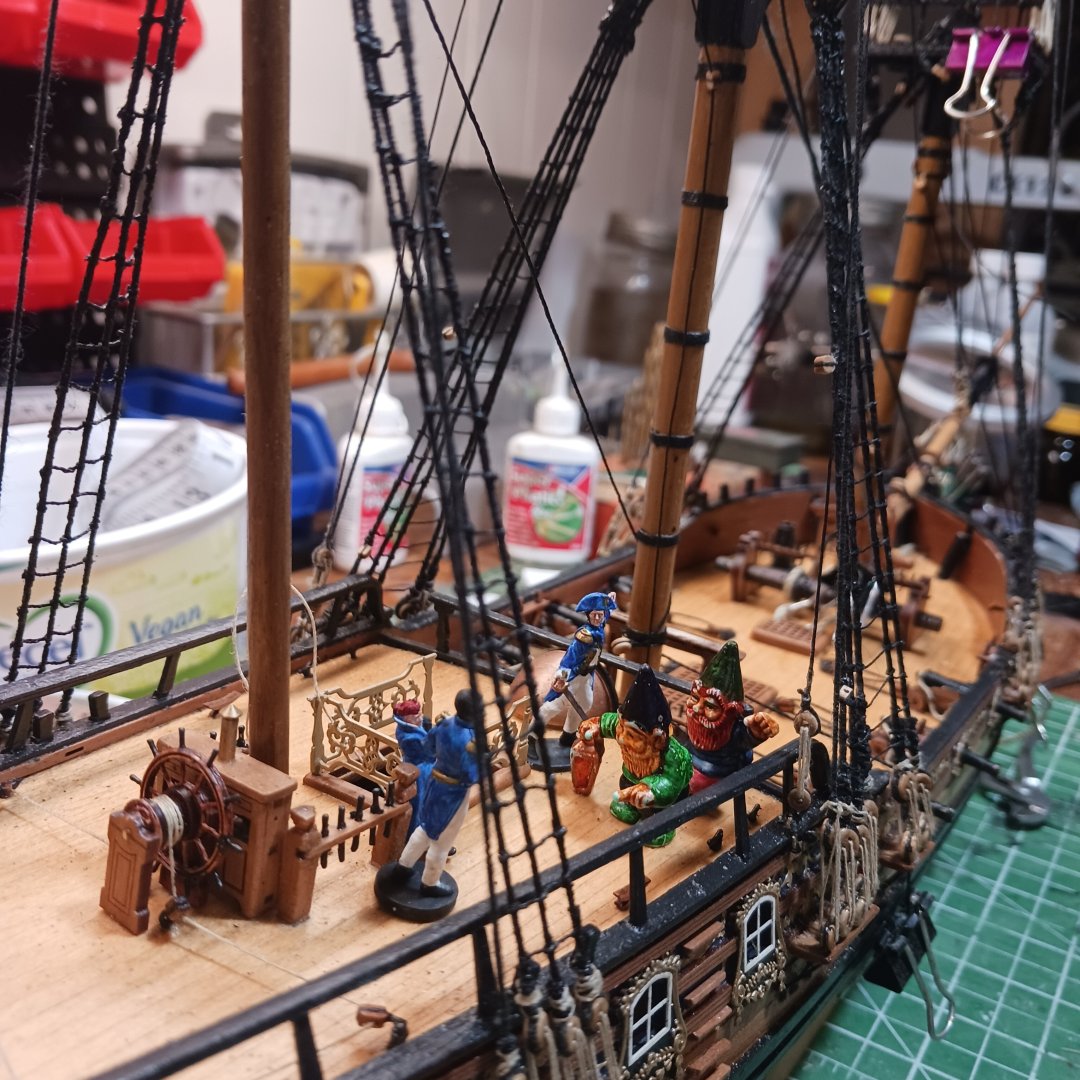
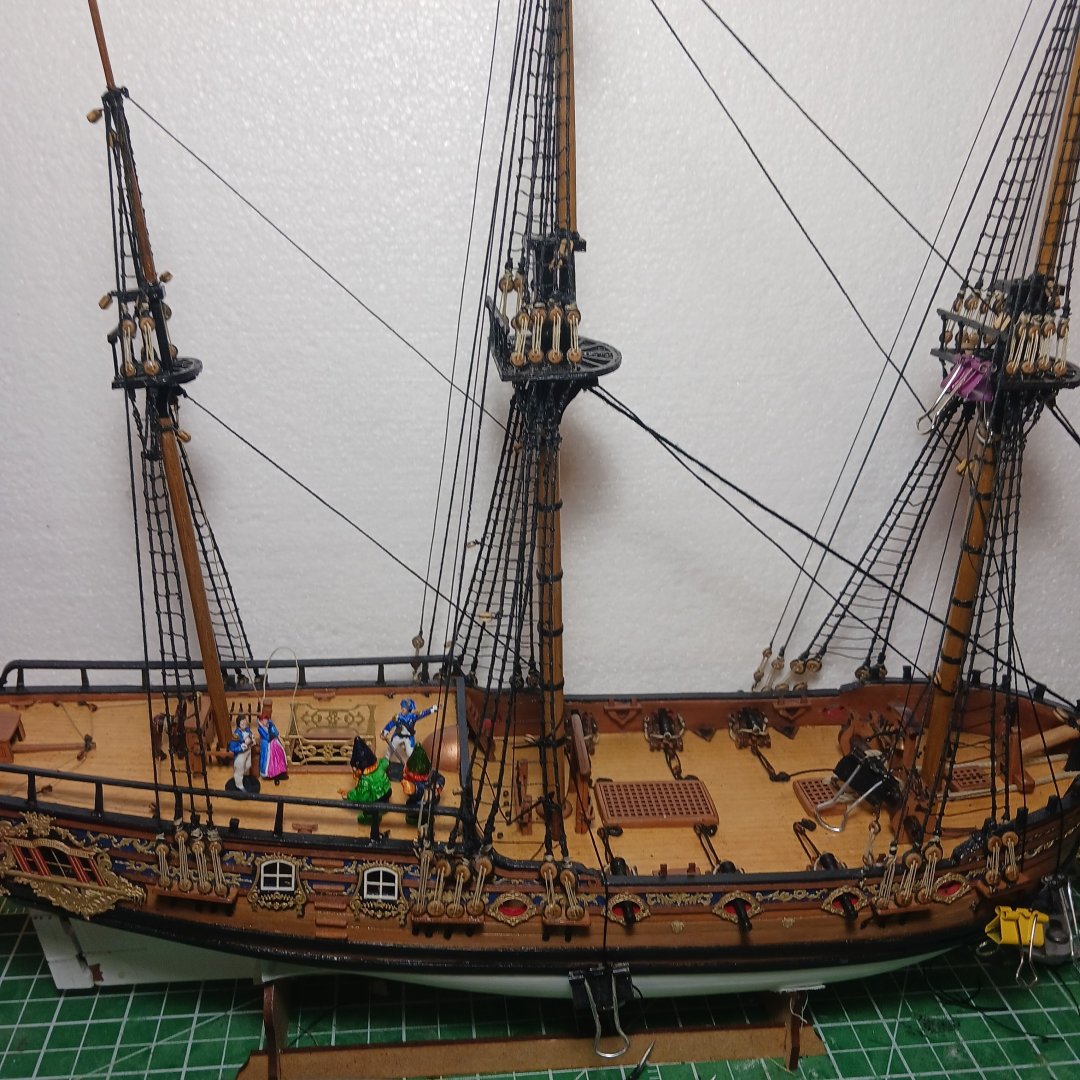
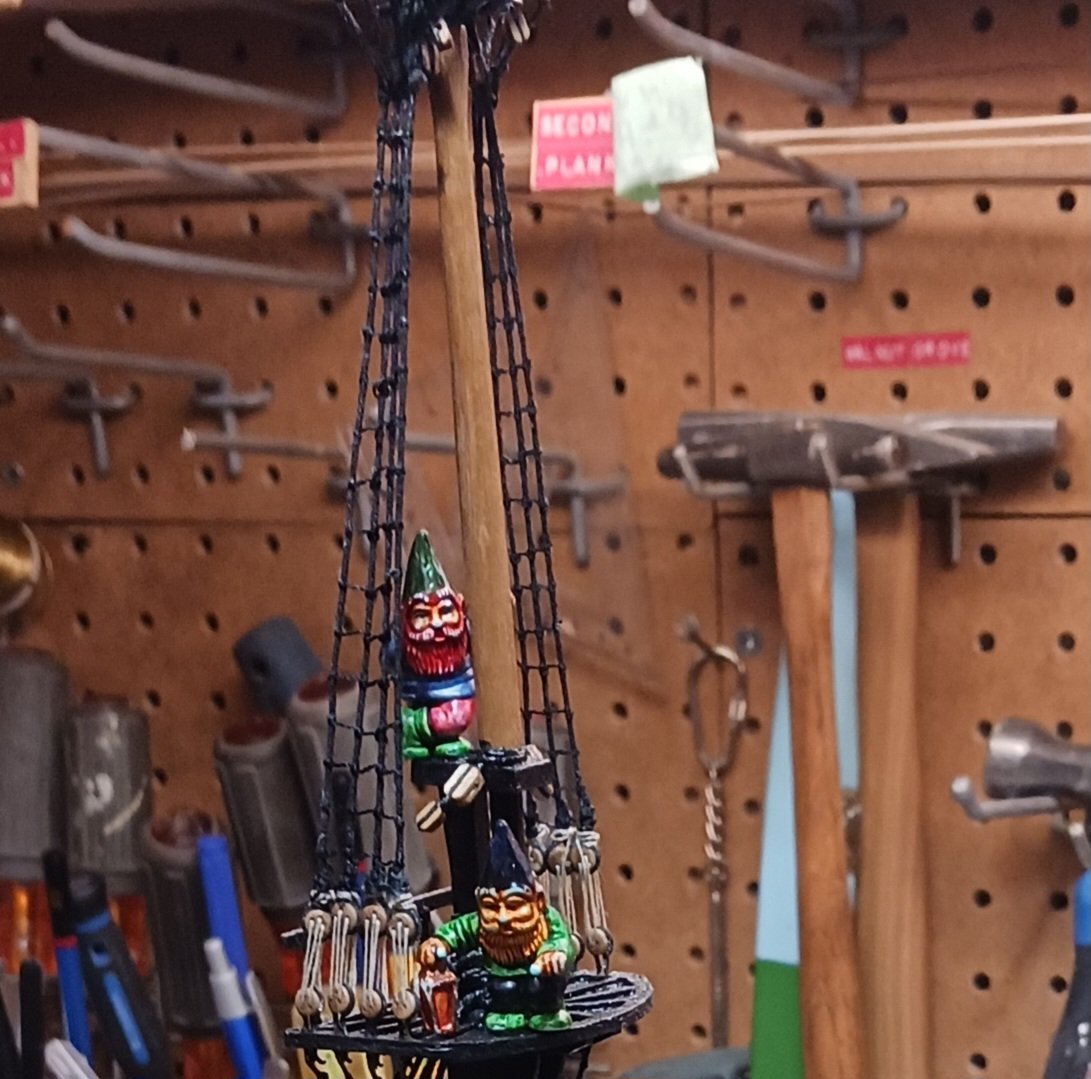
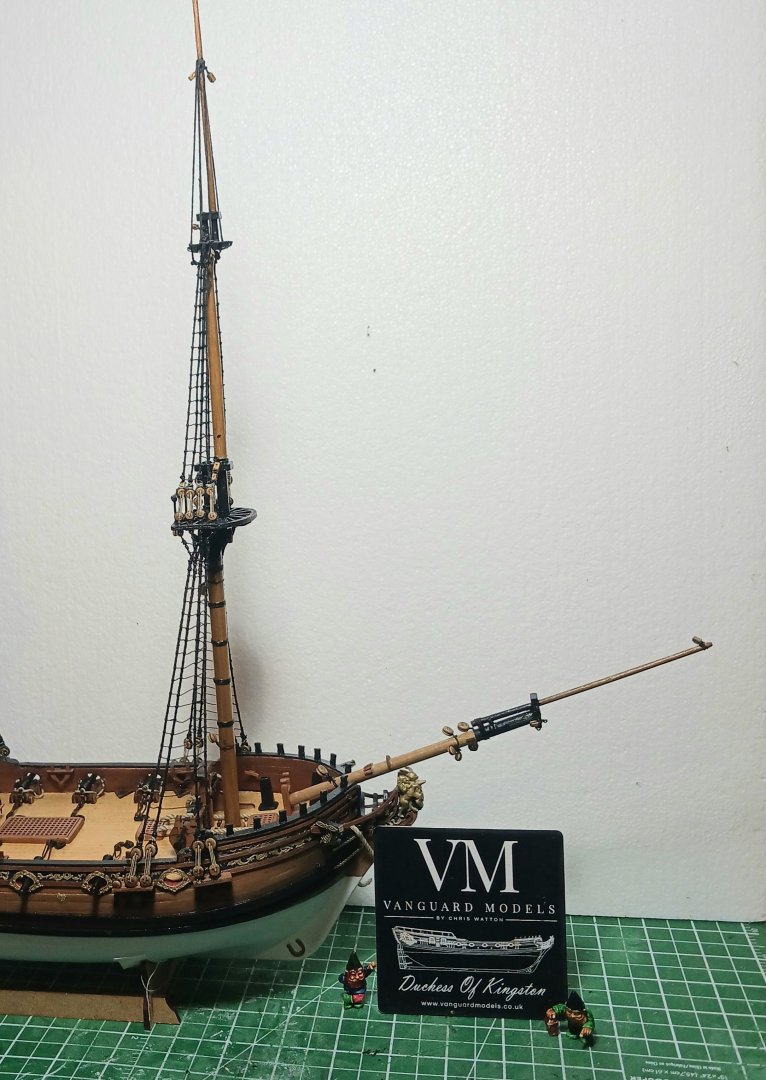
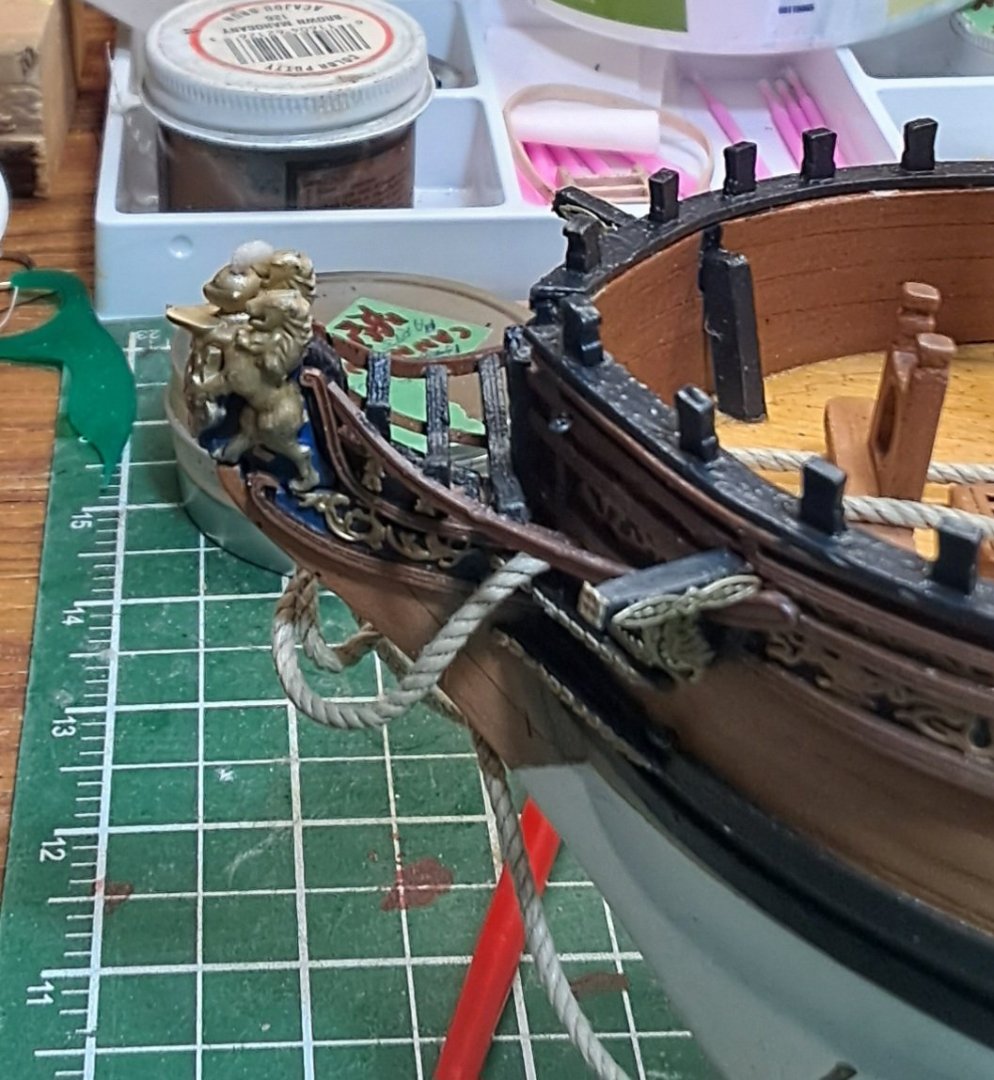
@Glenn-UK Thank you so much, I hit one of those moments when you just say , you better ask for help lol. So having been parked on Glen's logs, I asked . He told me how he made his, and now that he has giving me pictures and guidance, I am about to attempt it on my ship . All of the stays are run, I just have to tie them up. Of course I broke the Bowsprit mast again 😒 lol. After teing them off, I am going to attempt the crowsfeet rigging Glen explained it to me , I got it lol, now I just got to do it . But after teing all the stays, which have lines that run to belaying points, I am going to stop rigging and do some painting to relax 😌. I have made a few mistakes, lines have been cut and ca backed together lol but that's me . I just love putting kits together, an this Duchess is becoming one of my favorites. I wound not be "Surprise" at me buying another Vanguard Model in the future. My freind Rodney had to stop modeling a few years back. Old man shaking syndrome, he gave me his ship yard of models and lot's of books and the list is endless and priceless. One of his models is an Astrolabe, it has the hull and the masts are done but not on or rigged . I think that I will finish that next. Mainly because he has taken a turn for the worst, And I want to rig it up for him. Before I suffer the same fate, how sad it is , but inevitably I guess. The First Mate agreed and said the Pegasus will be there when you're ready. But Hey let's get back to the Duchess. Taking a break , Pile, sorry Private First Class Gnomer Pile, he is getting uppity about his title. Lol must be because of the meeting he and Goober had with the Royals I asked them how it went, he said you'll get my report later. Oohhh give the man a title lol. Goober said he thought she is beautiful, but thought she would be taller, like in his dreams. Lol 😆 🤣 The Figures are amazing, they come from my @Gabek Collection, the man is outstanding. I have a whole bag of figures and several ships boats to put together and paint. So I will be relaxing quite a bit for the next little while. I needed to get some cannon balls for the Duchess , I phone Gabe and he was just making some for his Triton build and said no problem, but I think it was lol. THANKS SO MUCH @Gabek. Just an amazing freind. He said he will add them to your box of goodie next time we meet. After she is all tied up I am going to study the plans and paint and study somemore lol, and probably paint some more 😅 . But I got to tell you that kid in me just is having way to much fun . Lol. You can have your cake and eat it to!!! Take care my friends , so greatful for all the help and likes. Thank you. Bob M. PFCGP Goober


- 207 replies
-
- 14
-

-

-
- vanguard models
- Duchess of Kingston
- (and 1 more)
-
I like the C A thread for a handel kinsmen. Lol. The little fellow you showed me before didn't have Neanderthal hands lol. What about a round tooth pick.. Great work my freind. Bob M.
- 732 replies
-
- 4
-

-
-
- Lula
- sternwheeler
- (and 1 more)
-
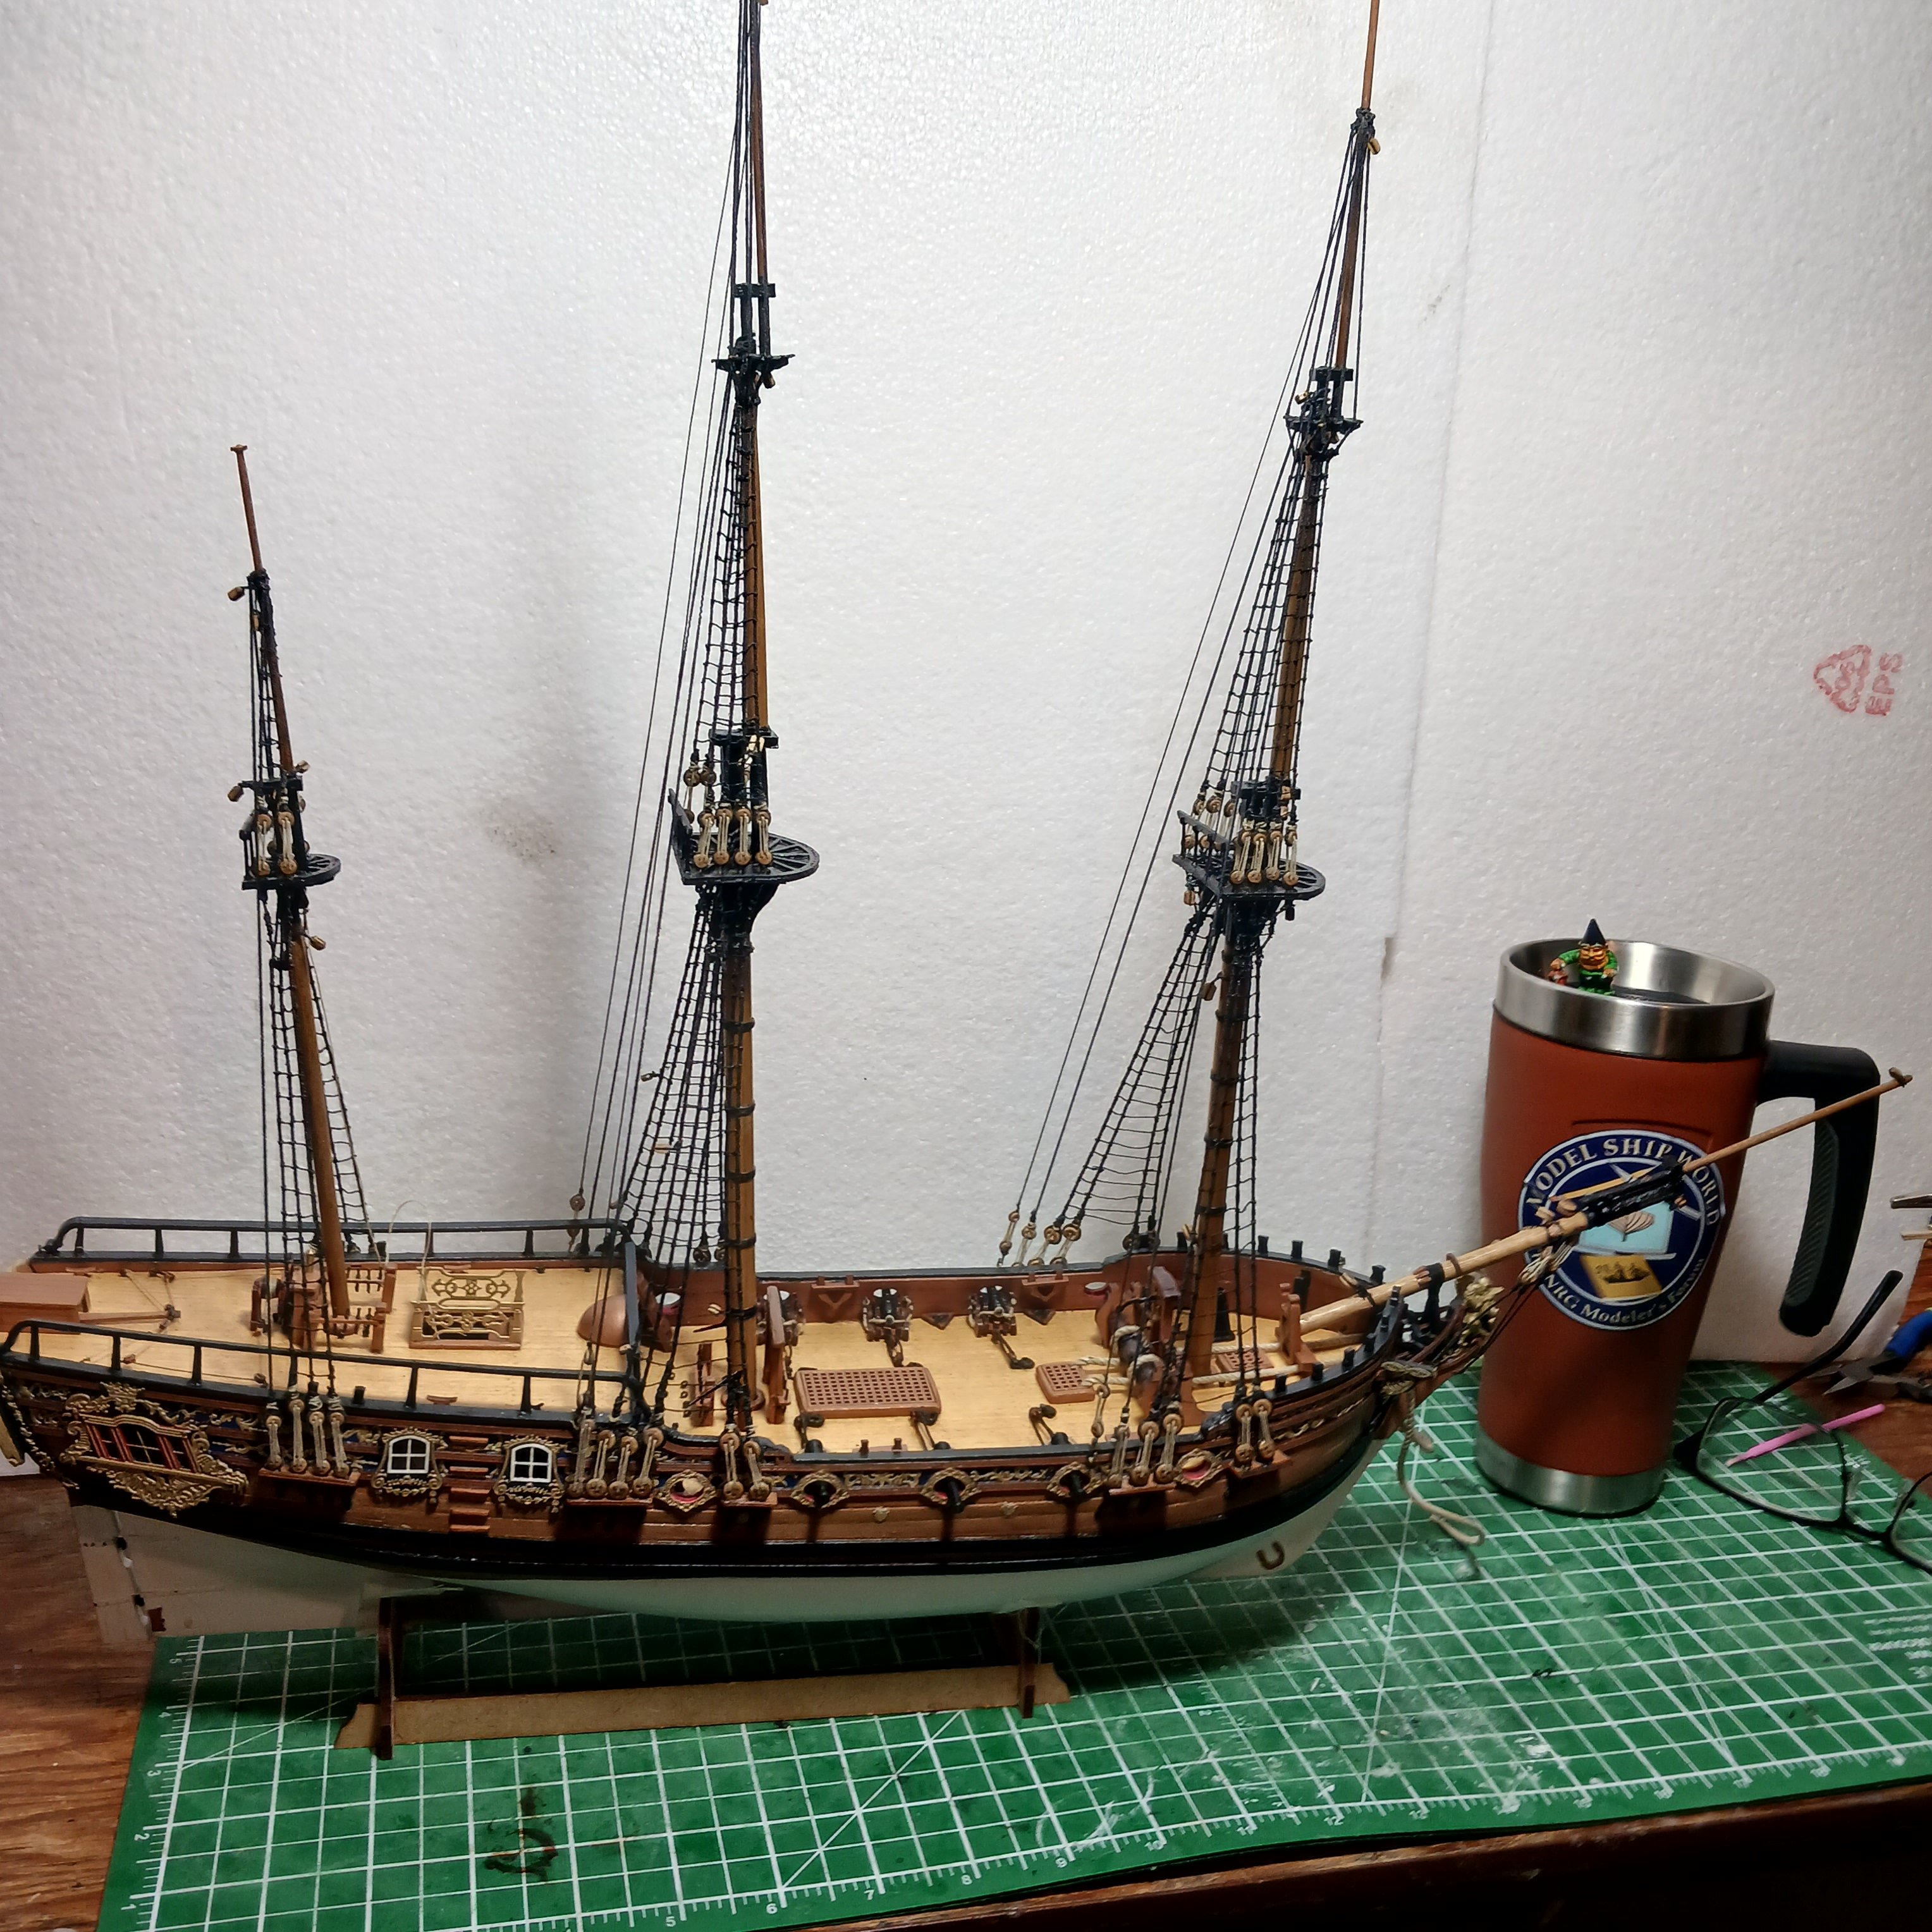
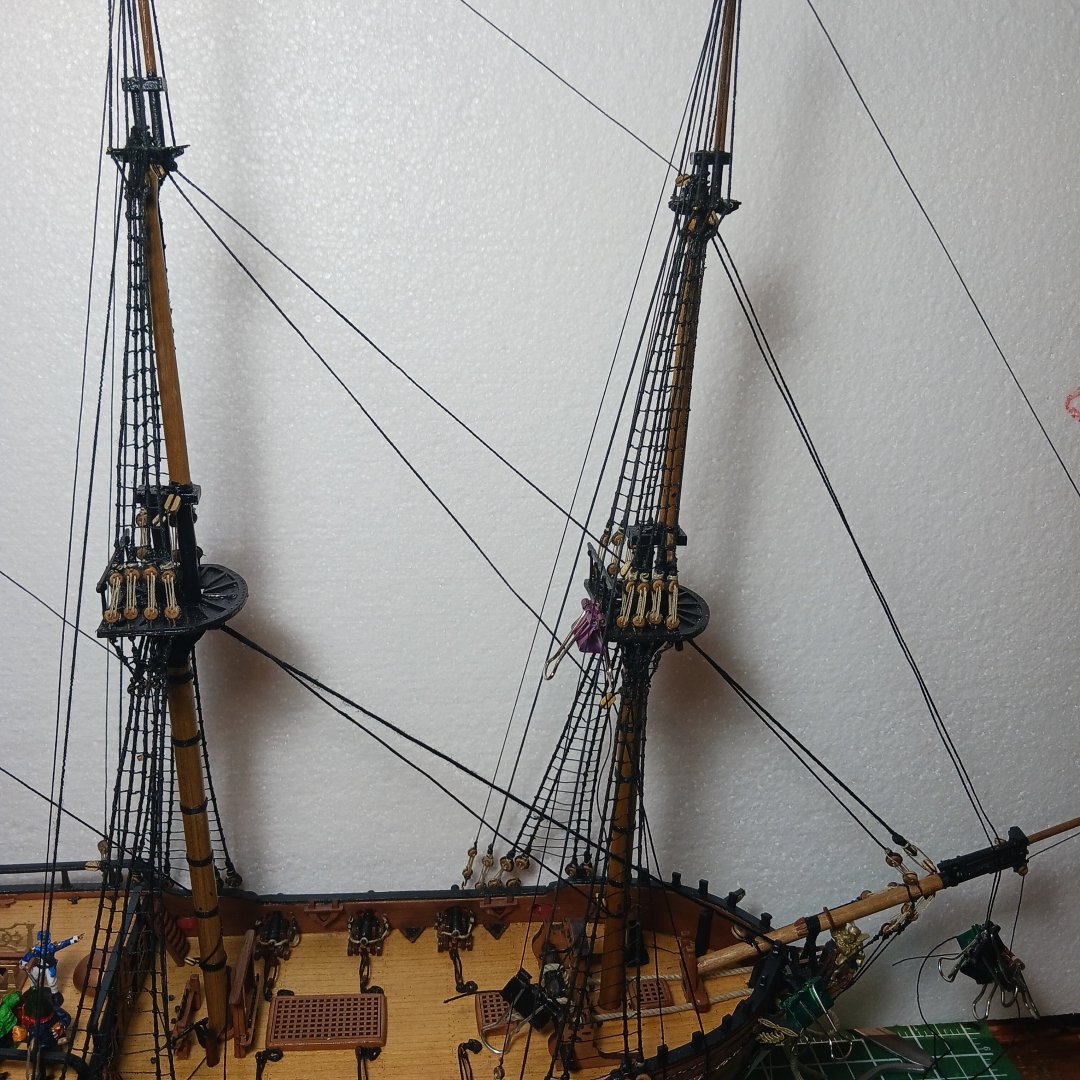
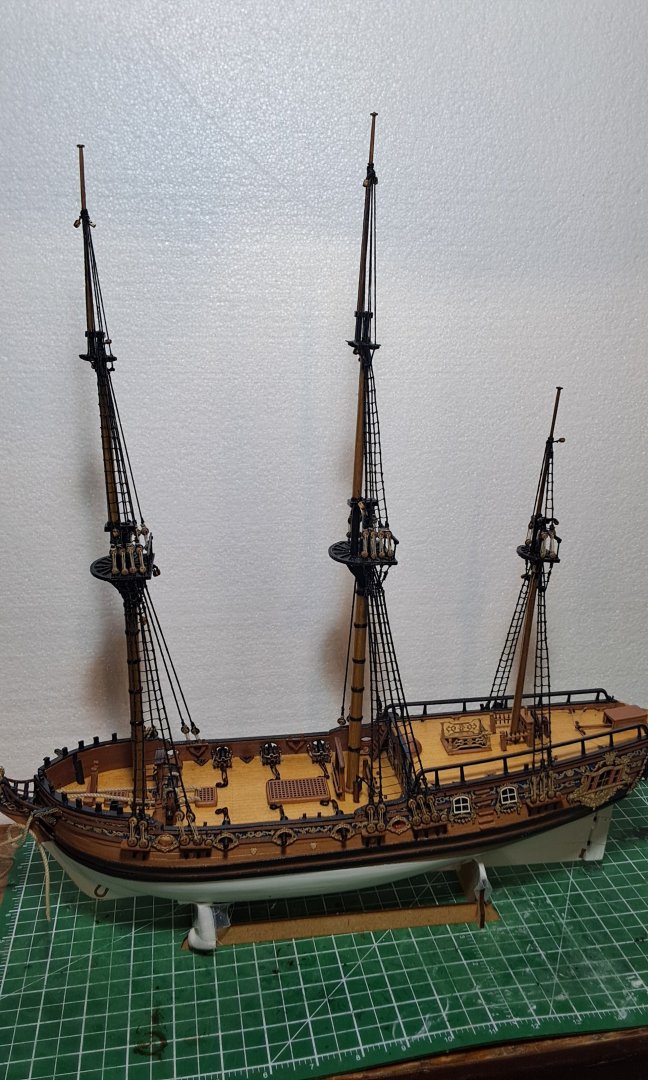
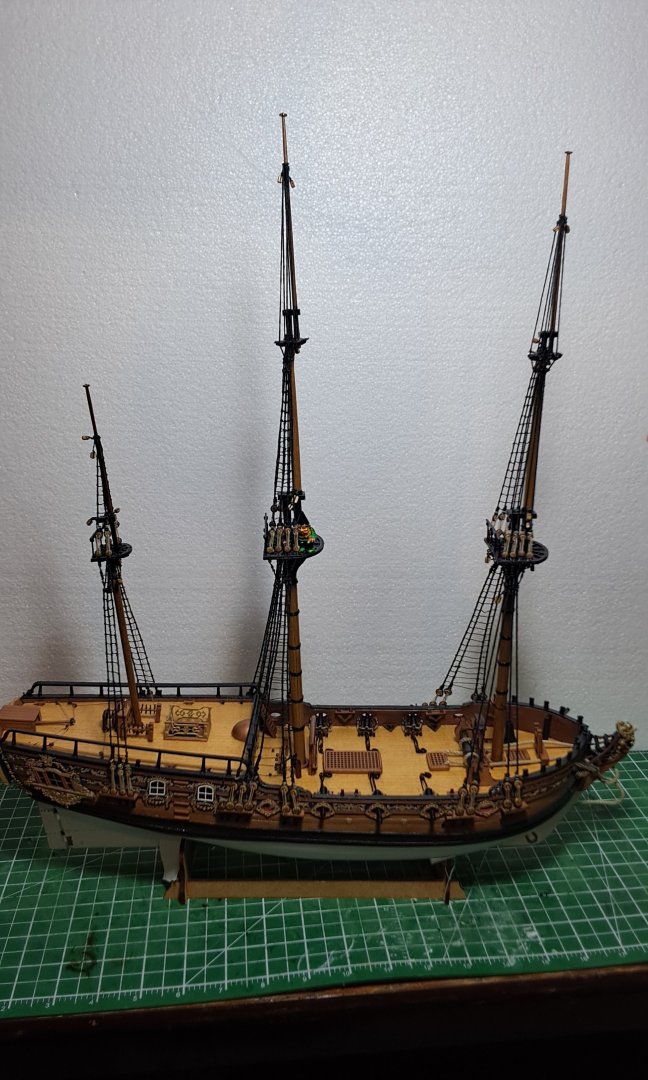
Well that was a couple of tiring days, but I conquered it lol. It started when I realized that I needed more F = 0.5 black thread. I quickly made up 5 feet and cut it up for the Backstays. For what ever reason, I ended up putting the .5 thread were the .75 line was supposed to go and the .75 where the .5 line goes. And when did I notice this? Lol, right after I tied the last deadeye on the Mizzen mast. Awww Fix Auto was what the First Mate said. She heard me scream out. When I told her what I did , she was sympathetic as she tried to hold back her laughter. Lol. So yesterday, I cut it all off and started again. You can be darn sure I was using the right lines now lol. A few 3mm deadeyes got damaged but I replaced the ones that were damaged, I have 3 left from the kit, but I have lots of deadeyes from leftover builds if I need more. So with that learning experience, I got back to the point of where I was two days ago lol. So with that, Pile FC, as he likes to be called , told me it's lookin good Bob, you be a modeler now because you never said it will do. You put on your modeling boots and fixed it. OK a bit of chest bumps between the crew, but lets carry on lol. So once again Pile made me go over everything, 🙃 again, everything checked out. So today this is where she sits. The crew gathered around the plans. Boom, sheet 12.. Pile let's out a laugh and says that we forgot to glue the blocks for the Main preventor stay and the Main stay lines that we shook off early in the build . Now where did I put those lol. This is a wonderful build, the First Mate and I were discussing this today and I told her that I just have to get better at seizing , as try as I might I know that the deadeyes are seized 3 times. But I only do two. Don't know why lol.. things are lining up and I have decided to wait for all touch ups and tighting all the lines for a less shaky day lol. Thank you so much everyone. Knocklouder

- 207 replies
-
- 13
-

-
-
- vanguard models
- Duchess of Kingston
- (and 1 more)
-
Bob M.
-
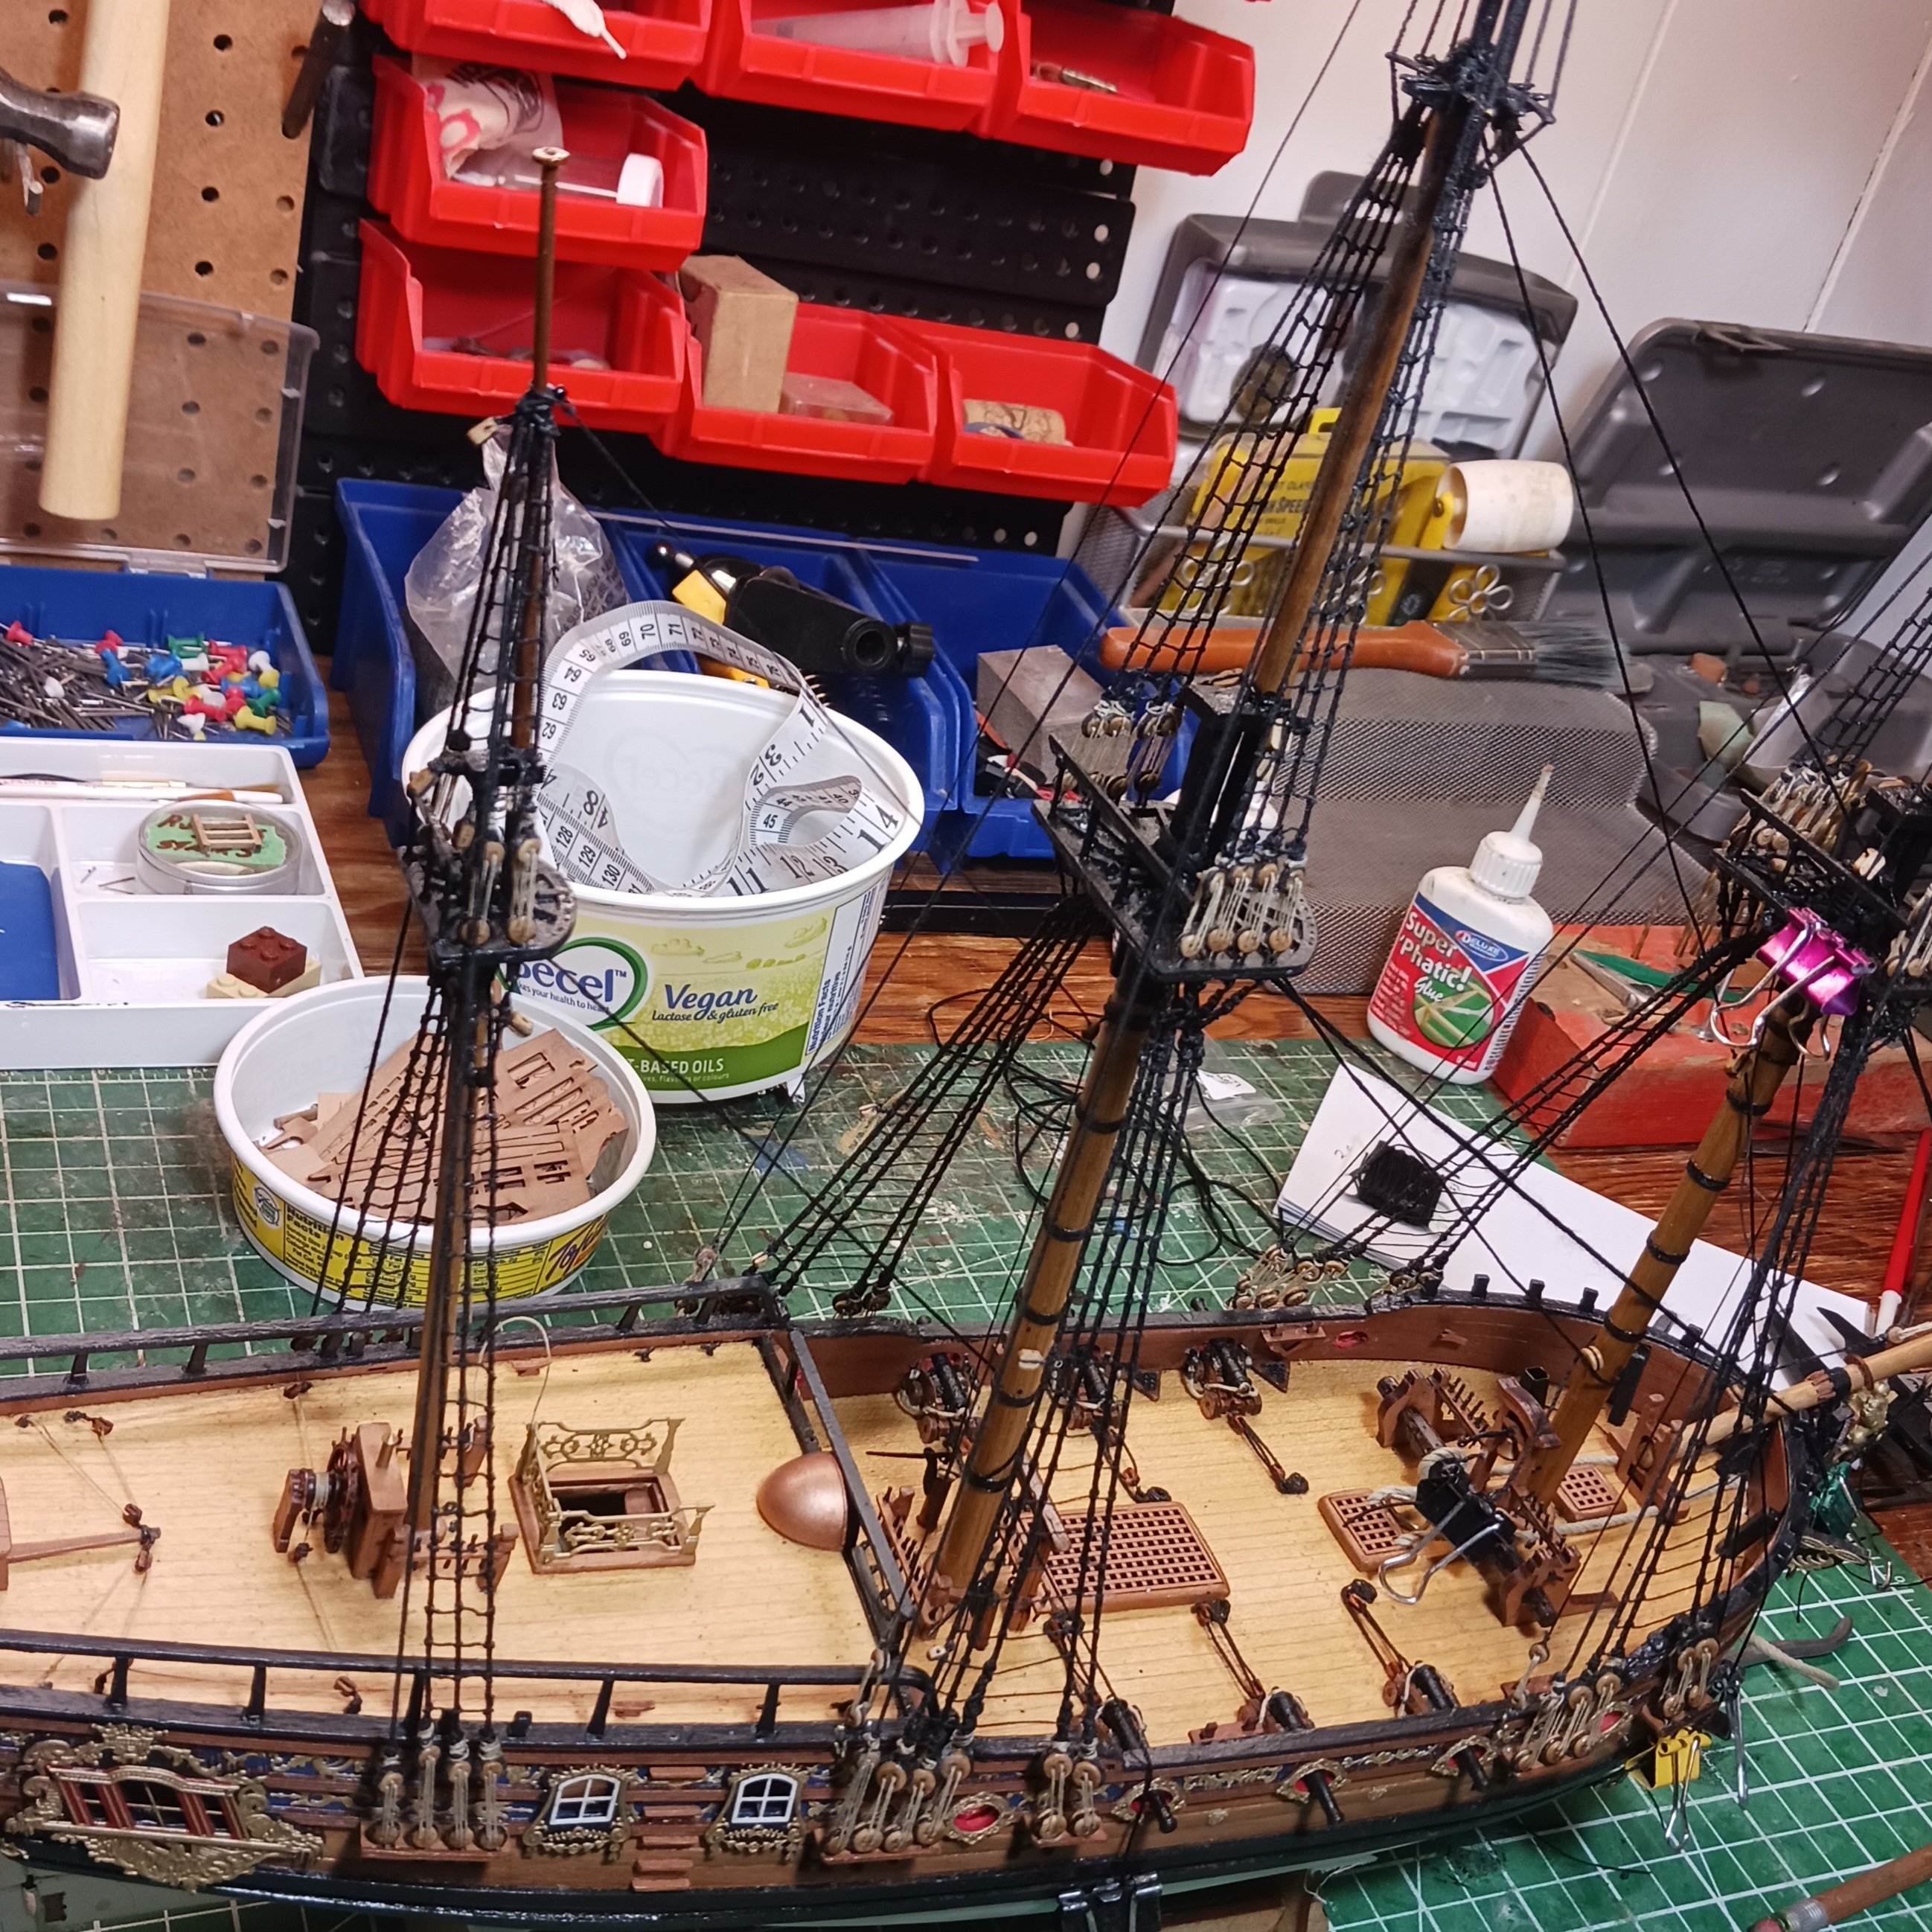
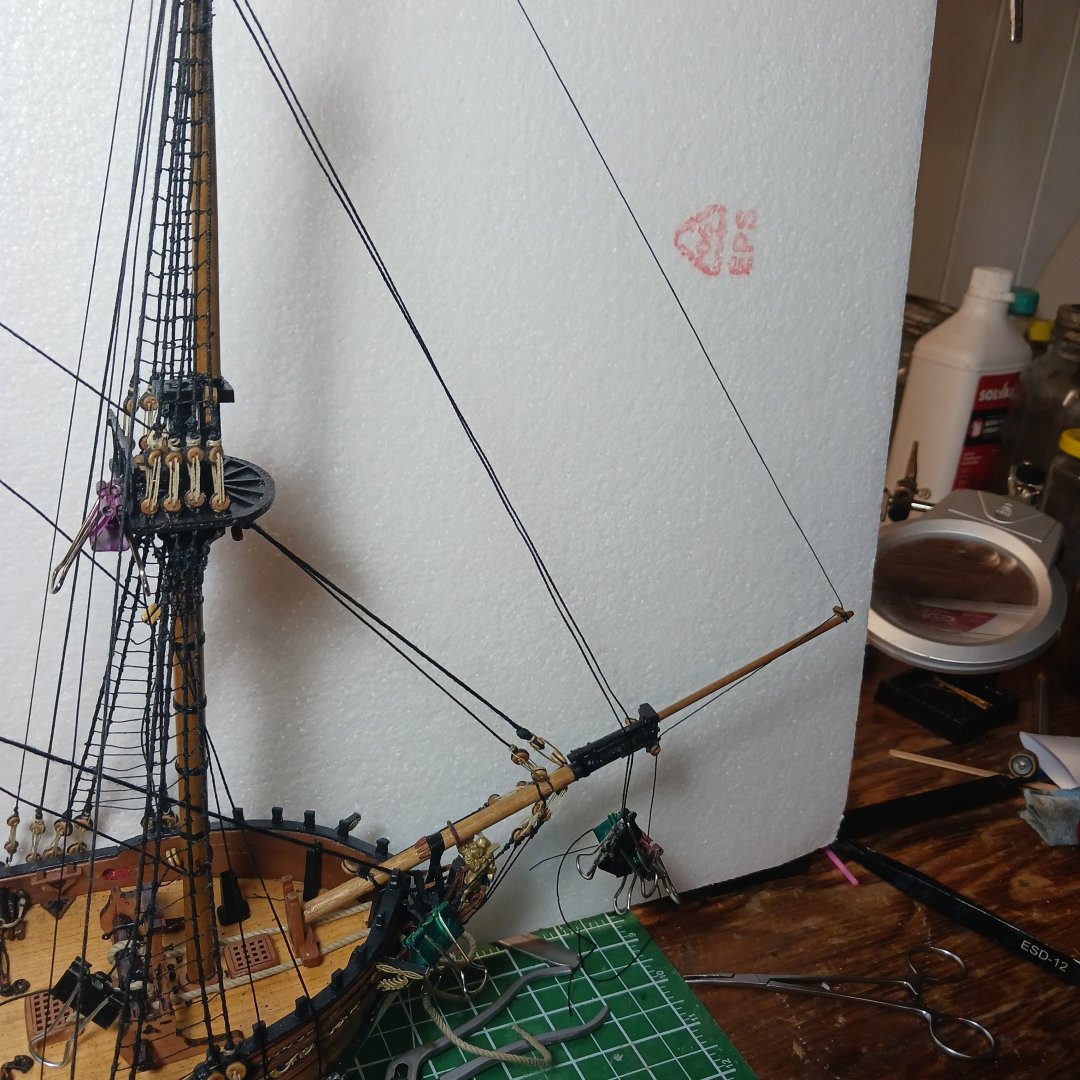
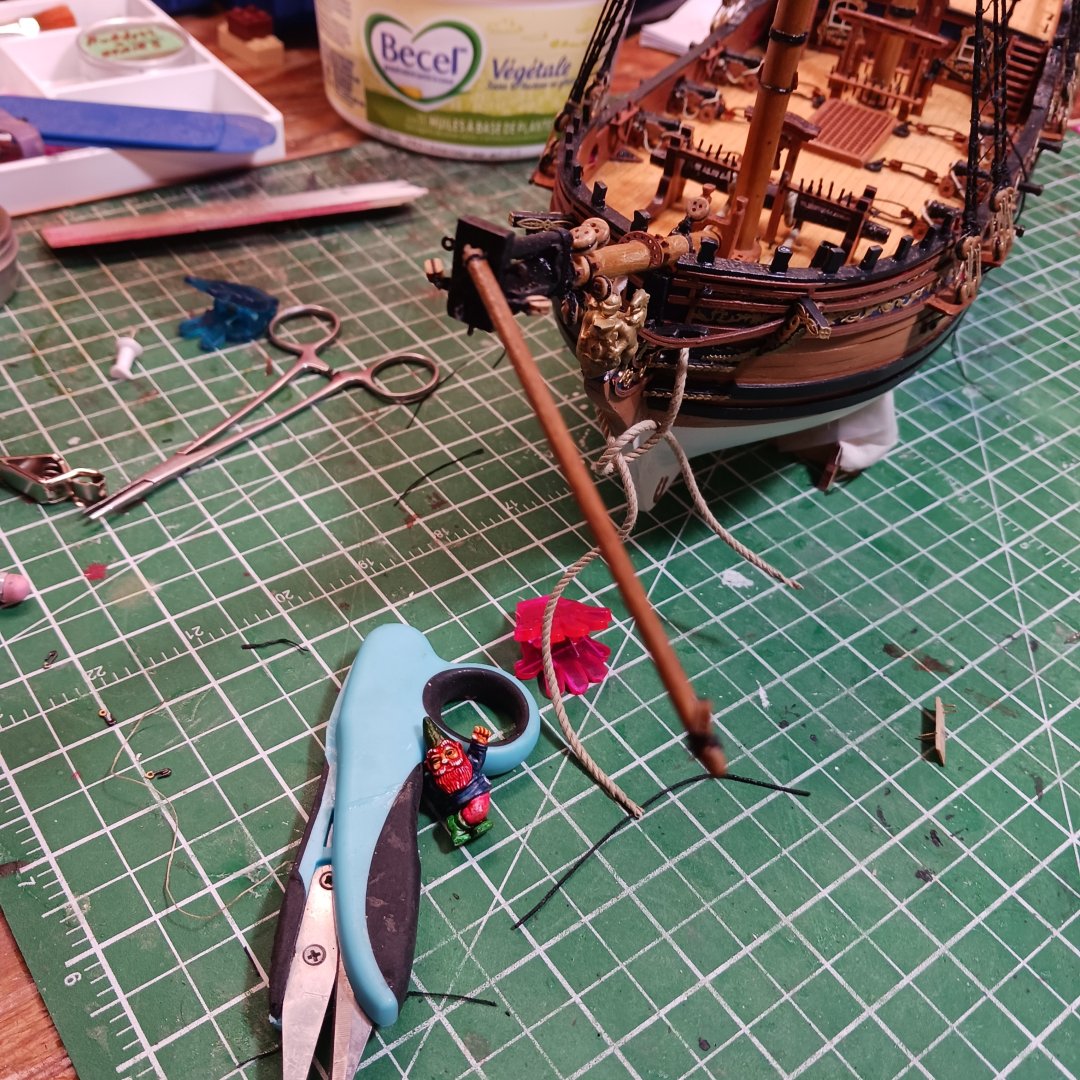
Rigging is coming along nicely, but it seems to be a little bit harder for me to tie things up. The old hands are shaken pretty badly. I still have to touch up things and straight up a few things. I have to add Four single blocks and rig the bowsprit. Which is in need of repair , lol the hands may shake but they are still can do damage lol. Goober says It is a clean break so it should not be to hard to fix. A bit of sanding, wee bit of drilling, and a pin just to be safe. And no one will notice it. All though the pin won't help much when hitting it with a 275 pound sleghammer lol. Today the four blocks and rig the bowsprit, then I get to flip to sheet 12. . Pile and Goober are taking the Fifth about the Missing Controls button.lol. but glad there are back. Still having the time of my life modeling. Even when things happen, like serving 5 feet of line the wrong size, or breaking thing off lol. The enjoyment of the build surpasses the difficulties of the learning curve. I like to thanks everyone for their support and putting up with me. Best of luck in the New Year. Bob M. PFCGP Goober


- 207 replies
-
- 14
-
-
- vanguard models
- Duchess of Kingston
- (and 1 more)
-
Same here thought it was something I did lol. Knocklouder.
-
Great looking paint job, . Your off to a great start this year!! Happy New Year and all the best. Bob M.
- 55 replies
-
- 2
-
-
-
- Le Martegaou
- billing boats
- (and 1 more)
-
Fantastic work Keith, the boiler looks awesome. Have a great New Year my friend, . Pile ,Goober and I hope for all the best for you and Maggie in the new year. Bob M. PFCGP Goober 🙂 PS I went and bought a quart of Black Paint lol.
- 732 replies
-
- 6
-
-
-
-
- Lula
- sternwheeler
- (and 1 more)
-
Wow my freind, are they ever straight. I don't think I would be too much help, lol. Shakey Builders Syndrome 😆 Great work my freind. Bob M.
- 301 replies
-
- 7
-
-
-
- Constitution
- Bluejacket Shipcrafters
- (and 1 more)
-
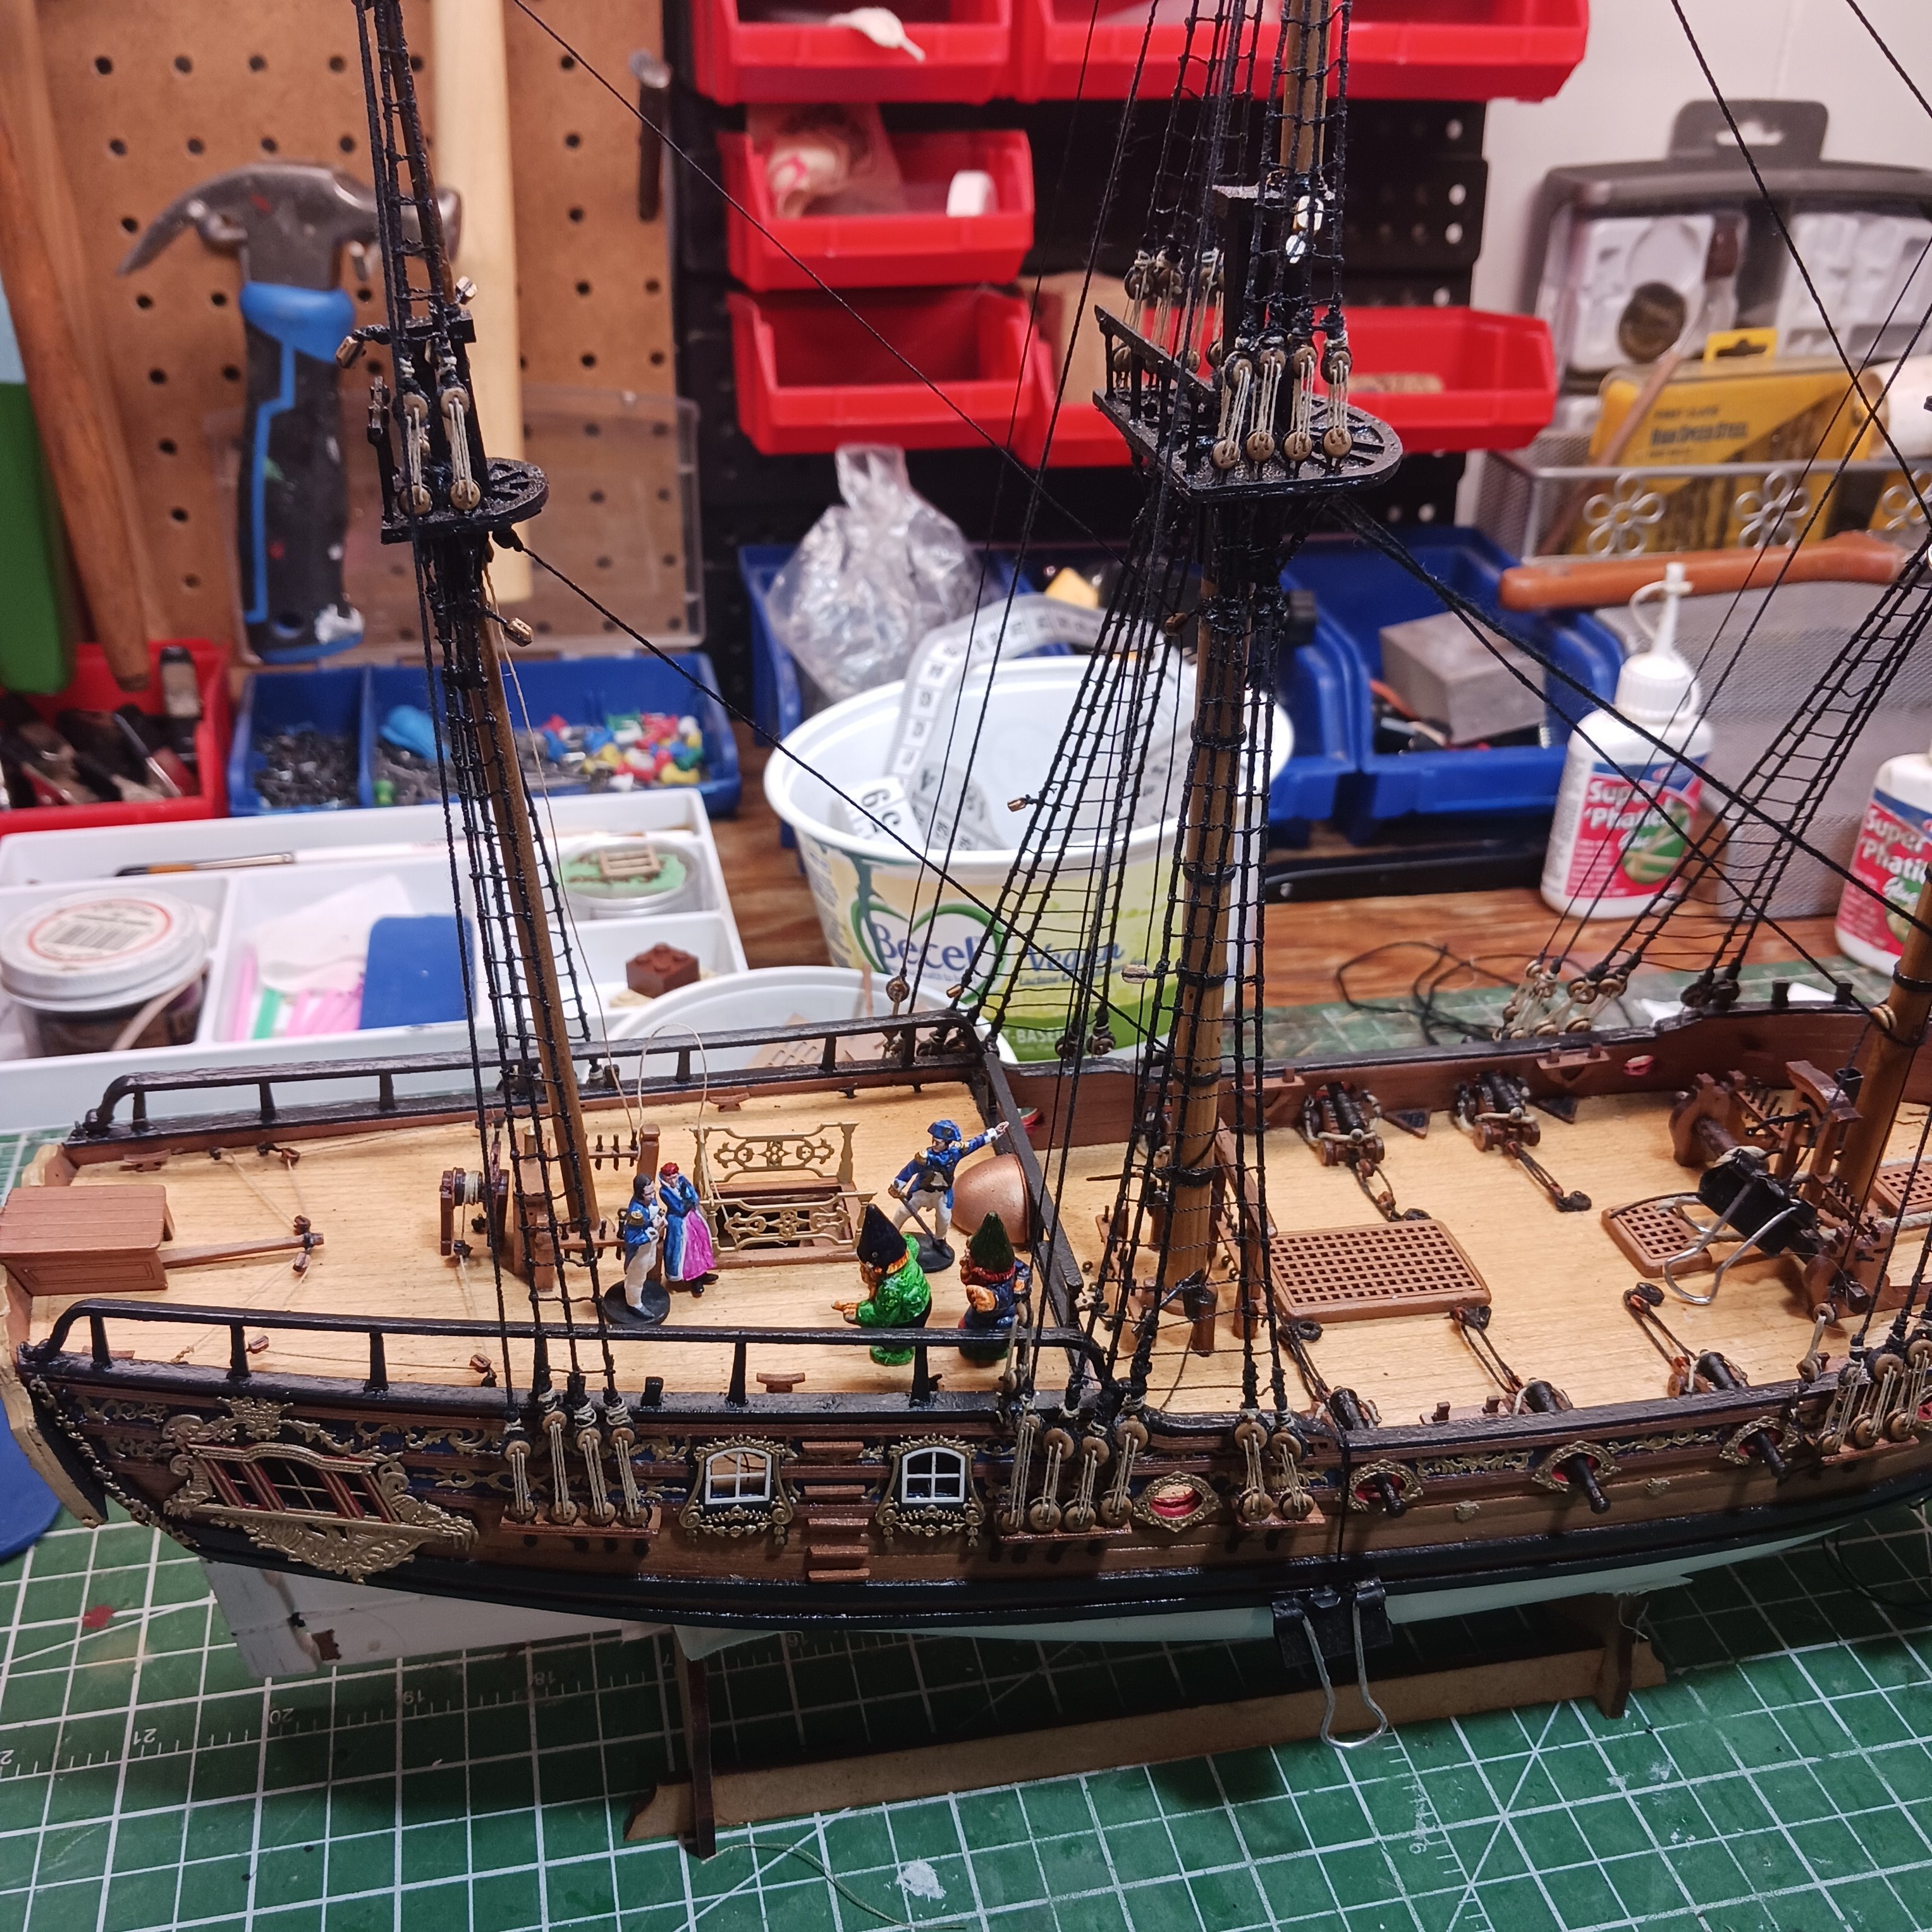
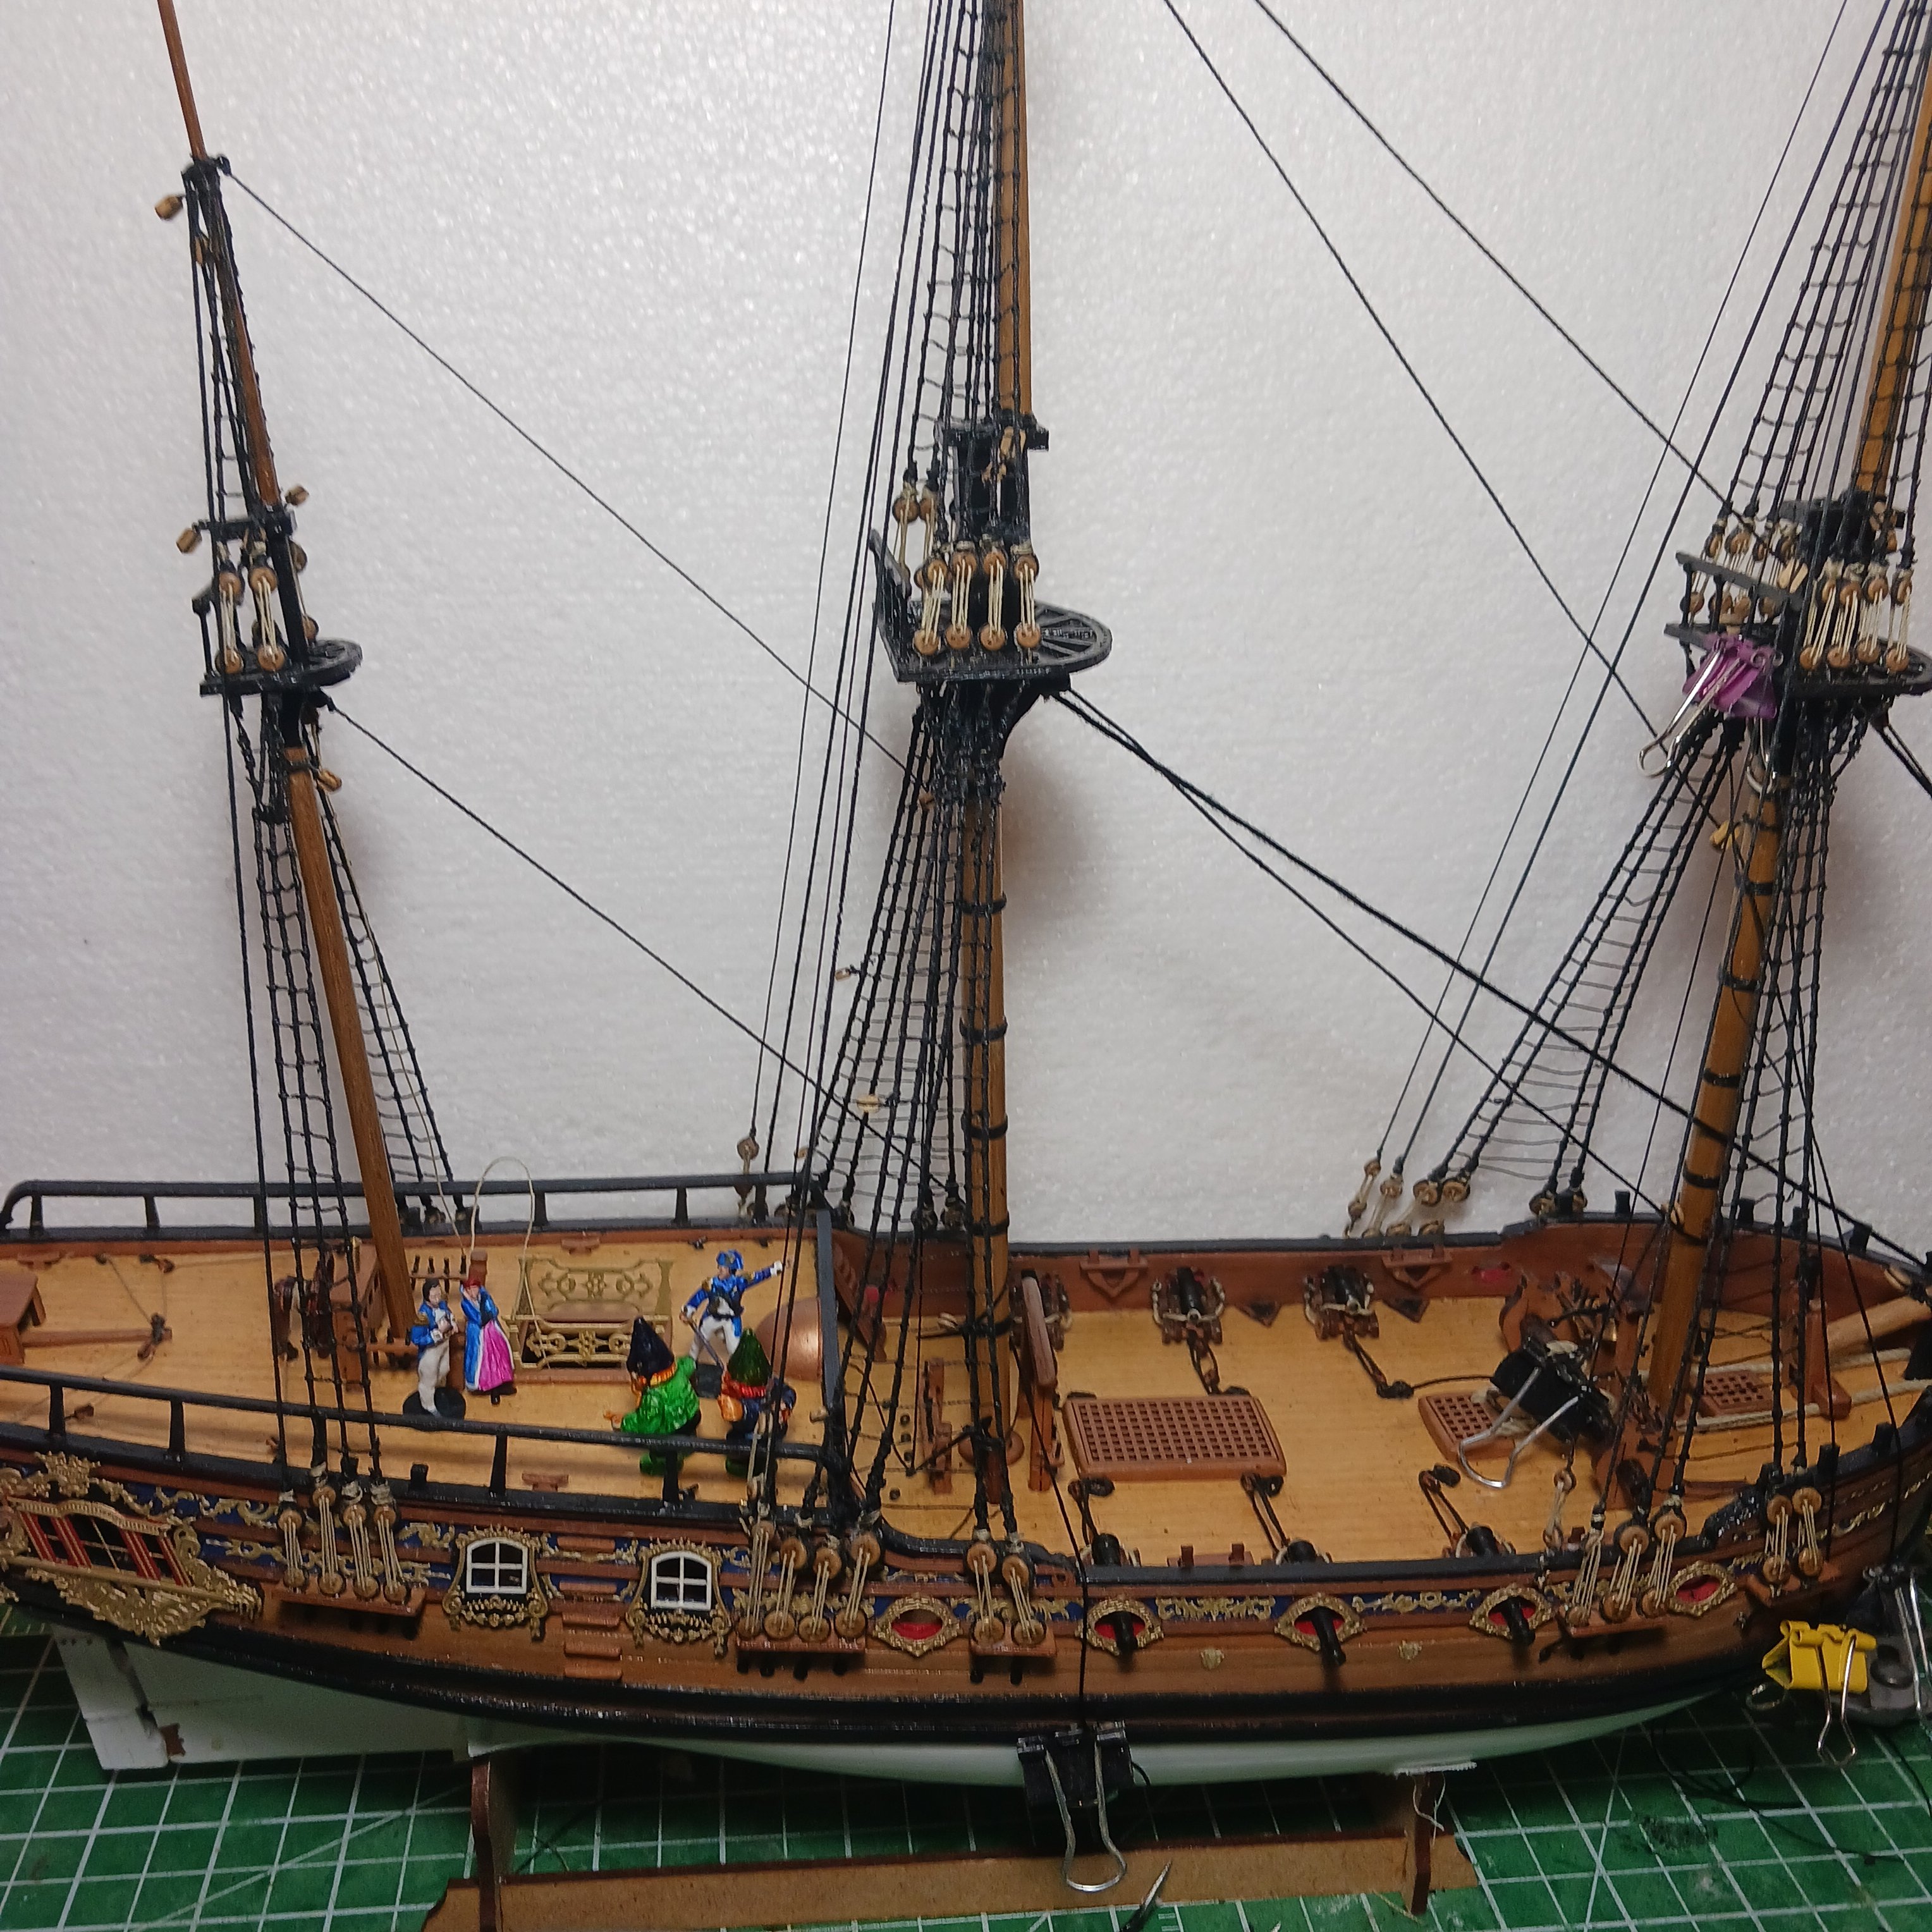
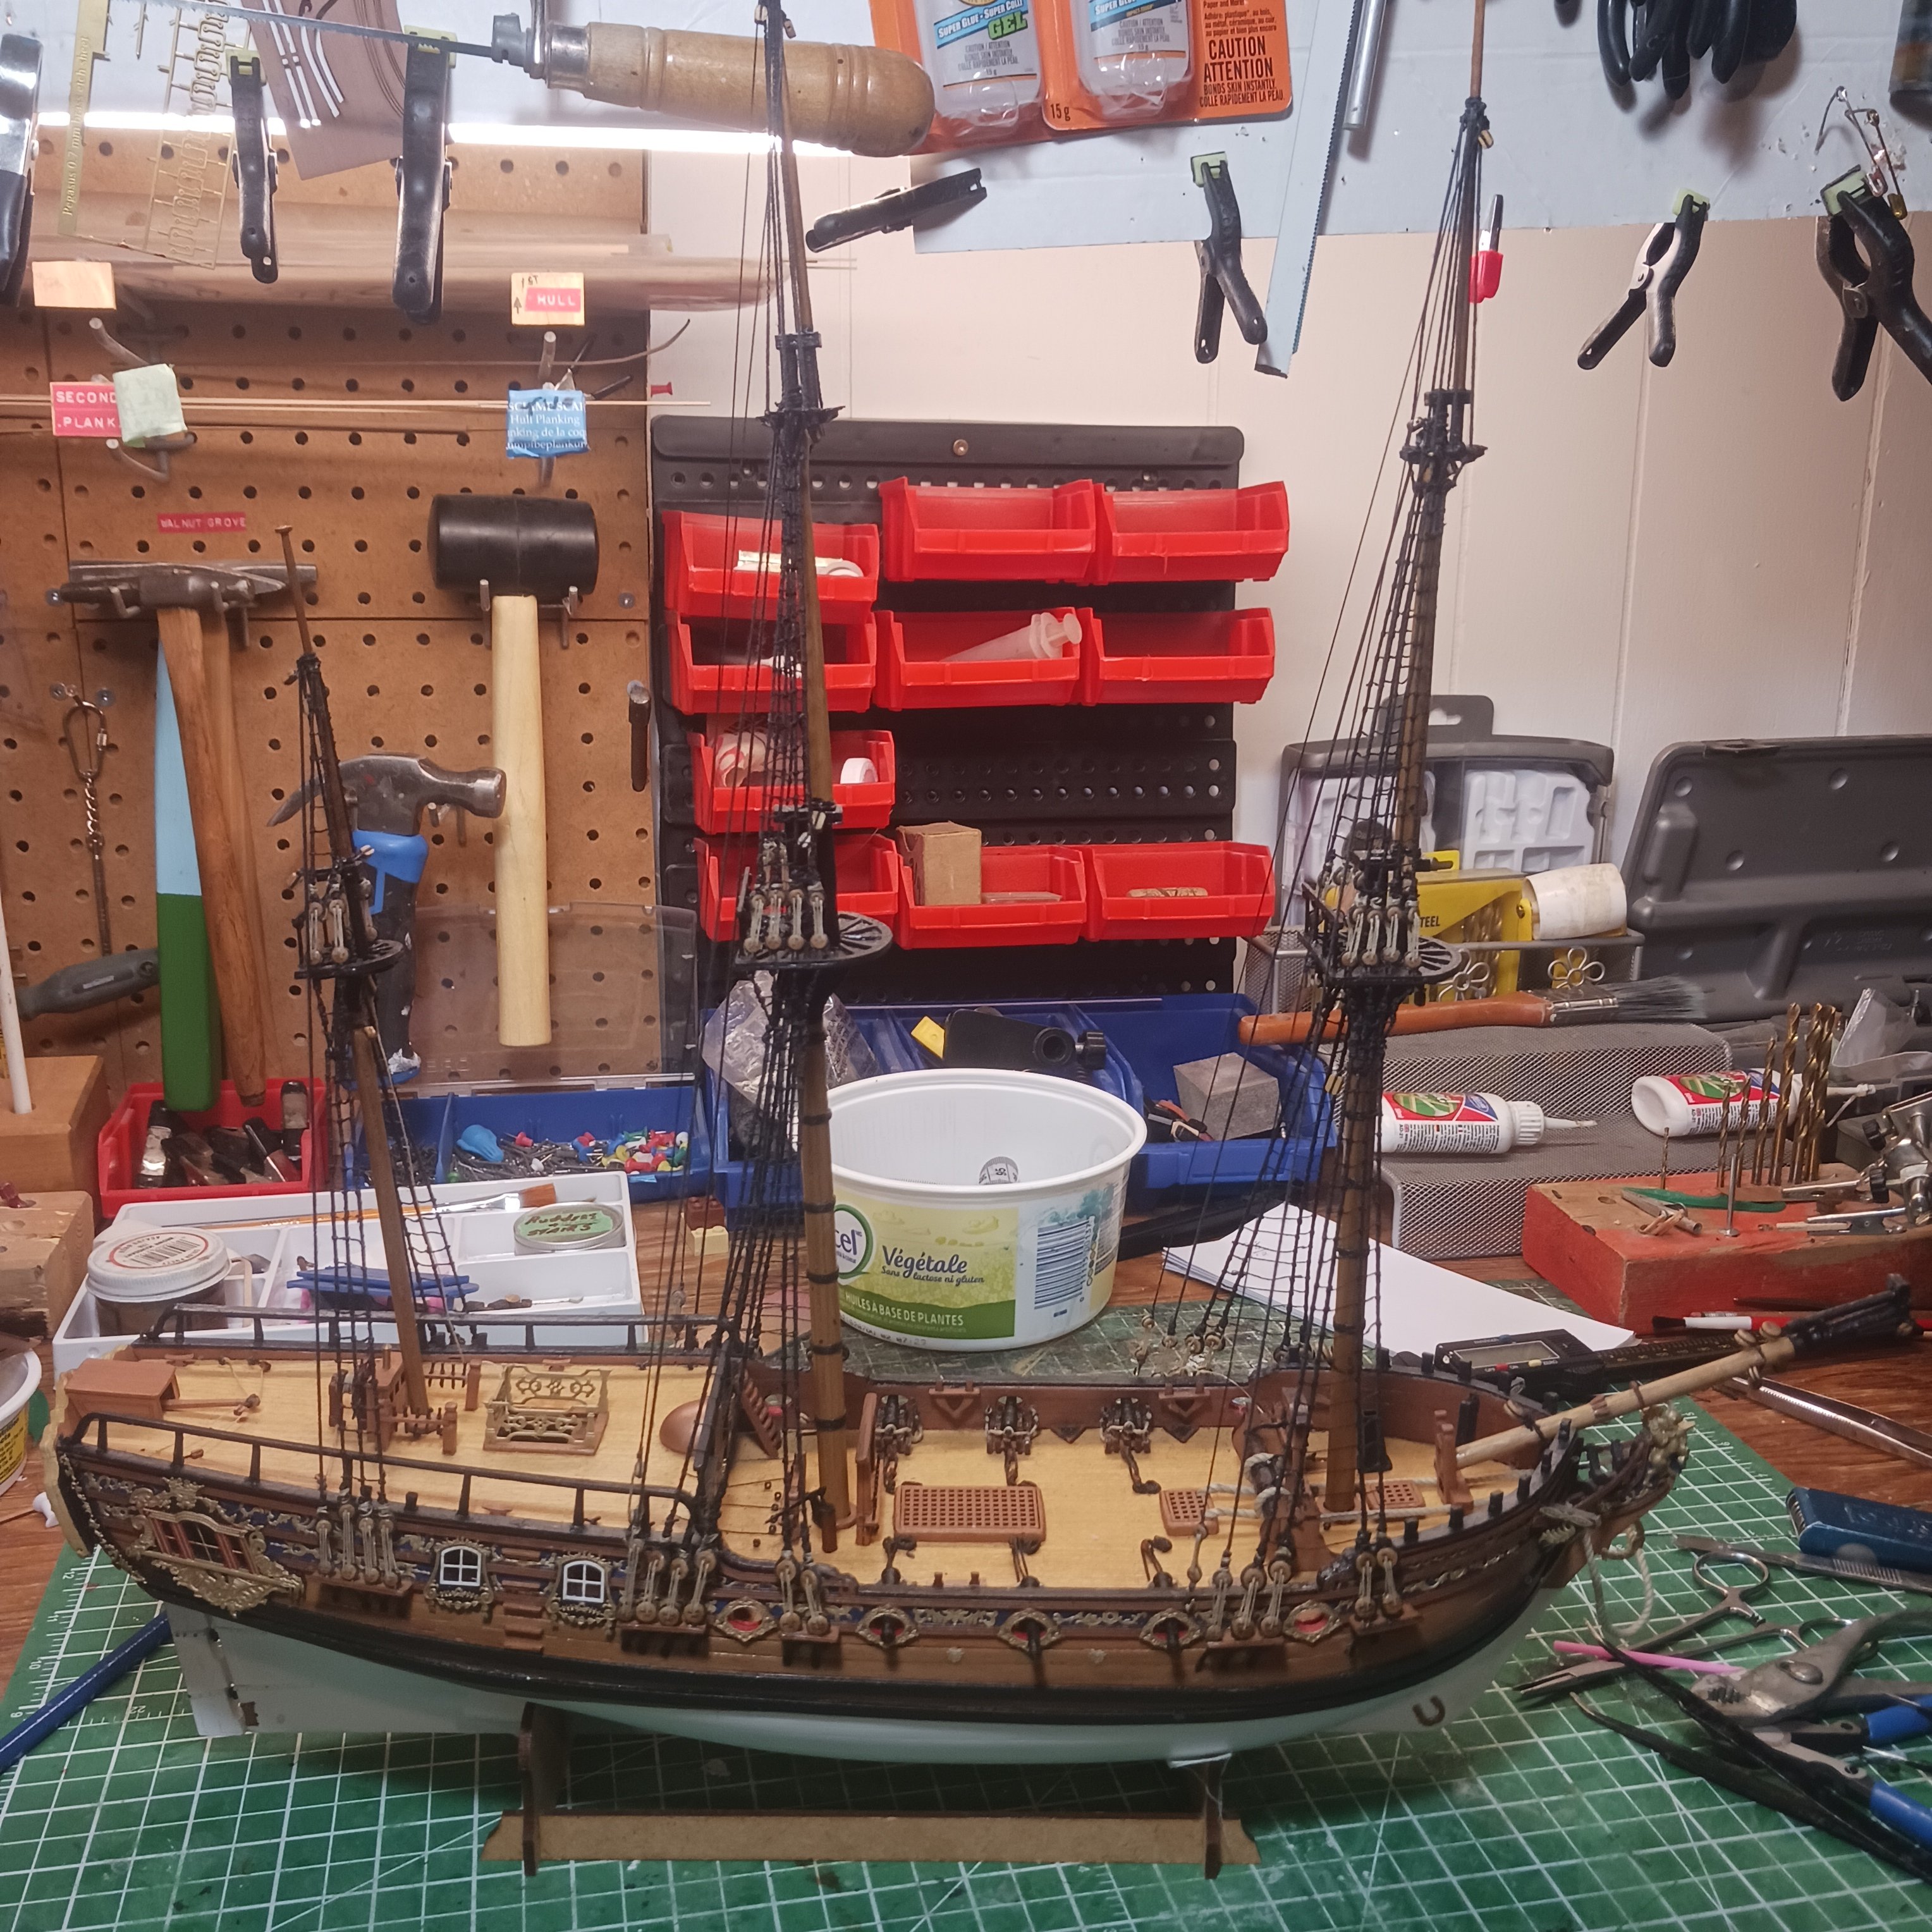
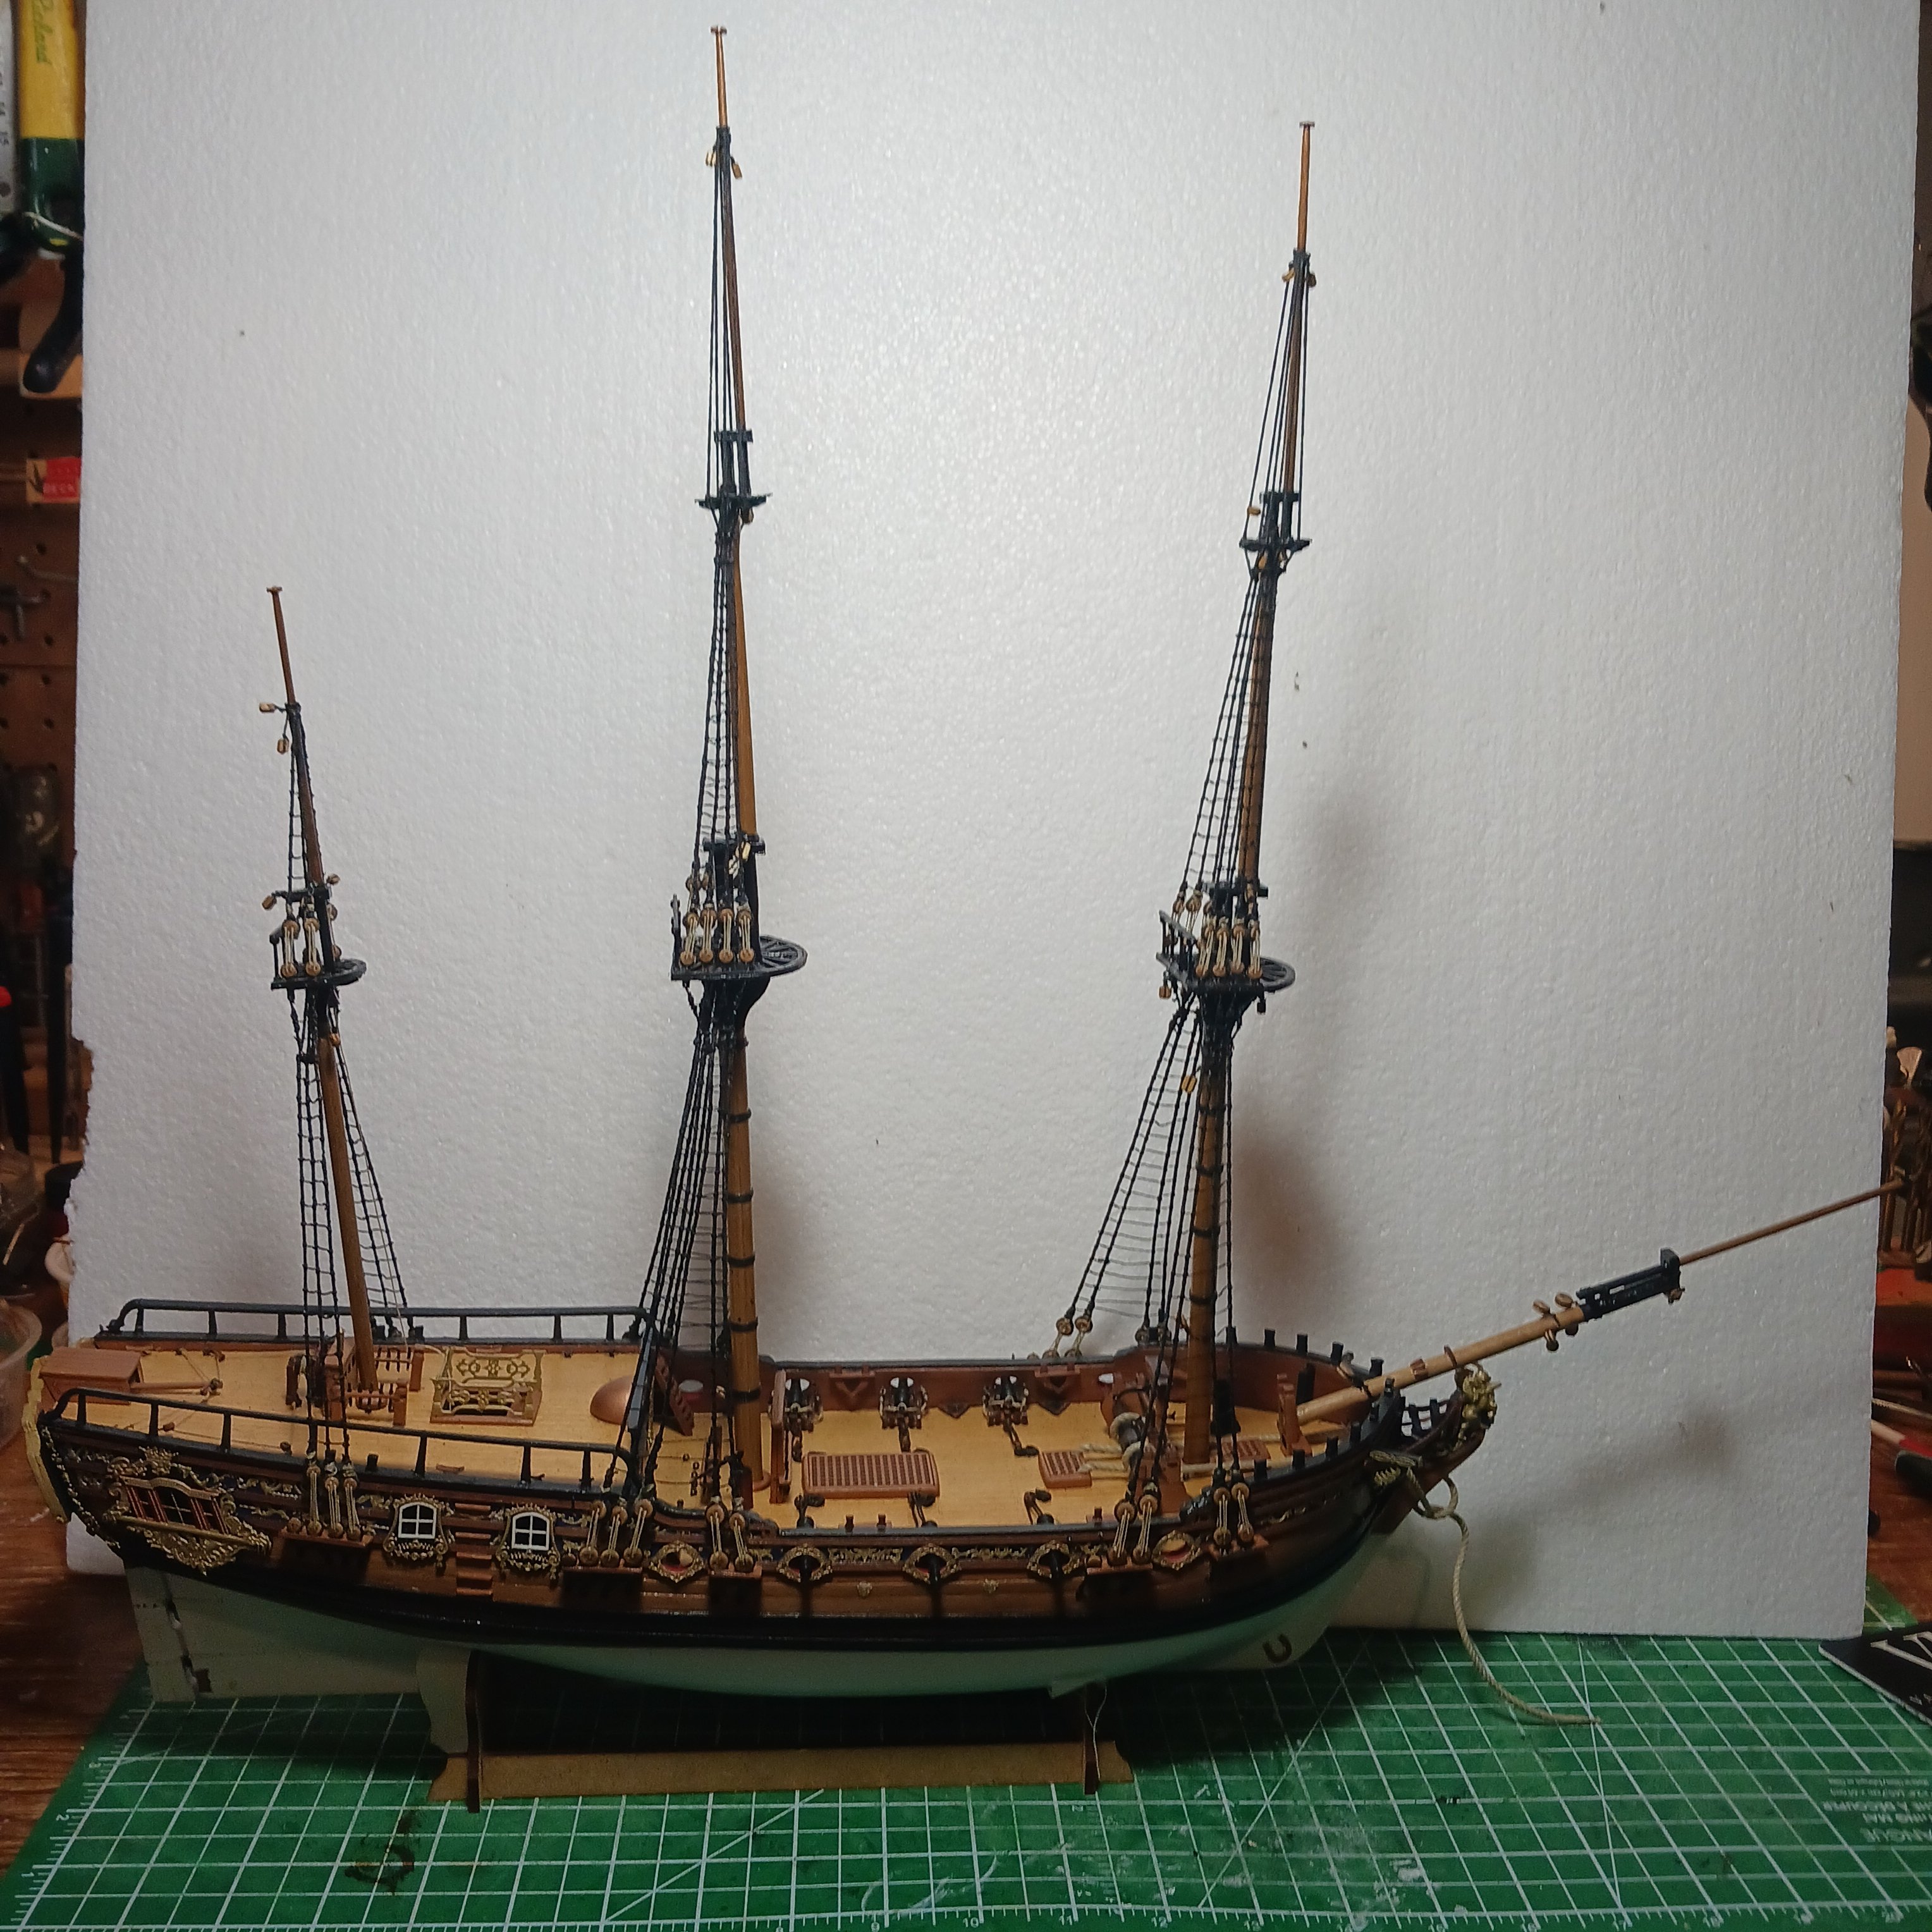
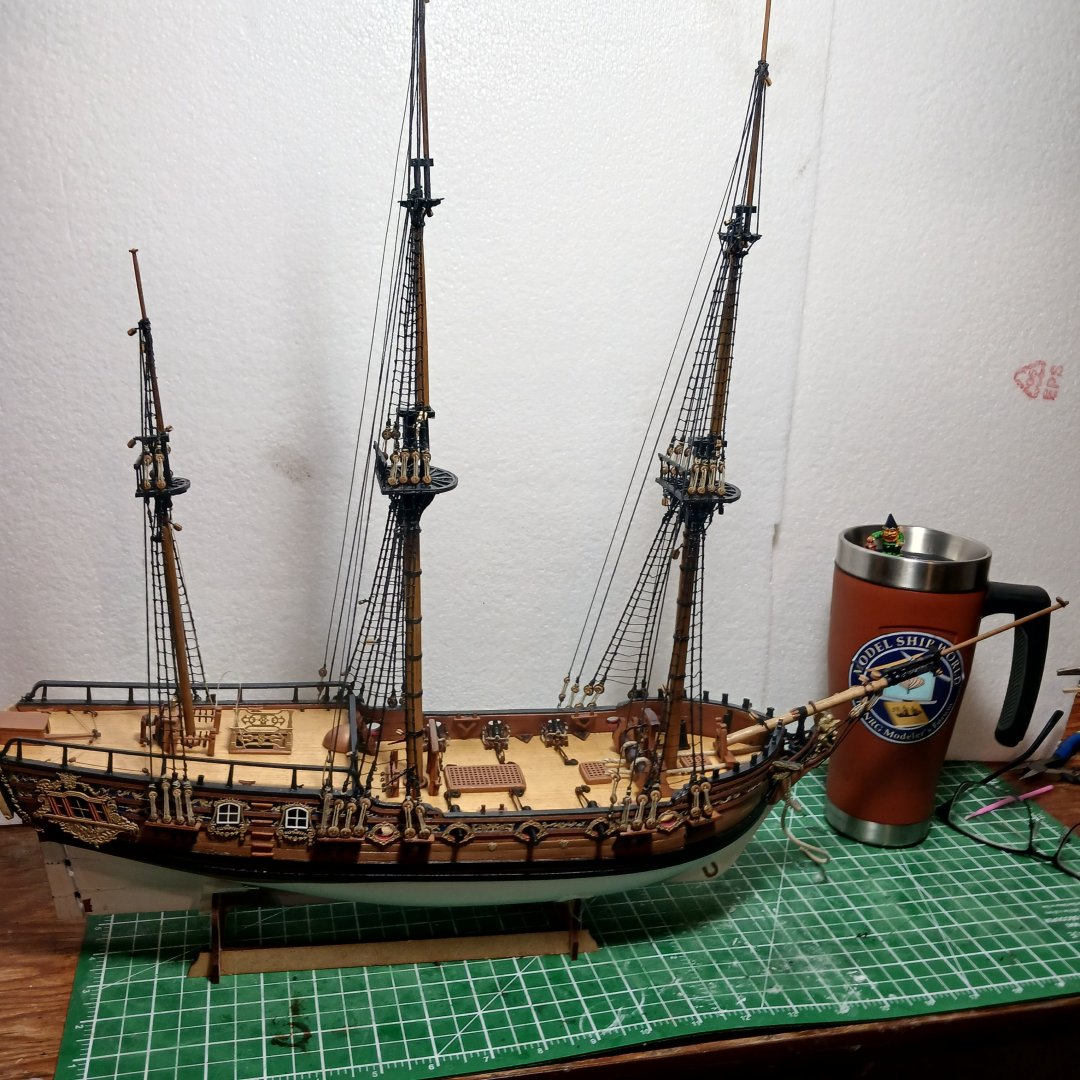
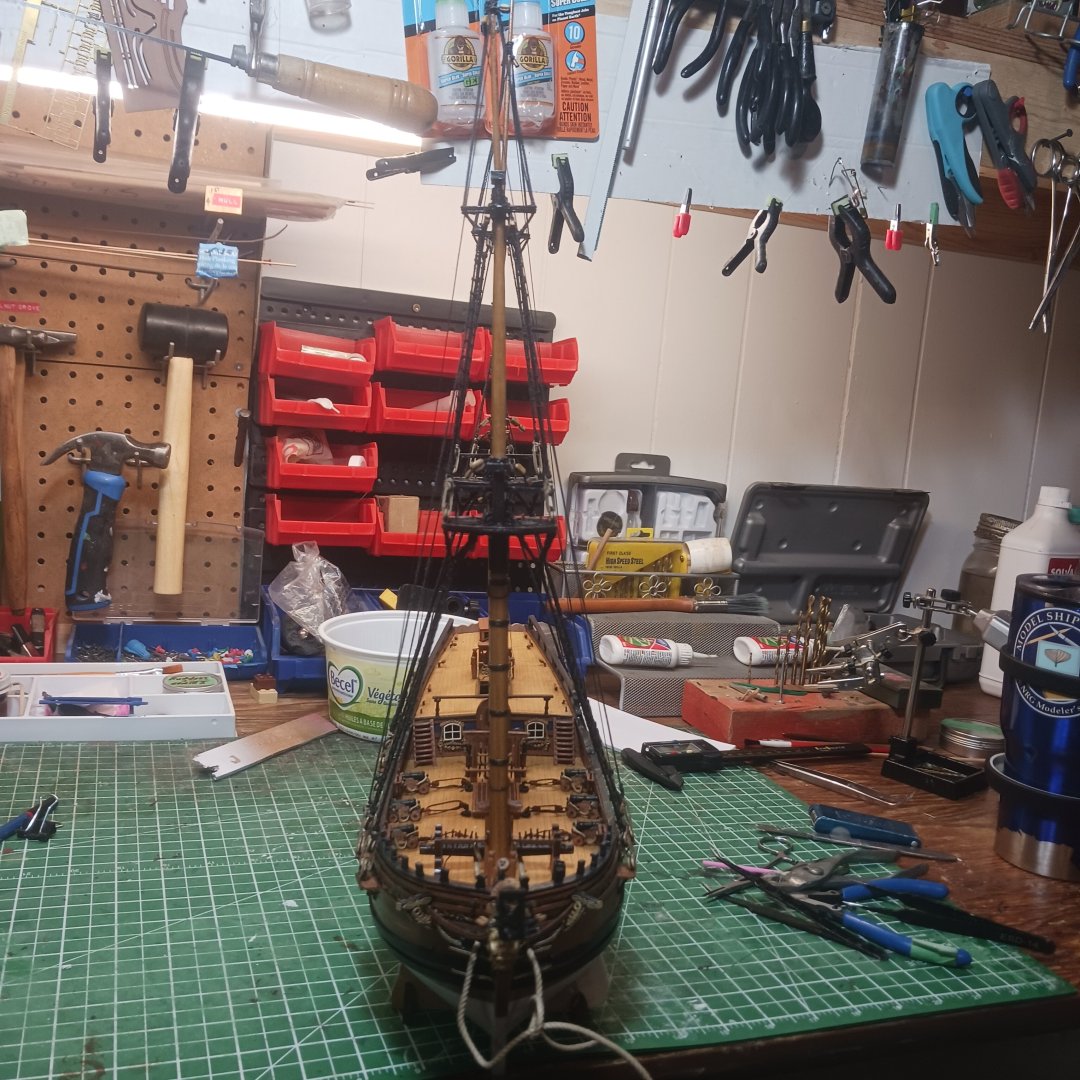
All good things must come to and end. . I have finished the Ratlines,!! Maybe I should see if @Glen McGuireneeds some help lol. Like I say I keep looking at the Pegasus for comfort, she has lotr of Ratlines, lol. I am pretty happy with what I have done. Some mistakes have been made, just to bad I had to make them on this ship though. It is a beautiful ship, now I will start some yard work, right after I rig the Bowsprit . The Crew is all excited, we are about to turn the plan to sheet 12. 😀. But first they wanted to get the picture taken so they can log it for the future. Lol. The Bowsprit mast is ready to go, but Pile ever the stickalur for details said hold on we are missing blocks for the crossjack yards and the Mizzen yard blocks. Lets go over everything again. Ok. Sounds like a plan. Ok We looked at sheet 12, found a mouse, lol I had to laugh. I can't seem to get rid of rodents lol. I am going to a hockey game tonight so that's it till next time. Thanks so much for looking in and liking She differently got that Knocklouder style lol. 😎. Take care my freinds and have a safe New Year. Bob M. & The Crew.

- 207 replies
-
- 13
-
-
- vanguard models
- Duchess of Kingston
- (and 1 more)
-
Good luck on your journey!! Bob M.
-
Good luck on your journey !!
-
Great to see you back 😀. Looking forward to seeing your rigging.!! Bob M.
- 419 replies
-
- 2
-
-
- Victory Models
- Pegasus
- (and 2 more)
-
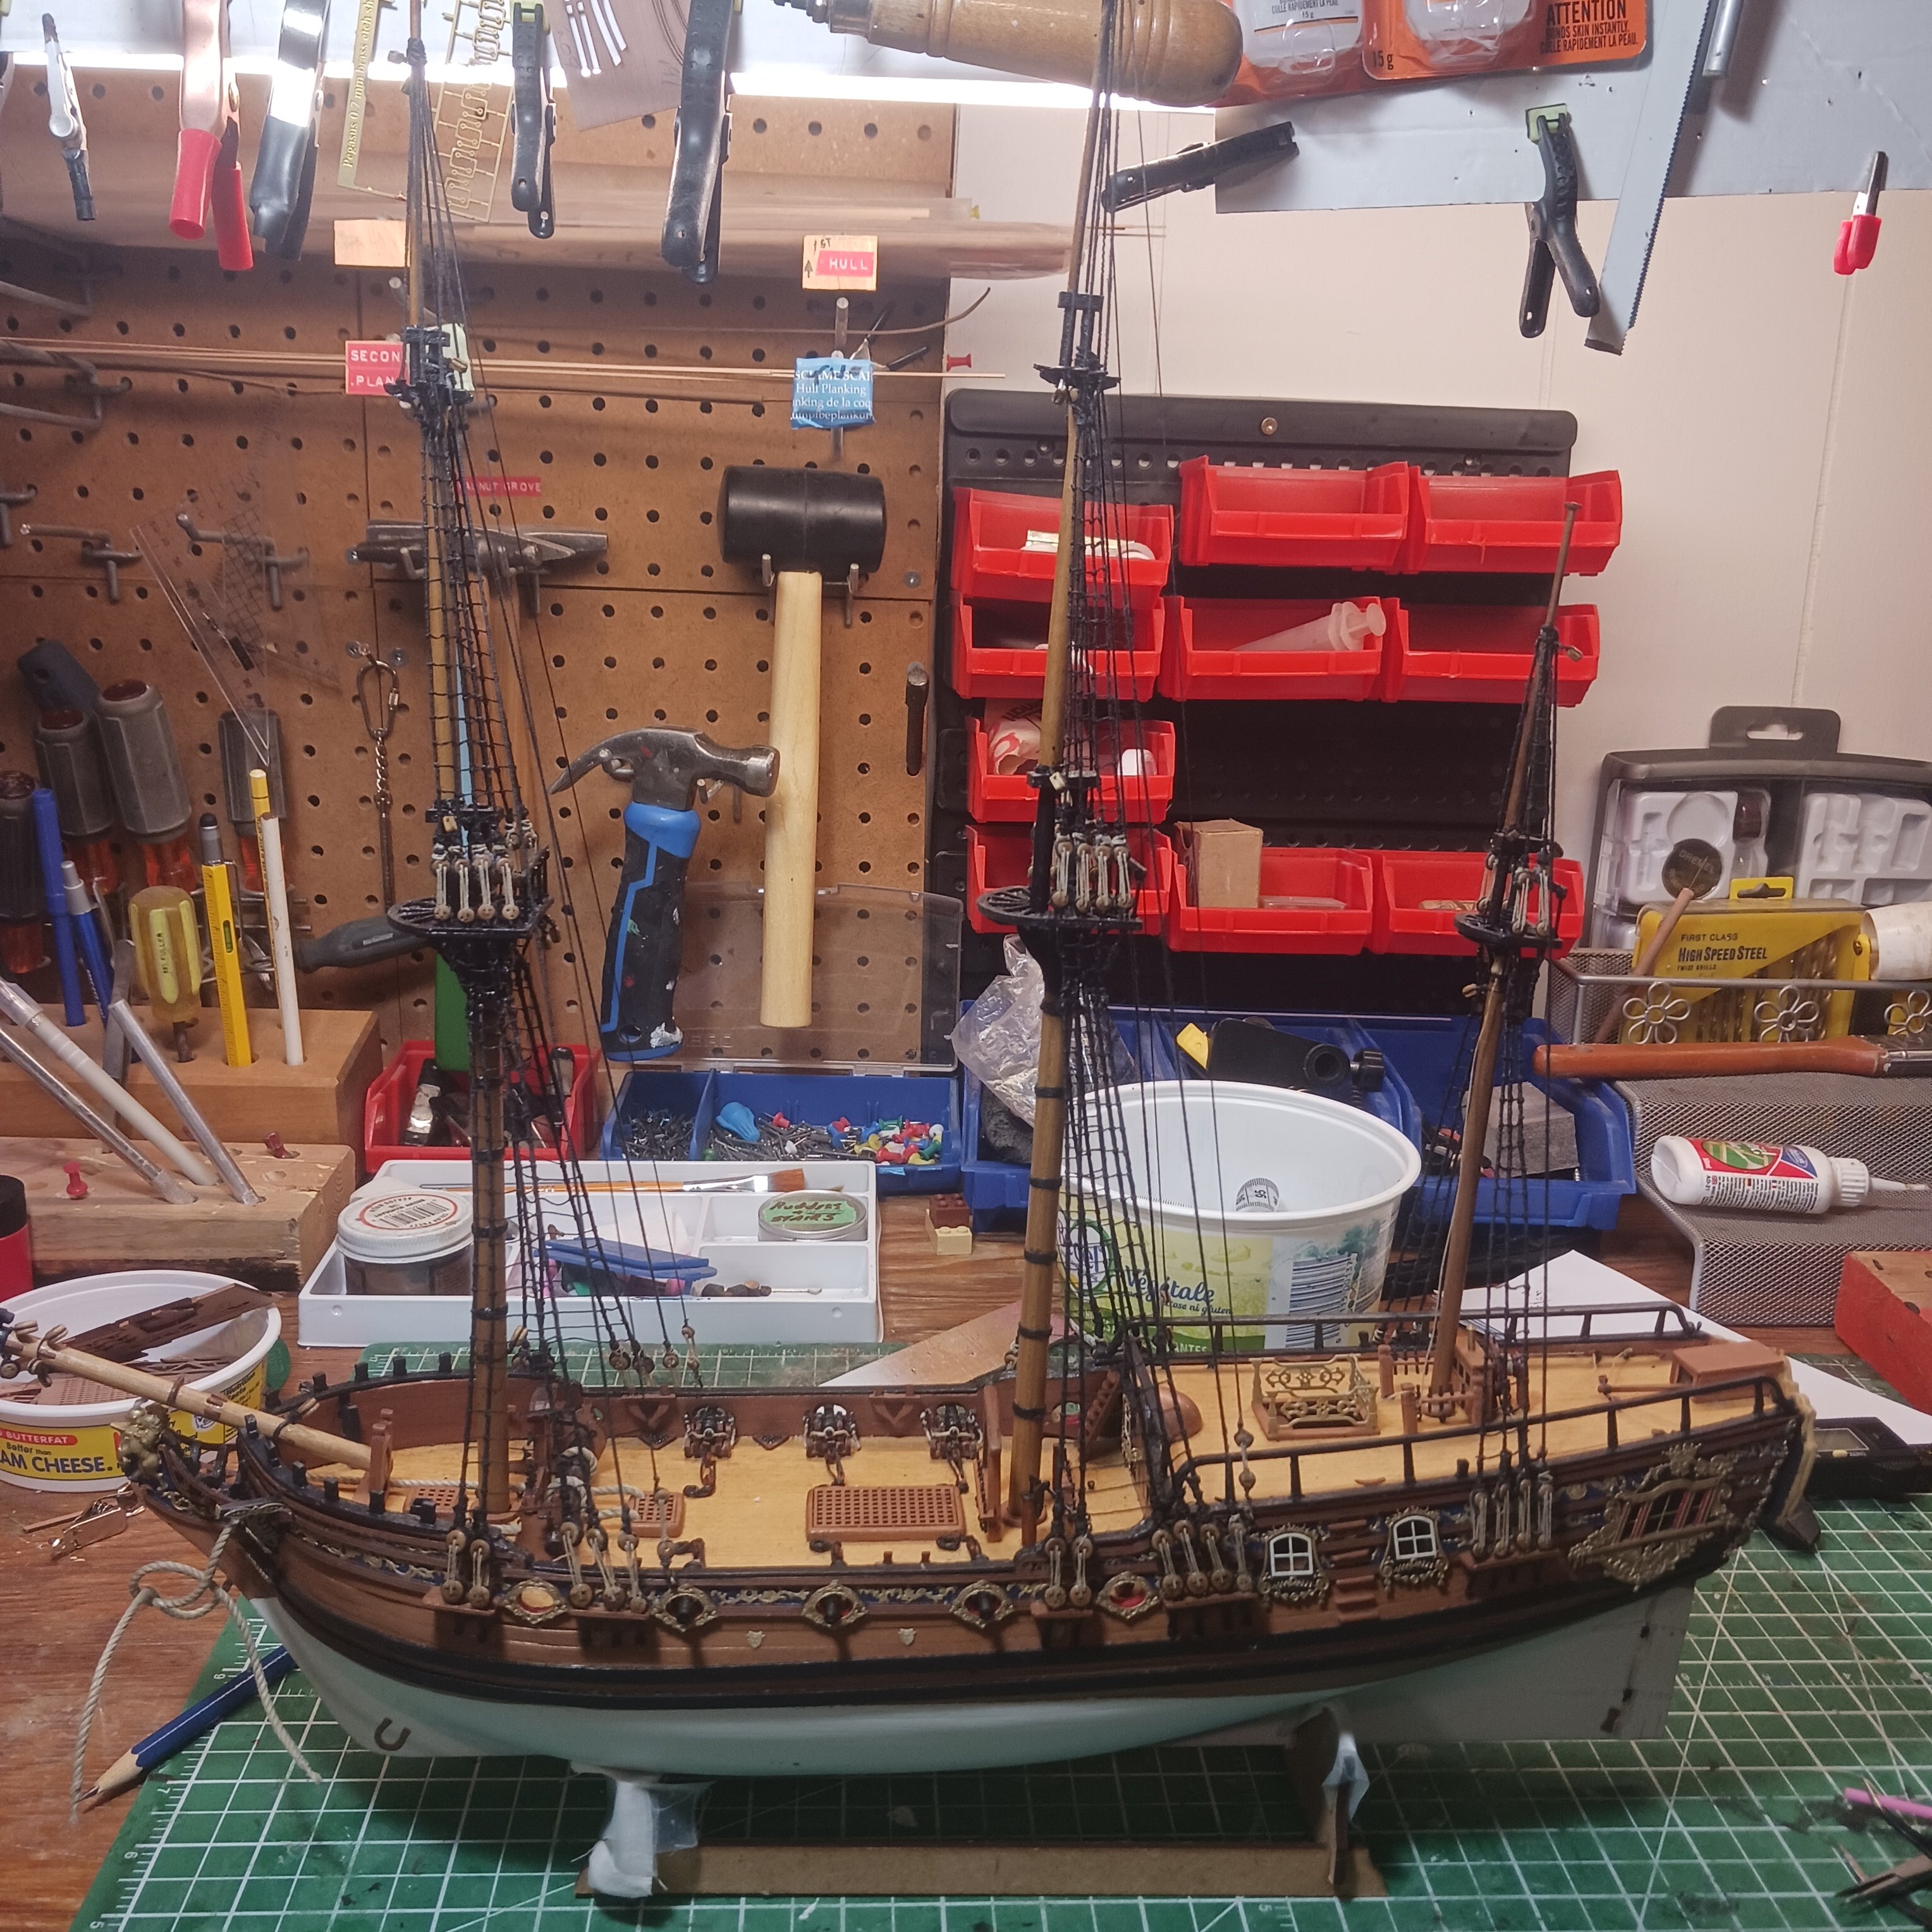
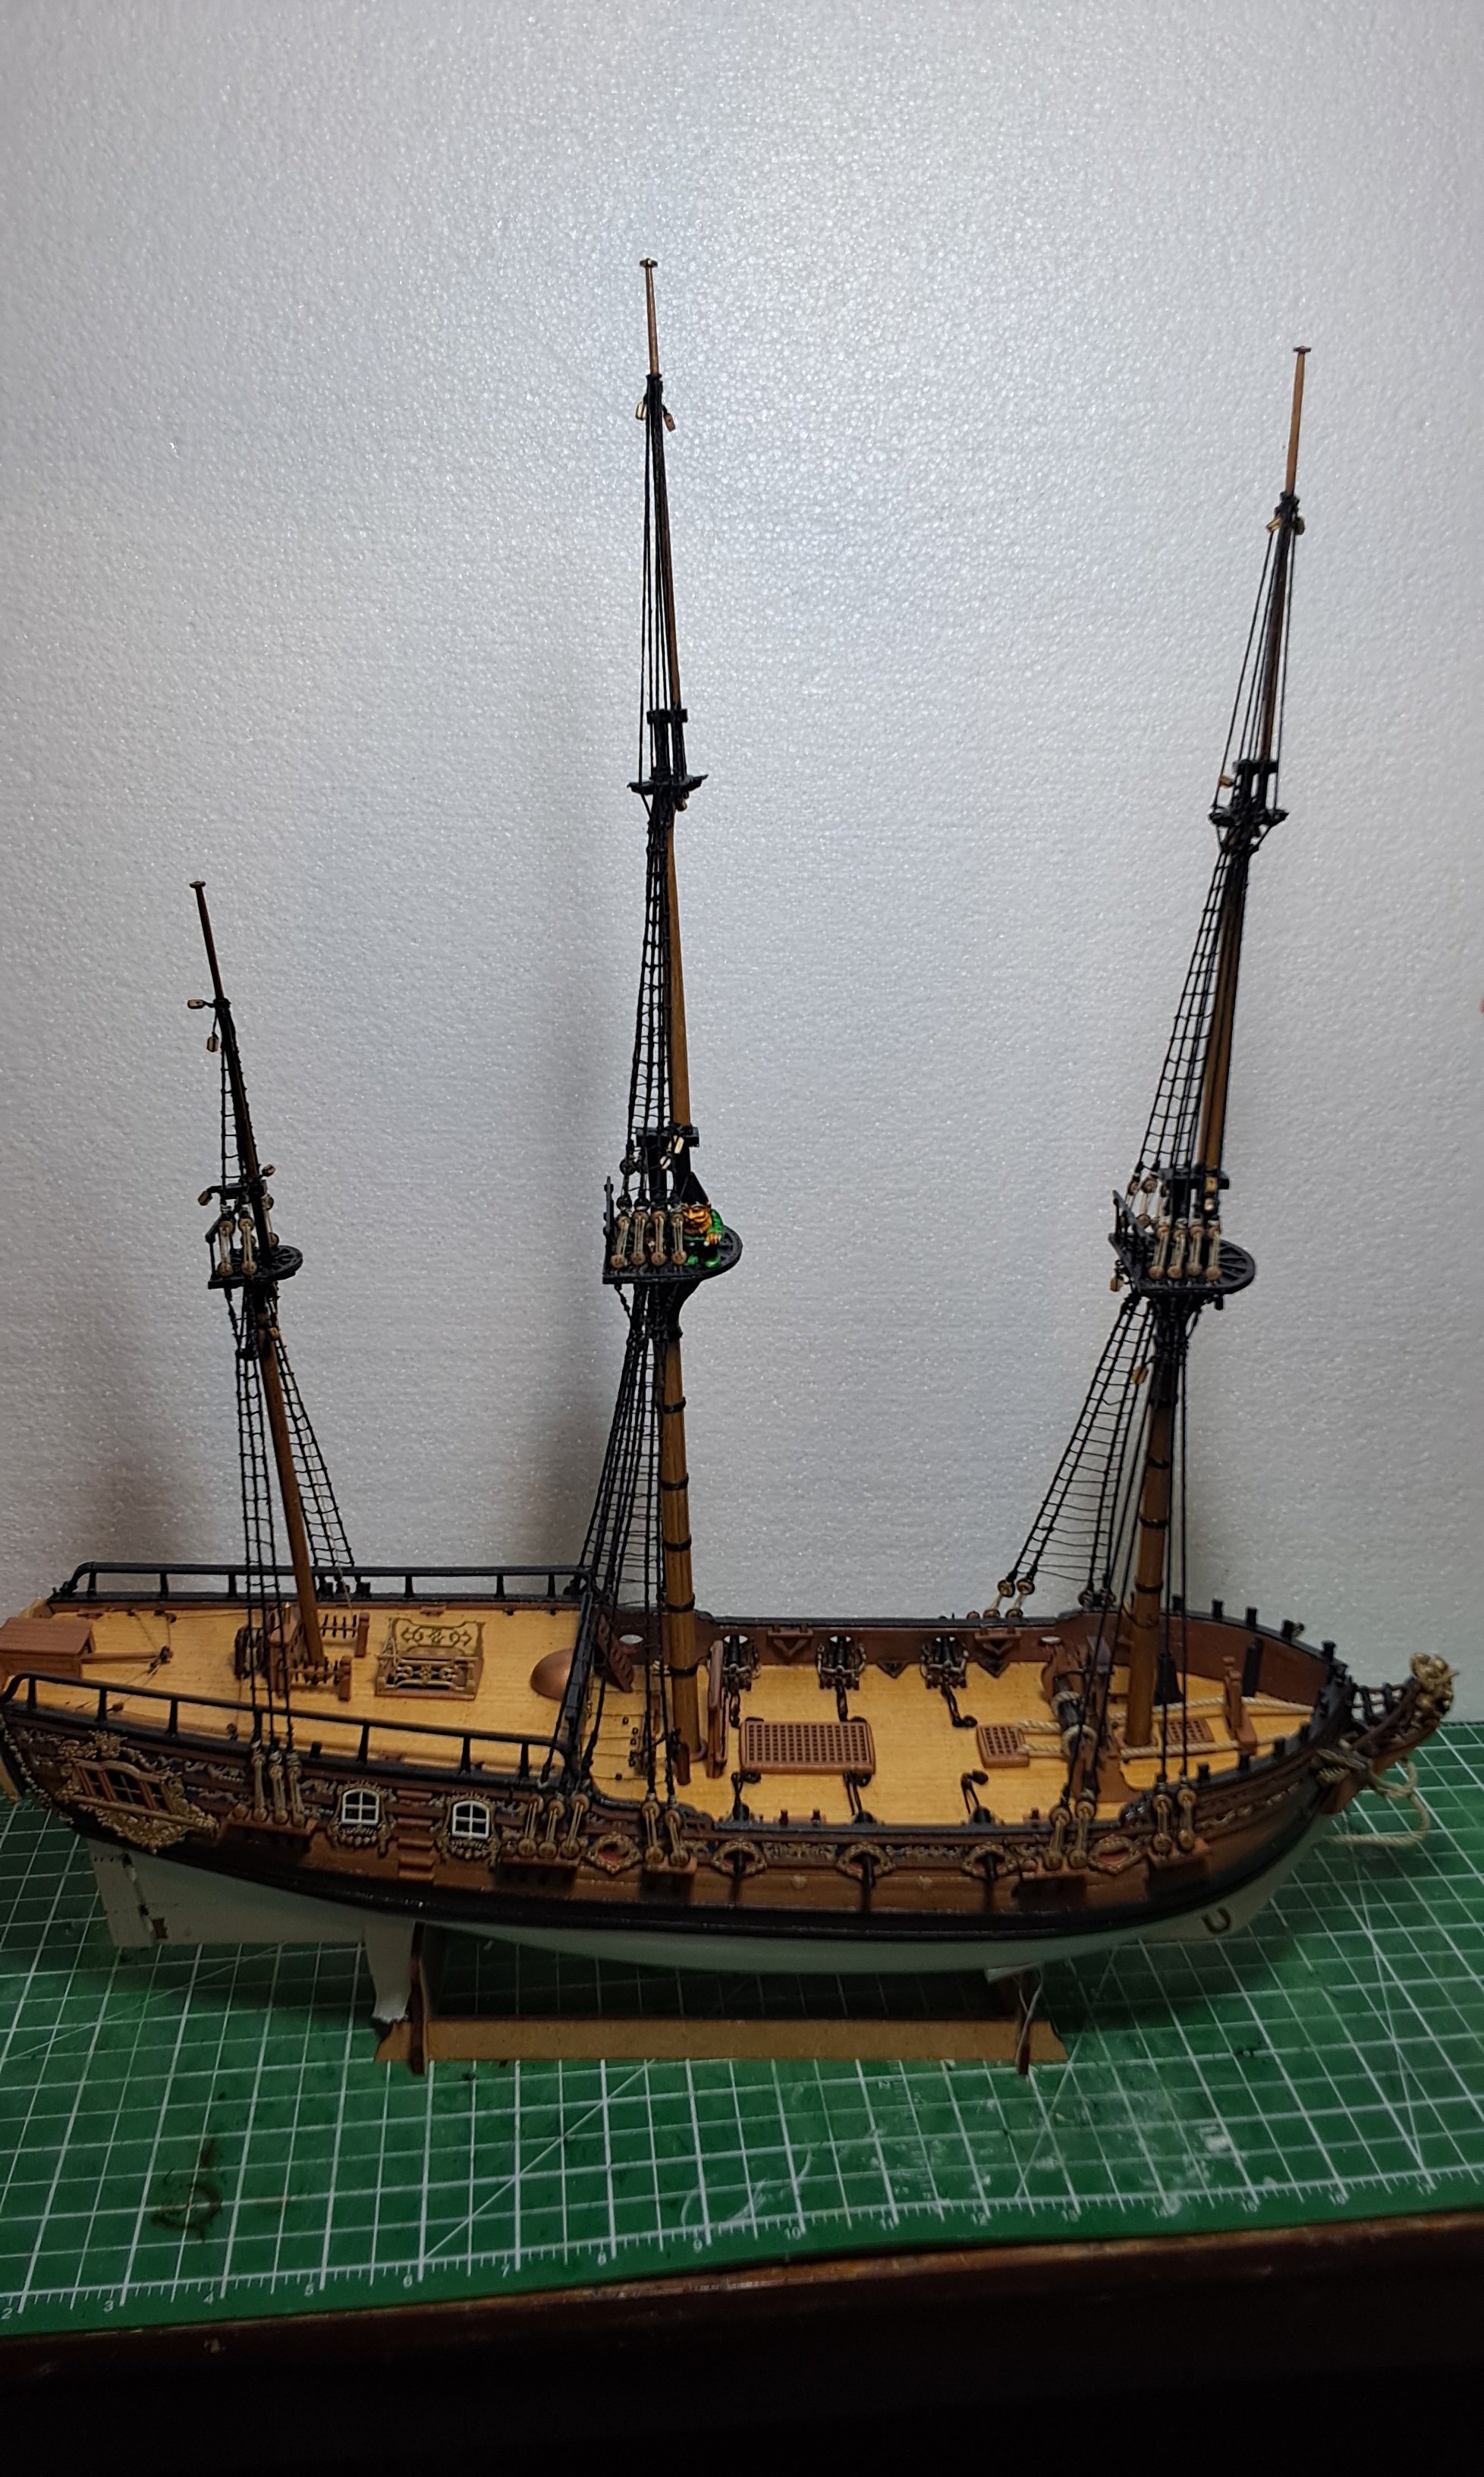
The ratlines on the portside are finished, a bit of lining up but for now looking good .😊. Now to the starboard side. Today I managed to tie on the Mizzen and the main masts ratlines, Pile was quick to point out that I missed two lines on the Futtock shrouds 🧐. Tomorrow, because tonight everyone wants to watch a movie. A family movie tonight, and I kinda got the feeling maybe I better show up lol. I hope to finish the ratlines tomorrow, and get the Bowsprit on and maybe the gammoning on as well. The knights feather is growing on me . Still I will wait till after I put the mast on first. We will see, Pile wants a team meeting about a few things so I told him to put it on the list, lol. The rigging is going ok, not nearly as neat as the logs that I follow for the Duchess, @Glenn-UK and @DocRob plus few other as well. I try to learn as much as I can, the books and the help that members have shown me over the last couple years is paying off I think 🤔. I have a long way to go on rigging, I feel a little bit concerned about the way I rig. The knot tying is shaky at best. But I think I got Clove hitches and serving lines aced lol. I completely forgot about the King of the Mississippi diorama I have been doing. Ratlines take president lol. And I am pretty sure I will finish rigging the Pegasus next Got to run lol. Thanks so much for all the support and likes 👍 👌. Bob M . PFCGP Goober 🙂. Forgot one lol.


- 207 replies
-
- 17
-
-
- vanguard models
- Duchess of Kingston
- (and 1 more)
-
Bob M.