HOLIDAY DONATION DRIVE - SUPPORT MSW - DO YOUR PART TO KEEP THIS GREAT FORUM GOING! (Only 20 donations so far - C'mon guys!)
×


Thunder
-
Posts
582 -
Joined
-
Last visited
Content Type
Profiles
Forums
Gallery
Events
Everything posted by Thunder
-
Hi, good luck with your new build. This turned out a 'tour de force' for me as I wanted to add extra bulkheads to improve the planking and ended up modifying them all to correct the hull shape. Still have not rigged her but well worth the time taken as she is a real beauty when built.
-
Hi Wahka_est, I did change the deck planking material, I purchased Lime to replace as I prefer the lighter colour rather than the sometimes orange of Tanjanika. However, purchased some for next project from Cornwall model boats and is was awful. It was not usable with dark streaks every few inches. They wouldn't except it was poor quality. The fore and main stays have had different thread used as when I calculated the size that provided in the kit was too small.
-
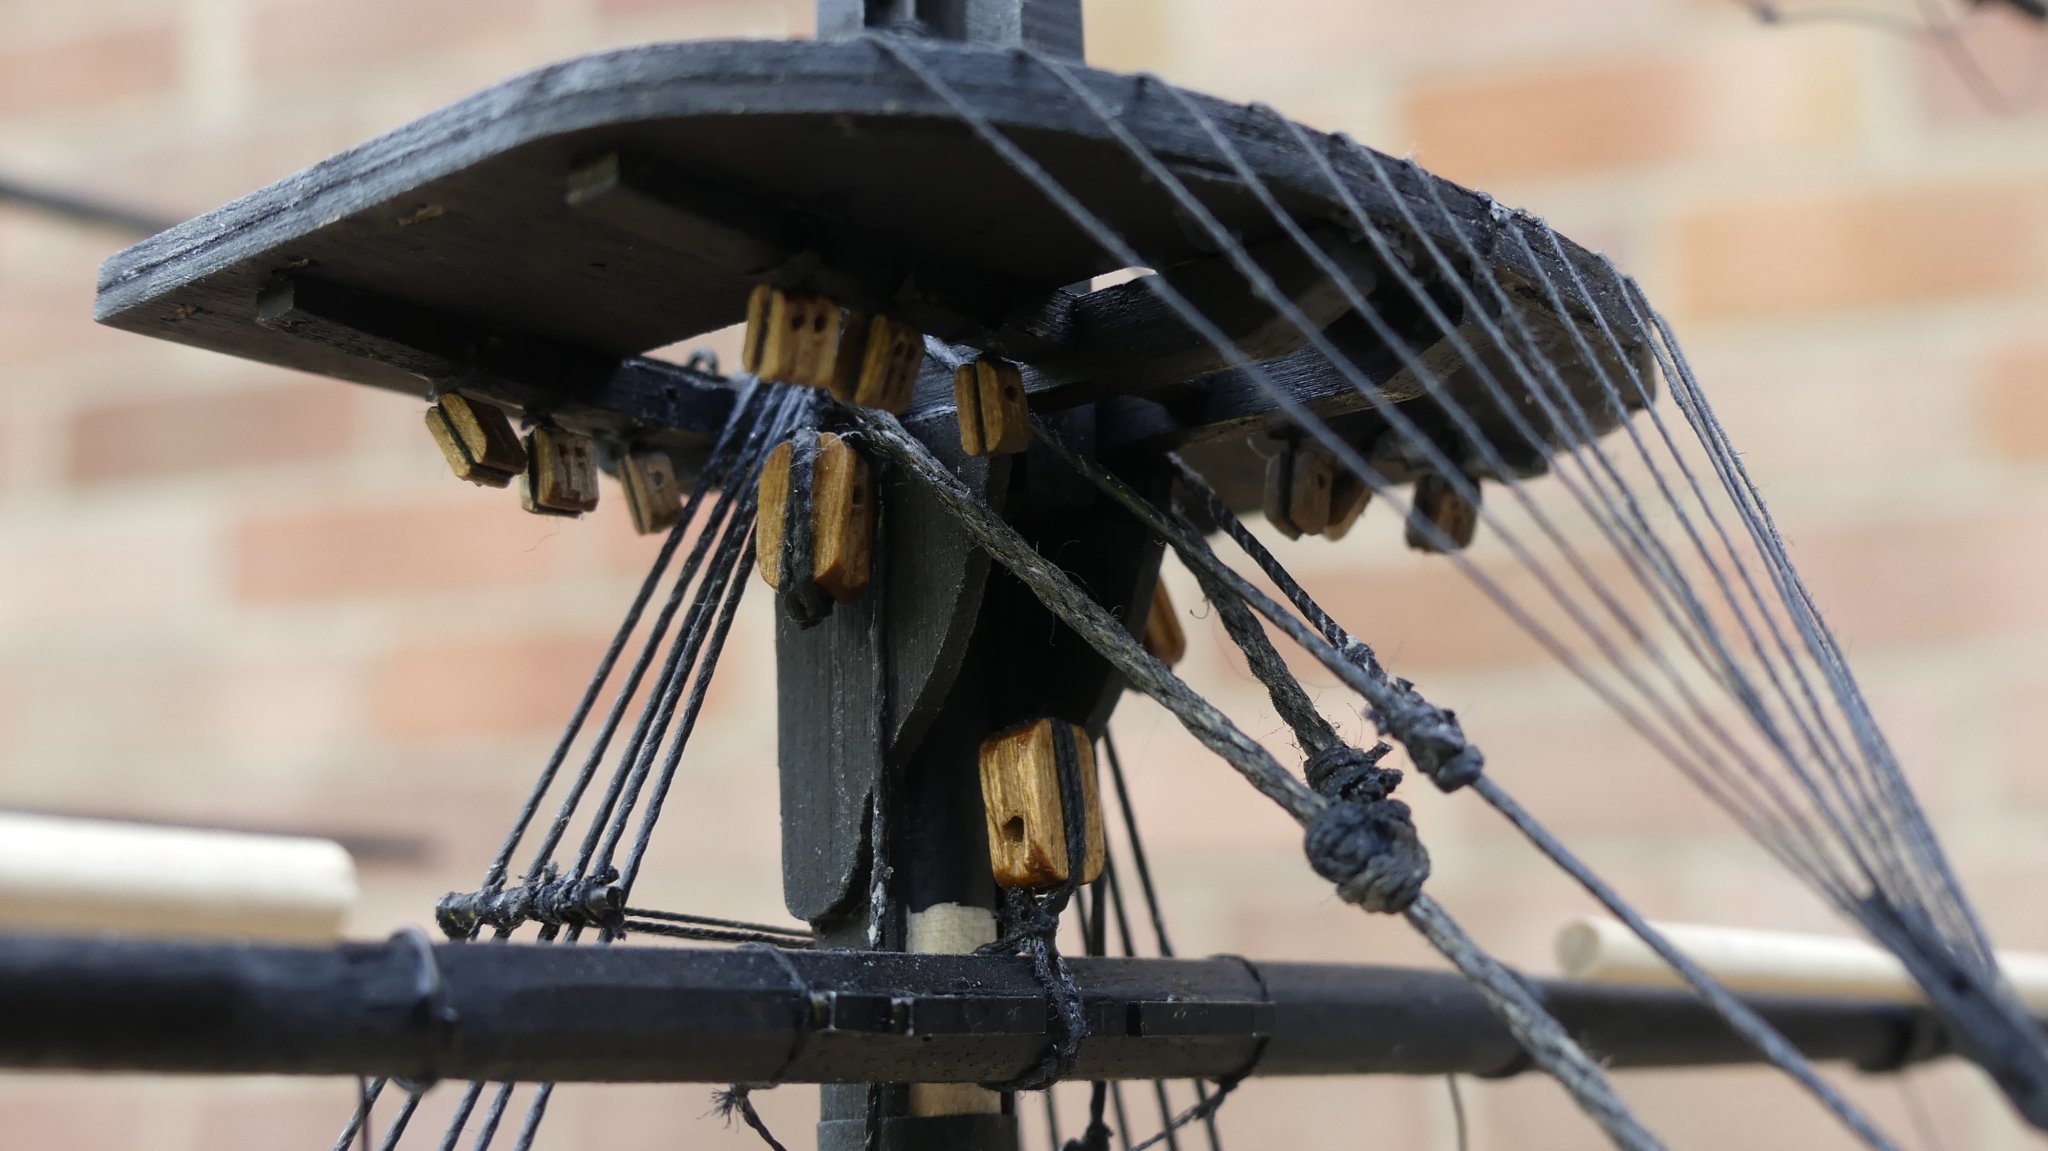
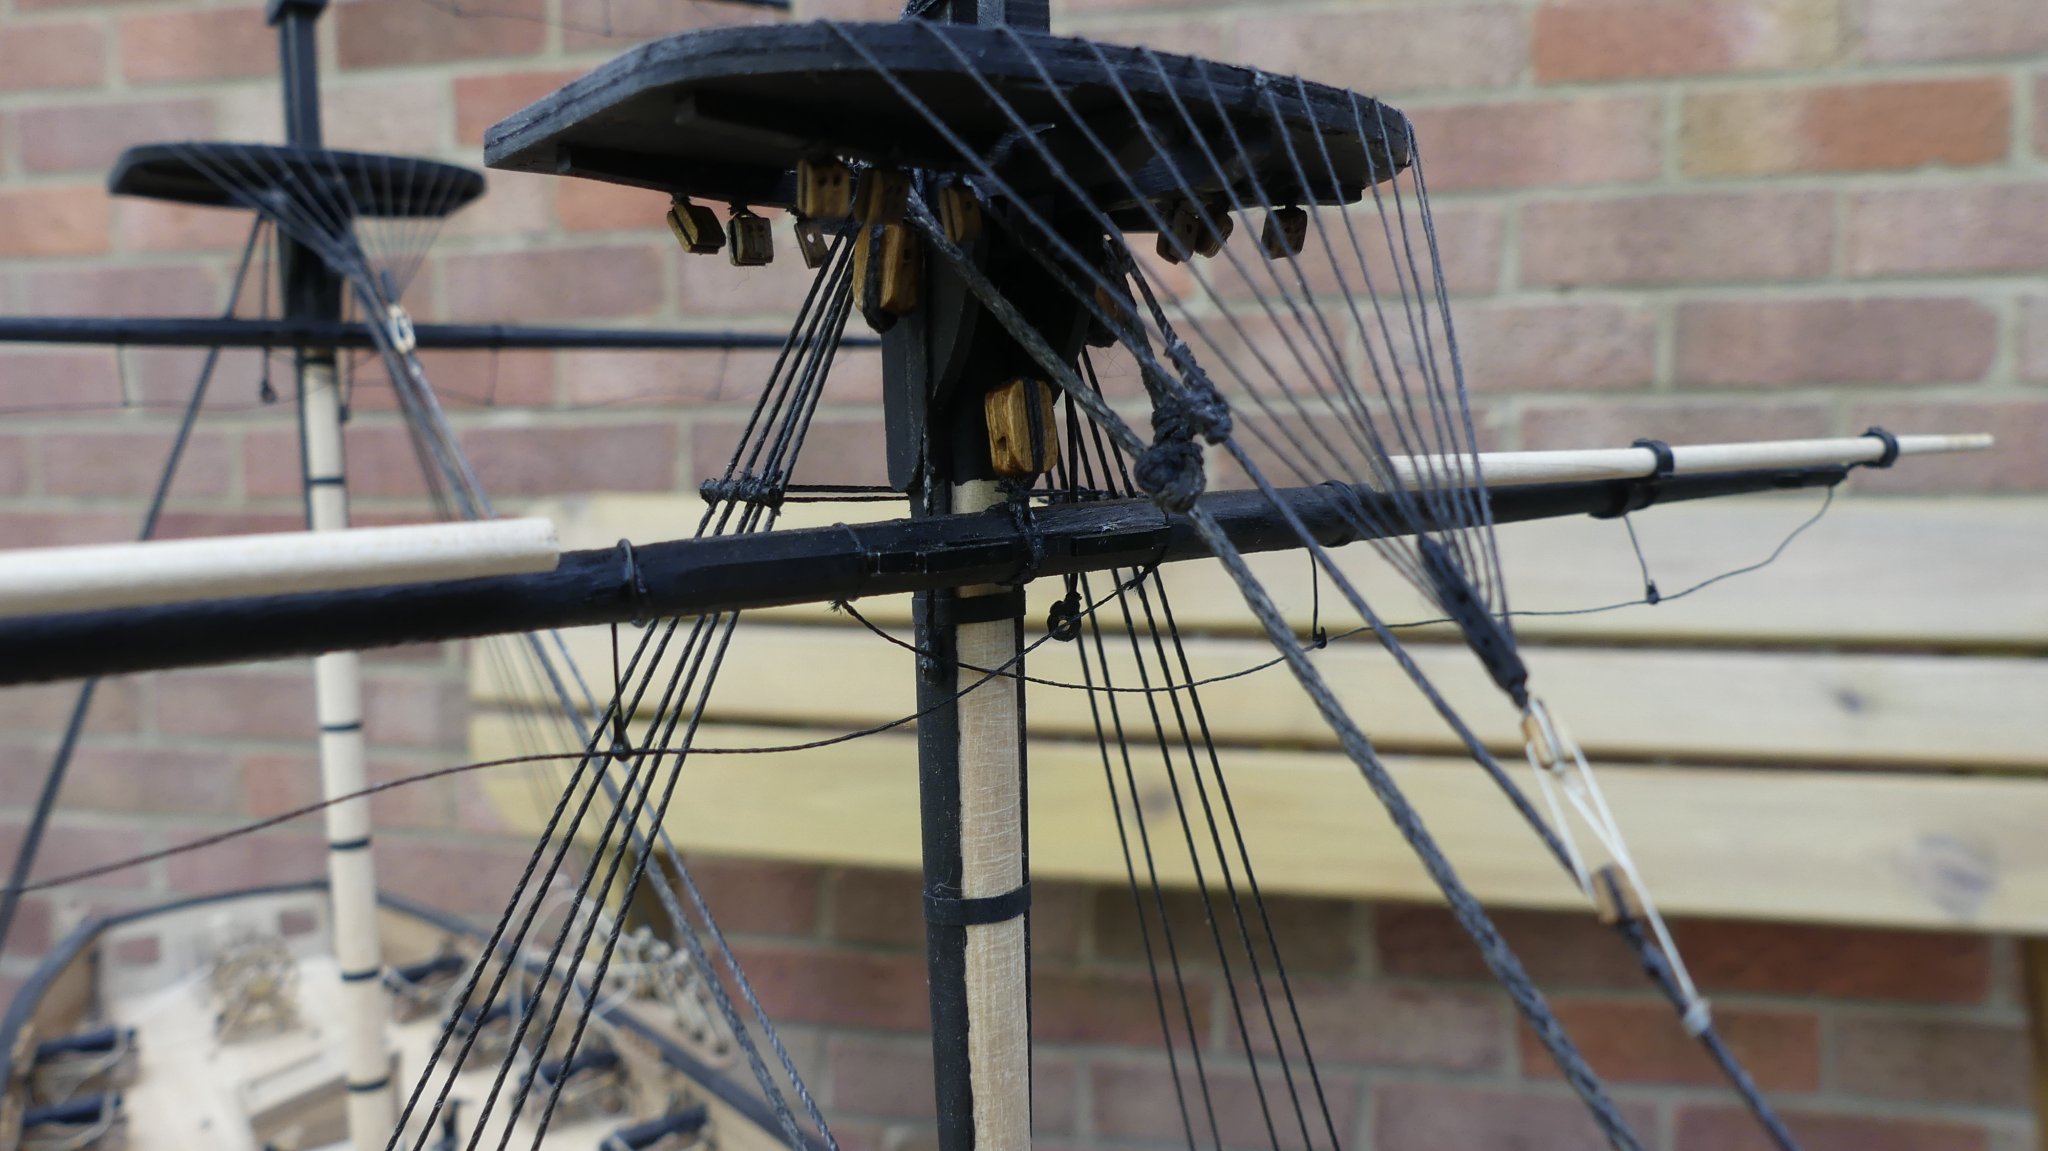
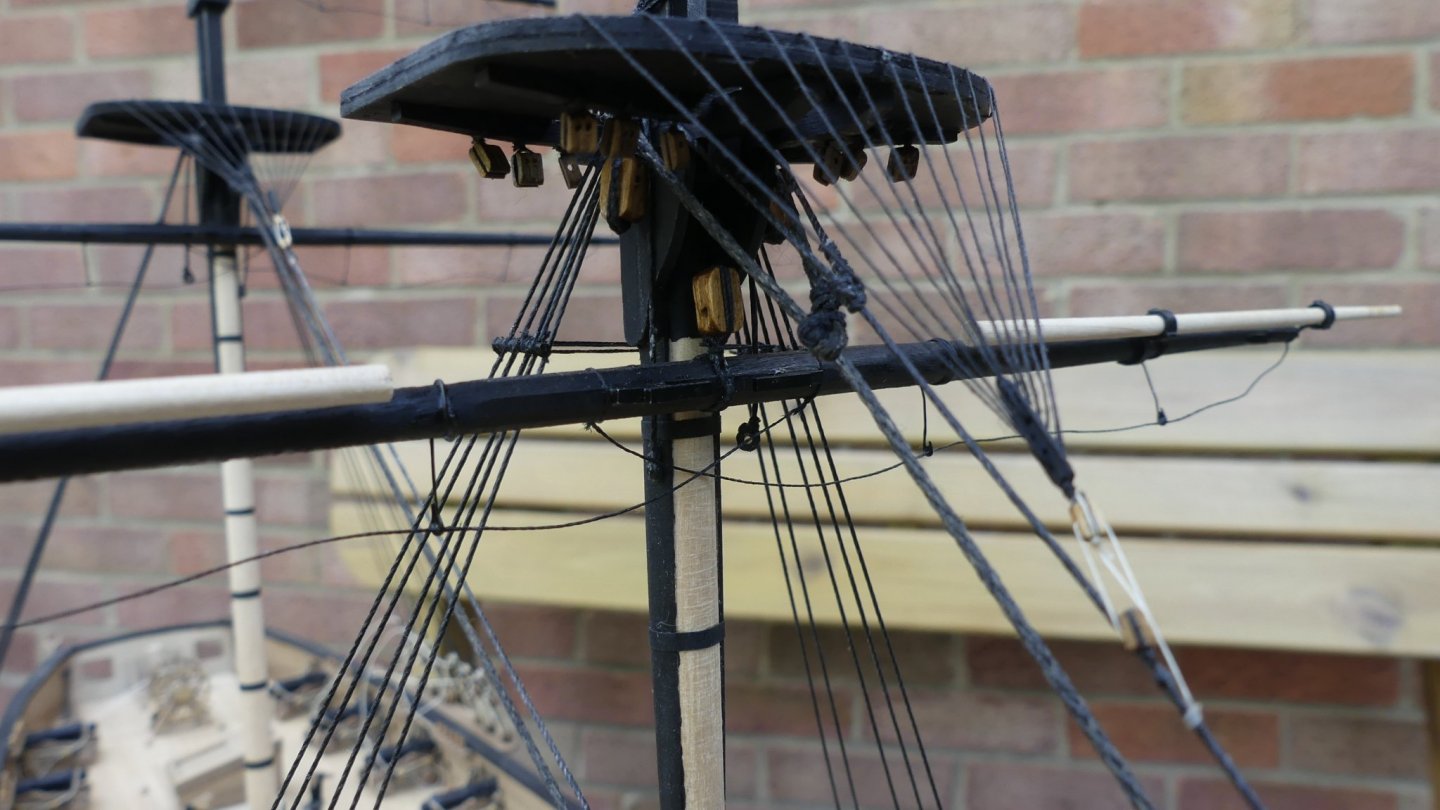
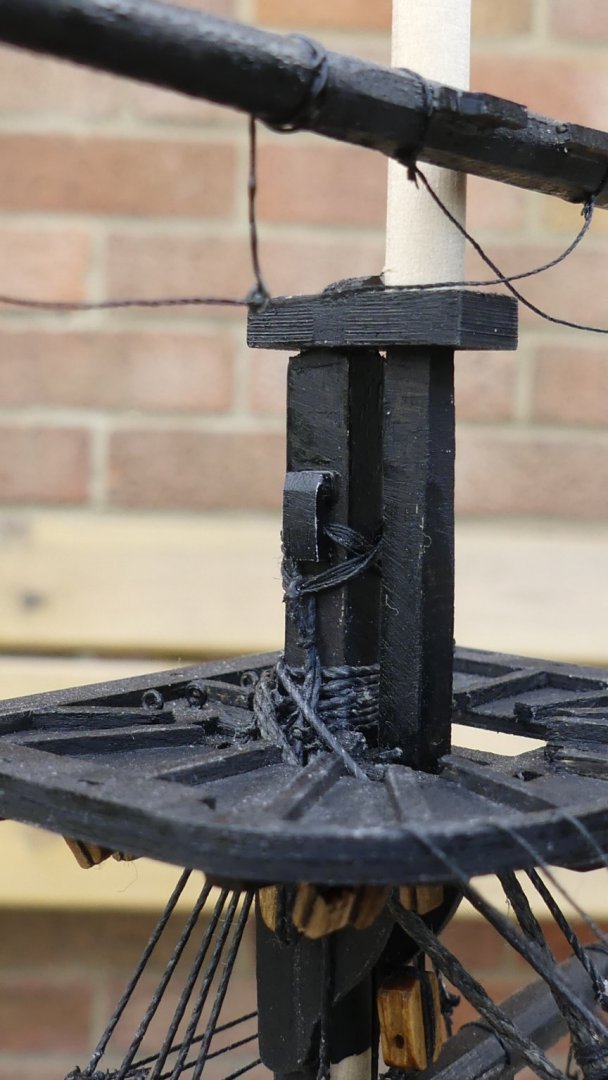
Photographs of Tops with Catharpins, Crowsfeet, stays, Jeers

- 102 replies
-
- 4
-

-
- cruiser
- caldercraft
- (and 1 more)
-
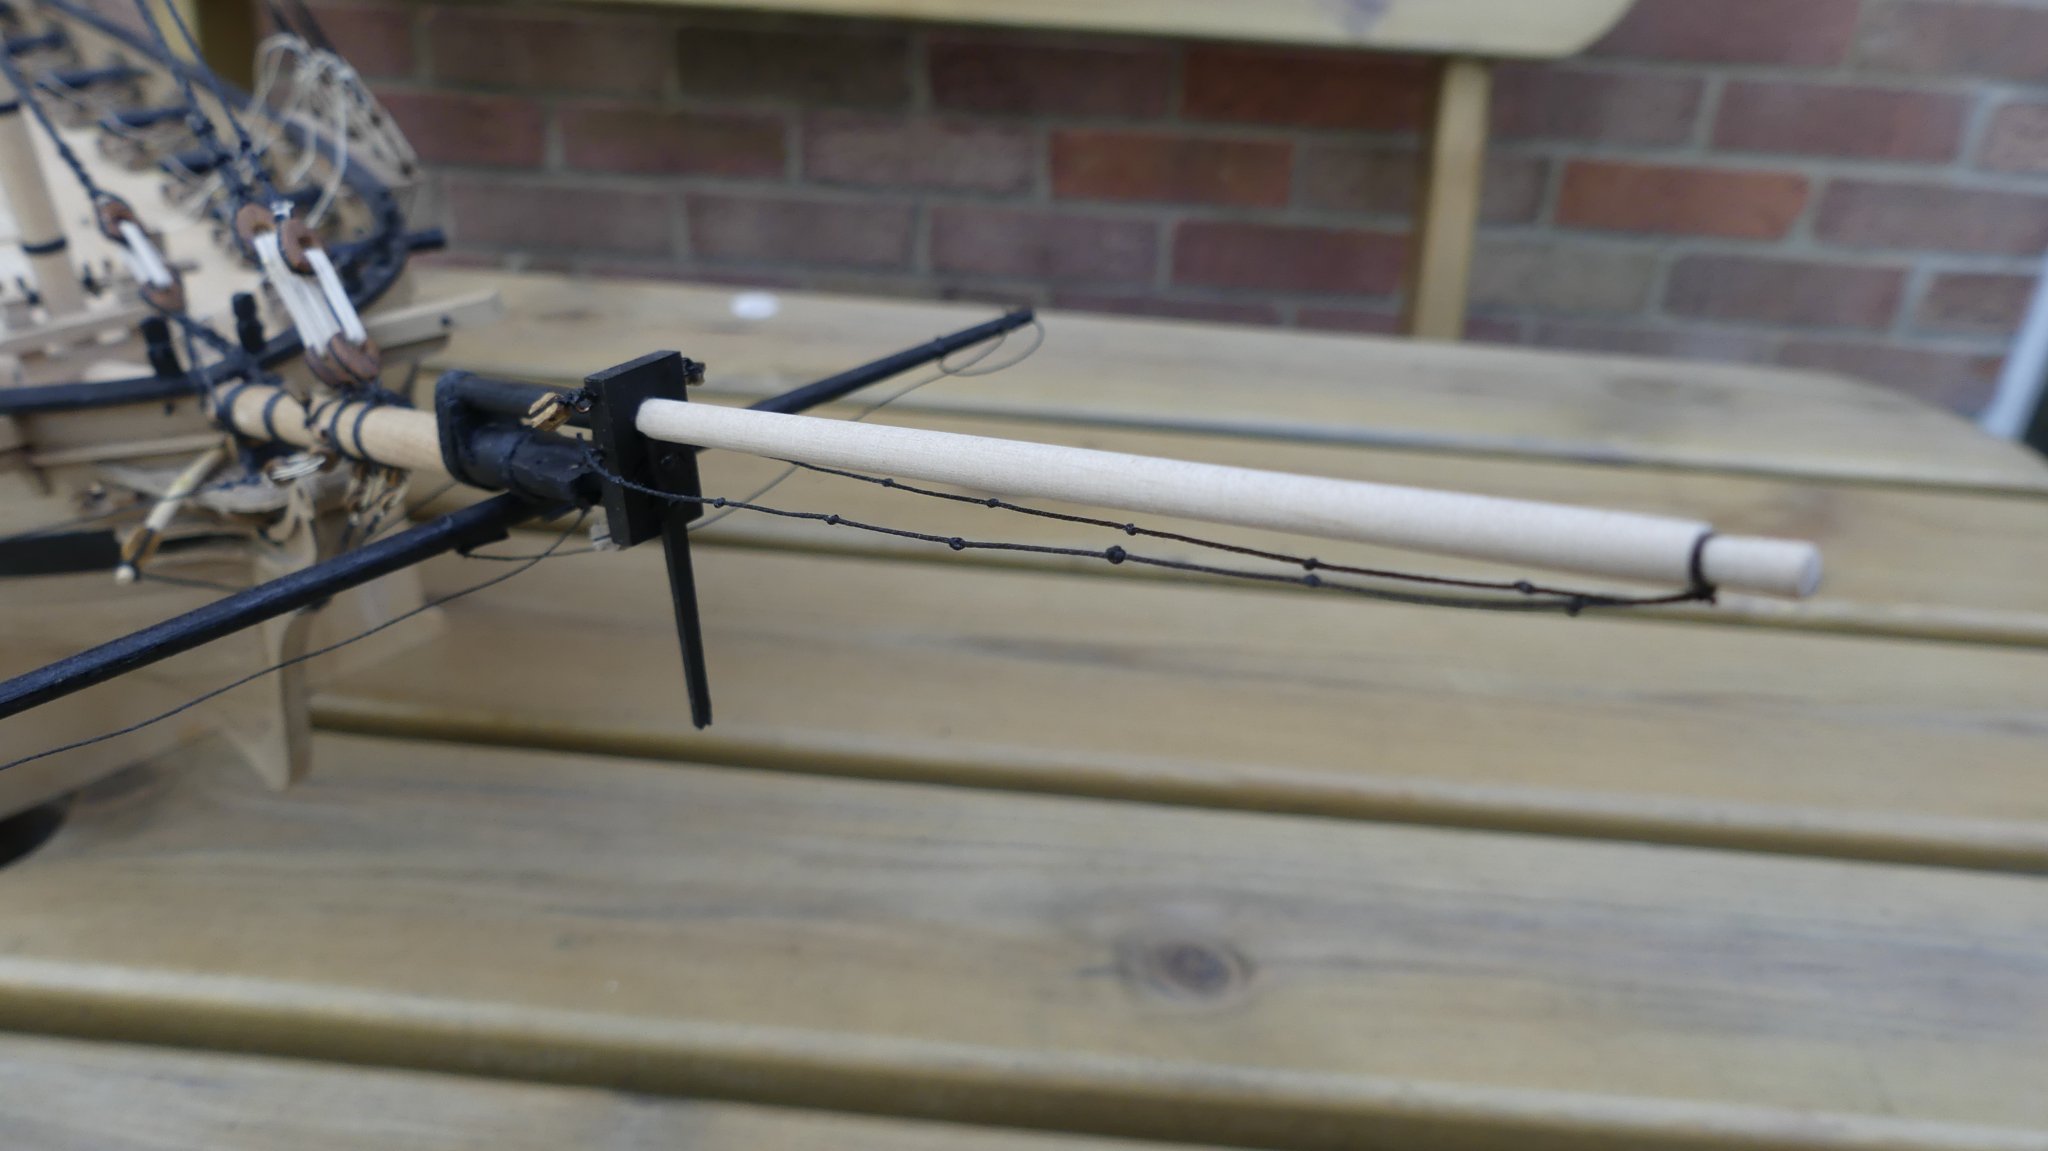
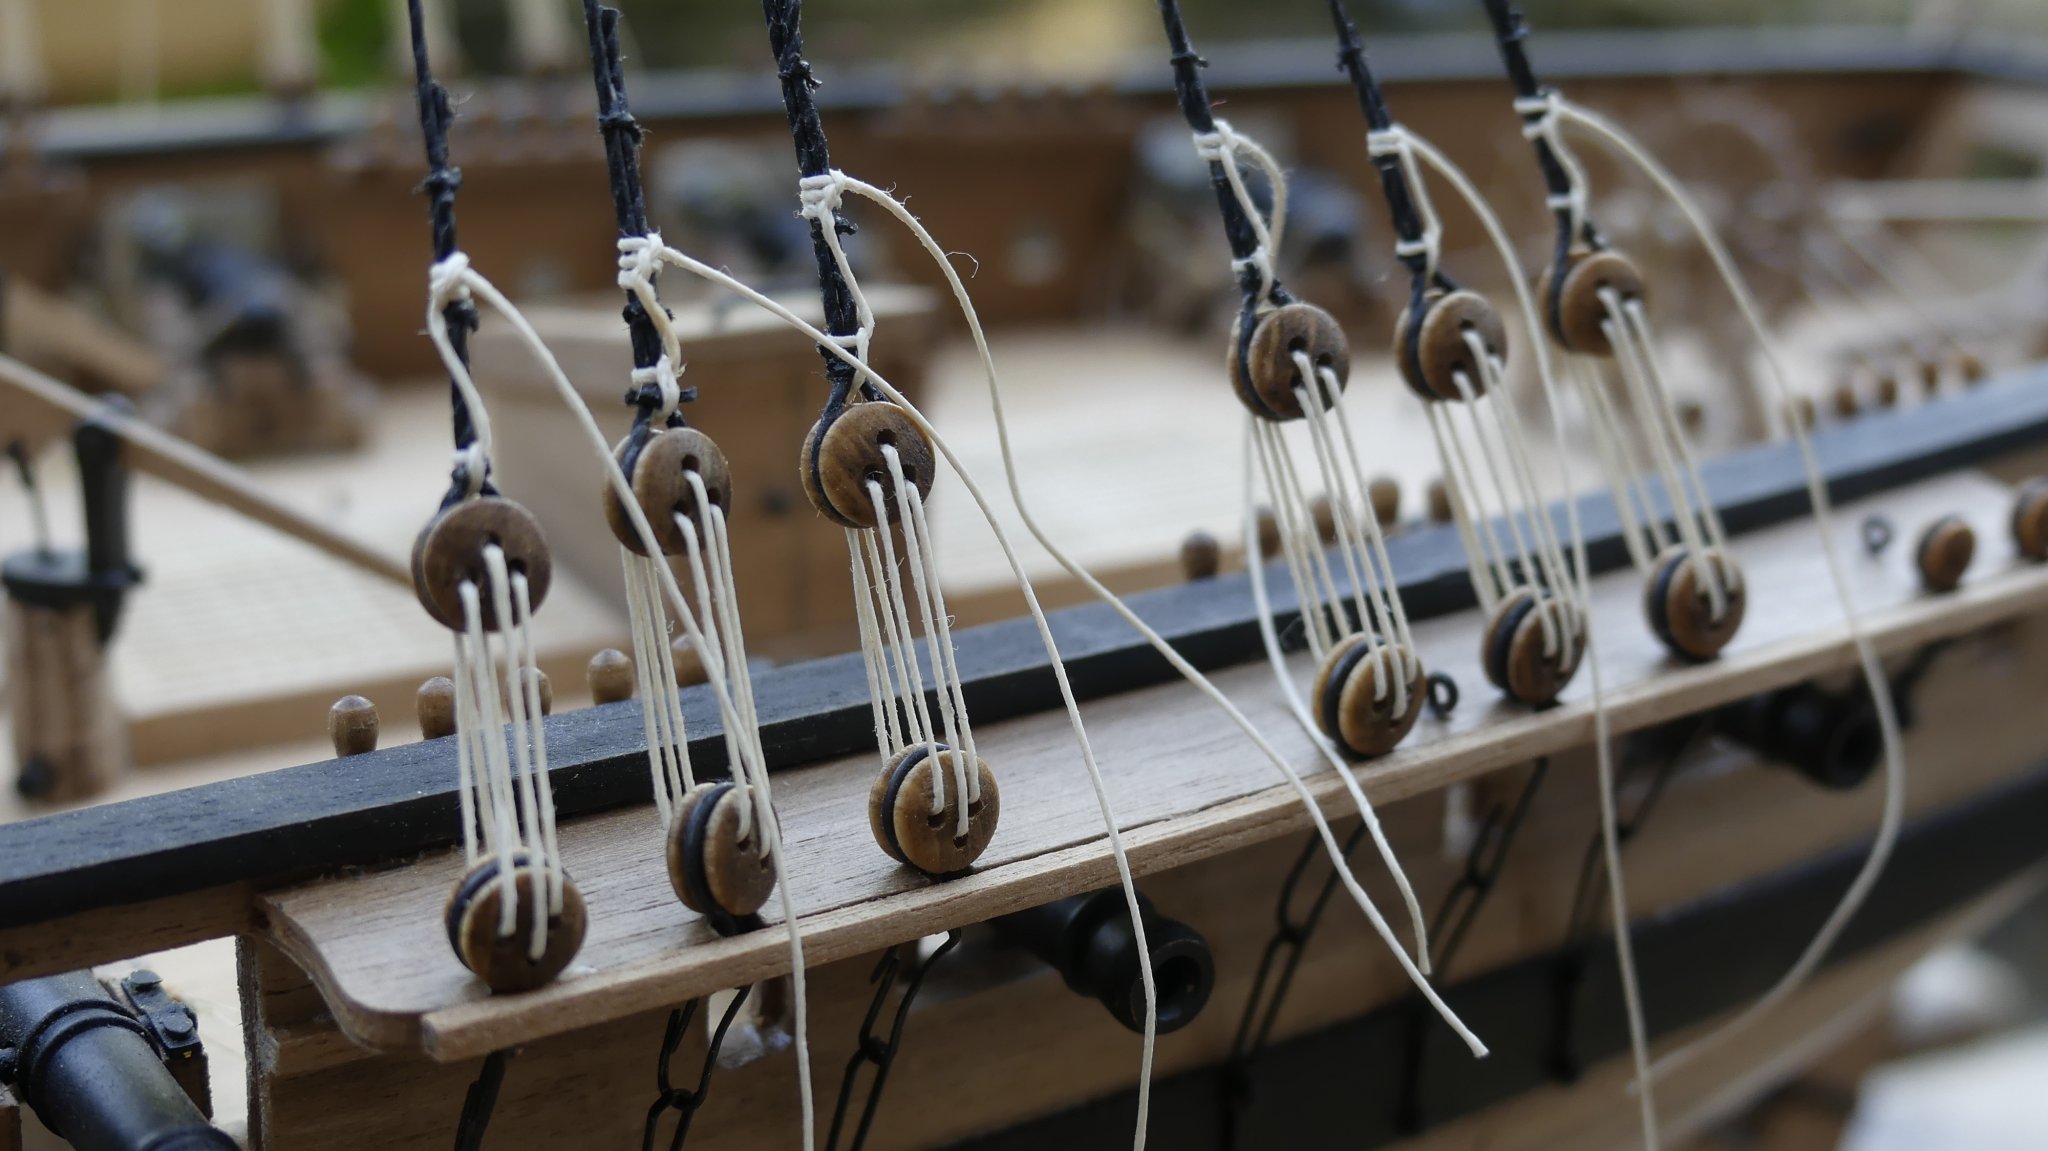
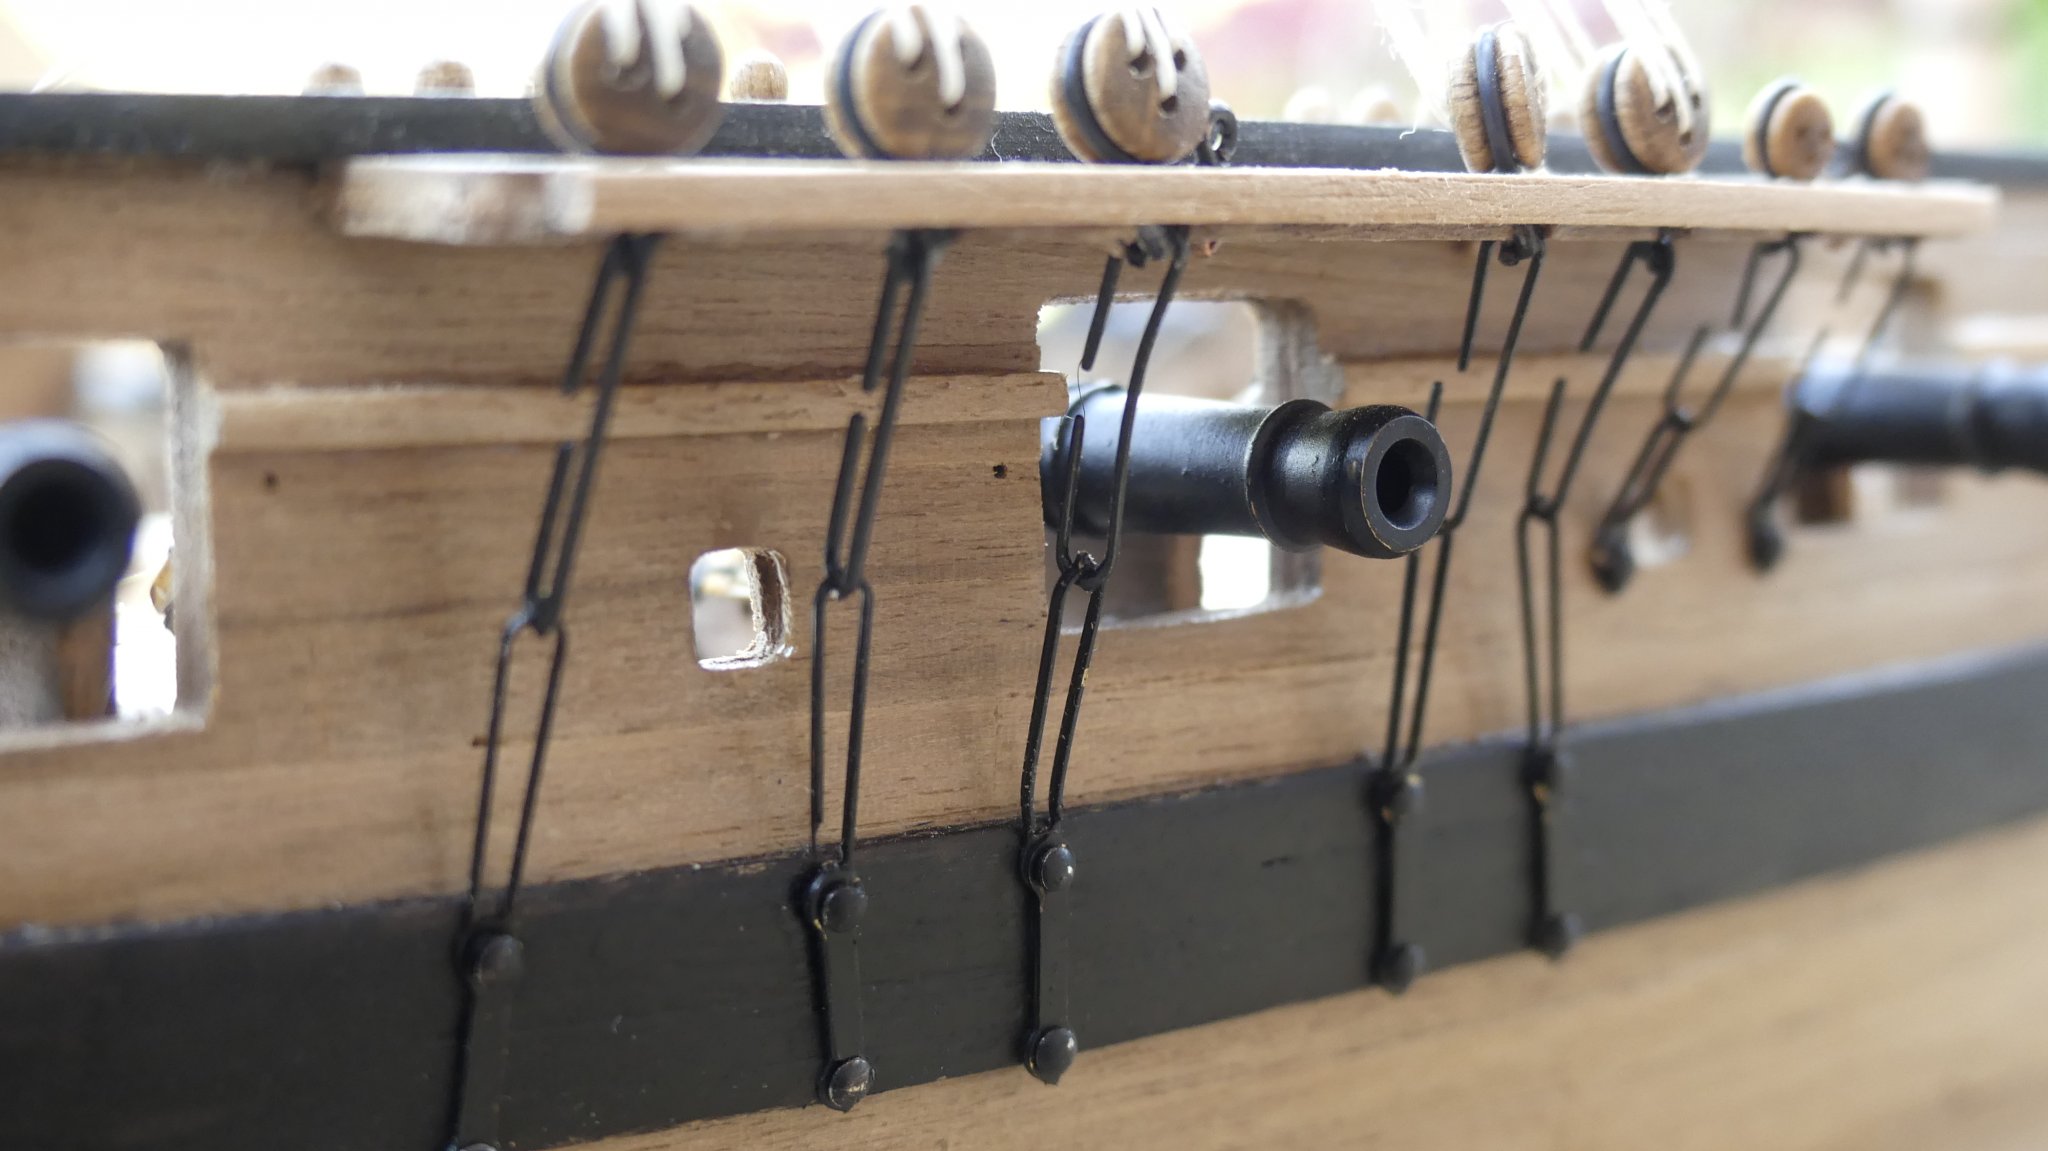
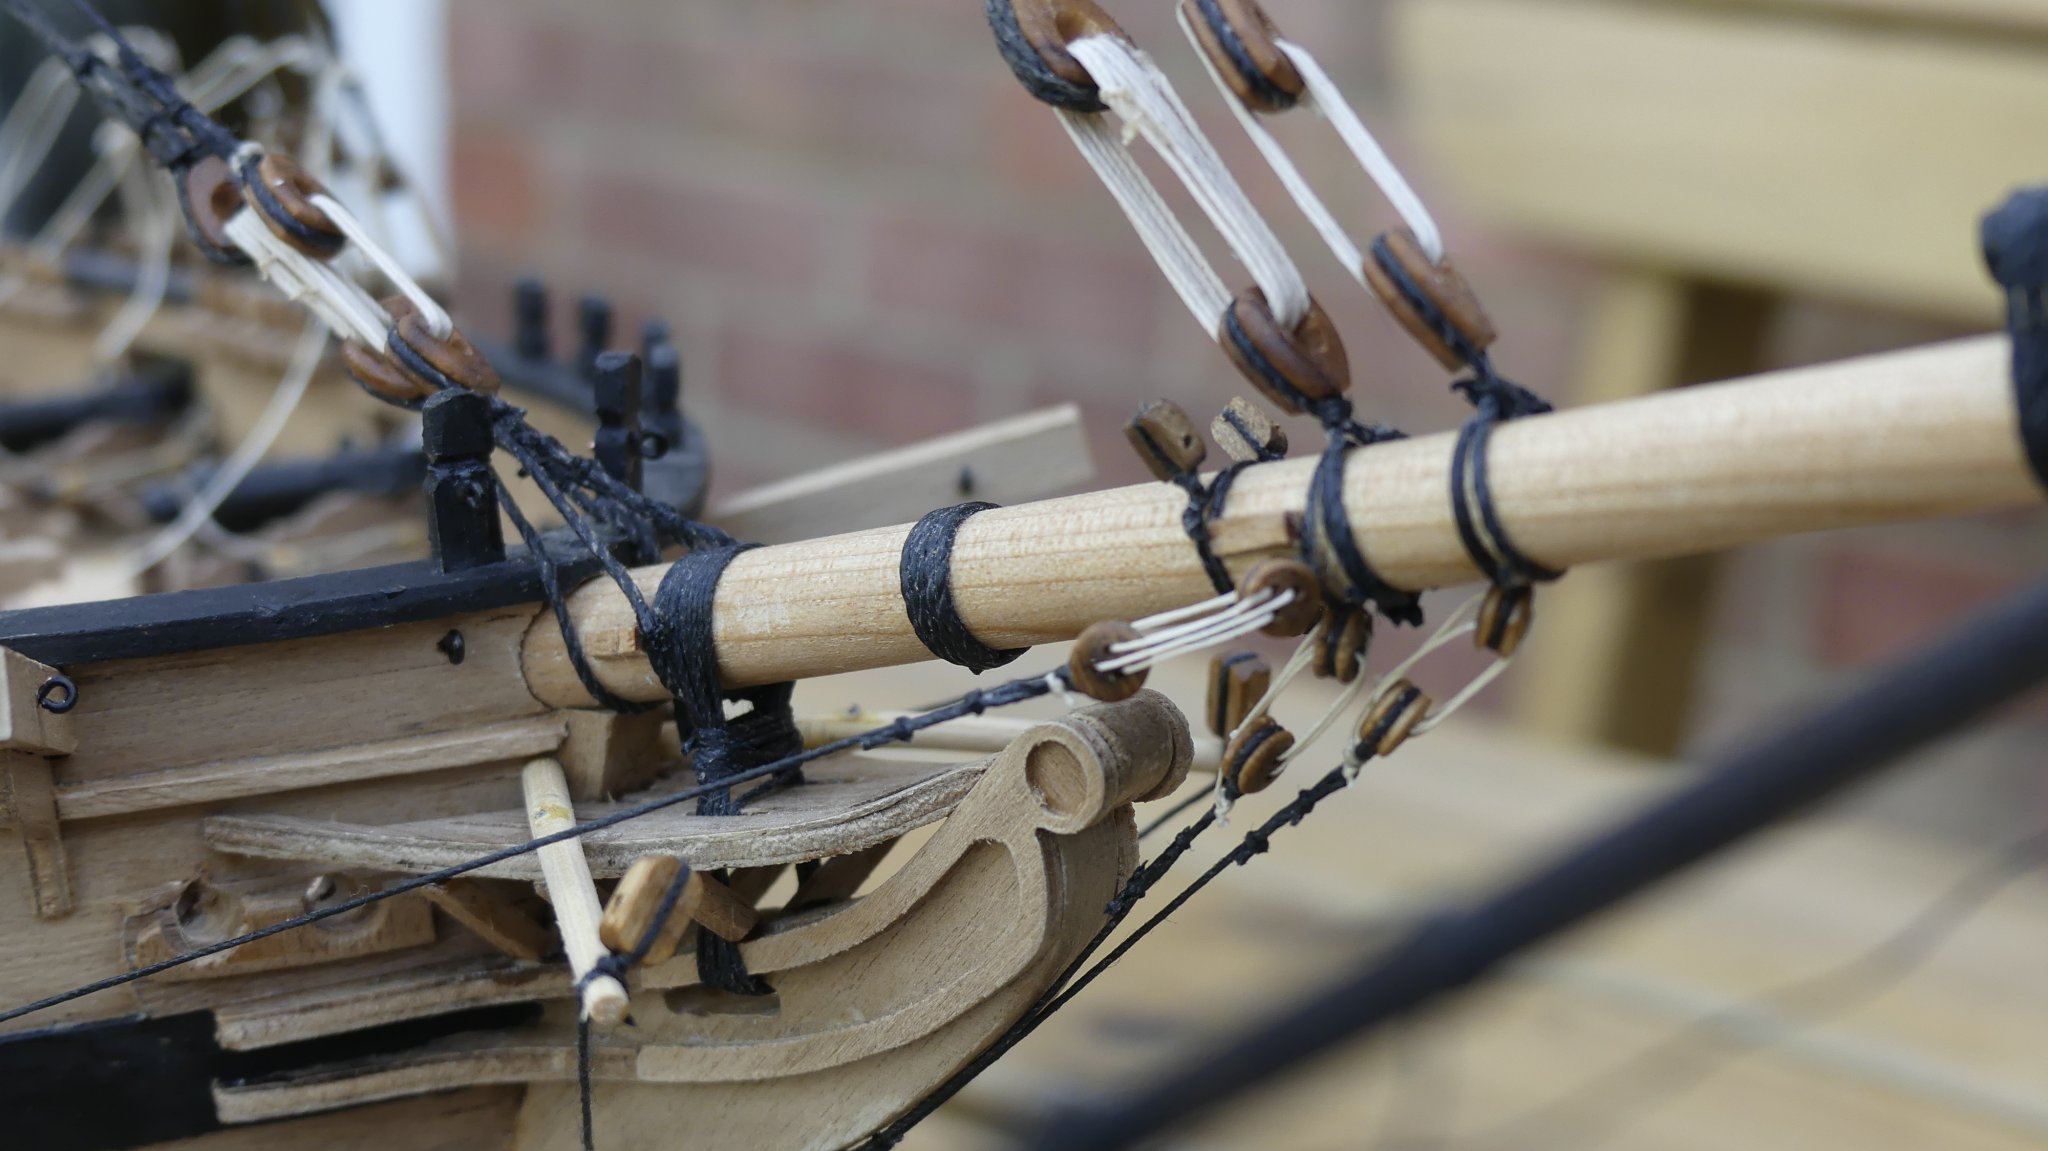
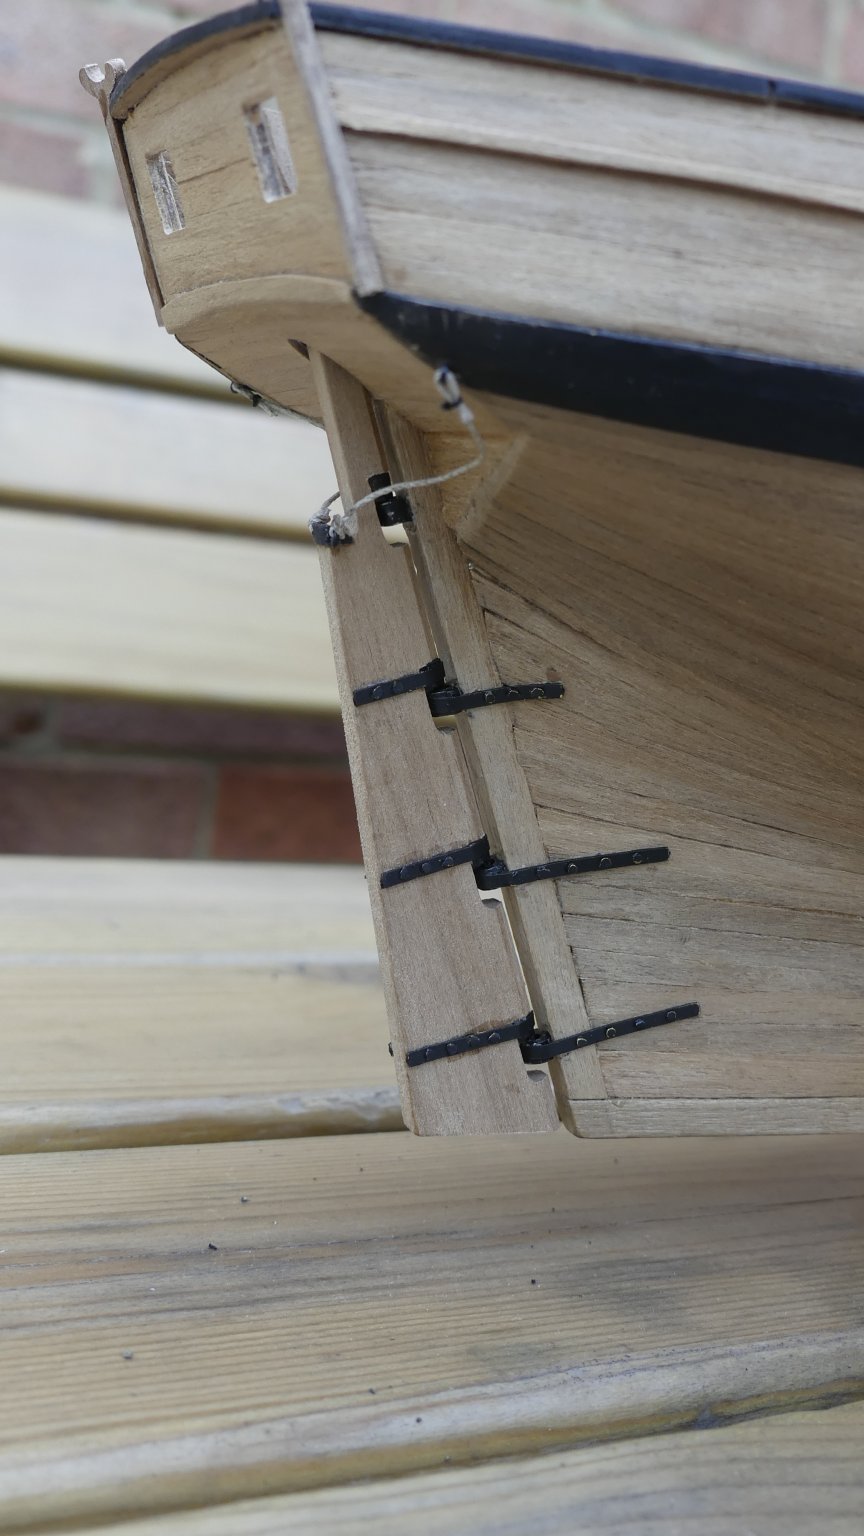
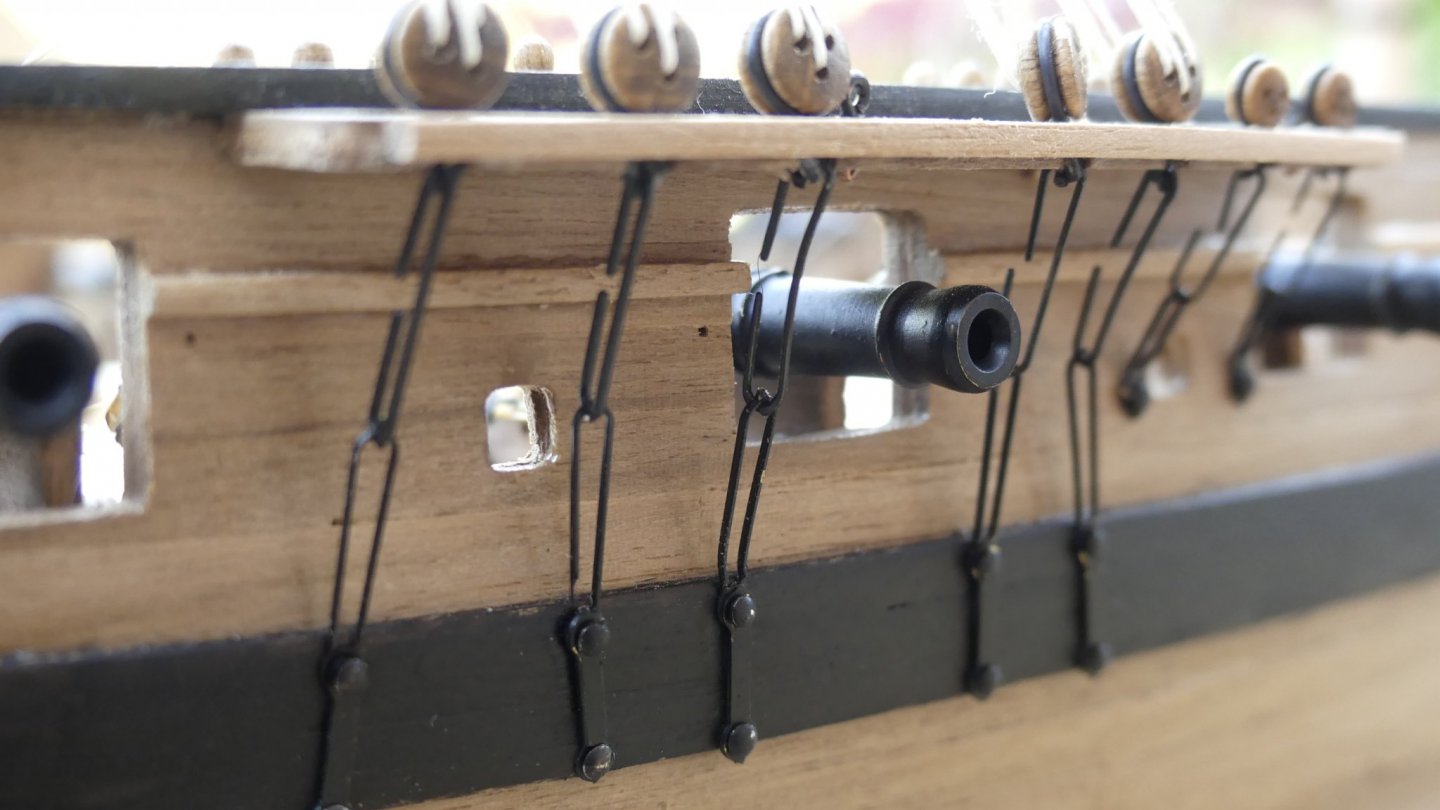
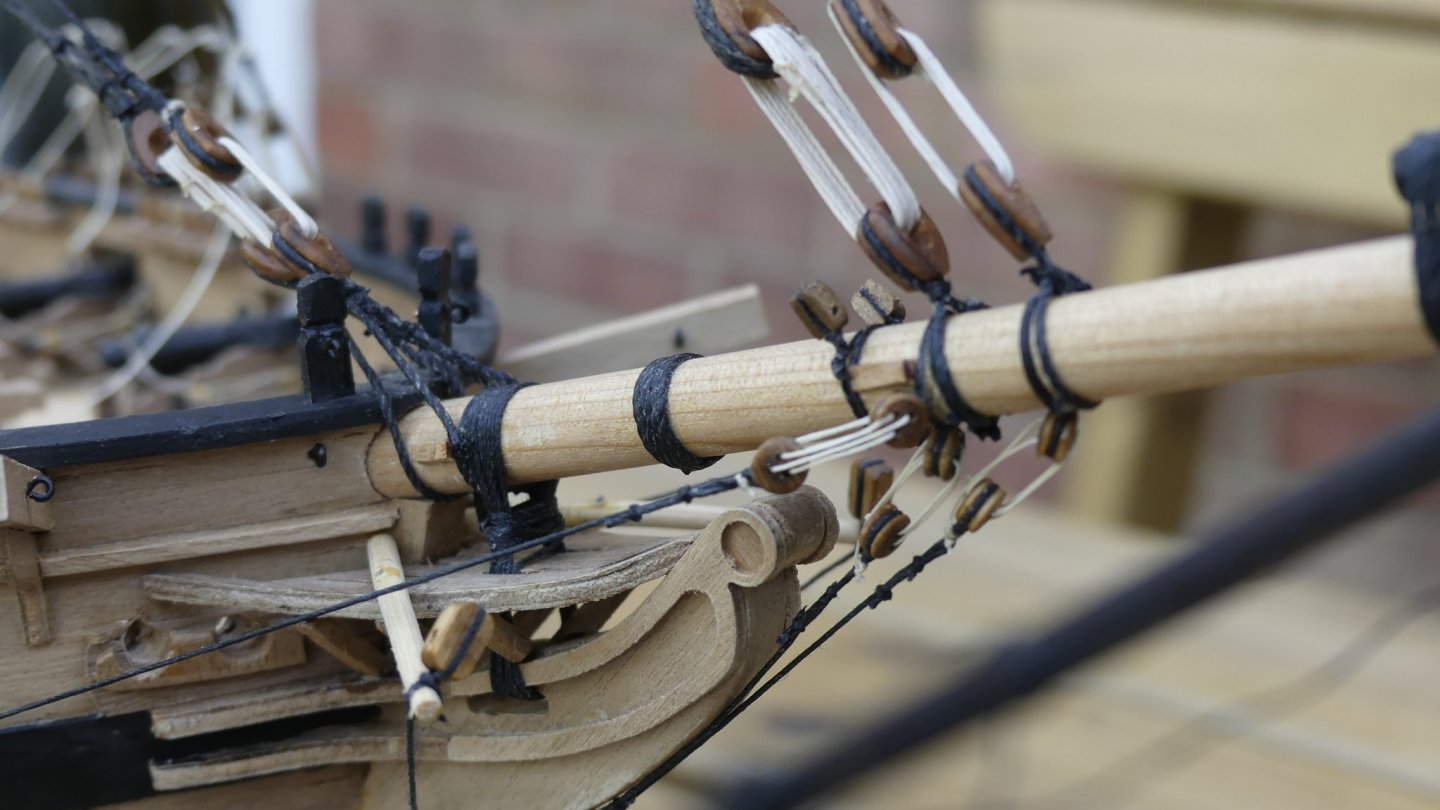
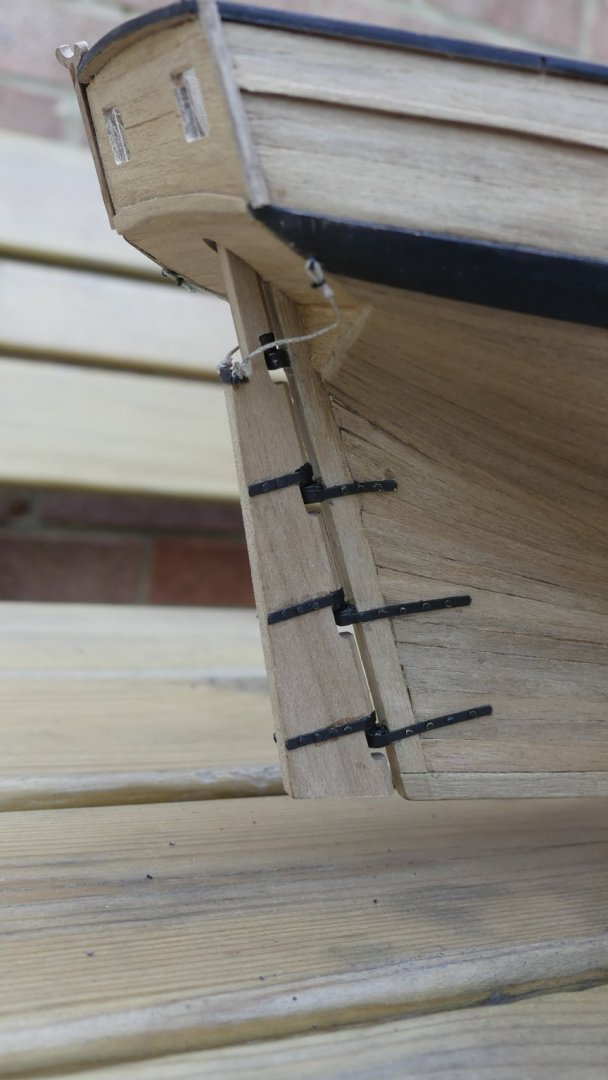
It may be worth noting the bowsprit has rope wooldings. The masts, you will see later has iron hoops. This was my own decision based on information I could find regarding how it was the smaller classes of ships that were used to try new techniques before implementing on ships of the line. Chain plates photographs below. I really struggled with these. I checked and double checked the Wale position but when come to this found the dead eye strops to be the wrong lengths, now photographed this does show these really need some more work. Next photograph shows the shrouds and dead eyes rigged.

- 102 replies
-
- 4
-
-
- cruiser
- caldercraft
- (and 1 more)
-
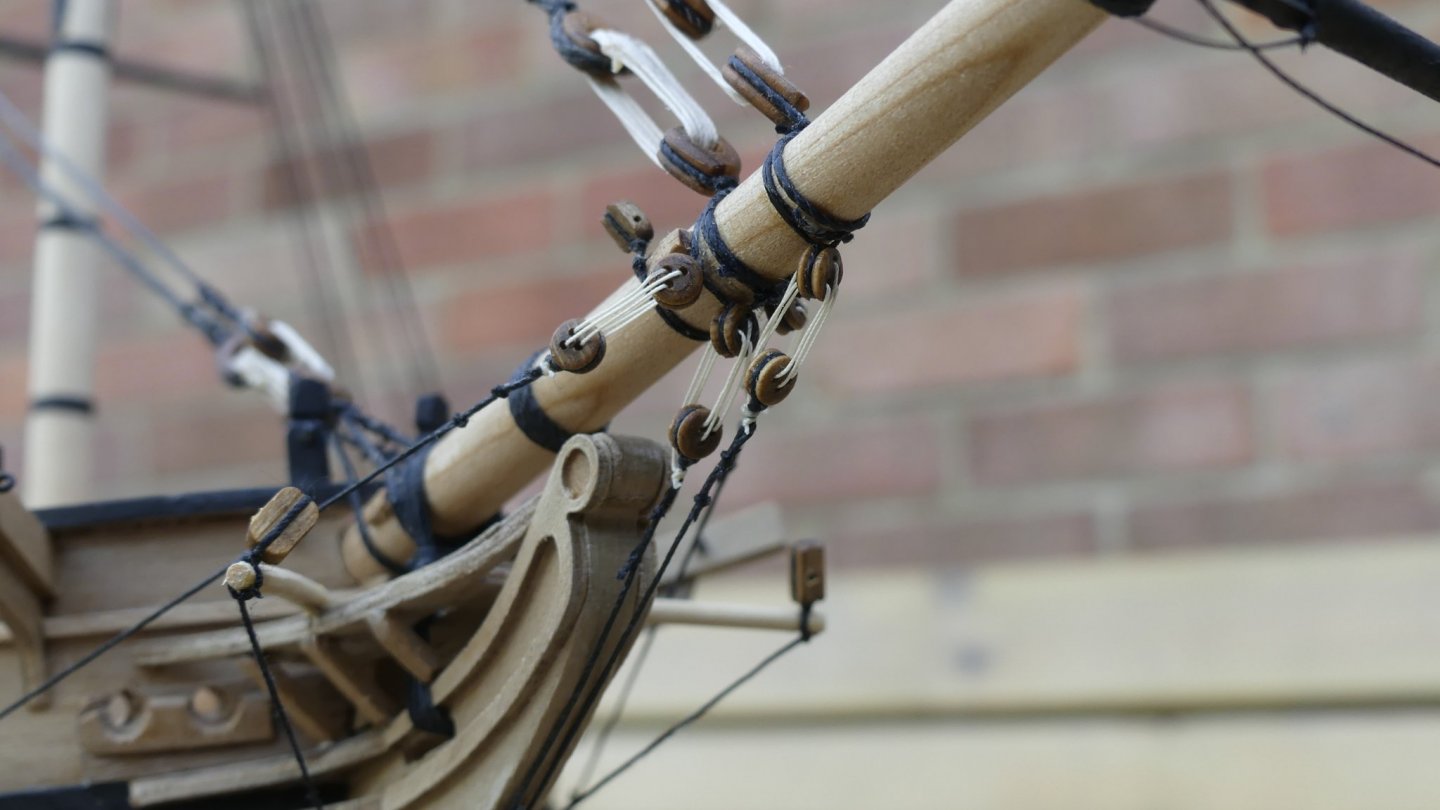
Now moving onto the rigging. I always research my own rigging and compare with kit instructions. Many items were as per the kit but also many not. I will try to point out differences where I remember. First items rigged are always the gammoning, bowsprit shrouds and bobstays. As you can probably tell I have jumped a few stages. The photographs were taken much down the line and you will note that the fore, main and preventer stays have been rigged. If you know the correct order of dressing the masts and yards you will know that to rig these I would also have rigged the mast pendants and shrouds. Unfortunately this is a catch up session as I have not been disciplined with my updates.
- 102 replies
-
- 4
-
-
- cruiser
- caldercraft
- (and 1 more)
-
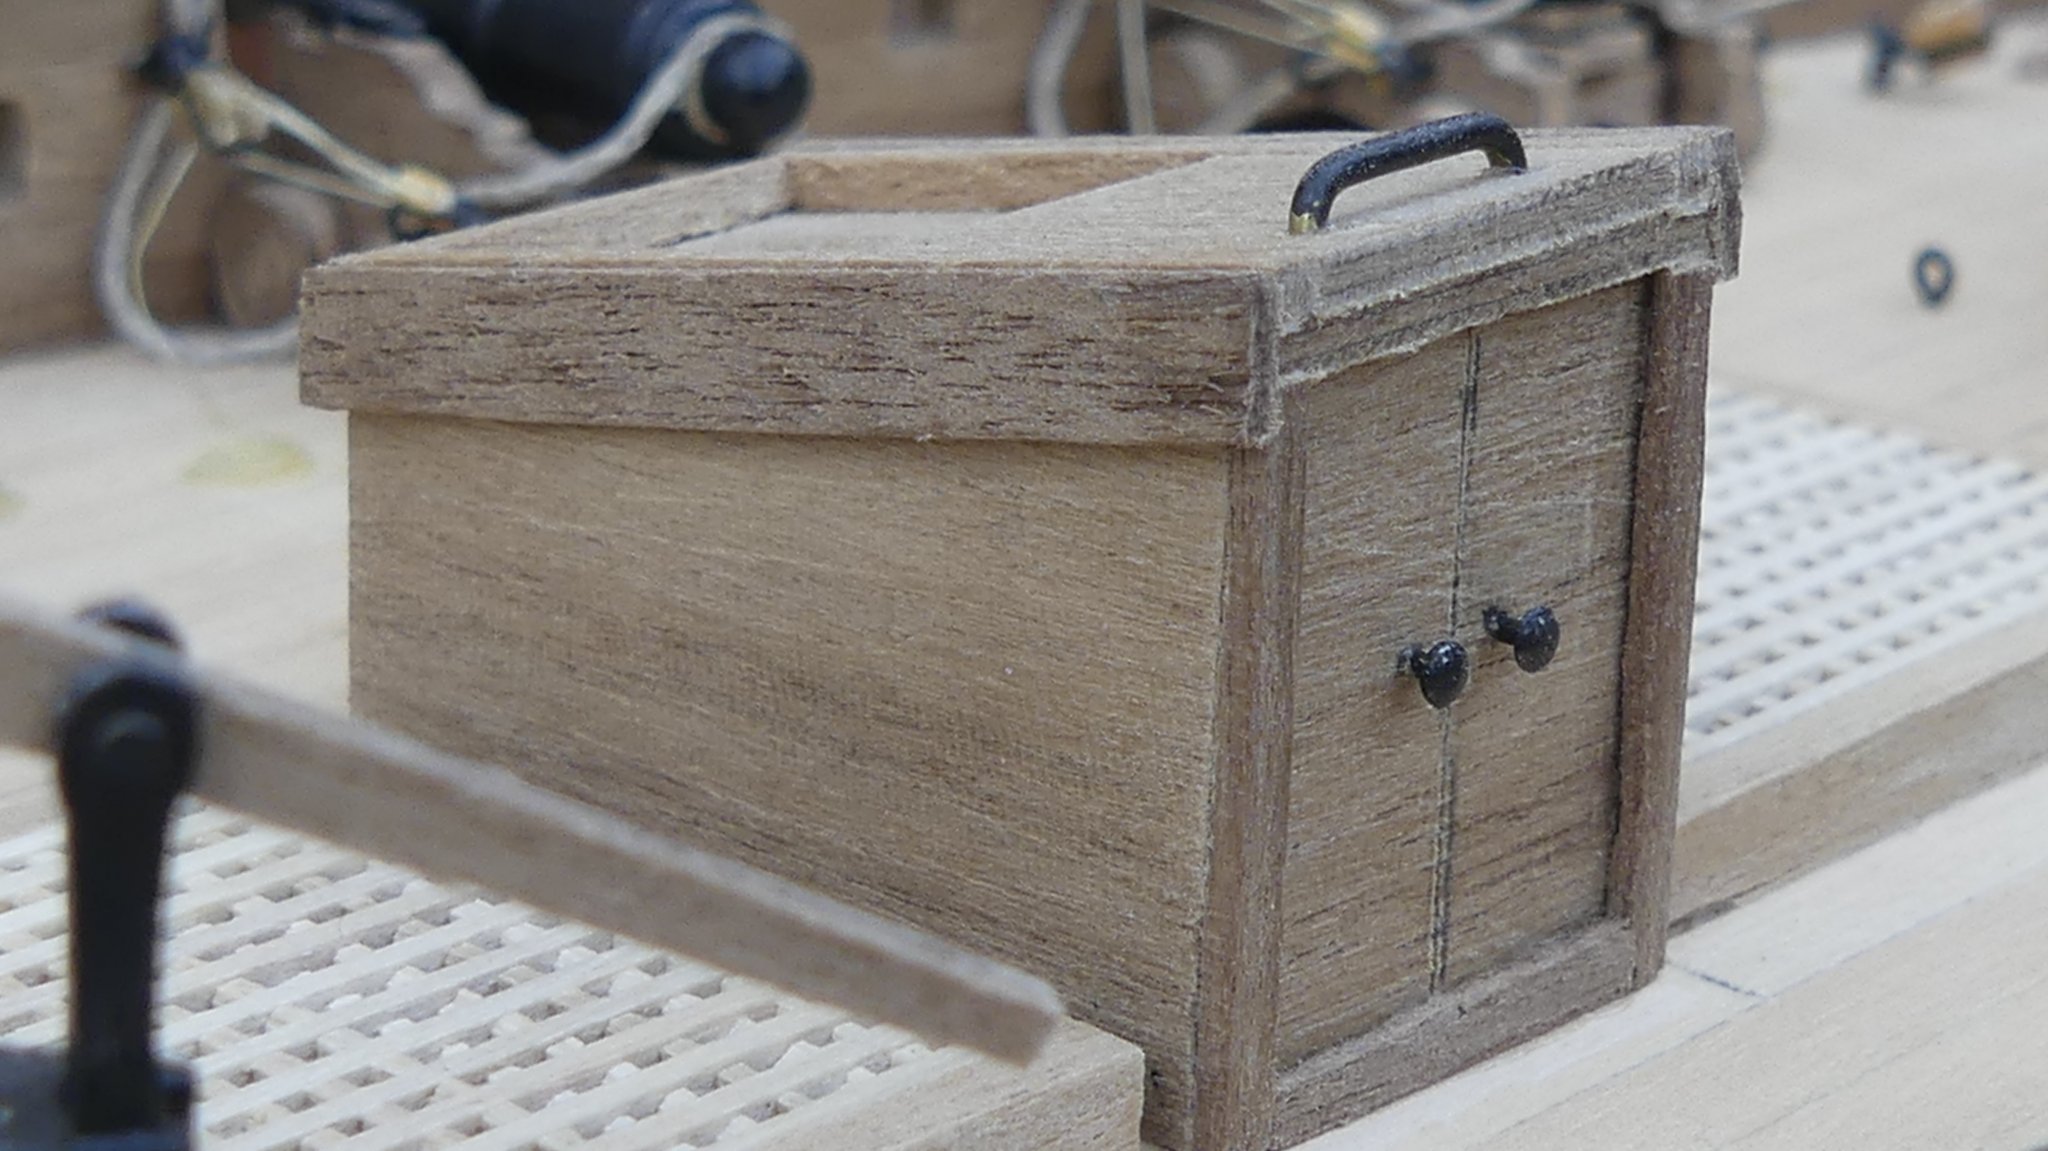
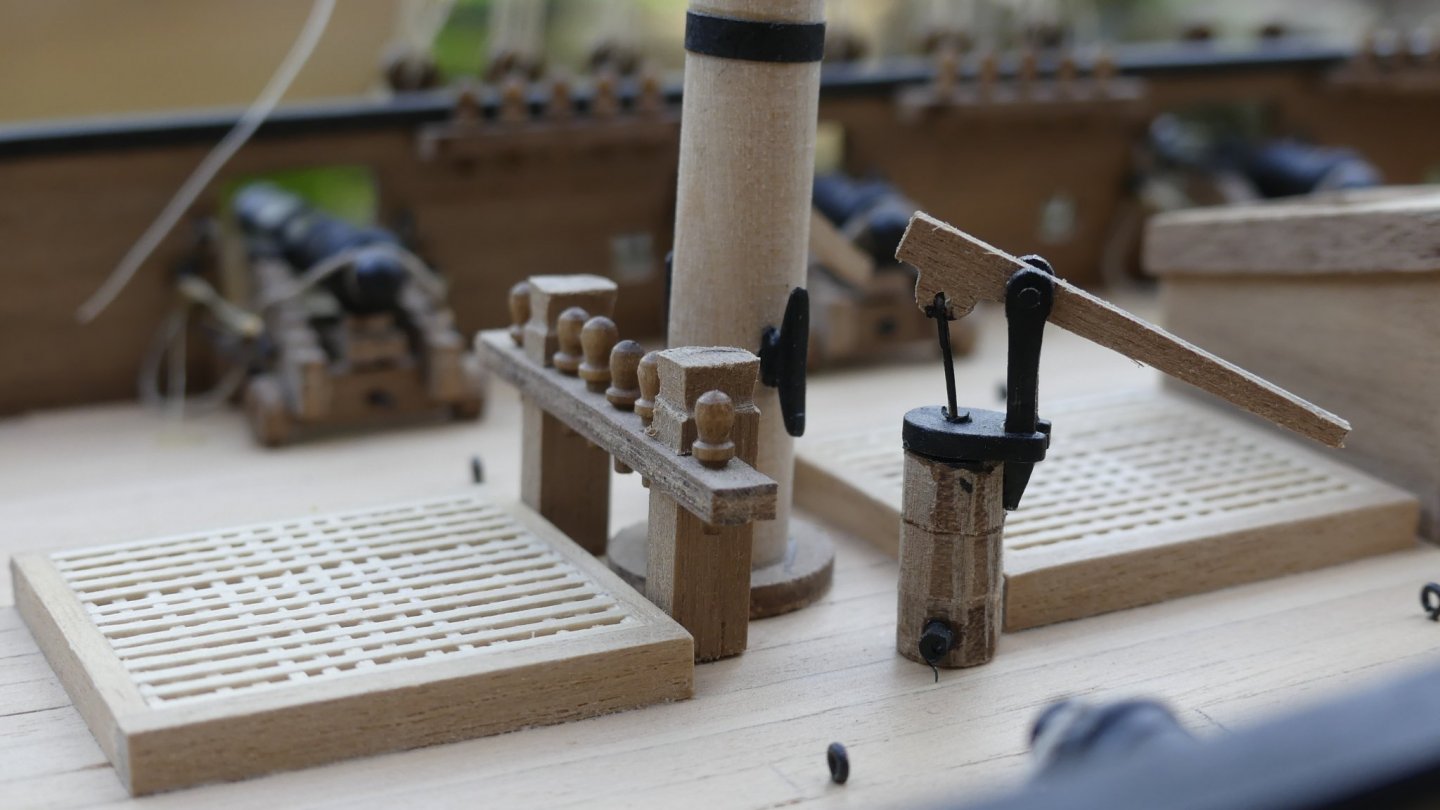
Elm Tree Pumps, Mast Bitts installed. Isn't amazing how you think you have done a good job and then you take a photograph and it shows every little tiny fault. Trouble is you know that with the supplied wood you are unlikely to get it any better.
- 102 replies
-
- 5
-
-
- cruiser
- caldercraft
- (and 1 more)
-
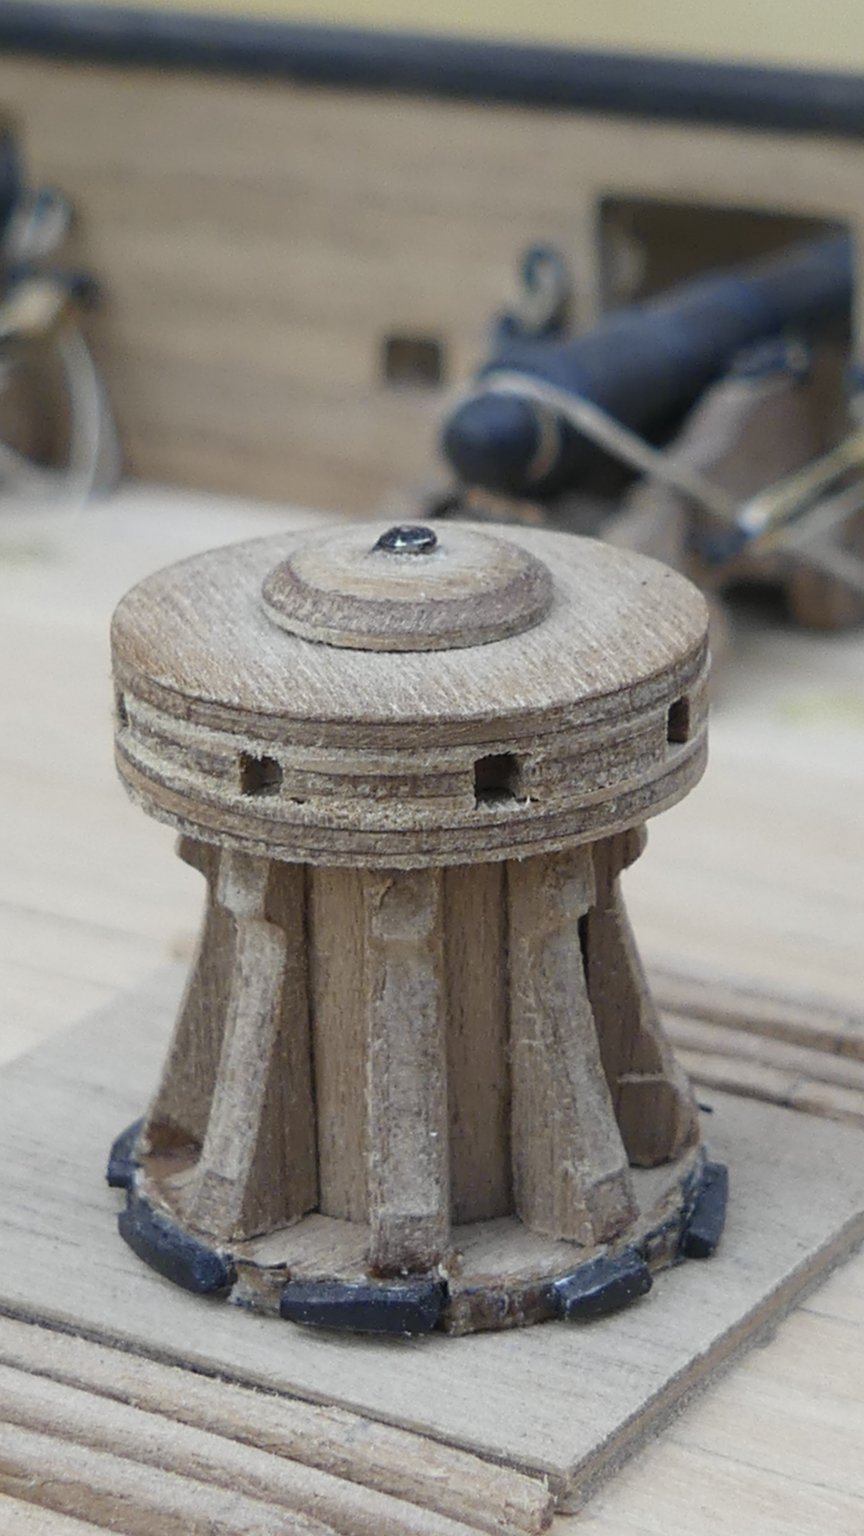
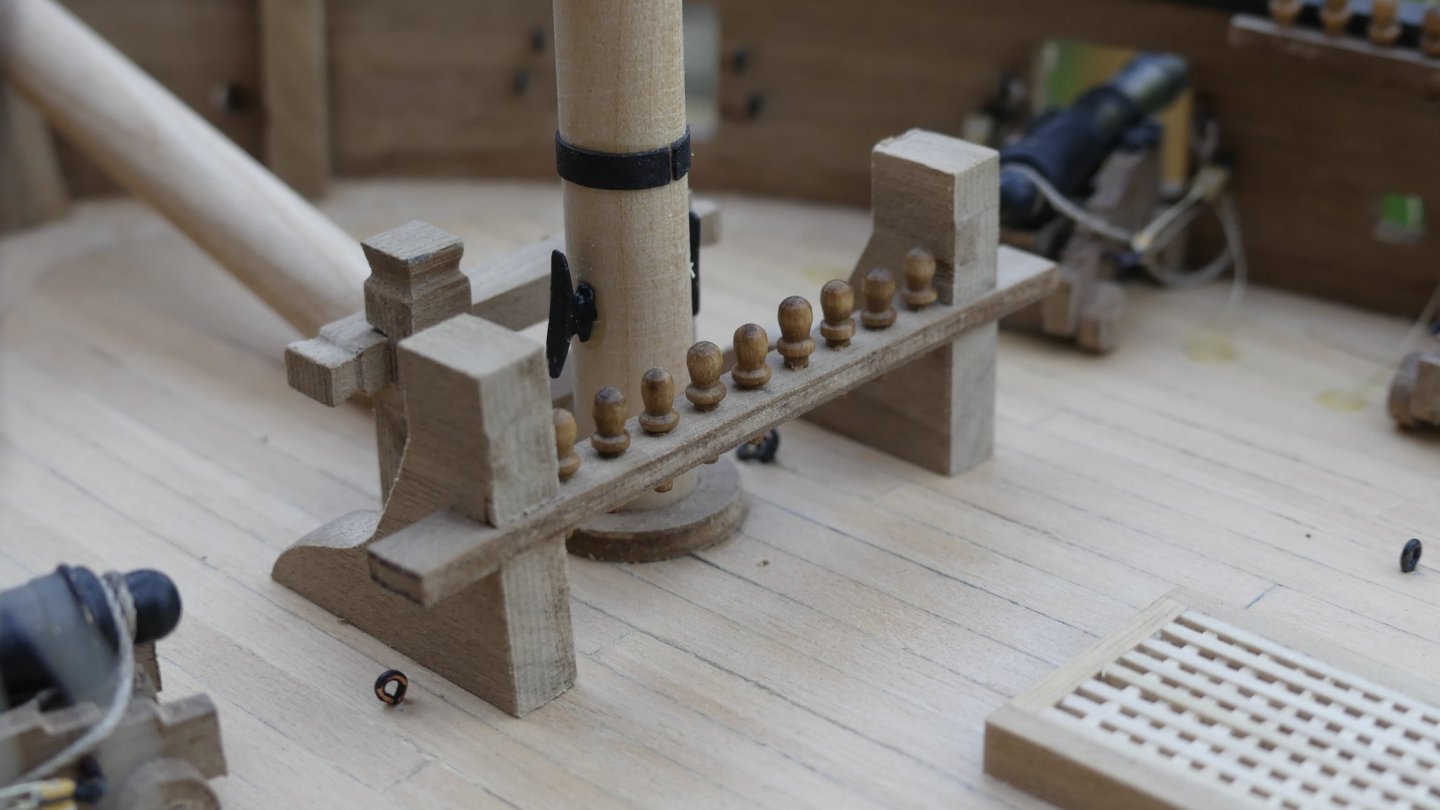
Capstan built and installed with pawls added. Companion way built and installed. Modified due to kit items not covering deck cut out.


- 102 replies
-
- 7
-
-
- cruiser
- caldercraft
- (and 1 more)
-
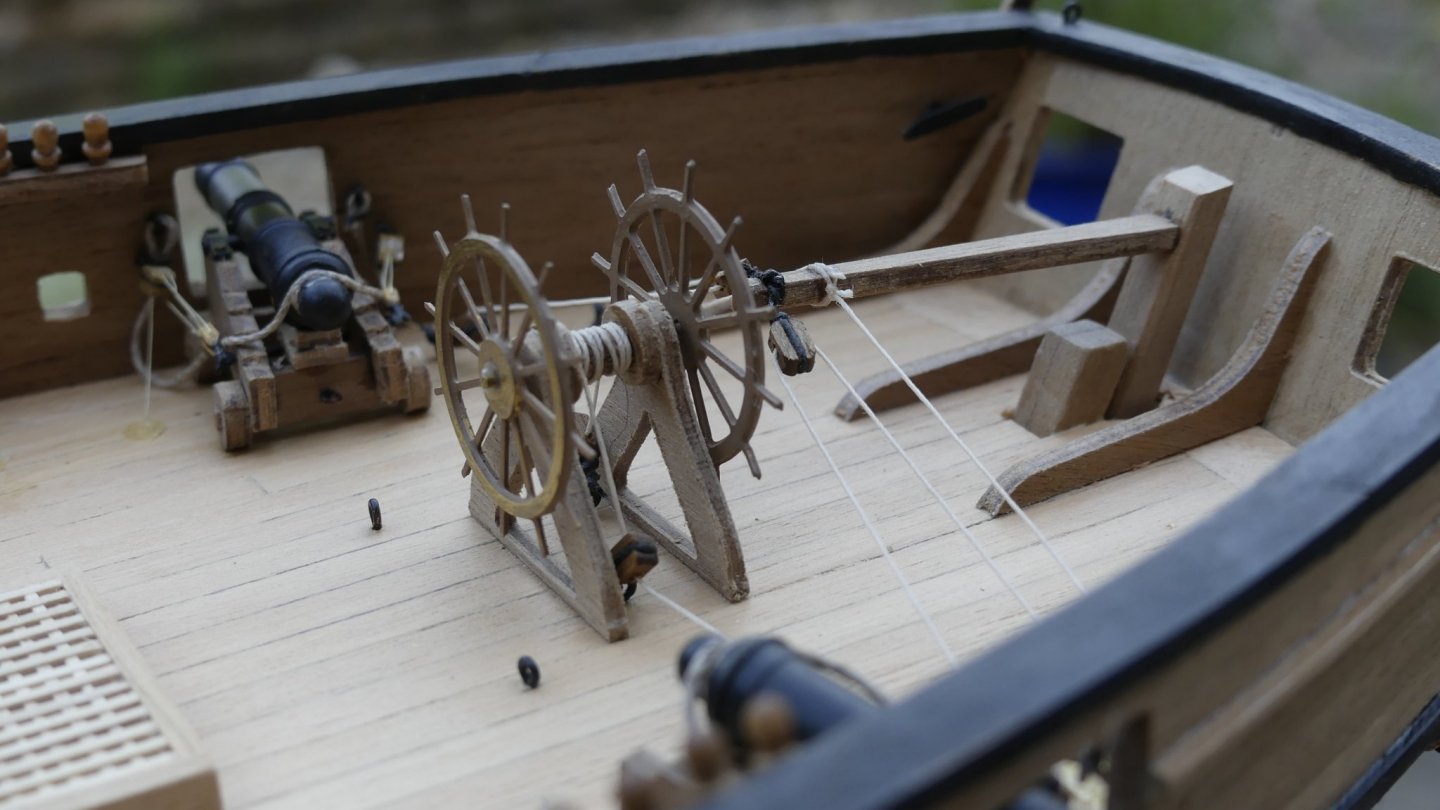
I have been asked for an update so here goes! Model moved on then had a break to finish some old OO gauge kits. Rudder shipped and rigged. Ships wheel and tiller rigged. You also get a good shot of one of the cannons installed. From memory found tiler length incorrect to kit and had to position ships wheel different to plans due to this.
- 102 replies
-
- 8
-
-
- cruiser
- caldercraft
- (and 1 more)
-
When have you actually passed the halfwaypoint in building a kit?
Thunder replied to Vane's topic in Wood ship model kits
Once the masts are stepped I start to feel that I can see the light at the end of the tunnel and start to plan the next build. -
If you go into advanced search on ebay and select ended items you may just find some that sold recently and what they went for.
-
Many years ago I experimented with the elastic that is used in the cuffs of knitted jumpers. I used it on the Pyro 'Bon Homme Richard'. It must be 18 years now and it is still ok. I never used it since just because it was clear in colour so all needed painting. What was left got used for securing baits to keep them presented correctly whilst sea fishing.
-
Hi, Has anyone ever used or seen this product? https://www.migjimenez.com/en/83-rigging If already covered then please remove this topic.
-
From Memory the hackney book covers: short History of the ship Colour scheme with tips on painting methods Extra materials and tools. Short cuts to the build which is more like a simple list of modifications. Advanced modifications Step by step build sequence which references each modification at the stage it needs completing. Step by step rigging instructions of standing and running rigging Step by step rigging instructions of sail rig either under sail or what would be rigged during harbour rig. What is so good about the book is the rig can be adopted for any version of the kit. The two others in the series, Mayflower and Cutty Sark are equally good. The mayflower for tips on painting to simulate wood.
-
Hi, I should stop now and read the book if you want to use it. There are holes to drill and blocks to fit under the mast tops that you will not be able to do once they are fixed in place. I used the airfix masts and yards and the only one pulled out of shape is the sprit sail yard. This is after all those years. I didn't use the airfix threads but the book tells you possible sources and how to check they are the correct sizes. For the smallest I use Fly tying fishing silk thread. Then guttermann and the largest is Twilleys. Blocks are a mixture of lead fishing shot, wood and home made out of strip styrene. get the whole strip, run groves along whole lengths on each side using a draw knife, drill holes and cut to length with flush cut miniature electrical side cutters. Cut the correct way and it even rounds off the edge. String all onto a length of wire and paint brown. Can make doubles and trebles the same way.
-
Hi, My method of painting to look like wood is the total opposite to above. I paint the lightest colour I see in the wood then make a wash of thinned enamel paint of a darker brown and apply to individual planks, I will then add a little burnt red and pick out a few more planks and few already with a wash on them. Continue till you get the effect you want. Finally a dark wash applied with a small brush to capillary into the plank gaps.
-
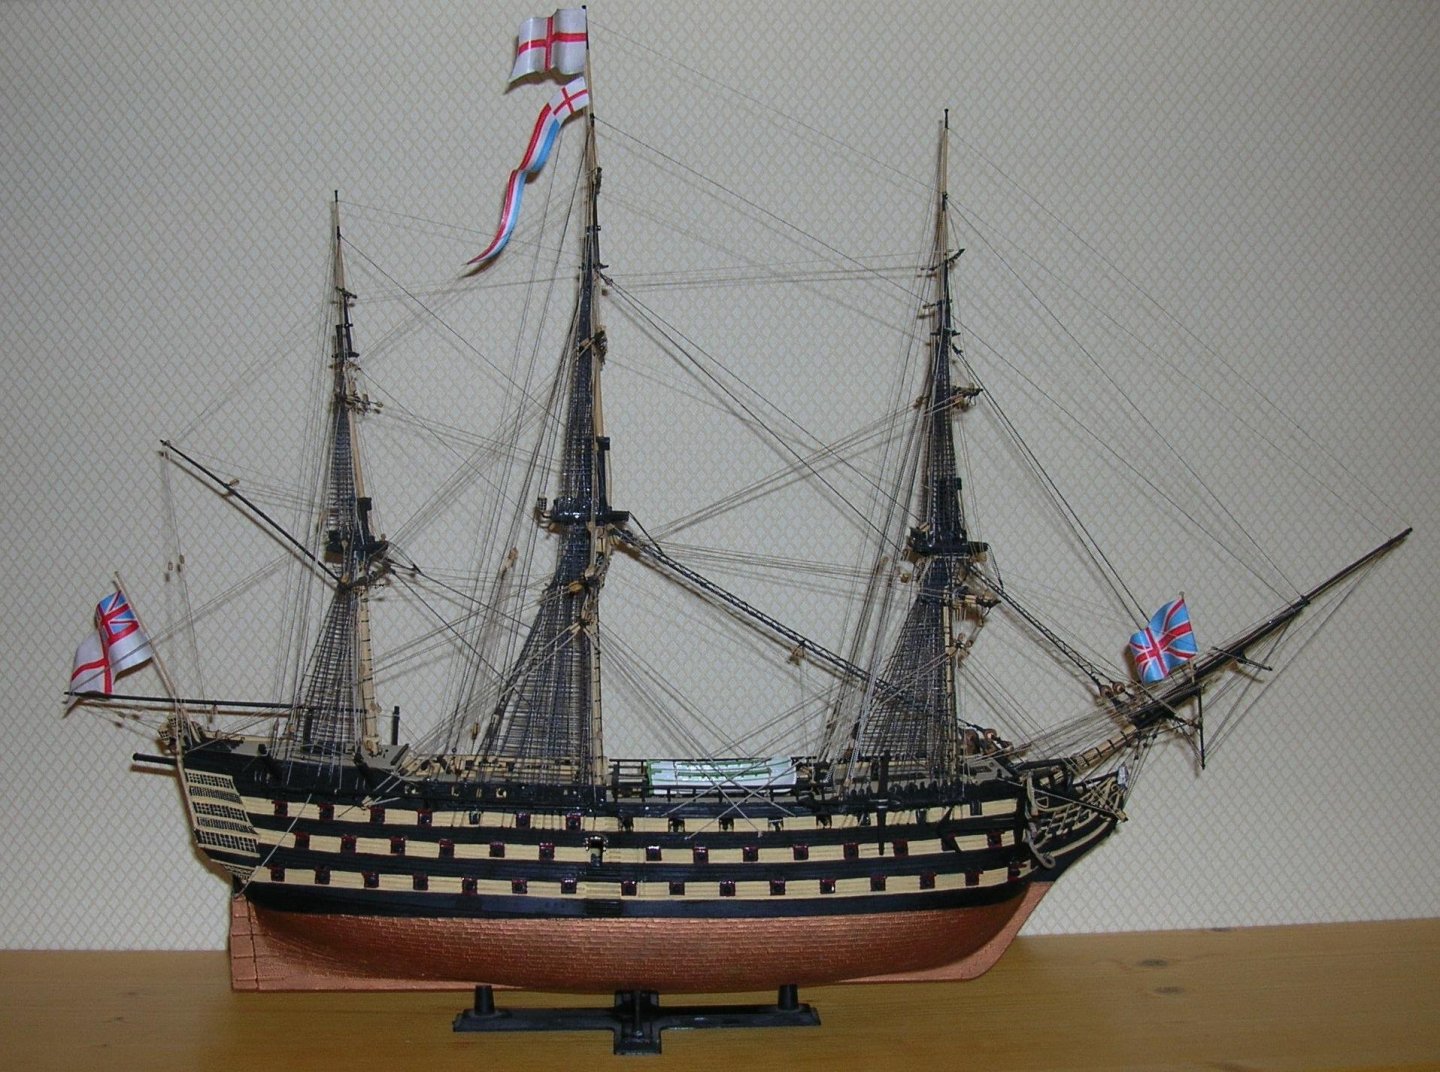
Hi, Definitely make use of the Noel C L Hackney book. I built the Victory Airfix kit 30 years ago and it is still on display, Actually in the lounge at the moment. You can see her in the back ground of my latest build. His 'order of dressing the masts and yards' is what I still use today. The step by step method makes sure you get blocks in place at the right time so not to make it more difficult later. Combined with the James Lees book I use it for any age sailing warship.
- 190 replies
-
- 10
-
-
Hi, I am sorry no one has replied to you. Would it be worth you searching for builds of this kit and requesting instructions from them directly? Adrian
-
Heller 1/130 scale Cutty Sark Instructions Search
Thunder replied to RustyNail123's topic in Plastic model kits
I always thought that the Heller cutty sark was a re-badge of the Airfix kit, as is their Wasa -
I think what you are asking for is very difficult to answer unless you have owned or, even better, built the kit. I could generalise by what manufacturers I have brought from and from this I would say to avoid any of the Italian kits over than Euromodel but even them only go for the Mordaunt or William as the others are completely fictional. My experience is below: Sergal's racehorse - avoid!!! absolute joke. Panart's Royal Caroline, hull inaccurate just a fare representation Caldercrafts Chatham - yes, matches the plans in GMM Caldercrafts Cruiser, matches plans I have of a sister ship other than simplified head rails. Corel's Resolution - no such vessel but very close to the Ferrett Corel's Unicorn - No, too much work to make accurate so I sold it. Caldercraft's Pickle - Unsure as no accurate drawings exit. Caldercrafts Supply - I think so other than a mistake with one bulk head, spacing of gun ports and debate over stern galleries. Caldercrafts Diana- not built yet but looks fare to me. Old design of kit. Caldercrafts Granado - yes Caldercrafts William - yes Caldercrafts Mary Rose - only as good as present knowledge of ship Caldercrafts Victory - as Mary Rose. Constructo's Halifax - a representation Mamoli's Mary - A representation concerning mouldings but hull not bad Rhoda Mary - A representation Revell's Rattlesnake - Actually seems to match the model shipways lines accurately but not sure if these are accurate. Caldercrafts Bounty - seems fairly accurate Caldercrafts Endeavour - jury is still out until I build it. Lauck Street shipyard - fair American You would think so but gun ports have been moved to make easier. (not built yet) Model Shipwrights Speedy - yes but difficult to come by and old design. Victory models Lady Nelson - made up, no such ship. Billings Mayflower - no one really knows for sure. Billings Gothenburg - keep away from this one.
-
Went with the metal bands, not due to kit instructions as probably flawed but because I believe new inventions were tried on smaller classes of vessel and would like to think it was tried on this one. If went by James Lees would have been wooldings but, as with most reference material, these books deal mainly with ships of the line. Come on Ian McLaughlan, when are you going to do volume two to fill that gap??
- 102 replies
-
- 3
-
-
- cruiser
- caldercraft
- (and 1 more)
-
Sorry, got to ask, is that the fuselage of a sopworth pup in the fore ground?
- 82 replies
-
- 1
-
-
- artesania latina
- cutty sark
- (and 1 more)
-
I know I have been bad in not posting updates but I now need some help. If there is the interest here I will bring it up to date. What I need help with is below. I have got to the stage of building the lower masts and can not decide on metal bands, as the kit instructions suggest, or rope wooldings. My reason for uncertainty is that the kit has cannon and so assuming is portrayed as built which would be 1796. I can find no mention of the metal hoops replacing the wooldings before 1800. Even though I have this detail I also know that most references are very deficient regarding these smaller war ships and I also know that the smaller warships were always used for testing new technology. This means any rigging details can swing either way. The construction of the caldercraft lower masts is closer to the woolding pre 1800 method but again this does not allow for the transition period that 1796 sits firmly in. would appreciate anyone's thoughts or results of their research.
- 102 replies
-
- 1
-
-
- cruiser
- caldercraft
- (and 1 more)
-
If you want to set the height of the gun port from the deck you can make up one of the cannon, sit it on the deck and mark the centre point with the cannon barell. don't cut it to full size as one you have the cannon able to protrude it will be slightly lower due to the camber of the deck. Therefore, best to remeasure once having a hole for the cannon to be pushed through. Not sure if this is what you were looking for but hope it helps.
-
what are these boats worth if anything?
Thunder replied to Probate1's topic in New member Introductions
Hi, Unfortunately built models never realise their true value unless built under a commission. You never really see them sell well on ebay. Your top model is, best guess, a Mediterranean ship rigged merchant vessel similar to a Genoese or Venetian but is not an accurate build so would be only symbolic. The lower is a Chinese Junk ( Don't be offended this was what they were called). Neither are what I would call a scale replica model but more what you would find for sale in a seaside souvenir shop. Not sure how the Junk is constructed but the top one may well be plank on frame so someone may of built from kits. I might be completely wrong and someone here may have more knowledge. I do not think they are of great value but do have a charm that someone might want to put on display in their study. You see similar in many a rental holiday cottage in the UK. Hope this helps.