HOLIDAY DONATION DRIVE - SUPPORT MSW - DO YOUR PART TO KEEP THIS GREAT FORUM GOING! (Only 64 donations so far out of 49,000 members - C'mon guys!)
×


allanyed
-
Posts
8,149 -
Joined
-
Last visited
Content Type
Profiles
Forums
Gallery
Events
Everything posted by allanyed
-

Topmasts and Topgallant masts vs Lower Mast
allanyed replied to Tommy Vercetti's topic in Masting, rigging and sails
Tommy, What ship(s) and year(s)? In general, Lees and Anderson per Druxey's post above are the best books that I have found for the 17th century. I have seen a number of contemporary drawings of masts and yards on the RMG Collections site as well. I am not sure if any go as far back as the 17th century but a search on their collections site should turn up anything appropriate. Allan -
AHB The wedge idea is super, thank for sharing. Personally I do not agree that using white PVA on rigging is useless as I have never had an issue with it holding fast rigging seizings, knots and clinches on cleats, pins, etc. over the past 45 years. This includes one model that I built in the late '70s that has made numerous moves around the US over those years and is still in great condition. From comments here at MSW, CA may be OK for some things, but it seems that it is not such a good idea for rigging based on their experience. I do wonder if the material of the rope being used makes a difference though in the type adhesive that works best in these situations. Thanks again for sharing your idea on the wedge. Allan
-
Welcome to MSW Kenn, It would be a polite thing if you would post an introduction in the new member forum here at MSW. The subject was concerning clothing for marines aboard ship over 200 years ago, so are you saying Quaker Marine store has vintage clothing? You make no mention on where the store is located. Merry Christmas and happy 2022 Allan
-
Newspaper, Welcome aboard. Been a long time since I read or heard much in Afrikaans, (55 years) and this brings back fond memories of Capetown, P. E., (with a half day side trip to Cape St. Francis to check out the surfing thanks to an incentive after watching Bruce Brown's movie), East London and Durban. Beautiful country. Merry Christmas to you and yours. Allan
-
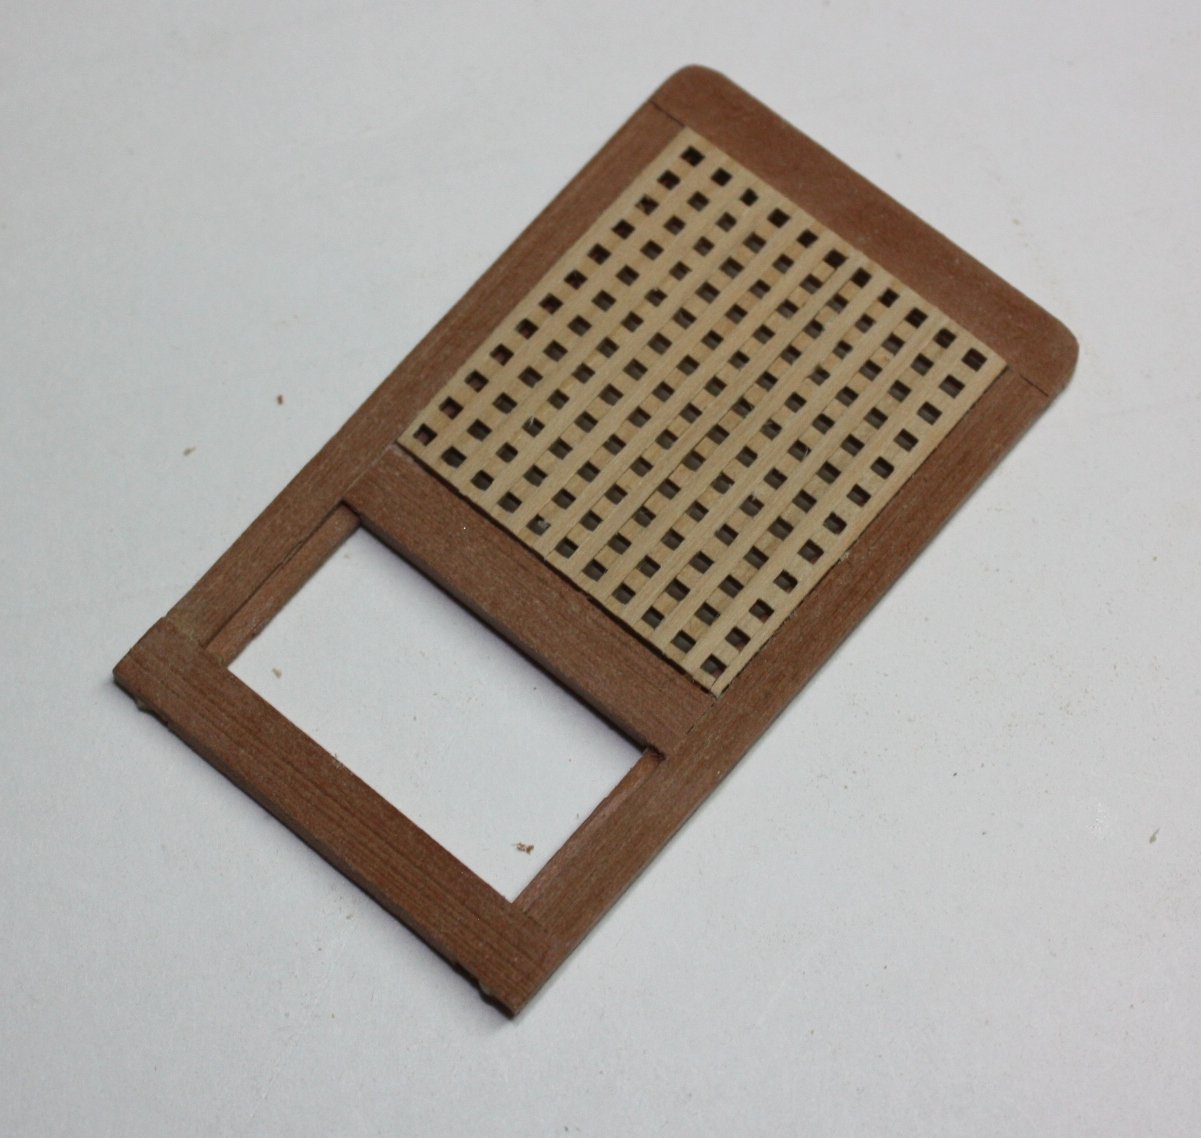
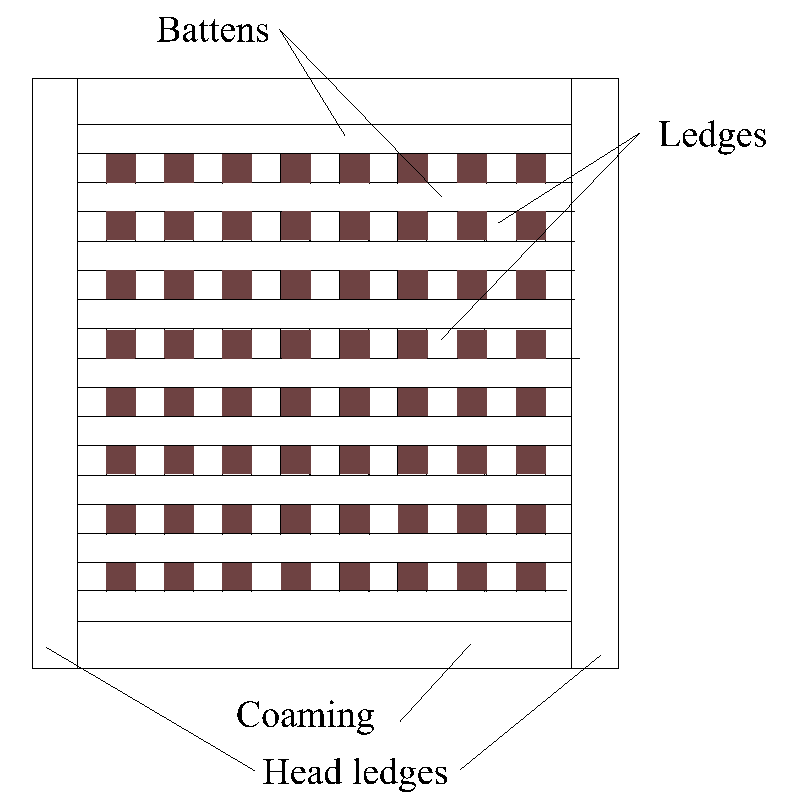
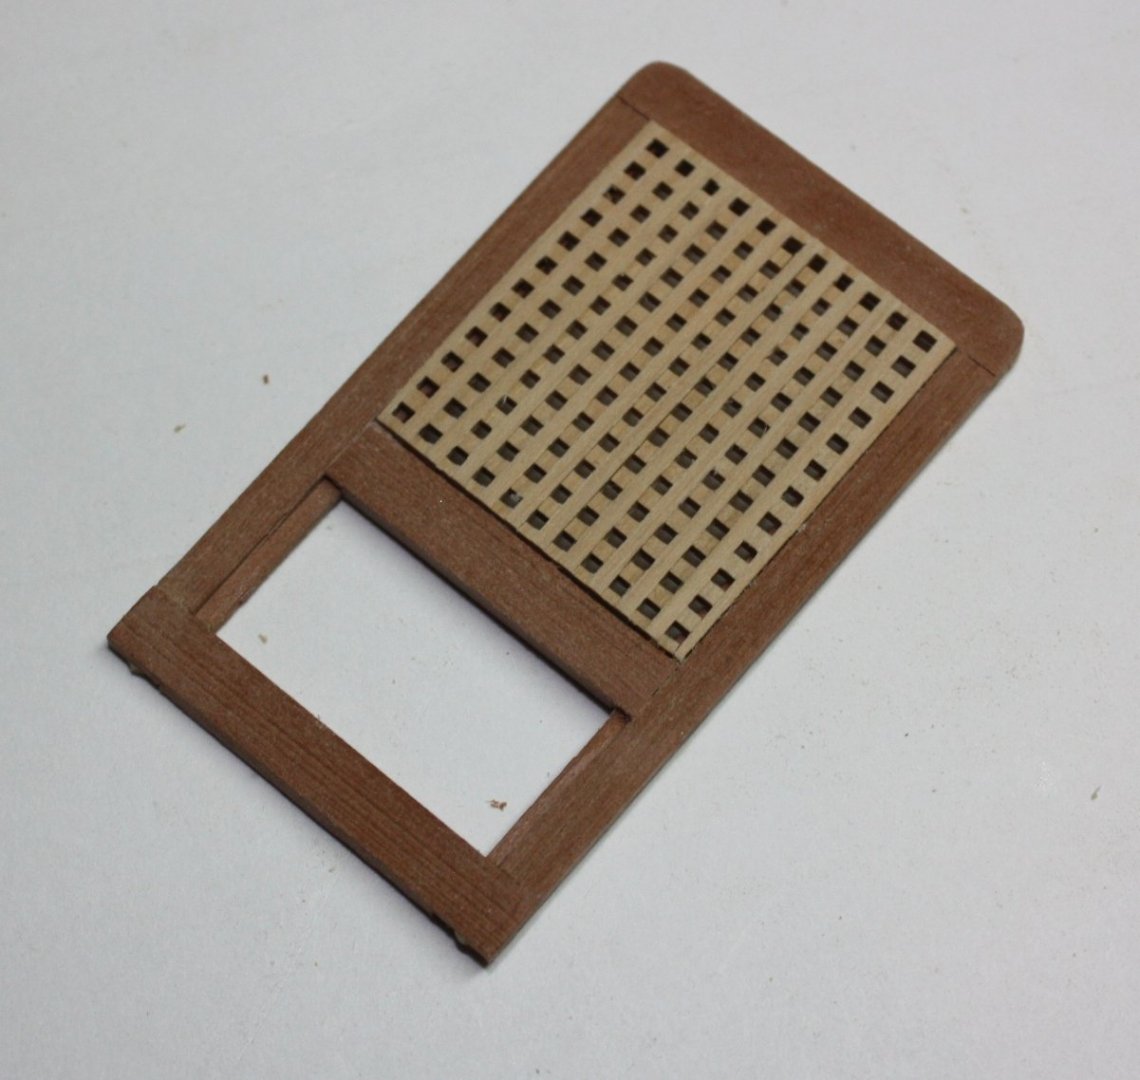
Jeff This looks like it is a good quality kit and your workmanship looks to be great. The only glaring oddity I see are the gratings which I am guessing is a mistake on the plans. The battens are running athwartships with the ledges running fore and aft rather than the other way around. I look forward to your next update, Allan
- 42 replies
-
- 1
-

-
- lively of baltimore
- lumberyard
- (and 2 more)
-
Walrus Fear not on the last strakes. If you spile the planks as described here at MSW by David Antscherl or heat bend the planks as described here at MSW by Chuck Passaro you should not have any tricky issues and certainly no need for clamps if the planks are done properly. Allan
-
Chief, THAT was funny. It happens to all of us, but it is never planned. Just as I was taking some of the last photos for the volume 2 manuscript of Euryalus , she got bumped and rolled off the photo table onto the concrete floor. A few small things snapped of and it took some hours to fix what happened in a few seconds so caution is key at all times. Allan
-
Welcome Ray!!! Why are there so many retired military in Kansas??? Our youngest son retired in Lansing, KS as an O-5 and is equal to or outranked by nearly every neighbor on his block who are also all retired and still under 60 years old. Heading there this week for Christmas so make for some good weather for us!!! Again, welcome to MSW Allan
-
HMS VICTORY 1765 by albert - 1/48
allanyed replied to albert's topic in - Build logs for subjects built 1751 - 1800
You can figure the scale pretty easily. Measure the maximum breadth midships or the length on the gun deck. It will not be exact, but should be pretty close for figuring the scale. Beam of the Victory is 52 feet 10 inches and the length on the gun deck (rabbet to rabbet) is 186 feet (2,232 inches) . For a scale of 1:96 the length on the gundeck would be 23 1/4", for 1:64 it would be 34 7/8", for 1:48 it would be 46 1/2" etc. Allan -
Can you please post in English? Many thanks Allan
-
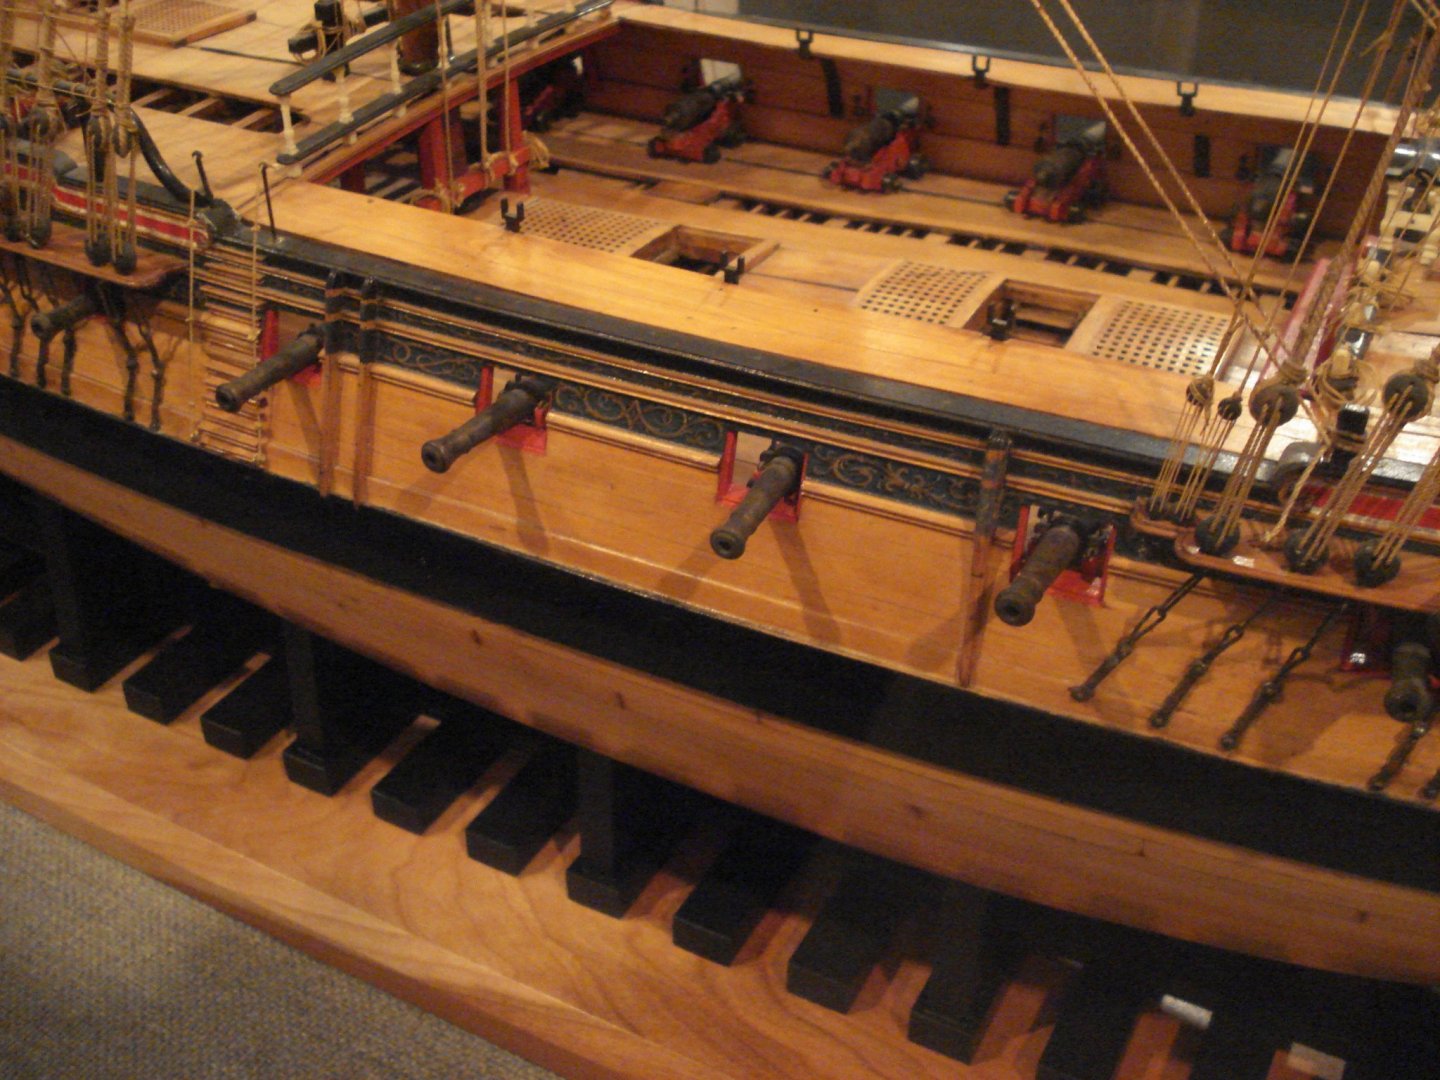
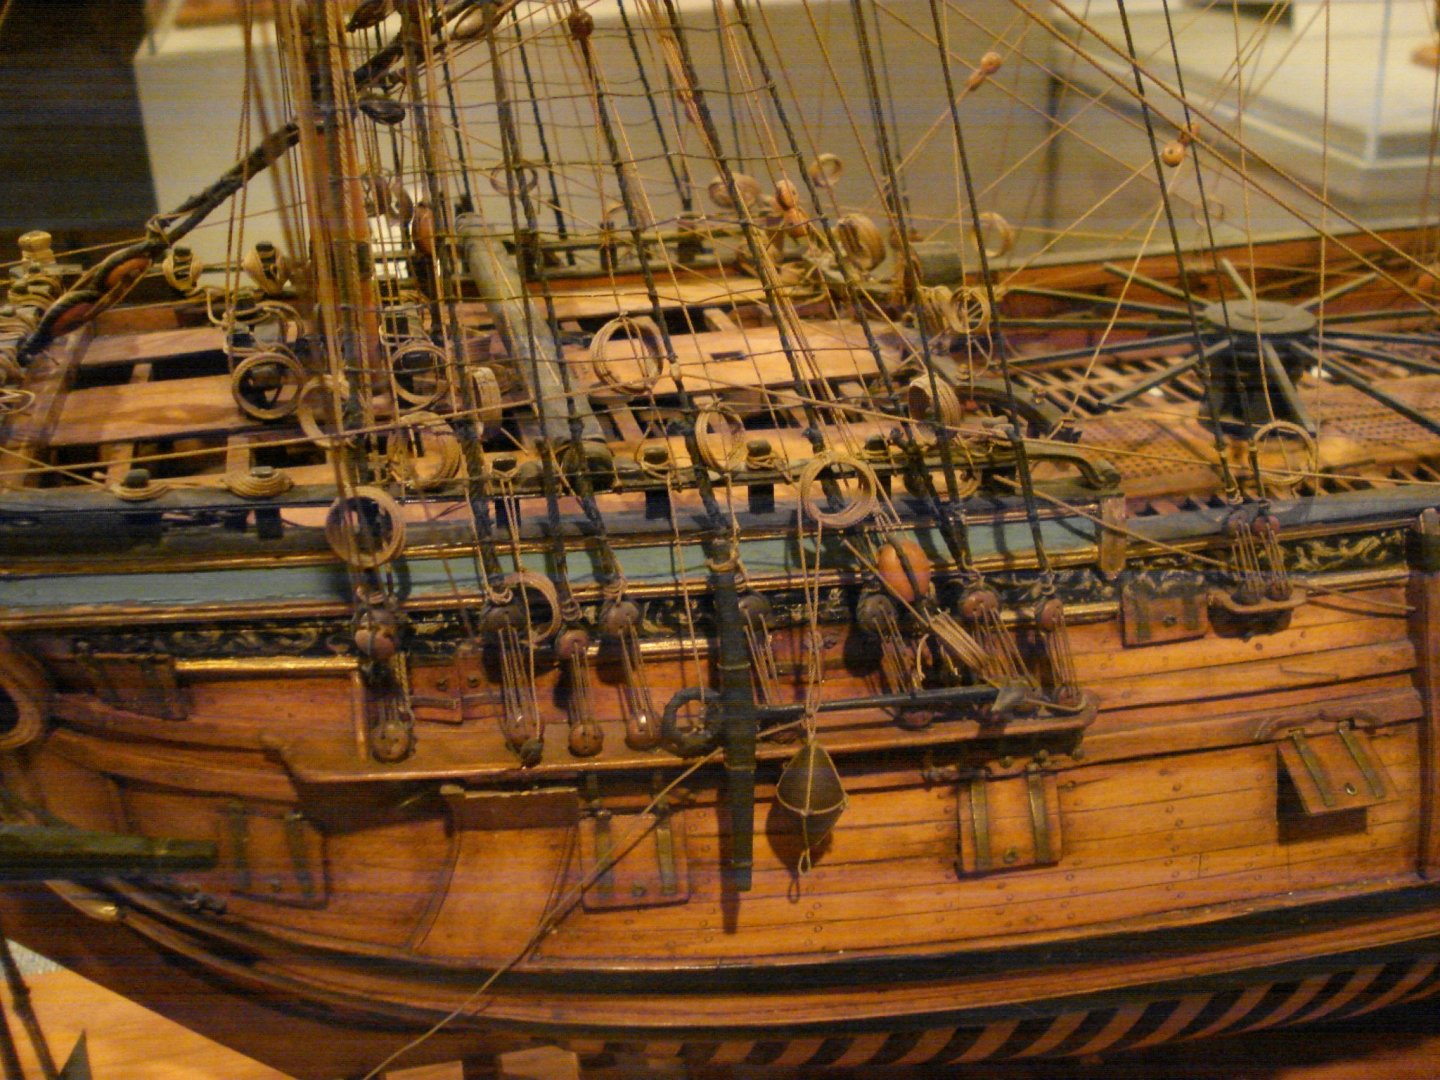
Dave, To make life easier, cannon that are out of sight need not be rigged, it is up to you. Even contemporary models are often missing rigging on cannon, and often the cannon are not even included. Two of many examples at Preble Hall follow. Allan
-
Hi Lieste For 42 pounders, from the same sources as above. 1723 1743 6" 7" Thanks for sharing about the British replacing 42 pounders with 32 pounders during peacetime, this was new information for me. I would like to learn more about this as it is actually very interesting so if you would be so kind, can you share your source for this? Thanks again, your help on this is appreciated. Allan
-
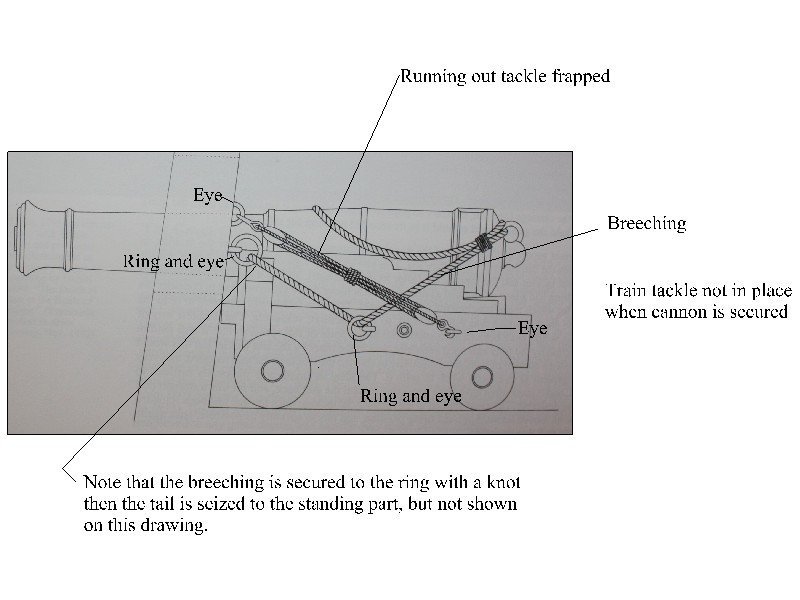
Dave, If I am understanding you correctly, the rings are not glued to the carriage brackets but rather are on eye bolts. These would be for the breechings. There are also eyebolts on which the running out rigging is hooked. Spyglasses photo shows this. The drawing below may also help. I strongly doubt glue, even epoxy, will hold up to any contact without coming off. I still wonder why so many kits still use cast carriages as they are not close to realistic and difficult to work with for things such as this. It is nice to see there are a couple kit makers that have provided these in wood. Cheers Allan
-
Hi Lyle, Sorry for the late reply. Regarding the gratings, a picture may be easier. Just an FYI regarding the name on the stern. The names on the stern were not made of pieces, but rather were painted on. (This only lasted from about 1781 to 1791, before and after which until late in the 19th century, names were not shown at all.) For this size, it may be easier to buy a page of stick on letters as they are so thin as to look like they are painted. Happy holidays!! Allan
-
Lieste, Sorry for any confusion, I was only referring to English ships as Jay's subject was for HMS Victory. I have no information on French ships, but for English ships: Below- 1723, 1743 and 1765 data are from the Public Records Office and 1747 is from a list of stores on the HMS Invincible (NMM RUSI/6) Caruana, The History of English Sea Ordnance, Volume 2 page 385 1723 1743 1747 1765 6" 6" 7.5" 7" Allan
-
Bonjour Mic. Bienvenue a toi notre nouvel ami. Where do you live in France? Merry Christmas and a happy new year to you and your family.
-
Hi Lieste, Jay's project is for Victory, 1765 so it probably would more appropriately be based on the 1745 and 1750 Establishments (which were very similar) , not the Seaman's Vade Mecum which did not come out until 1812. The Vade Mecum is probably a great thing to have for ships built after 1812, but maybe not so much for the 1700's. Out of curiosity, have you compared the Vade Mecum with Steel's Elements and Practice of Rigging and Seamanship 1795? I wonder how close they might be. Have a great holiday season!! Allan
-
From another former merchant marine engineer, welcome aboard MSW Boydie. Allan
-
Thanks Bill! Alas I have never built a kit and probably never will. One of my suppliers gave me the SOS or maybe it was the Soleil Royale many years ago and when I opened it and saw the materials I decided to stay with scratch building. Wish we had MSW back then to give it to someone here as it wound up in our neighborhood garage sale. I know there are finally two or maybe three kit designers/makers that do a fine job, but after investing in tools over the years, it would make no sense for me to make the switch. Thanks again for your post, it is very much appreciated. Allan
-
Super warm welcome to MSW. The diversity in home locations of our members never ceases to amaze! Allan
-
New Member Rock Harris: An Introduction
allanyed replied to rock harris's topic in New member Introductions
Welcome Rock, Your introduction was great and quite entertaining!!! Thanks for that!! Looking forward to seeing more of you here at MSW Allan -
Your library for building a model of Victory is impressive to say the least. If you plan to do any rigging, I urge you to get a copy of David Lees book The Masting and Rigging of English Ships of War. For armament, the best book, IMHO to have is Adrian Caruana's The History of British Sea Ordnance, Volume 2. For Victory I do not believe there are a full set of contemporary plans still around, including at RMG. As Victory has been done to death by modelers for eons, there are many other vessels with complete sets of contemporary plans available at RMG you might want to consider if you are going to be scratch building. A good example of a second rate with seven detailed high resolution drawings available for free is the 98 gun HMS Glory 1788. Scantlings from The Shipbuilder's Repository 1788 would fit right in and is available on its own or in the Scantlings of Royal Navy Ships 1719-1805 from SeaWatch Books. I realize you are well invested in Victory by now, but thought an alternative could be interesting for you. Considering your obvious interest in doing research first, (kudos to you for that!!!) I hope you start a build log and post photos as you progress in your project. AND as a fan of Victory, please do sign up per my signature below. Adam Preston is making progress to get this TV series going. Allan
-
Thanks for the explanation Bill, much appreciated and added more mystery to the mystery of the MC. In researching the model kit I did see that the kit changed the name a well. Enjoy the project!!! Allan
-
Hi Bill Are you speaking of the Mary Celeste which was found with her crew missing? Just as a point of interest there was no actual ship named the Marie Celeste. If you search Mary Celeste 1861 there is some information at the Library of Congress, the Smithsonian and maybe other museum/sources. They have paintings and photographs that may be of help. Allan
-
Will, Next time you glue up the strips, here is an alternative that you might like. I glue long strips (6" or more) together slightly thicker than needed. Once dry I run them through my thickness sander to get to the final thickness. Once done I can cut of pieces to suit the lengths and widths that I need. Allan