allanyed
-
Posts
8,149 -
Joined
-
Last visited
Content Type
Profiles
Forums
Gallery
Events
Everything posted by allanyed
-
 Jon, I was concerned about the number of pins available as well. The drawings from the National Archives only show 10 port and 10 starboard on the rails as well as seven eyes. There are also the pin rails around each mast and two pins forward near the bow. Plus we know of the two at the boom saddle for a total of 34. Chapelle mentions a total of 43 with their positions listed on the schooner Phillip P. Manta, including four in the stern seat. To be sure there were a LOT of variations in the number and locations of the belay points over the years so I am unsure of the exact location on the Effie at the time she was built. I would be absolutely thrilled to have an exact belay plan based on contemporary information on Effie specifically. With her modifications over the years, including for Arctic exploration service, there were changes in many things as you know, including different deck houses, an engine, air cowls, and so forth so could have been with the rigging as well. Regarding the boom seat, yes, from what I could find the saddle/yoke did not rest directly on these but rather had a boom seat on the forward side of the mast. The more I learn the more I find I don't know and that is a great thing as life will never be dull. Thanks for your input! Do you have the current belay plans for Ernestina from the shipyard or what they are basing the plan on? Even though it is current, it may be closer to what she had when launched than plans from other sources I have found. Allan
- 86 replies
-
- 3
-

-
- schooner
- effie m morrisey
- (and 1 more)
-
MONTAÑES by Amalio
allanyed replied to Amalio's topic in - Build logs for subjects built 1751 - 1800
Amalio, Thanks for sharing the details. Another great lesson in my ever growing book of how to do something. Allan -
The mail system is indeed a mess and of course they always feel the need to raise prices of postage to go with the poor service. I sent an envelope from Florida to Maine (1600 miles) this month and it took 11 days to get there. I did quick check and found the following regarding the Pony Express: In 10 days, riders could deliver a letter the 1,966 miles from the base in St. Joseph, Missouri, to the terminus in Sacramento, California. Keep in mind this was 150 years ago!!! Allan
-
Michel, Mon plaisir. Allan
-
MIke What schooner are you rigging? I am sure there was some kind of traditional order when rigging a full sized ship, but for a model, I think you have more leeway. Definitely rig as much as possible before you install blocks, eyes, hoops and so forth on the the masts, gaffs, booms, spars etc. The following is just my way when rigging schooners, but it is not by any rule, just the way I have had good experience. I start with the main mast, pre-install the mast hoops, cross trees, cheeks, bails, everything possible, before stepping the mast. Then on to the foremast, but I see no reason not to go with the foremast first. Next up for me are the shrouds and swifters. Pre-rigged sprit or spike, depending on the vessel, can go next and then top masts follow, then appropriate stays, spring stays and other standing rigging. Next up are the pre-rigged booms and gaffs. I have actually gone with the sprit as late in the order as possible at times as it sticks out and extra care needs to be taken when turning or otherwise handling the model. Again I don't think there is any set rule for a model but I am very curious to read what others do. Allan
-
White, Welcome aboard MSW. Can you tell us the source of this quote? It is a new term for me, but based on the few words they give regarding renewing the through bolts, it sounds like it MAY be that this is the strip of wood molding (moulding) that goes on the outboard edges of the channels which would cover the through bolts and close the slots in which the deadeye chains fit. Remove this molding, replace the bolts, then replace the molding &c. Hope someone has a clear answer regarding what this term is. Allan
-
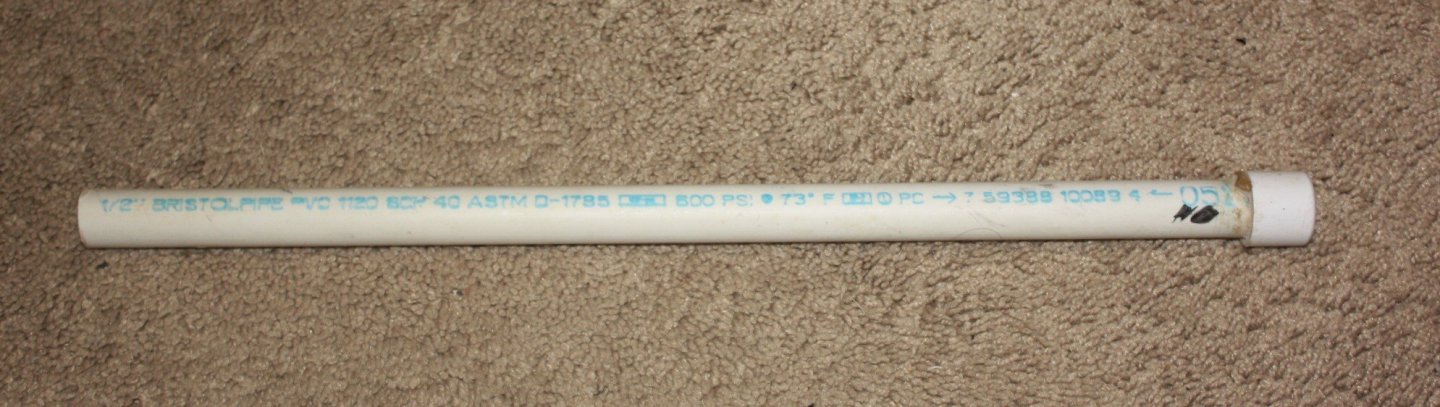
Heat is the key as very well explained above, but I do like to soak some of the problem planks a bit before bending and ironing them as explained in Chuck Passaro's write up. To do the soaking I have a couple pieces of 1/2 inch ID plastic pipe that I cut to a few different lengths with a cap glued on one end of each. Cheap and easy to find in any hardware store. Small, uses little water, keeps the water warm longer if you want to use hot water. Larger diameters are of course readily available. The long pieces of wood tend to rise (float) for a while so I loosely cap the other end as well to keep them submersed. You will know they are thoroughly wet when they do not bob up after the loose cap is removed. MOST of the time I forgo the water and just use dry heat with no issues. Allan
-
How to stain or dye boxwood?
allanyed replied to tkay11's topic in Painting, finishing and weathering products and techniques
Jaager, I think you missed a little bit. Considering the open grained walnut, --in many, not all, kits ---not even an obscuring surface stain will fix that problem. Any close grained wood would really be a huge help. Cost of course is a factor, but there has to be better choices for the same price or a price that is reasonably close. Allan -
How to stain or dye boxwood?
allanyed replied to tkay11's topic in Painting, finishing and weathering products and techniques
Tony, Most of us would LOVE to have some true boxwood and use it in its natural color. Why do you want to color it? If whatever finish is on the ruler is removed, the wood will be a bit yellowish and may even have darkened over time. This is a beautiful wood that the model builders of old used and I do not believe they stained or otherwise colored them. Further to the above by Jaager and Roger, I have had no issues with India ink when dying wales and the adjacent black strake which have been made of Castillo, (calycophyllum multiflorum). This is of course not as hard as true boxwood (buxus sempervirens,) but pretty close. Dyes and/or inks may be something for Tony to try on a small test piece to see how well it penetrates. Allan -
Thanks Keith! I cannot recommend enough the internally stropped blocks from Syren. I followed the instructions for assembling them on his website but modified to using PVA and found the results to be better than using CA. His rope is also a pleasure to work with as I have not yet tried making my own. With this material available at a good price I doubt I will ever make my own unless I do a fully rigged rated ship in a relatively large scale. Allan
- 86 replies
-
- 6
-
-
- schooner
- effie m morrisey
- (and 1 more)
-
No buttocks
allanyed replied to Don Case's topic in Building, Framing, Planking and plating a ships hull and deck
Lots of ways to skin the proverbial cat here Don. You can certainly draw up each station (what I think you are calling sections) by hand. There were no easily affordable CAD programs 35 years ago and we managed somehow :>) Shaky hands..... CAD may be actually be better for you. As for an old brain, I was around 60 when I first gave it a try. I am FFFFFAAAARRRR from being an expert but learned enough to enjoy using this tool. Back one step. You mention making your frame as close to the lines as possible. Are you talking about framed build (POF) or bulkhead build (POB)? If you want to build a framed model, keep in mind each frame is made up of anywhere from 7 to 12 pieces, a bulkhead being just one solid piece in most instances, thus my question. Allan -
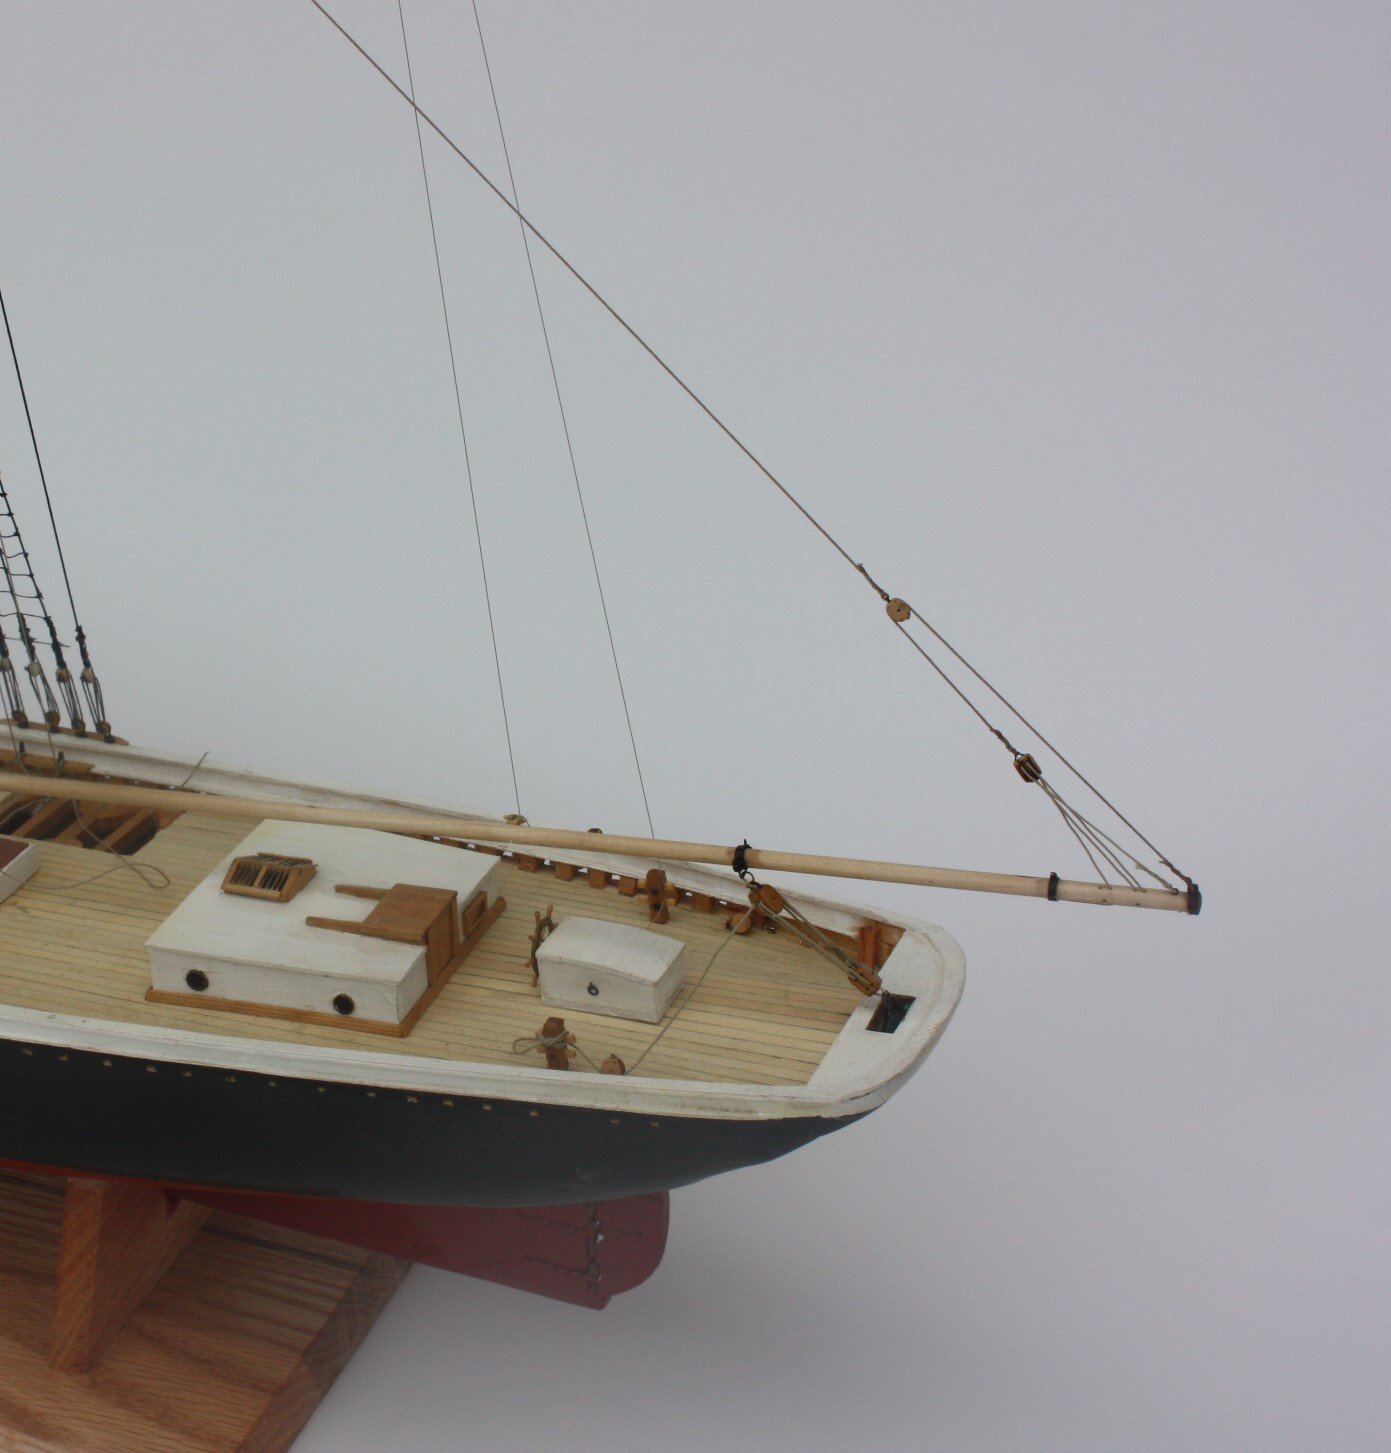
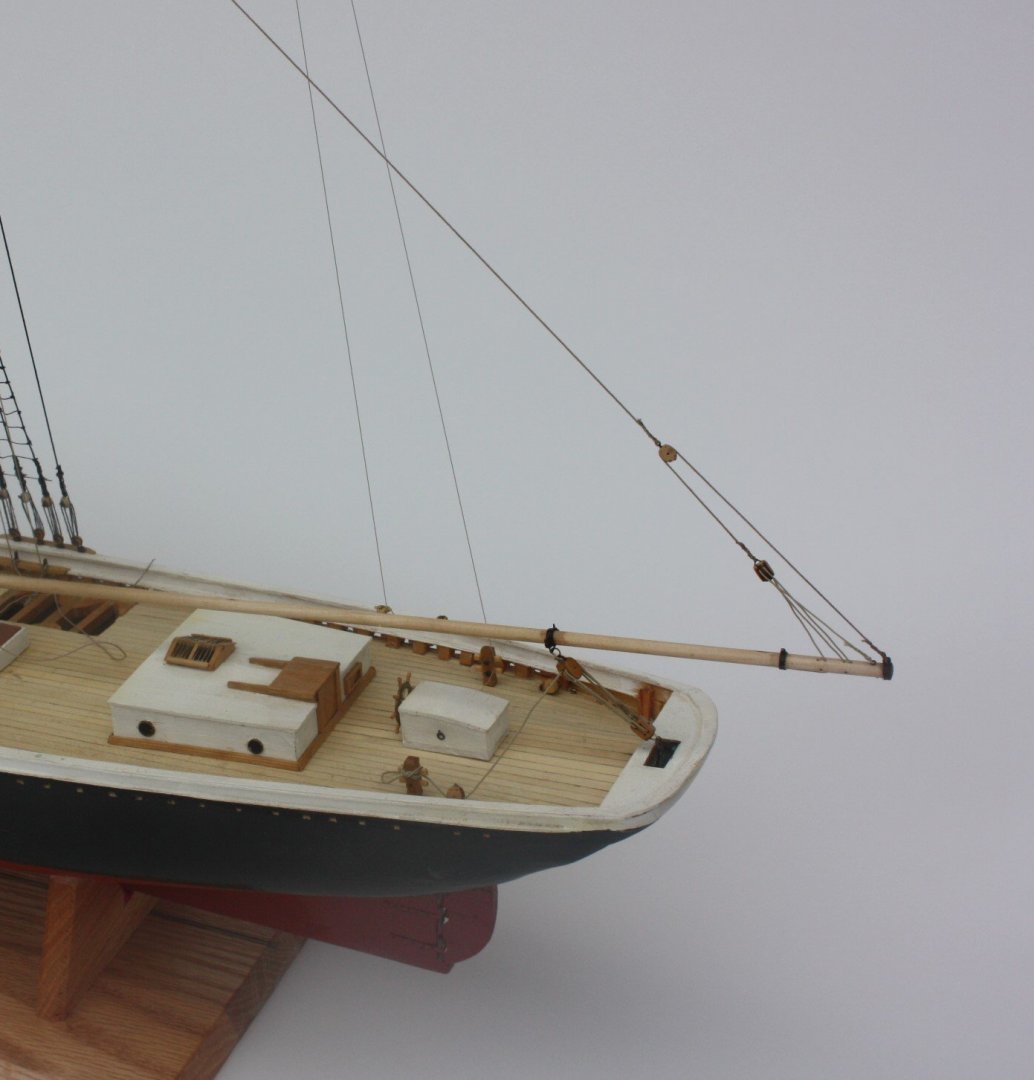
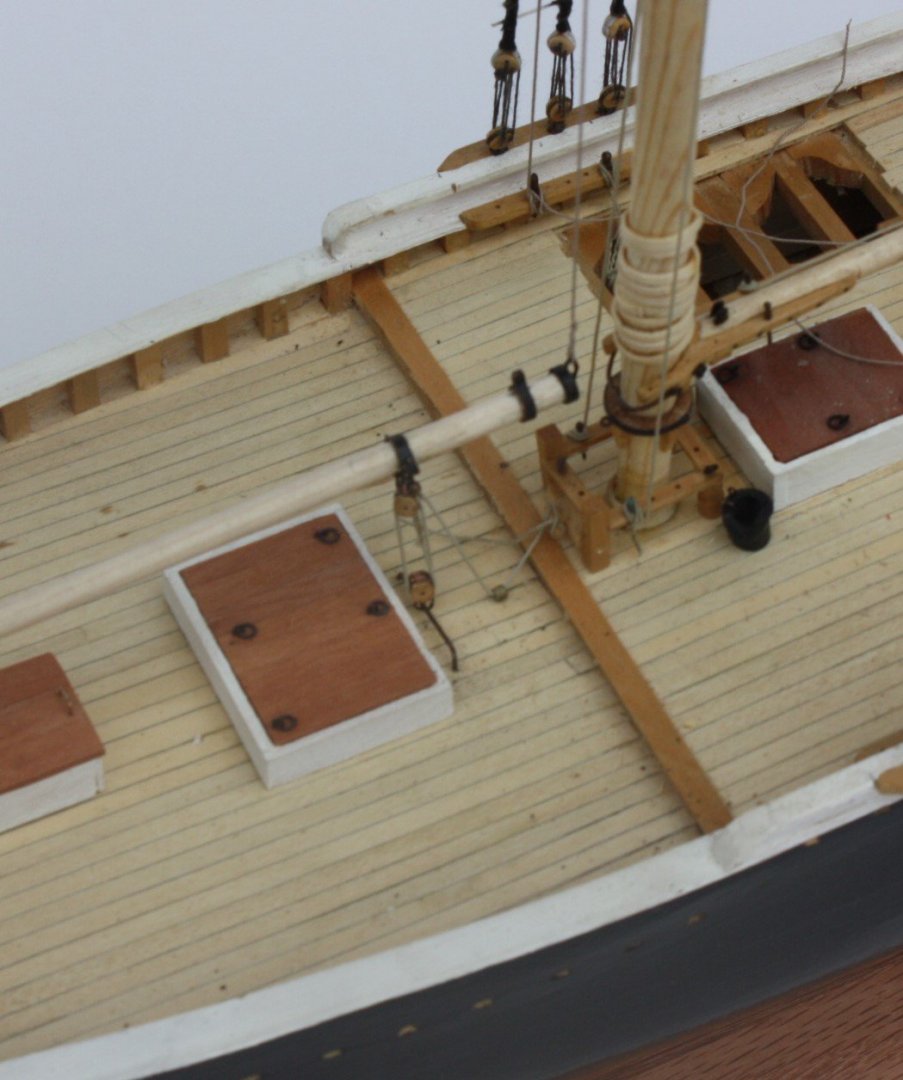
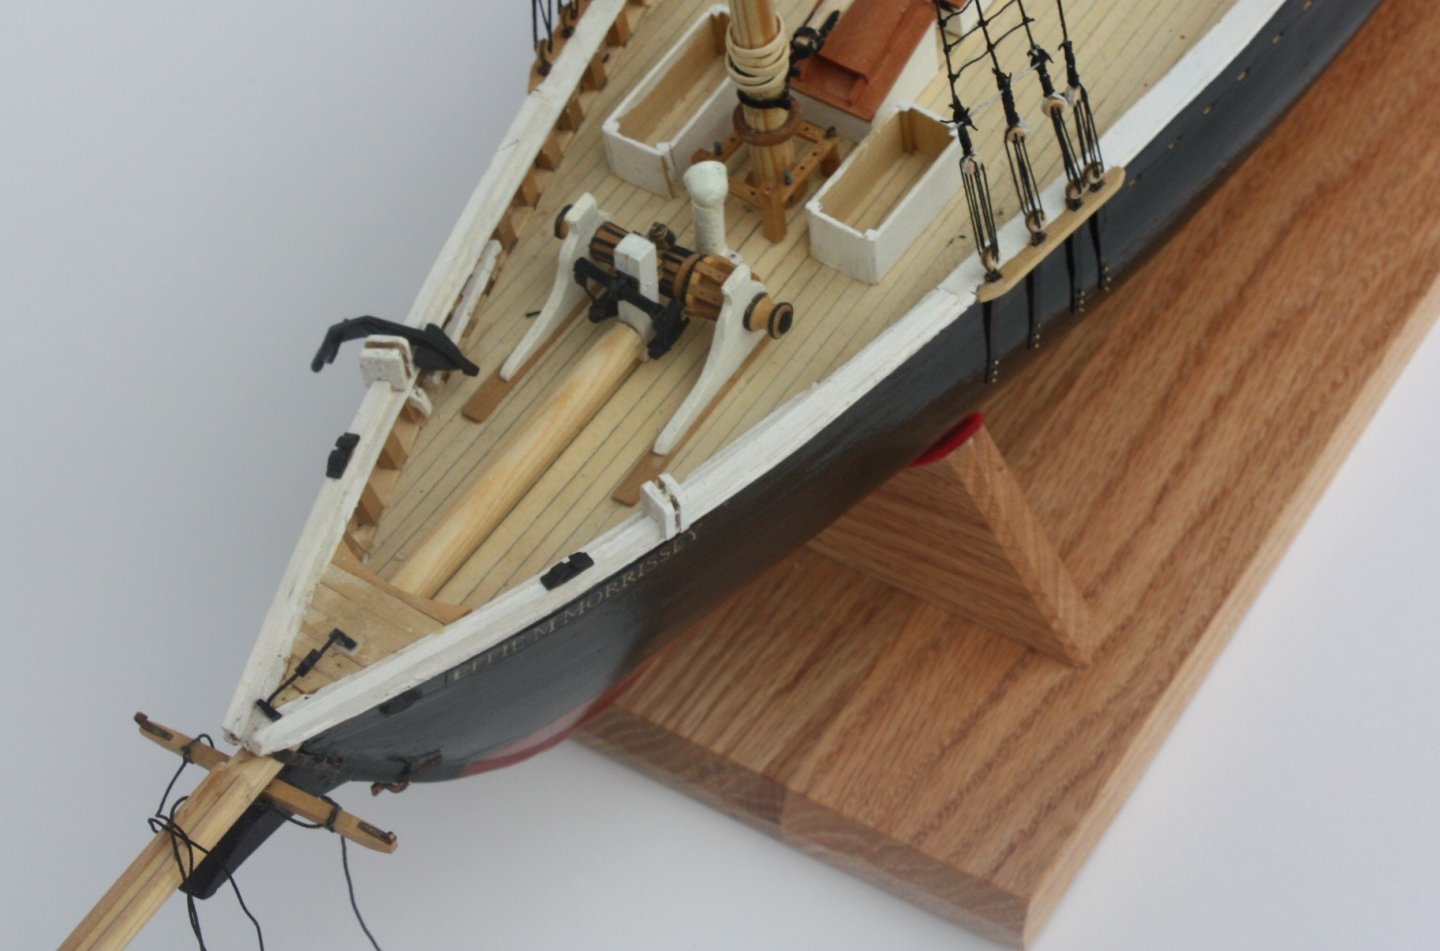
Progress photos of Effie follow. Should be done with the standing rigging in a week or so then on with sails and running rigging. As with models of ships of old where it is far easier to pre-rig the spars with the various hardware, I have done so with the gaffs, booms, and spike and continue to find it a good practice to follow. Allan
- 86 replies
-
- 10
-
-
- schooner
- effie m morrisey
- (and 1 more)
-
No buttocks
allanyed replied to Don Case's topic in Building, Framing, Planking and plating a ships hull and deck
If you study the drafting articles here at MSW you will have everything you need to convert the images into your own CAD drawings. Easiest way to start and to also correct distortions that most of the old drawings have is to insert the image into a new drawing page in your CAD program and extend or shrink whichever dimension, if either, is off a bit. Most of the originals are 1:48 but you can enlarge the image so the length of the gundeck, which is easy to find in many, if not most, cases is actual size. Trace the lines with straight lines, arcs and circles for the most part. Once your drawing is complete, you can scale to whatever you want. Keep in mind these were done by hand with pencil and/or pen so the lines do not have the same perfect edge as a line in you CAD program as you will see when you enlarge a section to a large extent. When you blow up the image you will find lines that do not meet or go beyond the meeting point at times but such was the nature of drawing by hand. This is a great way to learn about the construction of these ships and will no doubt bring on a host of additional questions. Again, study the information here at MSW, it will answer most of your questions. Allan -
Section line questions
allanyed replied to Don Case's topic in Building, Framing, Planking and plating a ships hull and deck
Don, Not sure what you mean. The station line numbers along the keel are a reference to their location along the keel, they have nothing to do with the keel itself. The body plan gives the shape of the hull at each of these stations. You can study some drawings that show both body plan and profile and you will see the station line numbers on each view. There are plenty to choose from on the Wikimedia site and the RMG Collections site from which to choose. https://commons.wikimedia.org/wiki/Category:Ship_plans_of_the_Royal_Museums_Greenwich If you are still unsure, please post a sketch or drawing of why you think station lines would have any connection with the shape of the keel. Allan -
Section line questions
allanyed replied to Don Case's topic in Building, Framing, Planking and plating a ships hull and deck
From David Steel's The Shipwrights Vade Mecum DEAD-FLAT. A name given to that timber or frame which has the greatest breadth and capacity in the ship, and which is generally called the midship bend. In those ships where there are several frames or timbers of equal breadth or capacity, that which is in the middle should be always considered as dead-flat, and distinguished as such by the character ['+' surrounded by a circle]. The timbers before dead-flat are marked A, B, C, &c. in order; and those abaft dead-flat by the figures 1, 2, 3, &c. The timbers adjacent to dead-flat, and which have no rising, are distinguished by the characters (A) (B) &c. and (1) (2) &c. Allan -
The ends depend on the vessel, era, etc. Gloucester and other fishing schooners (which obviously have nothing to do with the Revenge) have eye splices on each end which are then seized to the shrouds and/or swifters. Allan
-
Paint or blackening
allanyed replied to Bill Hill's topic in Painting, finishing and weathering products and techniques
Dart, I assume you mean leave the metal as brass, but unfortunately, other than the bells, door hardware, and very old cannon, there is very little if any brass on the vessels I have been working on and it would not look realistic to leave it a brass color. The guns on the model you posted are a good example of this unless they really were made of brass or bronze. That said, the model is gorgeous. I do try to use copper whenever possible and use liver of sulfur for blackening but brass is needed in quite a few applications for the stiffness. Rich, Thanks, l will give the Brass Black a try. I see Jax metal blackener and it gets great reviews as well. I wonder if either one will blacken silver solder or soft solder. Curious minds and all that........ Allan -
Derek, Thank you very much for posting the videos. I learned more about sharpening chisels in 30 minutes than I had ever learned before in all my years. Allan
-
Paint or blackening
allanyed replied to Bill Hill's topic in Painting, finishing and weathering products and techniques
What does the membership recommend in place of Blacken It, which I cannot find from my old suppliers? Thanks Allan -
Why do some manufacturers make single plank kits?
allanyed replied to Meriadoc Brandybuck's topic in Wood ship model kits
I have done one double planked model, and it was a scratch build POB over forty years ago using plans from a kit manufacturer (don't remember which one) . Did the first layer of planking teach my anything, it sure did! Did I ever do a double planked hull after that - no, never saw the need. There are good reasons for double planking mentioned above. But the one thing I find to be the best reason NOT to do double planking is that many, if not most, kits use completely inappropriate wood for the second layer. Based on photos in build logs here at MSW they seem to mainly use open pore walnut strips that look terrible, especially in texture. Is this wood really that much less expensive that a more appropriate species cannot be used? Obviously favored species like boxwood, pear, and Castello are not candidates, but what about other species that the better quality kits have gone to? Allan -
Question Sherboune 1763 Inventory Rigging and blocks
allanyed replied to cotrecerf's topic in Masting, rigging and sails
Hi Henry, Can you please share your source on these rules as It sounds like it could be really useful when reading these old papers? Alas, as Jason points out it seems that the scribe that wrote the above page did not follow the rule you mention very much. On the third line from the bottom, left side, there is one example and there appear to be other inconsistencies throughout. Allan -
Question Sherboune 1763 Inventory Rigging and blocks
allanyed replied to cotrecerf's topic in Masting, rigging and sails
This was my take as well Druxey, but don't understand why two different "1s" would be used. I looked at the tutorials on the National Archives at Kew website and it goes into letters in depth but I could not find anything on numerals there. For anyone wanting to read and perhaps transcribe a handwritten contract, the tutorial there is invaluable. Allan -
Super model, super display Dan. One of the things I miss about New Jersey was occasionally getting to see your work in person at the NJ meetings. Allan
- 33 replies
-
- 2
-
-
- James B Colgate
- whaleback
- (and 2 more)
-
It may be easier and give a better result if you can lower the offending bulkhead. Not sure this would align it with the adjacent bulkheads, but looks like it may solve the problem. If the top is then a tad too low to align with the others it would be easier to add a shim on top then on the sides. I wonder if others with this kit have had the same problem. Could be a manufacturing glitch. Allan
-
George, I had also used high thread count bed linens in the past for 1:48 scale before trying silk span. You can find 600 to 800 TC in most stores that carry fine linen products and I was able to find some in one of the largest chain variety stores here in the US for a reasonable price. There are higher thread counts but that was the highest I could find at that time. There were a variety of colors and I chose a beige that blended well with beige thread/line. I purchased a pair of pillow cases and it was sufficient for all the sails on the schooner Columbia which went to a client and the schooner Lettie Howard (which was stolen out of the back of our car while it was on a car transport truck during our move to Florida), both at 1:48 scale. Having used both materials, my preference right now is silk span. Word to the wise, NEVER leave ANYTHING in your car if you are having it transported. Allan