MORE HANDBOOKS ARE ON THEIR WAY! We will let you know when they get here.
×


Rustyj
-
Posts
2,528 -
Joined
-
Last visited
Content Type
Profiles
Forums
Gallery
Events
Everything posted by Rustyj
-
 Thank you Ron, Grant and Kevin. Well the other gangway has been installed and the skid beams added. Gotta make some ladders and the top rails then a case and I should be wrapping her up by next weekend. Just in time for the hectic end of August when I don’t have time for any modeling.
- 332 replies
-
- 3
-

-
- Triton
- cross-section
- (and 1 more)
-
Boy to me it sure looks like you nailed it! Very nice.
-
You'll be fishing, we'll be modeling and the pages keep turning. What a great day!
- 1,668 replies
-
- 1
-
-
- syren
- model shipways
- (and 1 more)
-
Like Russ said I put them under wales and I also placed them at the top of the frames.
-
Hi Bob, It all looks very nice. So clean and crisp. Love it.
-
Hey Augie, Once a page you have to mention the case you are building just to meet you know who's standard!
-
Thank you Paddy. Hi Pete. No bevel on the trim. The individual piece still has the pencil lines on it and may give it a beveled look.
-
Hi Russ, I wish I could take credit for great planning, but it looked ok and was what I had on hand. Sometimes it just works out ok in the end. I am using holly to make the gangways. I measured the length and glued them together and then used a dremel drum sander to rough in the shape and sandpaper to finish it. I used a little strange way to make the trim molding. It’s made out of pear. I cut the straight top piece and then traced the shape for the two curves, cut it out and sanded it to shape. I wasn’t having a lot of luck making individual pieces to fit the curve and for some reason a whole piece was easier. Not the strangest thing I’ve done. And here is the first one in place. I'm getting there slow but sure.


- 332 replies
-
- 5
-
-
- Triton
- cross-section
- (and 1 more)
-
Hi Ron, I really like the look of your lower deck. I don't think it was overkill at all. Well done.
-
Scratch building the Syren using the kit's plans
Rustyj replied to rtropp's topic in Wood ship model kits
Hi Richard, No one simple answer. It depended on the parts needed but generally speaking I used a scroll saw to cut out most parts. I would cut out and paste the plans on the wood using temporary paper cement and cut them out using the scroll saw. Some parts were cut using a razor saw or xacto blades. Sometimes I would cut them larger then needed and then sand to the correct shape. The better the wood, the nicer the piece produced. This is what works for me and trust me there were many a piece that went into the scrap bin. The hardest thing for me to learn was throw it in the bin and do it again. I hope this helps. -
Hi Augie, I know many of our friends here will send along a well deserved “Well Done!” on a truly wonderful build and a riot of a build log. Having built her too I fully understand the sense of accomplishment and pride you have and it is well deserved. Great choice in the Confederacy and I eagerly await the fun to start again when you get to it. Enjoy your time fishing, travelling and building the case. I look forward to seeing ya building back here soon. Again great job!
- 1,668 replies
-
- 1
-
-
- syren
- model shipways
- (and 1 more)
-
Well Done! Oh by the way today is the tomorrow you mentioned yesterday! Pictures pictures pictures!
- 1,668 replies
-
- 3
-
-
- syren
- model shipways
- (and 1 more)
-
Scratch building the Syren using the kit's plans
Rustyj replied to rtropp's topic in Wood ship model kits
Hi Richard, The Syren was my first adventure to the "dark side" of scratch building and was a wonderful experience. As Chuck said "Go for it"! -
Very nice job on what I consider a difficult part. Well done!
-
Looking really good. I really like your method. Much nicer than the jig I used.
-
Hi Russ, I used some .028” line I had for the breeching rope. It was the closest I had on hand. Thanks on the colors. I’m real pleased with how they came out. Hi Ben, Have you still got that spy hidden in my shop? I started dusting the Echo off just last night!
-
That's very nice Bob. I really like the way you are presenting her.
-
Hi Ron, The planking is very nice. With all the beams covered you are the only one who knows the joints don't fall on them.
-
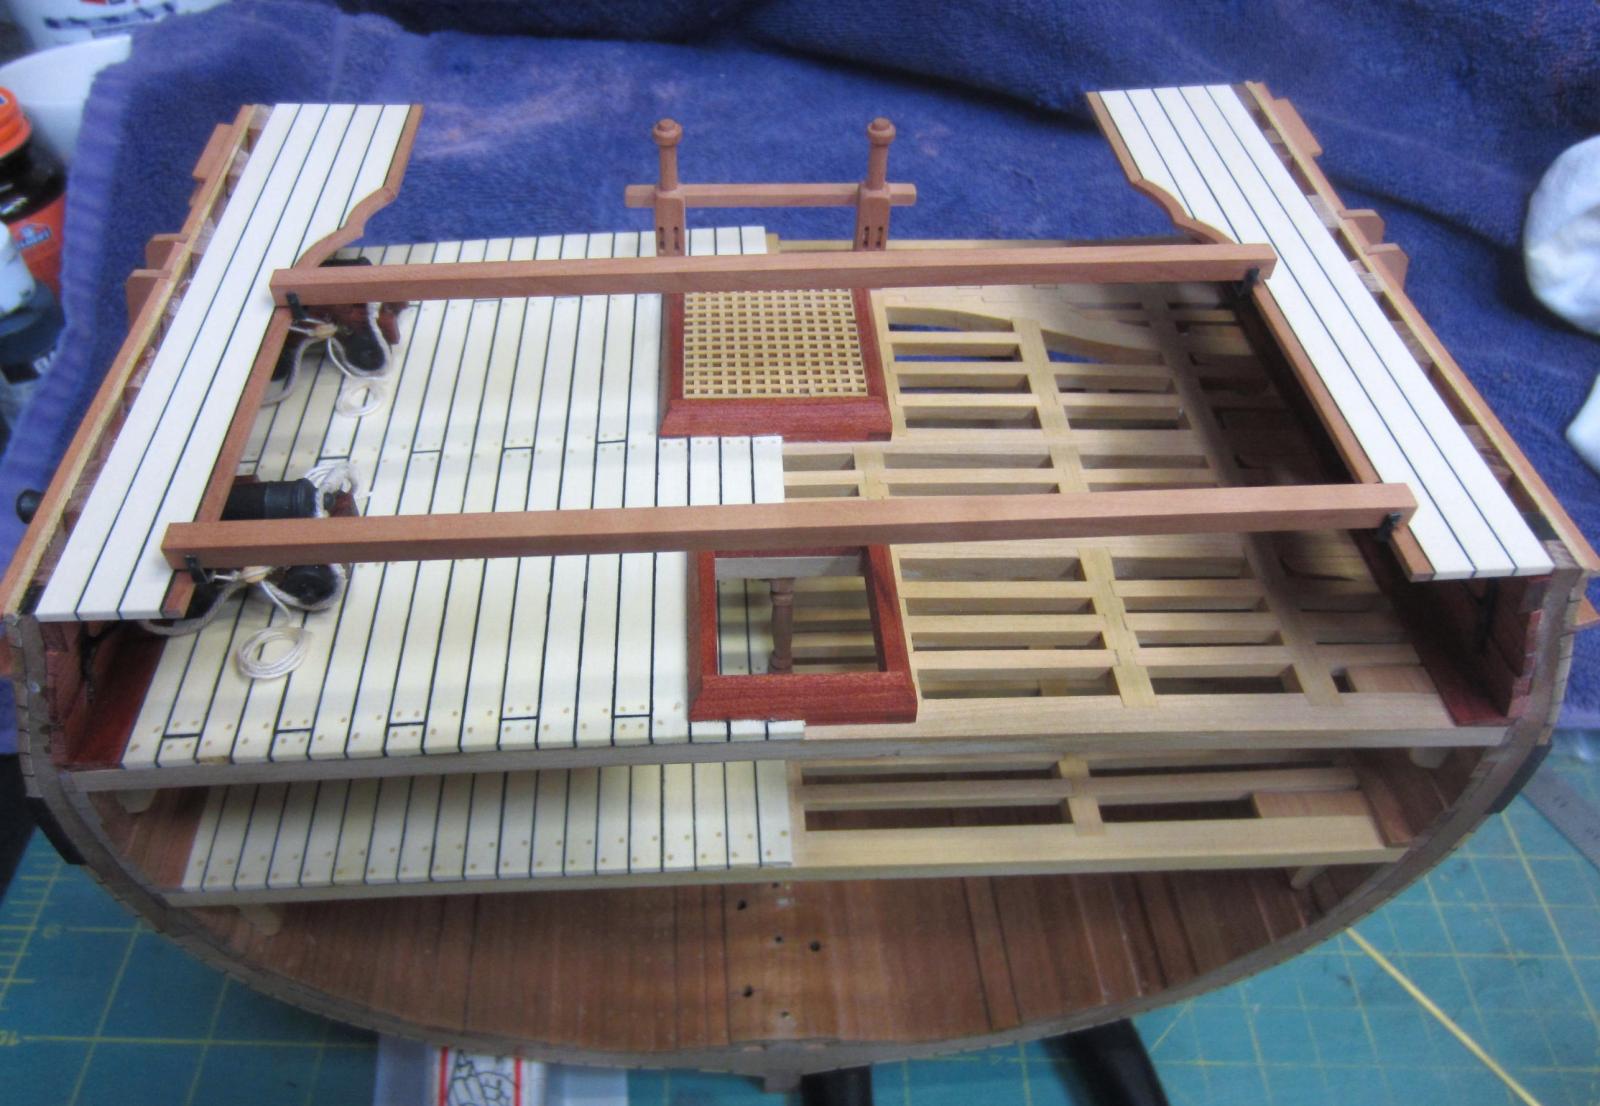
Ok all the paint has been applied and gangway iron supports are being installed. I've also placed the cannon and rigged them. I'll finish the supports and make the walkway next. Then it's ladders and a few other bits and pieces.


- 332 replies
-
- 3
-
-
- Triton
- cross-section
- (and 1 more)
-
Good catch there. I think I've had that same supervisor on some of my builds. Had to fire him more than once too!
-
Hi Ben, You're making good progress. Seeing you're doing such a good job of it I think I'm gonna mail my frames to you so you can raise them too!
-
Only because I had to go to work my friend.
-
Hi Augie. Very nice job on the anchors and buoys! Man you are getting close.....except for the case that is.
- 1,668 replies
-
- 1
-
-
- syren
- model shipways
- (and 1 more)
-
Hi Bob, Very nice job on on the deck and bulwarks planking. Also lining the ports with red heart came out very nicely too.
-
Wonderful Chris! Keep it going your almost there. Plus I'm greedy and love seeing your work on her.