


marktiedens
-
Posts
1,737 -
Joined
-
Last visited
Content Type
Profiles
Forums
Gallery
Events
Posts posted by marktiedens
-
-
A small update - the necessary blocks & wooldings have been added to the masts. More blocks & eyebolts need to be added to various parts of the decks yet before stepping the masts.
Mark
- Mirabell61, NMBROOK, fmodajr and 6 others
-
 9
9
-
-
-
Another small update - I decided to re-do the rudder chains. I removed the ropes attached to the rudder & used chains with rope pendants instead. It`s a simplified version,but I think it will do.
Mark
-
Update - after a bit of a break,I finally got the bowsprit pre-rigged with the necessary blocks & sprit topmast shrouds.

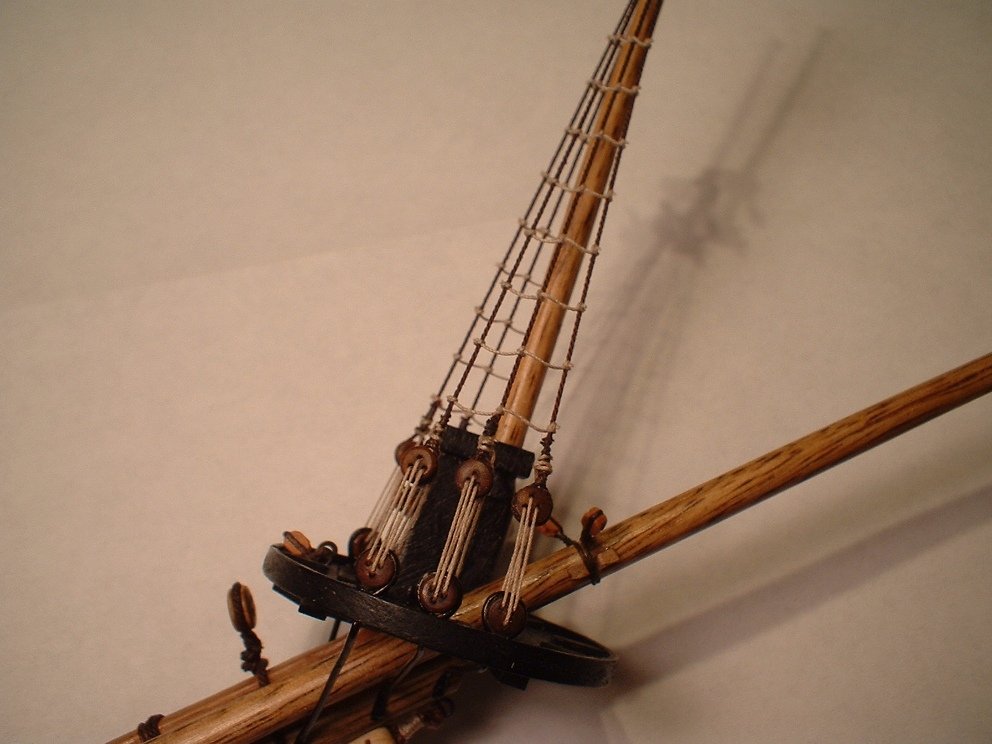
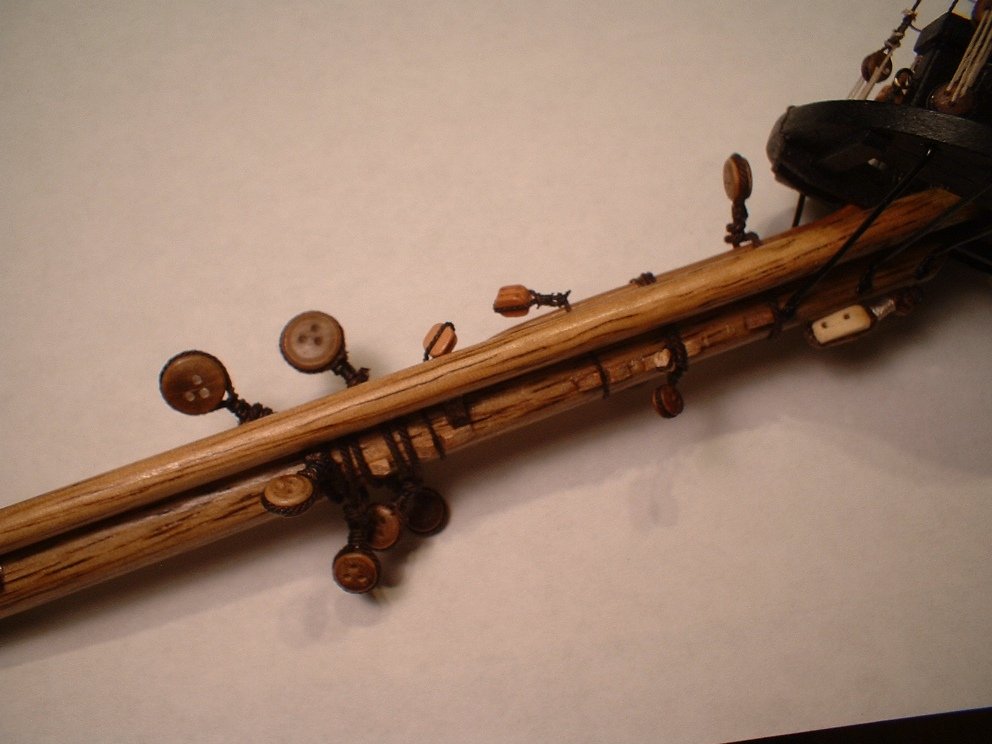
Mark
- piratepete007, Mirabell61, md1400cs and 5 others
-
8
-
-
Hi Ken - nice progress. For some reason I can`t see the pictures in post #50. Anyone else able to see them? The pictures in post #51 look fine.
Mark
-
Can`t speak for holly or maple,but I bleached my walnut deck planks & they came out a nice light gray & didn`t seem to hurt the wood any.
Mark
- Eddie, Canute, John Allen and 2 others
-
5
-
Hi Mr.Pucko - you are off to a good start. I couldn`t help but notice the templates have the gun ports parallel to the frames. I am pretty sure they should be parallel to the planking & wales. If you look at a picture of the real ship in the museum you will see what I mean. I drew some lines on your picture to show you what I mean. It seems that none of the kit makers can get things right even though they have the real ship to look at. Just an observation.
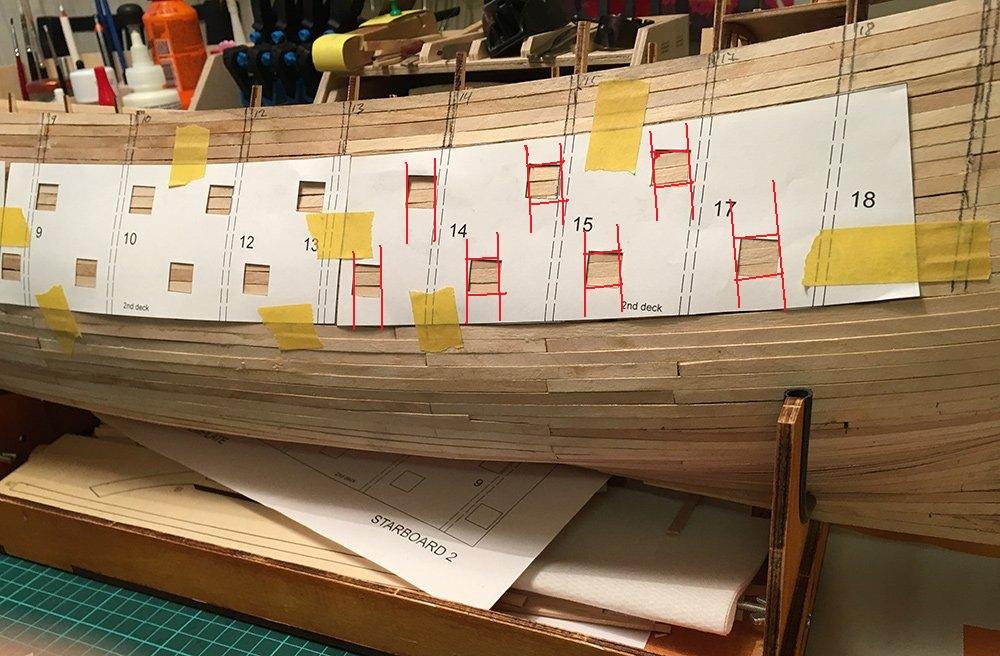
Mark
- coxswain, Vivian Galad, Jörgen and 4 others
-
7
-
Hi Ken - before gluing the middle gun deck in place I dry fitted all the upper decks at the stern & made sure the holes for the mizzen mast lined up. Then with the mizzen mast in place I made a step for it on the lower gun deck. You can either use long strips or individual blocks for the dummy guns,whichever is easier for you. Whichever way you go,make them plenty wide & tall to give you a lot of leeway for positioning the gun ports. My middle row of gun ports is a little too low,which made everything at the bow a little off. I would say the middle gun deck could then be glued in place. Refer to Pete`s info too - he may have different thoughts than me.
Mark
-
Hi Ken - welcome to the Royal William club
 . This is a challenging build,but from the looks of your past build you should do very well. If you run into any snags,don`t hesitate to contact Pete(piratepete007). He wrote the interpretive info on Euromodel`s web site & is very helpful - been a great help to me.
Mark
-
Thanks Greg,much appreciated.Thanks also for everyone looking in & hitting the like button. My rigging skills are not the greatest,so we`ll see how that goes
") .
.
Mark
- kmart and albertovecchi
-
2
-
Hi Scott - you are doing a fine job with this kit. I built it many years ago. One thing I noticed when I built mine was the bottom row of dummy gun barrels stuck out way too far. I didn`t notice it until they were all glued in place - I should have shortened them or got shorter gun barrels. You might want to test fit them & see what you think.
Mark
-
Thanks Pete - the tedious work has yet to come(rigging)
.
Mark
-
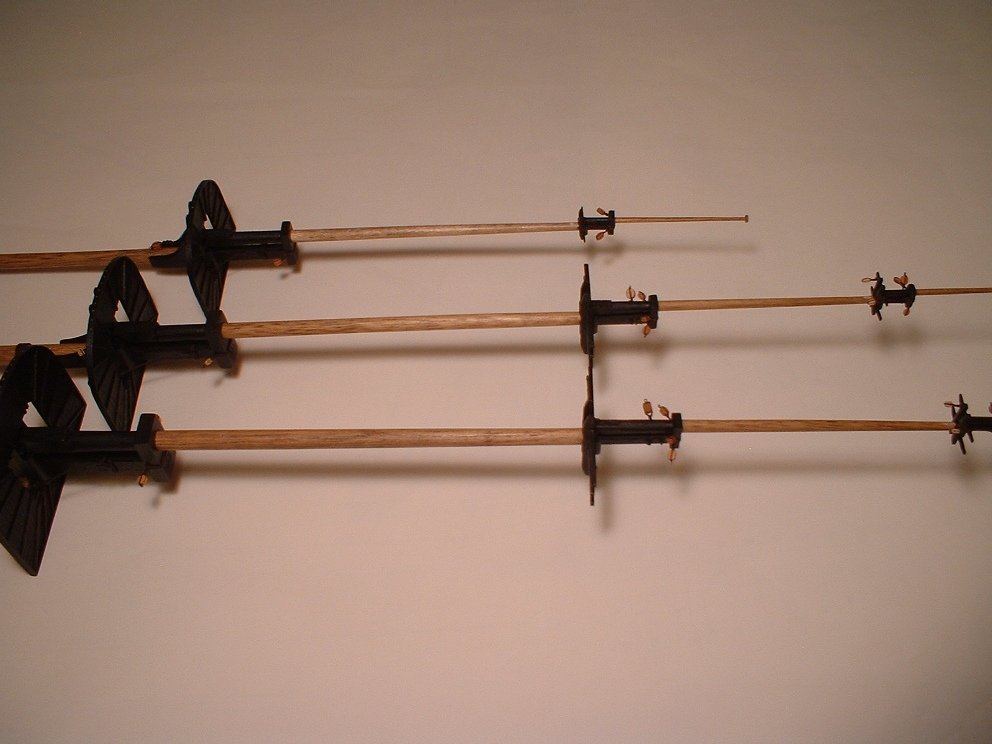
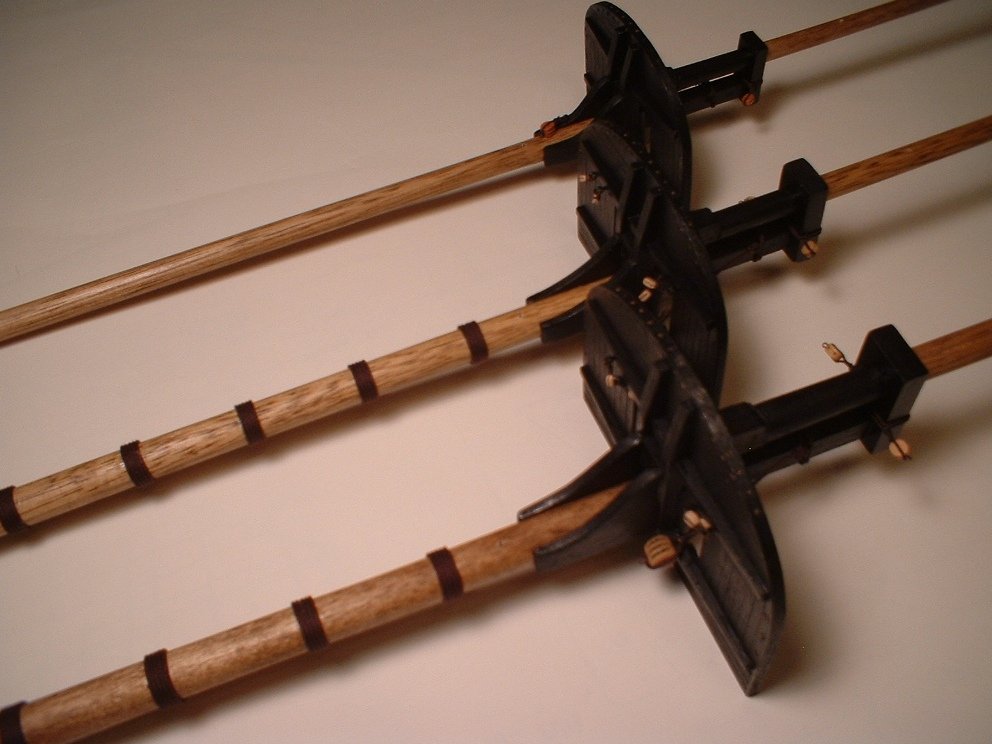
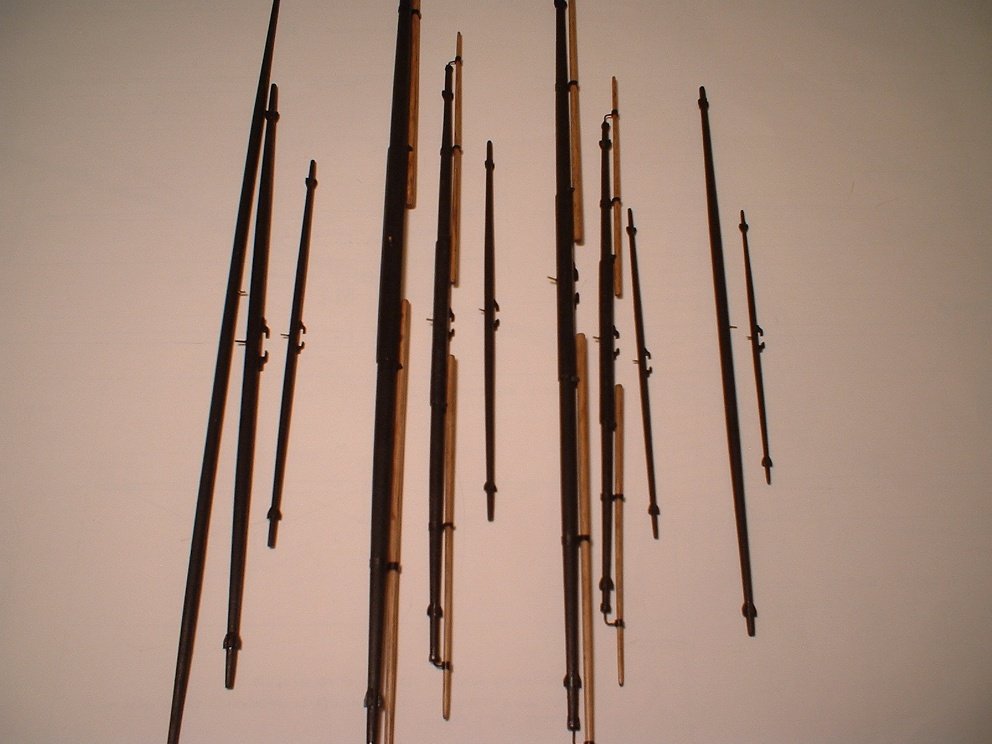
A small update - all the yards are now built. Next I will be adding the necessary blocks & ropes to the masts & yards before permanently mounting them to the ship.
Mark
- fmodajr, NMBROOK, Mirabell61 and 5 others
-
8
-
-
-
Thanks Greg - although the pictures don`t show it well,there is quite a difference (cheap camera,artificial lighting,poor camera skills,etc.,etc.
Mark
-
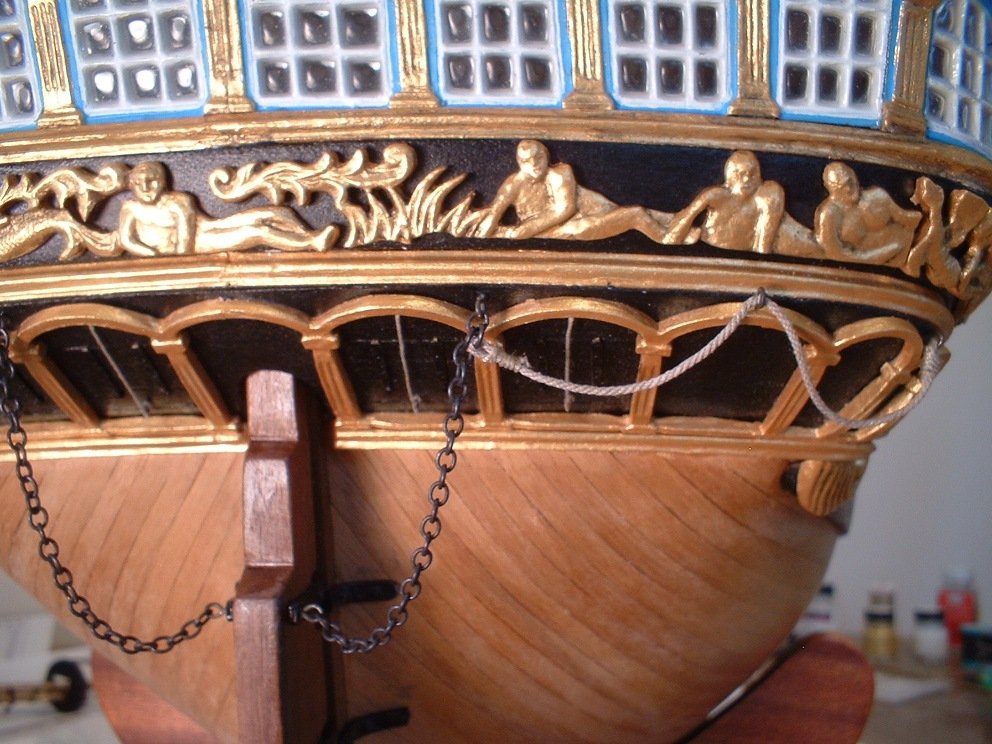
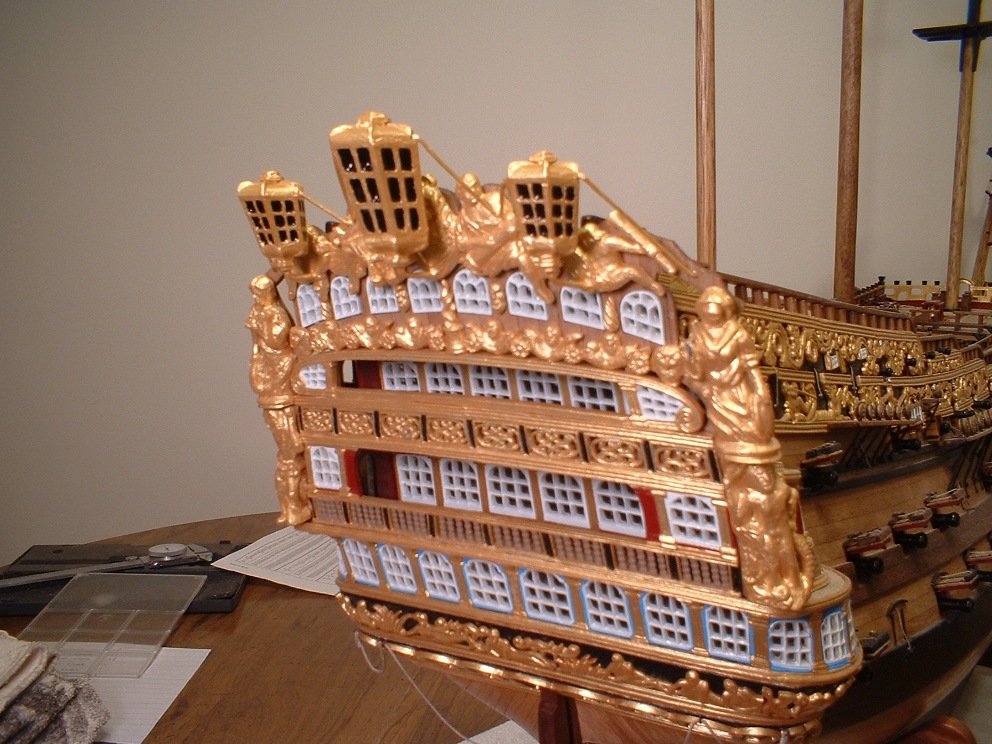
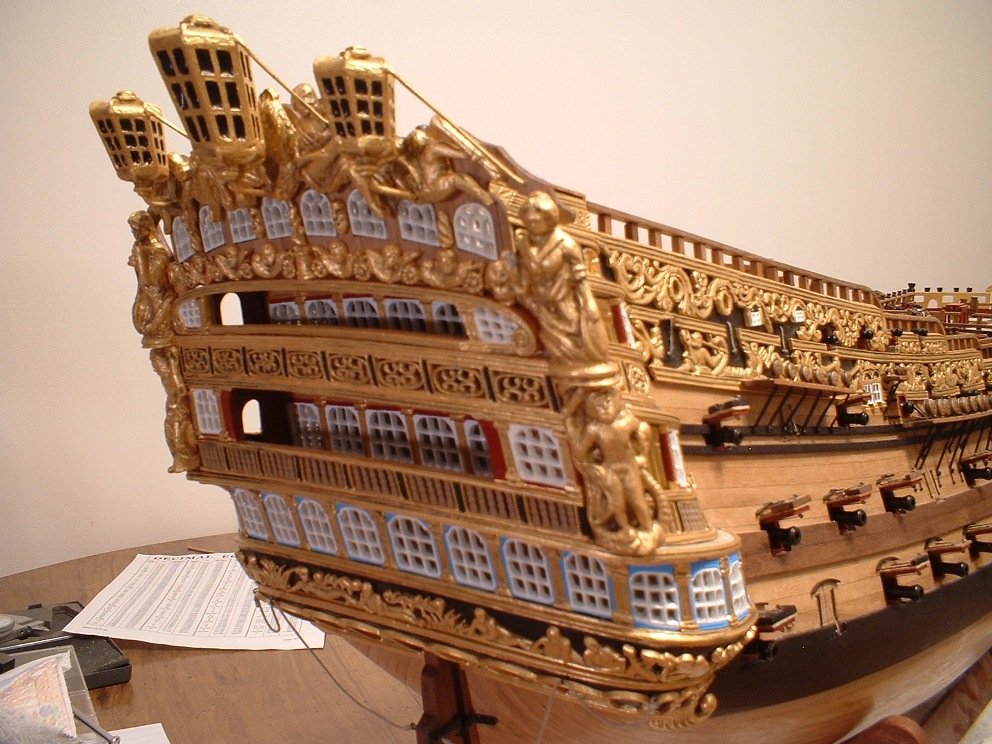
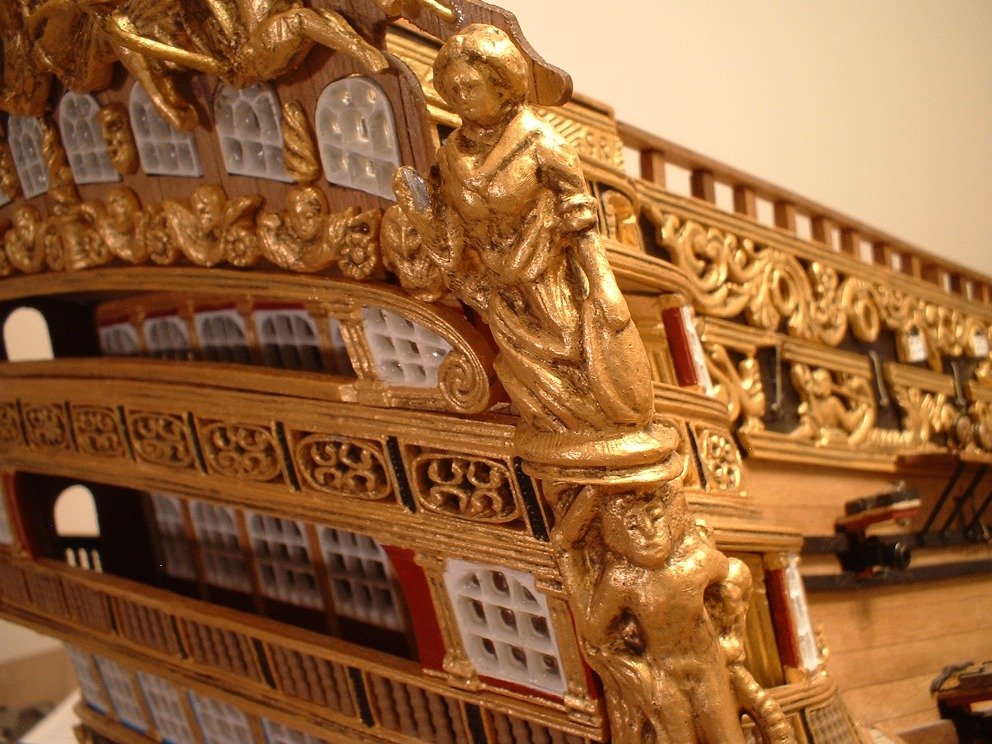
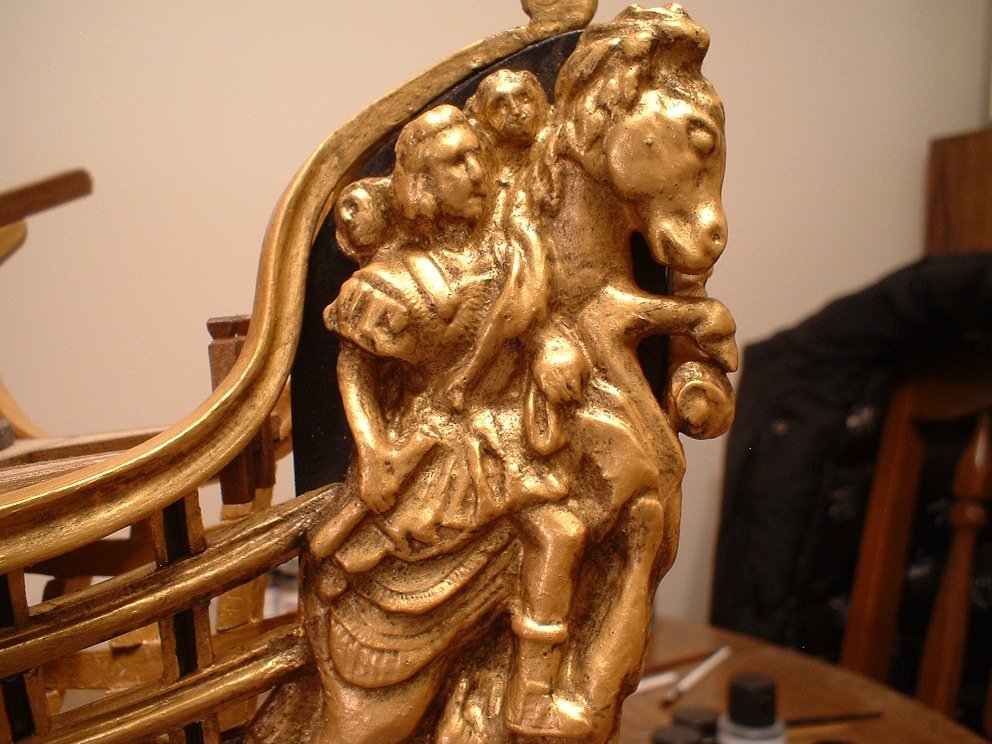
Well,after spending the better part of the day applying a wash to all those gold decorations,I think there is a real improvement to them. The first picture is before & the next three are after applying the wash. They actually look better in person than my cheapo camera shows.
Mark
- Mirabell61, zoly99sask, NMBROOK and 13 others
-
16
-
Thanks everyone for your opinions & suggestions - I will be heading out to the local hobby shop shortly to get some of the Vallejo washes & see how it goes. I agree that the decorations are a bit too "fresh" looking & hard to see the details.
Mark
-
Keith - I am still tweaking things,so a black wash is not out of the question - it can be applied at any time.
Pete - my reason for using gloss black is that glass is very reflective. I may tone it down with a coat of clear semi-gloss to see how that looks.
Mark
- piratepete007 and md1400cs
-
2
-
-
Hi Michael - the lantern glass is not painted. I painted the interior of the lanterns yellow with a touch of red to try & simulate a flame & filled the panes with liquid glass. what you see through the "glass" is the painted center of the lantern. Unfortunately,it did not turn out as I hoped it would. I may still try & do something with them,though.
Mark
-
Don & Greg - thanks very much! Also thanks to everyone looking in & hitting the like button.
Mark

Royal William by marktiedens - FINISHED - Euromodel - scale 1:72
in - Kit build logs for subjects built from 1501 - 1750
Posted
Thanks Greg & Pete - I should be farther along,but with the weather turning nice progress has slowed.Even with Pete`s guidance it still takes me a while to figure out all this rigging stuff. I am also a little short on eyebolts,so I need to make a few more before moving on.
Mark