


marktiedens
-
Posts
1,737 -
Joined
-
Last visited
Content Type
Profiles
Forums
Gallery
Events
Posts posted by marktiedens
-
-
Great job,Don.Takes me back to fishing with my Dad in a little 12 footer.

Mark
-
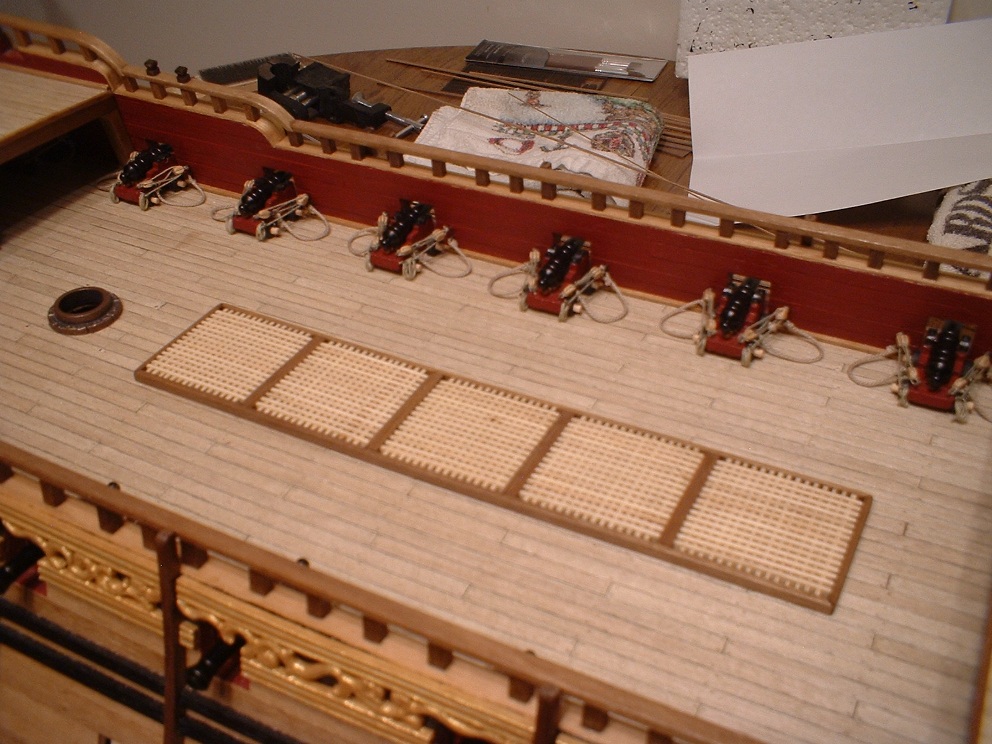
Thanks Frank - yes,plenty of room on this deck. Here is a little better picture -

Mark
-
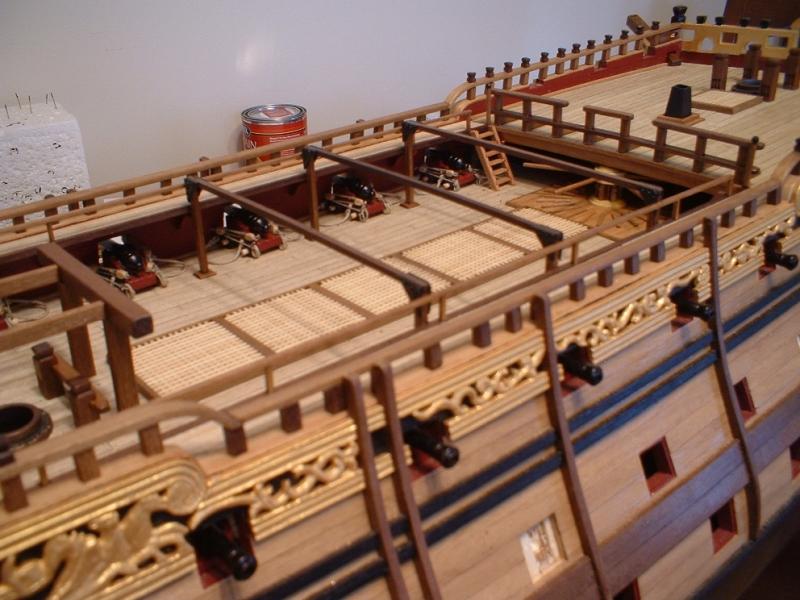
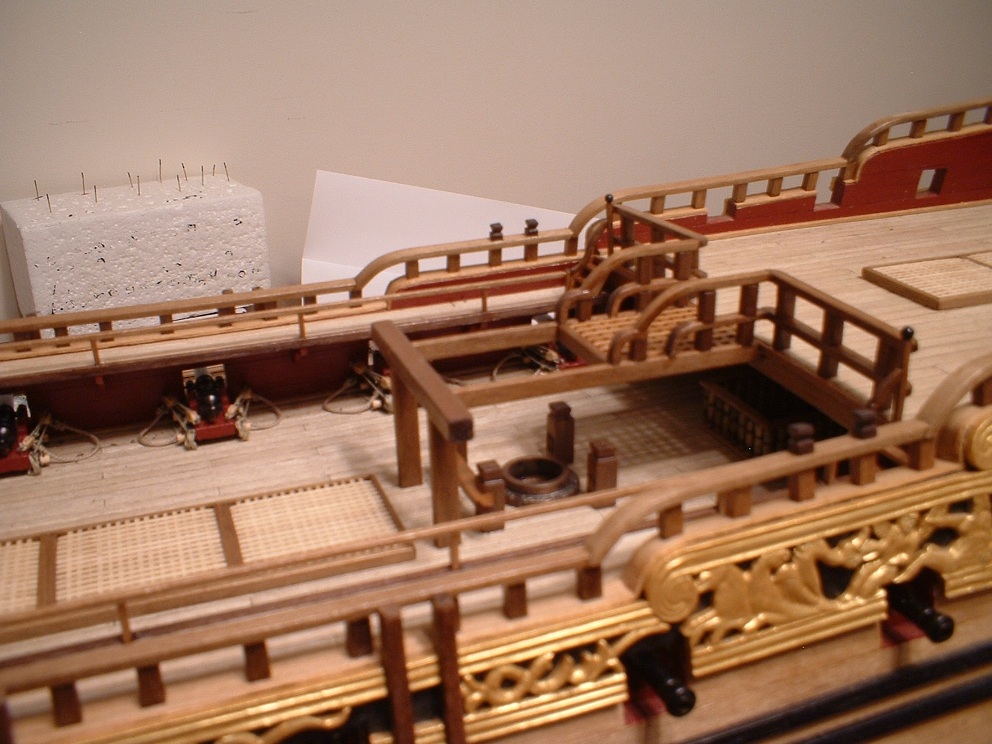
Another update - all the cannons with carriages are now in place & rigged. Very fiddly work - the blocks are only 2.5mm long & difficult to work with. Also the curved ladders are now in place & a curved handrail added up to the upper quarter deck breast rail.
Mark
- dgbot, Seventynet, WackoWolf and 10 others
-
 13
13
-
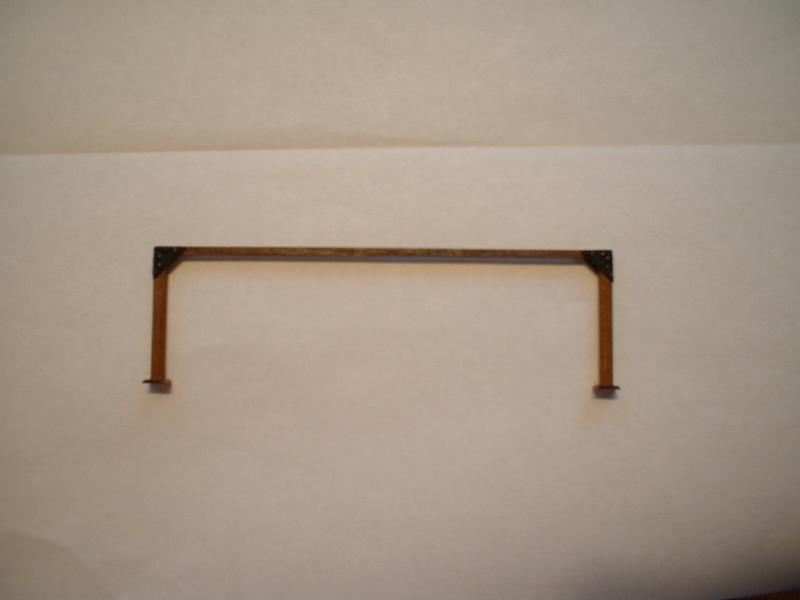
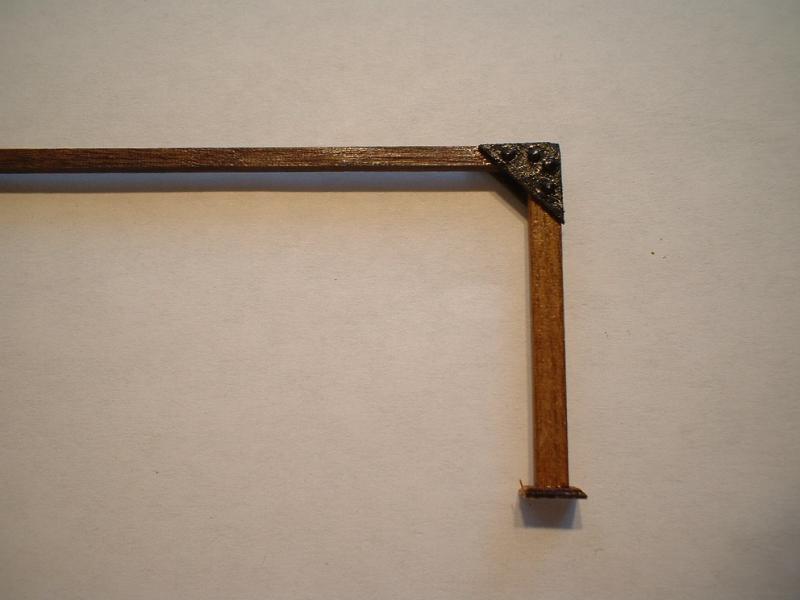
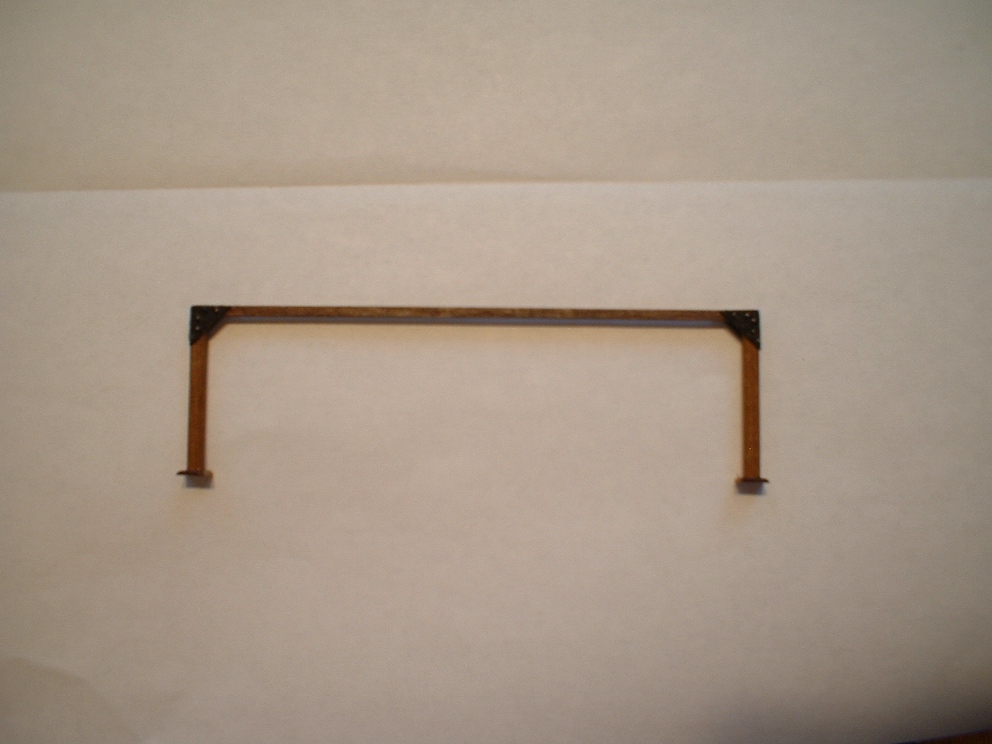
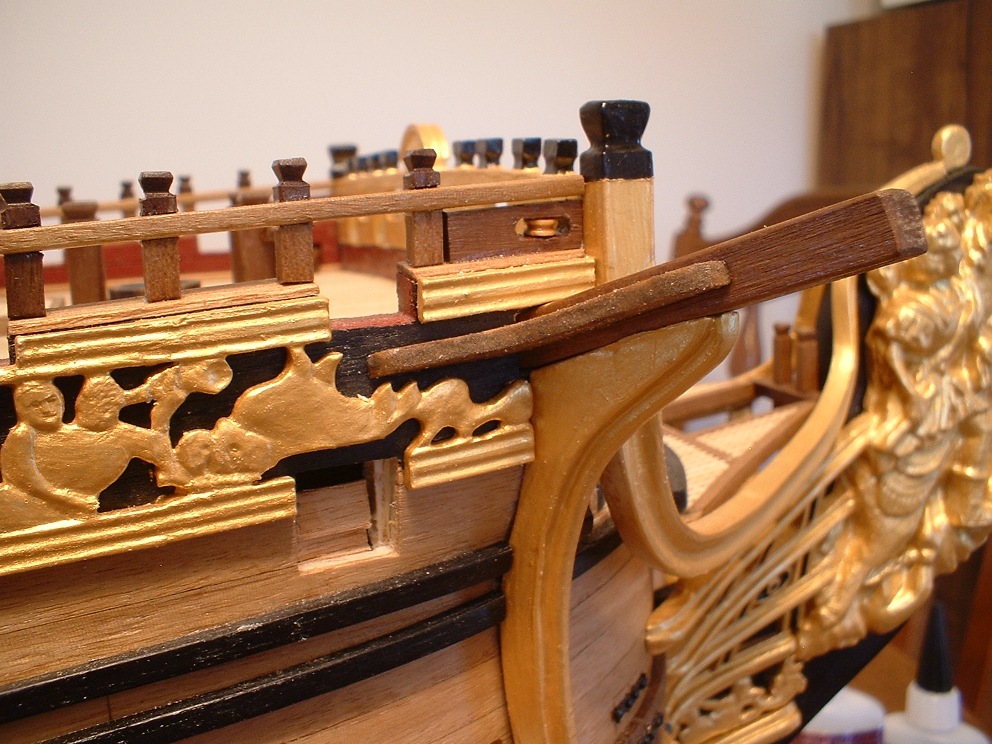
Another small update - made up the skid beams for the ship`s boat using 2x2 & 2x3mm lumber,& added gussets at the corners,& glued in place.
After that I drilled & filed the holes in the catheads & glued them in place. Still waiting for some small blocks to arrive so I can get the rest of the guns in place on those upper decks.

Mark
- maggsl_01, Seventynet, dgbot and 11 others
-
14
-
-
Thank you very much Greg & Don and also for all the likes
 .
.Mark
-
Hi Pete - what you are looking for may be here - http://www.wasadream.com/Index/indexenglish.html Scroll down to pictures 441 to 458. The Vasa museum used to have some very nice pictures on their web site,but most of them seem to be gone now
 .
. Mark
-
Thanks Keith & Lawrence. One thing I forgot to add to my last post is the bottom of the staircase was narrowed down to 10mm & the top steps ended up at 13mm wide. It looks just the opposite in the last picture,but it`s just the camera angle. Also forgot to add that stringers were added to the sides of the steps - I had to curve & add a twist in them to fit right - that was the hardest part. I have been conversing with Pete as to whether their should be an inner balustrade or not & am leaning toward leaving it on. The plans show an inner balustrade, but it seems to be absent on contemporary models. Have to think about that for awhile.
Mark
- piratepete007 and fmodajr
-
2
-
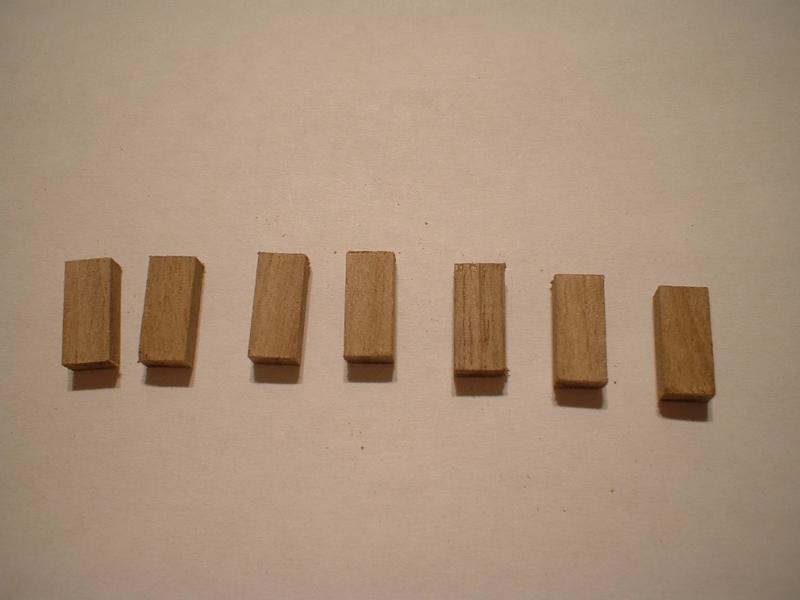
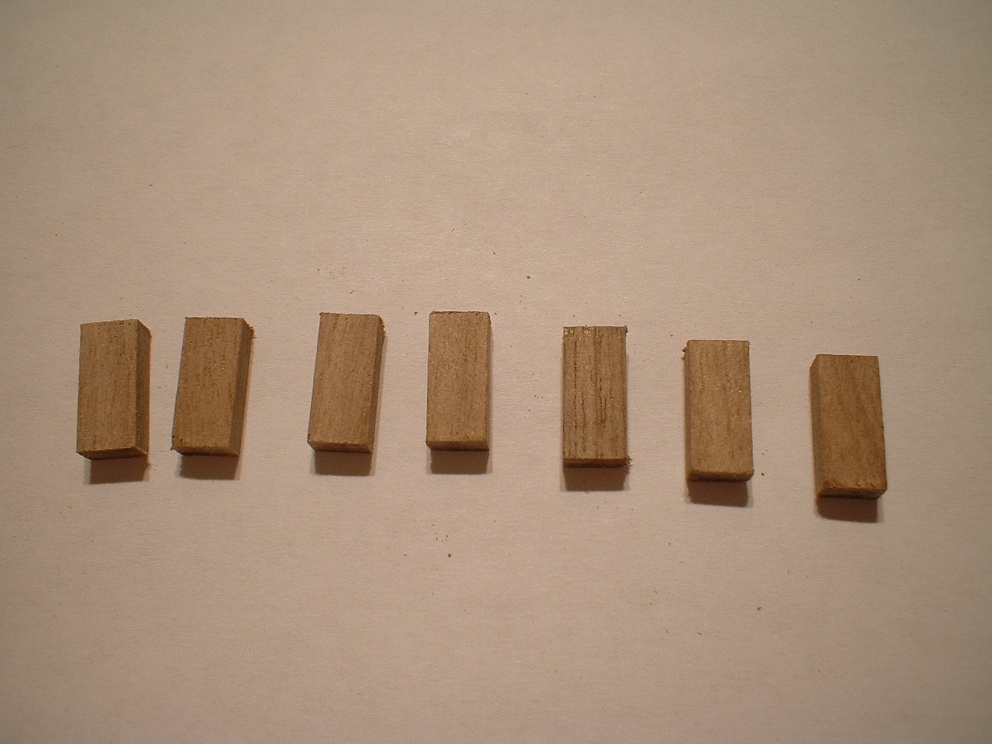
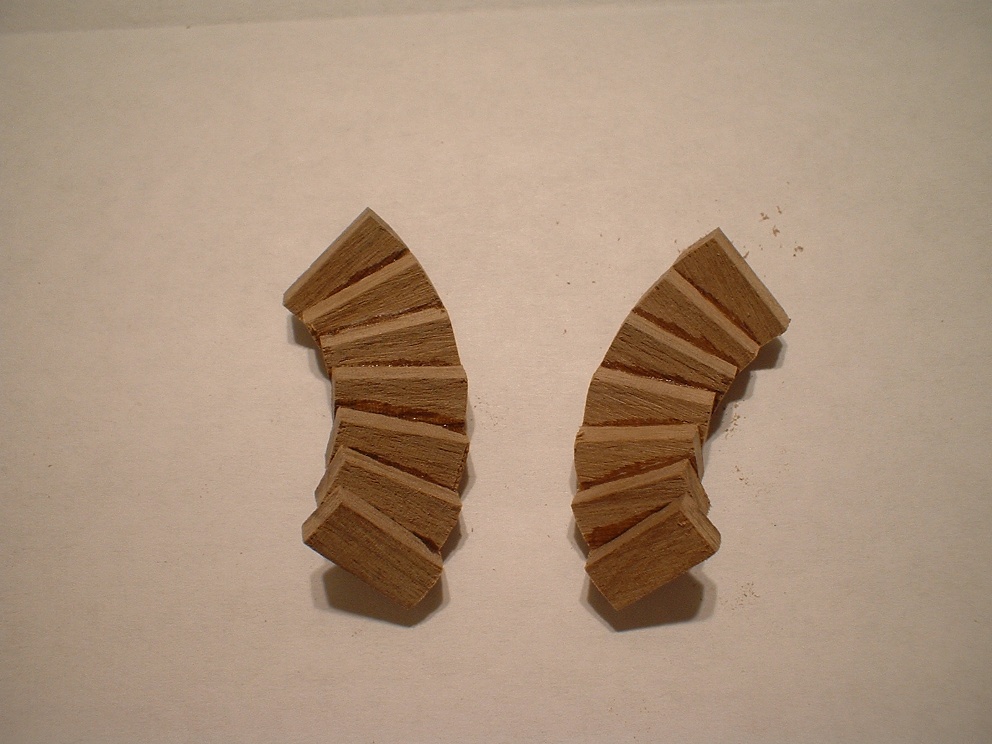
Hi all - another update. Figured I may as well do the curved stairs. First thing I did was cut the steps from some 3x5mm strip.
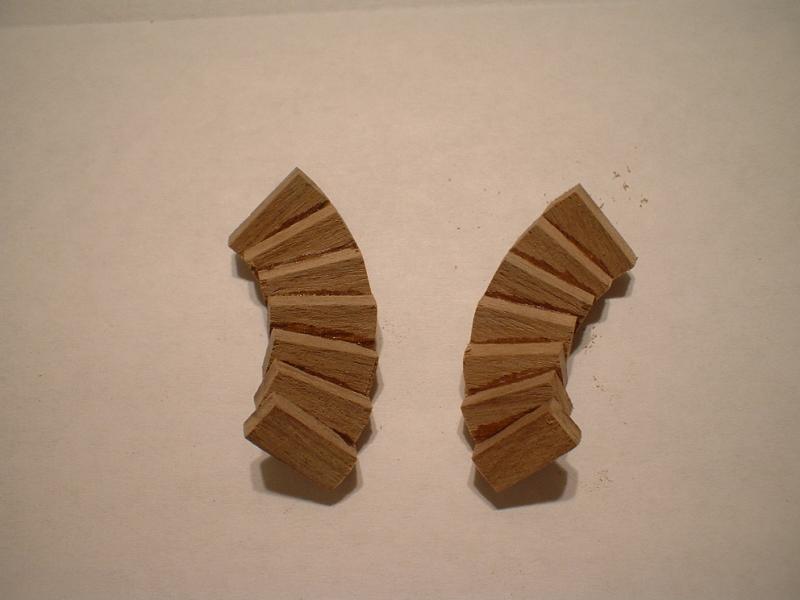
Then I glued them up into a curve.
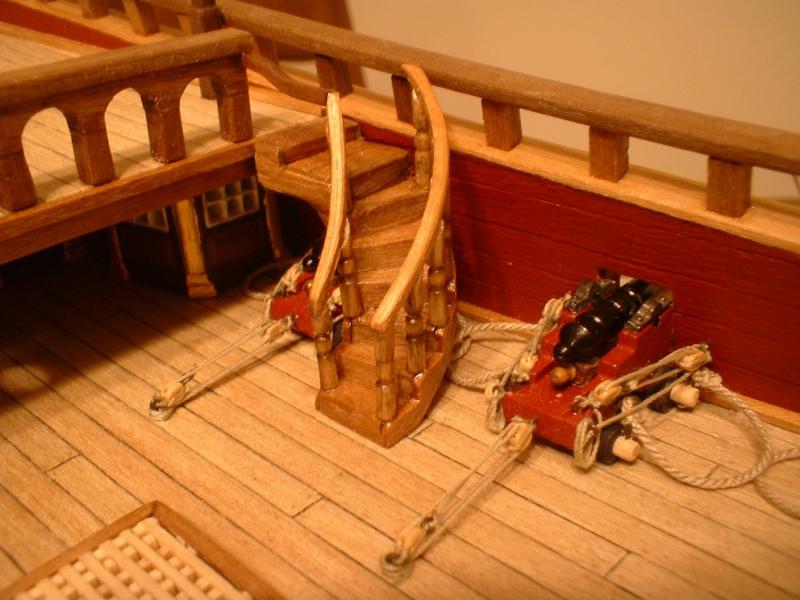
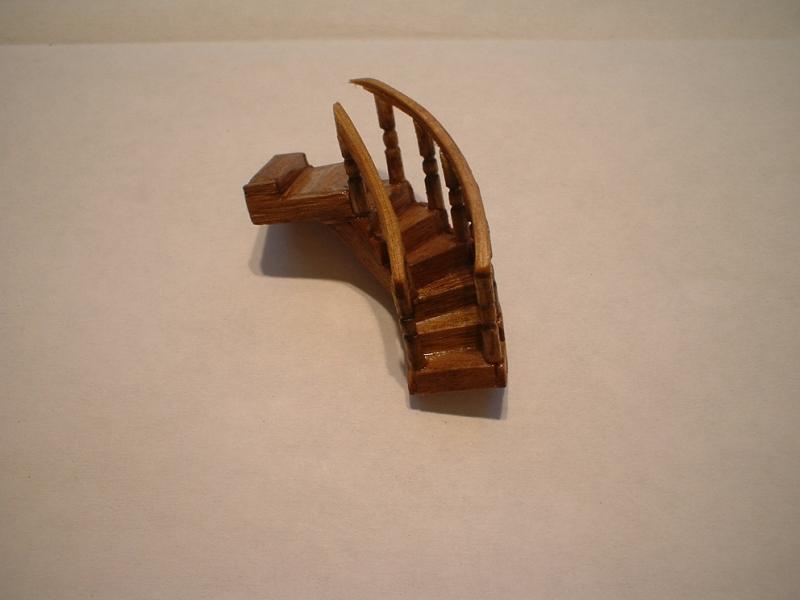
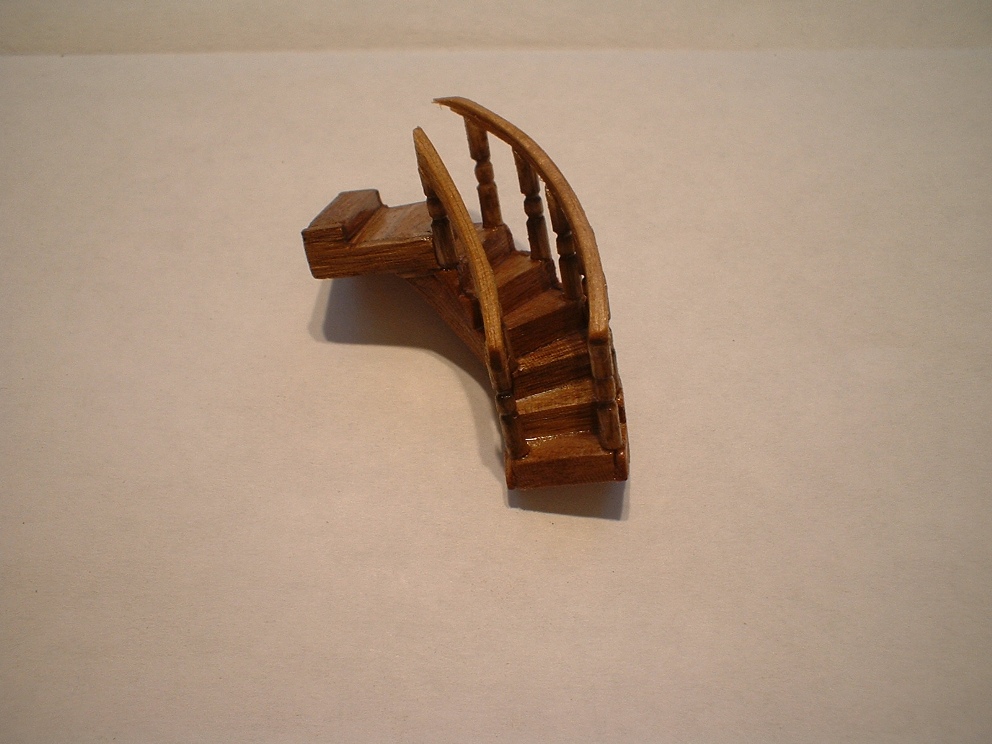
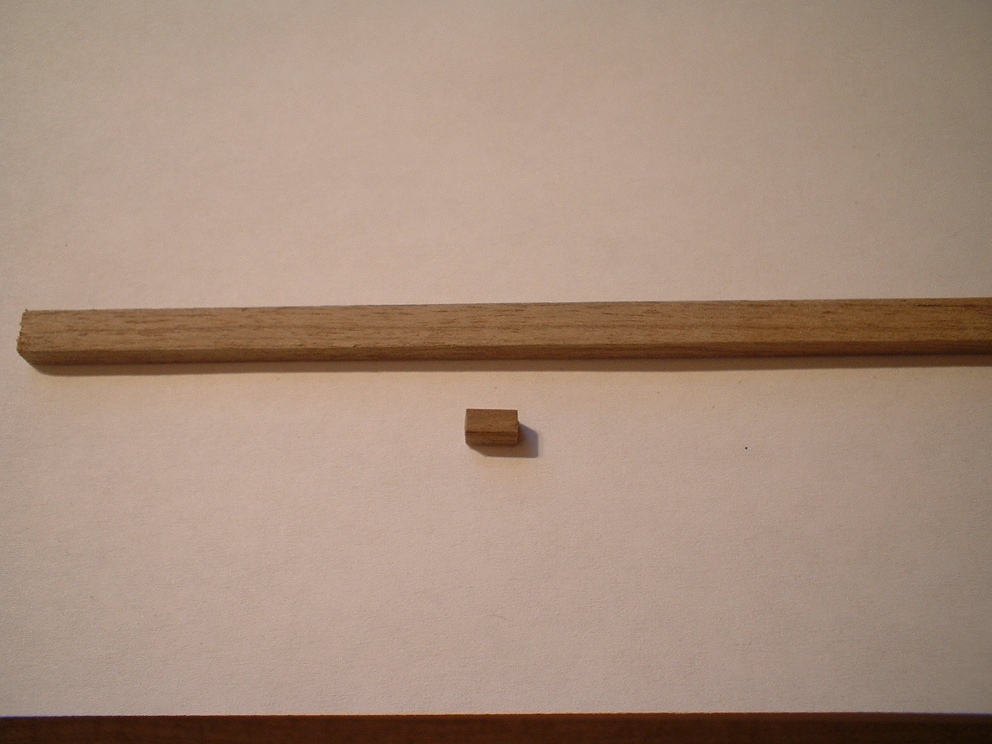
Then I added a landing at the top plus one more step. I made the hand rail stanchions by putting a round wood toothpick in my Dremel & cut some grooves with a file. After staining & gluing in place,I formed the handrail with my plank bender & glued them in place.
This last picture shows the curved stairs in place. They are not glued down yet - the quarter deck guns need to be mounted first as access will be limited after the stairs are permanently in place.
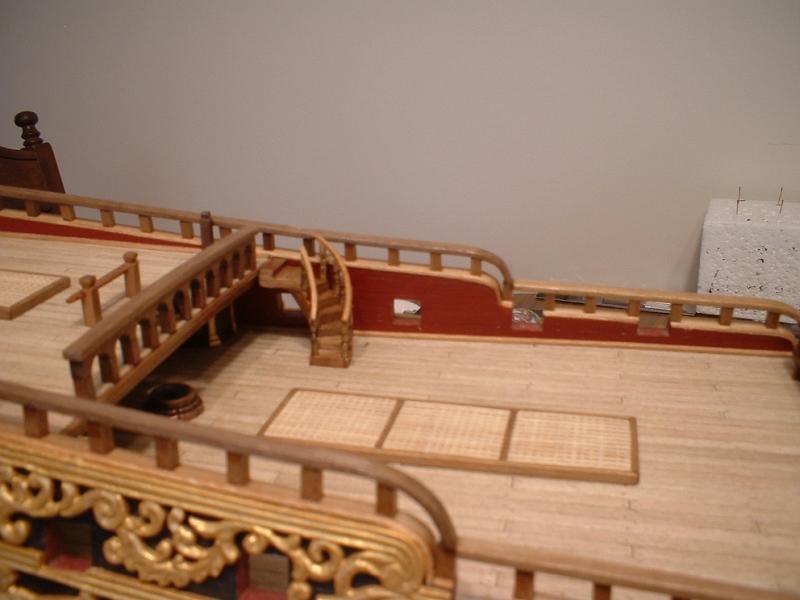
As always,thanks for looking in. Also the hand rail will be finished after the stairs are permanently in place.
Mark
-
Thanks Greg for your generous comments
. Mark
-
Hi Keith - got them from Ages of Sail - they are much nicer than I could ever make. They are made by Amati,I think. If you go to their web site,click on "fittings". They have a lot of fittings,so you may need to go through numerous pages to find them.
Mark
- WackoWolf, Landlubber Mike, Keith_W and 1 other
-
4
-
-
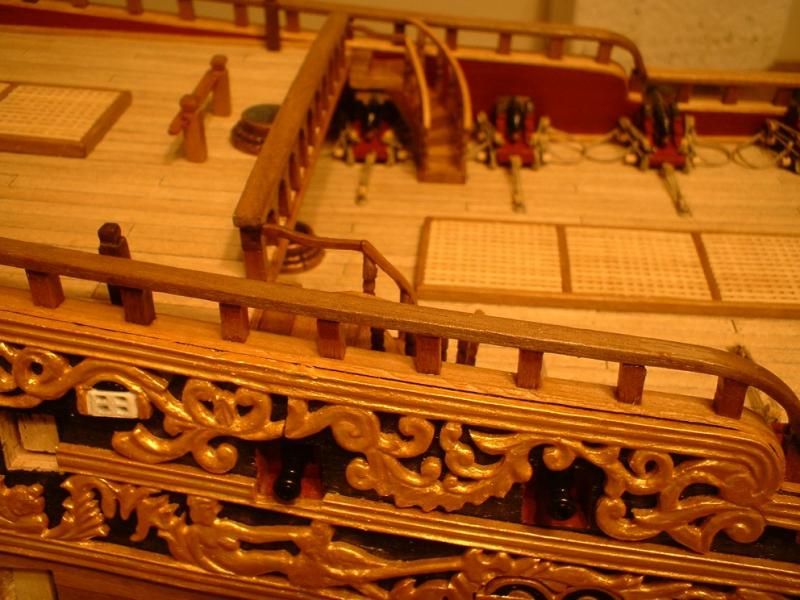
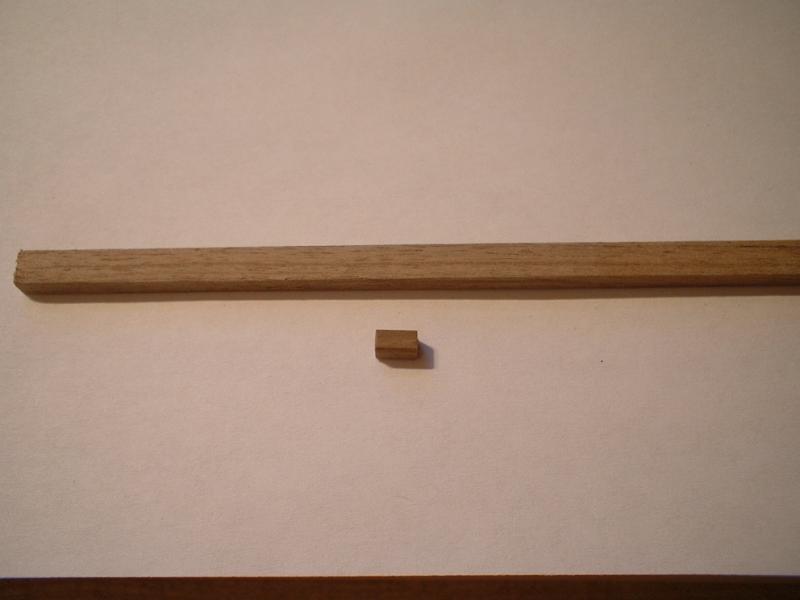
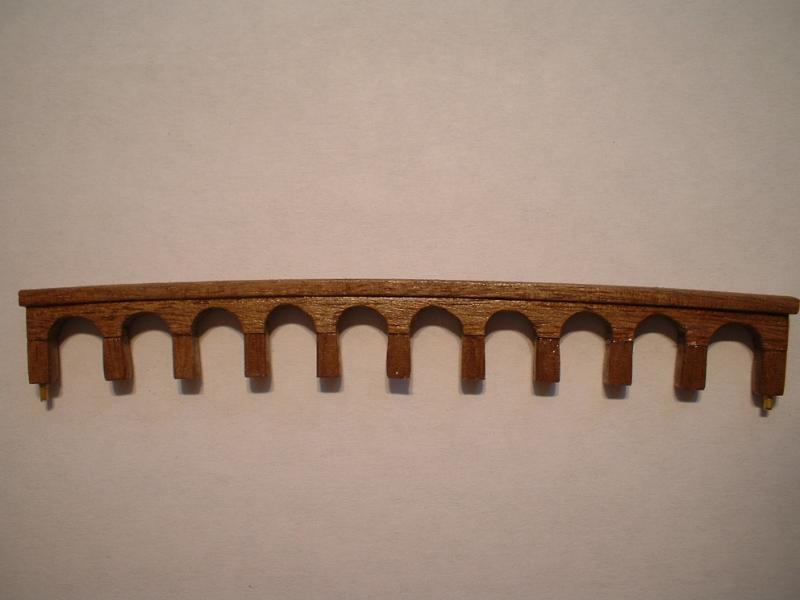
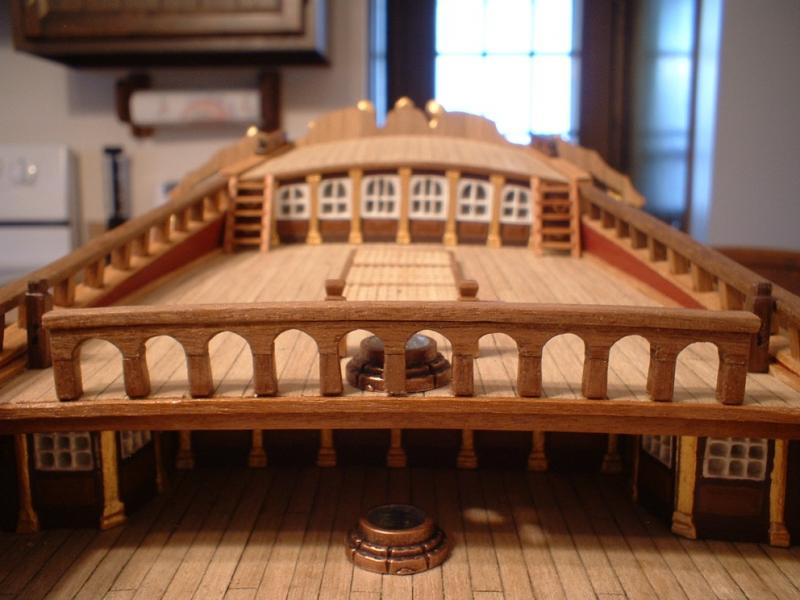
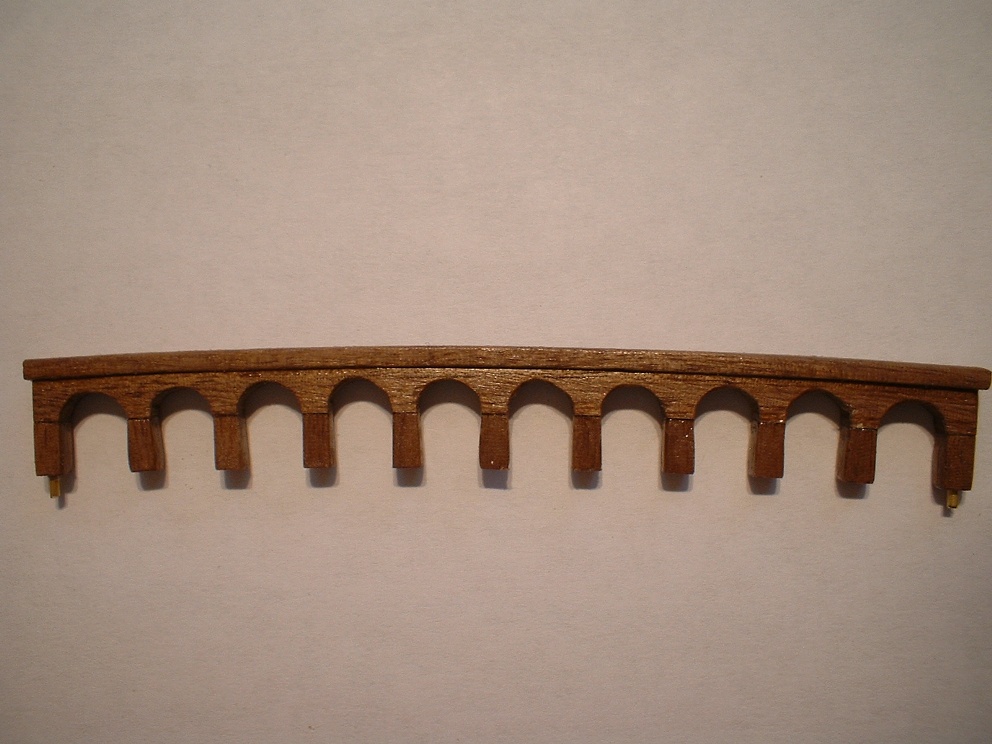
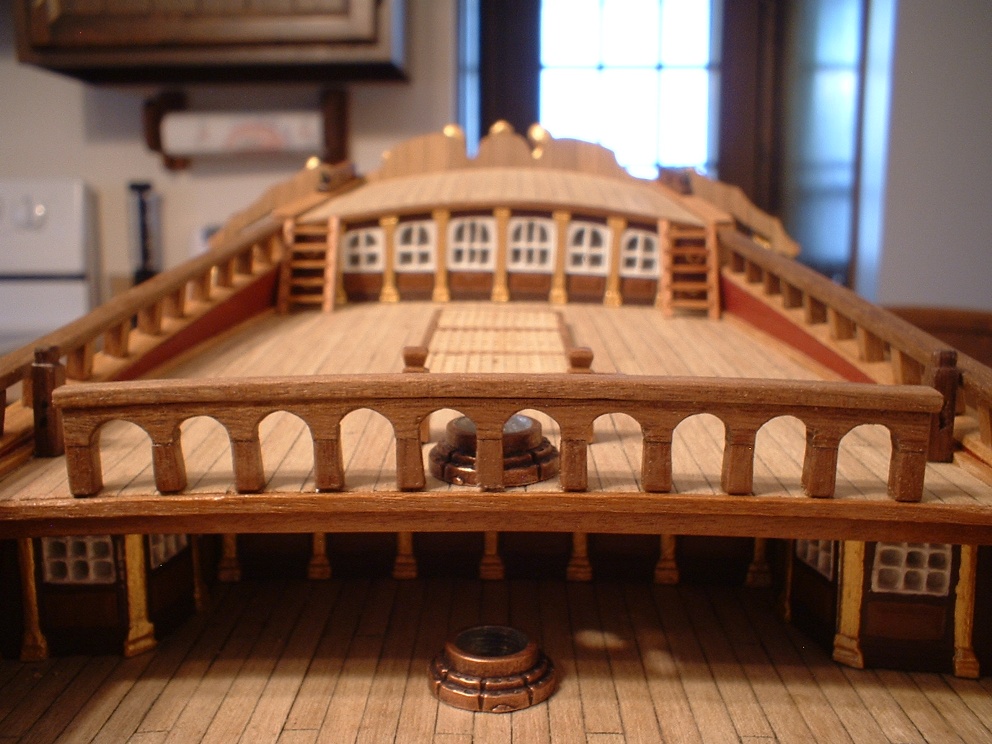
Another update - upper quarter deck breast rail completed. first I cut 11 3X3X5MM posts for the rail. They were then glued onto a 3mm wide strip - spaced 6mm apart according to the plans. I happened to have a 6mm wide half round file which I used to create the arches,then a 2x4mm strip was bent to the curve of the deck camber & glued on top of the arches. Then the assembly was glued to the deck. I may work on the curved staircases next - have to think a while on those.
Mark
- canoe21, tarbrush, Robin Lous and 10 others
-
13
-
Thanks Don - being retired it`s party time all the time for me

Mark
-
Thanks very much,Nils & a late happy birthday to you as well

Mark
-
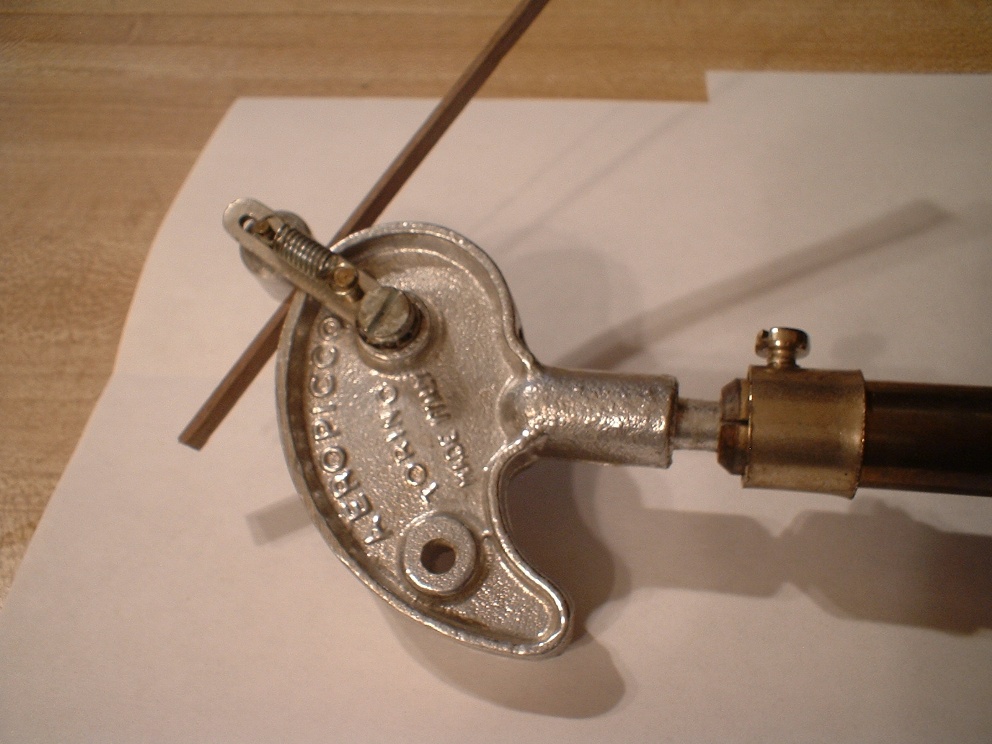
Yes,Don- that is the one tool in my arsenal I wouldn`t give up. By the way,the head is an aluminum casting.
Mark
-
That is one l-o-n-g bowsprit - looking good.
Mark
- Altduck, mtdoramike and Canute
-
3
-
Thanks Michael
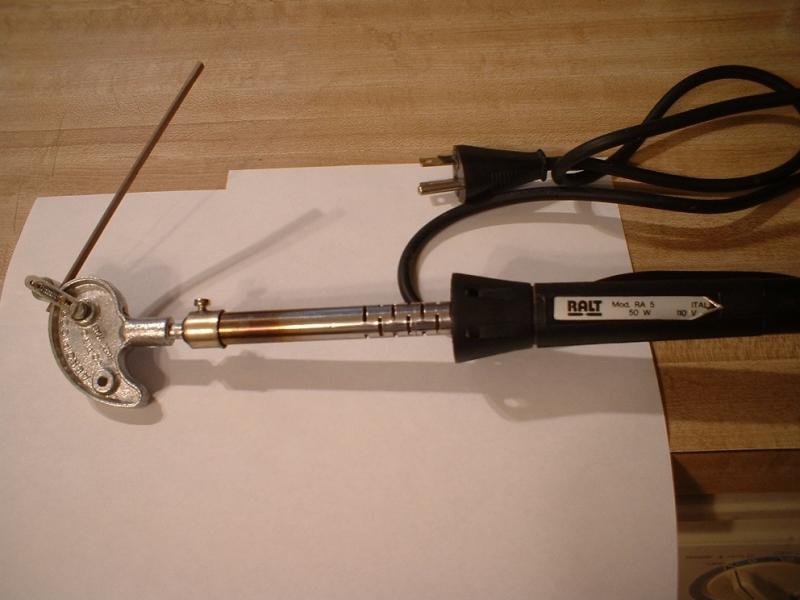
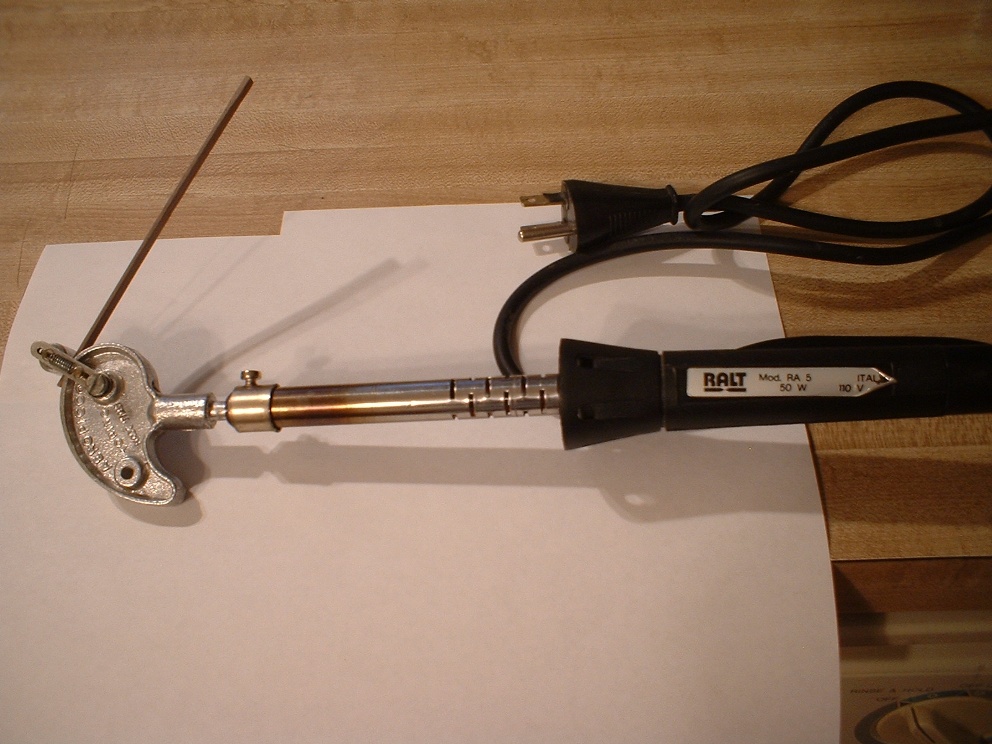
.In case anyone was wondering how I bent all those railings,here is what I use - a plank bender I bought many years ago when Aeropiccola was still in business. It`s simply a 50 watt soldering iron with a comma shaped head in it. It has an adjustable spring loaded roller to hold the plank down & you just plug it in & it will heat up. After soaking the plank in some plain water,I slip the plank under the roller,let the iron heat up,& start applying some pressure on the plank & it will start bending. Softer woods need only a few minutes to soak,while harder wood may need up to an hour depending on the thickness of the wood. This is the most useful tool I have - if you ever find one for sale -BUY IT.

Mark
- piratepete007, Seventynet, cristikc and 5 others
-
8
-
-
Thanks Don - sorry about some of the poor photos. All I have is a point & shoot camera - difficult to get some things in proper focus.
Mark
-
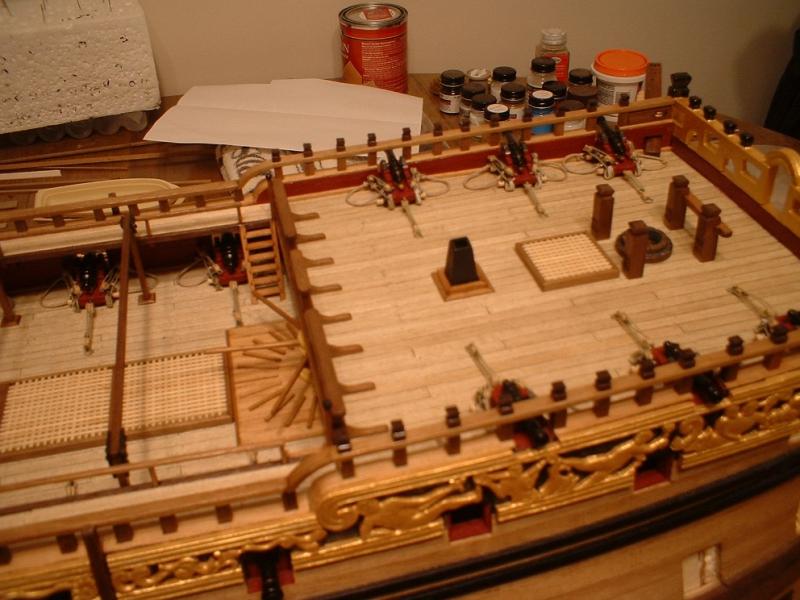
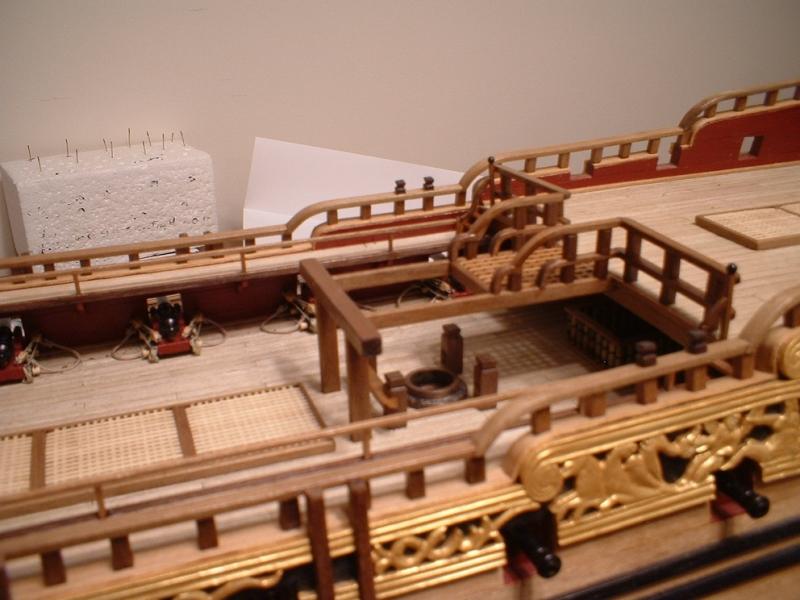
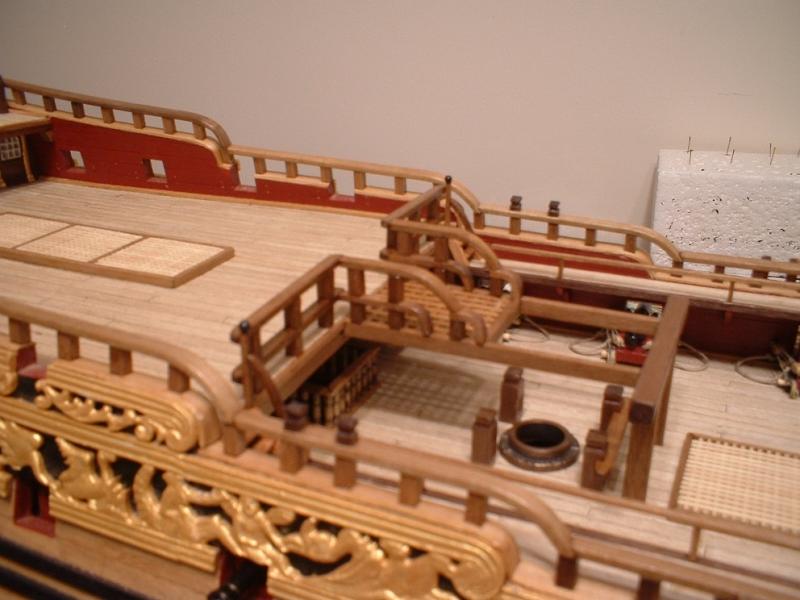
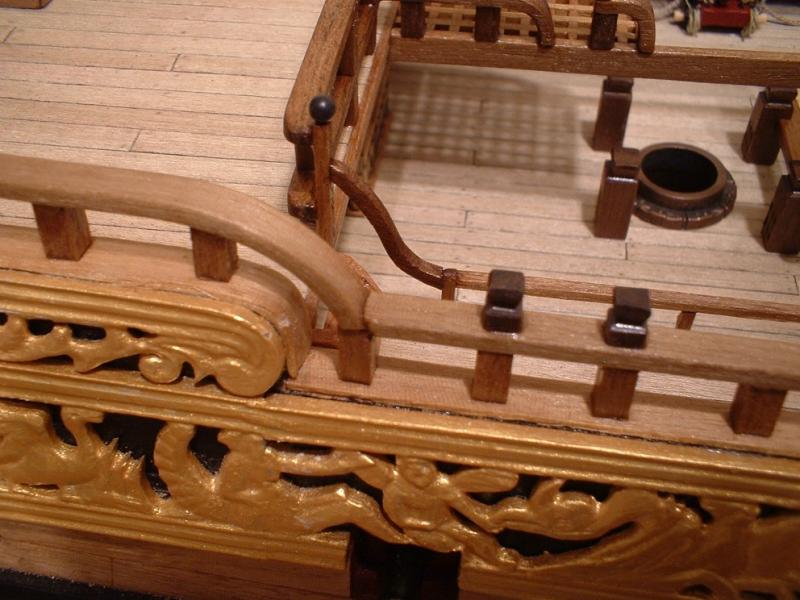
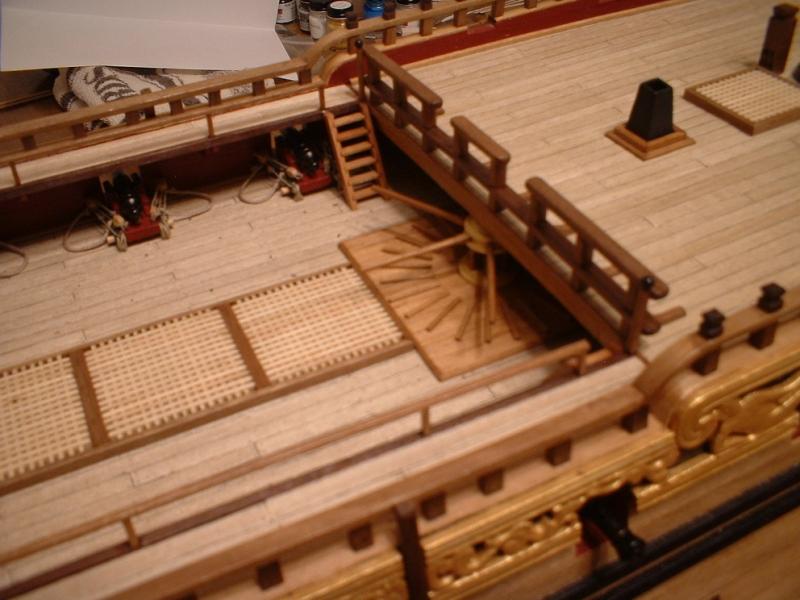
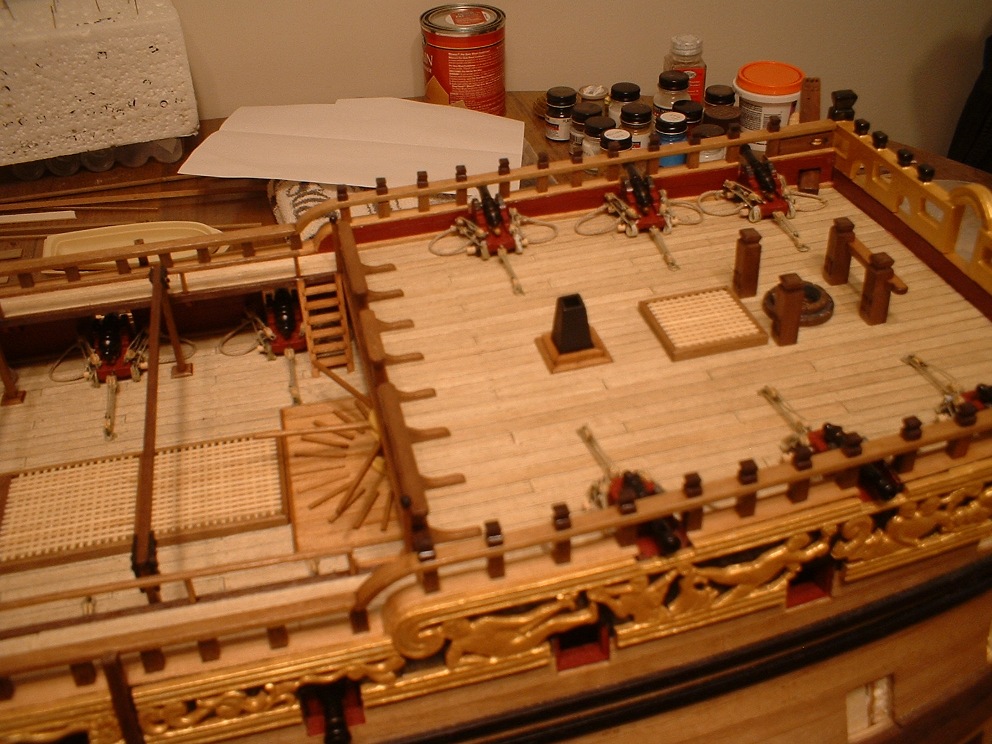
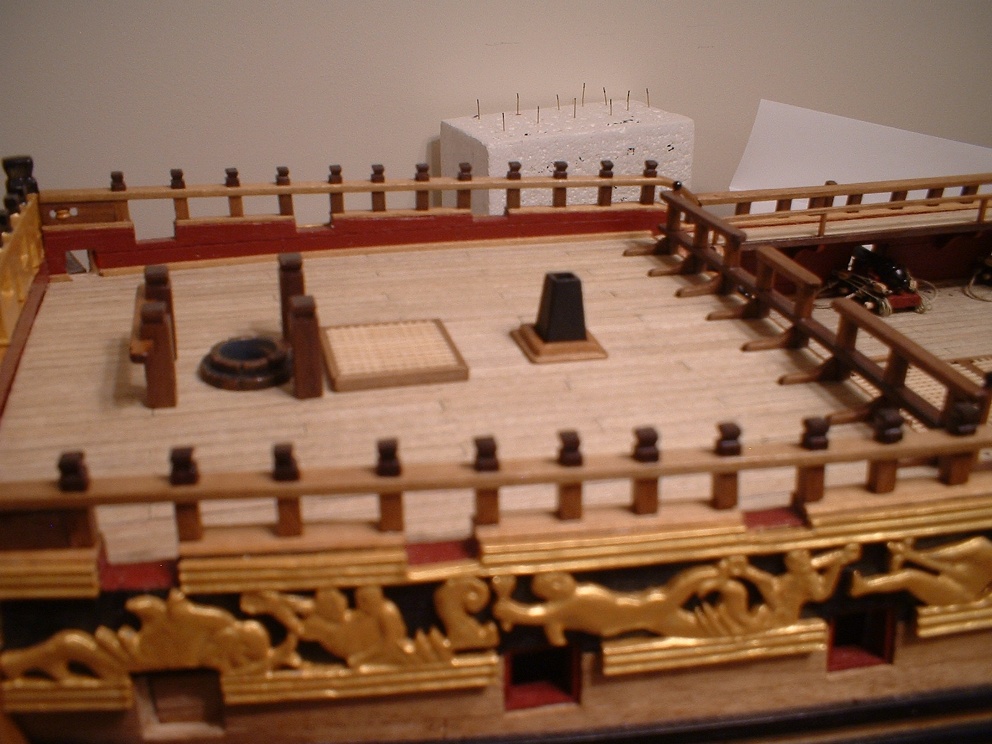
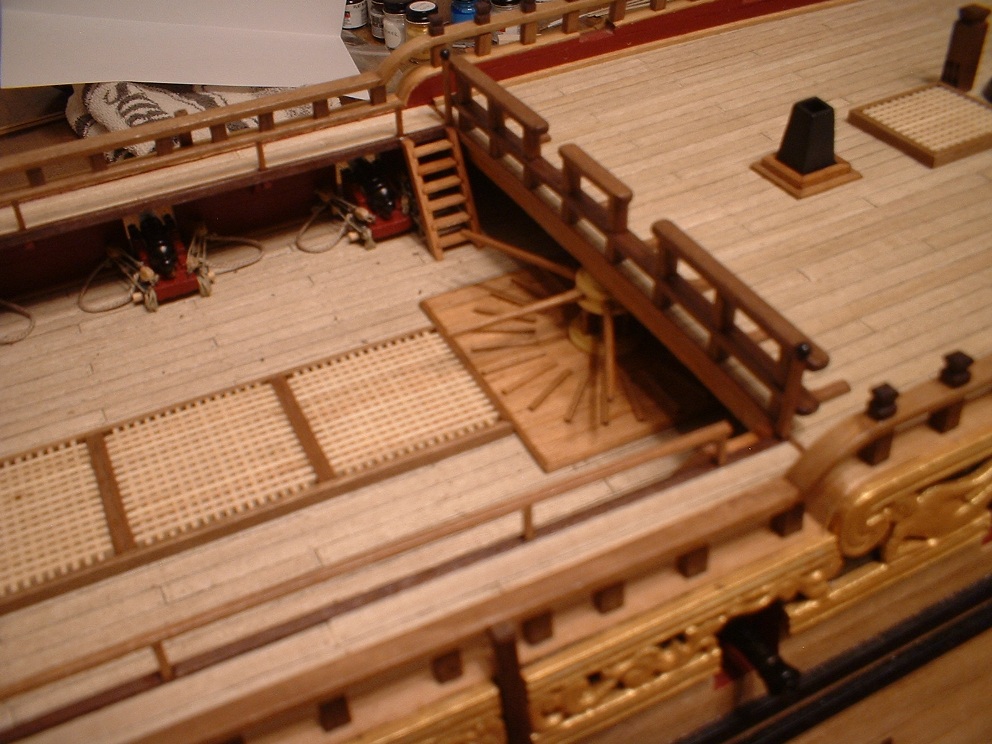
More progress in the shipyard - First thing I did was assemble all the ladders & glued them in place. Next I built a base for the capstan from 1x5mm strips edge glued together & added the small timbers around the base. One small problem I had was when I built the capstan I shortened it to fit under the forecastle deck beam but forgot to take into account the thickness of the base. So I just cut a hole in the base just big enough for the capstan to fit into. After fitting the base in place,I could just slide the capstan into place
. Then I fitted all the bitts in place - all were pinned & glued. Next up were the forecastle & quarter deck railings. Their construction was pretty straightforward - just a matter of cutting a bunch of short timbers & gluing them together. Bending some of those 2x3mm timbers was a bit tricky,but I got `em done. The railing on the gangway was a bit fiddly due to the timbers were only 1.5mm square. The S shaped piece of railing joining the gangway railing to the quarter deck railing kept splitting or kinking when I tried to bend it,so I ended up just carving it from a larger timber. Also the plans showed that the grating between the quarter deck railings appears to have larger openings than the gratings on the decks,so I used a little larger spaced grating from my stash.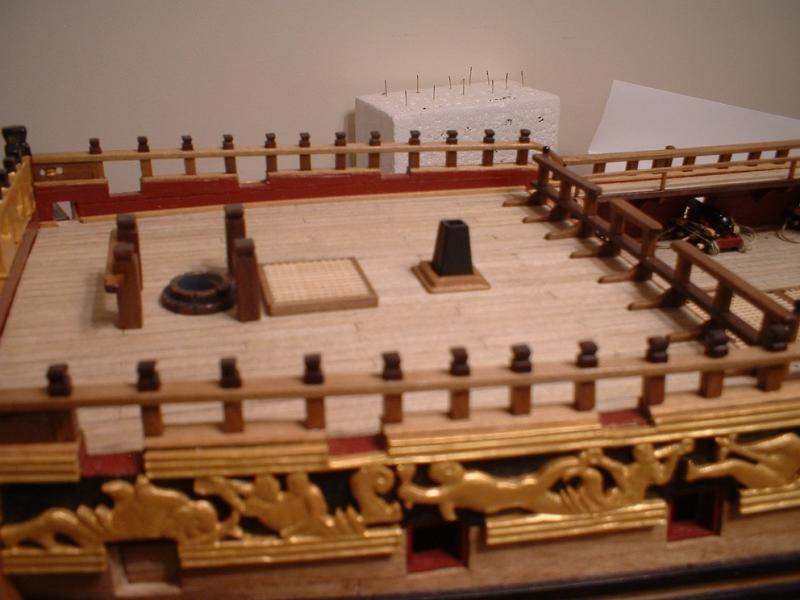

Mark
- pirozzi, canoe21, GrantGoodale and 11 others
-
14
-
-
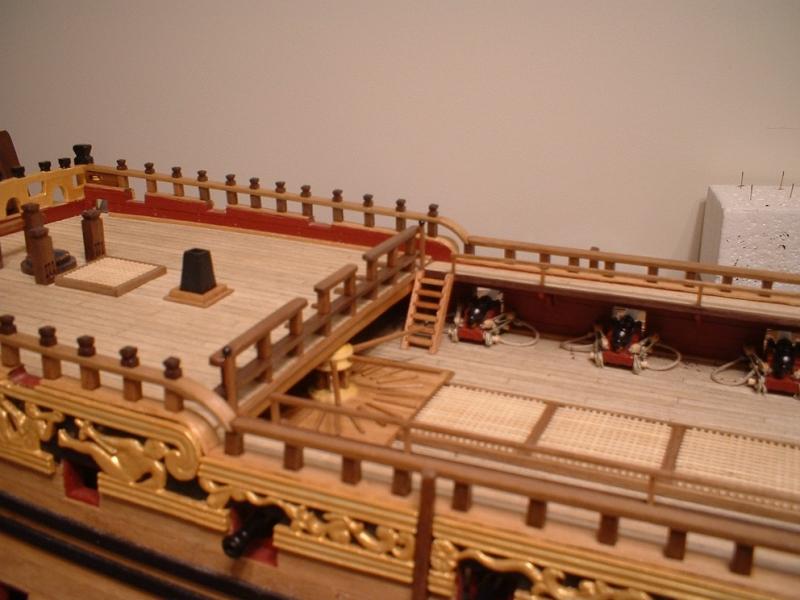
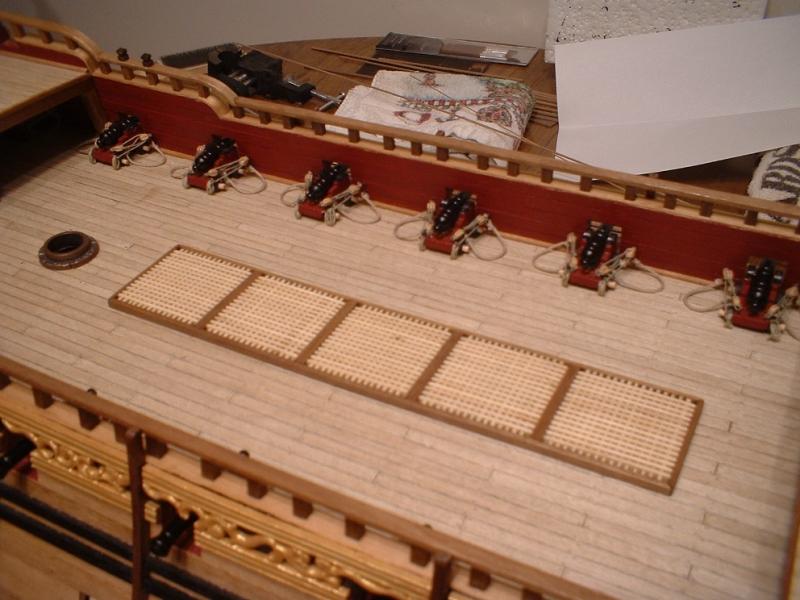
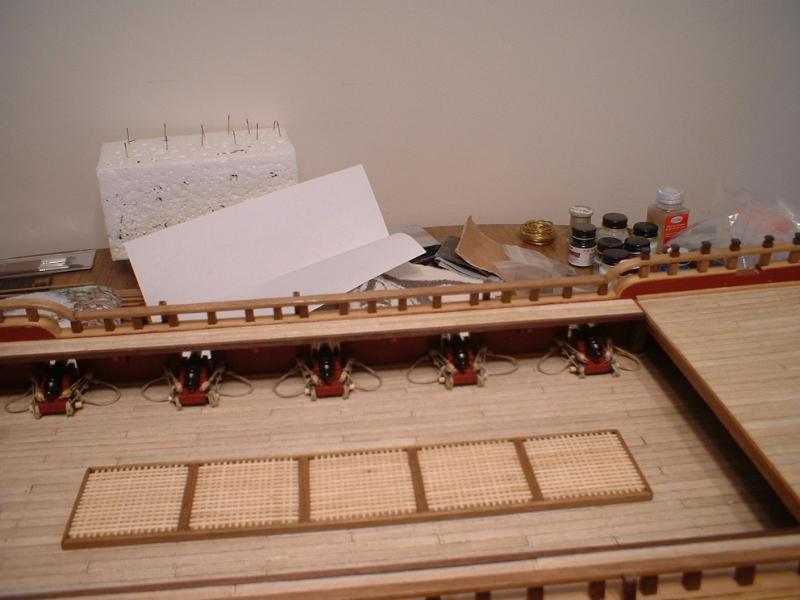
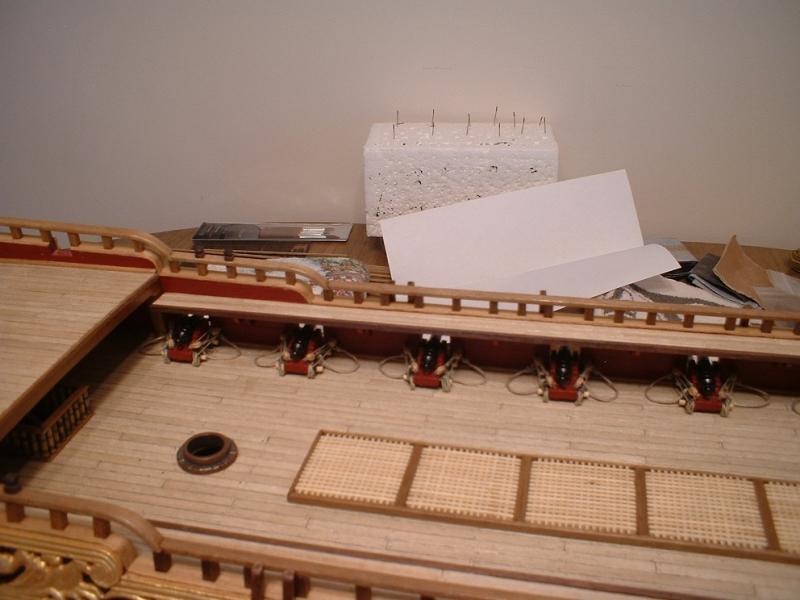
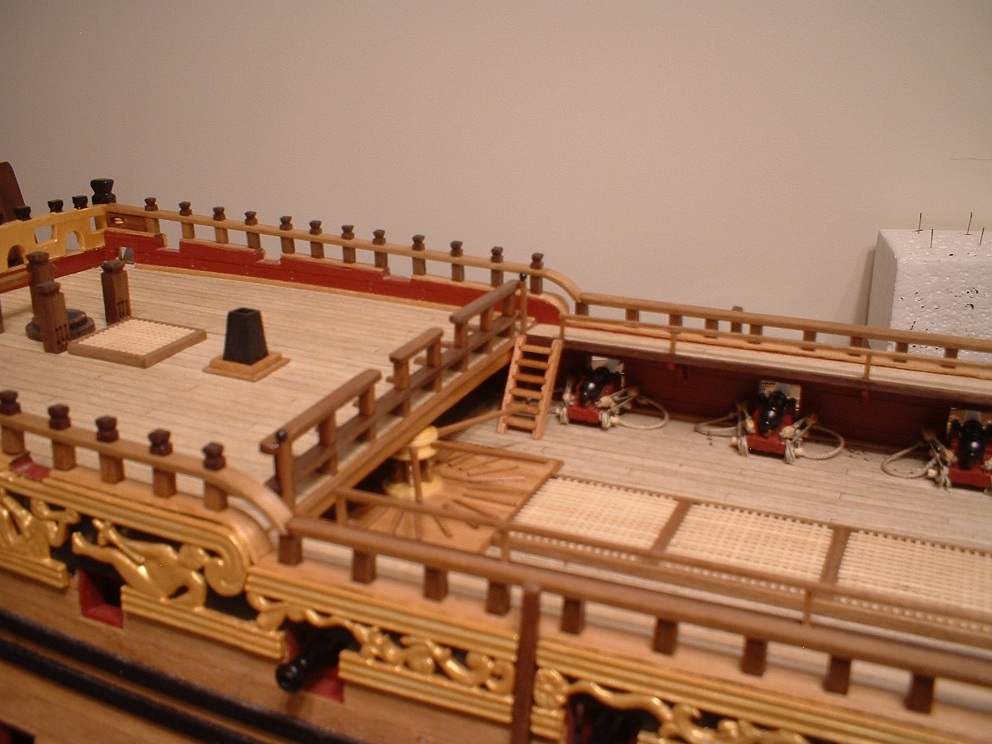
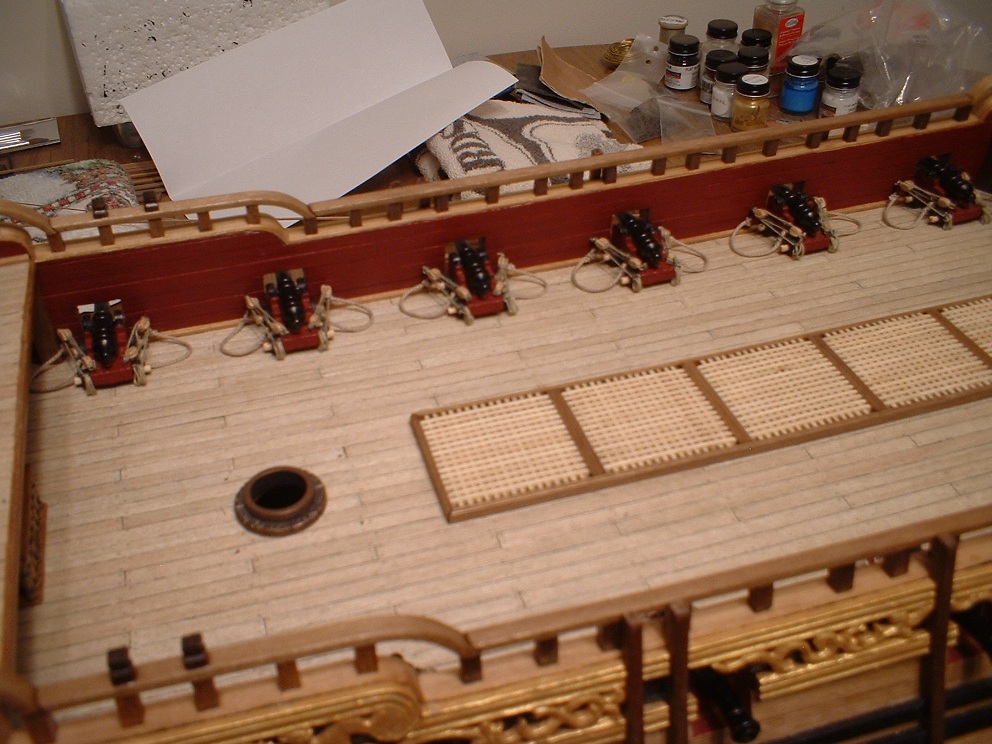
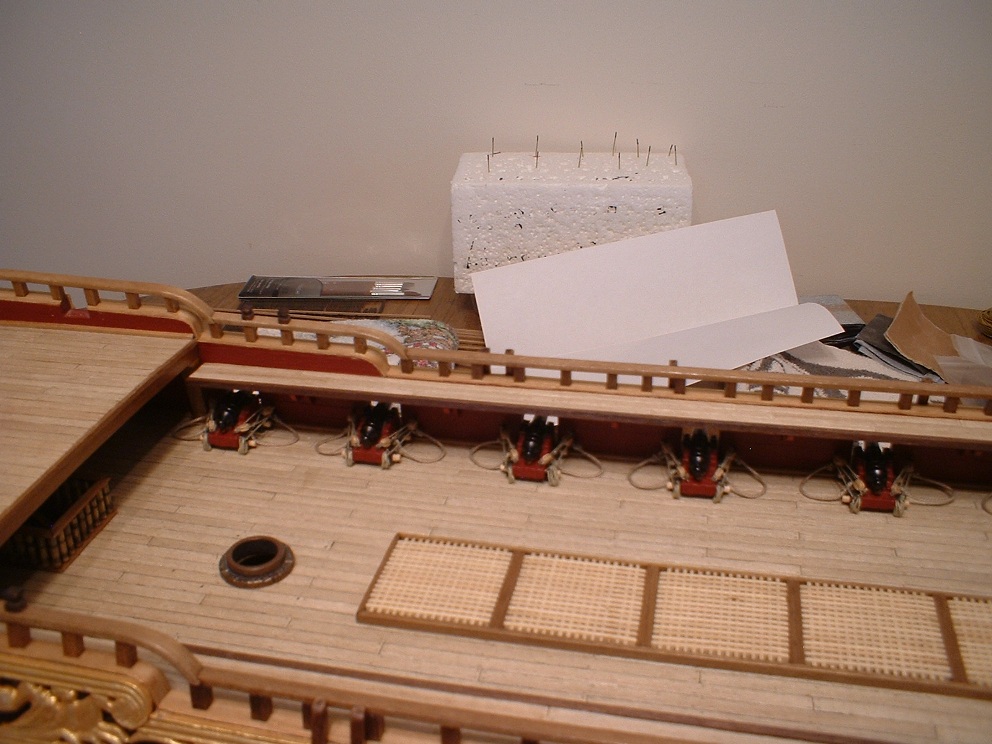
Hi all -
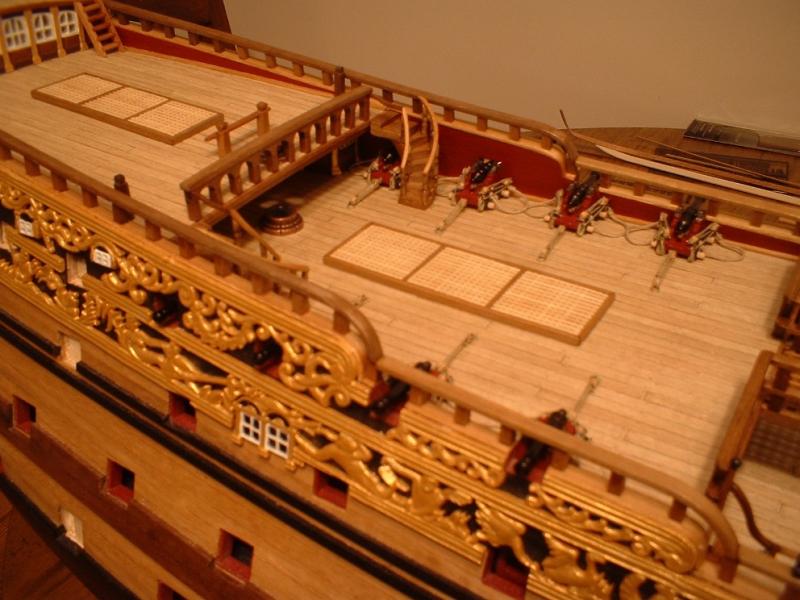
More progress - I figured it was as good a time as any to get the 12 guns at the waist mounted as the rigging would be difficult to do after mounting the gangways. I won`t go into a lot of detail on the building of the guns,but I did modify the carriages a little by thinning them down a bit & putting a slant on the front to match the slant of the inner planking. The gun barrels were simply painted semi-gloss black & the trunnion caps were made from some copper strip & painted black also. The blocks I used were from Syren - very nice blocks. They are slightly larger than I would have liked,but smaller ones are a bit difficult for me to work with. After fixing the guns in place,the previously built gangways were installed. The front edge is level with the forecastle deck,& the rear edge is 2 steps lower than the quarter deck. Next up is some ladders & railings. Thanks everyone for looking in.


Mark
- NMBROOK, Mirabell61, piratepete007 and 6 others
-
9
-
Hi E.J. - one thing you can do to simulate pulleys is to use a deadeye. Just file it flat on the sides so it fits snugly in the sheave. If you want it to look like metal you can paint it with brass paint or whatever color you like. They come in many sizes,although probably not small enough to fit in a small block.
Mark


Royal William by marktiedens - FINISHED - Euromodel - scale 1:72
in - Kit build logs for subjects built from 1501 - 1750
Posted
Update - I thought it would be a good time to build the bell tower. It`s simply 3 metal pieces glued together with the bell. I also added a rope for the clapper.
The side entry was next to build. after opening some of the recessed areas the sides & floor were painted black with gold trim. I had some L shaped timber from a previous build which I cut to length & chamfered the ends to make the steps. After those were glued in place I fitted the roof & turned some support posts from 2mm timber & glued in place. Finally ,2 floor supports were shaped & glued in place under the floor.
Mark