


Jasseji
-
Posts
604 -
Joined
-
Last visited
Content Type
Profiles
Forums
Gallery
Events
Posts posted by Jasseji
-
-
@hollowneck @Tankerman Thank you for those replies, i have never used vallejo Liquid Gold and i surely will try to paint all of the stern and frieze decorations with it, but in case i fail i want to Explore alternatives.
I am more comfortable with 'normal' acrylic Gold paint and i do have experience with citadel washes so this got me thinking, especially considering the fact that this is a small ship and i am also not convinced that she Would be as much covered in Gold in real life (maybe on launch but surely after the first damage, nobody would ever reapply so much Gold)
BTW, Does blackened Brass hold paint better?
-
-
I do need a piece of advise @glennard2523 or @James H do you paint all the decorations with liquid Gold or some of them with 'normal' Gold paint?
Or anyone for that matter who could advise?
-
25 minutes ago, glbarlow said:
I’d love to have it on my log. I work hard at removal but always concerned about removing too much wood. I appreciate you’re taking the time and along with BE would appreciate the value add on my log.
Yes, Please do, if you have some twchnique of Re oval without sanding away too much it Would be greatly appreciated
-
Guys really, let's Calm down.
@Chuck's comments and tips are valuable but they might come down as bit harsh, especially when they are written on a forum which sometimes doesnt properly convey the poster's intentions...
So, Please tell us your Char-removal technique, i am curious.
And honestly everyone, it's a hobby, i know @James H that we should thrive for perfection but for some of us there is a sanity-limit as well as a time limit on how much we can dedicate for it.
I believe @glennard2523 conciously rushed the further steps after having reslised that he has made an unrecoverable mistake.
So please, let the comments flow
-
2 minutes ago, glennard2523 said:
Well said, I could not agree more. I build for my own enjoyment and keeps my mind active in my twilight years😃
SPAM NOTICE: when i play video games, i feel old with all the kids around, here i feel like a kid among all you Oldtimers
") (no offence meant, i am 40)
(no offence meant, i am 40)
- hollowneck, Glenn-UK and BobG
-
 1
1
-
 2
2
-
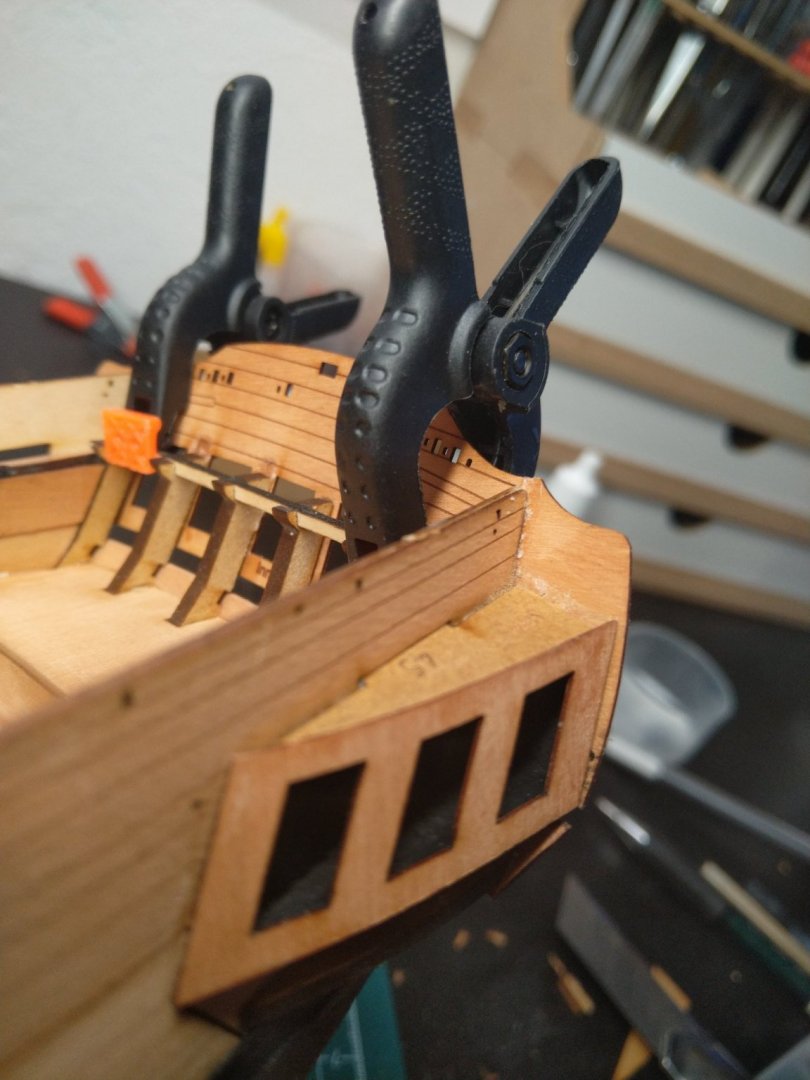
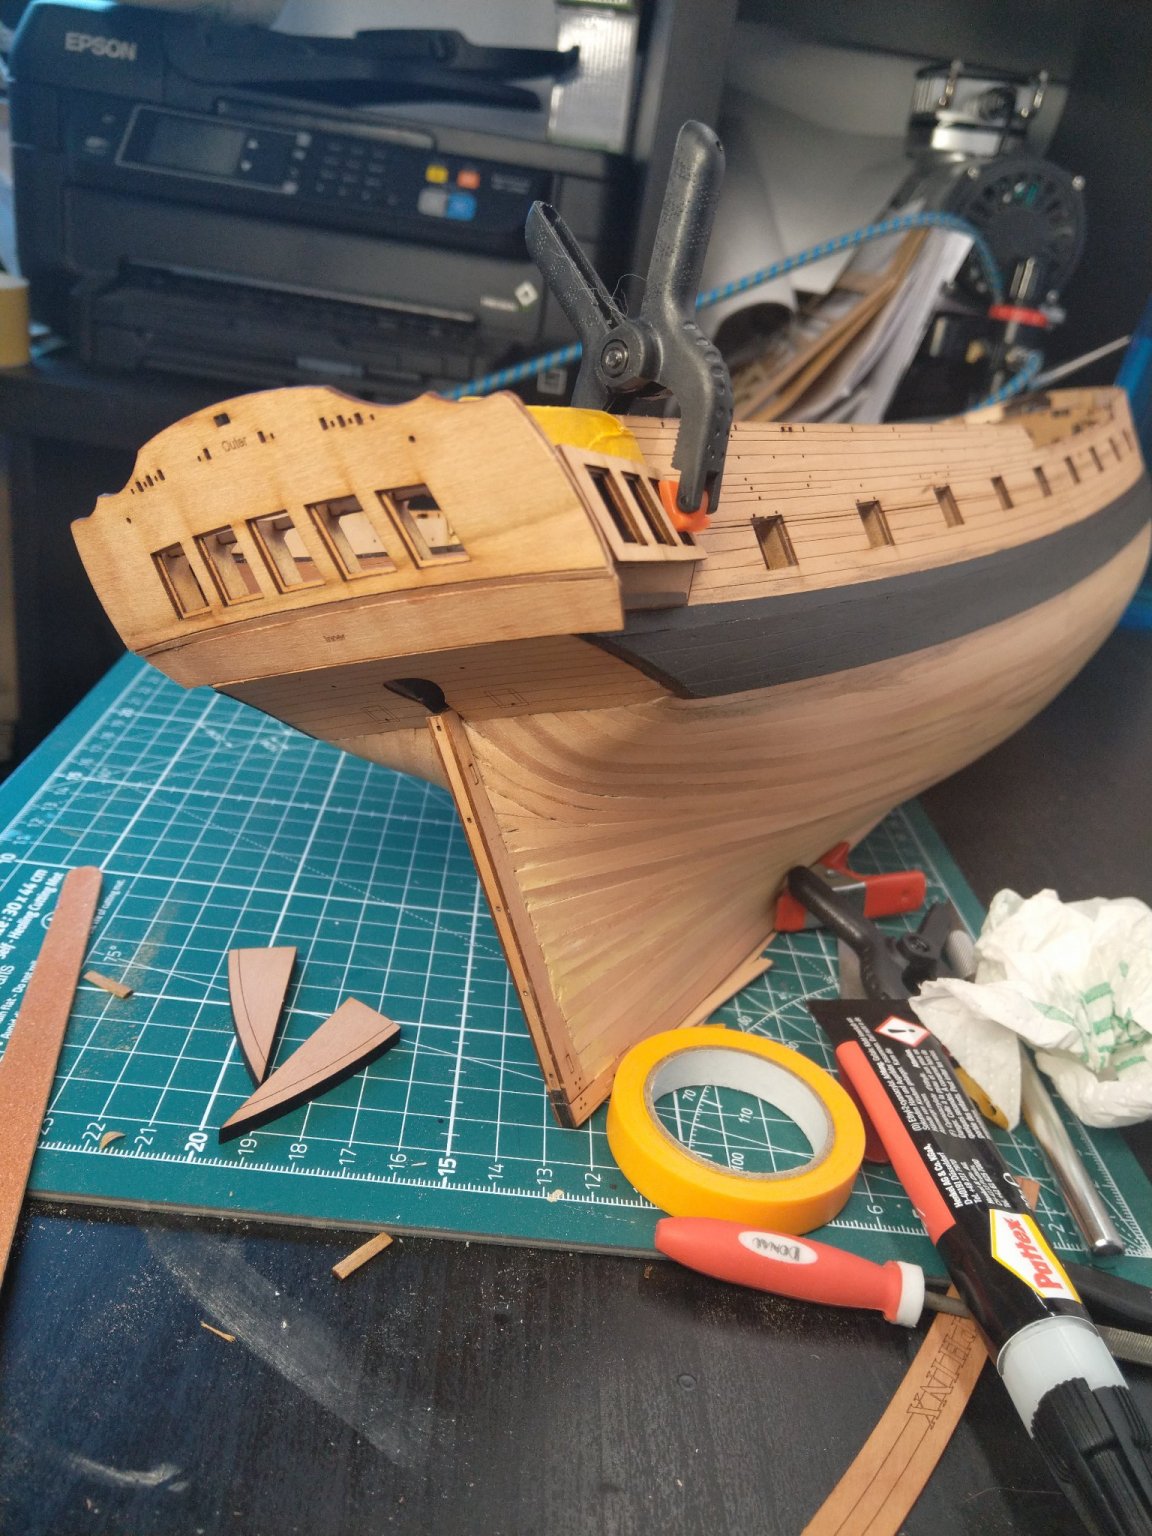
After feeling being recalled to the Principal's office by @Chuck i decided it's time to finally open up those gunports:

They were never meant to stay the way they were, it was just laziness and putting it away to another time (and now Chuck gave me an Excuse to focus on some other tasks than the Galleries)
I am keeping the Char only in places which will either be invisible, or covered in black paint (but i do remove the laser-sheet tabs there and give them a light touch of 400-grit sandpaper which doesnt remove the char but smoothens the surface)
Also thanks Chuck for pointing out those wooden decoration pieces (Sheer rails)
I was going to ask if i should round their edges
Also guys, it's not a Museum-Piece and let's chill a bit
- Glenn-UK, Tankerman, CaptnBirdseye and 3 others
-
6
-
-
-
18 minutes ago, glennard2523 said:
You are doing a great job. I made such a mess of this aspect of the build that recovery was not an option for me.
i do make a mess, i attempt to hide it behind bad pictures
(although i do appreciate the feedback)
- hollowneck, mtaylor and Glenn-UK
-
2
-
 1
1
-
1 hour ago, glennard2523 said:
Nice neat work. Difficult to be certain from your last photo, but it would be an idea to check the gallery and stern fascia rail alignments. It looks to me that there could be an issue with the bottom rails with the quarter gallery rail sitting higher than the stern fascia bottom rail. I think it would have been better to fit the upper counter pattern to the stern fascia and fill the gap below it.
yes, you are right, i have placed the Upper Counter pattern now against the Stern Fascia and it seems that the rail will cover the gap and should also connect with the Quarter Gallery Rails.
That little piece below the Quarter Galleries took me several hours to make, i am trying to gather my strenght for the other side (need to remove the gallery window partterns there first for a tiny correction tho)
- mtaylor, CaptnBirdseye and hollowneck
-
3
-
-
Right @Blue Ensign, let's cover these 2 Posts with a smuch Thread pages as possible

Stern Fixes and works on the Quarter Galleries

I will place the Engraved Upper counter (the one with the name) centrally on this area, the rails wich will be glued at a later staeg at the counter edges will cover the extra space here
- CaptnBirdseye, hollowneck, mtaylor and 1 other
-
4
-
23 minutes ago, Blue Ensign said:
Hi Jacek,
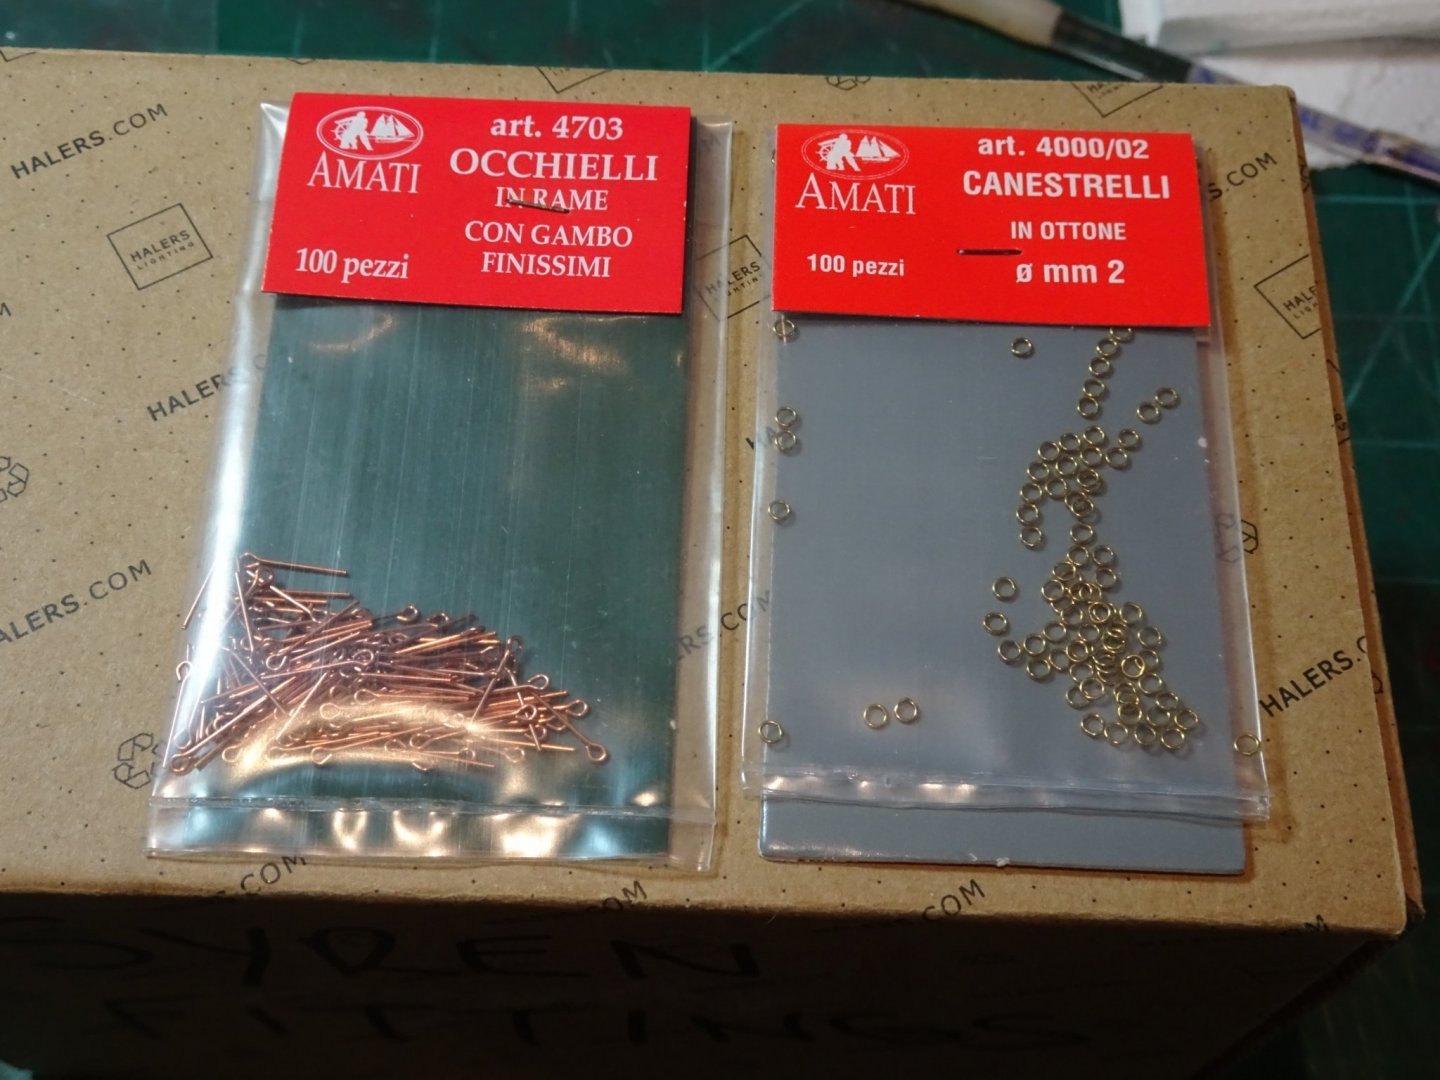
These are the measurements applicable to 9 pounder guns.
The Breeching rope is 4½" ø equating to 0.56mm ø at scale.
I will be using Syren 0.63mm line for the purpose.
The Breeching ring is 3” in the clear = 1.19mm. The ring thickness is ⅞”ø = 0.34mm at scale.
The Amati 2mm rings are close to these dimensions.
The loops are ½”ø thick, (0.19mm) and 1½” in the clear (0.59mm)
The Amati eyebolts are close enough for scale, but need a slight tweak to make them loops rather than eyes.
These figures are taken from The FFM, David Antscherl, and The Arming and Fitting of English ships of War, Brian Lavery.
Chris is not a great fan of rigging guns, but the manual does provide details of blocks and line sizes. If following the manual advice I would go for the larger 0.75mm ø line to provide a nice contrast with the 0.1mm tackle lines.
The provided carriage eyebolts are too thick, and are flat rather than rounded, as a result of the etching process.
In reality this matters little in the overall scheme of things, very little will be seen of the gun detail once the Gangboards are in place, but the pedant in me drives me on.🙄
Hope this helps.
B.E.
I have a similar feeling about the guns, i want to rig at least the 5 on each side which might be visible below the Boats
although i am running into a Problem with fittings (again): Cornwall Model boats doesnt ship to EU, Amati doesnt ship to germany because they have an agreement with a reseller here.
That reseller charges 6 times the price of Amati...
I need to move to the UK

-
56 minutes ago, Blue Ensign said:
Blimey Glenn, I expect to add around £100 in additional stuff for my build but I think you'll hold the record for the most expensive Sphinx build on MSW.
B.E.
100 only ?
I am already at 50eur and i ordered only additional Blocks and eyebolts
- hollowneck and mtaylor
-
2
-
28 minutes ago, Blue Ensign said:
Thanks for your input guys, as a weathering novice it’s all useful stuff.
@ Bob – re the wheel axles – it only requires the slightest touch on the corners, I will do it even less on the other guns.
@ Thuky – with these particular guns once they are secured between the carriage brackets there is no need to touch them again, or even during fitting. Held on a cocktail stick they can be fitted untouched by human hand, or in Jacek’s case a catspaw.
@ Jacek – They don’t look quite as weathered from normal viewing distance but a spot of extra buffing will remove any residual rust.
-re the carriage iron work –
For the ring bolts I used 2mm eyebolts and 2mm brass rings. The eye of the eyebolt was reduced in size a fraction and closed around the ring.
For the loops I use the eyebolts set slightly into the carriage side.
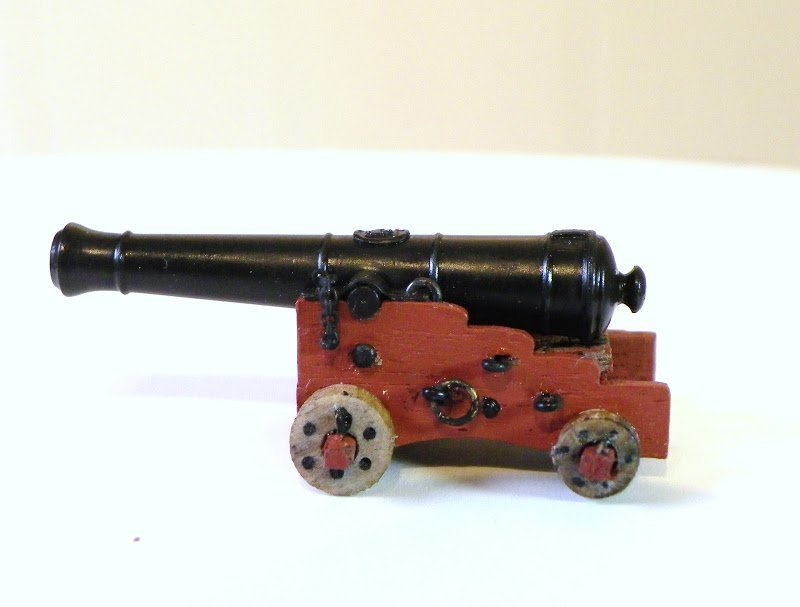
As fitted on a Pegasus carriage
I also used the same approach for the tackle rings and bolts on the bulwarks.
B.E.
yup, looks good with the eyebolts, for the ring on the carriage you used something bigger than the 2mm rings ? (is it 4?)
-
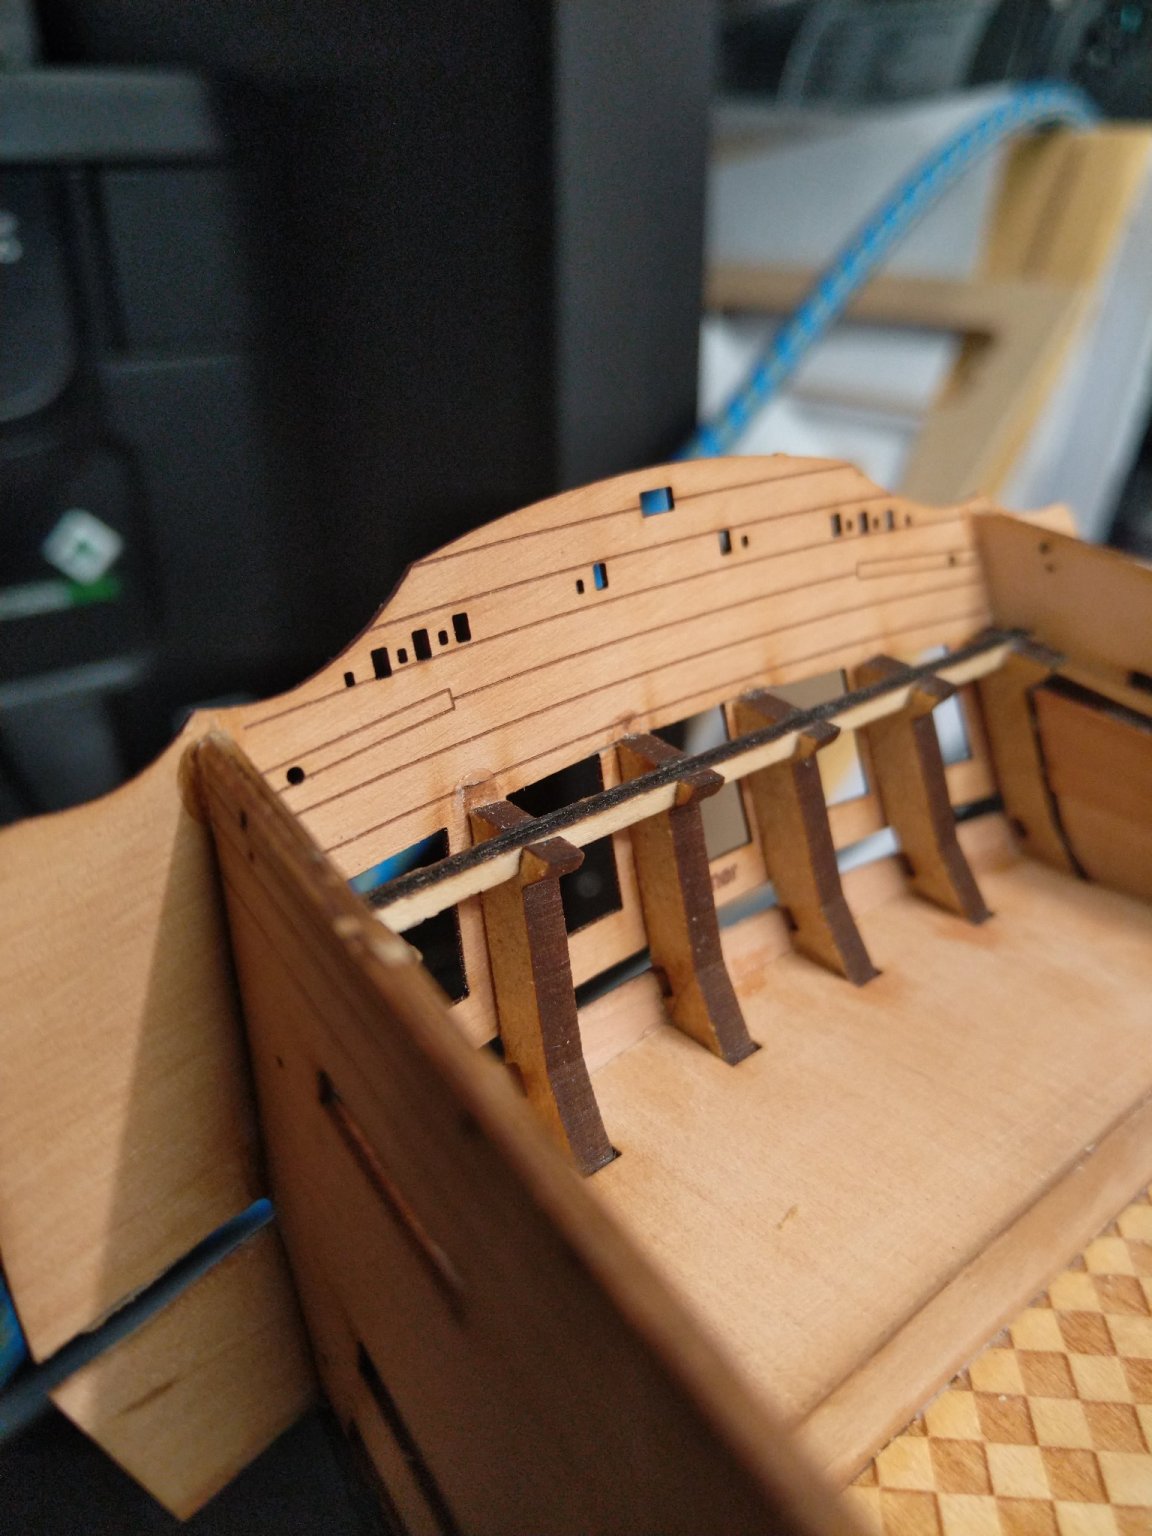
Just now, James H said:
Maybe a half plank strip top and bottom of that 'inner' part?
Actually i cut out some of the leftover wood from which that piece was taken, attempting to fit it now
- hollowneck and mtaylor
-
2
-
-
On a side Note @Blue Ensign what size of eyebolts and rings Would you suggest for the cannons? (actually if i'd replace the cannon eyebolts then i'd go replacing All eyebolts and rings, just dont have the oppinion what sizes Would Look Best)
-
The weathering effect looks great, but i'd present 100 lashes to the Crew, who'd let their gun get to this stage
- Blue Ensign and mtaylor
-
2
-
-
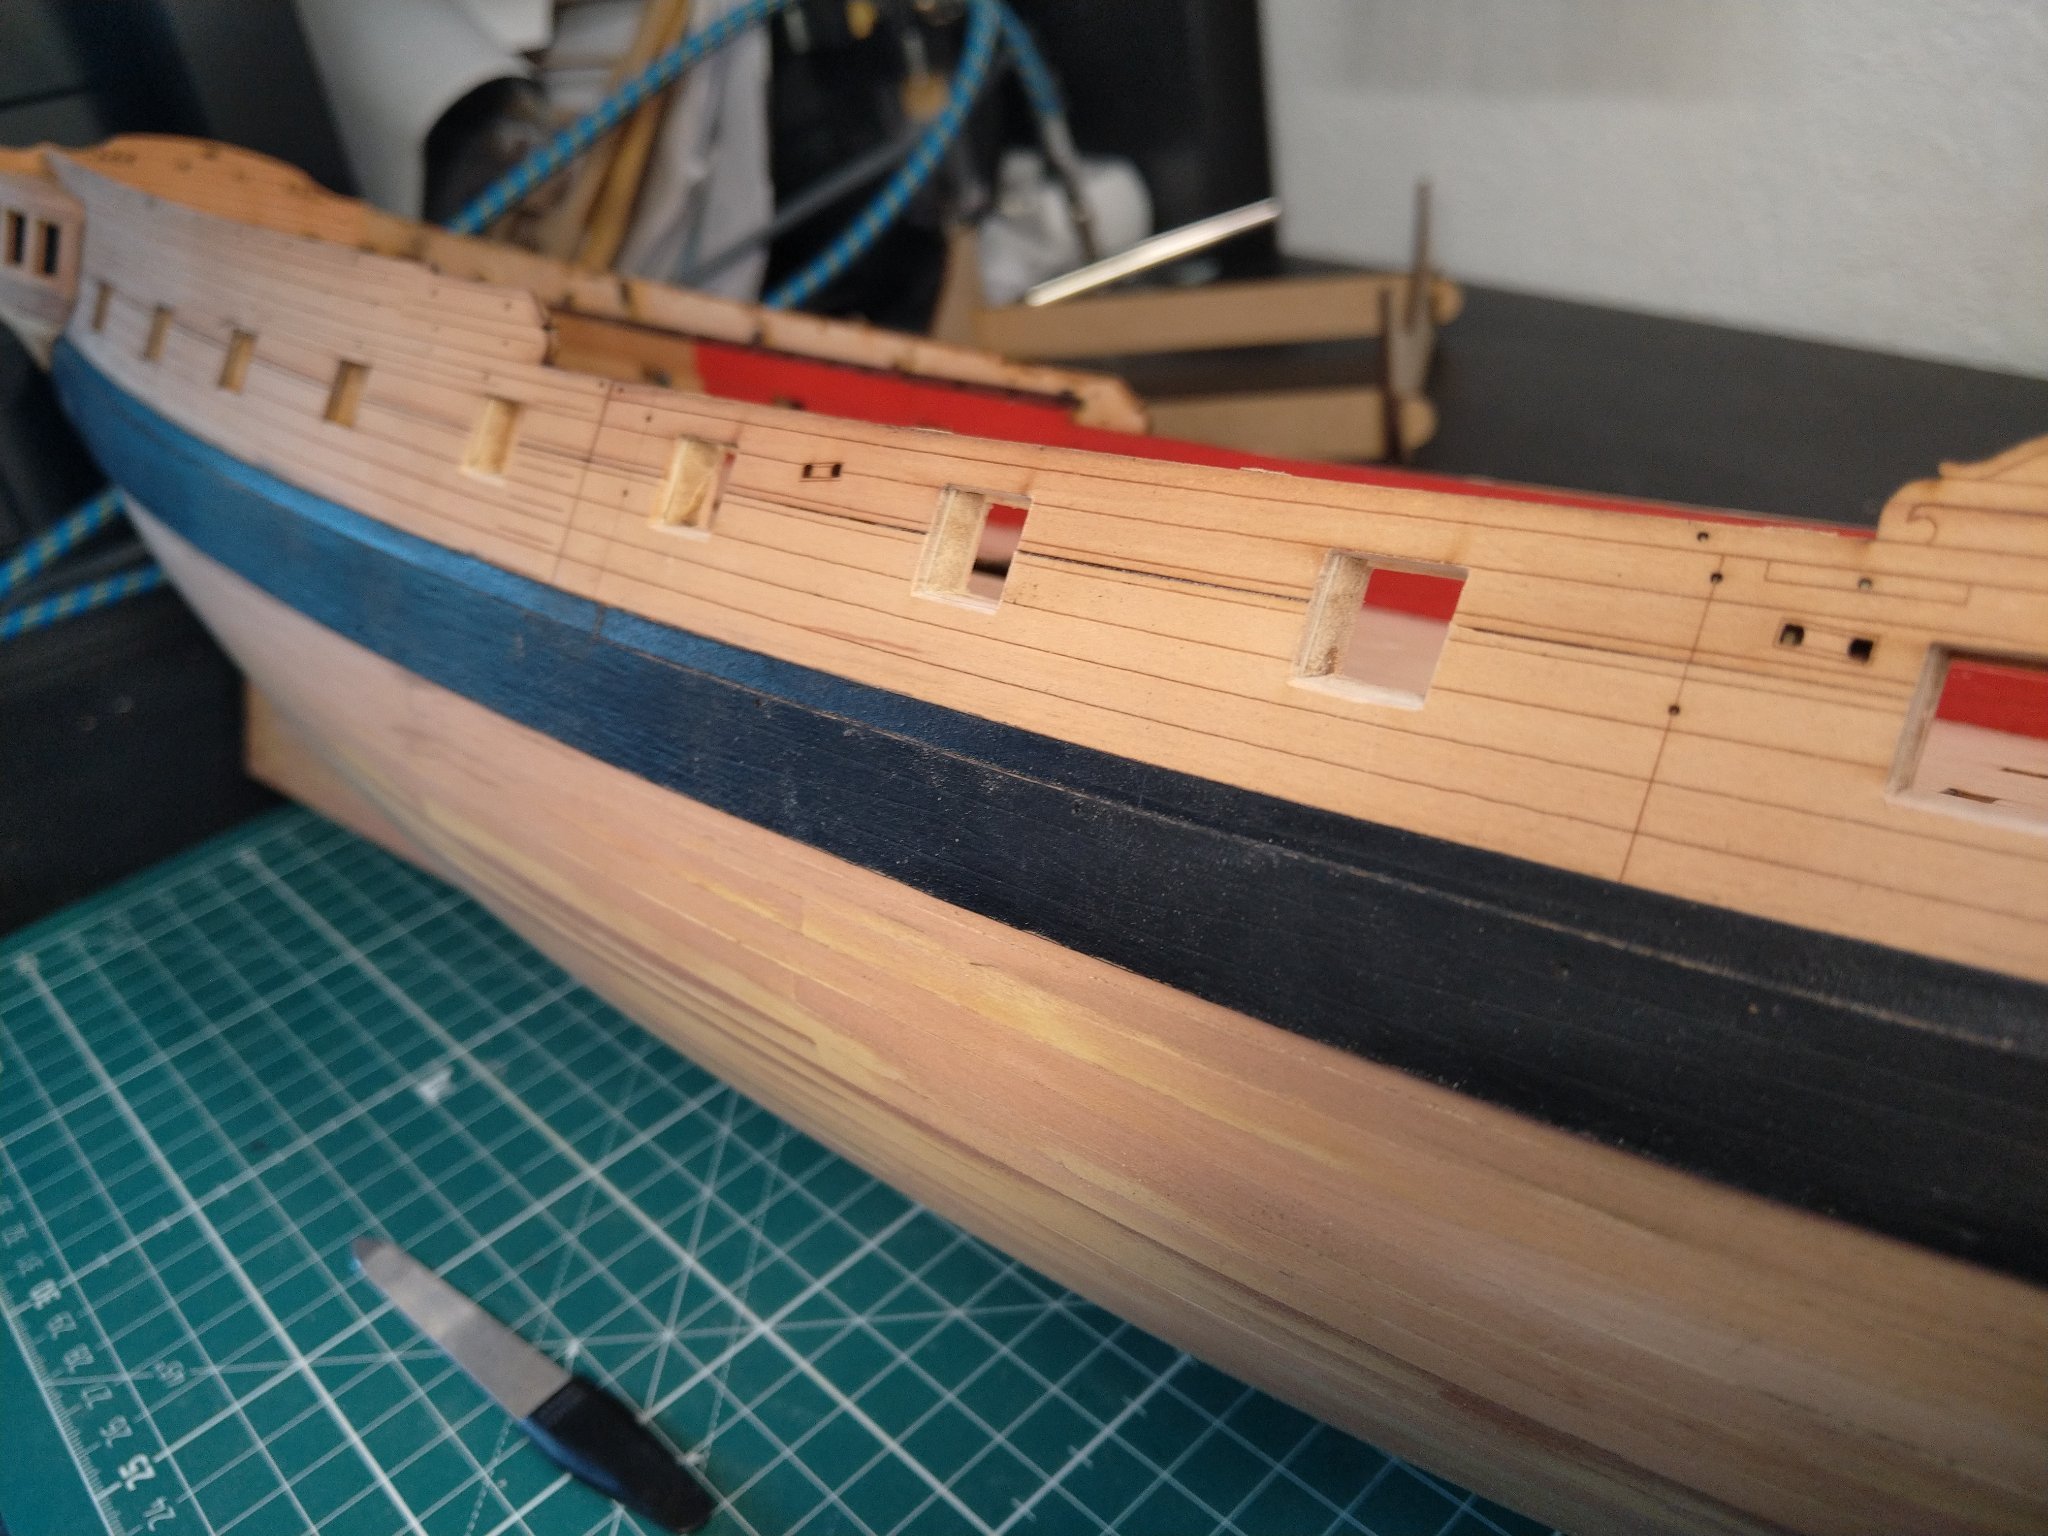
5 minutes ago, hollowneck said:
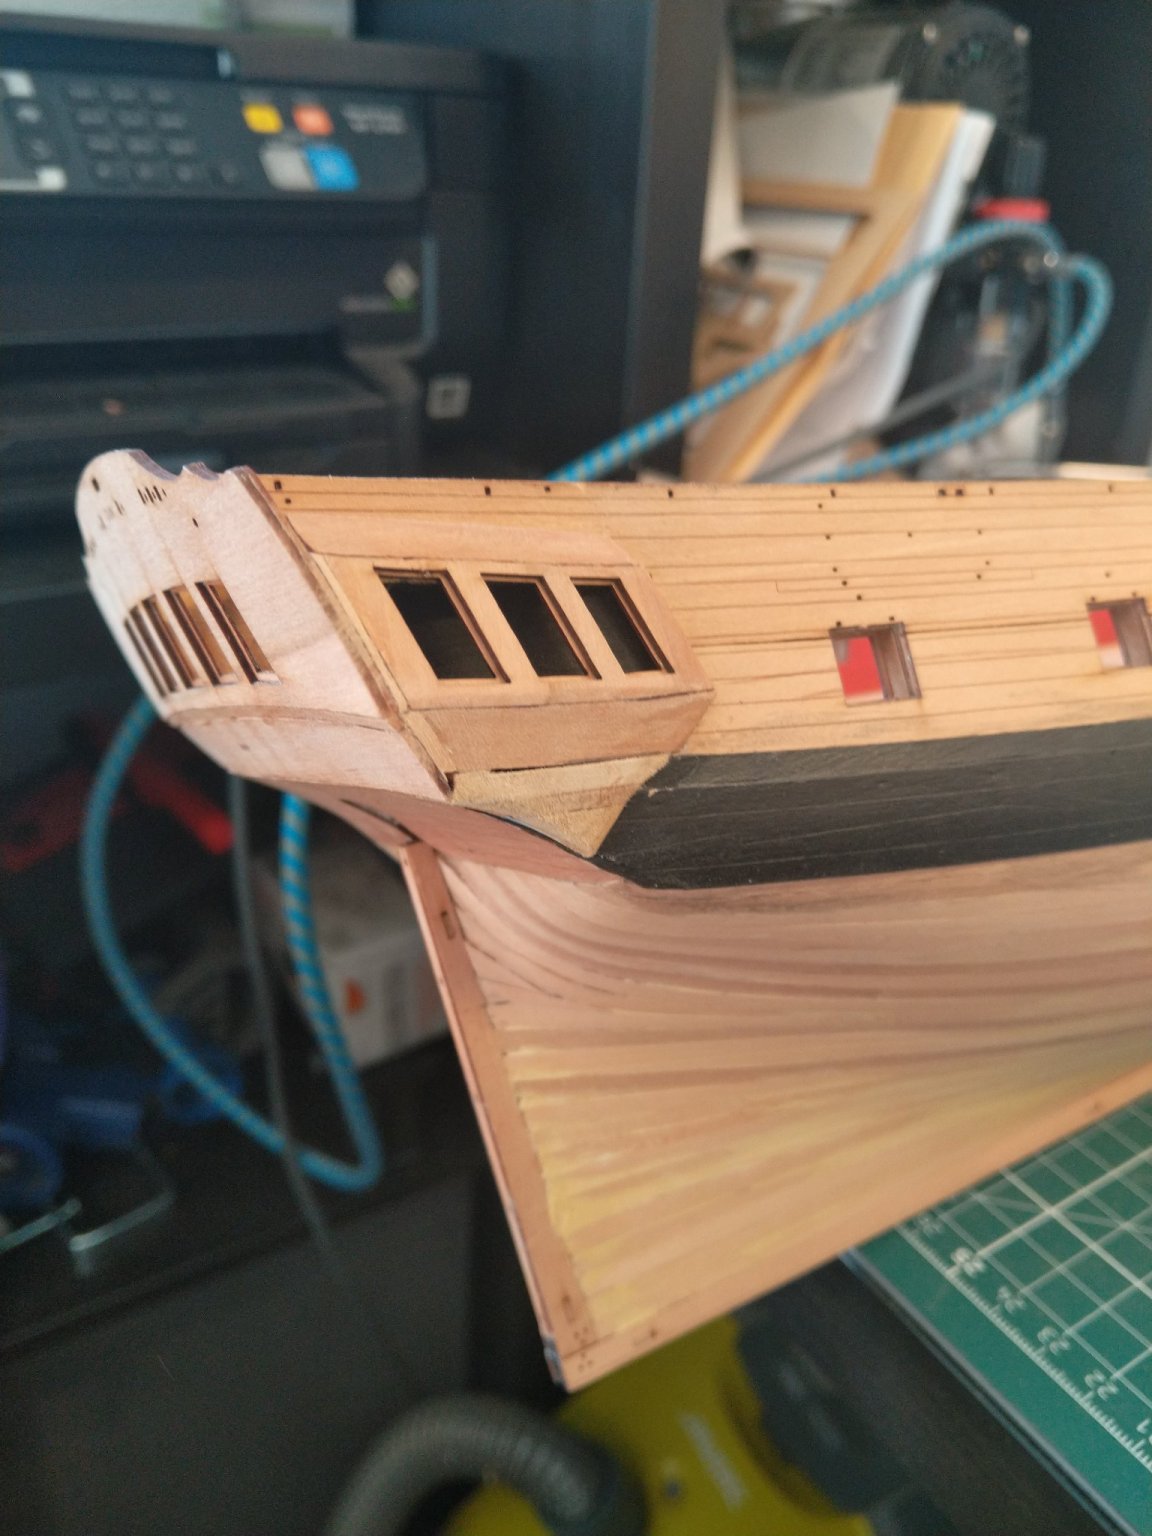
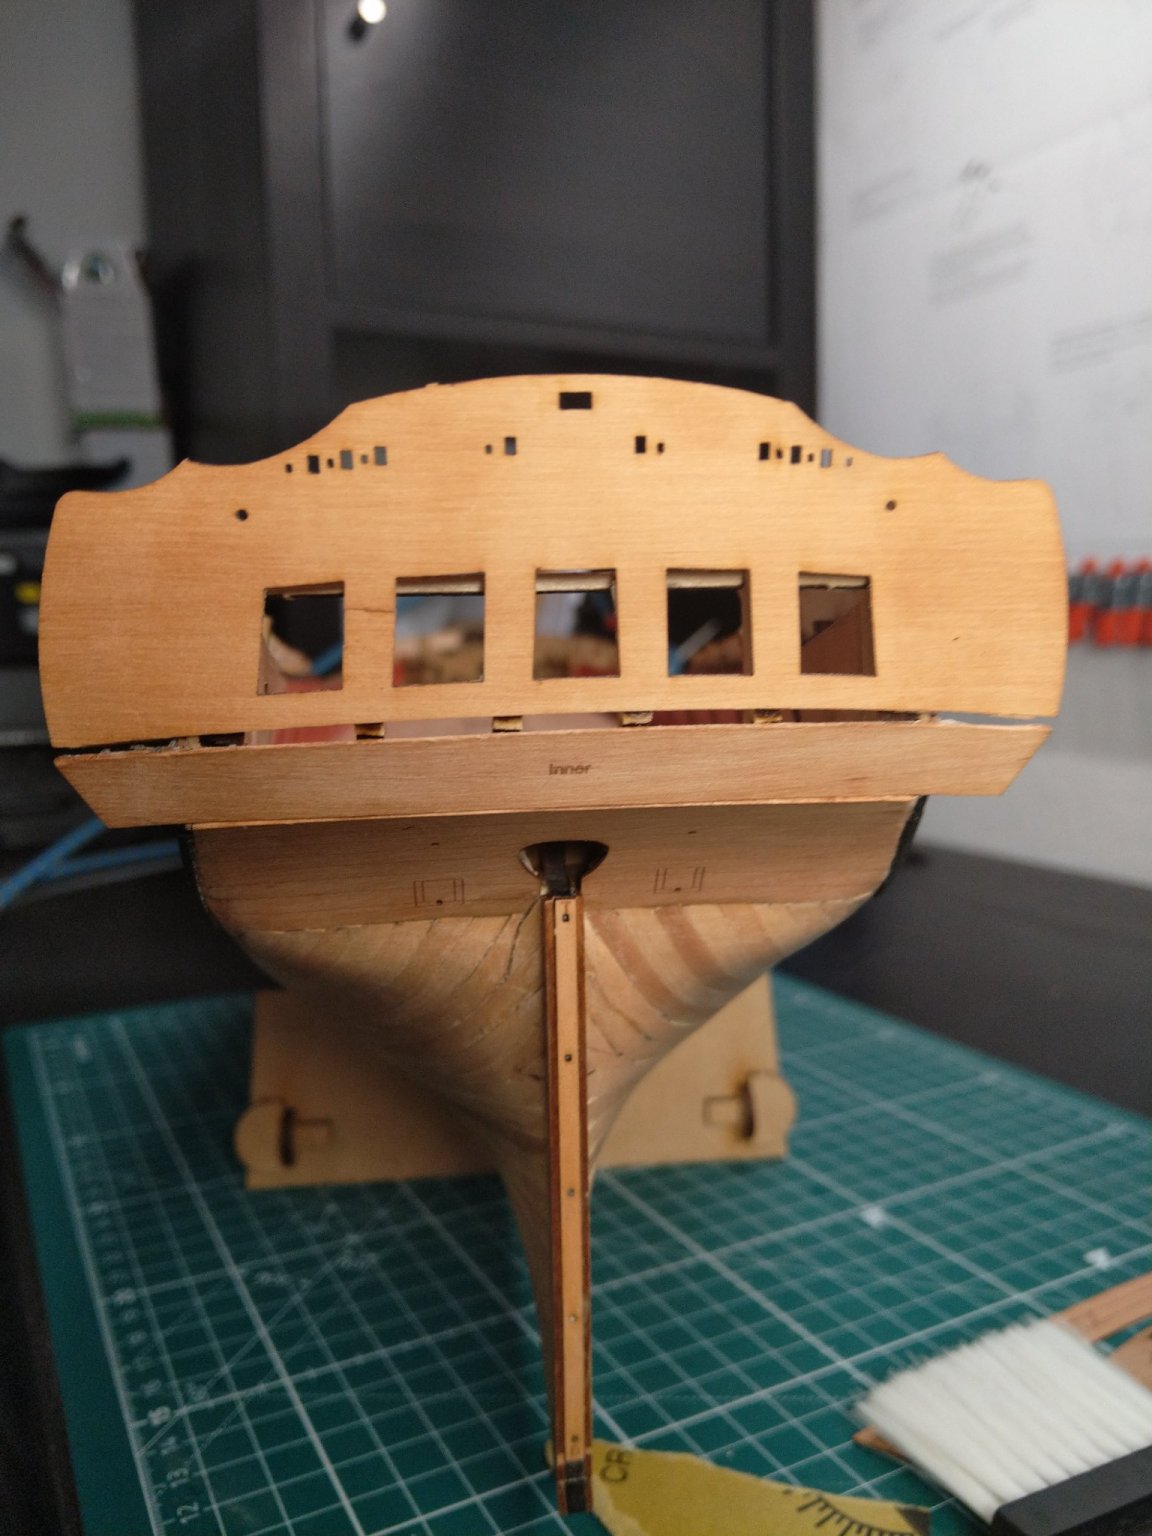
That looks better - your stern fascia is now even a little higher than mine - which will be fine to align the bulwarks to stern interface. And, Yes, the ply piece that reinforces the fragile MDF stern timbers IS VISIBLE through the windows. A more significant issue as you've discovered is that the lower counter (inner pattern) doesn't meet the stern fascia bottom properly. Hence, some scratching will be required; perhaps a slender strip that can fill the visible gap- but you'll need to trace the curvature at the bottom of the stern piece so don't mount it yet!
Ron
That gap is the smallest issue here, i have enough strip-wood to fill that, i will try tomorrow to remove the upper counter-Inner and reposition it
-
3 minutes ago, hollowneck said:
The stern fascia piece needs to align so that the top of it (which has the "scallop" peak on the sides is exactly flush - even- with the highest point of the bulwarks that it meets (thin red section). You can see (barely) that my alignment of these elements at this point is slightly lower (perhaps .6 mm) than optimum but my tolerance at this same point is closer on the starboard side of my build. This is what I meant by "close tolerances for proper fitting."
My comment about the lower counter and finishing piece/drop has nothing to do with this upper stern fit dilemma; my apologies, this may have been confusing. Please note however that in the manual there is an error in the build photo on Page 41, step photo 220 and points to the PREVIOUSLY MOUNTED Gallery Upper Pattern in error: this is a subsequent build step and DOES affect the lower gallery construction. James H may clarify this for you.
Ron
no, i'm clear about step 220, what i am not clear about if the Fascia position is correct in step 313 or in step 202 (level with bulwarks as in step 202 or higher as in step 313)
-
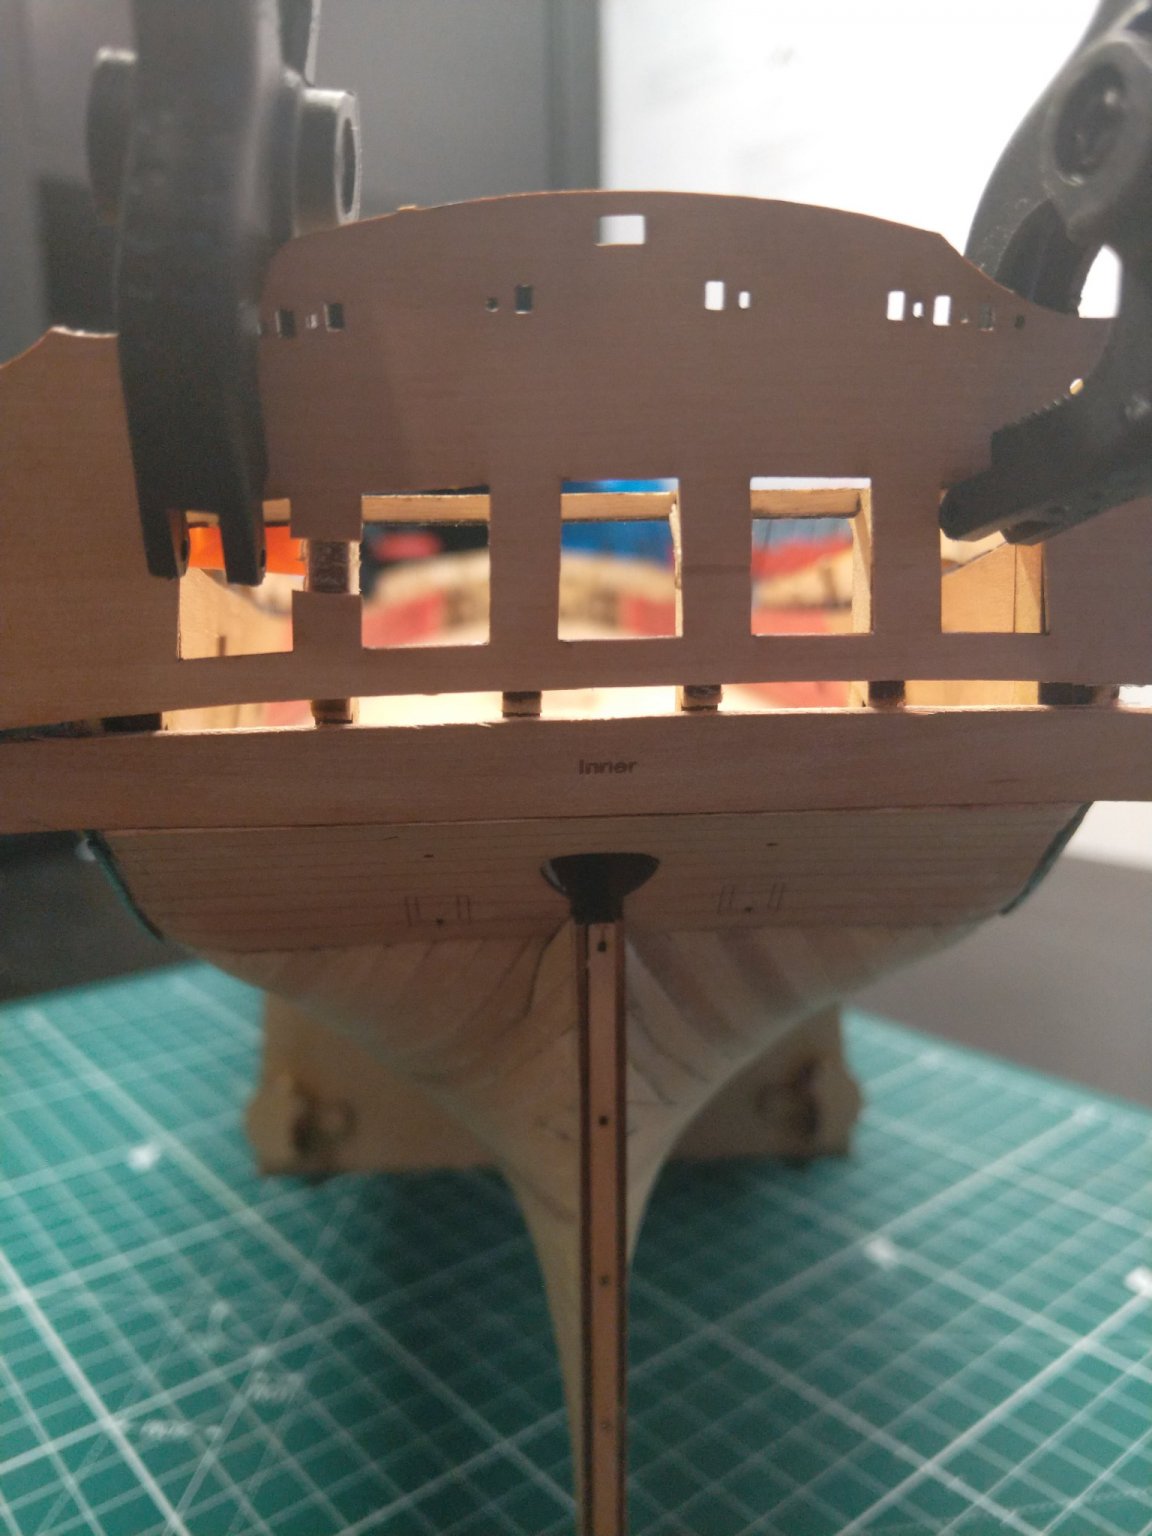
Ok, ok, little panic, some cursing and the glue gave way.
I positioned the Fascia as in Step 313:
Ok, so this would be the proper way ?
But then, the connecting rod of the trandom timbers is visible through the windows (te gap between the counters i can cover with something, no problem, but that connecting rod irritates me here a bit - because it would mean the top of the windows is flush with upper deck level, possibly even higher)

- Gregory, GrandpaPhil, CaptnBirdseye and 1 other
-
4

HMS Sphinx 1775 by Jasseji (Jacek) - Vanguard Models - 1:64
in - Kit build logs for subjects built from 1751 - 1800
Posted · Edited by Jasseji
Opening gunports and Char Removal:
Admiral isnt too happy about this task, amount of mess this generates, phuh.
Next up:
Port Gallery changes and "Gallery Drop"
Still waiting for Blackening solution and Acetone.
On a side Note, Amati did decide to send my order to Germany (i have placed an order on their website giving my Parents shipping address in Poland but then i sent them an E-Mail asking them to send this to Germany citing the EU Anti-Geoblocking and anti-cartell regulations...) - i think i will describe this in another Topic as i have very strong feelings about this situation...