


Jasseji
-
Posts
604 -
Joined
-
Last visited
Content Type
Profiles
Forums
Gallery
Events
Posts posted by Jasseji
-
-
I have ordered replacement Films for the bottom VAT immiedately so i can Experiment.
I have a 5litre Glass jar which i could use to cure the IPA, just have to Check if it will fit in the wash and cure station.
- lmagna, thibaultron, mtaylor and 1 other
-
 4
4
-
Sanding MDF is more Toxic, Acrylic Paint is more Toxic

On the note of Cleaning the IPA: couldnt you just leave it in the Wash&Cure Station and start the UV Led's for a few minutes or so ? Wouldnt that also help in curing out the particles ? (abviously not in the same container but some glass container so the included vat doesnt get clouded - although that shouldnt matter anyway if the Vat for cleaning is kept clear or not)
And for cleaning the Resin tray for the printer - also i saw one guy just starting a "blank" print, so the printer only started turning on the curing screen, after that he just removed the Resin rests from the bottom with the included spatula
-
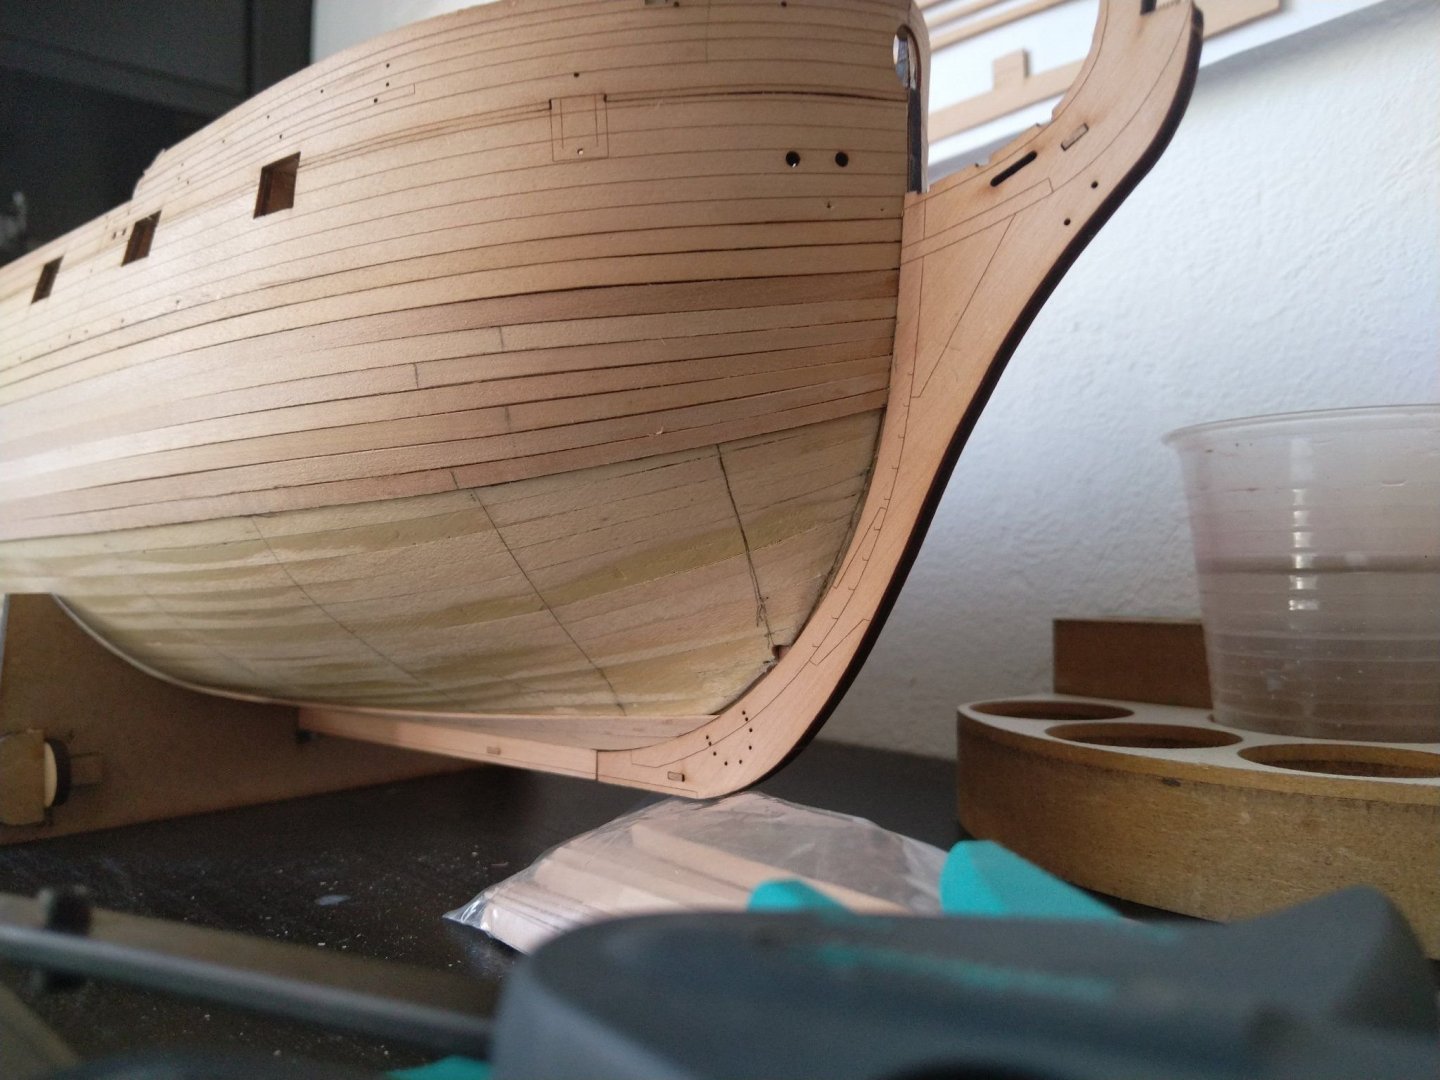
Current state of Stern and bow.
No tapering at the Stern, 9 Strakes:
Bow 8th Strake added without tapering, using an Ancient Technique called "Squeeze it in until it sits":

I felt i needed the untapered plank to correct the line for the rest of the planks (and this wont be visible so who cares)
Garboard both sides with 3 Strakes done.
- hollowneck, JpR62, BenD and 8 others
-
11
-
1 hour ago, Blue Ensign said:
You're welcome Jacek.👍
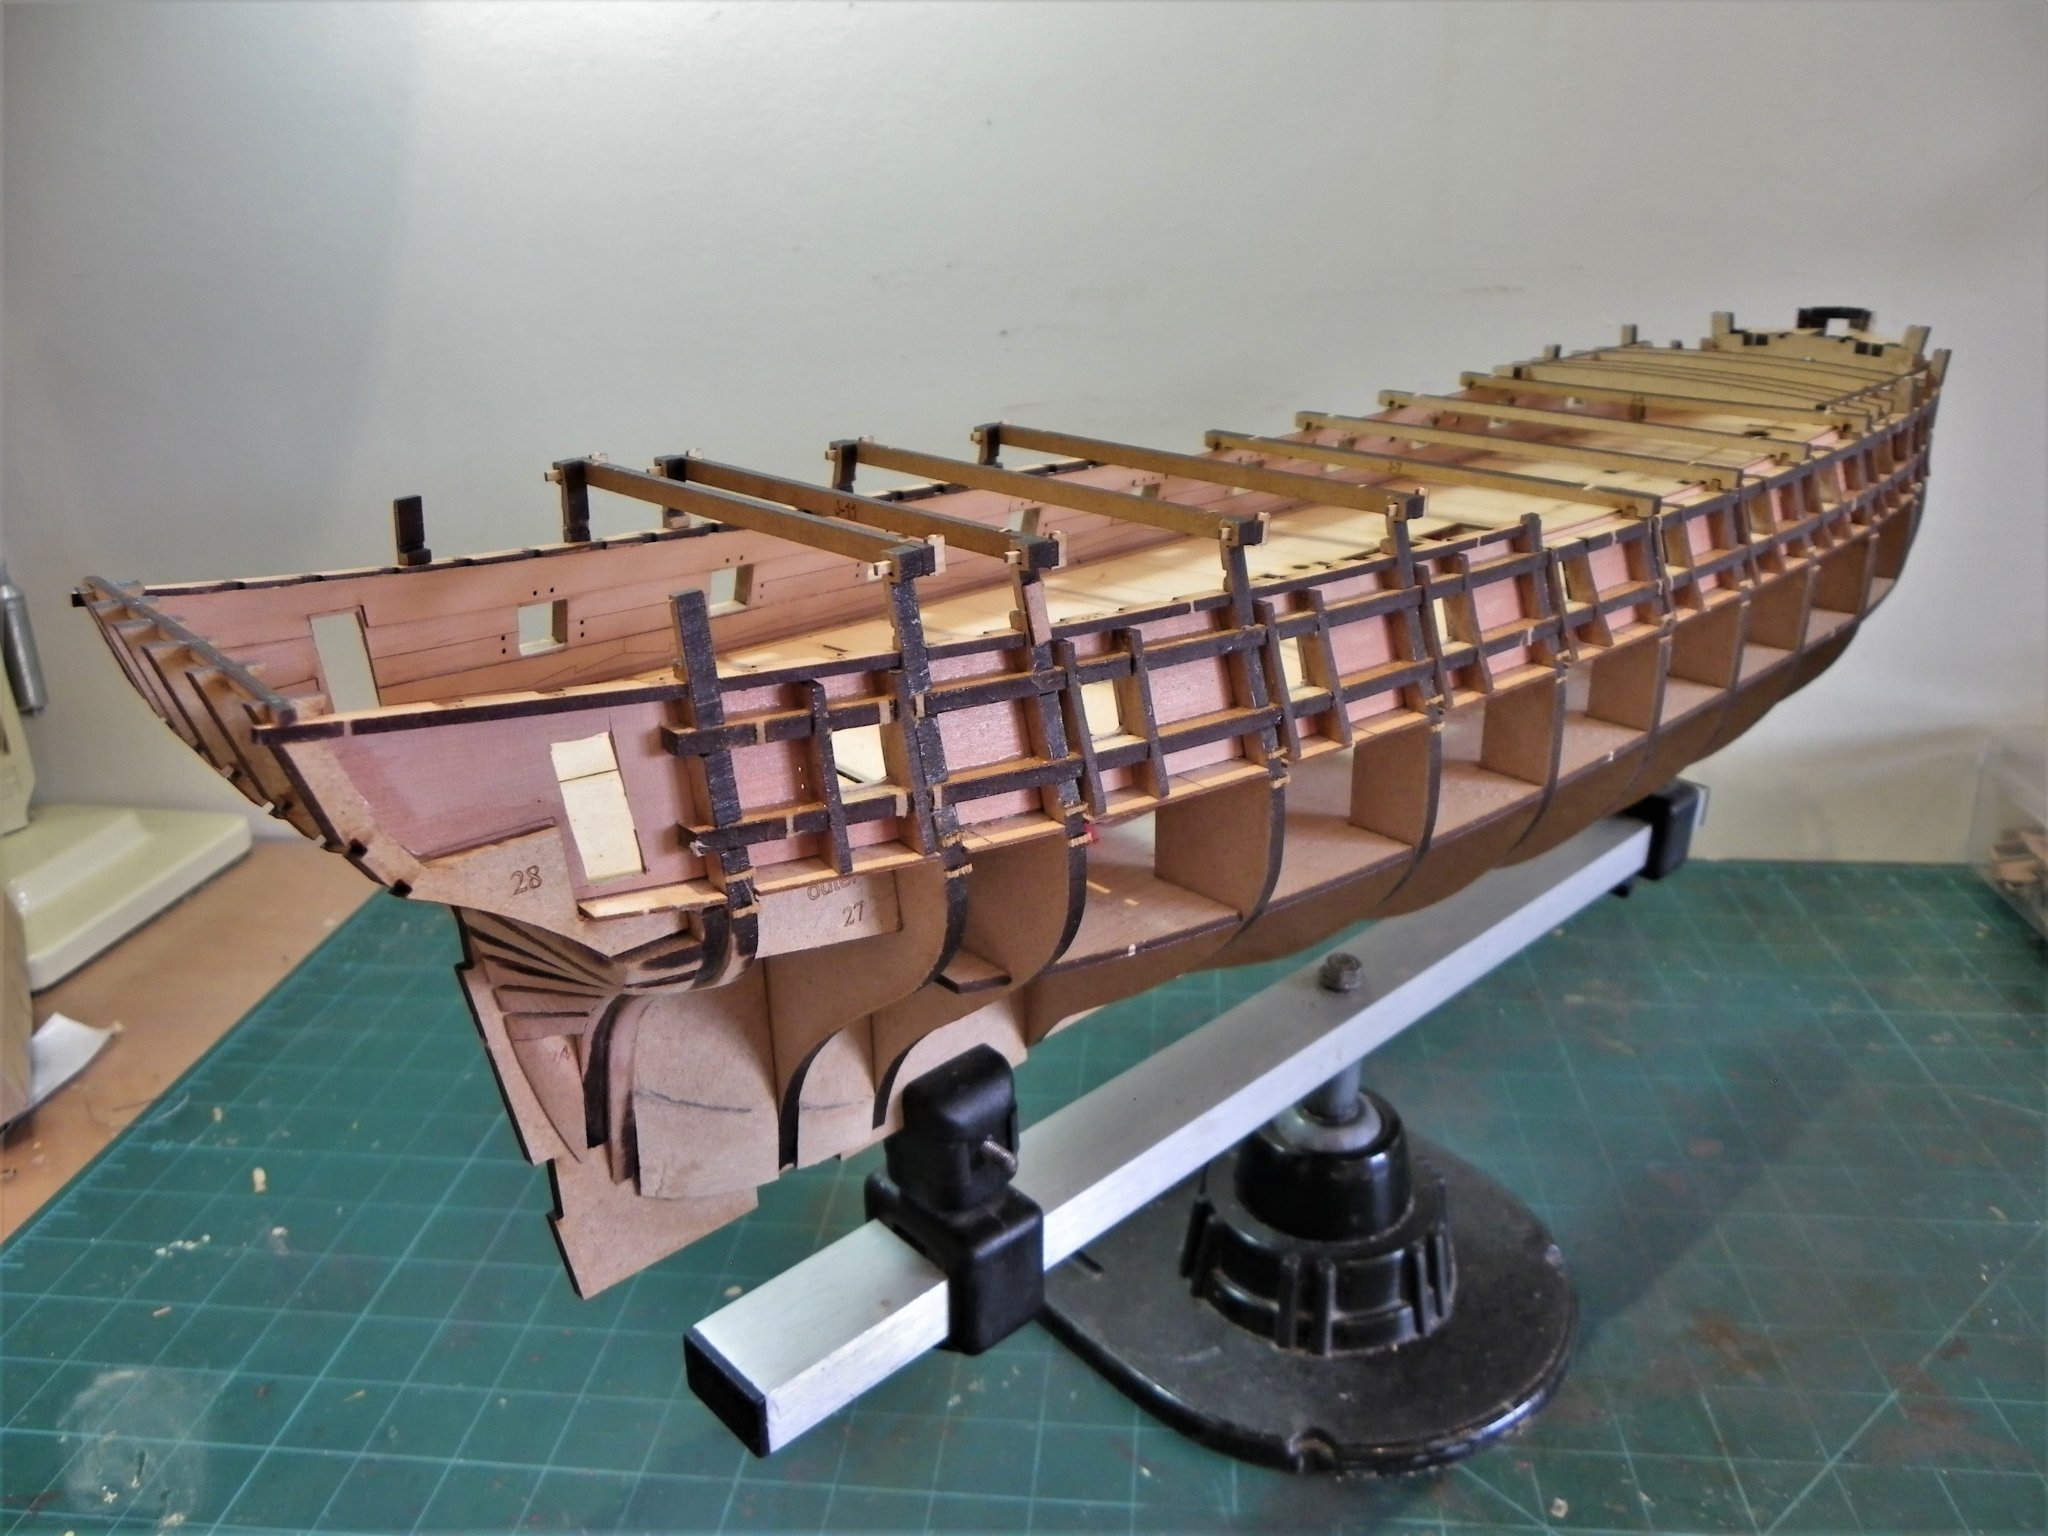
A reconsideration.
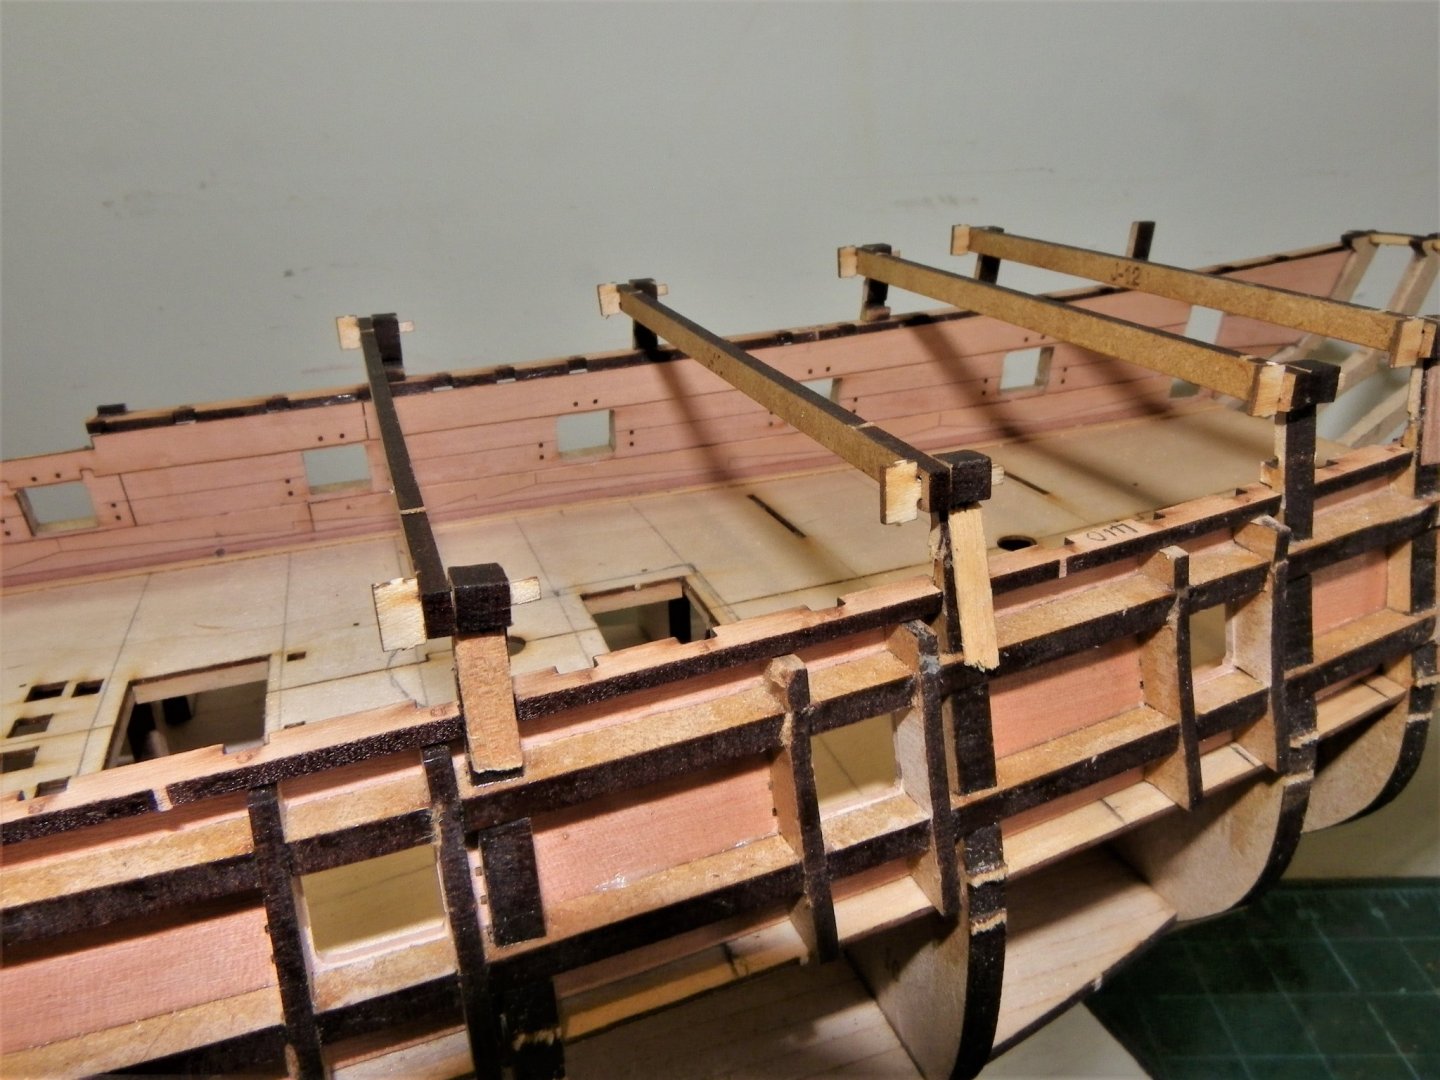
Back in Post 15 I expressed my doubts about the validity of the Quarterdeck area bulkhead extensions designed to hold bracing jigs to prevent spread of the hull.
I had to splint four of them where they had broken off, seemingly by the simple act of looking at them.😉
0431
Oh, me of little faith, with the bracing jigs in place they have become quite firm and the splinting has held good.
The splinting can be seen on two of the extensions.
0435
.thumb.JPG.c677c753014b9e65b96473815f0c62d5.JPG)
0432(2)
.thumb.JPG.77c46bbe8d3a99adf4ee15fa9f9945d4.JPG)
0429(2)
.thumb.JPG.d9acecf6e2563f70e784c94911e22bc7.JPG)
0433(2)In fact all the bracing jigs fitted perfectly across the hull, and I have to commend Chris on both the fit and the initial idea for this design feature.
I'm still not entirely sure what difference the jigs will make, my hull feels pretty solid without any flex evident, but I will use the jigs as indicated.
Movin' on.
B.E.
24/09/21
All i can say is, even with all of them broken off, the hull didnt flex, i was fitting them for test after placing the bulwark liners and all is still fine
- Blue Ensign and mtaylor
-
2
-
1 hour ago, Egilman said:
I set up the current print with Lychee, yes it supports the Mono X, but it changes the lift spec from Photon Workshop, drops it from 2mm/sec to 1mm/sec this effectively makes a 4 hour print into an 8 hour print... It is noticeable right away when you start the part printing....
Slicers; (and my experiences)
Photon Workshop:
Anycubic's slicer is kinda basic, and you have to hunt for info cause it isn't intuitave....
ChituBox:
Elegoo's Slicer is kinda techy, much like a full bore 3D program, it has a learning curve, and it bailed out on me a couple of times... Hard to find reliable info on how to effectively use it...
Lychee:
Comes to us from Mango 3D, a producer of 3D printer op systems and motherboards... It is based upon the Mango Slicer, a proprietary slicer software that can be modified to suit any Printer Manufacturers specifications.... Lychee is very intuitive.... (although it requires a Mango 3D account and e-mail verification, it is free) It took me just a few minutes to figure it out.....
The first two left me asking questions and searching for info on the web... The third I had figured out and up and running in a few minutes....
This nube will recommend it, (Lychee) over the other two, but bear in mind, I've only 1.5 successful prints under my belt so take it for what it's worth... If your new to this, give it a try, I don't think you will be disappointed...
Another 4 hours till the rose print is finished... I will do pics of the finishing process...
EG
I'm far from being a succesful 3D Artists, but i know my way around different 3D Programs (3DMax, Lightwave, Modo, maya, brr Blender) so i can only speak from usabilty Experience from the Software side:
Photon Workshop: Basic but seems to have all the needed features
Chitubox: Crashing and completely unituitive
PrusaSlicer: Complex and a mess of an interface
Lychee: Just works and all is easy to find (The lifting and lowering speed seems to be in the Resin Settings)
Update: The Admiral is so enthusiastic about the idea, that we ordered the Photon X, who am i to argue with the Admiral
")
- thibaultron, mtaylor and Egilman
-
2
-
 1
1
-
-
9 minutes ago, Egilman said:
1/64 scale figures.... Not a problem..
https://www.ebay.com/b/1-64-Figures/180506/bn_7023455365
Simple google search, you probably would have to doctor a few into the poses you want.... (on a 3D printer, you can make them any scale you want just find the files)
I hovered over a year on the Mono X the recent $200.00 drop in price tripped it for me....
From what I hear, middle of next year for DLP from Anycubic, (that's an estimated time) also the print standards will only be marginally better than MSLA.... (I think it is speculation cause the info really hasn't been officially released yet, but there is this ideal floating around in the heads of our younger crowds that newer is always better, that belief keeps the cell phone makers & car manufacturers in business)
I've read some fora where the manufacturers are already considering the future of filament printing now that high resolution resin printing is the cutting edge and prices are dropping.....
Still a lot of flux in the industry and gambling, the one thing for sure is it is the future and it's coming quickly....
I know about the Hotwheels Figures, hower i am looking for 18th Century Stuff.
The only thing i found so far is modeled in 1:72, so would need to upscale, hence loosing detail.
I do know how to make 3D Models myself in Maya/Modo, however i hate doing character skeletons and especially posing them afterwards
All the Gaming Figures just dont cut it somehow (Except i'd go with the "Sphinx-Egypt" Theme and do some Mymmy/Skeletons Crew
I am sure i will find something suitable sooner or later
- Egilman, thibaultron, lmagna and 1 other
-
4
-
9 hours ago, Egilman said:
That is an interesting piece, but it's not a subject I'm interested in unfortunately... (but, miniature figures are the biggest draw to 3D modeling at this time) I'm more into traditional modeling of real world things... And I've found a test piece that fits all the conditions I set up for my second test.... A rose, (in Anycubic's slicer) I'm doing two of them at the same time, they will have parts that need to be glued together... A better test of my intentions...
The Anycubic test cube has finished and has been washed and is getting it's final UV cure.....
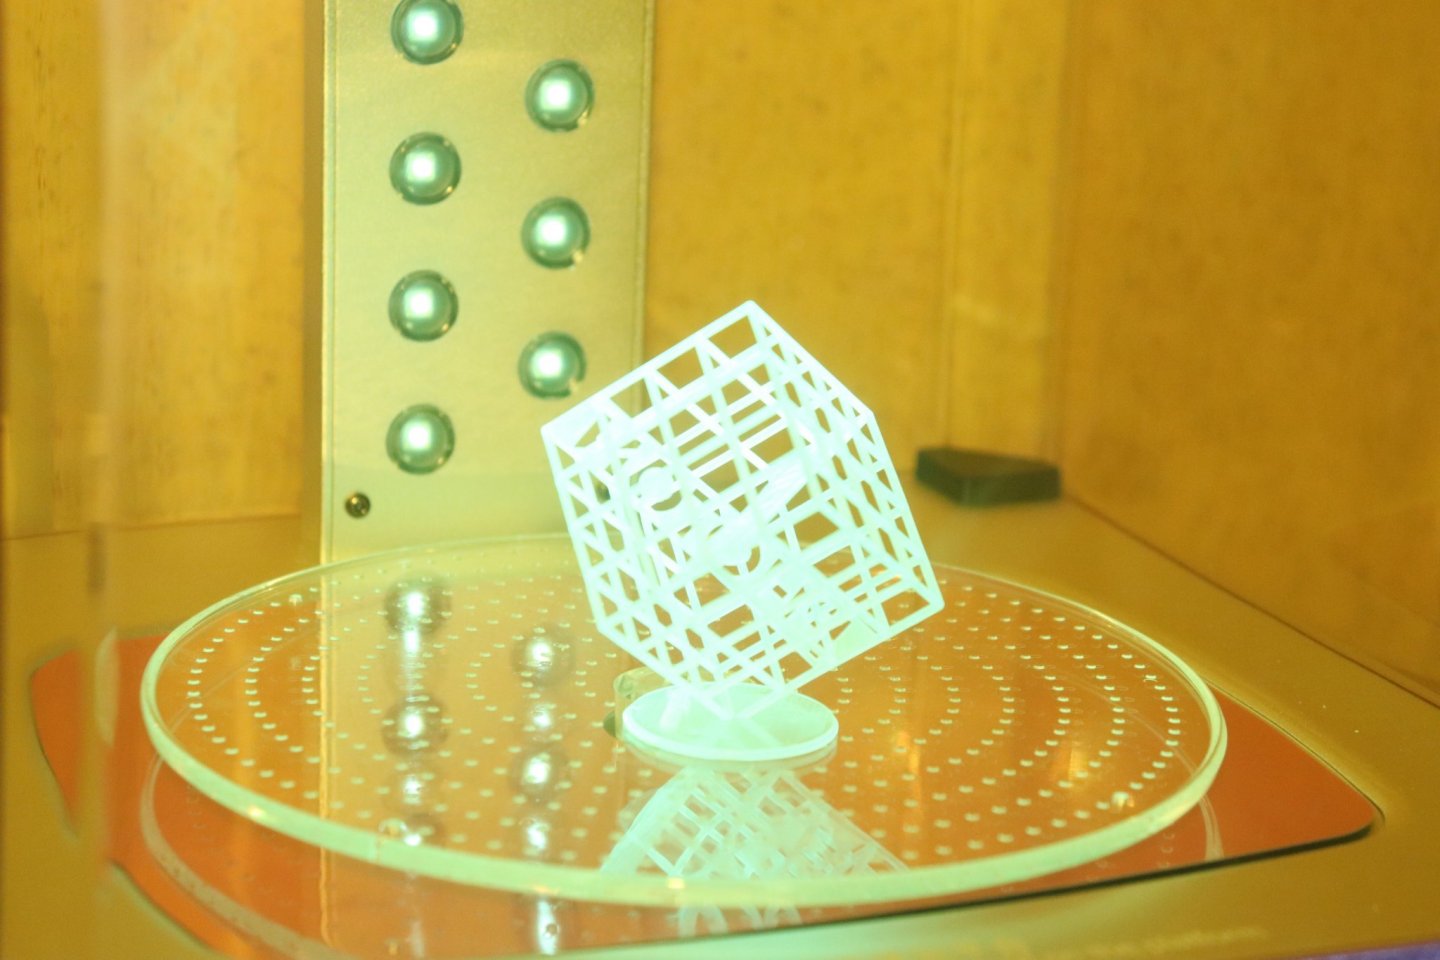
Complete and sitting on my desk....
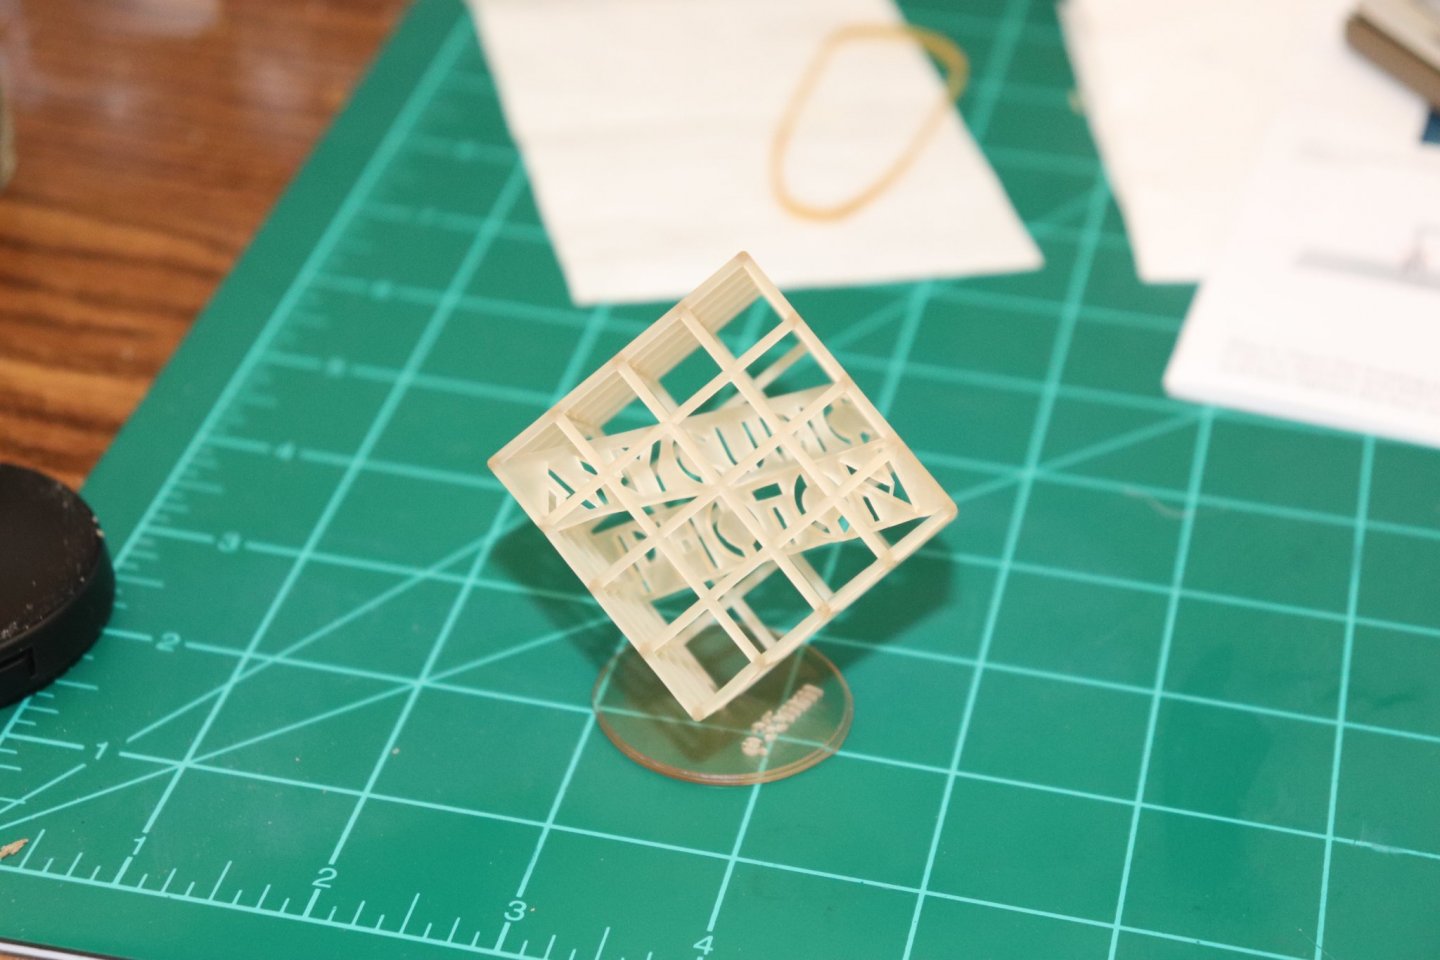
This is the neatest thing since the Exacto knife..... Damn impressive if you ask me...
I've got the rose printing now, another 4 hr print, the turnaround from finish to starting the next print is all of abut 15 minutes and that was my first time...
I'm very impressed... A very easy process....
EG
I am compiling a lostof interesting things to print, my Son likes Robots, hence taht got on my list
I am also hovering over the Trigger, Admiral is already convinced, we even agreed on converting one of the Storage Rooms in the Attic for this + some heavier machines (like lathe and proper airbrush station).
Now only if one could find proper Crew Figures for 1:64
Although i still think if it wouldnt be better to wait for the DLP Printer from AnyCubic
- lmagna, thibaultron and mtaylor
-
3
-
20 minutes ago, Egilman said:
The promised update when I could actually see what it's doing...
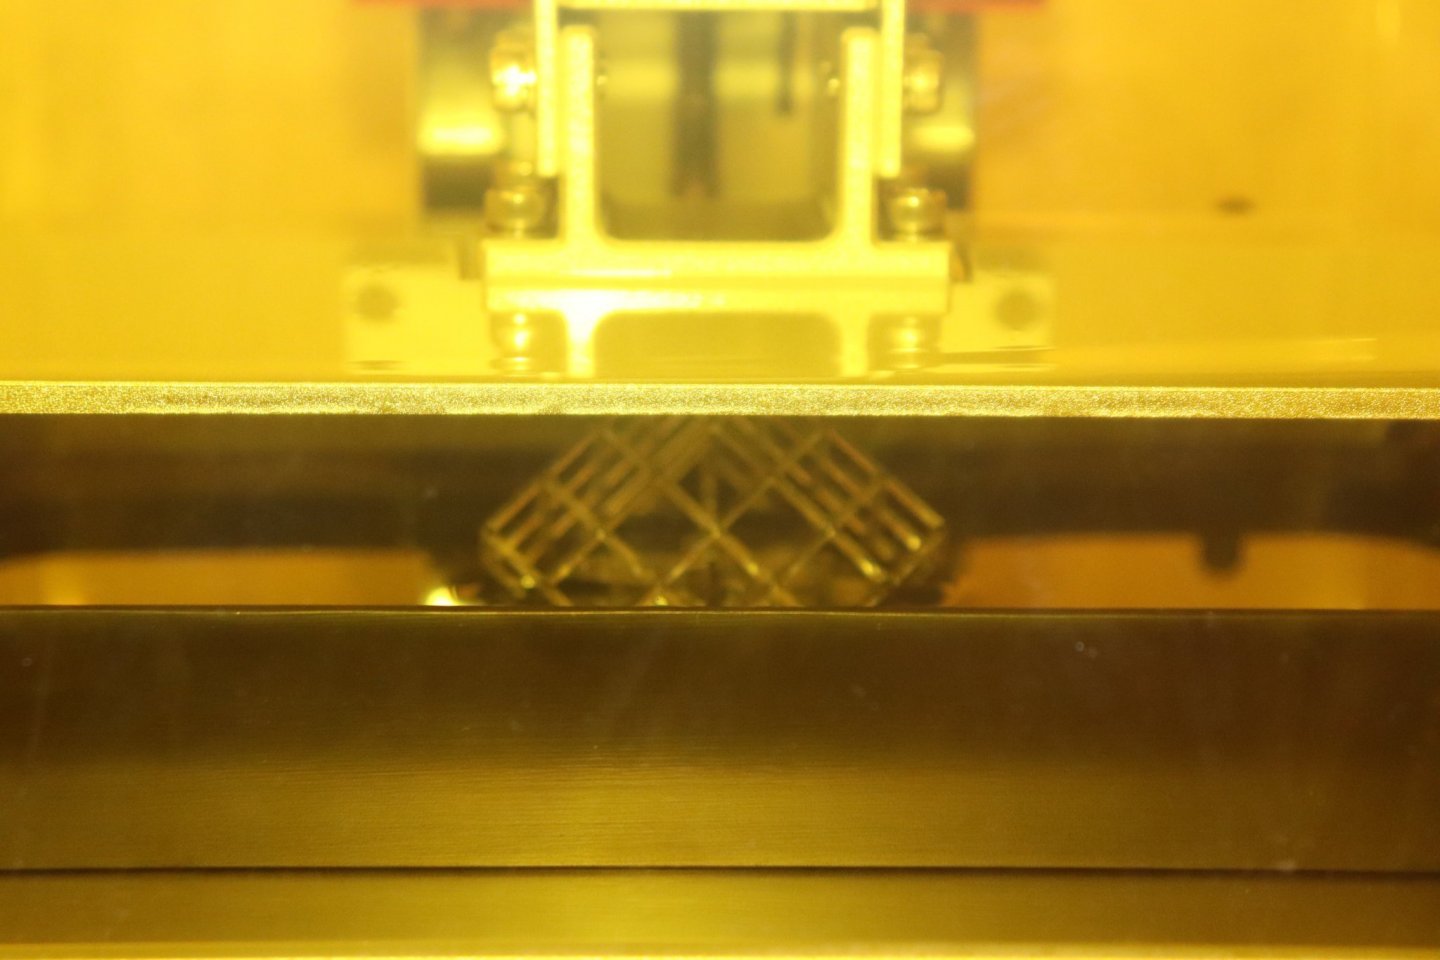
Clear Resin, absolutely amazing....
A shot of the LED's doing their thing....
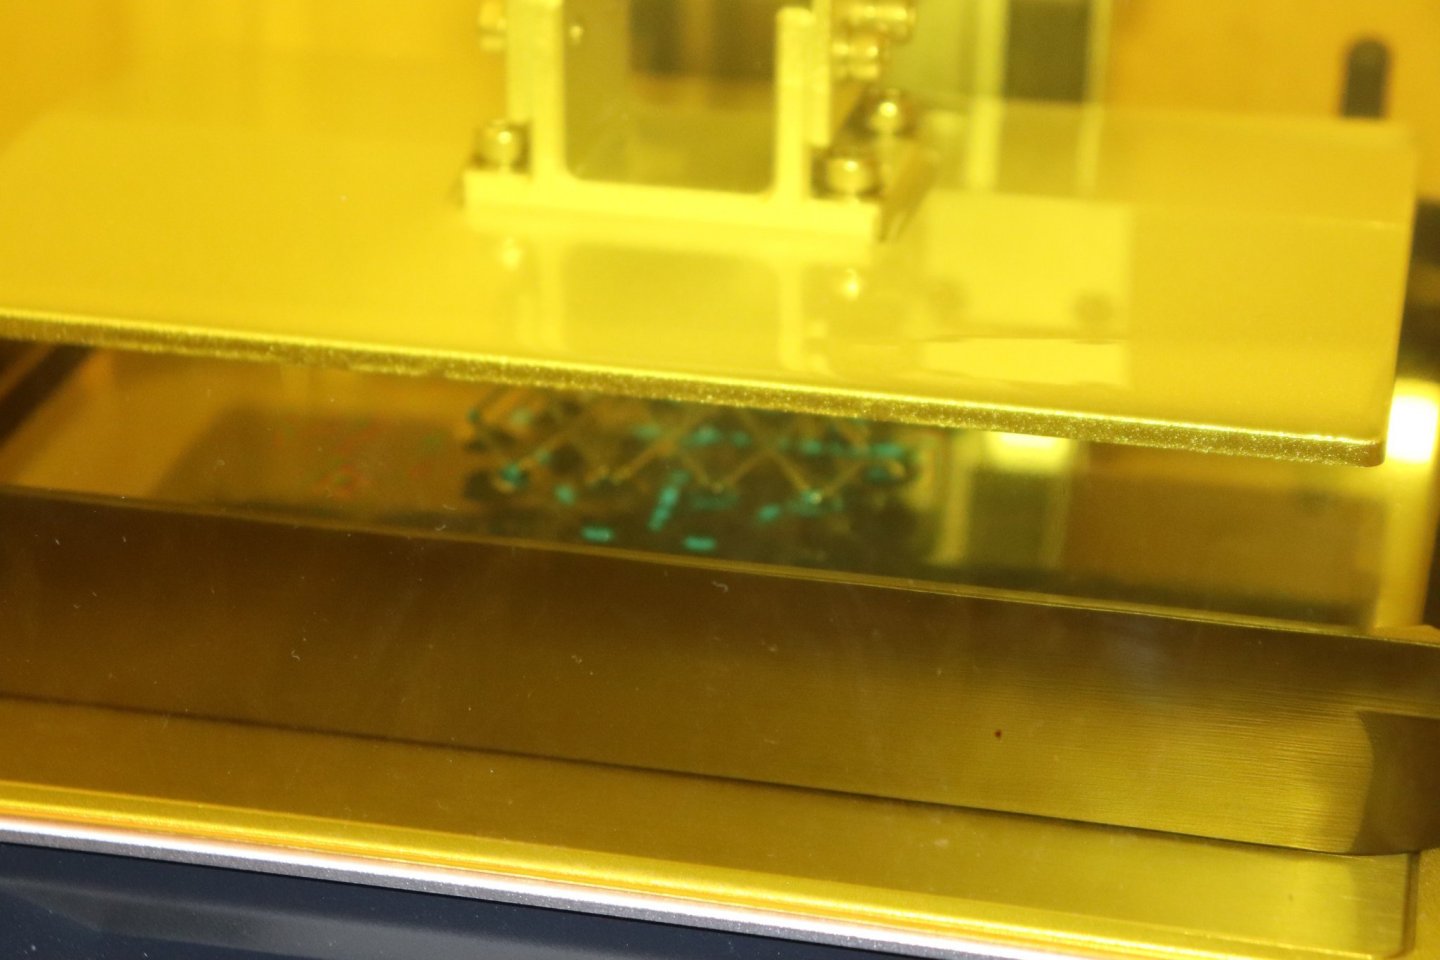
I know I'm gonna have fun doing this... Half way through, 1.5 hours to go before washing and curing.... (still praying that it doesn't fail)
EG
Try this
https://www.thingiverse.com/thing:4149818
You need to Support IT first tho, i think I'll use Lychee
-
2 minutes ago, dafi said:
On top of it all writing are computer based letters 😉
Oh, I love the look of the low rider scene, my friend has a car like this ...
😆😆😆
XXXDAn
That's not even the worst part of it, if this would be a Fort-Gun then the Carriage might be on rails, so small wheels arent the biggest issue
-
-
-
5 minutes ago, glennard2523 said:
@Jasseji I am using three very similar methods.
a) In the first instance, straight after the plank is glued in place, I will sand the joint line between the two planks. This will remove any excess ca gel and the sawdust can sometimes bind with any residual ga gel in the joint area to fill gaps.
b) For the plank edges with the stern counter, stern post and stem post I am sanding the planks in situ and then using an old paint brush which is dipped in diluted pva move the plank sawdust to the joint between the planks and posts where needed.
c) Where the plank joint has been made (i.e. when I have cut a plank in half and then fitted one half for the bow and the other half for the stern) I brush some diluted pva over the plank joint area and sand so any gaps get filled with the sawdust / pva mix. This is also will be used if there a small gap between adjacent planks.
I hope that explains what I am doing.
Right, i was using Method 3 for the 1st and 2nd planking on the LN, also mostly on the 1st Planking of the Sphinx (basically paint the Hull with diluted PVA before sanding so the mix gets into the gaps)
I was wondering if using Varnish would be better or worse than PVA ?
-
34 minutes ago, Ian B said:
Thank you for taking time to give me such comprehensive answers. Based on what you are saying I shall leave the lower rings empty as that is the right way-- I never knew
") As you can see she is just about ready to have them fitted..
As you can see she is just about ready to have them fitted..
As long as you are showing the guns in the 'Ready to fire' position then yes, if they'd be stowed then i'd only add some kind of tackle
-
-
38 minutes ago, Roger Pellett said:
My compressor that cost about $100 US has a top pressure of about 8 BAR (125 psi). It also has a tank and a built in pressure regulator that allows output pressure to be turned down as needed. These compressors are sold by large home improvement stores throughout the US. It’s noisy, but so are my other full sized power tools. My wife has been putting up with noise and dirt from an in home workshop for over 50 years. My first workshop was the second bedroom of a two bedroom Apartment. When you need a tool, buy the right one and it will last you a lifetime.
Roger
Oh, then you have bettercompressors over there in the US, the ones for ~100€ over here run max at 6 Bars (but they are quiet on the other hand)
- Roger Pellett, DaveBaxt, mtaylor and 1 other
-
4
-
16 minutes ago, DaveBaxt said:
I am assuming its just a case of adjusting a pressure switch to get the required output pressure or is it more complicated than that?
It's a valve where you can Set the pressure and there is a dual to Show what pressure is bei g deliverrd
-
40 minutes ago, Blue Ensign said:
Well done Jacek, that looks impressive. 👍
B.E.
Thanks, now have to finish the Same on Port side, then 4 or 5 more planks So the stern will be done until the waterline.
I didnt measure yet, but as per my Initial counts i will need at least 2 more Bands of 7 planks each, will try to do the 2nd Band Properly, the 3rd i will decide when i get to it
-
Just now, DaveBaxt said:
Ah! rhat
Ah! that was the question I was asking myself ( but as usual I didn't know the answer) So \if I decided to go down the air brush route for painting I would need another compressor or can you raise the pressure enough to work for both? I have just received my crock pot and Sparex for pickling so for the time being I will be using this for removing any unwanted residues, but always nice to lean about more alternatives. Thank you once again for your input. Best regards Dave
The Air Erasers require 2.5-4.5 bar pressure, a standard Single-Piston Airbrush Compressor goes up to 4 bar (the stable range is 3-3.5bar).
To be on the safe side you'd need ideally a Double-Piston Compressor which are only slightly more expensive (20-30 euro more than a single-piston) and they go up to 6-7bar
-
19 minutes ago, James H said:
That just looks really nice. 😁
The hull shape is really easy flowing and that pear in connection with CA doesnt need really too much bending (i only add a tiny bit of Edge Bend to avoid Clinkering but dont have to use any tool to ben around the Bow).
In hindsight, i should have used CA for the Upper Bulwark liner so i could have avoided those nasty Pinholes (they wont be visible i know, but clamping this with PVA causing warpings was a pain)
-
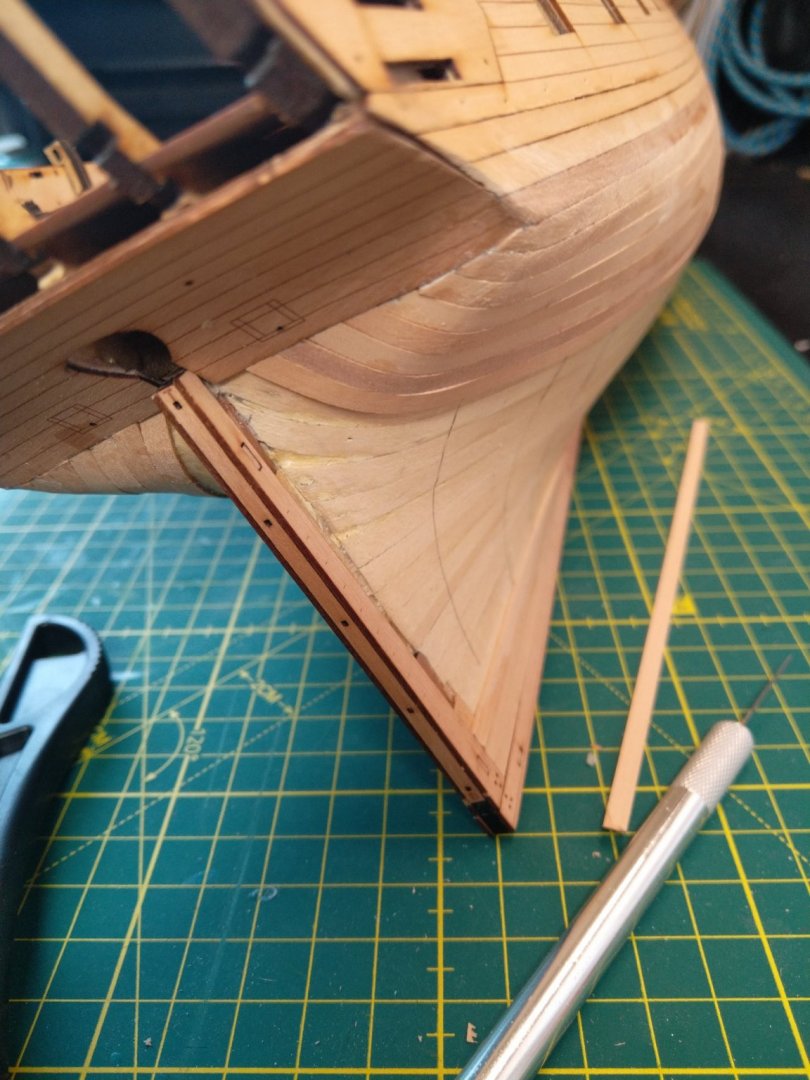
1st Planking Band Ready on Starboard side and Added Garboard strake, blatantly copying @glennard2523 with his 2-Plank Garboard Strake idea:
Mu 1st Plank Band consists of 7 Planks, 2 are very lightly tapered, 5 next are tapered to 2.5mm
Port side almost the same status
- Kathy Teel, PhillH, BenD and 12 others
-
15
-
3 hours ago, Ian B said:
Can I assume the gunport cover apart from the two ropes on the upper side for opening the lid, the two rings on the inside should also have ropes running in through the gun port opening. It is just all the pictures on here show the rings with nothing attached? well the pictures i have found dont... LOL
i dont think you would normally attach anything to them unless you want to secure the Gunports in a closed position, then you could run some rope through them or use any tackle you'd have at hand, wouldnt be attached however when the gun is in use and 99% of the Models show guns in firing or loading positions
- mtaylor, Keith Black and allanyed
-
3
-
22 minutes ago, DaveBaxt said:
Unfortunately I do not own an air brush as yet .( Only modelling for a couple of years) but do have a couple of spray cans including primer. I am still currently building up my tool store but hope to one day step up and get one. The Air eraser also sounds interesting and will do a search for them and see if there available in the UK. Once again I would just like to thank every one for their help on this subject. Best regards Dave.
search Amazon, this is basically a sand blaster which looks like a regular airbrush but with a bigger container for the sand and needs a compressor to work (around 100EUR on Amazon for the compressor)
-
28 minutes ago, Egilman said:
Good question...
I don't think I have any good answers.. Wish I did....
Outside the initial cost factor, you have to decide how big your going to build... What scales your going to be working in and what type of projects.... Think towards the largest single part you will need towards what your going to build... Get it's measured size in real life, down scale it to your working scale, and buy build volume accordingly...
One of the advantages of larger build volume is you can make repetitive parts in one printing, you need a dozen of a certain part you can do it in one print rather than a dozen separate prints... That's my situation, I'm going to need a dozens of tall parts that are identical or close to identical, that measure around 8" so a 9.5" print height is required... The Mono X will print a dozen of those all at once easily...
That how I reasoned it out....
It all depends on what you want to do with it....
Ye the point is, i would start with small stuff, propably 1:64 scale figs and Lego parts but then at one point i am sure i would realise i want to build larger things as well.
Decisions
- mtaylor, lmagna, thibaultron and 1 other
-
4


.JPG.4c2f1282463bfb4f1bba341170df08b4.JPG)
.JPG.8b47463883930e744429a2751926eb45.JPG)
.JPG.57feb6689f5761a1a5ea627fd2389e85.JPG)


HMS Sphinx 1775 by mtaylor - FINISHED - Vanguard Models - 1:64
in - Kit build logs for subjects built from 1751 - 1800
Posted
The Wales are like anatomic curves.
They need to be distinguisahble
But not too much
Not too Little as well
If you get me")