


Jasseji
-
Posts
604 -
Joined
-
Last visited
Content Type
Profiles
Forums
Gallery
Events
Posts posted by Jasseji
-
-
a lot of the models would float, as i believe most of us are sealing the Hulls with Varnish, but in case of all the Sailing Ships, they are too top-heavy and lack any ballast, so they'd float only in calm water, any wind or wave would make them fall to the side and sink eventually
 at least that is what i think, havent tried it (yet[tm])
-
Decorations Commencing.
I am Actually enjoying this a lot, every 5 minutes i spend on the model gives visible changes
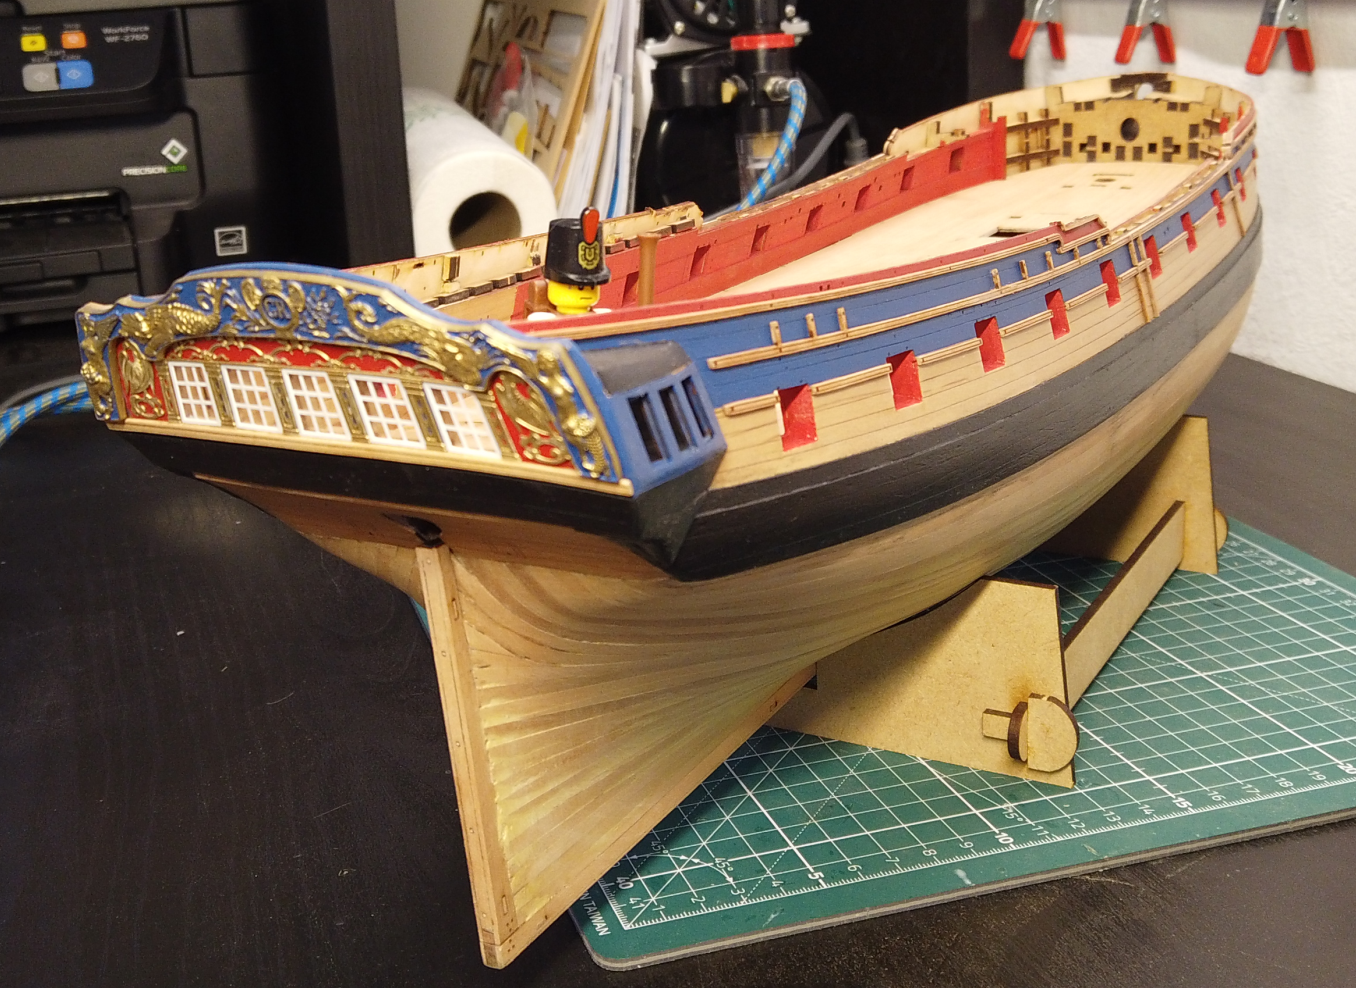
(yes, i noticed now i have forgotten to clean up one of the vertical tabs of the molding, cant really do anything about it now, maybe will try to rip it out but i am afriad that it would damage too much around it)
-
4 hours ago, hollowneck said:
Thanks, Mark. I'm going to try and show as many tools and materials as possible as I continue. I know this helps me when I read a log.
We all use different tools and approach building tasks in our own ways, so seeing how something is achieved is just as valuable as why it was done.
My next post (perhaps tomorrow) will be about how I approached solving a problem that had me in a slight dilemma. It's about the option that this kit offers for not making it as an Admiralty-styled ship model. Sneak preview shown here...
Ron
oh, yes, please, that's something which is on my list of considerations as well
-
21 minutes ago, mtaylor said:
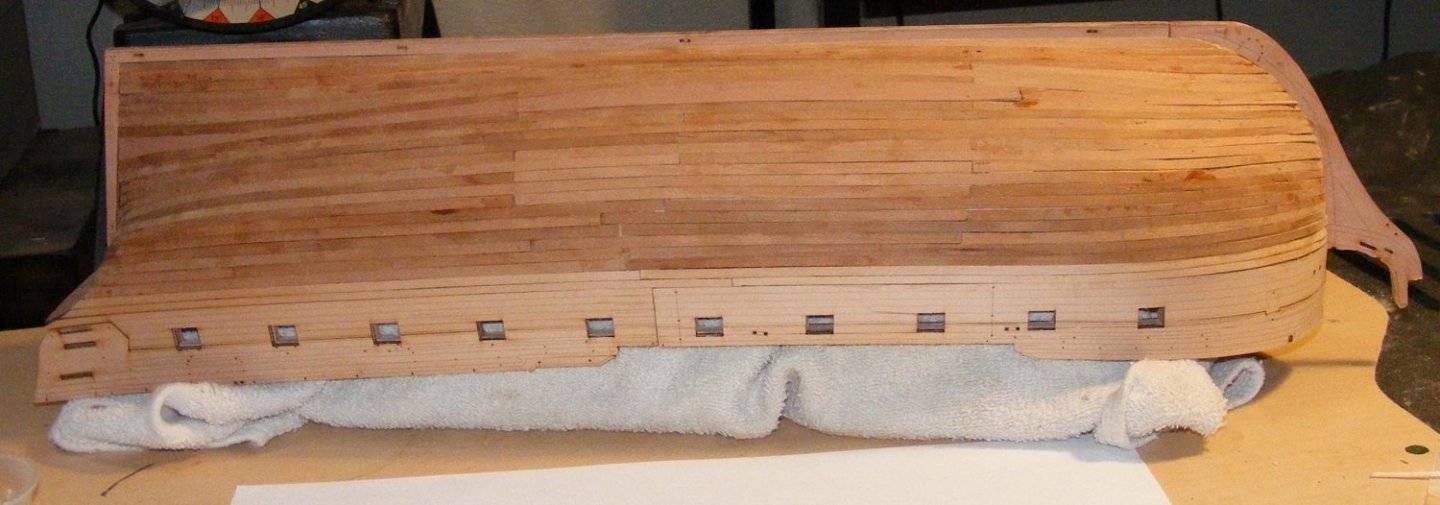
Update. I was planking from top toward the bottom and bottom up (I had divided the hull into 3 zones per tutorial). Low and behold, somewhere I messed up. Could have the lining off of things but ended having to jerry rig the middle section. I ran the "normal" planks as far down as I could and then "cheated". My fix will be to sand and fill and sand then paint. I've looked at some period paintings and realized I can do white stuff up to the water line (normal) and then run the black on wales on down to the water line and hide some ills. I screwed up, realized it, and will at this point make it look good since ripping off planks isn't an option. The first layer is pretty thin and even soaking the pear planks with alcohol I ran into issues. Such is life. I took a look at the Belle Poule which is on hold and the planking there looks better. Not sure what I did differently... thicker planks maybe? Filled in between bulkheads?
I still need to work on the planking on the the other side and triple check more for my peace of mind and to work on getting it right even though the paint will hide it.
I'm thinking on the paint not to paint the keel, stern post, and stem and call it "artistic license".... but I probably will just paint.
Here's the pick of the side that's been planked. from a distance (across the room
") it looks pretty good all things considered though I feel like I lost my touch.
it looks pretty good all things considered though I feel like I lost my touch.
I was looking at paintings and also at the surviving ships of the Era (Victory, Trincomalee, Unicorn, Constitution) and obviously they are all painted black.
While it's definitely/propably not 100% how they looked at launch (and the 2 Leda class being later ships), it's definitely not wrong to paint black, alhough i would love to have some kind of contrast, hence my considerations between white and ochre below the wales (i can start white, go ochre and then black if it doesnt look good :D)
-
25 minutes ago, myxyzptlyk2003 said:
Cutting those pieces up would scare me no end. Any actual cutting would remove some (albeit small) amount of material making the cut up piece "smaller"than the original. The only way I could think of with these delicate pieces is to maybe score them and then break them gently?
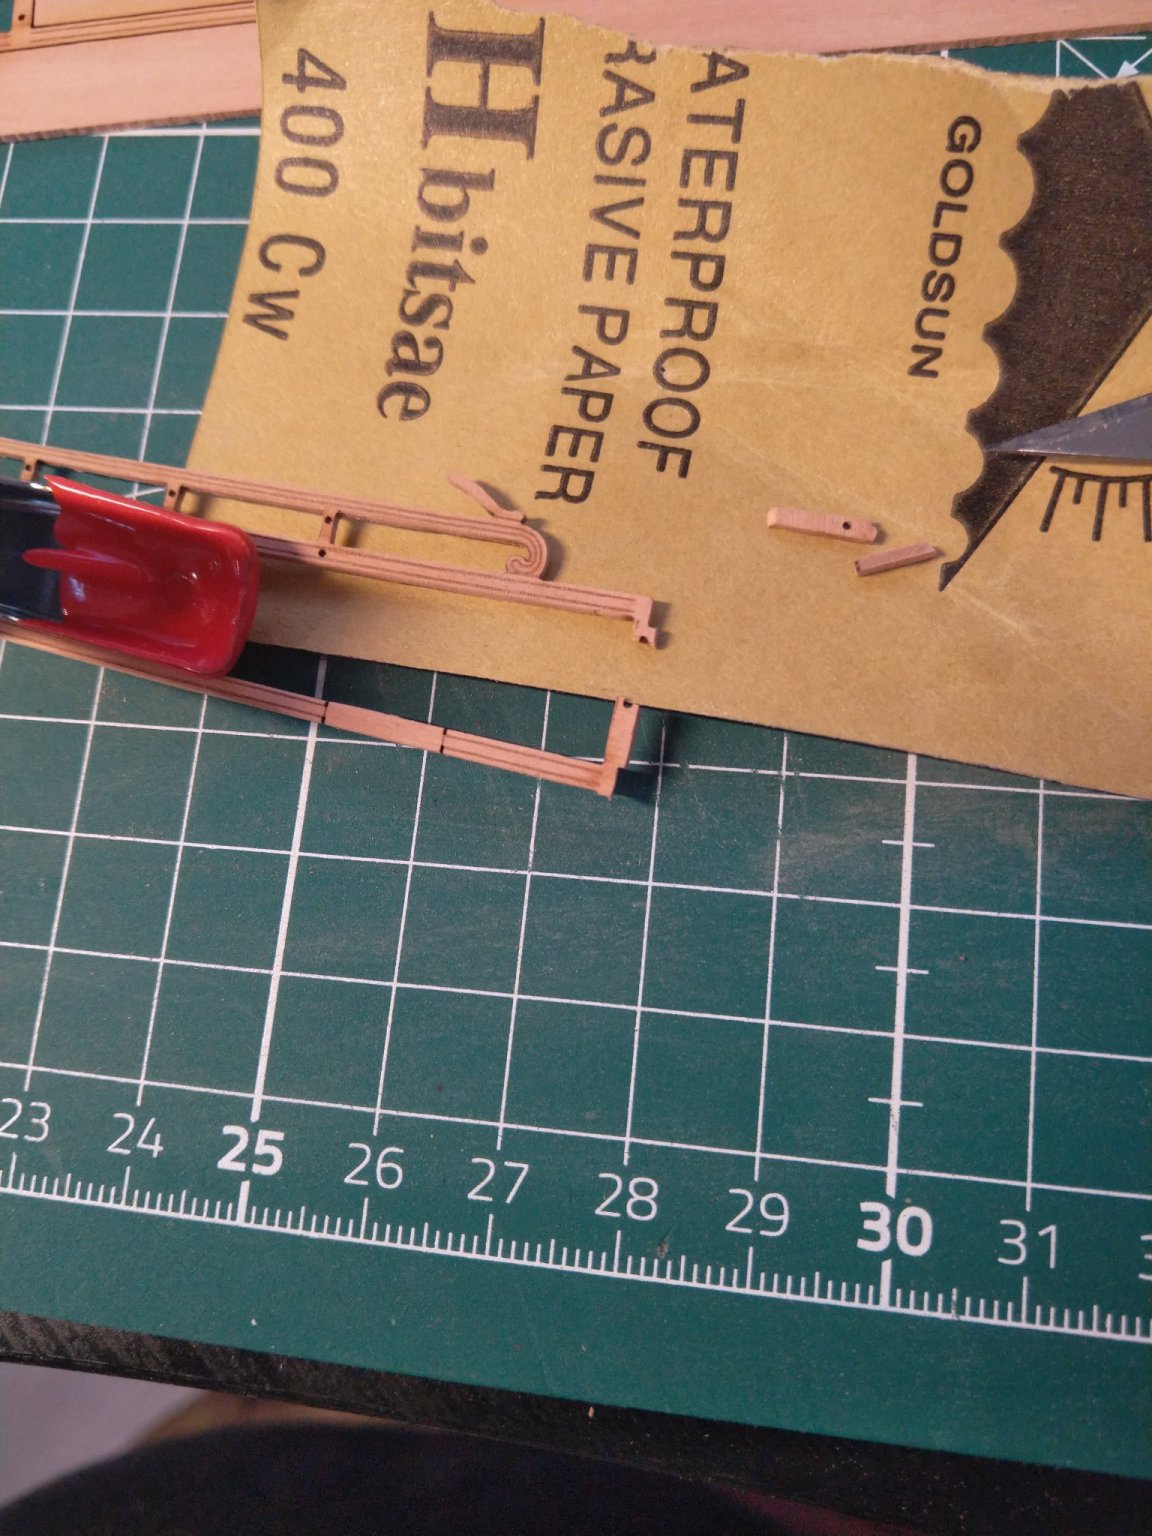
I have cut the vertical Tabs connecting the long pieces together with a thin knife plade and i use a file and sandpaper only between the places the Tabs have been.
When glued to the model, the Cuts will be hidden behind the supporting knees of the chainplates/Channel so even if they are smaller by a tiny bit, it wont be visible (if you wanted to Look at those places on the finished model, you'd have to Look behind the assortment of lanyards connecting the deadeyes)
- mtaylor, Ryland Craze and hollowneck
-
 3
3
-
44 minutes ago, hollowneck said:
Jacek,
That's exactly what I dd with these pieces: cut them into bite-size chunks very carefully and THEN de-char and mount them.
Chuck has also suggested just tossing these (with the exception of the upper volute piece) and making one's own. This requires accurately cut 1.5-2mm hardwood strips (pear in this instance for aesthetic reasons) and making a necessary scraper tool.
Ron
I have a lot of pear left and cutting such thin pieces should not be too big of a problem, i am not sure tho, if i'd be able to make those scrapes
- mtaylor and hollowneck
-
2
-
56 minutes ago, Blue Ensign said:
Well done Jacek, what a difference the Chuck approach has. 👍
B.E.
Yes, Chopping them up makes it easier to DeChar - also, i have removed all the linings between the gunports before gluing the molding in place and shaped and fitted the pieces which go between the gunports separately (mostly because i realised, that James' approach of cutting them with pliers and filing in place destroys the paintwork inside the Gunports in my case, also the pressure of pliers can destroy the mouldings themselves ).
Starboard side is a work in progress now, scraping the mouldings one by one now and only will start gluing when i have all cleaned up (takes time but i can do these parts during Conference Calls at work).
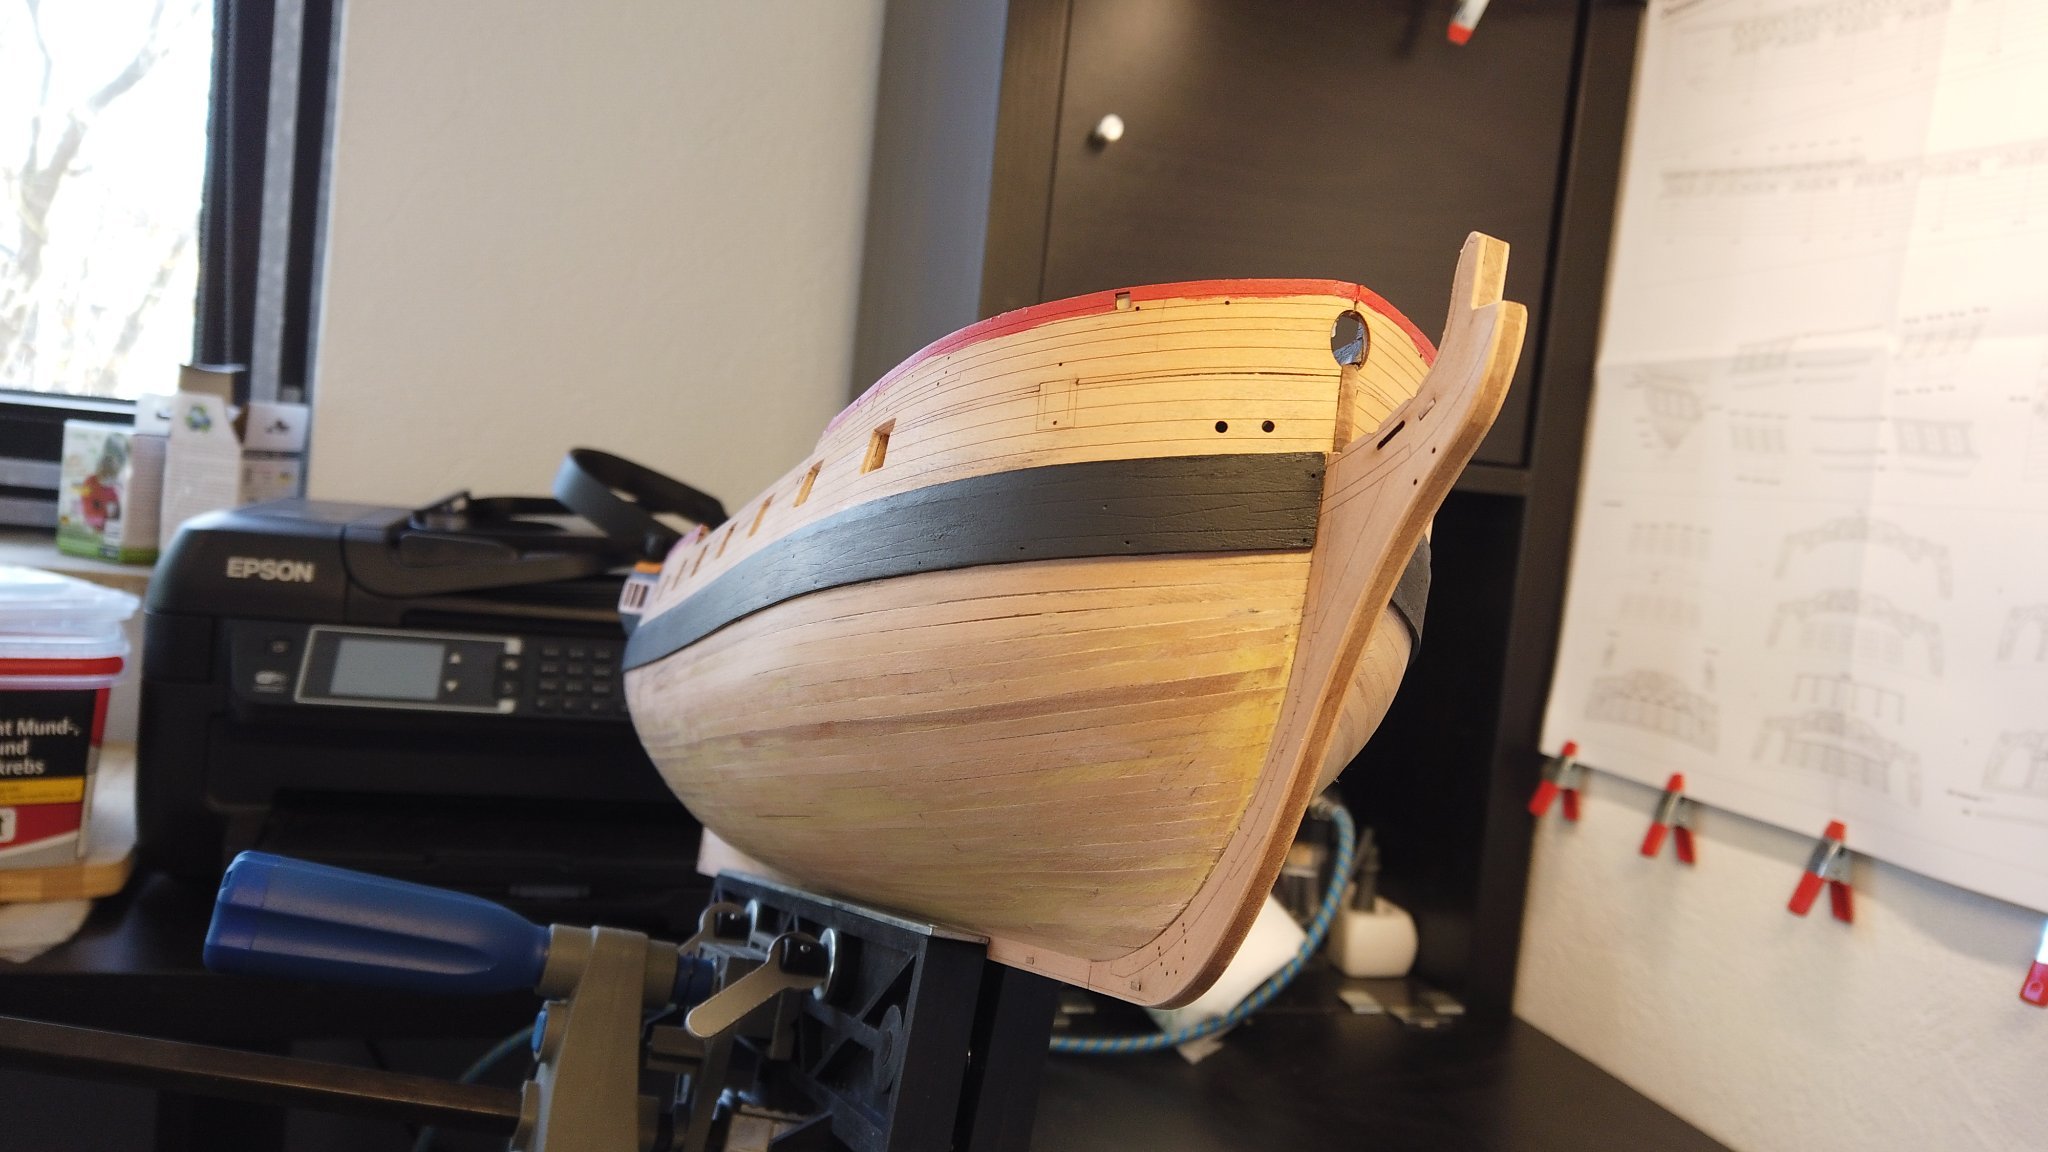
Looking at the pics tho, one thing i wont be able to do is to leave bare wood below the wales, i screwed up here as i forgot the wale pattern when i was doing the 2nd planking (the "best" 3 planks are hidden under the wale) and it just doesnt look presentable now. I am thinking between White and Ochre paint for the area between the wale and waterline (if i choose white, i'd consider coppering below the waterline too)
- hollowneck, ccoyle, mtaylor and 2 others
-
5
-
After failing to fit the Bow Rails in one piece, i went with Chucks suggestion to chop up the rest in more manageable pieces.
The cuts on the Vertical connectors will be hidden by the Channel Knees.
End-Result on Port Side:
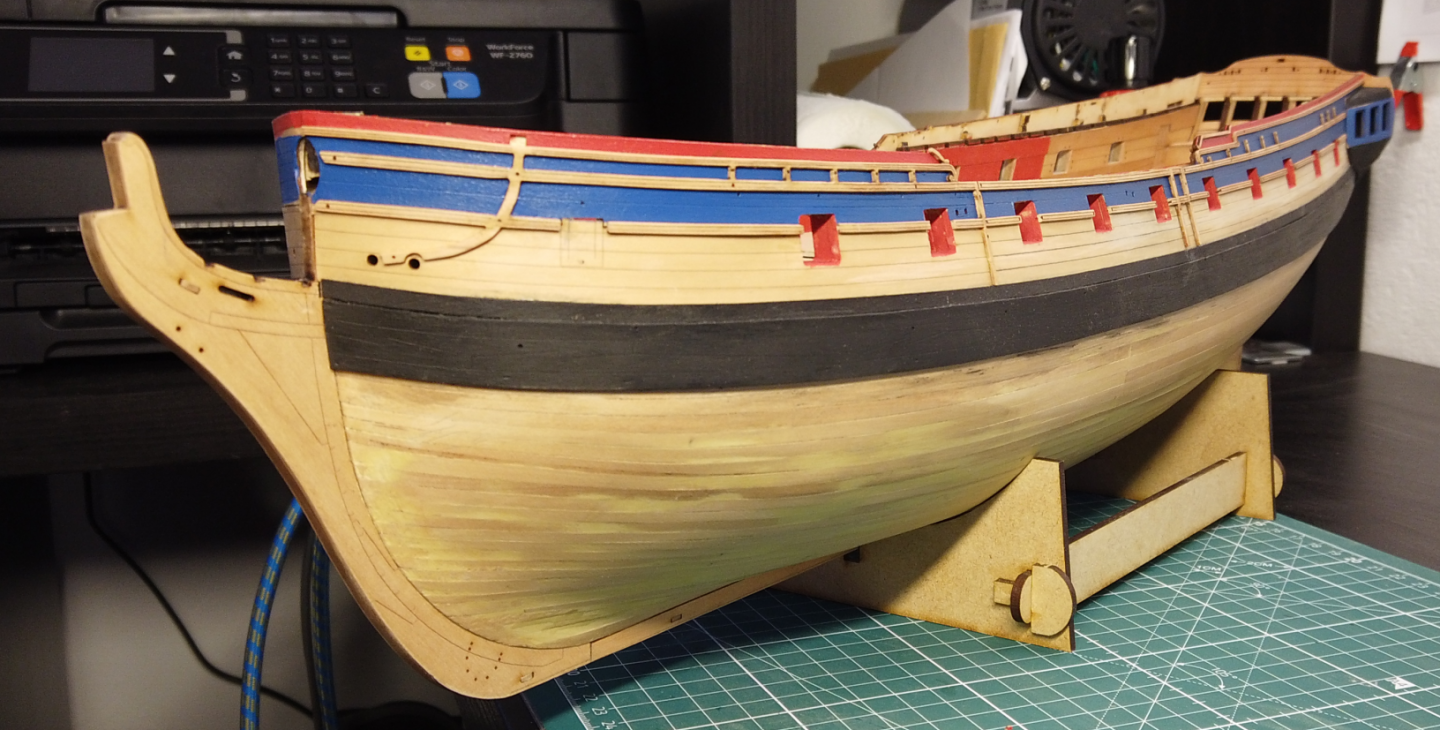
Some corrections in the Wale paintjob required (also some touchups in the Quarter gallery Area) and i can move to the other side
-
1 minute ago, RockinBudgie said:
Great Idea Chris 👍
Mind you, i suppose the grading is subjective. Having been following most (if not all) the Sphinx builds, a lot of people are saying that with a little patience it's buildable by all skill levels. That's a testament to your design skills.
Wishing the best of luck
RB
I second that, this Kit is designed in such a Superb way, that even on a low skill level and with little patience one can achieve a passable result which might be okay for some builders (and especially until now i havent encountered any real showstoppers which might result in this kit not getting finished)
Of course, the more skill and patience you bring, the better the end result but in the end it's up to the builder what level of quality they want to achieve and if some just want to "slap it together" just to have a personal feeling of achievement, then that was perhaps not your intention, but i wouldnt berate anyone for that
- chris watton, mtaylor, hollowneck and 5 others
-
8
-
-
-
Thank you for bringing this up, i have noticed this with the Main Wale liner already, although in that case for me it was enough to brush some water over the whole shape and it warped back as it should (but the wale is thicker than the Cabin Bulkheads).
I will use CA for that i think
-
-
17 minutes ago, chris watton said:
I cannot supply you with my master files that I paid a lot of money to commission, sorry.
I would never ask for the files and i didnt, my question was more about ordering it ready-made but in pieces
Anyway, i will try to correct that, i do have another idea tho for the future if it doesnt turn out the way i'd like to
-
13 minutes ago, Laggard said:
Coming back to this as Allans helpful description contained this:
“It is basically a groove in the lower edge of the garboard seats as well as the ends of the balance of planking as it rises up the post and stem.”
Now as a newbie I have to find out what a garboard is. It’s often one deep rabbit hole just to understand one word. The definition for garboard will undoubtedly have some term that I will need to look up. It never ends.
Hell, I have several glossaries bookmarked and still can’t tell you the difference between seizing and stropping.
Maybe this will help:
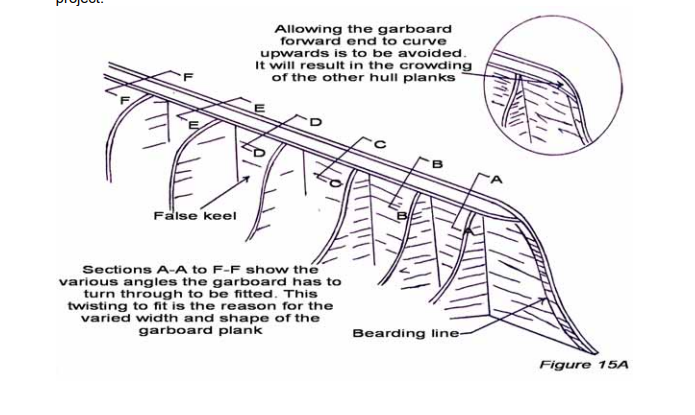
The Garboard plank is basically the first 2-3 Planks, some make id from a piece of wood double the width of the normal planks, some just do it from 2-3 normal planks shaped accordinglyso at the bow it's paralell to the keel (Reference pic from https://modelshipworldforum.com/resources/Framing_and_Planking/plankingprojectbeginners.pdf).
Also regarding rabbets, on some kits you dont have to make the rabbet by yourself, only you glue a thin sheet of wood on the keel and stem which is a bit smaller than the keel itself (usually done for the 2nd planking)
Like here on the Vanguard Models Sphinx:
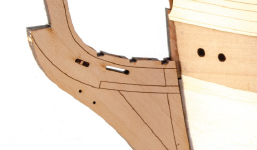
If your kit doesnt have this option, you could always add some 0.5mm veneer to act as a liner for the keel and stem and this way you would create a Rabbet more easily than cutting into the original keel material
-
7 hours ago, mtaylor said:
I don't see a problem with your gold. Looks great from here.
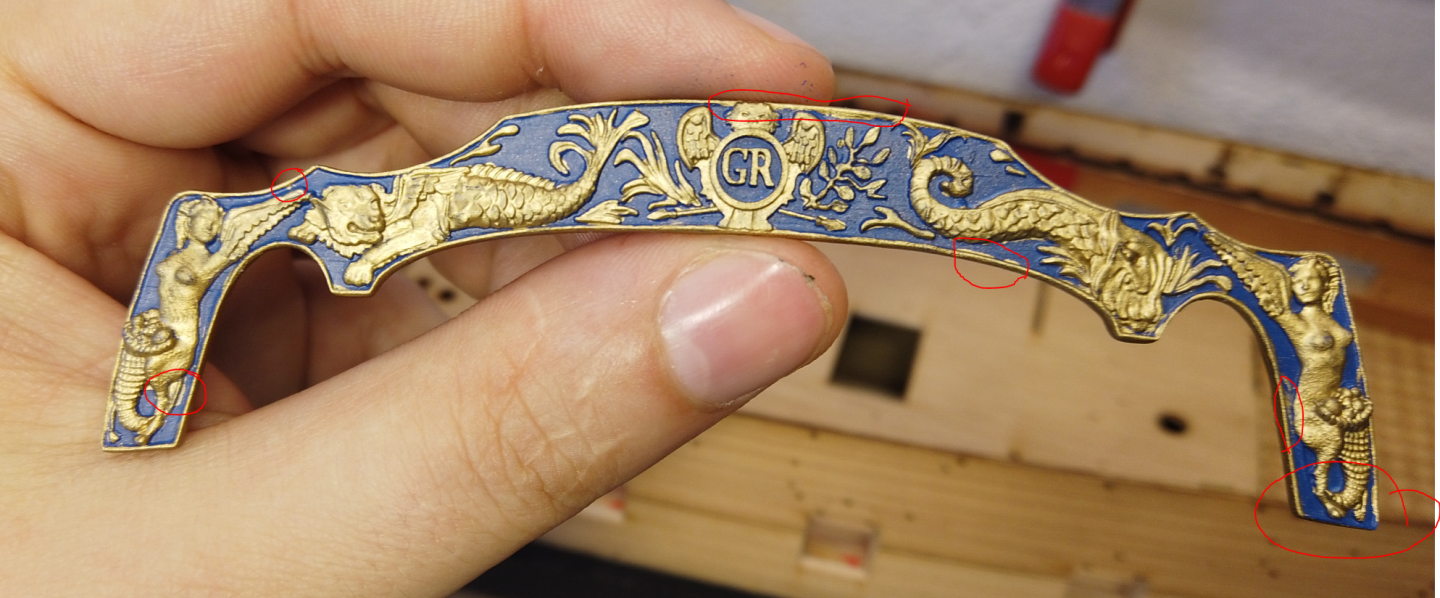
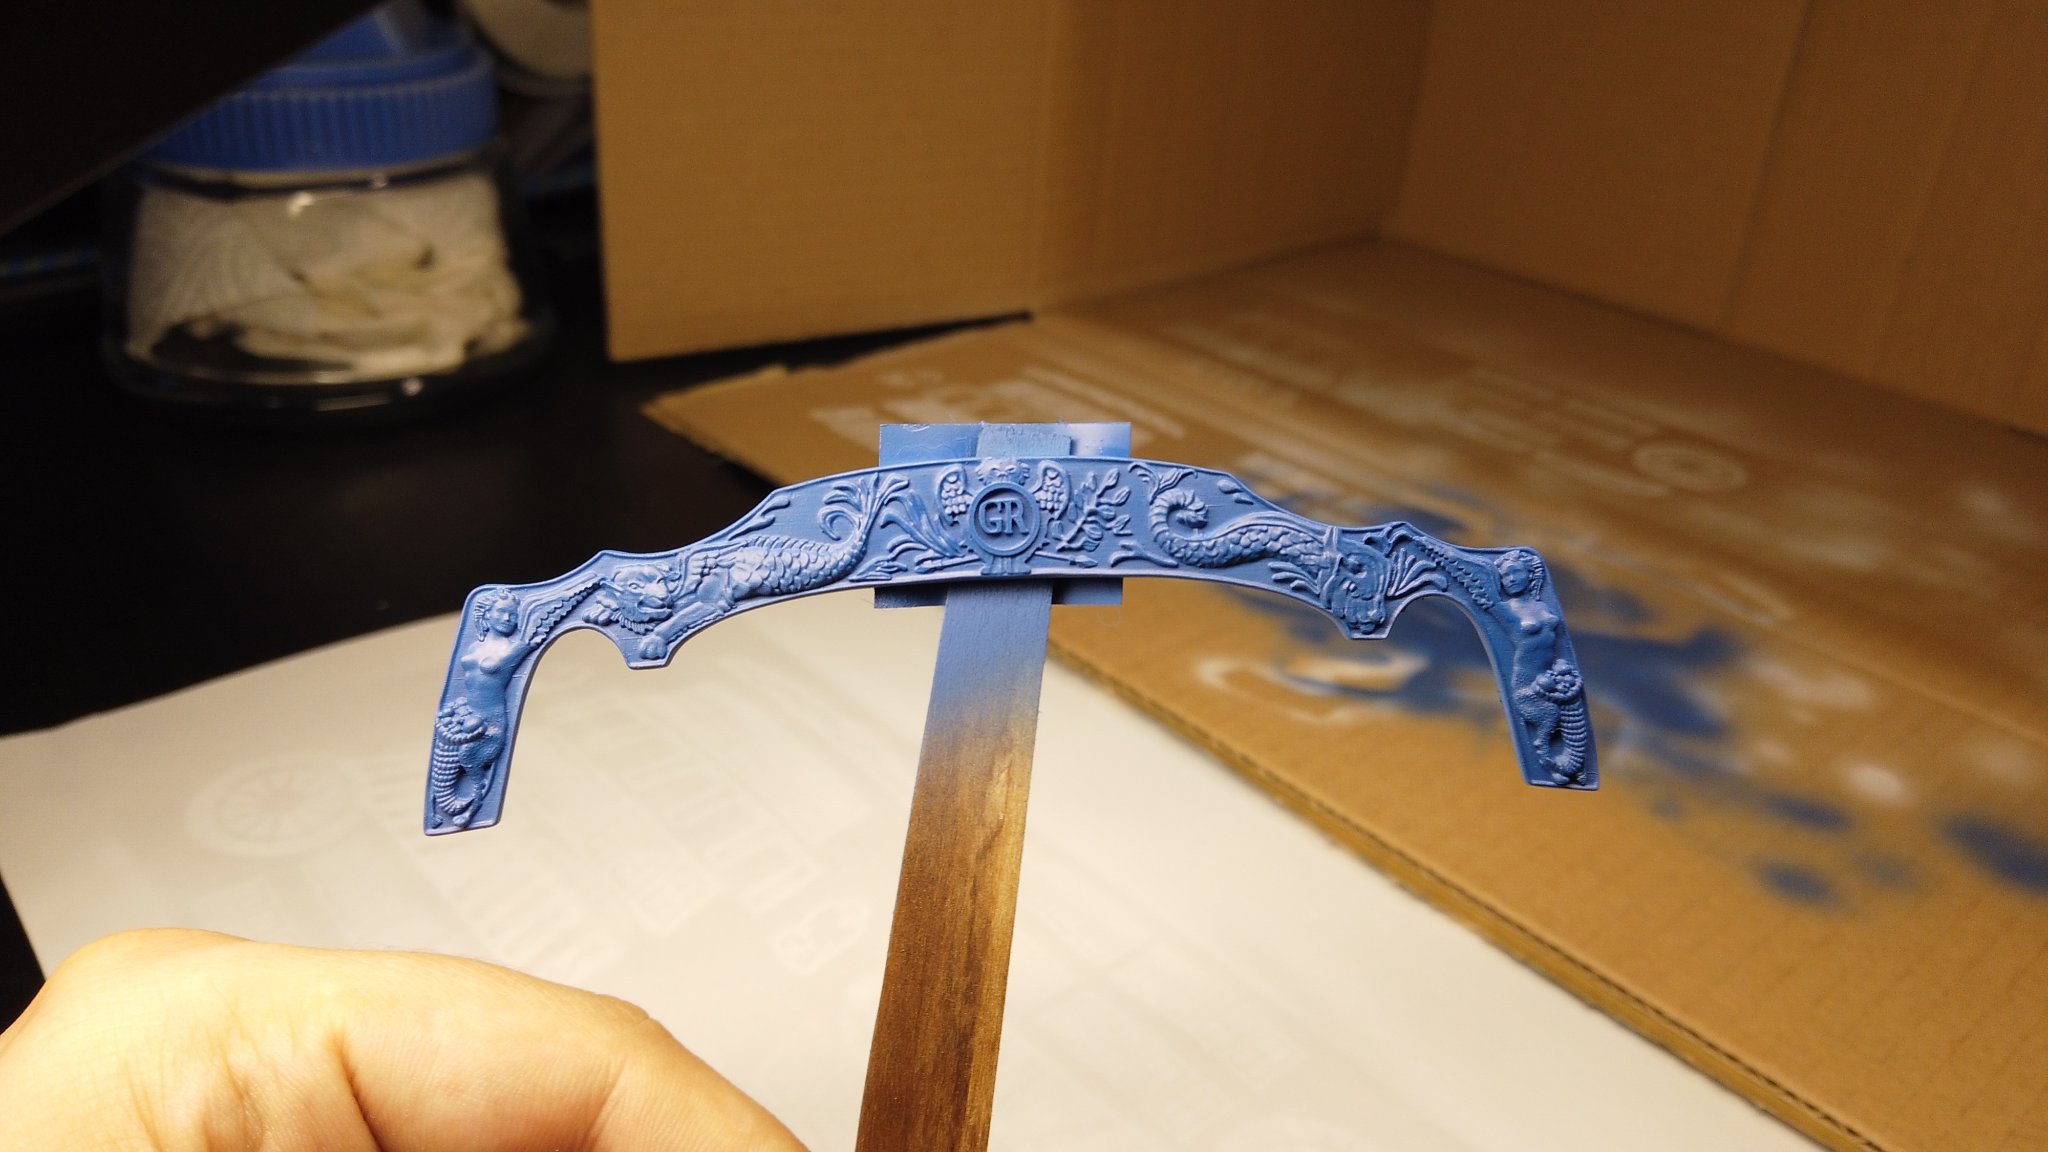
I have to fix at least the upper edge.
It would be better definitely if i'd try to make the decoration in 2 parts - the blank "Cartouche" painted blue and then 3D Print figures and lettering separately.
I'd have to see if i can re-create the figures in Blender or Maya, dont suppose @chris watton that it would be possible to order that separately somehow ?
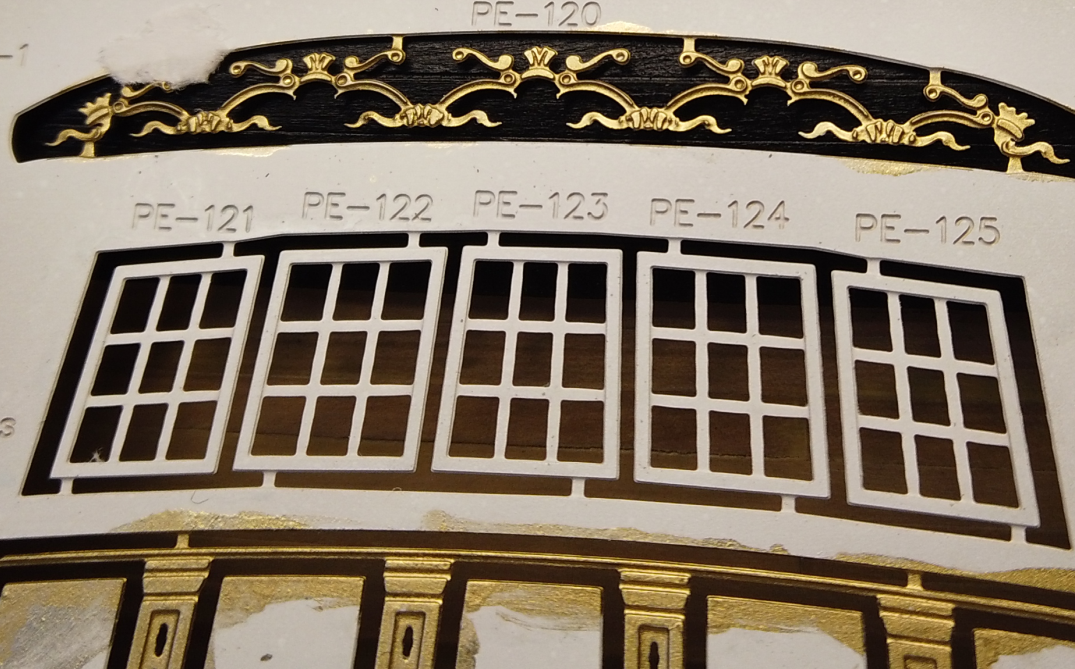
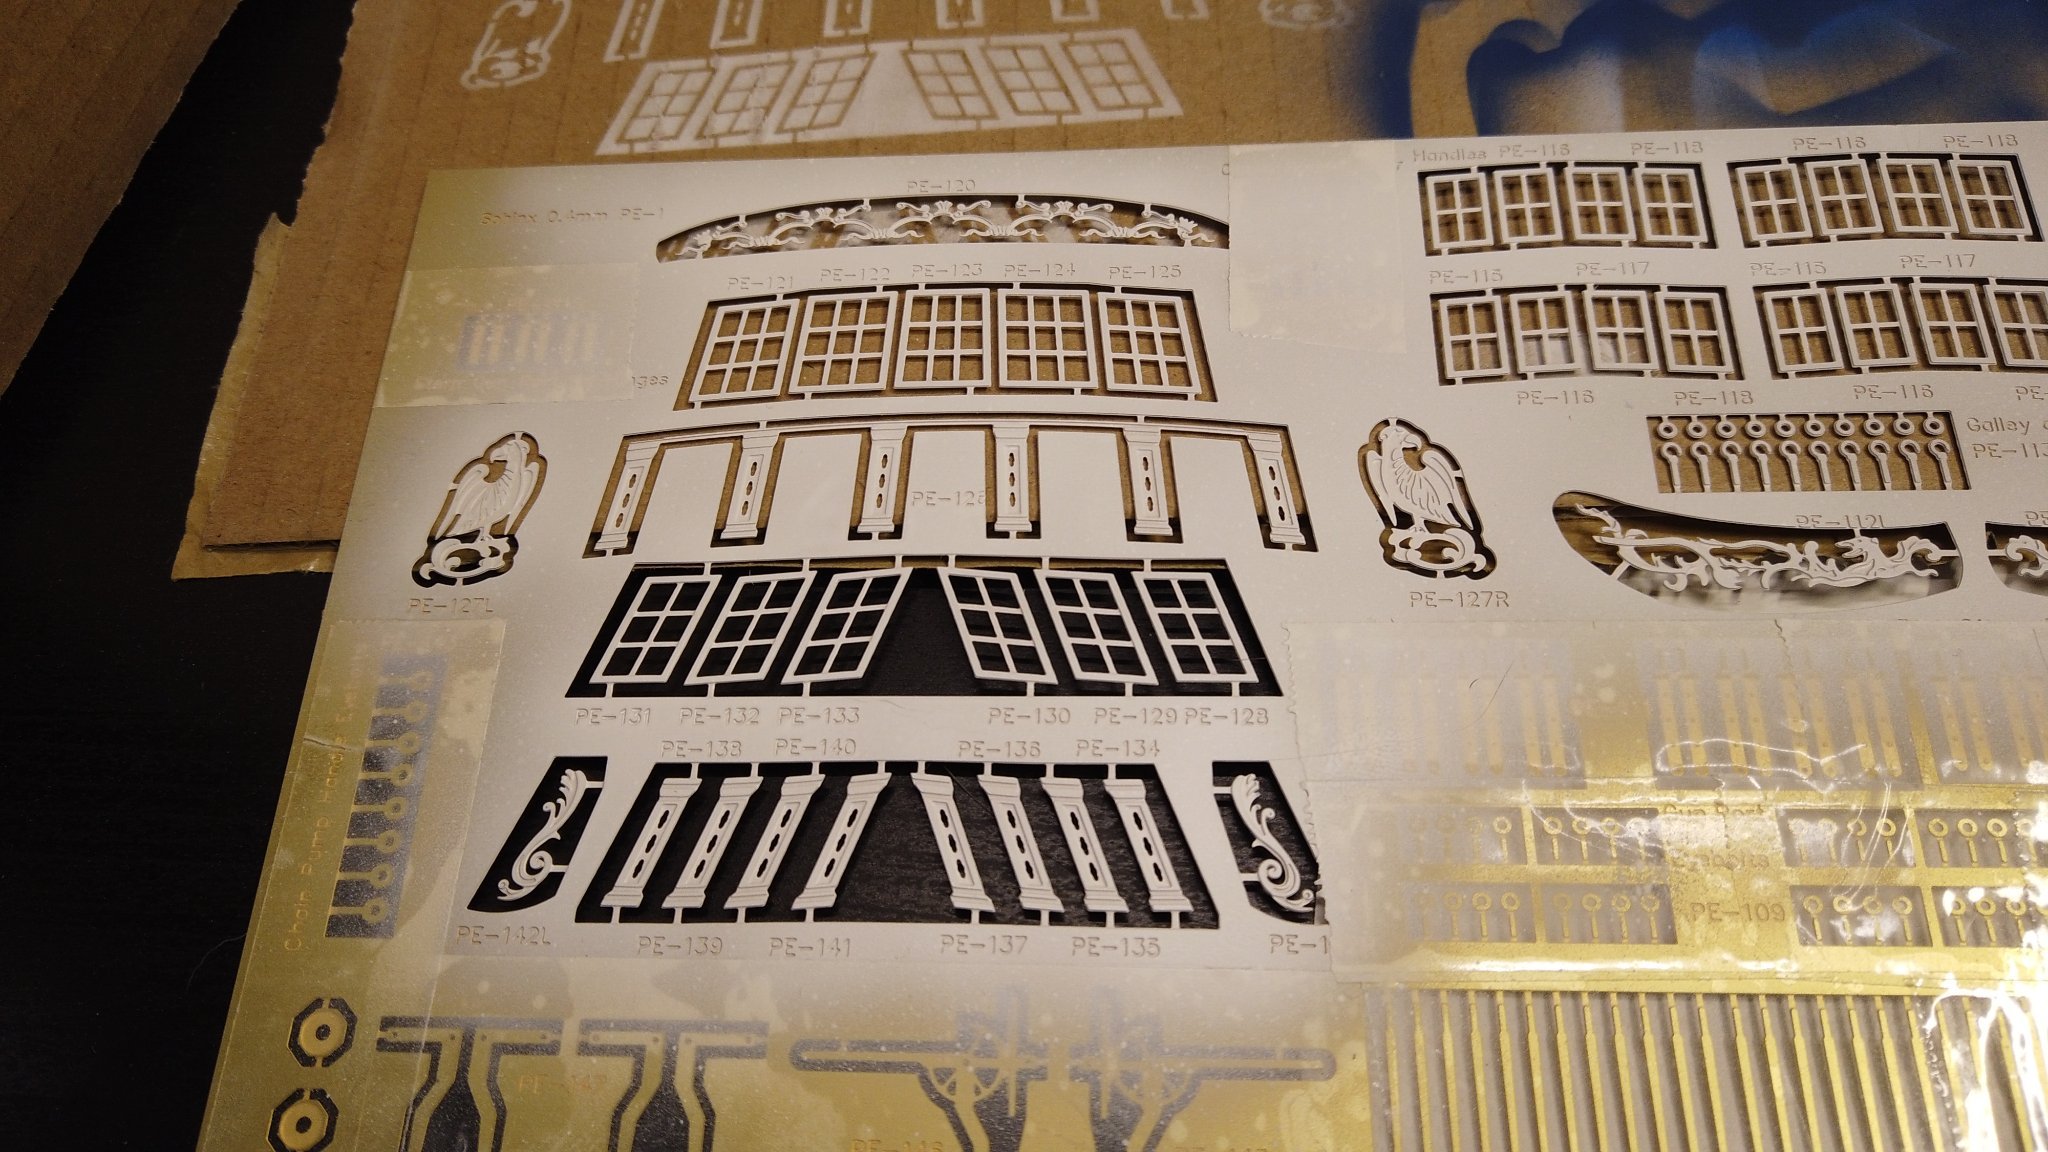
Here is the Effect of the Gold paint on the PE Decor, i like it and it is very easy to paint actually:
-
42 minutes ago, hollowneck said:
Nice work! This is certainly dramatic and the Vallejo liquid gold does drip -😂
No problem, minor blue touch-ups with a steady hand (and a tiny brush) will fix things. I've been thinking about adding the Vallejo gold to the full surround on my stern decoration fascia. It looks especially nice on your treatment.
Ron
I tested it on the frieze work, it surely Sticks better to the primer than reguar Gold paint so i will paint all decorations in it, just have to try to fix those strokes in the resin decor (the steady hand with the tiny brush might be a problem tho)
- hollowneck, mtaylor and BobG
-
3
-
-
-
2 hours ago, hollowneck said:
I have decided to create a Build Log for my build of Vanguard's HMS Sphinx, rather than continue to post my photos and comments here - as well as intruding on other's logs with detailed posts.
I've got a new set of photos with commentary that I'll post in Kit Build logs sometime soon. This is where all my detailed stuff more appropriately belongs.
Thanks for your encouragement guys (and gals), see you there in a few.
Ron
Indeed Ron, please join the party and provide a Link to your log (also i dont mind you spamming my Log with your pics, please feel free to do so whenever you feel like it, i do enjoy the direct Input)
-
-
18 minutes ago, glbarlow said:
I understand English isn't your first language, and it far exceeds the little German I know from my years living there. Rant implies and angry, attacking, or defensive tone, I'm sure not what you meant.
German isnt native for me either (well, a bit it is but my Main Language is Polish, i just grew up with German).
I always understood 'rant' as a passionate exclamation, like "this isnt working as i hoped it Would, wasted so much time!", at least that Was my impression that BE was frustrated that He wasted time on an unsuccesful endeavour.
My English is quite good actually on one side but limited mostly to business and technical-IT English, It's 20 years since i needed any real small-talk or day-to-day communication
-
2 minutes ago, glbarlow said:
I completely agree, nor do I. Odd wording to use for someone like you who takes the time to share and explain his techniques.
Seriously, i do believe that It's a bit stiff lately, meaning, some People do take Things too Serious.
@Blue Ensign sorry for my wording, i hope i didnt offend you but my vocabulary is missing some Times and i dont always realise the full meaning of a Word. What i meant is you mentioned your idea on the lining gave you some concerns
I think I'll stop Posting at all.
-
1 hour ago, hollowneck said:
Jacek,
Yes, I believe the blackening I use (in the U.S. = Birchwood/Casey brand) makes the P/E better hold an acrylic or solvent-based paint. I consider blackening like a "primer" coat. In some cases, the blackening alone is quite adequate for the task (especially very small eyebolts, rings, etc.); it does rub off but it still removes the curse of having "golden" fittings sprinkled about the model: Not kool. I'll sometimes even add a matte black paint to these small items to simulate iron.
I'm doing the chains now and I'll blacken all the P/E pieces. Then, to make this task manageable, I'm "stringing" all the pieces onto a thin wire so I can spray paint them evenly with either my airbrush or a spray can of matte black. Sure beats painting each one of these complex multi-part assemblies! This will create a consistent look to all these very prominent fittings. I did this with the chain and hand pump P/E and I believe imparts a proper "look" to these on-deck items.
On another matter, I've also scratch-lined my gunports; removing all that char first was a Sh$#$& task! I'm somewhat surprised that Chris didn't provide some laser pear for doing this. A minor complaint, but applying red paint to fix this really isn't a good solution - particularly for someone who doesn't want to paint all the bulwark items in screaming red. My preference: less is more in this case, like my removal of the unnecessary extra P/E decs on the stern.
I use the Citadel washes quite a lot (in conjunction with appropriate base colors).
Ciao,
Ron
Ye, i would have also preferred the Gunports not being Red inside, actually considering Black, ideally it would be if we could keep them unpainted but thet would require lining them up with someting, i do have a lot of pear left so maybe that will do (but looking at @Blue Ensign, he did rant something which i didnt really understand about his lining idea)
- BobG and hollowneck
-
2


HMS Sphinx 1775 by Jasseji (Jacek) - Vanguard Models - 1:64
in - Kit build logs for subjects built from 1751 - 1800
Posted · Edited by Jasseji
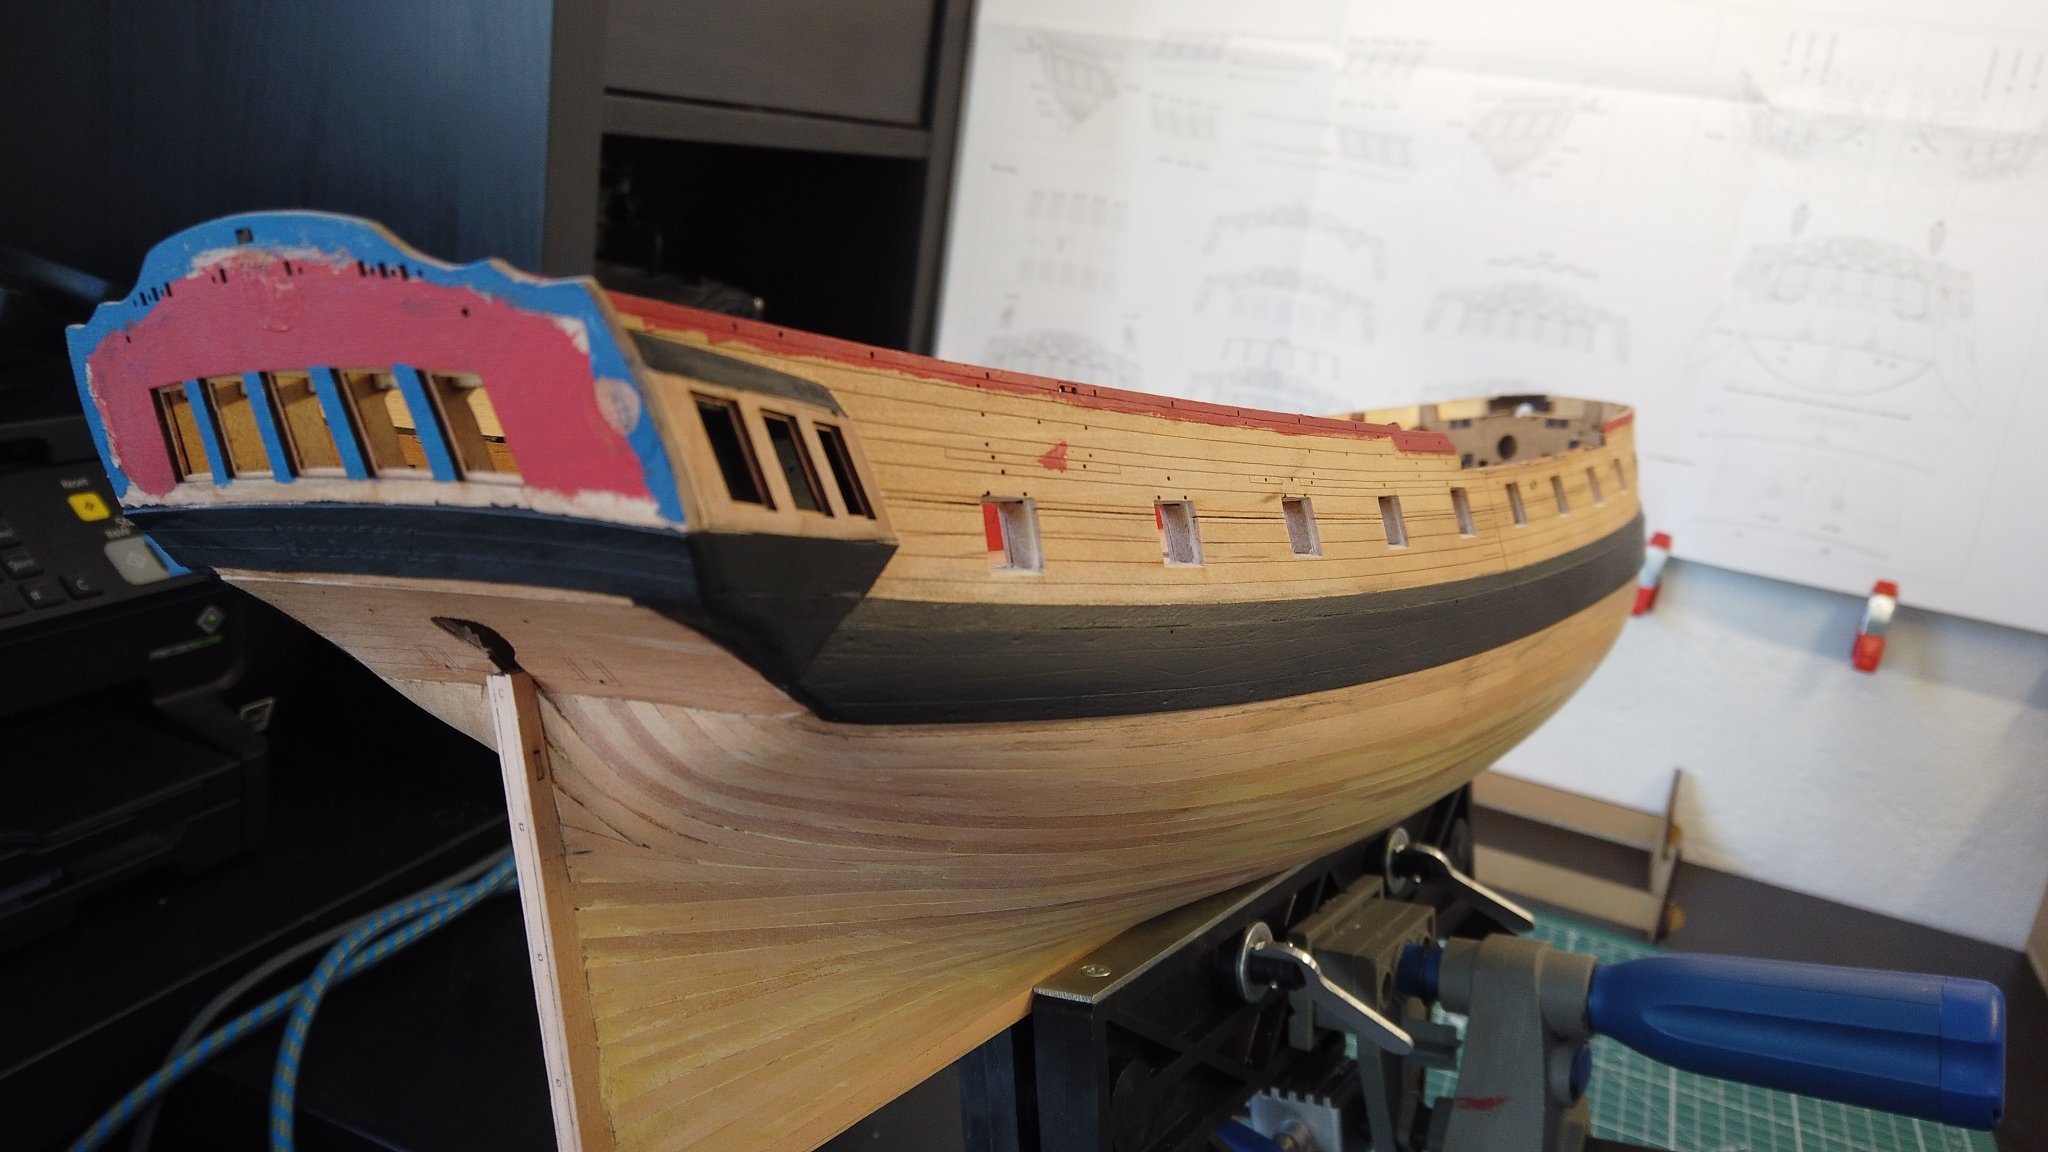
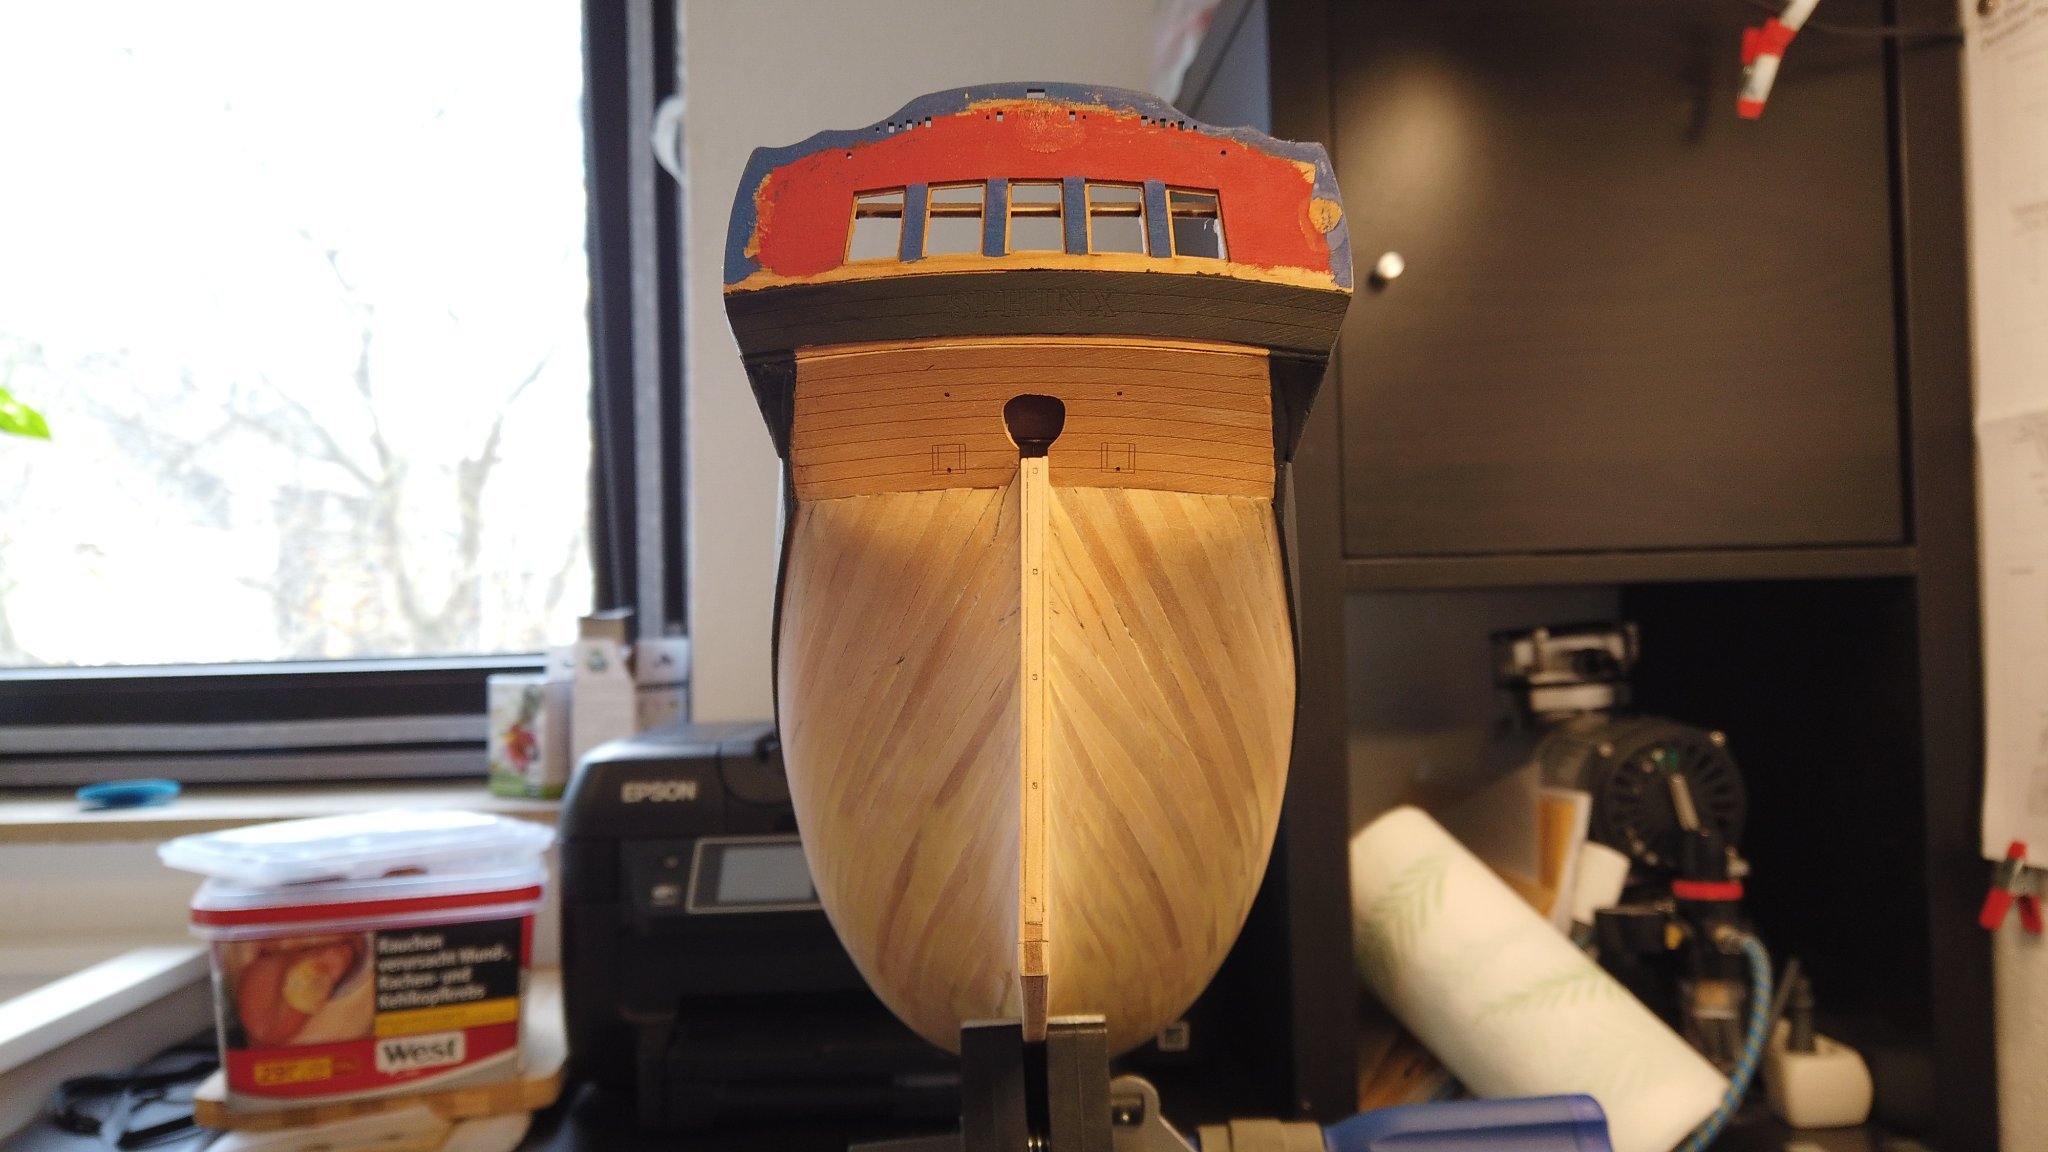
Sitting at this stage for the last few days, i am exploring ideas how to fix this issue...
There are some:
1. Due to the mistakes in the Counter/Fascia positioning, the lower rail on the Galleries is well, too low, hence only the bottom part of the decoration will fit (still have to reposition that one rail tho)
2. i screwed up both the Gallerie length forward as well as the fascia curve on the Starboard side (on port too but it's less prominent there)
So what i will have to do, propable next steps:
- Fix the rail position so it is paralell to the middle
- attach the lowermost decoration below the gallery
- Design some new decoration to go in the space between the middle and lower rails
- move the "flower" which was supposed to be in front of the galleries to the back (already done as you can see, there was a big gap at the back and the flower wouldnt fit in the front)
The Gold paint is refusing to stay properly on the frieze work, i will have to do touch0ups before i start with the deadeyes (after fitting the deadeyes this area will be inaccessible by brush i think)